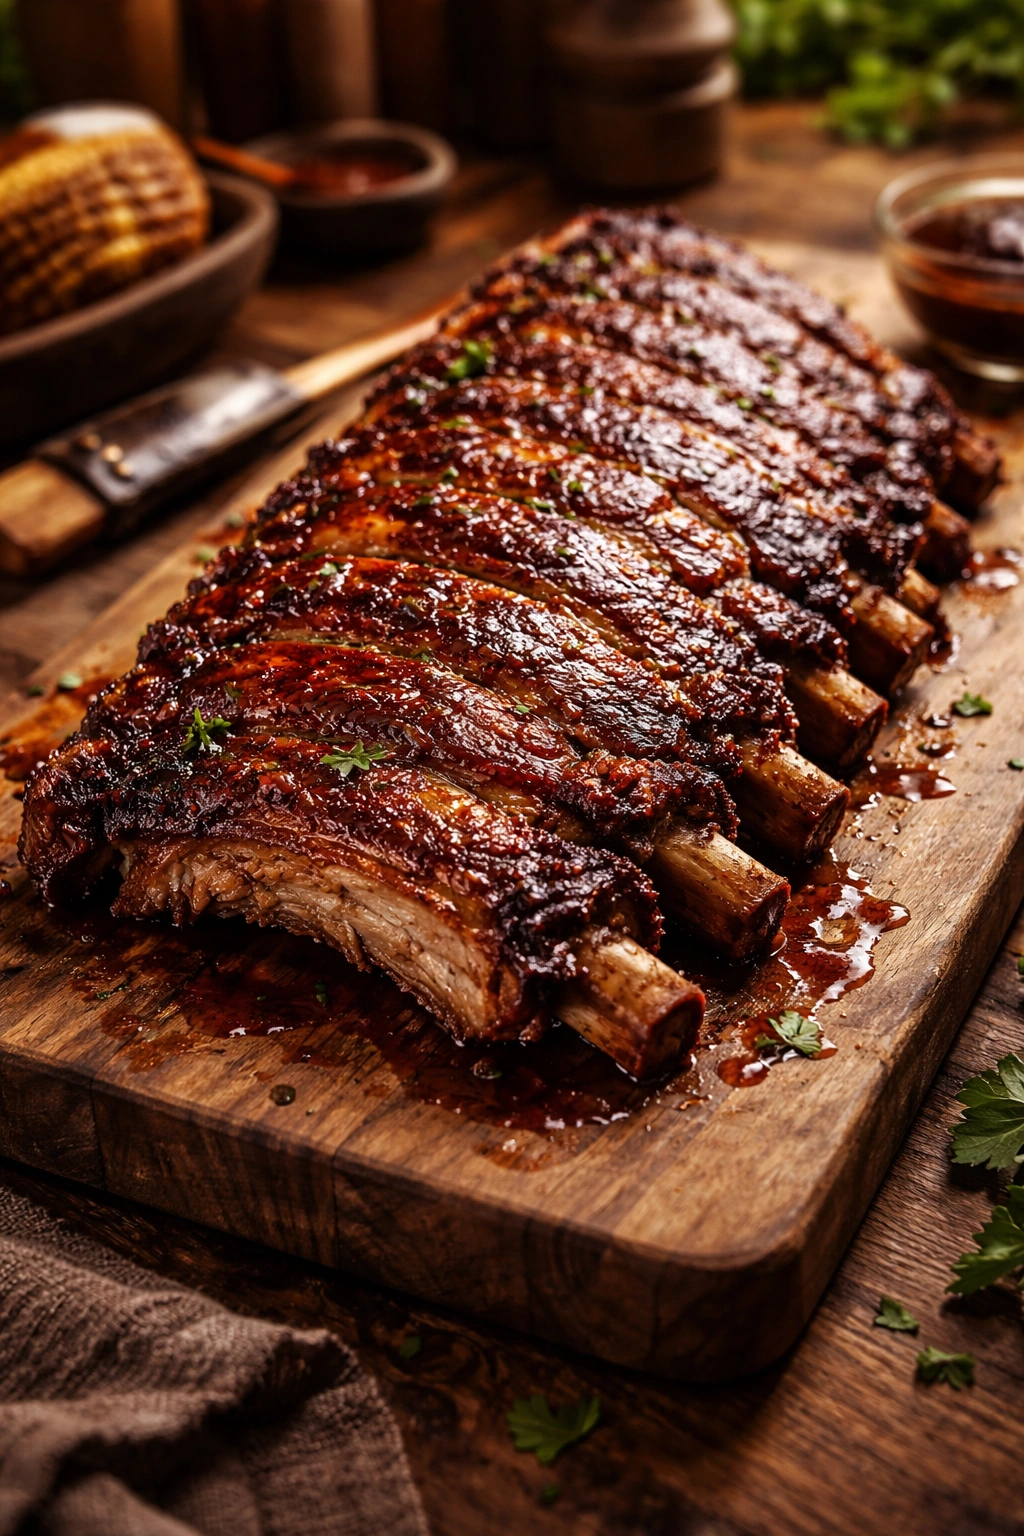
When you want restaurant-quality ribs without the hassle of tending a smoker all afternoon, the combination of slow oven-baking followed by a quick grill or broil finish is your secret weapon. This method delivers what everyone craves: meat so tender it falls from the bone with barely a touch, a caramelized exterior glistening with sauce, and deep, satisfying flavor that tastes like you spent hours perfecting your technique. The best part? You’re looking at less than 15 minutes of actual hands-on work spread across an entire cooking session. The oven does the heavy lifting while you relax, and then a final few minutes under high heat creates that smoky, charred finish that makes people think you know what you’re doing.
The science behind this approach is simple but powerful. Low-and-slow oven heat gently breaks down the connective tissue and renders the fat in the ribs without drying them out, while the aluminum foil wrapping traps steam that keeps everything moist and tender. Once that work is done, a hot grill or broiler caramelizes the surface, locks in the sauce, and gives you those beautiful grill marks or a sticky, glossy crust that catches light. Whether you finish indoors or out, this method works reliably every single time—and once you master it, you’ll find yourself making ribs far more often than you expected.
Choosing the Right Ribs for Fall-Off-the-Bone Tenderness
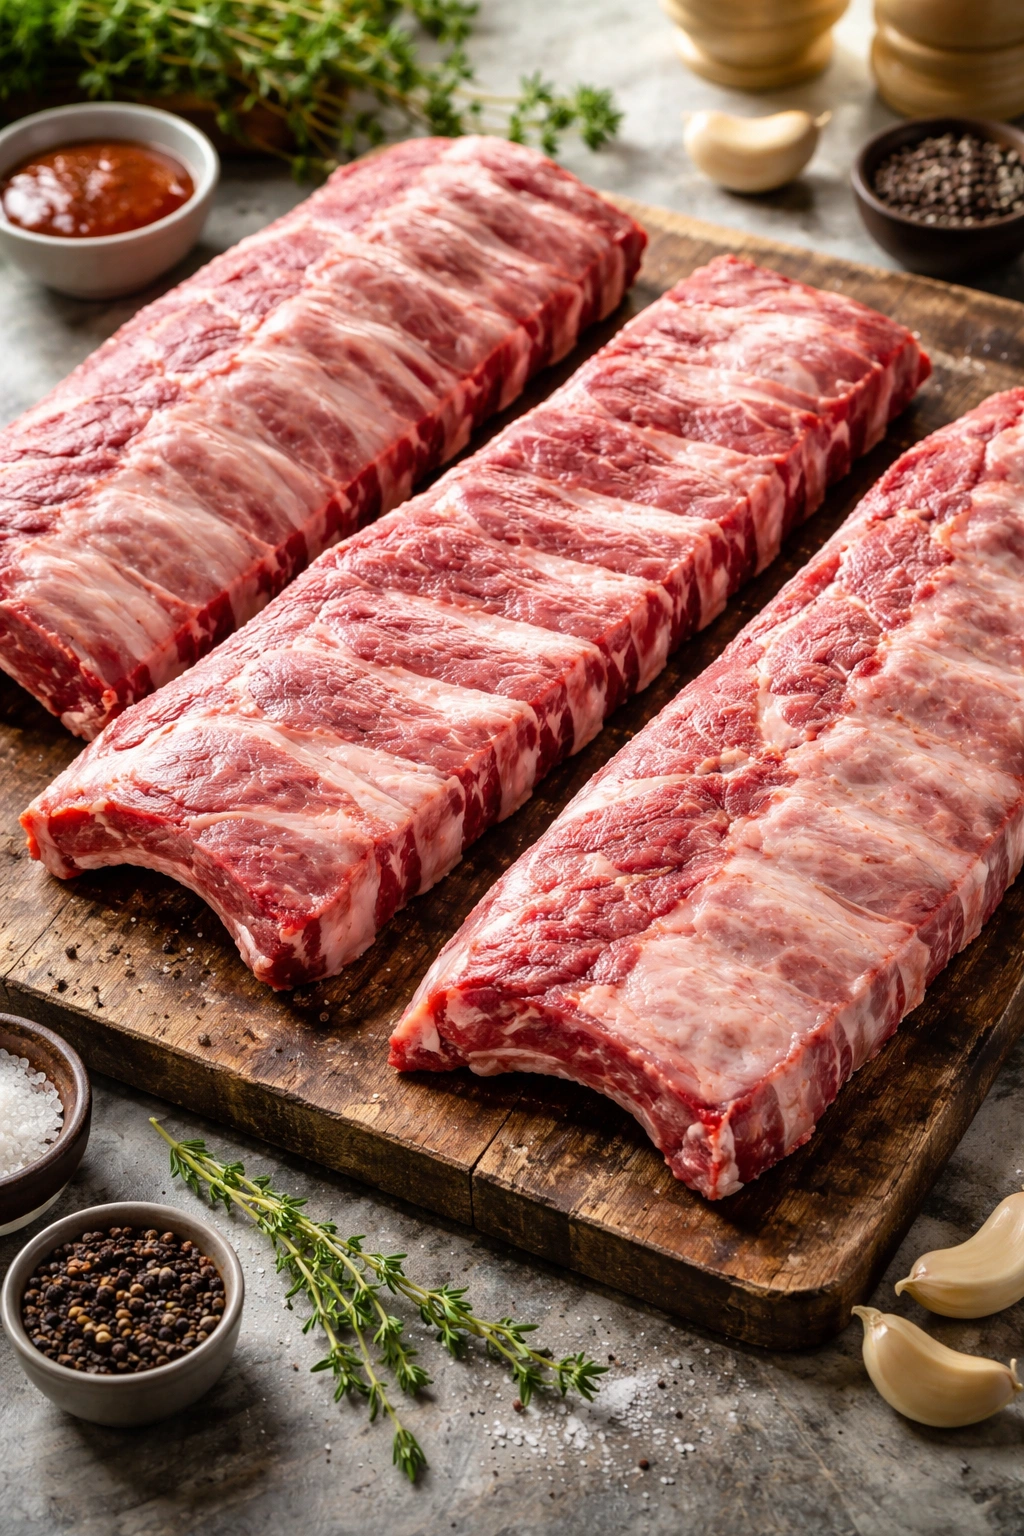
The first decision is picking your rib cut, and it matters more than you might think. Baby back ribs are the most popular choice, and for good reason. They’re smaller and leaner than their alternatives, which means they cook faster and appeal to people who prefer less fat. When cooked properly, they reach that ideal fall-off-the-bone texture in roughly 2 to 2.5 hours in the oven—fast enough for a weeknight dinner but slow enough to develop real flavor.
St. Louis-style ribs are a close second and honestly, they’re worth trying if you see them. These are spare ribs trimmed to a uniform rectangular shape, making them easier to handle on a baking sheet. They’re meatier and fattier than baby backs, which some people prefer because that fat renders during cooking and keeps the meat incredibly juicy. They typically need a bit more time—around 2.5 to 3 hours—but the payoff is worth it.
Spare ribs are the largest and meatiest option, with the most fat, which translates to the most flavor if that’s what you’re after. They’re also the most forgiving if you accidentally overcook them slightly. Plan on 3 to 3.5 hours in the oven for these.
A standard rack weighs around 3 to 5 pounds, and most recipes work with 2 racks, which comfortably feeds 4 to 6 people depending on appetite and what sides you’re serving. When shopping, look for meat that’s a pinkish-red color with white (not yellow) fat, which indicates freshness.
Removing the Membrane for Maximum Flavor Penetration
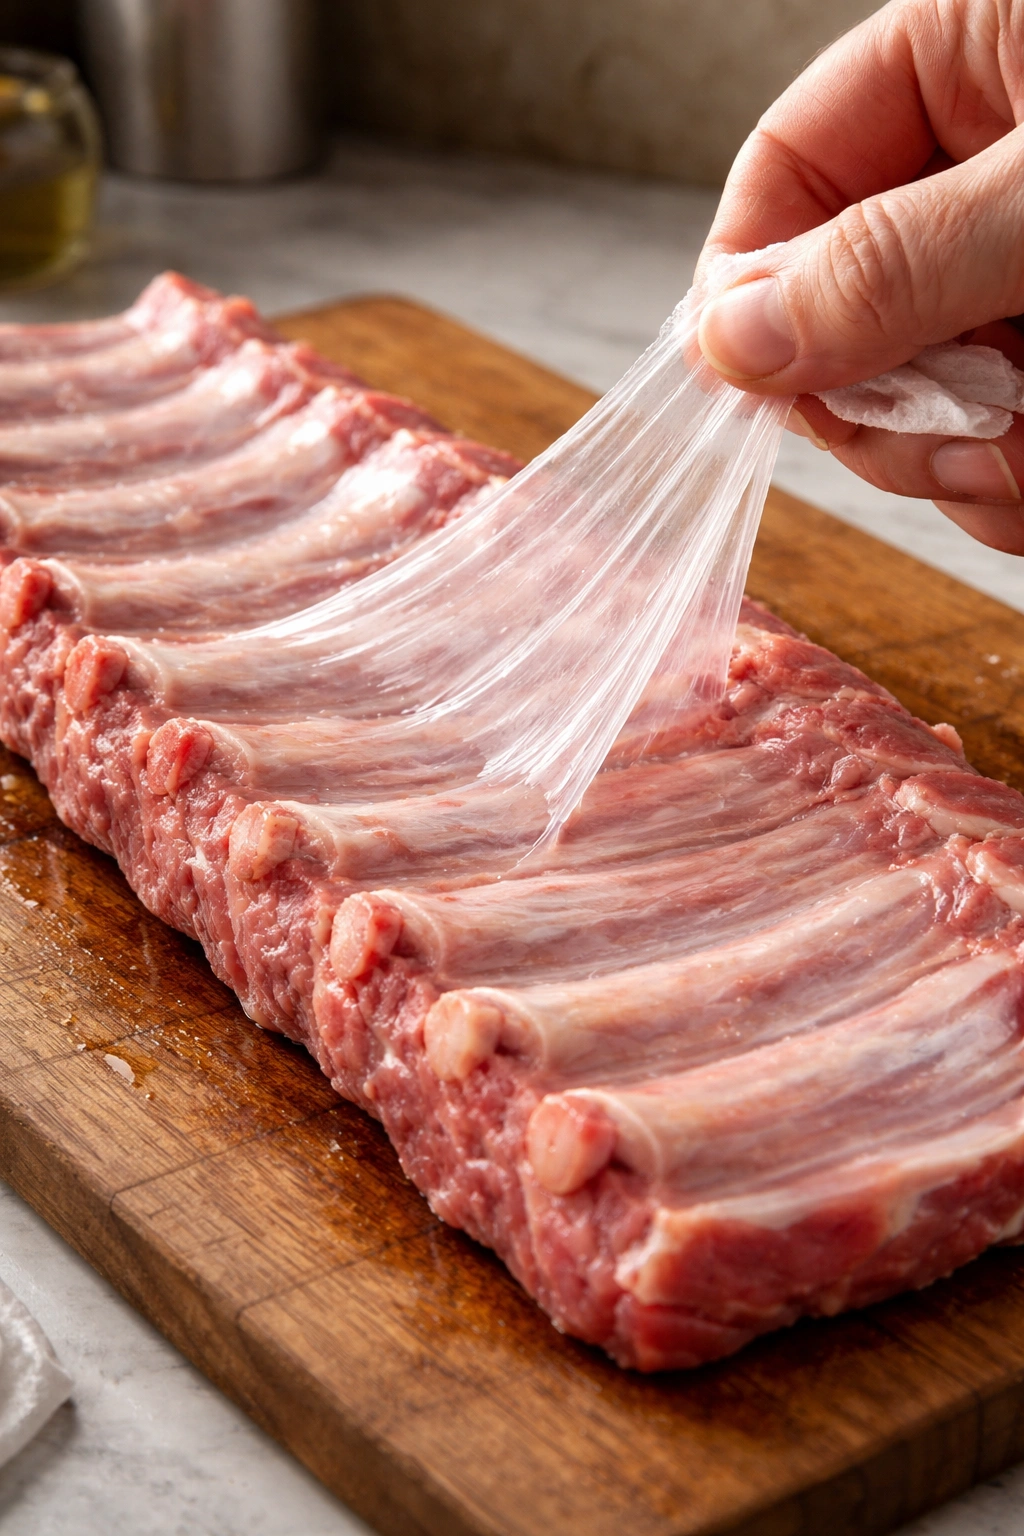
This step takes only a minute but makes a noticeable difference in the final texture. On the back of every rack, there’s a thin, papery membrane called the silver skin. During cooking, this membrane can become tough and chewy, and it also prevents your seasoning from penetrating both sides of the meat.
To remove it, pat the ribs dry with a paper towel first—a dry surface gives you better grip. Place the rack bone-side up on a cutting board and locate the membrane running along the back. Slide a thin knife (a butter knife or paring knife works perfectly) under the edge of the membrane at one end of the rack. Once you’ve created a little lift, grip the membrane with a paper towel—this helps prevent it from slipping through your fingers—and gently pull it away from the bones in a slow, steady motion. If it tears, that’s fine; just loosen and pull away the remaining pieces.
Some butchers will remove this for you if you ask, and in some cases, the ribs come already cleaned. If you don’t feel confident doing it yourself, don’t skip the ribs over it; the meat will still be good without removing it. However, taking the extra 60 seconds to remove it does genuinely improve both tenderness and seasoning absorption.
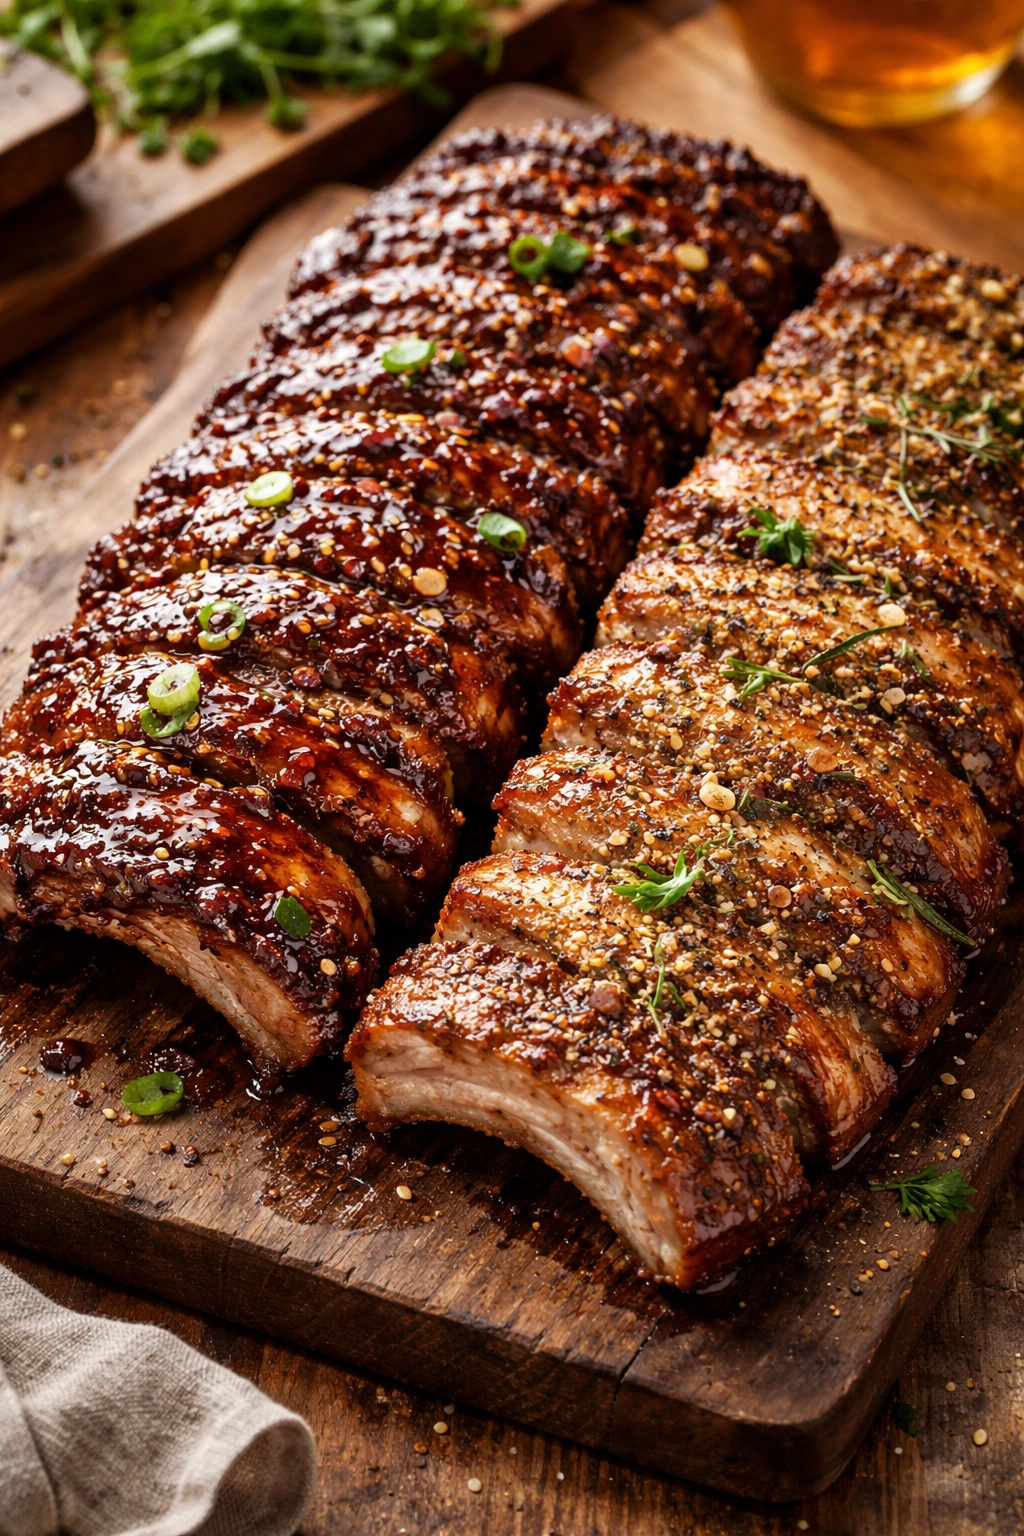
Building Your Dry Rub: The Foundation of Flavor
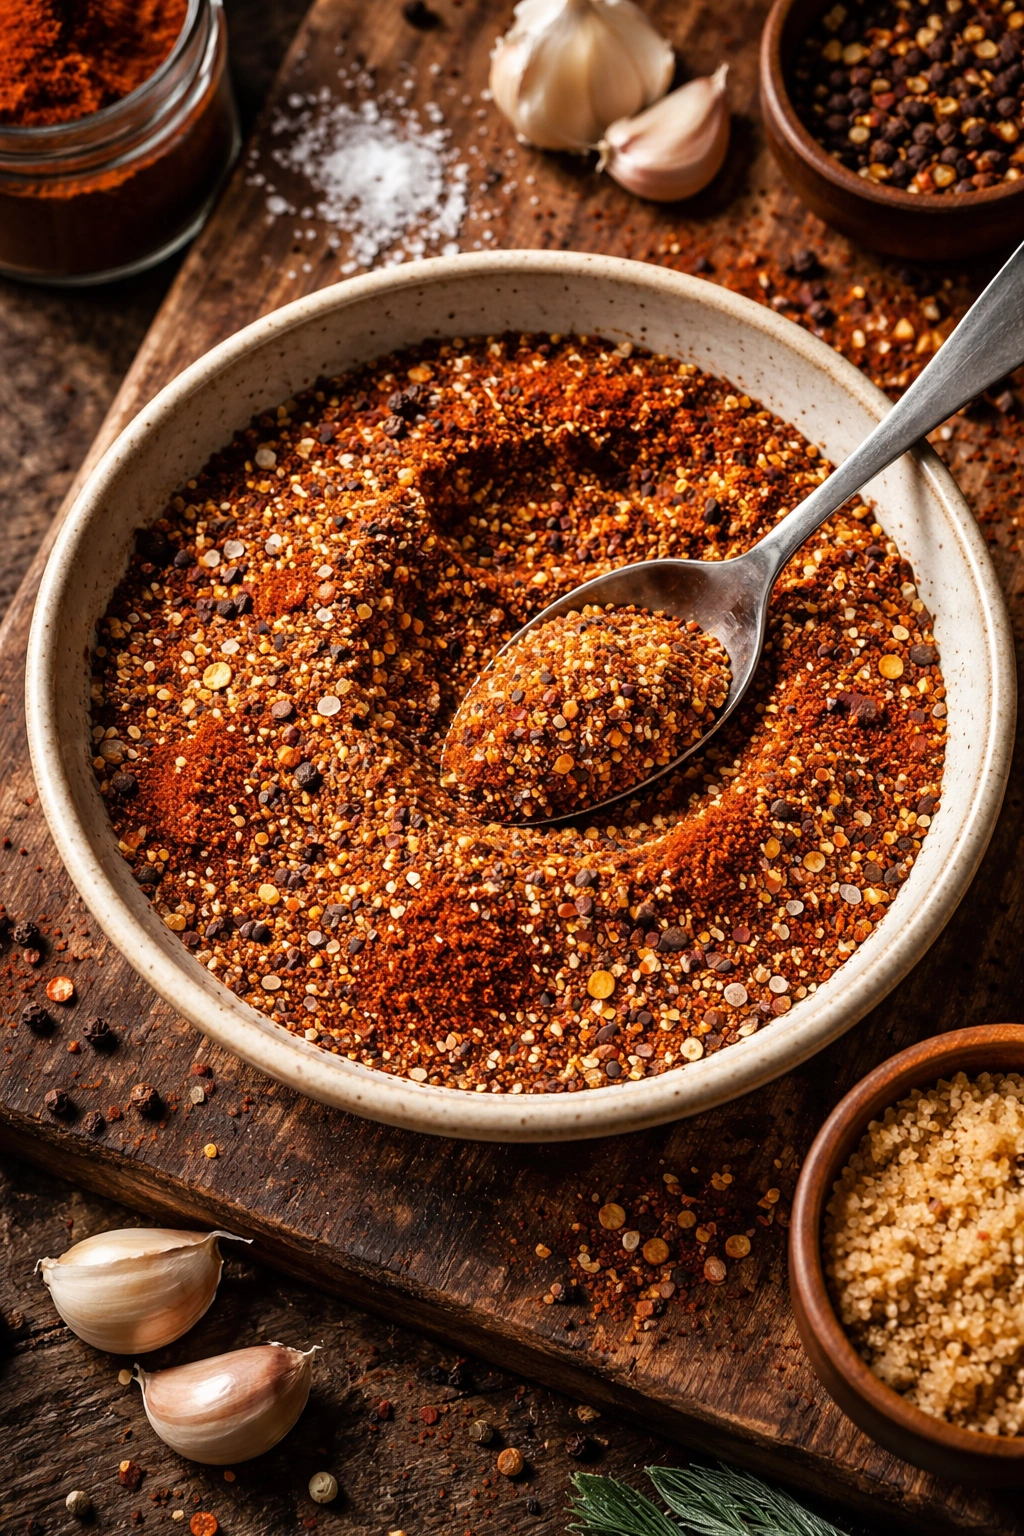
A good dry rub is what separates memorable ribs from forgettable ones. The rub you apply before cooking creates the flavor foundation that lasts through the entire cooking process and into that final caramelized crust. The best rubs balance sweetness, smokiness, savory depth, and a touch of heat—you want all these elements playing together, not one overpowering the others.
For the Spice Rub:
- 1/2 cup packed dark brown sugar
- 2 tablespoons smoked paprika
- 1 tablespoon garlic powder
- 1 tablespoon onion powder
- 2 teaspoons ground cumin
- 1 teaspoon dry mustard powder
- 1 teaspoon salt
- 1/2 teaspoon black pepper
- 1/2 teaspoon cayenne pepper (optional, for heat)
Mix all these ingredients in a small bowl and set aside. The brown sugar won’t fully incorporate—it’ll stay a bit granular, and that’s exactly what you want. Those little sugar granules caramelize on the outside of the ribs during cooking, creating that coveted sticky crust.
The mustard powder might seem like an odd choice, but it adds a tangy depth that enhances the overall flavor without tasting obviously mustardy. The cumin brings warmth and earthiness. The smoked paprika is what gives these ribs that BBQ-joint taste even though they’re baking in your kitchen. If you prefer less spice, reduce the cayenne to 1/4 teaspoon or omit it entirely; if you like heat, go up to 1 full teaspoon.
You can absolutely use a store-bought BBQ dry rub instead if you prefer convenience. Just check that it doesn’t contain too much salt—some commercial rubs are heavy-handed with it.
Preparing the Ribs for the Oven
Start by preheating your oven to 275°F and positioning a rack to the middle level. Set aside a large rimmed baking sheet (a half-sheet is perfect) and several lengths of heavy-duty aluminum foil. Line the baking sheet with foil for easy cleanup, as the ribs will release a decent amount of liquid during cooking.
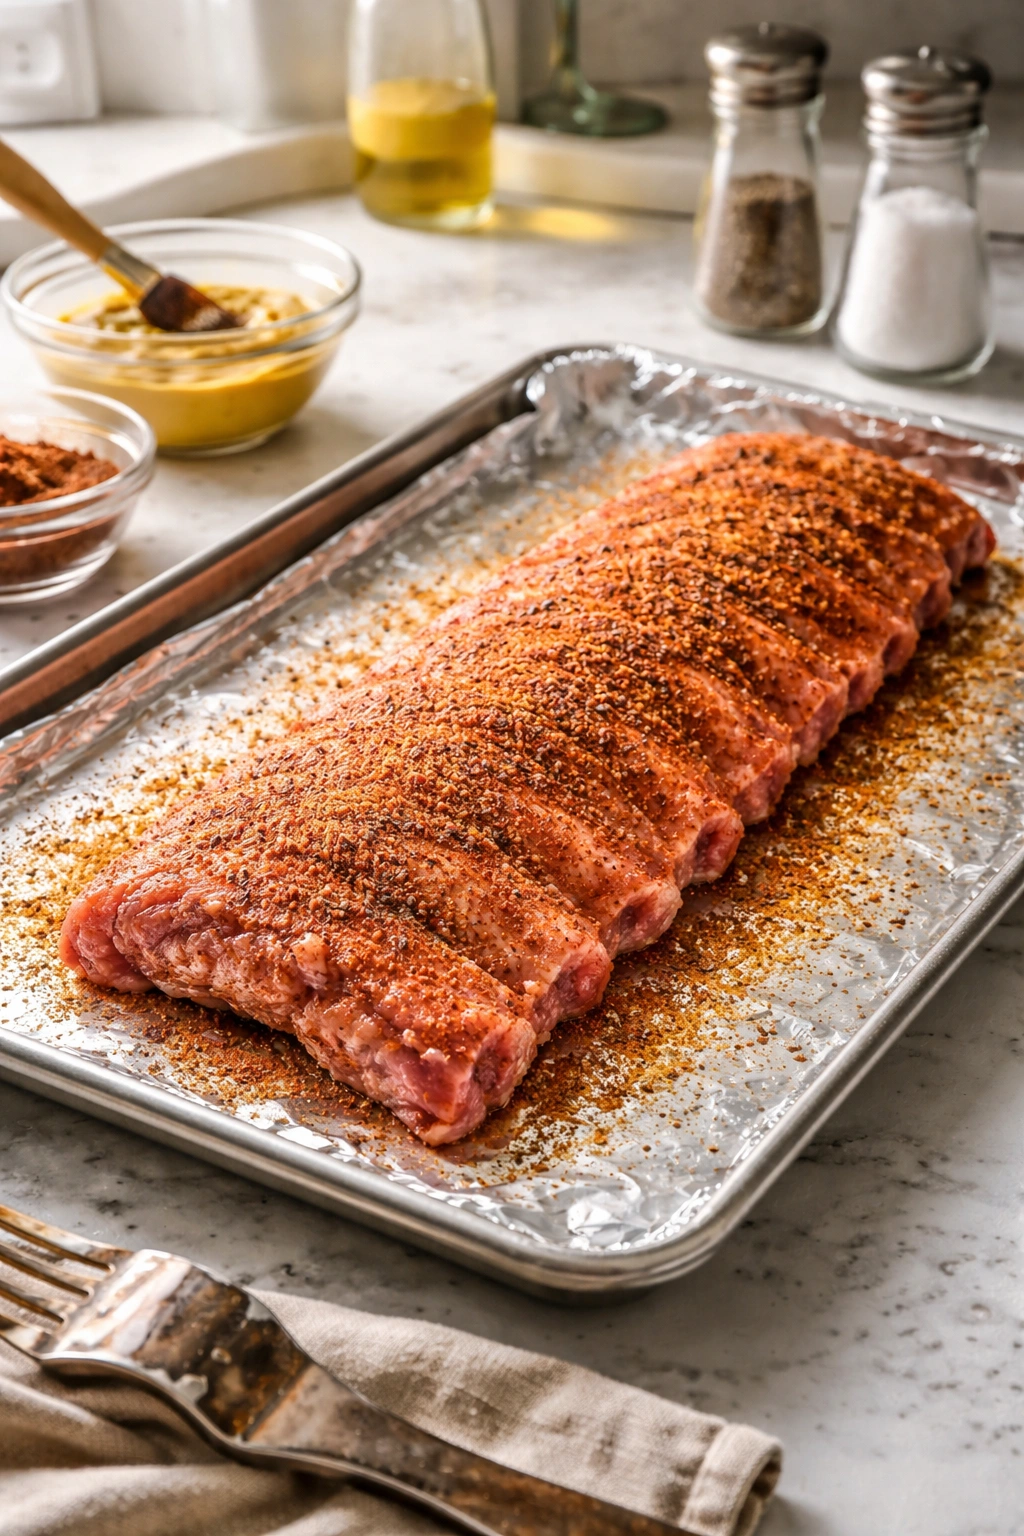
Pat your ribs completely dry with paper towels. Any surface moisture will prevent the rub from adhering properly and will create steam when the ribs first hit the oven, which isn’t what you want at this stage. Rub a thin coat of yellow mustard all over both sides of the ribs if you like—this is optional but recommended, as the mustard acts as a binder that helps the spices stick to the meat and also helps tenderize it. The mustard flavor completely disappears during cooking; you won’t taste it in the final ribs.
Now apply your spice rub generously to both sides of the ribs, pressing it in with your hands so it makes contact with the meat rather than just sitting on the surface. Don’t be shy—it will look like a lot, but much of it will dissolve into the meat during the long, slow bake. Make sure you fill in all the gaps and edges. If you’re using mustard, apply the rub to the mustard layer, which holds it in place beautifully.
Place the ribs meat-side up on your foil-lined baking sheet. If both racks don’t fit comfortably in a single layer, you can overlap them slightly or use two baking sheets.
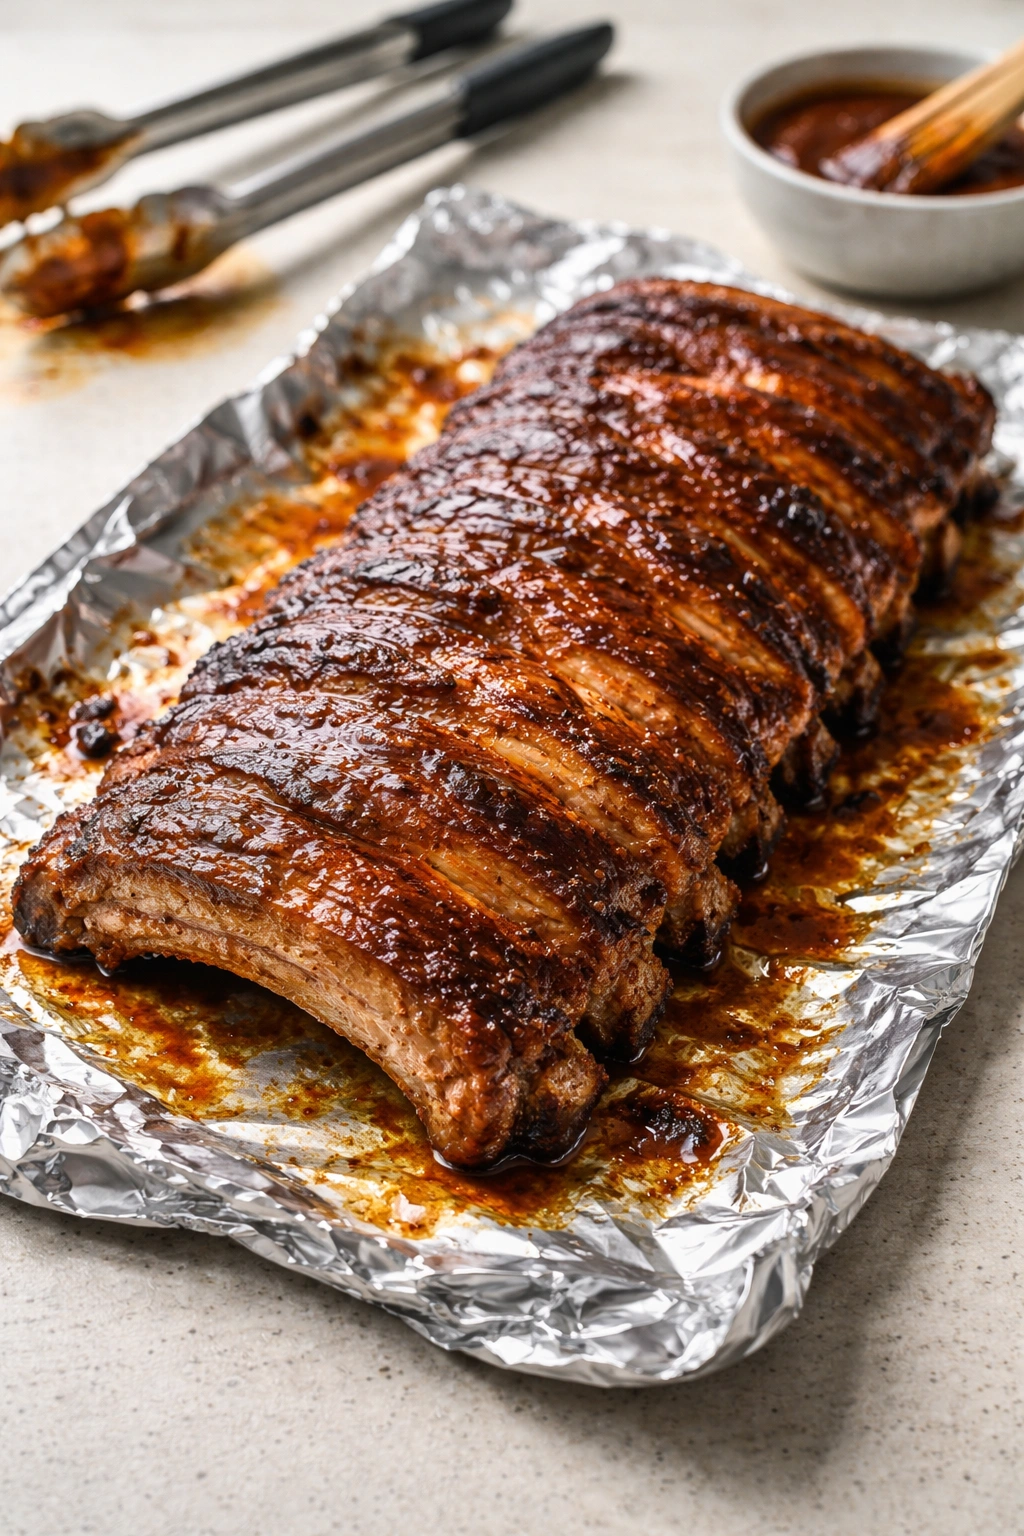
Wrapping and Baking: The Low-and-Slow Magic
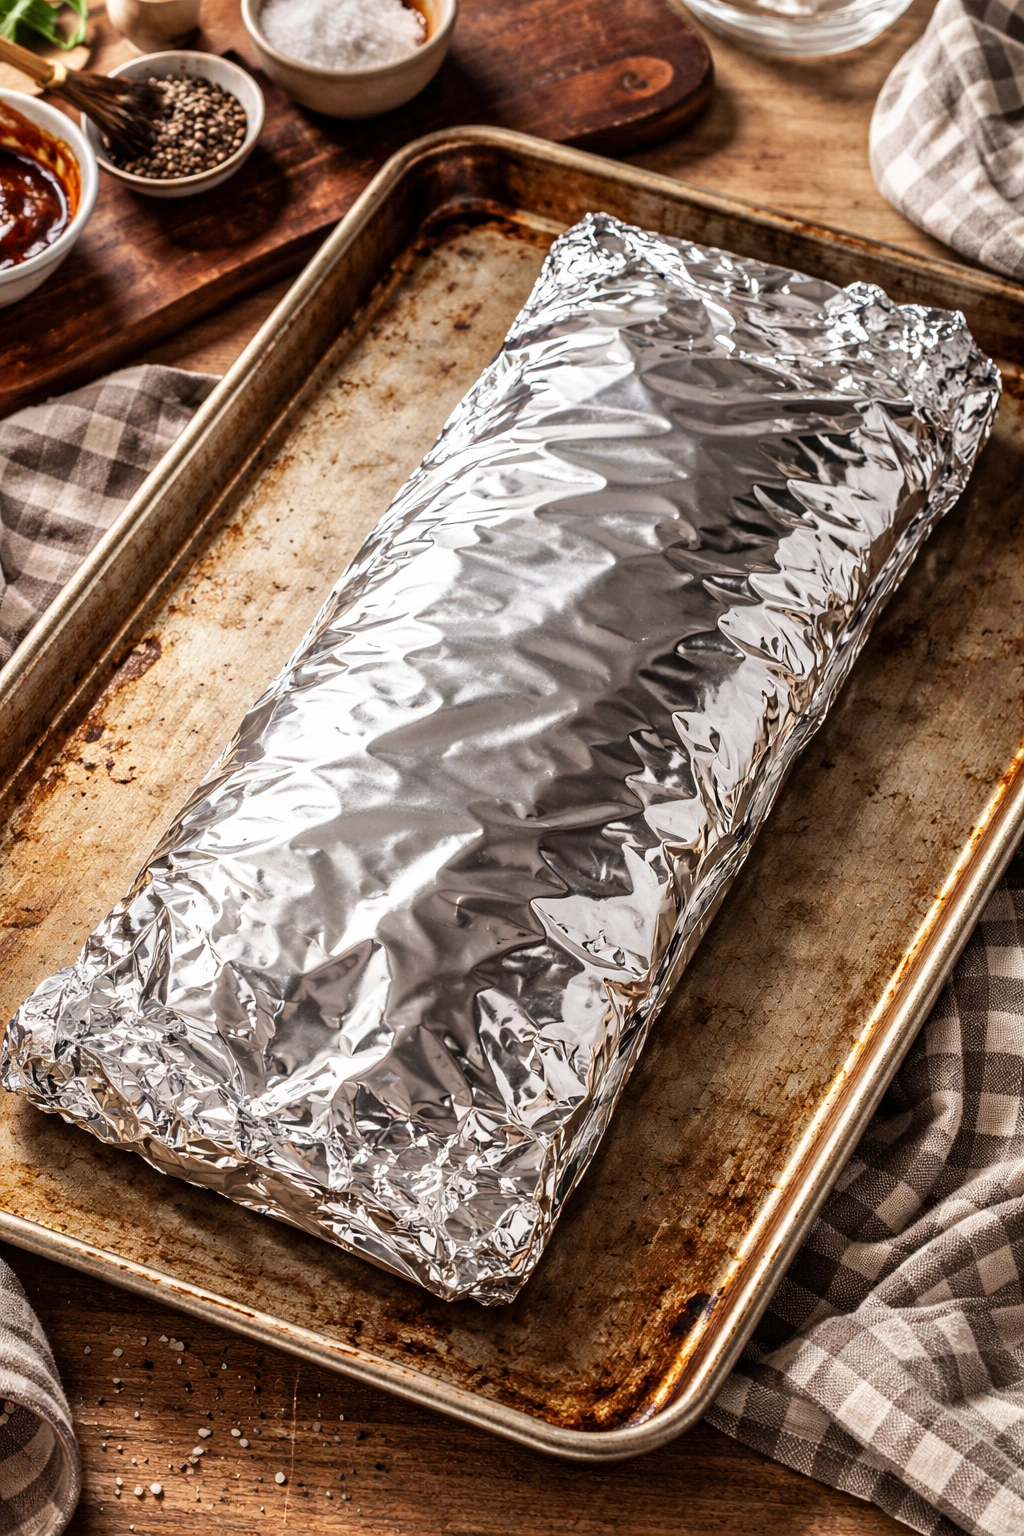
This is where the real work happens—and the real magic, since you’re not actually doing any work. Wrap the ribs tightly in aluminum foil, folding the edges in on themselves to create a seal that traps moisture inside. Some people prefer to wrap each rack individually in its own foil packet, while others wrap both racks together on the baking sheet. Both methods work; individual wrapping just makes them slightly easier to handle later.
The foil wrap is crucial. It creates a steaming environment that gently breaks down the collagen in the meat and renders the fat, resulting in that fall-off-the-bone texture. Without this seal, your ribs will dry out and toughen no matter how low the temperature.
Slide the baking sheet into your preheated 275°F oven and set a timer for 2 hours. For baby back ribs, check them at the 2-hour mark by carefully opening a corner of the foil (watch out for the steam) and piercing the thickest part of the meat with a knife. If the knife slides through with almost no resistance, the ribs are ready. If there’s still some toughness, reseal the foil and give them another 20 to 30 minutes.
St. Louis-style and spare ribs typically need the full 2.5 to 3 hours, sometimes more. The safest approach is to start checking at 2.5 hours and then go from there. Every oven runs slightly differently, and rib thickness varies, so relying on visual and tactile cues rather than strict time is your best bet.
Don’t open the oven repeatedly to peek. Every time you open the door, heat escapes and the cooking time extends. Check once, at the 2-hour mark, and then again if needed, but resist the urge to monitor constantly.
Preparing Your Barbecue Sauce While Ribs Bake
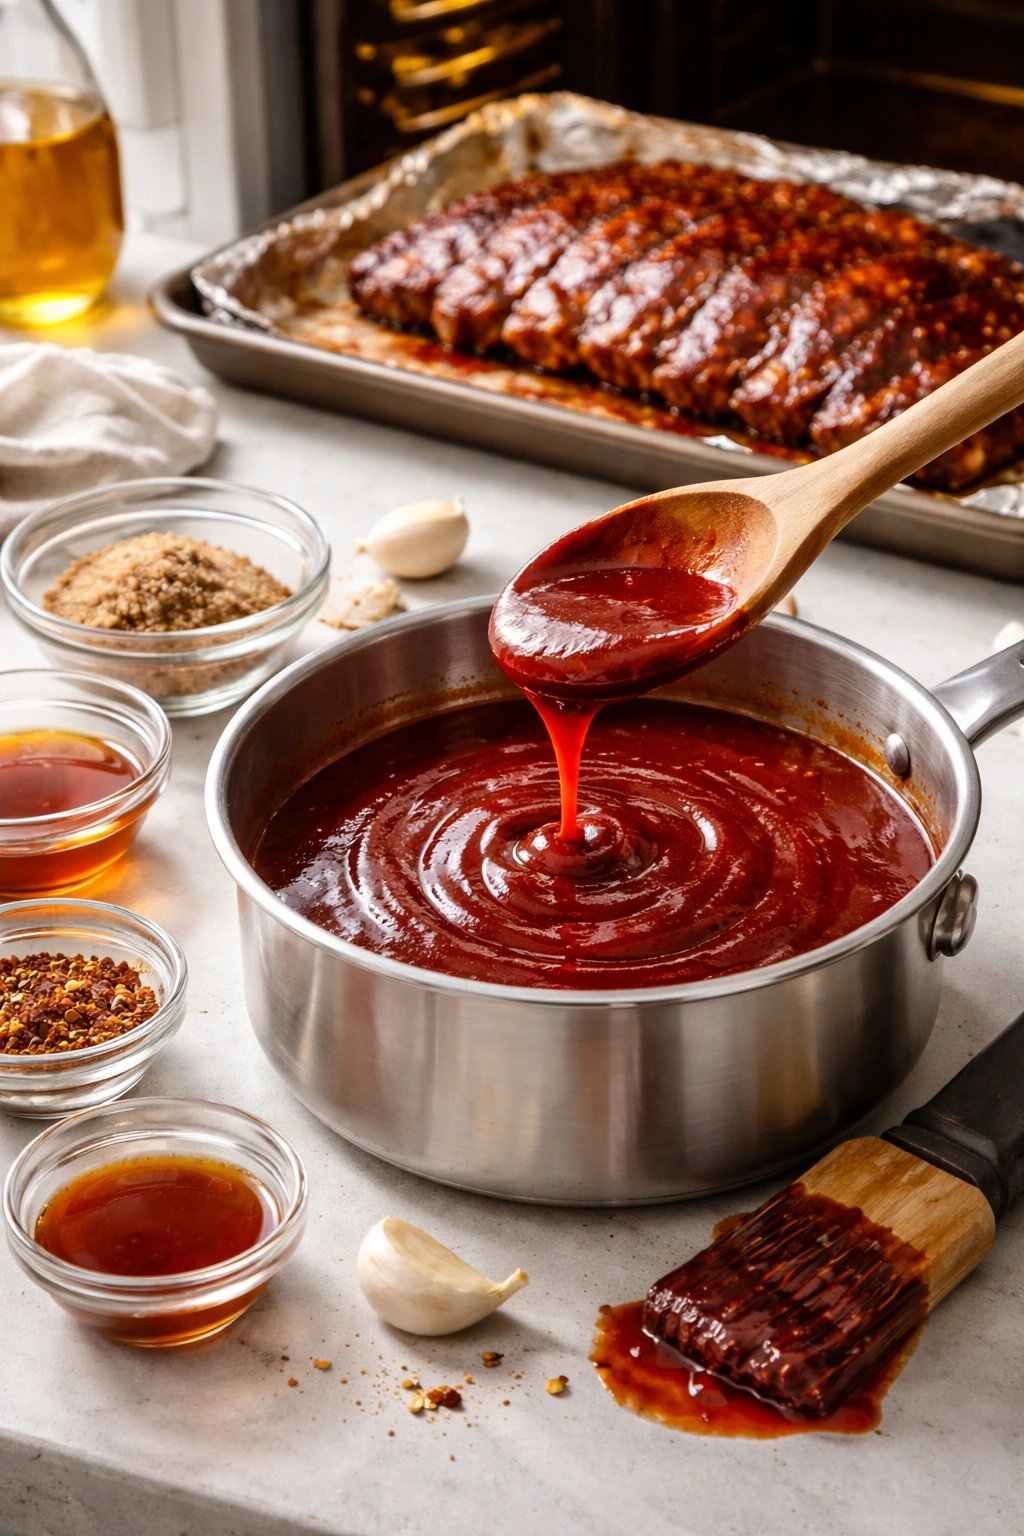
While your ribs are transforming in the oven, prepare your sauce. A good BBQ sauce should be balanced between sweet, tangy, and savory, with just enough body to cling to the meat without sliding off during broiling or grilling.
For a Homemade Tangy BBQ Sauce:
- 1 cup ketchup
- 1/4 cup apple cider vinegar or distilled white vinegar
- 1/4 cup brown sugar
- 2 tablespoons molasses
- 1 tablespoon Worcestershire sauce
- 1 teaspoon Dijon mustard
- 1 tablespoon hot sauce (sriracha, Frank’s RedHot, or your preference)
- 2 cloves garlic, minced
- Salt and black pepper to taste
Combine all ingredients in a saucepan over medium heat and stir until smooth. The mixture should start to bubble gently around the edges after a few minutes. Let it simmer for 5 minutes, stirring occasionally, then taste and adjust seasonings. If it’s too sweet, add more vinegar. If it’s too tangy, add a bit more brown sugar. Remove from heat and let it cool slightly. You want the sauce to be spreadable but not piping hot when you apply it to the ribs.
This sauce is darker and more complex than most store-bought versions. If you prefer to skip homemade, any quality bottled BBQ sauce works fine—Sweet Baby Ray’s, Kansas City Style, Memphis-style, or whatever matches your taste preference. Some people like a thin, runny sauce; others prefer something that coats the meat heavily. Pick whatever style appeals to you.
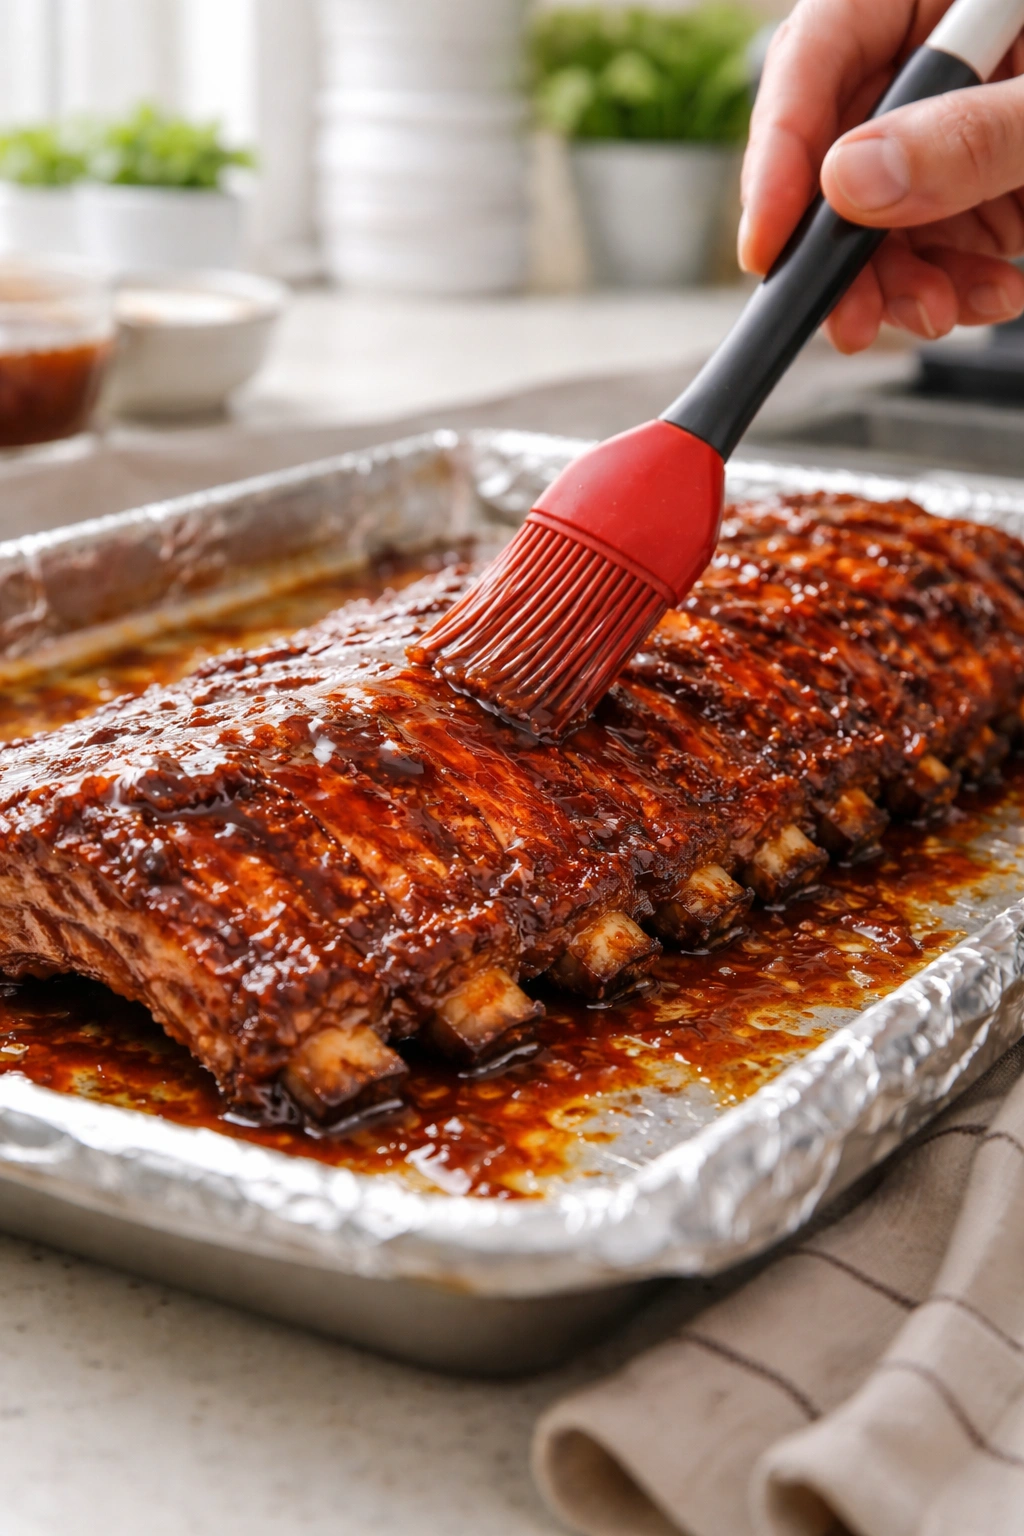
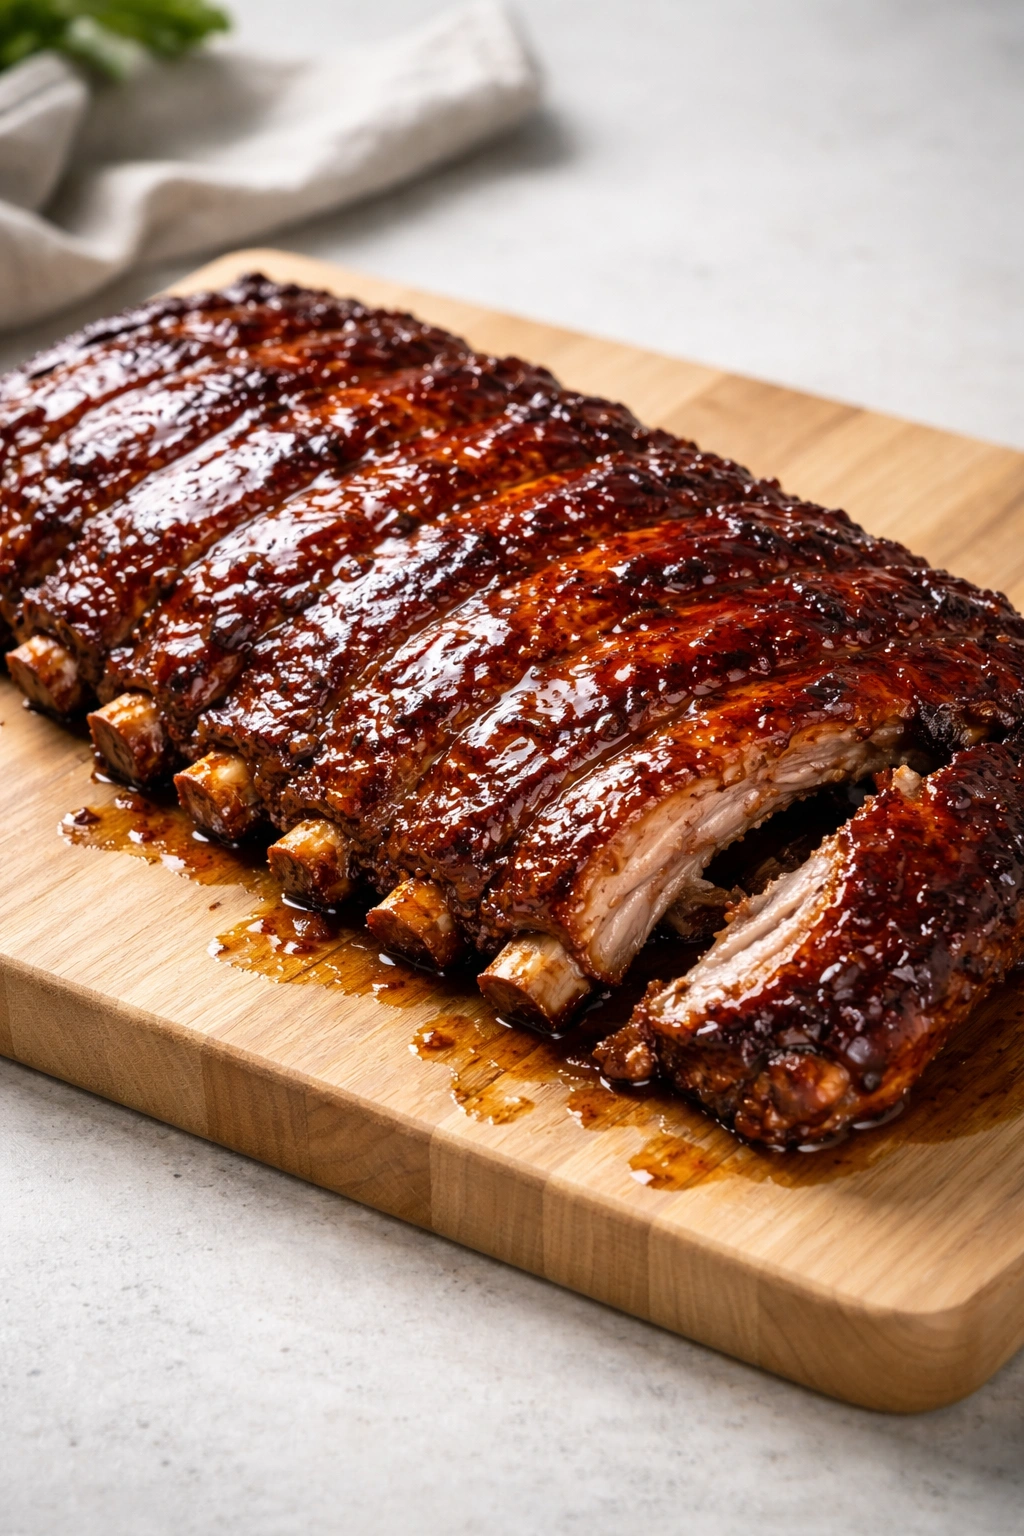
The Critical Finishing Step: Broiling or Grilling
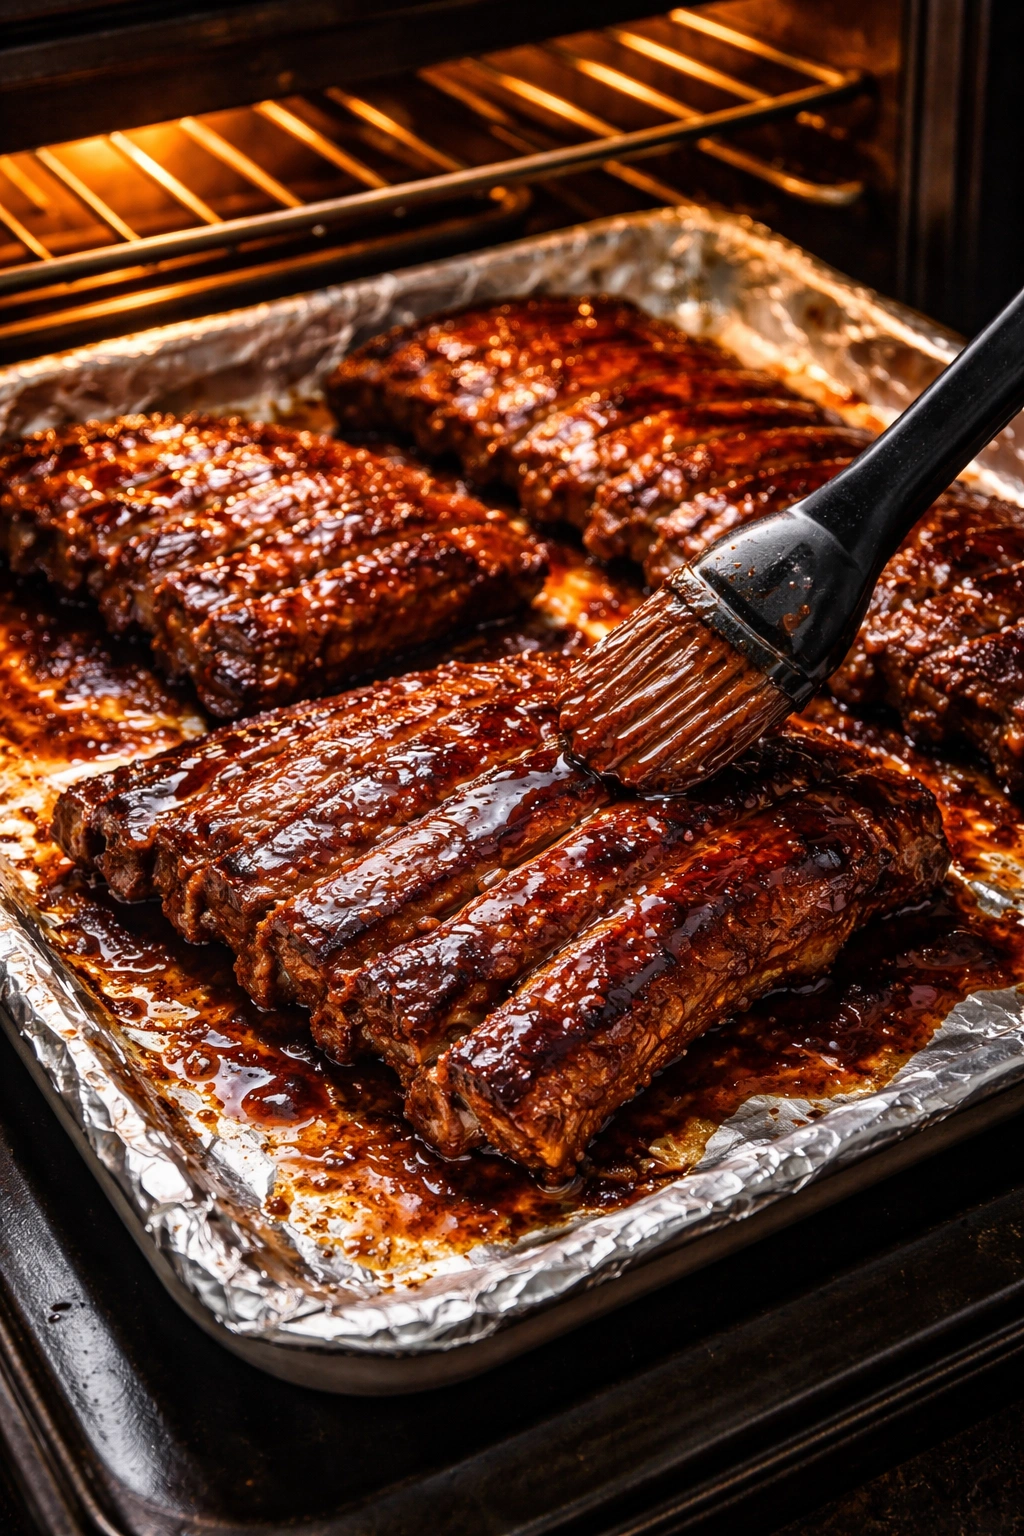
This is where the ribs transform from cooked to absolutely unforgettable. Once the ribs are fork-tender, remove them from the oven and carefully open the foil. You’ll see a pool of rendered fat and meat juices—this is liquid gold for flavor, so don’t discard it immediately. Drain off the excess liquid (you can save it for soups or stocks if you like) and pat the ribs dry with paper towels. A dry surface is essential for proper caramelization.
For the Broiler Method:
Turn your oven to broil and position the rack about 6 inches from the heating element (closer if your oven runs cool, farther if it runs hot). Place the ribs on a foil-lined baking sheet and brush generously with your BBQ sauce on the meat side. Broil for 3 to 5 minutes, watching constantly—the sauce will bubble and caramelize quickly, and sugar burns fast. You’re looking for a glossy, dark caramelized coating, not charred or blackened. Flip the ribs and brush the bone side with sauce, then broil for another 2 to 3 minutes. The entire process from foil to finished ribs takes less than 10 minutes.
For the Grill Method:
Preheat your grill to medium-high heat (around 400°F if you have a thermometer) and brush the grates clean with an oiled brush. Place the ribs directly on the grates, meat-side down, for 2 to 3 minutes. You should see light grill marks forming. Flip and cook the bone side for 1 to 2 minutes, then flip back to meat-side and begin basting with sauce. Continue flipping and basting every 2 minutes for about 8 to 10 minutes total, until the sauce is deeply caramelized and sticky. The grill method gives you those attractive char marks and a smokier flavor than broiling.
Either method produces spectacular results. The difference is mainly in aesthetics and whether you want a slight smokiness from the grill. Broiling is more convenient and gives you more control, while grilling adds extra flavor and those coveted grill marks.
Perfect Serving and Timing Information
Yield: Serves 4 to 6 people (2 racks of ribs)
Prep Time: 15 minutes
Cook Time: 2 hours to 3 hours (depending on rib type and oven), plus 5-10 minutes broiling or grilling
Total Time: 2 hours 20 minutes to 3 hours 10 minutes active time
Difficulty: Beginner—this recipe is genuinely foolproof. The hardest part is remembering to check the ribs at the 2-hour mark, but even if you forget and bake them a bit longer, they’ll still turn out delicious.
Expert Tips for Flawless Results Every Time
Start with quality ribs. The difference between grocery store ribs and butcher-shop ribs is noticeable. Ask your butcher to trim them and remove the membrane if you prefer, and don’t hesitate to ask questions about where they come from.
Use heavy-duty foil, not regular foil. Regular foil can tear during the long baking, which defeats the purpose of the seal. Heavy-duty foil costs a bit more but it’s worth it for reliability.
Place ribs meatiest-side down on the baking sheet. The rendered fat and juices from the meat above drip down naturally, creating a self-basting effect that keeps everything moist. This is especially important for the long, slow bake.
Don’t skip the final finishing step. The difference between ribs that have been broiled or grilled to caramelize the sauce and those that haven’t is night and day. That caramelization creates the texture contrast and visual appeal that makes people excited to eat them.
Mix your sauce properly. If you make homemade sauce and it breaks or separates while simmering, whisk in a tablespoon of cornstarch mixed with an equal amount of cold water. This thickens it and brings it back together. Start with less cornstarch slurry than you think you need; you can always add more.
Brush sauce in thin layers, not thick ones. A thin layer caramelizes better and coats more evenly than trying to slather on a quarter-inch of sauce. You can always apply a second layer after the first one sets.
Don’t panic about slightly uneven cooking. If one side of a rack finishes a few minutes before the other when grilling, just move it to a cooler part of the grill. The ribs are forgiving at this stage since they’re already cooked through.
Variations and Flavor Adaptations
Once you’ve made these ribs once using the basic method, you’ll find yourself wanting to experiment. The foundation is so solid that you can build almost any flavor direction on top of it.
Asian-Inspired Sticky Ribs: Replace the spice rub with 2 tablespoons each of packed brown sugar, soy sauce, and minced fresh ginger, plus 1 tablespoon each of sesame oil and rice vinegar, and 1 teaspoon of five-spice powder. For the sauce, combine 1/2 cup hoisin sauce with 1/4 cup soy sauce, 2 tablespoons honey, 1 tablespoon rice vinegar, and minced garlic. Finish with a sprinkle of toasted sesame seeds.
Spicy Chipotle Ribs: Add 2 teaspoons of smoked chipotle powder to your dry rub, or keep the base rub as is and use a spicy chipotle BBQ sauce for finishing. These have a real kick and a deep, complex heat.
Coffee-Rubbed Ribs: Mix 1 tablespoon of finely ground espresso powder into your dry rub. This sounds unusual but it adds incredible depth and complexity without making the ribs taste like coffee. It’s especially good with the bourbon or whiskey-based BBQ sauces.
Dijon and Herb Ribs: Brush the ribs with Dijon mustard before applying the rub, then add 1 teaspoon of dried thyme and 1 teaspoon of dried oregano to your spice blend. This version tastes more European and sophisticated.
Maple-Bourbon Ribs: Keep the base rub but finish with a sauce made from equal parts bourbon and maple syrup, plus 1/2 cup ketchup, 2 tablespoons apple cider vinegar, and a pinch of cayenne. This version is slightly sweet with whiskey depth.
Vinegar-Based Carolina Ribs: Skip the heavy sauce and instead brush the finished ribs with a thin mixture of apple cider vinegar, Worcestershire sauce, hot sauce, and a bit of brown sugar. This lighter approach lets the rub shine through.
Vegetable-Forward Rub: Add 2 teaspoons of garlic powder and 2 teaspoons of onion powder to your base rub, then reduce the brown sugar slightly if you want less sweetness. This version skews savory.
Make-Ahead Rub Option: Mix your dry rub and apply it to the ribs the night before, then wrap them in foil and refrigerate. The spices will penetrate the meat deeper, resulting in even more flavorful ribs. Just remove them from the fridge and let them sit at room temperature for 15 minutes before putting them in the oven.
Storage, Leftovers, and Make-Ahead Strategies

Oven-baked ribs keep beautifully, which makes them perfect for cooking ahead or enjoying leftovers without guilt.
Refrigerator storage: Cooked ribs will keep in an airtight container for up to 4 days. Store them without the sauce if possible, so the sauce doesn’t get soggy, and add fresh sauce when you reheat them.
Freezer storage: You can freeze cooked ribs for up to 3 months. Wrap each rack tightly in plastic wrap first, then place in a freezer bag. Thaw overnight in the refrigerator before reheating.
Reheating in the oven: This is the gentlest method and prevents drying. Preheat your oven to 250°F, place the ribs on a foil-lined baking sheet, brush with a little more BBQ sauce, cover tightly with foil, and warm for 20 to 30 minutes until heated through. Remove the foil and broil briefly if you want to re-crisp the exterior.
Reheating on the grill: Place ribs on a medium-heat grill for 5 to 10 minutes, basting occasionally with fresh sauce. This method gives you a fresh caramelized finish.
Reheating in the microwave: This is fastest but produces softer results. Arrange ribs on a microwave-safe plate, cover with a damp paper towel, and microwave in 2-minute intervals until warmed through.
Make-ahead option: You can bake the ribs completely through the foil-wrapping stage up to 1 day ahead, then refrigerate them. When you’re ready to serve, remove them from the fridge, let them sit for 15 minutes, and proceed directly to the broiling or grilling step. This saves you a significant chunk of time on game day or when you’re entertaining.
Bake at a higher temperature for faster results: If you only have 1.5 hours instead of 2.5 hours, bake at 300°F instead of 275°F. You’ll lose a tiny bit of the slow-cooked flavor development, but the ribs will still be very good. Check them at 1.5 hours and adjust as needed. Don’t try to bake faster than this or you risk them becoming tough rather than tender.
Serving Suggestions and Complementary Sides
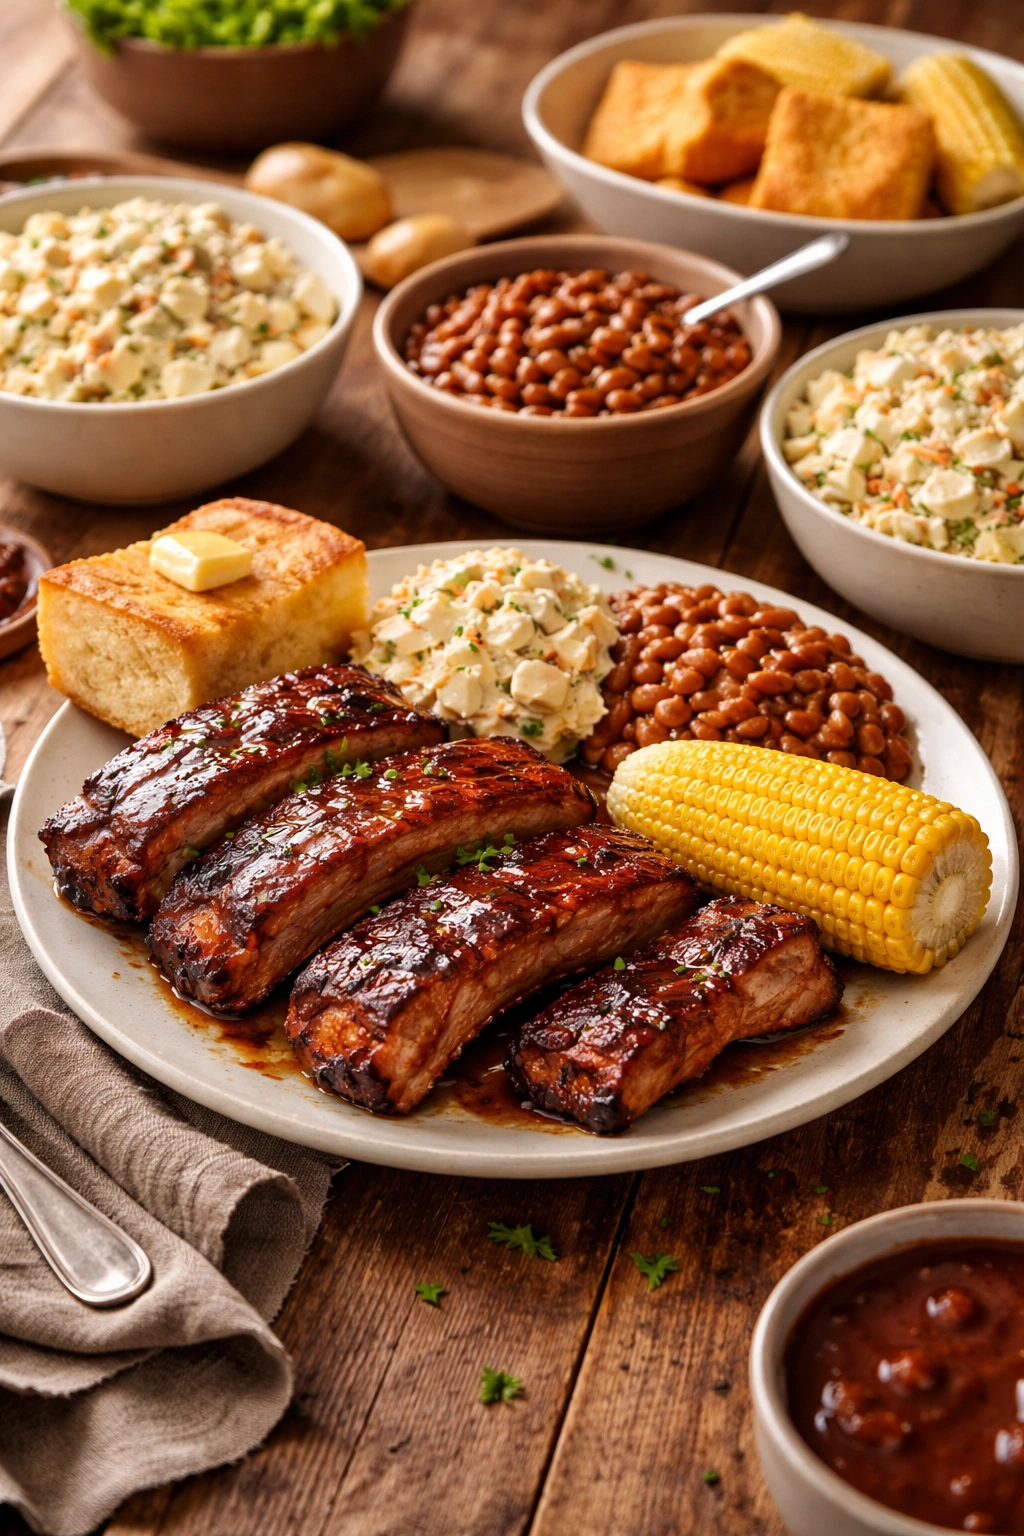
Ribs are the star of the plate, but the right sides make the entire meal sing. These are the sides that work best alongside fall-off-the-bone ribs, either as a sit-down dinner or as part of a larger BBQ spread.
Classic Creamy Coleslaw: The cool, crunchy texture and tangy dressing cut through the richness of the ribs perfectly. Make it ahead so the flavors blend.
Old-Fashioned Potato Salad: Creamy, substantial, and filling, potato salad is almost mandatory with ribs. The cool potato and mayo-based dressing balance the smoky, spiced meat.
Baked Beans: Either homemade or from a can with a touch of brown sugar and bacon stirred in. The beans echo the sweet-savory flavors of the ribs.
Creamed Corn or Corn Pudding: Summer comfort in a bowl. The sweetness of corn complements the spiced rub beautifully.
Mac and Cheese: Whether it’s creamy stovetop or baked with a crispy topping, mac and cheese feels like the right choice next to ribs.
Cornbread or Buttermilk Biscuits: A simple bread to sop up sauce and build a meal structure that makes everything feel more substantial.
Grilled Corn on the Cob: If you’re finishing the ribs on the grill, throw corn on there too. Brush it with butter and let it char slightly.
Simple Green Salad: If everything else is rich, a fresh salad with a sharp vinaigrette provides welcome brightness.
Pickled Vegetables: Quick-pickled onions, peppers, or cucumbers add a sharp counterpoint to the sweetness of the sauce.
For drinks, cold lemonade, iced tea, or beer all pair excellently. If you’re making homemade BBQ sauce with bourbon or whiskey, serving a bourbon cocktail or whiskey smash makes sense too.
Common Mistakes and How to Avoid Them
Under-cooking the ribs. The most common mistake is removing them from the oven before they’re actually tender. If a knife doesn’t slide through easily, keep baking. Underbaked ribs are disappointing and you can’t fix them at the broil step.
Opening the oven too many times. Every peek costs you 10 to 15 minutes of cooking time. Resist the urge and trust the process.
Using too little seasoning. You need a generous coating—about 1.5 teaspoons of rub per pound of ribs. Don’t be timid.
Forgetting to remove the membrane. This single step makes a noticeable difference in texture. Two minutes of effort is worth it.
Skipping the finishing step. Broiling or grilling creates the sticky, caramelized exterior that makes ribs memorable. Don’t skip it to save time.
Using thin foil that tears. This defeats the purpose of the seal and your ribs may dry out. Spring for heavy-duty foil.
Applying sauce too early. Sauce applied during the long bake just burns and tastes bitter. Always apply it in the final 5-10 minutes.
Burning the sauce under the broiler. Watch constantly during this step. The difference between gorgeously caramelized and burnt is less than a minute.
Not adjusting for oven differences. Your oven may run hotter or cooler than mine. Use the visual and tactile cues (knife resistance, meat tenderness) rather than timing alone.
Why This Method Works Better Than Many Alternatives
Smoking ribs produces phenomenal flavor, but requires a smoker, hours of active management, temperature control, and skill that takes time to develop. Boiling ribs (a shortcut some people try) makes them mushy and leaches flavor. Grilling them start-to-finish often results in a charred exterior with an undercooked interior. The oven-and-finish method splits the difference beautifully—it takes less than 3 hours total, requires zero special equipment beyond a regular oven, produces consistent results every single time, and generates flavor that rivals methods that take twice as long.
The foil-wrapped oven method mimics the low-and-slow environment of a smoker without the smoke component. The caramelized finish gives you that desirable crust and visual appeal. You can make them indoors in winter and outdoors in summer using the same exact base method. The ribs come out so tender that even people with dental work or difficulty chewing can eat them comfortably. And perhaps most importantly, after making these a few times, you won’t need to consult a recipe anymore—the process becomes second nature.
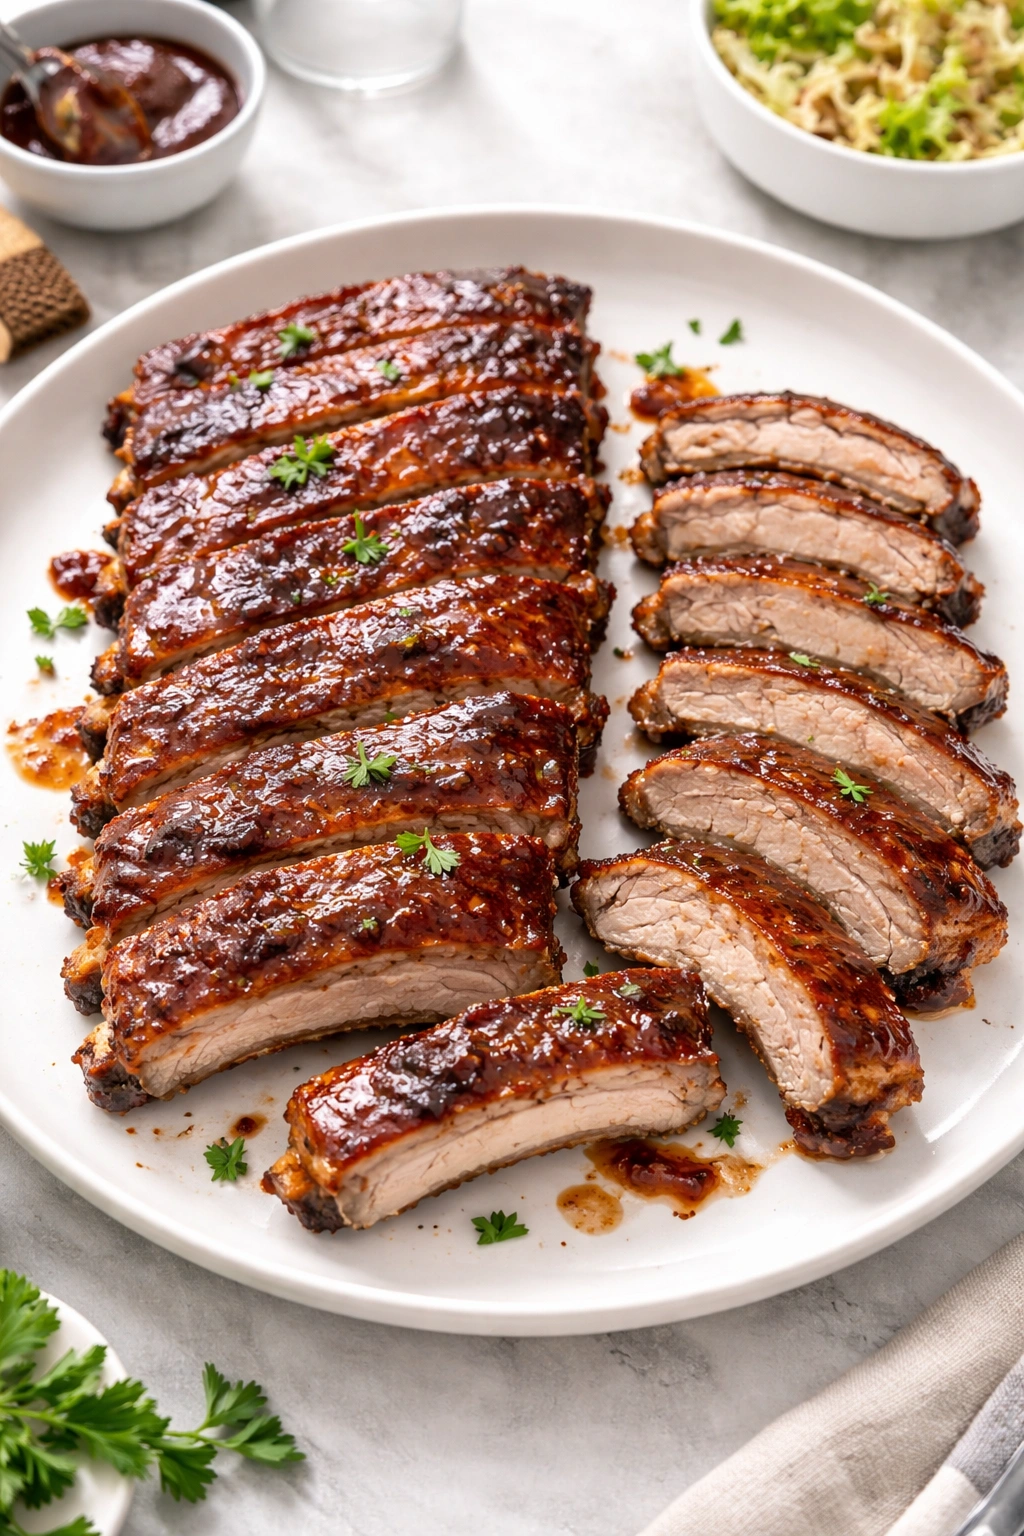
Final Thoughts
The first time you pull a rack of ribs from the broiler or grill and see that glossy, caramelized exterior, you’ll understand why this method has become a crowd favorite. The meat falls from the bone with the gentlest pressure. The sauce is sticky and deeply flavorful. The flavors have had hours to develop and meld. Everything tastes like you’ve been perfecting this for years, even though you probably started with no experience whatsoever.
The beautiful thing about this recipe is how forgiving it is. If you bake the ribs 15 minutes longer than planned, they’ll still be perfect. If your grill runs hotter than expected, they won’t burn. If you prefer your sauce sweeter or spicier, you control every element. Start with this basic method, make it once or twice exactly as written, and then begin playing with variations. You might discover that you prefer baby backs over St. Louis-style, or that a vinegar-based sauce is your favorite, or that finishing on the grill instead of under the broiler makes all the difference in your mind. That’s the joy of mastering a simple technique—once you understand the fundamentals, you can make it entirely your own.