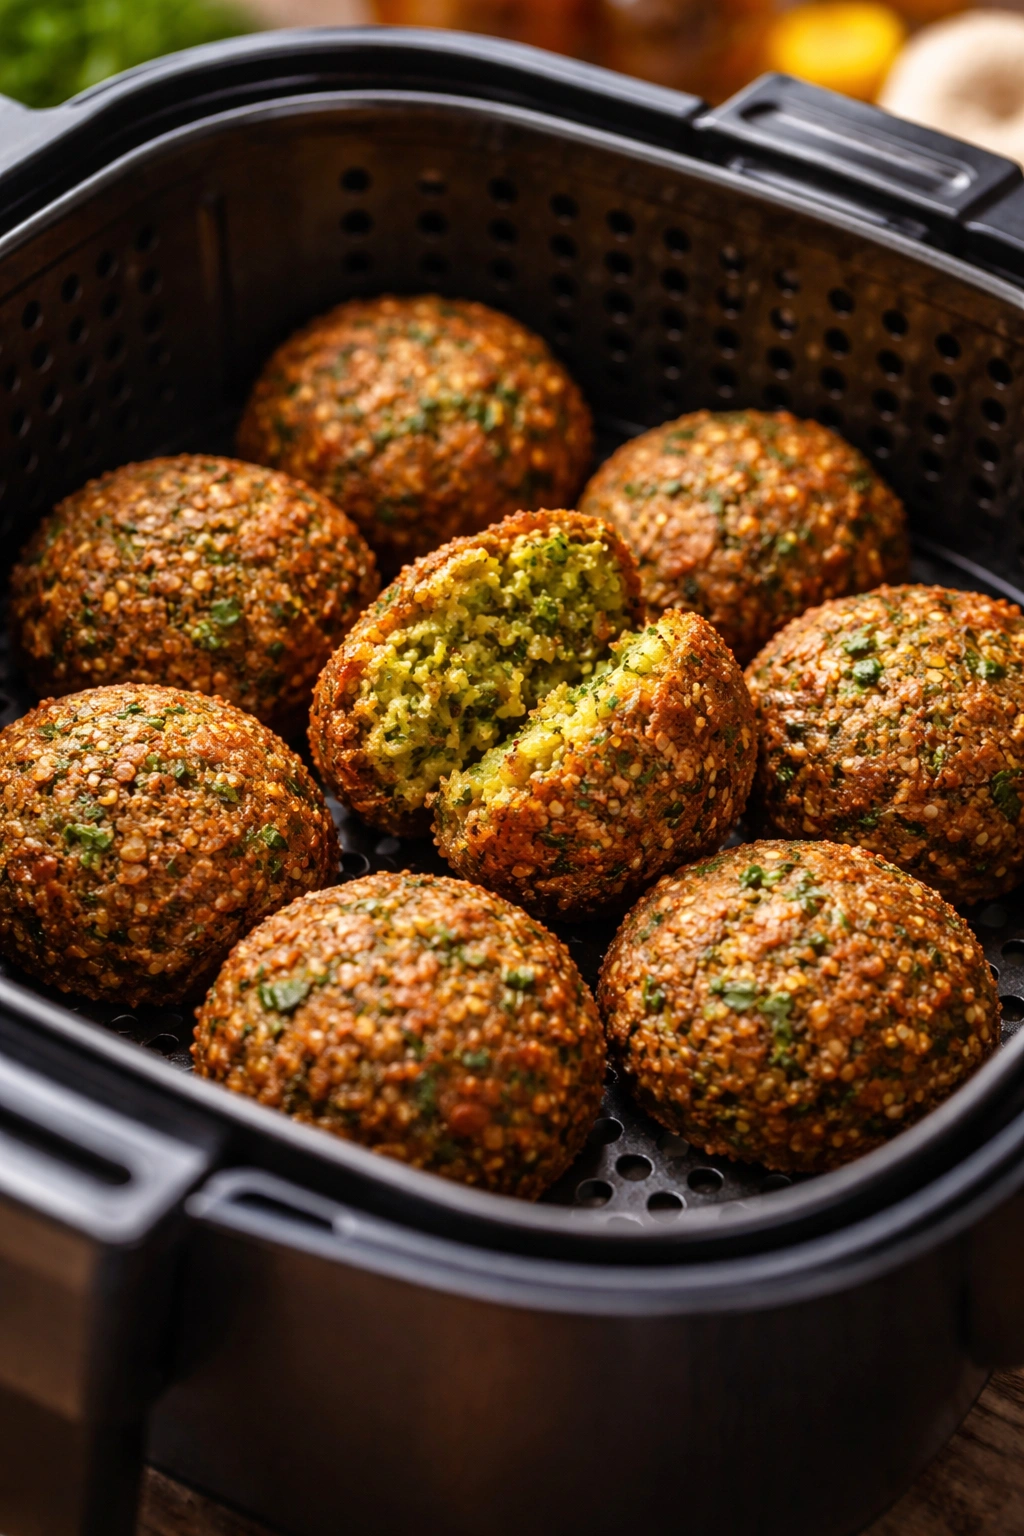
Crispy Air Fryer Falafel Done in 20 Minutes
If you’ve ever craved that authentic, golden-brown, perfectly crispy falafel but dreaded the mess of deep-frying, your air fryer just became your new best friend. Here’s the truth: air fryer falafel delivers the same crackling exterior and tender, herbaceous center that makes traditional deep-fried versions so irresistible — without the splatter, the lingering oil smell, or the caloric guilt. The magic happens through a combination of proper preparation, the right temperature, and one key ingredient that most home cooks overlook: patience during the soaking stage.
I’ve tested this recipe dozens of times, experimenting with different air fryer temperatures, soaking times, and mixture consistency to nail the sweet spot where the outside turns deep golden brown and crispy while the interior stays light, fluffy, and flavorful. The result? Falafel that rivals anything you’d find at a Middle Eastern restaurant, ready in just 20 minutes of active cooking time. Whether you’re serving these as an appetizer with tahini sauce, stuffing them into warm pita bread, or tossing them onto a vibrant salad, you’ll find yourself making this recipe far more often than you expect.
Why Air Fryer Falafel Works Better Than You’d Think
The skepticism is understandable. Deep-fried falafel has been perfected over centuries across the Middle East and North Africa. Submerging them in hot oil creates an instantaneous, dramatic crust while the interior steams gently inside its protective shell. How could an air fryer possibly compete?
The answer lies in understanding what an air fryer actually does: it circulates extremely hot air at high velocity around food, creating crispy, browned exteriors through a process remarkably similar to deep-frying, just without the oil bath. When configured correctly — meaning proper spacing, adequate preheating, and a light mist of oil spray — an air fryer achieves crispness that hovers somewhere between 95 and 98 percent of what traditional deep-frying produces. For most home cooks, the difference is barely noticeable, especially when paired with fresh toppings and sauces.
What makes air fryer falafel genuinely superior to oven-baked versions, however, is the speed and texture. Baked falafel often emerges with a dense, dry interior or an unevenly cooked center. Air fryer falafel, by contrast, stays moist and tender on the inside while achieving that satisfying exterior crunch. The circulating heat also means cooking time drops significantly — from 25-30 minutes in an oven to just 10-15 minutes in an air fryer.
What Makes Falafel So Beloved Across Cultures
Falafel occupies a unique space in global cuisine: it’s the vegetarian protein that even meat lovers crave. Walk through any Middle Eastern neighborhood, and you’ll find falafel stands — often centuries-old family operations — treating these humble chickpea fritters like culinary art forms. But falafel’s appeal runs deeper than nostalgia or tradition.
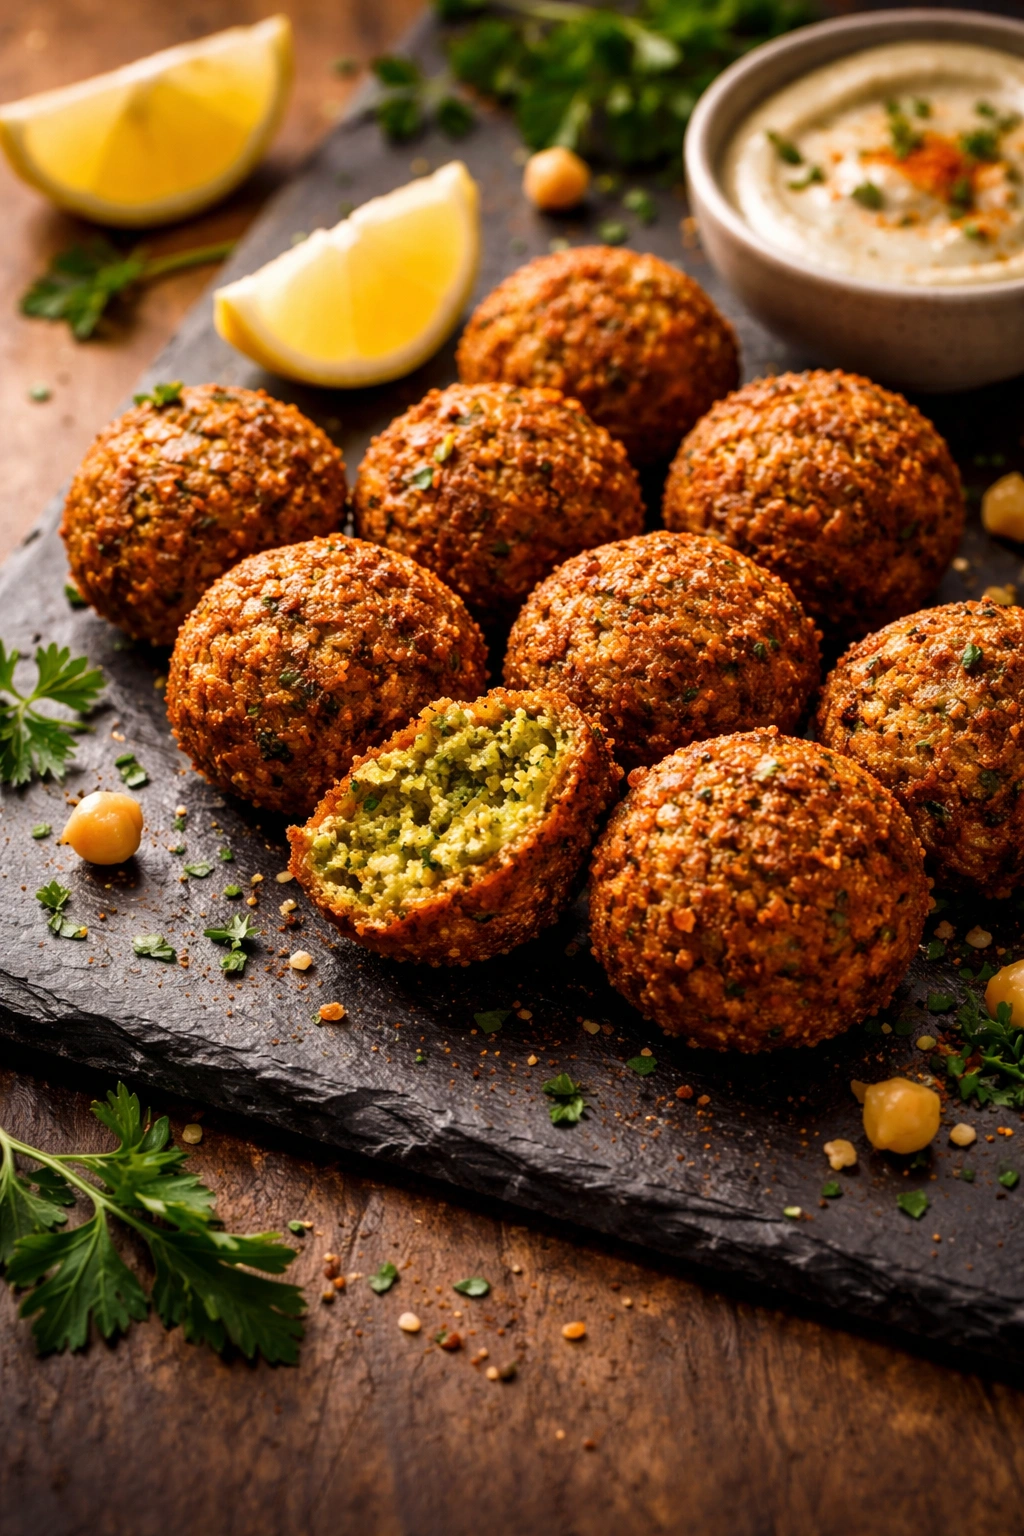
The magic comes from the combination of textures and flavors working in perfect harmony. The crispy outer shell provides immediate textural satisfaction, almost like biting into a savory pastry. The moment you break through that crust, you hit a warm, creamy interior that yields easily to your teeth. The flavor profile — warm spices like cumin and coriander, bright fresh herbs like parsley and cilantro, sharp garlic and onion, and just a whisper of heat from cayenne or fresh chili — creates an incredibly complex taste experience from a short list of ingredients.
Falafel is also deeply democratic in its appeal. It’s naturally vegan, making it accessible to vegetarians, vegans, and those observing plant-based diets. It’s gluten-free when made properly (no breadcrumb fillers or flour binders necessary). It’s economical — dried chickpeas cost pennies per serving — yet tastes expensive and carefully crafted. You can serve falafel at a casual weeknight dinner or an elegant dinner party, and it works equally well in either context.
The Secret to Achieving That Perfect Crispy Exterior
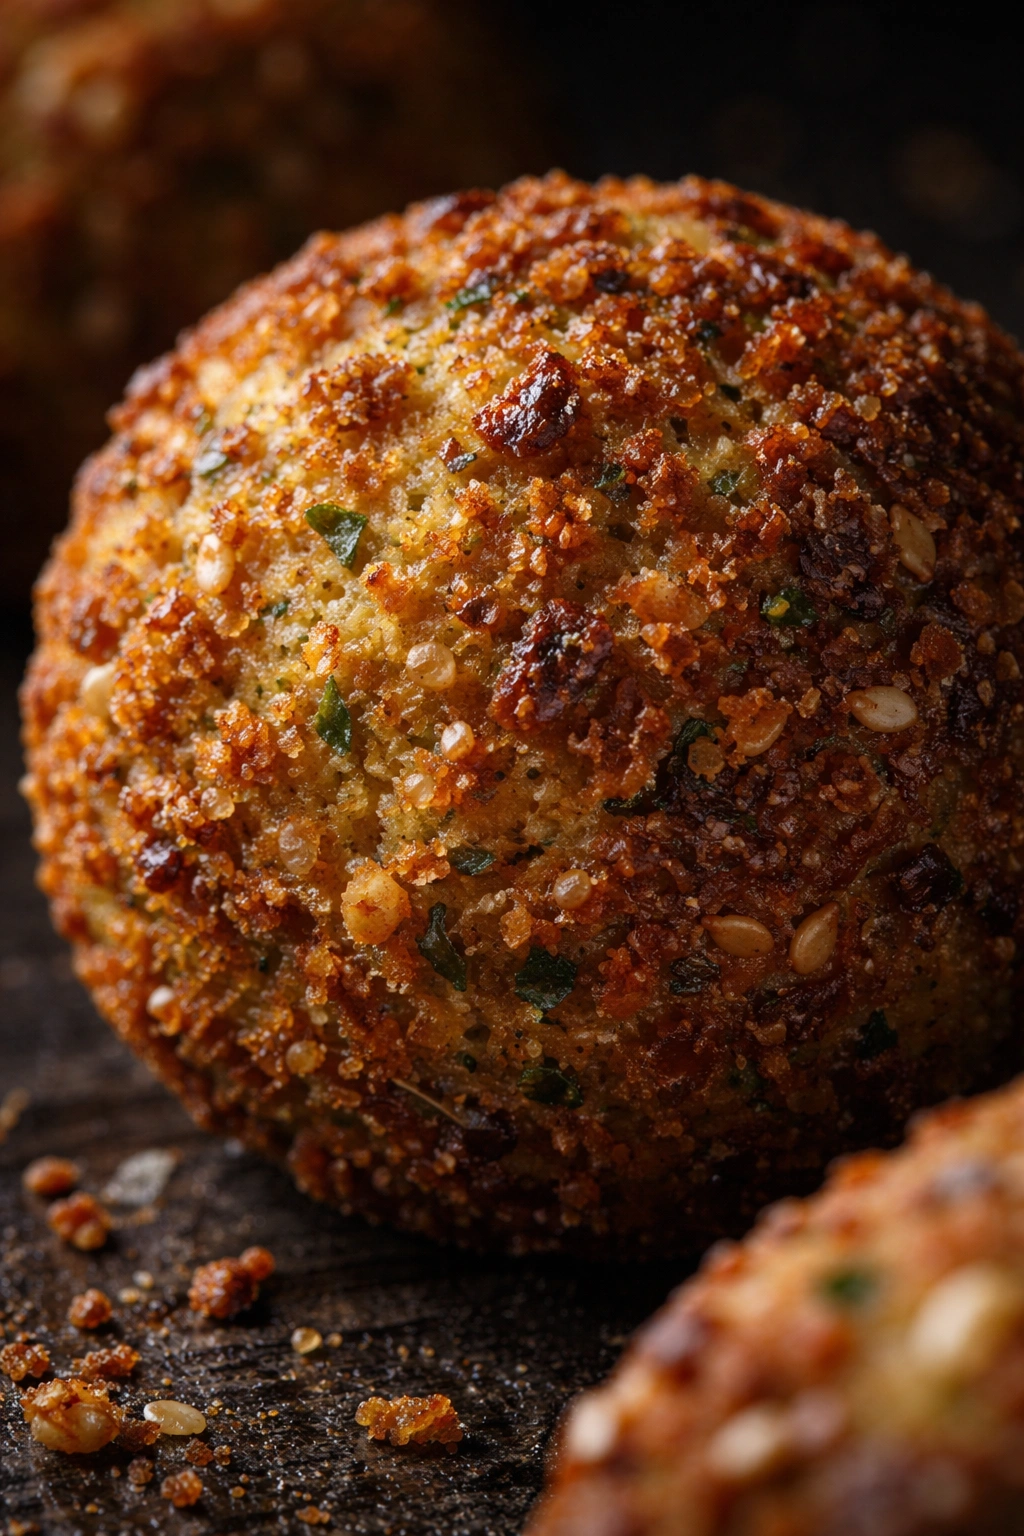
Getting falafel truly crispy in an air fryer comes down to understanding the moisture content of your mixture and the physics of hot air circulation. Here’s what most home recipes skip over: the texture of your falafel mixture before cooking determines 80 percent of your success.
Many cooks use canned chickpeas out of convenience, telling themselves it doesn’t matter much. It matters completely. Canned chickpeas are fully cooked, which means they’re saturated with water and extremely tender — almost mushy. When you process them into a falafel mixture, that excess moisture means your batter either falls apart or requires added flour to bind it together. More flour equals denser, heavier falafel that won’t crisp properly no matter your air fryer temperature.
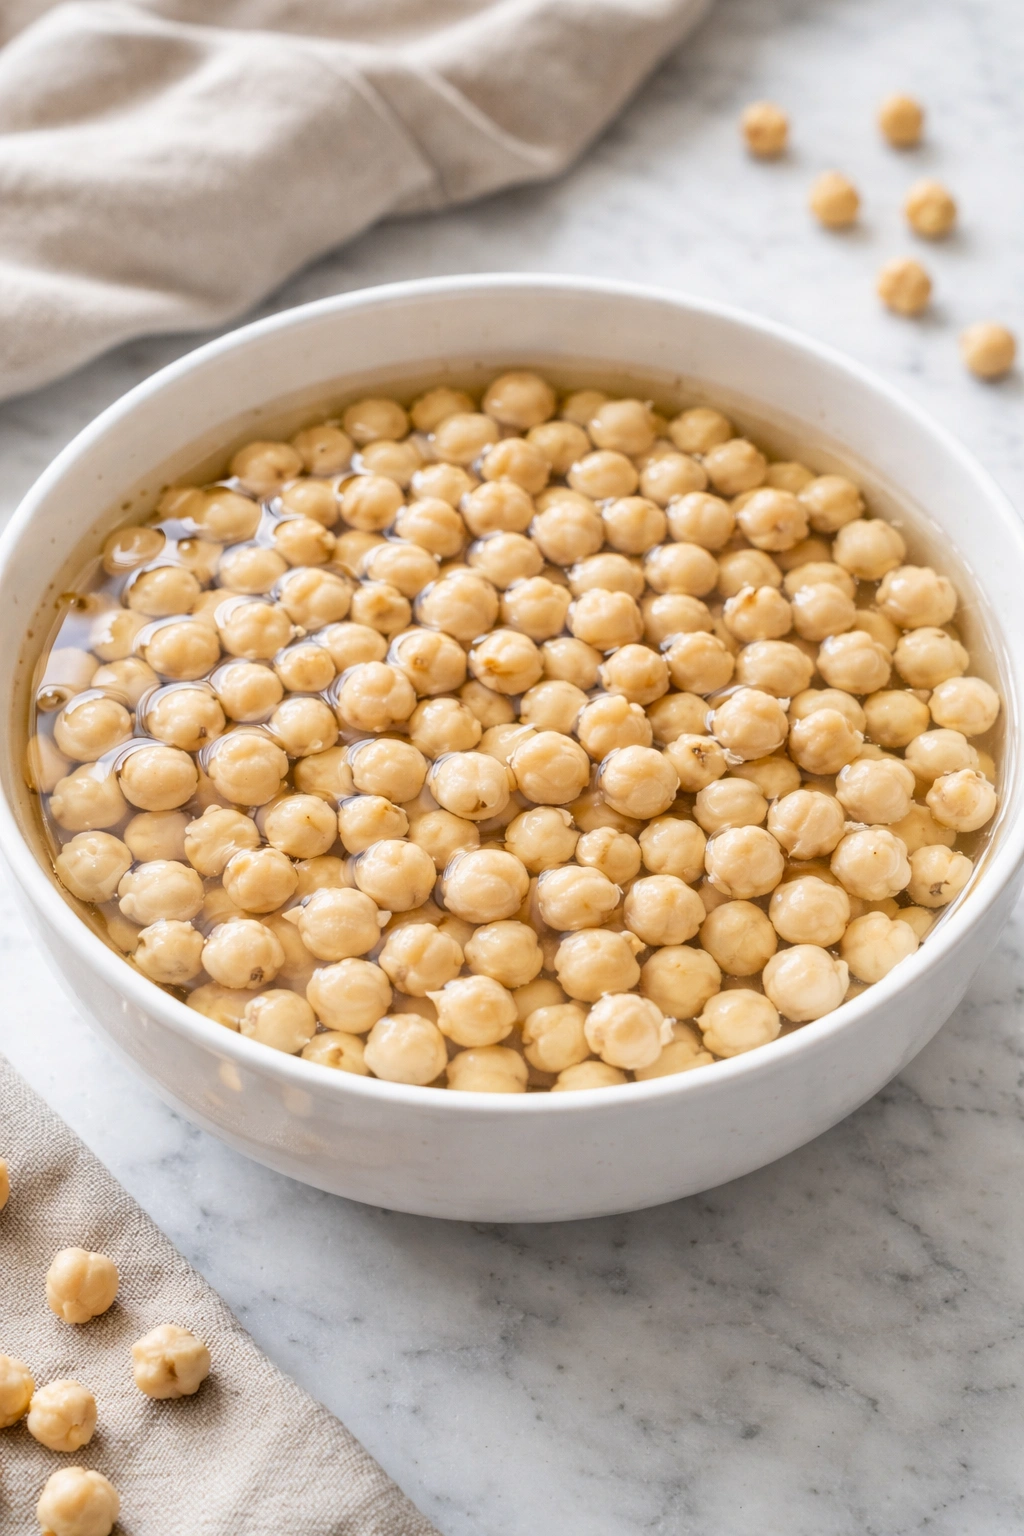
Dried chickpeas, by contrast, require a full overnight soak. This rehydrates them gradually, allowing them to plump up while their starch content remains stable. When processed, soaked dried chickpeas form a mixture with just the right balance of moisture and structure — sturdy enough to hold its shape without flour, yet moist enough to stay tender after cooking.
The second secret is air circulation within your air fryer basket. You absolutely cannot overcrowd the basket. Each falafel needs breathing room on all sides so the hot air can access every surface. Crowding them together causes some pieces to steam instead of fry, creating uneven texture and soft spots. Work in batches if necessary — it’s worth the extra effort.
Third, a light spray of oil on the exterior of each falafel is non-negotiable for crispness. You’re not deep-frying; you only need a thin coating. This mist provides the fat molecules necessary for browning and crisping. Without it, your falafel may cook through but won’t develop that desirable golden, crunchy shell.
Key Ingredients Explained: Why Each One Matters
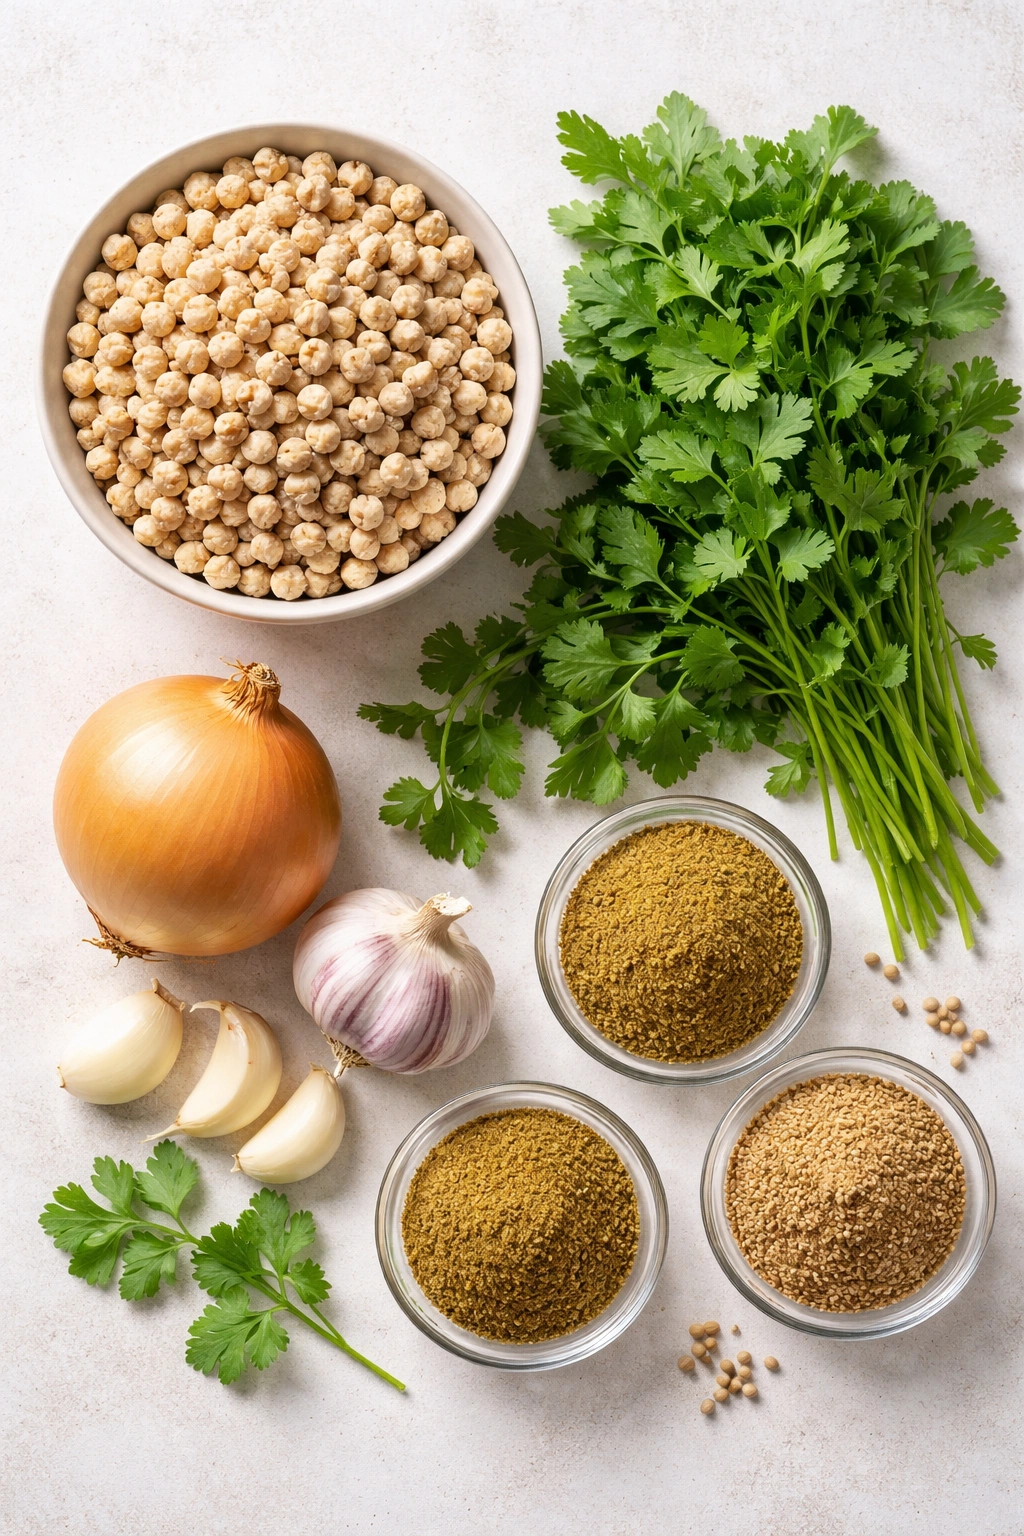
Every ingredient in traditional falafel serves a specific purpose, and understanding what each one contributes helps you appreciate why substitutions often backfire. Let me break down what you’re actually working with:
Dried chickpeas are the foundation — they’re what give falafel its protein, fiber, and distinctive slightly earthy flavor. As mentioned, they must be soaked uncooked, never using canned or pre-cooked varieties.
Fresh herbs — primarily parsley and cilantro — provide brightness, visual color, and a fresh, green herbaceous note that cuts through the richness of the falafel. These aren’t optional flavor boosts; they’re structural elements of authentic falafel. Dried herbs won’t work because they lack the moisture and vibrancy.
Onion and garlic are aromatics that build a savory flavor foundation. Yellow onions are ideal because they’re milder and sweeter than red onions, creating a balanced base that doesn’t overpower the delicate herb flavor.
Ground cumin and coriander are warming spices that create the signature falafel taste profile. Cumin brings earthy, warm notes, while coriander adds subtle citrus and nutty complexity. Together, they create a flavor that’s hard to identify but impossible to forget.
Salt is critical not just for taste but also for bringing out the natural flavors of the herbs and spices, preventing the falafel from tasting flat or one-dimensional.
Baking powder is the ingredient that separates good falafel from exceptional falafel. It causes the mixture to rise slightly during cooking, creating a lighter, airier crumb inside rather than a dense, compact texture. Use it, but add it just before cooking, not during the initial mixing, as it loses potency when left sitting in the refrigerator.
A light mist of oil for cooking completes the picture — it’s what browns the exterior and creates the crispy texture that makes air fryer falafel so satisfying.
The Importance of Soaked Dried Chickpeas (There’s No Real Shortcut Here)
I want to address this head-on because it’s the question I receive most often: Can I use canned chickpeas and just add more flour to make it work?
Technically, yes. Practically, no — if you want genuinely good falafel. Here’s why: canned chickpeas are cooked under pressure until completely soft. Their cell structure has broken down significantly. When you process them, they turn into a paste far more quickly than soaked dried chickpeas do. This paste tends to be gluey and requires substantial flour additions to achieve any structure at all.
Each addition of flour makes your falafel denser and more bread-like. You’re moving away from falafel territory and toward chickpea fritters — they’re different beasts entirely. The chickpea fritters can be perfectly delicious, but they lack the light, airy interior and that delicate, fine crumb that distinguishes truly excellent falafel.
Soaking dried chickpeas overnight might seem like a barrier to “quick” cooking, but here’s the reality: you can soak them one evening, then make falafel the next morning in 20 minutes. Alternatively, soak a larger batch and refrigerate the soaked (but uncooked) chickpeas for several days — they’ll keep in the fridge for up to three days, giving you flexibility.
There’s also a practical reason kitchens across the Middle East use dried chickpeas: they’re cheaper, shelf-stable for years, and available year-round. Once you embrace overnight soaking as a normal part of meal prep, you’ll realize it’s genuinely minimal effort for genuinely superior results.
Serving and Timing Information
Yield: Makes 18-20 falafel (serves 4 as a main course with sides, or 6 as an appetizer)
Prep Time: 20 minutes (not including soaking)
Cook Time: 15 minutes
Total Time: 35 minutes (plus 12-24 hours for soaking chickpeas)
Difficulty: Beginner — The process is straightforward, and a food processor does most of the work. The only requirement is planning ahead to soak chickpeas overnight.
Complete Air Fryer Falafel Ingredients
For the Falafel:
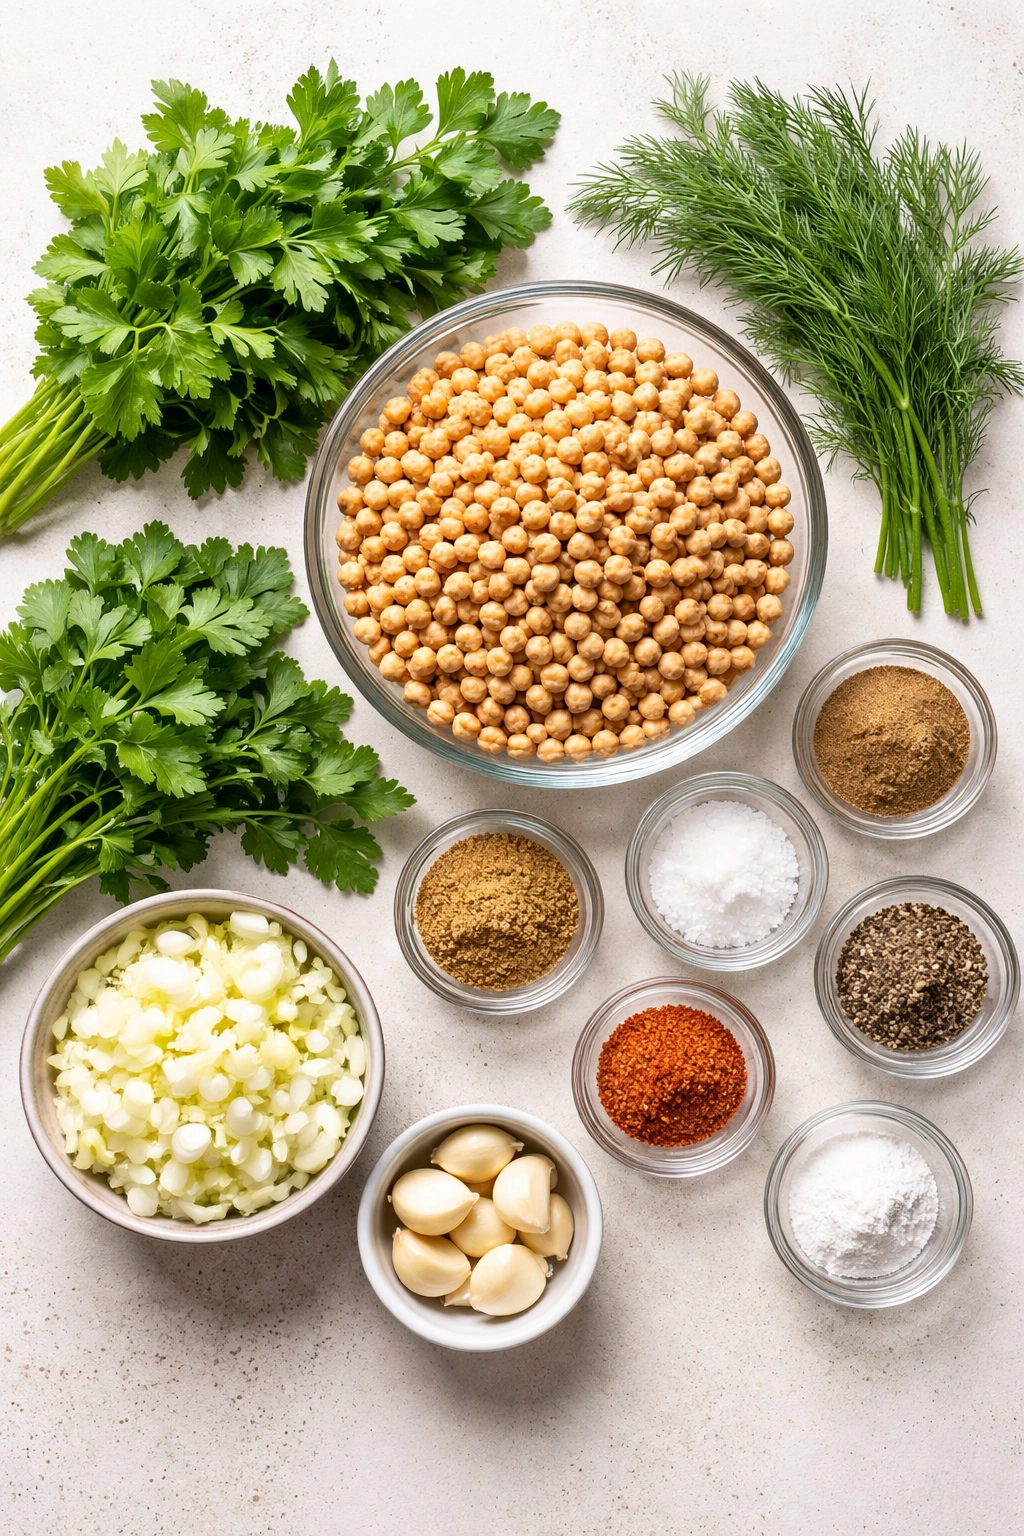
- 2 cups (400 grams) dried chickpeas, soaked in water overnight or up to 24 hours, then drained and thoroughly patted dry
- 1 cup fresh parsley leaves, packed, stems removed
- ¾ cup fresh cilantro leaves, packed, stems removed
- ½ cup fresh dill, stems removed (optional, but highly recommended)
- 1 small yellow onion, roughly chopped (about ½ cup)
- 5-6 garlic cloves, peeled and roughly chopped
- 2 teaspoons ground cumin
- 2 teaspoons ground coriander
- 1 teaspoon kosher salt (adjust to taste)
- ½ teaspoon ground black pepper
- ½ teaspoon cayenne pepper (optional, adds gentle heat without spiciness)
- 1 teaspoon baking powder (add this after chilling, just before cooking)
- Cooking spray (olive oil or neutral oil spray)
For Serving:
- Warm pita bread
- Tahini sauce (store-bought or homemade)
- Fresh lettuce or mixed greens
- Diced tomatoes
- Sliced cucumbers
- Thinly sliced red onion
- Fresh lemon wedges
- Optional: sliced pickles, hummus, or roasted vegetables
Detailed Step-by-Step Instructions
Prepare the Chickpeas (The Day Before):
-
Place 2 cups of dried chickpeas in a large bowl and cover with 6-8 cups of cold water — the chickpeas will expand considerably as they soak, so use more water than you think you’ll need. The chickpeas should be covered by at least 2-3 inches of water at all times.
-
Let the chickpeas soak at room temperature for 12-24 hours. The longer soak (closer to 24 hours) is ideal because it ensures every chickpea is completely softened and plumped, giving you the best texture in the final falafel.
-
After soaking, drain the chickpeas in a colander and rinse them thoroughly under cold running water. Spread them out on a clean kitchen towel and pat them dry as completely as possible — excess moisture is the enemy of crispy falafel.
Make the Falafel Mixture:
-
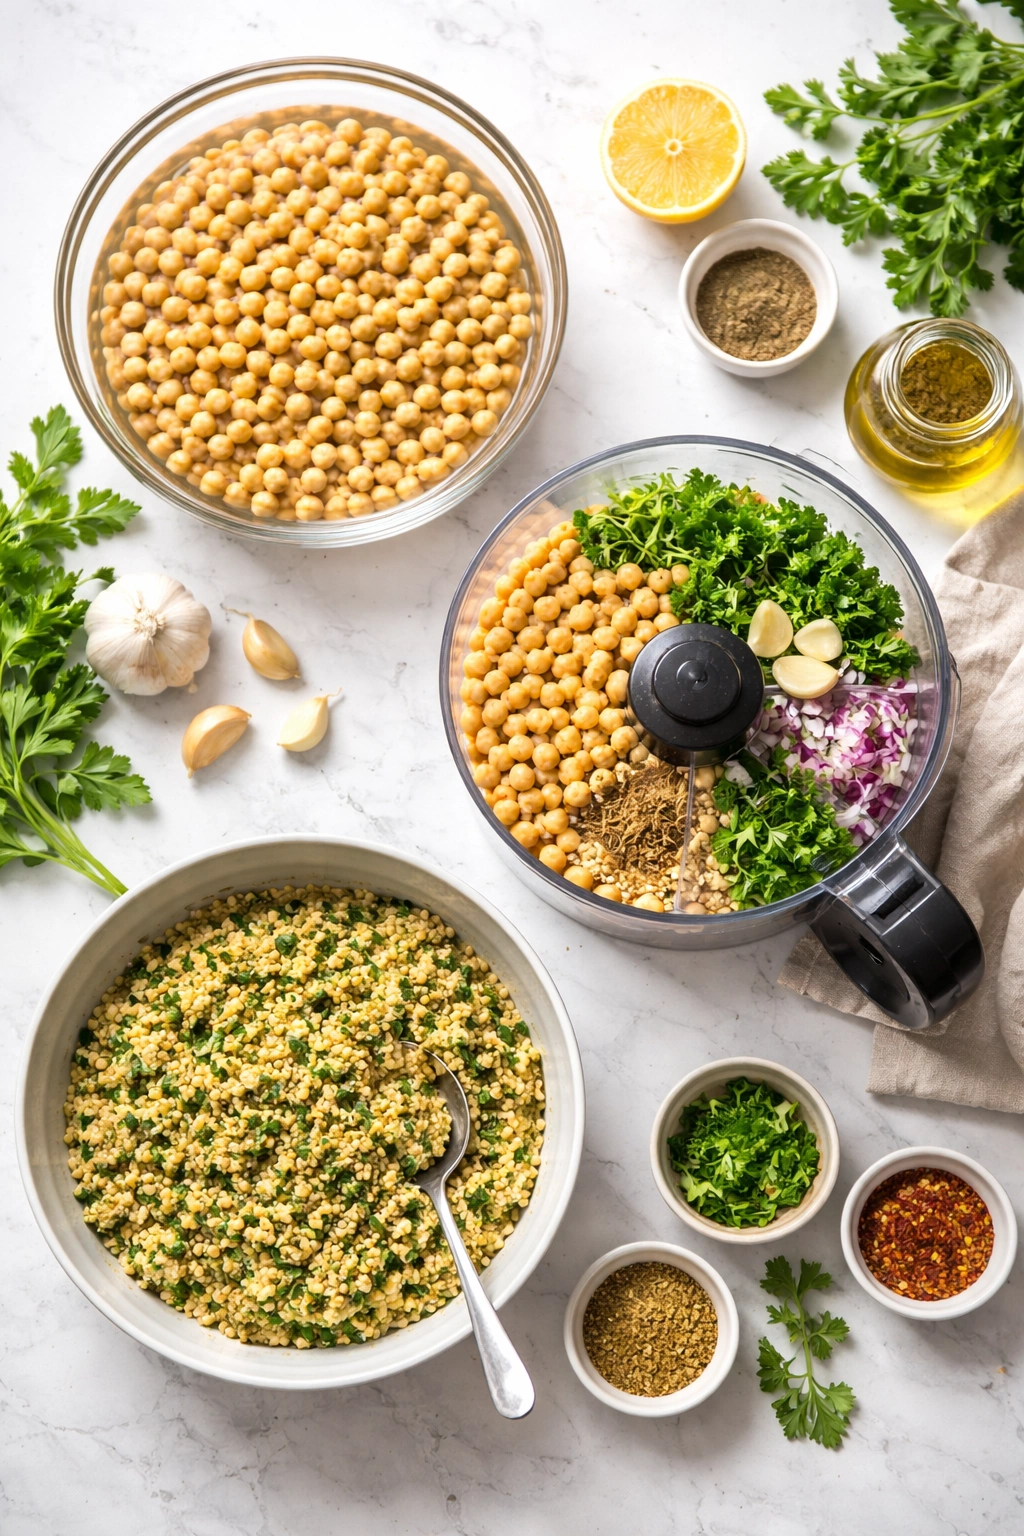
Add the drained, dried chickpeas to the bowl of a food processor fitted with the S-blade attachment.
-
Pulse the chickpeas for about 20-30 seconds, scraping down the sides of the food processor bowl with a rubber spatula, and pulse again. Repeat this process 2-3 times until the chickpeas are broken down into small, fine pieces roughly the size of breadcrumbs or coarse cornmeal. The texture should be granular and somewhat crumbly, not smooth or paste-like. If you process too long, you’ll end up with a heavy mixture that produces dense falafel.
Advertisements -
Add the parsley, cilantro, dill (if using), chopped onion, garlic, cumin, coriander, salt, black pepper, and cayenne pepper to the food processor.
-
Pulse everything together for another 30-40 seconds, scraping down the sides as needed, until the mixture is well combined and has turned a beautiful bright green color. The texture should still feel slightly grainy, with some small pieces of herbs and chickpeas visible — not a smooth paste.
-
Transfer the entire mixture to a bowl, cover with plastic wrap, and refrigerate for at least 45 minutes, or up to overnight. This resting time is crucial. It allows the starches in the chickpeas to absorb any excess moisture, helps the flavors meld together, and makes the mixture much easier to shape. If you skip this step, your falafel mixture will be sticky and difficult to work with.
Shape the Falafel:
-
Remove the falafel mixture from the refrigerator. Sprinkle the 1 teaspoon of baking powder evenly over the top of the mixture and gently fold it throughout with a spoon or spatula until the baking powder is fully incorporated. Don’t overmix once you’ve added the baking powder — just combine until no white streaks remain.
-
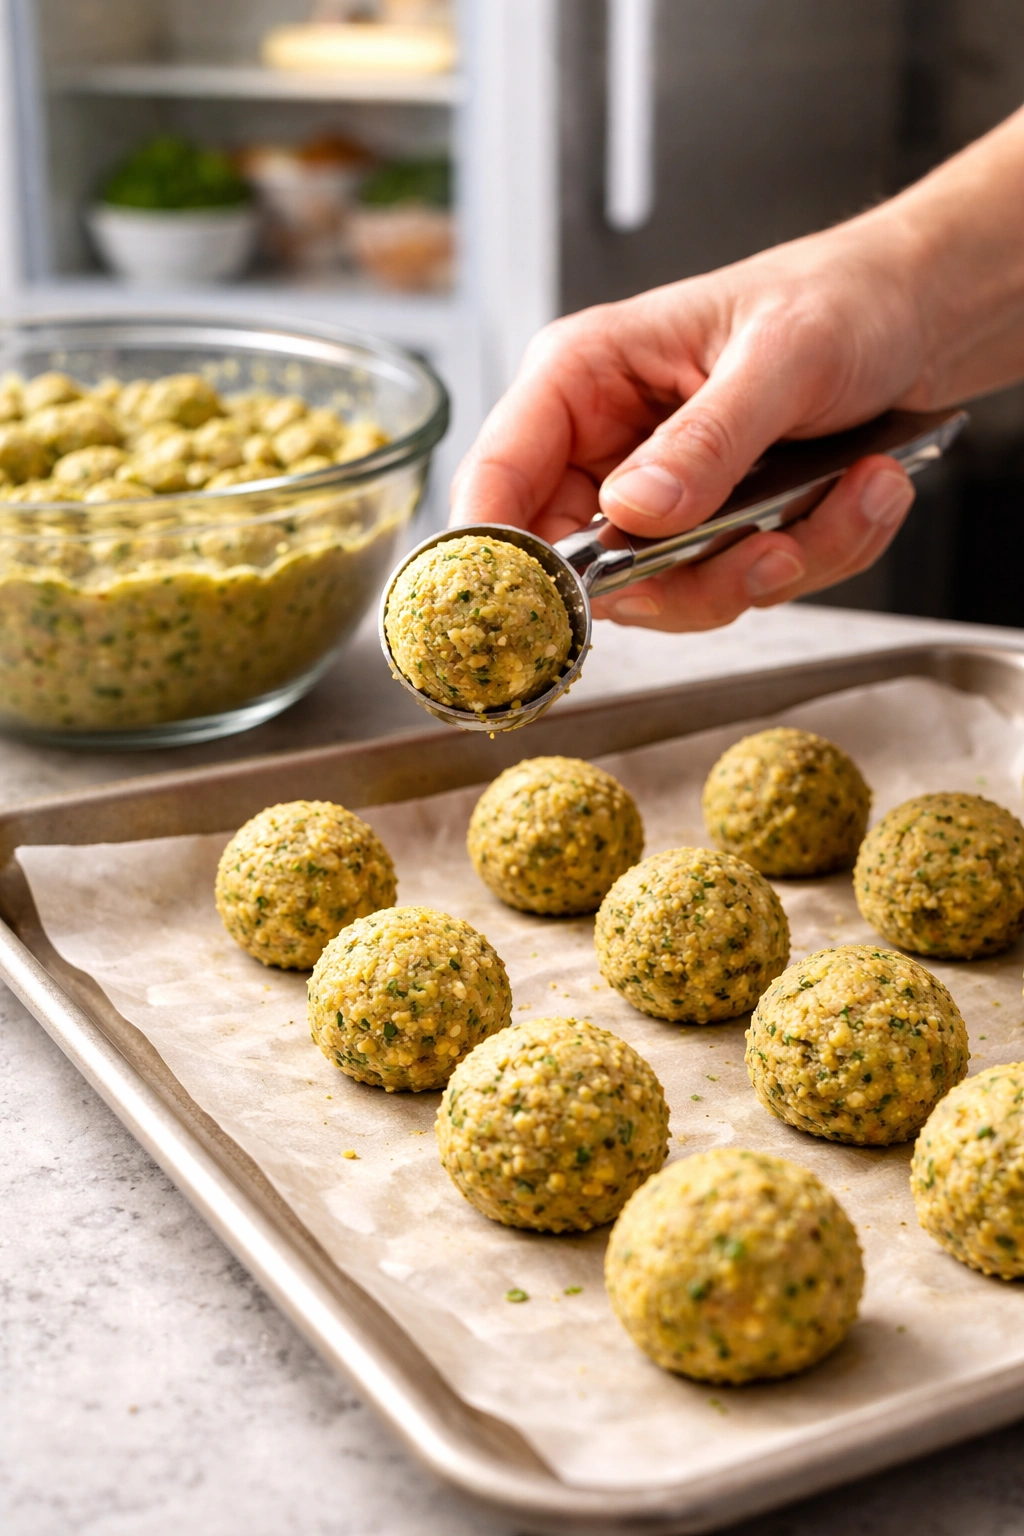
Wet your hands slightly with cool water (this prevents the mixture from sticking to your palms). Scoop out about 1½ tablespoons of the falafel mixture using a small ice cream scoop or measuring spoon.
-
Gently roll the scooped mixture between your palms to form a ball, then lightly flatten it into a disc shape about ½ to ¾ inch thick. These discs work better in an air fryer than balls because they lay flat, cook evenly, and don’t roll around the basket.
-
Place each formed falafel on a plate or baking sheet as you shape the remaining mixture. You should end up with approximately 18-20 falafel.
Preheat and Prepare the Air Fryer:
-
Preheat your air fryer to 400°F (200°C) for 3-5 minutes. Proper preheating is important — you want the air fryer at full temperature when the falafel goes in, so the exterior starts crisping immediately.
Advertisements -
Lightly spray the basket of your air fryer with cooking spray to prevent sticking.
Cook the Falafel:
-
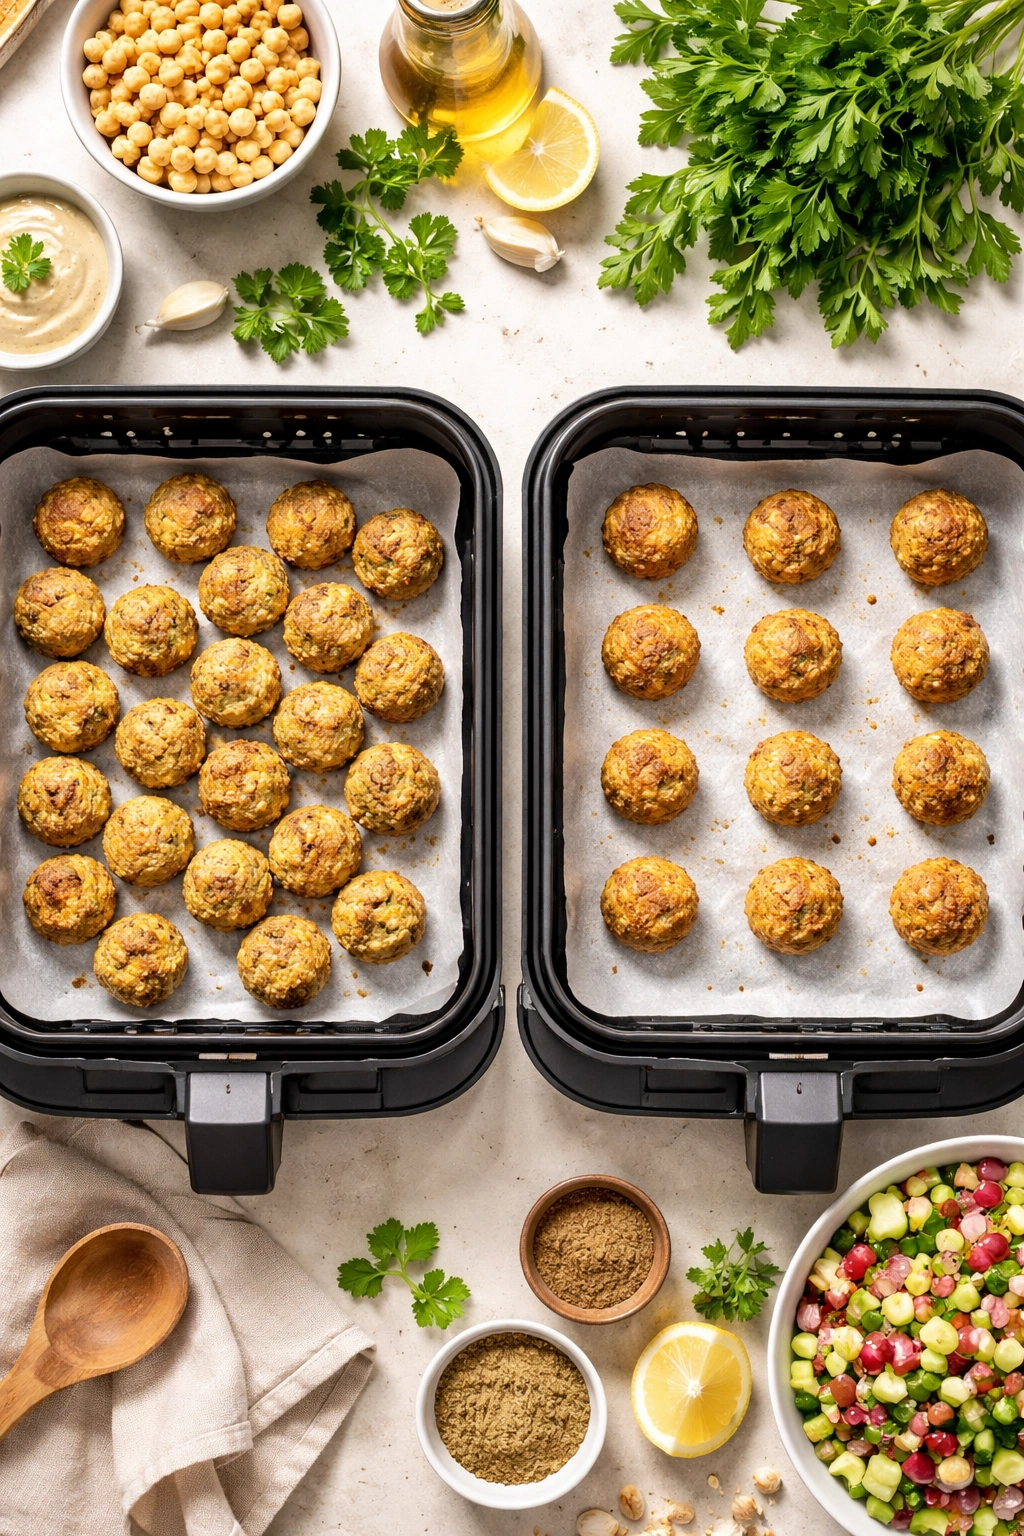
Working in batches, arrange half of the falafel discs in the air fryer basket in a single layer, leaving at least ½ inch of space between each piece so hot air can circulate freely. Do not overcrowd the basket — this is non-negotiable if you want crispy results.
-
Lightly spray the tops of the falafel with cooking spray — just a quick mist, not a heavy coating.
-
Set the timer for 10 minutes and air fry at 400°F (200°C). At the 5-minute mark, check on the falafel; if they’re already quite golden on the bottom, you might reduce the remaining cooking time slightly.
-
After 10 minutes, carefully flip each falafel using tongs or a small spatula. The cooked side should be golden brown and crispy. If they’re not brown enough yet, that’s fine — they’ll continue cooking as you flip.
-
Lightly spray the newly exposed top side with cooking spray.
-
Air fry for another 5-7 minutes until the second side is also golden brown and crispy, and the falafel feels firm but not hard when you press it gently. The exact time depends on your air fryer’s power and model, so check around the 5-minute mark.
-
Transfer the cooked falafel to a clean plate or paper towels. They’ll continue to crisp slightly as they cool for the first 1-2 minutes.
-
Return the empty air fryer basket to the air fryer (still at 400°F), and repeat the process with the remaining falafel batch, reheating the basket for just 1-2 minutes before adding the second batch.
Advertisements -
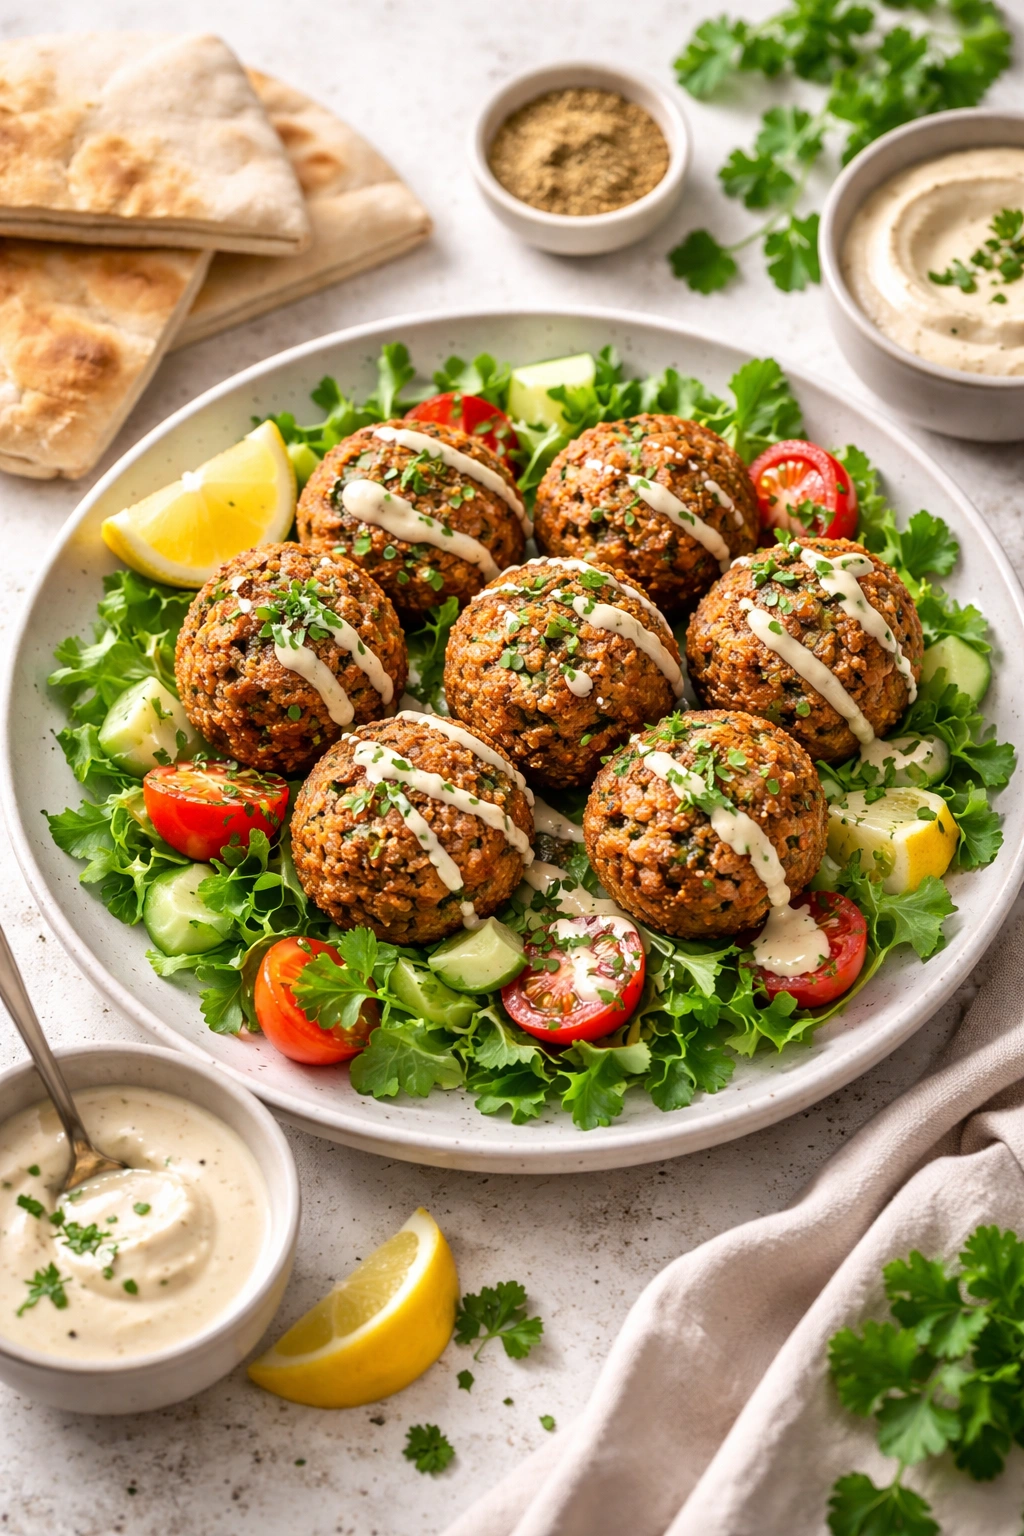
Serve the falafel warm, ideally within 5-10 minutes of cooking when the exterior is at its crispiest.
Tips for Achieving Absolutely Perfect Results
Use a falafel scoop or ice cream scoop for consistent sizing. All your falafel will cook in roughly the same amount of time, preventing some from being undercooked while others overcook. Consistency also matters for presentation and even heating in pitas.
Don’t skip the refrigeration step. Even if you’re in a hurry, 30 minutes in the fridge makes a remarkable difference in your mixture’s handling and the final texture. The starches need time to absorb moisture, and the flavor compounds need time to integrate.
Pat your soaked chickpeas completely dry. Moisture is the enemy of both proper texture and crispness. Use a clean kitchen towel or paper towels and be thorough — this single step prevents mushy interiors and soggy exteriors.
Understand your air fryer’s personality. Air fryers vary significantly by brand and model. Some run hotter than others; some have more powerful air circulation. Start checking your falafel around the 8-minute mark on the first side, then adjust future batches accordingly. You might need 12 minutes total instead of 15, or vice versa. Keep notes on what worked best.
Space matters more than you think. Each falafel needs room for air to flow completely around it. If you’re tempted to squeeze one more piece into the basket to save time, resist that impulse. Overcrowding produces some crispy pieces and some steamed pieces — uneven and disappointing.
Lightly misting with oil is all you need. You’re not deep-frying. A quick spray that lightly coats the exterior is sufficient. If you spray too heavily, the excess oil pools at the bottom of your basket, potentially making the bottoms greasy rather than crispy.
Serve immediately after cooking. Falafel is best enjoyed hot, when the contrast between the crispy exterior and warm, tender interior is most pronounced. They’ll still be good after cooling, but that initial crispness is magical.
Common Mistakes to Avoid
Using canned chickpeas is the #1 mistake, which we’ve already discussed at length. The texture simply won’t be right, no matter what compensations you make. Plan ahead and soak dried chickpeas.
Over-processing the mixture creates a paste instead of a coarse, granular texture. This produces dense, heavy falafel that doesn’t crisp properly. Pulse in intervals and stop as soon as everything is roughly combined.
Skipping the refrigeration step leaves you with a sticky mixture that’s nearly impossible to shape. Even 20-30 minutes makes a difference; overnight is ideal.
Overcrowding the air fryer basket is the second-most-common mistake. Yes, you’ll need to work in batches, but this is non-negotiable for crispness. Space equals air circulation equals crispy falafel.
Not drying the soaked chickpeas thoroughly introduces excess moisture that makes your mixture harder to shape and prevents proper crisping. Spend two minutes patting them dry with a towel.
Adding the baking powder too early causes it to lose its leavening power by the time you cook the falafel. Add it just before cooking, after your mixture has chilled.
Neglecting to preheat the air fryer means the falafel spends the first few minutes reaching proper cooking temperature, potentially resulting in uneven cooking or soft centers. Preheat for 3-5 minutes.
Cooking at too low a temperature won’t produce crispy results. 400°F is the sweet spot — hot enough to crisp the exterior before the interior dries out, but not so hot that the outside burns before the inside cooks through.
Flavor Variations and Customizations
While traditional falafel sticks to a specific flavor profile for good reason, there’s room to make these your own once you understand the base formula. Here are tested variations that work beautifully in an air fryer:
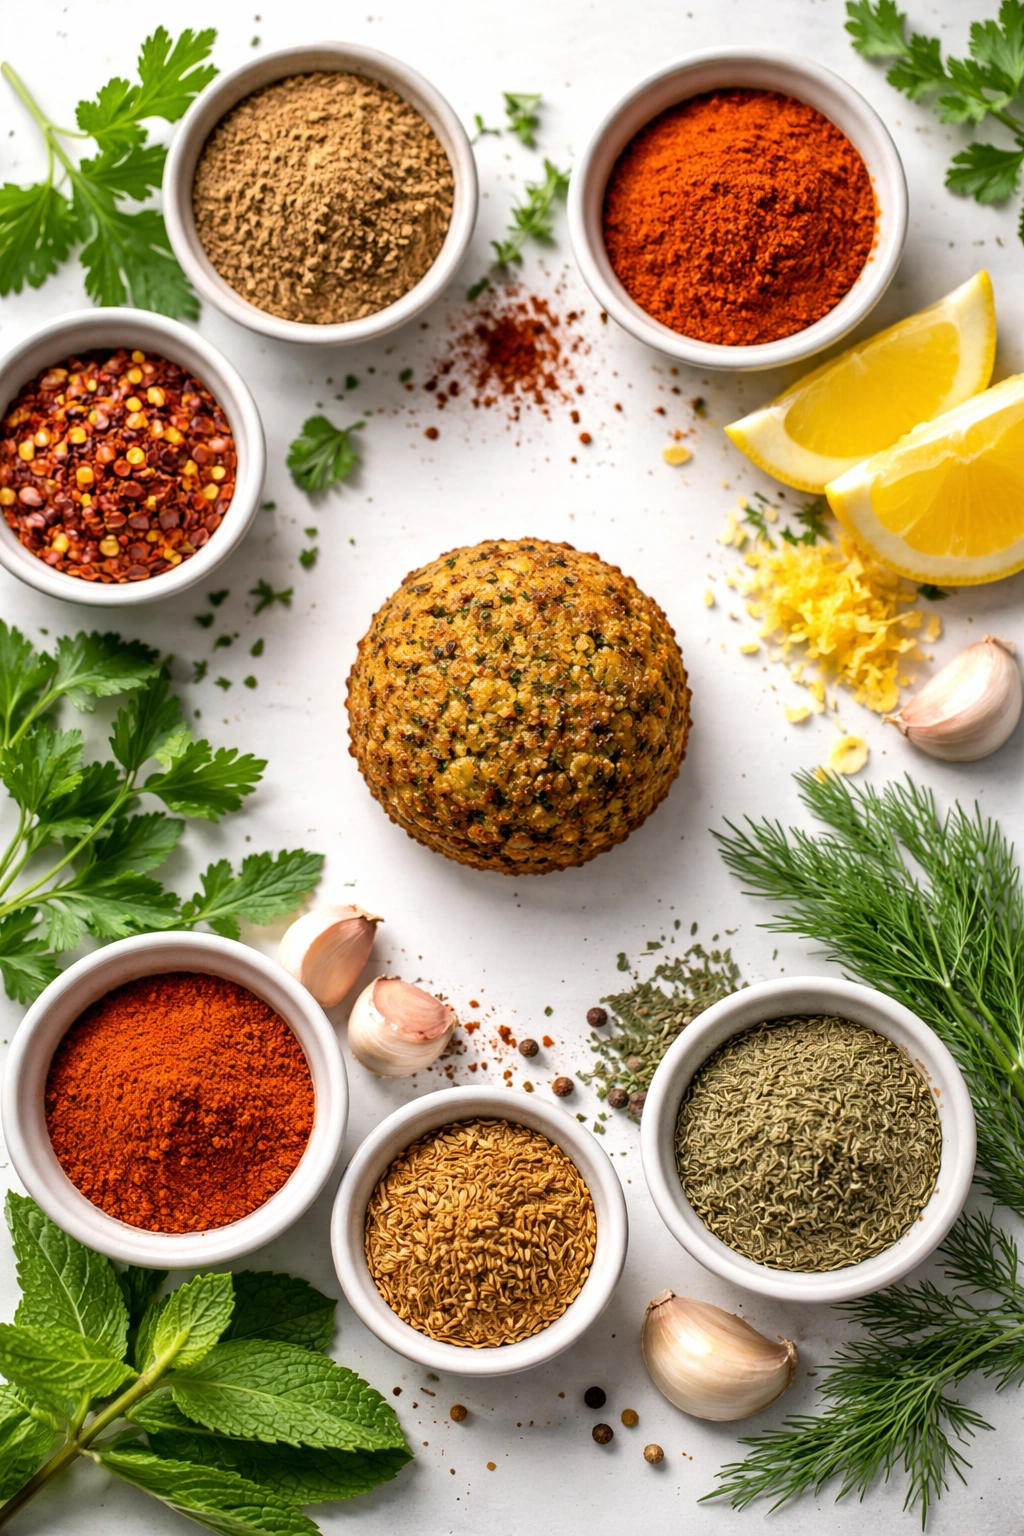
Spicy Version: Add ½-1 teaspoon of cayenne pepper or ¼-½ teaspoon of crushed red pepper flakes along with the other spices. You can also add fresh green chili peppers (finely minced) for a different kind of heat and freshness.
Extra Herbaceous: Swap the dill for more parsley and cilantro, or add ¼ cup of fresh mint for brightness. You can also experiment with adding 1-2 tablespoons of chopped fresh dill mixed with fresh parsley for a Mediterranean angle.
Lemony Version: Add the zest of one lemon and 1 tablespoon of fresh lemon juice to brighten the flavor profile dramatically. This works especially well if you’re serving the falafel in a salad rather than a pita.
Smoky Version: Add ½ teaspoon of smoked paprika along with (or in place of some of) the regular paprika. You can also add ¼ teaspoon of ground sumac if you have it — it adds a subtle tangy complexity.
Cumin-Forward Version: If you love cumin’s warm, earthy flavor, increase it to 3 teaspoons while reducing the coriander to 1 teaspoon for a richer, more pronounced spice profile.
Less Garlic: If you find traditional falafel too pungent, reduce the garlic to 3 cloves instead of 5-6. You can always adjust upward next time based on your preference.
Substitutions That Work:
- You can use white onion instead of yellow onion — it’ll be slightly sharper but still delicious.
- If you don’t have fresh dill, omit it and use extra parsley instead. Fresh dill is wonderful, but not essential.
- You can use regular paprika instead of the smoked version — it will taste slightly less complex but still delicious.
- Dried coriander and cumin are fine if you’re out of ground versions; use the same amounts.
Storage, Make-Ahead, and Freezing Guide

Refrigerating Cooked Falafel:
Leftover cooked falafel will keep in an airtight container in the refrigerator for up to 5 days. They’ll lose some crispness as they sit, but they’re still completely delicious, especially in salads or crumbled over grain bowls.
To reheat and restore crispness, place them in a 350°F (175°C) air fryer for 2-3 minutes, or in a conventional oven at 350°F for 5-7 minutes until warmed through and crispy again. You can also reheat them in the microwave for 30-45 seconds, though the exterior won’t be as crispy as the oven or air fryer method.
Making Ahead (The Uncooked Mixture):
You can prepare the falafel mixture up to 2 days ahead. After pulsing all ingredients together, transfer to a container, press plastic wrap directly against the surface of the mixture (this prevents oxidation and discoloration), and refrigerate. When you’re ready to cook, let it come to room temperature for about 10 minutes, add the baking powder, shape, and air fry as directed.
Freezing Uncooked Falafel:
This is my favorite make-ahead method. After shaping your falafel into discs, arrange them in a single layer on a parchment-lined baking sheet and freeze until completely solid — usually 2-3 hours. Then transfer the frozen falafel to a freezer-safe bag or airtight container, separating the layers with parchment paper so they don’t stick together.
Frozen uncooked falafel will keep for up to 3 months. You can cook them directly from frozen — just add 3-4 minutes to your cooking time at the same temperature. There’s no need to thaw first.
Freezing Cooked Falafel:
You can also freeze already-cooked falafel using the same method: cool completely, arrange in a single layer on a baking sheet, freeze until solid, then transfer to a freezer bag or container. They’ll keep for up to 3 months.
To reheat frozen cooked falafel, thaw in the refrigerator overnight, then reheat in a 350°F air fryer for 2-3 minutes or in a conventional oven for 5-7 minutes.
Serving Suggestions and Pairings
The Classic Falafel Pita Sandwich:
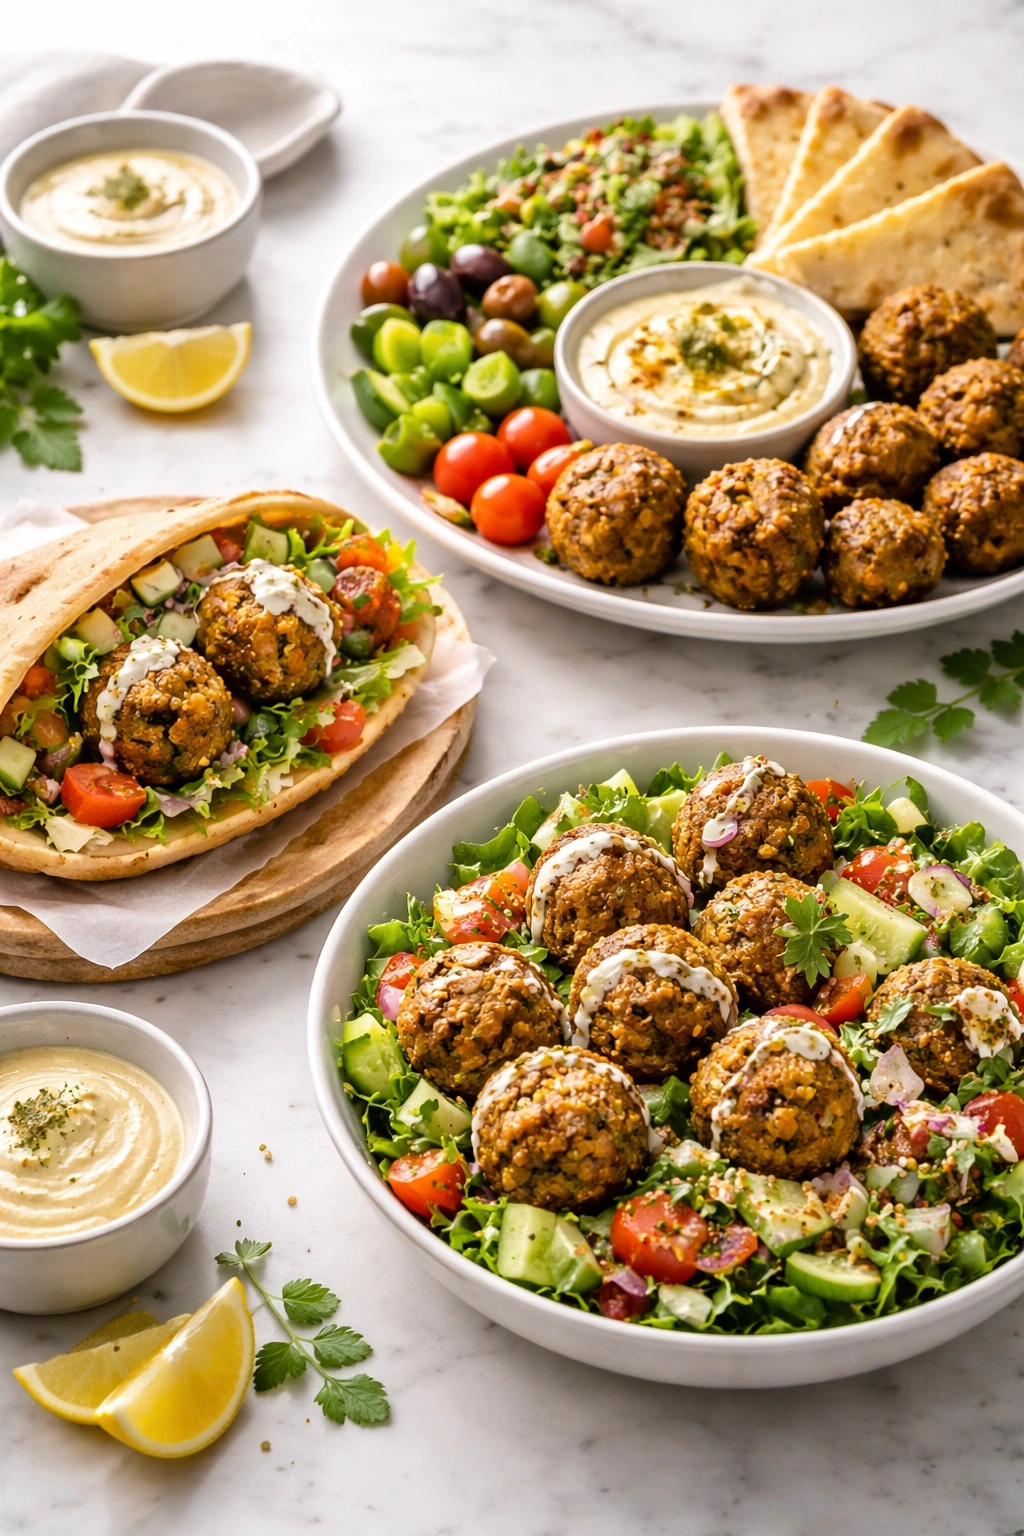
This is how falafel is most commonly enjoyed. Warm a pita bread (microwave for 15 seconds to make it pliable), split it open to create a pocket, and stuff with 4-5 warm falafel. Add fresh lettuce or mixed greens, sliced tomatoes, sliced cucumbers, thin red onion slices, and a generous drizzle of tahini sauce. Optional additions: pickled turnips or pickles (they provide a sharp, briny contrast to the rich falafel), fresh parsley or cilantro, and a squeeze of lemon juice.
The Falafel Salad Bowl:
Layer fresh greens (romaine, spinach, or mixed greens) in a bowl and top with 4-5 warm falafel crumbled into chunks. Add diced tomatoes, sliced cucumbers, shredded carrots, roasted chickpeas for extra crunch, and fresh herbs. Drizzle with tahini dressing or lemon-herb vinaigrette. This version is lighter and vegetable-forward while still delivering that satisfying falafel element.
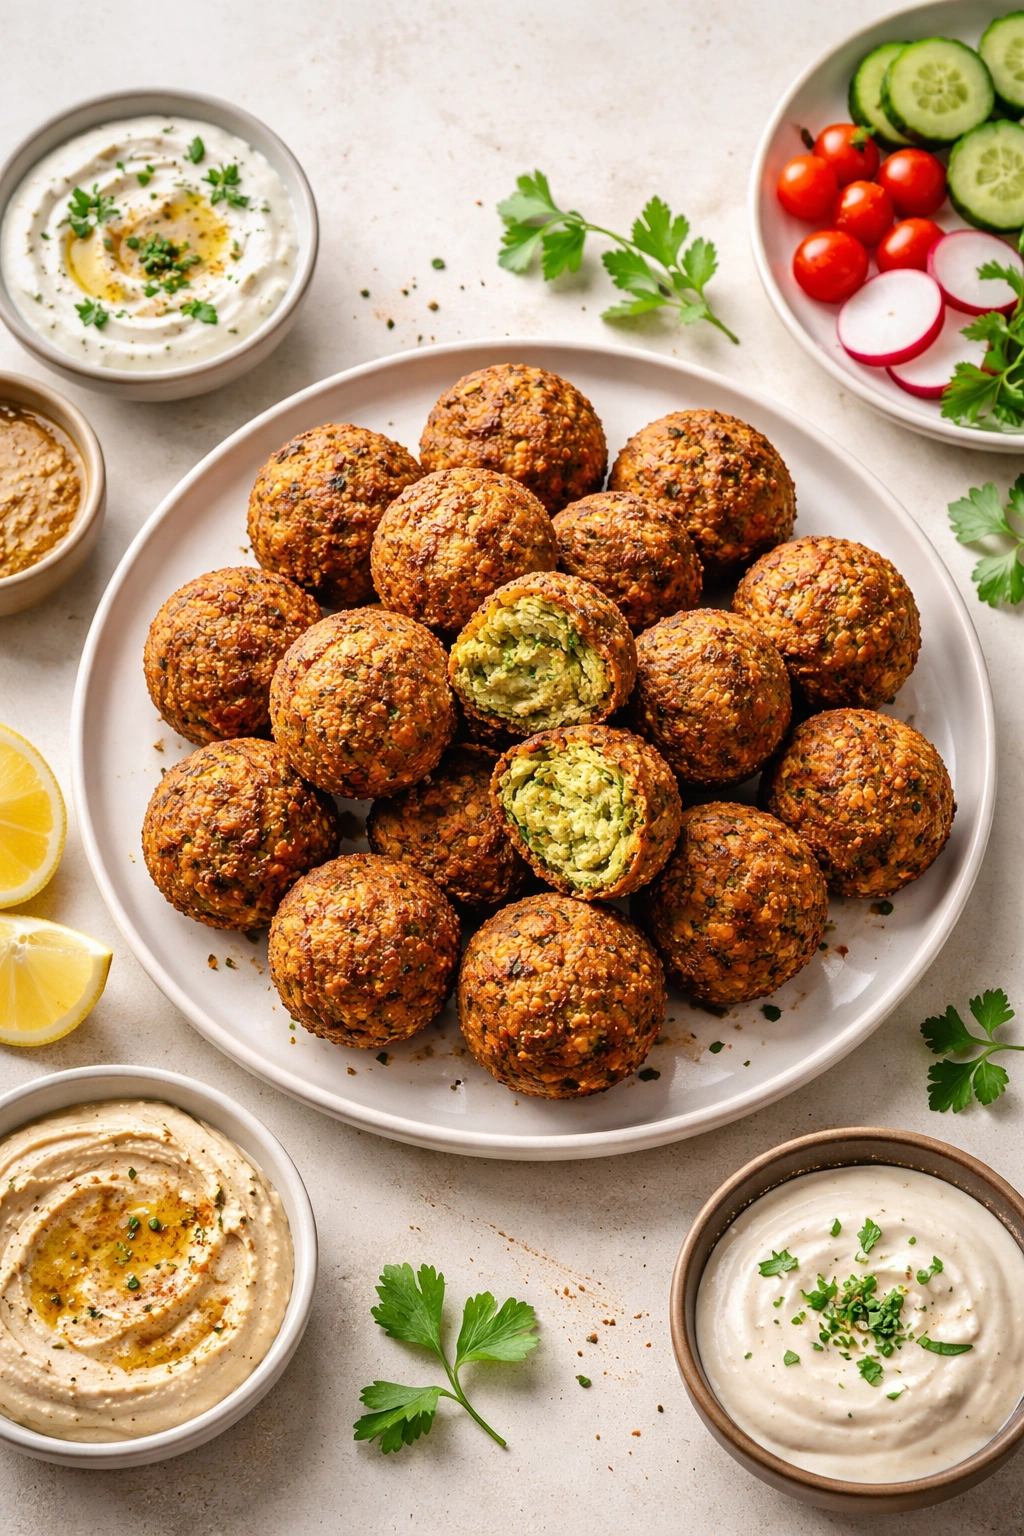
Mediterranean Mezze Platter:
Arrange warm falafel on a large platter alongside other Middle Eastern favorites: hummus, baba ganoush, tahini sauce, warm pita bread, Kalamata olives, crumbled feta cheese, roasted red peppers, sliced radishes, fresh herbs, and lemon wedges. Guests can build their own combinations, making it perfect for entertaining.
The Falafel Wrap:
Instead of pita, use a large flatbread or tortilla. Fill it with falafel, shredded lettuce, diced tomatoes, cucumbers, and tahini sauce, then wrap tightly. These travel well for lunch and can be made ahead and refrigerated.
Falafel as a Snack or Appetizer:
Serve warm falafel with a trio of dipping sauces: tahini sauce, hummus, and yogurt-based tzatziki. Each offers a different flavor and texture experience. Arrange them on a platter with lemon wedges and fresh herbs for garnish.
Falafel Over Hummus:
Spread a generous dollop of hummus in a shallow bowl, top with 4-5 warm falafel, drizzle with tahini sauce, sprinkle with fresh parsley, pine nuts (if you have them), and a pinch of paprika or sumac. Serve with pita bread for dipping.
Tahini Sauce Recipe (If You Want to Make Your Own):
In a bowl, whisk together ½ cup tahini, ¼ cup fresh lemon juice, 2-3 tablespoons of water (add gradually until you reach your desired consistency), 2 minced garlic cloves, and salt to taste. The sauce should be pourable but still coat the back of a spoon. If it’s too thick, add more water 1 tablespoon at a time. If it separates, whisk well.
Final Thoughts
Crispy air fryer falafel is one of those recipes that feels indulgent and restaurant-quality but actually comes together with minimal effort. The longest part of the process — soaking the chickpeas — happens while you sleep. The actual cooking and assembly takes less than 30 minutes from start to finish.
What makes this version special isn’t just the speed or the reduced oil. It’s that you’ve invested 20 minutes into understanding why each ingredient matters, why proper preparation matters, and how to achieve restaurant-level crispness at home. You’re not just following steps; you’re learning the principles that make truly excellent falafel.
The first time you pull a batch of golden, crispy falafel from your air fryer and bite into one while it’s still warm — when that exterior cracks satisfyingly and you hit the tender, herbaceous interior — you’ll understand why falafel has been a beloved street food across the Middle East for generations. It’s simple, it’s delicious, and it’s completely satisfying without being heavy.
Make a double batch. Freeze half. You’ll thank yourself next week when you’re reaching for easy, delicious dinner options that come together in minutes. Your air fryer falafel will be waiting.