Pork chops are one of those weeknight dinner heroes that somehow manage to feel both casual and impressive at the same time. They cook in minutes, they’re naturally lean and protein-packed, and there’s something about a properly cooked chop that just makes people happy — even the pickiest eaters at the table. The secret isn’t some complicated technique or an exotic ingredient list; it’s understanding a few core principles that separate dry, tough chops from tender, juicy ones that practically melt on your fork.
What makes pork chops so appealing for families is their sheer versatility. You can dress them up with a wine reduction and fresh herbs for a dinner that feels restaurant-worthy, or you can keep them simple with just salt, pepper, and a hot pan if you’re racing against the clock. They pair beautifully with everything from roasted vegetables and rice to mashed potatoes and salads. And because they’re relatively inexpensive compared to other proteins, you can feed a hungry family without breaking the budget.
The good news is that making restaurant-quality pork chops at home is genuinely easier than most home cooks realize. The real challenge isn’t the cooking — it’s understanding the small details that make the difference between mediocre and memorable. That’s exactly what we’re covering here: how to select the right chops, cook them with confidence, avoid the common pitfalls that trip people up, and bring them to the table in a way that has everyone asking for seconds.
Why Pork Chops Are Perfect for a Family Dinner
Pork chops have earned their place as a family favorite for good reasons that go beyond just convenience. They’re approachable enough for inexperienced cooks yet interesting enough to keep experienced home cooks engaged with flavor and technique.
The texture and flavor of a well-cooked pork chop is naturally satisfying. Unlike some proteins that require heavy sauces or special preparation to taste good, a properly seared pork chop is delicious on its own — with just salt and pepper — because of its inherent meat quality and the appeal of a golden, caramelized crust.
Pork chops also cook remarkably fast. From the moment your pan hits temperature to the moment you’re plating dinner is often less than 15 minutes for boneless chops. This speed makes them realistic for busy weeknights when you don’t have time for slow-roasting or marinating.
They’re also naturally nutritious. Pork is a lean protein when you choose the right cut, with B vitamins and minerals your family actually needs. It’s not a diet food, but it’s not indulgent either — it’s genuinely good-for-you food that tastes indulgent.
From a practical standpoint, pork chops are forgiving in ways many proteins aren’t. They work whether you’re cooking for two people or six. They taste good hot, warm, or even at room temperature, which means leftover pork chops can become salad toppings or sandwich fillings without any drama.
Choosing the Right Cut and Thickness for Best Results
The difference between a mediocre pork chop and a great one often comes down to what you buy before you ever touch the stove. Understanding your options at the butcher counter or meat section makes a real difference in your final results.
Bone-in versus boneless is the first decision. Bone-in chops (typically cut from the rib or loin) have more flavor because the bone conducts heat differently and adds richness to the meat. They’re also harder to cook unevenly because the bone acts as an insulator. Boneless chops cook slightly faster and offer more meat per package, but they require slightly more attention to avoid overdrying. For family dinners, bone-in chops are worth seeking out if your butcher has them available.
Thickness matters enormously. A chop that’s less than ¾ inch thick will cook so quickly that it’s nearly impossible to develop a proper crust before the interior overcooks. A chop that’s less than ½ inch thick is essentially guaranteed to be dry. Aim for chops that are 1 to 1½ inches thick — this gives you the window you need to sear them beautifully without racing against the clock.
The cut itself makes a difference too. Rib chops (from the rib section) tend to be slightly fattier and more forgiving, with a bit more flavor. Loin chops (from the back) are leaner and more delicate, requiring slightly more attention to avoid drying out. Center-cut chops are generally a good middle ground if you’re unsure. For a family dinner, rib chops are often your best bet because their extra fat content makes it harder to accidentally overcook them.
Look for meat that’s pale pink, not white (white indicates it’s been frozen), and avoid any chops that look dark brown or oxidized on the surface. Fresh pork chops should smell mildly porky and fresh, with no off-putting odor. If you’re buying more than you need for one meal, you can freeze the extras in airtight packaging for up to three months.
The Simple Ingredient List You’ll Need
Making restaurant-quality pork chops doesn’t require you to master complicated flavor combinations. In fact, the simpler approach often works better because it lets the quality of the meat shine through.
The non-negotiable ingredients are salt, pepper, and a fat for cooking — that’s genuinely all you need for a delicious pork chop. Everything else is optional building blocks that can take your dinner in different directions depending on your mood.
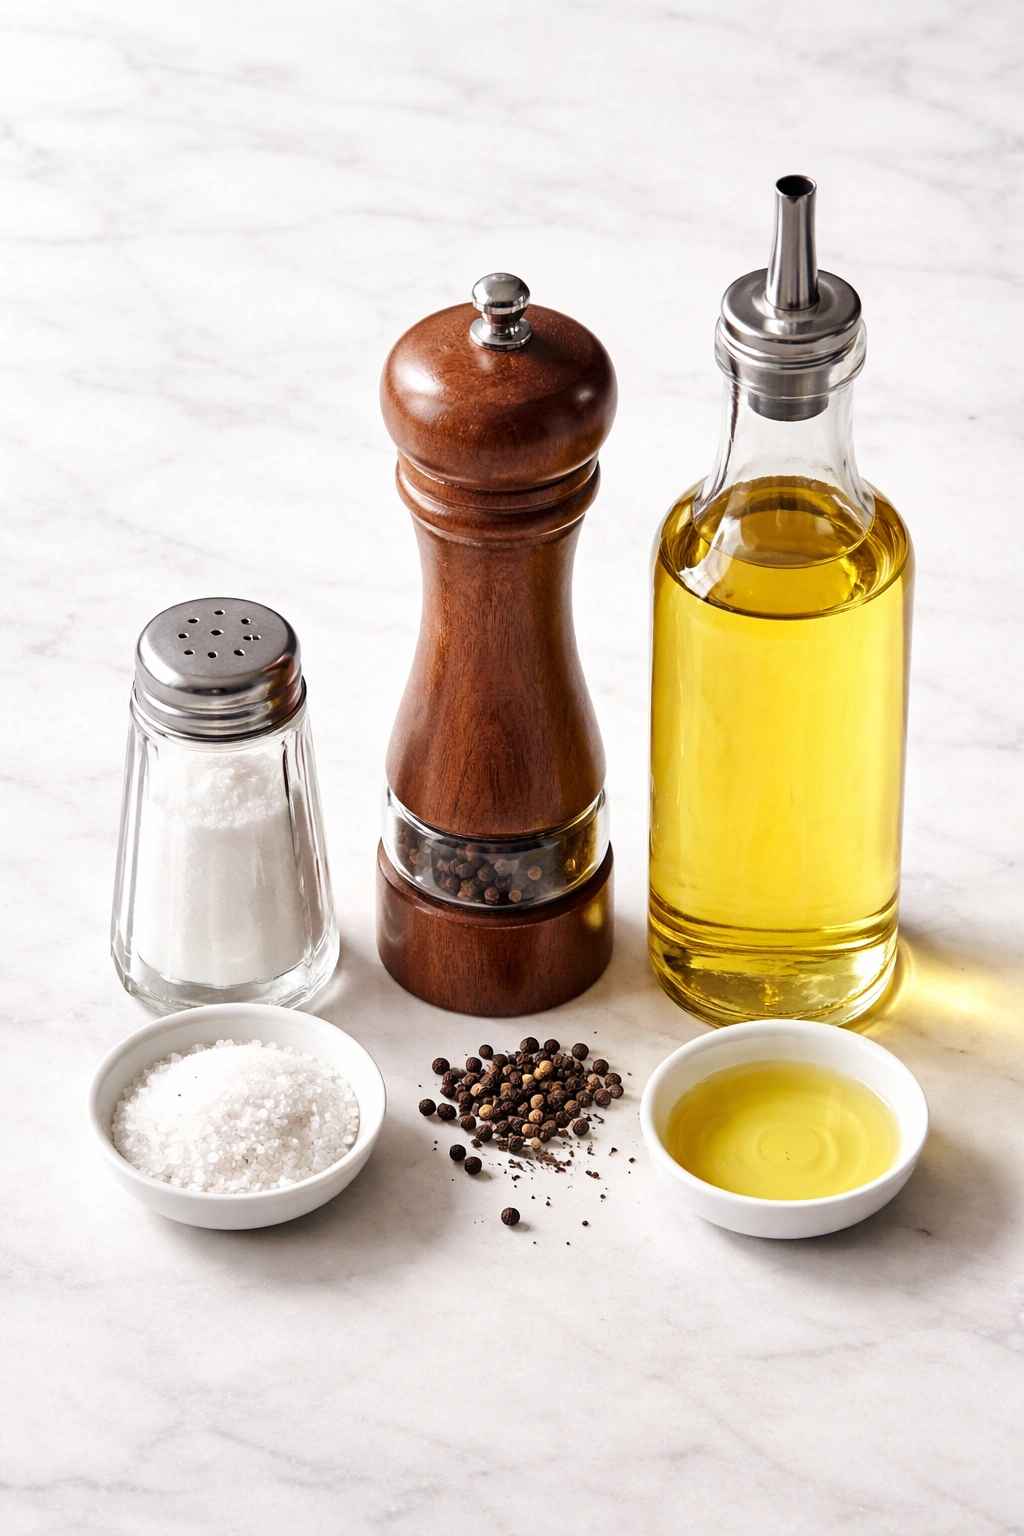
For the foundational seasoning, kosher salt and freshly ground black pepper are standards for good reason. They’re reliable, they don’t overpower the pork, and they let the natural meat flavor come through. If you have access to a good-quality sea salt or a finishing salt like fleur de sel, it’s nice sprinkled on right before serving, though it’s not essential.
The cooking fat is important enough to mention separately. You’ll want something with a high smoke point so it doesn’t burn when your pan gets hot. Avocado oil, refined vegetable oil, or canola oil are all solid choices. Butter has a lower smoke point, so if you’re using it, keep your heat to medium-high rather than high, or combine it with a neutral oil to raise the smoke point.
From there, the optional flavor-builders depend on what direction you want to go. Fresh garlic, dried herbs like thyme or oregano, paprika, fresh rosemary, lemon juice, soy sauce, and honey are all elements that work beautifully with pork without overwhelming it. We’ll cover variations below, but the core technique starts with these simple elements.
Yield: Serves 4 | Makes 4 pork chops Prep Time: 10 minutes Cook Time: 12 to 15 minutes Total Time: 22 to 25 minutes Difficulty: Beginner — no special equipment required, and the cooking process is straightforward even for someone making pork chops for the first time.
Ingredients
For the Pork Chops:
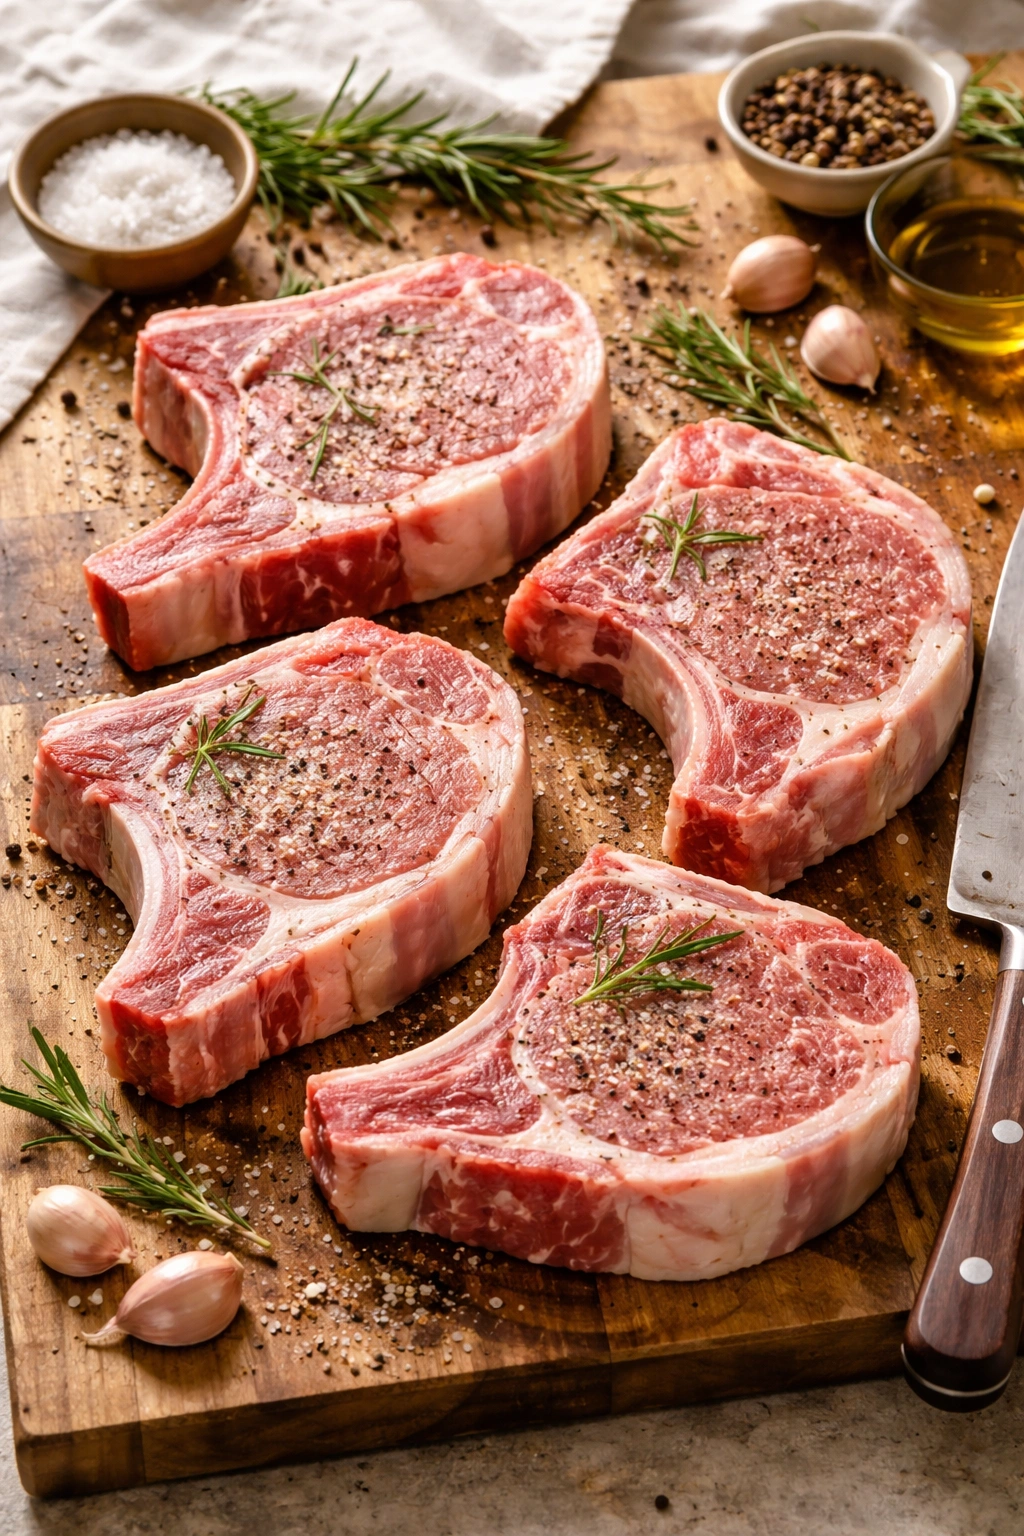
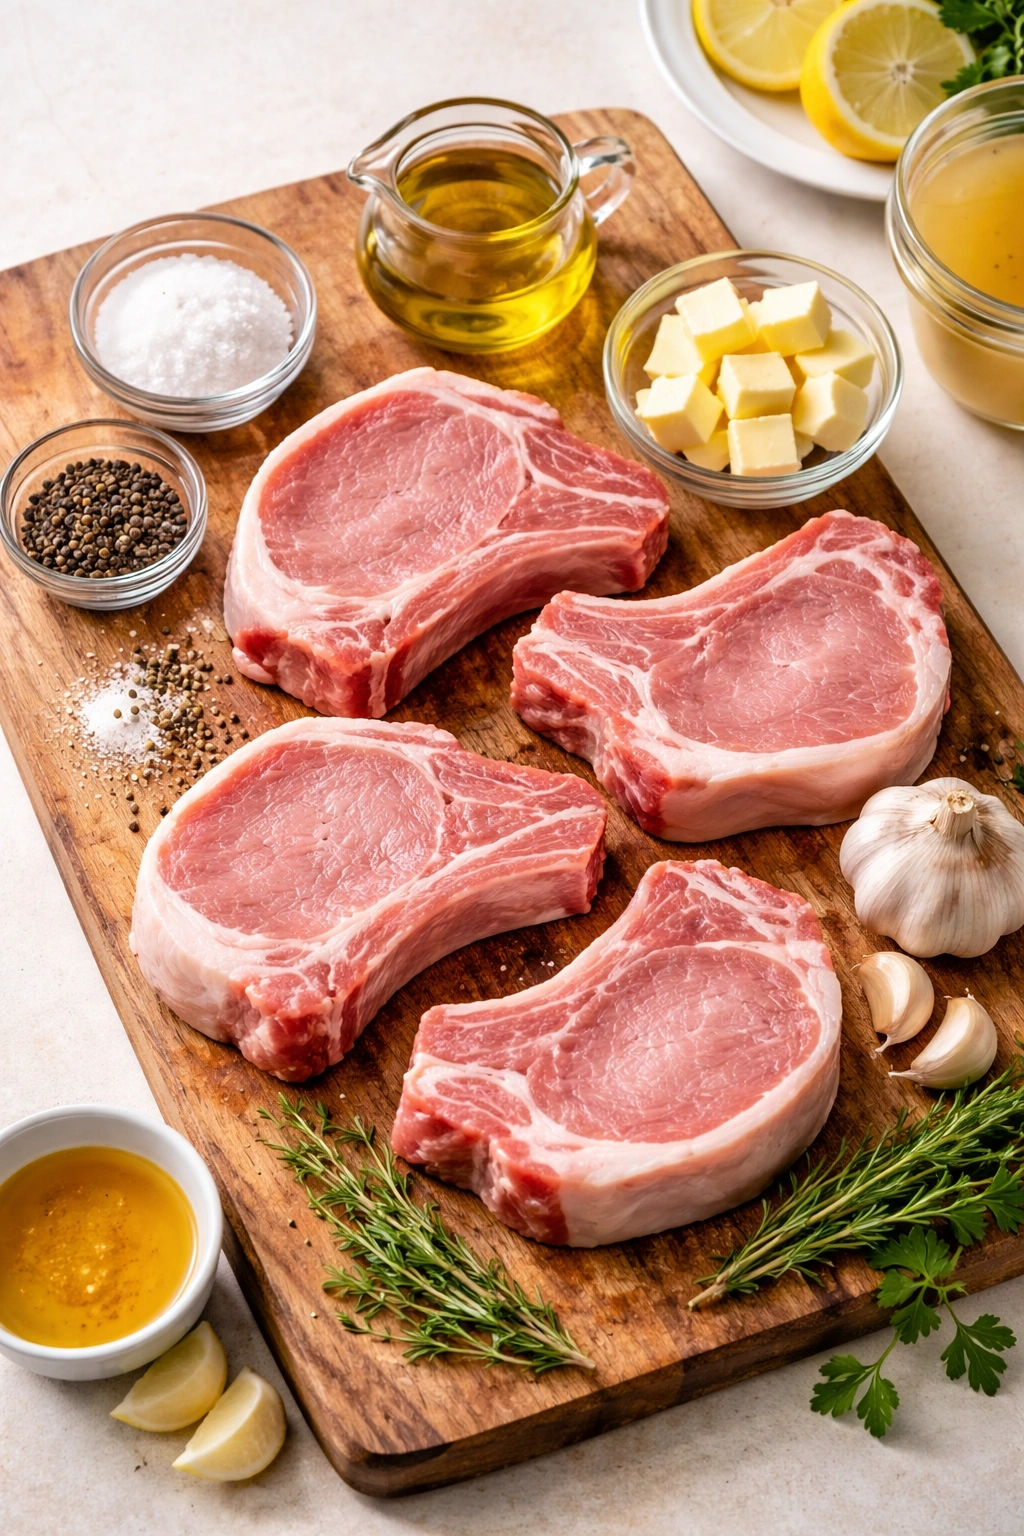
- 4 bone-in pork rib chops, each 1 to 1½ inches thick (about 2 to 2½ pounds total)
- 1½ teaspoons kosher salt (or sea salt)
- ¾ teaspoon freshly ground black pepper
- 2 tablespoons neutral cooking oil (avocado oil, canola oil, or refined vegetable oil)
- 2 tablespoons unsalted butter
- 4 cloves garlic, lightly crushed (optional, but recommended)
- 3 to 4 sprigs fresh thyme or rosemary (optional)
For Optional Pan Sauce (adds richness, completely optional):
- ½ cup dry white wine or low-sodium chicken broth
- ¼ cup heavy cream or unsalted chicken broth (if you prefer less richness)
- 1 tablespoon fresh lemon juice
- ½ teaspoon Dijon mustard
- Salt and pepper to taste
Preparation and Cooking Instructions
Prepare the Chops and Pan:
-
Remove the pork chops from the refrigerator 30 minutes before cooking. Room-temperature meat cooks more evenly than cold meat straight from the fridge. While you wait, this is the perfect time to prep any side dishes you’re planning.
-
Pat the pork chops completely dry on both sides using paper towels. Moisture on the surface prevents proper browning, so don’t skip this step even if it feels fussy. A truly dry surface is what creates that beautiful golden crust.
-
Season both sides of each chop generously with kosher salt and freshly ground black pepper. This seems simple, but seasoning the meat directly (rather than just the pan) allows the salt to penetrate and season the meat throughout, not just the surface. Season at least 5 minutes before cooking, which gives the salt time to begin breaking down the muscle fibers and help retain moisture.
-
Place a large skillet (cast iron or stainless steel work beautifully; non-stick is fine but less ideal for browning) over medium-high heat. Let it warm for 2 to 3 minutes — you want the pan genuinely hot before the chops touch the surface. The pan is ready when a drop of water flicked into it immediately sizzles and evaporates, not just sits there.
Sear the Chops:
-
Add the neutral cooking oil to the hot pan and let it warm for 30 seconds. You’ll see it shimmer and move easily across the pan — this is the signal that it’s hot enough.
-
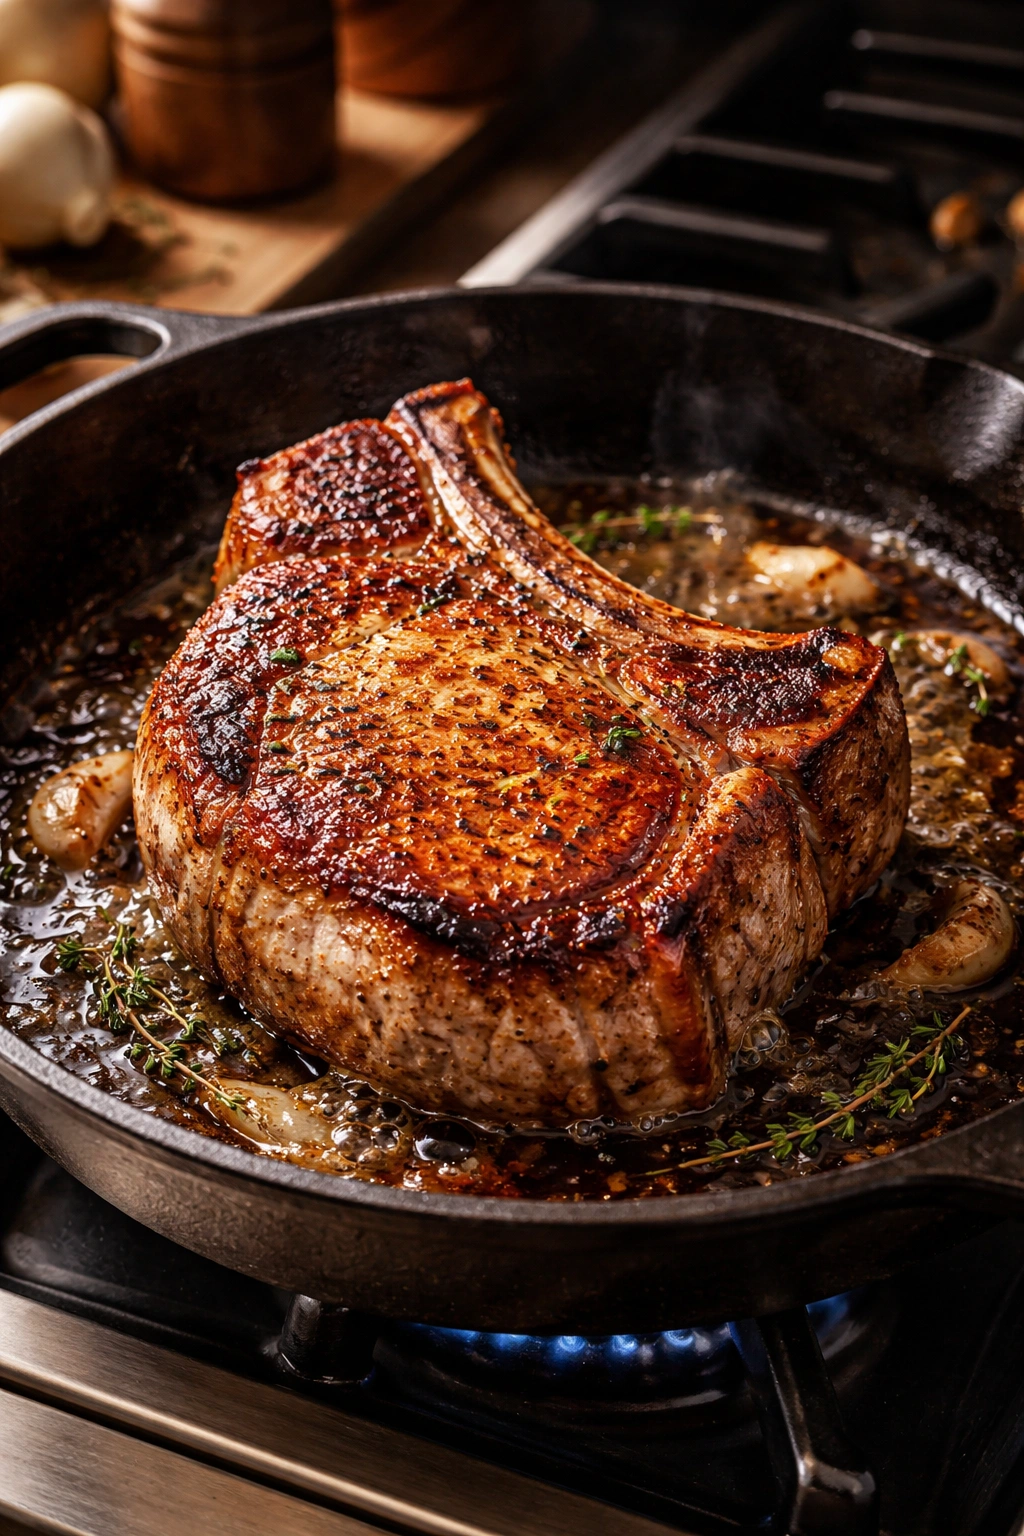
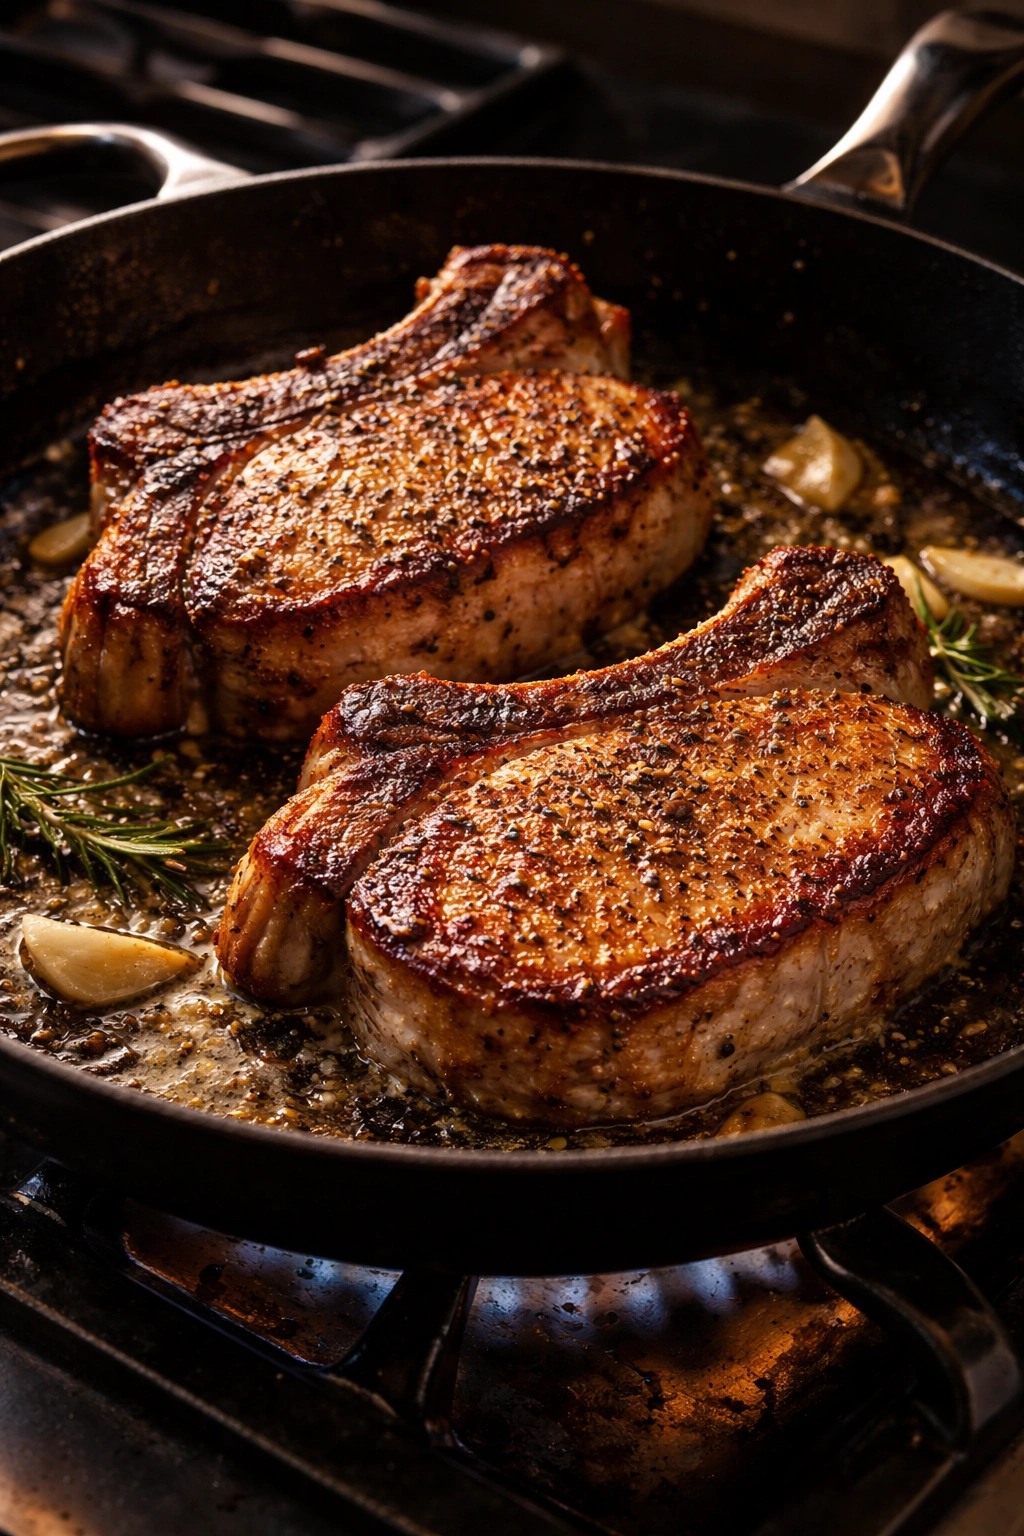
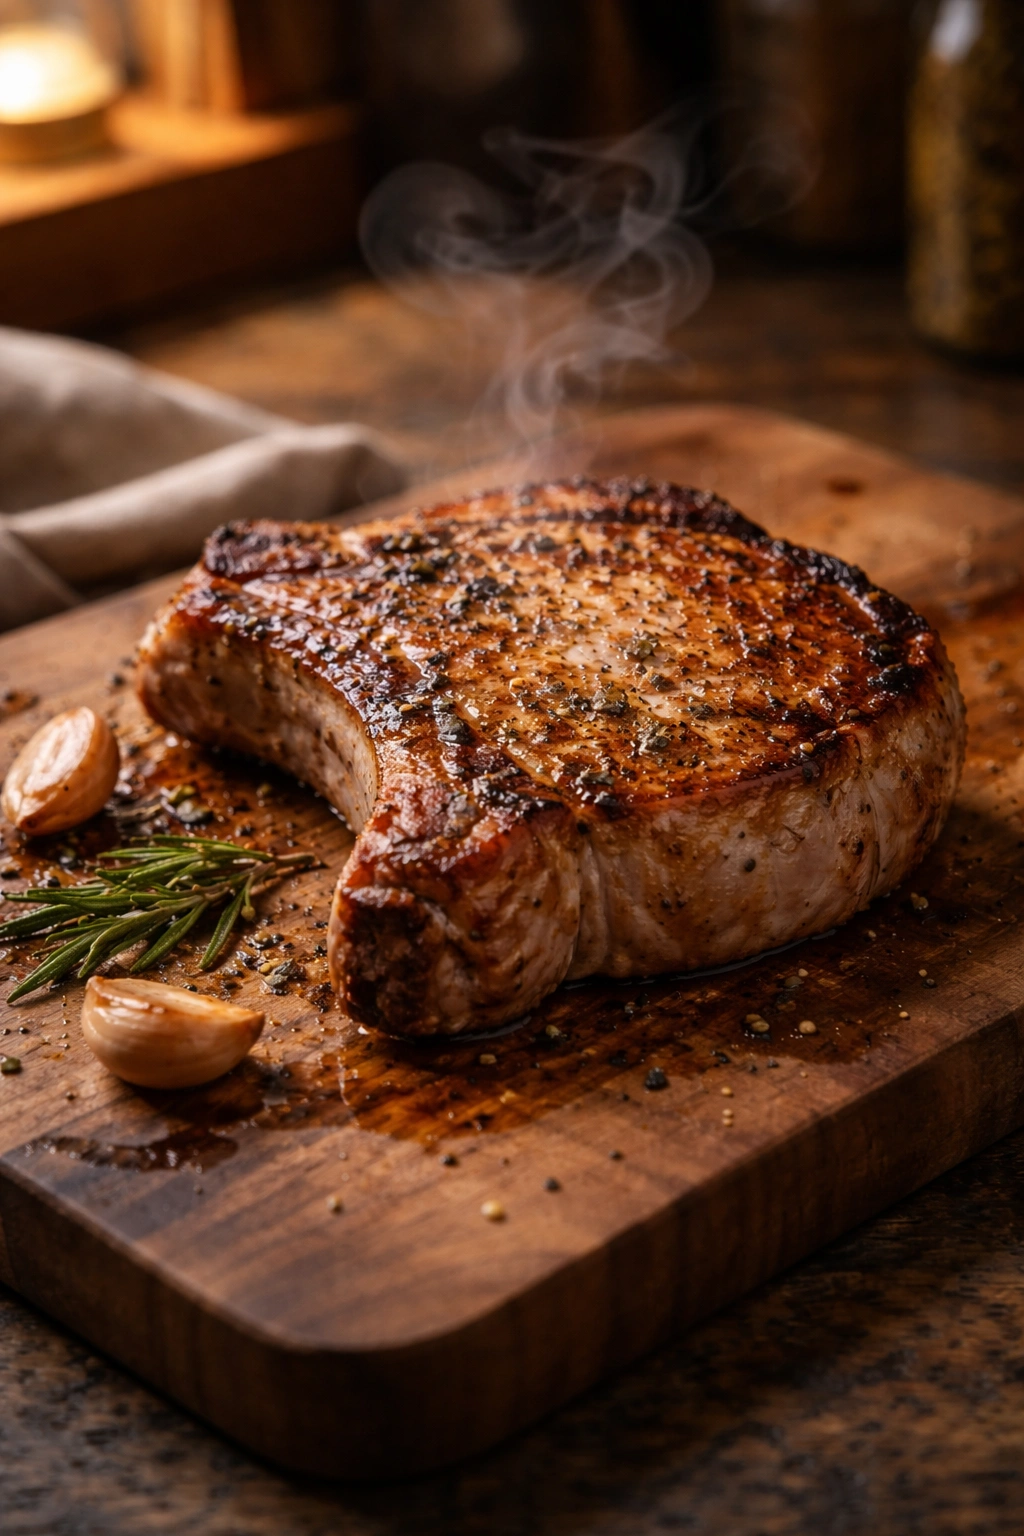
Carefully place the pork chops in the pan without moving them. They should sizzle loudly and immediately — this is exactly what you want. Do not move them or flip them constantly. Let them sit undisturbed for 4 to 5 minutes. This uninterrupted contact with the hot pan is what creates the beautiful golden-brown crust (a process called the Maillard reaction) that makes seared chops taste so good.
-
After 4 to 5 minutes, flip each chop carefully using tongs. Press down gently for a second as you flip — this ensures good contact with the hot pan. Sear the second side for another 3 to 4 minutes until that side is also golden brown and caramelized.
Advertisements
Build the Pan Sauce and Finish:
-
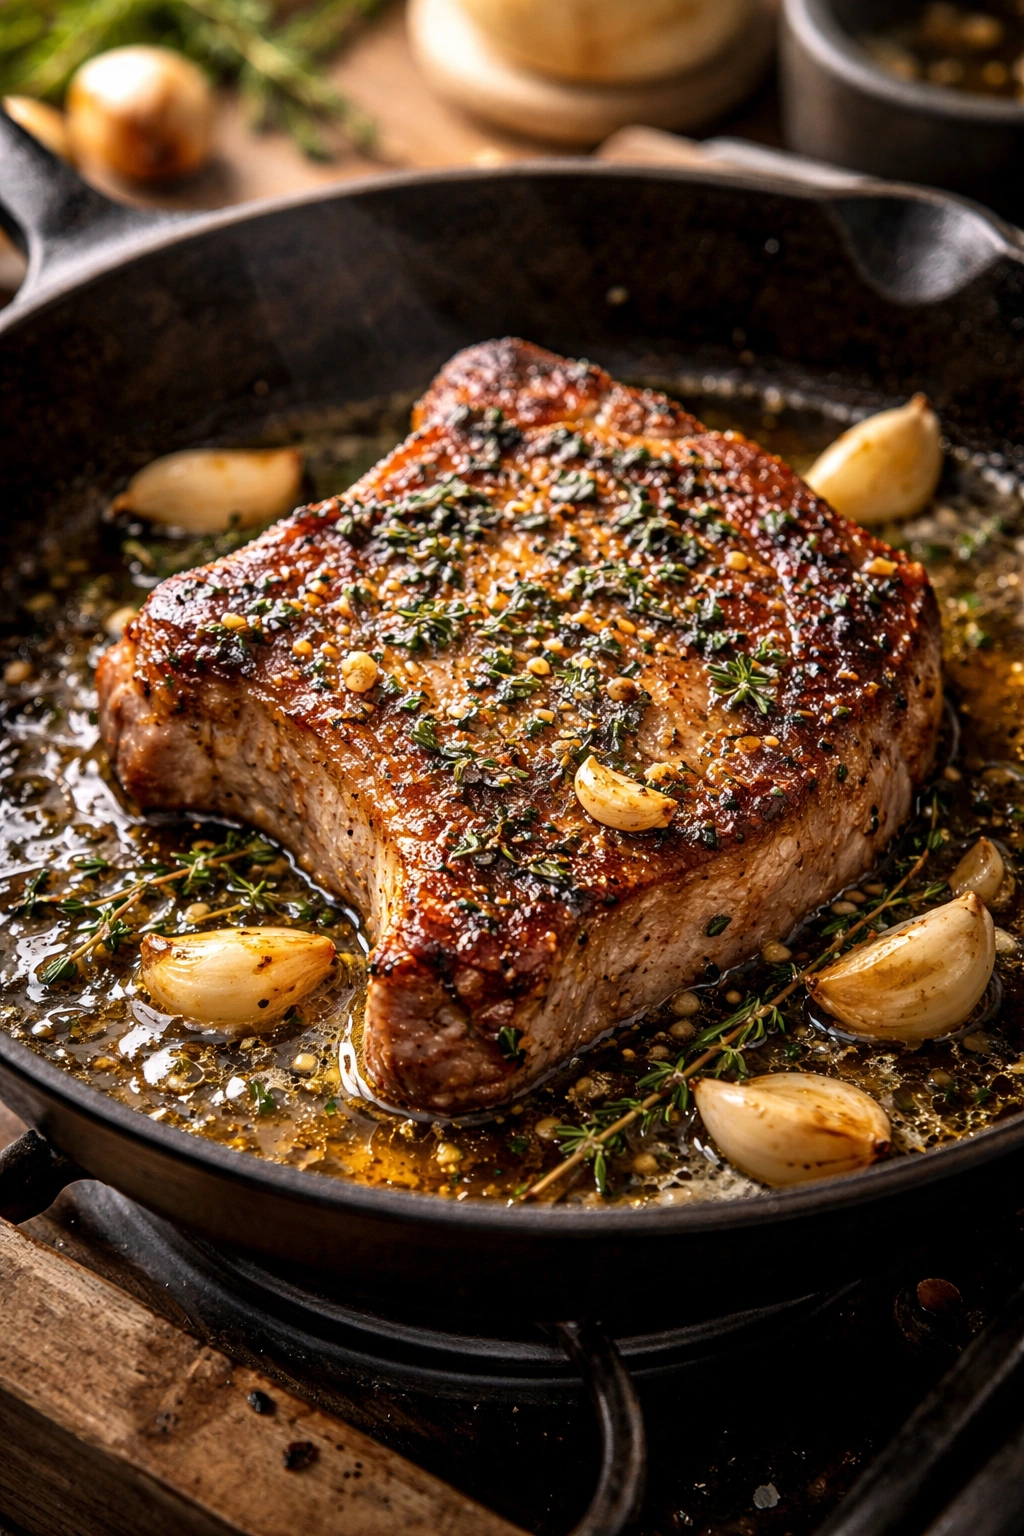
Reduce the heat to medium. Add the butter to the pan along with the crushed garlic cloves and fresh thyme or rosemary sprigs (if using). Let the butter melt and foam slightly — this takes about 30 seconds.
-
Tilt the pan slightly and use a spoon to baste the top of each chop with the hot, foaming butter several times. This adds flavor and helps cook the tops of the chops gently while the bottoms stay in contact with the pan. Baste for 2 to 3 minutes.
-
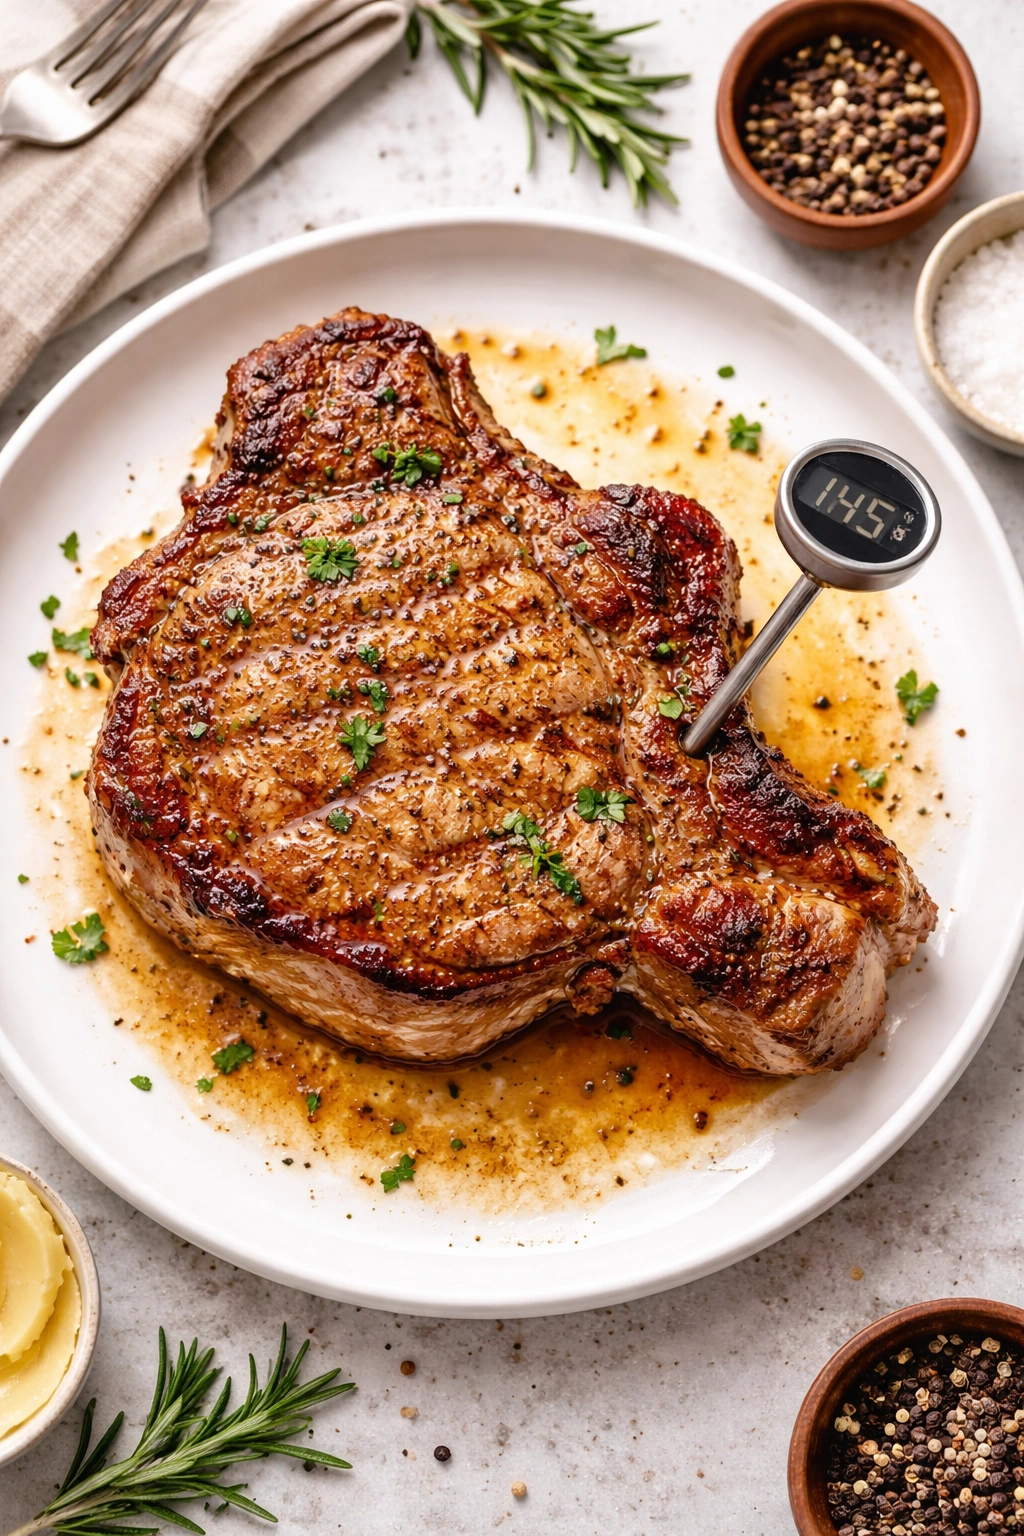
Check for doneness: Insert an instant-read meat thermometer horizontally into the thickest part of the largest chop, being careful not to touch the bone. The temperature should read 145°F (63°C) for perfectly cooked, slightly pink pork that is safe to eat. If your thermometer reads below 145°F, cook for another 1 to 2 minutes and check again.
-
Transfer the pork chops to a clean plate or cutting board and let them rest for 5 minutes before serving. This resting period is critical — it allows the muscle fibers to relax and reabsorb the juices rather than having them run all over your plate when you cut into the chop.
Make the Pan Sauce (Optional but Recommended):
-
While the chops rest, the pan is still hot. If you’d like a simple pan sauce, carefully pour the wine or broth into the hot pan, scraping the bottom with a wooden spoon to loosen all the browned bits (called deglazing). These flavorful bits dissolve into the liquid and create incredible depth of flavor.
-
Let the liquid reduce over medium-high heat for 2 to 3 minutes, until it has reduced by about half and thickened slightly. Add the cream (or extra broth if you prefer less richness), lemon juice, and Dijon mustard. Stir to combine and let it simmer for 1 more minute.
-
Taste the sauce and adjust the seasoning with a pinch of salt and pepper if needed. The sauce should taste bright and savory, not heavy. Strain out the garlic cloves and herb sprigs if desired (though they’re edible and many people leave them in), and drizzle the warm sauce over the rested pork chops.
Pro Tips to Keep Your Pork Chops Juicy and Tender
The difference between dry pork chops and juicy ones often comes down to a few small details that most home cooks overlook. Here’s what actually makes the difference.
Don’t skip the resting period. This is the single most important step for keeping pork chops juicy. When meat cooks, the proteins contract and push out moisture. Resting for just 5 minutes allows the proteins to relax and reabsorb that moisture so it stays in the meat instead of running all over your plate. It sounds like a small thing, but it’s the difference between a chop that’s pleasantly moist and one that’s dry and disappointing.
Thickness is your friend. A thin pork chop will dry out before the exterior has a chance to develop color and flavor. The 1 to 1½-inch range gives you enough thickness that you can sear the outside beautifully while keeping the interior juicy and slightly pink (which is safe for pork at 145°F). If your butcher only has thin chops available, reduce your cooking time accordingly and check the internal temperature more frequently.
Invest in an instant-read meat thermometer. Guessing whether pork is done by touch or appearance is why so many home cooks end up with either undercooked or dry chops. An inexpensive digital thermometer ($15-25) takes the guesswork out completely. Pork is safely cooked at 145°F, which is considerably lower than many people think — it’ll still have a slight blush of pink in the very center, and that’s exactly right.
Let your meat come to room temperature. Cold meat straight from the refrigerator will take longer to cook through, and by the time the inside reaches the correct temperature, the outside will have overcooked. Removing pork chops from the fridge 30 minutes before cooking means they’ll cook more evenly and quickly.
Don’t crowd the pan. If you’re cooking for more than four people, resist the urge to crowd all the chops into one pan to save time. Cramped chops steam rather than sear, and you’ll lose that beautiful golden crust. Cook them in batches if needed — a few extra minutes is worth the dramatically better results.
Season ahead of time. Salting the meat 5 or more minutes before cooking allows the salt to begin breaking down the muscle proteins, which helps the meat retain moisture and seasoning penetrates deeper. If you salt right before cooking, the salt sits on the surface and doesn’t have time to work.
Use a cast-iron or stainless steel pan. These materials get genuinely hot and stay hot, which is what creates the crust. Non-stick pans are convenient, but they don’t heat as evenly or retain heat as well, so your sear won’t be quite as impressive.
Baste with butter for extra flavor and tenderness. The butter carries fat-soluble flavors and helps cook the chops gently. If you’re pressed for time, you can skip this step, but if you have 2 to 3 minutes to spare, it’s worth doing.
Common Mistakes and How to Avoid Them

Most pork chop disasters fall into a few predictable categories. Understanding what goes wrong means you can avoid it.
Starting with cold meat. Pork chops fresh from the refrigerator don’t cook evenly — the outside overcooks trying to get the inside to temperature. The fix is simple: pull them out 30 minutes before cooking.
Using meat that’s too thin. When chops are less than ¾ inch thick, they cook so quickly that you can’t develop proper browning and keep the inside from drying out at the same time. This is why looking for 1 to 1½-inch thick chops at the butcher makes such a difference.
Skipping the patting dry step. Moisture prevents browning. It sounds like nitpicking, but truly dry chops brown beautifully, and wet chops steam and stick. Spend 20 seconds patting them dry with paper towels.
Moving the chops too much while they’re searing. Constant flipping and moving prevents a crust from forming. Once you place them in the hot pan, let them sit still for 4 to 5 minutes before flipping. One flip is plenty.
Cooking at the wrong temperature. If your heat is too low, the chops won’t brown properly and will cook through too slowly, drying out in the process. If your heat is too high, the outside will burn before the inside cooks. Medium-high is the right setting for most stovetops and most pans.
Not using an instant-read thermometer. Eyeballing doneness is how dry pork chops are born. Buy a thermometer ($15 is plenty) and use it. Pork is safely done at 145°F, which is much lower than people traditionally thought.
Skipping the resting period. Cut into a chop right out of the pan and all the juices run onto the plate instead of staying in the meat. Five minutes of resting makes an enormous difference.
Buying the leanest possible chops. Lean cuts cook faster and dry out more easily. A chop with some marbling (visible fat throughout the meat) is actually easier to cook well and tastes better.
Flavor Variations to Keep Things Interesting
Once you’ve mastered the basic seared pork chop, there are endless directions you can take them. Here are the variations that work best for family dinners because they’re all simple but satisfying.
Garlic and Herb Version
This is barely a variation — it’s just the basic recipe with more emphasis on the aromatics. Add 5 or 6 cloves of crushed garlic and a generous handful of fresh thyme, rosemary, or sage to the pan along with the butter during the basting stage. Let the herbs infuse into the butter and baste the chops repeatedly. Fresh herbs make an enormous difference here; dried herbs can substitute but use only a third as much.
Apple and Cider Version
After the chops finish searing and are resting, make a quick pan sauce by deglazing with ½ cup apple cider (the unfiltered, unsweetened kind works best) instead of wine. Reduce for 2 minutes, then add 2 tablespoons of whole grain mustard, 1 tablespoon of honey, and a pinch of fresh thyme. Simmer for another minute and spoon over the rested chops. This works beautifully in fall or anytime you want something slightly sweet and savory.
Lemon and White Wine Version
This is restaurant-style simplicity. Deglaze with ½ cup of dry white wine, reduce for 2 minutes, then add the juice of half a lemon, 2 tablespoons of butter, and a tiny pinch of fresh parsley. The brightness of the lemon cuts through the richness of the pork perfectly.
Honey Soy Glaze Version
For a different flavor direction entirely, skip the wine sauce. Instead, brush the chops with a mixture of 3 tablespoons of soy sauce, 2 tablespoons of honey, 1 tablespoon of rice vinegar, and 1 clove of minced garlic during the basting stage. This creates a glaze that’s salty, slightly sweet, and deeply savory — it’s excellent with rice and roasted bok choy or broccoli.
Dijon and Mustard Seed Version
After searing, make a quick pan sauce by reducing ½ cup of chicken broth with 2 tablespoons of whole grain mustard, 1 tablespoon of Dijon mustard, 1 teaspoon of honey, and fresh thyme. This is elegant enough for company but simple enough for a regular Tuesday night.
Chili Lime Version
Rub the chops before cooking with a mixture of ½ teaspoon of chili powder, ¼ teaspoon of cumin, a pinch of smoked paprika, and the zest of one lime. Sear as normal. After resting, finish with a squeeze of fresh lime juice and a sprinkle of cilantro. This is especially good if you’re serving Mexican-inspired sides.
Balsamic and Fig Version
After searing, deglaze the pan with ¼ cup of good balsamic vinegar and ¼ cup of chicken broth. Add ¼ cup of chopped fresh figs (or fig jam if fresh aren’t available) and let everything reduce for 2 minutes. This is sophisticated and tastes like something from an upscale restaurant.
Storage, Leftovers, and Make-Ahead Options
Pork chops are excellent for making ahead and keeping on hand, which makes them realistic for busy families.
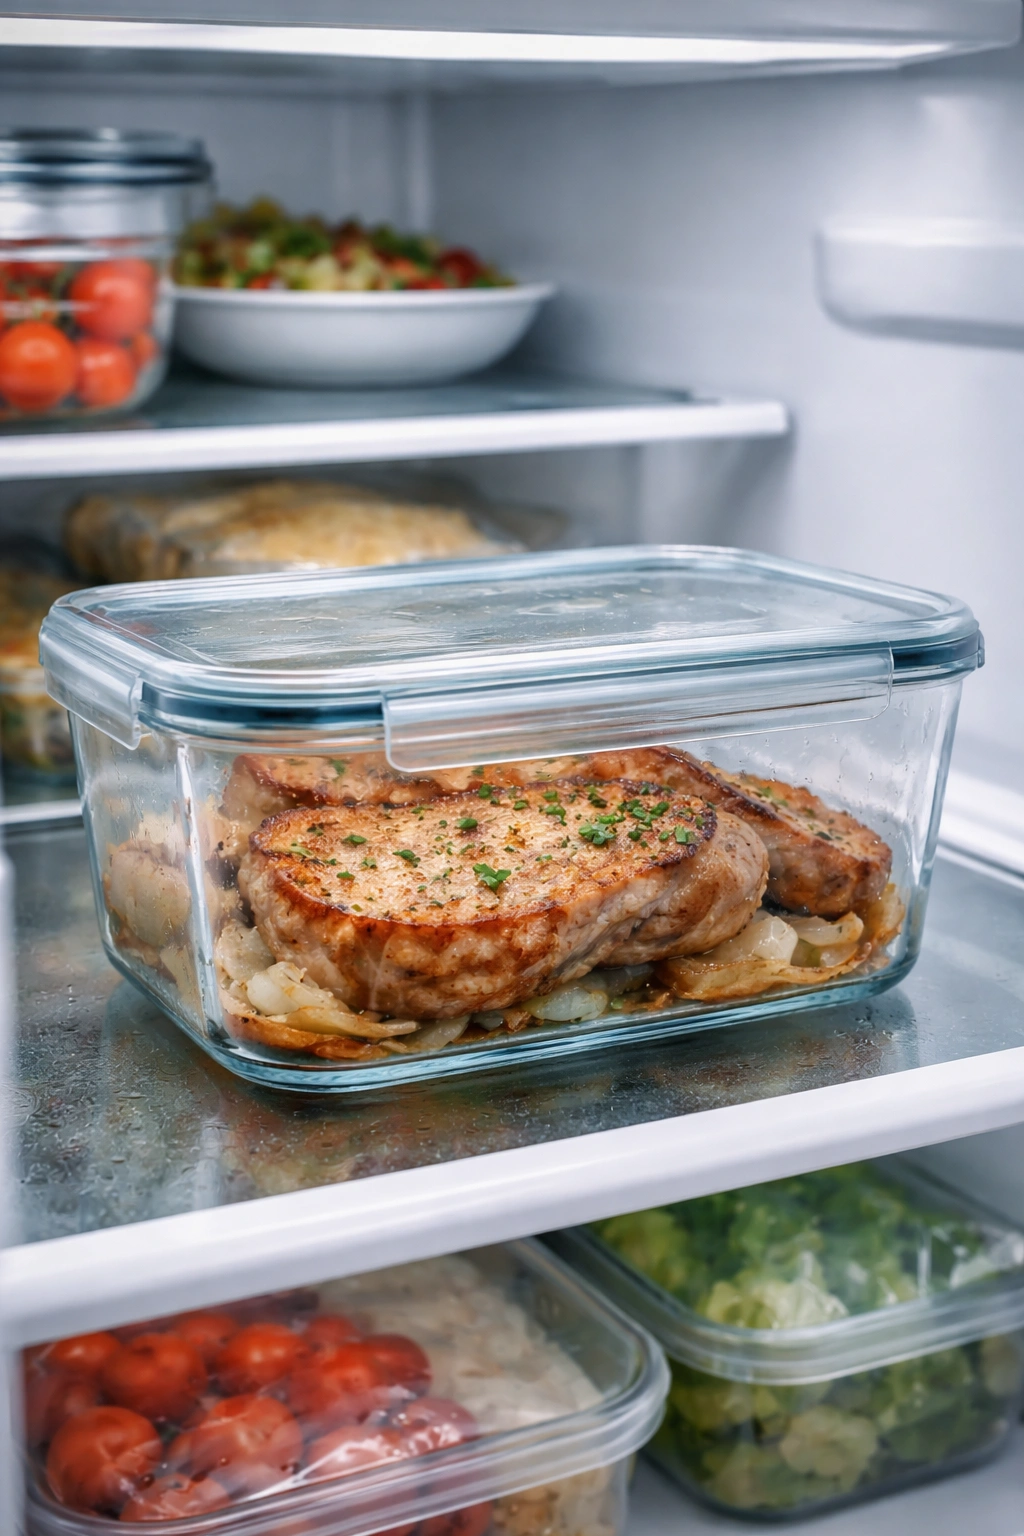
Cooked pork chops keep in an airtight container in the refrigerator for up to 4 days. They taste best eaten the same day, but they’re absolutely fine the next day served cold in a salad or warm with a simple reheating method. To reheat without drying them out, place them in a covered skillet with a splash of broth or water over low heat for 3 to 5 minutes until they’re warmed through. Don’t use high heat, which will overcook them further.
You can freeze cooked pork chops for up to 3 months. Let them cool completely, then store them in a freezer-safe container with a piece of parchment paper between each chop so they don’t stick together. To reheat from frozen, thaw them overnight in the refrigerator, then warm as described above.
Raw pork chops can be seasoned and stored, unbaked, for up to 24 hours before cooking. This is a handy trick if you want to prep dinner early in the day — just season the chops, place them on a plate or cutting board, cover them loosely with plastic wrap, and store them in the refrigerator until you’re ready to cook.
Pork chop leftovers are excellent in salads. Slice them and pile them on a bed of greens with mustard vinaigrette, roasted vegetables, and maybe some goat cheese or blue cheese. They’re also great between bread with a spread of whole grain mustard for a simple sandwich.
If you’ve made a pan sauce, store the chops and sauce together. The sauce will help keep the meat moist during storage and when reheating.
Perfect Sides to Serve With Pork Chops
Pork chops work with almost any side dish, but these are the combinations that feel most natural and are most likely to please a whole family.
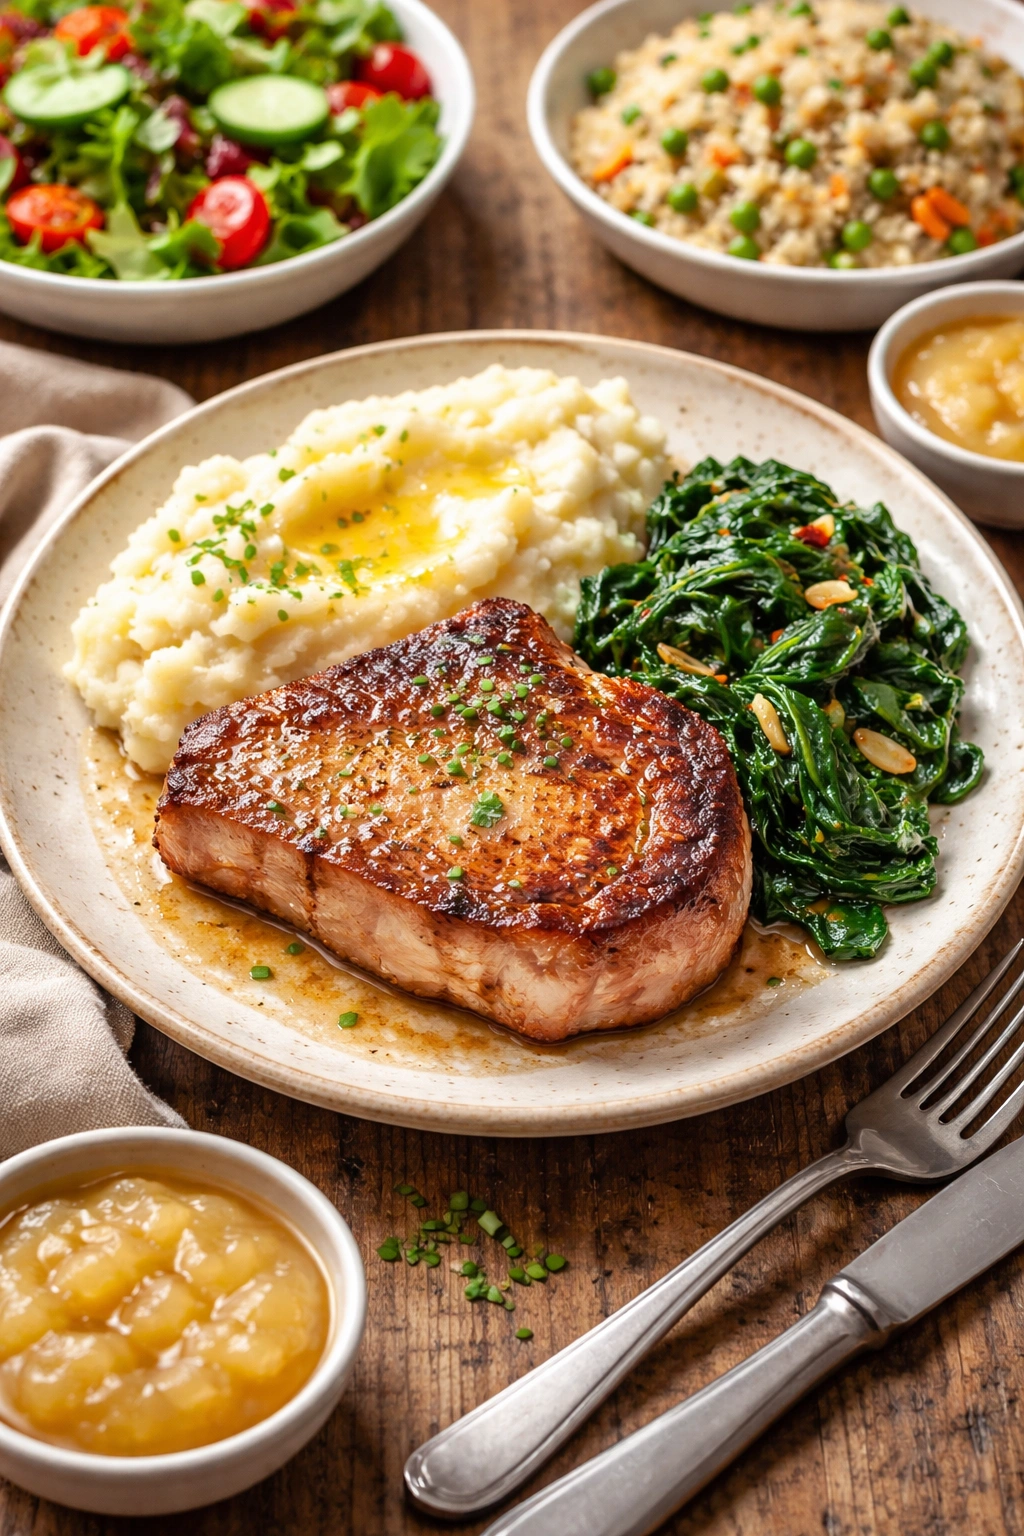
Mashed potatoes and sautéed greens is a classic pairing that never disappoints. The creamy potatoes balance the savory, seared pork, and the greens add brightness and nutrition without any fuss. You can make the mashed potatoes ahead of time and reheat them gently while the chops cook.
Rice pilaf and roasted vegetables makes a complete, balanced meal that’s easy to prep. Cook rice with some broth and herbs while your chops sear, and roast vegetables (broccoli, carrots, Brussels sprouts) in the oven. Everything comes together at roughly the same time.
A simple salad with fresh lemon vinaigrette cuts through the richness of seared pork beautifully. Tender greens, shredded carrots, and a bright dressing that’s heavy on lemon juice and light on oil are all you need.
Roasted apple slices echo the fruit-and-pork pairing that’s been popular in European cuisine for centuries. Toss apple slices with a tiny bit of butter, salt, and a pinch of cinnamon, then roast them alongside your chops.
Simple steamed or roasted green beans with a bit of butter and garlic are a lighter option if you’ve already served potatoes or another starch elsewhere in your meal. They cook quickly and don’t require advance preparation.
Polenta or creamy corn adds richness and comfort without feeling heavy. Stir in butter and a little bit of Parmesan cheese for extra flavor.
Couscous or orzo with fresh herbs is a modern grain option that feels a bit lighter than rice or potatoes but still fills you up. Cook them with vegetable or chicken broth instead of water for better flavor.
Final Thoughts
Easy pork chops for the whole family really does come down to a few core principles: choosing the right thickness, letting your meat come to room temperature, getting your pan genuinely hot, searing without moving them around constantly, checking for doneness with a thermometer, and letting them rest before serving. Master these basics and you’ll never serve a dry, disappointing pork chop again.
The beauty of this approach is that it’s flexible enough to work with whatever’s in your refrigerator. The basic seared chop with butter and garlic is genuinely all you need. If you have wine on hand, add a pan sauce. If you’ve got fresh herbs, use them. If you want something sweeter or more spiced, the variations above show you exactly how to adapt without complicating the core technique.
Pork chops are realistic weeknight dinner that doesn’t require special skills or a long ingredient list, but they feel special enough that people will think you’ve put real effort into dinner. That combination — easy to make, impressive to eat — is exactly what makes them a family favorite worth returning to again and again.