Making gravy from scratch tastes infinitely better than anything you’ll get from a packet, and honestly? It’s not even harder once you understand the basic mechanics. The difference is real — it’s the contrast between something that tastes like salt and cornstarch, and something that tastes like actual meat, butter, and carefully built depth. Once you nail the technique, you’ll never waste money on a mix again.
Most people shy away from making gravy because they think it requires finesse they don’t have. The truth is that gravy is one of the most forgiving things you can make in the kitchen. There’s no rising, no timing precision, no temperature-sensitive chemistry. It’s just fat, flour, and liquid combined in the right proportions with enough attention to texture. Mess up the proportion slightly? You can fix it. Get a lump? You can strain it out. Want more flavor? Just add more of whatever makes sense. This is the opposite of stressful.
The beauty of homemade gravy is that you control every single variable — the depth of the roux, the type of stock, the seasonings, the thickness, whether you add cream or wine or pan drippings from the meat itself. You can make it rich and luxurious or light and clean. You can build it from turkey drippings for Thanksgiving, from pan drippings after you sear steak, or from a simple butter-and-broth base when you’re starting from nothing. This flexibility is why real cooks make their own gravy, every single time.
Why Homemade Gravy Tastes So Much Better
The difference between packaged gravy mix and from-scratch gravy comes down to what you’re actually dissolving into your liquid. A mix packet contains dried beef or chicken flavor (which tastes oddly dusty), cornstarch or modified food starch as a thickener, salt, and a handful of stabilizers and anticaking agents. It’s engineered to be shelf-stable and foolproof, which means it tastes like the compromise it is.
Real gravy is built on actual rendered meat fat, toasted flour, and stock that simmered for hours and contains actual bone collagen that turns into gelatin. There’s no comparison. When you taste homemade gravy, you’re tasting the depth of a proper stock, the richness of real fat, and the subtle sweetness of caramelized flour. These are the flavors that make gravy worth eating at all.
The thickening agent matters too. A properly made roux (equal parts fat and flour cooked together) thickens gravy while adding flavor through the toasting process. The flour doesn’t taste like “thickening” — it tastes like a natural extension of the sauce itself, almost invisible but doing important work underneath the surface. Cornstarch, by contrast, thickens without adding anything, and it can give gravy an unpleasant slippery mouthfeel if you overuse it.
Beyond the ingredient quality, homemade gravy lets you adapt to whatever meat you’re serving. Turkey gravy tastes completely different from beef gravy, and both are different from pork or chicken gravy — because they’re built from the drippings and stock of those specific meats. You can’t get that specificity from a one-size-fits-all packet.
The Science Behind Why Gravy Works
A successful gravy relies on three basic components: fat, thickener, and liquid. Understanding how these interact takes the mystery out of gravy-making and makes you instantly confident.
The fat is usually butter, the rendered fat from meat drippings, or sometimes a combination of both. The fat is where flavor lives, and it’s the medium that allows your thickening agent to distribute evenly throughout the liquid. If you skip the fat, your gravy will taste thin and one-dimensional.
The thickener is flour in a traditional gravy, and it works through a process called gelatinization. When flour is heated in fat (creating a roux) and then mixed into a hot liquid, the starch granules absorb liquid and swell, thickening the entire mixture. This happens at around 140-150°F, which is why your gravy will suddenly thicken as it heats. The longer you cook the roux before adding liquid, the darker and more flavorful it becomes — but also the less thickening power it has (because the starch granules break down with prolonged heat). This is why flour-based gravies are so customizable: you can make them thin and delicate or thick and clinging.
The liquid is where your actual flavor comes from. Stock (beef, chicken, turkey, vegetable) contains dissolved proteins, minerals, and if it’s a good quality stock, actual collagen from bones that gives body and richness. Water works in a pinch, but it makes gravy taste flat. Chicken or beef stock makes it taste intentional.
The magic happens when you combine all three: the fat carries the heat evenly, the flour thickens the liquid while cooking out its raw flour taste, and the stock provides the underlying flavor. The result is a liquid that clings to food instead of running off, and tastes savory and satisfying.
Building Gravy From Meat Drippings vs. Making It From Scratch
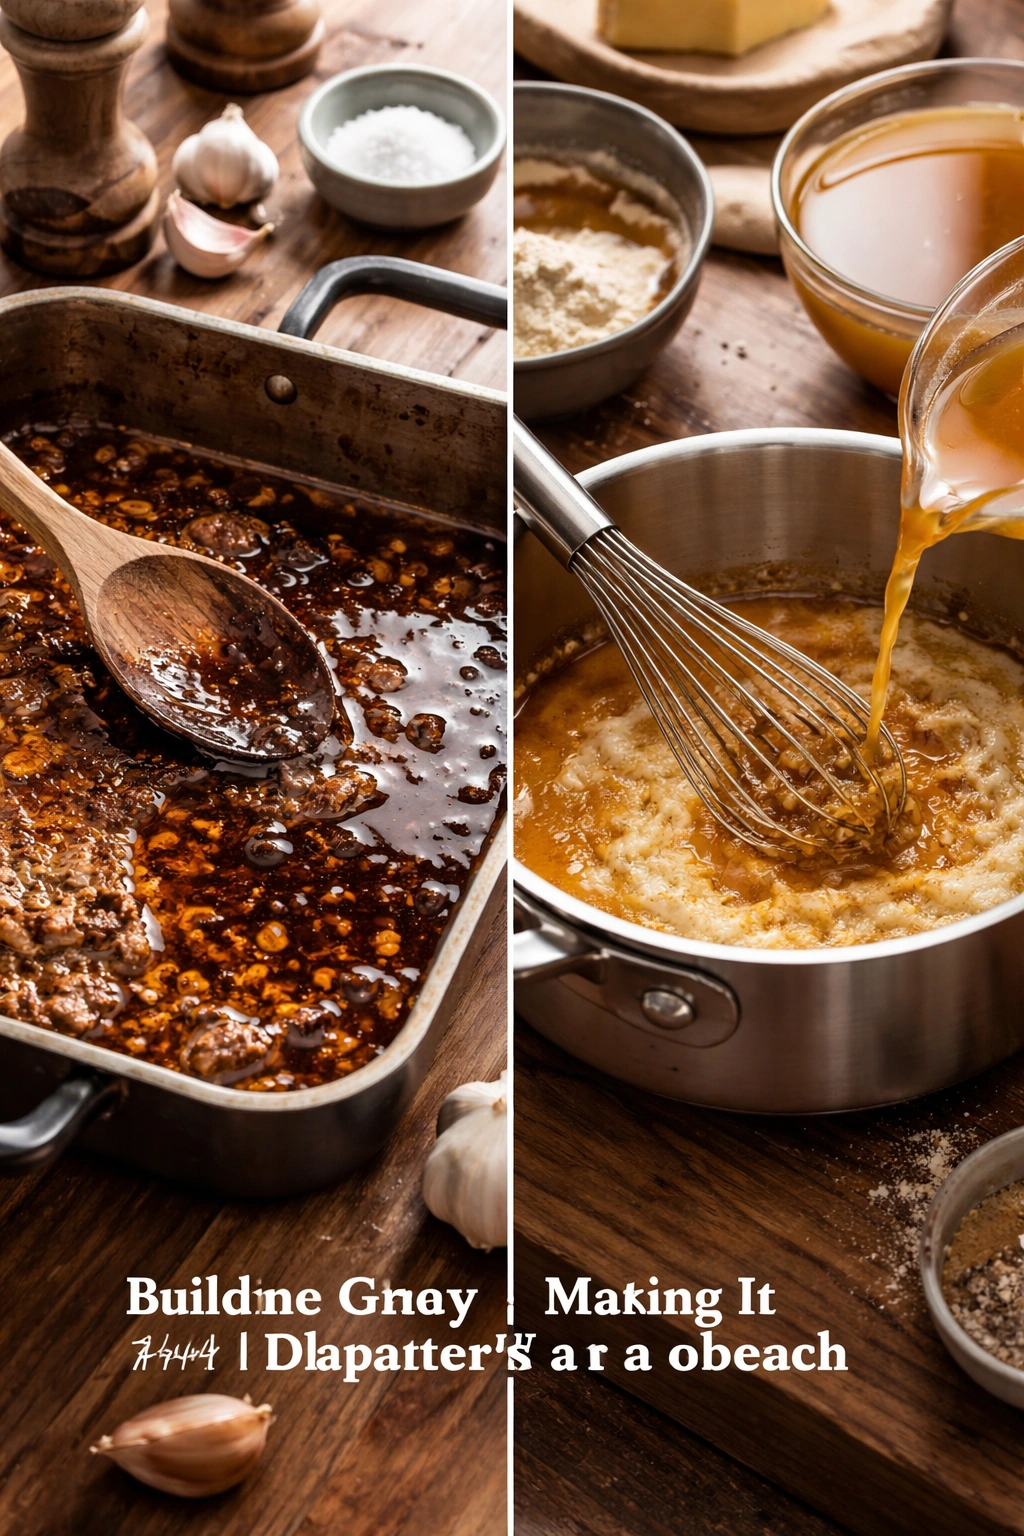
These are two different starting points that affect your approach, but the final technique is identical.
If you’re making gravy from roasted meat (a turkey, chicken, beef roast, pork, or lamb), you have an advantage: the pan drippings. These drippings are a mixture of rendered fat from the meat, browned bits of meat stuck to the pan (called fond), and any juices that escaped during cooking. This is liquid gold. It already contains deep, concentrated meat flavor that you cannot recreate by starting with stock alone.
The process is straightforward: strain the drippings to separate the fat from the liquid. The fat goes into a saucepan to make your roux, and the liquid (plus additional stock if you need more volume) becomes your gravy base. Since the meat drippings are already concentrated, you need less stock than you would if starting from nothing.
If you’re making gravy without meat drippings — because you’re serving it alongside boneless, skinless chicken breasts that didn’t produce much dripping, or because you’re making it ahead of time, or because you’re just having some meat left over and want gravy — you start with a butter roux and stock instead. This works perfectly well, but it requires more attention to building flavor through seasoning and perhaps aromatics.
The technique itself doesn’t change: you make a roux, you add stock slowly while stirring, you heat until thickened, you season. The only difference is where your baseline flavor comes from.
Creating a Proper Roux: The Foundation of Every Gravy
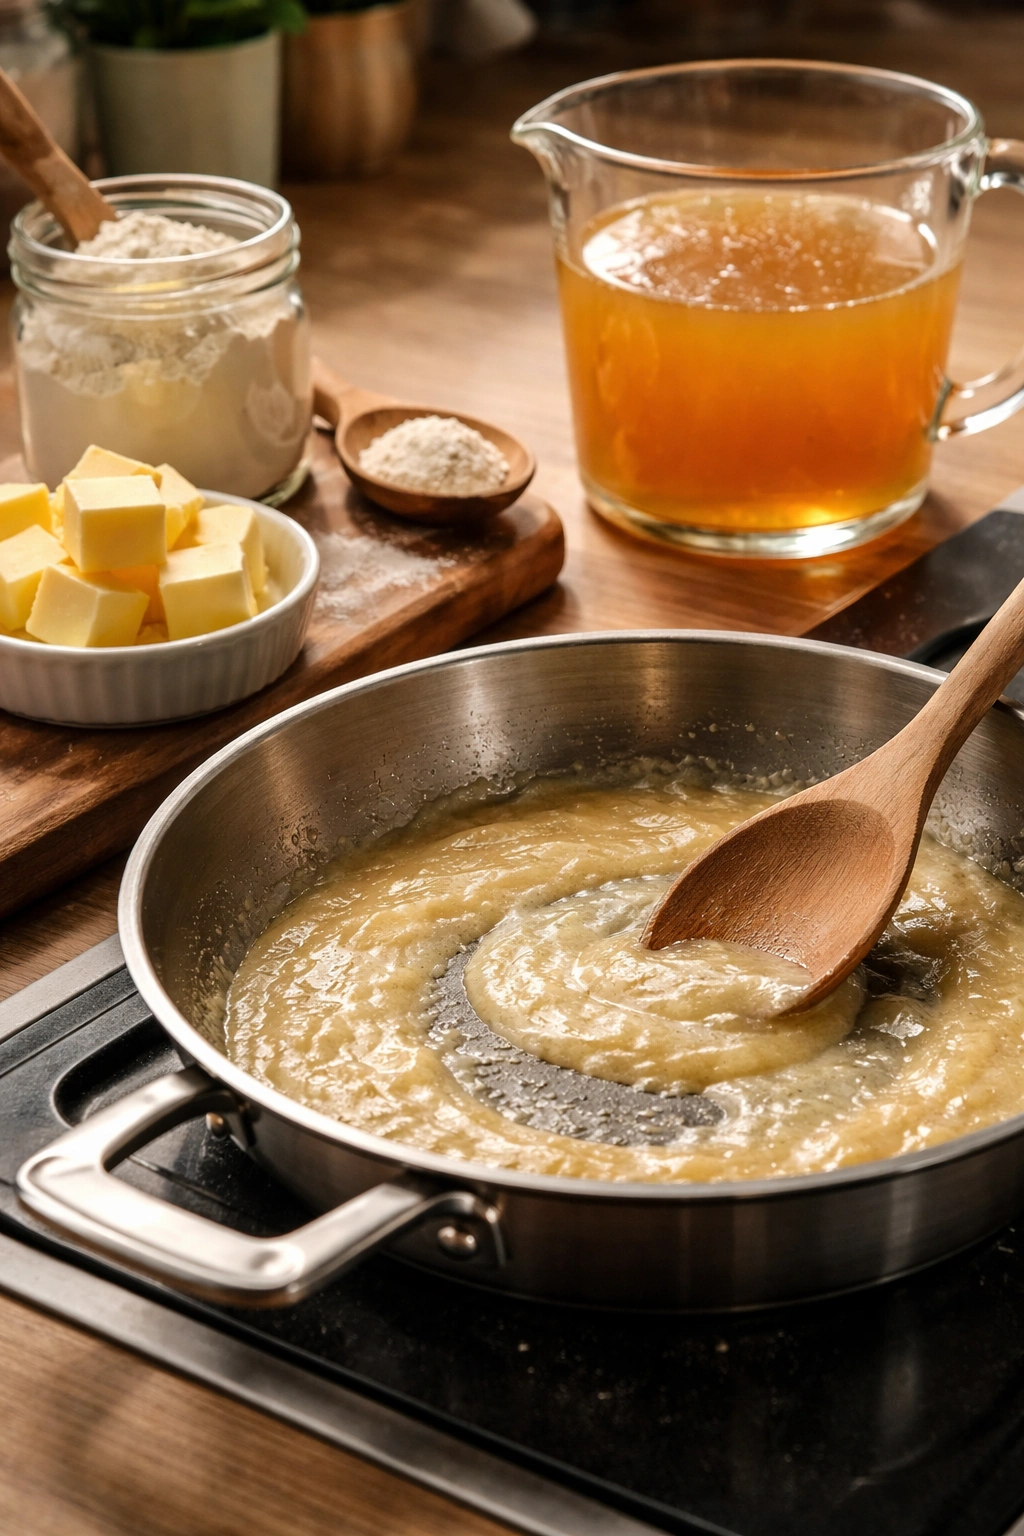
A roux is equal parts fat and flour mixed together and cooked, and it’s literally the foundation of gravy. Most roux-related failures come from either too much flour relative to fat (creating a paste instead of a pourable sauce) or not cooking the roux long enough before adding liquid (leaving a flour-y taste in the finished gravy).
The ratio is simple: for every 2 tablespoons of fat, use 2 tablespoons of flour. This creates a roux that, when mixed into 1 cup of liquid, produces a medium-thickness gravy — the kind that clings to the food but still pours reasonably easily. Want thicker gravy? Use slightly more flour. Want thinner gravy? Use slightly less flour, or add more liquid at the end.
The fat should be hot but not smoking. If it’s too cool, the flour will clump. If it’s too hot, you risk burning the flour before it cooks through. Medium heat is your sweet spot.
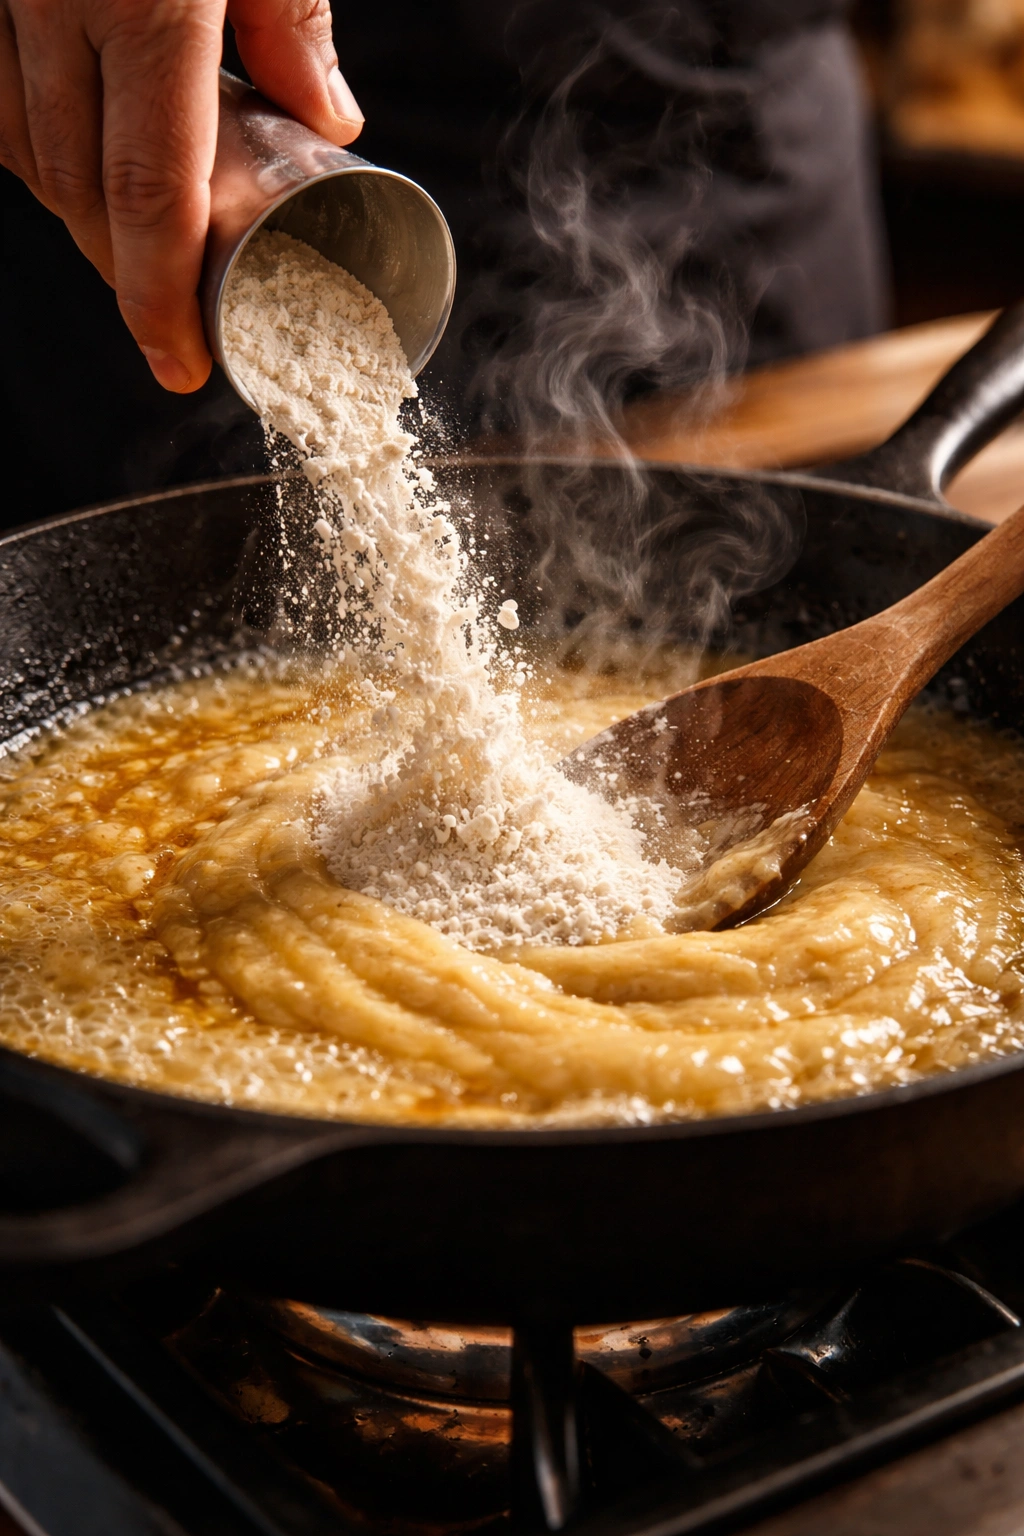
Add the flour to the hot fat all at once, then stir constantly for about 1-2 minutes. This is the crucial step most people skip or rush through. You’re cooking out the raw flour taste and allowing the flour to toast slightly, which adds deeper flavor. The roux should bubble gently — you should hear it sizzling softly. At about 1 minute, it will smell nutty and toasted. By 2 minutes, it might smell almost caramel-like. That toasting is flavor development. Don’t stop here.
The longer you cook a roux, the darker it becomes and the more it develops complex, almost savory flavors. A pale roux (cooked for just 1-2 minutes) tastes mild and floury. A medium roux (cooked for 3-4 minutes) tastes richer and more buttery. A dark roux (cooked for 5+ minutes) tastes almost nutty and concentrated, but it begins to lose its thickening power because the starch starts to break down. For gravy, a medium roux is usually ideal — dark enough to taste good, but still thickening effectively.
Making Smooth, Lump-Free Gravy: The Critical Technique
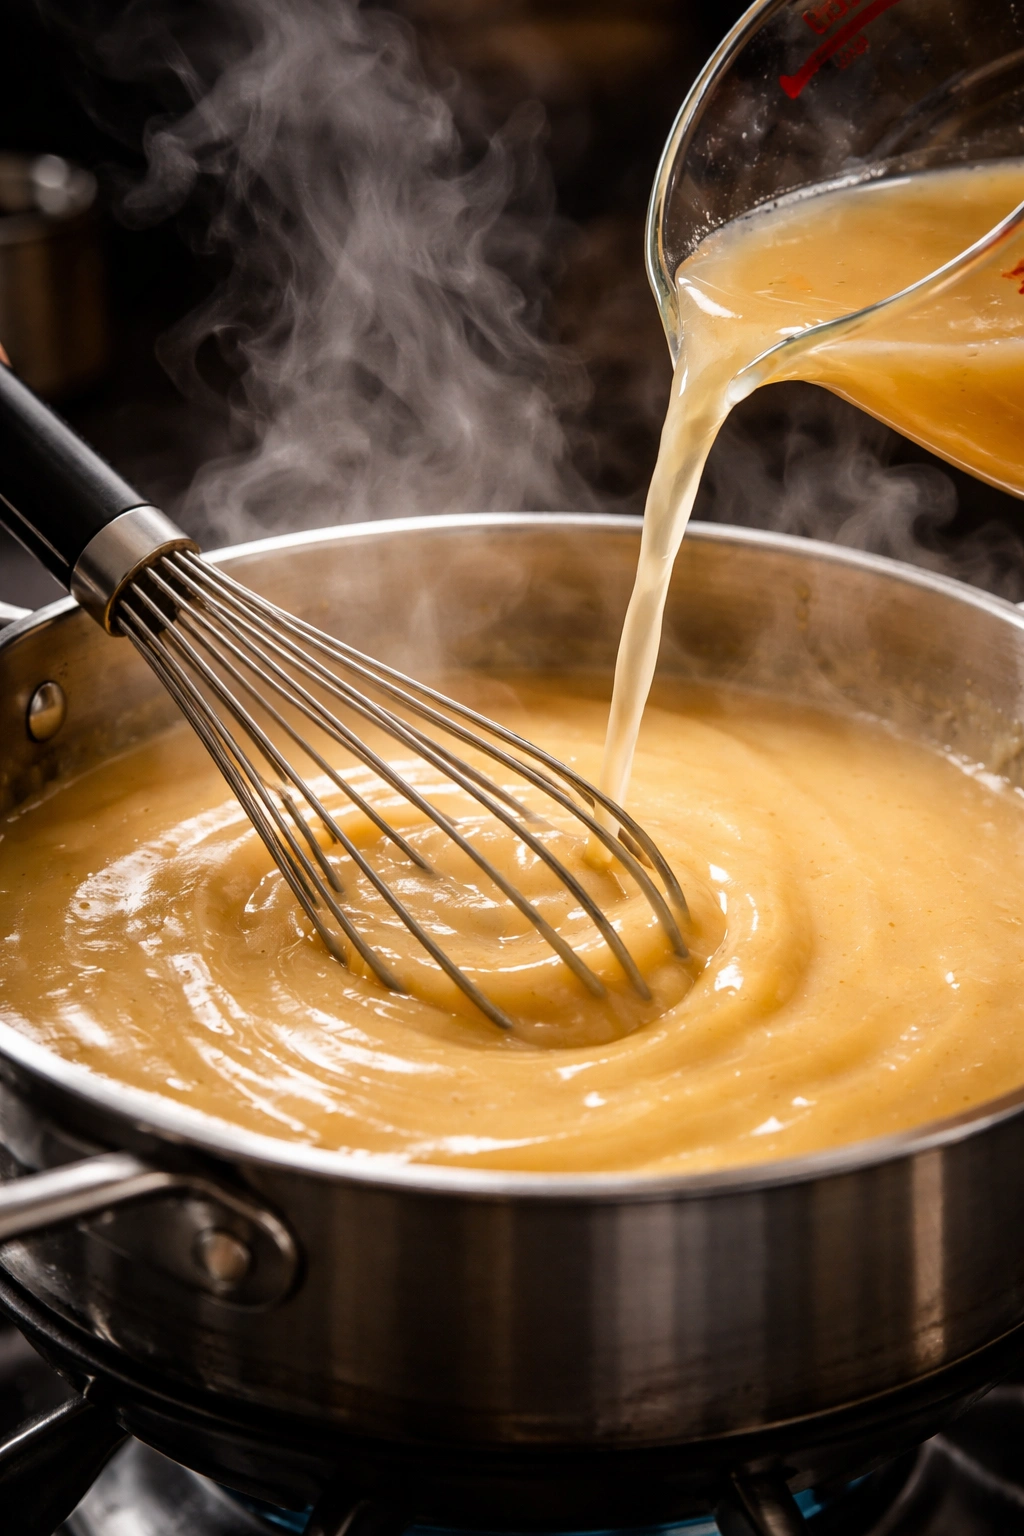
The single biggest complaint about homemade gravy is lumps. This happens because cold or room-temperature liquid hits hot roux too quickly, and the flour granules seize up instead of distributing evenly. The fix is surprisingly simple: add the liquid gradually while whisking constantly, rather than pouring it all in at once.
Here’s the exact technique: after your roux has cooked for 1-2 minutes, turn the heat down to medium (this reduces splashing and gives you more control). Pour in about 1/4 cup of your cold or room-temperature stock — not hot stock, but not ice-cold either, just whatever temperature it is — while whisking vigorously. Whisk for about 30 seconds until this small amount of stock is fully incorporated and the mixture is smooth.
Then add another 1/4 cup of stock, whisking again until smooth. Continue this process until you’ve incorporated all of your liquid. Yes, this takes longer than dumping it all in at once. Yes, it matters. The gradual addition allows the flour granules to hydrate and swell evenly, so they disperse throughout the liquid instead of clumping together.
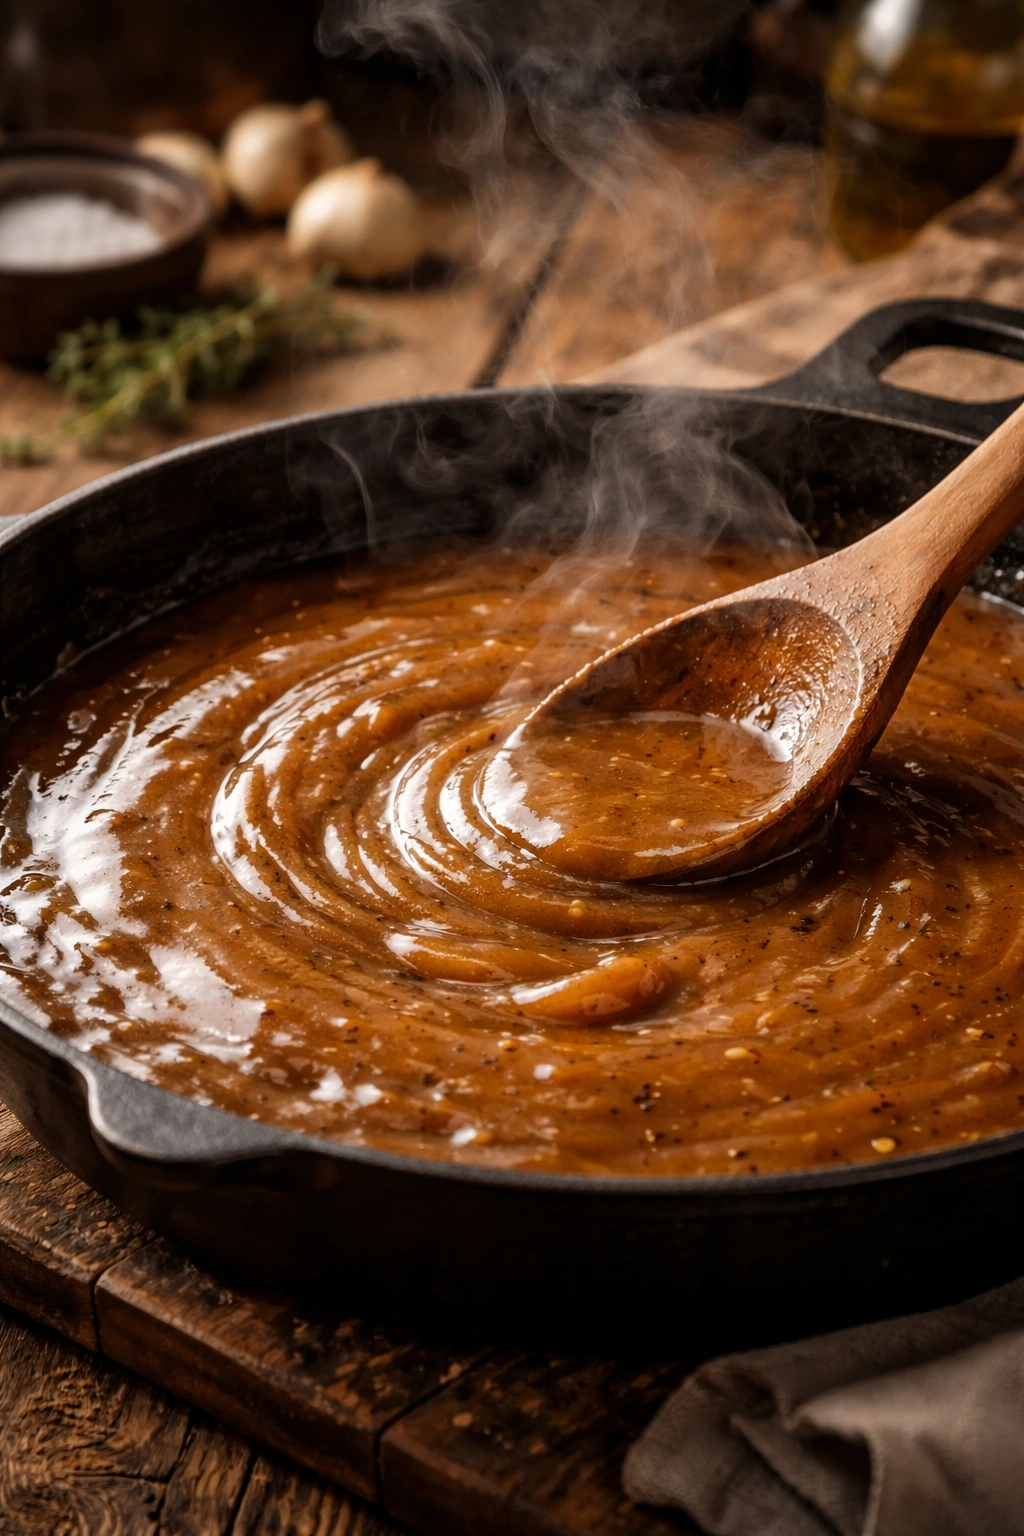
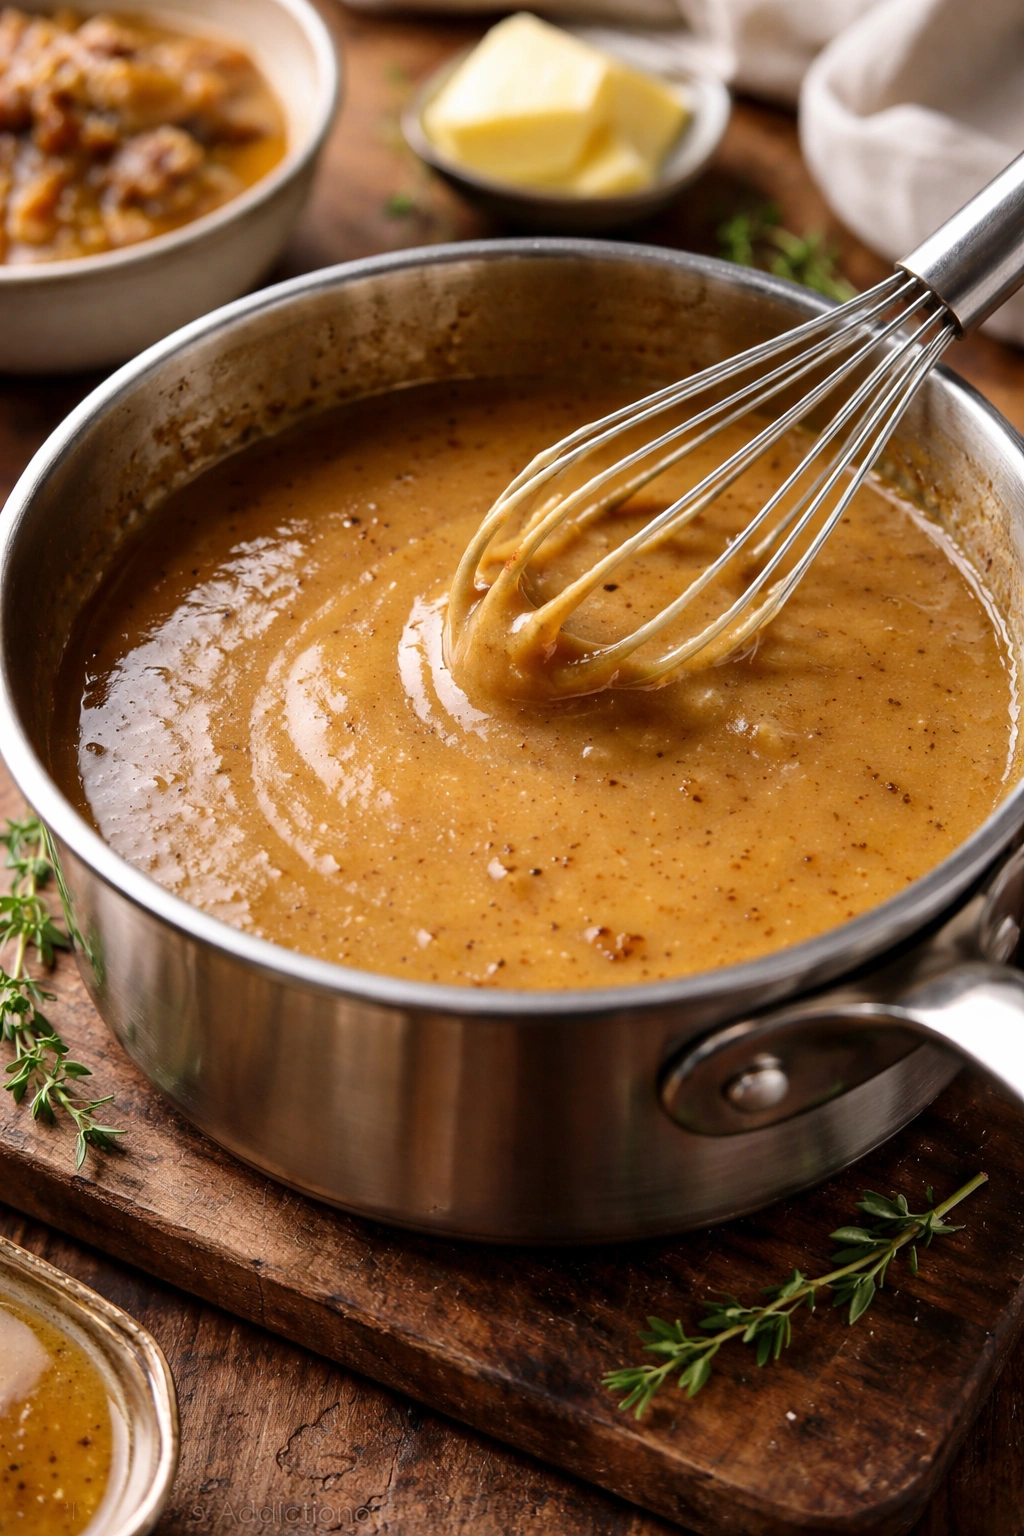
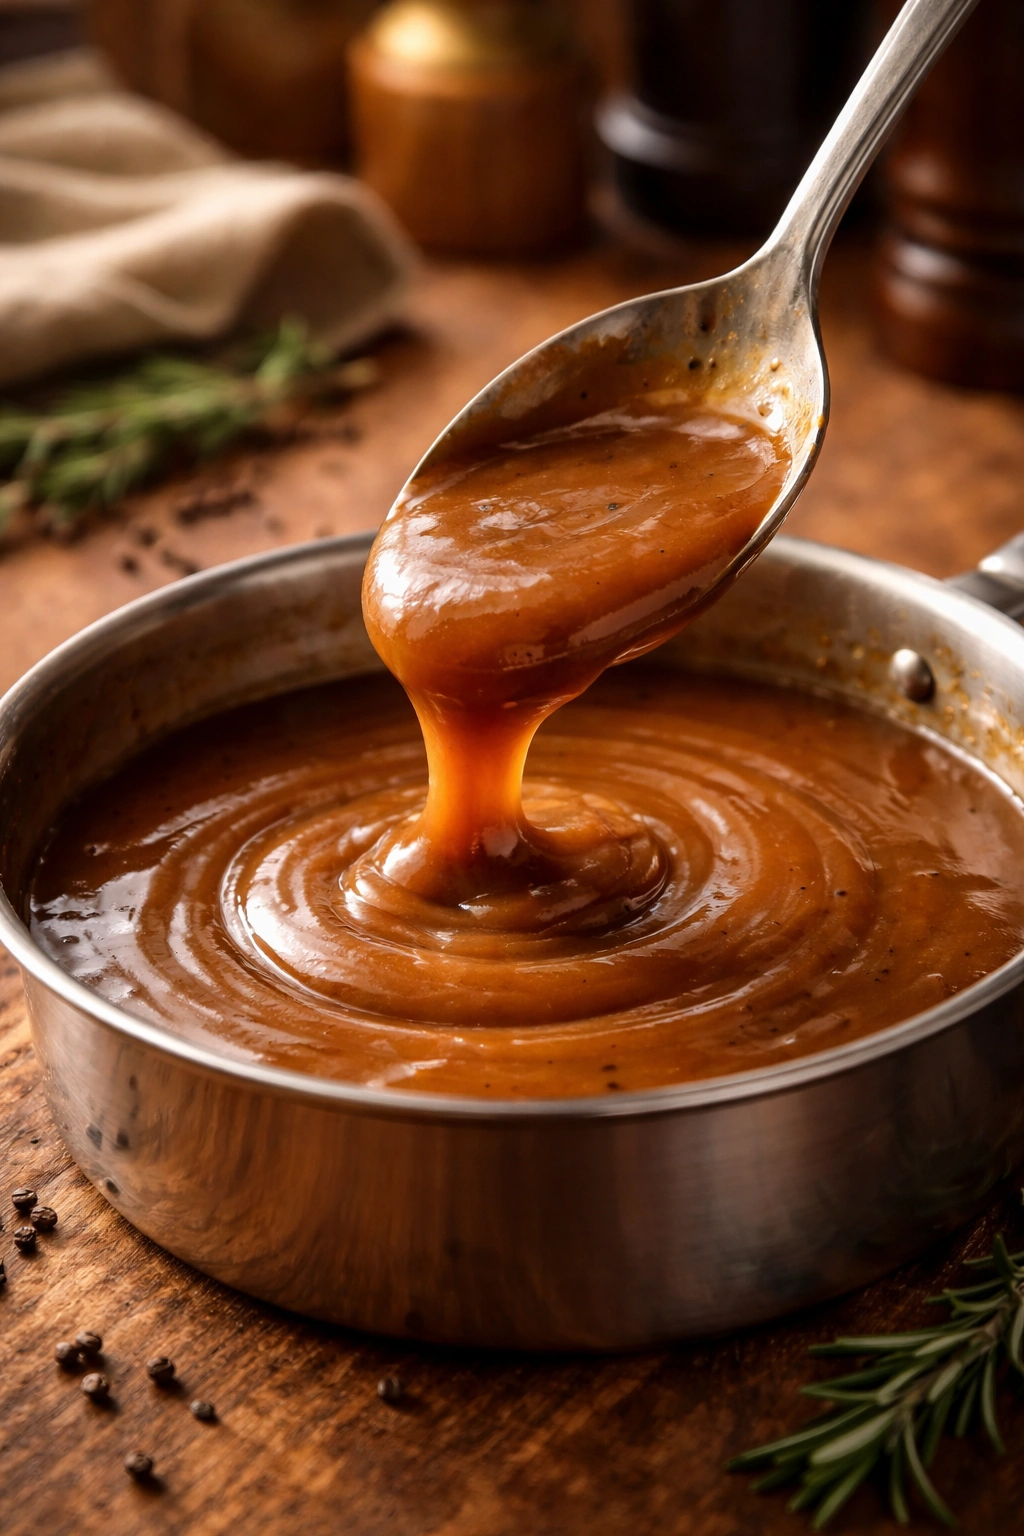
Once all the liquid is incorporated, increase the heat to medium-high and bring the gravy to a simmer, whisking frequently. It will look thin at first — almost like broth. But as it heats and approaches a simmer, it will noticeably thicken. Keep whisking to prevent sticking on the bottom of the pan. Simmer for about 1 minute to ensure the flour is fully cooked and has lost any remaining raw taste.
If despite your best efforts you end up with lumps, don’t despair. Pour the gravy through a fine-mesh sieve into a clean saucepan, pressing gently on the lumps to extract as much gravy as possible. You’ll lose maybe 10 percent of your volume to the straining, but the gravy will be smooth. Some people prefer this method anyway, especially if they’re serving people who are texture-sensitive.
Seasoning Your Gravy With Depth and Balance
A proper gravy is seasoned in layers, not all at once. This builds complexity instead of a flat, one-note taste.
Start with salt and black pepper. These are your base seasonings. Add salt gradually — about 1/4 teaspoon at a time — tasting after each addition. Gravy should taste distinctly savory. It should make your mouth water a little. You want to season it enough that every spoonful is flavorful, but not so much that it tastes purely salty. Black pepper should be visible and noticeable; freshly ground pepper adds more flavor than pre-ground, but either works.
Once you’ve nailed the salt and pepper, add one or more of these flavor builders:
Worcestershire sauce adds umami depth and a subtle tangy quality. Start with 1/2 teaspoon and taste. The flavor is bold, so a little goes a long way.
Soy sauce (use a good quality one) adds saltiness and umami, similar to Worcestershire but slightly different in character. Use it sparingly — 1/2 to 1 teaspoon for a full batch.
Dry mustard powder (about 1/4 teaspoon) adds a subtle sharpness that makes the other flavors pop without making the gravy taste obviously mustard-y.
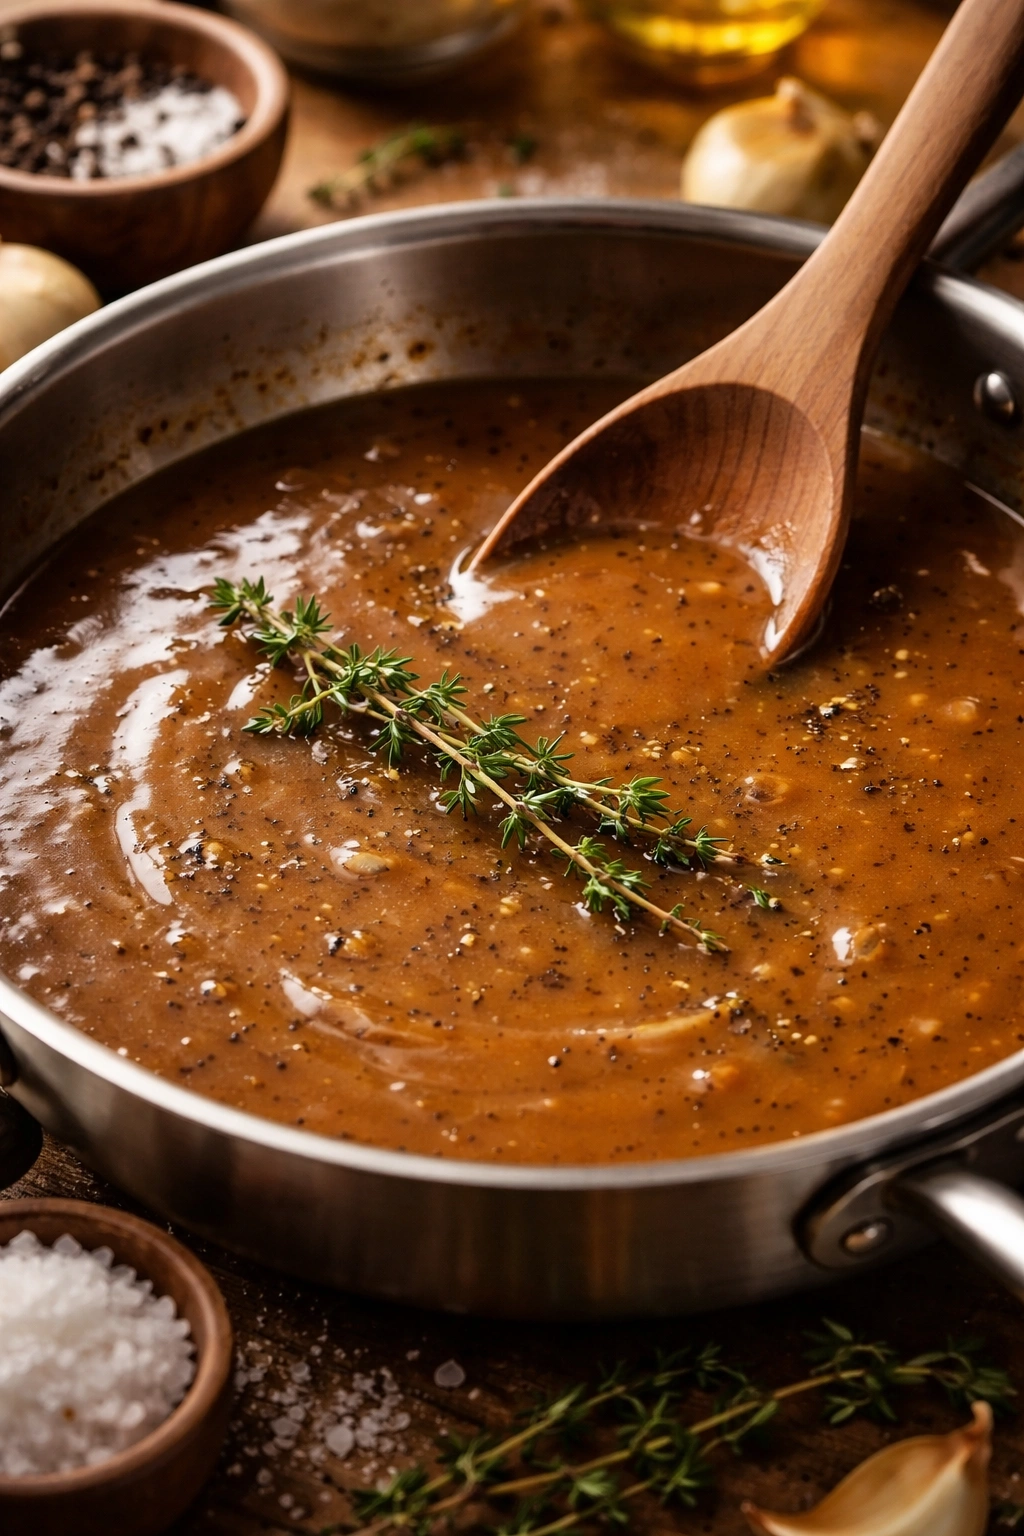
Fresh thyme or sage (if you have it) adds herbal complexity. A small pinch of dried herb works too, though fresh is better.
Garlic powder (just 1/8 teaspoon) adds savory depth without making the gravy taste garlicky.
Red wine or Cognac (about 1/4 cup, added before simmering the final gravy) adds tannic complexity and sophisticated depth. Let it simmer for at least 30 seconds so the alcohol cooks off.
The key is to taste as you go and add one seasoning at a time. This way, you can tell which flavor is which, and you’ll develop a sense for how much of each ingredient creates the effect you want. Underseasoned gravy tastes watery and disappointing. Properly seasoned gravy tastes intentional and professional. Overseasoned gravy tastes salty or one-note.
Basic Brown Gravy From Meat Drippings
Yield: Makes about 2 cups | Serves 6 to 8
Prep Time: 5 minutes
Cook Time: 10 minutes
Total Time: 15 minutes
Difficulty: Beginner — This is a straightforward technique requiring only basic stirring and attention.
Ingredients
- 2 tablespoons of fat (reserved from meat drippings or butter)
- 2 tablespoons all-purpose flour
- 1½ cups meat stock (beef, chicken, or turkey, depending on what you’re serving) or a combination of stock and the strained liquid from the pan drippings
- ½ teaspoon fine sea salt, plus more to taste
- ¼ teaspoon freshly ground black pepper, plus more to taste
- ¼ teaspoon Worcestershire sauce (optional but recommended)
- Pinch of dry mustard powder (optional)
Instructions
Make the Roux:
-
Pour the fat into a small saucepan and set it over medium heat. If using cold drippings from the roasting pan, pour them into the saucepan through a fine-mesh sieve, allowing the liquid to drain into a bowl below. The fat will separate from the liquid as it cools; skim the clear fat from the top and measure out 2 tablespoons into the saucepan. Discard the liquid that drained through (or keep it to add to your stock if it looks appetizing).
-
Once the fat is hot (you should see it shimmer and a few wisps of steam, but it should not smoke), add the flour all at once and stir constantly with a wooden spoon or whisk for 1 to 2 minutes. The mixture will bubble gently and smell nutty and toasted. This toasting step is critical — it cooks out the raw flour taste and develops flavor.
Add the Stock:
-
Reduce the heat to medium-low. Pour in about 1/4 cup of the stock (or a combination of stock and strained drippings) while whisking vigorously. Whisk for about 30 seconds until the mixture is completely smooth and lump-free.
-
Add another 1/4 cup of liquid and whisk again until smooth. Repeat this process with the remaining liquid, adding it in 1/4-cup increments and whisking after each addition. Do not rush this step — gradual liquid addition is what prevents lumps.
-
Once all the liquid is incorporated, increase the heat to medium-high and bring the gravy to a simmer, whisking frequently. It will look thin at first, but it will thicken noticeably as it heats. You should see small bubbles breaking the surface.
Season and Finish:
-
Simmer for 1 minute, stirring, to ensure the flour has lost its raw taste and the gravy has reached full thickness.
-
Remove from heat and add the salt, pepper, and Worcestershire sauce (if using). Stir well. Taste and adjust seasoning — add more salt if it tastes flat, more pepper if you want more bite, more Worcestershire if it needs more umami depth.
-
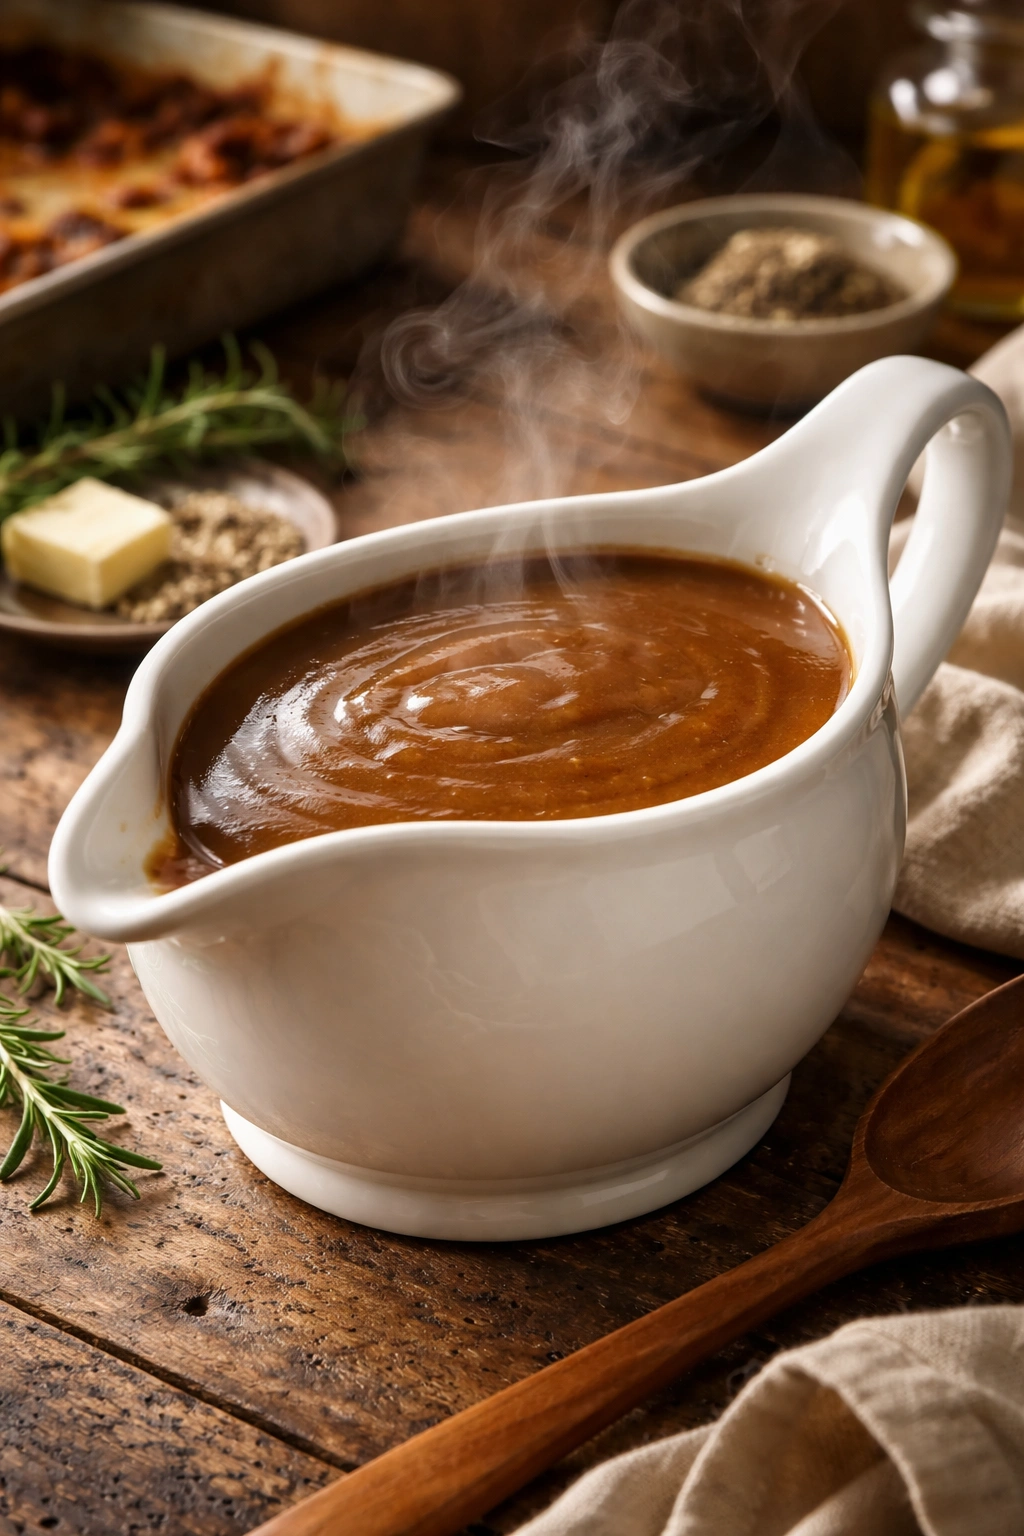
Pour into a warm serving boat or bowl and serve immediately. If the gravy sits for more than a few minutes, it may develop a skin on top; stir it back in or gently reheat over low heat.
Poultry Gravy: Building Flavor From Turkey or Chicken Drippings
Poultry gravy is slightly different from beef gravy because poultry fat has a distinctive flavor that benefits from specific seasonings. The technique is identical, but the seasonings shift.
When you roast a turkey or whole chicken, the drippings are a beautiful blend of golden fat and rich browned meat bits. These drippings are your secret weapon — they contain far more actual turkey or chicken flavor than any stock could provide, because they’re concentrated directly from your bird.
The best approach is to make gravy immediately after the bird comes out of the oven and while those drippings are still hot. Let the bird rest for 15-20 minutes (which is necessary for carving anyway), then make the gravy while everything is at the right temperature.
Pour the drippings from the roasting pan into a heatproof measuring cup or bowl and let them sit for 5 minutes. The fat will float to the surface. Using a spoon or a fat separator (a small pitcher with a spout at the bottom), skim off about 3-4 tablespoons of the clear fat into a saucepan. The remaining liquid underneath is your flavorful stock base — save every drop.
Make your roux from the fat exactly as described above. When adding liquid, start with the strained drippings, then add additional turkey or chicken stock if you need more volume. The ratio should be roughly 2 parts drippings to 1 part additional stock, since the drippings are very flavorful and additional stock would dilute that flavor.
Season poultry gravy with salt, pepper, and a tiny pinch of fresh or dried sage or thyme if you have it. Some people add a small splash of white wine or dry vermouth. Worcestershire sauce works too, though it’s a touch heavier for delicate poultry gravy.
Sausage Gravy: Rich, Porky, and Full of Textured Flavor
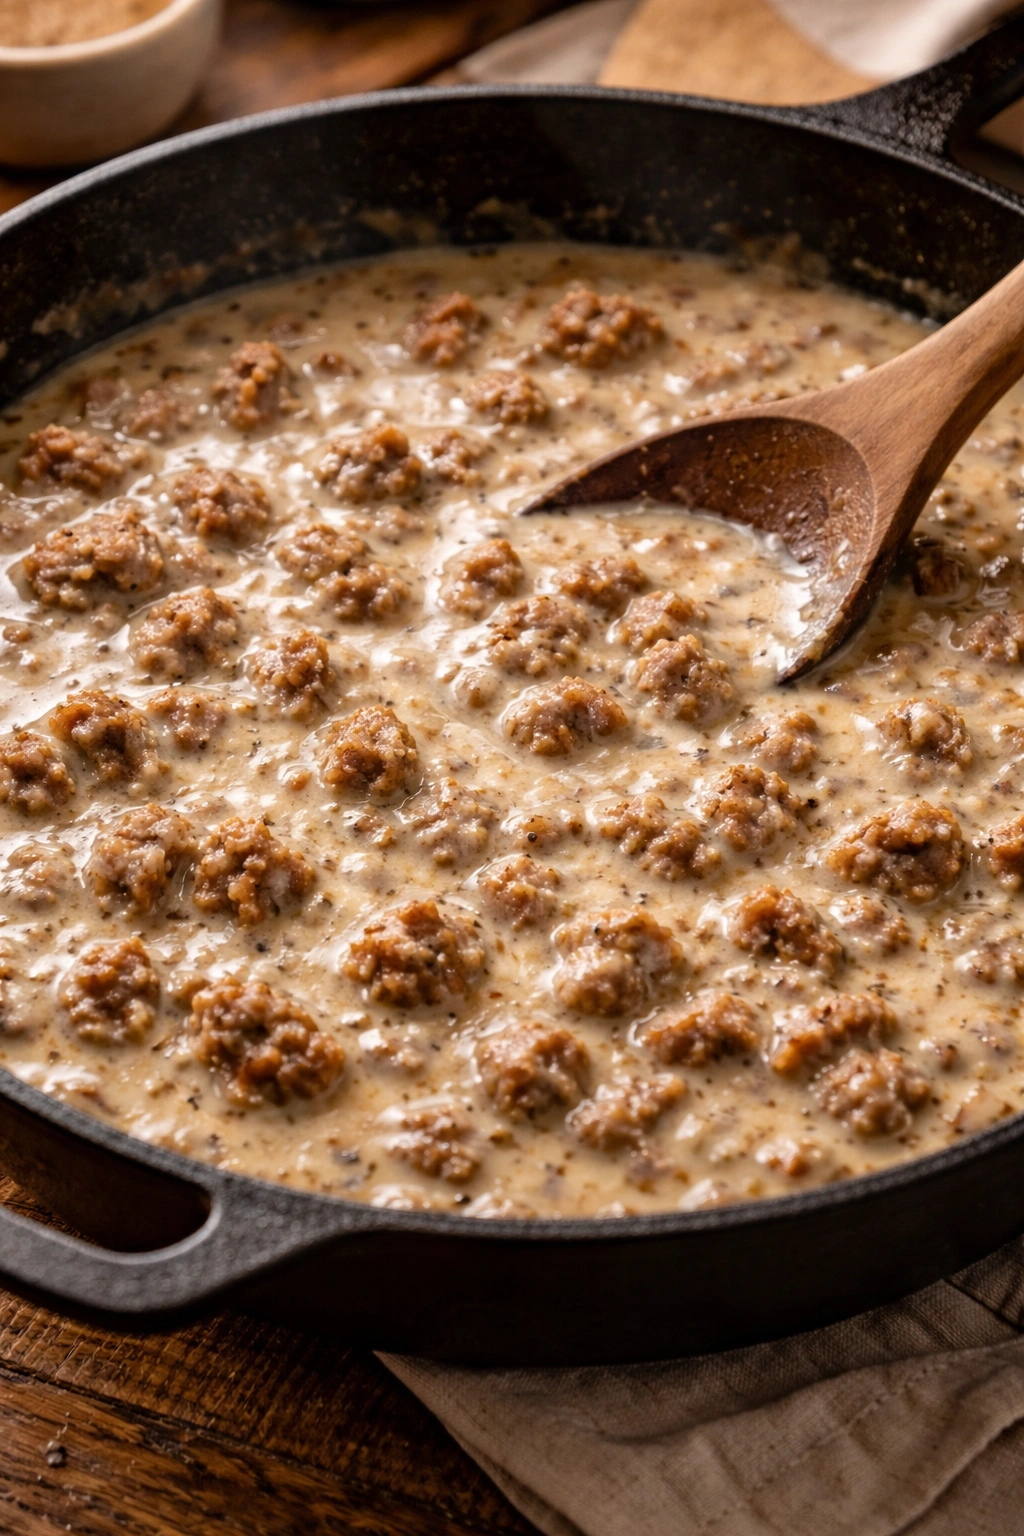
Sausage gravy is gravy made directly from bulk sausage meat — it’s what you find at diners with breakfast biscuits, though it works just as well at dinner. This is a different technique because you’re cooking the sausage itself as part of the process.
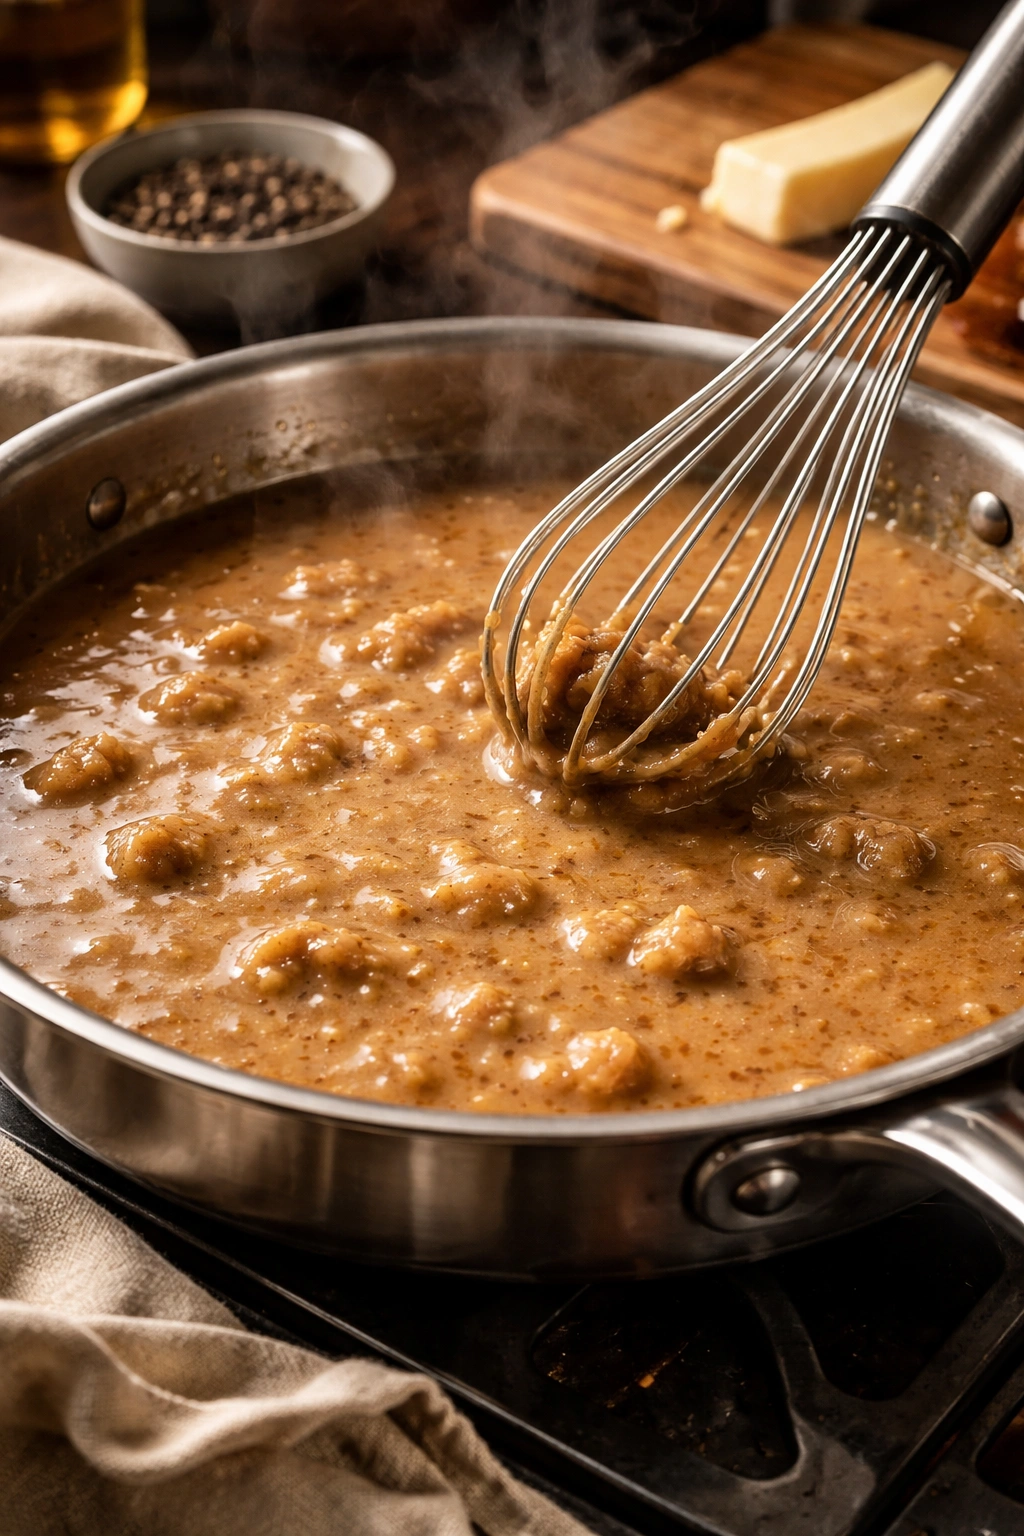
Crumble 1 pound of bulk breakfast sausage (your preferred brand or homemade) directly into a large skillet over medium heat. Break it up with a spoon as it cooks, allowing it to brown evenly. This should take about 8-10 minutes. You want the sausage to be thoroughly cooked and broken into small crumbles, and you want the drippings to turn brown (not just gray). Don’t drain the fat — that fat is essential to your gravy.
Once the sausage is cooked, sprinkle 3-4 tablespoons of all-purpose flour directly over it. Stir well, coating all the sausage pieces and allowing the flour to toast in the sausage fat for about 1-2 minutes. The mixture will smell rich and nutty.
Gradually add 2-3 cups of whole milk or a combination of milk and chicken stock, whisking constantly to prevent lumps. Milk makes the gravy richer and creamier than stock alone. Bring to a simmer over medium heat, stirring frequently, for about 1-2 minutes until it thickens. Season with salt, pepper, and a pinch of cayenne if you like heat.
The result is a chunky, creamy, deeply savory gravy that’s perfect over warm biscuits or mashed potatoes.
Vegetarian Gravy: Building Depth Without Meat
You don’t need meat to make fantastic gravy. The key is using vegetable stock with enough umami depth, plus seasonings that provide savory intensity.
Use a vegetable stock that actually tastes like something — not the thin, pale broth that comes from boiling vegetable scraps, but a stock with body and flavor. Many grocery stores now carry quality vegetable stocks from brands that actually simmer their base for hours. If you can find mushroom stock, even better — mushrooms contribute umami depth that mimics the savory quality of meat-based gravies.
Make your roux from butter (about 3 tablespoons per 2 tablespoons flour), cooking it until medium-brown and deeply nutty. Add your vegetable stock gradually as always. Once it thickens, add:
- 1 tablespoon of tamari or soy sauce (for umami depth)
- 1 tablespoon of balsamic vinegar or red wine vinegar (for complexity and slight sweetness)
- 1 teaspoon of Worcestershire sauce (yes, vegetarian versions exist now)
- A small handful of finely chopped fresh mushrooms, sautéed separately until deeply browned and caramelized, then stirred into the finished gravy
The mushrooms are optional but worth the effort — they add savory depth and a meaty texture that mimics what meat drippings provide in a traditional gravy.
Common Gravy Mistakes and How to Fix Them
Lumpy Gravy: You added too much liquid too quickly, or you didn’t whisk vigorously enough. Prevention: always add liquid gradually in small increments while whisking continuously. Fix: strain the gravy through a fine-mesh sieve and start over with a fresh roux if the lumps are significant.
Gravy That’s Too Thin: You used too much liquid relative to roux, or you didn’t cook it long enough to thicken. Prevention: use the 1:1 ratio of fat to flour, and simmer the gravy for at least 1 minute to ensure the flour is fully gelatinized. Fix: make a small roux separately in a separate pan (1 tablespoon butter plus 1 tablespoon flour) and whisk it into the thin gravy while simmering, then simmer for another minute.
Gravy That’s Too Thick or Pasty: You used too much flour relative to liquid, or you’re not using enough heat to cook it properly. Prevention: follow the proportions carefully. Fix: whisk in additional stock, milk, or even water (1 tablespoon at a time) to thin it to the right consistency. Remember that gravy continues to thicken slightly as it cools, so if it looks slightly too thin while hot, it will probably be perfect when served.
Raw Flour Taste: You didn’t cook the roux long enough before adding liquid, or the gravy didn’t simmer for long enough after you added the stock. Prevention: always cook the roux for at least 1-2 minutes, and always simmer the finished gravy for at least 1 minute. Fix: simmer the gravy for another 2-3 minutes while stirring frequently. The raw flour taste should disappear.
Gravy That Breaks or Gets Greasy: This usually happens with cream-based gravies when the cream is added to a gravy that’s too hot or too acidic. Prevention: if making cream gravy, let the base gravy cool slightly, then add heavy cream very slowly while whisking. Fix: whisk vigorously and slowly add more stock to redistribute the broken fat.
Burnt or Scorched Taste: You cooked the roux too long or at too high heat, or you let gravy scorch on the bottom of the pan while simmering. Prevention: use medium heat, watch the roux constantly, and stir gravy frequently while it simmers. Fix: there’s no fixing a burnt taste — you have to start over.
Flat, Boring Taste: Your stock is weak, or you haven’t seasoned it properly. Prevention: use quality stock with good flavor, and taste and adjust seasonings as you go. Fix: add Worcestershire sauce, soy sauce, or a small splash of wine to boost umami depth. Increase salt and pepper until the gravy tastes actively savory.
Flavor Variations That Add Personality
Once you master the basic technique, you can spin it in countless directions by changing the stock, adding different liquids, or incorporating specific ingredients.
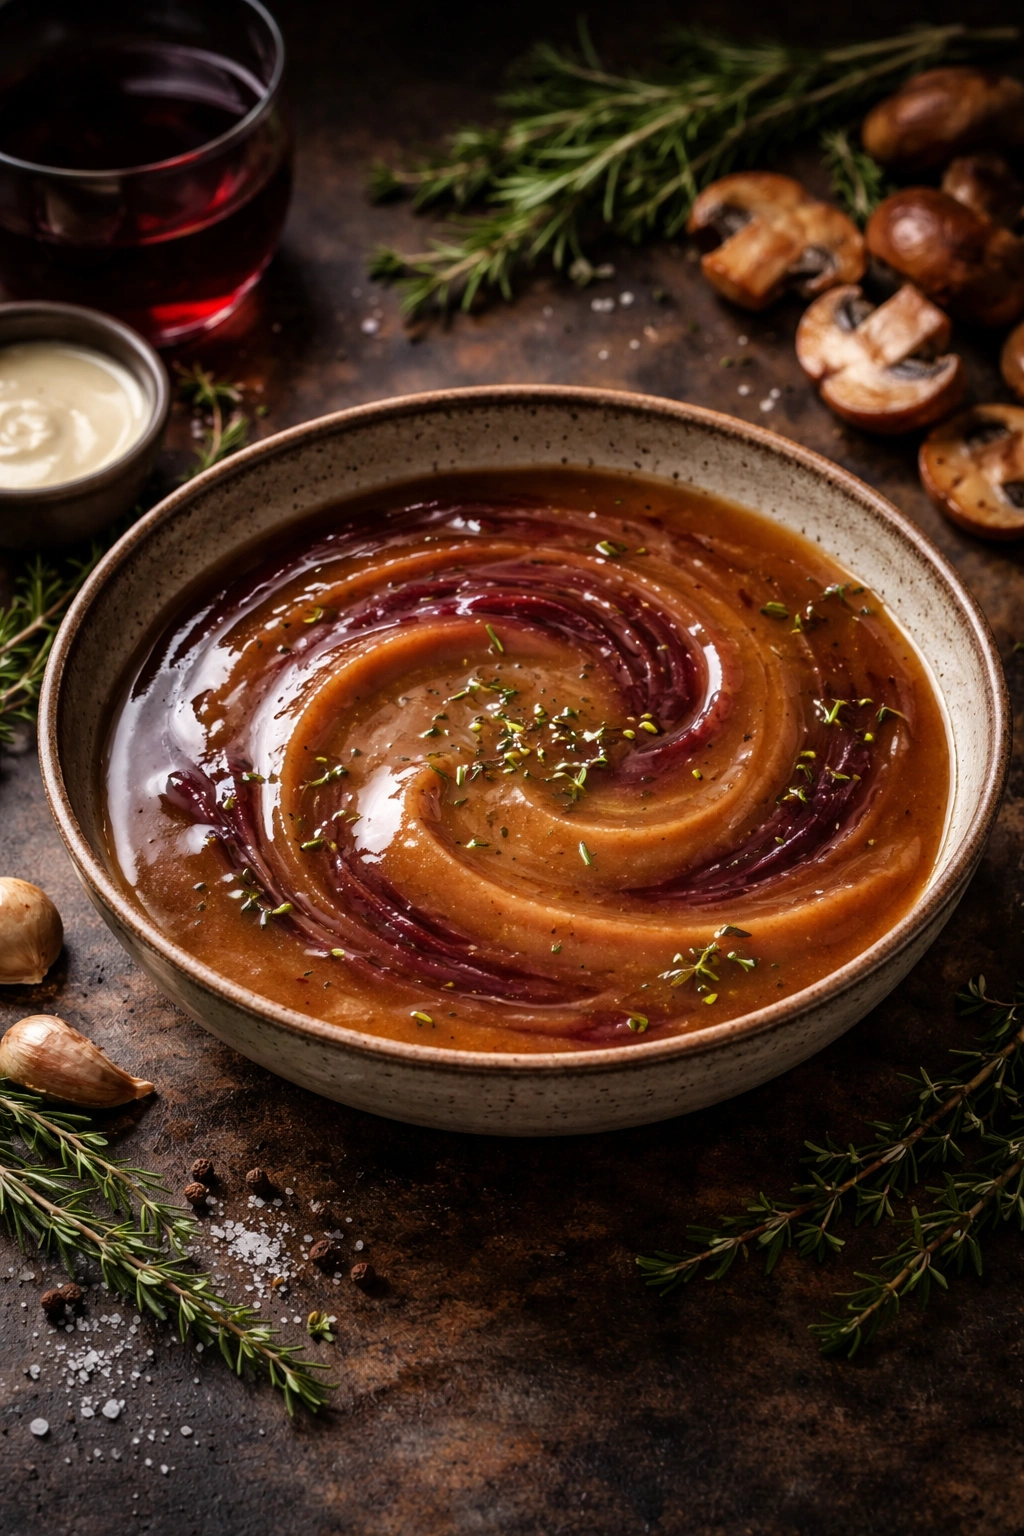
Red Wine Gravy: After making your roux and before adding all the stock, add 1/2 cup of red wine (a decent quality, but nothing expensive — don’t use cooking wine). Let it simmer for 1-2 minutes so the alcohol cooks off and the tannic flavors mellow, then add your stock as usual. The result is a darker, more sophisticated gravy with subtle acidity.
Cream Gravy: Make your base gravy with beef or chicken stock, then before serving, remove from heat and whisk in 1/2 cup of heavy cream or sour cream. Don’t heat the cream beyond a gentle warm — too much heat and it can break. Sour cream adds tang; heavy cream adds richness. Start with a small amount and taste before adding more.
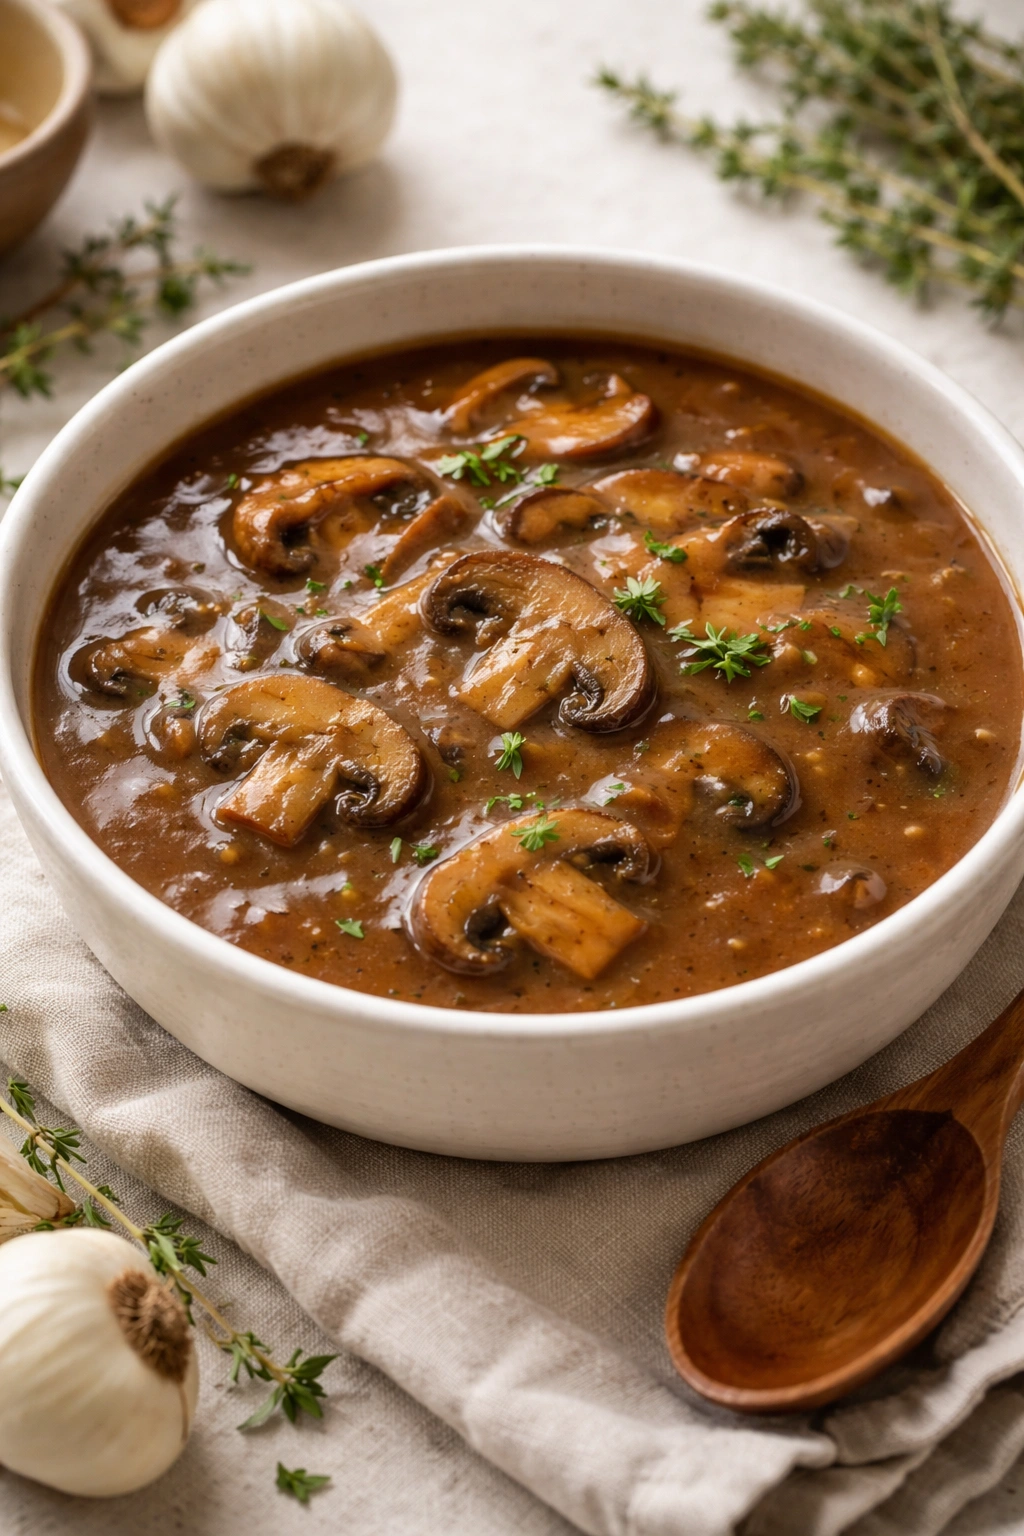
Mushroom Gravy: After making your roux, sauté 1-2 cups of sliced mushrooms (cremini, button, or a mix) separately in butter over high heat until deeply browned and caramelized. Reserve them, then make your gravy. Stir the cooked mushrooms into the finished gravy. This works with any base gravy and adds earthiness and texture.
Herb-Infused Gravy: While your base stock is heating (but before making the roux), add a few sprigs of fresh thyme, rosemary, or sage and let them steep for 5-10 minutes. Strain out the herbs, then proceed with the roux. The gravy will taste subtly herbal and sophisticated.
Pan Sauce Gravy: If you’ve seared meat in a skillet (a steak, chops, or chicken breasts), use that skillet directly. Remove the cooked meat to a plate, then add 2 tablespoons of butter to the pan with all the browned bits. Add 1 tablespoon of flour and toast for 1 minute, then add 1 cup of beef or chicken stock and a splash of wine if you have it. Bring to a simmer and season to taste. This is faster than making gravy separately and intensely flavorful because you’re capturing all those pan-seared flavors.
Storage, Make-Ahead Tips, and Reheating

Homemade gravy keeps well in the refrigerator for up to 4 days in an airtight container. It also freezes beautifully for up to 3 months.
To store in the fridge: let the gravy cool to room temperature, then transfer it to a storage container. You can skim off any fat that solidifies on top if you prefer a lighter version, or leave it for more richness.
To freeze: pour cooled gravy into ice cube trays if you want individual portions, or into a freezer-safe container if you want to freeze it in bulk. Thaw in the refrigerator overnight before reheating.
To make ahead: you can make gravy several hours in advance and keep it warm in a slow cooker on the lowest setting, or in a heatproof container set over a pot of gently simmering water (a bain-marie). Stir occasionally. This works perfectly for holiday cooking when you’re juggling multiple dishes.
To reheat: if gravy has been refrigerated and the fat has solidified on top, you can either skim it off (for a leaner gravy) or leave it for richness. Reheat gently over low heat, stirring frequently. If it seems too thick, whisk in a bit of stock or water. If it seems too thin, simmer it gently for a few minutes to concentrate it slightly. Never microwave gravy — the uneven heat can create hot spots and can cause it to break if it contains cream.
If gravy develops a skin during storage, whisk it back in or skim it off, depending on your preference. That skin is flavorful — nothing is wasted.
Serving Gravy With Confidence
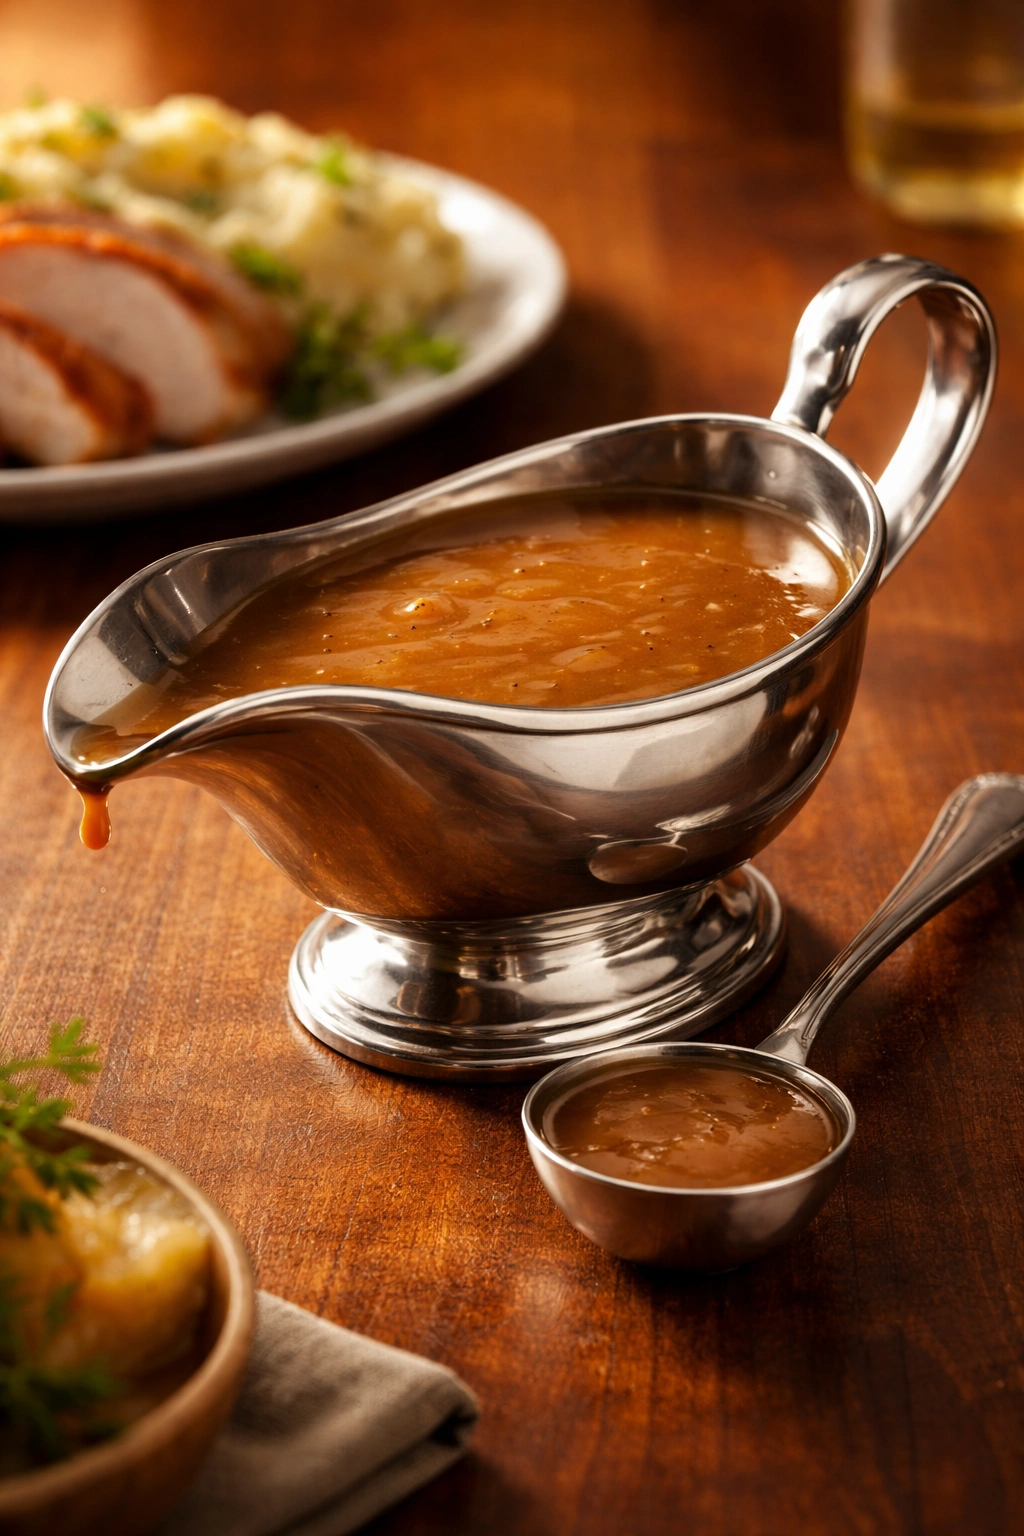
Serve gravy in a warm gravy boat or a small, elegant bowl. Use a small ladle so guests can help themselves to the amount they want. Hot gravy stays in a gravy boat for about 30-45 minutes before it cools significantly, so time the finishing and serving to your meal schedule.
Gravy pairs beautifully with almost everything savory: mashed potatoes (the classic pairing), roasted vegetables, rice, grains like polenta or farro, roasted meat, and even fresh bread. A spoonful of gravy can transform simple roasted chicken or plain rice into something restaurant-quality.
For holiday meals, make slightly more gravy than you think you’ll need — people always eat more than expected, and it’s better to have extra (which keeps well) than to run out. A typical ratio is about 1/4 cup of gravy per person, though that varies wildly depending on whether people are spoon-drowning their potatoes or just adding a light coating.
Final Thoughts
Homemade gravy is one of those cooking skills that seems intimidating until you make it once, then becomes automatic. The technique is straightforward, the failures are easily fixed, and the result is infinitely better than anything from a packet. You’re not just making a sauce to pour on food — you’re creating something that enhances and brings out the flavors of everything on the plate.
Start with the basic method using meat drippings or simple stock. Master the gradual liquid addition, understand what the roux is doing, and taste as you season. Once you’ve made gravy a handful of times, you’ll develop an intuition for adjusting consistency and flavor on the fly. You’ll start experimenting with wine, herbs, and mushrooms. You’ll make sausage gravy on impulse because you suddenly remember how good it is.
That’s when you’ll realize you don’t need a package mix ever again. Real gravy is easier, cheaper, more flavorful, and infinitely more satisfying than the alternative.