A French dip sandwich might seem like a fancy restaurant indulgence, but it’s actually one of the easiest and most impressive sandwiches you can make at home. The magic isn’t in the complexity — it’s in the quality of a few simple ingredients and a homemade au jus that blows store-bought versions out of the water. When you bite into warm roast beef piled on a crusty roll and dip it into rich, beefy jus that you’ve made yourself, you’ll understand why this sandwich has remained a classic for over a century.
The real revelation comes from making your own au jus. Most people think it requires hours of simmering beef bones or a complicated reduction. The truth is different — a truly excellent au jus comes together in less than 30 minutes using ingredients you probably already have in your pantry. This approach uses beef broth as your base, then layers in depth with caramelized aromatics, fresh thyme, and a touch of red wine. What emerges is something far superior to those packets of gravy mix, with genuine beef flavor and a silky body that clings to every bite of meat.
The sandwich itself doesn’t demand rare skills, but it does benefit from understanding a few key details. The choice of meat matters more than you’d think, the bread deserves attention, and the assembly has a simple logic that transforms ordinary ingredients into something you’ll crave. Whether you’re making this for a casual weeknight dinner or feeding a crowd for a game-day gathering, this version scales beautifully and comes together faster than you’d expect.
Why French Dips Make the Perfect Homemade Lunch
The French dip sits in that rare category of dishes that feel restaurant-worthy but don’t require restaurant-level effort. What makes it so compelling is the textural contrast — the structural integrity of a good crusty roll giving way to tender, beefy meat, all unified by a savory dipping sauce that adds moisture and flavor to every bite. There’s a ritual to it too, the dipping and the slight resistance of the bread as it absorbs the jus. That combination engages more senses than a standard sandwich.
What makes this sandwich perfect for home cooking is that every element improves with freshness. Store-bought roast beef often sits under heat lamps or gets sliced days in advance. Homemade au jus has a brightness and depth that can’t survive the thermal abuse of a warming station. Even modest-quality ingredients — a basic beef roast, standard deli-style sandwich rolls, pantry staples — become notably better when you control the timing and technique yourself.
Why This Approach Works Better Than You’d Expect
The secret is embracing shortcuts that actually improve the final product rather than diminish it. Using quality deli roast beef rather than cooking your own roast saves substantial time while delivering tender, sliceable meat. The au jus, though, is where your effort makes the biggest visible difference. This homemade version tastes like it took all day when it genuinely requires only the time it takes to chop vegetables and simmer.
The Satisfaction Factor Nobody Mentions
There’s something deeply satisfying about assembling a French dip at home. You’re not ordering from a menu or heating up a pre-made sandwich. You’re building something warm, customizable, and finished exactly when you eat it. The roll gets toasted to your preferred level of crispness, the meat is heated through but not dried out, and the au jus is at its ideal temperature for dipping. That control over timing and quality is part of what makes homemade food worth making.
What Makes Homemade Au Jus So Worth the Effort
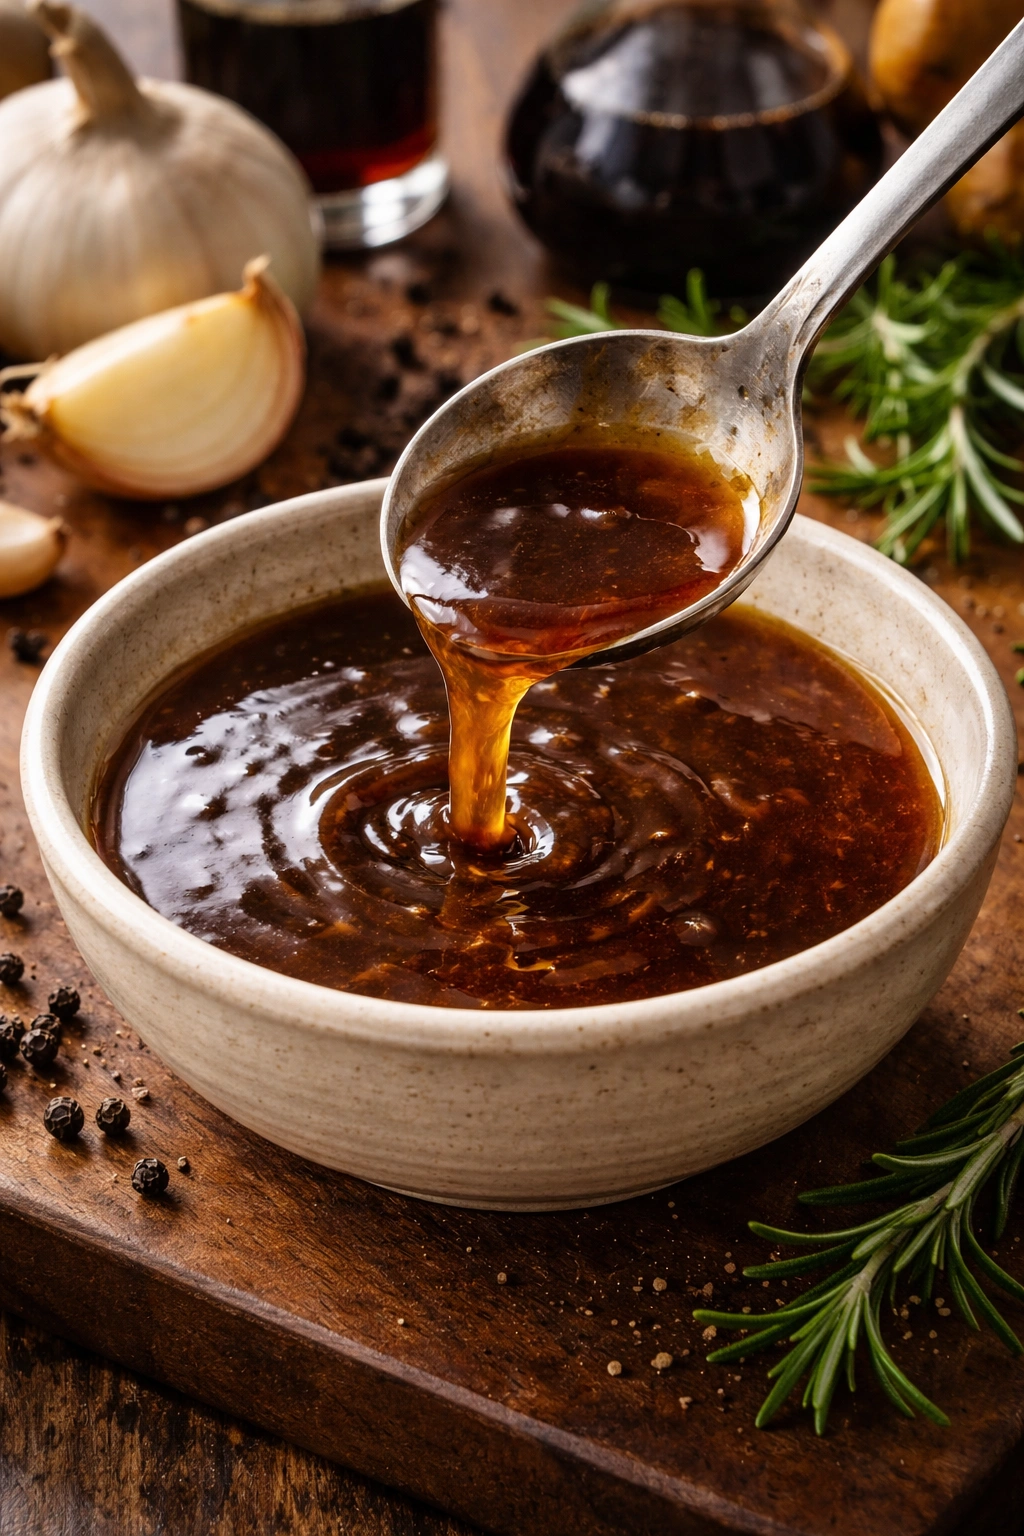
Store-bought au jus mixes and bottled versions have their place, but homemade au jus is genuinely in a different category. The difference comes down to architecture — a good au jus needs body, developed flavor, and aromatic depth that develops only through controlled cooking and proper technique.
Starting with quality beef broth gives you a foundation, but the magic happens next. When you sauté diced onion, garlic, and fresh thyme until they’re golden and fragrant, then add a small splash of red wine to deglaze the pan, you’re building layers of umami and savory depth. That wine adds a subtle complexity and acidity that brightens everything else. Finishing with a touch of Worcestershire sauce (which is itself fermented and umami-rich), a whisper of soy sauce, and fresh cracked pepper creates a sauce that tastes like it simmered for hours.
The Science of Flavor Development in Jus
The Maillard reaction — that browning that happens when you heat onions and garlic — creates hundreds of flavor compounds that don’t exist in raw vegetables. Fresh thyme brings herbal notes and volatile compounds that survive brief cooking. The red wine’s acidity and tannins cut through the richness of the beef broth, preventing the sauce from feeling heavy or one-dimensional. Even the tiny amount of soy sauce (just 1 teaspoon) contributes glutamates that enhance the perception of beef flavor without tasting salty or out of place.
Why Temperature and Timing Matter Here
Au jus shouldn’t be boiled aggressively — a gentle simmer preserves the clarity and brightness of flavors while allowing some reduction. Too much reduction concentrates salt and can turn the sauce harsh. The goal is a thin, coating consistency that clings to meat, not a gravy. Homemade au jus tastes better when it’s fresh and warm, which means making it just before you intend to serve is worth the minimal time investment.
Serving and Timing Information
Yield: Serves 4 (one sandwich per person, with extra au jus for dipping)
Prep Time: 15 minutes
Cook Time: 20 minutes
Total Time: 35 minutes
Difficulty: Beginner — No special equipment or advanced techniques needed. Everything is straightforward, and the au jus recipe is nearly foolproof.
Ingredients for the Homemade Au Jus
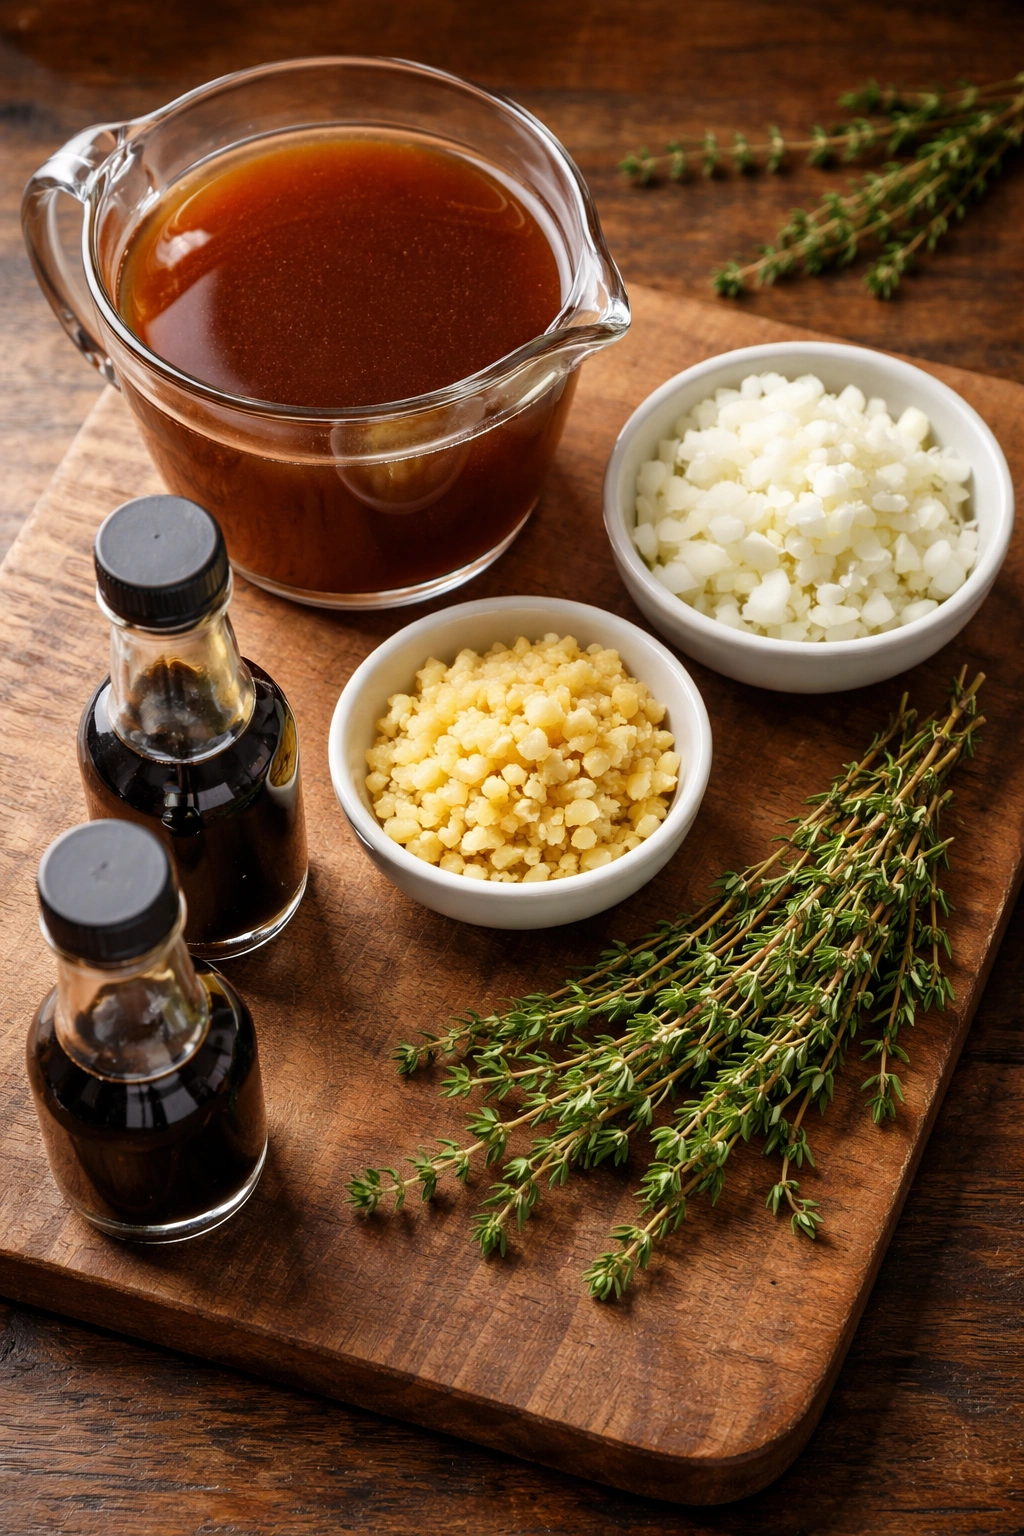
- 2½ cups beef broth (use low-sodium for better control over salt level)
- 1 small yellow onion, diced into ¼-inch pieces
- 3 cloves garlic, minced finely
- ¼ cup dry red wine (a basic wine works fine here — this isn’t a special cooking wine, just something you’d drink)
- 2 sprigs fresh thyme (or 1 teaspoon dried thyme if fresh isn’t available)
- 1 tablespoon Worcestershire sauce
- 1 teaspoon soy sauce
- ½ teaspoon freshly cracked black pepper
- 1 teaspoon cornstarch mixed with 1 tablespoon cold water (for thickening, optional — skip this if you prefer thinner jus)
- Salt to taste (add only at the end; beef broth is already salted)
Ingredients for the Sandwiches
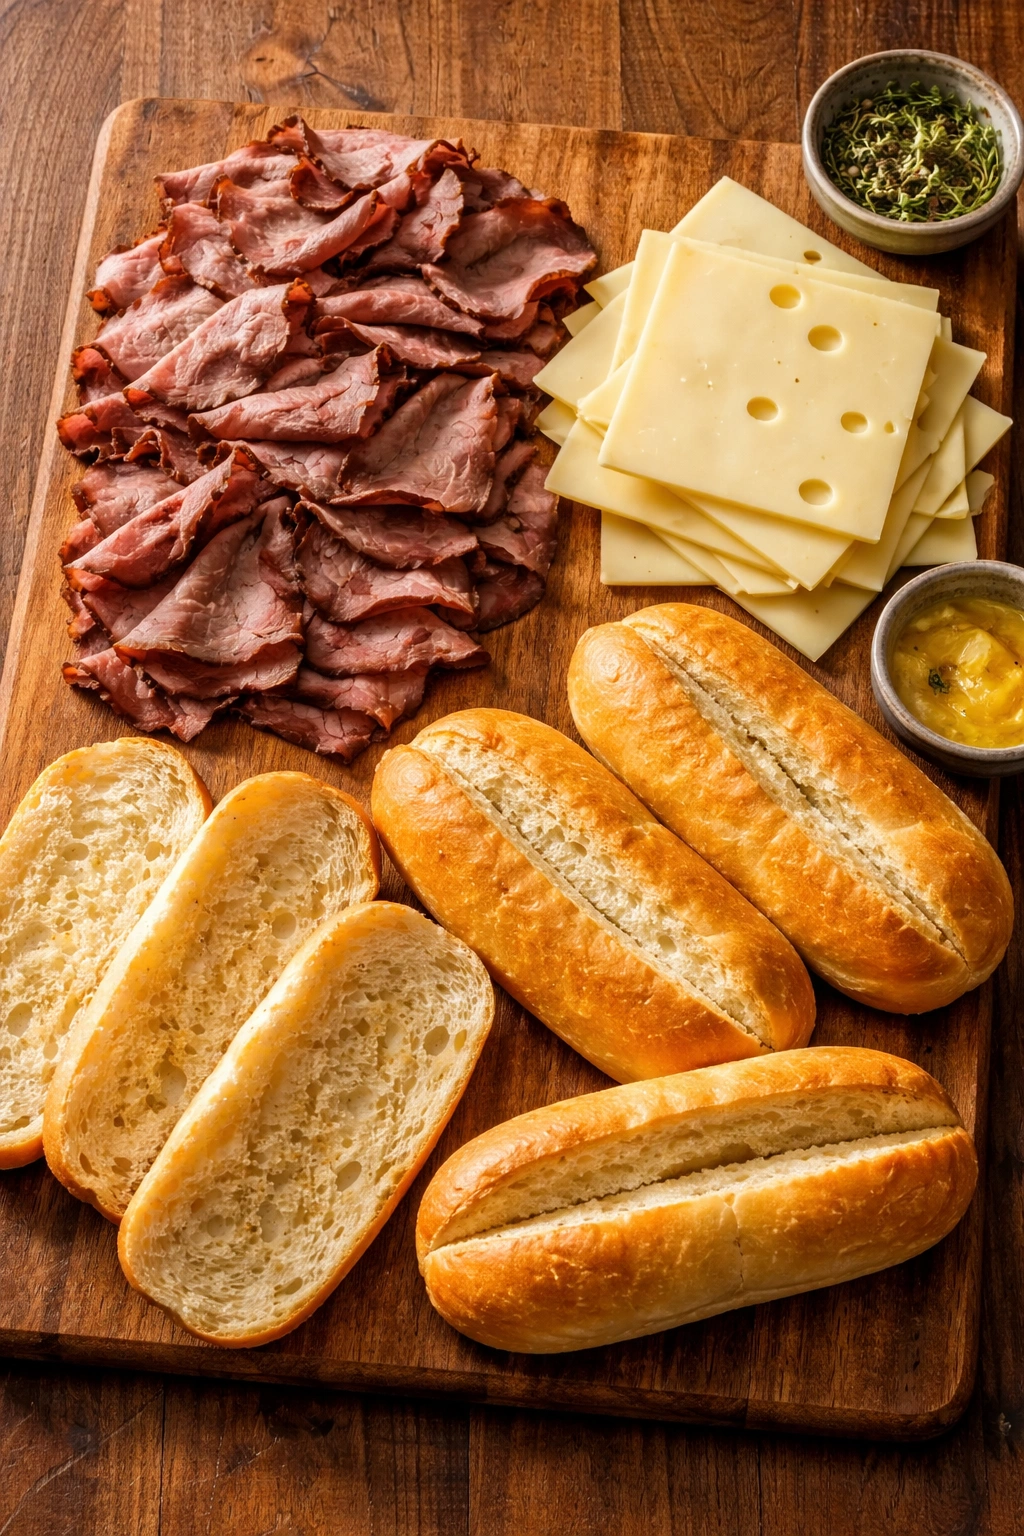
- 1 tablespoon unsalted butter, divided
- 4 hoagie rolls or crusty sandwich rolls (about 6-7 inches each), split lengthwise
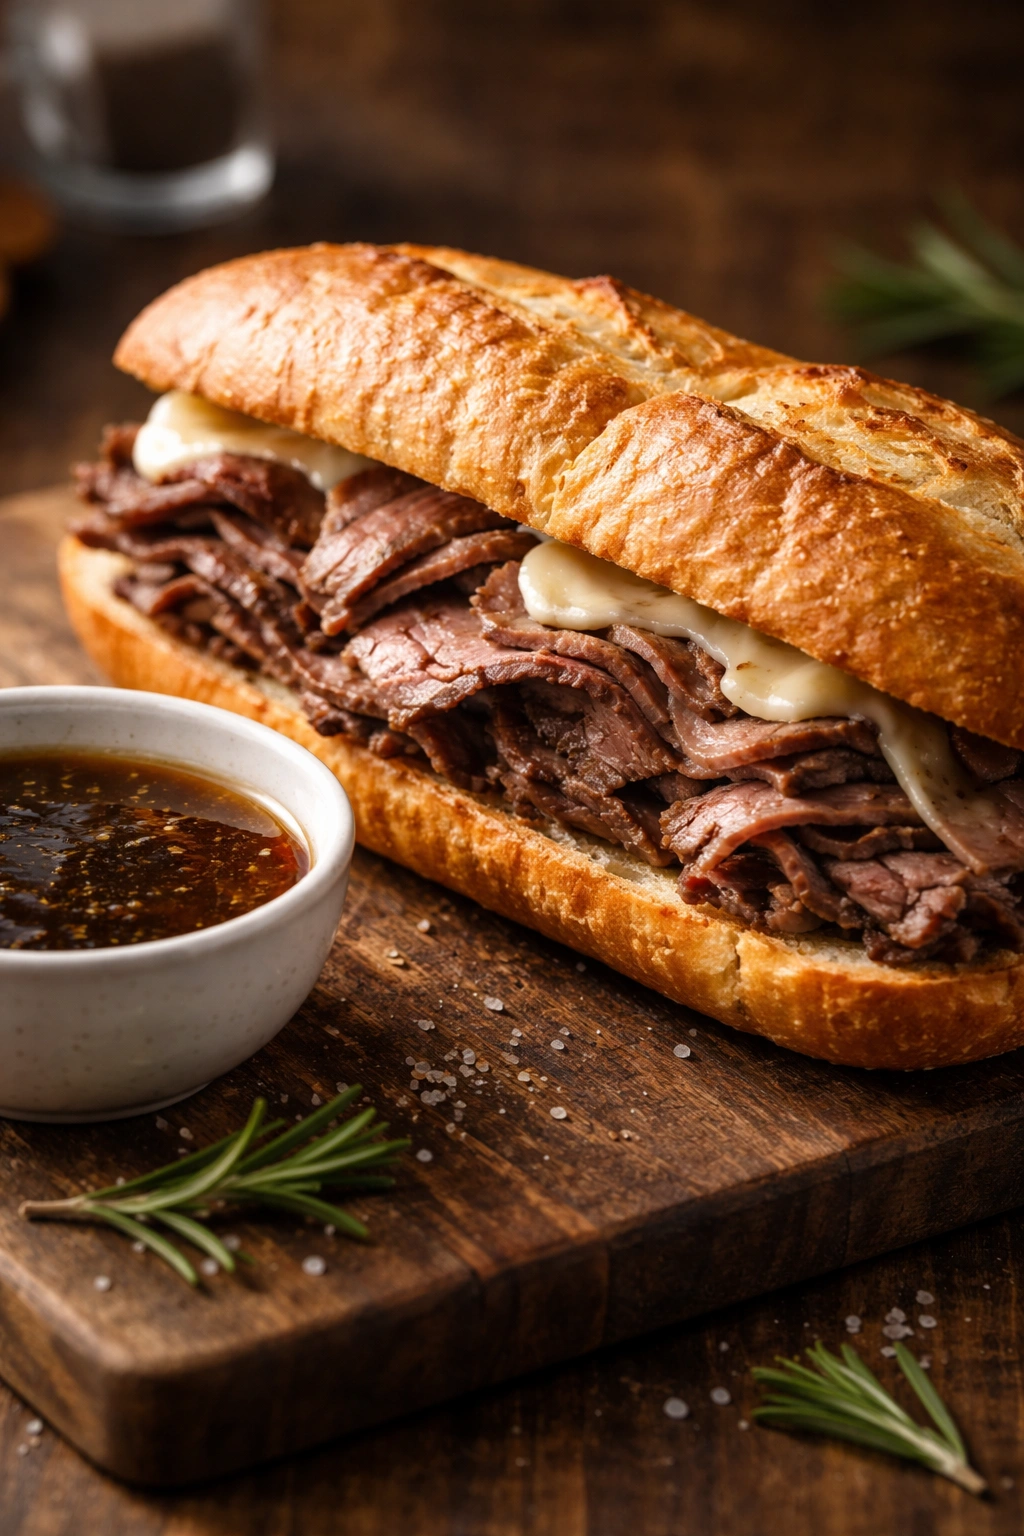
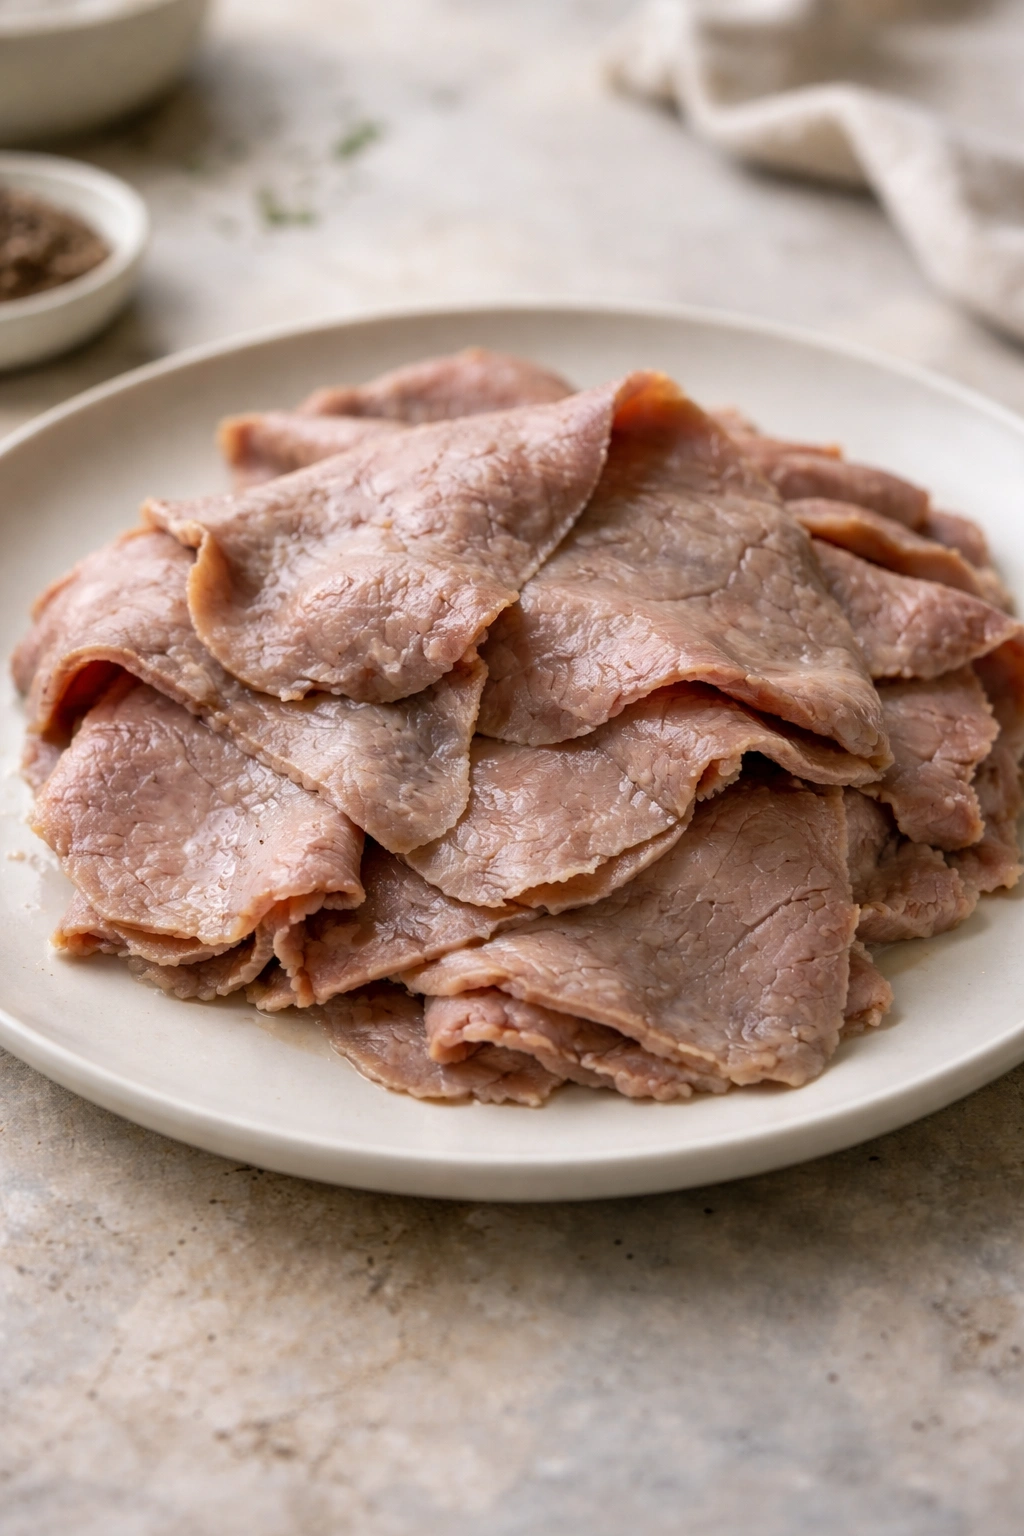
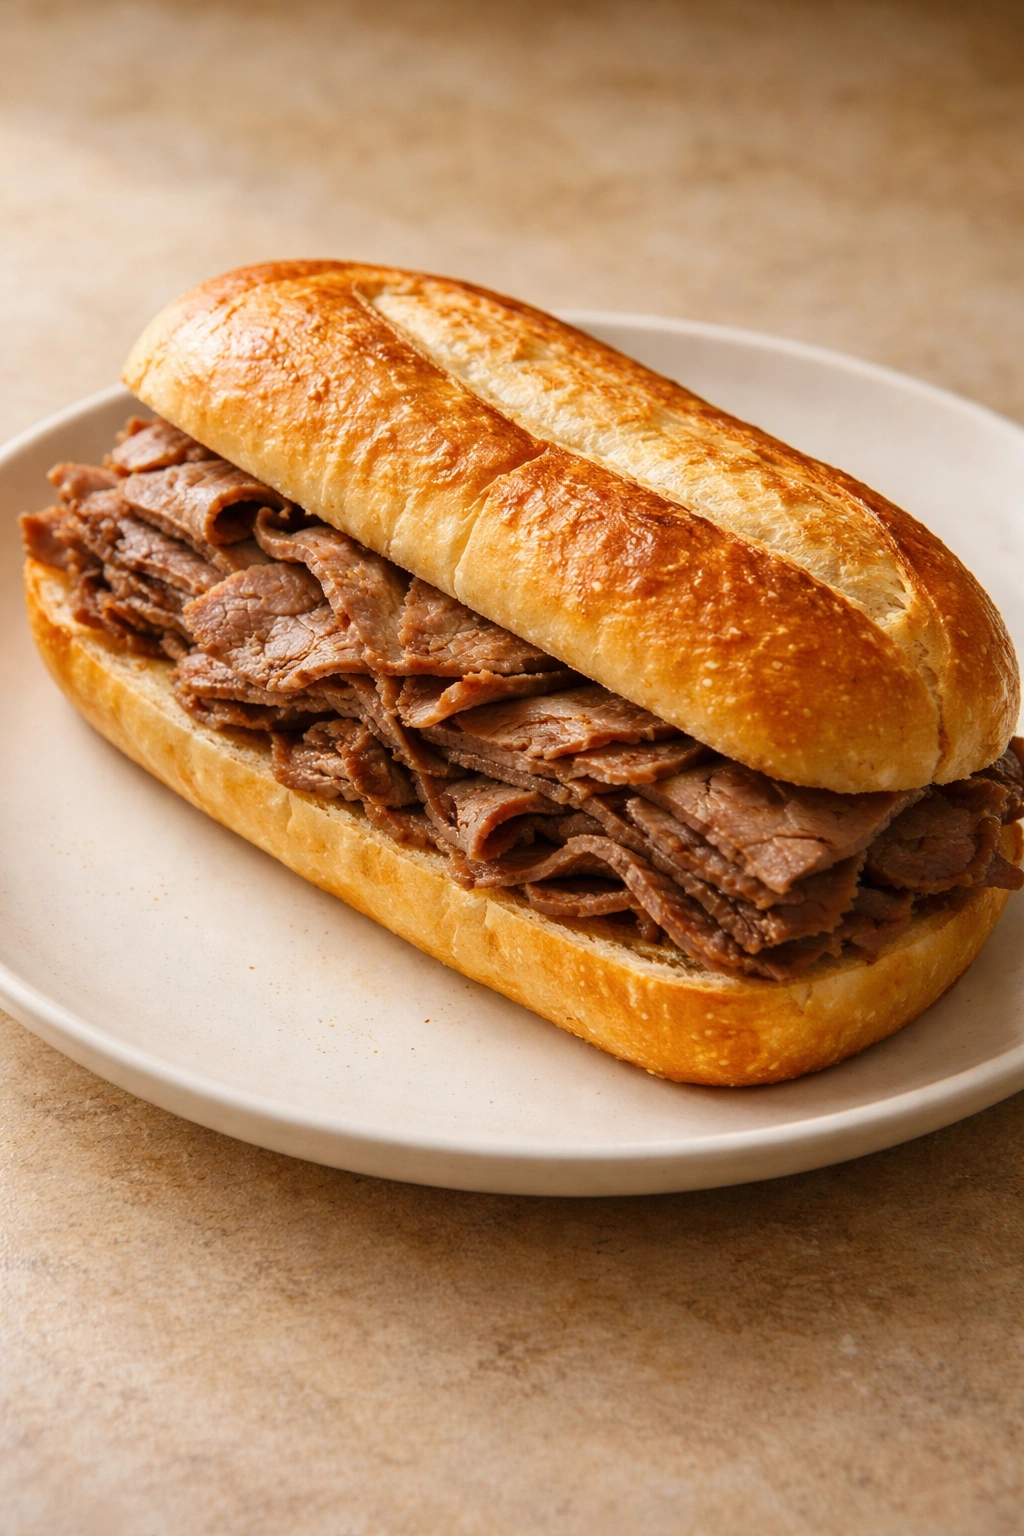
- 1 pound quality deli roast beef, sliced thin (ask the deli counter to slice it for you rather than buying pre-sliced, which dries out faster)
- 4 slices Swiss cheese or provolone (optional but traditional — use good-quality cheese, not individually wrapped singles)
Instructions for Homemade Au Jus
Make the Au Jus:
-
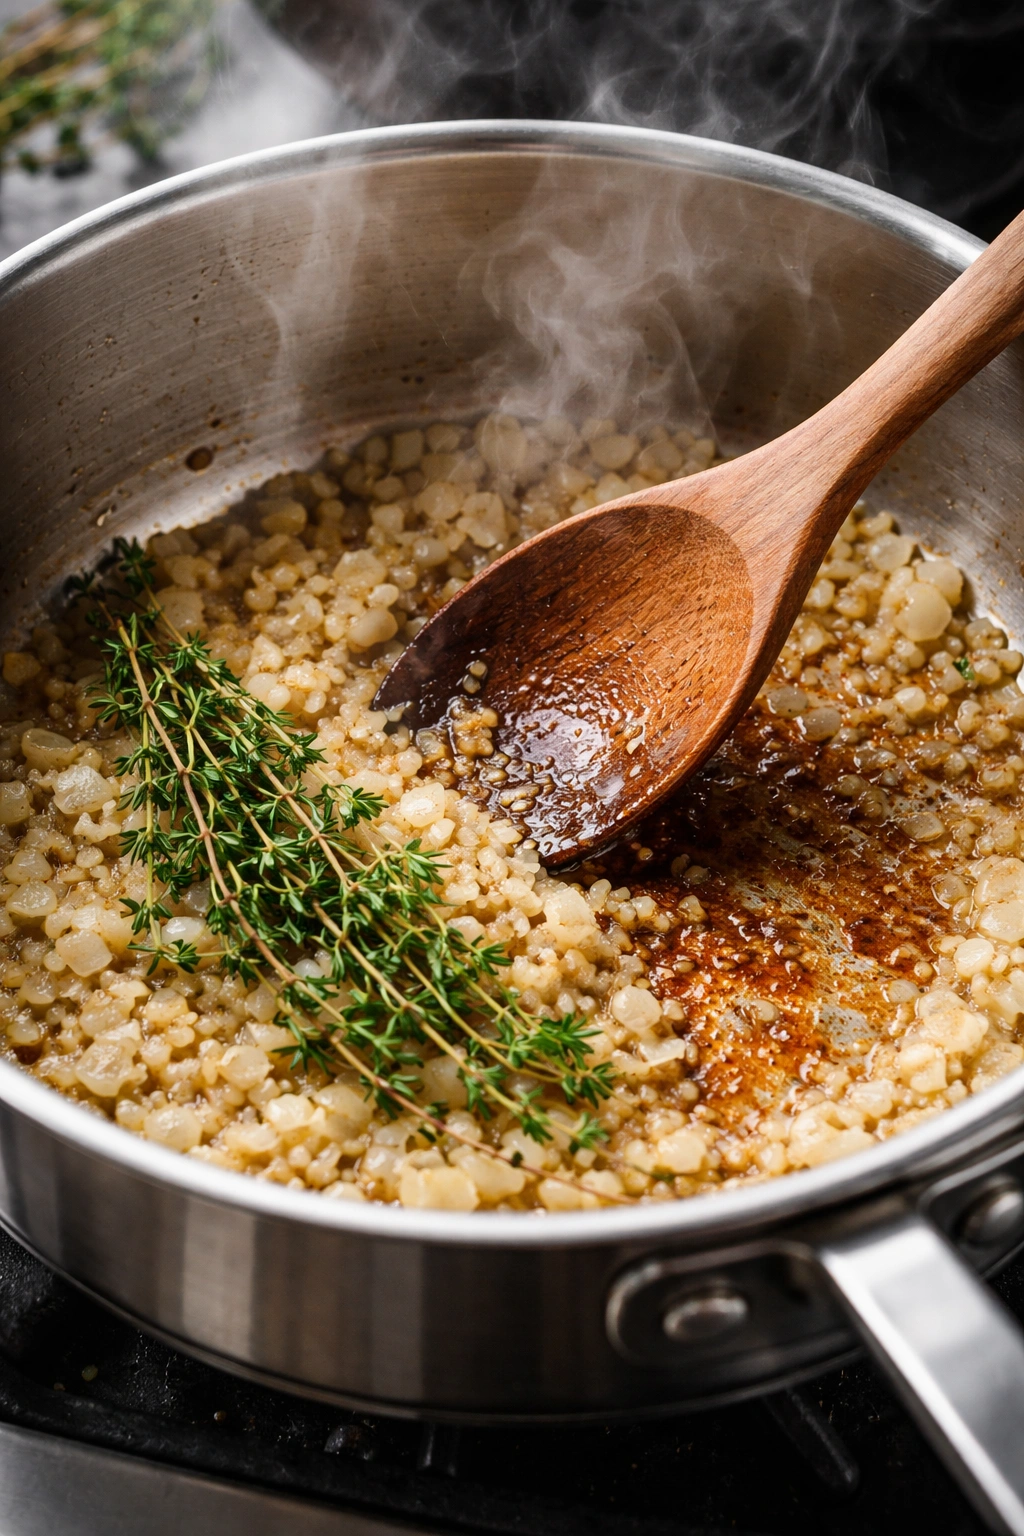
In a medium saucepan, heat 1 tablespoon of water over medium-high heat. Once the water begins to steam, add the diced onion and a pinch of salt. Sauté the onion, stirring frequently, for 4 to 5 minutes until the pieces become translucent and the edges pick up a light golden color. The salt draws moisture from the onion and helps it brown evenly without burning.
-
Add the minced garlic and fresh thyme sprigs to the onion. Stir constantly for about 1 minute until the garlic becomes fragrant but not browned. The timing here matters — raw garlic tastes sharp and unpleasant, but burned garlic tastes acrid and bitter.
-
Pour in the red wine, immediately scraping the bottom of the pan with a wooden spoon to release any browned bits stuck to the surface. These caramelized bits dissolve into the wine and concentrate flavor. Let the wine simmer for 2 to 3 minutes, which allows some of the alcohol to cook off while the acidity mellows slightly.
Advertisements -
Add the beef broth and bring everything to a simmer over medium heat. Once simmering gently, add the Worcestershire sauce, soy sauce, and cracked black pepper. Stir to combine and taste a spoonful — the jus should taste richly beefy with subtle herbal and slightly tangy notes. Simmer gently, uncovered, for 8 to 10 minutes. Do not boil aggressively; a gentle simmer preserves the bright flavors and allows better development of depth without harsh concentration.
-
If you prefer a slightly thicker jus that clings better to the meat, whisk the cornstarch and cold water together to make a slurry, then slowly pour it into the simmering jus while stirring constantly. The jus will thicken noticeably within 30 seconds. If you prefer the traditional thin consistency, skip this step entirely.
-
Strain the au jus through a fine-mesh sieve into a small pot, pressing gently on the solids with the back of a spoon to extract all the flavorful liquid. Discard the solids. Taste and add salt if needed, adjusting to your preference. Set aside and keep warm over low heat until you’re ready to serve.
Toast the Rolls and Assemble:
-
While the au jus simmers in its final minutes, preheat the oven to 350°F (175°C). Split each hoagie roll lengthwise, creating a top and bottom half. Arrange the bottom halves, cut-side up, on a rimmed baking sheet or directly on the oven rack.
-
Place the roast beef in a shallow microwave-safe bowl and add just enough water to lightly moisten the meat — about ¼ cup. Cover the bowl loosely with a microwave-safe paper towel and microwave on 50% power for 2 to 3 minutes, stirring halfway through, until the meat is warmed through but not hot. Do not microwave at full power; high heat makes the thin slices of deli meat tough and rubbery. Alternatively, you can warm the meat gently in a skillet over low heat with just a tiny splash of the au jus, stirring occasionally, for about 3 minutes.
-
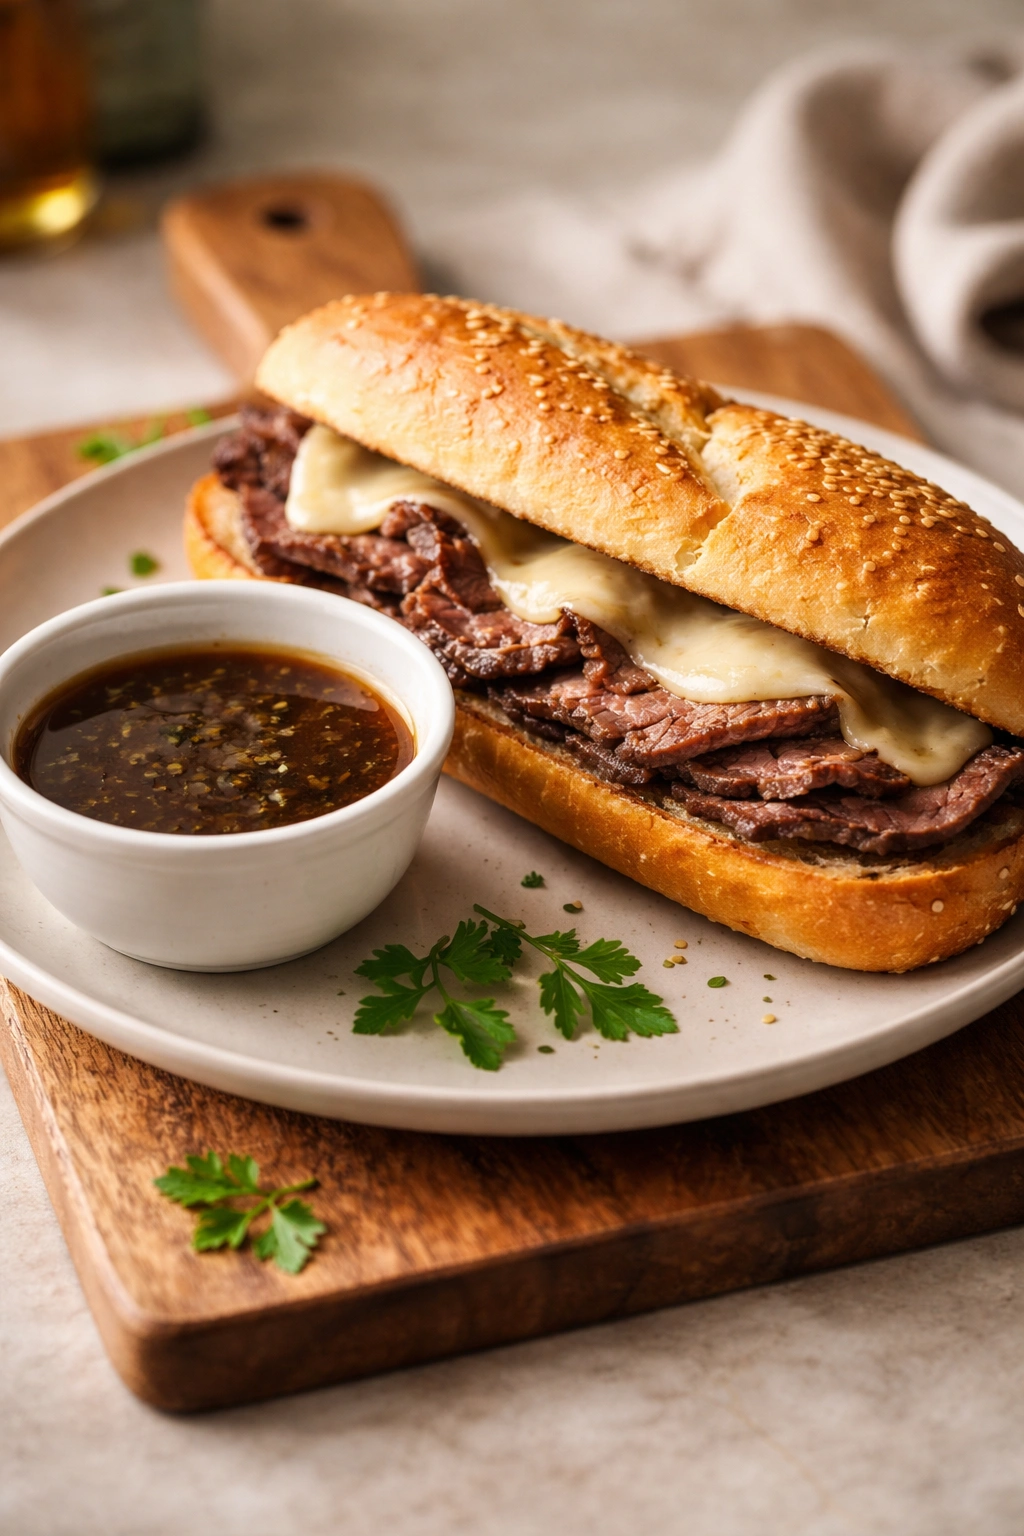
Divide the warmed roast beef evenly among the four bottom roll halves, piling the meat in a generous heap. If using cheese, place one slice on top of the meat on each sandwich.
-
Toast the bottom halves with meat and cheese in the preheated oven for 3 to 4 minutes, until the roll edges are crispy and golden and the cheese melts slightly. Arrange the top halves on the baking sheet alongside the bottoms for the same 3 to 4 minutes, toasting them until they’re warm, dry, and slightly crisp.
-
Assemble each sandwich by placing a toasted top half on top of the meat and cheese. Serve immediately, with the au jus poured into small individual dipping bowls alongside each sandwich, or into a communal bowl if serving family-style. Diners dip as they eat.
Pro Tips That Make a Real Difference
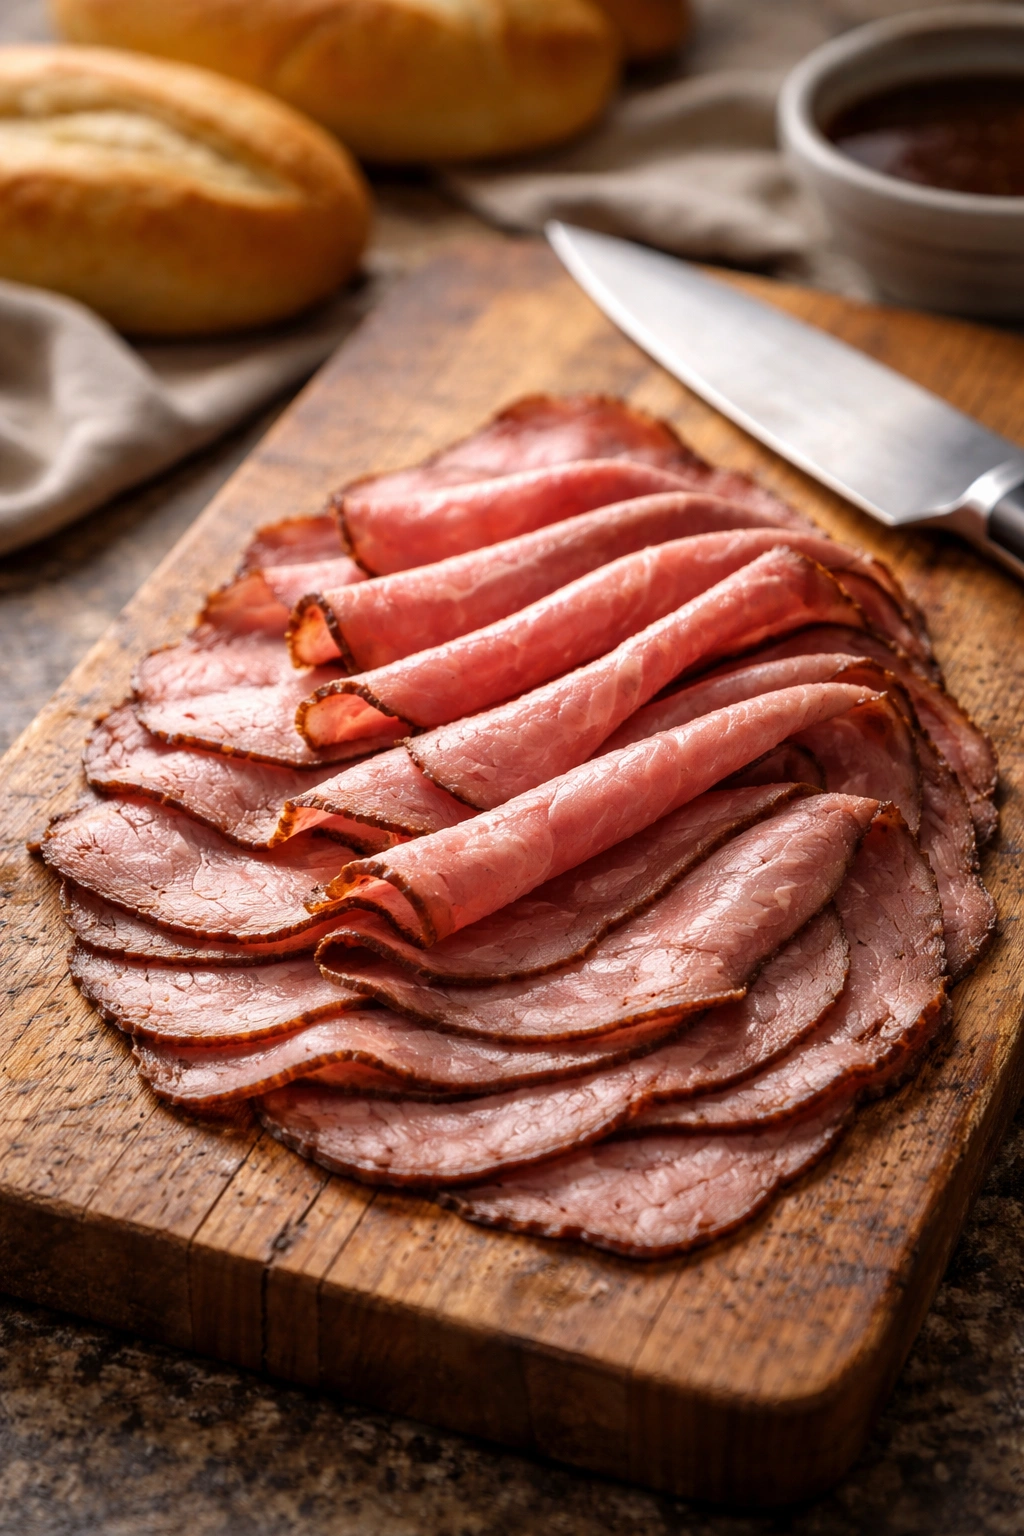
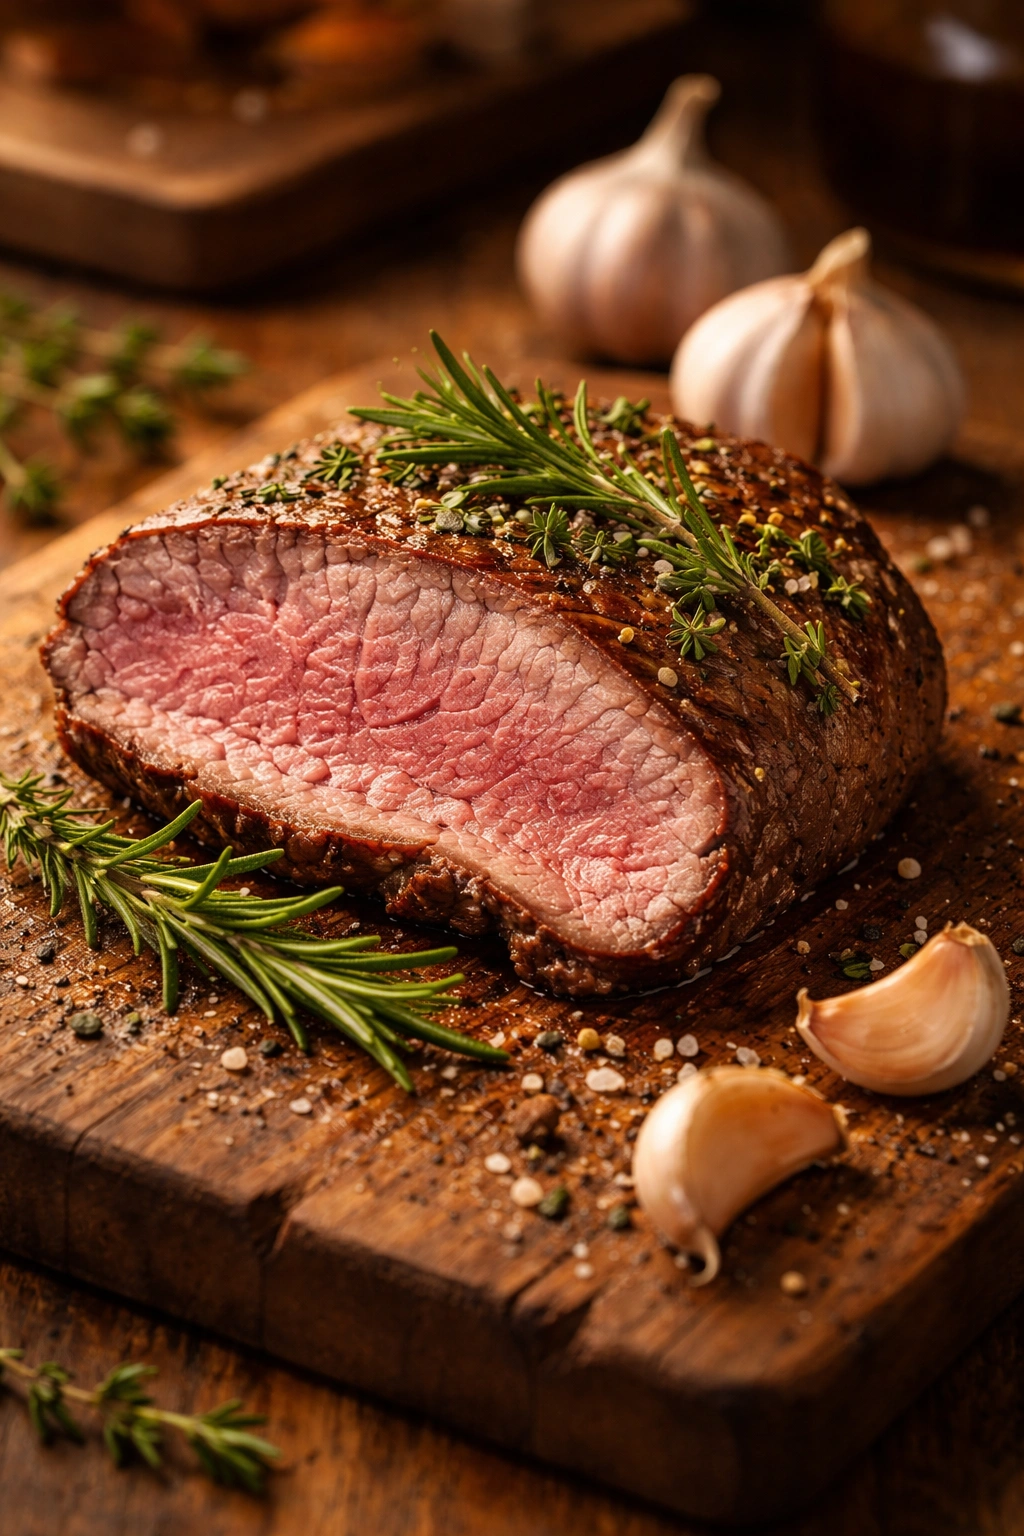
The thickness of your meat slice matters more than you’d think. Meat sliced thicker than ⅛ inch will be chewy rather than tender when warmed. Ask the deli counter to slice the roast beef as thin as they can without it shredding — you want delicate, almost translucent slices that heat through in seconds and layer easily on bread. If you’re cutting your own roast beef at home (which isn’t necessary, but some people do), pop it in the freezer for 30 to 45 minutes first, which firms it up enough to slice thinly by hand.
The quality of your rolls changes everything. A dense, plastic-wrapped sandwich roll will turn to mush when dipped into jus. Look for crusty rolls with real structure and an airy interior — a bakery roll, an Italian hoagie roll, or even a halved baguette works beautifully. The crust should have some resistance when you bite into it, and the interior should have irregular air pockets. When you toast these rolls, the exterior dries out slightly and becomes even more structurally sound, which means it holds up to dipping without falling apart.
For make-ahead flexibility: The au jus keeps well in the refrigerator for up to 5 days. You can make it completely in advance and simply reheat it gently over low heat before serving, adding a tiny splash of water if it’s thickened too much. The sandwiches are best assembled and served immediately — cold roast beef on cold bread doesn’t have the same appeal — but you can slice and arrange the meat ahead and toast the rolls and cheese right before serving.
Dipping technique that maximizes flavor: Don’t just dunk the sandwich and pull it out. Hold the sandwich horizontally so the cut surface is facing down into the jus, and let it soak for 2 to 3 seconds so the bread absorbs some of the sauce without becoming waterlogged. The goal is a sandwich that’s enriched by the jus, not one that falls apart from oversaturation.
Common Mistakes That Undermine the Whole Sandwich
The most widespread mistake is using meat that’s too cold when you assemble the sandwich. Cold roast beef tastes waxy and congealed, even if the roast beef itself is quality. Taking 3 minutes to warm the meat gently transforms the eating experience — the meat becomes tender and succulent rather than dense and fibrous.
Another common pitfall is boiling the au jus aggressively. It’s tempting to crank the heat and speed things up, but aggressive boiling concentrates salt and bitterness while driving off the subtler aromatic compounds. A gentle simmer produces a brighter, more balanced sauce. You want to see small, frequent bubbles breaking the surface, not a rolling boil.
Using cold or room-temperature rolls is another opportunity missed. A cold roll provides no contrast to cold meat, and the whole sandwich becomes unappealing. Even 3 to 4 minutes in the oven makes an enormous difference — the bread becomes warmer, the crust dries out and crisps, and everything comes together as a cohesive, hot sandwich rather than a collection of cold components.
Skipping the straining step for the au jus leaves you with grainy, unappealing sauce when you could have had silky, professional-looking jus with zero extra effort. Push the solids gently through the sieve; they contain valuable flavor compounds and will pass through if you’re patient.
Which Cuts of Meat Work Best in French Dips
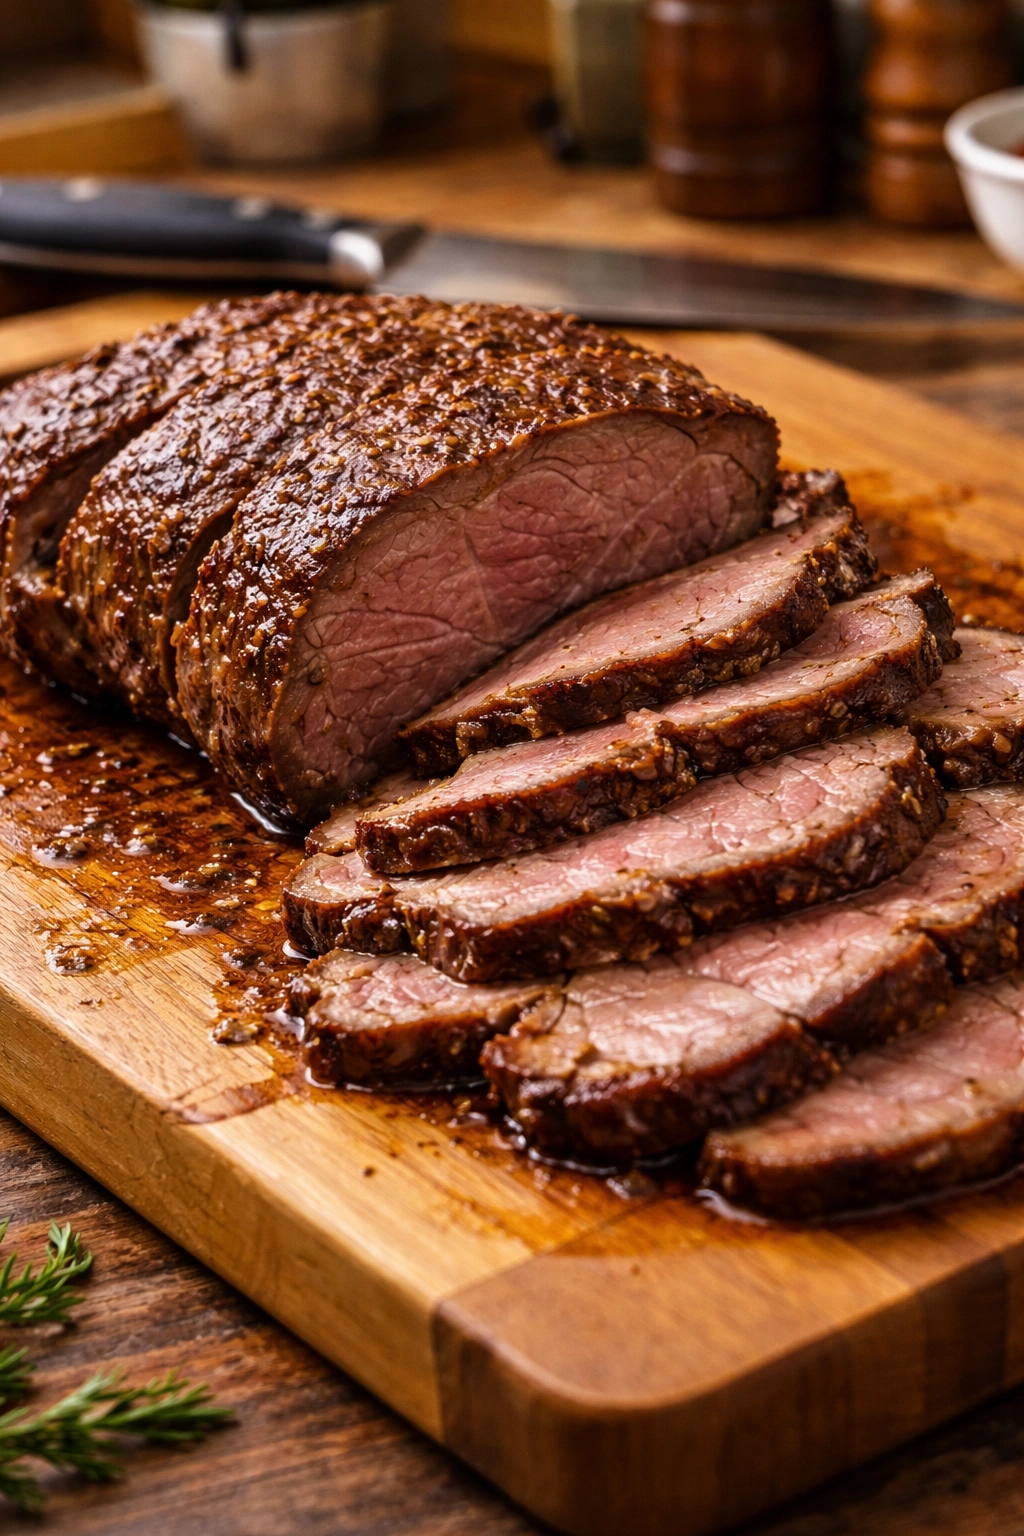
Traditional French dips use roast beef, which is actually a category of preparations rather than a specific cut. Deli-counter roast beef is typically made from chuck roast or a similar economical cut that’s been slow-roasted and sliced thin. This is genuinely the best choice for French dips — it’s designed for slicing, it has inherent tenderness from low-temperature cooking, and the slight marbling adds flavor and richness.
If you want to cook your own roast at home, which isn’t necessary but can be rewarding, a chuck roast is your best choice. It has enough fat marbling that it becomes tender and succulent at lower-than-conventional cooking temperatures. A 3-pound chuck roast cooked low and slow (around 275°F in the oven, covered with foil and a bit of broth, for about 4 hours) will yield wonderful sliceable meat with much better flavor than deli-counter roast beef, though you’ll need to slice it thin yourself with a sharp knife or ask a butcher to slice it for you.
Some people use thinly sliced prime rib or other premium cuts, and while the meat is excellent, it’s genuinely unnecessary — you’re dipping it in sauce, and the jus flavors are more important than prime rib’s inherent quality. The traditional approach uses an economical cut prepared well, which is both more budget-friendly and actually optimal for this application.
A note on leftover cooked roast: If you have leftover roast beef from another meal, a French dip is a perfect way to use it. Slice it thin, warm it gently, and you’ve transformed leftovers into something that feels completely different and special.
Flavor Variations Worth Exploring
The basic French dip is perfect as-is, but there’s room for variation depending on what flavors appeal to you. A garlic and herb version uses a full 5 cloves of garlic instead of 3, and adds 1 tablespoon of fresh rosemary along with the thyme. The rosemary brings an almost piney intensity that pairs beautifully with beef. Toast the roll halves with minced garlic mixed into a touch of butter before placing them in the oven for a deeper garlic presence throughout.
A red wine reduction version increases the red wine to ½ cup and lets it simmer for 3 to 4 minutes instead of 2 to 3, developing more of the wine’s character and tannins. This creates a more sophisticated jus with noticeable wine notes — it’s excellent if you’re serving this to guests or want something slightly more refined than the basic version.
Horseradish au jus adds 1 to 2 teaspoons of fresh grated horseradish or prepared horseradish to the jus in the final minutes of simmering. Horseradish brings heat and pungency that cuts through the richness beautifully, and it’s a classic pairing with roast beef. Start with 1 teaspoon and taste — the strength of prepared horseradish varies, and you can always add more.
A balsamic variation replaces the red wine with 3 tablespoons of aged balsamic vinegar. Balsamic brings sweetness, acidity, and complexity that creates a jus unlike the traditional version. It’s exceptional if you use Swiss cheese on the sandwich, which echoes the sweetness in the balsamic.
Caramelized onion version uses 2 medium onions instead of 1 small onion, and extends the sautéing time to 10 to 12 minutes, stirring frequently and adding tiny splashes of water if the pan gets too dry. The onions turn deep golden brown and develop almost candied sweetness. The resulting jus is richer and more complex. This version is worth the extra time if you have it.
Storage, Make-Ahead Planning, and Reheating
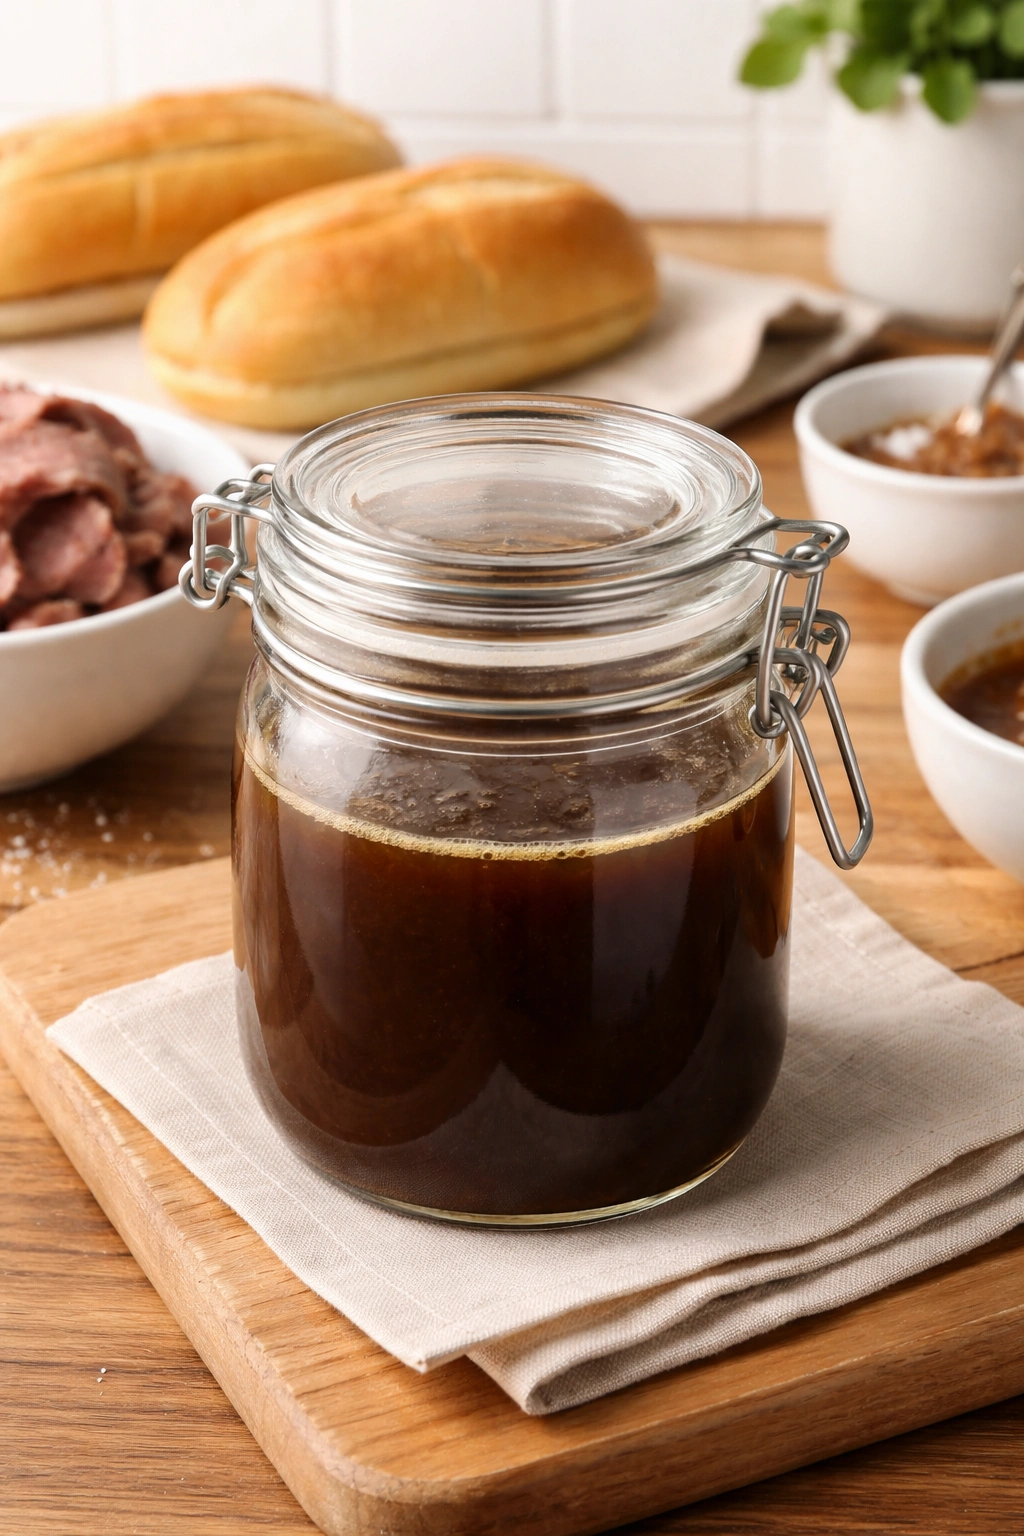
The au jus can be made up to 5 days in advance and stored in an airtight container in the refrigerator. Do not freeze au jus — freezing breaks the emulsion and creates a separated, less appealing sauce when thawed. When you’re ready to use it, gently reheat it over low heat, stirring occasionally, until it’s warm. If it’s thickened too much in the fridge (which is normal), add a tablespoon or two of beef broth or water to return it to the proper consistency.
The roast beef can be sliced and stored in the refrigerator for up to 3 days, covered tightly. Don’t freeze raw deli roast beef; freezing changes its texture. If you’ve cooked your own roast, cooled it, and sliced it, it keeps for 3 to 4 days refrigerated and freezes reasonably well for up to 3 months, though the texture becomes slightly less tender after thawing.
The rolls are best fresh the day of serving, but they can be lightly wrapped and stored at room temperature for 1 day. Avoid refrigerating bread — it accelerates staling. If you do end up with day-old rolls, toasting them longer in the oven brings back some of their appeal.
The assembled sandwich should be eaten immediately while the bread is still warm and crispy and the jus is hot for dipping. However, if you need to make these ahead for a large gathering, you can toast the rolls and assemble the meat and cheese 10 to 15 minutes before serving, holding them at room temperature until it’s time to eat.
Serving Ideas and Ideal Pairings
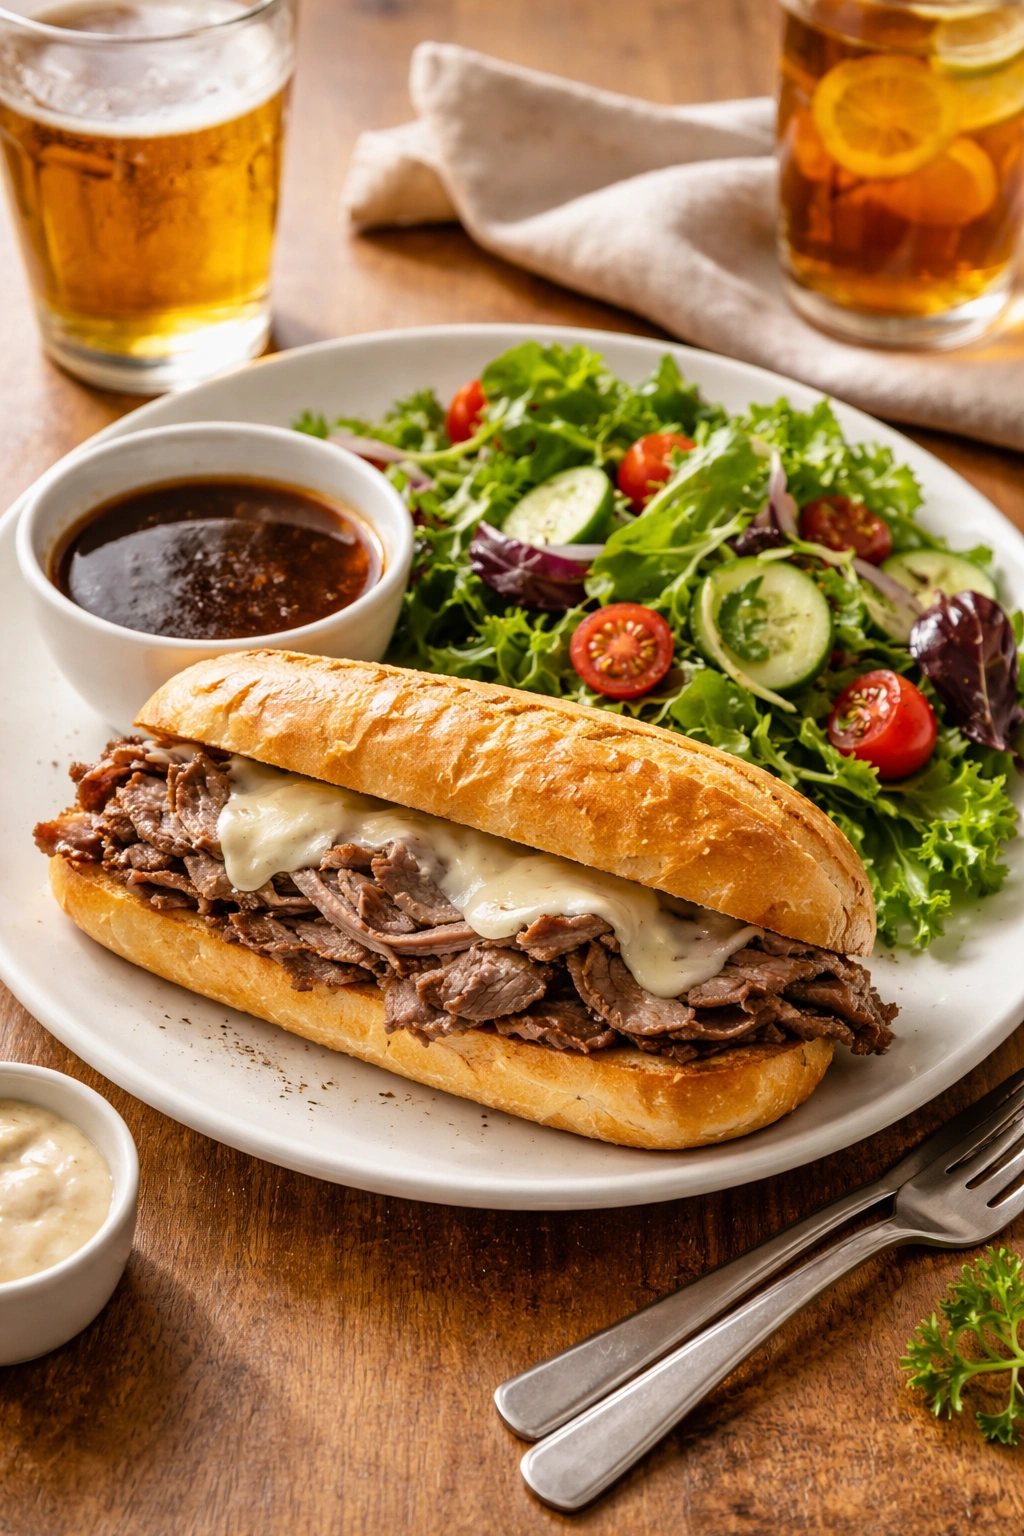
French dips are substantial enough to be a complete meal on their own, but they’re even better paired thoughtfully. A simple, sharp green salad with vinaigrette cuts through the richness beautifully — the acidity and fresh greens cleanse the palate between bites. Think a basic salad of mixed greens, perhaps with arugula for a peppery bite, dressed with lemon vinaigrette or red wine vinaigrette.
Thin, crispy fries are the classic pairing — steak fries, shoestring fries, or even curly fries all work. The salt and crispness contrast with the tender meat and rich jus. If you want something a bit lighter, oven fries or roasted potatoes tossed with rosemary and sea salt are excellent.
A simple vegetable side like roasted carrots with thyme, steamed broccoli with lemon, or sautéed mushrooms adds nutrition and variety to the plate without competing with the sandwich. Roasted mushrooms are particularly good because their earthy flavor echoes the beef in the au jus.
For beverages, a cold beer is the traditional choice — nothing fancy needed, just a crisp pilsner or lager. Iced tea, whether unsweetened or lightly sweetened, is an excellent non-alcoholic option that cleanses the palate. Some people enjoy a full-bodied red wine like a Côtes du Rhône, which has enough tannins and acidity to stand up to the sandwich and echo the wine in the jus.
If you’re serving these for game day or casual gathering, set out a small bowl of extra au jus for communal dipping so people can come back for more as they eat. Some people love dipping every bite; others just dip the first few. Having extra sauce available means everyone gets what they want.
Final Thoughts
A French dip sandwich made at home with proper technique and a genuinely good au jus is the kind of meal that reminds you why homemade food matters. It’s not difficult — nothing here requires special equipment or advanced skills — but it does require paying attention to details. The meat needs to be sliced thin and warmed gently. The rolls need to be quality and toasted. The au jus needs to simmer gently and get strained so it’s silky and refined.
What’s remarkable is how little time this actually takes. Thirty-five minutes from starting the au jus to having four hot sandwiches ready to eat is genuinely achievable, and the result tastes like it required far more effort and expertise than it actually did. That gap between effort and result — between how simple this is to make and how impressive it tastes — is the real magic of this sandwich.
The next time you crave a French dip from a restaurant, consider making this instead. You’ll spend roughly the same amount of money on ingredients, take less time than driving to and from the restaurant, and end up with something fresher and more delicious than most restaurants produce. That’s not hyperbole — it’s just what happens when you control the quality of ingredients and apply basic technique. The sandwich is waiting for you.