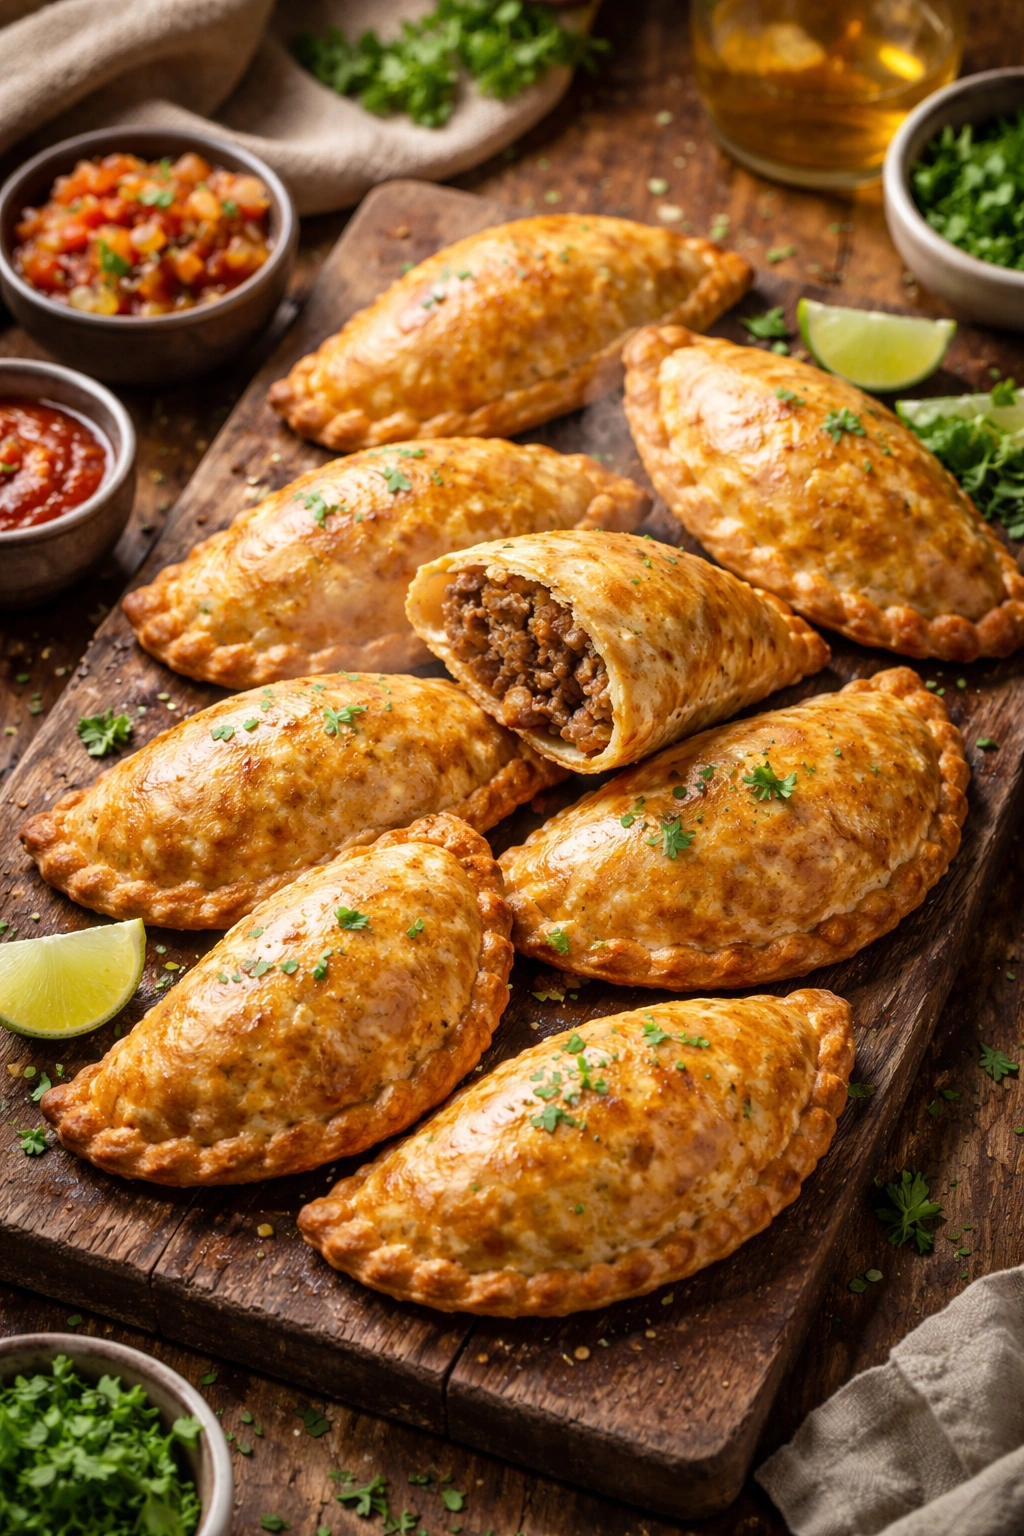
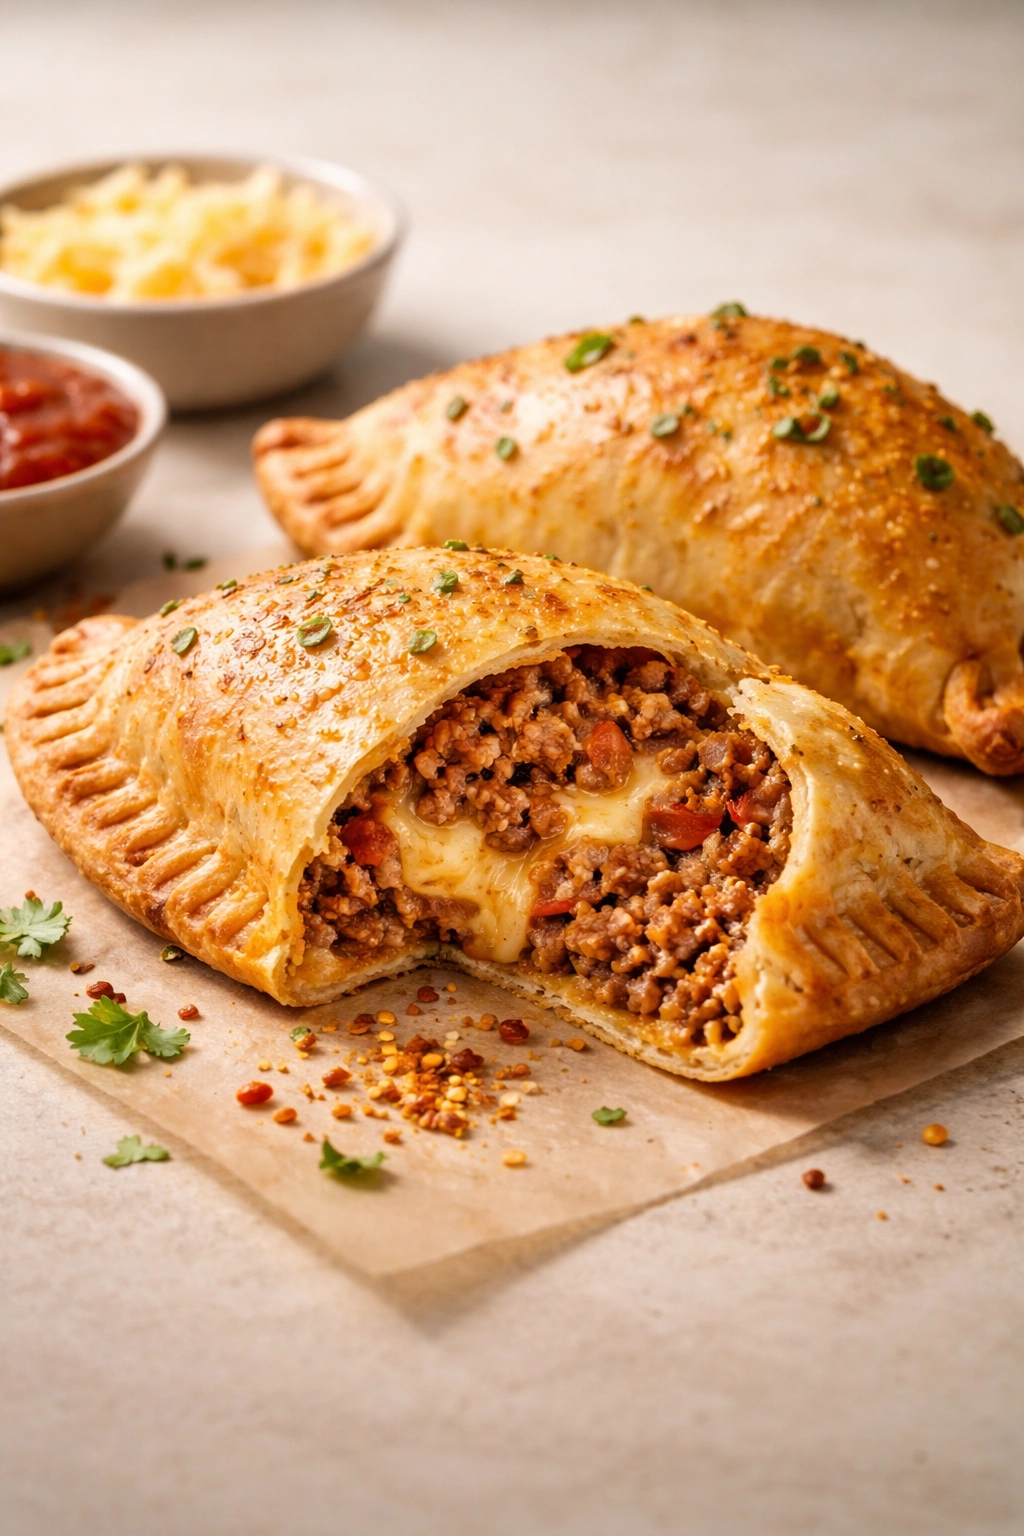
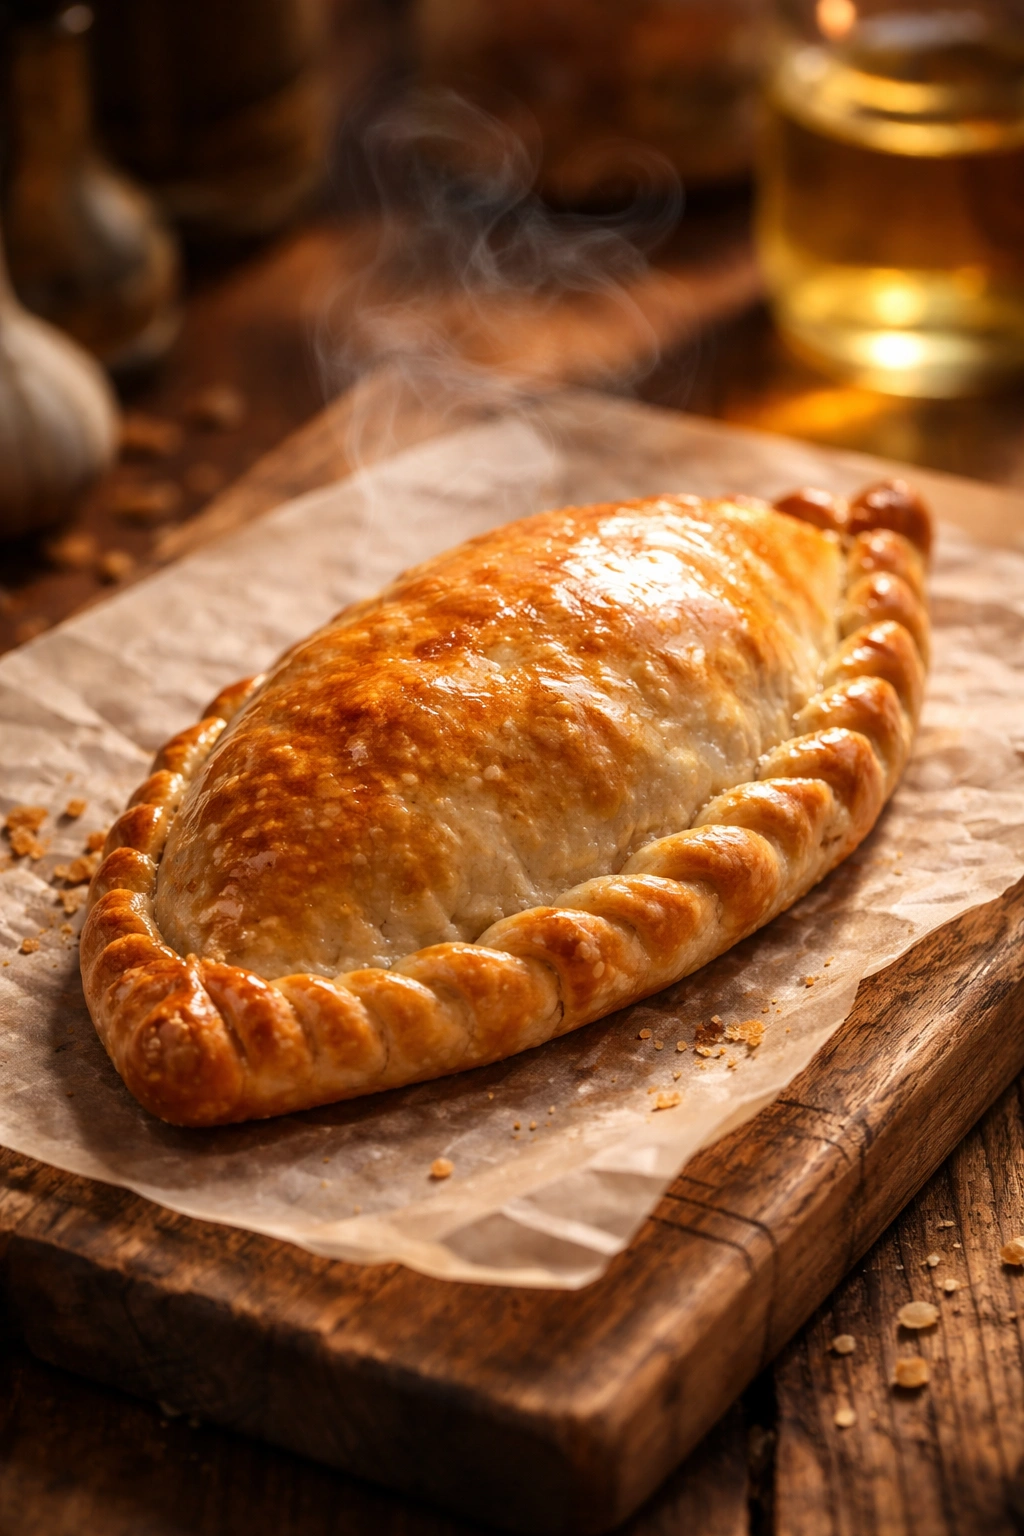
There’s something genuinely magical about biting into a homemade beef empanada fresh from the oven—that moment when the flaky, buttery crust gives way to reveal a savory, warmly-spiced filling. The crust shatters between your teeth, the beef is tender and juicy, and the whole thing is just right in a way that frozen empanadas from a box can never quite achieve.
If you’ve been intimidated by the idea of making empanadas at home, this article is here to convince you that it’s not only doable but genuinely easier than most people think. These handheld pockets of joy aren’t some mysterious delicacy that requires culinary school training—they’re straightforward, forgiving, and absolutely worth the modest effort involved. Whether you’re cooking for a casual weeknight dinner, prepping appetizers for a party, or stocking your freezer with make-ahead meals, homemade beef empanadas deliver impressive results every single time.
The best part? Once you master the basic technique, you’ll find yourself making these again and again. They freeze beautifully, they reheat perfectly, and they’re the kind of dish that makes guests genuinely impressed, even though the work involved is surprisingly minimal. Let’s walk through exactly how to make them.
Why Homemade Empanadas Beat Store-Bought
There’s a genuine difference between a homemade empanada and its commercial counterpart, and it goes way beyond just bragging rights. Store-bought empanadas—whether frozen or chilled from the refrigerated section—are typically made with dough that’s been engineered to withstand factory conditions and long storage periods. This means the crust is either dense and heavy or, conversely, tastes vaguely of paper.
Homemade empanada dough is where the magic lives. When you make it yourself, you control every variable: the amount of butter, the water content, the resting time. The result is a crust that’s simultaneously crispy on the outside and tender on the inside, with real flake and structure. The filling, too, tastes incomparably better when you’re starting with fresh beef, whole spices you toast yourself, and vegetables you dice by hand.
Beyond texture and flavor, there’s an economic argument worth making. A batch of homemade empanadas costs roughly what you’d pay for a single box of frozen ones, yet yields empanadas that blow them away. Make a double batch and freeze half—you’ve just built a stockpile of restaurant-quality appetizers for a fraction of the cost.
Understanding the Empanada: History and Origins
Empanadas aren’t a modern invention, and they’re not confined to a single country either. The name comes from the Spanish verb empanar, which means “to coat in bread” or “to wrap,” and while Spain is often credited as the birthplace of the empanada (dating back to at least the 16th century), these pastry pockets have evolved and taken root across Latin America, with every region and culture putting its own spin on the concept.
In Chile, empanadas are typically baked and filled with beef, onion, and spices. In Argentina and Uruguay, they’re beloved as street food, often fried and served with chimichurri. The Dominican Republic calls their version pastelitos. Mexico embraces the empanada with regional variations—some baked, some fried, filled with everything from traditional beef to chorizo to rajas con queso.
What unites all these variations is the fundamental concept: a hand-held pastry pocket designed to contain and protect a flavorful filling, making it portable enough to eat standing up at a festival or sitting down at a formal dinner. This versatility is part of why empanadas have endured for centuries and continue to show up on tables everywhere from casual family dinners to upscale restaurant menus.
Creating the Perfect Flaky Empanada Dough
The dough is where homemade empanadas truly distinguish themselves from their frozen counterparts. There are genuinely different approaches to making empanada dough, and the method you choose will affect both the texture and the ease of assembly.
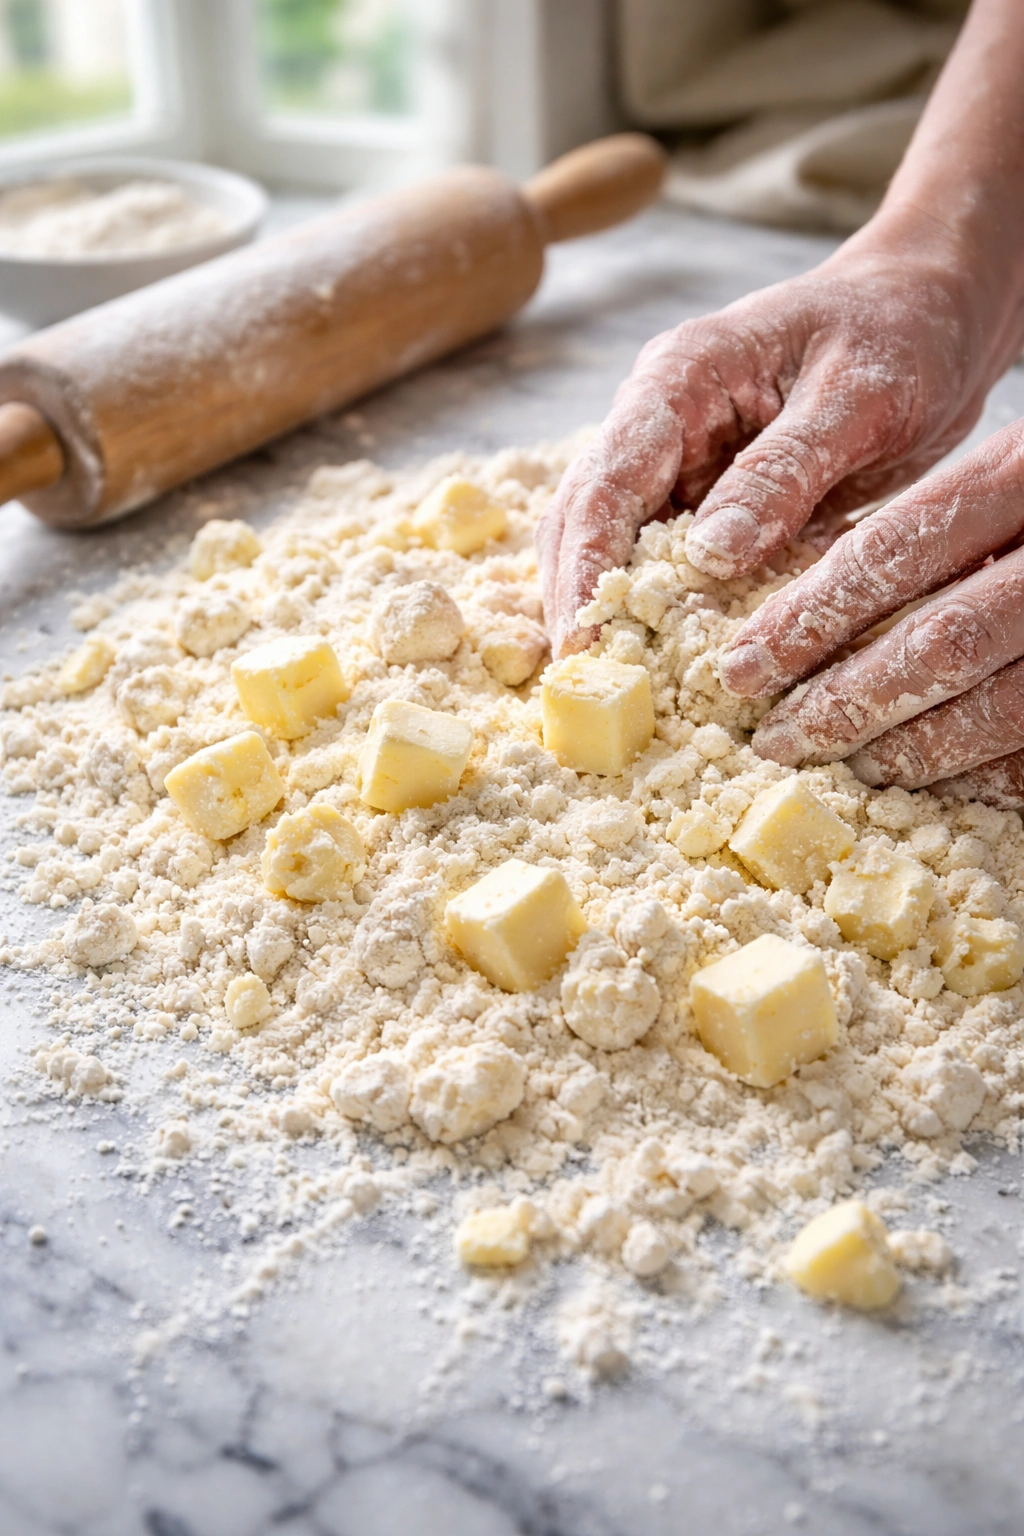
The most traditional approach involves making a dough similar to pie crust—cold butter worked into flour with ice water, creating little pockets of fat that steam during baking and create flakiness. This method produces an exceptionally tender crust, but it requires careful handling and specific kitchen temperature conditions to prevent the butter from warming up too much before baking.
An easier alternative uses a hot water method, where you heat water and butter together, pour the mixture into flour, and mix until combined. This dough is slightly less flaky than the traditional method but is far more forgiving to work with. It’s greasier to the touch initially (which might seem odd), but after chilling, it becomes quite manageable. The trade-off is worth it for home cooks because the final result is still remarkably flaky and tender, without the temperamental nature of traditional pie dough.
The key to both methods is adequate chilling time. Whether you’re using pie dough, homemade empanada dough, or even store-bought puff pastry, the dough must be cold and rested before you shape the empanadas. Cold dough resists breaking, doesn’t tear as easily when you fold it, and bakes up flakier. Most doughs benefit from at least 30 minutes of refrigeration, though overnight resting is even better. Think of this chilling time as an investment that pays dividends in the final texture.
When rolling out the dough, work gently and keep your surfaces lightly floured. Roll each piece to roughly ¼-inch thickness—thin enough to be delicate, but not so thin that it tears when you fill and fold it. If the dough becomes too warm as you work, pop it back in the fridge for a few minutes to firm up.
Making the Savory Beef Filling
The beef filling is where all the aromatic, warming spices and savory depth come from. Start with ground beef—specifically, 80/20 or 85/15 ground beef. This fat ratio ensures the filling stays moist and flavorful rather than becoming dry or dense. If you prefer leaner beef, use 90/10, but you may want to add a small splash of beef stock to compensate for the lost moisture.
Brown the beef in a skillet over medium-high heat, breaking it apart with a wooden spoon as it cooks. This step takes about 8-10 minutes. Don’t rush it—you want the beef to develop some color and browning, which adds depth of flavor beyond just “cooked meat.”
Once the beef is browned, add your aromatics: diced onion, minced garlic, and finely diced bell pepper if you’re using one. Let these cook together for another 2-3 minutes so the vegetables soften slightly and their flavors meld with the beef. This is where your filling starts to smell genuinely amazing.
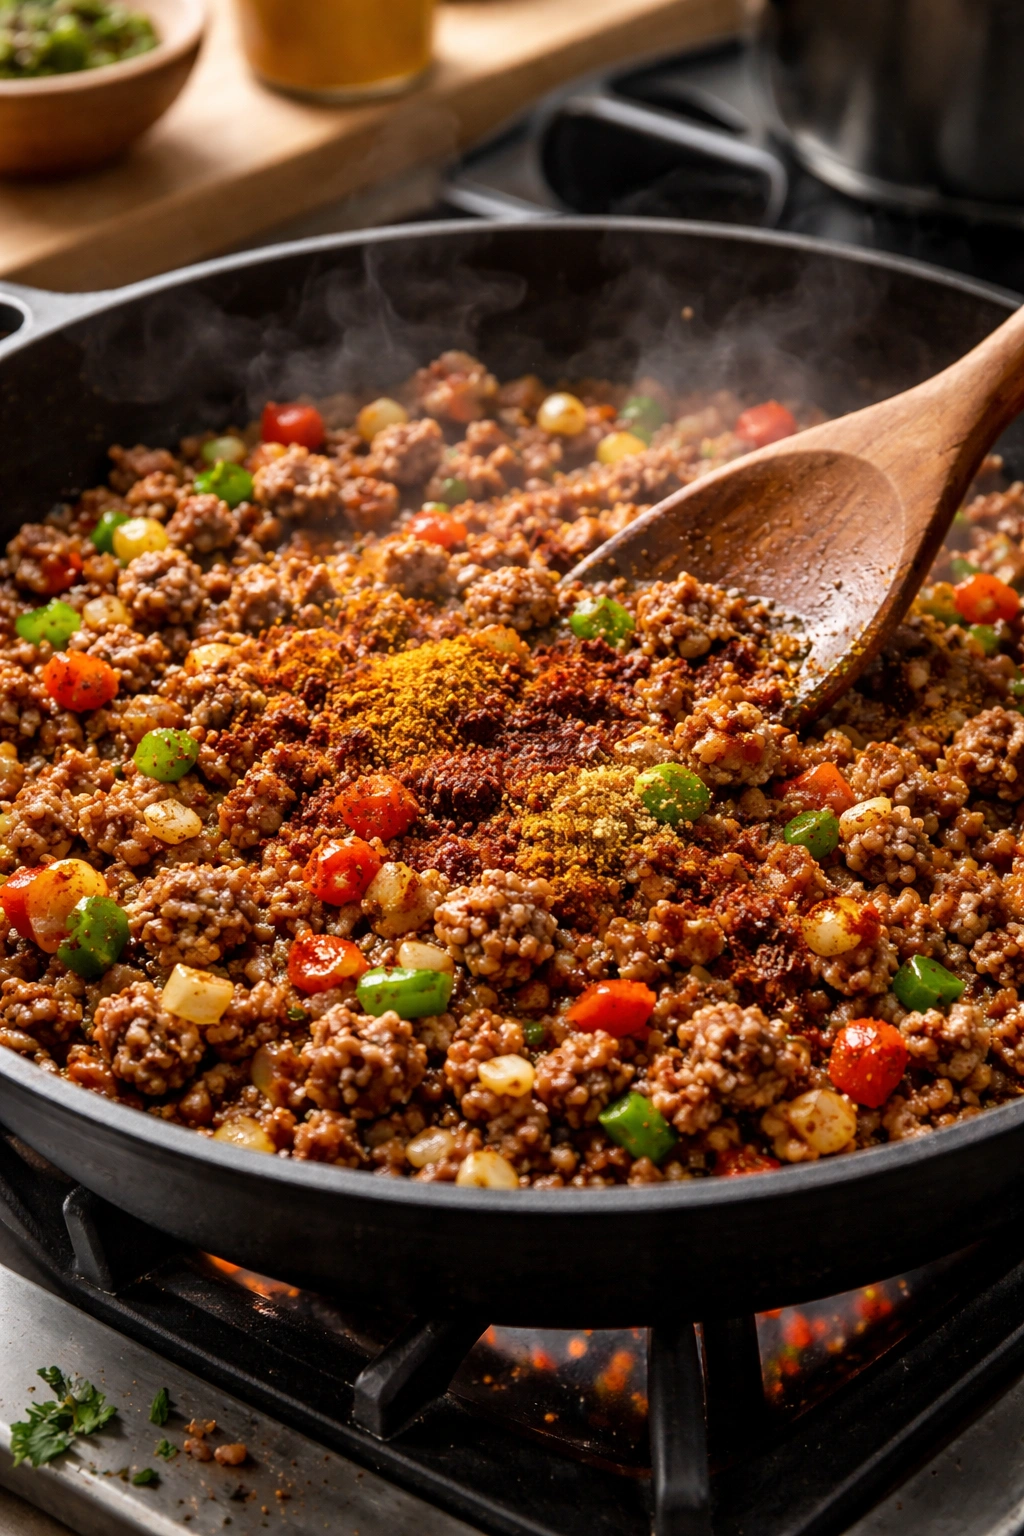
Now come the spices—this is critical. The warm spice profile that defines a great beef empanada relies on cumin, chili powder, cinnamon, and a hint of cloves or paprika. Add these spices directly to the hot beef mixture, stirring constantly for about 1-2 minutes. This brief cooking step, called “blooming” the spices, releases their essential oils and deepens their flavor significantly. You’ll notice the whole kitchen suddenly smells like something special.
Add tomato paste if you’re using it (about 1-2 tablespoons) and stir to combine. A small amount of beef or chicken stock helps keep the filling from drying out as it bakes, but you don’t want it wet—aim for a mixture that holds together without being soupy. The filling should look moist and cohesive, not like chili.
Some recipes add diced potatoes that have been boiled separately. This addition makes the filling heartier and adds subtle sweetness and texture. If you’re including potatoes, dice them quite small (about ⅓-inch cubes) and boil them for only 3-4 minutes so they’re just barely tender—they’ll continue cooking inside the empanada.
Fresh corn, diced pimientos, roasted red peppers, and fresh cilantro are all delicious additions that add brightness and complexity. The beauty of this filling is its flexibility—you can adjust seasonings to your taste, add vegetables you love, and make it genuinely your own. Let the filling cool to room temperature (or speed this up by spreading it on a plate in the refrigerator) before assembling the empanadas. Filling warm empanadas with hot beef mixture can soften the dough before it even gets to the oven, making assembly more difficult and affecting the final texture.
Assembling and Sealing Your Empanadas

Assembly is the most time-consuming part of making empanadas, but it’s also quite forgiving once you understand the technique. The key is not to overfill and to seal the edges thoroughly.
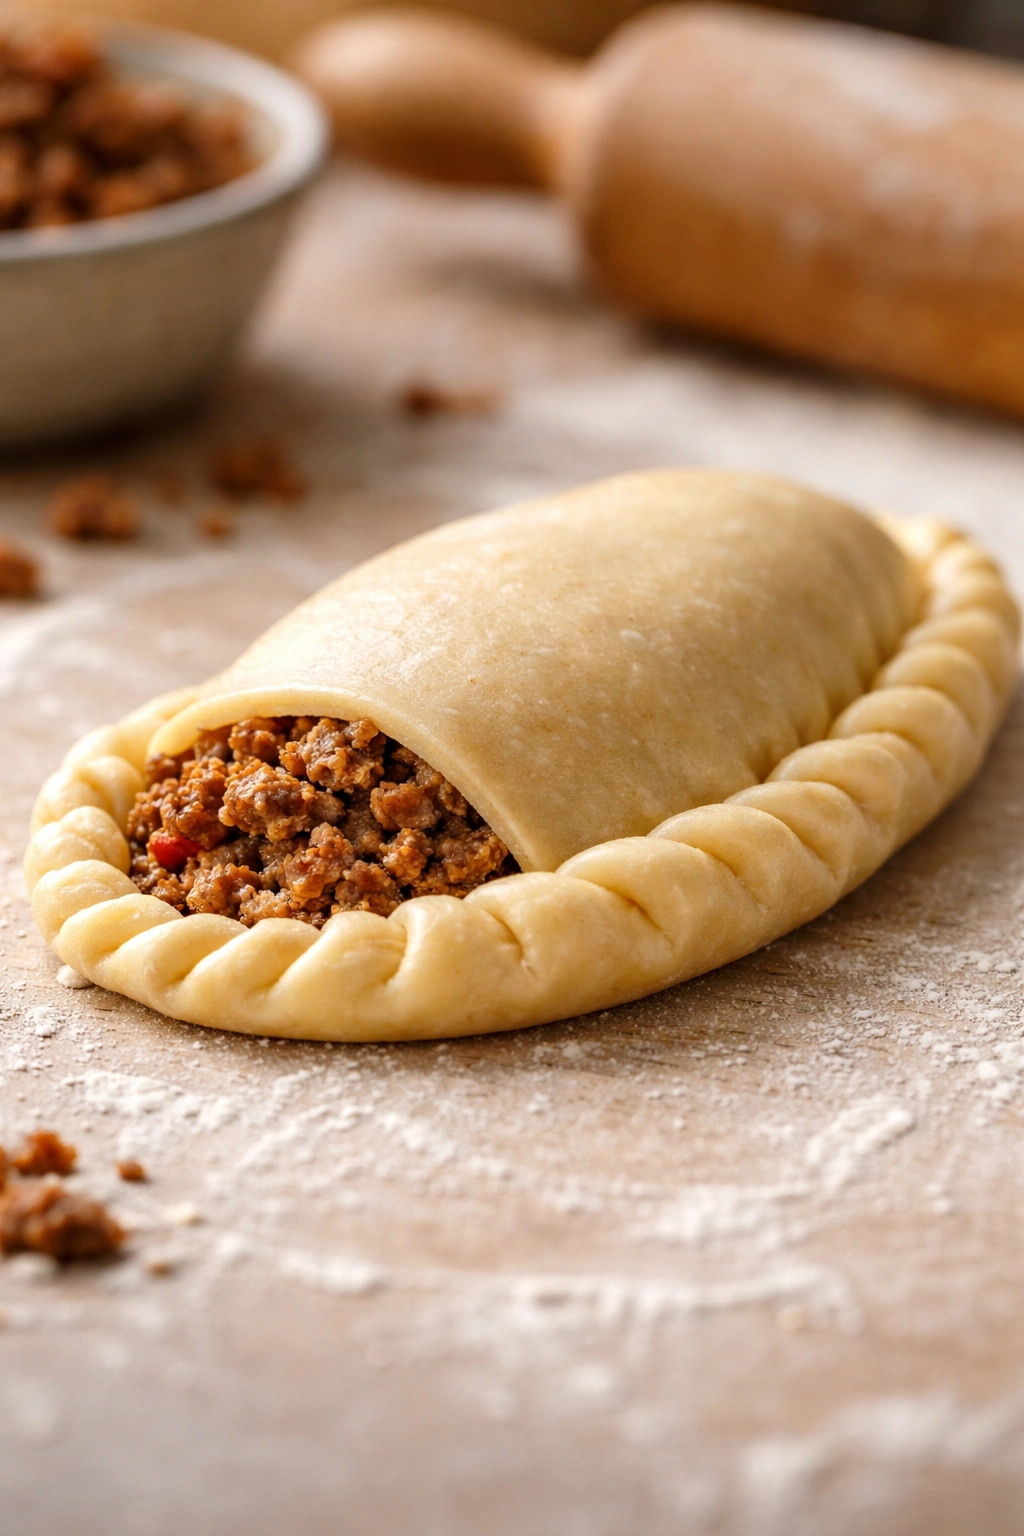
Start with a dough circle (roughly 5-7 inches in diameter, depending on how large you want your empanadas). Place about 1½ to 2 tablespoons of filling in the center of the circle, leaving a visible border of about ½ inch all the way around. This might seem like a small amount of filling, but overfilling is the #1 reason empanadas burst open in the oven or become impossible to seal properly. Resist the temptation to stuff them fuller.
Brush that ½-inch border lightly with egg wash (a raw egg beaten with a tablespoon of water). This egg wash acts as the “glue” that holds the dough together when you fold it.
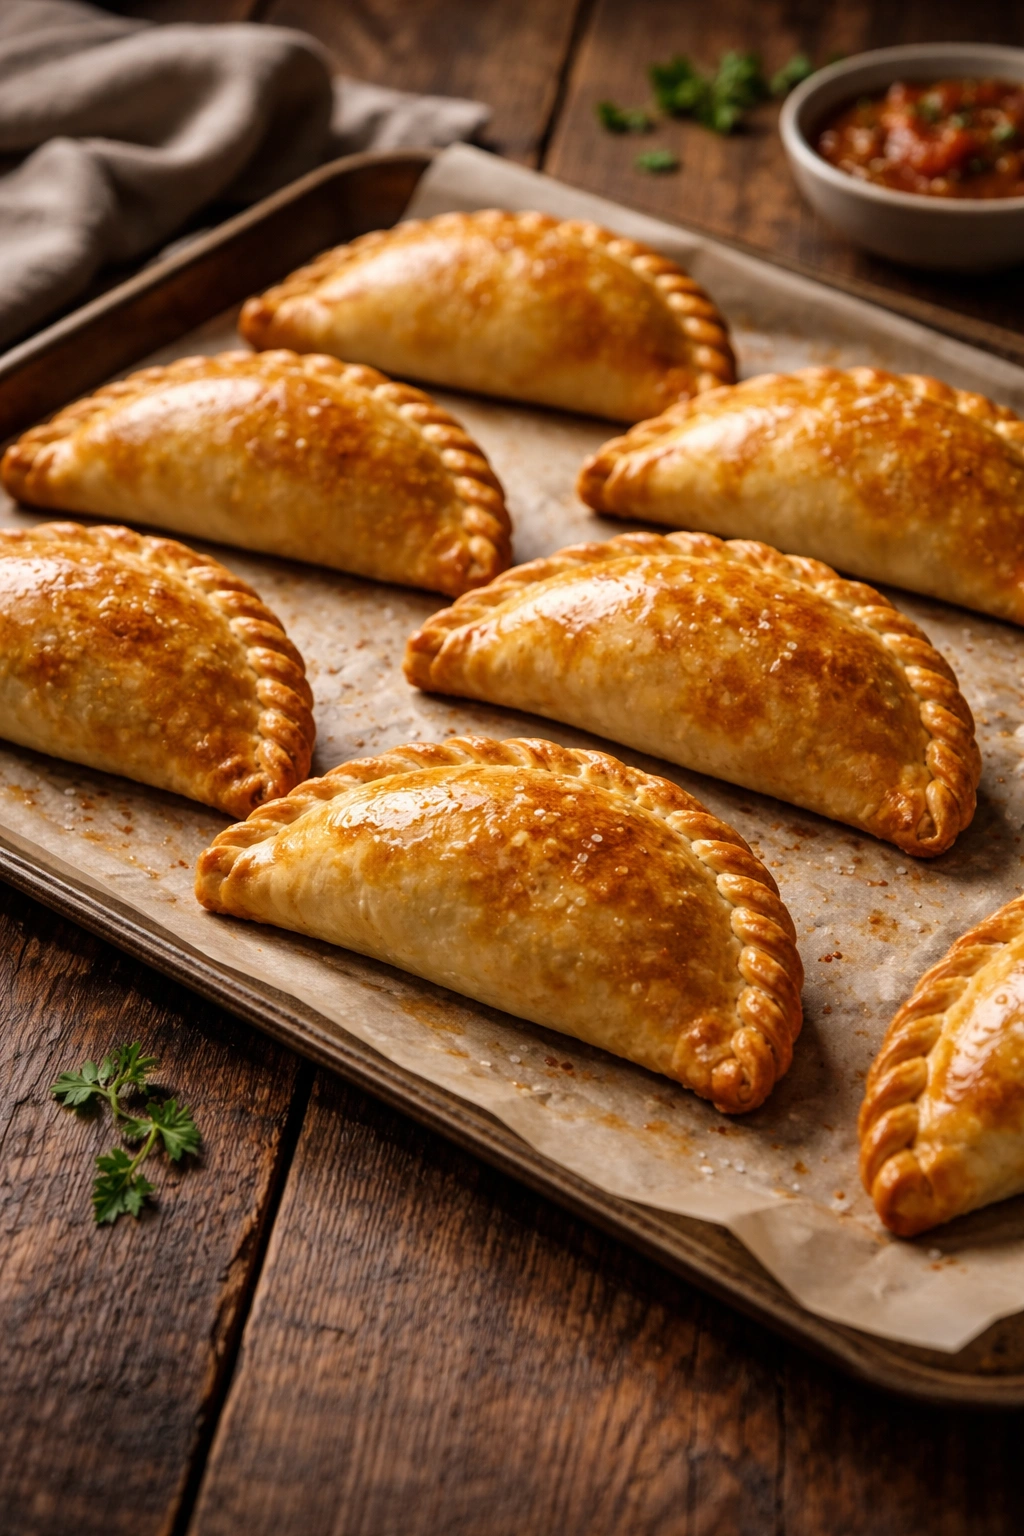
Fold the dough circle in half, creating a half-moon shape. Starting at one end, pinch and press the sealed edge firmly with your fingers, working your way around. Some cooks use a fork to crimp the edges, pressing down firmly to seal. Others prefer the traditional “repulgue” technique—pinching and twisting the edge to create a rope-like pattern that’s both decorative and functional. Either method works fine; it’s really about what feels comfortable to you.
The important part is that the seal is tight and complete all the way around. Any gaps or weak spots are where filling will escape during baking. Run your finger along the sealed edge after you’ve crimped it—it should feel secure, with no gaps or soft spots.
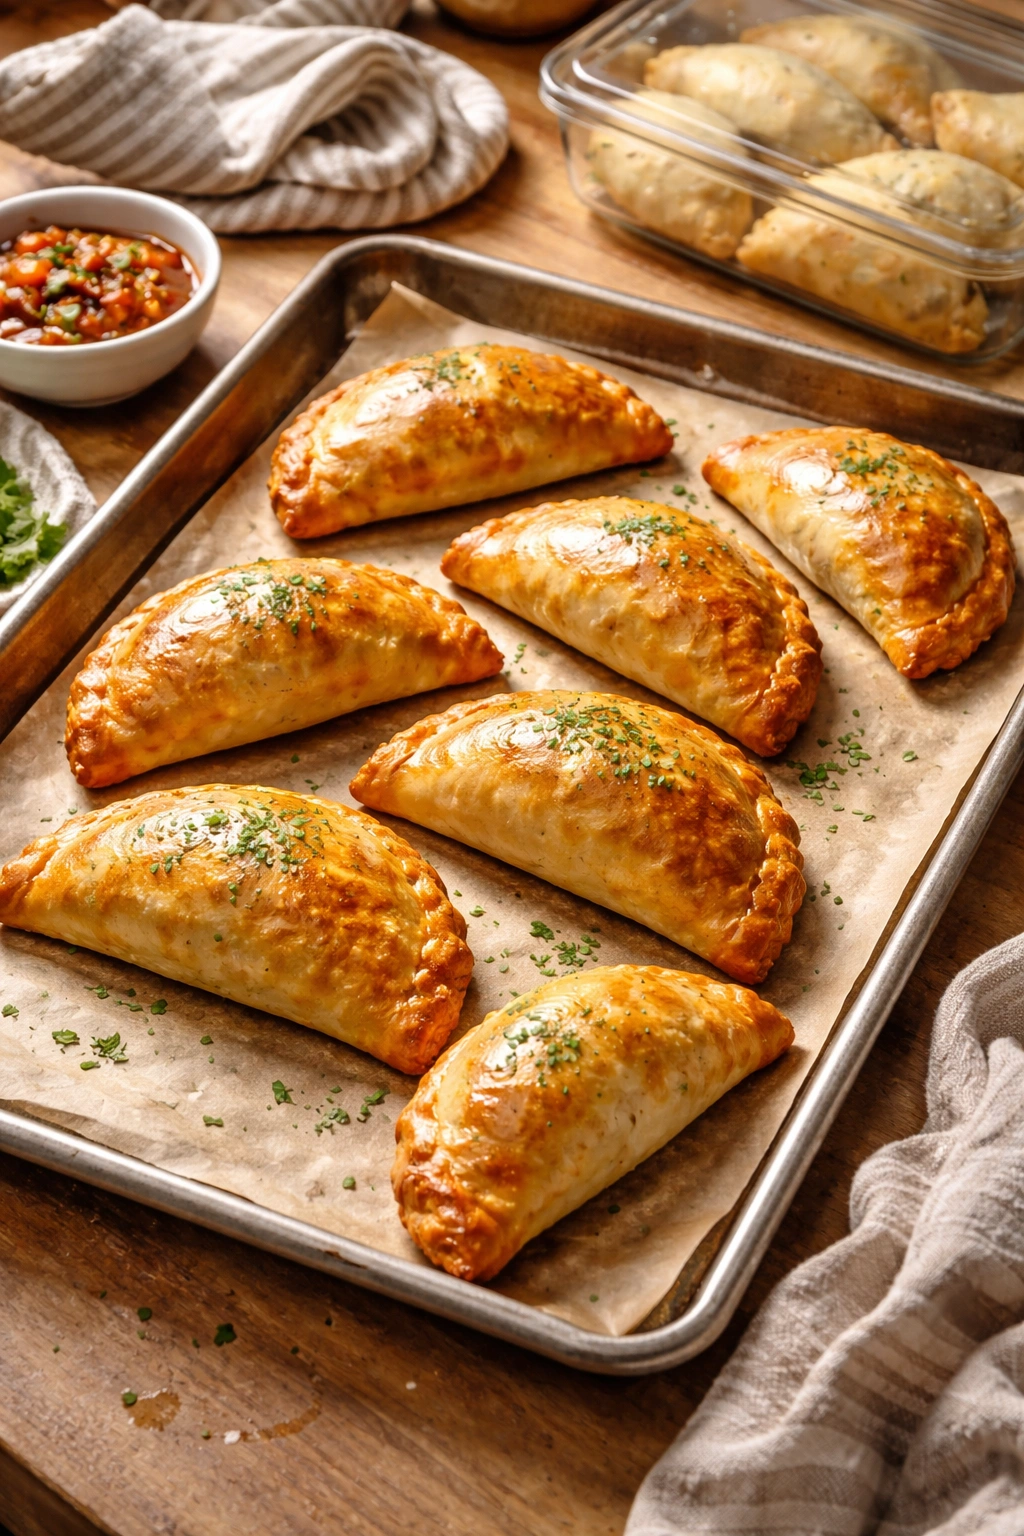
Arrange the sealed empanadas on a parchment-lined baking sheet in a single layer, not touching. If they’re crowded, steam from one can affect another. Give them a final light brush of egg wash on top for a beautiful golden color.
Baking Your Beef Empanadas to Golden Perfection
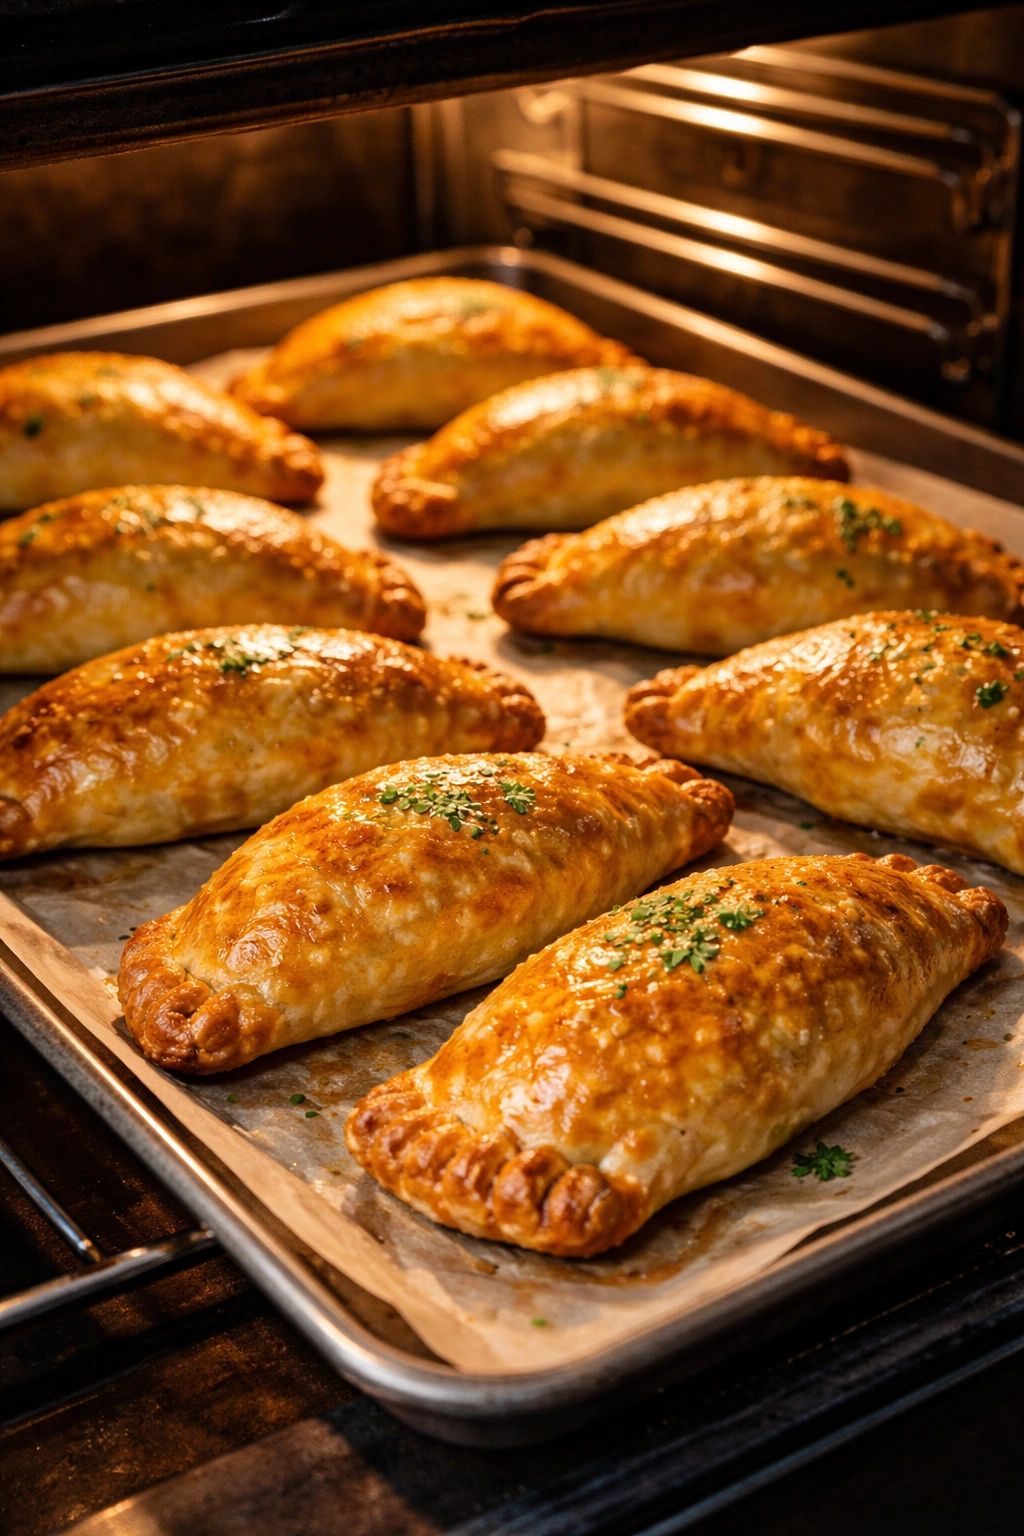
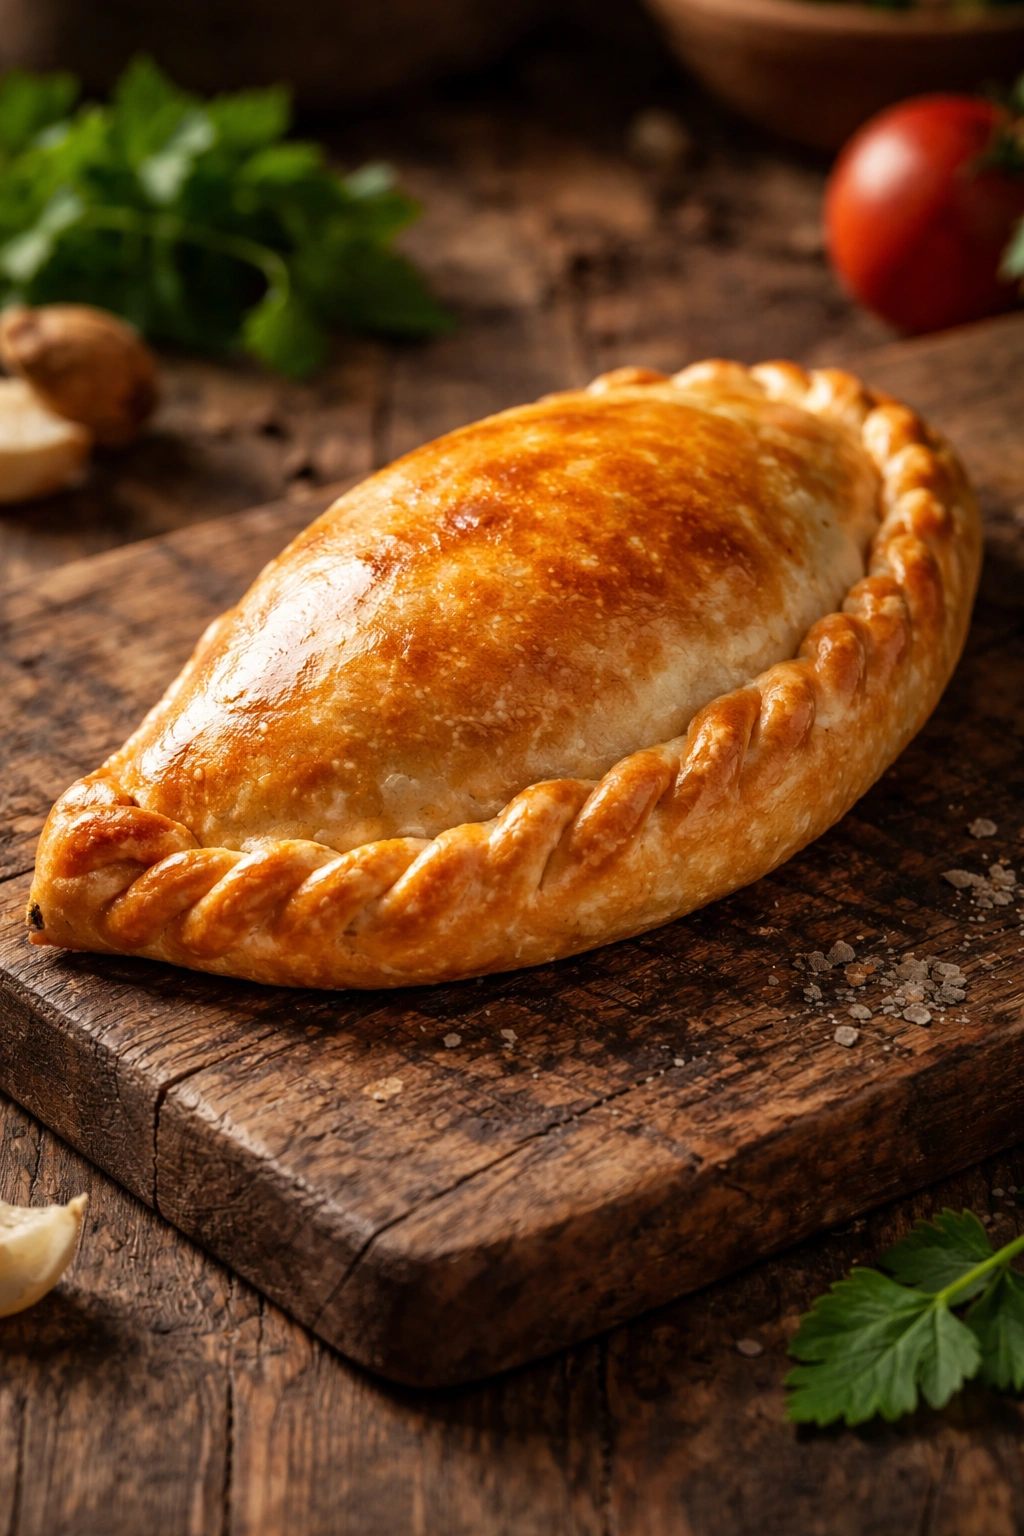
Preheat your oven to 375-400°F (190-200°C), depending on your specific oven. Most empanadas bake at around 375-400°F for 30-35 minutes until they’re deep golden brown. The higher end of that temperature range creates a crispier, more deeply browned crust; the lower end produces a more gently golden, slightly softer crust. Both are delicious—it’s a matter of preference.
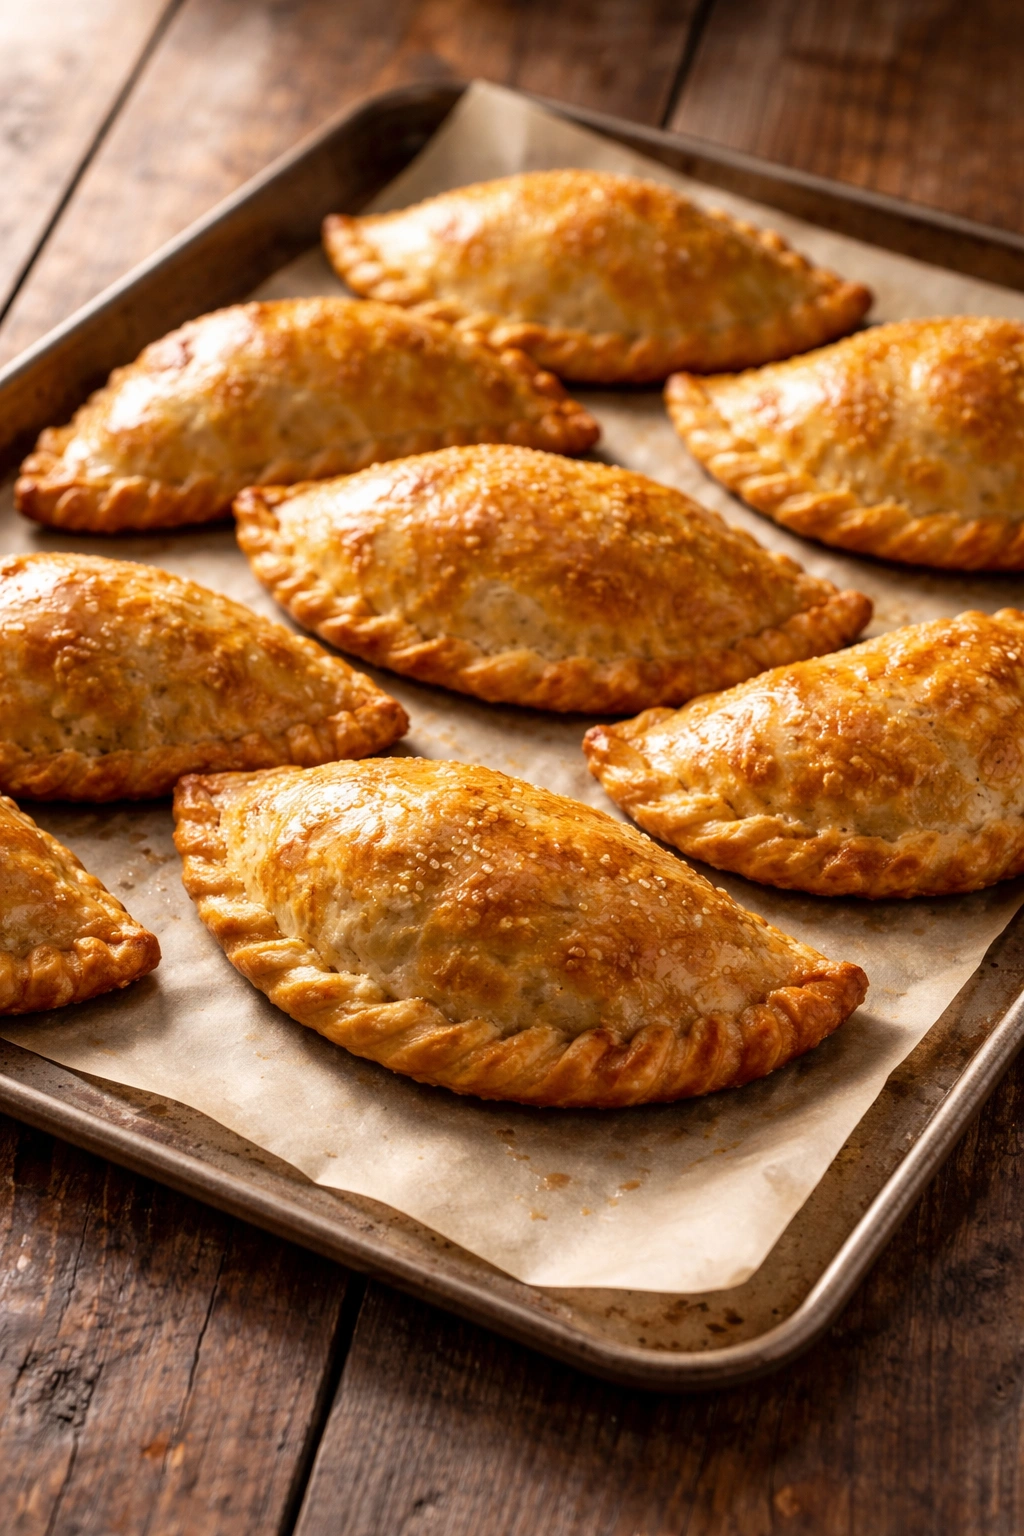
Baking time varies based on the size of your empanadas and the exact temperature of your oven. Start checking at around 25 minutes. You’re looking for a deep golden-brown color, particularly on the edges, and a crust that feels crispy when you gently tap it. The empanadas should look puffed and cooked through, not pale or doughy.
If the tops are browning much faster than the bottoms, rotate the pan halfway through baking. This ensures even cooking.
A critical detail: Let the baked empanadas cool for at least 5-10 minutes after removing them from the oven before serving. This resting period allows the filling to set slightly and the crust to firm up. If you bite into an empanada straight from the oven, the filling may be dangerously hot, and you’ll burn the roof of your mouth—a regrettable learning experience many of us have had.
Common Mistakes That Ruin Empanadas (and How to Avoid Them)
Even with the best intentions, it’s easy to make a misstep that undermines your empanadas. Being aware of these pitfalls makes you far less likely to encounter them.
Overfilling is the most common culprit. Too much filling puts pressure on the dough as it cooks, and if the seal isn’t absolutely airtight, filling will leak out, resulting in messy empanadas with dried-out filling. Resist the temptation. The filling-to-crust ratio is important; too much filling, and the empanada becomes unbalanced. Err on the side of less filling, and you’ll get better results.
Using dough that’s too warm is another frequent issue. When dough is warm, it becomes sticky and difficult to work with. Pieces tear easily, and the seal doesn’t hold as well. If at any point your dough feels soft or warm, pop it back in the refrigerator for 5-10 minutes. This brief chill dramatically improves workability.
Inadequate sealing leads to bursting or leaking. The sealed edge must be completely tight. Some people use a fork with adequate pressure; others prefer pinching by hand. Whatever method you use, be thorough. Run your finger along the seal one more time before placing it on the baking sheet to confirm it’s solid.
Hot filling in cold dough can seem counterintuitive, but warm filling placed in cold dough softens the dough prematurely, making the whole assembly more difficult and potentially affecting how the crust bakes. Always cool your filling first.
Dough that hasn’t been chilled long enough lacks the structure to hold up properly during assembly and baking. 30 minutes is truly the minimum; overnight is ideal. This single factor contributes enormously to success.
Skipping the egg wash or using it unevenly results in inconsistent browning and sometimes a dull, pale finished empanada. A light brush of egg wash on both the sealed edges and the top creates that beautiful golden-brown color and adds a subtle shine.
Make-Ahead and Freezer Strategies
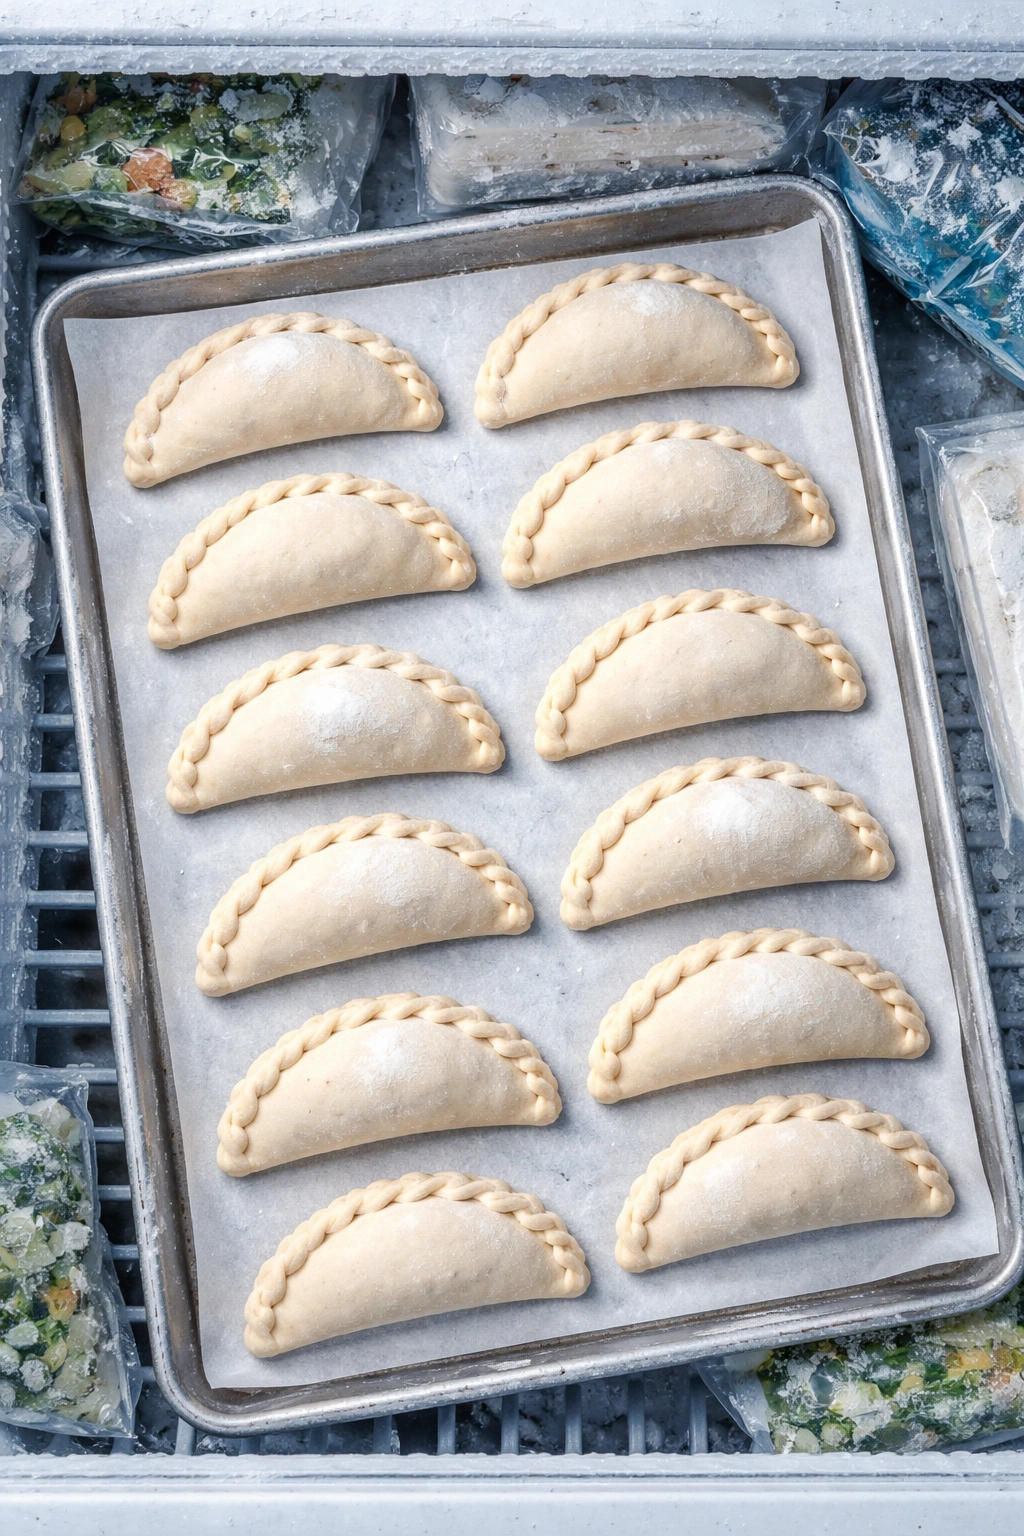
One of the greatest advantages of homemade empanadas is how beautifully they freeze. This makes them an ideal make-ahead option for busy weeks.
Freezing unbaked empanadas is the best approach. Assemble your empanadas as usual, place them on a parchment-lined baking sheet in a single layer without touching, and freeze for 2-3 hours until completely solid. Once frozen, transfer them to a freezer bag or airtight container, where they’ll keep for up to 3 months. When you’re ready to bake them, place them directly on a parchment-lined sheet and bake at the same temperature, adding about 5-10 minutes to the cooking time since they’re starting frozen.
The advantage of freezing unbaked empanadas is that they bake up with the same texture and crispness as freshly assembled ones. Freezing after baking slightly diminishes the flakiness of the crust, though they’re still quite good.
You can also make the components ahead if you prefer. The dough can be wrapped in plastic and refrigerated for up to 3 days or frozen for up to 3 months. The filling can be cooked, cooled, and refrigerated in an airtight container for up to 4 days. This makes it possible to make one component on Monday, another on Tuesday, and assemble everything on Wednesday—spreading the work across several days.
Serving and Pairing Ideas
Empanadas are genuinely versatile and work equally well as an appetizer, a main course, or something in between.
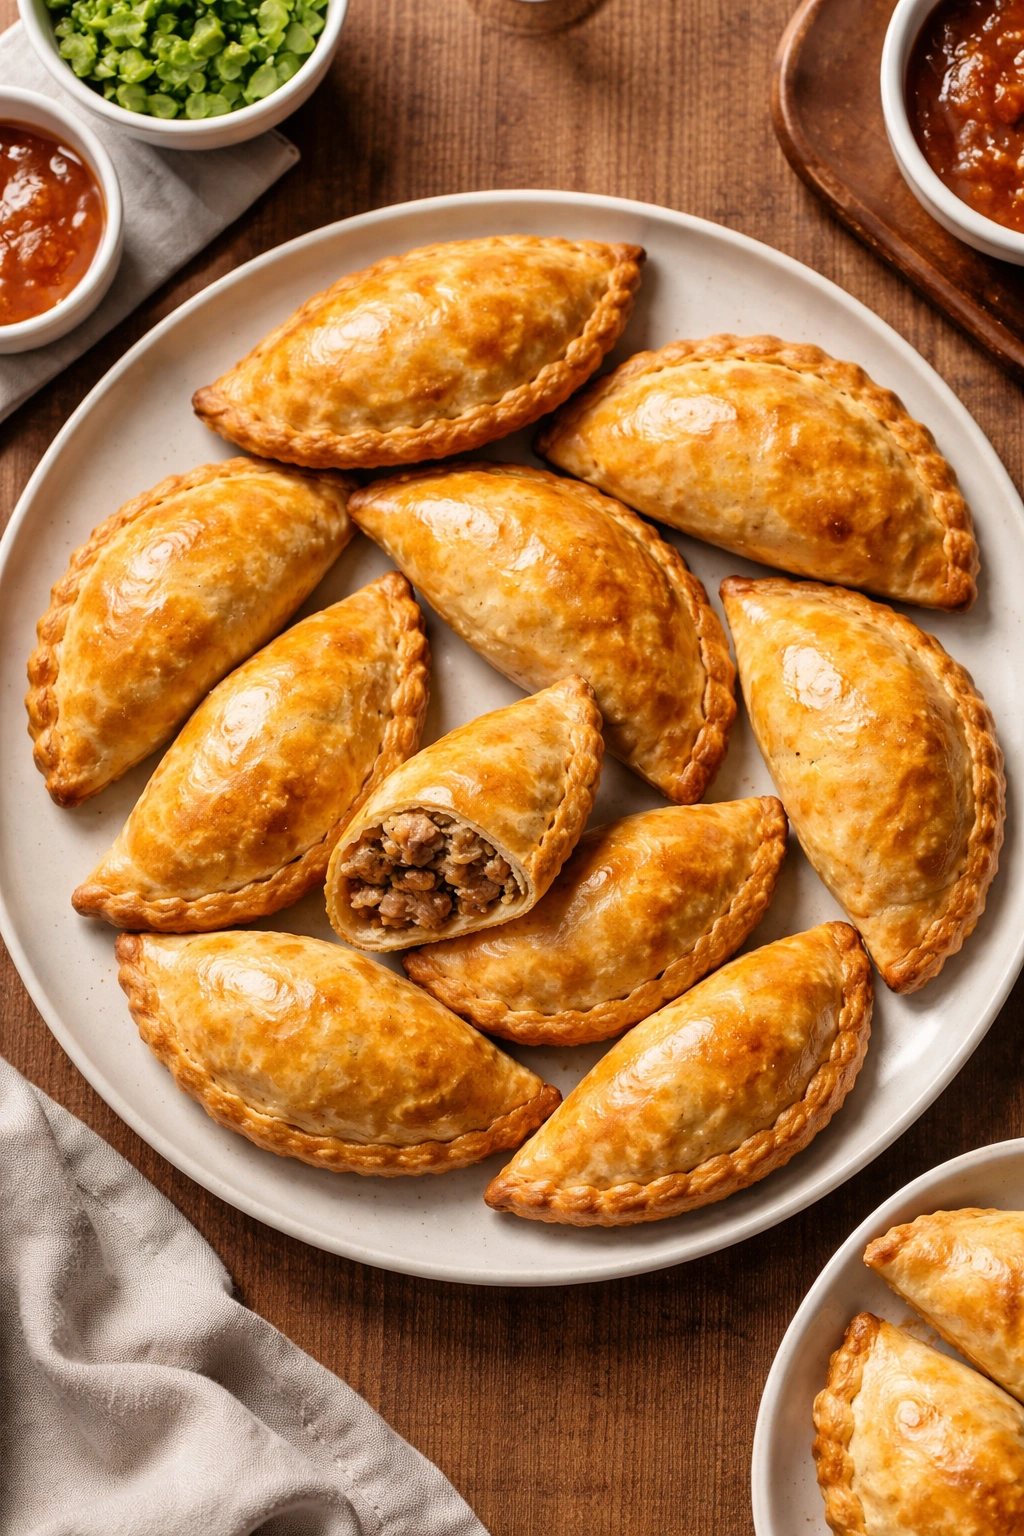
For a casual appetizer spread, arrange warm empanadas on a platter alongside several dipping options: guacamole, salsa (mild and spicy), sour cream, and a cilantro-lime crema. Provide small napkins because these are definitely hand-held eating food.
As a main course, serve empanadas with complementary sides. Mexican rice, black beans, or a simple salad with lime vinaigrette all pair beautifully. A serving of 2-3 empanadas per person constitutes a satisfying dinner, especially with sides.
For a party or game day, empanadas are perfect because they can be eaten without utensils while standing or watching something. Make a larger batch ahead, freeze half of it, and you’ve created a scalable menu that handles anywhere from 4 people to 20.
Consider serving empanadas with chimichurri sauce (an Argentine herb condiment that’s genuinely transformative with beef empanadas), salsa verde, or a spiced crema made from sour cream thinned with lime juice and topped with fresh cilantro.
Variations to Customize Your Empanadas
The base beef empanada recipe is genuinely excellent, but part of its charm is how easily it adapts to different tastes and dietary preferences.
For a cheese-forward version, add ½ to ¾ cup shredded sharp cheddar, Mexican blend, or Oaxaca cheese to the cooled filling. The cheese adds richness and creates little pockets of melted creaminess throughout.
For heat lovers, add diced jalapeños when you’re browning the beef, increase the chili powder, add a pinch of cayenne pepper, or both. Some recipes also include a small amount of hot sauce mixed into the filling.
For a spicy-sweet profile, keep the cinnamon that’s already in the beef (many traditional empanada recipes include a small amount) but increase it slightly, and add ¼ teaspoon of cloves. This warm, complex spice profile is characteristic of many Latin American empanada traditions.
For a completely different protein, substitute ground chicken or turkey, though note that poultry is naturally milder than beef, so you may want to increase seasoning proportionally. Ground pork also works beautifully, especially with different spice profiles.
For a vegetarian version, omit the meat and increase the vegetables: add diced zucchini, mushrooms, corn, black beans, and extra bell peppers. Season generously (vegetables need more seasoning than meat-based fillings) and add cheese for richness and protein.
For a mini empanada appetizer, use smaller dough circles (cut with a 3-inch cutter instead of 5-inch) and reduce the filling amount proportionally. Bake these at the same temperature but for only 15-20 minutes.
Storage and Reheating Tips
Baked empanadas stored in an airtight container in the refrigerator will keep for 3-5 days. The crust will gradually lose some of its crispness, but the empanadas remain perfectly delicious, especially if you reheat them properly.
To reheat, place empanadas on a parchment-lined baking sheet and warm them in a 300-350°F oven for about 10 minutes (or 5-7 minutes if they’re already at room temperature). This gentle reheating re-crisps the crust without drying out the filling. Microwaving is faster but will result in a slightly softer, less appealing texture—the oven method is worth the extra few minutes.
Frozen baked empanadas follow the same reheating protocol; they may just need an extra minute or two to warm through completely.
Do not refreeze empanadas after they’ve been thawed and baked, as this degrades texture and safety.
Yield, Prep Time, and Difficulty
Yield: Makes 10 to 12 empanadas | Serves 4 to 6 as a main course, or 8 to 12 as an appetizer
Prep Time: 30 minutes
Cook Time: 45 minutes (includes dough chilling time)
Total Time: 1 hour 15 minutes active + at least 30 minutes dough chilling (can be done ahead)
Difficulty: Intermediate — The technique is straightforward, but assembly requires patience and attention to detail. No special equipment is required beyond what most home cooks already have.
Homemade Beef Empanadas
For the Empanada Dough:
- 2½ cups all-purpose flour
- ½ teaspoon fine sea salt
- ½ cup (1 stick) unsalted butter, chilled and cut into ¼-inch cubes
- 2 large eggs, room temperature (1 for dough, 1 for egg wash)
- ⅓ cup ice water, plus more as needed
For the Beef Filling:
- 1 tablespoon extra virgin olive oil
- ¾ pound 80/20 ground beef
- ½ medium yellow onion, finely diced
- 1 medium carrot, finely diced
- 1 celery rib, minced
- 2 garlic cloves, minced
- 1 teaspoon ground cumin
- ½ teaspoon chili powder
- ½ teaspoon ground cinnamon
- ¼ teaspoon ground cloves (optional but recommended)
- ¼ teaspoon smoked paprika
- ¾ teaspoon fine sea salt
- ¼ teaspoon freshly cracked black pepper
- 1 small russet potato, peeled, finely diced, and boiled until just tender (about 3-4 minutes), then drained
- ½ cup frozen peas, thawed
- ¼ cup beef stock
- 1-2 tablespoons tomato paste (optional, adds depth)
- ½ cup shredded sharp cheddar or Mexican blend cheese (optional but highly recommended)
- 2 tablespoons fresh cilantro or parsley, chopped
For Assembly:
- 1 large egg, beaten with 1 tablespoon water (egg wash)
Making the Empanada Dough
Prepare the Dough Ingredients:
-
In a large bowl, whisk together the flour and salt until evenly combined. Set aside.
-
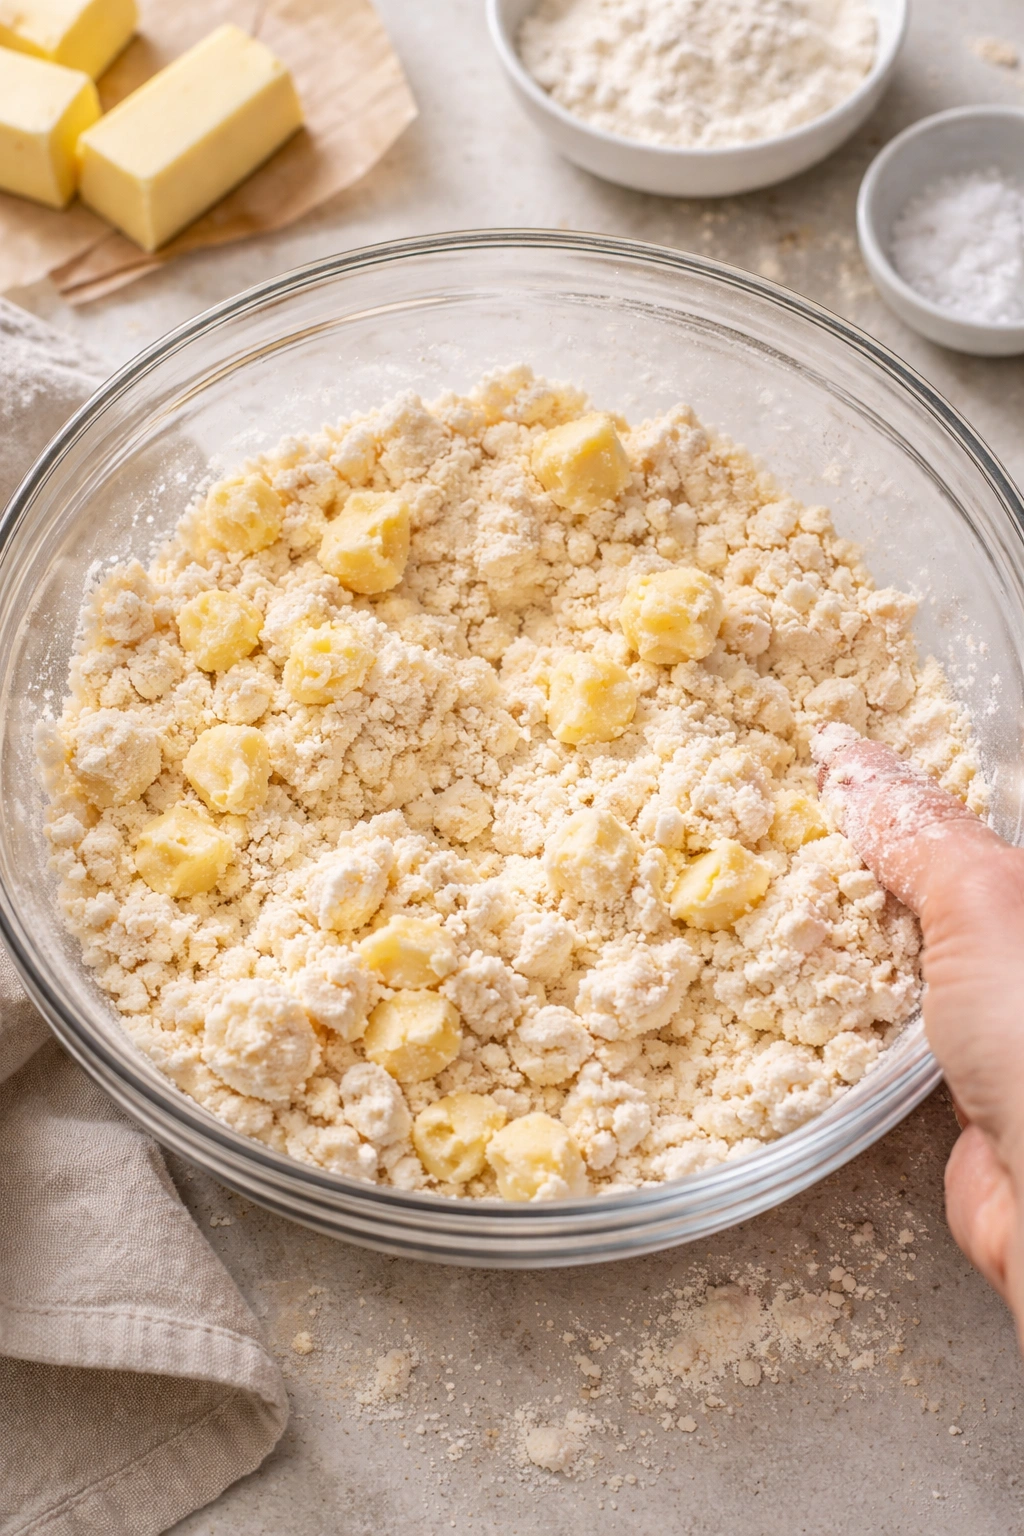
Cut the cold butter into ¼-inch cubes (keeping it cold is genuinely important—if your kitchen is very warm, return the butter to the freezer briefly to chill it again before proceeding).
-
Add one egg and the ice water to the flour mixture, then add the butter cubes. Using a fork or your fingertips, work the mixture together until it resembles coarse breadcrumbs with some pea-sized pieces of butter still visible throughout. Do not overmix—you want visible streaks of butter, not a uniform, smooth dough. This is what creates the flakiness.
Advertisements -
If the dough seems too dry and won’t hold together, add ice water 1 tablespoon at a time, mixing gently until the dough just barely comes together. It should feel slightly wet and slightly greasy.
-
Shape the dough into a ball, wrap it tightly in plastic wrap, and refrigerate for at least 30 minutes, though overnight is ideal. Do not skip this chilling step—it is absolutely critical to the final texture.
Making the Beef Filling
Prepare the Vegetables and Meat:
-
Bring a small pot of salted water to a boil. Add the finely diced potato and cook for 3-4 minutes until just barely tender (it should be able to be pierced with a fork but still have some structure). Drain immediately and set aside.
-
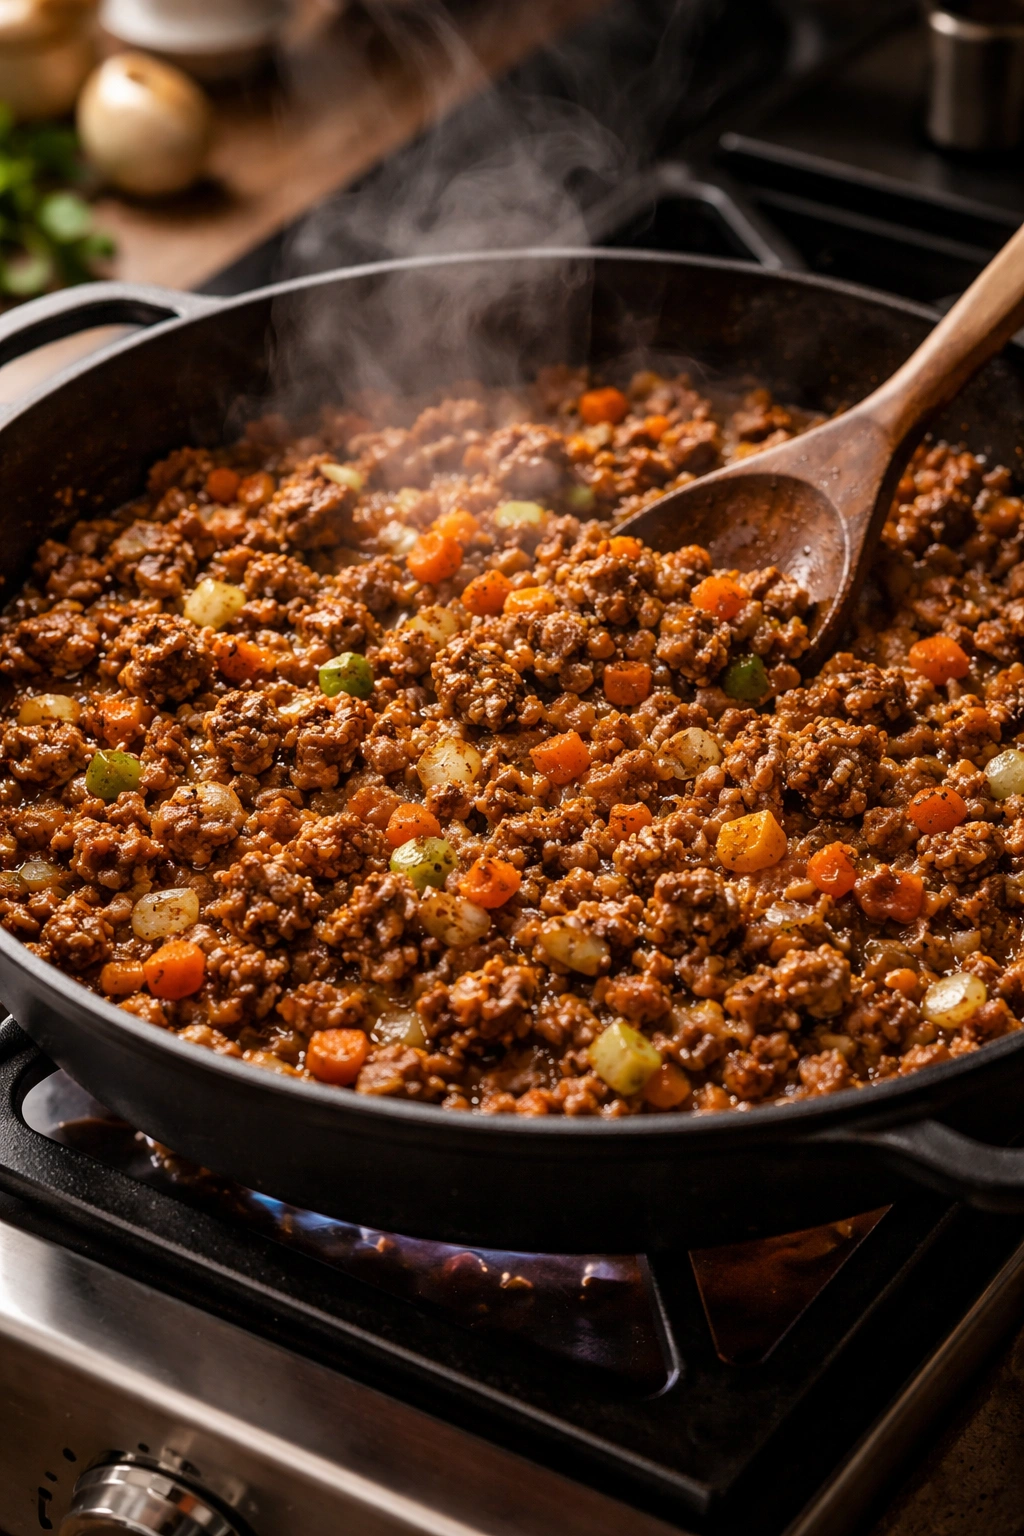
In a large skillet over medium-high heat, warm the olive oil until it shimmers. Add the ground beef, diced onion, carrot, and celery. Cook, breaking up the meat with a wooden spoon, until the beef is completely browned and the vegetables have softened, about 8-10 minutes. The mixture should smell deeply savory and smell slightly caramelized.
-
Add the minced garlic and cook for 30 seconds more, stirring constantly, until fragrant.
Season and Cook the Filling:
-
Reduce the heat to medium. Add the cumin, chili powder, cinnamon, cloves, paprika, salt, and black pepper directly to the hot mixture. Stir constantly for 1-2 minutes to bloom the spices (this releases their essential oils and deepens flavor dramatically).
-
If using tomato paste, add it now and stir thoroughly until combined, cooking for about 1 minute.
-
Add the beef stock and stir to combine. The mixture should look moist but not soupy. Simmer for 2-3 minutes until most of the liquid has been absorbed but the filling still holds together without being dry.
Advertisements -
Stir in the cooked potato, peas, cheese (if using), and cilantro. Remove from heat and let cool to complete room temperature. This is important—warm filling will soften cold dough during assembly. Speed up cooling by spreading the mixture on a plate and placing it in the refrigerator for 10-15 minutes.
Assembling the Empanadas
Prepare Your Workspace:
-
Preheat the oven to 375°F (190°C) and line a large baking sheet with parchment paper.
-
On a lightly floured work surface, remove the chilled dough from the refrigerator. Flour a rolling pin as well.
-
Divide the dough into 10-12 equal pieces (roughly golf-ball-sized or about 2 ounces each, if you want to be precise).
-
Roll each piece gently into a ball, then use the rolling pin to roll it into a thin circle approximately 5-7 inches in diameter and about ¼ inch thick. The dough should feel supple and roll easily—if it feels stiff or cracks, let it rest at room temperature for a minute or two.
Fill and Seal:
-
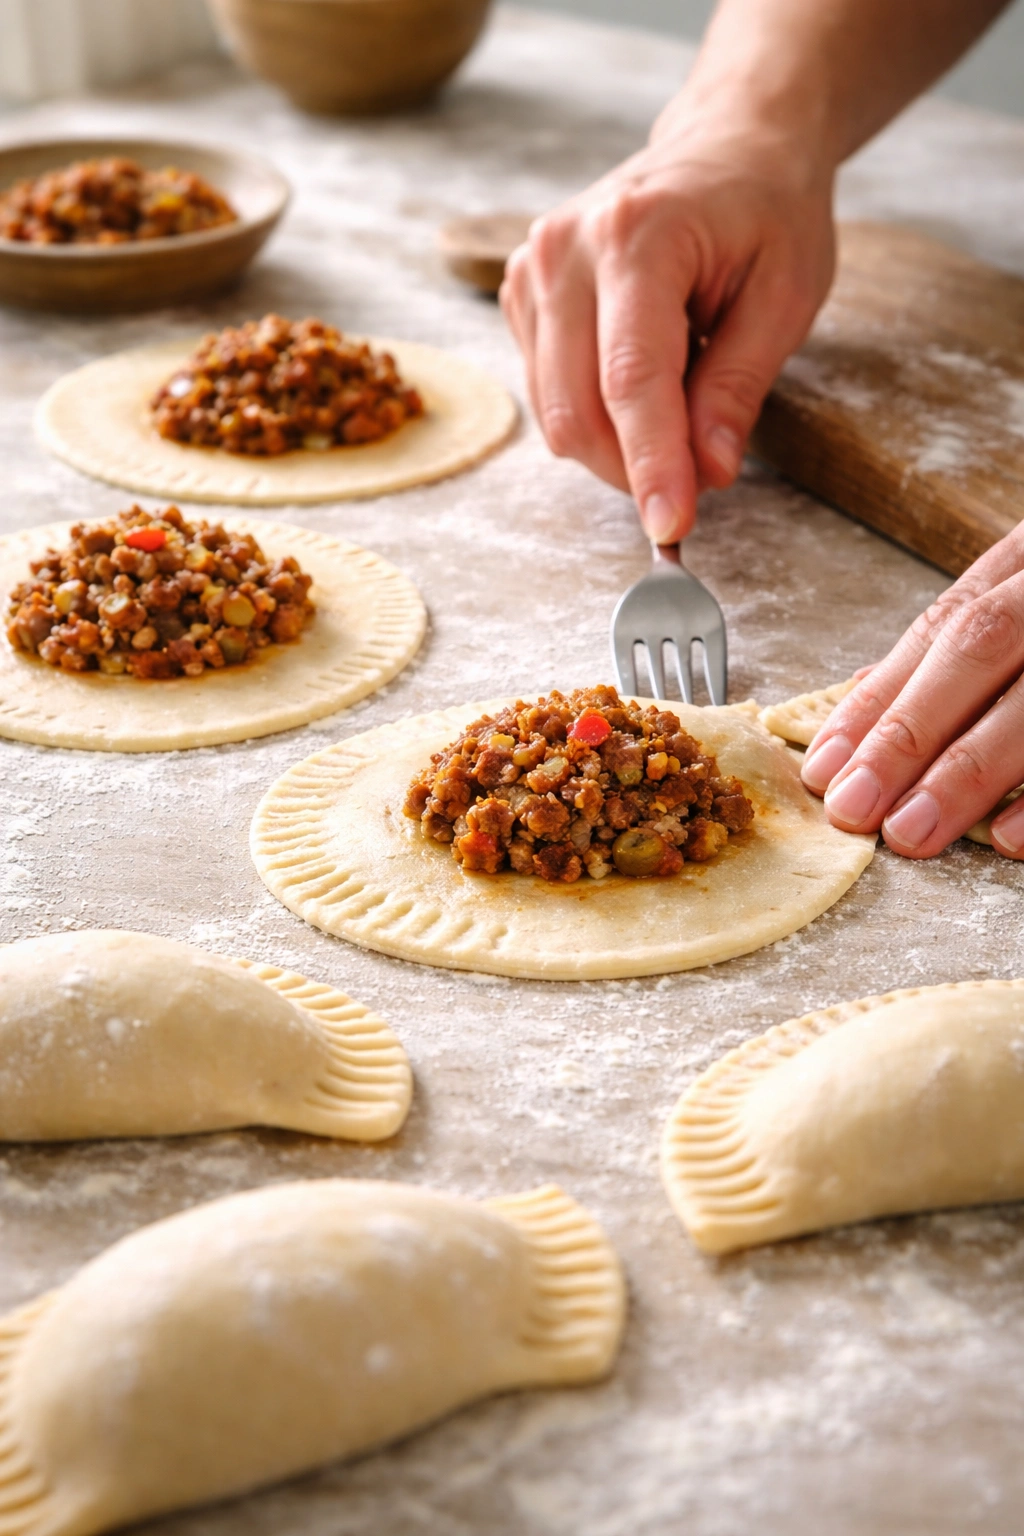
Place about 1½ to 2 tablespoons of filling in the center of each dough circle, leaving a ½-inch border of empty dough all the way around.
-
Using a pastry brush, lightly brush that ½-inch border with the egg wash. This acts as the sealant.
-
Carefully fold the dough circle in half to create a half-moon shape, pressing the edges firmly to seal. The seal should feel solid and complete.
Advertisements -
Using the back of a fork (or your fingers if you prefer), crimp along the sealed edge, pressing firmly to create an airtight seal. Run your finger along the seal one more time—if you feel any soft spots or gaps, press the fork down again to firm it up.
-
Transfer each sealed empanada to the prepared baking sheet, arranging them in a single layer without touching. Repeat this process with all remaining dough and filling.
Baking the Empanadas
Finish and Bake:
-
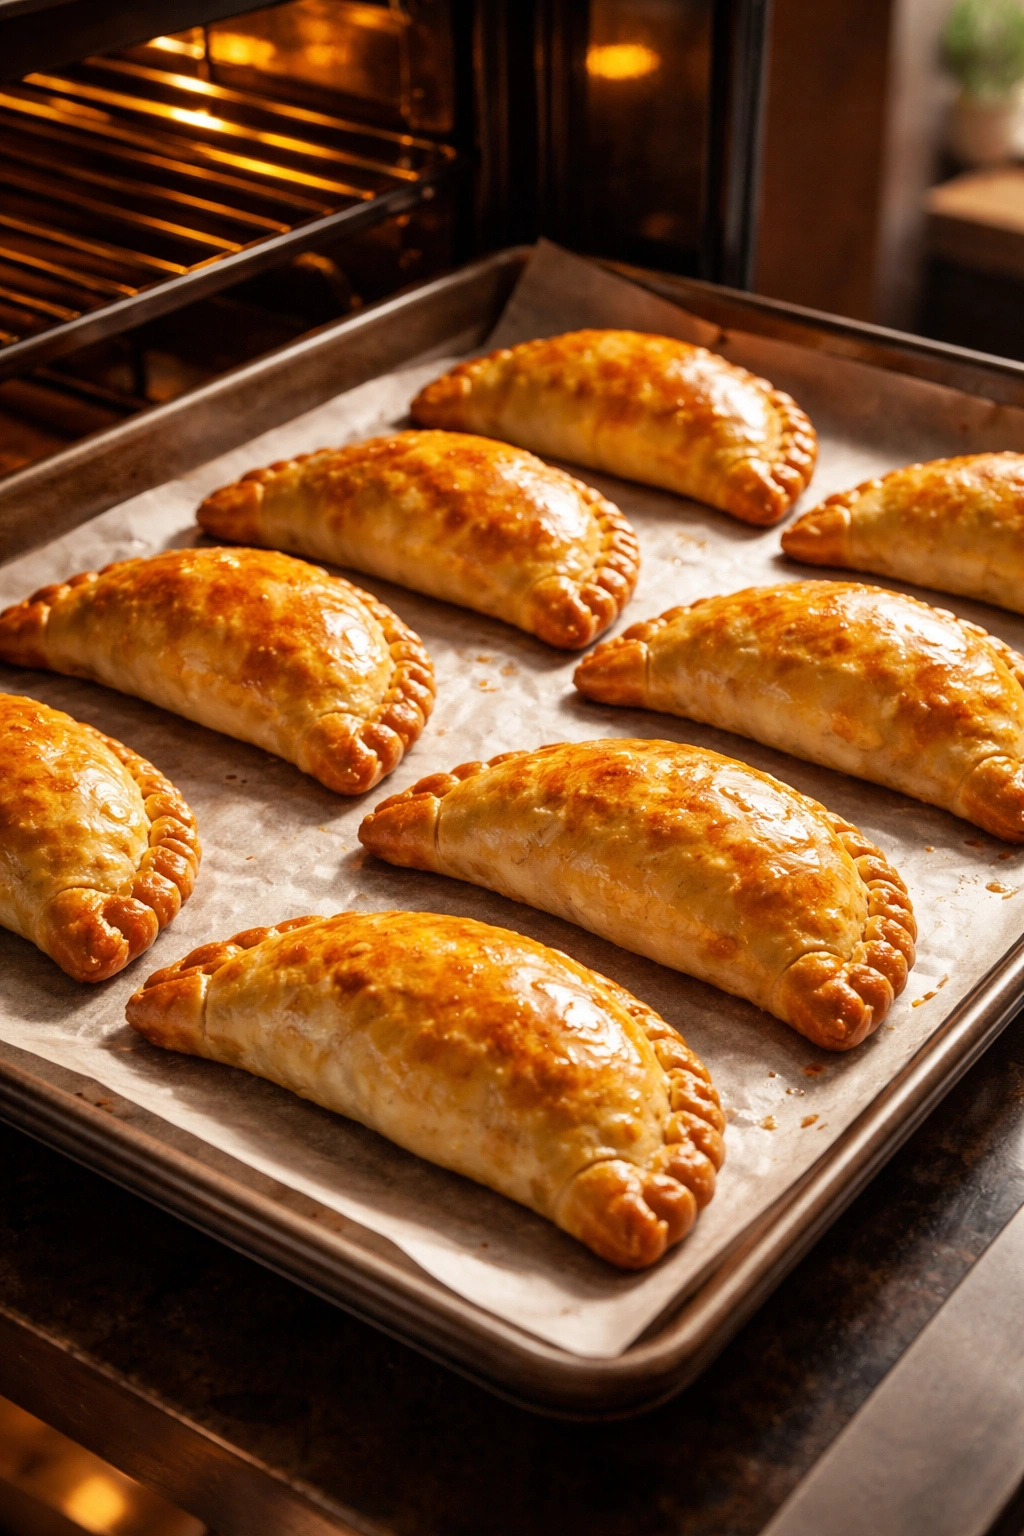
Brush the top of each empanada lightly with the remaining egg wash using a pastry brush. This creates that beautiful golden-brown color.
-
Bake at 375°F for 30-35 minutes, until the tops are deep golden brown. If you notice the tops browning faster than the bottoms, rotate the pan halfway through baking for even color.
-
The empanadas are done when the crust feels crispy when you tap it gently and the color is noticeably deep golden, not pale or light.
-
Remove from the oven and let cool for at least 5-10 minutes before serving. This resting period allows the filling to set and prevents burned mouths from biting into dangerously hot filling.
Tips for Success
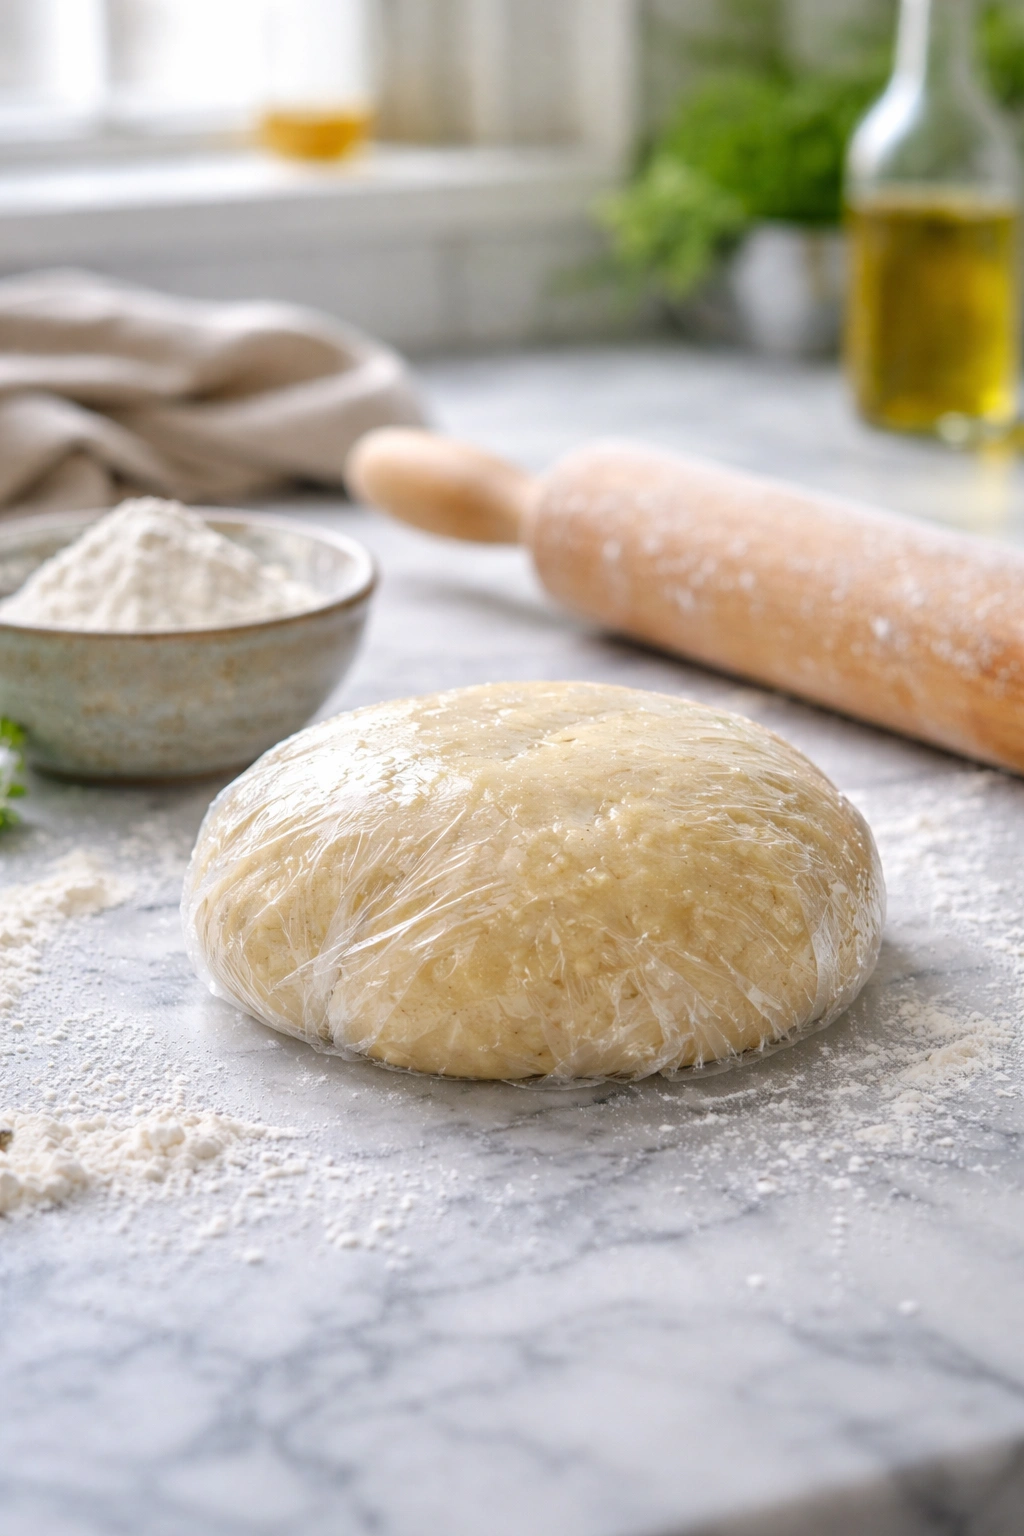
About the Dough: The dough will feel surprisingly greasy and wet immediately after mixing—this is completely normal and will change dramatically after chilling. Don’t add extra flour, or you’ll end up with a tough, dense crust.
About the Filling: Make absolutely certain the filling is cooled to room temperature before filling the empanadas. Even slightly warm filling will soften the dough and make sealing difficult.
About Assembly: Assembly goes faster with practice, but even on your first attempt, take your time. Rushing through this step leads to mistakes. Put on a podcast or music and enjoy the process. Involve family members or friends—it’s genuinely fun as a collaborative activity.
About Overfilling: I cannot stress this enough: resist the temptation to overfill. The 1½-2 tablespoon amount seems conservative, but it’s genuinely the sweet spot. More filling than this causes sealing problems and bursting during baking.
About the Egg Wash: A light, even egg wash creates beautiful color and shine. Don’t soak the empanadas in it—just a thin brush is enough.
Final Thoughts
Homemade beef empanadas genuinely deliver restaurant-quality results for modest effort. The technique is straightforward, the ingredients are simple, and the payoff is a crust that’s flaky and tender in ways that store-bought versions simply cannot match.
The first batch you make will take a bit longer as you get comfortable with the assembly process, but by the second or third batch, you’ll find a rhythm. Make a double or triple batch while you’re at it—freezing unbaked empanadas gives you a reservoir of impressive appetizers or quick dinners that you can bake whenever needed.
Whether you’re serving these for a casual family dinner, an elegant appetizer spread, or a crowd-feeding game day feast, homemade beef empanadas earn their place on your regular rotation. Once you taste one fresh from the oven, warm and fragrant and impossibly flaky, you’ll understand why people across Latin America and Spain have been making these for centuries. They’re worth the effort, every single time.