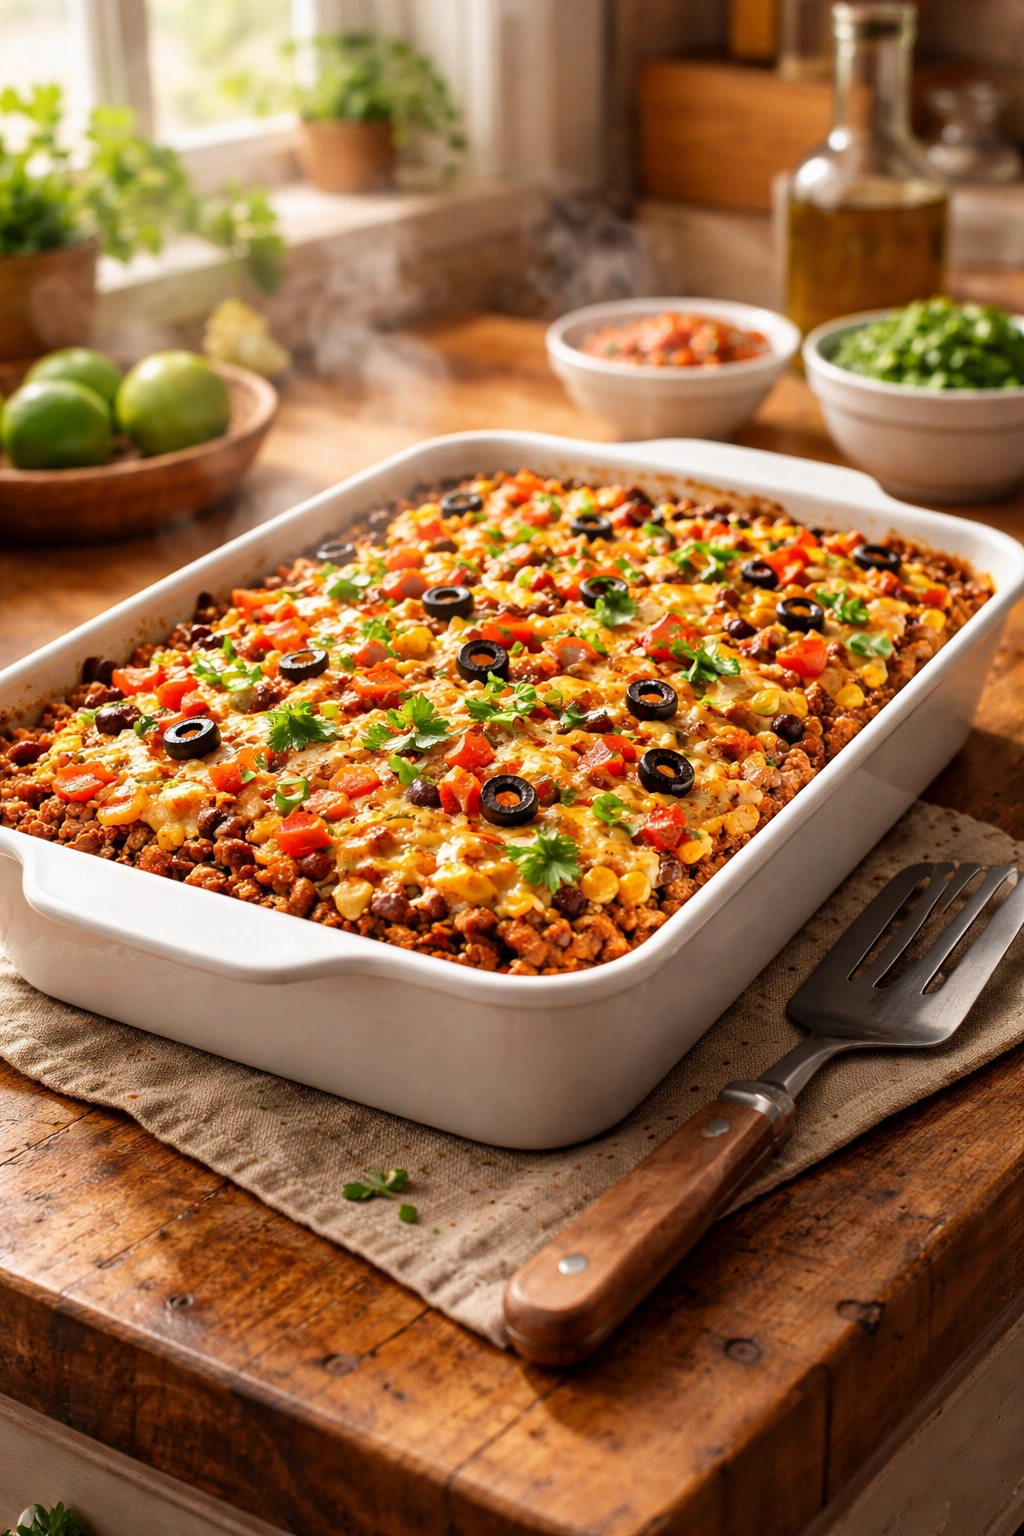
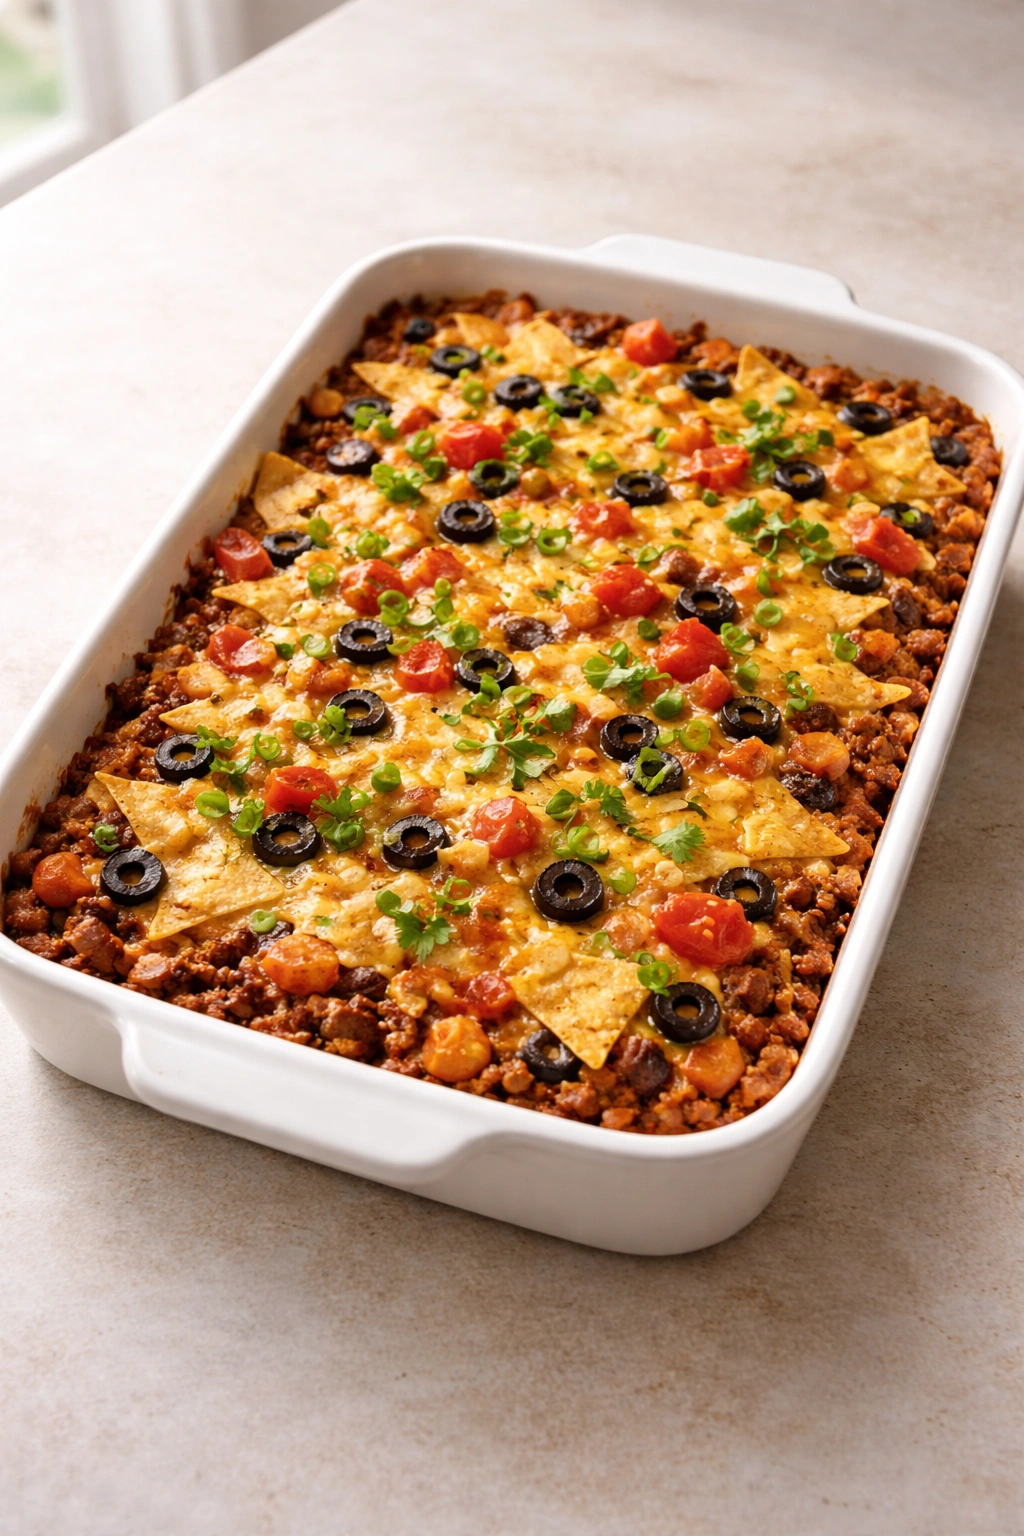
Easy Taco Casserole for Busy Weeknight Dinners
There’s a moment every weeknight when the question hits: “What’s for dinner?” It’s 5 p.m., you’ve got hungry people at home, and the last thing you want to do is stand at the stove chopping vegetables, warming tortillas one by one, and assembling individual tacos while everything gets cold. What if I told you there’s a solution that delivers all the taco flavors your family loves, but comes together in roughly the time it takes to preheat the oven? Welcome to taco casserole — the one-dish answer that somehow tastes even better than traditional tacos while being infinitely easier to pull together.
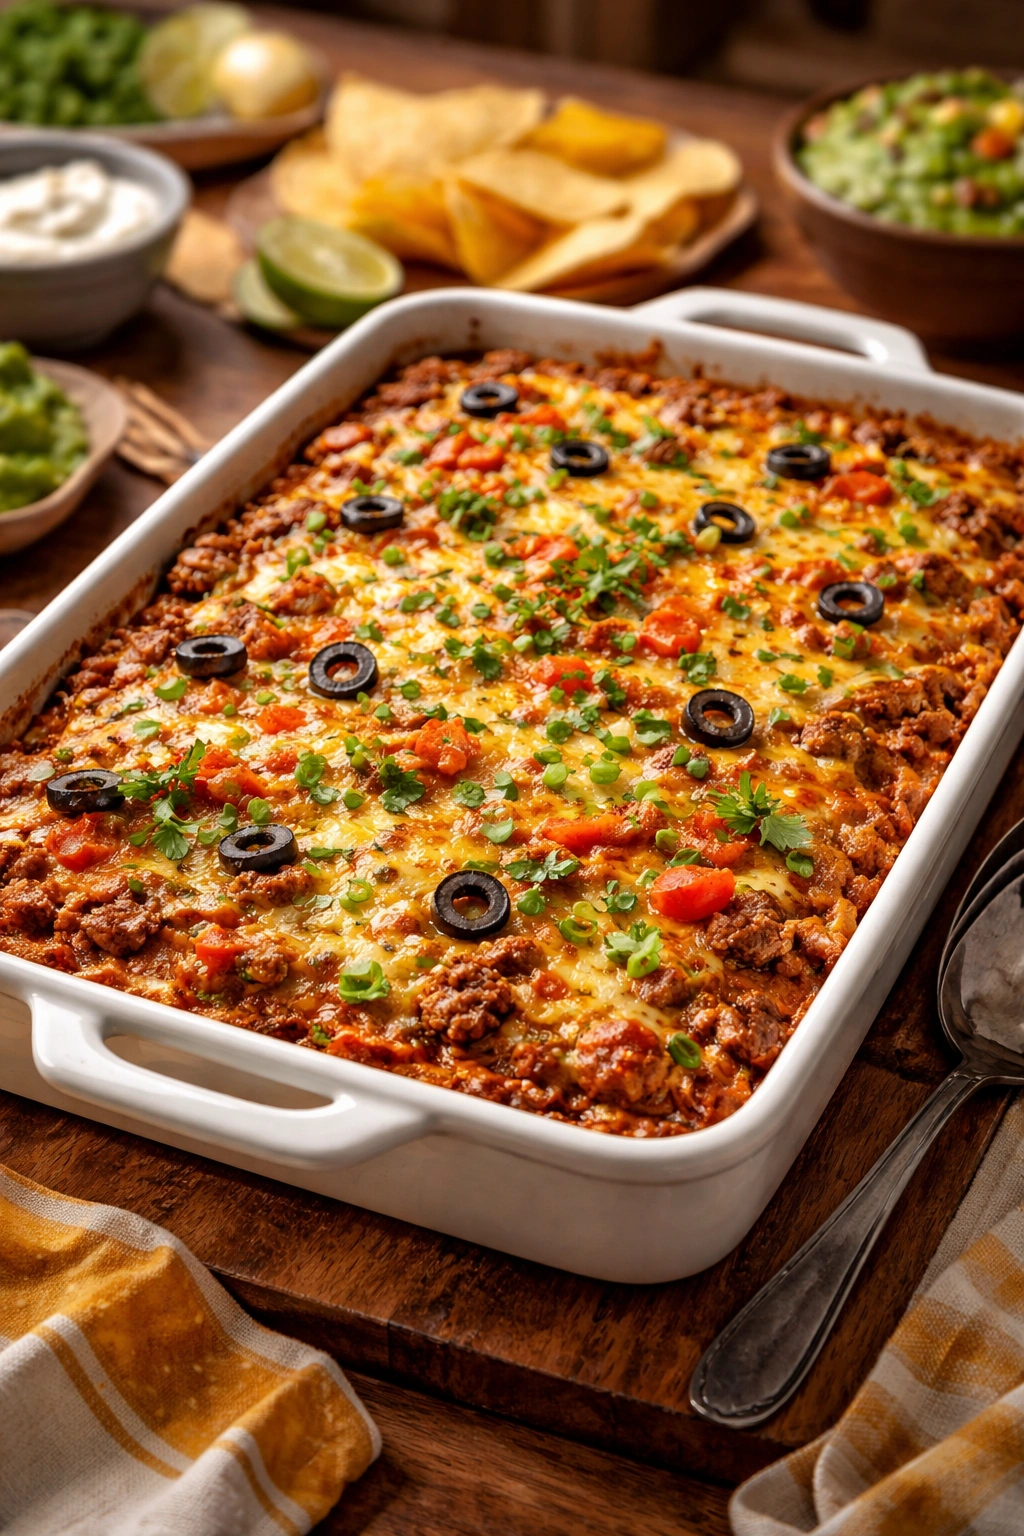
This isn’t some newfangled casserole trend; taco casserole is genuinely beloved by families who value both taste and sanity on those chaotic nights. You get seasoned ground beef, melting cheese, all the spice and flavor you expect from a taco, plus a satisfying texture that comes from layering everything together. The magic happens when it all melds in the oven, creating something that’s greater than the sum of its parts. Unlike serving individual tacos where everyone’s at different stages of eating, a casserole comes straight from the oven hot and ready, and everyone serves themselves exactly what they want.
The best part? This dish adapts beautifully to what you have on hand. Ground turkey instead of beef? Works perfectly. Prefer black beans over pinto? Go for it. Want to add bell peppers or onions for extra texture? Absolutely — they practically cook into the dish. This flexibility makes taco casserole a weeknight staple that actually feels like you’re making something personalized, not just throwing together random ingredients. It’s comfort food that respects your time and your budget.
Why Taco Casserole Beats the Weeknight Dinner Stress
Let’s talk logistics. A traditional taco dinner requires warming tortillas, browning meat, keeping everyone’s toppings at the right temperature, and basically being a short-order cook for 20 minutes while people sit down hungry. With taco casserole, you’ve got one pan cooking time, one baking time, and then you plate it once. Everyone builds their own plate of hot casserole with their favorite toppings — sour cream, avocado, cilantro, whatever speaks to them. The difference in stress between these two approaches is genuinely noticeable, especially on nights when you’re juggling work, kids’ activities, or just the normal exhaustion of Tuesday.
Beyond the time factor, a casserole is inherently more forgiving. If you’re running 15 minutes late, it can sit in a warm oven. If someone shows up to dinner hungry enough to eat twice their usual portion, there’s casserole everywhere — not a pile of empty taco shells. It’s also the kind of dish that makes great leftovers. Reheat it in the oven, and it tastes nearly as good as the first night. Pop a portion in the microwave, and you’ve got a solid lunch the next day. That’s the kind of practical advantage that makes a recipe truly valuable in the context of busy family life.
The Architecture of a Perfect Taco Casserole
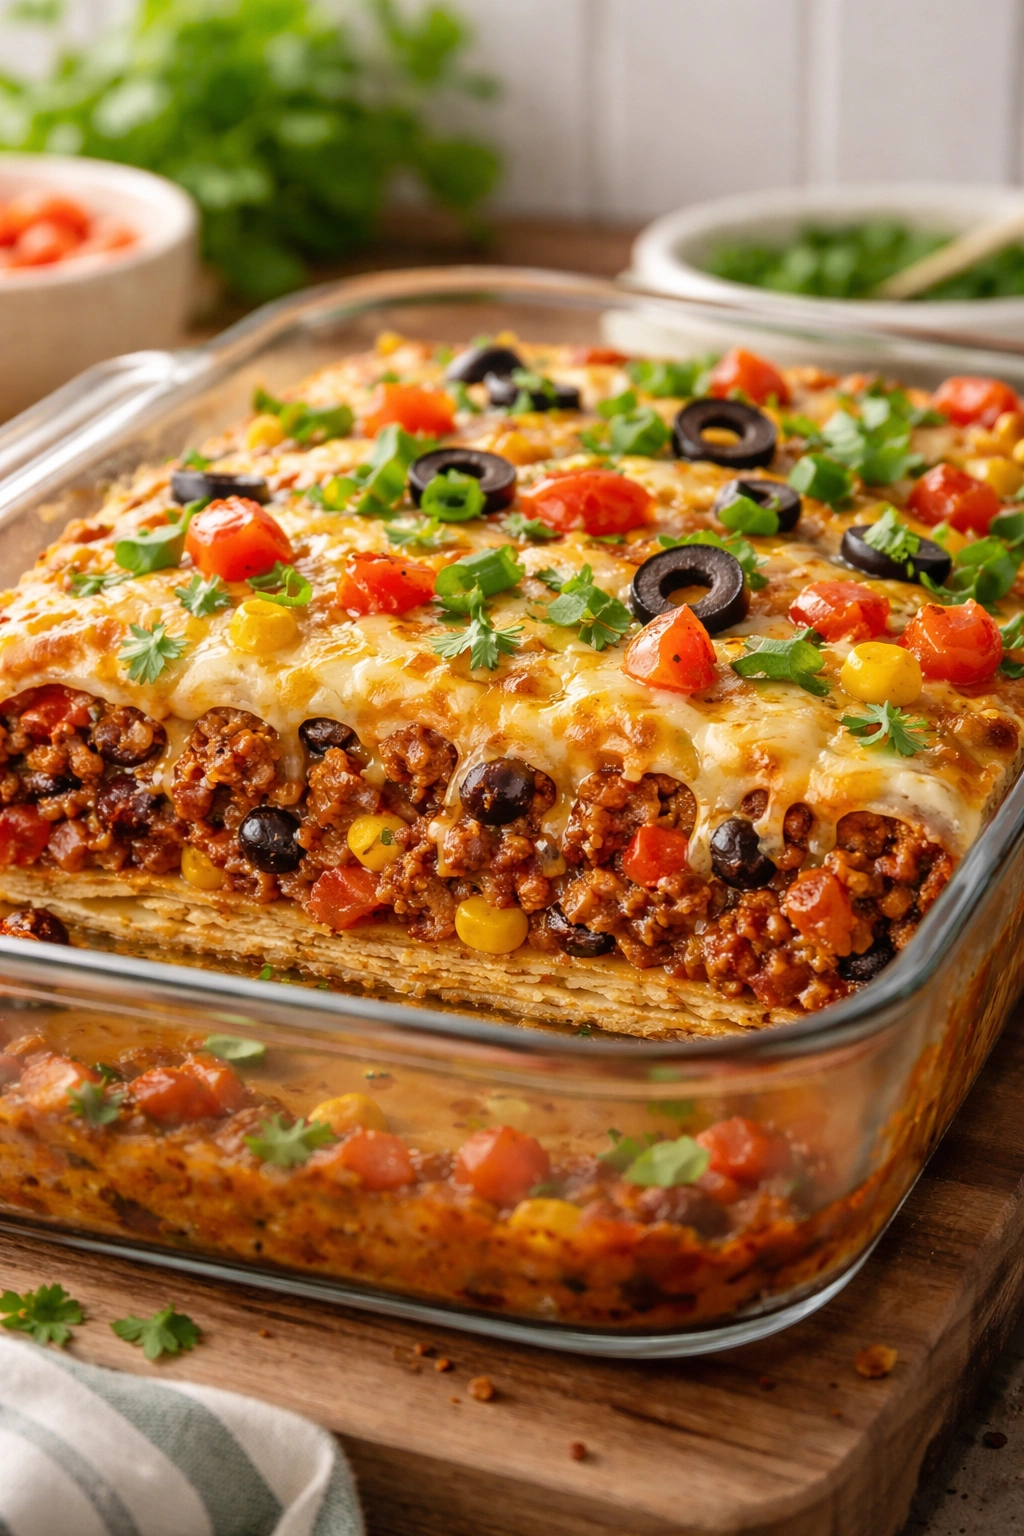
Understanding how a taco casserole works makes it easier to execute confidently. At its core, you’re building layers: a base that provides structure, a flavorful meat mixture that carries all the taco seasoning and richness, cheese that binds everything and adds creaminess, and then toppings that add brightness and contrast. The genius of a casserole is that every forkful captures multiple components at once — you’re not biting into just meat or just cheese, but a complete bite that tastes balanced and satisfying.
The base layer is flexible — you can use corn tortillas, crushed tortilla chips like Fritos or Doritos, or a combination. Tortillas provide a softer, more substantial base that holds up to baking and actually absorbs some of the flavors from the mixture above, creating little pockets of texture. Crushed tortilla chips add crunch and a salty punch that stays crispy even after baking. Some people split the difference by using tortillas on the bottom and chips mixed throughout or on top for textural contrast. There’s no wrong choice here — just different preferences.
The meat mixture is where the actual cooking happens. You’re browning ground beef with onions and seasonings, then stirring in beans, corn, salsa, and sometimes fire-roasted tomatoes or additional spices. This mixture becomes deeply flavorful as the spices bloom and all the components soften and meld. The cheese helps hold everything together while also adding fat and richness that keeps each bite tender instead of dry. Fresh toppings added after baking — tomatoes, cilantro, avocado, sour cream — wake everything up with brightness and contrast that makes the whole dish sing.
How to Build Flavor in Your Taco Casserole Filling
The filling is the soul of this dish, so it’s worth understanding how to build genuine, layered flavor instead of relying entirely on a packet of taco seasoning. That said, there’s absolutely nothing wrong with using a seasoning packet as your foundation — the convenience is real, and the results are delicious. But if you want to take it a step further, you’re really just combining a handful of pantry spices in proportions that complement each other.
Chili powder is the backbone, providing warmth and a subtle smoke. Ground cumin adds earthiness and a distinctive flavor you recognize instantly from any taco restaurant. Garlic powder (or fresh minced garlic, if you want to go that route) brings savory depth. A pinch of oregano adds an herbal note that makes the whole thing taste a bit more complex than people expect. Salt ties everything together and lets the other flavors shine. Some people add a whisper of cayenne for heat, though most families find that salsa provides enough warmth without it.
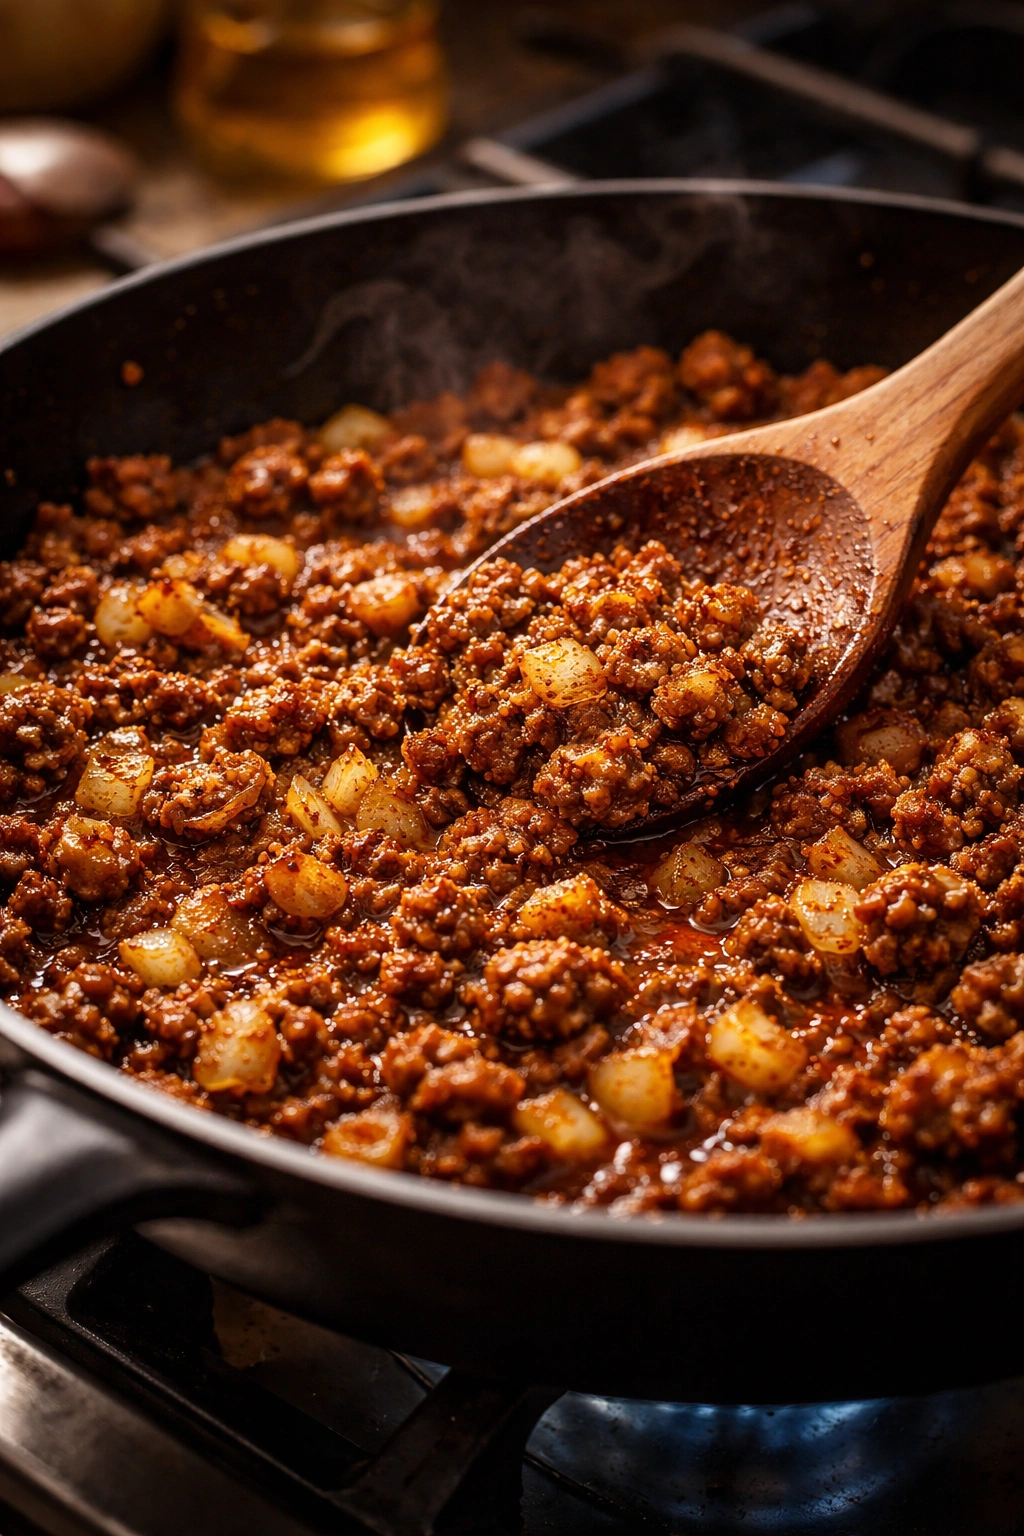
The secret to maximum flavor is actually cooking your onions and spices together before adding the meat — this blooms the spices and makes them taste less powdery and more integrated. Then when you add the beef and break it up, it cooks with those bloomed spices clinging to it. When you finally stir in salsa and beans, those flavors have time to get to know each other as everything simmers together. This whole process takes maybe 15 minutes total and tastes noticeably more complex than if you just dumped everything in at once.
Choosing Your Cheese Strategy
Cheese matters more than you might think in a casserole because it’s doing multiple jobs — it’s adding flavor, binding ingredients together, creating that appealing melted layer on top, and contributing richness that makes everything taste indulgent without being heavy. Shredded cheddar cheese is classic and reliable, with enough fat to melt smoothly and a flavor that complements taco spices perfectly. A Mexican cheese blend (usually a combination of cheddar, Oaxaca, and sometimes other cheeses) adds complexity and melts beautifully. Pepper jack adds a subtle heat that’s welcome if your family likes some spice.
The quantity of cheese might sound like a lot when you see 2 to 3 cups in a recipe, but remember that’s spread across the entire casserole and you’re feeding 6 to 8 people. You’re not eating it with a spoon. That amount creates a nice layer that’s cheesy and binding without being overwhelming. Some casseroles use half the cheese mixed into the meat mixture and then top the whole thing with the remaining cheese so you get a golden, melted top layer that’s absolutely gorgeous. Others layer it throughout in a lasagna-style approach. Either way works beautifully.
One pro tip from experienced cooks: shred your cheese from a block rather than using pre-shredded cheese if you have the time. Pre-shredded cheese has anti-caking agents that can sometimes make the texture slightly grainy or prevent it from melting as smoothly. A block of cheese and a box grater takes about 90 seconds, and the difference in texture is actually noticeable, especially if you’re making this regularly.
Serving and Timing Information Block
Yield: Serves 6 to 8 | Makes one 9×13-inch casserole
Prep Time: 15 minutes (hands-on active preparation — chopping if you’re adding vegetables, browning meat)
Cook Time: 20 to 25 minutes (baking until the casserole is hot and cheese is melted)
Total Time: 35 to 40 minutes active time from start to eating
Difficulty: Beginner-friendly — no special cooking techniques required, minimal knife work if you use pre-diced onions and skip additional vegetables, and the steps are straightforward even if you’ve never made a casserole before.
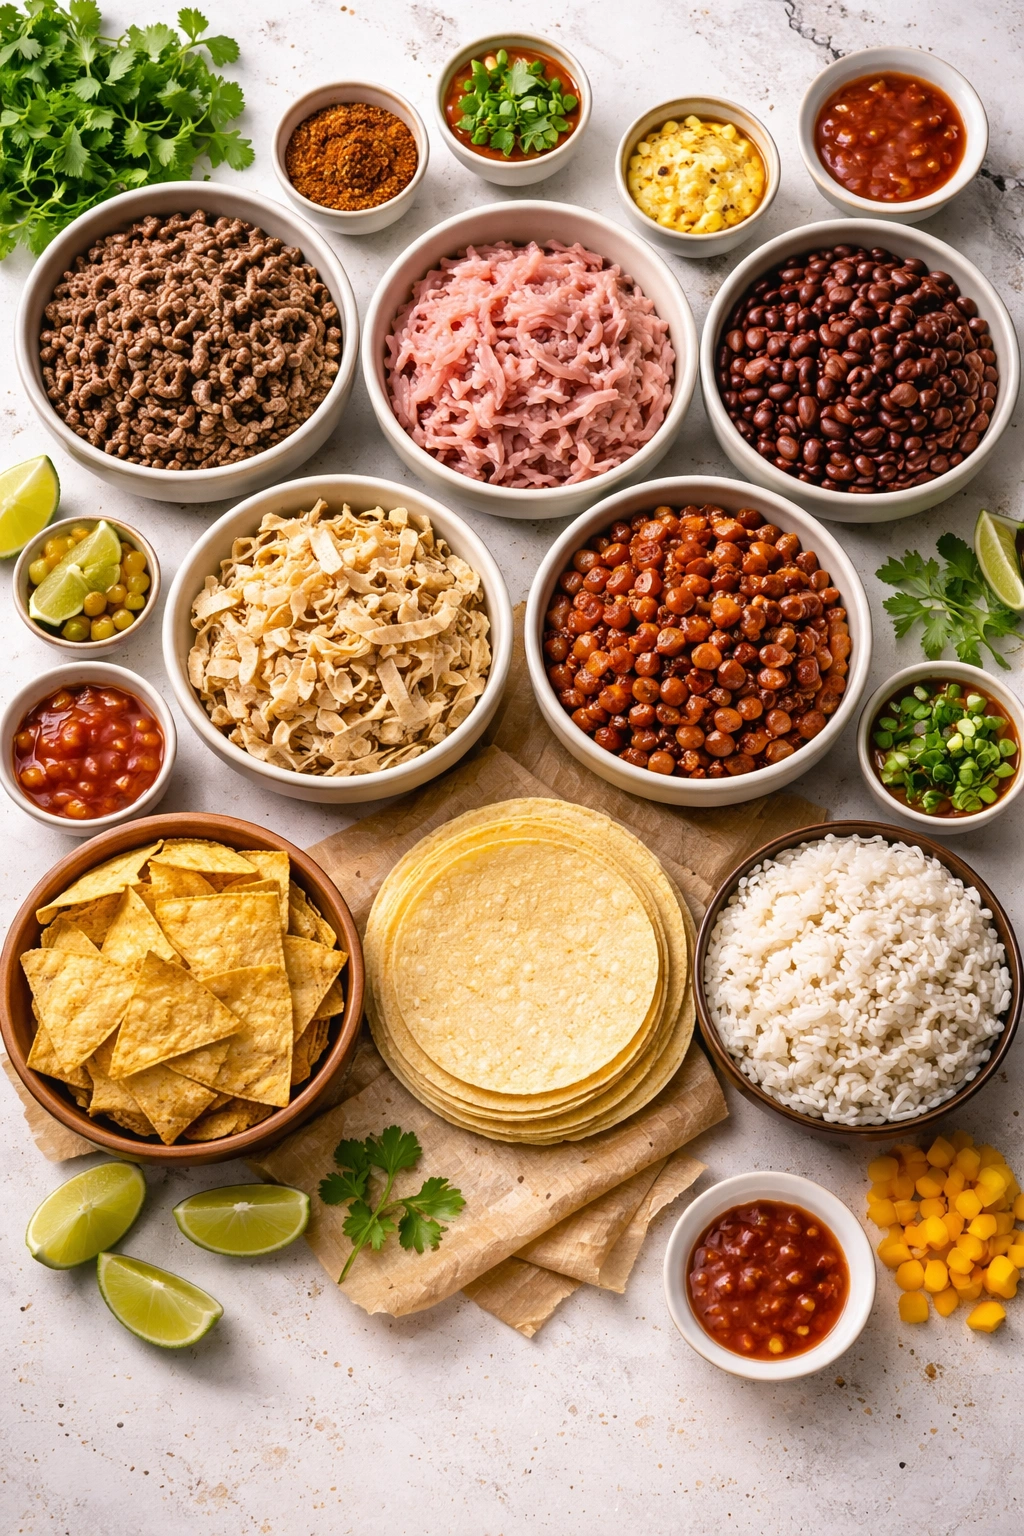
Recipe Ingredients

For the Beef Mixture:
- 1 tablespoon olive oil or cooking oil of your choice
- 1 pound lean ground beef (90/10 is ideal, but use what you have)
- 1 medium yellow onion, diced (about 1 cup), or ½ cup pre-diced onion from the grocery store
- 1 tablespoon chili powder
- 1 teaspoon ground cumin
- ½ teaspoon garlic powder (or 1 clove fresh garlic, minced)
- ¼ teaspoon salt, plus more to taste
- ⅛ teaspoon black pepper
- 1 can (15 ounces) black beans, drained and rinsed (or white beans, pinto beans, or refried beans — your choice)
- 1 cup corn, fresh, frozen, or canned and drained
- 1 jar (15.5 ounces) salsa, mild or medium (use medium if you want more flavor — mild can taste watery by comparison)
- ½ cup of the salsa reserved for the baking dish bottom
- 1 cup of shredded cheese (divided — see below)
For Assembling the Casserole:
- 3 cups tortilla chips (crushed Fritos, Doritos, or any sturdy tortilla chip you prefer) OR 8 to 10 corn tortillas, torn or cut into pieces (or a combination of both)
- 2 to 3 cups shredded cheese (Mexican blend, sharp cheddar, pepper jack, or your favorite melting cheese — divided use so you have some for layers and some for topping)
For Serving (Optional Toppings):
- Fresh diced tomatoes or halved cherry tomatoes
- Chopped fresh cilantro
- Thinly sliced green onions or scallions
- Sliced or diced avocado
- Sour cream or Greek yogurt
- Sliced black olives
- Shredded iceberg or romaine lettuce
- Hot sauce, jalapeño slices, or your favorite heat source
- Extra salsa
Step-by-Step Recipe Instructions
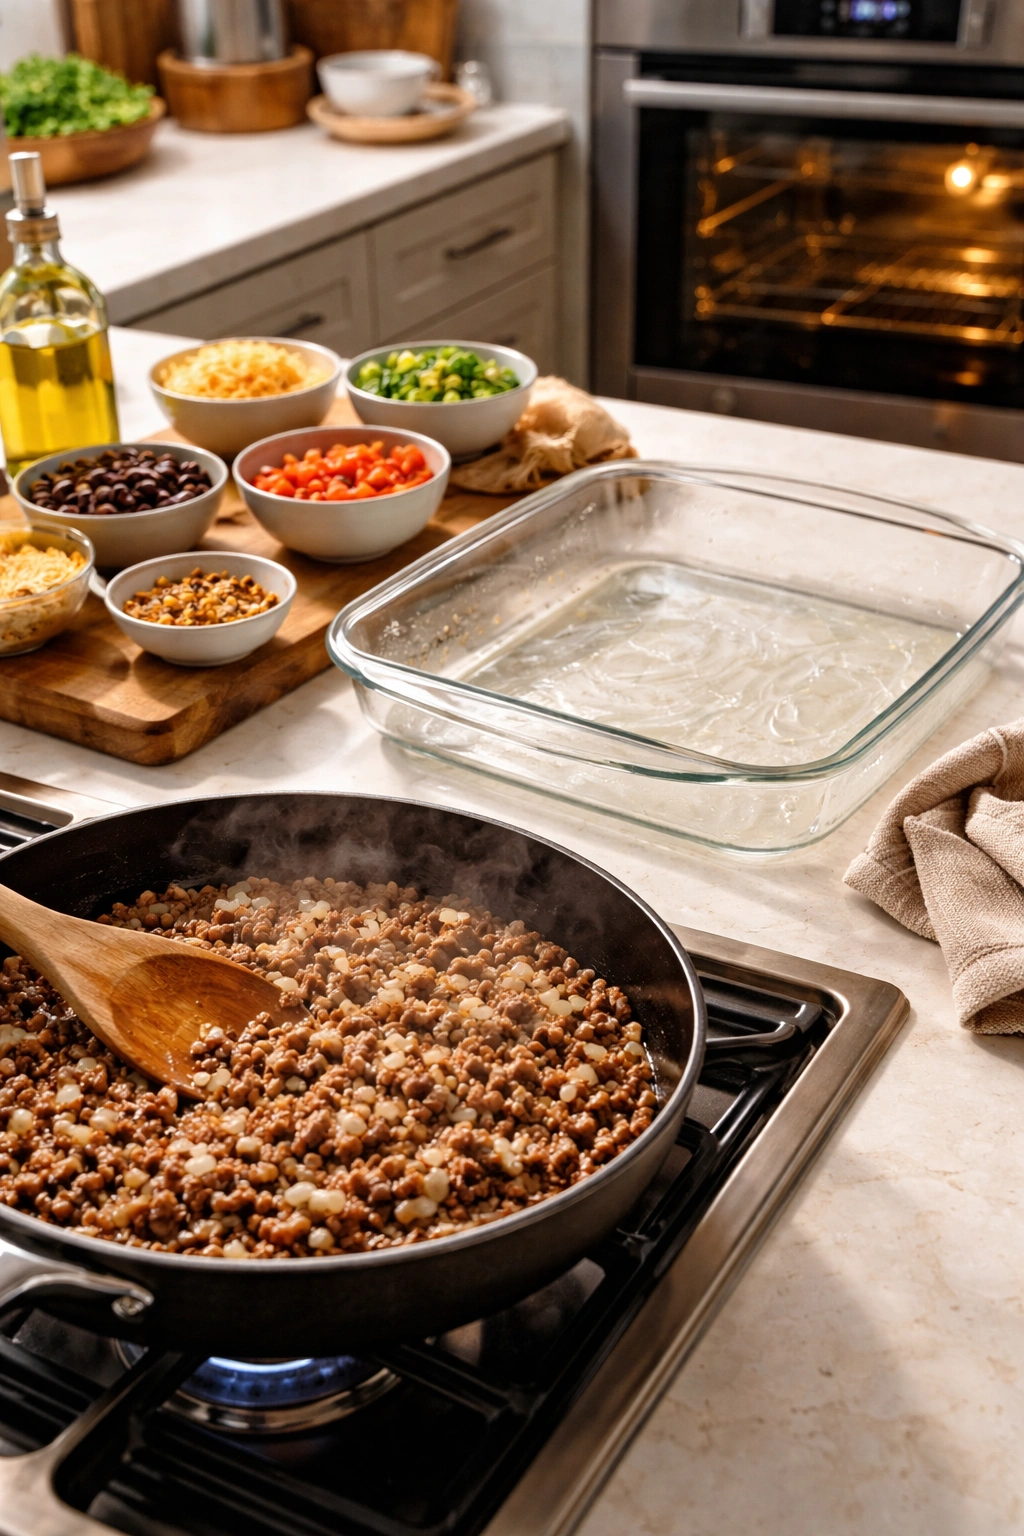
Prepare Your Equipment and Preheat:
-
Preheat your oven to 350°F (175°C) and position the rack to the middle of the oven so the casserole bakes evenly.
-
Lightly grease a 9×13-inch baking dish (metal or glass both work fine) with a little butter, oil, or cooking spray so the casserole doesn’t stick to the bottom.
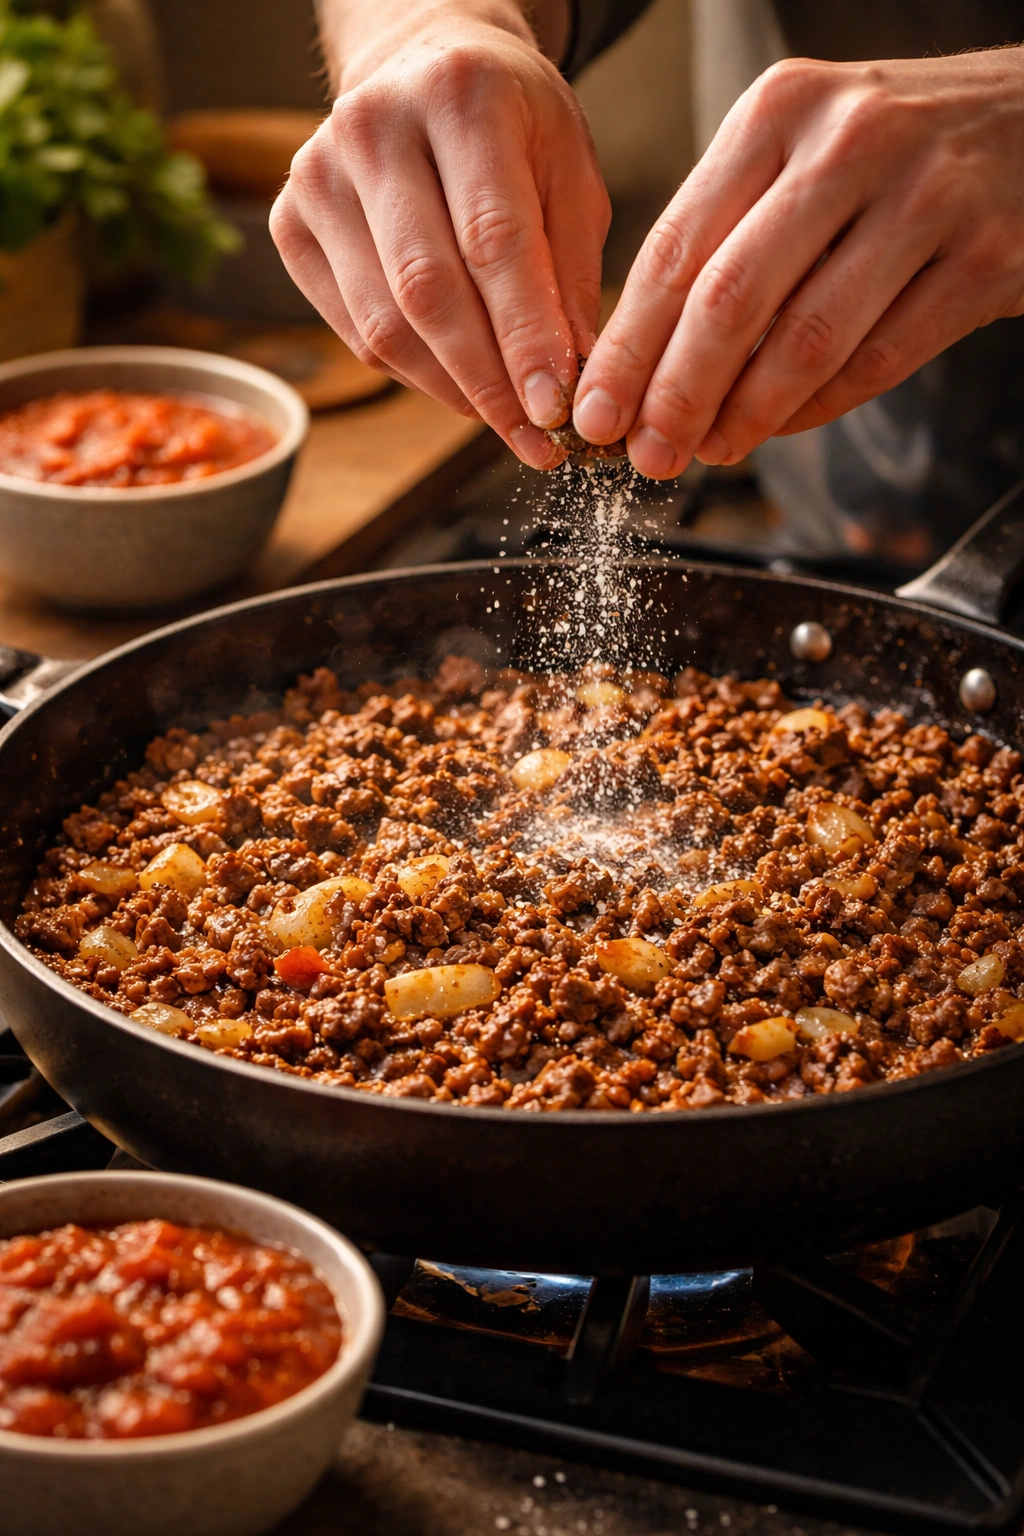
Brown the Beef and Build Flavor:
-
Place a large skillet over medium-high heat and add the olive oil. Once the oil is hot but not smoking, add the diced onion and cook, stirring occasionally, for about 2 to 3 minutes until the onion softens and becomes fragrant — you’re looking for the edges to turn slightly translucent and maybe a tiny bit golden.
-
Add the ground beef to the skillet with the onion. Using a spoon or meat chopper, break the beef into small, bite-sized pieces as it cooks. Don’t let it clump together — you want it in fine crumbles so it distributes throughout the casserole. Cook for 5 to 7 minutes, stirring occasionally, until the beef is no longer pink and is completely browned.
-
If your beef released a significant amount of grease (this depends on the fat content — 90/10 leans don’t release as much), spoon most of it off the surface and discard it. You want a little fat left for flavor, but not a puddle.
-
Reduce the heat to medium and sprinkle the chili powder, cumin, garlic powder, salt, and black pepper over the beef and onion. Stir everything together so the spices coat the meat. Let it cook undisturbed for about 1 minute — this allows the spices to bloom and deepen in flavor. You should smell something amazing at this point.
Advertisements
Build the Complete Mixture:
-
Add the drained beans, corn, and 1 jar of salsa (you reserved ½ cup for the baking dish, so you’re using about 1 cup here) to the skillet. Stir everything together until combined, scraping any browned bits from the bottom of the pan — those are pure flavor.
-
Let this mixture cook on medium heat for 3 to 5 minutes, stirring occasionally, until the salsa simmers slightly, the beans warm through, and the whole thing starts to look cohesive. The mixture should smell intensely savory and spiced and should coat a spoon without looking watery.
-
Stir in 1 cup of your shredded cheese, mixing it in so it melts slightly and distributes throughout. Remove the skillet from heat.
Assemble the Casserole:
-
Spread the reserved ½ cup salsa over the bottom of your prepared 9×13 baking dish. This creates a moisture barrier so your base doesn’t dry out during baking.
-
Distribute 1.5 cups of your tortilla chips (or about half your tortillas) in a relatively even layer over the salsa. Don’t overthink it — just spread them out so they cover most of the bottom. It’s okay if there are small gaps.
-
Spoon half of your beef mixture (roughly half of what’s in the skillet) over the chip or tortilla layer, spreading it into a relatively even layer with a spoon or spatula.
-
Sprinkle half of your remaining cheese (about 1 to 1.5 cups) over the beef layer.
-
Create a second base layer: distribute the remaining 1.5 cups tortilla chips (or remaining tortillas) over the cheese.
Advertisements -
Top with the remaining beef mixture, spreading it so it covers as much of the chip layer as possible.
-
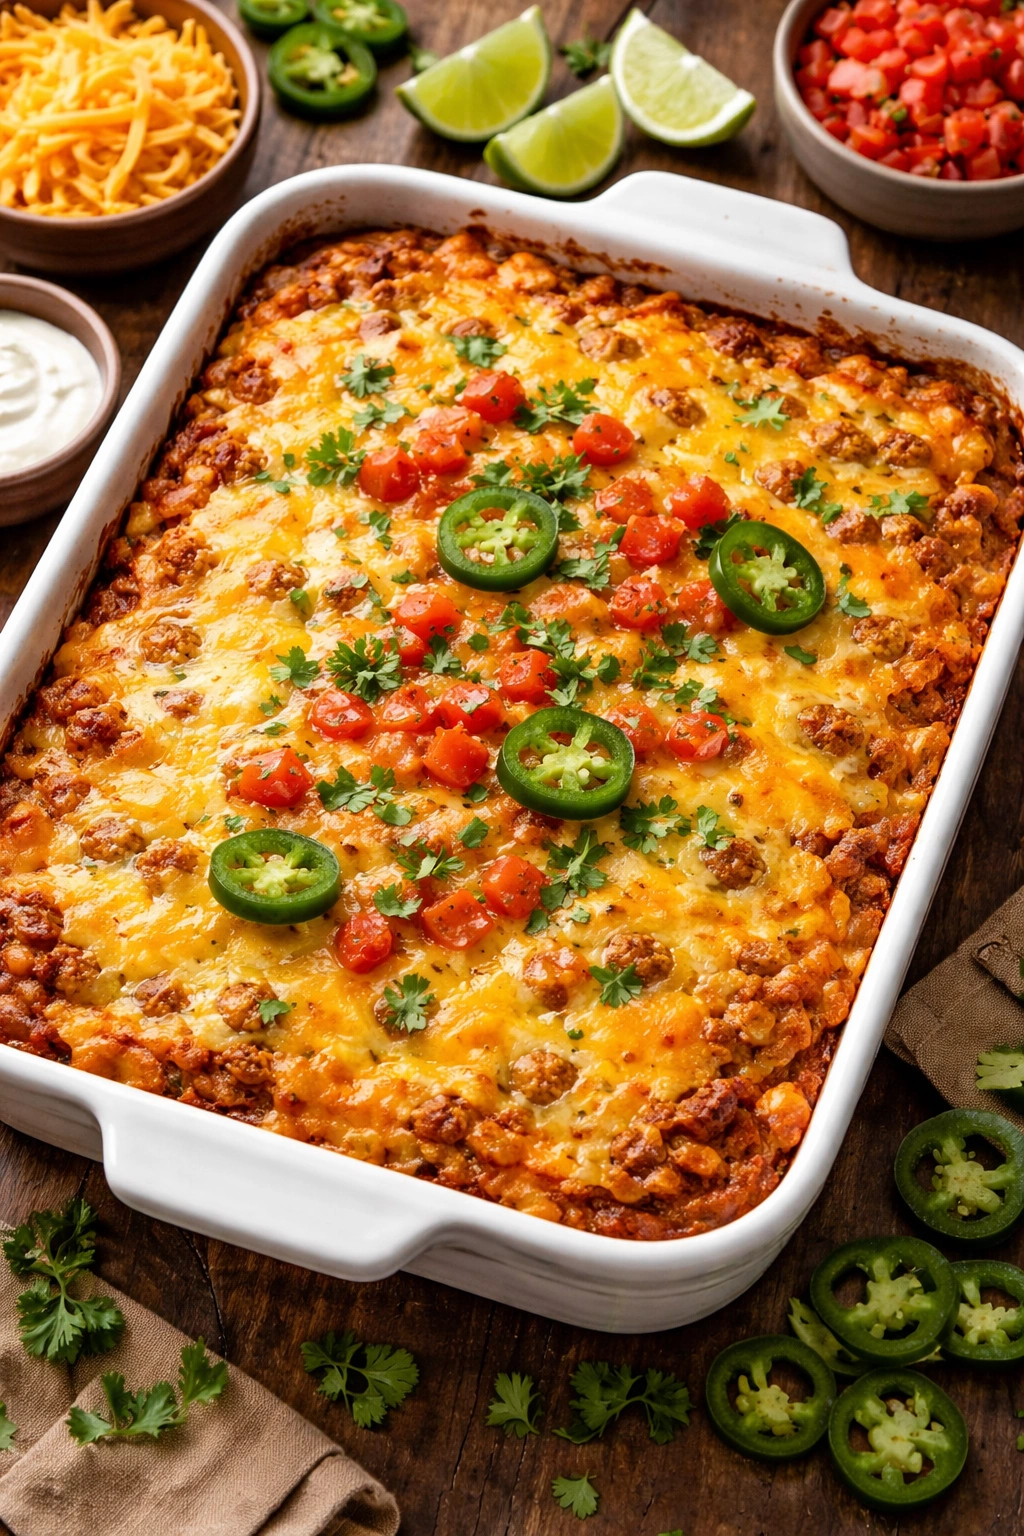
Finally, top with the last of your cheese (another 1 to 1.5 cups) — this will be the golden, melted top that everyone sees.
Bake Until Perfect:
-
Place the baking dish in your preheated 350°F oven and bake uncovered for 20 to 25 minutes. You’re looking for the cheese on top to be melted and bubbly, and the casserole to be hot all the way through. If you insert a fork toward the center, it should come out hot.
-
If your oven runs cool or you prefer extra-melty cheese, you can bake for an additional 5 minutes, but watch it so the cheese doesn’t brown too much — a light golden color is perfect, but dark brown tastes slightly scorched.
-
Remove from the oven and let it rest for 2 to 3 minutes before serving. This allows the cheese to set slightly and makes it easier to scoop without everything sliding around on the plate.
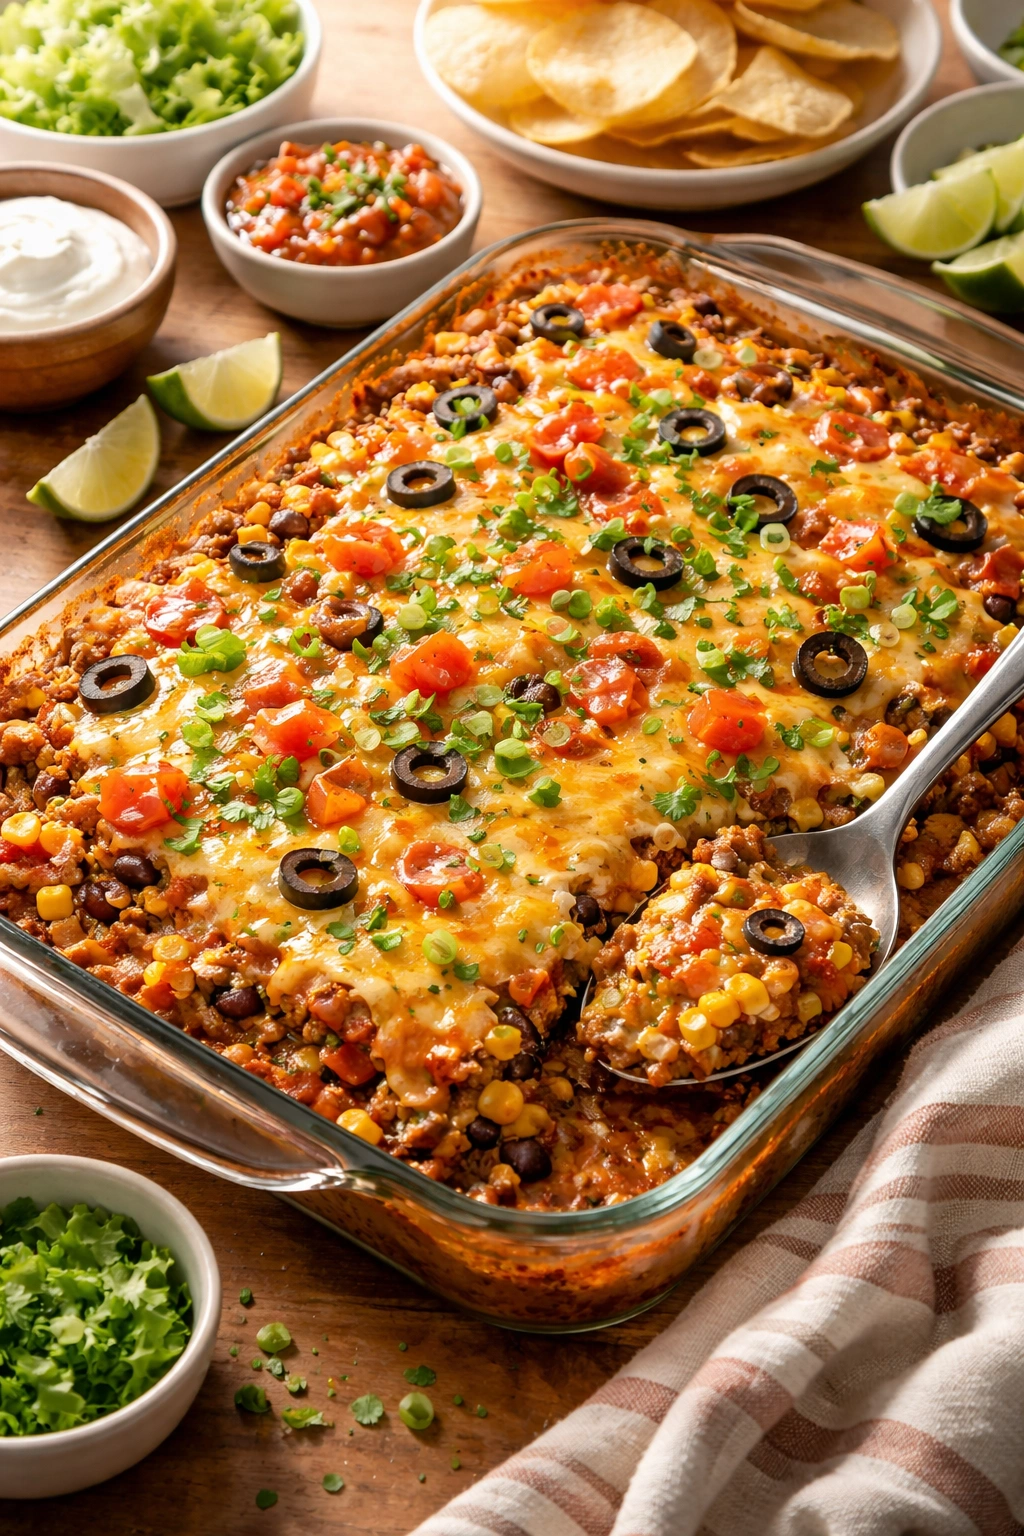
Serve:
- Scoop the casserole into bowls or onto plates and top with your choice of fresh toppings — a dollop of sour cream, fresh cilantro, diced tomato, sliced avocado, whatever your family loves.
Pro Tips That Actually Make a Difference
Salt your salsa, not your beef. Many people assume they need to add extra salt to the meat, but salsa is already salty. Taste the mixture before you finish cooking it and adjust salt only if it needs it. You can always add more salt to individual servings if someone wants it, but you can’t remove it from the whole casserole.
Use medium salsa for flavor, not mild. This is one of those details that seems small but genuinely changes the outcome. Mild salsa can taste watery and one-dimensional. Medium salsa has more tomato body and more spice complexity without being overwhelmingly hot. Unless your family is genuinely sensitive to heat, medium is worth the upgrade.
Don’t skip the simmering step. After you add the salsa and beans, that 3 to 5 minutes of cooking lets everything marry together. It’s not just heating through — it’s actually developing more cohesive flavor.
Brown your onions first, then add beef. This matters because the onion releases moisture that helps prevent the beef from sticking, and the onion develops subtle sweetness that balances the spices. If you throw the beef in first, it tends to seize up and brown too aggressively.
Taste and adjust seasoning in the skillet, not the baking dish. Once everything is layered and in the oven, you can’t adjust flavor. Spend 30 seconds tasting the meat mixture before it goes into the dish and add a pinch more cumin, salt, or chili powder if you think it needs it.
Fresh toppings are non-negotiable. The casserole itself is rich, cheesy, and cooked. Fresh cilantro, bright diced tomatoes, cool sour cream, creamy avocado — these aren’t optional extras. They’re what elevate the whole dish from one-note to complex and craveable.
Common Mistakes That Derail the Dish
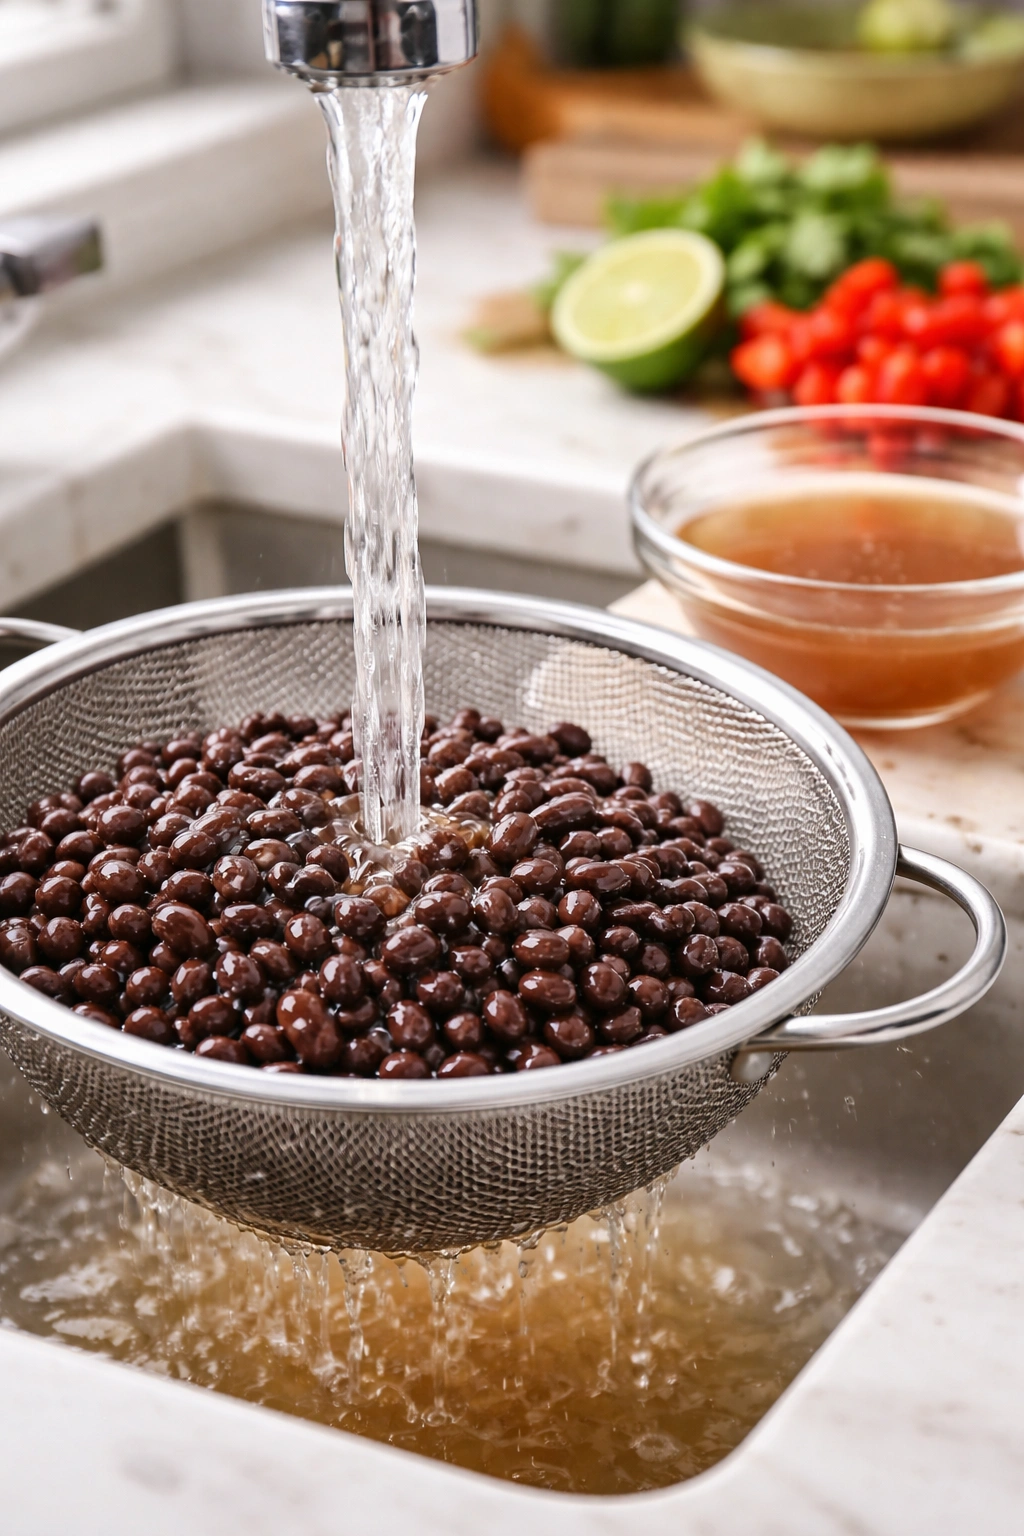
Using unrinsed canned beans. Those beans come packed in thick starch that makes the casserole gluey instead of savory. Drain them, rinse them under cold water for 10 seconds, and drain again. This single step makes a noticeable difference in texture.
Draining away the moisture, then wondering why it’s dry. Some recipes say to drain the salsa jar — don’t do that. Salsa is your moisture. If anything, you might add a splash of water if the mixture looks too thick, but you’re not removing liquid.
Skipping the base layer of salsa in the baking dish. This seems like a tiny thing, but it prevents the bottom chips or tortillas from scorching against the hot ceramic, and it adds flavor from the first bite. Don’t skip it.
Shredding the cheese way ahead of time. If you shred your cheese an hour or more before you need it, those anti-caking agents can start to clump and affect how it melts. Shred it right before you use it, or store shredded cheese in an airtight container in the fridge if you’re doing prep earlier in the day.
Using canned diced tomatoes in the mixture instead of fresh tomato as a topping. The two have completely different purposes. Canned tomatoes in the mixture make it watery; fresh tomato as a topping adds brightness. Don’t confuse the two.
Make-Ahead and Freezer Instructions That Actually Work
This casserole is genuinely freezer-friendly and make-ahead friendly, which is why it’s so valuable for busy families. You’ve got several options depending on how far ahead you want to prep.
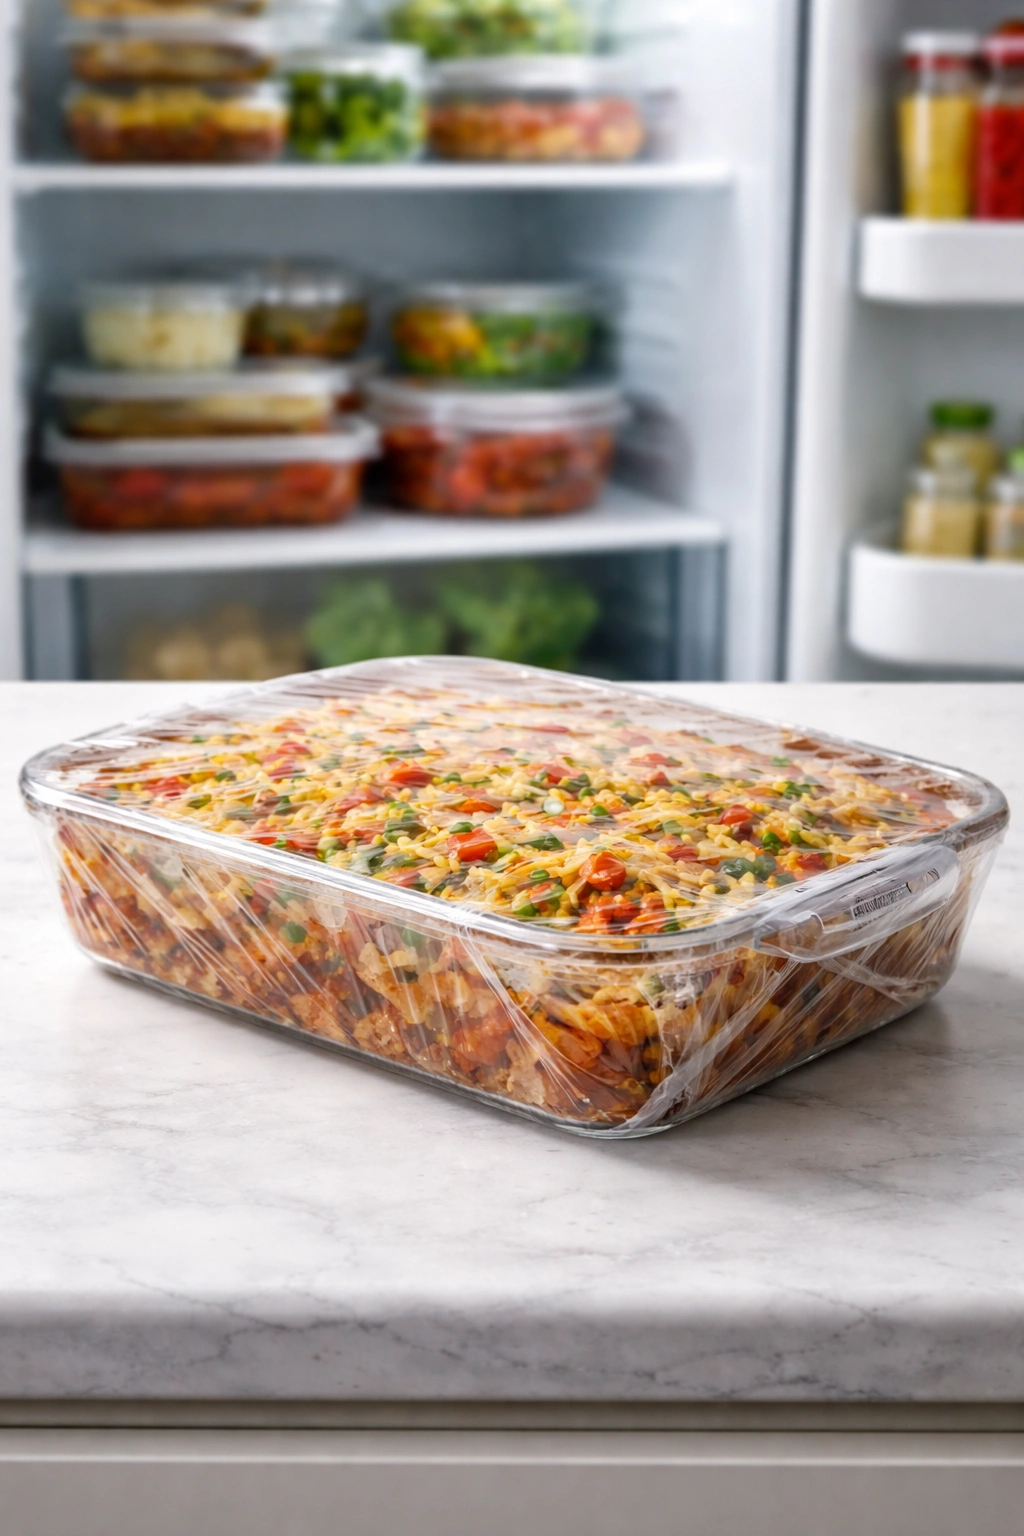
Make-Ahead Option 1: Assemble the night before. Brown the beef, build all your layers in the baking dish, cover it tightly with plastic wrap, and refrigerate overnight. The next evening, just pop it straight from the fridge into a preheated 350°F oven. It’ll take about 30 to 35 minutes instead of 20 to 25 because it’s starting cold, but otherwise everything is identical. This is the easiest version if you want to offload work to the previous night.
Make-Ahead Option 2: Freeze the unbaked casserole. Assemble everything, cover the baking dish with plastic wrap first, then cover with foil (the plastic wrap keeps the plastic taste away from the food), label it with the date, and freeze for up to 3 months. When you’re ready to bake it, thaw it in the refrigerator overnight, then bake as usual. If you forgot to thaw it, you can bake it from frozen, but add about 15 to 20 minutes to the baking time and cover it with foil for the first part of cooking to prevent the cheese from browning before the inside is hot.
Make-Ahead Option 3: Freeze just the beef mixture. Brown the beef, cool it completely, and freeze it in an airtight container for up to 3 months. When you’re ready to make the casserole, thaw it in the fridge, then assemble and bake. This works beautifully if you’re short on refrigerator space but want components ready.
Make-Ahead Option 4: Prep everything and bake same-day. Chop your onion and measure your spices the morning of. Brown the beef right when you get home. Assemble and bake while you change clothes or help kids with homework. The whole thing still comes together in 40 minutes, but some of the work is done earlier in the day.
Pro tip for freezing: Use a disposable aluminum baking dish if you plan to freeze the assembled casserole. This lets you pop it straight from freezer to oven without needing your good baking dish tied up for weeks.
Ingredient Swaps and Substitutions That Work Beautifully
The beauty of this casserole is that it’s genuinely flexible. You’re not working with delicate ratios or chemical reactions — you’re layering compatible flavors. This means you can swap ingredients based on what you have, what’s on sale, or what your family prefers.
Protein options: Ground turkey works perfectly and tastes nearly identical to beef — use the same quantity and cooking method. Ground chicken is leaner and slightly more delicate; use it if you prefer, but it can be drier, so don’t overcook it. Ground chorizo adds intense spice and richness; reduce the quantity to ¾ pound chorizo and ¼ pound regular ground beef so it’s not overwhelming.
Bean options: Black beans are classic for a reason, but pinto beans, kidney beans, white beans, or refried beans all work. If you use refried beans, use them straight from the can without diluting — they’re already thicker and add creaminess.
Base layer options: Crushed tortilla chips are standard, but crushed Doritos add extra seasoning (nacho cheese or cool ranch both work), crushed Fritos are neutral, or corn tortillas create a softer, more substantial base. You can also do half tortillas and half chips for textural contrast.
Cheese options: Cheddar is classic, Mexican blend is reliable, pepper jack adds heat, Oaxaca adds complexity, Monterey Jack works beautifully. You can also mix two cheeses — like half cheddar and half pepper jack.
Salsa options: Mild, medium, or hot depending on your family’s heat tolerance. Red salsa, green salsa, or even a pico de gallo-style fresh salsa all work (though fresh salsa is more watery, so you might drain it slightly). Some people use enchilada sauce instead for a different flavor profile.
Add-in vegetables: If you want to bulk up the casserole with more vegetables, sauté diced bell peppers, diced jalapeños, or finely chopped zucchini with the onion before adding the beef. They’ll cook right into the mixture and add texture without significantly changing the cooking time.
Building the Ultimate Toppings Bar

Here’s where people’s eyes light up: a casserole toppings bar. You set out the hot casserole and an array of fresh, cool, bright toppings, and everyone customizes their own plate. This works beautifully because it lets people eat exactly what they want without creating more dishes or cooking time.
Sour cream is essential — the cool tang balances the rich cheese and spices. Fresh cilantro is non-negotiable if you have access to it; the herbal brightness changes everything. Fresh diced tomatoes provide juiciness and acidity. Sliced avocado or guacamole adds creamy richness and sophisticated flavor. Sliced black olives add briny funk that makes tacos taste like tacos. Shredded lettuce adds crunch and freshness.
The optional but impressive additions: a lime wedge so people can add brightness if they want, pickled onions for sharp tang, crispy tortilla strips for extra crunch, chopped red onion for bite, diced jalapeños for heat, hot sauce for anyone who wants more spice, and pico de gallo if you want to get fancy.
The thing about a toppings bar is that it makes people feel like they’re creating something themselves, which makes them more likely to eat it enthusiastically. Plus, if someone doesn’t like cilantro or doesn’t eat tomatoes, they’ve got control over their own plate instead of you having to make something different.
How to Store and Reheat Leftovers
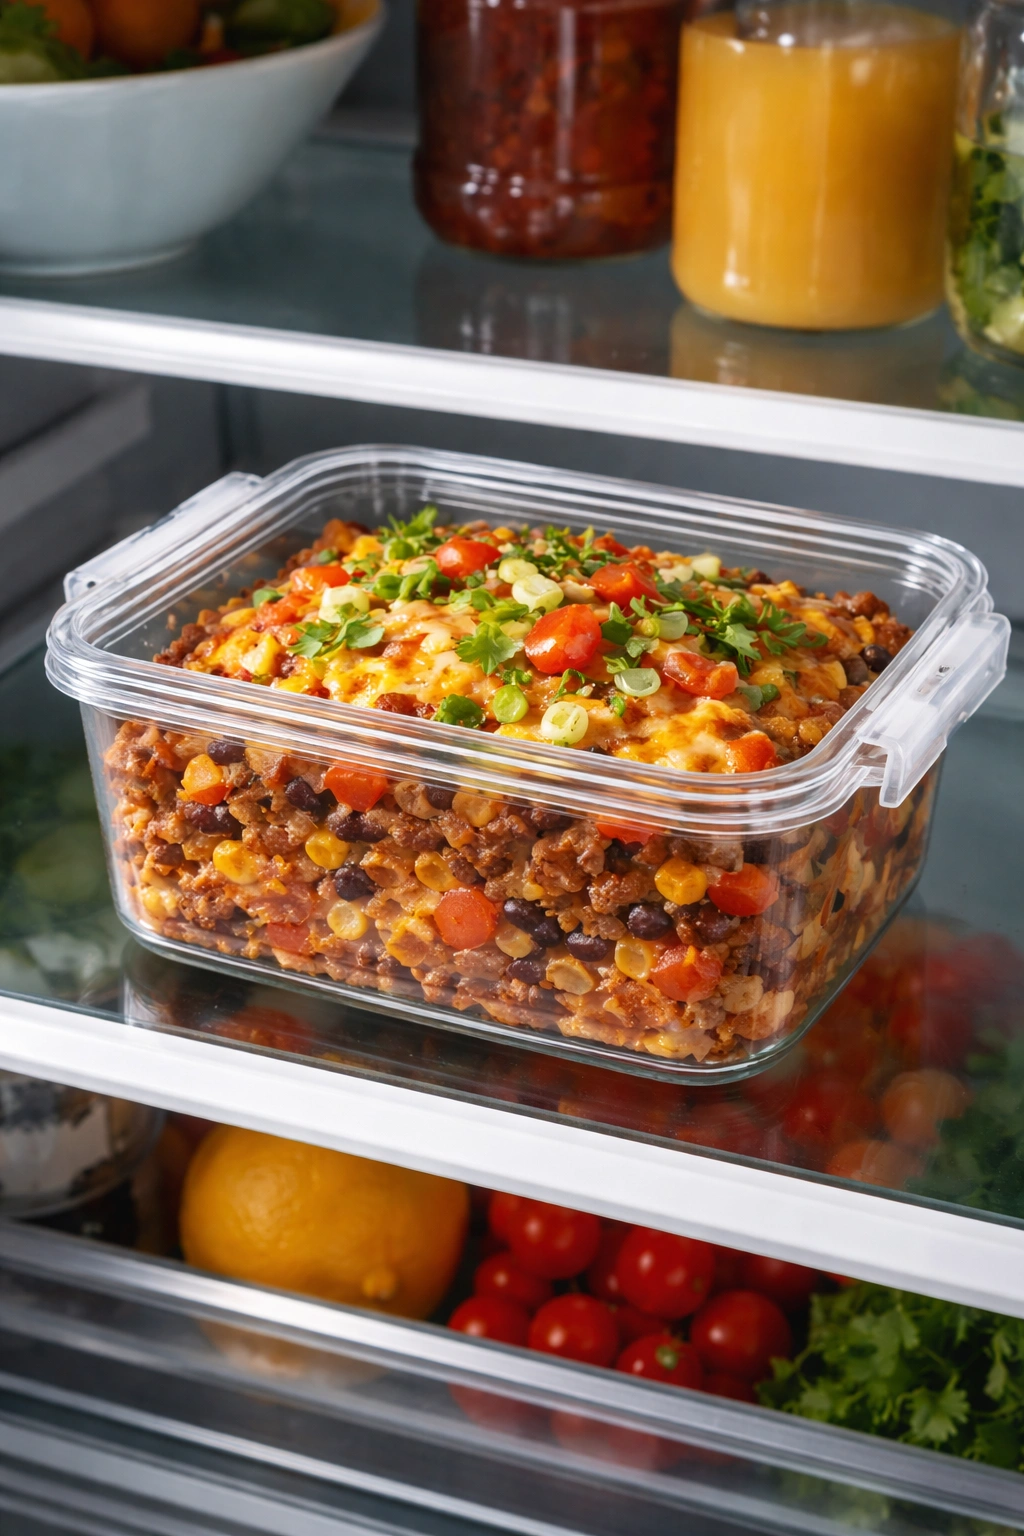
Leftover taco casserole keeps in an airtight container in the refrigerator for 3 to 4 days. The casserole itself doesn’t go bad, but the tortilla chips or tortillas can soften and get a bit soggy after the first day, which some people don’t mind but others find less appealing. That said, it’s still delicious and absolutely worth keeping.
The best reheating method is to pop individual portions into a 350°F oven for about 10 minutes until warmed through. This reheats more gently than a microwave and keeps the texture better. If you’re reheating in a microwave (totally valid on busy nights), use 50% power for 2 to 3 minutes so it heats through without the cheese getting tough.
If the leftover casserole seems a bit dry after sitting overnight, add a small spoonful of salsa before reheating — it adds moisture and refreshes the flavors. This also works if you’re storing it in a fairly airtight container and it dries out.
Frozen leftovers keep for up to 3 months. Portion them into individual containers or wrap well with plastic wrap and foil. Thaw in the refrigerator overnight and reheat as above. Or, if you’re desperate for dinner and forgot to thaw, you can reheat a frozen portion in a 325°F oven for about 25 to 30 minutes covered with foil, then uncover for a final 5 minutes.
Why Families Keep Coming Back to This Recipe
Ask anyone who makes taco casserole regularly why it’s their go-to, and you’ll hear the same themes: it’s fast, it tastes better than the effort required, it feeds a crowd, it makes great leftovers, and somehow everyone in the family eats it without complaint. That last part is the real magic. Picky eaters who wouldn’t eat a traditional taco because they don’t like something touching something else will happily eat a casserole because they can customize their plate. Kids who are suspicious of “weird food” will eat this without realizing they just ate beans and vegetables because the flavors are so familiar and comforting.
It’s also a recipe that respects your intelligence as a cook. You’re not following arbitrary rules or wrestling with techniques. You’re building flavor through logical steps and assembling components in a sensible way. Once you make it once, you can make it in your sleep. You know exactly what to do, and you can adapt it based on what’s in your pantry. That’s the kind of recipe that becomes a weeknight staple instead of something you make once and forget.
Final Thoughts
Taco casserole is honest comfort food that doesn’t require hours of prep or complicated techniques. It’s a recipe for people who want their families fed, their kitchens not destroyed, and their taste buds genuinely happy. You brown some meat with onions and spices, stir in beans and salsa, layer it all with cheese and your choice of base, and let the oven do the work. Thirty-five minutes later, you’ve got something that tastes like you spent way more effort than you actually did.
The best part is that this dish welcomes substitutions and tweaks. You’re not going to ruin it by using turkey instead of beef or black beans instead of pinto. You’re not going to mess it up by adding extra vegetables or choosing a different salsa. This flexibility means you can make it fit your family’s preferences, your budget, and what’s actually in your kitchen right now. That’s the kind of recipe worth keeping close.
Next time you’re facing that late afternoon “what’s for dinner” question and you need something fast, delicious, and foolproof, you know exactly where to turn. Your family already knows they love tacos. Taco casserole is just you giving them the same flavors they crave, but in a form that lets you actually relax instead of running around like a short-order cook. That’s not just a recipe — that’s a gift to yourself on busy nights.