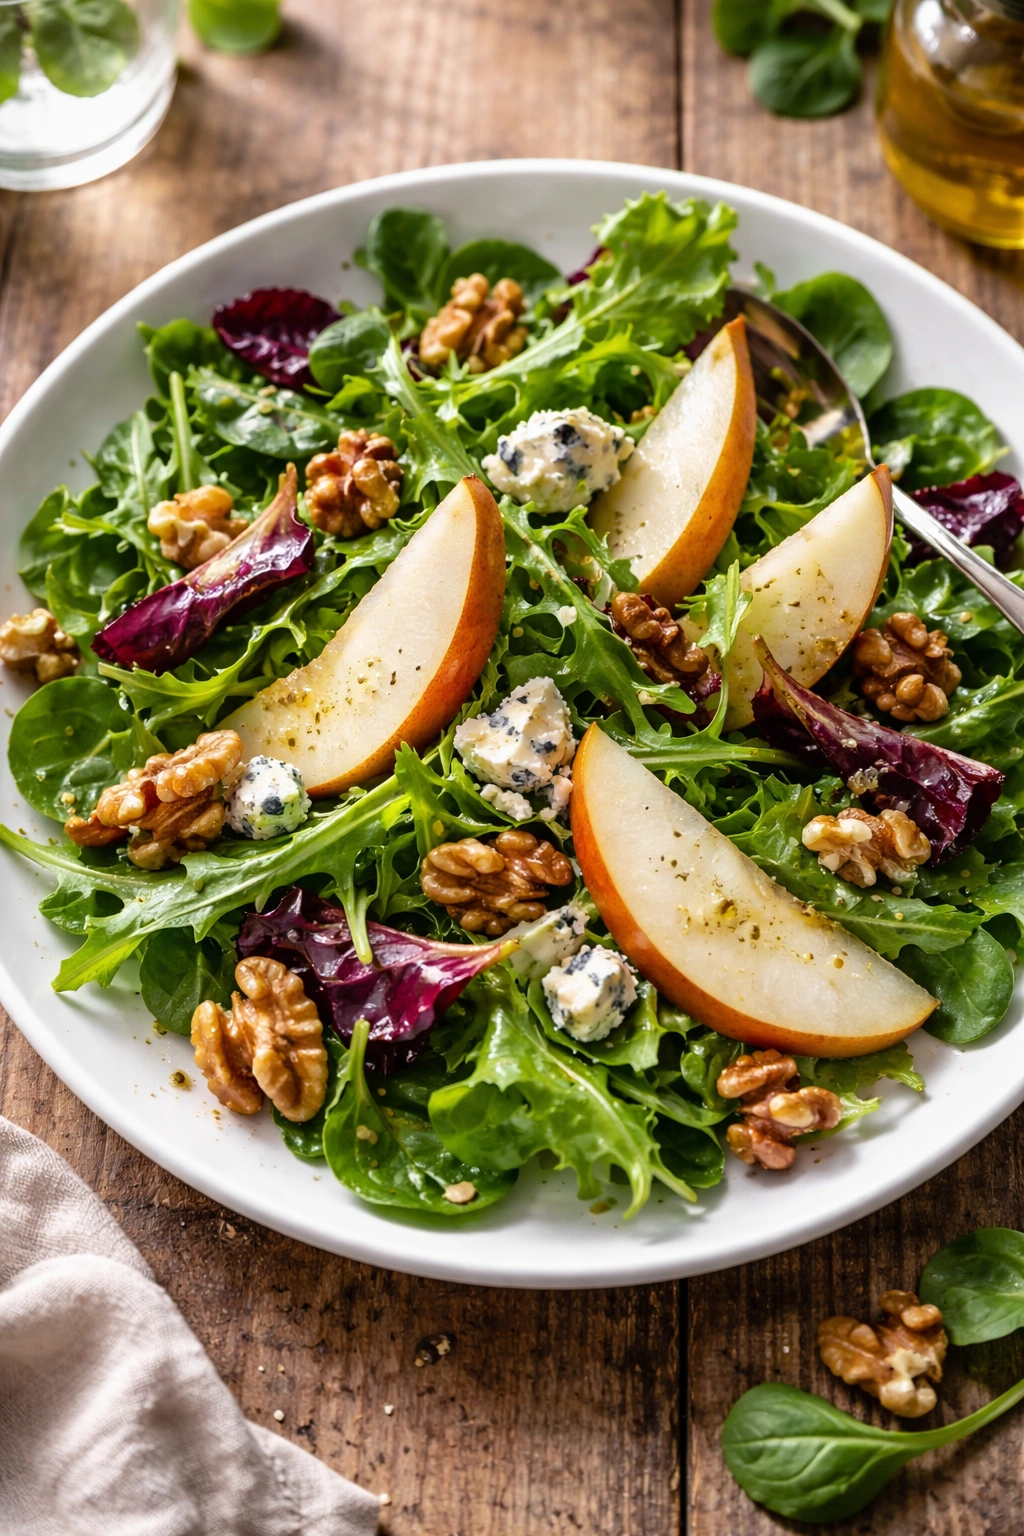
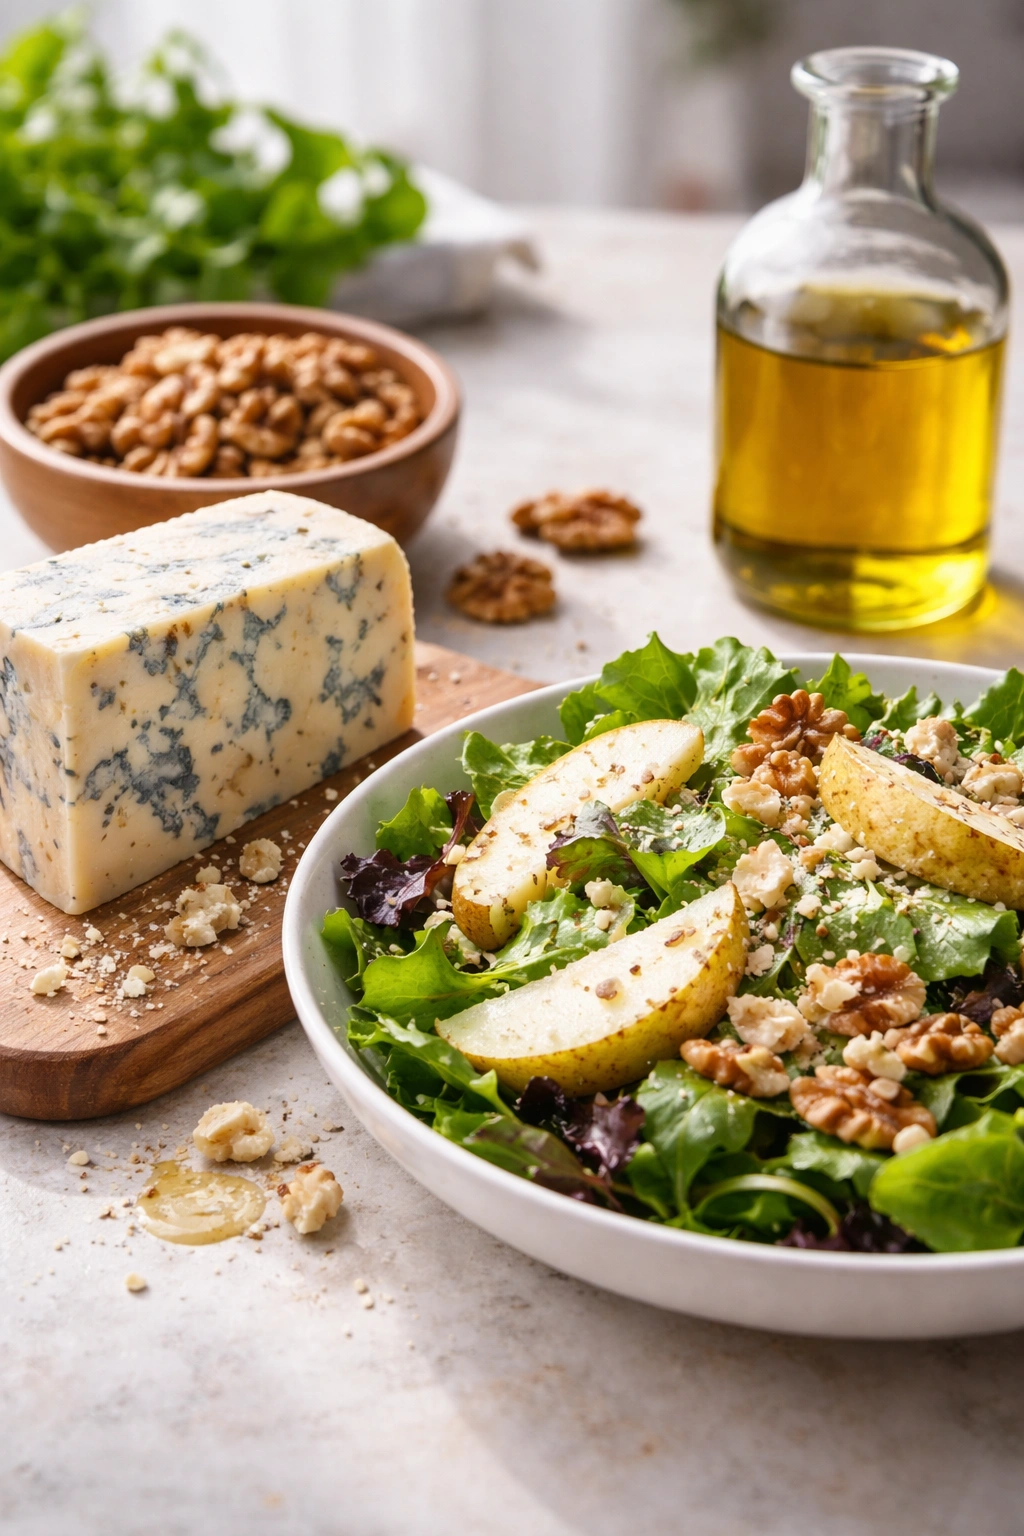
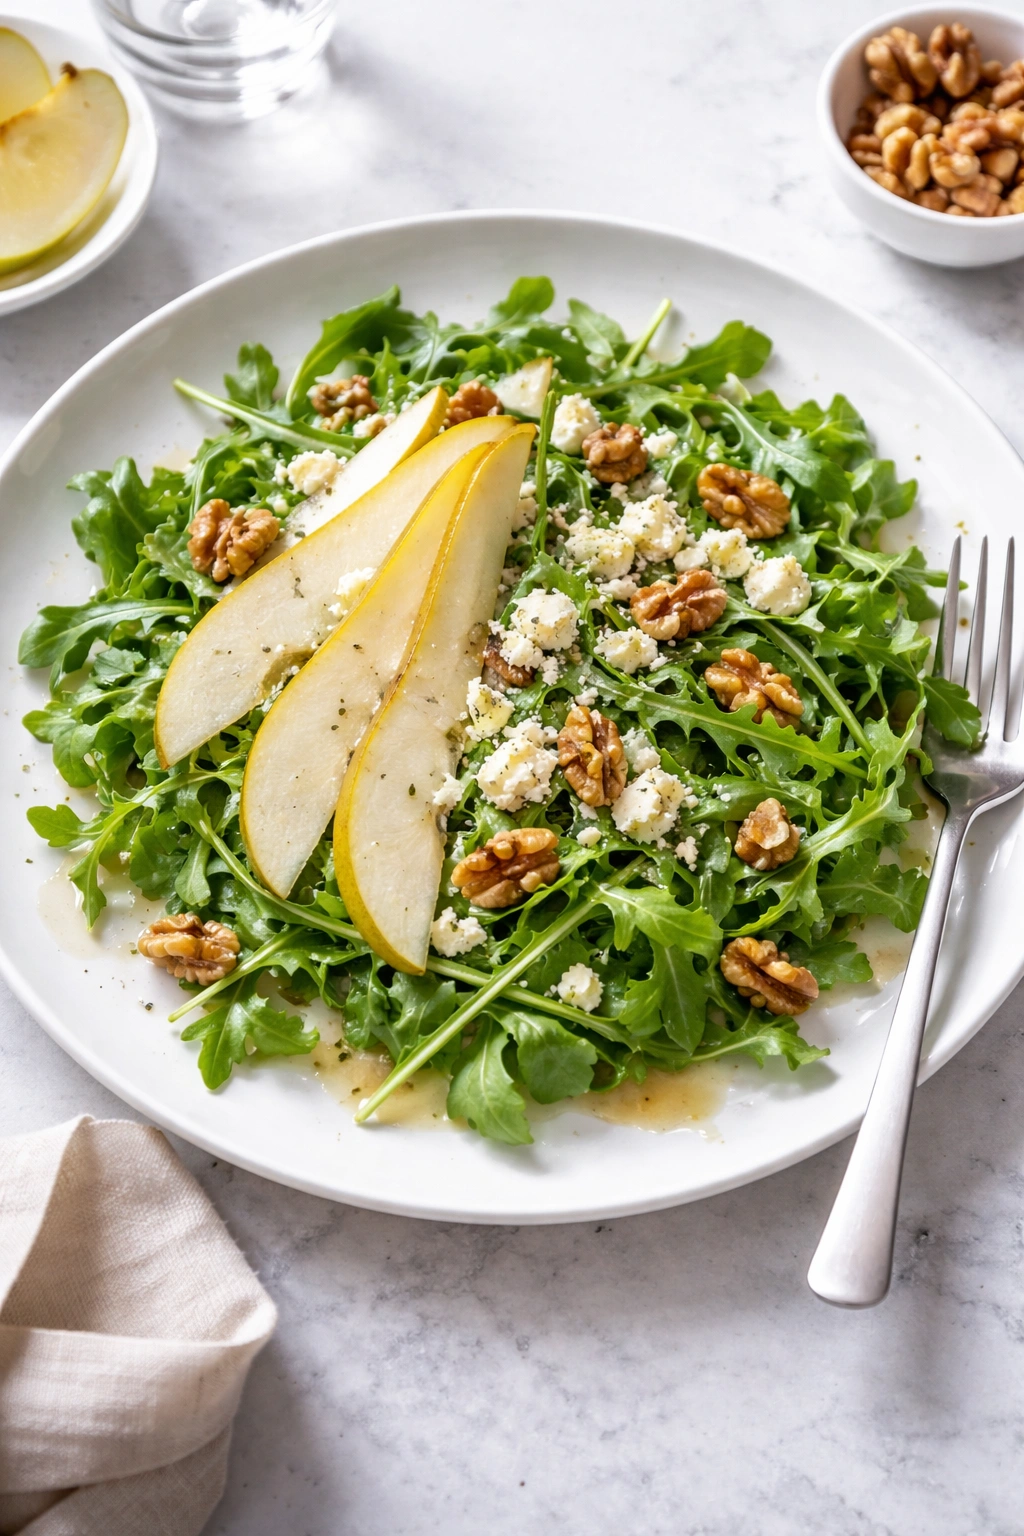
There’s something almost magical about the moment a fork cuts through a tender salad leaf, releasing that sweet earthiness, and hits a crumble of gorgonzola that’s been waiting to dissolve across your palate. The cool, creamy blue cheese mingles with the buttery crunch of toasted walnuts and a slice of fresh pear — its delicate sweetness playing perfectly against the sharp, funky intensity of the cheese. This is the kind of salad that tastes like you’ve spent hours fussing in the kitchen when, in reality, you’ve pulled together something genuinely elegant in under twenty minutes. It’s the difference between eating salad because you think you should and eating salad because you’re genuinely excited about what’s on your plate.
This gorgonzola salad has become a staple for good reason. It works as a sophisticated first course that won’t leave your dinner guests hungry, a substantial lunch when you add some grilled chicken or crispy chickpeas, or a side dish that elevates even an ordinary weeknight dinner into something memorable. The beauty lies in how the few simple ingredients — a handful of greens, quality cheese, nuts, fruit, and a proper vinaigrette — come together to create something greater than their parts. It’s proof that exceptional food doesn’t require complexity, just intention and quality ingredients.
What makes this particular combination so compelling is the balance it strikes between flavors and textures. The gorgonzola brings umami depth and a peppery finish. The walnuts add earthiness and a satisfying crunch. The pear contributes natural sweetness and a delicate juiciness that keeps everything from feeling too heavy. The greens provide structure and a clean backdrop. And the vinaigrette — made with a touch of shallot and Dijon mustard — brings everything into harmony. Learning how to build this salad properly means you’ll have a template you can pull from again and again, adapting it to whatever produce looks best at the market or whatever your mood demands.
What Makes This Salad Different
This isn’t a salad that relies on volume or complicated prep work. Instead, it succeeds through the thoughtful pairing of genuinely good ingredients and the care taken in how they’re combined. Many salads throw together random components and hope they’ll work. This one respects the character of each element and builds on their natural compatibility.
The secret is understanding that a salad like this is really about contrast — contrast in flavors (sweet pear against sharp blue cheese), contrast in textures (soft leaves, creamy cheese, crunchy nuts), and contrast in temperature (cold greens against room-temperature or slightly warm walnuts and cheese). When you nail these contrasts, you create something that feels dynamic and interesting in your mouth rather than one-note or flat.
A lot of people make mediocre versions of this salad because they either use tired, sad lettuce from the bottom of a plastic container, or they buy pre-shredded cheese that tastes like plastic, or they use raw walnuts that taste a bit bitter and pasty. The moment you upgrade any one of those components — use fresh greens that actually taste like something, buy a wedge of gorgonzola and crumble it yourself, toast your own walnuts until they’re fragrant — the entire salad becomes something else. It’s not about fancy technique. It’s about respecting the ingredient.
Why Gorgonzola Works So Well Here
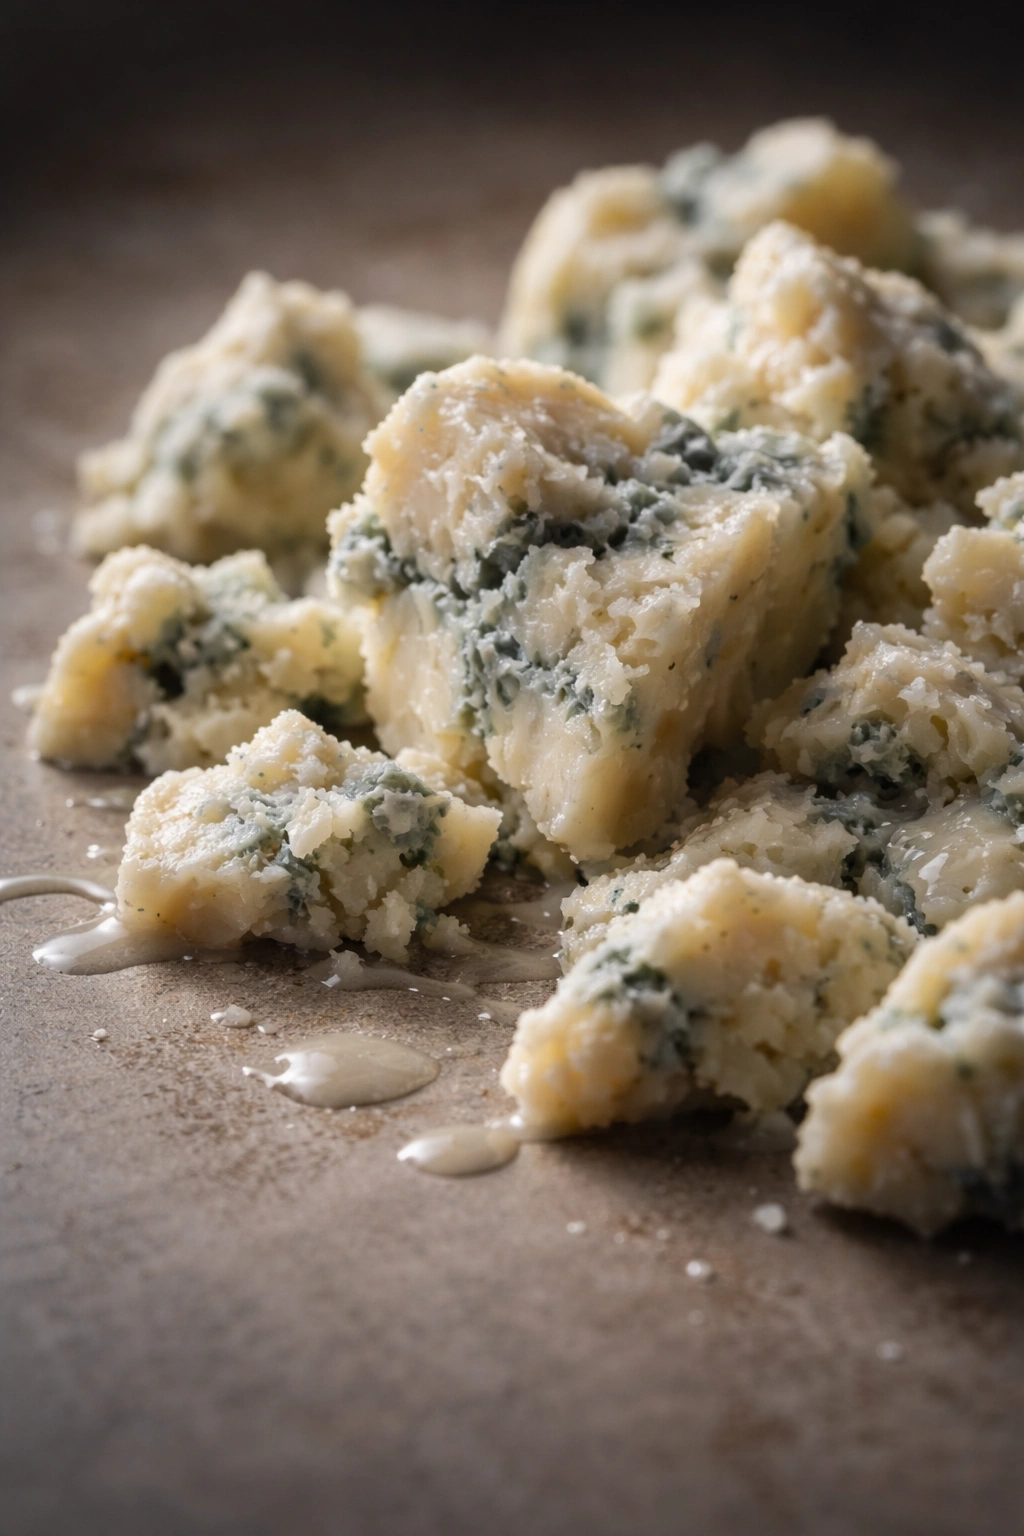
Gorgonzola might be the most misunderstood blue cheese. People often think it’s aggressively peppery or overwhelming, but when it’s good — and there’s a real difference between good gorgonzola and mediocre stuff — it’s actually creamy, nutty, and sophisticated. The peppery notes are there, sure, but they’re balanced by a subtle sweetness and a richness that comes from the milk fat.
The reason gorgonzola specifically works so well in this salad is that it crumbles easily and distributes throughout every bite. Unlike some cheeses that clump together, gorgonzola breaks into small pieces that spread across the greens and nestle in all the pockets of your lettuce. When you fork into the salad, you’re getting cheese in nearly every bite, which is exactly what you want. The cheese also has a lower melting point than many other blues, so it softens slightly when it hits the warmer (or room-temperature) dressed greens, becoming almost creamy while still maintaining its form.
Different styles of gorgonzola exist, and the distinction matters. Gorgonzola Naturale is aged for longer and has thinner veining and a firmer texture — it’s what many people buy when they think they don’t like blue cheese. Gorgonzola Piccante (or creamy style) is younger, fattier, and more intensely flavored. For a salad, you want to aim for something in between — a gorgonzola that’s creamy enough to crumble easily but distinctive enough to make a real flavor impact. Buy a small wedge from a good cheese counter if possible, rather than pre-crumbled versions that taste metallic and have stabilizers added.
Selecting Quality Pears for Peak Flavor
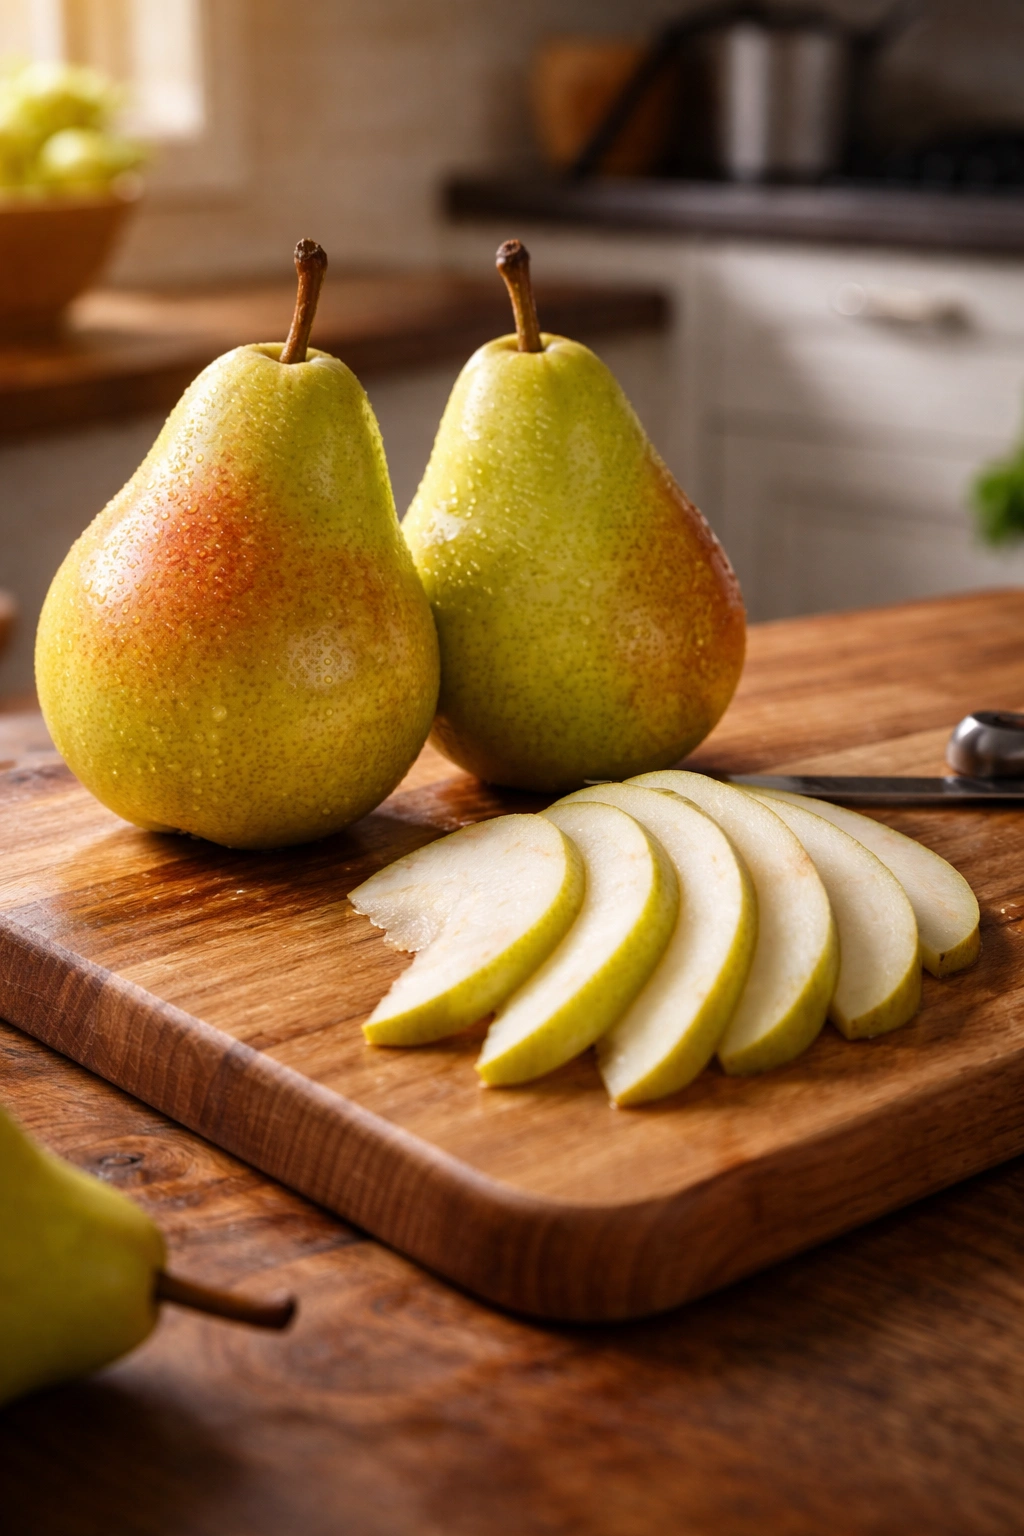
The pear is the anchor that keeps this salad from feeling too heavy or one-dimensionally savory. It provides sweetness, yes, but more importantly, it brings a delicate floral quality and a subtle tartness that plays beautifully against the cheese’s intensity.
Here’s what most people get wrong: they buy a pear that’s either rock-hard or already turning brown and mushy. A perfect pear for this salad should yield slightly when you press it gently with your thumb, but it shouldn’t dent permanently. You want it to be ripe enough to taste something, but still firm enough to slice cleanly without falling apart. If your pear is like a baseball, it won’t contribute much flavor — it’ll just be a watery, mealy disappointment. If it’s already soft enough that it’s starting to brown, you’ve actually crossed the line into overripe.
The best pears for salads are typically Bartlett, Bosc, or Comice varieties. Bartlett pears have the sweetest, most floral quality and that pale green or yellow color that looks beautiful on a plate. Bosc pears are denser and have a slightly grittier texture, but they hold their shape excellently when sliced and have a more subtle, earthy sweetness. Comice pears are wonderfully creamy and buttery in texture. Any of these will work brilliantly. Avoid Red Pear or Anjou if you have other options — they tend to be drier and less flavorful in raw applications.
To know if a pear is ready to use, hold it gently in your palm and apply very light pressure where the stem meets the fruit. This is the softest part. If it yields to gentle pressure, you’re good to go. If nothing happens, set it aside for a day or two. If you buy pears a few days before you plan to use them, you can actually control their ripeness. Keep them in a paper bag at room temperature to speed up the process, or in the crisper drawer if you want to slow things down.
One smart move: slice the pear just before serving. Pears oxidize quickly once cut, so if you slice them twenty minutes before eating, they’ll turn an unappealing brown. If you absolutely must slice them ahead, toss the slices with a squeeze of fresh lemon juice, which prevents oxidation and actually complements the salad’s flavors.
Toasting Walnuts to Unlock Their Depth
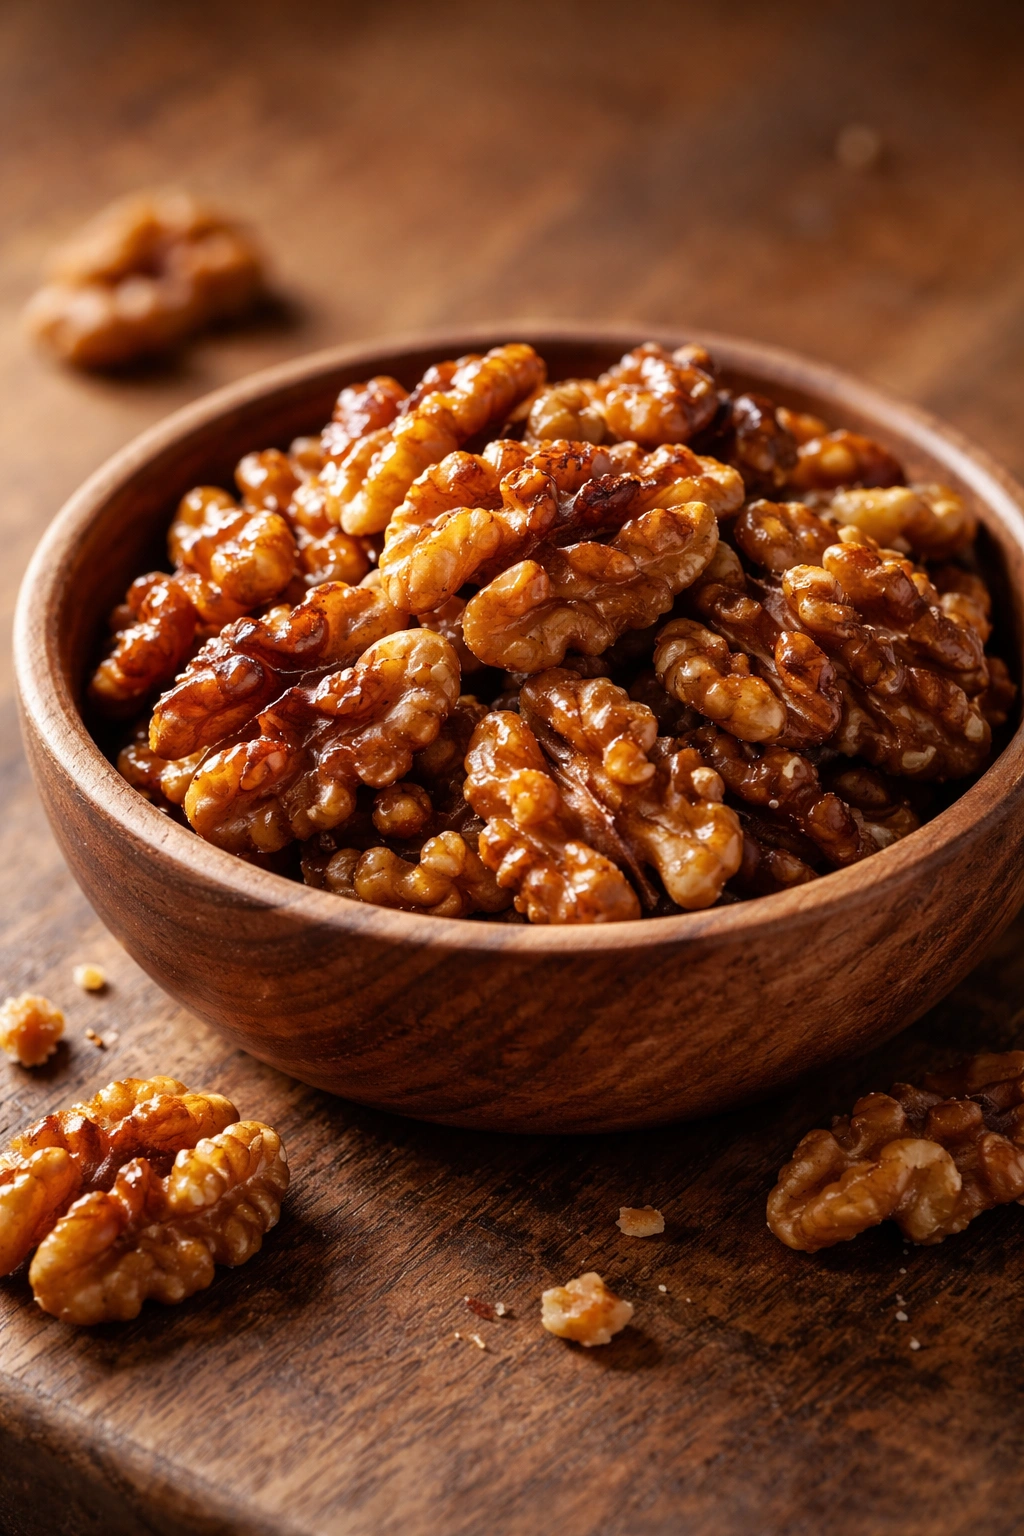
Raw walnuts have a reputation for being slightly bitter and a bit pasty. Toasted walnuts are something else entirely — they become warm, earthy, and richly nutty, with a crunch that feels substantial against the soft greens and creamy cheese. The difference between raw and toasted walnuts in this salad is the difference between a decent salad and a really good one.
Toasting unlocks the nutty oils in walnuts and actually reduces their astringency. It’s a small step that changes everything. You have two options: oven-toast or stovetop-toast. Both work, but the stovetop method gives you more control and happens faster.
For stovetop toasting, spread your walnut pieces in a dry skillet over medium heat and let them warm through, shaking the pan every 20-30 seconds or stirring with a wooden spoon, for about 3-5 minutes total. You’re looking for them to darken slightly and smell wonderfully nutty — that’s your signal they’re done. It happens quickly, and they can go from perfectly toasted to burnt in about 30 seconds, so stay present. When they smell incredible, pour them onto a plate immediately to stop the cooking process. They’ll continue to toast slightly from residual heat, so don’t wait until they look perfectly dark in the pan.
For oven toasting, spread walnuts on a baking sheet in a single layer and toast at 350°F (175°C) for 8-10 minutes, shaking the pan halfway through. This method is less hands-on but takes a bit longer. Again, you want them fragrant and just slightly darkened, not brown.
Important: Toast your walnuts several hours before serving, or even the day before. Once they cool completely, you can store them in an airtight container. Toasting them far in advance means you’re not scrambling at the last minute, and cool toasted walnuts actually add a more pleasant textural contrast than walnuts that are still warm. If you toast them while you’re making dinner and use them immediately, they soften from the heat and moisture in the salad bowl, which isn’t ideal.
Building the Vinaigrette
The vinaigrette is where a lot of home cooks lose the thread. A proper vinaigrette has to be acidic enough to brighten the salad, but not so acidic that it overpowers the delicate flavors of the greens and pear. It needs to have enough fat to carry flavor and coat the leaves, but not so much that it makes the salad feel heavy or greasy.
The foundation is a good ratio: roughly 3 parts oil to 1 part acid (vinegar or lemon juice, or a combination of both). But the quality of those components matters enormously. A thin, one-note oil will produce a thin, one-note vinaigrette. A quality extra-virgin olive oil brings its own character and complexity, which makes the entire salad taste better.
For the acid, you have options. Red wine vinegar is classic and brings a slight bite. Balsamic vinegar is richer and slightly sweet, which plays nicely with the pear. Sherry vinegar is sophisticated and subtle. A combination of vinegar and fresh lemon juice adds brightness. For this particular salad, a combination of red wine vinegar and sherry vinegar, or vinegar plus a squeeze of lemon, works beautifully — the acidity supports the pear and cheese without overwhelming either one.
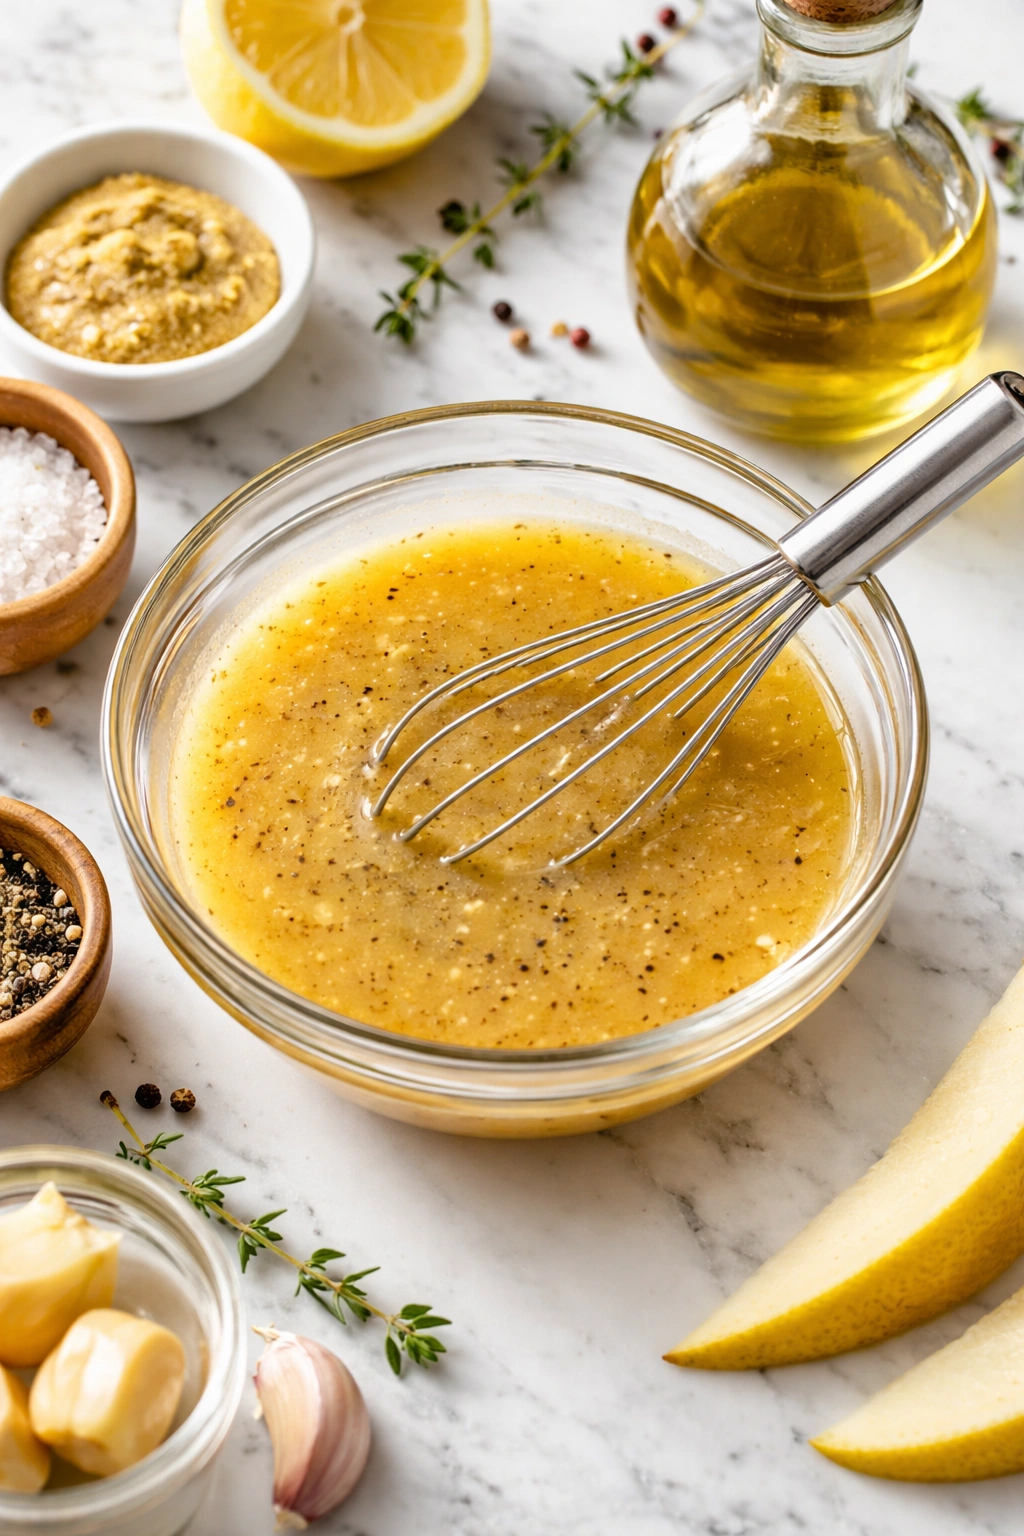
Beyond oil and acid, you want a touch of Dijon mustard, which acts as an emulsifier and keeps the vinaigrette from separating, plus adds subtle complexity. A minced shallot brings a gentle onion note that bridges the flavors of all the components. A tiny pinch of salt (sea salt, not table salt) and a grind of black pepper round everything out. Some people add a touch of honey or maple syrup, which can be nice if your pears are particularly tart, but it’s not necessary if your fruit is good.
The basic formula: whisk together 1 tablespoon of minced shallot, 1 tablespoon of red wine vinegar, ½ tablespoon of sherry vinegar, 1 teaspoon of Dijon mustard, and a tiny pinch of salt and pepper. Let that sit for 5 minutes — the salt will help draw out the shallot’s juices and the flavors will meld. Then whisk in ¼ cup of really good extra-virgin olive oil slowly, a little at a time, whisking continuously to emulsify it. Taste and adjust — if it’s too acidic, add a touch more oil. If it’s too oily, add a splash more vinegar. This makes just enough to dress a good-sized salad for 4 people generously.
Yield, Prep Time, and Difficulty
Yield: Serves 4 as a first course or side salad | Serves 2 as a substantial lunch salad with protein added
Prep Time: 15 minutes (hands-on preparation only — washing, chopping, and assembling)
Cook Time: 5 minutes (walnuts should be toasted ahead if possible, but if toasting fresh, this is the time needed)
Total Time: 15-20 minutes active (or as little as 15 minutes if you use pre-toasted walnuts)
Difficulty: Beginner — This salad requires only basic knife skills and no special equipment or cooking technique. The only “cooking” involved is toasting nuts on the stovetop, which is forgiving and impossible to mess up if you stay present. Even someone making a salad for the first time will succeed.
Ingredients
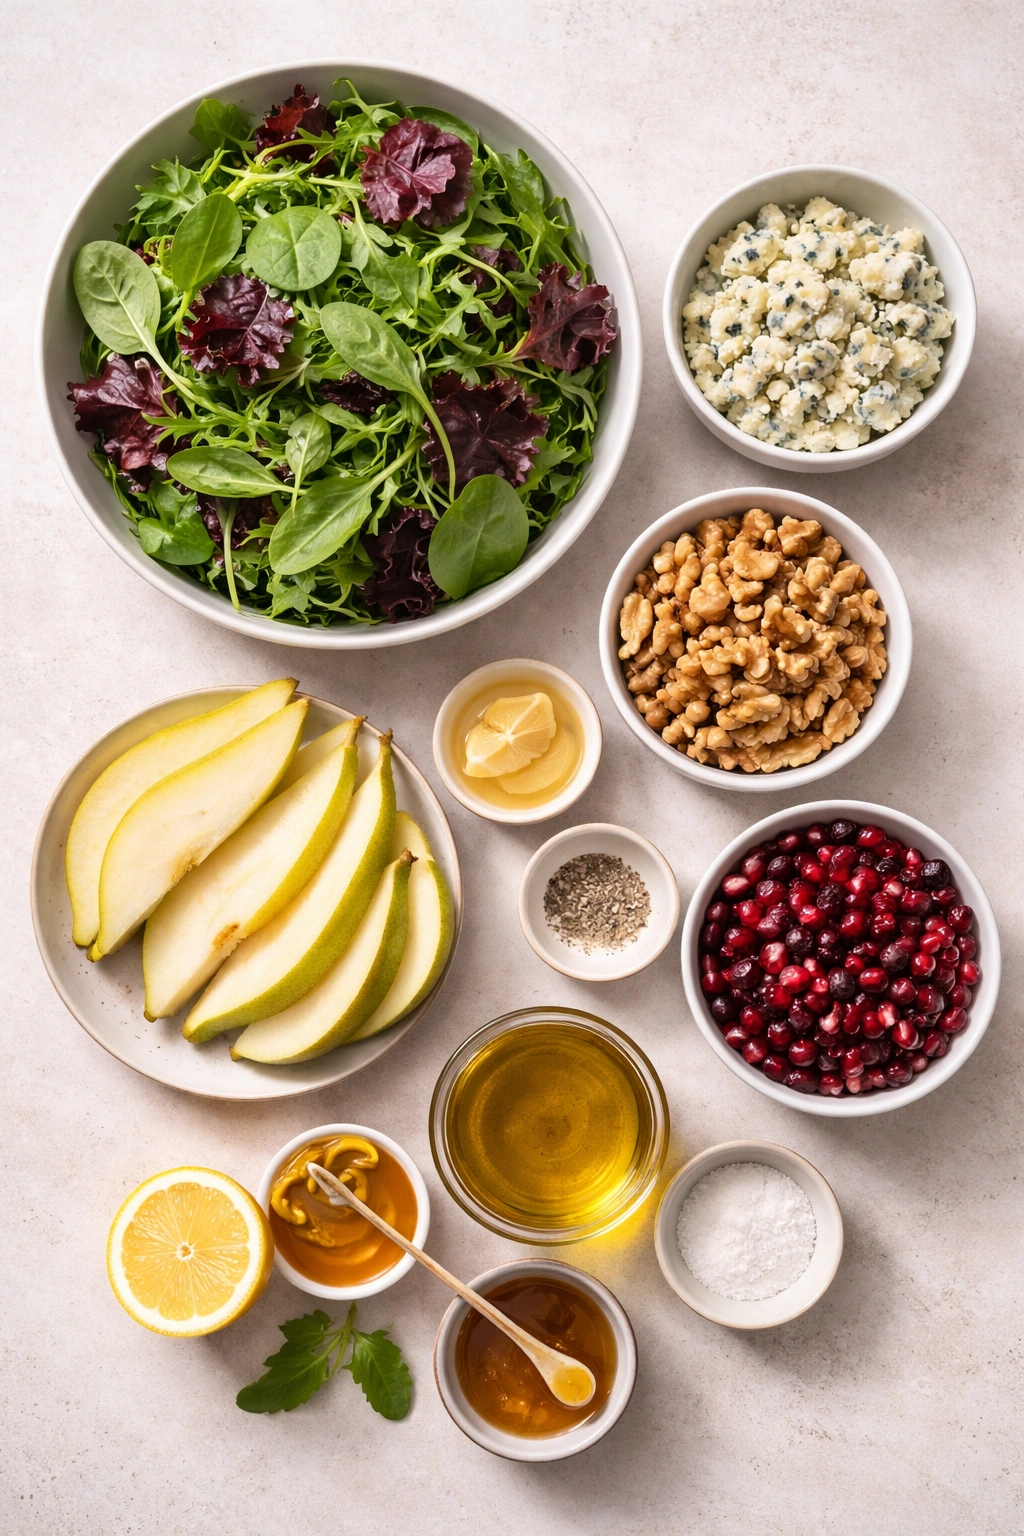
For the Salad:
- 6 cups mixed greens (a combination of arugula, baby spinach, and romaine or butter lettuce — approximately 4 to 5 ounces total, or one standard “salad bowl” of fresh greens)
- 4 ounces fresh, ripe gorgonzola cheese (one small wedge, which you’ll crumble with your hands or a fork)
- ¾ cup raw walnut pieces (these will be toasted just before serving)
- 2 medium ripe pears (Bartlett, Bosc, or Comice varieties work beautifully)
- ¼ cup pomegranate arils or dried cranberries, optional but recommended (they add a pop of tartness and color)
For the Vinaigrette:
- 1 tablespoon finely minced shallot (approximately half of one medium shallot)
- 1 tablespoon red wine vinegar
- ½ tablespoon sherry vinegar (or substitute with ½ tablespoon fresh lemon juice)
- 1 teaspoon Dijon mustard
- Fine sea salt (just a small pinch, about ⅛ teaspoon)
- Freshly ground black pepper
- ¼ cup extra-virgin olive oil
Step-by-Step Instructions
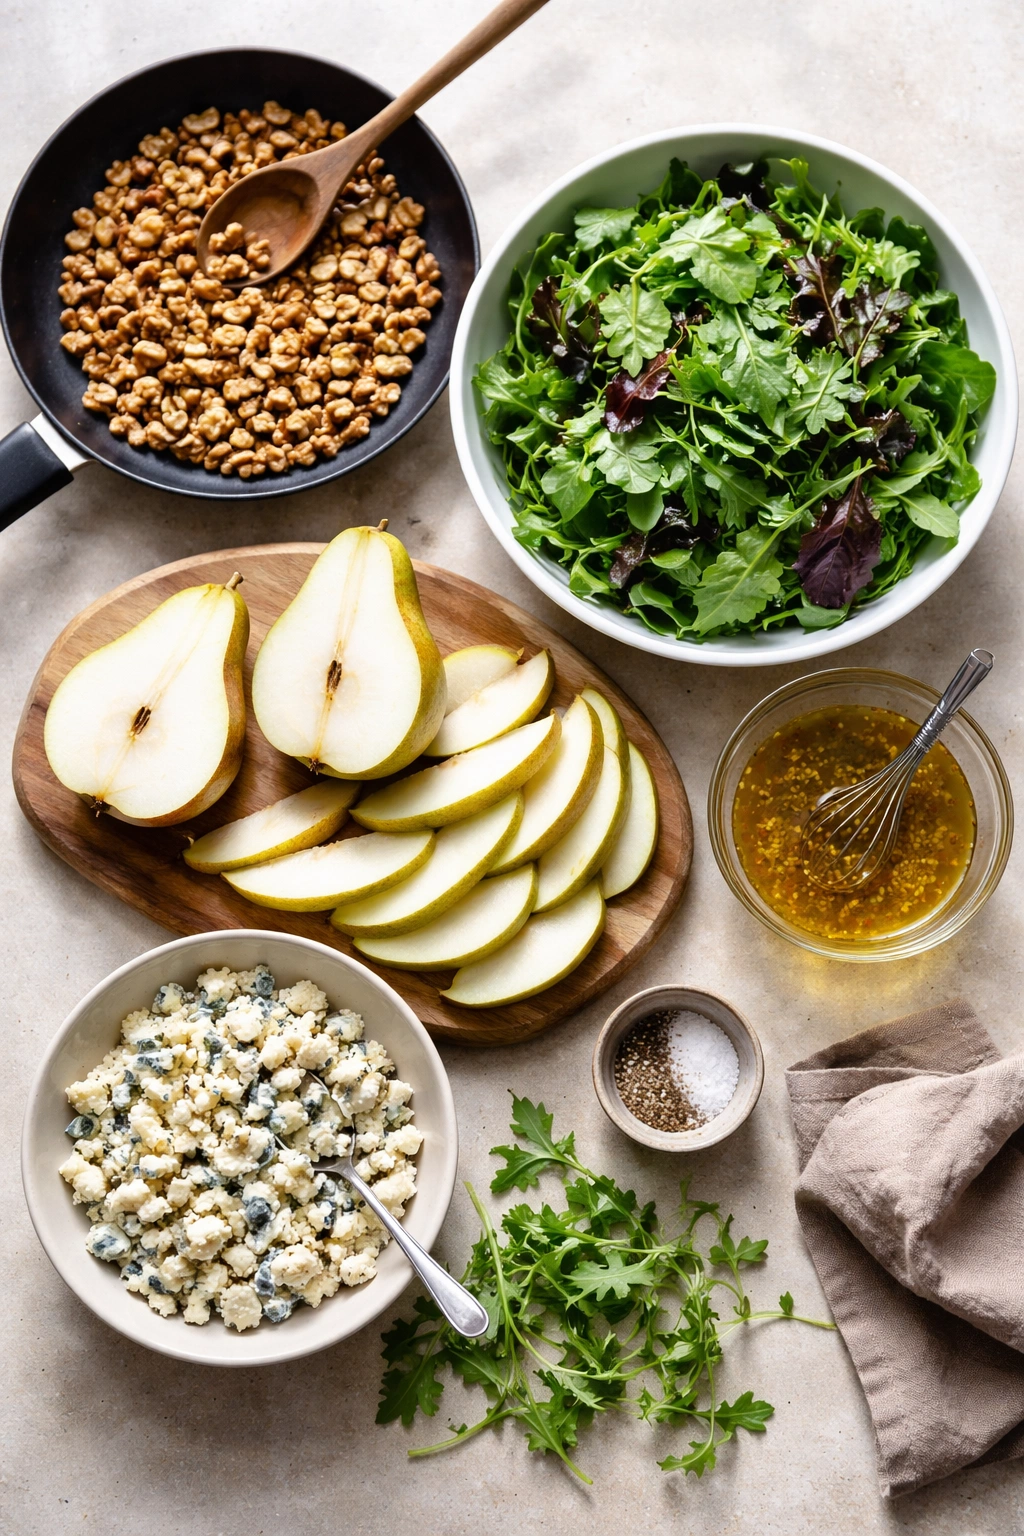
Prepare the Components:
-
If your walnuts haven’t been toasted, place ¾ cup of raw walnut pieces in a dry skillet over medium heat. Shake the pan or stir constantly for 3-5 minutes, until the walnuts smell wonderfully fragrant and darken slightly. The exact time depends on how thick your skillet is and your stove’s heat, so use your nose as your timer — when they smell toasted and nutty, they’re done. Immediately pour them onto a plate to stop the cooking from residual heat, and let them cool completely.
-
Wash your mixed greens thoroughly under cool running water and spin or pat them dry with paper towels. Damp greens will dilute your vinaigrette, so this step is worth taking time for. Tear or cut any large leaves into bite-sized pieces. If you’re making this salad ahead, you can store the dried greens in a sealed container in the refrigerator for up to 2 hours.
-
Gently cut your pear in half lengthwise, working around the central core. Scoop out the core with a melon baller or the edge of a small spoon. Slice each pear half into thin crescents, approximately ¼-inch thick. If your pear is very firm, using a sharp knife will make this much easier. Set the sliced pears on a clean cutting board or plate and do not dress them yet — you’ll add them to the salad at the very last moment to prevent browning.
Make the Vinaigrette:
-
In a small bowl, combine the minced shallot, red wine vinegar, sherry vinegar (or lemon juice), Dijon mustard, salt, and black pepper. Whisk these together with a small fork or whisk. Let the mixture sit for 5 minutes — this allows the salt to draw out the shallot’s juices and lets the flavors begin to meld and soften the shallot’s raw bite slightly.
-
While the vinaigrette base rests, measure out your ¼ cup of extra-virgin olive oil into a small measuring cup or similar vessel. Now whisk the resting vinegar mixture again briefly, then begin adding the olive oil in very thin streams — just a teaspoon at a time — while whisking continuously. This slow addition and constant whisking helps emulsify the oil and vinegar into a creamy, cohesive dressing rather than a separated, oily mixture. Continue until all the oil is incorporated. Taste the vinaigrette and adjust — if it tastes too sharp, add a tiny splash more oil. If it feels too oily, add a few drops more vinegar.
Assemble the Salad:
-
Place your cleaned, dried greens in a large salad bowl. Crumble the gorgonzola cheese with your hands directly over the greens — aim for pieces roughly the size of a marble or walnut, which distribute more evenly than larger chunks. If your cheese is very cold and hard, you can also chop it with a knife, but the texture of hand-crumbled cheese is more appealing.
Advertisements -
Add the cooled toasted walnuts to the bowl, and if you’re using them, add the pomegranate arils or dried cranberries.
-
Just before you’re ready to serve, arrange the pear slices on top of the greens in a loose, casual pattern. At this point, the salad can sit uncovered for 5-10 minutes without wilting, but I wouldn’t wait longer than that.
-
Pour approximately ⅔ of the prepared vinaigrette over the salad and toss very gently with your hands or two large serving spoons, lifting and turning the greens rather than aggressively mixing them. The goal is to coat everything lightly and evenly without bruising the tender leaves. Start with ⅔ of the dressing because you can always add more, but you can’t remove dressing that’s already been mixed in. Taste one bite — if the salad tastes a bit bland, add more vinaigrette. If it tastes perfectly balanced, you’re done. Some people like a more heavily dressed salad, and others prefer their greens to taste more like greens than dressing, so this is entirely to your taste.
-
Serve immediately on chilled plates or bowls, dividing the salad evenly among your diners. The moment from finished salad to plate to mouth should be as quick as possible — this is when the salad is at its peak, with the greens still crisp, the nuts still crunchy, and the pear still fresh.
Pro Tips for the Perfect Gorgonzola Salad
Toast your walnuts well ahead of time. Ideally, toast them earlier in the day or even the day before, and store them in an airtight container at room temperature. This eliminates the last-minute scramble and ensures your walnuts are cool and crispy rather than still warm and soft. A salad that’s in perfect condition except for warm, slightly soggy walnuts is a disappointment.
Buy your cheese from a real cheese counter, not pre-crumbled. Pre-crumbled gorgonzola has anti-caking agents and sometimes tastes a bit off — like it’s been sitting in a bag for too long. A wedge of cheese that you crumble yourself costs about the same, tastes significantly better, and the crumbling takes literally 30 seconds. This single change will make the biggest impact on the quality of your finished salad.
Use the best olive oil you can afford. This is one of the few places where good olive oil really shines. A buttery, grassy, peppery extra-virgin oil brings so much character to the vinaigrette that it becomes almost a ingredient in its own right rather than just a fat delivery vehicle. Inexpensive, neutral oils produce a boring vinaigrette. Better oil produces a vinaigrette that people compliment.
Don’t wash your greens until you’re ready to use them. If you wash salad greens and then store them for several hours, they lose crispness and develop a tired, limp quality even if they’re in a sealed container. Wash them just before assembling, or no more than an hour or two ahead if you’re using a proper salad spinner to extract all water. Moisture is the enemy of crispness.
Let your pear reach perfect ripeness before making this salad. A rock-hard pear won’t contribute much flavor and will taste watery. One day at room temperature in a paper bag can make the difference between an okay pear and a perfect one. If you buy pears several days before you plan to use them, you have time to get them just right. Patience pays off here.
Make extra vinaigrette. The recipe above makes about ½ cup, which is enough to dress the salad perfectly. But salad dressing is one of those things that’s genuinely good on so many other things — roasted vegetables, simple grilled fish, crusty bread — that making a little extra is never wasteful. It keeps well, refrigerated, for up to a week.
Taste your vinaigrette on a leaf of the actual greens you’re using. The vinaigrette will taste different on a spoon than it will on a bitter arugula leaf or a mild butter lettuce. Before you add it all to the salad, taste a small piece of green that’s been lightly coated with dressing. This gives you a preview of how everything will actually taste together.
Don’t overdress. This is the hardest thing for home cooks to learn, but salads are better slightly under-dressed than even slightly over-dressed. An over-dressed salad is basically a bowl of greens swimming in liquid. A slightly under-dressed salad lets you taste each component distinctly. It’s better to serve the extra dressing on the side so people can add more to their own portions.
Common Mistakes and How to Fix Them
The salad tastes flat and one-dimensional. This usually means the vinaigrette isn’t acidic enough or the cheese isn’t distributed evenly. Add a splash more vinegar to the dressing, or if you’ve already assembled the salad, add a small squeeze of fresh lemon juice directly over the greens. Alternatively, you might not be using enough cheese — remember that gorgonzola should be a prominent flavor, not just a whisper. If the salad feels bland overall, taste a piece of the cheese by itself. If the cheese itself tastes like nothing (which sometimes happens with mediocre gorgonzola), you’ve identified your problem and you’ll want better cheese next time.
The walnuts taste bitter or slightly off. Raw walnuts contain tannins that some people perceive as bitterness, especially if the nuts are older or have been stored improperly. Toasting them longer will help — aim for a deeper brown color and let them toast until they smell really nutty. Alternatively, you might be using walnuts that are past their prime. Buy smaller quantities and store them in the freezer if you don’t use them frequently. Taste a walnut before you add them to the salad — if they taste stale or off, they’ll compromise the entire dish.
The pear is mealy and tastes watery rather than sweet and floral. This means you bought a pear that either wasn’t ripe enough or is a variety that doesn’t handle raw salads well. Next time, buy from a better produce source and look specifically for Bartlett or Bosc pears. Let them ripen on the counter in a paper bag for 1-2 days. There’s not much you can do with a mealy pear once it’s already been sliced, except resolve to be more careful about produce selection next time — this is one area where quality really, truly matters.
The greens are wilted and sad looking by the time you serve the salad. You’ve either assembled the salad too far in advance, or you’ve dressed it too aggressively too far ahead. Assemble the salad and dress it no more than 5-10 minutes before serving. If you’re making this for a dinner party, make the vinaigrette and prepare all the components ahead, but do the actual assembly in the final minutes. Tender greens are forgiving up to a point, but once they’re dressed, the clock starts ticking.
The vinaigrette has separated into oil on top and vinegar on the bottom. This usually means you added the oil too quickly or you didn’t whisk hard enough during the process. For your next batch, slow down when you’re adding the oil — think in terms of a thin stream, almost a drizzle, rather than pouring. And whisk continuously and vigorously while you’re adding it. The muscular energy you put into the whisking is what creates the emulsion. If your dressing has already separated, you can fix it by whisking it again vigorously, or by starting with a fresh small bowl, putting in a teaspoon of Dijon mustard, and then whisking the separated dressing back into it slowly.
Variations and Adaptations
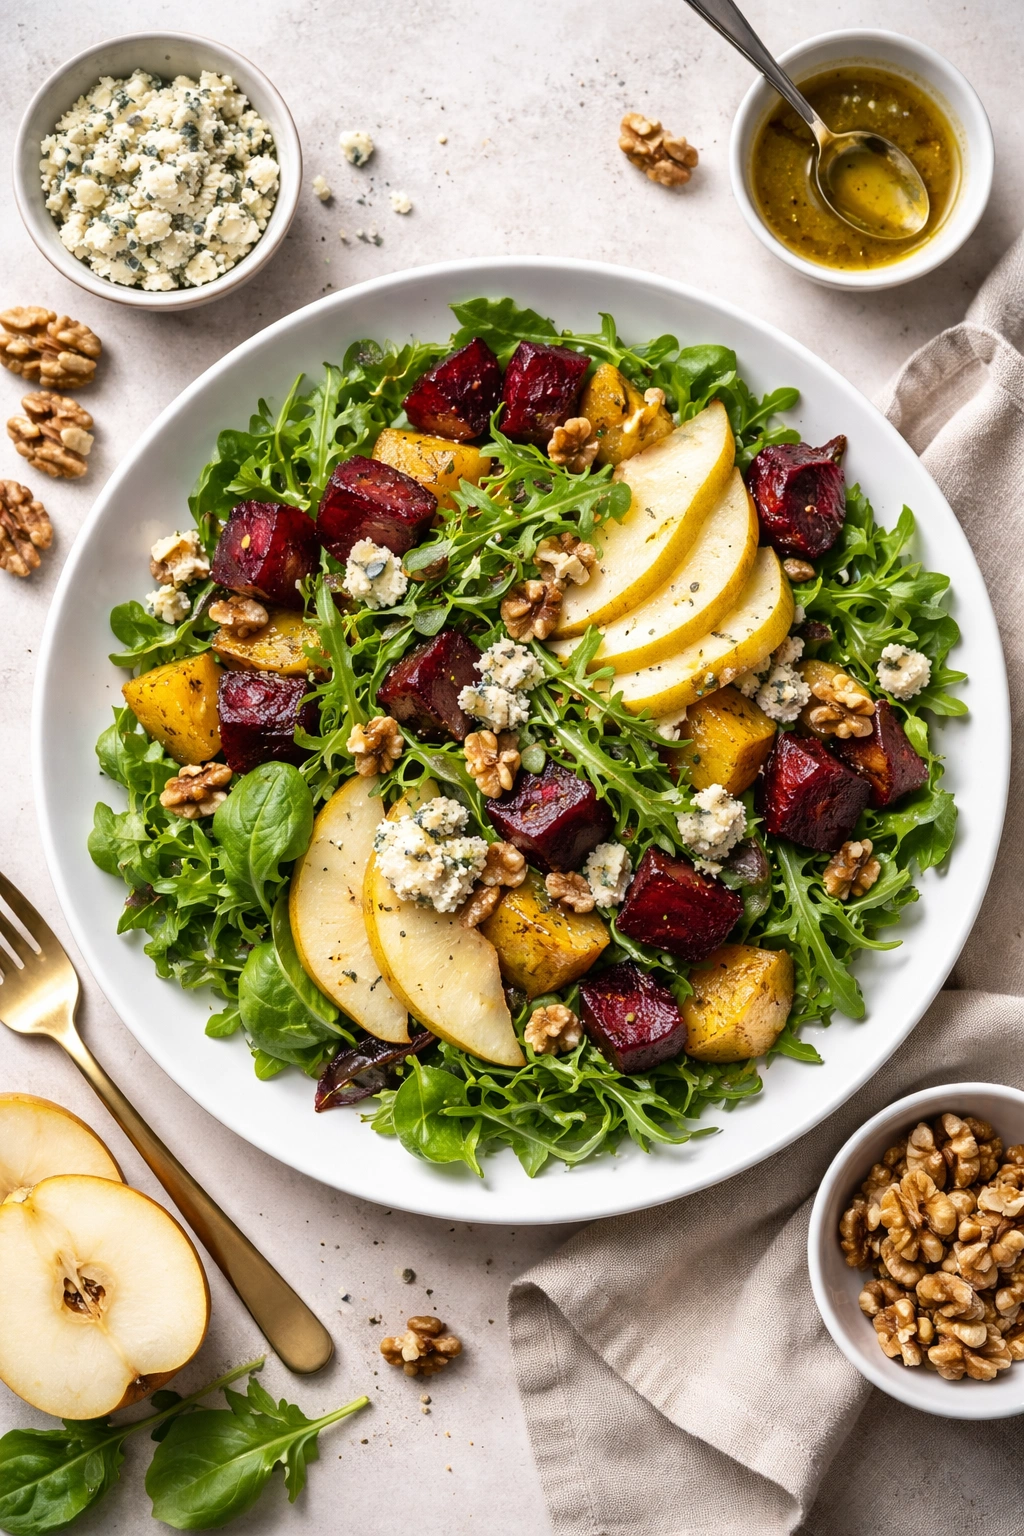
Warm version with roasted beets: Roast some beets until tender, peel them, and cut them into thin slices or matchsticks. Warm them gently in a saucepan with a touch of the vinaigrette, then layer them over the greens alongside the pear and walnuts. The warm, earthy sweetness of roasted beets plays beautifully against the gorgonzola. Use slightly less cold pear if you go this direction, since warm and cold beets bring a lot of sweetness already.
Add a protein for a more substantial meal: Thinly slice grilled or seared chicken breast and arrange it on top of the salad. Grilled salmon also works gorgeously — the richness of the fish complements the creamy cheese. Crispy chickpeas roasted with salt and paprika bring a vegan protein option. Even a poached egg, with its runny yolk acting as an additional richness, transforms this into a complete main course salad.
Swap the greens: If you can’t find a mix of arugula and butter lettuce, use whatever tender green lettuce looks freshest. Romaine works. Mixed field greens work. Spinach alone works. The one thing to avoid is iceberg lettuce, which is mostly water and adds nothing flavor-wise. You want greens that actually taste like something.
Use dried cranberries if pomegranate is out of season: Pomegranate arils are beautiful and fresh-tasting, but they’re expensive and not always available. Dried cranberries offer a similar tartness and chewiness and work just as well. Soak them in a touch of warm water for 5 minutes to plump them up if they seem particularly shriveled.
Try a different blue cheese: If you can’t find gorgonzola, or if you want to experiment, other blue cheeses can work beautifully here. Roquefort is sharper and more peppery. Danish blue is creamier and milder. Point Reyes (an American blue) is rich and slightly sweet. The principles remain the same — buy a wedge, crumble it by hand, and use good quality.
Make it with apples instead of pears: Tart, crisp apples like Granny Smith can substitute for pears. The acidity of a sharp apple actually complements gorgonzola even more dramatically than pear does. Use a similar amount and slice them just before serving to prevent browning. The salad becomes slightly more assertive and less delicate with apples.
Add fresh herbs: A handful of torn fresh mint, tarragon, or chives scattered over the finished salad brings freshness and a hint of complexity. Herbs are optional, but they’re a lovely touch if you have them on hand.
Storage and Make-Ahead Tips
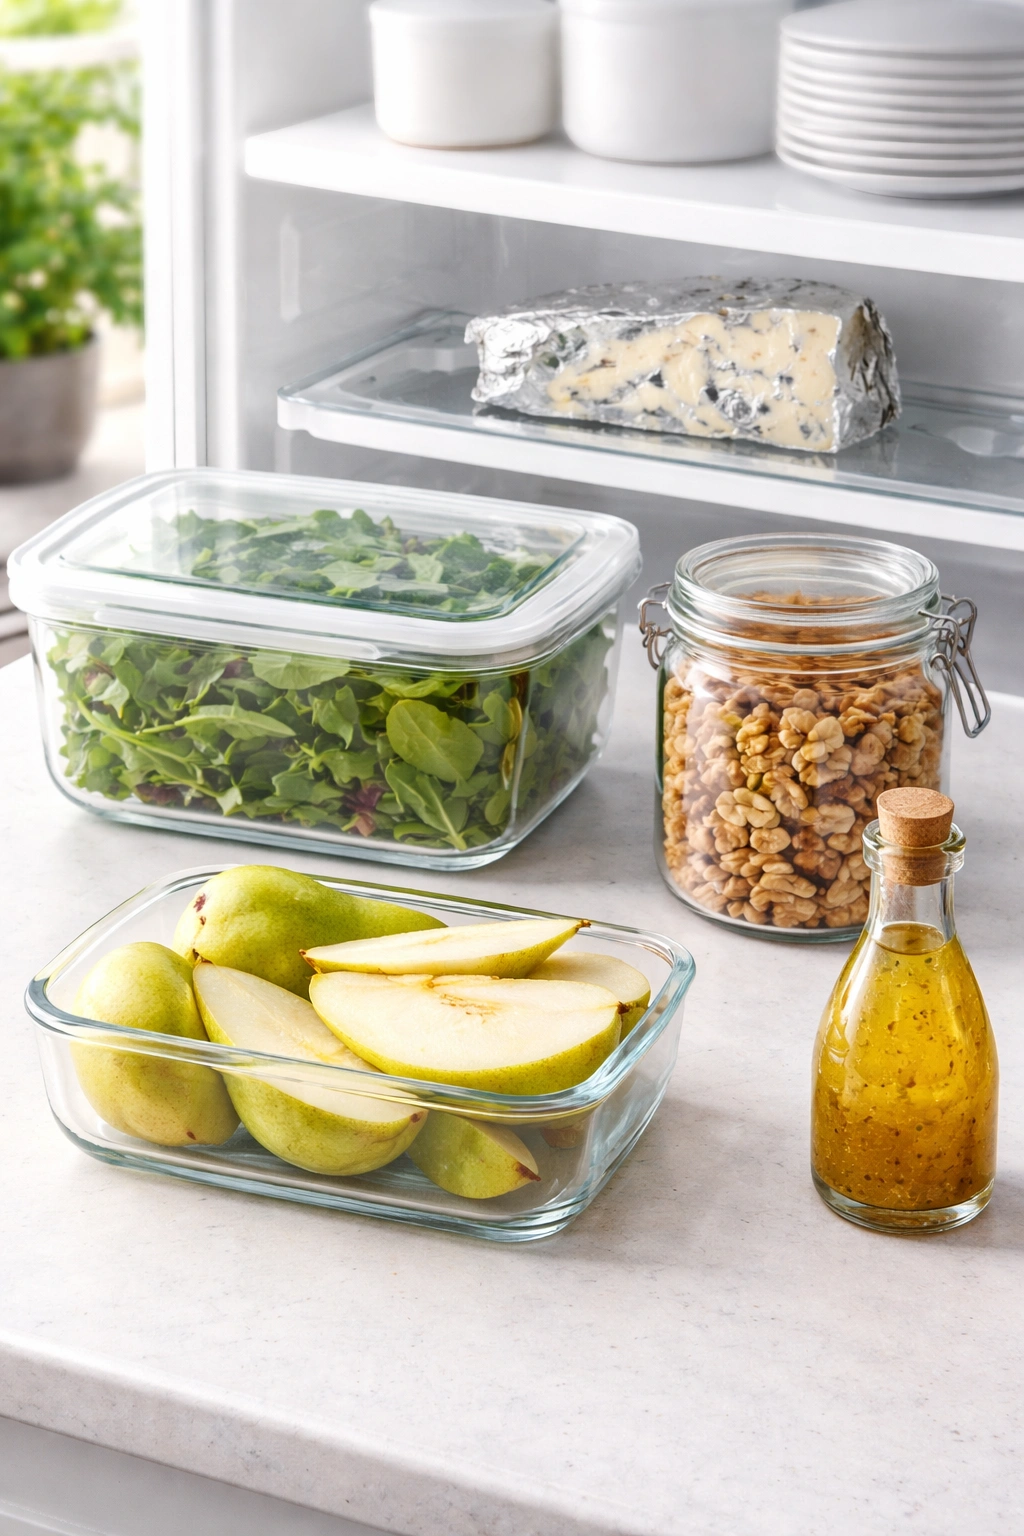
The assembled salad does not keep. Once everything is mixed with dressing, the greens begin to soften and the salad becomes less appealing within 10-15 minutes. So plan on assembling this salad just before serving. However, all the individual components can be prepared hours ahead.
Keep the components separate until the last moment. Wash and dry your greens, crumble your cheese, and toast your walnuts earlier in the day. Store the greens in a sealed container in the refrigerator (they’ll keep fresh for several hours this way). Keep the cheese in its wrapper on a shelf. Keep the nuts in an airtight container at room temperature. The pears should be left whole or already sliced and stored, stem-side down, in an airtight container — they’ll brown more slowly this way — until you’re ready to serve.
The vinaigrette lasts for about one week, refrigerated. Make it in advance if you like, and keep it in a covered jar in the refrigerator. It may separate, but a vigorous shake will recombine it. Let it come to room temperature before using, or if you want to use it cold, shake it again right before pouring.
Leftover salad that’s been dressed can be saved, though it won’t be crispy. If you have a large batch and greens left over, store undressed leftovers in an airtight container in the refrigerator for up to 2 days. The gorgonzola and walnuts don’t suffer for overnight storage. The pear will brown slightly, but it’s still delicious. If you have leftover vinaigrette-dressed salad, you can refrigerate it for 1 day, but expect the greens to be soft and the overall texture to be less appealing.
Toast extra walnuts and store them. Since toasted walnuts keep well in an airtight container for about a week, consider toasting a larger batch than you need for this salad. Toasted walnuts are useful on all kinds of things — yogurt, oatmeal, other salads, roasted vegetables — so having them on hand is never wasteful.
Plating and Serving Suggestions
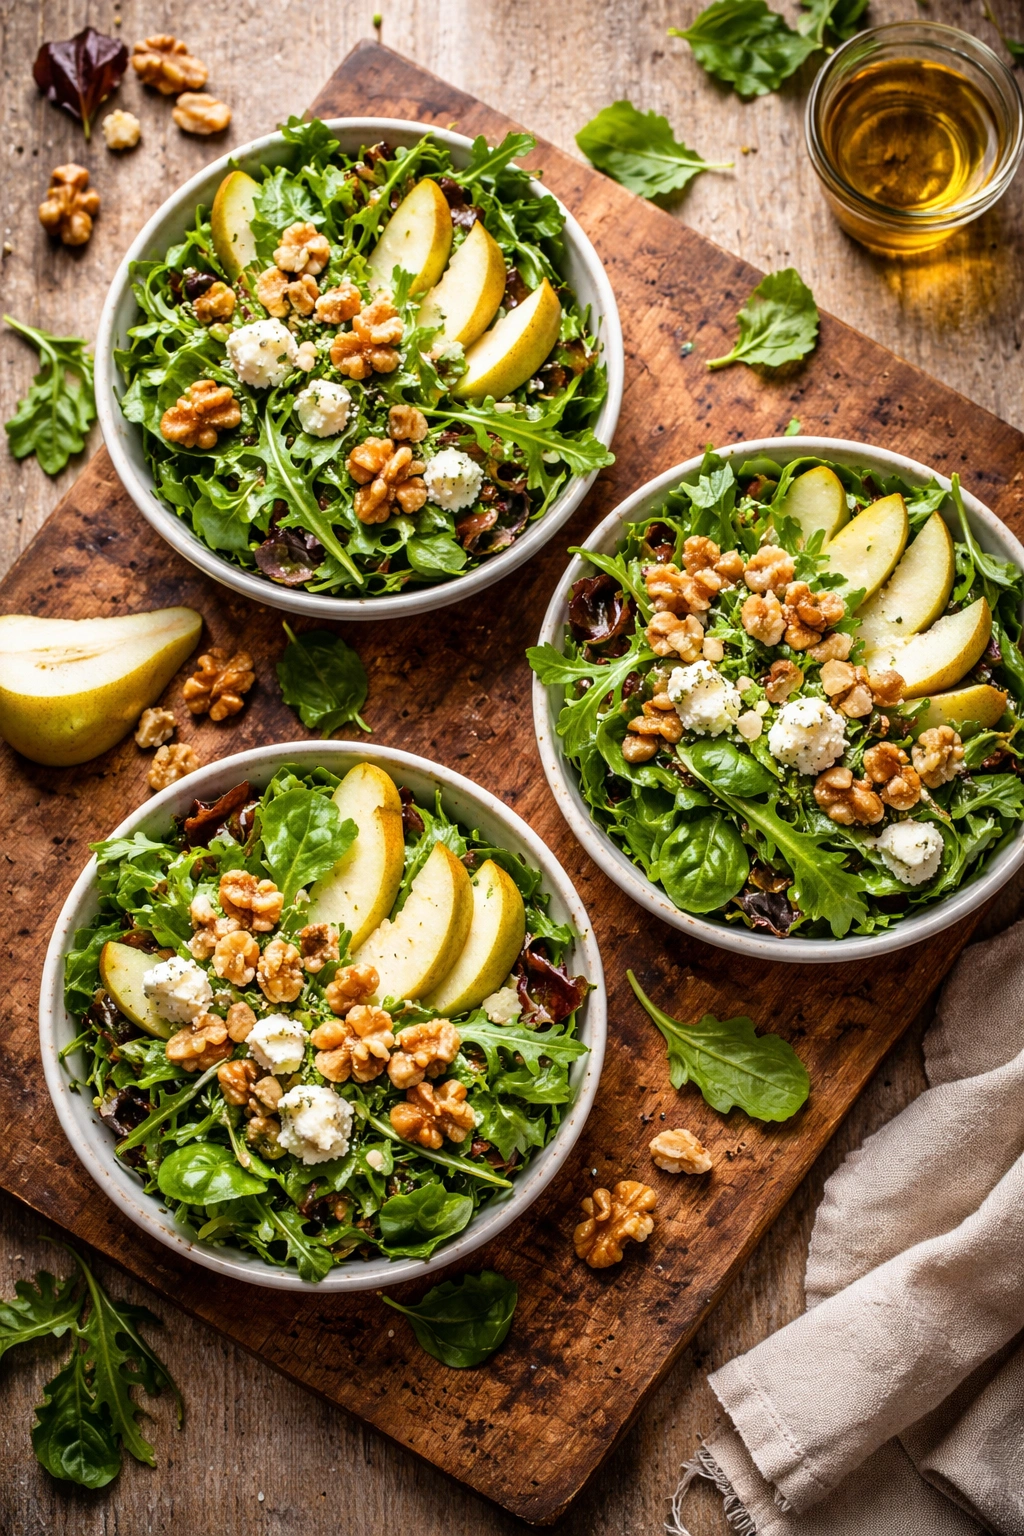
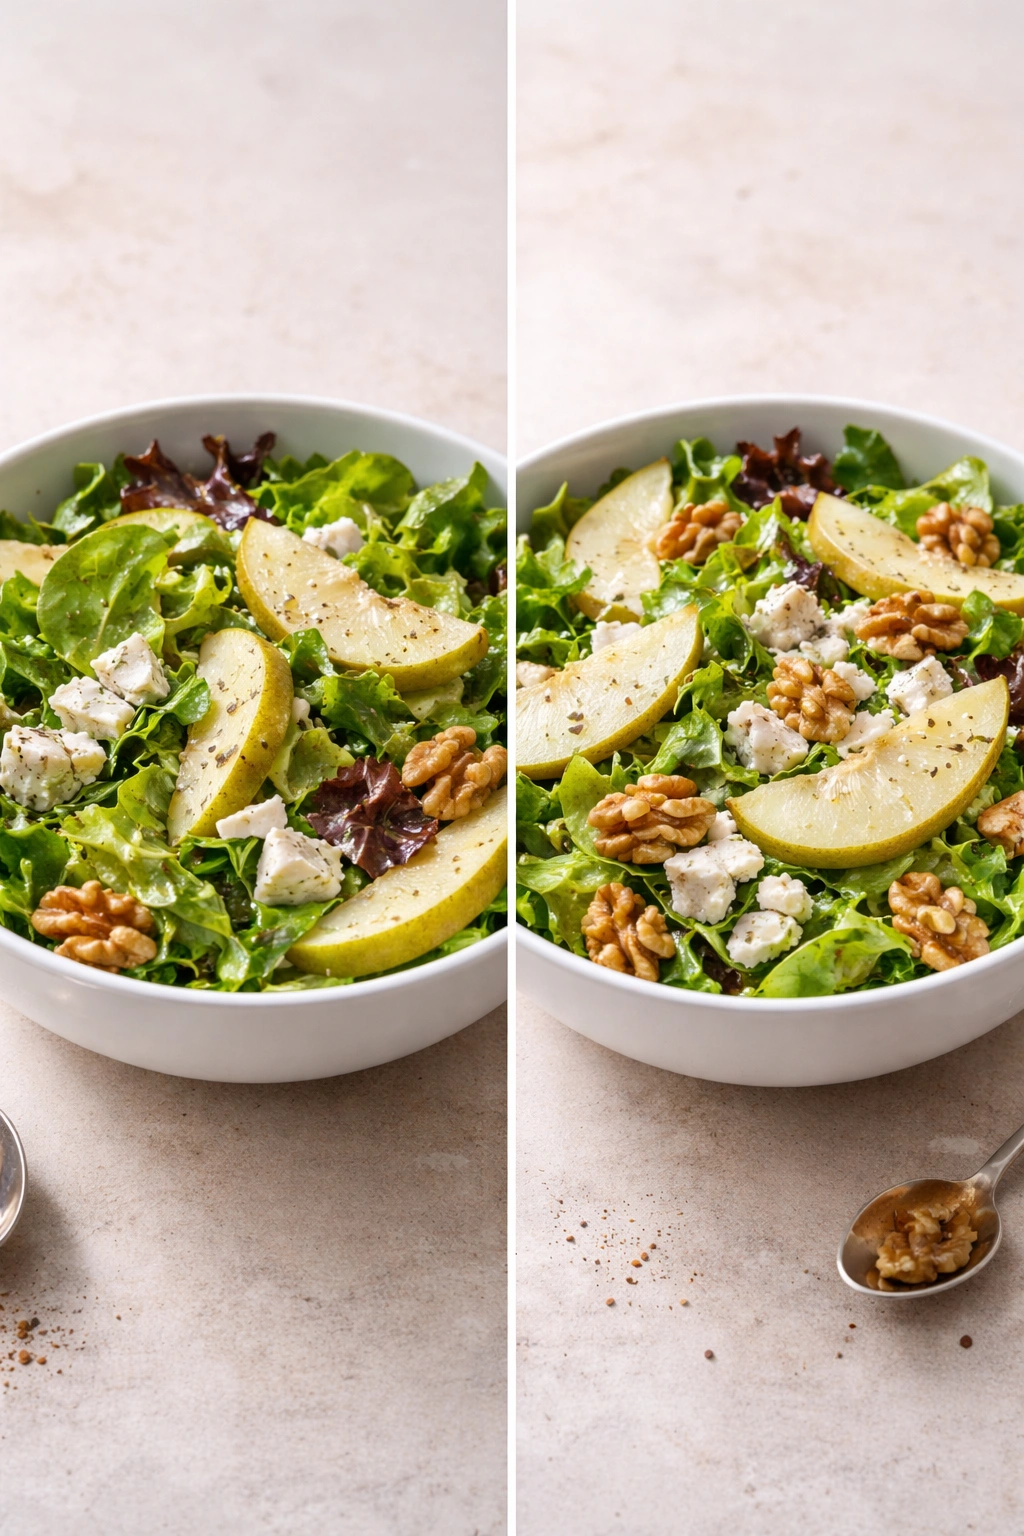
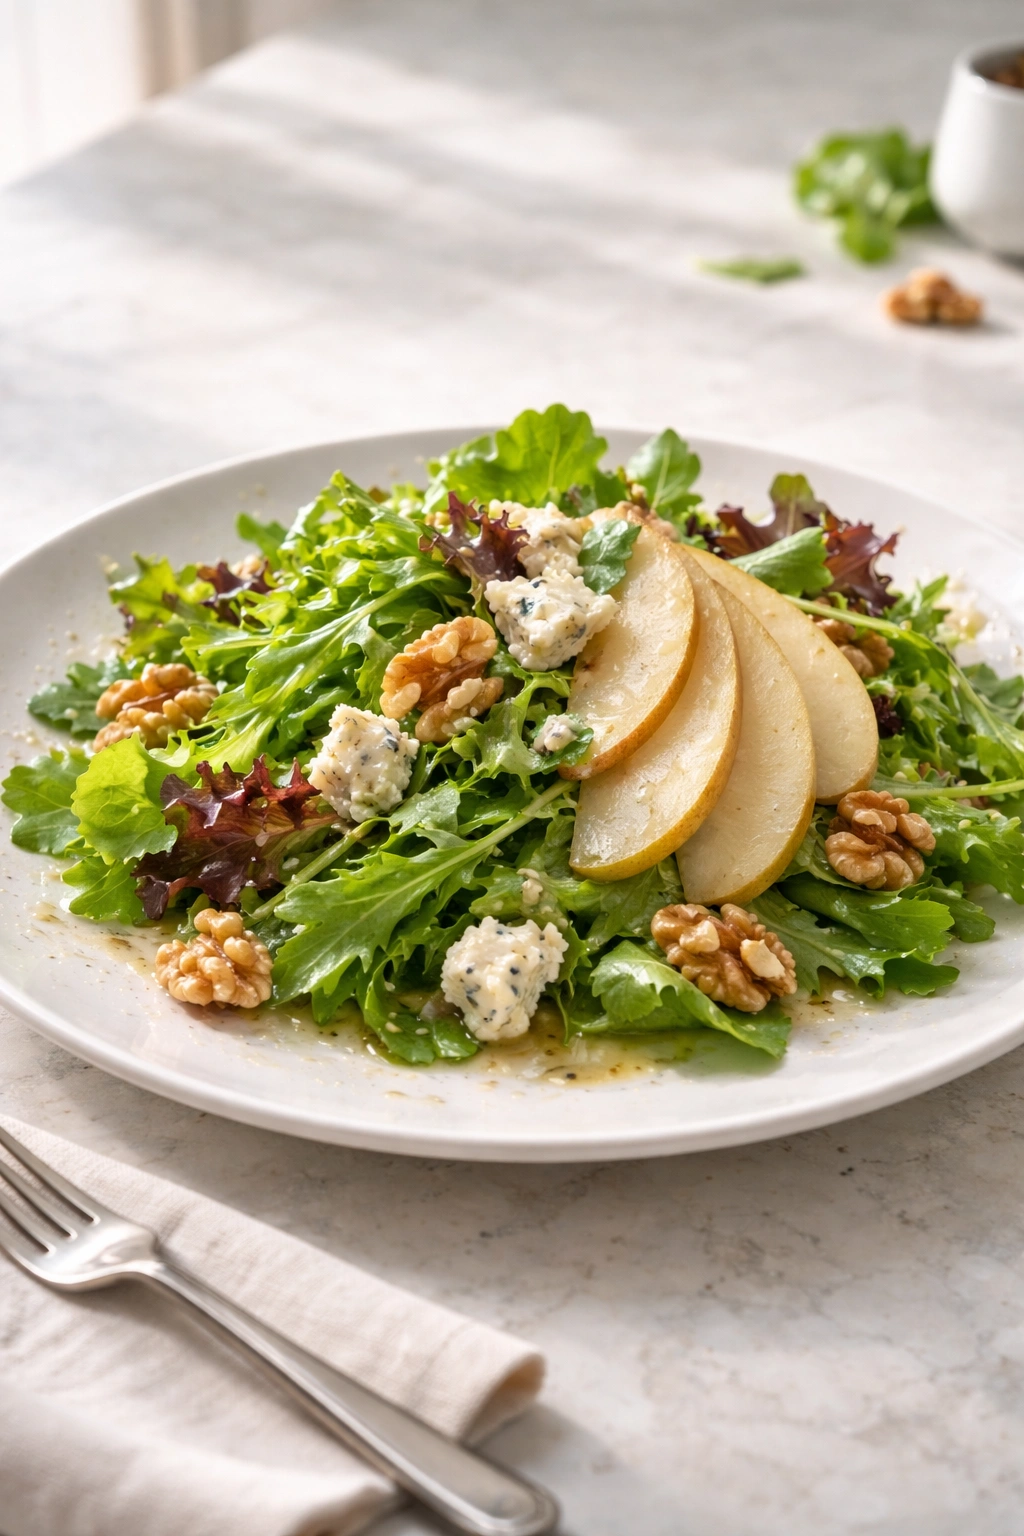
Presentation matters with this salad because the colors and textures are genuinely beautiful. The deep green of the arugula, the white and blue veining of the gorgonzola, the golden-brown crunch of the walnuts, and the pale green and pink of the pear create a naturally elegant plate.
Arrange the components with intention rather than randomly tossing. Place the greens as a bed, crumble the cheese over and around them, scatter the walnuts, and then arrange the pear slices in a loose, casual pattern that shows off their color. The goal is a plate that looks intentional and pretty without looking fussy or over-styled. This is restaurant-quality salad — it should look like you care about how it looks.
Serve on chilled plates. A cold plate keeps the salad colder longer and makes the whole experience more pleasant. Pop your plates in the freezer for 10 minutes before serving, or in the refrigerator for at least an hour.
Drizzle the vinaigrette just before serving. Pour it around the salad rather than just dumping it in the center, and let some of it pool slightly on the plate — it looks beautiful and tastes good.
Add a crack of fresh black pepper right before serving. It looks professional and adds a peppery bite that ties everything together.
Pairing This Salad With Other Dishes
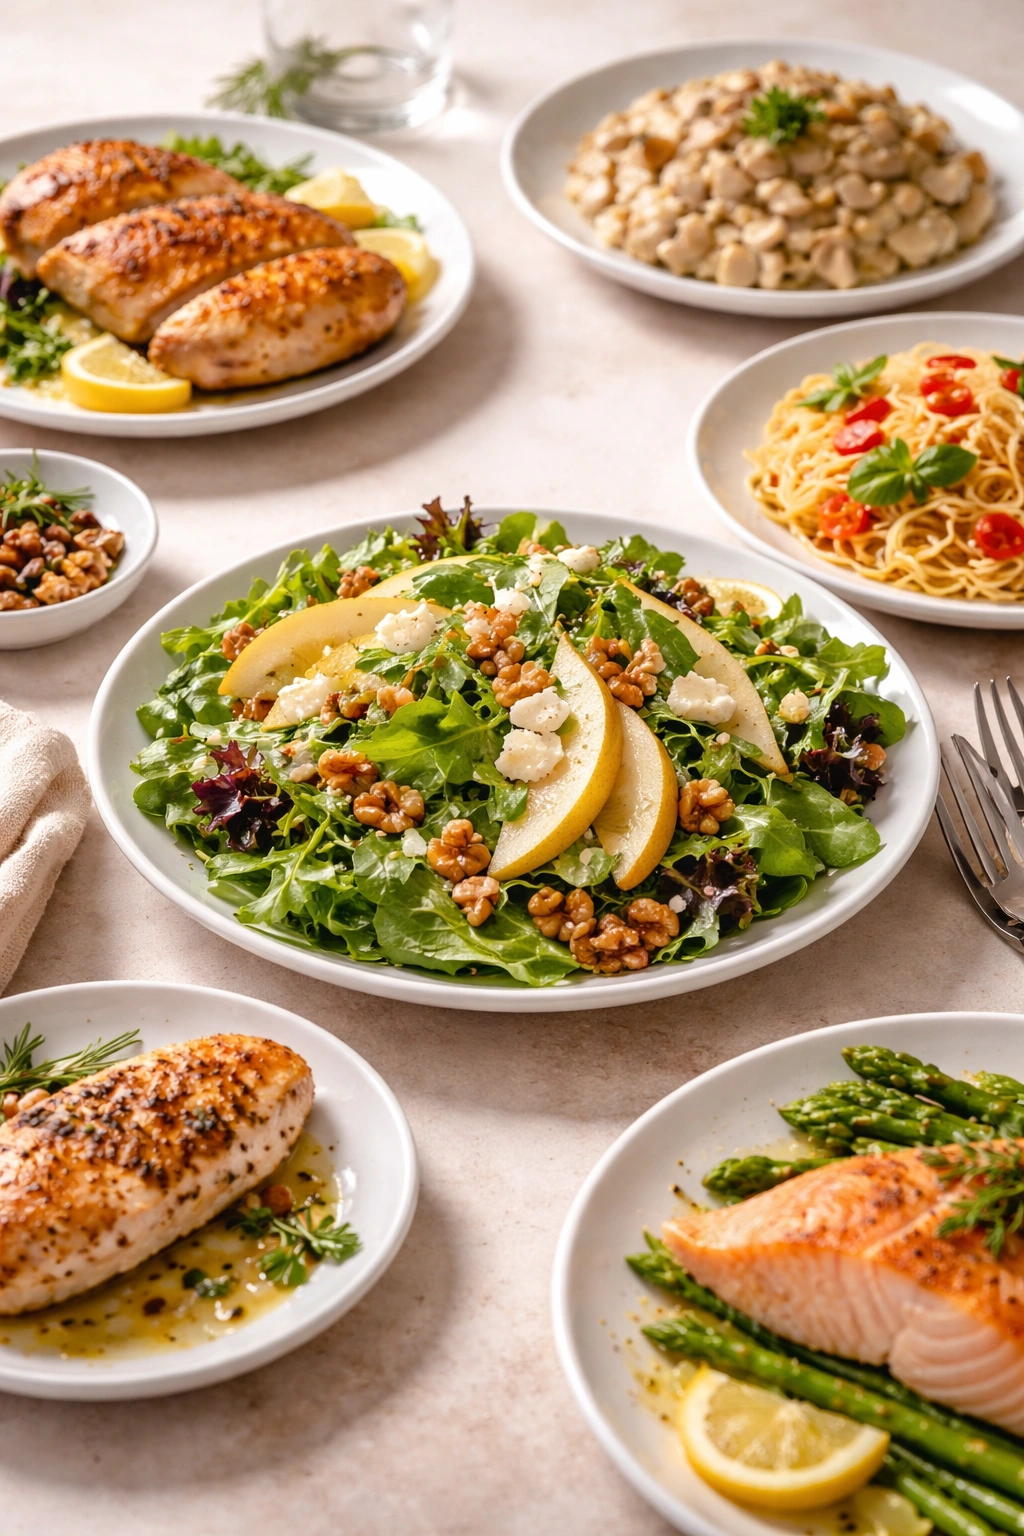
As a first course, this salad is substantial enough to satisfy without being so heavy that it overwhelms the main course. It works beautifully before a roasted chicken, a pasta dish, a piece of grilled fish, or even a simple steak. The cool, crisp, slightly tangy nature of the salad prepares your palate perfectly for whatever comes next.
As a side salad served alongside a main, it works especially well with roasted salmon or halibut — the richness of the fish and the richness of the gorgonzola complement each other rather than competing. It also pairs well with a simple roasted chicken, or with mushroom risotto if you’re serving vegetarian.
The vinaigrette in particular pairs well with simple protein preparations — grilled fish, roasted chicken breast, or a piece of steak can all benefit from a small drizzle of the extra dressing on the side. Since the vinaigrette is fairly robust and flavorful, it works well with proteins that are prepared simply without heavy sauces.
For drinks, pair this salad with something crisp and slightly acidic. A dry white wine like Sauvignon Blanc or Pinot Grigio works beautifully. So does a light rosé. If you’re serving this at lunch and not serving alcohol, sparkling water with a squeeze of lemon or lime is perfect. Avoid heavy, oaky wines — the acidity and crispness in the wine should echo the acidity in the salad.
Final Thoughts
This gorgonzola salad with walnuts and pear is proof that you don’t need to be a skilled cook to create something genuinely impressive. What you need is good ingredients, a basic understanding of how flavors and textures work together, and willingness to take just a little bit of time. The components themselves do most of the work — you’re just providing the framework.
The first time you make this, treat it as an exercise in quality. Buy the best ingredients you can afford, toast the nuts yourself, and taste the vinaigrette before you serve it. The second time, you’ll move faster and with more confidence. By the third or fourth time, you’ll be making it without thinking, knowing exactly how it should taste and feel, and maybe even customizing it slightly based on what looks good at the market.
That’s when a recipe becomes a tool in your kitchen — when you know it well enough to make it quickly, taste it accurately, and trust your instincts about how to adapt it. This salad is worth getting to know that well. It’s the kind of thing you’ll make over and over, for weeknight dinners and dinner parties, and it’ll be different every time because the seasons change and the ingredients vary, but the core — that balance of creamy, sharp cheese, sweet fruit, crunchy nuts, and bitter greens — stays true. That balance is what makes it remarkable.