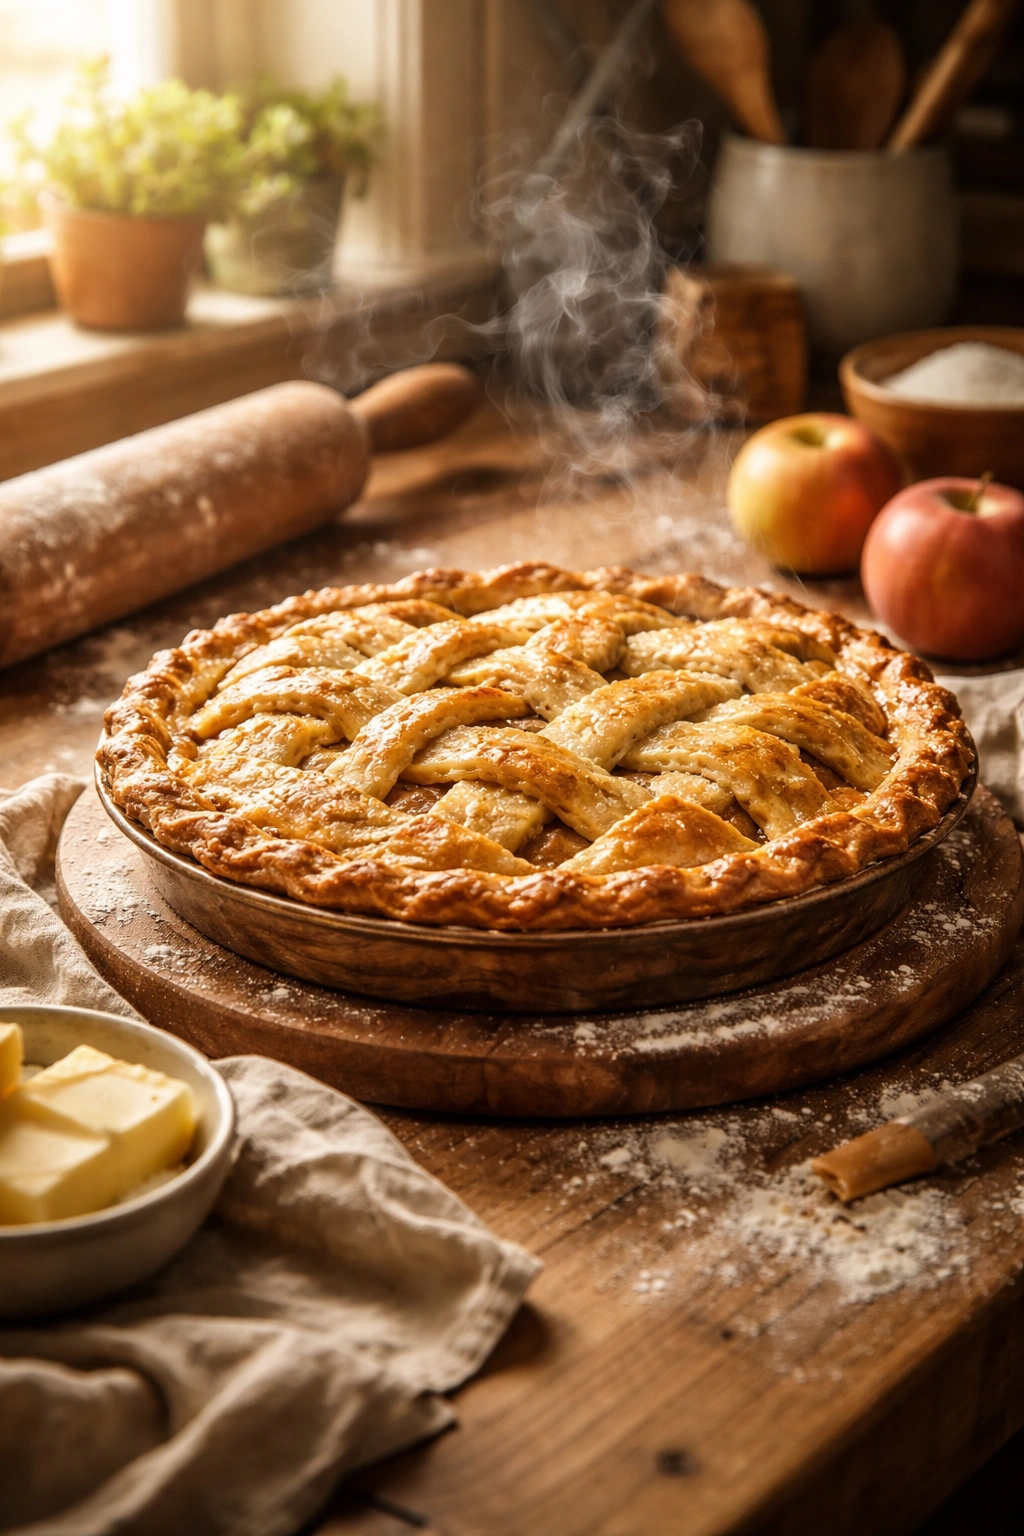
There’s something almost mystical about homemade pie. The golden, flaky crust, the fragrant filling bubbling at the edges, that first bite where butter melts on your tongue—it feels like an accomplishment reserved for experienced bakers. The truth? Making pie at home is genuinely easier than most people believe, and once you master the fundamentals, you have a dessert that works for literally any occasion. A casual weeknight family dinner, a formal holiday gathering, a potluck contribution, a birthday celebration—the same basic technique and recipe adapt beautifully to all of them.
The barrier isn’t skill; it’s usually just understanding the few core principles that make pie crust work and learning that pie filling can be endlessly flexible. A flaky crust comes down to keeping butter cold and mixing gently—not complicated, just deliberate. Fillings can embrace whatever fruit is in season, whatever flavor profile fits your meal, whatever dietary restrictions you’re juggling. The structure of pie-making is forgiving enough to handle variations while remaining consistent enough to deliver reliable, impressive results every time.
This guide walks you through exactly how to build confidence in pie-making with a versatile foundation recipe that you’ll return to again and again. You’ll learn the specific techniques that separate tough, dense crust from the shatteringly crisp, tender version people remember. You’ll see how to adapt one simple filling formula into endless variations based on what’s available, what’s in season, and what story you want your pie to tell. Whether you’re making pie for your first time or hoping to deepen skills you already have, this is the roadmap.
Why Homemade Pie Feels Harder Than It Actually Is
People hesitate with pie because they’ve absorbed a cultural narrative that pie crust is temperamental and finicky. Someone burned one as a teenager. They heard a relative say “I can never get my crust to flake.” They watched a cooking show where a professional chef stressed about the exact temperature of water. These stories create a mental barrier that doesn’t match reality.
The actual technical demands of pie are minimal compared to, say, yeasted bread or laminated pastry like croissants. Pie dough contains exactly five ingredients, comes together in under 10 minutes of actual work, and forgives mistakes far more readily than people expect. A crust that’s slightly overworked will still taste good—it’ll just be a bit less flaky. A dough that’s slightly too warm can be refrigerated for five minutes and will behave perfectly. A filling that’s thicker or thinner than intended still bakes into something delicious.
What separates successful pie bakers from frustrated ones isn’t innate talent—it’s having clear information about what actually matters versus what doesn’t. Keeping butter cold matters. Avoiding overworking the dough matters. Knowing whether to blind-bake the crust for your filling matters. Exact water measurements don’t matter—feel does. Fancy equipment doesn’t matter—a fork and a bowl work fine. Once you separate signal from noise, pie becomes a confident, repeatable skill rather than a gamble.
Understanding Pie Crust: The Foundation Everything Rests On
A flaky pie crust is built on a single principle: create pockets of steam inside the dough that lift and separate the layers as they bake. That happens when bits of cold butter are trapped inside flour, surrounded by a network of gluten. As the oven heat melts the butter, water in the butter turns to steam. That steam expands and pushes the dough layers apart, creating flakiness.
This is why cold butter matters so much. Room-temperature butter blends smoothly into the flour, distributing evenly—which sounds good but actually prevents layering. Cold butter resists blending and stays in distinct pieces, creating the pockets you need. By the time the filling bakes, the butter has melted and created steam, leaving tiny air gaps that make the crust crispy and tender.
Gluten development also matters, but in reverse. You want minimal gluten structure in pie drust—gluten creates toughness and chewiness, which is the opposite of what you’re after. That’s why you stop mixing as soon as the dough comes together, why you rest the dough in the refrigerator (cold slows gluten development), and why overworking the dough by hand is something you actually want to avoid. A slightly shaggy dough that barely holds together when you first make it becomes tender and cooperative after chilling.
Fat content is the third pillar. Pie crust is typically 1 part fat to 3 parts flour by weight. That high ratio of fat means every flour particle gets coated with fat, which blocks water from forming strong gluten networks. The result is a tender crumb rather than a tough one. All-butter dough (versus butter mixed with shortening) gives the best flavor and the most reliable flaking.
The Foolproof All-Butter Pie Dough Recipe
This is the recipe you’ll make again and again. It works for sweet pies, savory pies, fruit fillings, custard fillings, and cream fillings. It’s forgiving, reliable, and produces a crust that’s visibly flaky, genuinely tender, and tastes like real butter. The recipe makes enough for one 9-inch double-crust pie (a bottom crust plus a top crust) or two single-crust pies. Proportions are given by weight because weight is more accurate and reliable than volume measures, but volume equivalents are also included.
Yield: One 9-inch double-crust pie, or two 9-inch single-crust pies
Prep Time: 15 minutes (plus chilling)
Chill Time: Minimum 30 minutes (can be prepared 1–2 days ahead)
Difficulty: Beginner — the technique is straightforward, and the dough is forgiving. Even if you’ve never made pie before, this recipe succeeds.
Ingredients for the Pie Dough:
- 250 grams (2 cups) all-purpose flour
- 1 tablespoon granulated sugar
- 1 teaspoon fine sea salt
- 170 grams (12 tablespoons or 1½ sticks) cold unsalted butter, cut into ½-inch cubes
- 6–8 tablespoons ice water (start with 6 and add more as needed)
Equipment You’ll Need:
- A large bowl
- A pastry cutter, two forks, or your fingertips
- A measuring cup or spray bottle for water
- Plastic wrap
- A rolling pin (or even a wine bottle works)
- A 9-inch pie pan
- Parchment paper
Making the Dough:
-
In a large bowl, whisk together the flour, sugar, and salt until evenly combined. This distributes the salt and sugar throughout so they don’t clump in one spot.
-
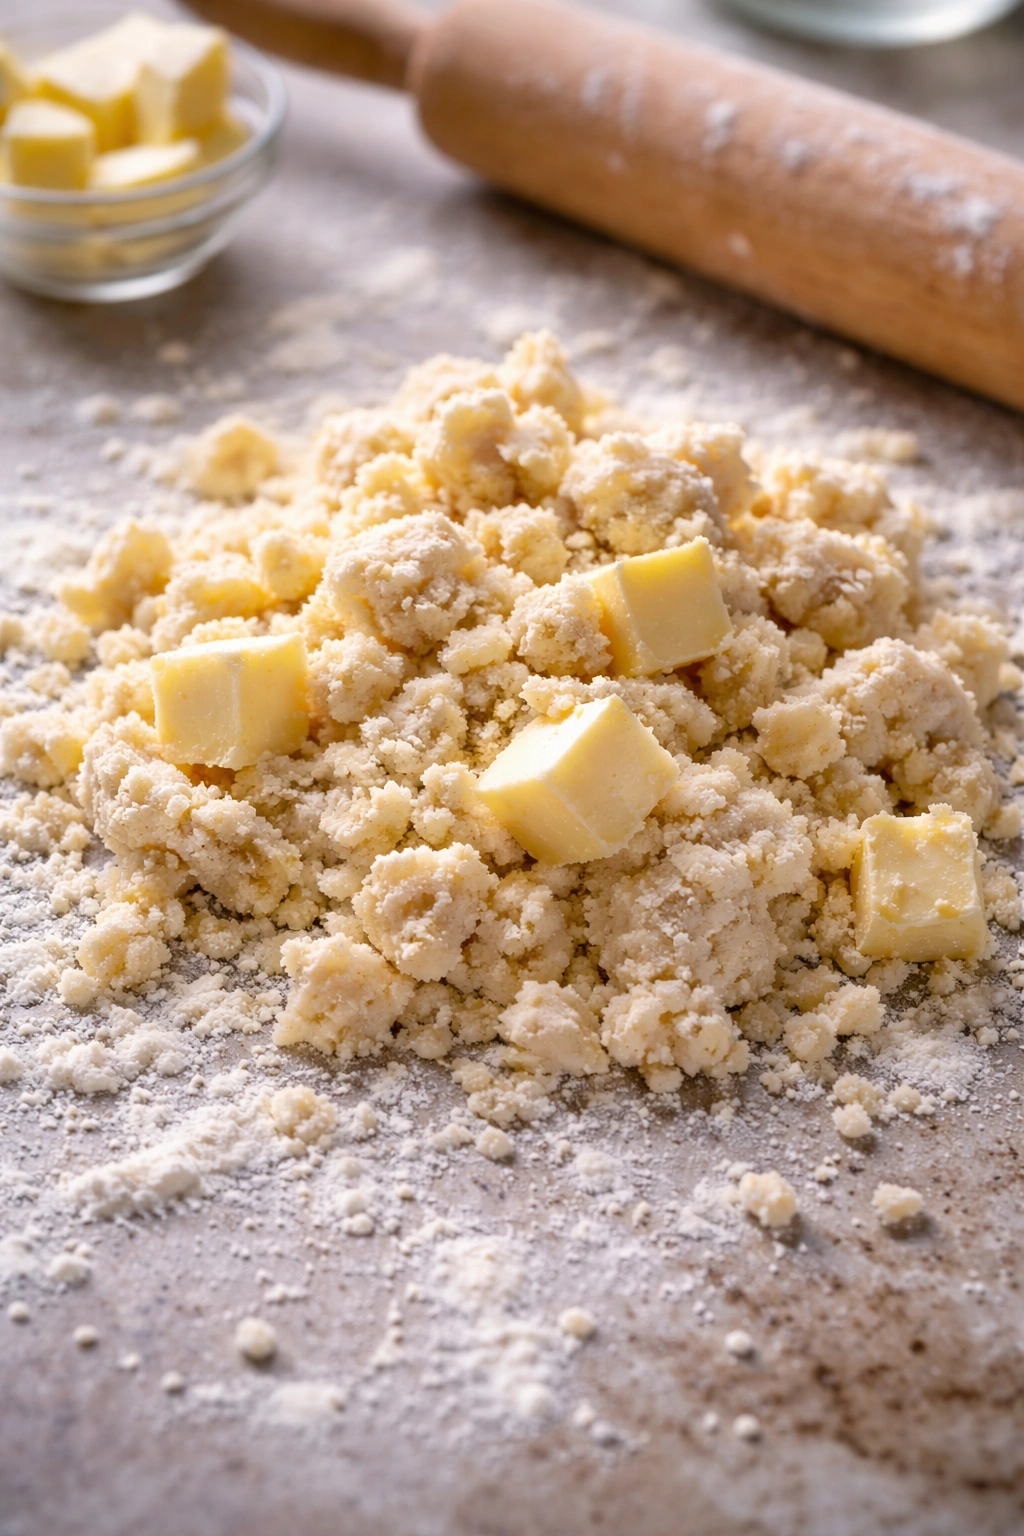
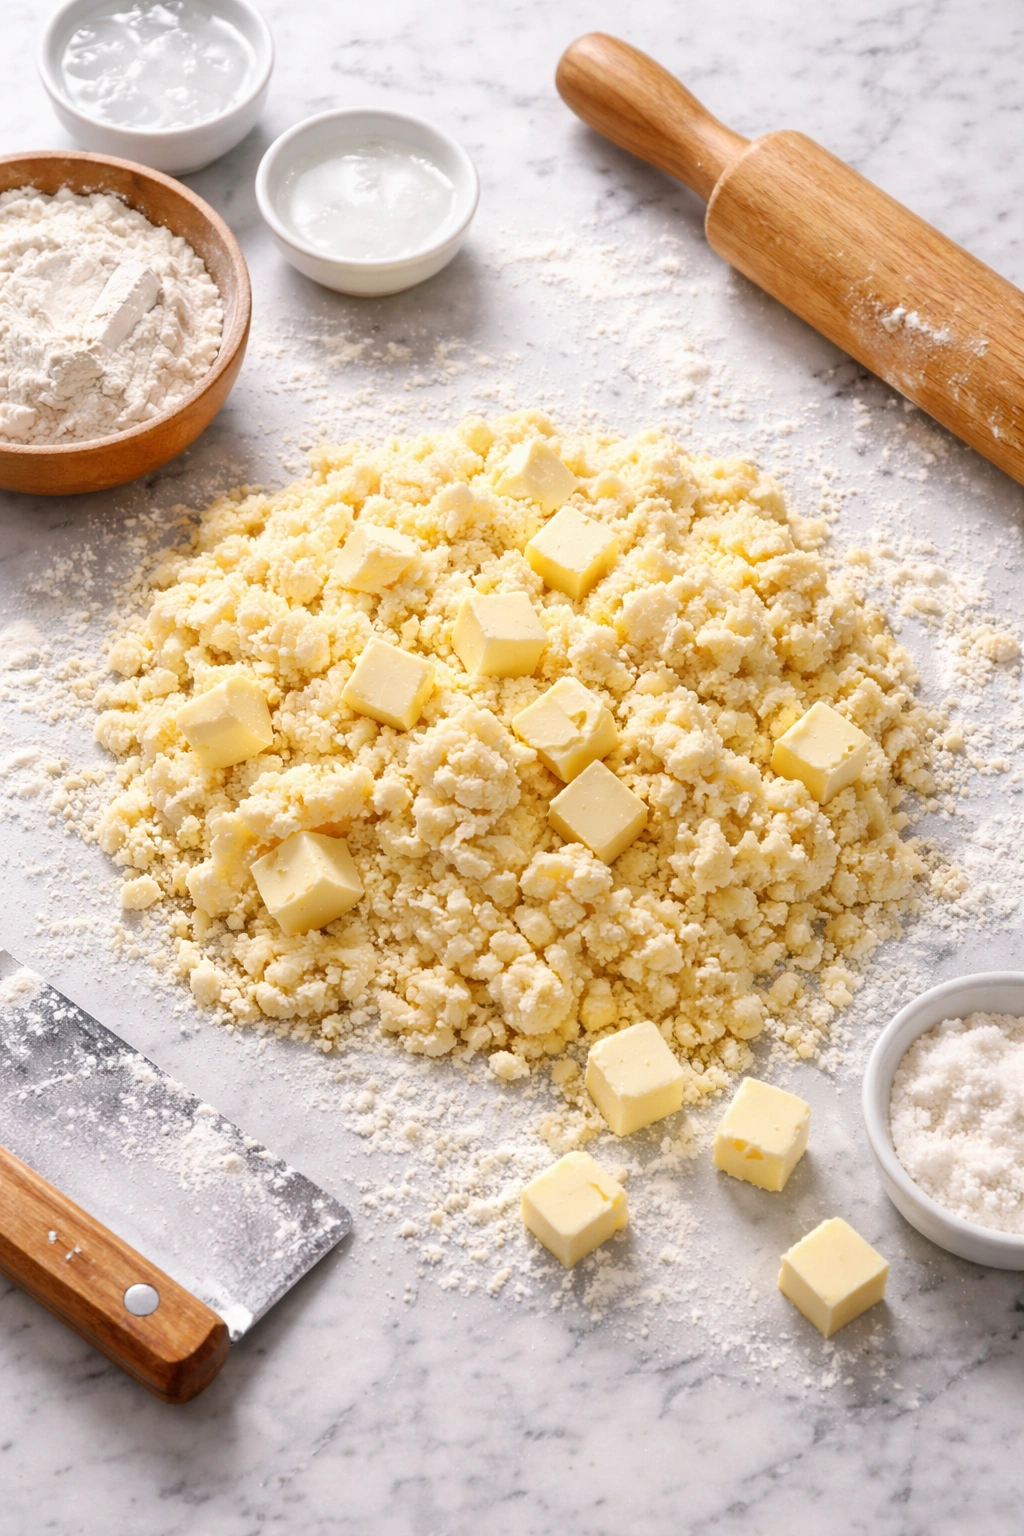
Add the cold butter cubes to the flour mixture. Using a pastry cutter, two forks, or your fingertips (working quickly so the butter doesn’t warm), break the butter into smaller and smaller pieces until the mixture resembles coarse sand with pea-sized lumps of butter still visible throughout. This takes about 2–3 minutes of work. Don’t aim for a uniform texture—you want distinct butter pieces, not a smooth paste. The uneven texture is exactly what creates flakiness.
Advertisements -
Sprinkle 6 tablespoons of ice water over the mixture, then gently toss with a fork, pressing and folding the dough until it starts to come together. Add 1 more tablespoon of water only if the mixture is still visibly dry and won’t hold together when you squeeze a handful. The dough should be shaggy and barely holding together—it will look quite rough and unpromising at this stage. That’s exactly right.
-
Turn the shaggy dough out onto a clean surface. Gather it into a rough ball with your hands, being as gentle as possible—don’t knead or overwork it. Wrap the ball in plastic wrap, flattening it into a disk about ¾ inch thick. Refrigerate for at least 30 minutes, though overnight (up to 2 days) is even better. Chilling does two critical things: it firms up the butter so it stays in distinct pieces during rolling, and it relaxes the gluten so the dough won’t shrink or tear when you roll and fit it into the pan.
Rolling, Fitting, and Preparing Your Pie Crust
After chilling, the dough is ready to roll. Remove it from the refrigerator and let it sit at room temperature for 3–5 minutes—dough that’s too cold will crack as you roll it, while dough that’s slightly warmed becomes pliable and cooperative. It should bend without breaking but still feel cold to the touch.
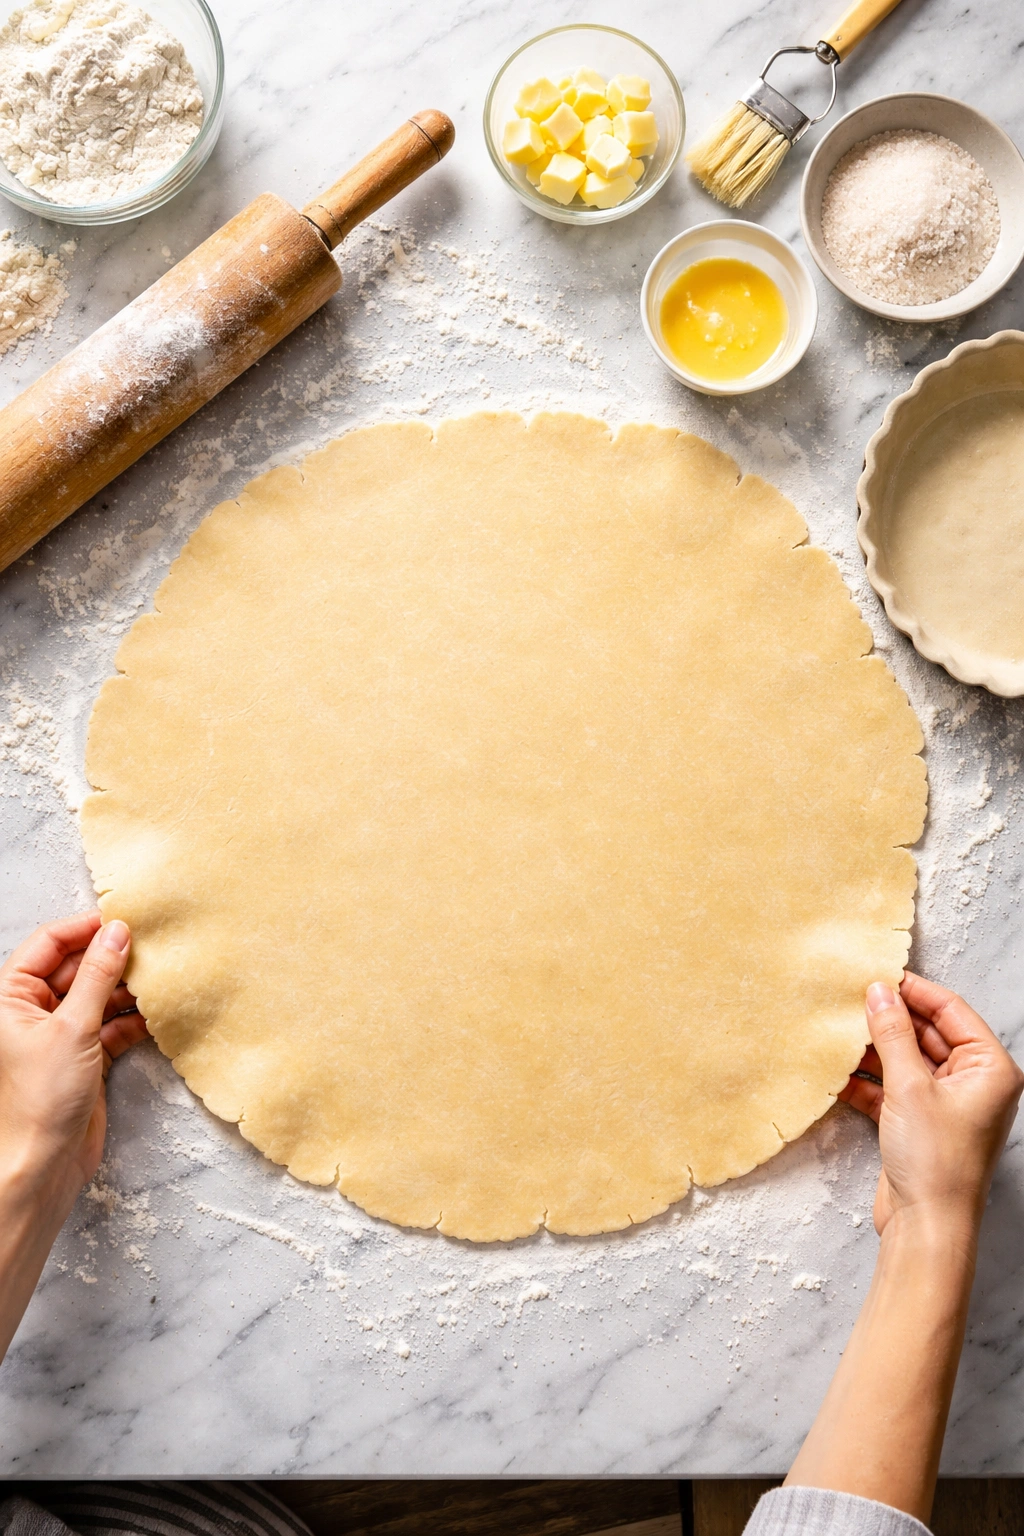
Lightly flour a clean countertop or large cutting board. Place the dough disk in the center and flatten it slightly with the heel of your hand. Begin rolling from the center outward, rotating the dough a quarter turn between each roll, so you’re building a circle gradually rather than stretching one direction repeatedly. Roll until the dough is about ⅛ inch thick and roughly 2 inches larger in diameter than your pie pan (a 9-inch pan needs roughly an 11-inch round of dough).
If the dough tears while rolling, don’t panic—just press the tear closed with your fingers. If cracks form at the edges, gather them and press them into the edge. Pie dough is quite forgiving about minor repairs because the dough will weld itself back together during baking.
To transfer the rolled dough to the pie pan without tearing it, roll it loosely around the rolling pin, then unroll it over the pan, centering it so the overhang is even on all sides. Gently press the dough into the corners and up the sides of the pan, working slowly so you don’t stretch it (stretched dough shrinks during baking). Leave the overhang hanging over the edge for now—you’ll trim it after you add the filling.
For a single-crust pie (filled with custard, cream, or a filling that doesn’t need a top crust), this is where you typically blind-bake the crust—bake it empty before adding the filling—to prevent a soggy bottom. See the blind-baking section below for those details.
For a double-crust pie (with both bottom and top crust), you’ll fit the bottom crust as described, add your filling, then repeat the rolling and fitting process for the top crust. Place the top crust over the filling, trim both crusts together to about 1 inch overhang, then fold the overhang under itself and crimp the edge decoratively or with a fork to seal the crusts together.
Blind-Baking for Custard and Cream Pies
Blind-baking (pre-baking a crust partially or fully before adding wet filling) prevents the dreaded soggy bottom crust. Fruit fillings are thick and bake long enough that the bottom crust sets, so blind-baking isn’t necessary for them. But custard, cream, and other wet fillings that bake quickly or don’t bake at all need a head start.
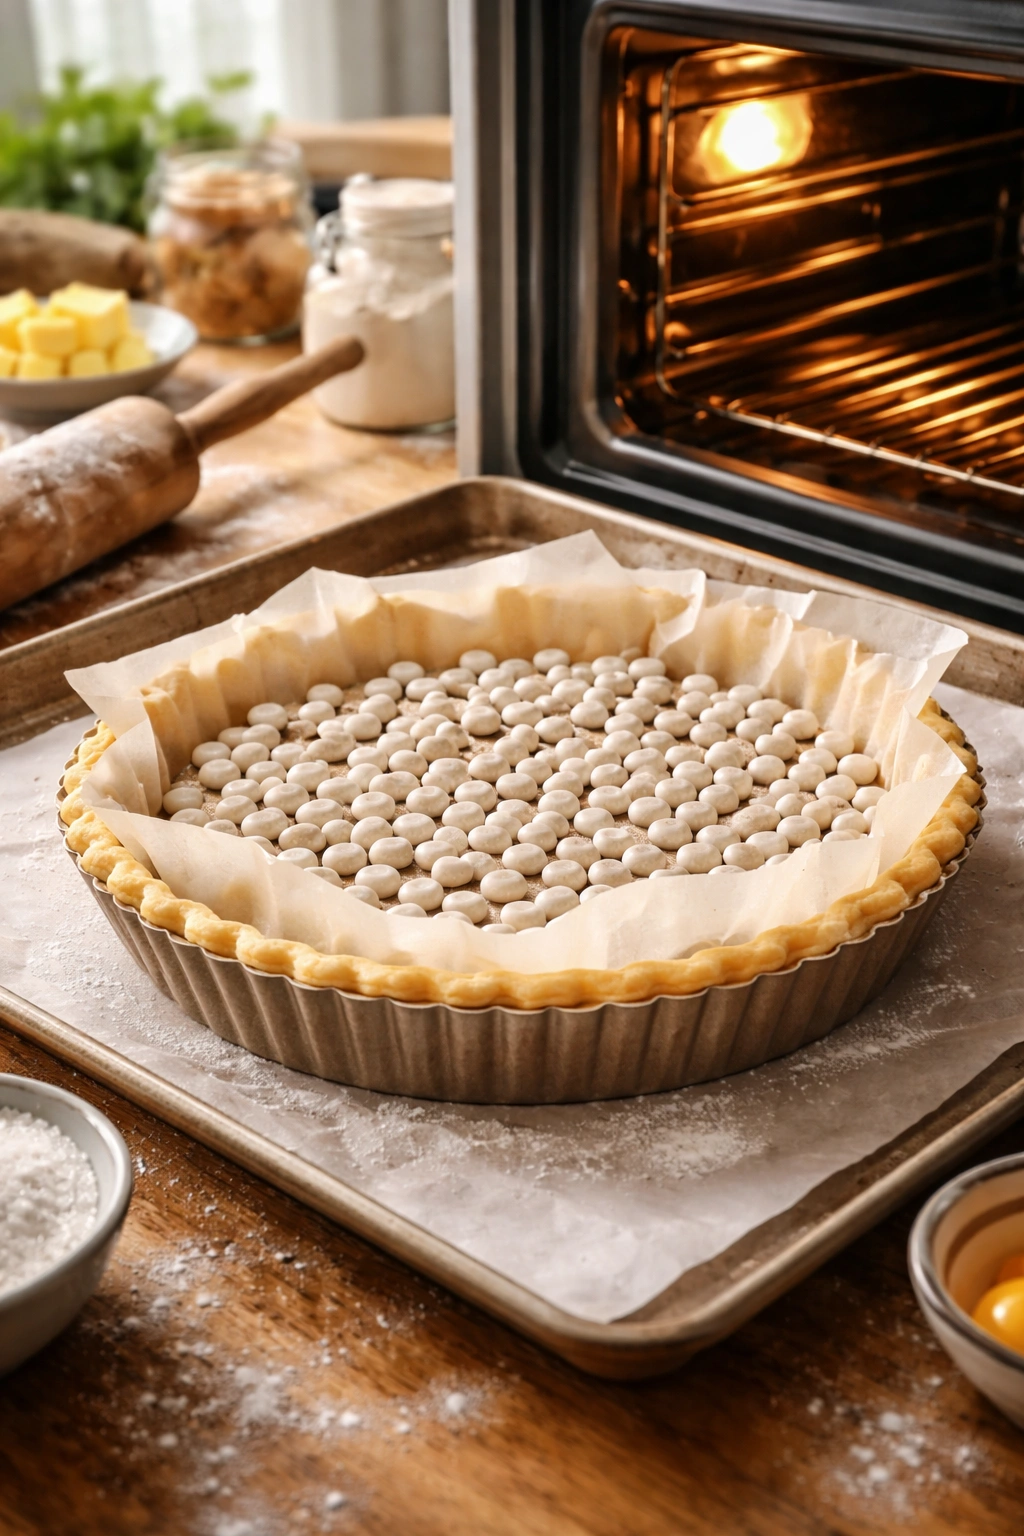
Once you’ve fit the dough into the pan, prick the bottom all over with a fork about 20 times—this allows steam to escape and prevents the bottom from puffing up unevenly. Line the crust with parchment paper or aluminum foil, pressing it gently into the corners. Fill it halfway with pie weights, dried beans, or uncooked rice—the weight keeps the crust from puffing and shrinking.
Bake at 375°F (190°C) for 12–15 minutes, until the edges are light golden but the bottom is still quite pale. Remove the weights and parchment, then bake for another 3–5 minutes until the bottom is set but still pale (you don’t want color yet—that will develop with the filling). The crust should look opaque and dry, not translucent or wet.
If small bubbles form under the bottom of the crust even with weights, prick them gently with a fork while the crust is still hot. Let the crust cool to room temperature before adding the filling.
Easy Fruit Filling: The Versatile Formula
The beauty of fruit pie is that the filling formula remains constant while the fruit changes. The ratio is simple: for every 5 cups of prepared fruit, use 3 tablespoons cornstarch, ¼ teaspoon salt, and ½ cup sugar (adjust sugar based on the fruit’s natural sweetness—tart fruit like rhubarb or green apples needs more; sweet fruit like strawberries needs less).
This filling creates a pie that slices cleanly without being runny, where the fruit flavor shines clearly, and the texture is neither gluey nor separated. The cornstarch absorbs excess moisture released by the fruit during baking and thickens it into sauce that coats each piece.
Basic Fruit Filling for a 9-Inch Pie:
- 5 cups fresh fruit, prepared (peeled, pitted, or hulled as needed, cut into ½- to 1-inch chunks)
- ½ cup granulated sugar (or less if the fruit is very sweet)
- 3 tablespoons cornstarch
- ¼ teaspoon fine sea salt
- 2 tablespoons fresh lemon juice or 1 tablespoon lemon zest (brightens fruit flavor and prevents browning)
- ½ teaspoon vanilla extract or almond extract (optional but recommended)
- ¼ teaspoon ground spice (cinnamon, nutmeg, cardamom—optional)
Making the Filling:
-
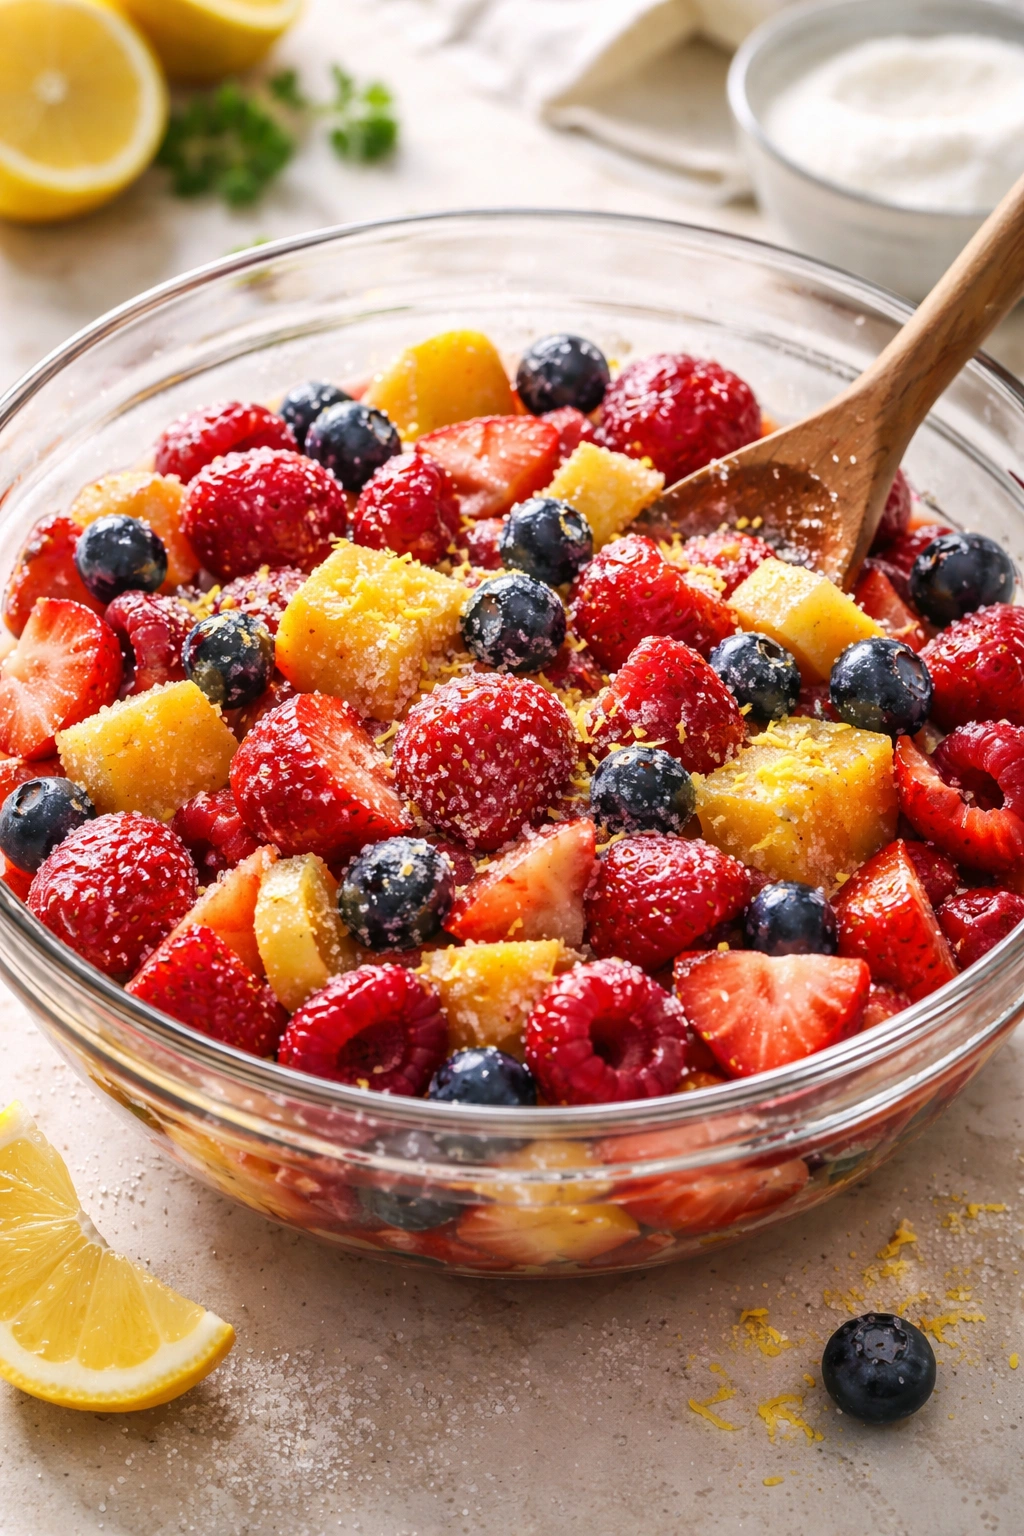
Place the prepared fruit in a large bowl. Sprinkle the sugar, cornstarch, salt, lemon juice, vanilla, and any spices over the fruit.
-
Gently toss everything together with a rubber spatula, folding until the fruit is evenly coated and the cornstarch is distributed. Don’t mash or bruise the fruit—you want distinct pieces, not mush.
-
Let the mixture sit for 10 minutes. If you see excess liquid pooling at the bottom, you can either drain some off or add an extra tablespoon of cornstarch to the mixture. This is where feel matters more than exact rules—you want the fruit to be well-coated but not swimming in liquid.
-
Pour the filling into the prepared crust, mounding it slightly in the center. Add the top crust (if making a double-crust pie), seal the edges, and cut a few steam vents in the top with a small knife.
Advertisements -
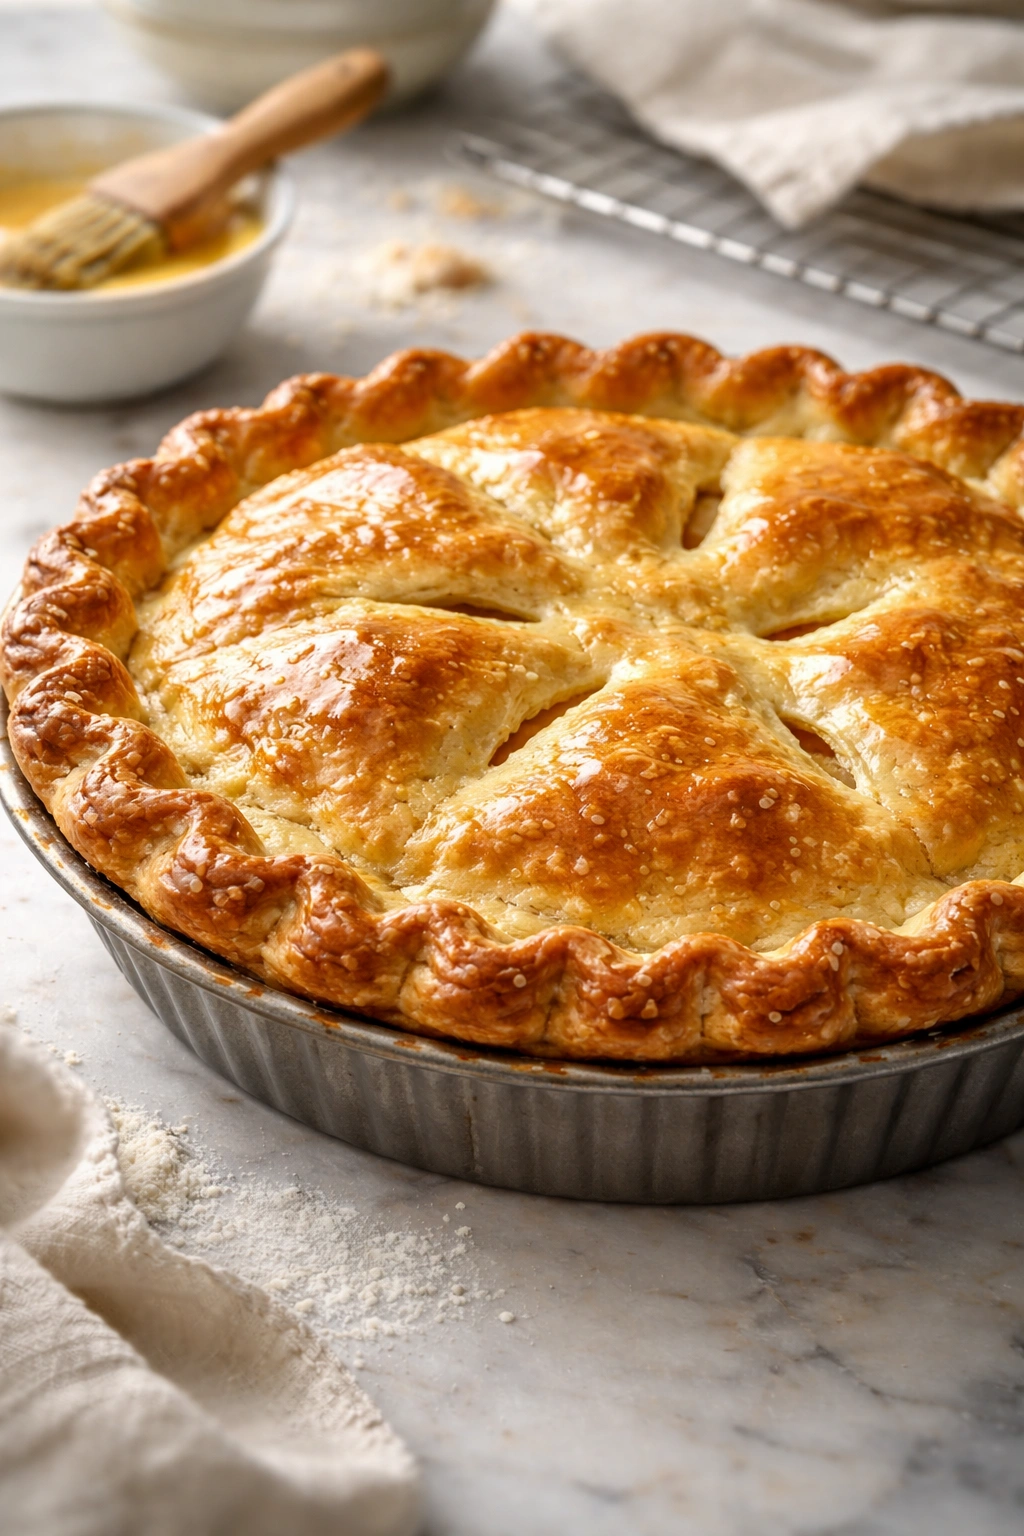
Bake at 375°F (190°C) for 45–55 minutes, rotating the pie halfway through, until the crust is deep golden brown and you see filling bubbling at the steam vents. If the crust edges are browning too quickly, cover them loosely with aluminum foil after 25 minutes of baking.
-
Remove the pie from the oven and place it on a wire rack to cool. Let it cool for at least 2 hours (preferably 4) before slicing—this allows the filling to set so it slices cleanly rather than running all over the plate.
Seasonal and Flavor Variations
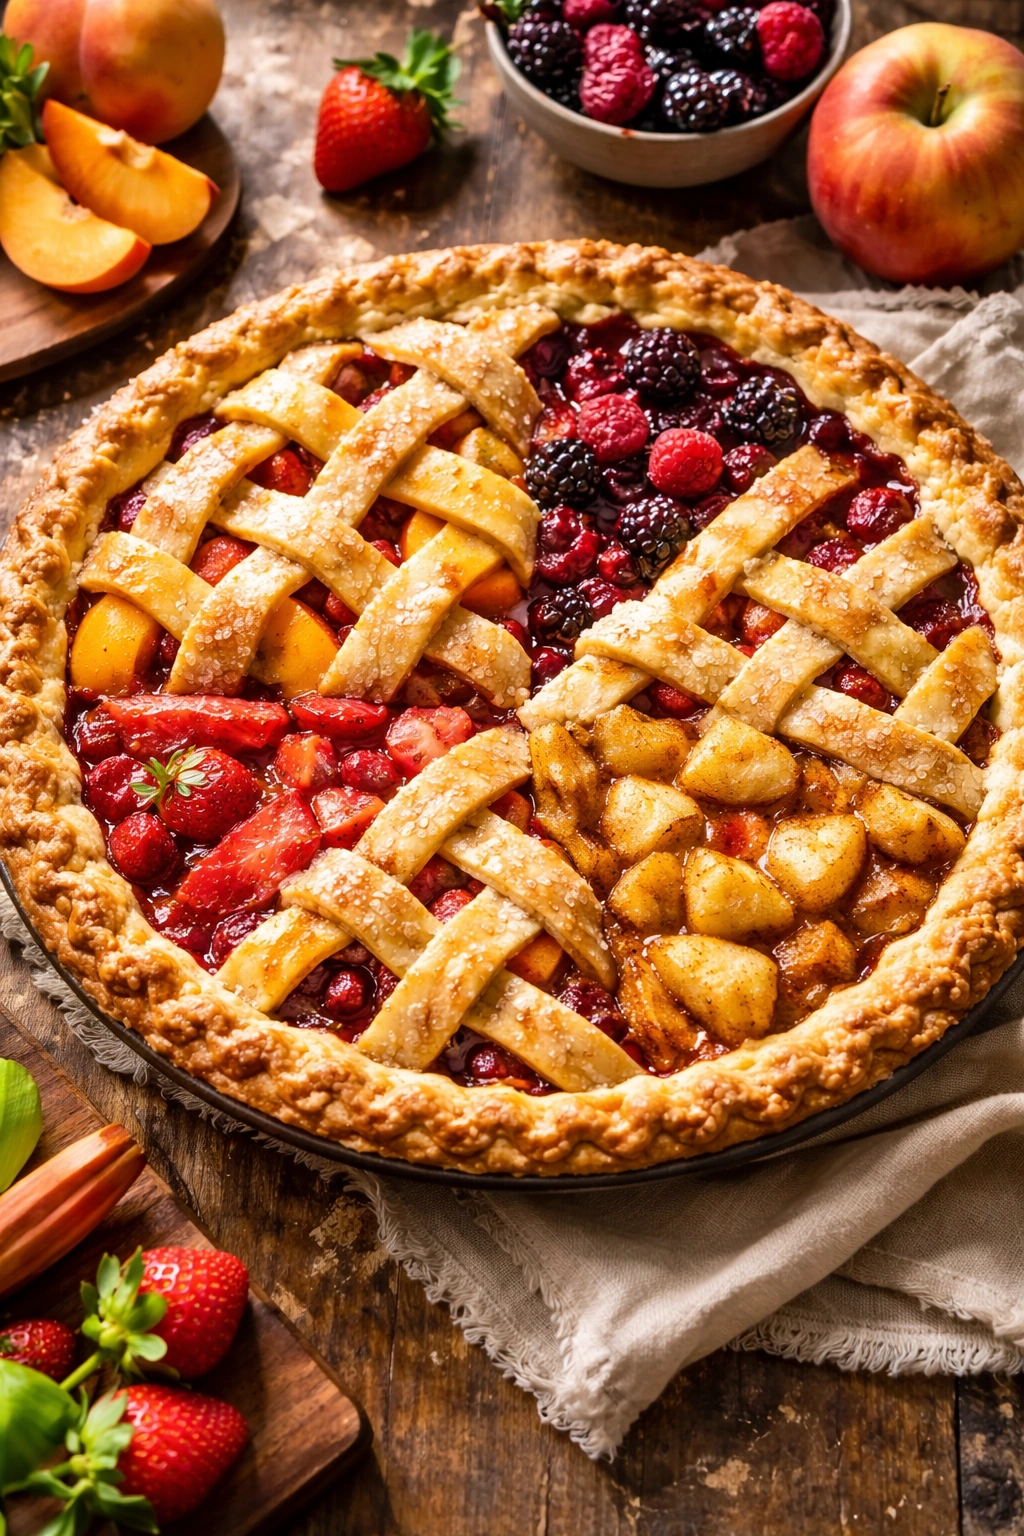
The same dough and filling technique adapts beautifully to any season. Summer means stone fruits and berries; fall brings apples and pears; winter highlights citrus; spring embraces rhubarb and early berries.
Summer Stone Fruit Pie: Use peaches, plums, nectarines, or apricots (5 cups, peeled and pitted). Add 1 tablespoon fresh ginger, minced, and ⅛ teaspoon almond extract. The ginger deepens the fruit’s complexity while the almond extract adds subtle richness.
Blackberry and Lemon Pie: Use 4 cups fresh blackberries plus 1 cup fresh raspberries. Increase lemon zest to 2 tablespoons and add ½ teaspoon vanilla. The tartness of berries balances with bright citrus, creating a pie that feels refreshing and sophisticated.
Apple Cinnamon Pie: Use a mix of tart and sweet apples—Granny Smith paired with Honeycrisp or Gala (5 cups, peeled, cored, and cut into ½-inch slices). Add ½ teaspoon ground cinnamon, ¼ teaspoon ground nutmeg, and ⅛ teaspoon ground cloves. Use the lower end of the sugar range (⅜ cup) because apples release more liquid than other fruits. This is the quintessential fall dessert.
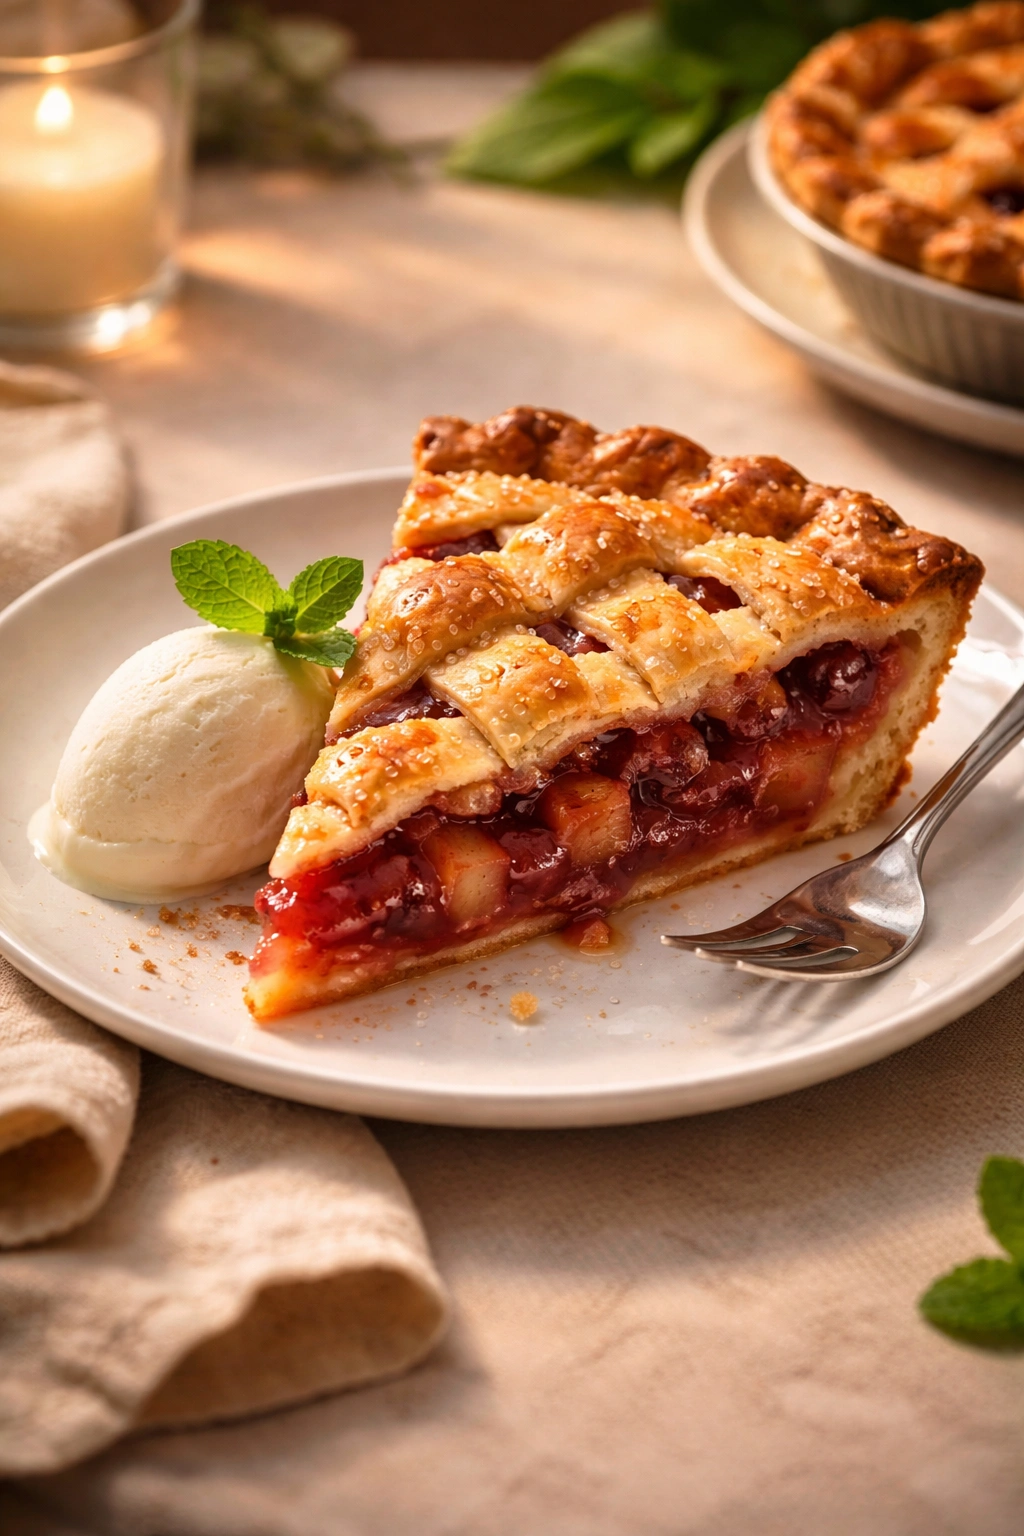
Rhubarb Strawberry Pie: Use 3 cups fresh rhubarb (cut into ½-inch pieces) and 2 cups fresh strawberries (hulled and halved). Rhubarb is extremely tart, so increase sugar to ¾ cup. Add 1 teaspoon vanilla extract. The strawberry’s sweetness and the rhubarb’s tartness create beautiful tension.
Peach Blueberry Pie: Use 3 cups peaches (peeled, pitted, and cut into ¾-inch chunks) and 2 cups fresh blueberries. Add 1 tablespoon fresh ginger, minced, and stick with the standard sugar amount. The ginger ties the two fruits together while adding warmth.
Pear Vanilla Bean Pie: Use 5 cups pears (peeled, cored, and cut into ½-inch slices). Instead of vanilla extract, split 1 vanilla bean, scrape the seeds into the filling, and add the pod while baking (remove it before serving). The vanilla’s floral notes echo the pear’s delicate flavor.
Tart Cherry Pie: Use 4 cups pitted tart cherries (fresh or frozen, thawed). Cherries release less liquid than other fruits, so drain any excess liquid before adding to the crust. Increase sugar slightly (½ cup) because tart cherries are intensely sour. Add ½ teaspoon vanilla and ⅛ teaspoon almond extract. This is the most classically “American” pie and feels right for summer gatherings.
Customizing Pie for Different Occasions
The same pie recipe adapts to fit virtually any social situation by making small tweaks to presentation, flavoring, or crust decoration. These shifts make the pie feel intentional and occasion-appropriate while requiring no additional baking skill.
Casual Family Dinner: This is where you emphasize simplicity and comfort. Serve the pie warm, still in its pan, with vanilla ice cream or whipped cream. Make a standard fruit pie with familiar flavors—apple cinnamon, peach, or berry. The rustic appearance is part of its charm.
Formal Dinner Party: Here, you’re signaling sophistication through refinement. Blind-bake the crust for a crisp bottom. Use more elegant flavor combinations like pear vanilla bean or peach with fresh thyme. Serve at room temperature (cooled fully and refrigerated), sliced onto individual plates with a quenelle of vanilla bean ice cream on the side. Brush the finished crust with egg wash before baking for a deep, professional-looking golden shine.
Potluck or Casual Gathering: These call for a transportable pie that holds up well. A double-crust fruit pie is ideal—it travels safely, stays intact when sliced, and looks impressive. Stick to berries or stone fruits that won’t weep much liquid. Provide plastic forks and napkins, and plate it buffet-style so guests can serve themselves.
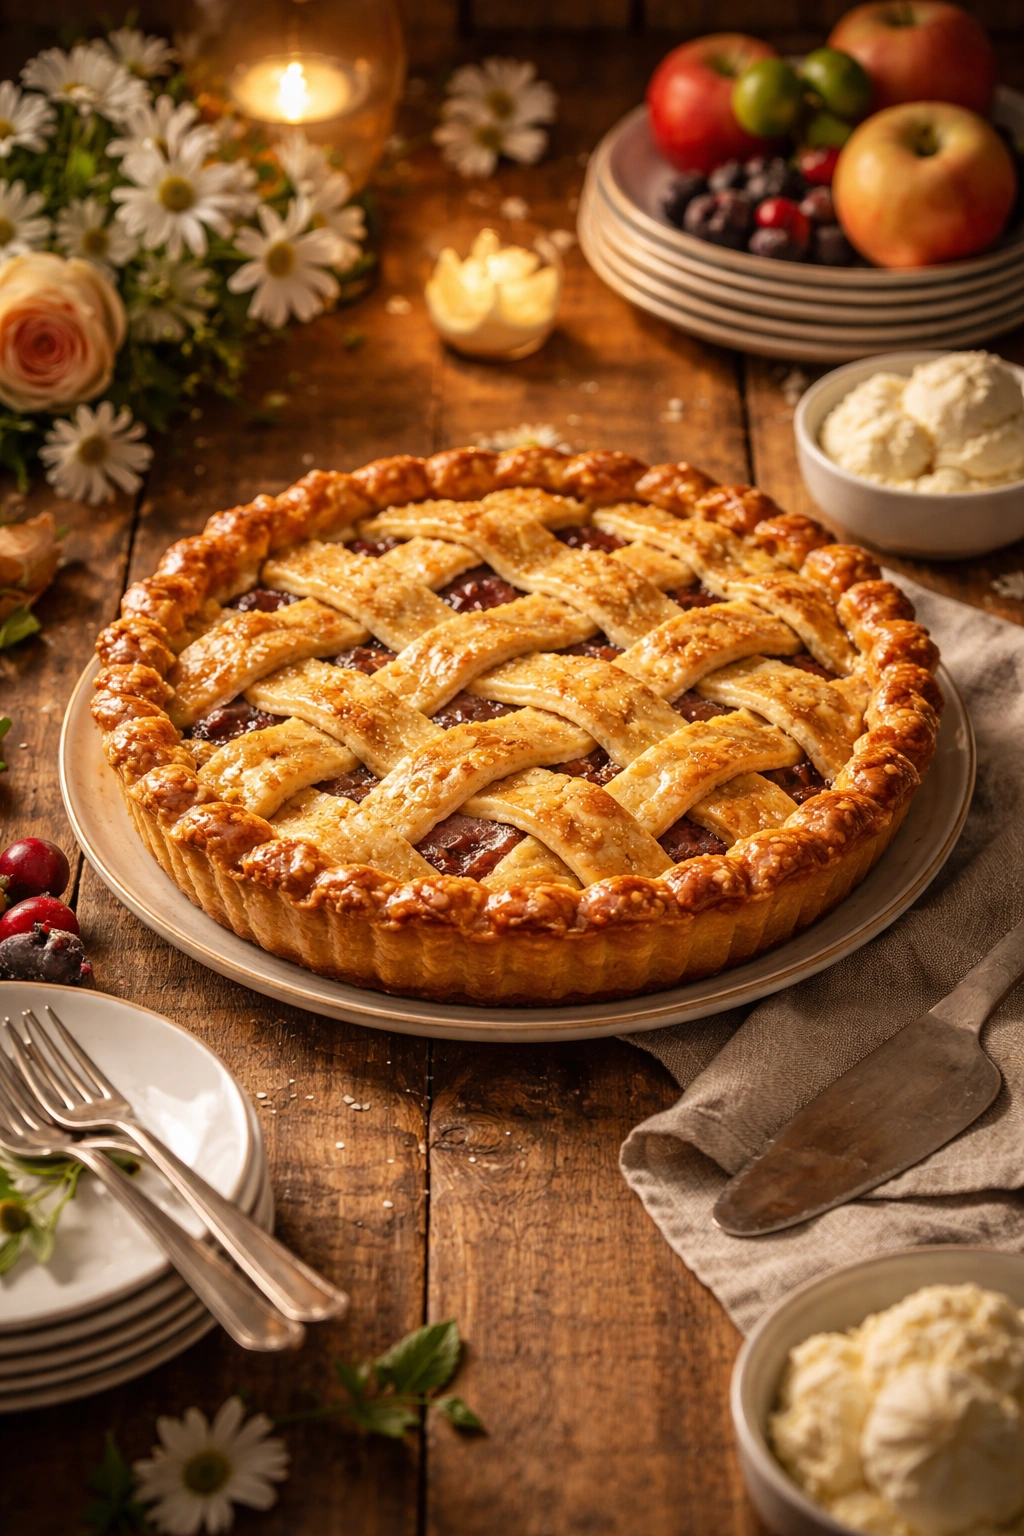
Birthday or Celebration: Make it feel special through decoration and flavor. Top the crust with a lattice pattern or create decorative cutouts. Consider slightly more adventurous flavoring—add fresh mint to strawberry, or black pepper to cherry. Serve with premium vanilla ice cream or homemade whipped cream, and consider adding edible flowers to the top if you’re feeling fancy.
Holiday Gathering: This is where tradition shines. Make apple pie with a classic double crust and a golden-brown finish. Serve warm with vanilla ice cream. Holiday pies signal comfort, continuity, and care—people eat them as much for memory and emotion as for flavor.
Dietary Occasion (Dairy-Free, Gluten-Free, Vegan): For dairy-free fruit pie, use vegan butter or coconut oil in the dough (it works identically). For gluten-free, swap all-purpose flour for a gluten-free flour blend (use the same weight). The filling requires no changes. For vegan pie, use vegan butter, skip any optional dairy components, and serve with coconut ice cream or dairy-free whipped cream.
Critical Baking Techniques and Common Mistakes
Understanding the most frequent pie pitfalls helps you avoid them and troubleshoot if something unexpected happens.
Soggy Bottom Crust: The most common complaint. Fruit pie is vulnerable because the filling bakes for up to an hour, and all that time the moisture is seeping into the crust. Prevention: bake the pie on the lowest oven rack (heat rises from below and sets the bottom crust first), put a baking sheet on the rack below to shield the bottom from direct heat, and don’t skip the resting time after rolling and fitting the dough (rested dough holds its structure better). If you still struggle, blind-bake the bottom crust for 12 minutes before adding filling.
Shrinking Crust: Dough shrinks during baking because gluten retracts. Prevention: rest the dough in the refrigerator for at least 30 minutes before rolling (cold dough shrinks less), avoid stretching the dough when fitting it into the pan, and rest the fitted crust for at least 10 minutes before baking. If your crust consistently shrinks, increase the chilling time to 1 hour or more.
Tough, Dense Crust: This happens from overworking the dough—mixing too long or with too much pressure. Prevention: stop mixing as soon as the dough barely holds together. The shaggy appearance at that stage is correct. If you’ve overworked a batch, chill it extra long (overnight) to let the gluten relax. Surprisingly, even overworked pie dough becomes tender again after a long rest.
Crust Brown Too Quickly: Dark crust before the filling is done baking. Prevention: use lower oven temperature (375°F instead of 425°F bakes more slowly and allows the filling to cook through without the crust burning), shield the edges with foil after the first 25 minutes of baking, and accept that a deeper golden brown is actually fine and looks more professional than pale crust.
Filling Still Runny After Baking: Not enough cornstarch or the filling didn’t bake long enough. Prevention: measure cornstarch carefully (too little won’t thicken the filling adequately), and bake until the filling bubbles at the steam vents (that’s your sign the filling has cooked sufficiently). After baking, allow at least 2–3 hours of cooling before slicing—the filling continues to set as it cools.
Crust Cracks When Rolling: Usually from dough that’s too cold or was overworked initially. Prevention: let chilled dough sit at room temperature for 3–5 minutes before rolling, and rest the dough longer if it keeps cracking. If it does crack during rolling, gently press the crack closed—the dough will weld itself during baking.
Storage, Make-Ahead Timing, and Reheating
Pie is one of the most make-ahead-friendly desserts. You can prepare components days in advance and assemble or bake just before serving.
Dough: Make the dough up to 2 days ahead and store it in the refrigerator, wrapped in plastic wrap. For longer storage (up to 1 month), wrap it tightly and freeze. Thaw frozen dough overnight in the refrigerator before rolling.
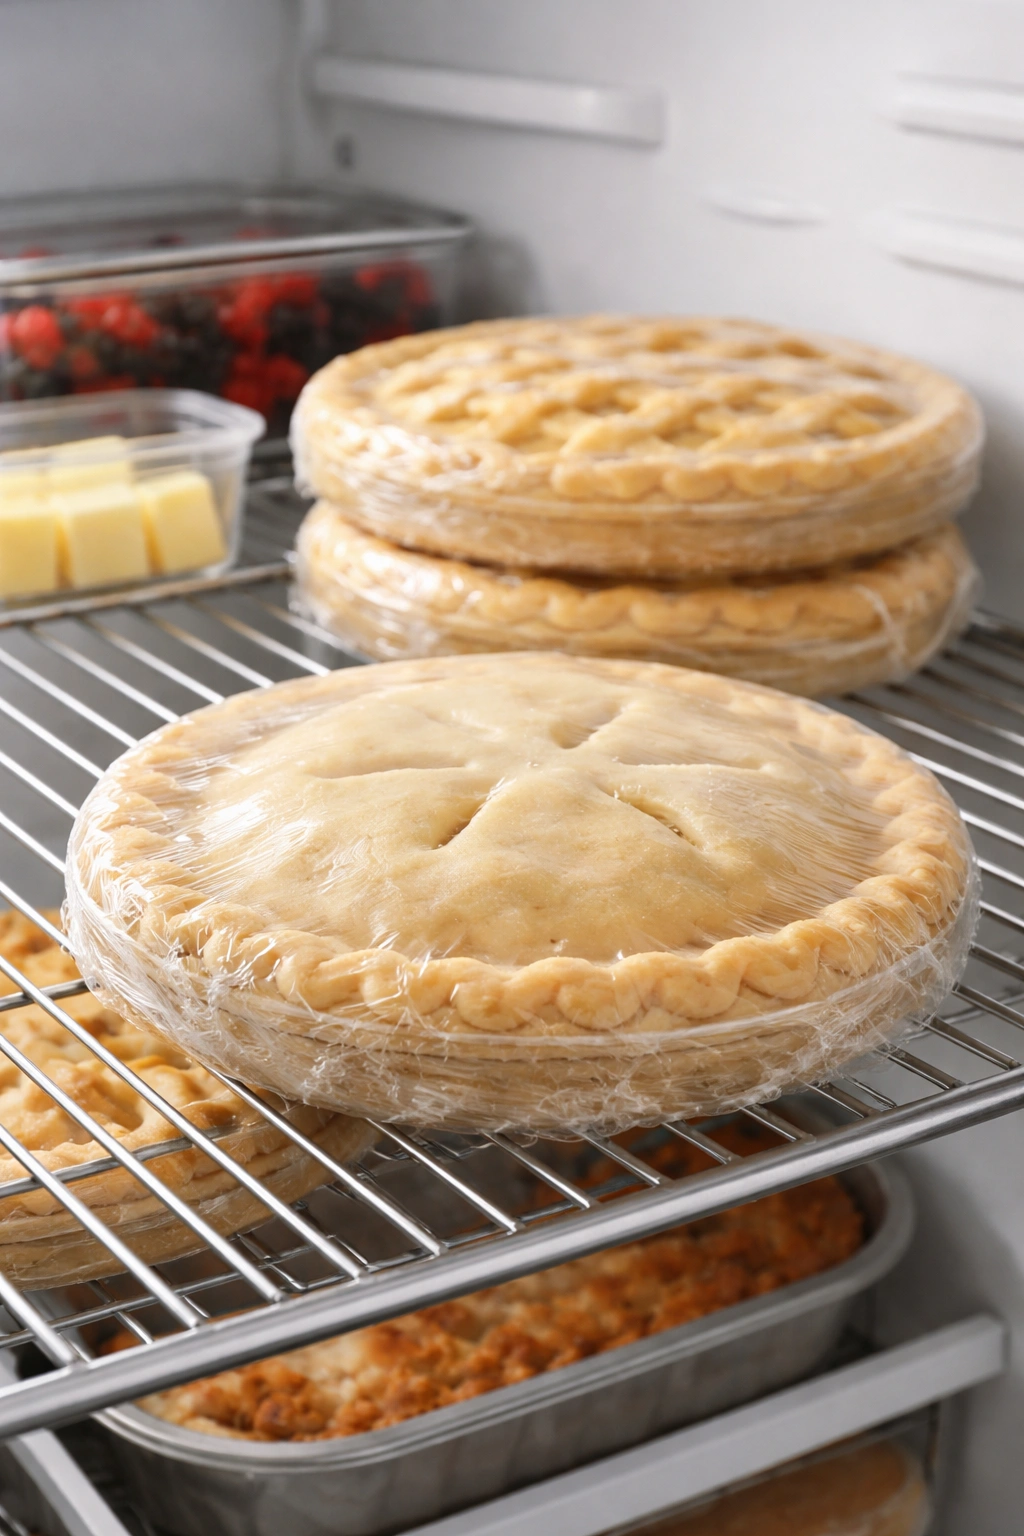
Rolled and Fitted Crust in the Pan: Fit the dough into the pie pan, wrap it well in plastic wrap, and refrigerate for up to 1 day. You can even freeze a fitted unbaked crust for up to 1 month (no thawing needed—bake directly from frozen, adding 5–10 minutes to the baking time).
Assembled but Unbaked Pie: Once you’ve fitted the crust, added the filling, and added the top crust, wrap the whole pie tightly and refrigerate for up to 12 hours or freeze for up to 1 month. Bake from chilled or frozen (frozen adds 10–15 minutes to the baking time). There’s no thawing needed—cold pie actually bakes more evenly because the crust stays flaky and the filling doesn’t separate.
Baked Pie: A fully baked pie keeps at room temperature for 1 day, in the refrigerator for up to 4 days, or in the freezer for up to 2 months. Cool completely before wrapping, and wrap tightly to prevent it from drying out or absorbing odors.
Reheating: Warm a slice at 300°F (150°C) for 10–12 minutes until it’s just heated through (overheating dries the crust). Or simply let it come to room temperature—many people prefer pie that’s not warm. The ice cream melts differently and the flavors bloom as the pie cools.
Serving Suggestions and Presentation for Every Occasion
How you serve pie signals its importance and creates the eating experience.
Casual Service: Serve in the pie pan, cut directly in front of guests, and plate with a server or cake knife. Offer vanilla ice cream on the side. This feels relaxed and unpretentious—perfect for family meals and informal gatherings.
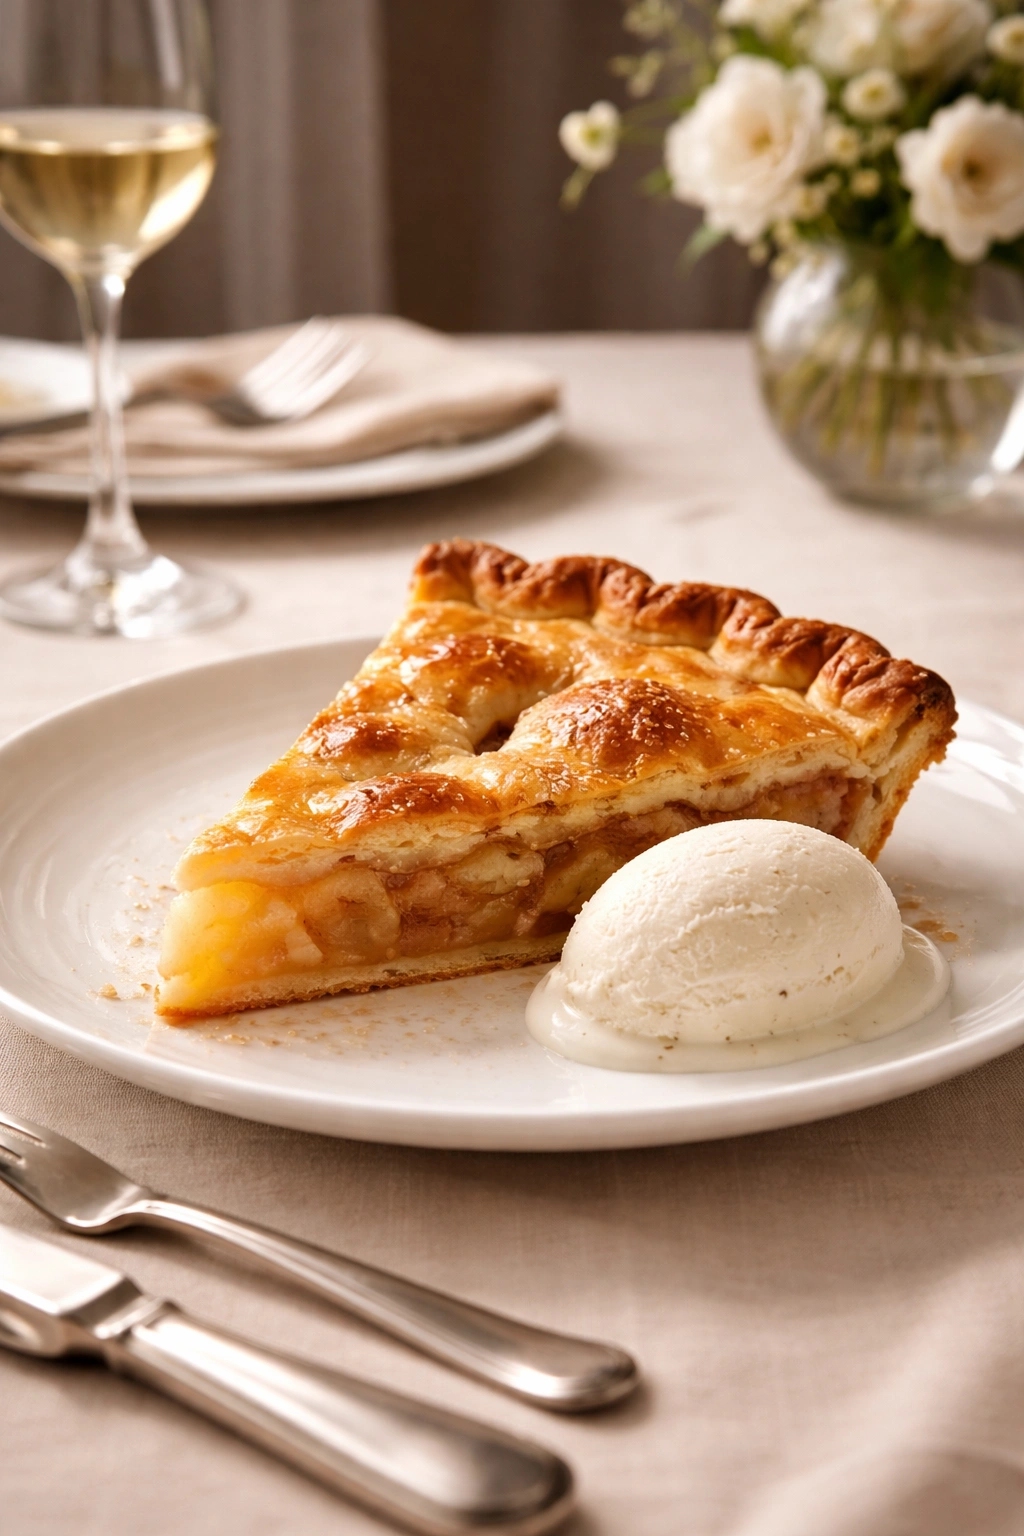
Plated Service: Cool the pie completely, then slice with a thin, sharp knife dipped in hot water (wipe between cuts for clean slices). Transfer to individual dessert plates. Top with a small quenelle of vanilla ice cream on the side, or a small dollop of unsweetened whipped cream. Garnish with a sprig of fresh mint or a few edible flowers if desired. This approach feels intentional and restaurant-style.
Pairing with Beverages: Serve fruit pie with coffee (especially for breakfast or brunch), with tea (afternoon gatherings), or with dessert wine like moscato or a light Riesling. The acidity in wine pairs beautifully with sweet fruit fillings. Vanilla ice cream itself doesn’t need pairing—it stands alone.
Garnishes That Add Polish: A light dusting of powdered sugar, a sprinkle of turbinado sugar on the crust for crunch, fresh fruit scattered around the plate, or a small sprig of mint all elevate presentation without adding complexity. A drizzle of berry coulis (strained berry sauce) around the plate feels restaurant-style and is surprisingly easy—just puree berries with a bit of sugar, strain through a fine sieve, and drizzle.
Why This Pie Works for Literally Any Occasion
The genius of this foundational pie recipe is its flexibility combined with its reliability. The dough is forgiving enough that even a beginner succeeds, yet produces a crust that genuinely impresses. The filling formula adapts to any fruit you have access to, any seasonal moment, any flavor direction. You can serve it warm in a casual context or cool and carefully plated for formality. You can make it hours ahead or assemble it moments before baking.
Pie also carries emotional weight that other desserts don’t quite match. It signals care—nobody casually throws together a homemade pie. It says you took time, thought about the occasion, and wanted to create something that nourishes both literally and emotionally. That feeling transcends whether you’re serving it at a weeknight dinner or a holiday gathering.
Once you’ve made this pie three or four times, you stop consulting the recipe. You feel the dough come together. You taste the filling and adjust the sugar intuitively. You know when the crust has baked long enough. It becomes a skill that feels less like following instructions and more like something your hands just know how to do.
Final Thoughts
Homemade pie is one of those rare things that feels impressive to the people eating it while being completely manageable for the person making it. The barrier isn’t difficulty—it’s simply understanding the few straightforward techniques that make pie crust flaky and filling flavorful. With this recipe and these principles in your toolkit, you have a dessert that works equally well for a casual Tuesday evening, a formal dinner party, a holiday celebration, or any gathering in between.
Start with whichever fruit speaks to your current season. Make the dough. Roll it. Fill it. Bake it. Notice how the kitchen fills with fragrance, how golden and beautiful the finished crust looks, how the first slice feels to cut. That sensation of accomplishment, that moment when someone takes a bite and their eyes light up—that’s not reserved for professional bakers. It belongs to anyone willing to try. And once you do, pie stops feeling like an intimidating project and becomes exactly what it should be: a simple, doable, deeply satisfying way to end a meal.