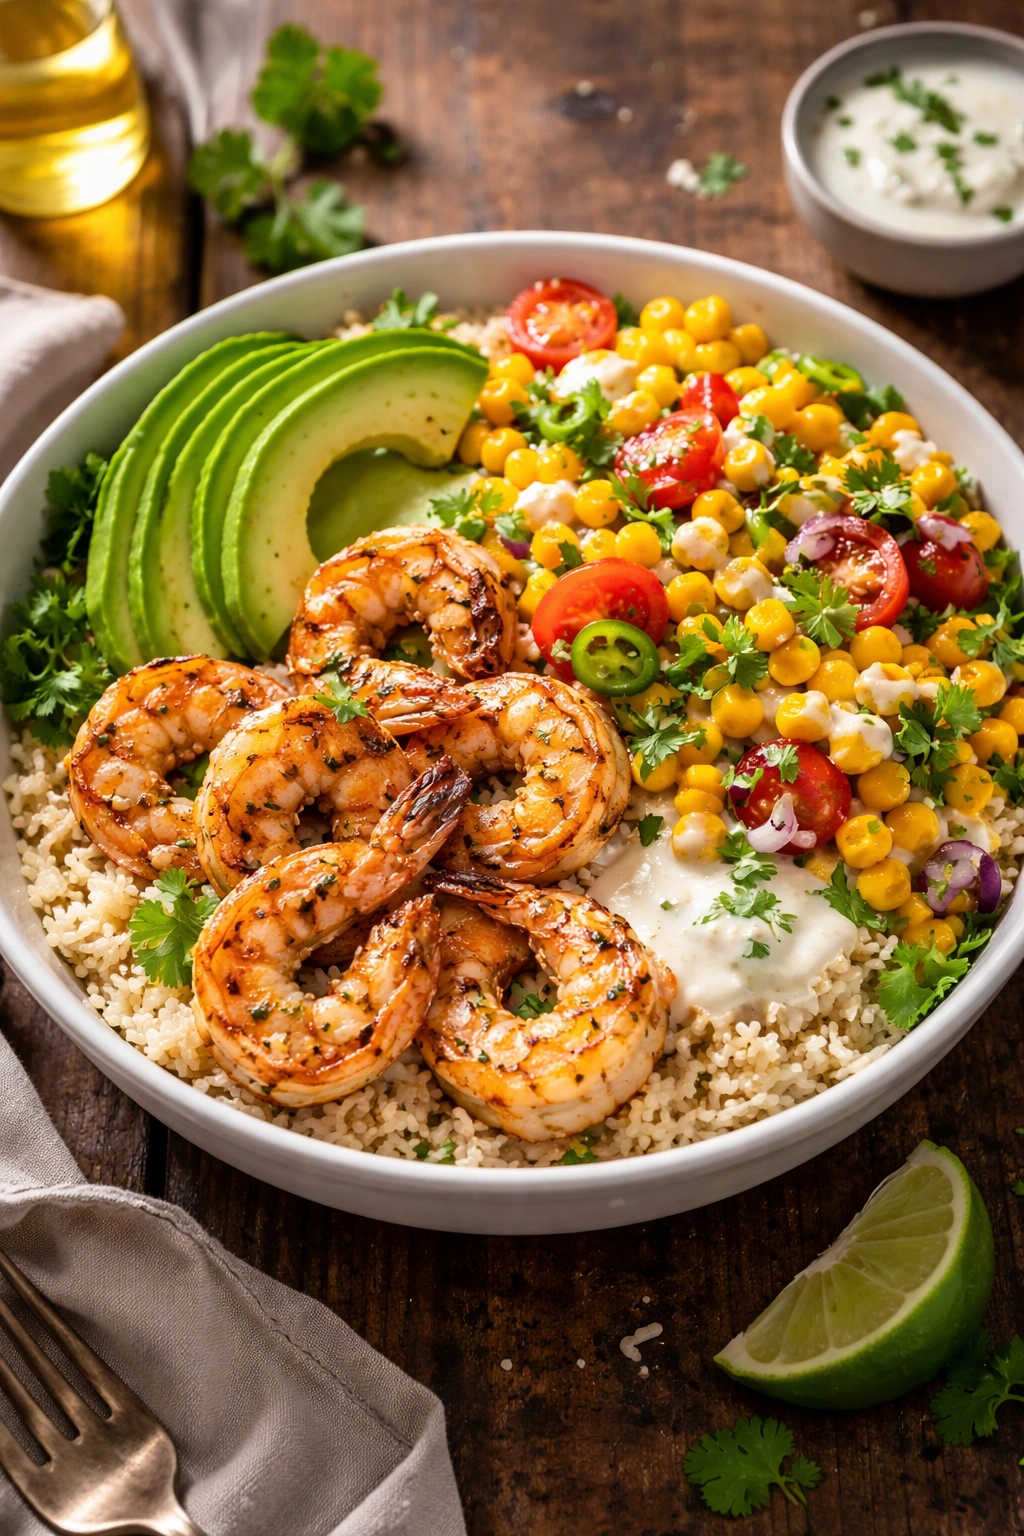
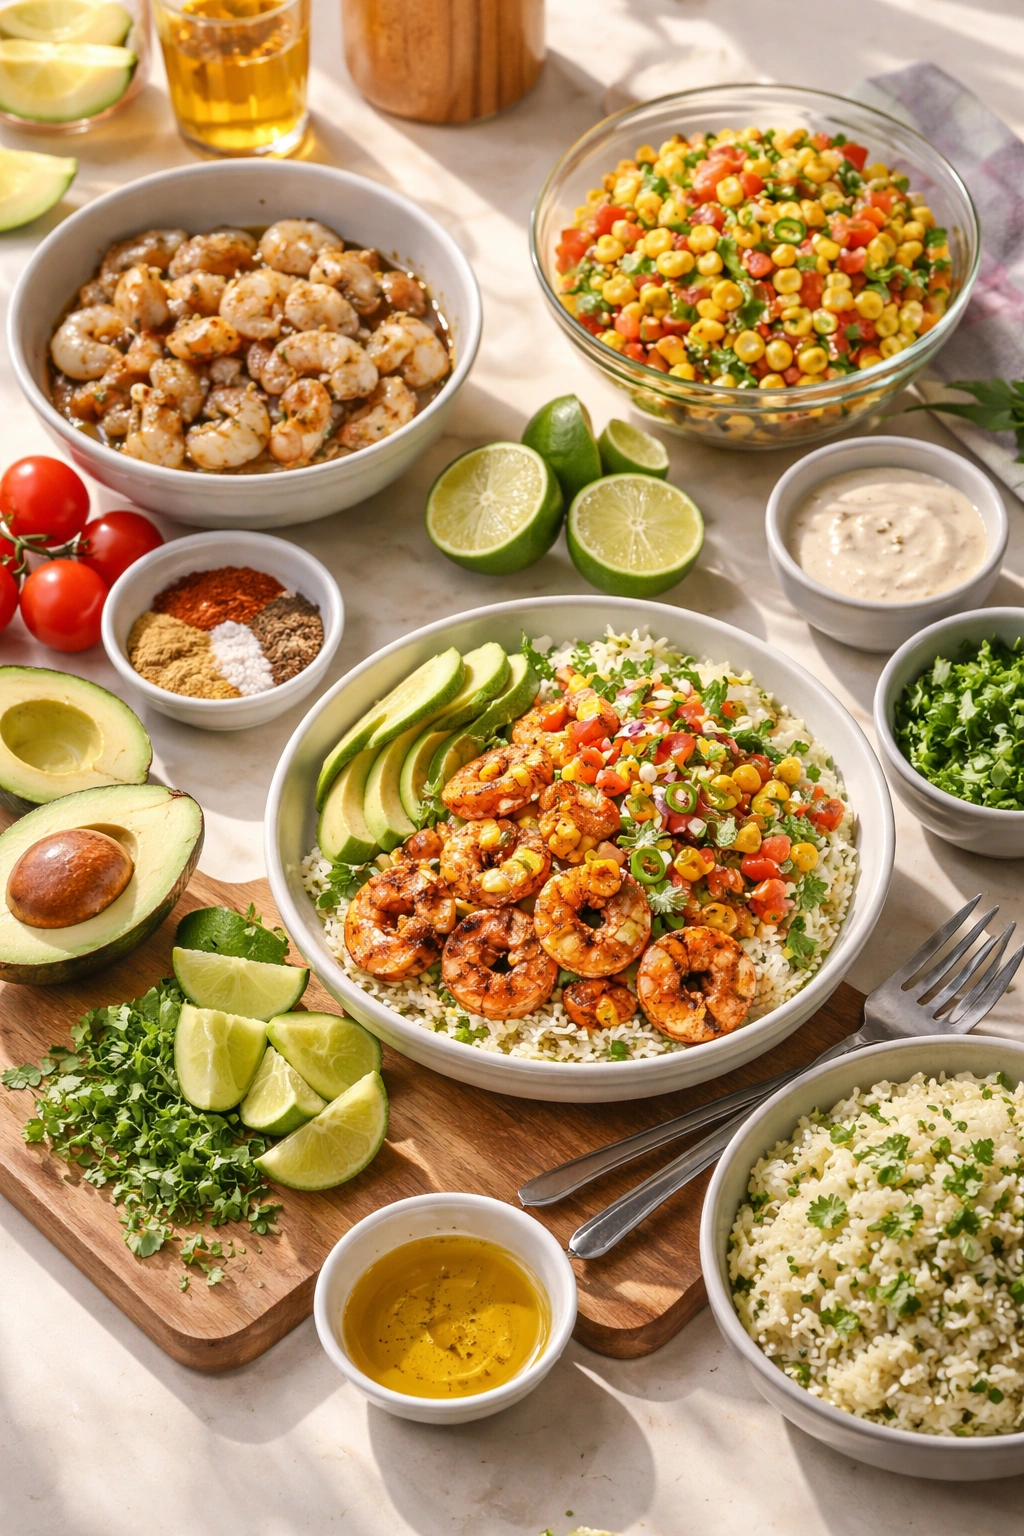
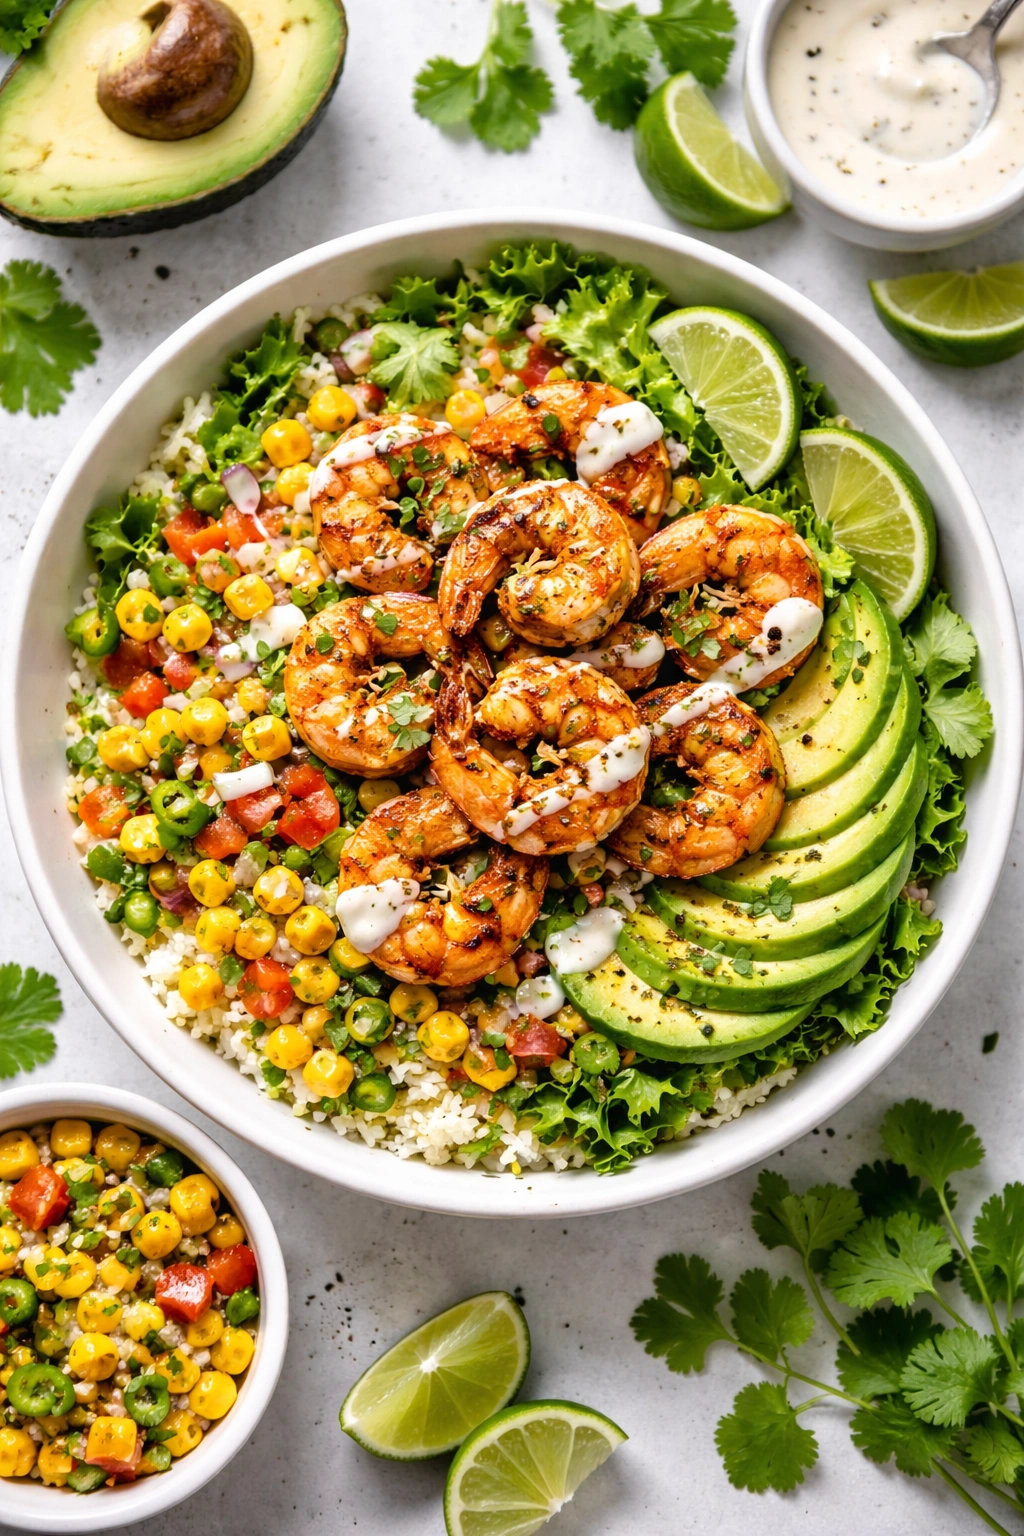
The beauty of a grilled shrimp bowl lies in its straightforward elegance—a handful of fresh ingredients come together to create something that tastes far more complicated than it actually is. When you’ve got perfectly charred shrimp, creamy avocado, and a bright corn salsa all working in harmony, you’re eating something that feels like a treat but takes less time to assemble than most weeknight dinners. It’s the kind of meal that satisfies without weighing you down, impresses whether you’re eating alone or feeding guests, and adapts beautifully to whatever’s in your kitchen.
I’ve made this bowl more times than I can count—sometimes on a weeknight when I needed something fast, sometimes for a casual dinner party where everyone wanted to customize their own plate. Every single time, I’m reminded that the best meals don’t require complicated techniques or hard-to-find ingredients. They just require good instincts about flavor balance and a commitment to using ingredients at their peak. The shrimp brings smokiness and protein, the avocado contributes richness and creaminess, the corn salsa delivers brightness and texture, and a simple creamy garlic sauce ties it all together without overwhelming anything else on the plate.
What makes this bowl special isn’t a secret ingredient or an unusual cooking method—it’s understanding how each component supports the others and knowing exactly how to build the bowl so every spoonful has a bit of everything. By the time you finish reading this, you’ll understand not just how to make this specific bowl, but how to adjust it for your tastes, prepare it ahead of time, and recognize when something isn’t quite right so you can fix it on the fly.
Why This Bowl Works as a Complete Meal
A successful bowl isn’t just a collection of ingredients piled together—it’s a carefully balanced combination of textures, flavors, and nutritional elements that make sense together. This grilled shrimp bowl achieves that balance without feeling fussy or overdone. The shrimp provides lean protein that keeps you satisfied without heaviness, while the avocado contributes creamy richness that makes the bowl feel indulgent even though it’s genuinely healthy.
The corn salsa is where the brightness lives. Fresh lime juice, sharp red onion, and herbaceous cilantro cut through the richness of the avocado and the smokiness of the grilled shrimp, keeping every bite feeling fresh rather than heavy. This contrast between creamy and zesty, smoky and bright, is what makes the bowl compelling enough to come back to again and again.
The creamy garlic sauce is the element that transforms everything from separate components into a cohesive dish. It doesn’t dominate—it enhances, bringing all the flavors together with its tangy, garlicky warmth. A truly well-made bowl is one where you want to eat every element, where nothing overpowers anything else, and where you find yourself going back for another spoonful just to experience the whole picture again.
What Makes a Perfect Grilled Shrimp
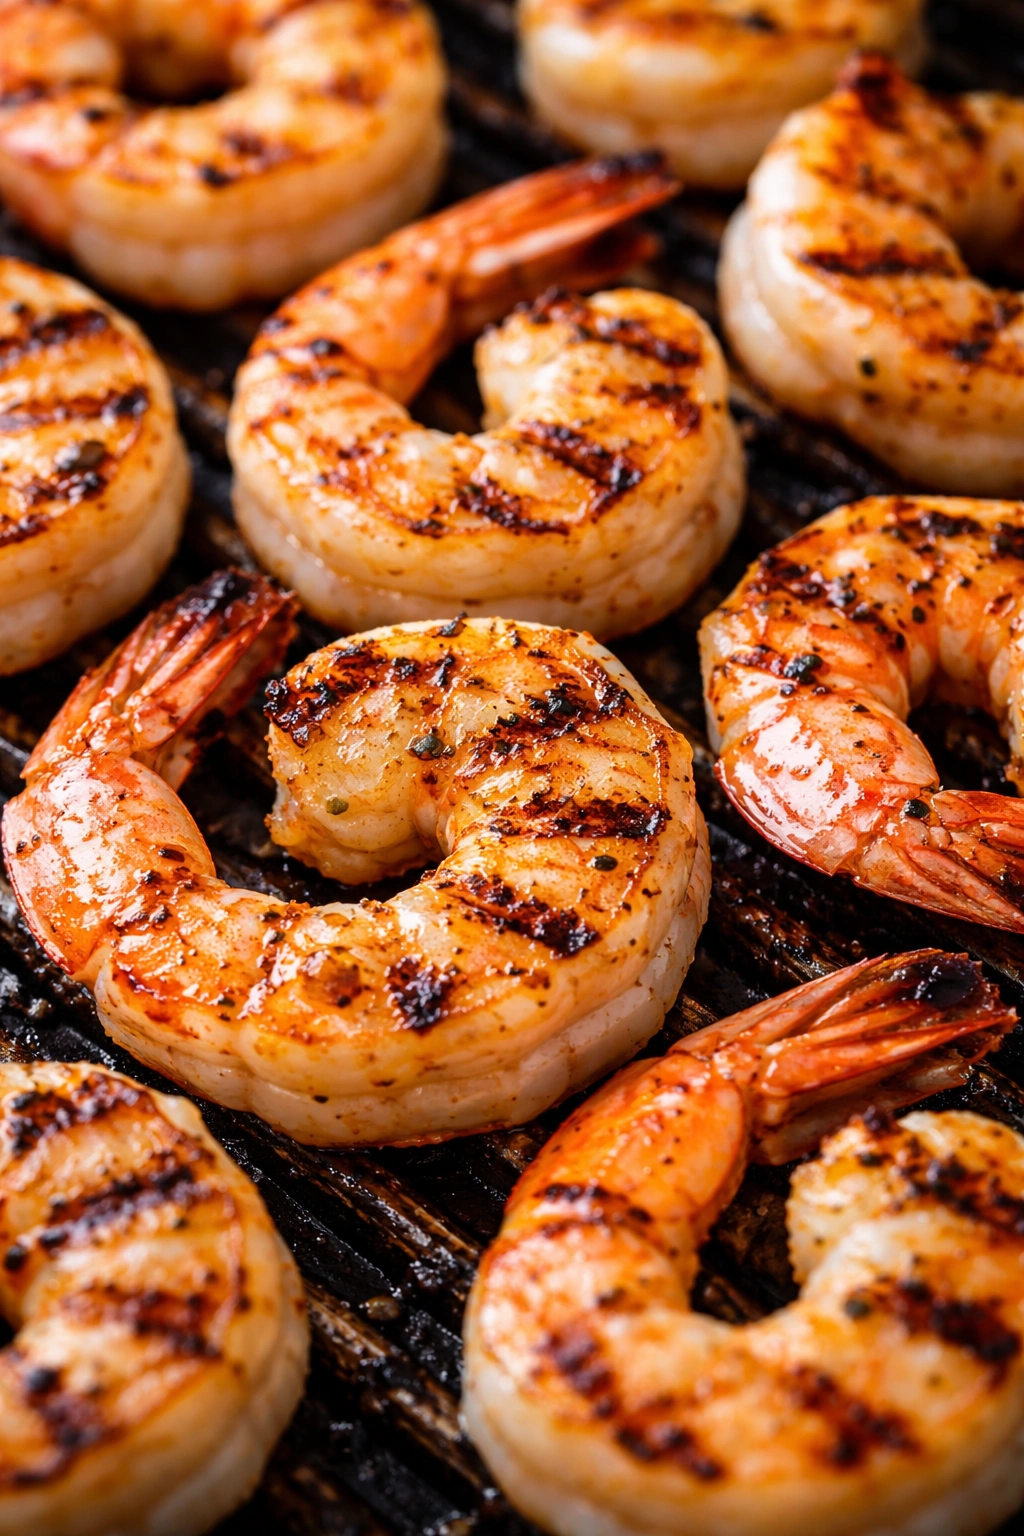
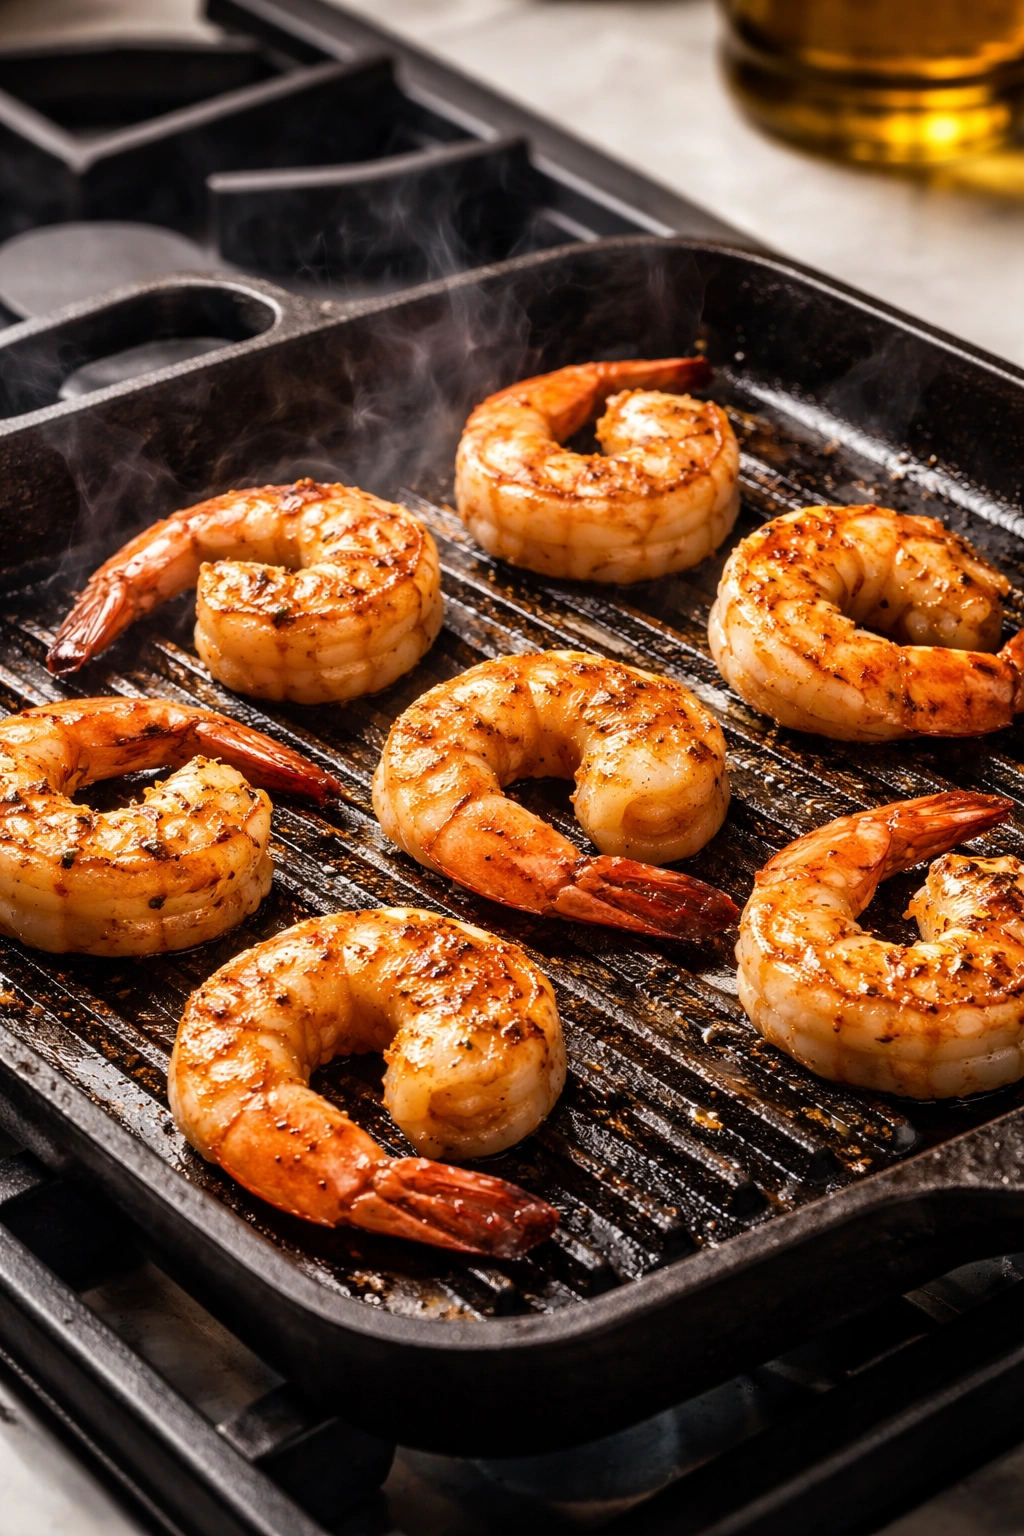
The foundation of this bowl is shrimp that’s cooked properly—pink, opaque, and still tender enough to be genuinely enjoyable. Overcooked shrimp becomes rubbery and loses its appeal, so understanding the exact moment when shrimp goes from raw to perfectly cooked is essential. Large or jumbo shrimp are ideal because they’re forgiving to grill, they develop beautiful char marks, and they stay juicy inside even when they get a little color on the outside.
Start with shrimp that’s completely thawed if you’re using frozen—pat it dry with paper towels before seasoning. Moisture is the enemy of a good sear, and a dry shrimp surface will caramelize and char in ways that a wet one never will. The dry exterior creates the fond and char marks that make grilled shrimp taste like something special rather than something you could accomplish in a pan on the stove.
The seasoning should be bold but balanced. Paprika adds color and a subtle warmth, while garlic powder brings depth without the risk of burning that fresh minced garlic might encounter on a hot grill. A pinch of cayenne brings heat that’s gentle rather than aggressive—you want warmth, not mouth-burning spice, since the other elements of the bowl will add brightness and richness that cayenne might overpower if you’re too heavy-handed with it.
Understanding the Corn Salsa
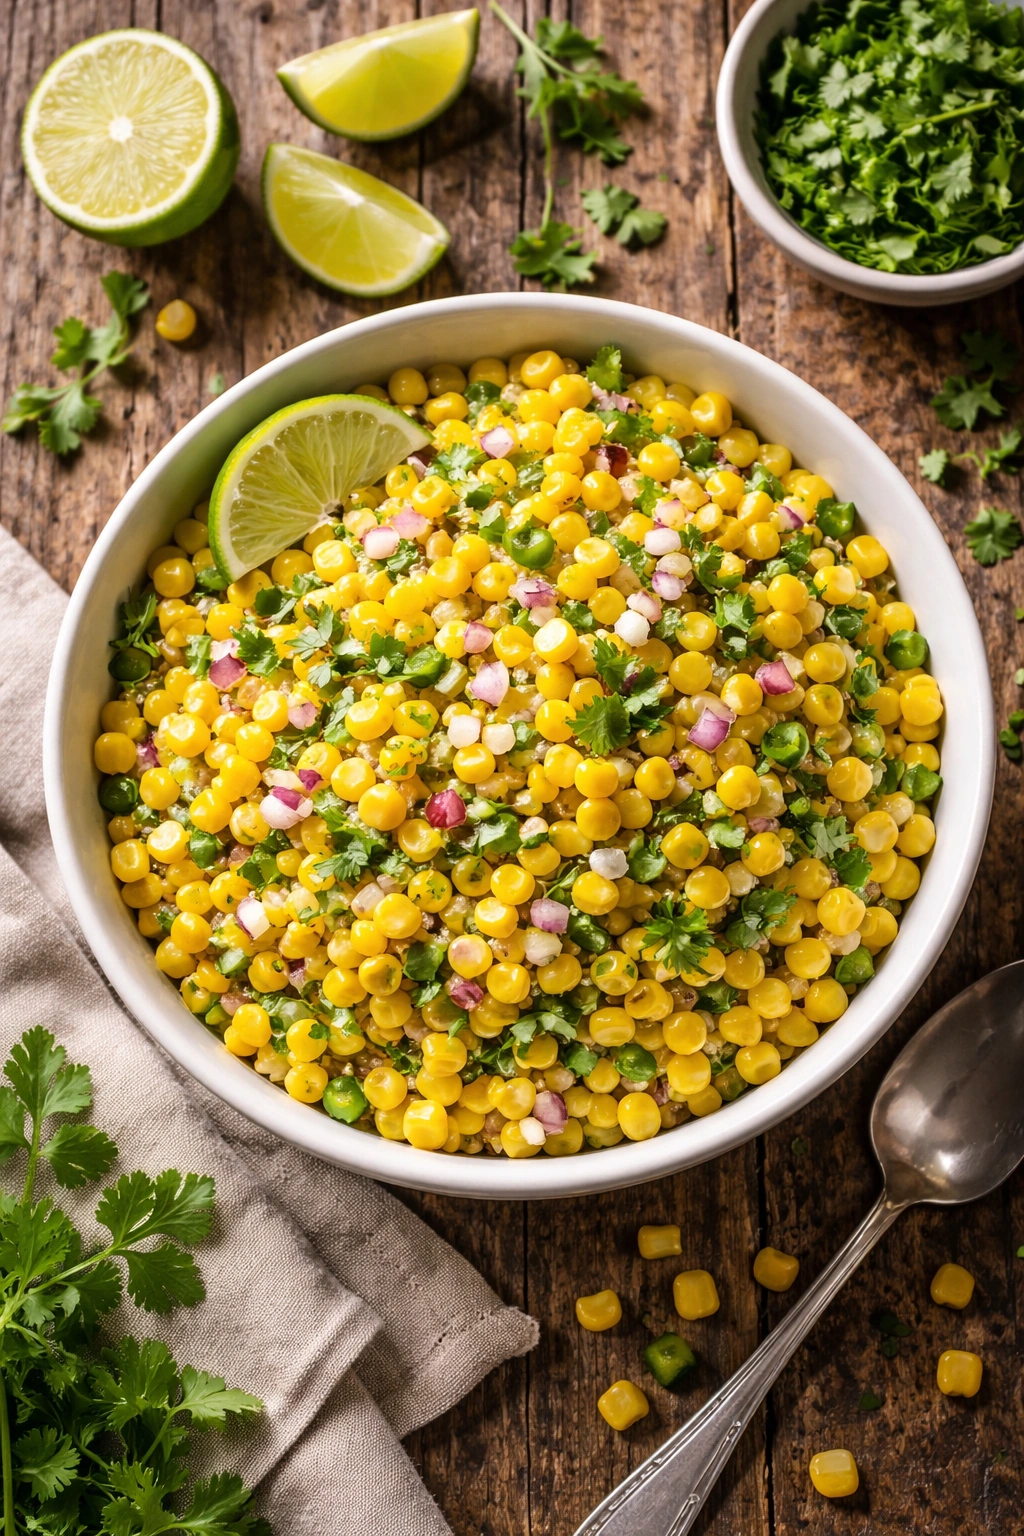
The corn salsa is what makes this bowl sing. It’s the element that provides texture contrast, brightness, and a hit of natural sweetness that balances the savory shrimp and creamy avocado. Fresh corn during peak season is wonderful, but frozen corn that’s been thawed works beautifully too—in fact, frozen corn often tastes sweeter and more consistent than fresh corn outside of summer months.
The red onion is crucial here because it brings a sharp, fresh bite that cuts through the richness of everything else. It keeps the salsa from being cloying and prevents the bowl from feeling like a one-note treat. Cilantro adds a distinctive herbaceous note, though it’s optional if you’re someone for whom cilantro tastes soapy—fresh parsley makes an excellent substitute and brings its own brightness to the mix.
Lime juice does more than add flavor—it acts as a preservative, helping the salsa stay bright and fresh even as it sits. The acid prevents browning and keeps all the flavors tasting vivid rather than muted. This is why it’s worth squeezing fresh lime juice rather than using bottled—the difference in vibrancy is noticeable, and since you’re only using a tablespoon or so, the effort is minimal for the impact it creates.
Serving and Timing Information
Yield: Serves 2 as a main course | Serves 4 as a side component
Prep Time: 20 minutes (hands-on active preparation)
Cook Time: 8 minutes (grilling the shrimp only)
Total Time: 28 minutes
Difficulty: Beginner — No special grilling technique is required, the steps are straightforward, and there’s nothing that can go seriously wrong if you follow basic timing cues.
Best Served: Fresh and immediately after assembly, while the shrimp is still warm and the avocado hasn’t had time to brown. The salsa and sauce can be made ahead and chilled.
Ingredients for Grilled Shrimp Bowl with Avocado Salsa

For the Grilled Shrimp:
- 1 lb large shrimp, peeled and deveined
- 2 tablespoons olive oil
- 1 teaspoon smoked paprika (or regular paprika)
- 1/2 teaspoon garlic powder
- 1/2 teaspoon ground cumin
- 1/4 teaspoon cayenne pepper (optional, for gentle heat)
- 1/4 teaspoon fine sea salt
- 1/4 teaspoon black pepper
- Juice of 1/2 lime (about 1 tablespoon)
For the Corn Salsa:
- 1 cup fresh or frozen corn kernels, thawed
- 1/2 cup red onion, finely diced
- 1/4 cup fresh cilantro, chopped (or fresh parsley as a substitute)
- 1 jalapeño, seeded and minced (optional, for those who like more heat)
- Juice of 1 lime (about 2 tablespoons)
- Salt to taste
For the Creamy Garlic Sauce:
- 1/2 cup mayonnaise (or Greek yogurt for a lighter option)
- 1/4 cup sour cream (or Greek yogurt for a lighter version)
- 2 cloves fresh garlic, minced very finely
- 2 tablespoons fresh cilantro, chopped
- 1 tablespoon fresh lemon juice
- 1/4 teaspoon fine sea salt
- 1/8 teaspoon black pepper
- Optional: 1/2 teaspoon hot sauce for a subtle kick
For Bowl Assembly:
- 1 large ripe avocado, sliced or mashed
- Sesame seeds for garnish
- Green onions, chopped, for garnish
- Optional base: 2 cups cooked rice, quinoa, or fresh mixed greens
- Lime wedges for serving
Building the Creamy Garlic Sauce
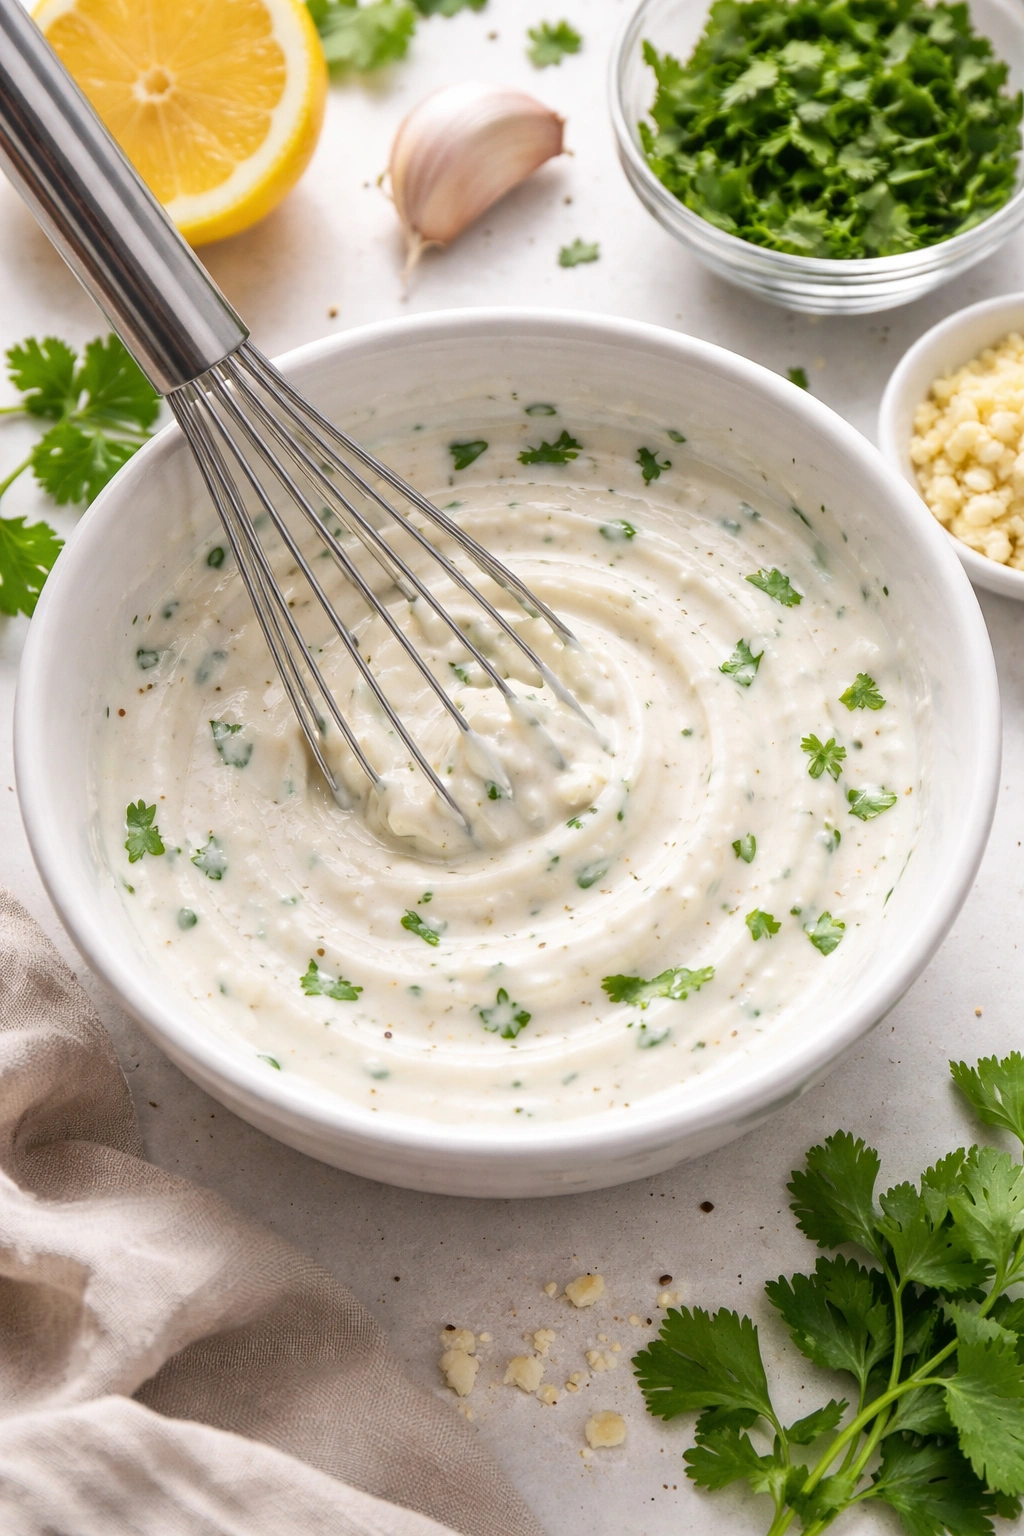
The creamy garlic sauce is what elevates this from a simple bowl to something that feels restaurant-quality. It’s tangy, garlicky, and herbaceous without being overwhelming, and it brings every element together into a cohesive dish. The key to getting this right is whisking it until it’s smooth and creamy rather than lumpy, which means taking a moment to fully incorporate everything rather than just stirring it together.
Start with good mayonnaise or Greek yogurt as your base—mayo creates richness and body, while Greek yogurt keeps things lighter and tangier. Sour cream adds a slight tang and helps thin things out so the sauce has a pourable consistency. The garlic should be minced very finely so you get small pieces distributed throughout rather than chunks that become aggressive. Fresh lemon juice brings brightness and helps prevent the sauce from feeling heavy or too rich.
Cilantro in the sauce ties it to the salsa and creates flavor continuity throughout the bowl. It’s a subtle thing, but when you taste a spoonful of shrimp with salsa and then drizzle of sauce, that shared cilantro note makes everything feel intentional rather than random. If you’re not a cilantro person, flat-leaf parsley works beautifully and brings a slightly earthier, gentler herbaceous note.
The sauce should be thick enough to cling to the shrimp and coat the back of a spoon, but pourable enough that you can drizzle it over the bowl. If it seems too thick, whisk in a teaspoon of water or a squeeze of lime juice to loosen it. Make this sauce at least an hour before you plan to serve it and refrigerate it—the flavors meld and deepen as it sits, making it genuinely better a few hours later than it is five minutes after you make it.
Step-by-Step Instructions for Grilled Shrimp Bowl
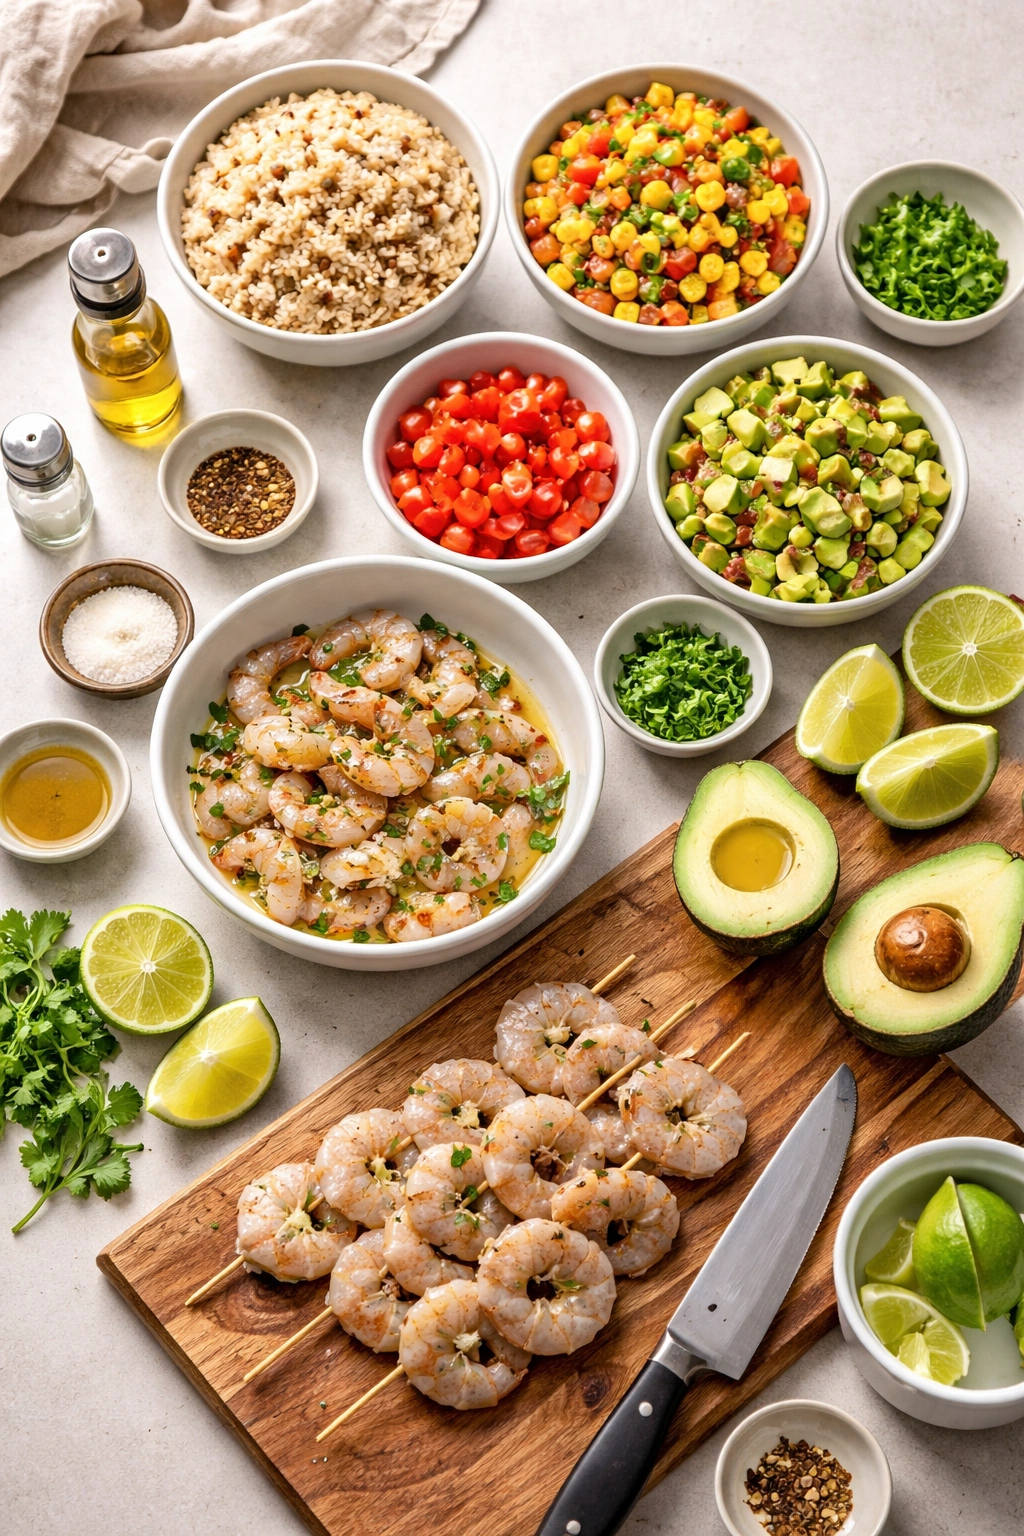
Prepare Your Ingredients:
-
Pat the shrimp completely dry with paper towels by laying them on a clean kitchen towel and gently pressing to remove excess moisture. Wet shrimp won’t develop a proper sear and may steam rather than grill. Don’t skip this step—it’s the difference between shrimp with beautiful char and shrimp that looks pale and steamed.
-
In a small bowl, combine the smoked paprika, garlic powder, ground cumin, cayenne pepper, salt, and black pepper. Whisk these together so they’re evenly distributed rather than having all the paprika in one spot and the salt in another. This spice blend is small in quantity but big in impact, so taking thirty seconds to combine it properly makes a real difference.
-
Measure out all your salsa ingredients in separate little bowls or piles on your cutting board—diced red onion, chopped cilantro, minced jalapeño if using. Having everything prepped and ready before you start grilling means you won’t be frantically chopping while the shrimp cooks and gets cold.
Advertisements
Marinate the Shrimp:
- Place the dried shrimp in a medium mixing bowl. Drizzle with the olive oil and sprinkle the spice blend over the top. Using your hands or two spoons, toss the shrimp until every piece is evenly coated with oil and spices. Make sure you’re coating the shrimp thoroughly—you don’t want some pieces to have lots of seasoning and others to be plain. Let the shrimp sit at room temperature for 5 to 10 minutes while you finish prepping everything else.
Make the Corn Salsa:
-
In a medium bowl, combine the corn kernels, diced red onion, chopped cilantro, minced jalapeño if using, and the juice of 1 lime. Gently fold everything together using a rubber spatula rather than stirring aggressively—you want to combine the ingredients without smashing the corn kernels or bruising the other delicate elements.
-
Taste the salsa and add salt as needed. The amount you’ll need depends on whether your corn was fresh or frozen and how salty you prefer your food. Start with 1/4 teaspoon and taste before adding more. Remember that the creamy sauce and shrimp will also contribute salt, so aim for the salsa to taste bright and flavorful rather than aggressively salty.
-
Cover the salsa and refrigerate it until you’re ready to assemble the bowl. It actually tastes better if it’s been chilled for at least 30 minutes, as this allows the flavors to meld and the sharp bite of the raw onion to mellow slightly.
Make the Creamy Garlic Sauce:
-
In a small bowl, combine the mayonnaise, sour cream, minced garlic, chopped cilantro, lemon juice, salt, and black pepper. Using a small whisk or a fork, whisk everything together until smooth and creamy. Don’t just stir—actually whisk so that you’re incorporating air and creating a light, fluffy texture rather than a dense paste.
-
Taste the sauce and adjust seasonings. It should taste garlicky but not aggressive, tangy from the lemon juice, and herbaceous from the cilantro. If it tastes too intense, add a splash of water and whisk again. If it tastes too bland, add another squeeze of lemon juice or a pinch more salt.
-
Cover the sauce and refrigerate for at least 1 hour before serving. Make it ahead by a few hours if you can—the flavors genuinely improve as it sits, and the garlic becomes more integrated and less sharp.
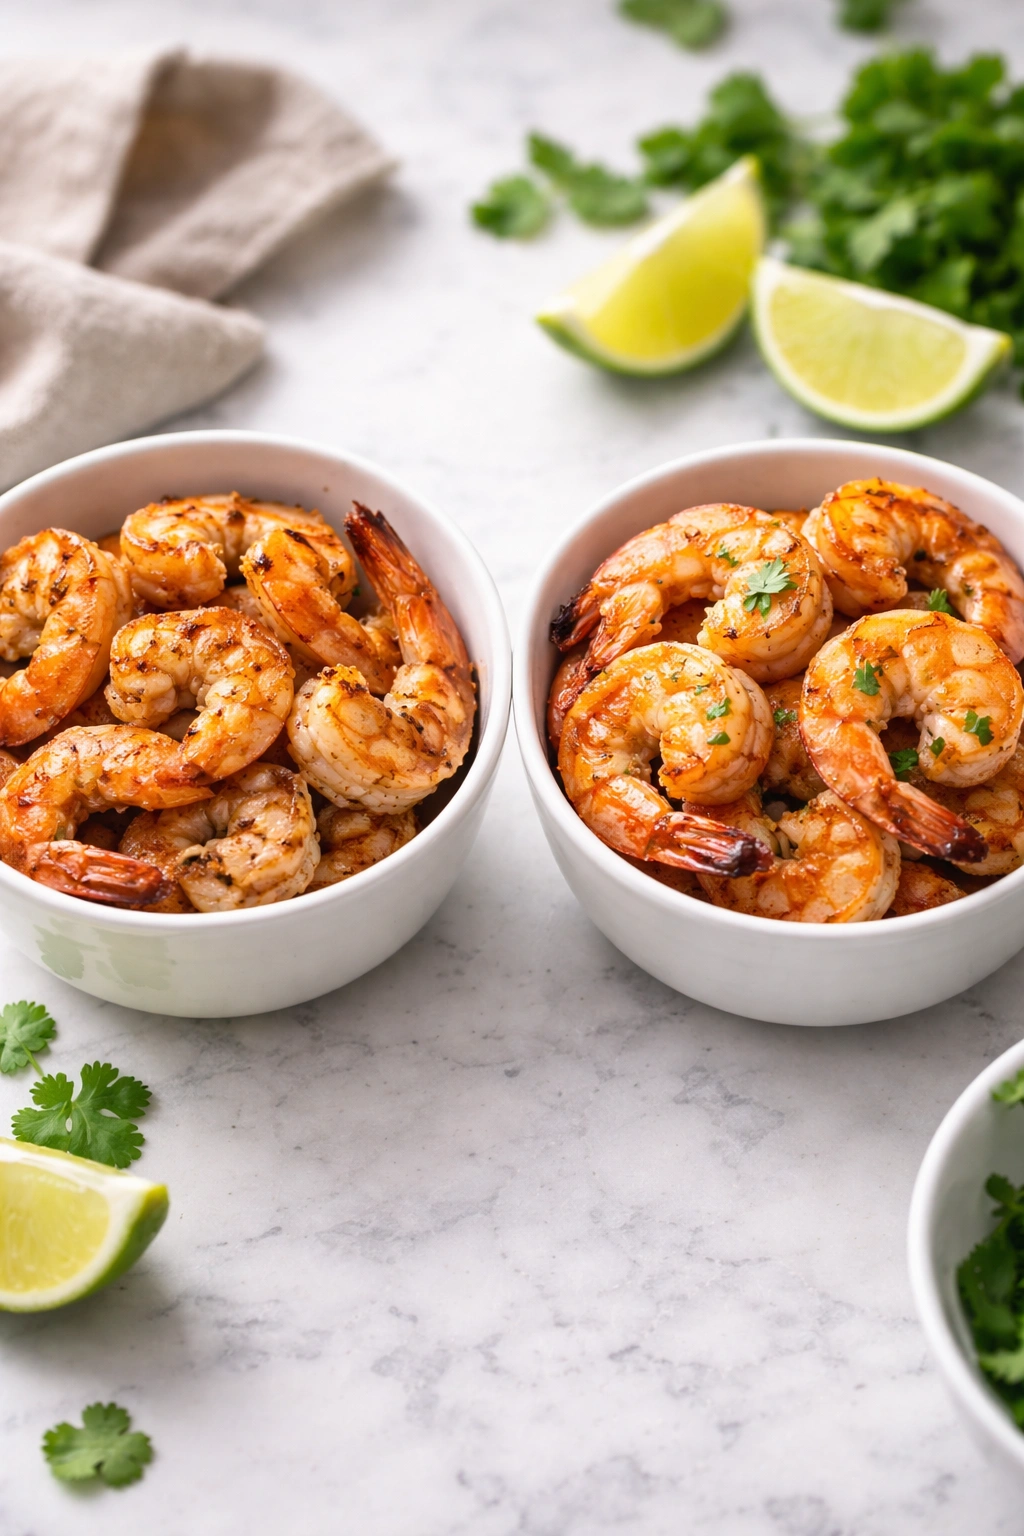
Grill the Shrimp:
-
About 10 minutes before you’re ready to serve, heat your grill or grill pan over medium-high heat (about 400°F if you can control the temperature). You want the surface to be quite hot—test it by carefully holding your hand about 3 inches above the grill for a few seconds. If you can only hold your hand there for 2 to 3 seconds before the heat forces you to pull away, the temperature is right. If you can hold it there longer, wait a bit more for the grill to heat fully.
-
Once the grill is hot, arrange the marinated shrimp in a single layer on the grill surface. Do not overcrowd the grill—leave at least a half-inch of space between each shrimp. If you crowd them, they’ll steam and sweat in their own moisture rather than grilling and developing that beautiful char. If you have a lot of shrimp, work in batches.
-
Let the shrimp cook undisturbed for 2 minutes on the first side. You’ll see them start to turn from gray-translucent to pink and opaque at the edges. Resist the urge to move them or flip them early—letting them sit creates the char and sear marks that make grilled shrimp taste like something special.
-
Using tongs, flip each shrimp and grill for another 2 to 3 minutes on the second side. The shrimp is done when it’s completely opaque and has turned from raw gray to a warm peachy-pink color. The exact timing depends on the size of your shrimp and the temperature of your grill, so watch the color change rather than relying solely on a timer. When the shrimp are opaque throughout and have a slight firmness when you gently press with the tongs, they’re done.
-
Transfer the cooked shrimp to a clean plate and set aside. Do not leave them on the hot grill surface—they’ll continue cooking and will become tough if you do. They can stay at room temperature for up to 10 minutes before assembly.
Assemble the Bowls:
-
Divide your salsa among serving bowls, spooning it into the bottom so it creates a bed for the shrimp. If you’re using a grain base like rice or quinoa, put that down first, then top with the salsa.
-
Arrange the grilled shrimp on top of the salsa, dividing them evenly between the bowls. You want a generous amount of shrimp in each bowl—it’s the protein and star of the show, not a garnish.
-
Slice your avocado just before assembly. Cut the avocado in half, remove the pit by tapping it with the side of a knife and twisting gently, then scoop the flesh out with a spoon. For a sliced presentation, use a spoon to slide between the skin and flesh, keeping the avocado half intact, then slice against the skin to create neat slices. For a mashed presentation, scoop directly into a bowl and mash with a fork. Arrange the avocado slices or spoon the mashed avocado around the shrimp.
-
Drizzle the creamy garlic sauce generously over each bowl. Don’t hold back here—the sauce is relatively light and you want enough of it so that every spoonful of the bowl gets a taste of the garlicky creaminess. Spoon some down the center, drizzle around the edges, and make sure it reaches the bottom of the bowl where some of the salsa sits.
Advertisements -
Finish with a sprinkle of sesame seeds for nuttiness and texture contrast, a scatter of chopped green onions for freshness and mild onion flavor, and a lime wedge on the side for squeezing over everything just before eating.
Essential Tips for Success
Your shrimp will only take 4 to 5 minutes total from the moment it hits the grill, so have all your other components completely ready before you start grilling. This isn’t a dish where you can prep as you go—you need to be ready to assemble immediately after the shrimp finishes cooking while it’s still warm. Set out your serving bowls, have your avocado sliced, and confirm that your sauce and salsa are within arm’s reach.
The quality of your shrimp matters more than you might think. Large shrimp that’s been kept cold up until the moment you cook it will be more tender and flavorful than small shrimp that’s been sitting out, and wild-caught will taste noticeably better than farmed in most cases. If you’re buying frozen shrimp, buy it from a source with good turnover so you know it’s fresh and hasn’t been sitting in a freezer for six months.
Don’t substitute the lemon juice in the sauce with lime juice, even though lime is featured prominently in other parts of this dish. The slight tartness and subtle bitterness of lemon complements garlic in ways that lime doesn’t—lime is more aggressively acidic and tropical, while lemon is subtle and sophisticated. The combination of lime in the salsa and lemon in the sauce creates complexity and prevents the whole bowl from tasting one-note.
Common Mistakes to Avoid
The most common mistake is overcooking the shrimp by even a minute or two. Shrimp is done when it’s just turned opaque—that moment right before it would become firm and rubbery. The exact timing depends on the size of your shrimp and your grill temperature, so watch the color change rather than relying on a clock. If you’re unsure, cut one open to check—the meat should be opaque throughout with no translucent raw spot in the center, and it should be tender when you press it gently.
Another mistake is making the salsa too far in advance without understanding how it changes over time. The red onion will mellow and lose some of its sharpness as it sits, which is good, but the cilantro will start to darken and fade, and the overall color will become less vibrant. Make the salsa no more than a few hours before serving, and add any fresh cilantro garnish right before you serve rather than mixing it in hours in advance.
Not thawing frozen shrimp properly is a surprisingly common issue that affects texture. Shrimp that’s thawed in the microwave or hot water becomes mushy because the high heat damages the cell structure. Always thaw frozen shrimp in the refrigerator overnight or under cold running water, and always pat it completely dry before cooking. This extra minute of care makes a real difference in how the finished dish tastes and feels.
How to Perfectly Grill Your Shrimp
The grill temperature is critical for this dish, and it’s worth spending thirty seconds to check it before you put the shrimp on. You want heat that’s hot enough to sear but not so ferocious that the outside burns while the inside stays raw. Medium-high heat—around 400°F—is ideal for large shrimp. If your grill only has low, medium, and high settings without temperature numbers, aim for whatever looks like medium-high, which should be between the middle and high settings.
If you’re using a grill pan on the stovetop instead of an outdoor grill, preheat it for at least 2 to 3 minutes over medium-high heat. Cast iron grill pans are excellent because they retain heat beautifully and develop those coveted char marks. Make sure the grill pan is smoking slightly before you add the shrimp—this is your visual cue that it’s hot enough to properly sear them.
The shape your shrimp takes while cooking is actually a helpful doneness indicator. Raw shrimp has a slight S-curve to it. As it cooks, that curve becomes more pronounced and the shrimp curls into a C-shape. Perfectly cooked shrimp is in the middle of that journey—not still S-shaped, not yet fully curled into an O-shape. Once they start taking on an O-shape, you’ve either overcooked them or you’re about to—flip them immediately or pull them off the heat.
If you’re working with frozen shrimp and you’re concerned about them being the right temperature inside by the time the outside is seared, choosing truly large shrimp helps. Jumbo shrimp will take slightly longer to cook through and gives you a wider window for achieving a perfect sear while still ensuring they’re cooked completely inside. Small shrimp, by contrast, cook so quickly that it’s harder to avoid that overcooked rubbery texture.
Variations and Customizations
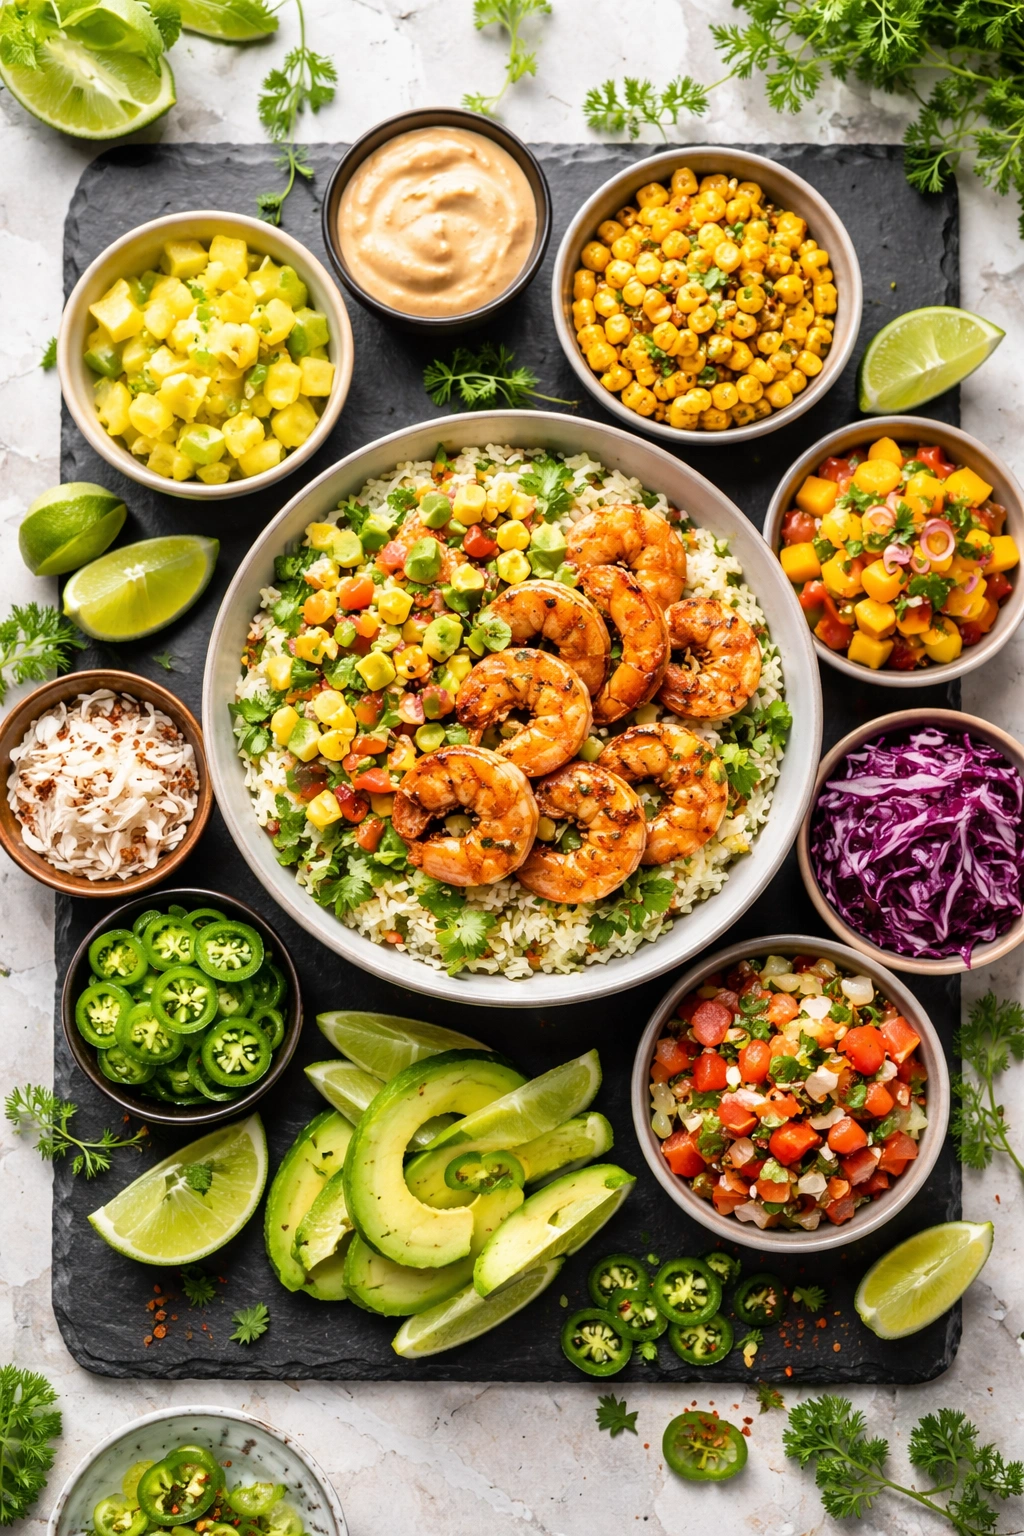
For heat lovers: Add more cayenne to the shrimp marinade, include jalapeño in the salsa, and consider adding a small splash of hot sauce or sriracha to the creamy sauce. You can also layer in some sliced jalapeños as a fresh topping.
For a tropical twist: Swap half of the corn in the salsa for diced fresh pineapple. The sweetness of the pineapple balances the heat from the shrimp and creates a completely different flavor profile that’s equally delicious. A sprinkle of toasted coconut flakes adds another layer of tropical flavor.
For a lighter version: Use Greek yogurt in place of the mayonnaise and sour cream in the sauce—it’s tangier, lighter, and creates a sauce that’s just as creamy but less heavy. You can also serve the bowl over mixed greens instead of rice, or skip the base entirely and just serve it as is.
For a vegetarian or vegan version: Substitute the shrimp with grilled firm tofu that’s been pressed, cubed, and marinated in the same spice blend. Tofu won’t take on char marks the same way shrimp does, but it will absorb the flavors beautifully and provide protein and substance. For the sauce, use dairy-free mayonnaise and coconut yogurt, or make a tahini-based sauce instead.
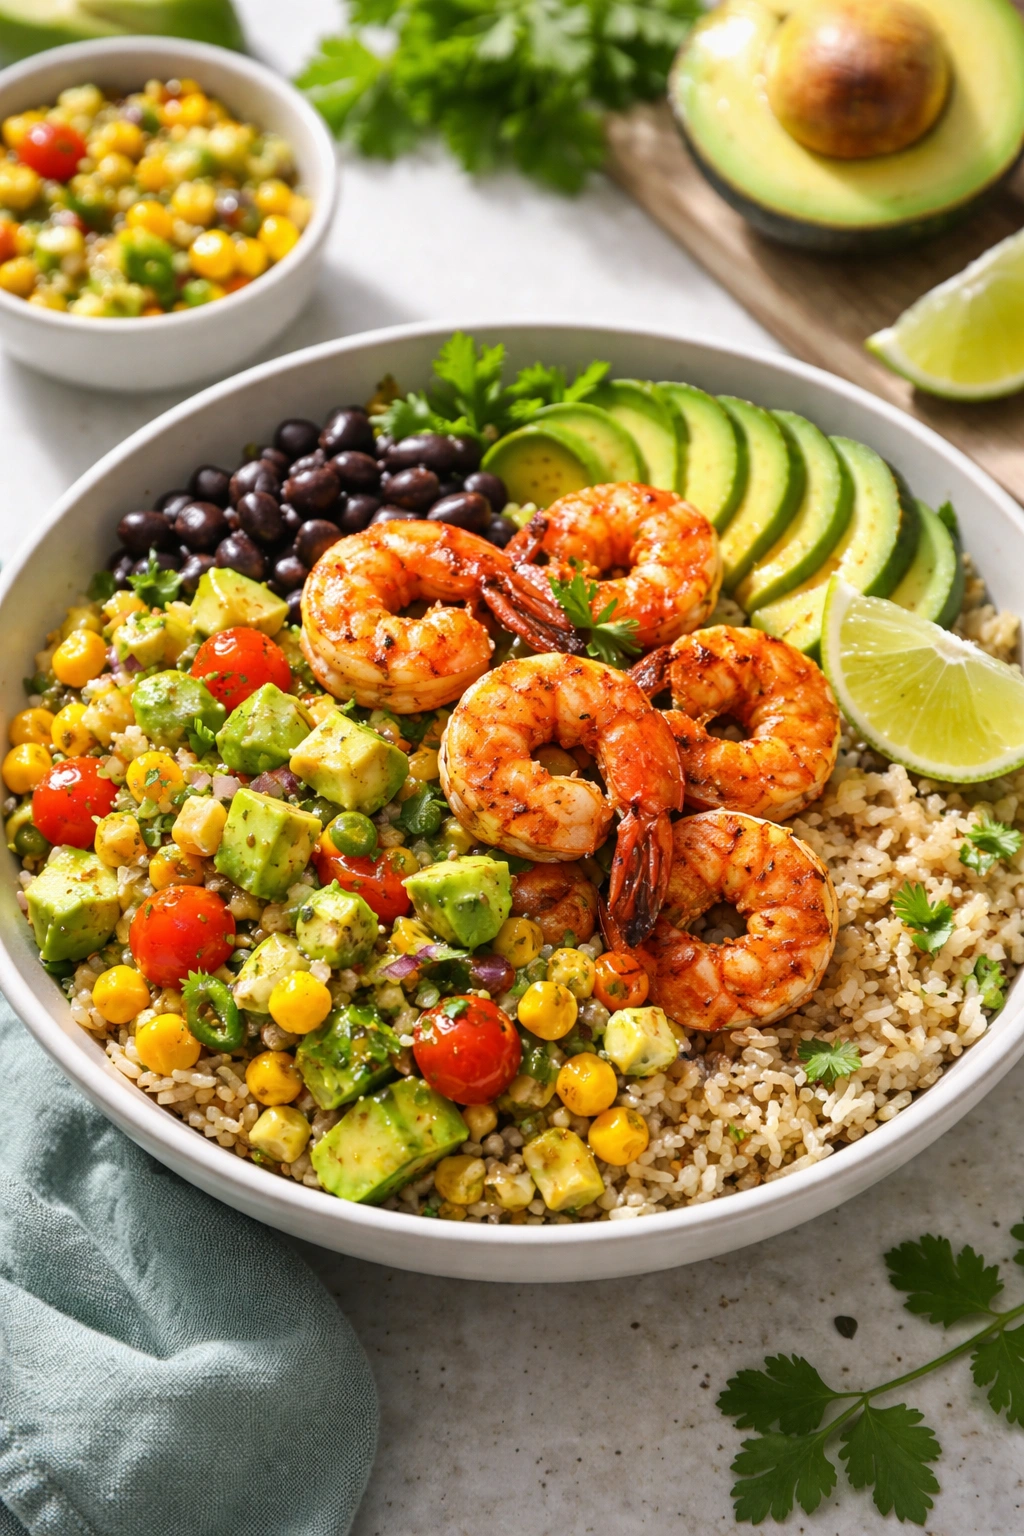
For a more substantial bowl: Add a grain base like brown rice, white rice, or quinoa. You can also add black beans, which pair beautifully with all the other flavors and add fiber and plant-based protein. Roasted sweet potato cubes work wonderfully too.
For a different salsa: Swap the corn for diced mango, diced tomato, or even diced cucumber. Each creates a completely different flavor experience while maintaining the general concept of bright, fresh, acidic elements that balance the creamy avocado and smoky shrimp.
Make-Ahead and Storage Guide
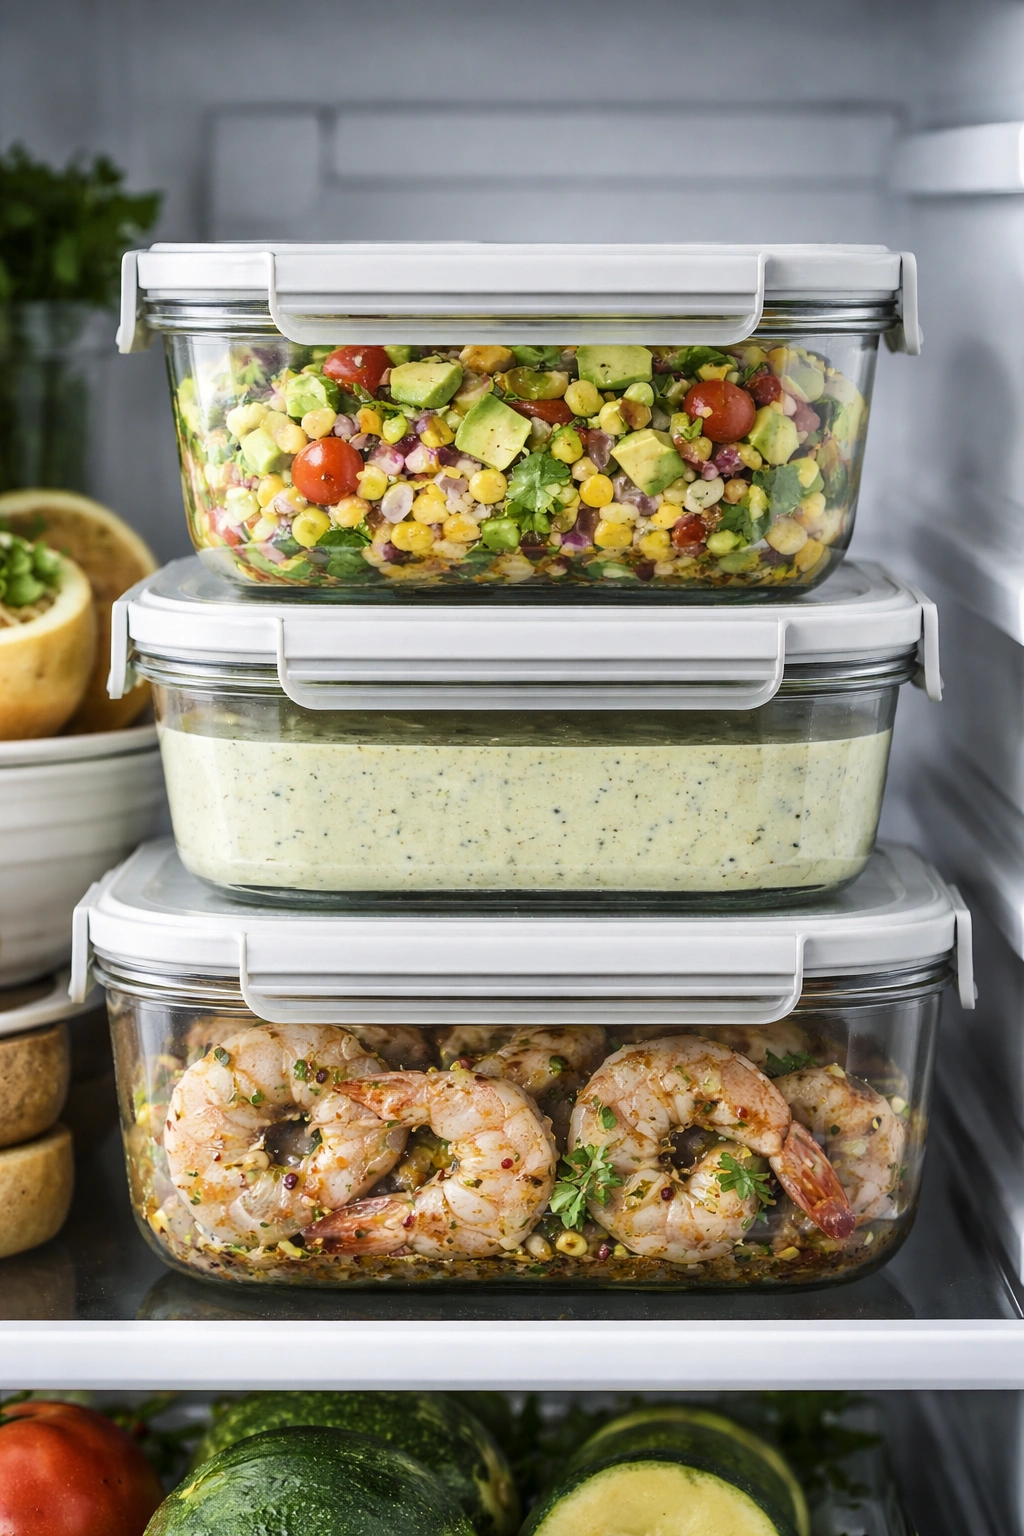
The corn salsa and creamy garlic sauce can both be prepared up to 3 days in advance and stored in separate airtight containers in the refrigerator. The flavors actually improve as they sit, so don’t hesitate to make them ahead. Just keep them separate from the shrimp so they don’t get soggy.
The shrimp can be marinated up to 24 hours in advance in the refrigerator in a sealed container or a zip-top bag. This actually allows the spices to penetrate more deeply into the flesh, making the cooked shrimp more flavorful. Just pull it out 15 minutes before you plan to grill so it comes closer to room temperature, which helps it cook more evenly.
Once cooked, the shrimp is best eaten within 2 hours, but it can be refrigerated in an airtight container for up to 3 days. Reheat it gently in a skillet over low heat or in the microwave in 30-second bursts rather than blasting it all at once—this prevents it from becoming any tougher than it already may be from the first cooking.
The avocado is the component that really needs to be handled with care. Once you slice or mash it, it will begin oxidizing and browning within 30 minutes to an hour, even in the refrigerator. Add a squeeze of lime juice immediately after slicing to help slow this process, and always add the avocado to the bowl immediately before serving rather than preparing it in advance. If you’re meal prepping, you can assemble the other components, store the avocado separately (keeping it with the pit if you’re only using half), and add the avocado at the last possible moment.
If you’re storing a fully assembled leftover bowl, keep the components separate rather than stacking them together. The salsa will make the grains soggy, the sauce will continue to seep and dilute, and the avocado will brown. By keeping everything separate, you can store each component for its maximum shelf life and reassemble when you’re ready to eat, which usually yields a much more pleasant result.
Serving Suggestions and Pairings
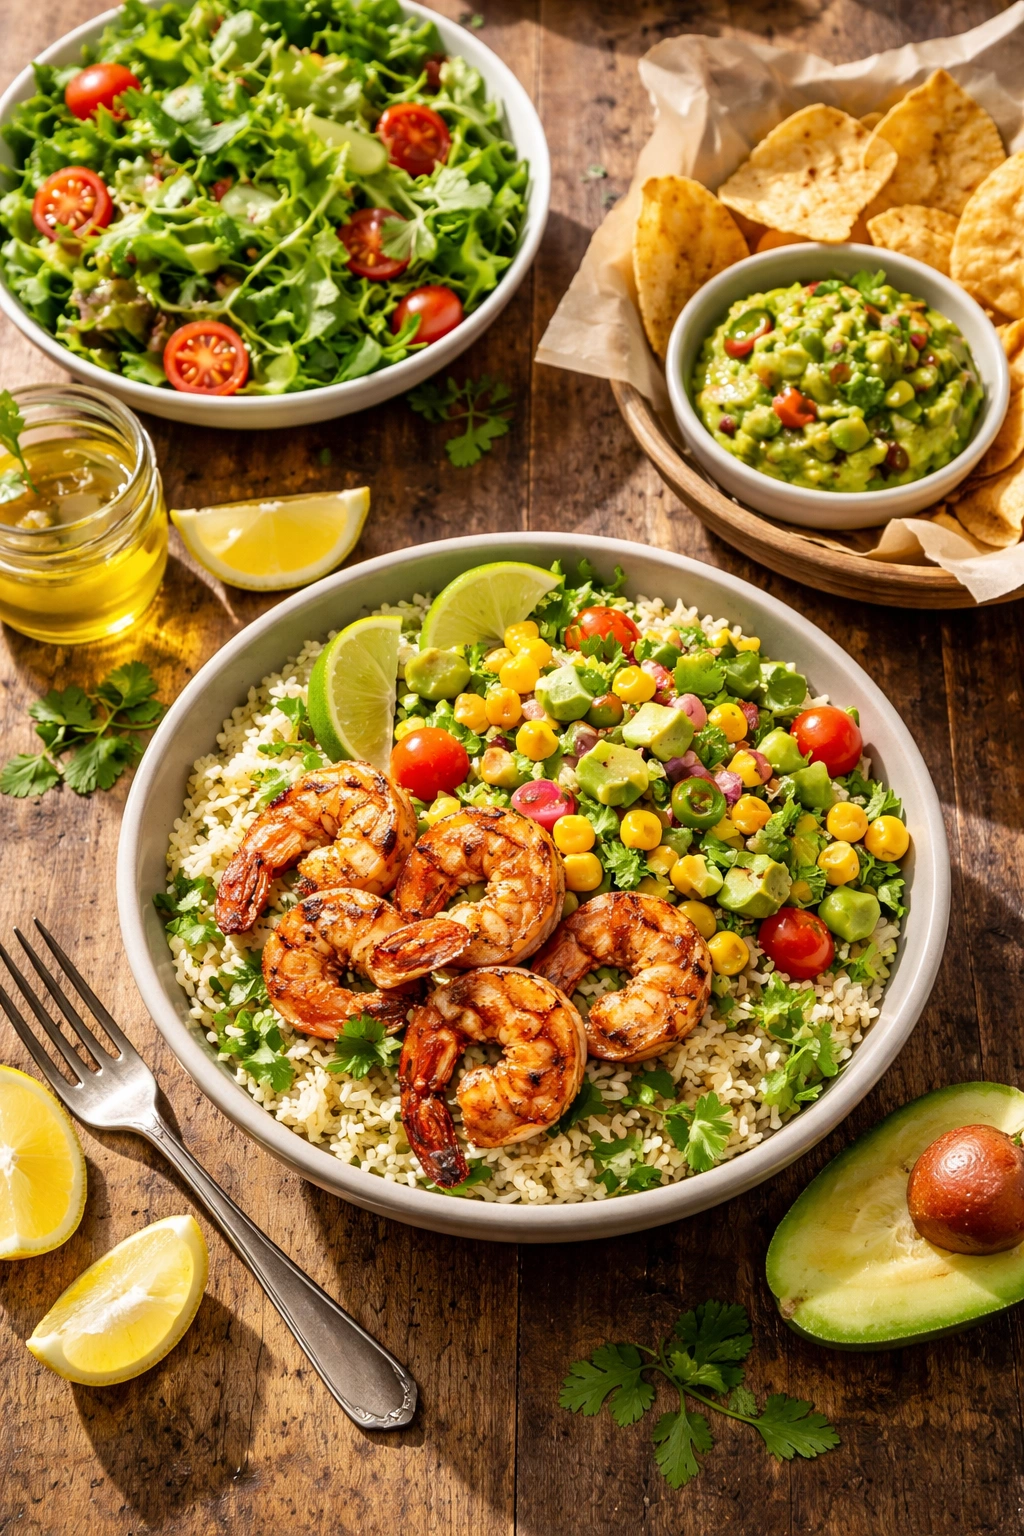
This bowl is substantial enough to serve as a complete dinner on its own, but it pairs beautifully with other elements if you want to create a more elaborate meal. A simple green salad with lemon vinaigrette provides brightness and freshness that complements the richness of the avocado. A side of crispy tortilla chips with guacamole feels indulgent and adds textural contrast.
For drinks, this bowl pairs beautifully with crisp white wines like Sauvignon Blanc or Pinot Grigio—the acidity of the wine complements the lime and cilantro in the bowl. Sparkling water with lime and a sprig of cilantro creates a refreshing non-alcoholic pairing that’s equally nice. Even a cold iced tea works if you want something simpler and more casual.
If you’re serving this at a gathering, consider setting up a build-your-own-bowl bar where guests can assemble their own according to their preferences. Set out the shrimp, salsa, sauce, avocado, and suggested bases, and let people construct their own perfect bowl. This works particularly well for groups with different dietary preferences, as people can easily skip components they don’t like or add more of what they love.
For breakfast or brunch, this bowl translates beautifully with the addition of a poached or fried egg on top. The egg yolk creates an extra richness and helps bring everything together. Some people swear by adding a small scoop of sour cream instead of the creamy garlic sauce when they’re making this for breakfast—it sounds unusual but it works.
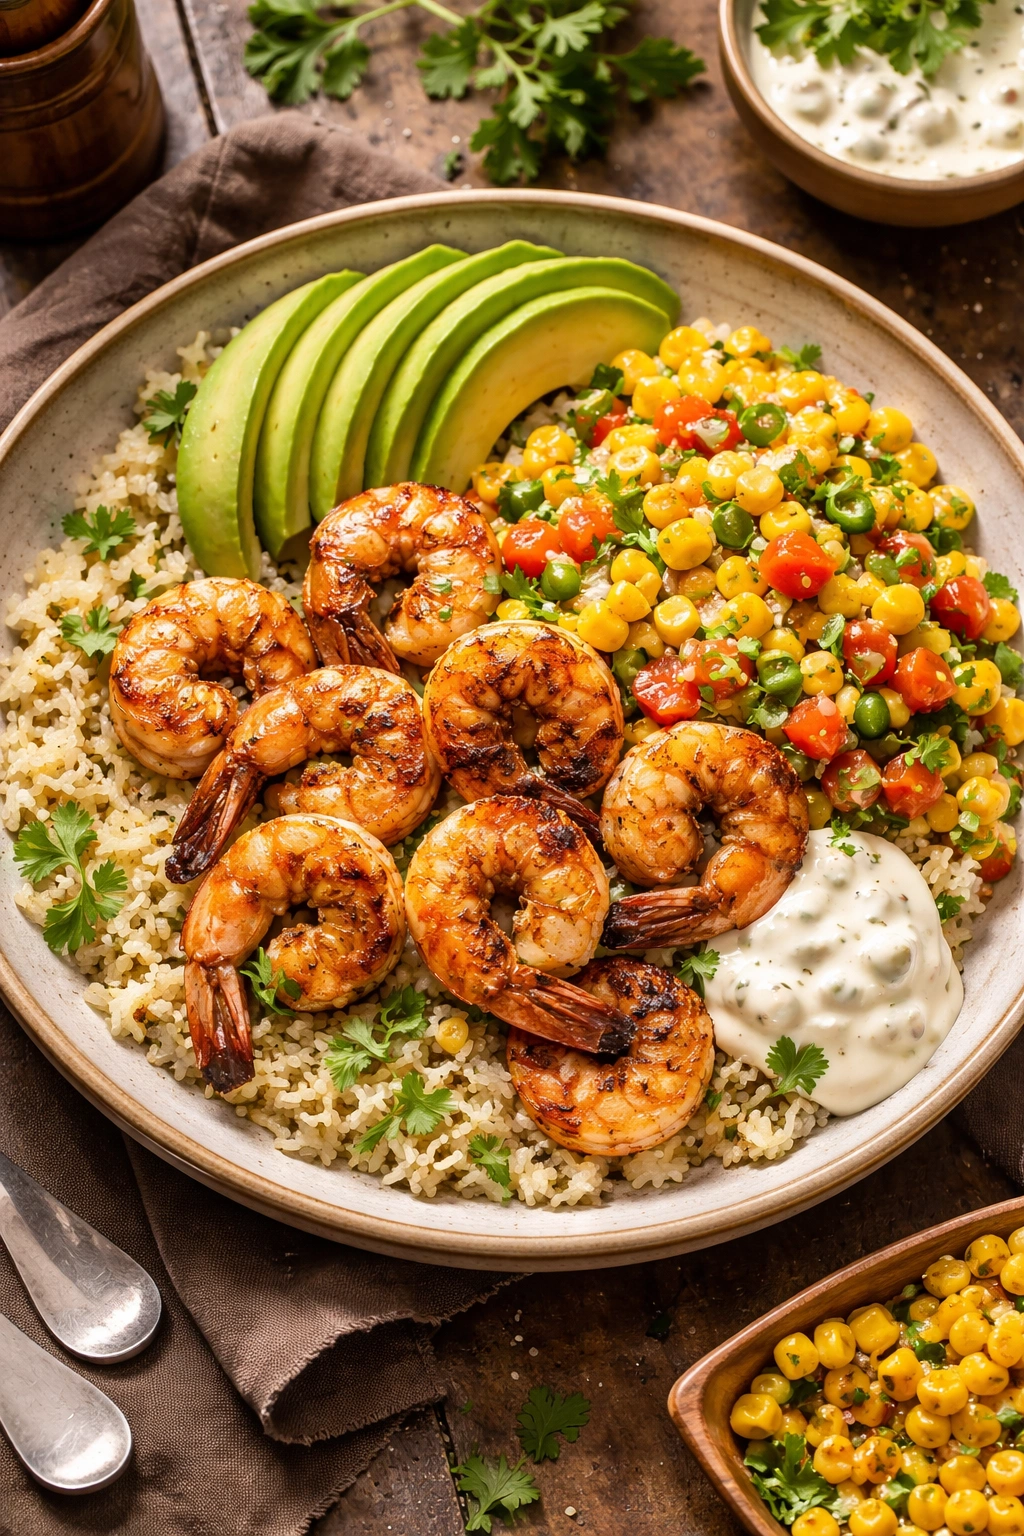
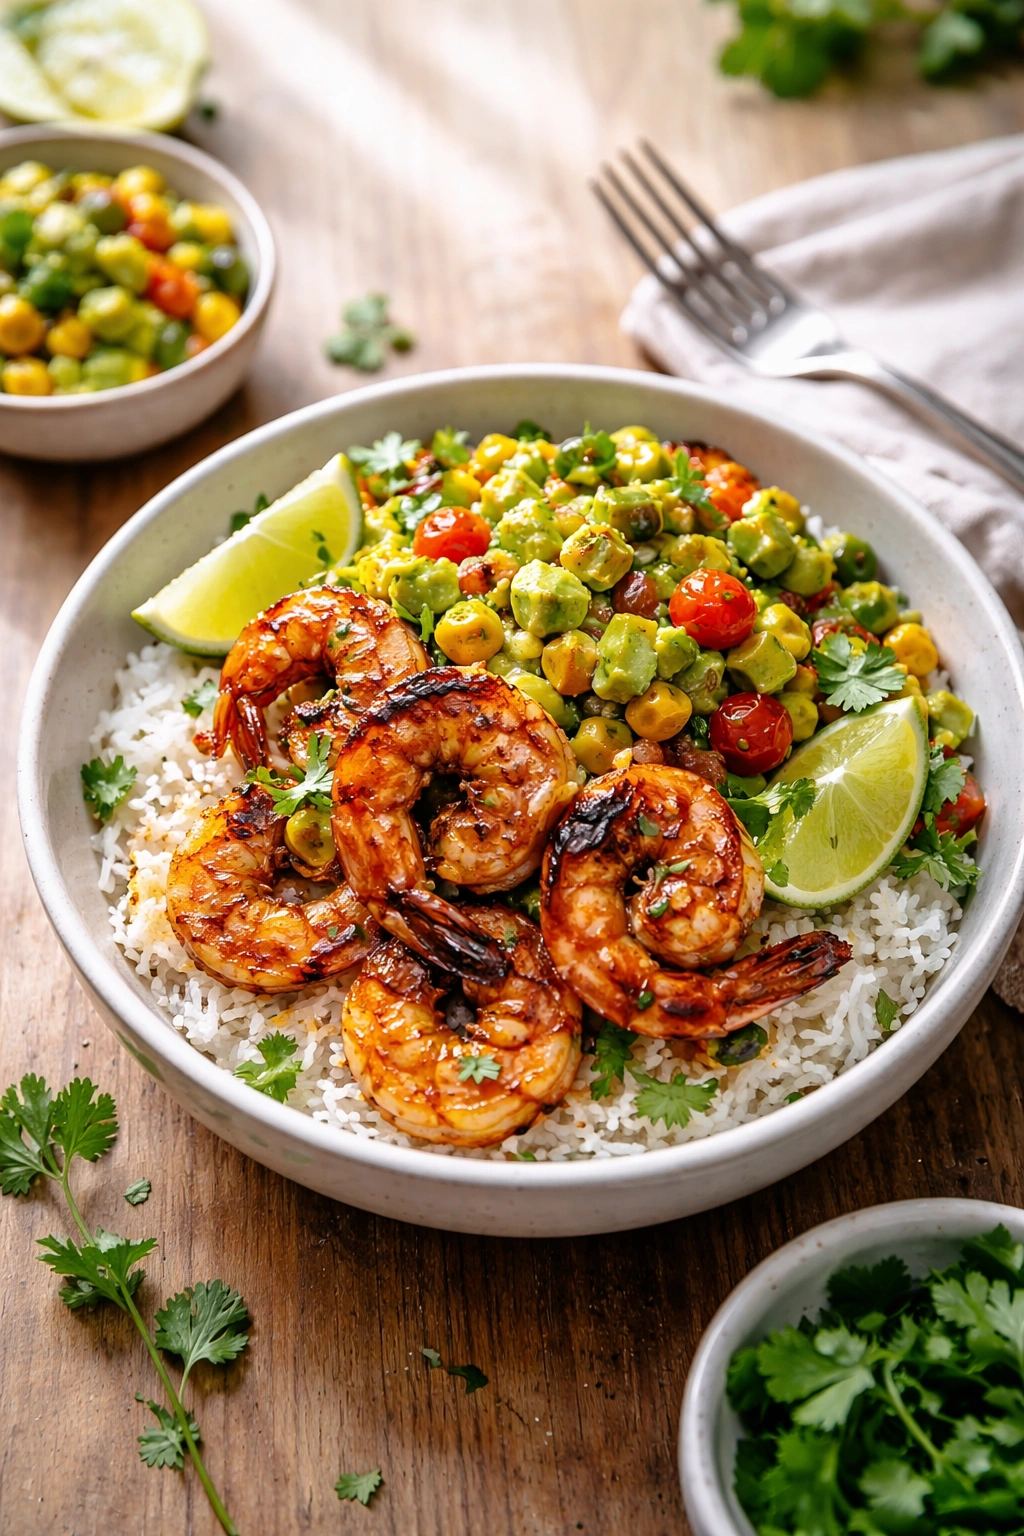
How to Build Your Bowl
The order in which you assemble your bowl matters because it affects both how the final dish looks and how the flavors come together in each spoonful. Start with your base—whether that’s rice, quinoa, or greens. This creates a foundation and helps distribute the wet components so they don’t all sink to the bottom and make everything soggy.
Next, spread the corn salsa across the grain or greens. This creates a middle layer that the shrimp will sit on and that will stick to the avocado as you build upward. The salsa provides structural support and flavor distribution.
Arrange the shrimp on top of the salsa so they’re visible and prominent. This is the protein, the star of the show, and it should be the most visually prominent element of the bowl. Position them so they look appealing and so there’s room for the other components around them.
Distribute the avocado around and between the shrimp. If you’re slicing it, arrange the slices in an appealing pattern. If you’re mashing it, dollop it in strategic spots rather than spreading it into one big thick layer.
Drizzle the creamy garlic sauce over everything, making sure to get some on the shrimp, some on the avocado, and some down to the base so that every bite is cohesive. This is the component that brings everything together, so don’t be shy with it.
Finally, finish with the sesame seeds and green onions, which add texture, freshness, and visual appeal. The green onions taste good but they also look bright and green against the other components, creating visual contrast that makes the bowl more appetizing. Serve with a lime wedge on the side so people can add more acidity if they want it.
Nutritional Benefits of This Bowl
This bowl is genuinely nutrient-dense without feeling like diet food, which is perhaps its greatest strength. The shrimp provides lean protein—about 24 grams per 3-ounce serving—without significant fat, making it an excellent choice for anyone trying to eat more protein without excess calories. The protein keeps you satisfied and supports muscle maintenance and repair.
The avocado contributes heart-healthy monounsaturated fats that support cholesterol levels and overall cardiovascular health. These fats also help your body absorb fat-soluble vitamins like vitamins A, D, E, and K from the other vegetables in the bowl. The fiber in avocado supports digestive health and also contributes to satiety.
The corn provides carbohydrates for energy along with fiber for digestive health. The vegetables in the salsa—the red onion, cilantro, and jalapeño—provide vitamins, minerals, and antioxidants. Red onion contains quercetin, a compound with anti-inflammatory properties. Cilantro is rich in vitamin K and various minerals. The lime juice adds vitamin C, which supports immune health and helps your body absorb iron from plant sources.
If you’re using quinoa as a base, you’re getting a complete protein with all nine essential amino acids, making the bowl even more protein-complete. Even if you’re using regular rice, you’re still creating a well-rounded meal that provides protein, healthy fats, carbohydrates, fiber, and micronutrients in appropriate proportions.
Final Thoughts
A grilled shrimp bowl with avocado salsa is one of those dishes that seems simple until you really think about what makes it work. It’s the balance between hot and cold, smoky and fresh, creamy and zesty that creates something greater than the sum of its parts. It’s a meal that tastes indulgent but supports your health, that comes together quickly but doesn’t feel rushed, and that impresses guests while being genuinely easy to execute.
Once you understand how the components work together and you’ve made it a couple of times, you’ll find yourself adapting it naturally based on what’s in your kitchen, what you’re craving, and what season it is. You’ll discover that the core of this bowl—perfectly grilled shrimp, bright salsa, creamy sauce—is adaptable enough to accommodate almost any flavor variation you dream up while still maintaining its essential character.
The beauty of this dish is that it proves you don’t need a complicated recipe or refined cooking technique to create something that tastes special. You need quality ingredients, attention to timing, and an understanding of how flavors balance. Everything else is just technique, and technique improves with practice. Make this bowl once and you’ll understand why it deserves a permanent place in your rotation. Make it twice and it’ll become something you can prepare almost without thinking. Make it three times and you’ll start creating your own variations, which is when cooking stops being about following instructions and starts being about expression.