When weeknight chaos hits and you’ve got hungry people expecting dinner in minutes, a 30-minute chicken breast casserole becomes your secret weapon. This isn’t some complicated, labor-intensive bake that requires advance planning or specialty ingredients you don’t have. It’s the kind of one-dish meal that comes together in your mixing bowl while your oven preheats, with minimal prep work and zero stress. You’ll have something warm, creamy, and deeply satisfying on the table before half an hour passes—complete enough to stand alone, but flexible enough to pair with whatever sides feel right for your family.
The magic of this particular casserole lies in starting with quick-cooking chicken breast, combined with ingredients that are either already cooked or require no cooking at all. You’re not waiting for raw chicken to cook through in the oven, which means you’re shaving precious time off the clock without sacrificing tenderness or flavor. The creamy sauce comes together in the mixing bowl, seasoning happens all at once, and the whole dish bakes while you set the table or prepare a simple green salad. Real talk: this casserole has saved my weeknight sanity more times than I can count, and once you master the basic technique, you’ll understand why it works so well.
The beauty of making a chicken casserole in this timeframe is that it feels like a proper, sit-down dinner—the kind with melted cheese and a golden-brown topping—but it requires the same effort as throwing together a weeknight pasta. It’s comfort food without the stress, and it scales effortlessly whether you’re feeding four people or planning to have leftovers for the next day.
Why This 30-Minute Chicken Breast Casserole Works
The secret to pulling off a delicious casserole in 30 minutes is understanding which steps can happen simultaneously and which ingredients skip the cooking process entirely. Unlike a casserole that bakes raw chicken from start to finish (which takes 45 minutes or longer), this version uses pre-cooked or quick-cooking chicken that won’t dry out during the bake time. You’re only in the oven long enough for the cheese to melt, the sauce to bubble around the edges, and the topping to turn golden—typically 15 to 18 minutes.
The second time-saver is your creamy sauce. Instead of making a roux on the stovetop (which adds 10 minutes of stirring and watching), you’re combining cream soup, sour cream, broth, and seasonings directly in a bowl. They blend together instantly, no heat required, no lumps to worry about. This approach gives you that same silky, velvety texture without any extra work. The sauce comes pre-seasoned too, so you’re not adjusting flavors on the fly.
Your ingredient list is intentionally short because everything needed to make this taste amazing is already present. You’re not adding a dozen items or rare specialty products. Chicken breast, a couple of canned or bottled ingredients, cheese, crackers or breadcrumbs, and basic seasonings—that’s genuinely all you need. The fewer ingredients you juggle, the faster the assembly moves and the easier cleanup becomes afterward.
Selecting the Best Chicken Breast for Speed
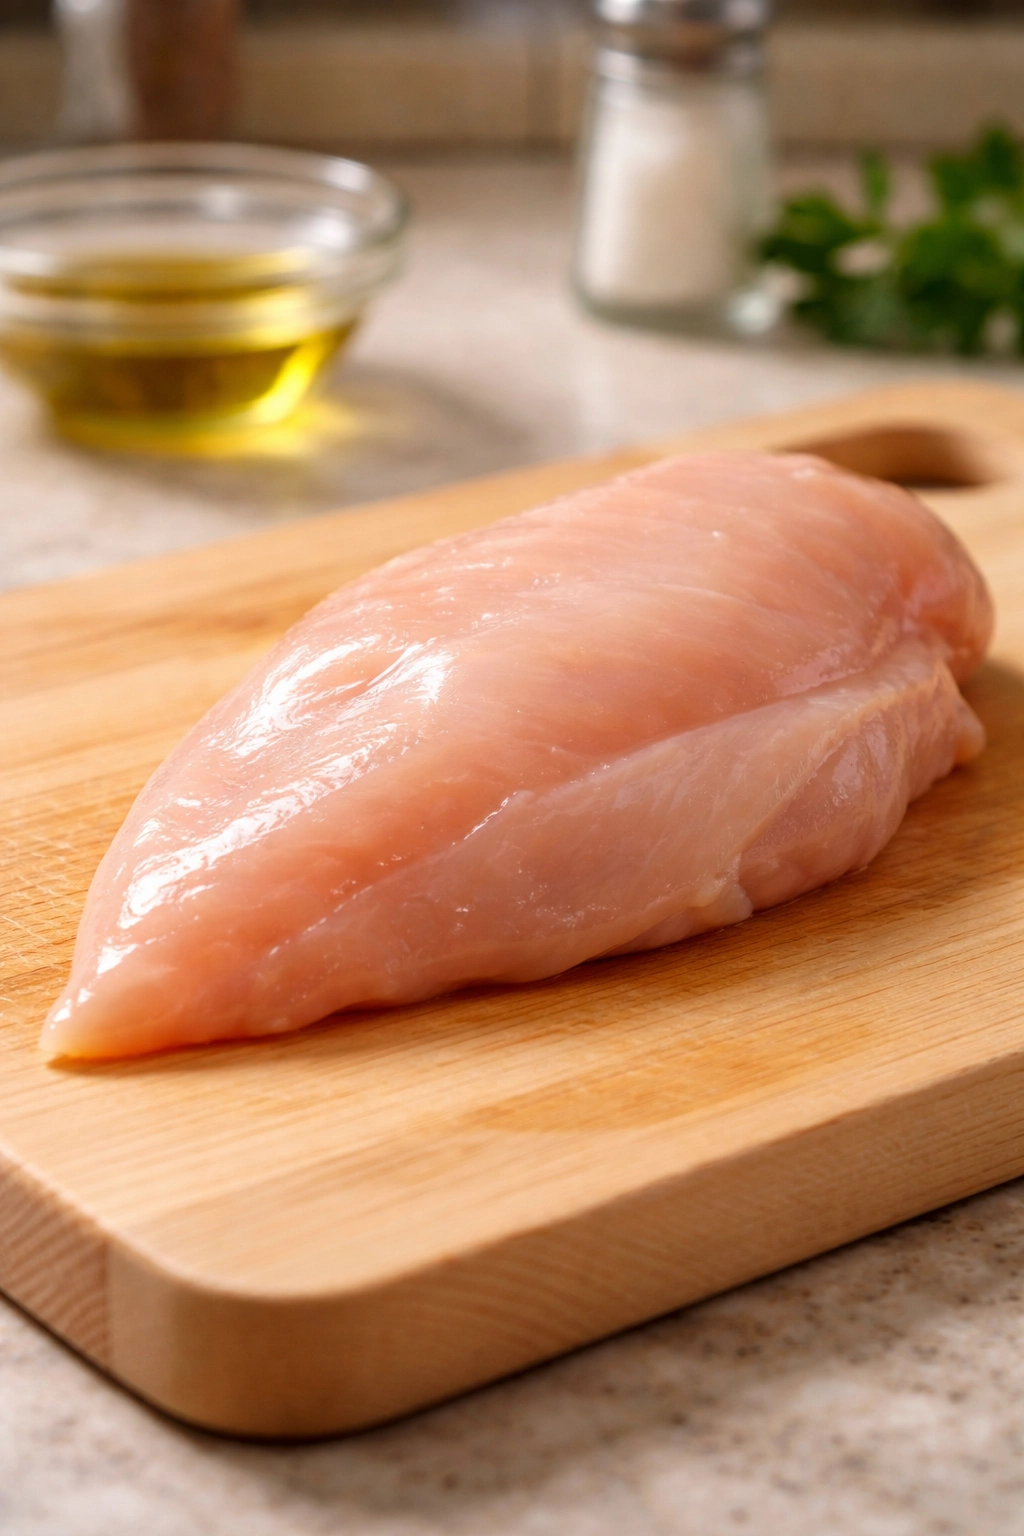
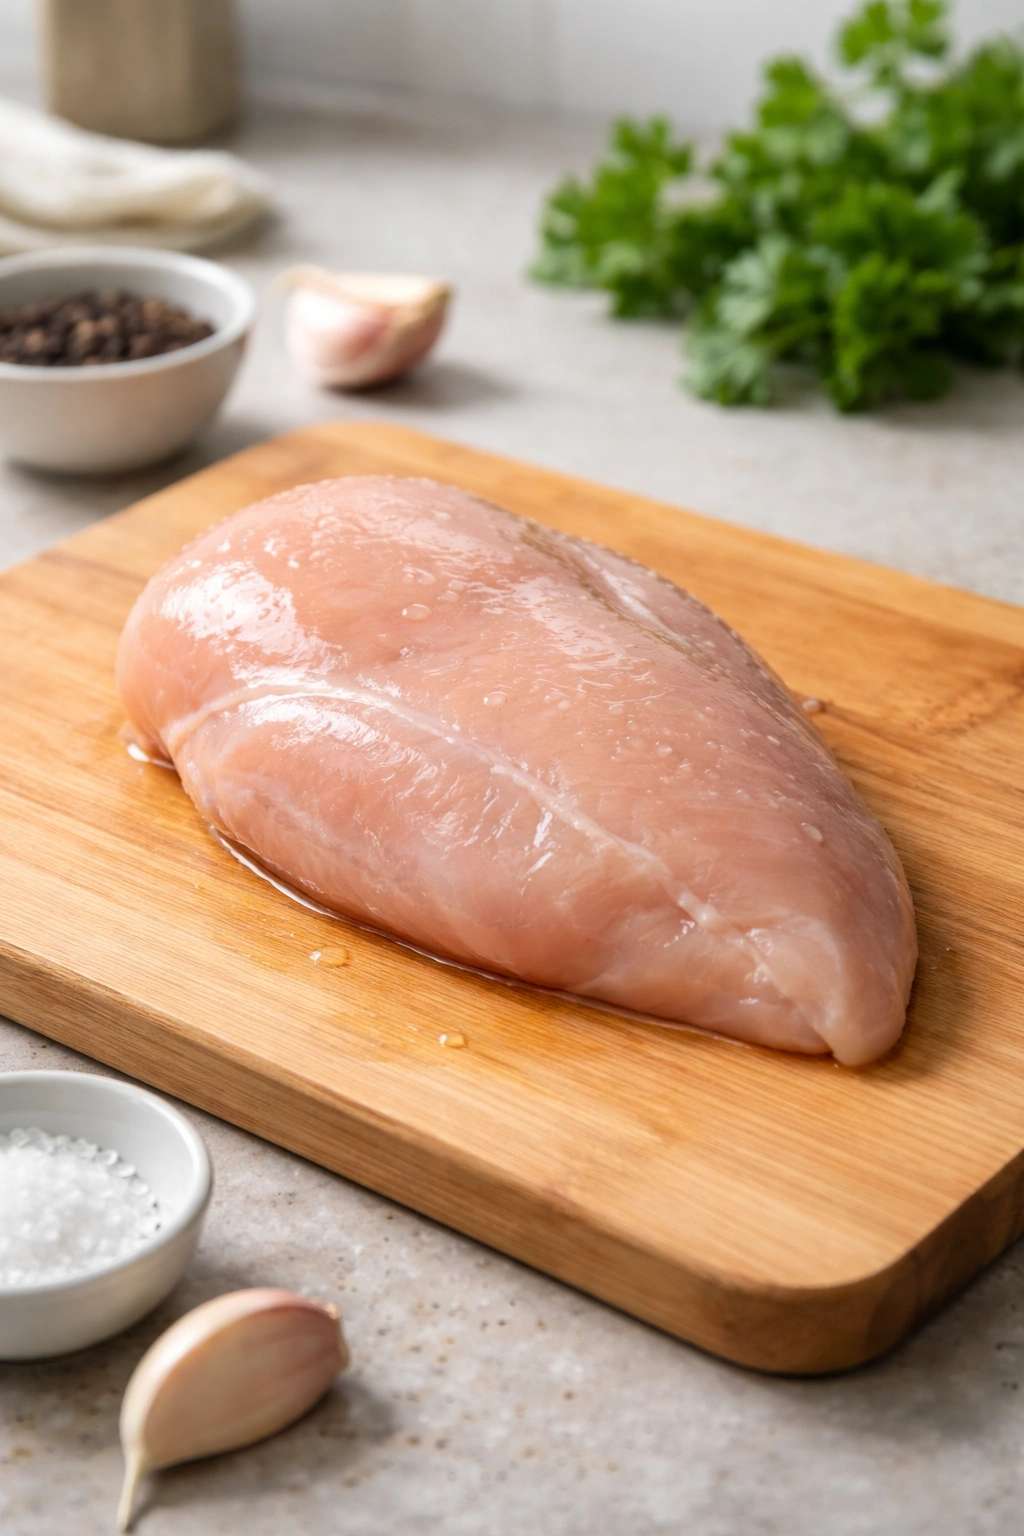
Using chicken breast rather than thighs or whole bird pieces is the entire reason this casserole stays under 30 minutes. Chicken breast cooks faster than any other cut because it’s lean, thin when pounded, and has no bones or skin to slow down the cooking process. You have three realistic options for getting cooked chicken on your timeline: buying a pre-cooked rotisserie chicken from the grocery store (the absolute fastest route), poaching boneless skinless breasts in boiling salted water for 12 to 15 minutes, or using leftover cooked chicken from a previous meal.
The rotisserie route saves the most time. You walk in, grab a hot chicken, and you’re done. The meat is already perfectly cooked, incredibly tender, and honestly, it tastes better than chicken you could cook at home in 15 minutes. The downside is cost—rotisserie chickens run $8 to $12 depending on where you shop. If you’re watching your budget, poaching fresh breast halves in boiling water is nearly as fast and costs significantly less. You’ll need a pot of salted water at a rolling boil; chicken breasts typically take 12 to 15 minutes to cook through.
Leftover cooked chicken is the most economical option if you’ve planned ahead and have some in your fridge or freezer. Shredded roasted chicken, grilled chicken from dinner yesterday, or even canned chicken (which I wouldn’t normally recommend but works in a casserole) all work fine. The point is getting cooked, ready-to-eat chicken into your casserole without additional cooking time. That’s what keeps this dish in the 30-minute window.
Understanding the Role of Each Ingredient
Condensed cream of chicken soup is the foundation of your sauce, bringing creaminess and chicken flavor without requiring you to make a roux or simmer broth on the stovetop. It’s concentrated, so one can plus sour cream, broth, and seasonings creates a sauce that tastes rich and homemade. If you’re concerned about sodium, use a low-sodium variety and adjust salt at the end. You can also substitute cream of mushroom soup for a slightly earthier flavor, or cream of celery if you prefer something more subtle.
Sour cream adds tang, richness, and a subtle depth that keeps the sauce from tasting one-dimensional. It also helps keep the sauce from breaking or curdling when baked, stabilizing everything. Greek yogurt works if you don’t have sour cream, though the flavor will shift slightly toward tang. Some cooks use cream cheese, but that requires melting and blending, which costs you time.
Chicken broth or stock dilutes the cream soup concentrate to the right consistency and prevents the sauce from being too thick or gluey. Low-sodium broth lets you control the overall salt level, which matters when you’re already using salted butter, cheese, and crackers. The liquid also helps everything blend seamlessly in the bowl without lumps.
Shredded cheddar cheese (shredded from a block, not pre-shredded from a bag) creates that melted, gooey topping that makes a casserole feel special. Pre-shredded cheese contains anti-caking agents that prevent proper melting, so it clumps instead of flowing smoothly. Fresh-shredded cheddar melts beautifully and browns nicely under the oven’s heat. You could use other melting cheeses—Monterey Jack, Gruyere, or even a mild white cheddar—but sharp cheddar delivers the most punch for flavor.
Crushed crackers or breadcrumbs form the crispy topping that contrasts with the creamy filling. Ritz crackers are traditional and taste delicious, but saltines, butter crackers, panko breadcrumbs, or even crushed cornflakes all work. The key is tossing your topping with melted butter so it crisps up rather than staying soggy. Crushed crackers take about 30 seconds; you can speed this up by putting them in a sealed zip-top bag and rolling over them with a rolling pin or your hands.
Yield: Serves 4 to 6 | Makes one 9×13-inch casserole
Prep Time: 10 minutes
Cook Time: 18 minutes
Total Time: 28 minutes (including oven preheating)
Difficulty: Beginner — This recipe requires no special skills, no culinary techniques, and straightforward assembly. Even someone cooking for the first time will have success.
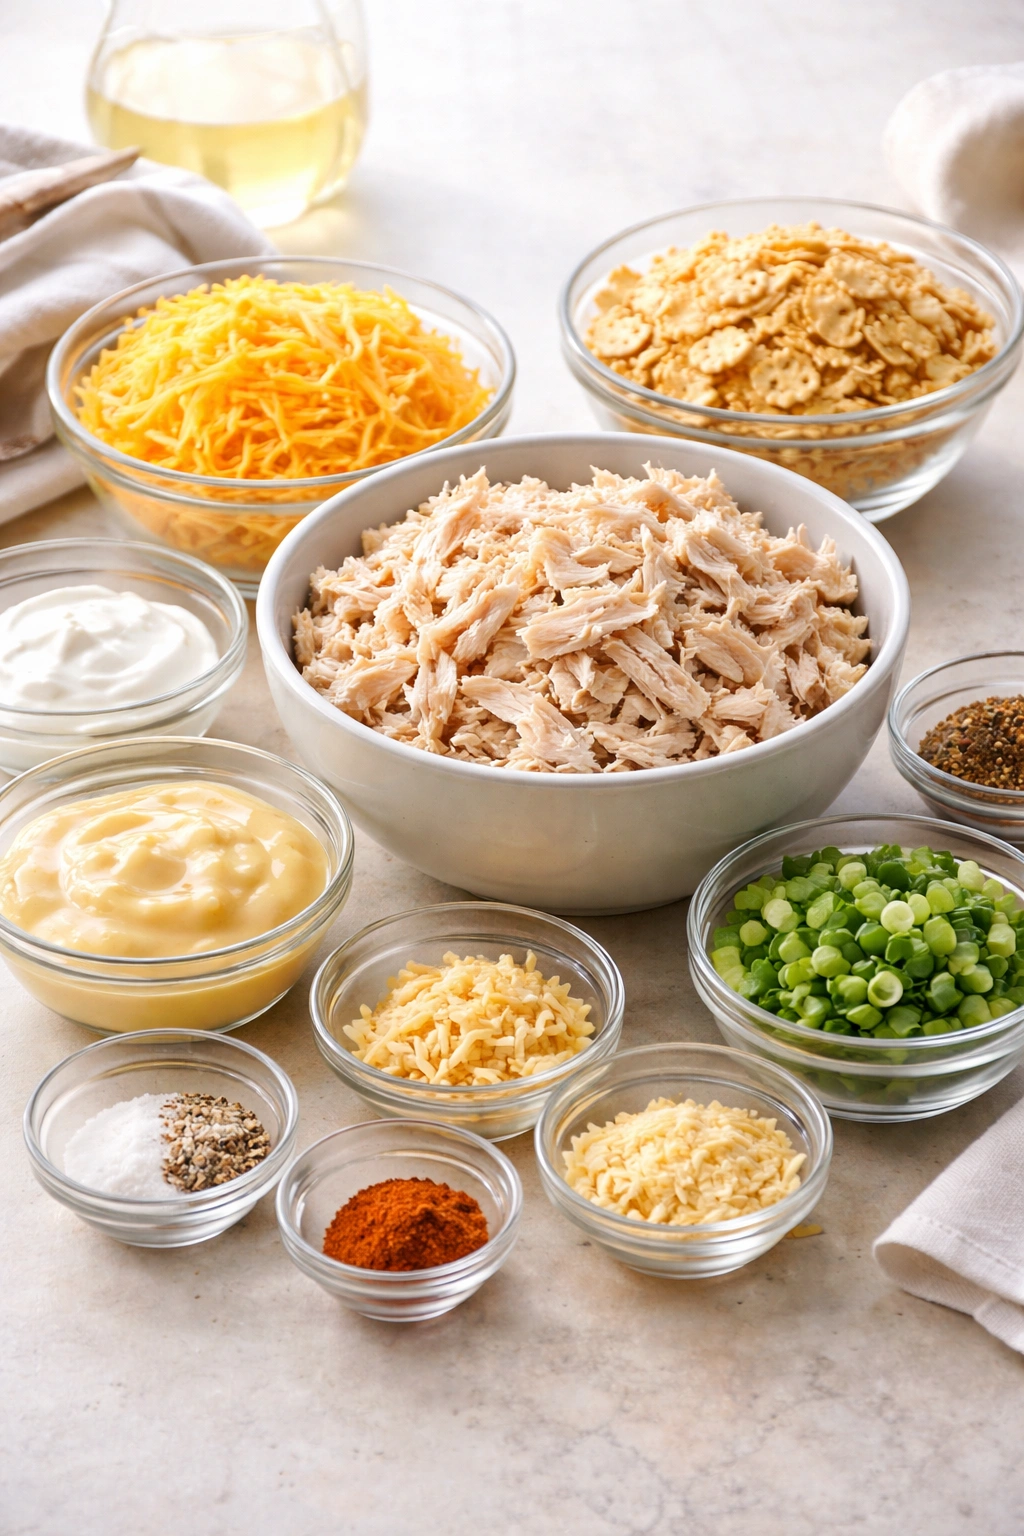
Complete Ingredient List
For the Casserole:
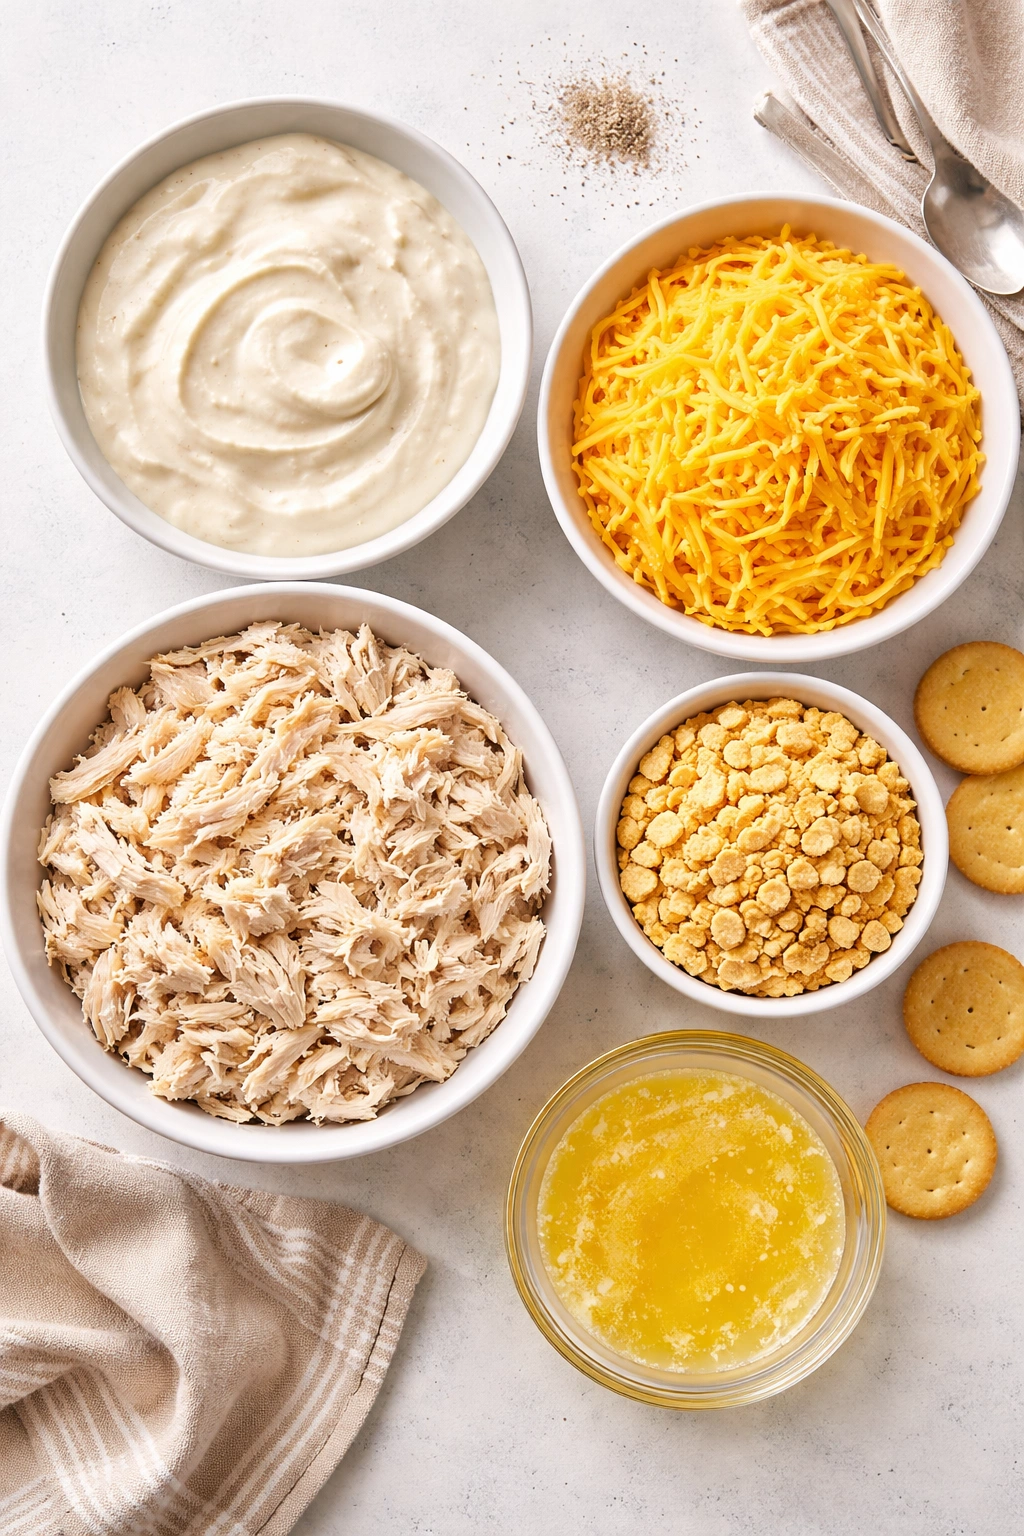
- 1 (10.5-ounce) can condensed cream of chicken soup
- ¾ cup sour cream, at room temperature
- ½ cup low-sodium chicken broth
- 3½ cups cooked shredded chicken breast (from 1 large rotisserie chicken, or about 1 pound boneless skinless breasts, poached and shredded)
- 1½ cups shredded sharp cheddar cheese, divided (fresh-shredded from a block, not pre-shredded)
- 1 teaspoon kosher salt
- ½ teaspoon garlic powder
- ½ teaspoon onion powder
- ¼ teaspoon black pepper
- ¼ teaspoon paprika (optional, adds subtle color and warmth)
For the Topping:
- 1½ sleeves buttery round crackers (such as Ritz), lightly crushed (about 200g or roughly 2 cups crushed)
- 4 tablespoons unsalted butter, melted
- ¼ cup shredded cheddar cheese (reserved for sprinkling on top)
How to Prepare Your Ingredients for Speed
The best time-saving strategy is getting everything ready before you turn on the oven. Grab a large mixing bowl and place all your ingredients on the counter in front of you—don’t go hunting through the pantry once you start mixing. If you’re using a fresh rotisserie chicken, remove the meat from the bones while your oven preheats (it takes about 3 minutes) and shred it with two forks or your hands. The chicken will still be warm, which is fine.
If you’re poaching fresh chicken breast, get your water boiling while you gather the other ingredients. Salted water boils faster and seasons the chicken as it cooks. Once the water reaches a rolling boil, add the chicken breasts and let them cook for 12 to 15 minutes, depending on thickness. You’ll know they’re done when the thickest part reaches an internal temperature of 165°F when checked with a meat thermometer. While the chicken cooks, crush your crackers (this takes one minute), measure out your sauce ingredients, and shred your cheese.
The only prep work that matters is pulling everything into the bowl and mixing. You’re not chopping vegetables, sautéing aromatics, or preparing any component separately. Everything happens in that bowl, then moves directly to the baking dish. This is the entire appeal of this casserole—it’s assembly, not cooking.
Step-by-Step Instructions for Your 30-Minute Casserole
Prepare the Oven and Baking Dish:
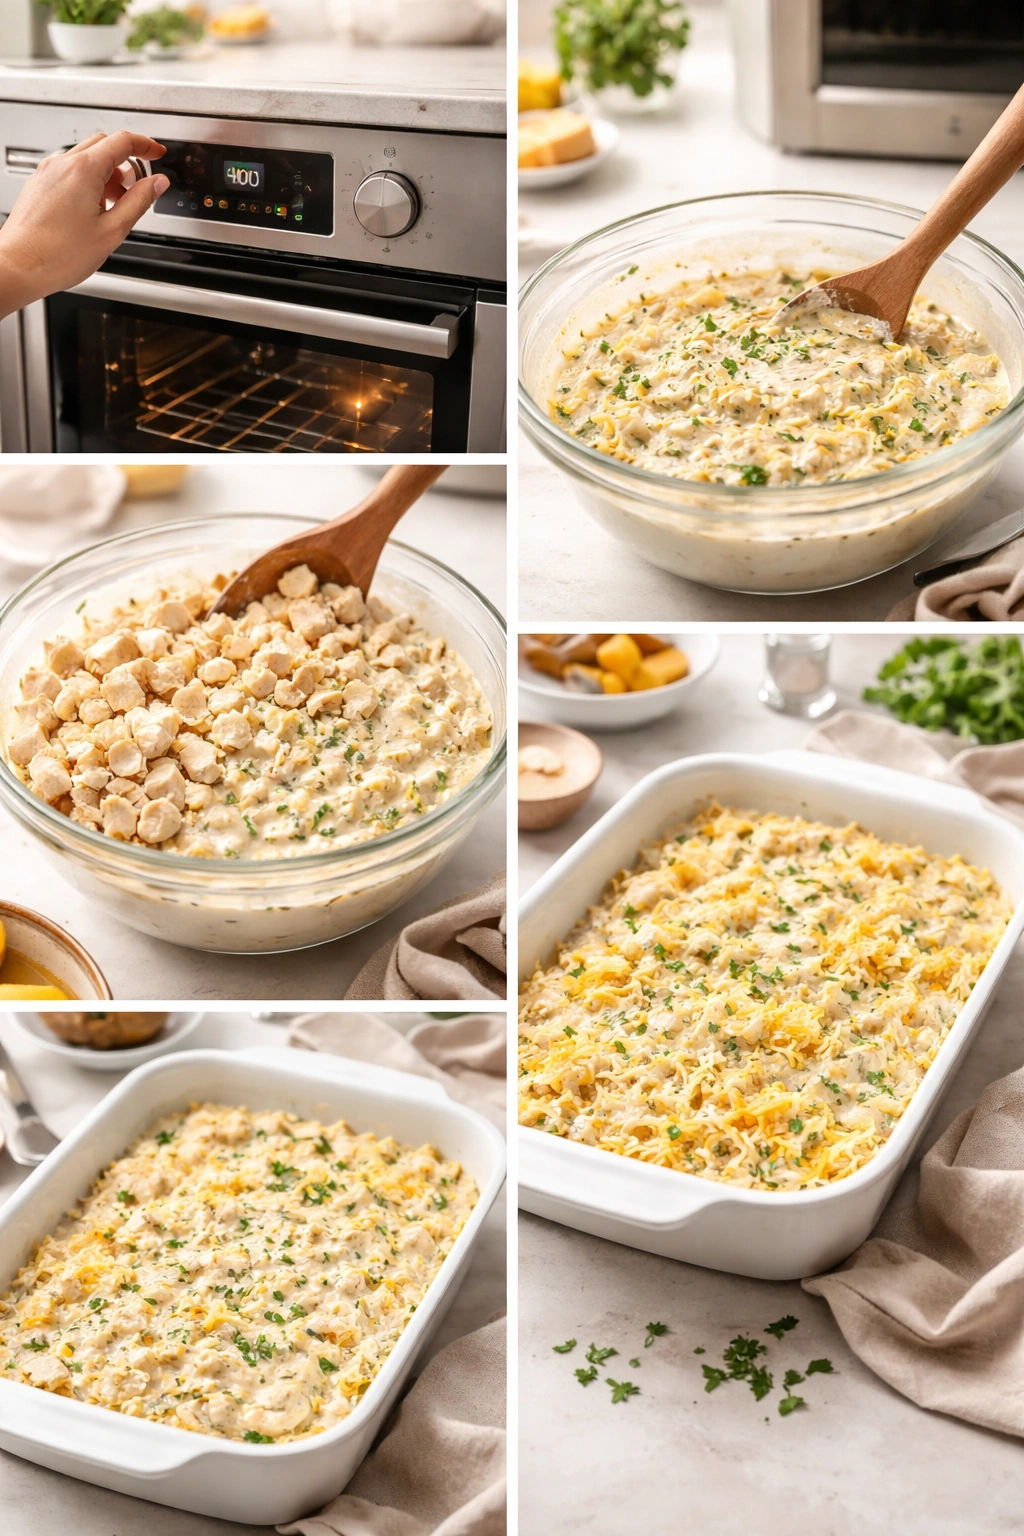
- Preheat your oven to 375°F (190°C) and position the rack in the center. While it’s preheating, lightly spray a 9×13-inch baking dish (glass or ceramic work equally well) with cooking spray, or brush it lightly with neutral oil. A light coating prevents sticking and makes cleanup easier.
Make the Creamy Sauce and Filling:
-
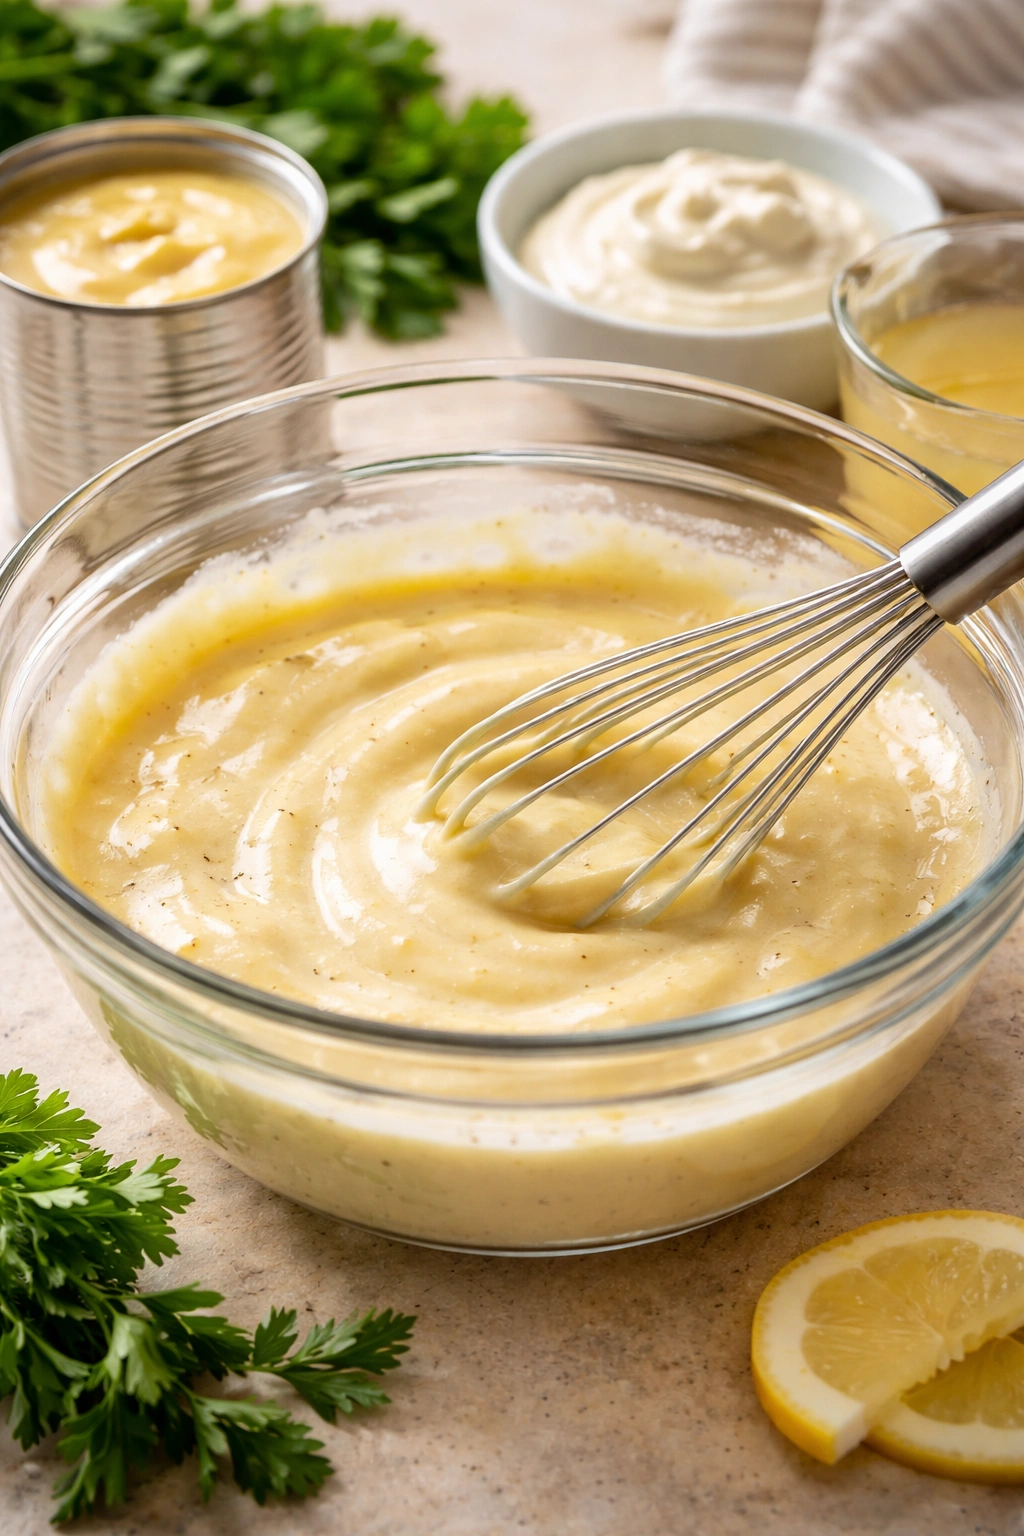
In a large mixing bowl, combine the cream of chicken soup, sour cream, and chicken broth. Whisk them together until you have a smooth, lump-free sauce. This should take about 30 seconds—don’t overthink it.
-
Add the kosher salt, garlic powder, onion powder, black pepper, and paprika to the sauce. Stir everything together thoroughly so the seasonings distribute evenly. You want the spices incorporated completely, not clumpy.
-
Fold in the cooked shredded chicken and 1 cup of the shredded cheddar cheese. Use a rubber spatula or wooden spoon, folding gently until the chicken is evenly coated in the creamy sauce. You’re not stirring vigorously or trying to break up the chicken—just combining everything so no dry spots remain.
-
Transfer the entire mixture to your prepared baking dish and spread it into an even layer with a spatula. Press down gently so the mixture is compact and level. Even distribution means everything bakes evenly and the cheese melts uniformly.
Advertisements
Prepare the Topping:
-
In a small bowl, combine the crushed crackers and melted butter. Toss them together with a fork until the crumbs are evenly coated—every piece should have a light sheen of butter on it. This ensures the topping crisps up rather than staying soft.
-
Sprinkle the cracker mixture evenly over the casserole filling, covering the entire surface. Break up any large clumps as you go. You want an even, distributed topping, not piled thickly in some spots and thin in others.
-
Sprinkle the remaining ½ cup of shredded cheddar cheese over the cracker topping. This creates a melted cheese layer under the crackers that holds everything together and adds extra flavor.
Bake and Rest:
-
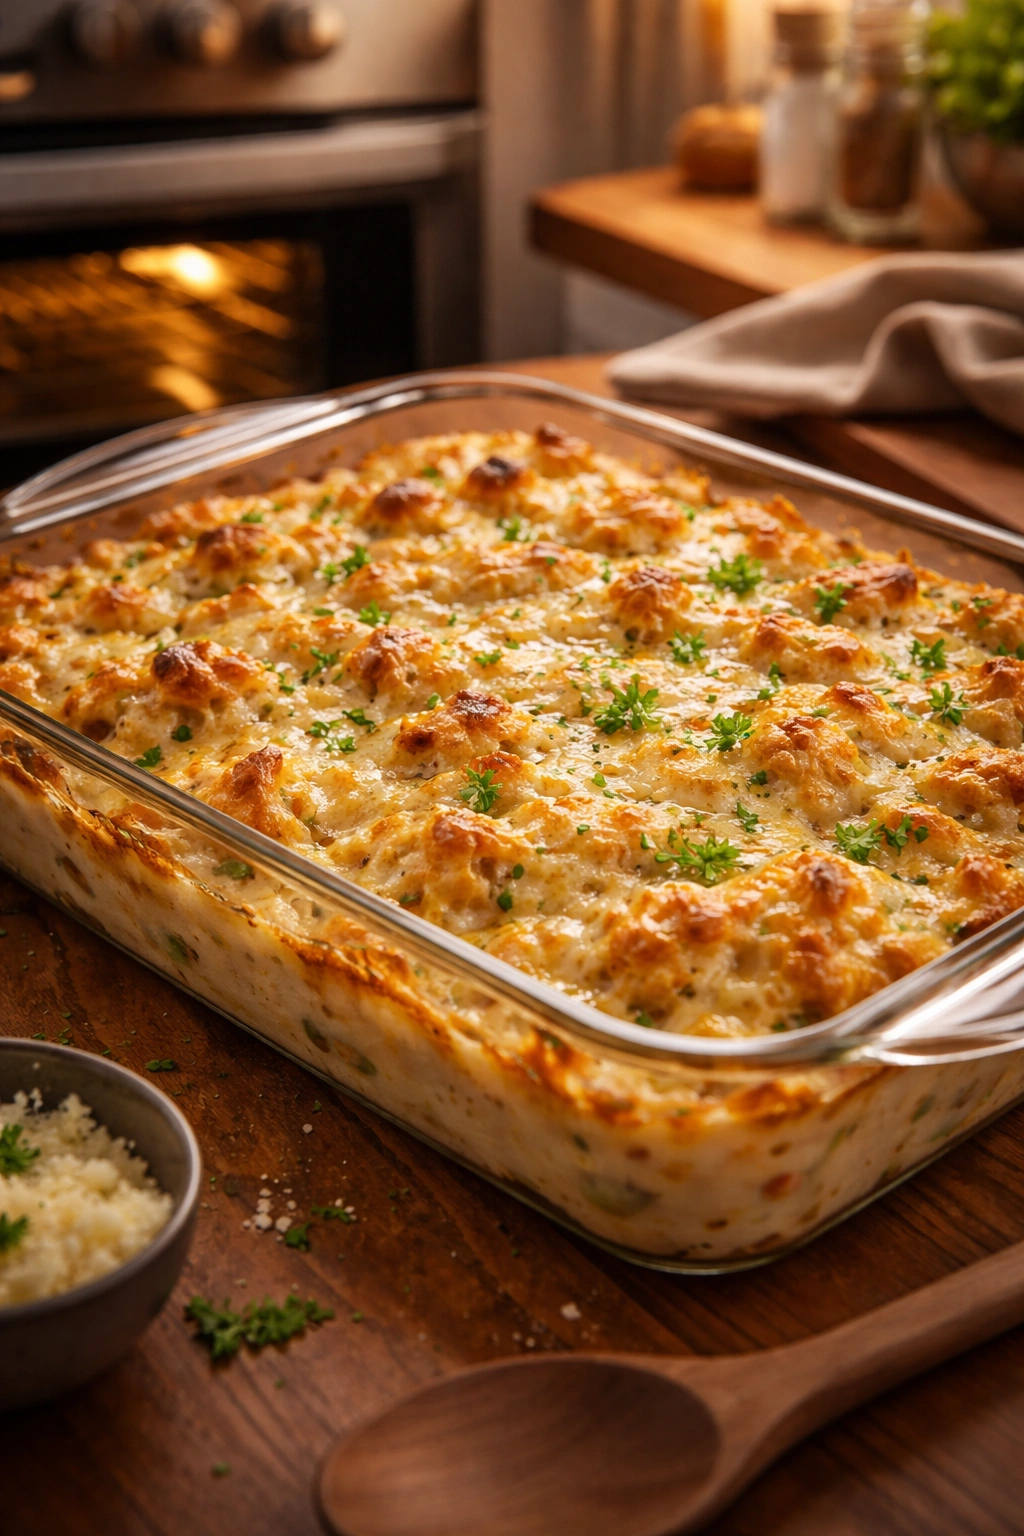
Bake the casserole in the preheated oven for 15 to 18 minutes, until the filling is bubbling gently around the edges and the cracker topping has turned light golden brown. The cheese should be melted and bubbly when you look at it, and the edges of the casserole should show slight browning and steam.
-
Remove the casserole from the oven and let it rest on the counter for 5 minutes before serving. This resting time allows the sauce to set slightly, making it less runny and easier to scoop onto plates. The casserole will still be hot—you don’t need to worry about it cooling down completely. This brief rest is simply to give the filling structure so it holds together when plated.
Pro Tips for Perfect Results Every Time
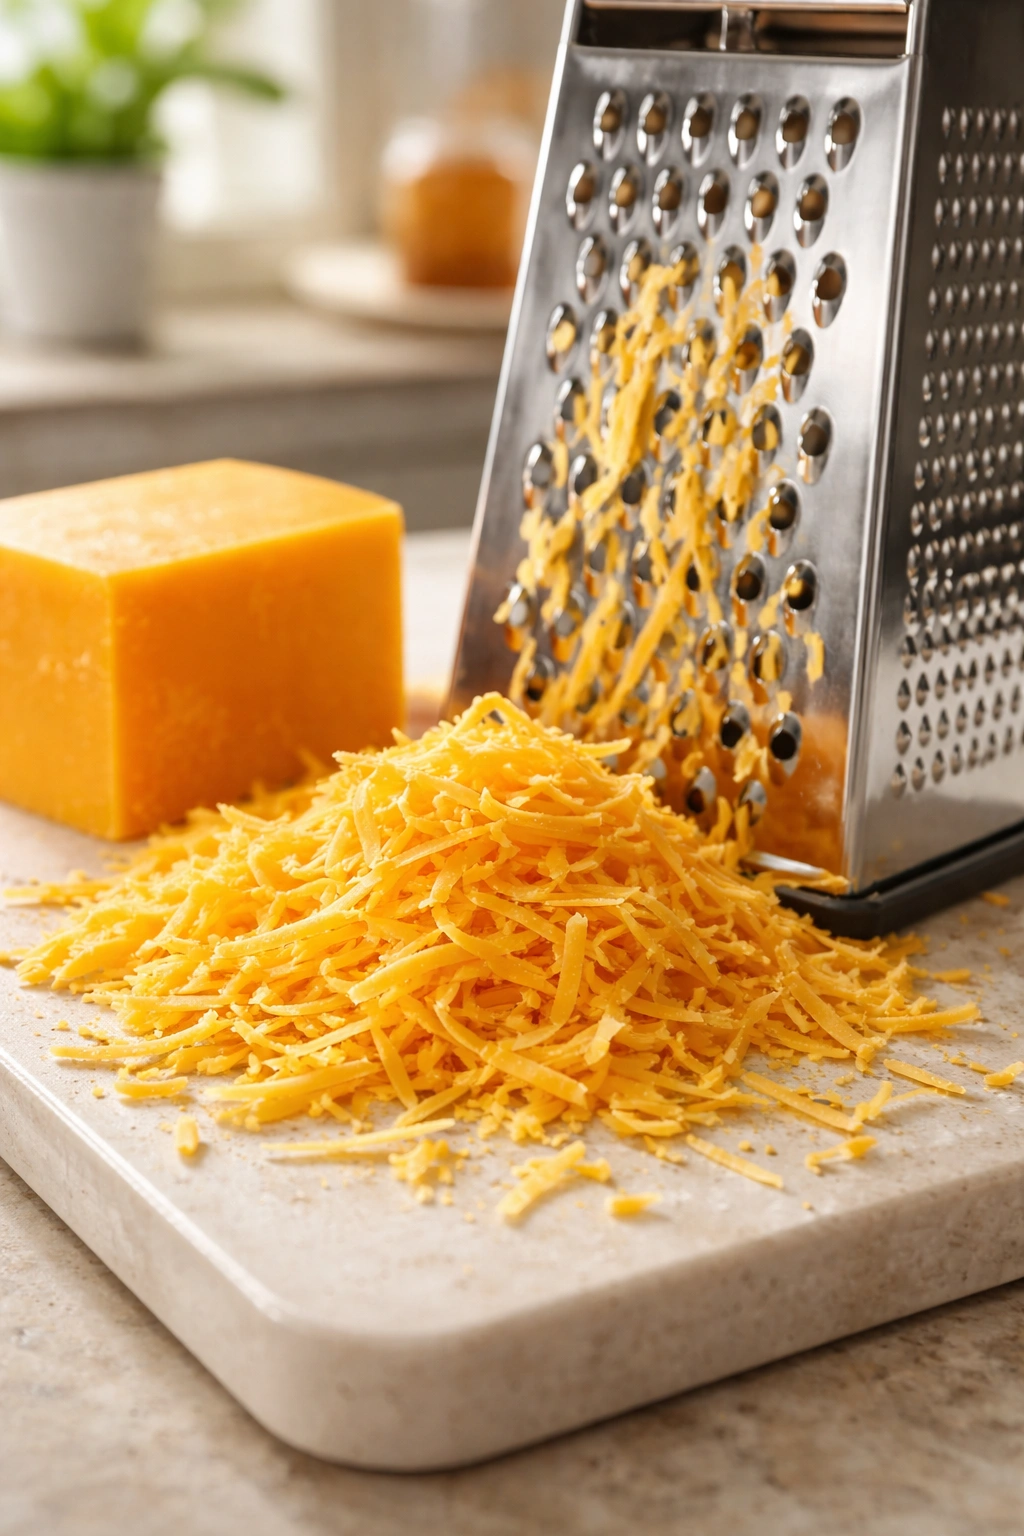
Use Fresh-Shredded Cheese, Always. Pre-shredded cheese contains cellulose and anti-caking agents that prevent proper melting. It separates and pools in puddles rather than melting smoothly. Fresh-shredded cheddar, even if it costs slightly more, melts beautifully and creates that gorgeous, gooey texture. You can shred a block of cheese in literally two minutes using the large holes on a box grater.
Don’t Skip the 5-Minute Rest. I know the impulse is to serve immediately because everyone’s hungry and it’s ready. But that 5-minute rest is crucial for giving the sauce time to set. If you scoop too soon, the casserole will be soupy and fall apart on the plate. After 5 minutes, it holds together perfectly while still being hot enough to enjoy.
Bring Sour Cream to Room Temperature. Cold sour cream is thicker and harder to blend into the sauce mixture. Take it out of the fridge while you’re preheating the oven so it softens. It mixes in smoothly and creates a silkier sauce overall. If you forget and your sour cream is still cold, let it sit in the bowl for a minute and whisk it more thoroughly—it’ll come together.
Toast Your Cracker Topping First for Extra Crispness. If you want an even crispier, more golden topping, toss the crushed crackers with melted butter and spread them on a small baking sheet. Toast them in your preheated oven for 2 to 3 minutes while you’re assembling the casserole filling. They’ll be pre-toasted and crispy, adding another layer of texture. This costs you only a couple of minutes since your oven is preheating anyway.
Taste the Sauce Before Baking. Dip a spoon into the sauce mixture before it goes in the baking dish and taste it. Does it need more salt? More seasoning? Better to adjust now than to eat an under-seasoned casserole. The sauce will taste slightly less seasoned once baked and diluted with cheese, so don’t undersalt thinking it will be enough.
Use Ceramic or Glass, Not Metal. Metal baking dishes conduct heat differently and can cause the edges of your casserole to brown or crisp too much while the center stays soft. Glass and ceramic distribute heat more gently and evenly. If you only have metal, reduce the oven temperature to 350°F and add 2 to 3 minutes to the baking time.
Common Mistakes to Avoid
Trying to Use Cold Chicken. If your cooked chicken is straight from the fridge, it can make the sauce cooler and delay cooking. Use chicken that’s at least close to room temperature. If you’ve just cooked it, that’s perfect. If it’s been refrigerated, you don’t need to reheat it, but letting it sit out for a few minutes before mixing is wise.
Overseasoning the Soup. The condensed cream of chicken soup is already quite flavorful and salty. Remember that you’re adding more salt with the seasoning and the cheese. Taste before you bake, and don’t assume you need more salt just because the recipe includes it—adjust to your preference.
Crushing Crackers into Powder. You want distinct crumbs, not a fine powder that turns to mush. Crush them just enough that you have pieces roughly the size of small peas to quarter-inch chunks. Bigger pieces stay crispier during baking.
Baking Too Long. This casserole is ready in 15 to 18 minutes. If you bake it for 30 minutes, the sauce can dry out around the edges, and the cracker topping can turn dark brown instead of golden. Watch for the bubbling at the edges and the light golden color on top; that’s your signal it’s done. Your oven temperature might run hot or cool, so check around 15 minutes.
Forgetting to Mix the Topping with Butter. Dry crackers on top will stay dry and tough. Always toss them with melted butter so they crisp up and become tender when heated. The butter is what transforms crushed crackers from a crunchy garnish into a delicious, integral part of the casserole.
Variations to Customize Your Casserole
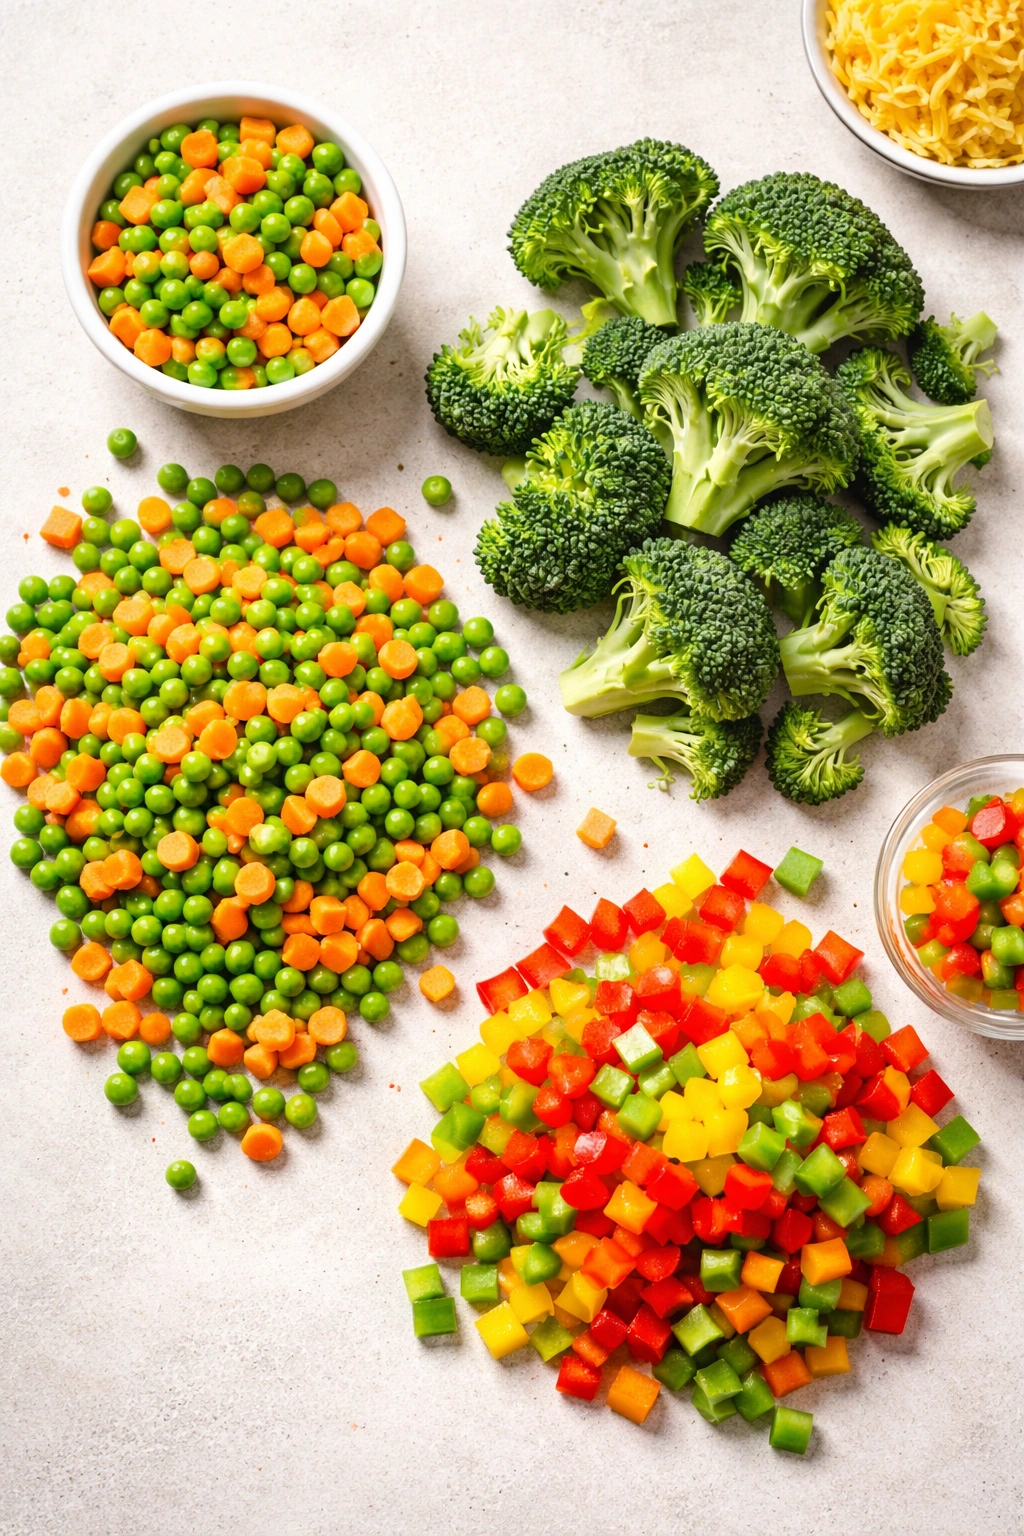
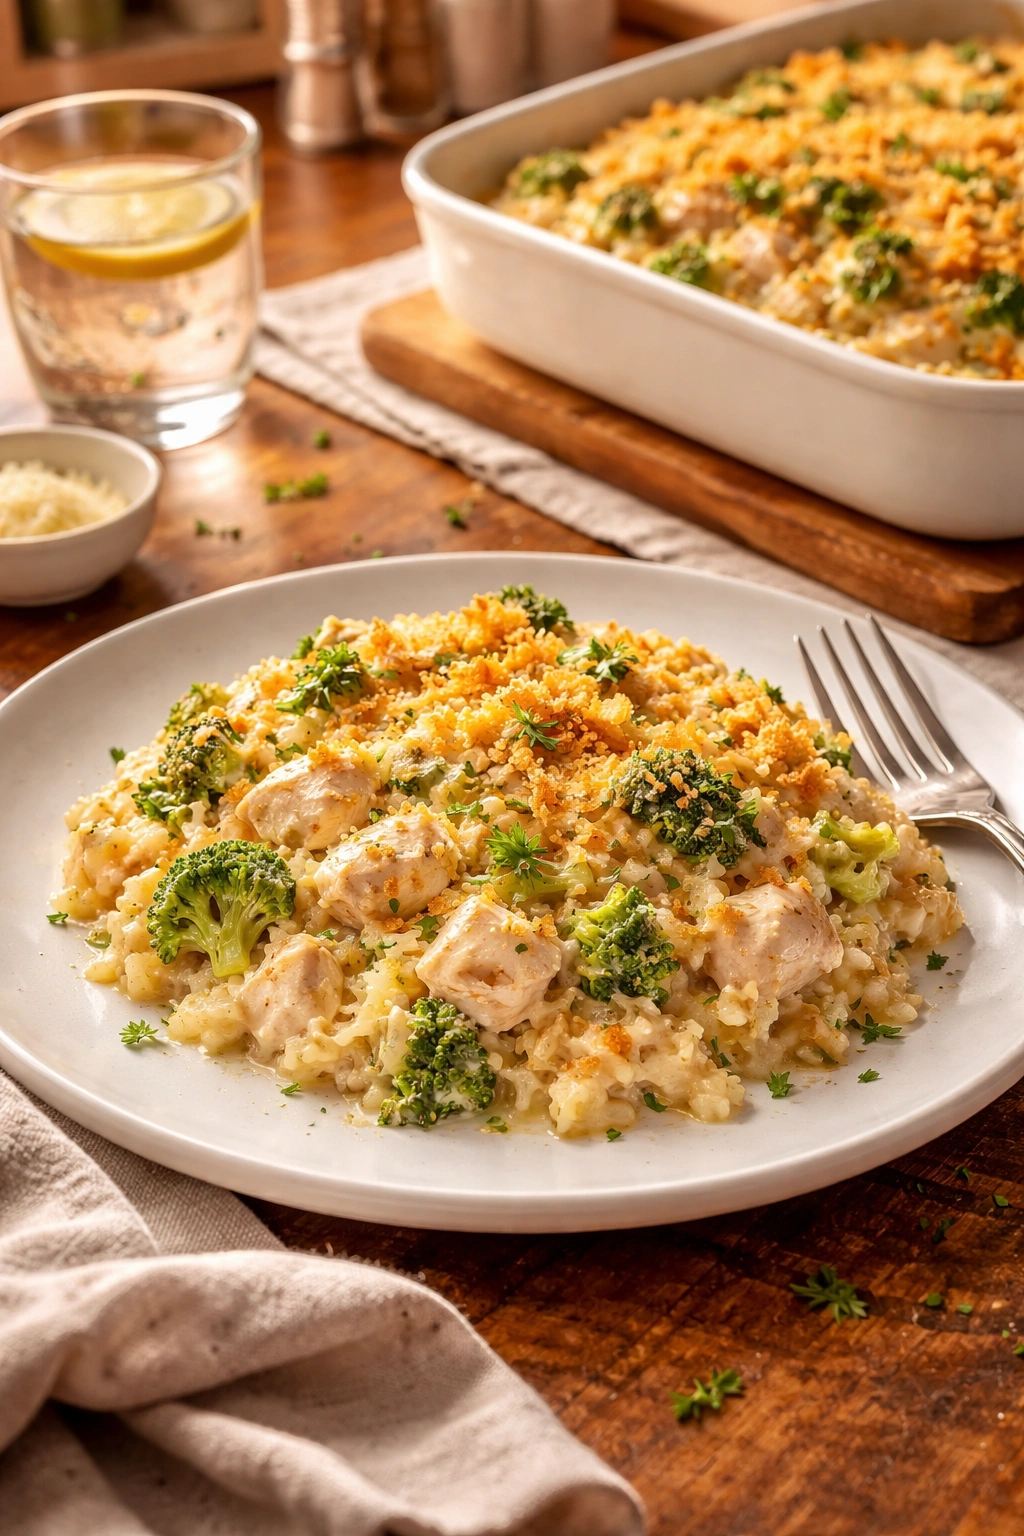
Vegetable-Loaded Version. Fold in 1 cup of frozen peas and carrots (no need to thaw), a cup of diced bell peppers, or 1½ cups of chopped broccoli florets right along with the chicken. Firmer vegetables like broccoli will soften slightly during baking without getting mushy. This turns a simple casserole into a complete meal with vegetables built in.
Herb-Seasoned Twist. Instead of just garlic and onion powder, add 1 teaspoon of dried Italian seasoning, ½ teaspoon of dried thyme, and ¼ teaspoon of dried rosemary to the sauce. Fresh herbs aren’t practical in a 30-minute window, but dried herbs blend in instantly and add complexity.
Cheese Variation. Swap half the cheddar for Gruyere, Swiss, or even white cheddar. A mix of cheeses creates more interesting flavor than a single cheese alone. You could also add a few ounces of cream cheese melted into the sauce for richness, though this adds a few minutes to prep.
Crispy Bacon Addition. Crumble 4 to 5 slices of cooked bacon (store-bought pre-cooked bacon saves time) into the chicken mixture before baking. Bacon adds a salty, smoky depth that elevates the whole dish. Sprinkle a little extra on the cracker topping for a garnish.
Ranch-Seasoned Casserole. Replace the garlic powder and onion powder with 1 to 2 tablespoons of dry ranch seasoning mix. This creates a ranch-flavored casserole that kids often love. Taste before baking since ranch mix is seasoned and salty.
Cream of Mushroom Version. Use cream of mushroom soup instead of cream of chicken, and increase the chicken broth to ¾ cup to keep the sauce the right consistency. Add ½ cup of sliced cooked mushrooms if you have them. This version tastes earthier and works beautifully with egg noodles on the side.
Pasta or Rice Casserole. Fold in 2 cups of cooked egg noodles, pasta, or white rice into the chicken mixture before baking. This makes the casserole heartier and more filling. If you add pasta or rice, increase the sauce by half (add another ¼ cup of broth and ¼ cup of sour cream) because the pasta will absorb liquid.
Storage, Reheating, and Make-Ahead Options
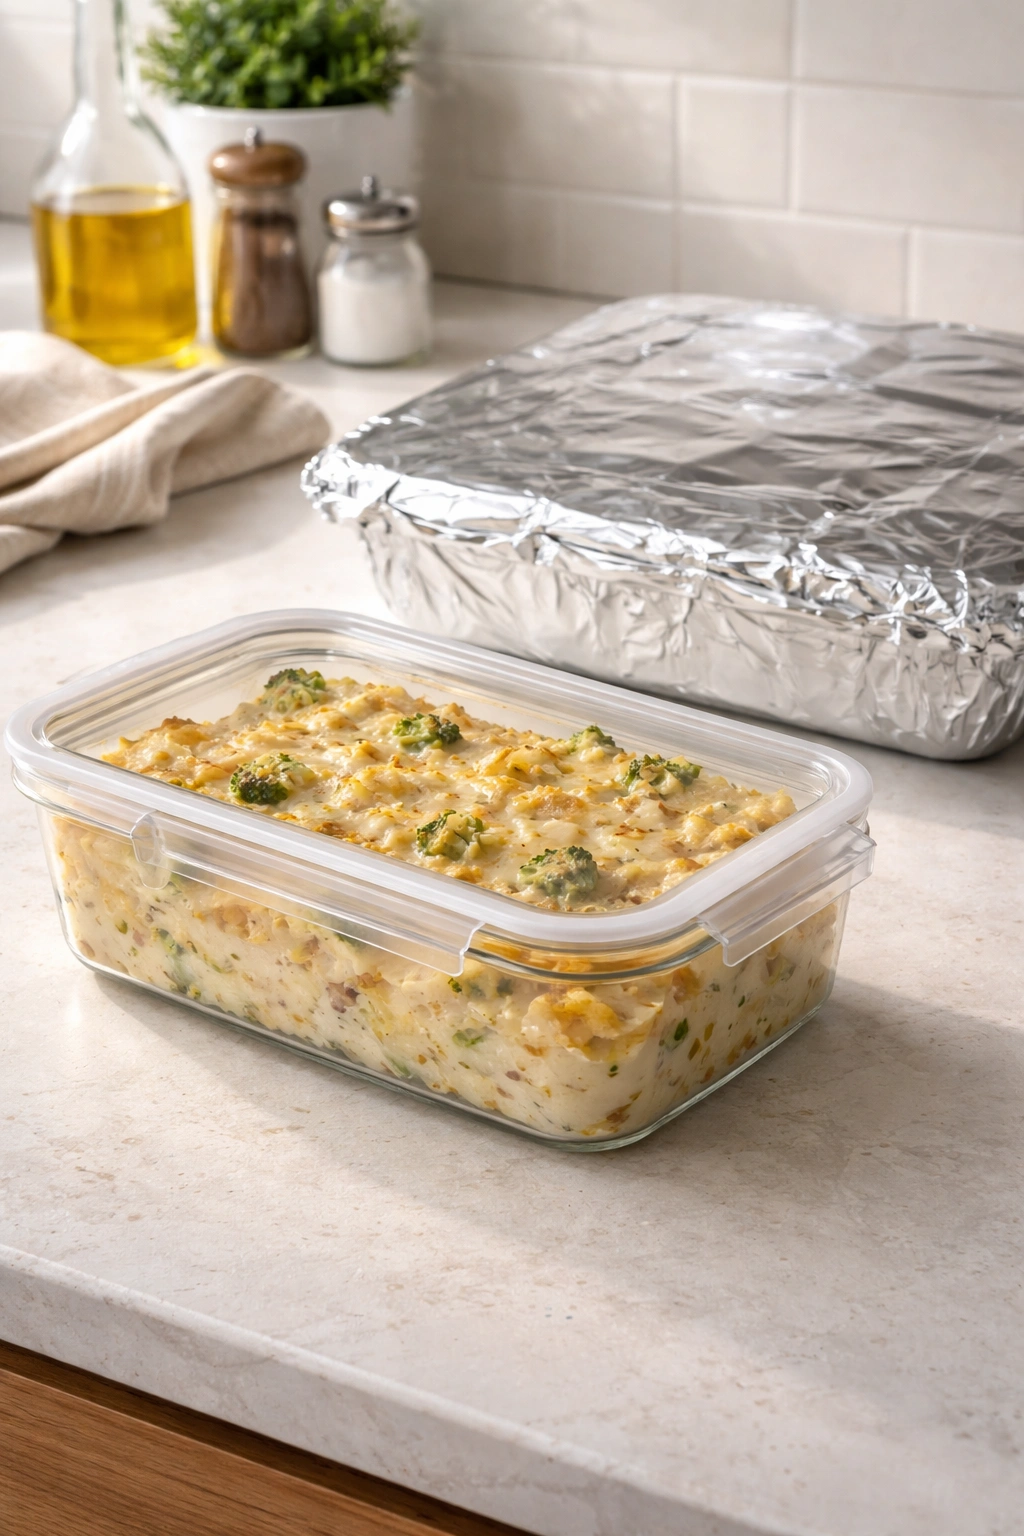
This casserole is genuinely designed for busy people, which means it needs to work with real-life schedules. Storing leftovers is straightforward: let the casserole cool to room temperature, then transfer it to an airtight container or cover the baking dish tightly with plastic wrap and aluminum foil. It keeps perfectly in the refrigerator for up to 4 days. You’ll have enough for a second meal or lunch the next day without any quality loss.
Reheating for best results means using the oven rather than the microwave. Cover the casserole with foil and bake it at 350°F for 15 to 20 minutes, until warmed through. The foil prevents the topping from burning while the filling heats. If you must use the microwave for speed, transfer a portion to a microwave-safe dish, cover it loosely, and heat in 1-minute intervals until warm. The microwave will soften the cracker topping, but the casserole will still taste good.
Make-ahead assembly works perfectly with this recipe. You can prepare the entire casserole through step 8 (topping included), cover it tightly, and refrigerate for up to 2 days before baking. When you’re ready to bake, add about 2 to 3 minutes to the baking time since the casserole will be cold when it goes into the oven. Don’t bake it while frozen—thaw it in the refrigerator overnight first, then bake as directed.
Freezing is possible both before and after baking. Unbaked casserole freezes beautifully; assemble it, cover it tightly with plastic wrap and then foil, and freeze for up to 3 months. Thaw it completely in the refrigerator overnight, then bake as directed (adding 2 to 3 minutes). Baked leftovers also freeze well; let them cool completely, portion into airtight containers, and freeze for up to 2 months. Thaw overnight and reheat gently in the oven.
Pro tip for freezing: If you’re using a ceramic baking dish, assemble the casserole in a disposable aluminum pan instead (which you can still find at any grocery store). Ceramic can crack from thermal shock if you go straight from freezer to oven. Aluminum pans handle temperature changes without issue, and the cost is negligible.
Best Side Dishes and Pairings
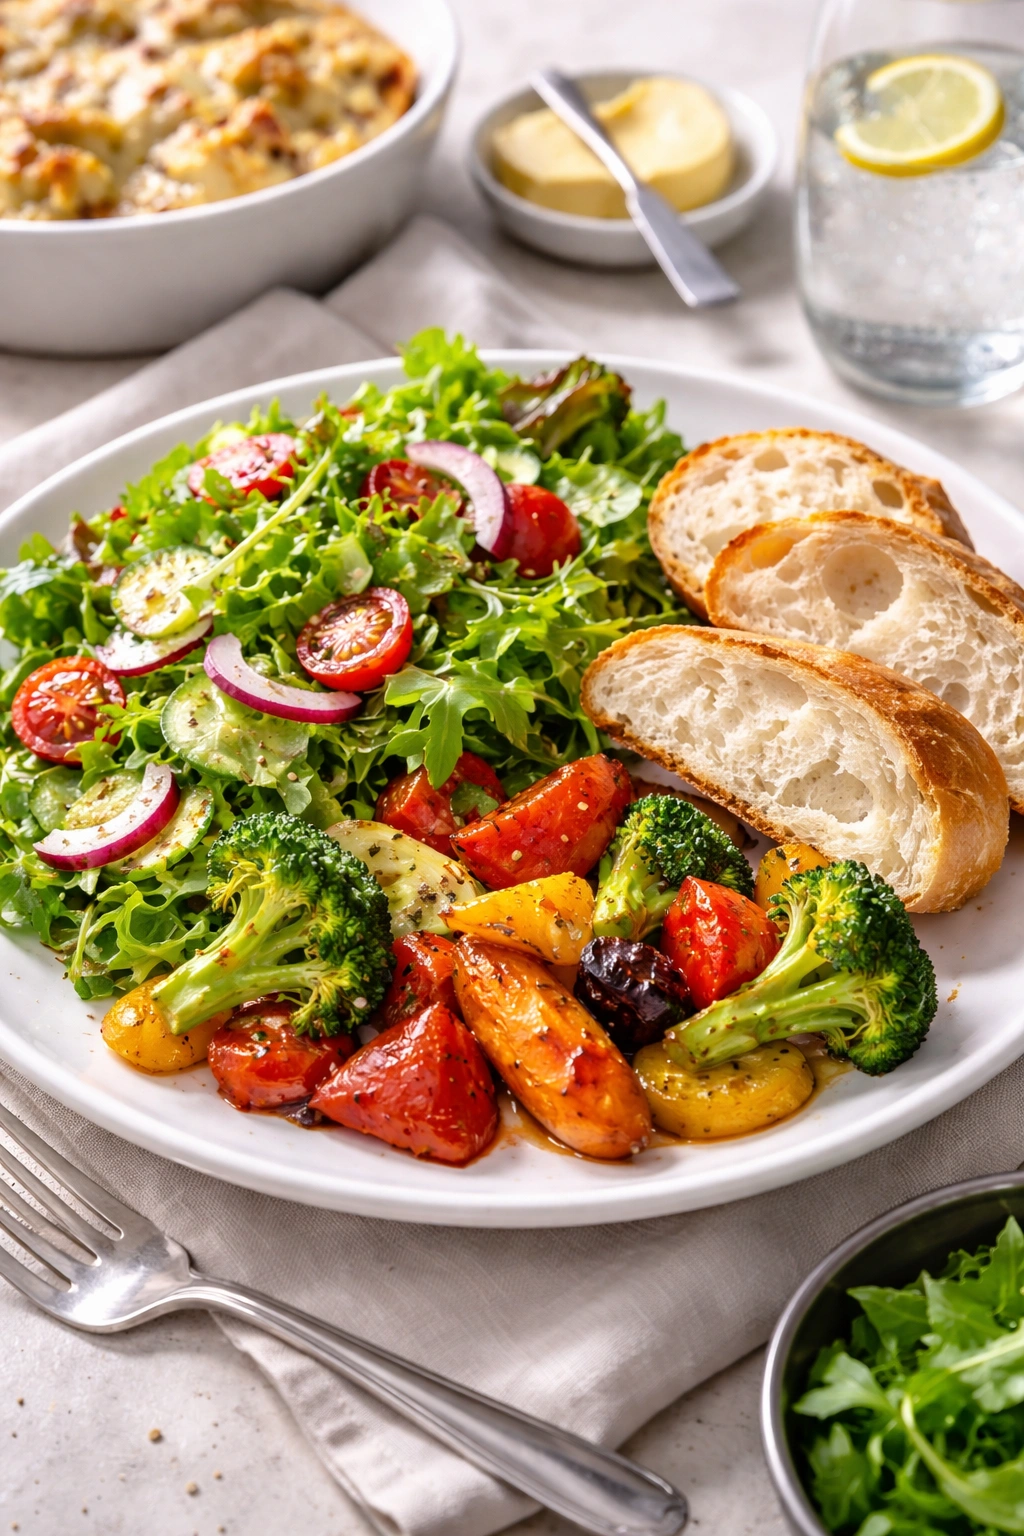
This casserole is complete enough to stand alone—it has protein, creaminess, and satisfaction built in—but sides add balance and make the meal feel more substantial. A fresh, crisp salad is the ideal pairing. The acidity of vinaigrette cuts through the richness of the creamy casserole beautifully. Try a simple mixed green salad with a tangy balsamic or vinaigrette, or a coleslaw with a sharp dressing.
Steamed or roasted vegetables on the side add color and nutrition without competing with the casserole. Roasted broccoli, steamed green beans, or roasted Brussels sprouts all work. The key is something that contrasts in flavor and texture—something slightly bitter or fresh to balance the creamy richness of the casserole.
Crusty bread or dinner rolls are perfect for those who want to soak up the creamy sauce. Buttered dinner rolls, garlic bread, or a slice of crusty sourdough all complement the casserole without feeling like you’re adding another heavy component. The bread softens the sauce and makes the meal feel more substantial.
White rice or egg noodles work if you want to extend the meal and add more volume. Some families prefer the casserole over a bed of rice or noodles rather than beside salad. This approach is common in comfort-food traditions and absolutely valid. Cook the rice or pasta separately while the casserole bakes, then plate together.
Steamed or buttered corn pairs nicely if you’re looking for something simple and familiar. Corn is slightly sweet and pairs well with the savory, creamy casserole filling.
Final Thoughts
A 30-minute chicken breast casserole isn’t just fast—it’s practical, forgiving, and genuinely delicious. It tastes like you spent hours on it, not twenty minutes assembling ingredients and waiting for the oven to do its job. Once you’ve made this once, you’ll understand how simple the formula is: cooked chicken, creamy sauce, melted cheese, crispy topping, oven for eighteen minutes, done.
The fact that it reheats beautifully, freezes without issue, and adapts to whatever vegetables or seasonings you want to add makes it your reliable friend on nights when everything feels chaotic. You’re not just getting dinner on the table; you’re winning at the hardest part of weeknight cooking—making something that feels special when you’re genuinely short on time.
Start with the basic version to understand how it works. Once you’ve made it a few times, you’ll feel confident swapping in ingredients, adding vegetables, or adjusting seasonings to match what you actually want to eat. That’s the real magic of this casserole: it’s simple enough to master in one attempt, but flexible enough to keep evolving based on your preferences and what’s in your fridge.