There’s nothing quite like biting into a warm homemade biscuit that’s genuinely fluffy—light, tender layers that practically dissolve on your tongue, with a golden-brown exterior that’s crisp but not hard. Yet most home bakers end up with something disappointingly dense and hockey-puck-like instead. The difference between success and failure comes down to understanding a handful of specific techniques that sound simple but require precision and intention to execute.
The real secret isn’t complicated, but it does require you to think differently about how biscuits actually work. Fluffy biscuits aren’t just about dumping ingredients together and hoping for the best. They’re the result of controlling moisture, temperature, and layering in ways that most recipes gloss over. Once you understand why these details matter, biscuits become remarkably reliable—you’ll make them consistently fluffy, every single time.
Why Biscuits Go Flat Instead of Rising
When biscuits come out of the oven looking more like thick pancakes than fluffy clouds, something specific went wrong before they even hit the oven. The problem isn’t usually that you made a “biscuit mistake” in some abstract sense—it’s that one or more specific technical failures prevented proper steam generation and lift.
Biscuits rise through steam, not yeast. When water in the dough heats up, it transforms into steam and pushes everything upward. But for this to work, you need sufficient moisture contained within the dough, enough trapped air pockets throughout the structure, and the right density balance. If your dough is either too dry or too wet, you won’t get adequate steam pressure. If you’ve overworked the gluten or failed to create distinct layers, steam has nowhere productive to go and just dissipates.
The most common culprit is actually overmixing. When you handle biscuit dough too much—whether by hand, with a fork, or with a mixer—you develop the gluten network excessively. In bread, that’s desirable because you want strong gluten to create structure. In biscuits, excessive gluten creates toughness and prevents the tender crumb you’re after. An overdeveloped dough resists the steam expansion and produces a dense, compact result instead of the light, flaky layers you’re chasing.
Over-working also squashes out those crucial air pockets and breaks down the butter pieces you’ve worked hard to distribute. Those distinct butter pockets are essential to fluffiness—they create steam barriers and interrupt gluten development, allowing the biscuit to rise in distinct layers rather than rising as one dense mass.
The Science of Steam and Layers Inside a Biscuit
Understanding what’s actually happening inside your biscuit during baking makes every step clearer. Biscuits work through a combination of steam expansion and layer separation. Here’s the mechanism: When you cut cold butter into your dry ingredients, you’re creating tiny pockets of fat throughout the dough. These fat pockets don’t dissolve into the dough; they stay as distinct pieces.
When the biscuit hits the hot oven, three things happen nearly simultaneously. The outer surface begins to set and solidify as starches gelatinize. The water in the dough turns to steam and expands, pushing upward. And the butter, now melting, creates small voids that allow separation between layers. This is why a properly made biscuit has visible, distinct layers when you tear it open—they’re not metaphorical layers, they’re actual physical separations created by melting butter and steam.
If your butter is too soft or fully mixed into the dough before baking, you lose those crucial pockets. The dough bakes as one integrated mass instead of a laminated structure, and you get density instead of fluffiness. If your dough is too dry, there’s insufficient steam generation to push those layers apart and keep them separated. If it’s too wet, the dough becomes heavy and steam can’t create lift against that weight.
The window for perfect biscuits is specific: you need enough moisture for adequate steam, but not so much that the dough becomes heavy or sticky. You need enough butter to create distinct pockets, but not so much that it overwhelms the flour and makes the dough greasy. You need enough mixing to develop a cohesive dough, but not so much that you overdevelop gluten.
Choosing the Right Flour for Fluffy Results
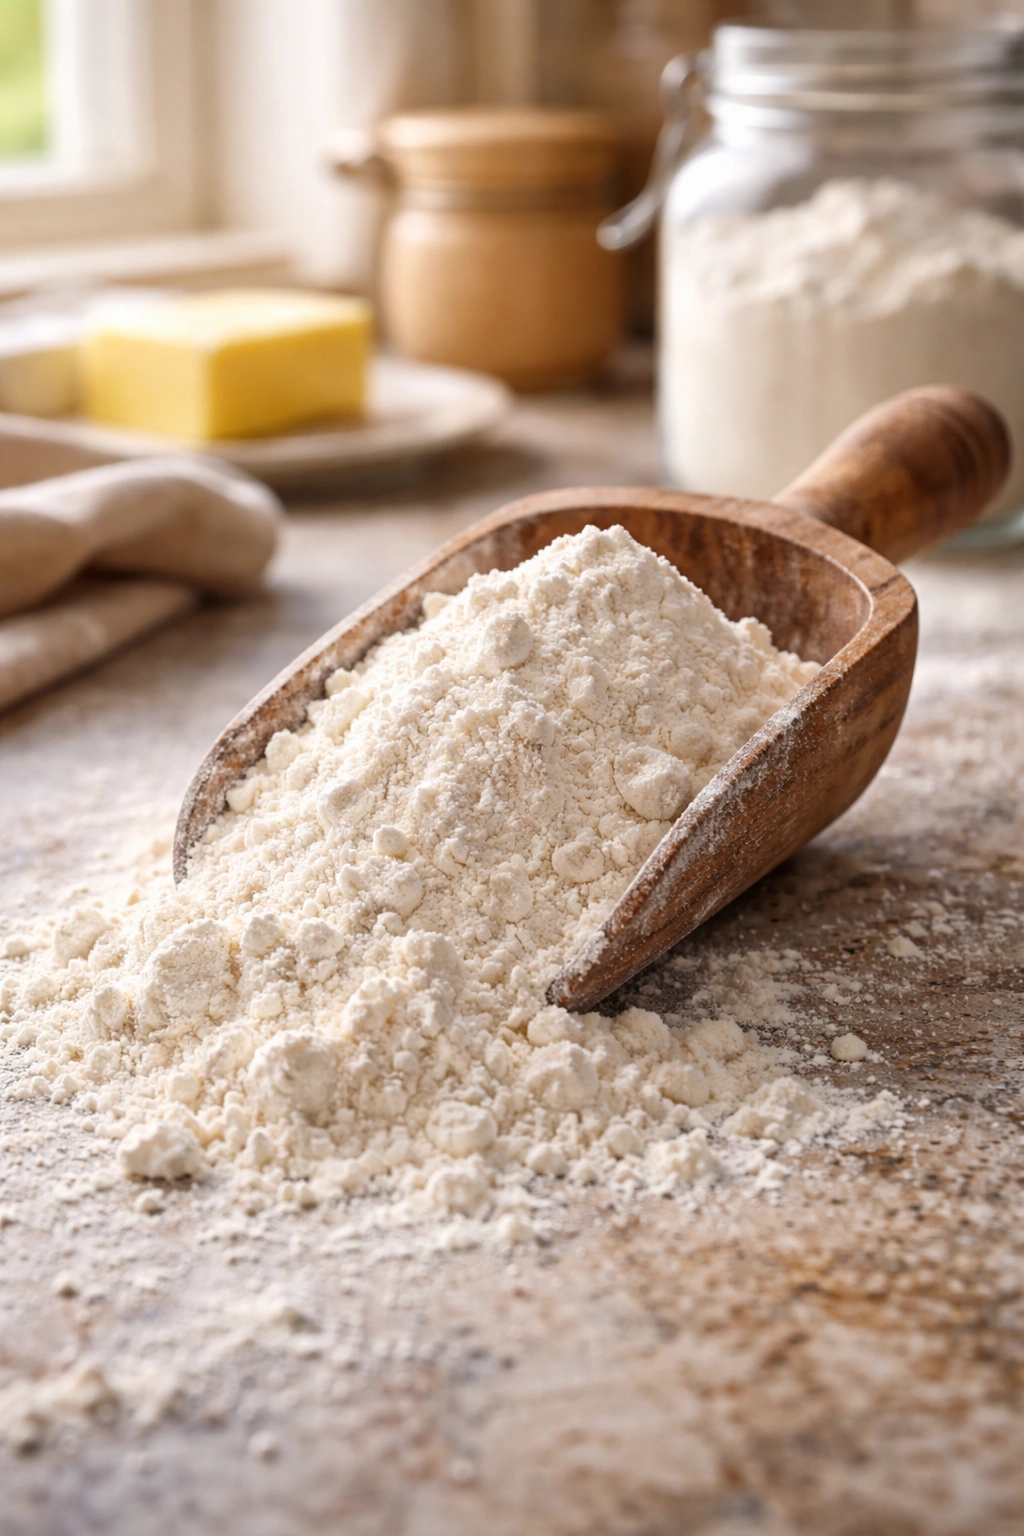
Your flour choice matters more than most recipes acknowledge. All-purpose flour is the standard choice for a reason—it sits at a middle point of protein content (around 10-12%) that allows for structure without excessive toughness. Avoid bread flour, which has a higher protein content (12-14%) and will create chewy, tough biscuits. Avoid cake flour, which is too soft and won’t create enough structure to hold your biscuits up.
The best flour for biscuits is actually Southern-style cake-flour blends or all-purpose flour from mills like King Arthur or White Lily if you can access them. These have slightly lower protein content than standard all-purpose flour, typically around 9-10%, and they produce remarkably tender, fluffy biscuits. If you’re using standard supermarket all-purpose flour, that absolutely works—just expect biscuits that are slightly less tender but still genuinely fluffy if you follow proper technique.
Freshness matters too. Flour oxidizes over time and loses some of its lift potential. If your flour has been sitting in your cupboard for over a year, it’s less effective. Open a new bag if you’re having persistent fluffiness issues with old flour.
Weight the flour properly. This is critical. Don’t scoop flour directly from the bag and pack it into your measuring cup—this compresses it and gives you far more flour than you need, resulting in a dry dough that won’t rise properly. Instead, spoon flour into your measuring cup and level it off, or better yet, use a kitchen scale and measure by weight. One cup of flour typically weighs 120-125 grams. Measuring by weight eliminates this variable entirely and makes your biscuits far more consistent.
Ingredient Selection Beyond Flour
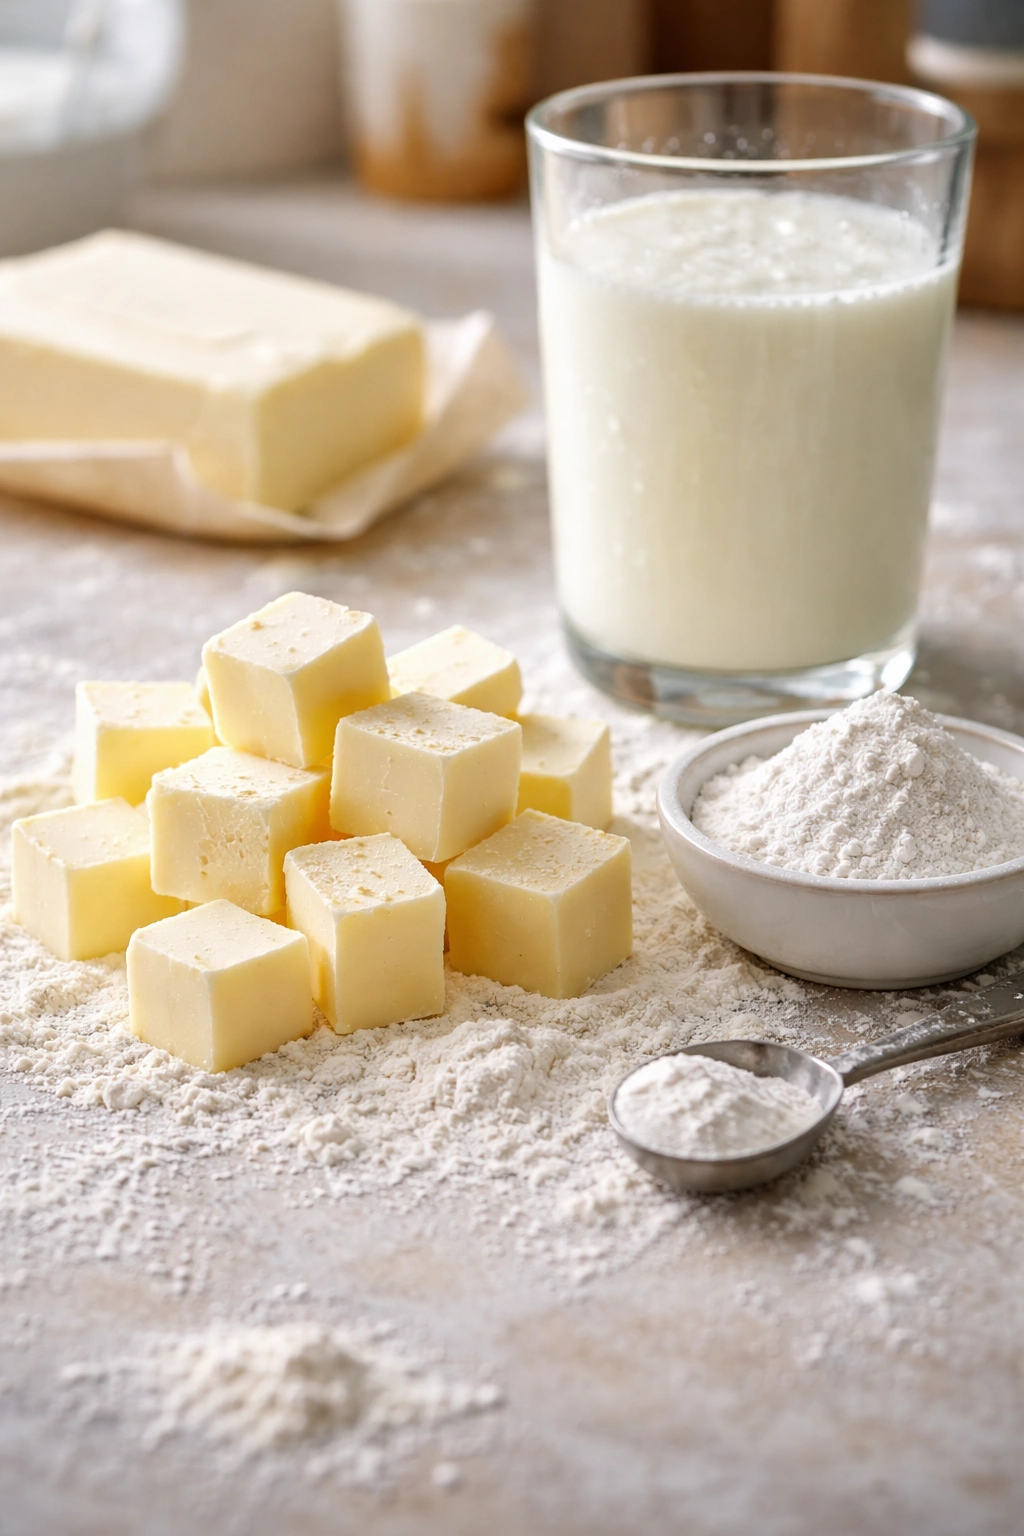
Butter is non-negotiable, and it must be unsalted and cold. Salted butter introduces unwanted sodium and can interfere with your control over the dough’s salt content. Cold butter is essential—it stays in discrete pieces during mixing and creates those critical pockets. Use butter straight from the refrigerator, ideally at around 32-35°F.
Buttermilk is the superior liquid choice over regular milk. The acidity in buttermilk reacts with baking soda (if you’re using it) to create additional lift, and the tangy flavor is distinctly more delicious than plain milk biscuits. If you don’t have buttermilk, make a substitute by combining regular milk with lemon juice or white vinegar—use one tablespoon of acid per cup of milk, stir, and let sit for five minutes before using.
Your leavening agent should be baking powder for standard biscuits, not yeast. Baking powder creates immediate lift in the oven through chemical reaction. Double-acting baking powder is fine (it reacts once when liquid is added and again in the heat). Make sure your baking powder is fresh—check the expiration date. Old baking powder has diminished lift power and will produce flatter biscuits. Salt should be fine sea salt or table salt—around ½ to ¾ teaspoon per batch.
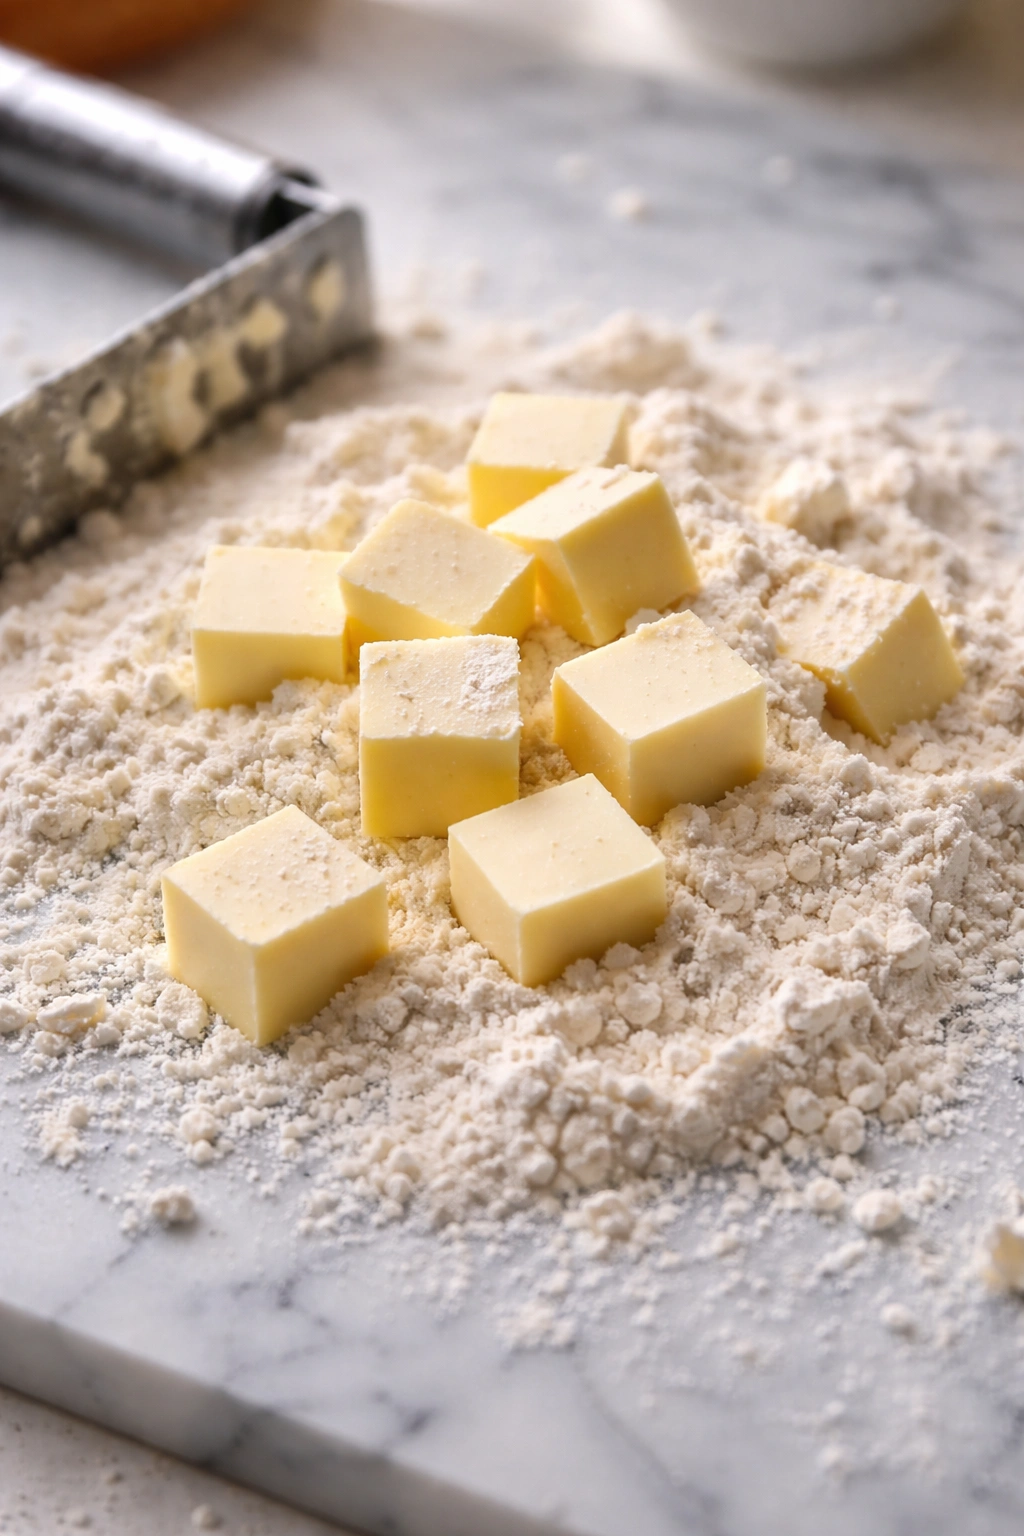
The Critical Lamination Technique: How to Cut In Butter
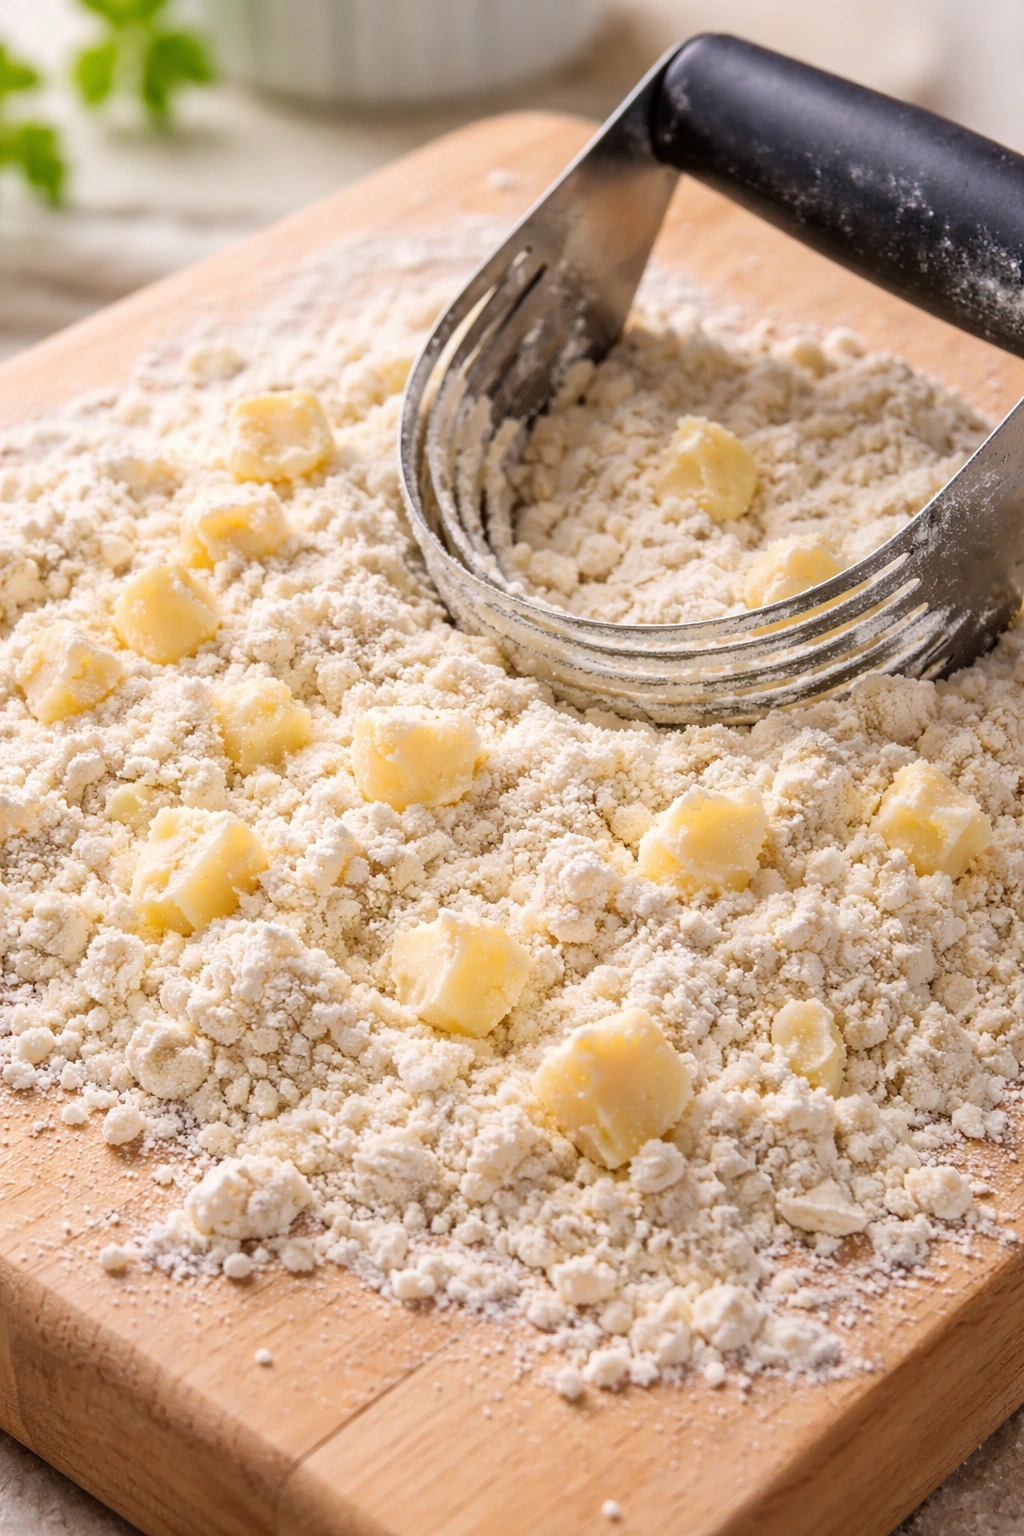
This is the single most important technique in making fluffy biscuits. Cutting in butter isn’t just mixing it in—it’s creating a specific texture where tiny, distinct pieces of cold butter remain separate throughout the flour mixture. This step determines whether you’ll get layers or density.
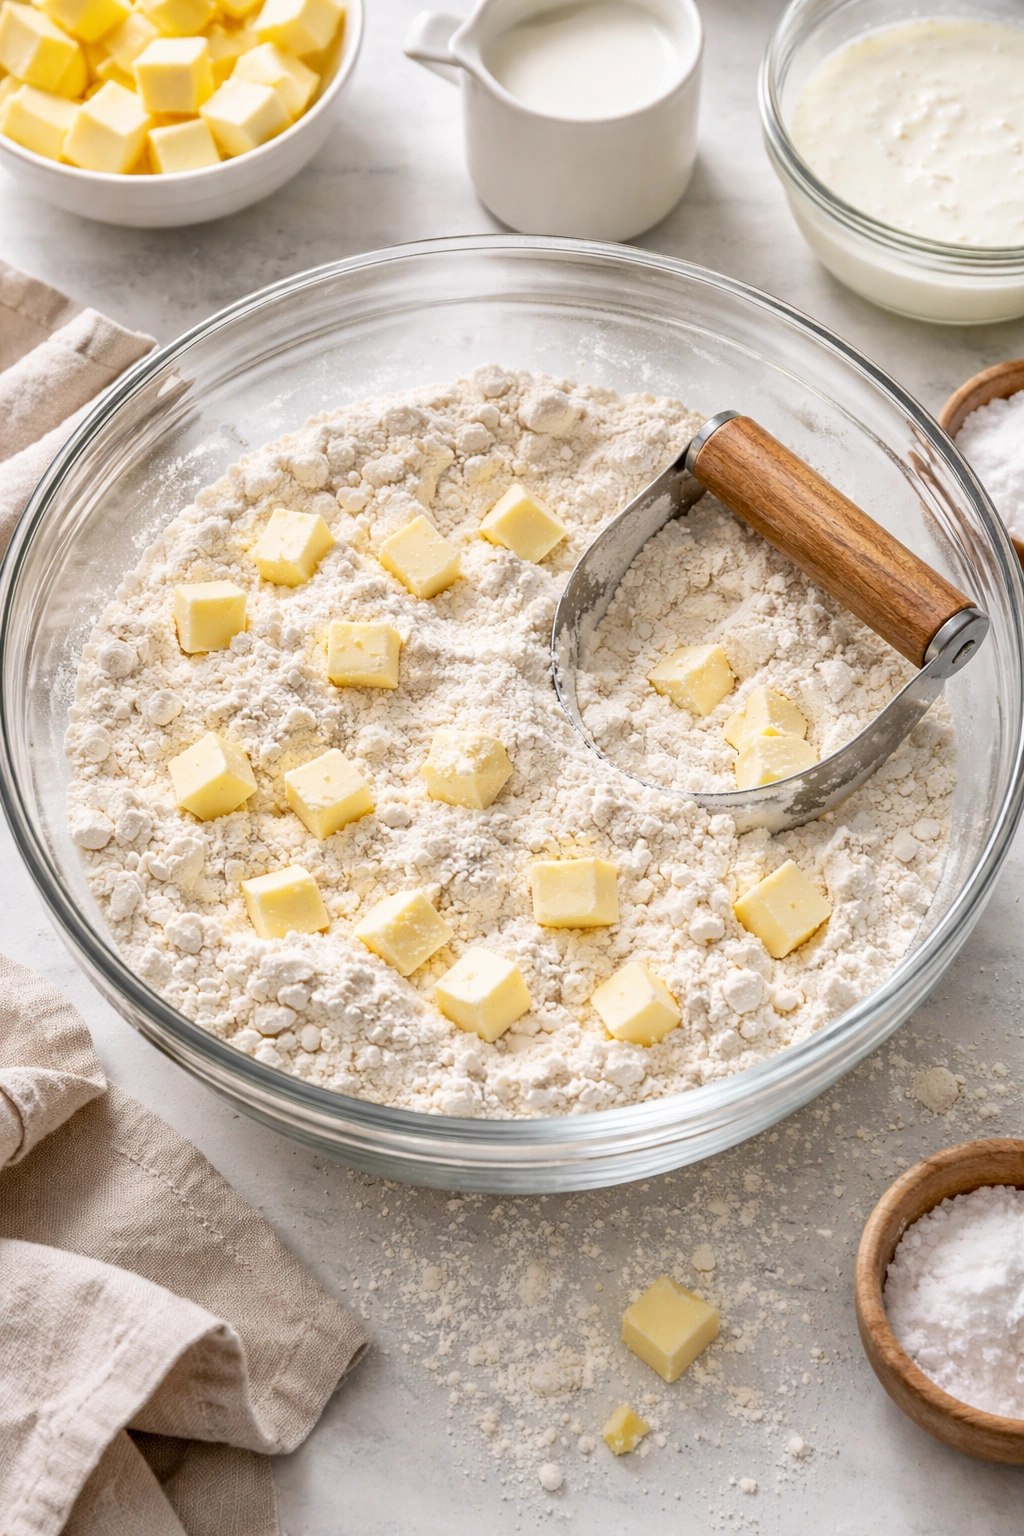
Use cold butter that’s been cut into roughly ½-inch cubes. Work with a pastry cutter, two knives, your fingertips (very briefly), or a food processor—each method has merits. A pastry cutter is the most beginner-friendly because it’s nearly impossible to overwork the dough with it. Two knives require more attention to detail but give excellent control. Your fingertips work brilliantly if you use them quickly and lightly, breaking down each piece of butter just enough that it’s coated in flour but still clearly distinct.
The goal texture is coarse breadcrumbs mixed with small peas. Not flour. Not fine crumbs like sand. You should be able to see visible flecks of butter throughout the mixture. If you work the butter in too much and it disappears into a smooth dough, you’ve lost the lamination and your biscuits will be dense.
A food processor makes this genuinely easy if you’re efficient: add your dry ingredients, pulse to combine, add cold butter cubes, and pulse 4-6 times just until the mixture looks like coarse breadcrumbs. The processor does this in seconds, which is actually an advantage because there’s minimal risk of warming the butter.
Add your buttermilk after your flour-butter mixture reaches the correct texture. This is crucial—if you add the liquid too early, it will start to dissolve the flour before you’ve cut in the butter, and you’ll lose the layering effect.
Mixing the Dough: The 30-Second Rule
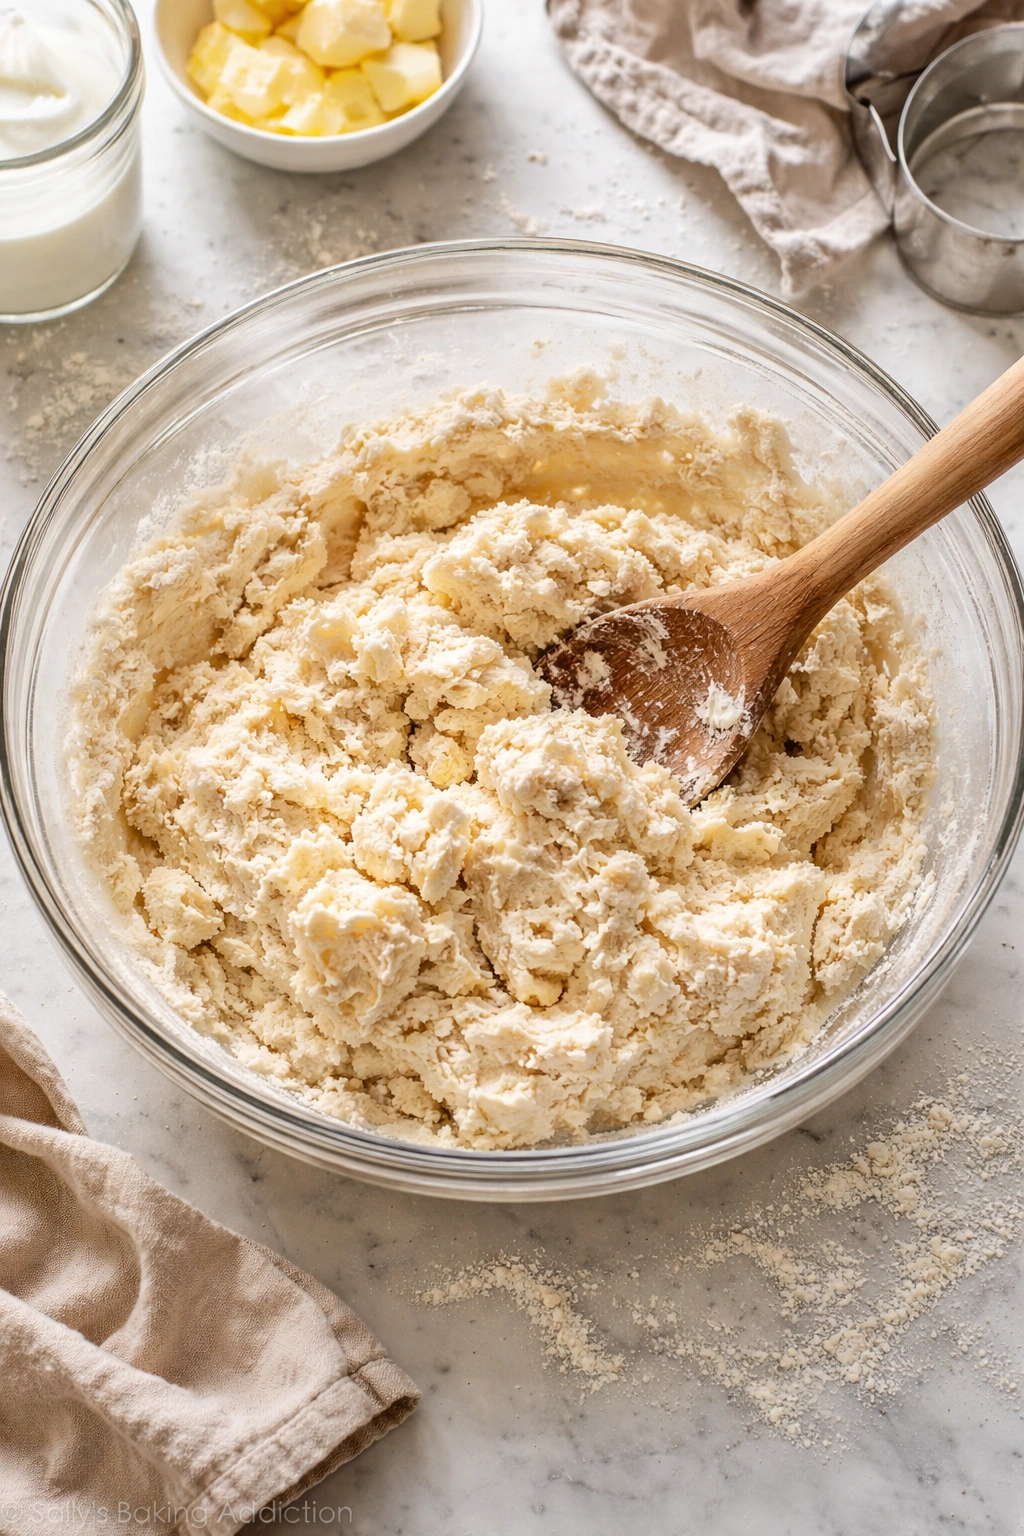
Once you add buttermilk, you’re on borrowed time. The dough needs to come together into a cohesive mass, but overworking it creates toughness. Aim for exactly 30 seconds of light mixing or gentle folding once you add the liquid. Use a spatula or wooden spoon and fold the dough over itself repeatedly, just until all the dry flour is incorporated and the dough pulls away from the sides of the bowl. You should still see streaks of butter and some slightly dry spots.
The dough will be quite shaggy and imperfect looking at this stage. That’s correct. Stop here. Resist the urge to beat it into a smooth, polished mass—that impulse is what ruins biscuits. Rough, shaggy dough makes fluffy biscuits. Smooth, overdeveloped dough makes hockey pucks.
If you’re using a stand mixer, use the paddle attachment on low speed for no more than 30-45 seconds. If you’re mixing by hand, use a wooden spoon and fold gently for 30 seconds. Don’t use an electric hand mixer, which tends to overwork the dough too quickly.
Resting and Chilling: Why Temperature Control Matters
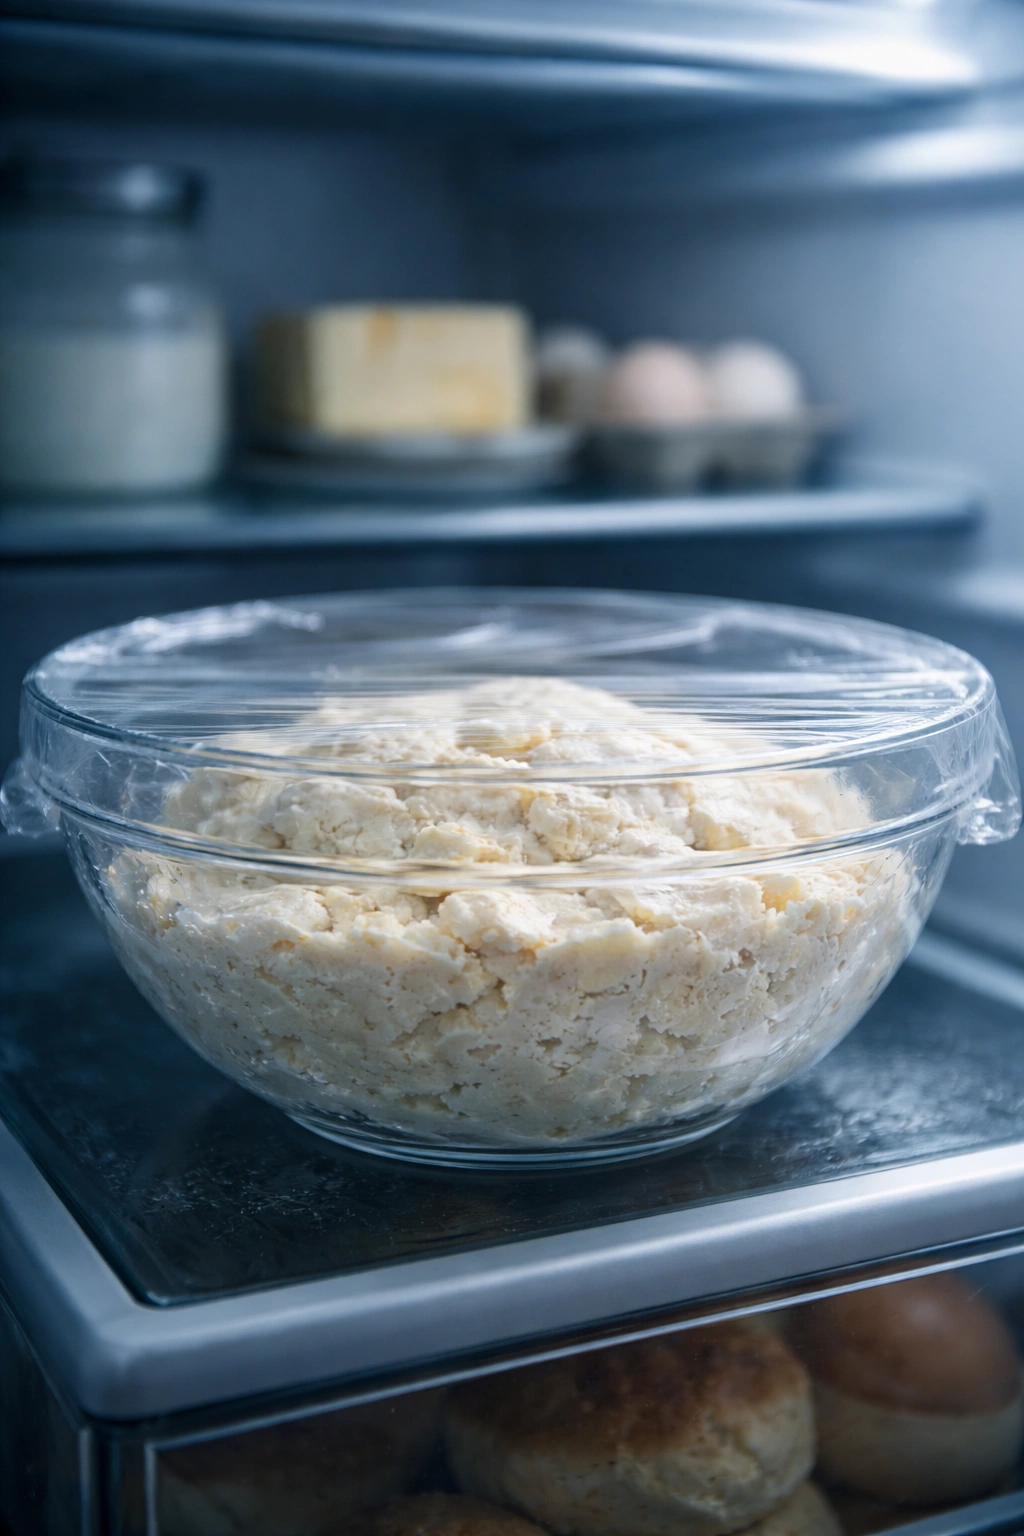
After mixing, your dough needs a cold rest. Cover the dough bowl and refrigerate for at least 30 minutes, ideally for 1 hour. This rest serves multiple purposes: it allows the flour to fully hydrate, it lets the gluten relax (reducing toughness), it keeps the butter cold so it doesn’t melt before baking, and it gives the baking powder time to begin its reaction.
Don’t skip this step. A cold dough is easier to shape, butter stays in distinct pieces longer during handling, and the dough will rise more dramatically in the oven. Cold dough = fluffy biscuits.
If you can’t rest the dough for a full hour, even 20-30 minutes helps significantly. This is where a clear bowl or plastic wrap is useful—you can see when your dough is chilled without unwrapping it repeatedly.
Shaping and Cutting: Technique That Creates Height
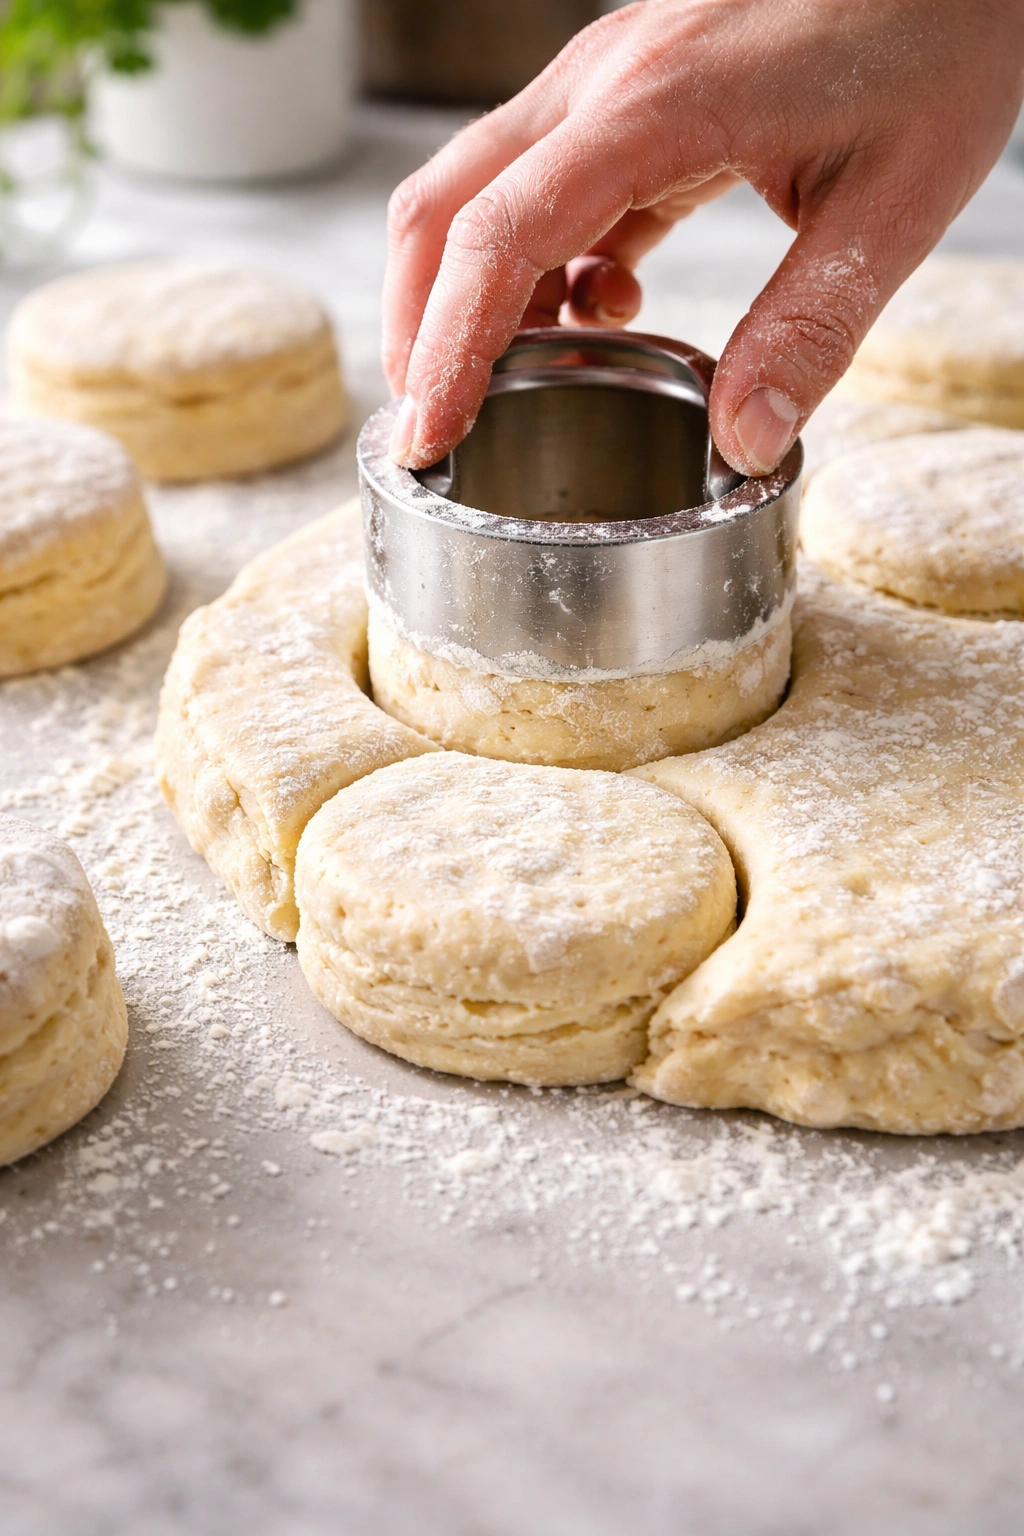
How you shape and cut your biscuits directly impacts their rise. Use a biscuit cutter that’s roughly 2 to 2.5 inches in diameter. Dip the cutter in flour before each cut—this prevents sticking and also prevents compressing the edges of the dough. Cut straight down with decisive pressure and lift straight up without twisting. Twisting seals the edges and prevents proper rise. Think of it like cutting through dough, not carving.
Cut your biscuits as close together as possible to minimize waste, but don’t re-roll scraps more than once. Each time you re-roll dough, you’re further developing the gluten and warming the butter, both of which reduce fluffiness. It’s actually better to discard leftover scraps than to re-work them excessively.
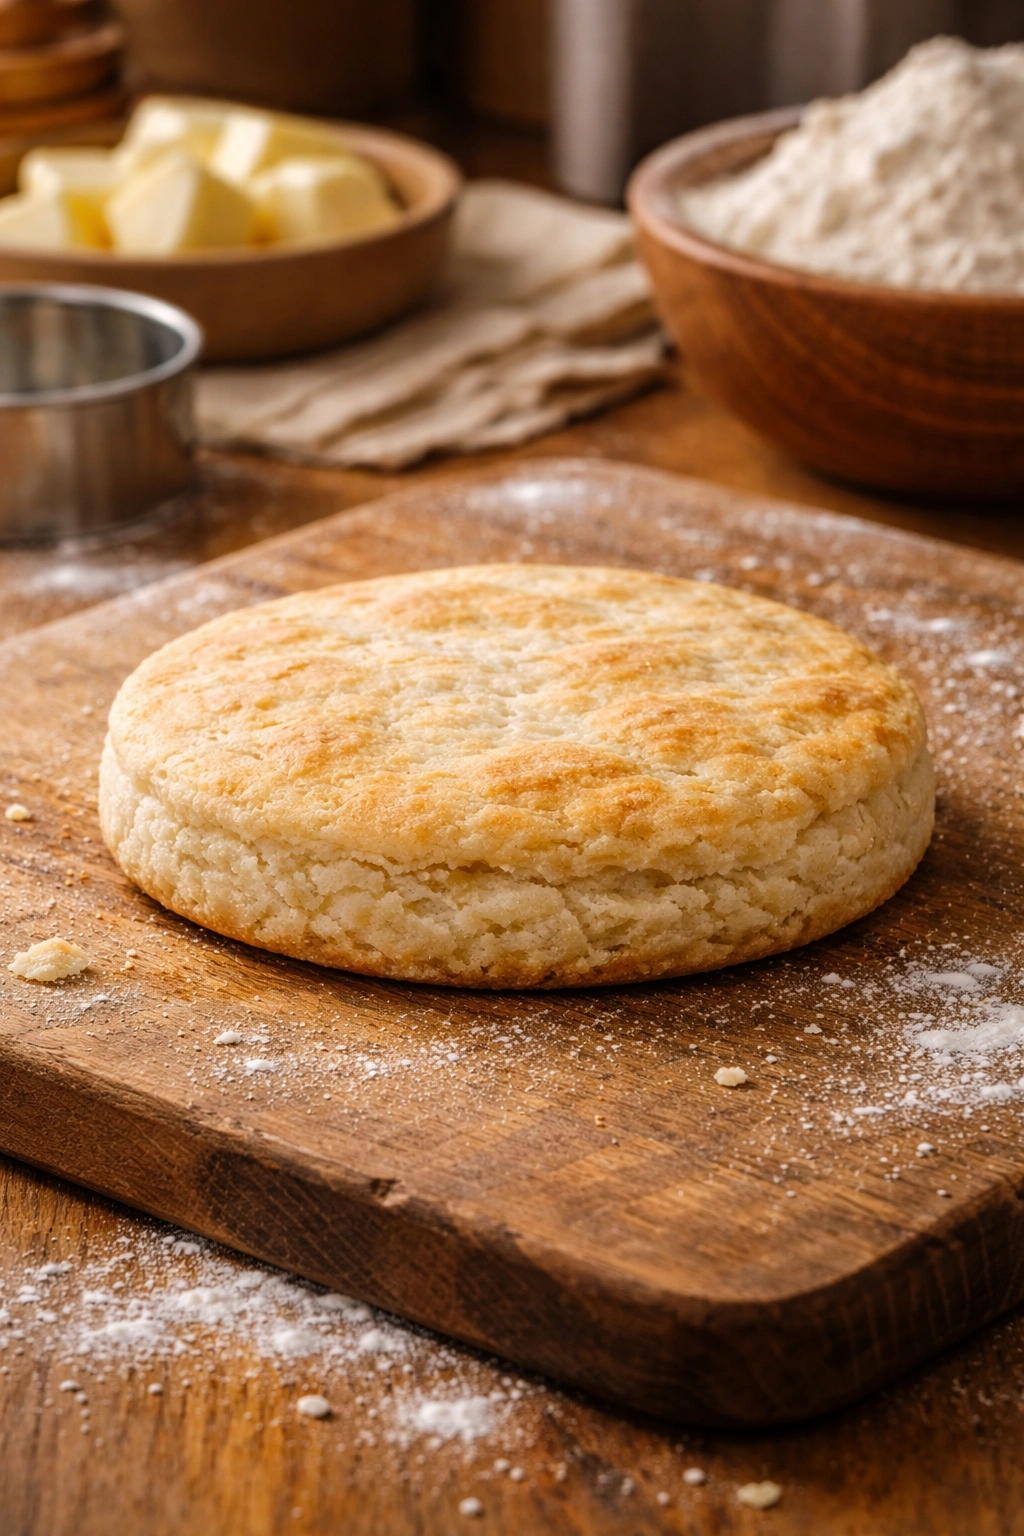
Pat your dough to roughly ¾-inch thickness before cutting. If it’s too thin (½ inch or less), biscuits won’t have enough structure to rise dramatically. If it’s too thick (over 1 inch), the interior won’t cook through properly and you’ll get a gummy center before the exterior is golden. Three-quarters of an inch is the sweet spot.
For biscuits with extra height and fluffiness, layer and fold your dough once before the final shaping. After mixing and the initial rest, gently fold the dough in half and pat it back out to thickness. This creates rudimentary lamination and gives you extra layers that produce extra height. This technique requires care not to overwork the dough, but if done quickly and gently, it noticeably improves fluffiness without creating the toughness that excess mixing produces.
The Oven: Temperature, Timing, and the Critical First Five Minutes
Your oven temperature must be accurate. Invest in an oven thermometer if you haven’t already—many home ovens run hotter or cooler than their dials indicate, and this directly affects biscuit rise. Preheat your oven to 425°F (220°C) for at least 15 minutes. A fully preheated oven is essential. If you put biscuits into a cold or partially heated oven, they won’t rise dramatically because the steam generation starts slowly.
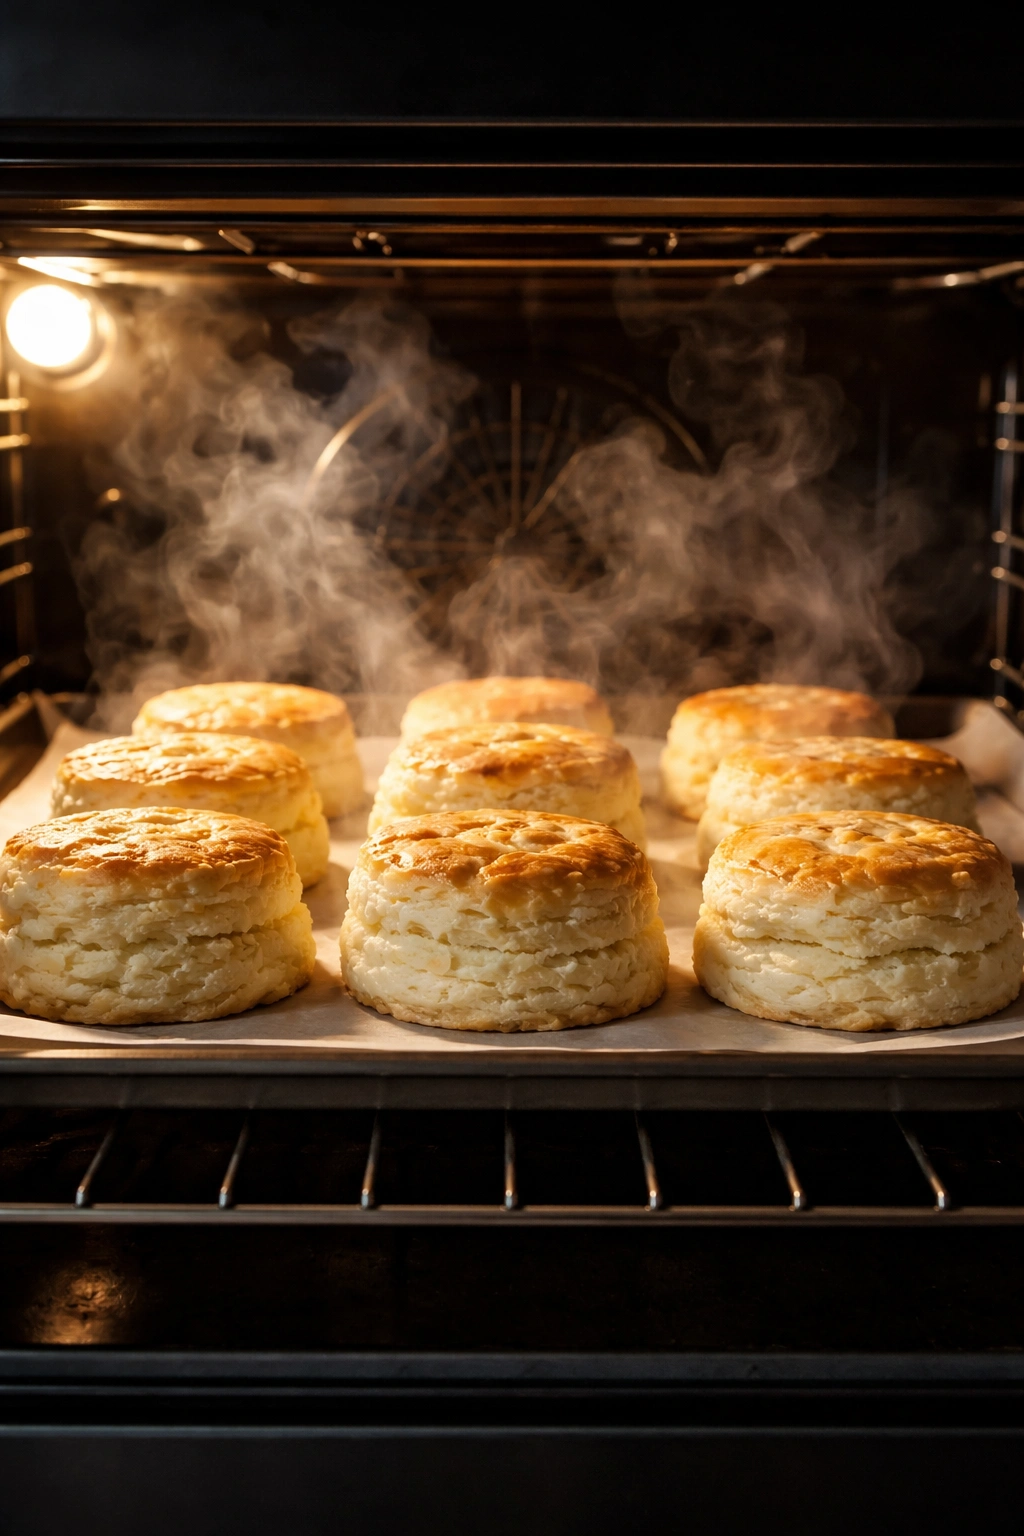
The first five minutes of baking are critical. This is when steam is being generated and your biscuits are expanding. An oven that’s too cool won’t generate enough steam for good rise. An oven that’s too hot will set the crust before the interior has finished expanding, creating a dense result.
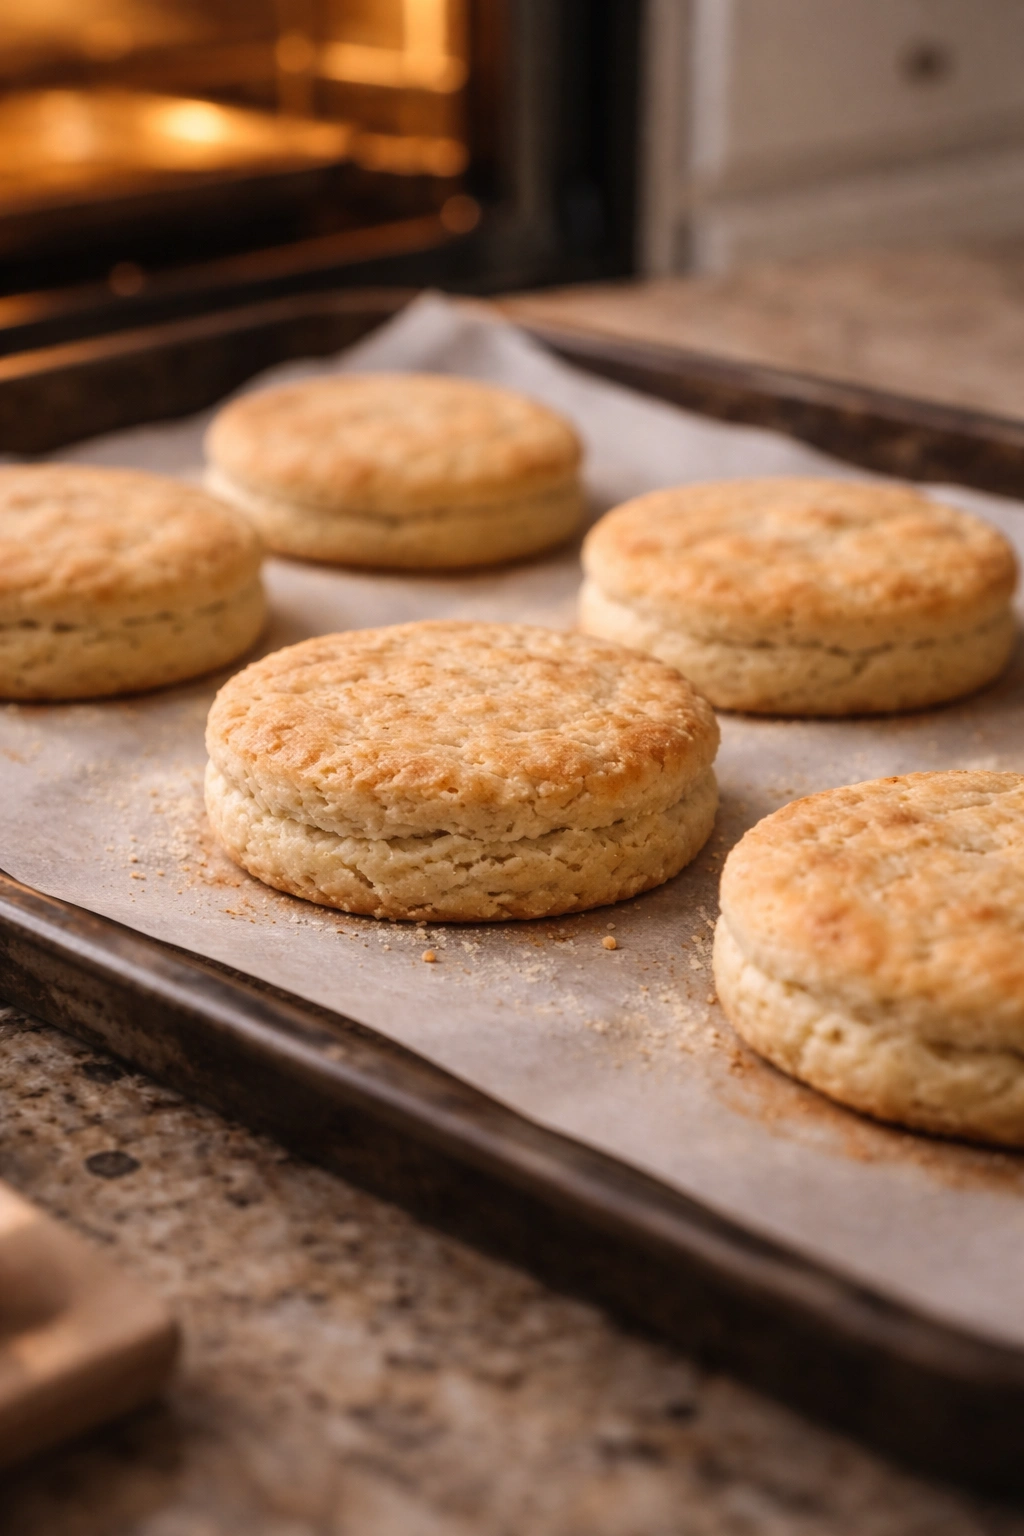
Bake biscuits for 13-15 minutes, until the tops are deep golden brown. The edges should be darker than the tops. Underbaked biscuits will be pale, slightly gummy, and won’t have achieved full fluffiness. Overbaked biscuits will be dry and tough. Deep golden brown is the visual cue that tells you they’ve baked long enough for the interior to cook through while remaining tender.
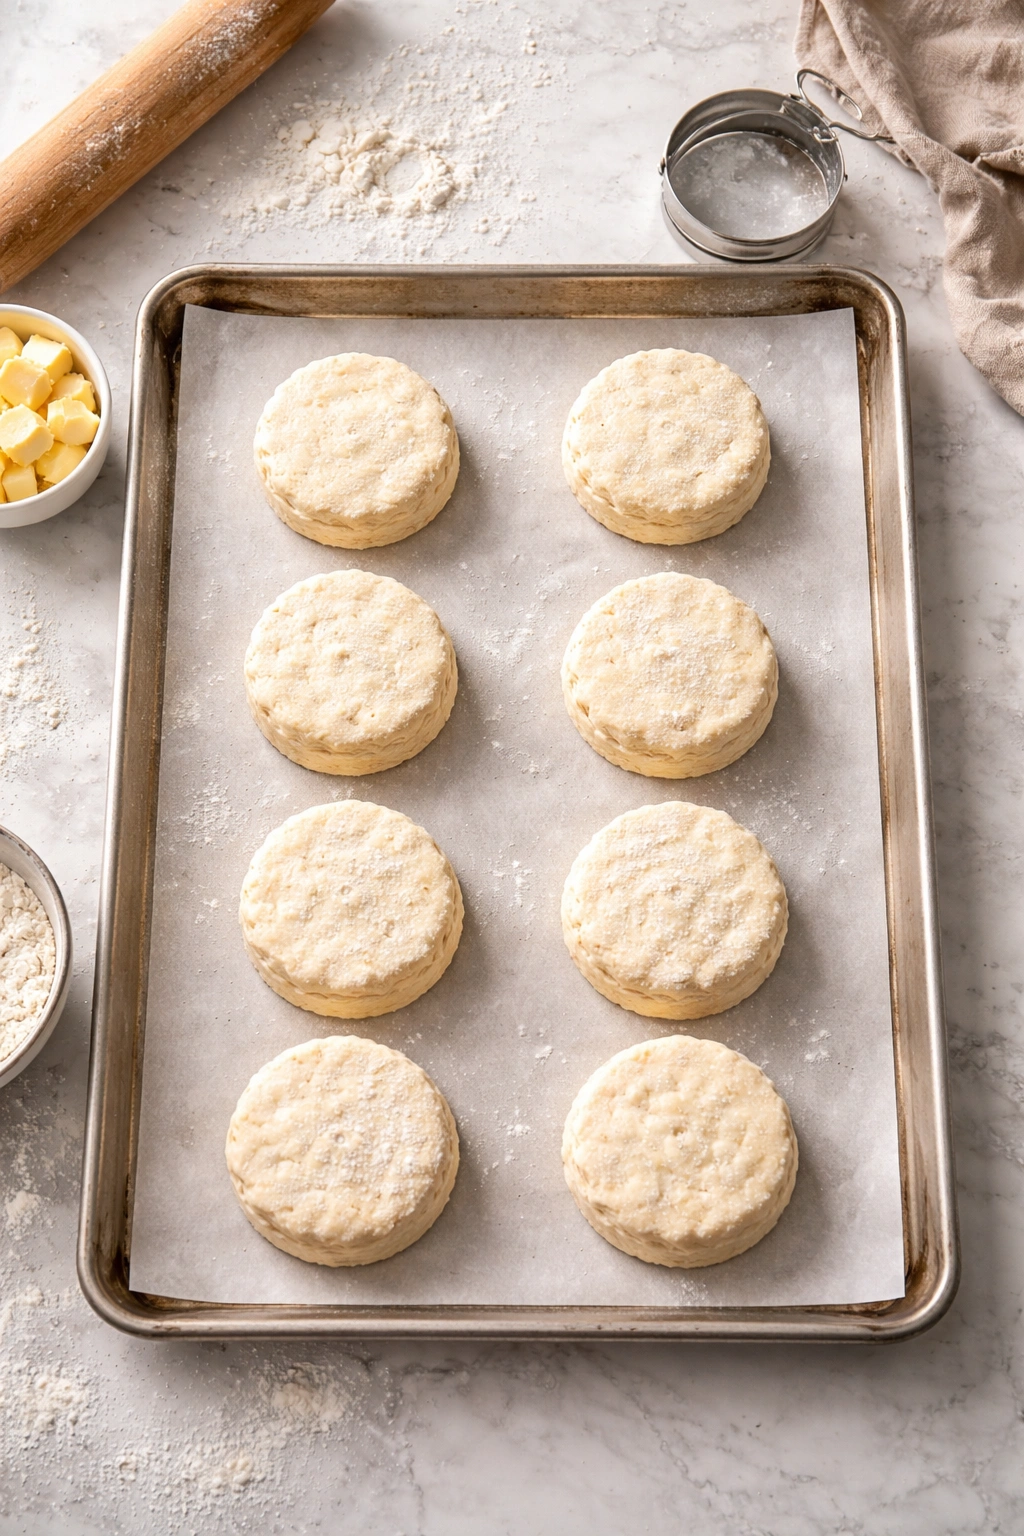
Place your biscuits on a baking sheet lined with parchment paper, and space them about 1 inch apart. Biscuits that are touching will rise slightly upward and become taller (because they can’t expand outward). Biscuits with space around them will expand more evenly. Choose spacing based on preference—touching biscuits are slightly taller and more delicate, spaced biscuits are slightly wider and more robust.
Yield, Prep Time, Cook Time, and Difficulty
Yield: Makes 8-10 biscuits (depending on cutter size) Prep Time: 20 minutes Cook Time: 14 minutes Total Time: 34 minutes active + 30 to 60 minutes chilling Best Served: Immediately, while still warm Difficulty: Intermediate — The individual steps are straightforward, but fluffiness requires attention to detail with temperature control, mixing time, and butter distribution. Not difficult, but precision matters more than with many other recipes.
Complete Recipe for Genuinely Fluffy Biscuits
For the Biscuits:
- 2½ cups all-purpose flour (or Southern-style cake flour if available), weighed or measured by the spoon-and-level method
- 2½ teaspoons baking powder, preferably double-acting
- ¾ teaspoon fine sea salt or table salt
- 6 tablespoons cold unsalted butter, cut into roughly ½-inch cubes
- 1 cup cold buttermilk (or ¾ cup whole milk + ¼ cup heavy cream, chilled)
Prepare and Mix:
-
Weigh your flour if possible, or measure it by spooning it into your measuring cup and leveling with a knife. Do not scoop directly from the bag. Combine the flour, baking powder, and salt in a large bowl and whisk briefly to distribute the leavening evenly.
Advertisements -
Add the cold butter cubes to the flour mixture. Using a pastry cutter, two knives, or a food processor, cut the butter into the flour until the mixture resembles coarse breadcrumbs with some small peas of butter still visible. You should be able to see distinct flecks of butter throughout—this is non-negotiable for fluffiness. If using a food processor, pulse 4-6 times and stop immediately when the texture reaches breadcrumb stage.
-
Pour the cold buttermilk into the flour-butter mixture. Using a wooden spoon or spatula, fold the dough gently for approximately 30 seconds, just until all the dry flour is incorporated. The dough will look shaggy and imperfect. This is correct—stop here even though you might feel like mixing it more.
-
Cover the bowl with plastic wrap and refrigerate for at least 30 minutes, preferably 1 hour. This rest is essential for fluffiness and ease of handling.
-
About 15 minutes before you’re ready to bake, preheat your oven to 425°F (220°C) with the rack positioned in the upper-middle of the oven. Place an oven thermometer in the oven to verify the actual temperature.
Shape and Cut:
-
Remove your chilled dough from the refrigerator. Dust your work surface lightly with flour. Gently turn the dough out onto the floured surface. Pat the dough to approximately ¾-inch thickness, working quickly and lightly without overworking it.
-
Optional lamination step for extra fluffiness: Fold the dough in half gently and pat it back out to ¾-inch thickness. This creates additional layers and noticeably increases height.
-
Using a 2 to 2.5-inch biscuit cutter dipped in flour, cut straight down through the dough with decisive pressure, then lift straight up without twisting. Twisting seals the edges and prevents proper rise. Space your cuts close together to minimize waste. You should get 8-10 biscuits depending on cutter size.
-
Arrange the cut biscuits on a parchment-lined baking sheet, spacing them about 1 inch apart (or touching if you prefer taller, more delicate biscuits). Do not re-roll scraps excessively; one re-roll is acceptable, but more than that will make them tough.
Bake:
-
Place the baking sheet in your preheated oven. Bake for 13-15 minutes, rotating the sheet halfway through if your oven has hot spots, until the tops are deep golden brown and the edges are darker. The biscuits should have visibly risen and be significantly taller than when they went in.
-
Remove from the oven and let the biscuits cool on the baking sheet for 2-3 minutes before serving. They’ll be at their absolute best served warm, within 5-10 minutes of coming out of the oven.
Why Your Biscuits Might Still Be Flat: Common Mistakes
Even with clear instructions, specific mistakes consistently derail biscuit success. Knowing what these are and how to recognize them helps you course-correct mid-bake.
Overworking the dough is the most common mistake. It happens because biscuit dough looks rough and imperfect when it reaches the correct stage, and many bakers feel compelled to keep mixing until it’s smooth and polished. This is exactly backwards. Smooth, polished dough makes dense biscuits. Rough, shaggy dough makes fluffy ones. Stop yourself at 30 seconds of mixing, even if the dough looks imperfect.
Warm butter is another silent killer. Butter should be cold enough that it remains distinct and visible in the dough. If your kitchen is very warm, work quickly, keep your butter in the freezer until the last moment, and consider chilling your mixing bowl and dry ingredients beforehand. Some bakers even use a chilled pastry blender or food processor because the friction generates warmth.
Too much liquid creates a heavy, sticky dough that can’t rise properly. Buttermilk varies in thickness, and different flours absorb liquid differently. If your dough feels sticky or overly wet—if it’s difficult to handle without sticking to your hands—you’ve added too much liquid. Use slightly less next time and add it gradually until the dough just barely comes together. This is where the fold method (adding liquid slowly and gently) helps—you can stop when the dough reaches the right consistency rather than committing to a fixed amount.
Expired baking powder produces disappointingly flat biscuits. Check the date on your baking powder box before you start. Baking powder loses potency over time, even if it looks fine. If yours is over a year old, buy a fresh box.
Oven temperature that’s too low prevents adequate steam generation and rise. Use an oven thermometer to verify your actual temperature. Many home ovens run 25-50 degrees cooler than their dials indicate, and this directly limits fluffiness.
Pressing or re-rolling the dough excessively overworks the gluten and warms the butter, both of which prevent fluffiness. Cut your biscuits efficiently, minimize handling, and don’t re-work scraps excessively.
Cutting biscuits with a twisted motion seals the edges and prevents proper rise. Cut straight down and straight up, decisively but without twisting.
Storage and Keeping Biscuits Fluffy
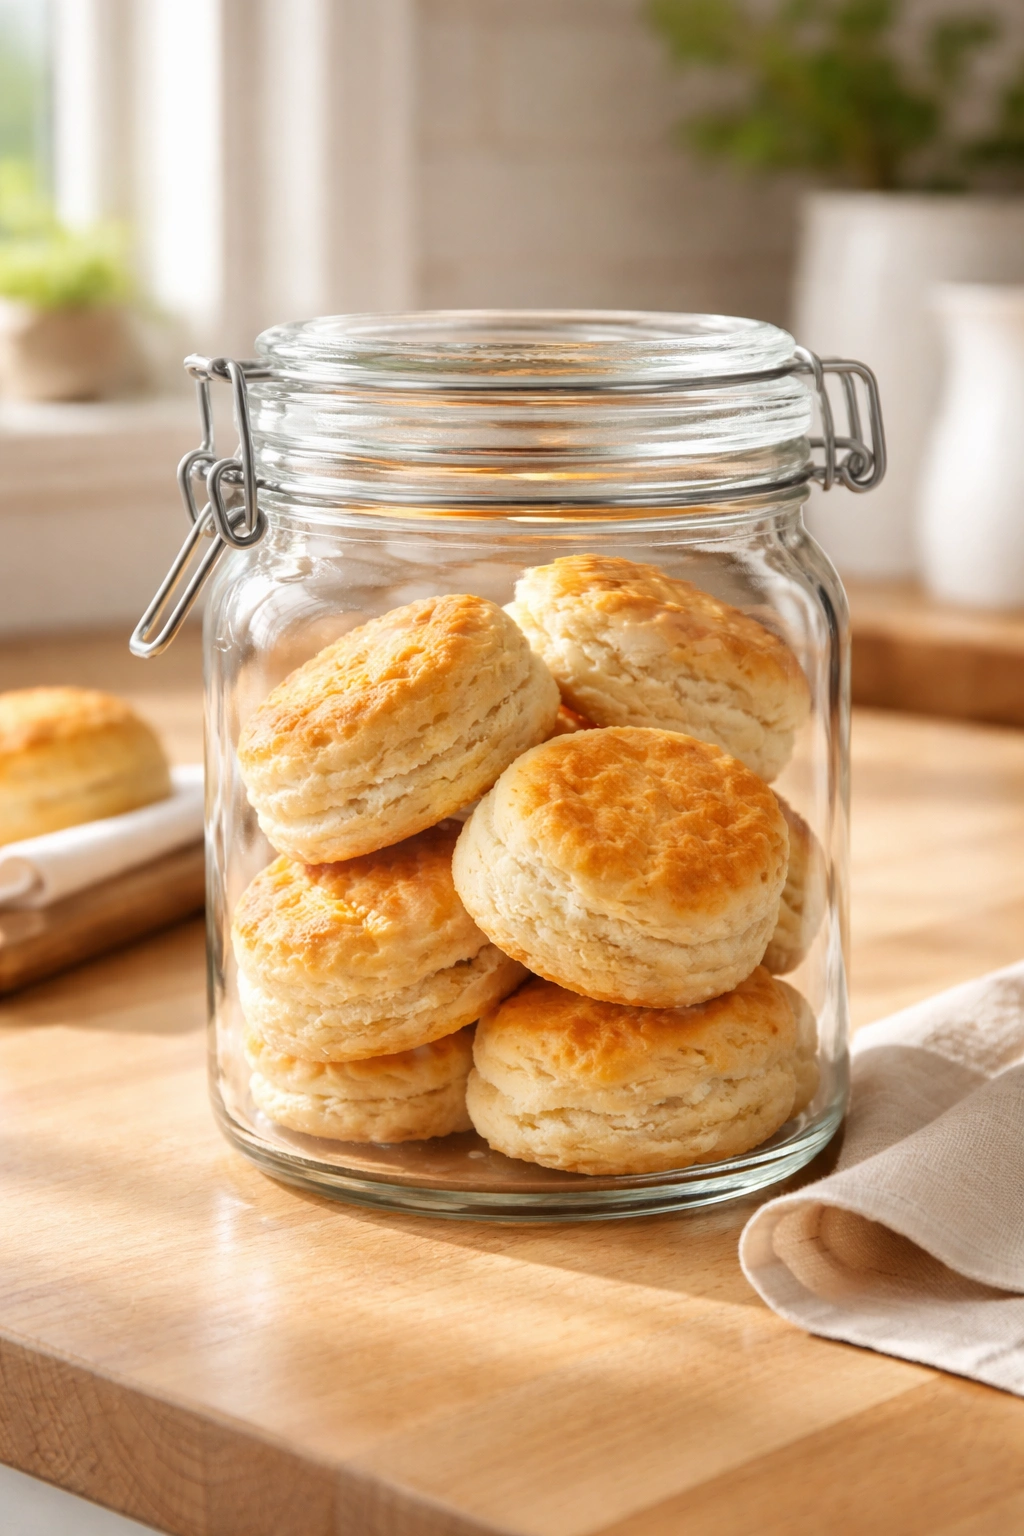
Fluffy biscuits are best eaten immediately, while still warm from the oven. At this moment, they’re at their absolute peak—tender, buttery, and genuinely light.
At room temperature, properly baked biscuits stay reasonably fresh for 6-8 hours in an airtight container. After that, they begin to stale and lose some fluffiness. The center dries out while the crust softens, which is the opposite of what you want.
In the refrigerator, biscuits last for 3-4 days in an airtight container. Cold storage actually helps them stay moist by slowing the staling process. To reheat refrigerated biscuits, wrap them loosely in foil and warm them at 325°F for 8-10 minutes. This restores some of the warmth and tenderness without drying them out.
In the freezer, biscuits last for 2-3 months. Freeze them in a freezer-safe container or bag. To reheat frozen biscuits, wrap them in foil and warm at 350°F for 12-15 minutes. They won’t be quite as tender as fresh biscuits, but they’re still genuinely good.
For make-ahead convenience, you can prepare the dough up to the point of cutting the biscuits, then freeze the cut dough rounds on a baking sheet. Once frozen solid, transfer them to a freezer bag. Bake frozen biscuits directly from the freezer, adding 2-3 minutes to the baking time and watching them carefully. This is genuinely convenient—you can have fresh-baked biscuits in about 20 minutes with minimal effort.
Don’t refrigerate unbaked biscuit dough for extended periods. Baking powder begins to dissipate as soon as it’s mixed with liquid, so leaving dough in the fridge for more than a few hours reduces its lifting power.
Testing Your Biscuits: How to Know If You’ve Nailed It
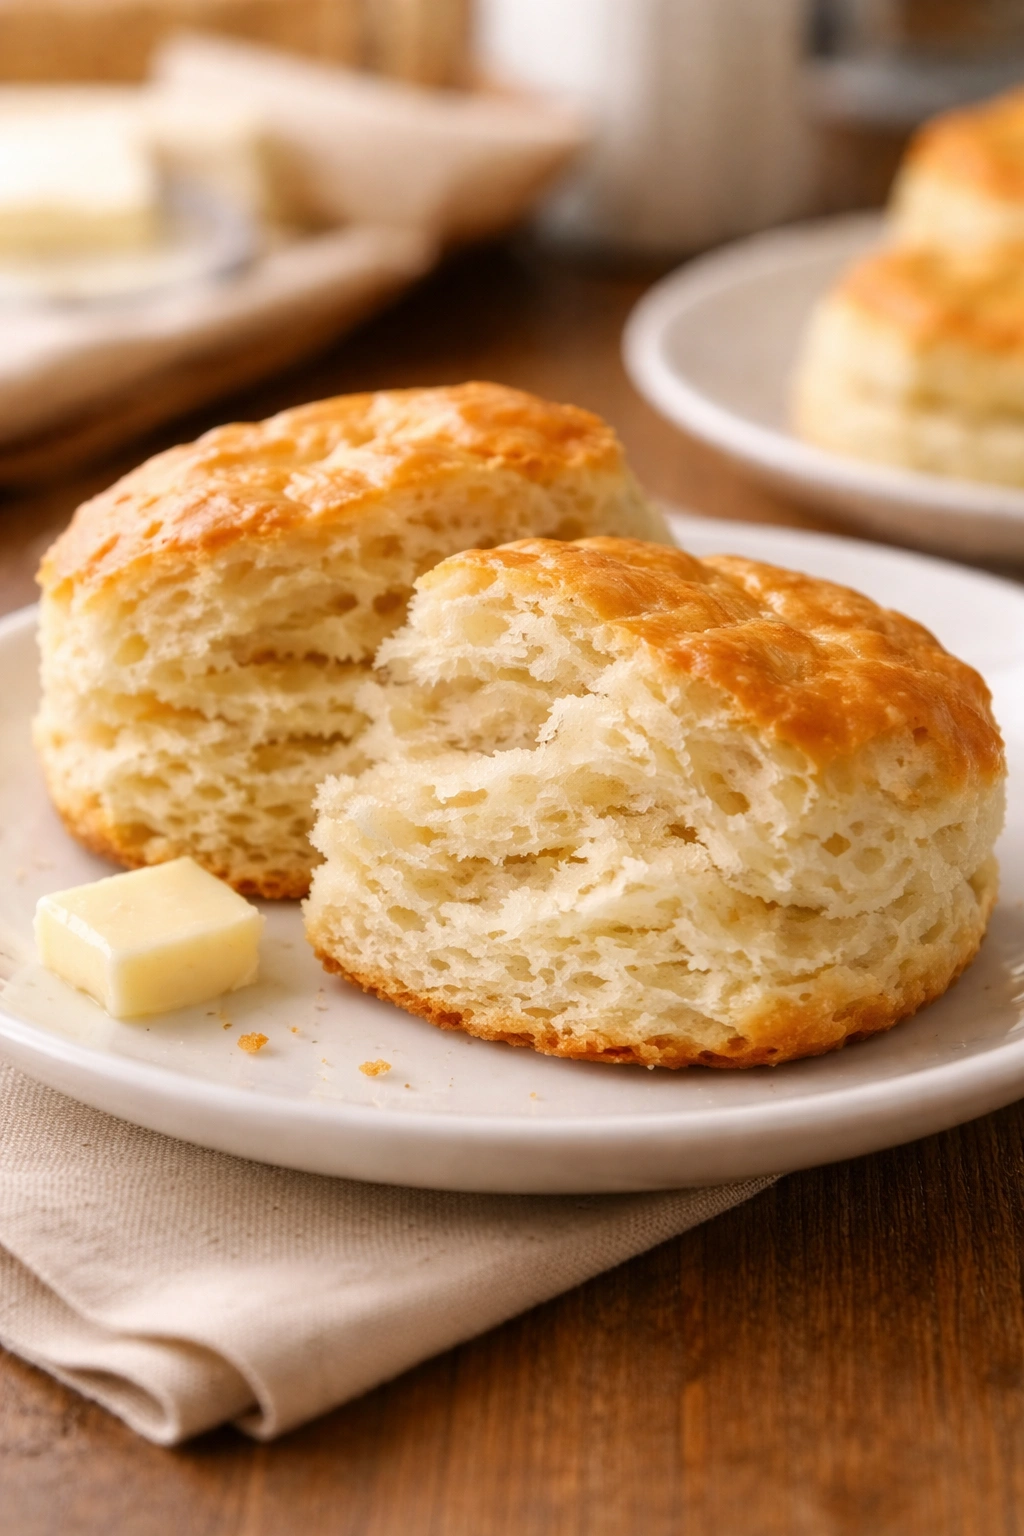
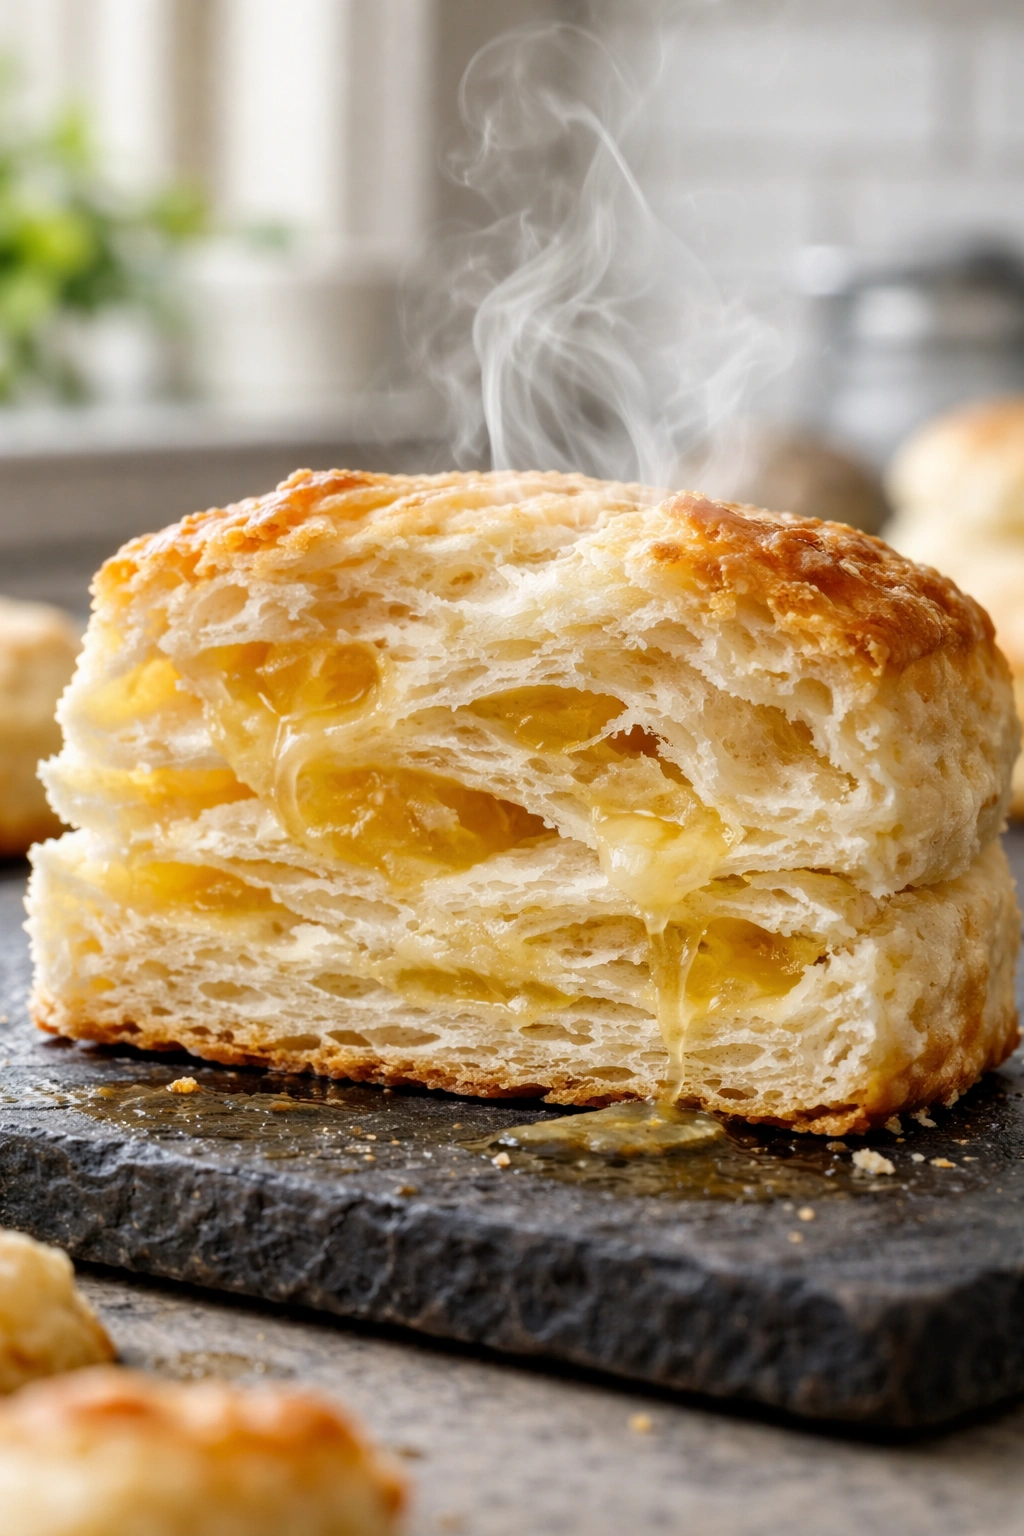
A truly fluffy biscuit has specific characteristics you can check for. When you cut a biscuit in half (best done while still warm), you should see distinct, visible layers. These aren’t subtle layers—they’re obvious separations that you can see clearly. If your biscuit looks like a dense, uniform crumb with no visible layering, you need to revisit your butter-cutting technique or your mixing time.
A truly fluffy biscuit is tender when you bite it—the crumb yields easily to your teeth without requiring much chewing. If your biscuit is tough or chewy, you’ve overworked the gluten. A truly fluffy biscuit has a golden-brown, crisp exterior that contrasts with the tender interior. If your biscuit is pale, it’s underbaked. If it’s burnt or overly dark, your oven is too hot.
A truly fluffy biscuit weighs less than you’d expect for its size. Pick one up and feel surprised by how light it is. If your biscuit feels dense and heavy, steam generation didn’t happen effectively.
Creative Variations While Maintaining Fluffiness
You can absolutely customize biscuits while keeping them fluffy, provided you’re thoughtful about modifications.
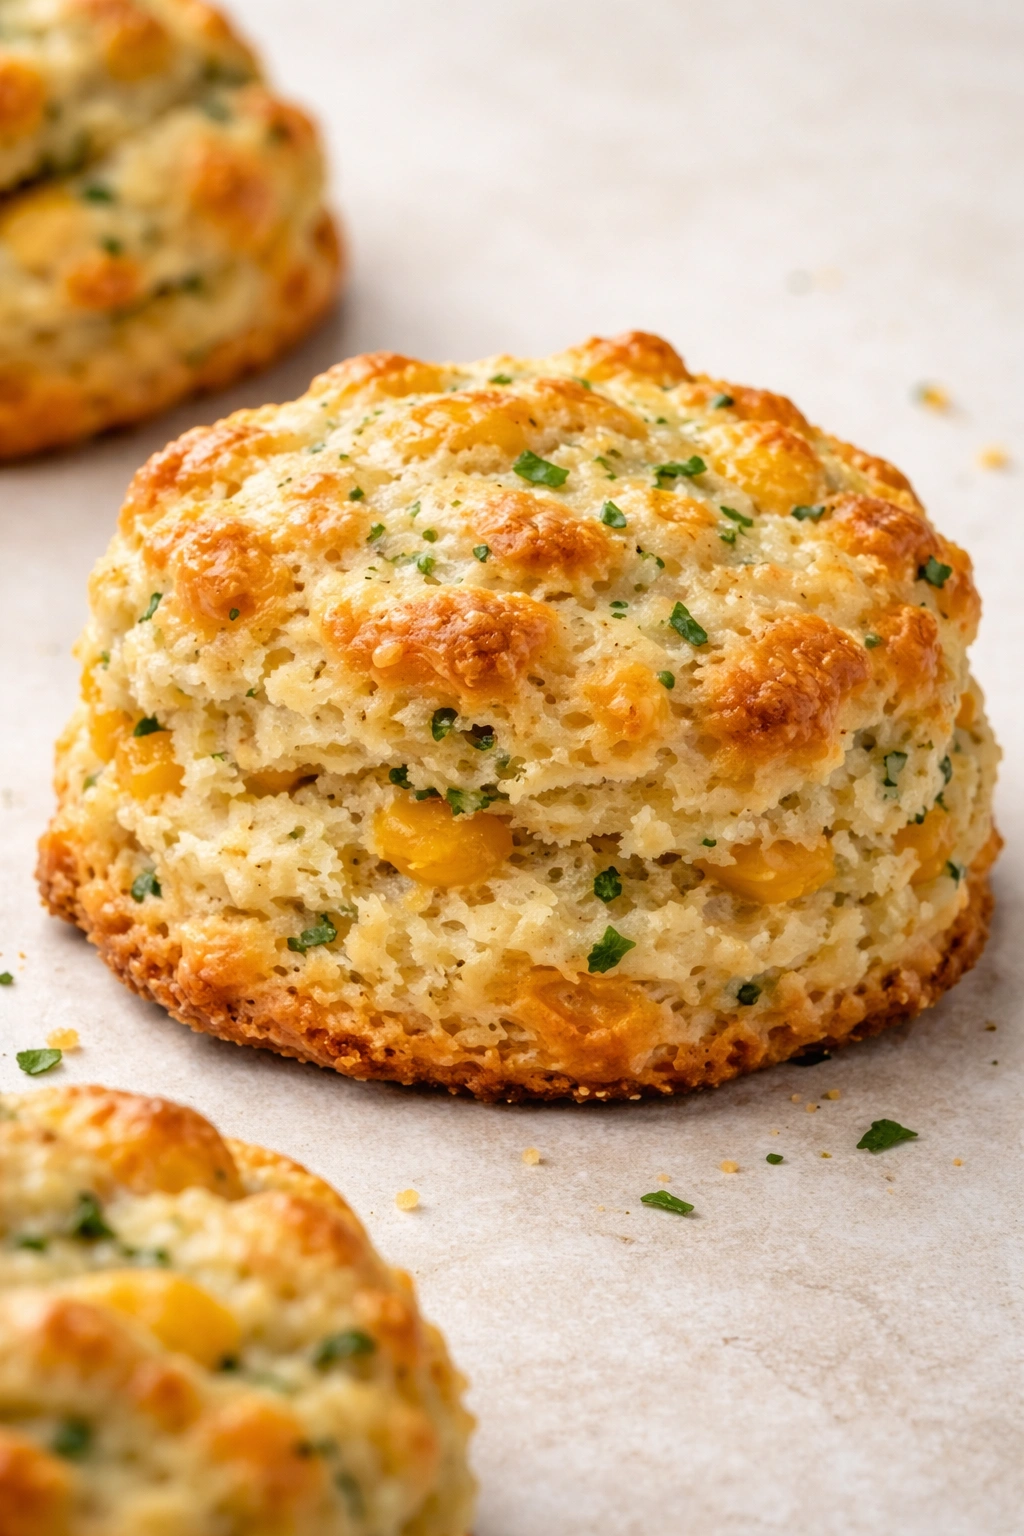
Herb and cheese variations work beautifully. Add ½ cup freshly grated sharp cheddar cheese and 2 tablespoons fresh or 1 tablespoon dried herbs (rosemary, thyme, or chives work wonderfully) to your dry ingredients. Mix them in before adding the butter. The cheese adds moisture and flavor, while herbs add sophistication. Cheddar cheese biscuits are exceptional alongside soups and stews.
Sweet variations require substituting a bit of sugar for salt. Replace the ¾ teaspoon salt with ¼ teaspoon salt, and add 2-3 tablespoons of sugar to your dry ingredients. Add 1 teaspoon of vanilla extract to your buttermilk before mixing. These work beautifully for breakfast service or with afternoon tea and jam.
Jalapeño and cheddar biscuits are genuinely addictive. Add ¼ cup minced fresh jalapeños (seeds removed for less heat, kept for more) and ½ cup shredded sharp cheddar to your dry ingredients. The moisture from the jalapeños means you might need slightly less buttermilk—add it gradually until the dough reaches the right consistency.
Cornmeal variations add texture and slight sweetness. Replace ½ cup of your all-purpose flour with cornmeal. This produces a slightly crumbly, less delicate biscuit, but still fluffy and genuinely delicious.
For any variation, the fundamental techniques remain unchanged: cold butter cut into discrete pieces, minimal mixing, adequate chilling, proper oven temperature, and vigilant attention to not overworking the dough. Variations fail when bakers assume the technique changes—it doesn’t. Only the ingredients do.
Serving Suggestions and Perfect Pairings

Fluffy homemade biscuits are versatile enough for virtually any meal. Serve them warm with butter and jam or honey for breakfast or afternoon tea—this is perhaps their most classic role. The butter melts into the warm, tender crumb while jam provides sweet, fruity contrast.
Serve them alongside soups and stews for dinner. A good biscuit soaks up broth without falling apart and provides satisfying substance. Tomato soup and biscuits is a particularly beloved pairing, as is any creamy vegetable soup.
Serve them with fried chicken for a proper Southern dinner. The biscuit’s buttery richness complements the chicken’s crispy exterior, while the tender crumb makes a perfect vehicle for hot sauce or gravy.
Use them as the base for breakfast sandwiches. Split a warm biscuit and fill it with scrambled eggs, crispy bacon or sausage, and a slice of cheese. The biscuit’s structural integrity and tenderness make it perfect for this application.
Serve them simply with good butter and fleur de sel for an elegant, minimalist approach. When your biscuits are genuinely fluffy and well-executed, they’re good enough to star on their own.
For breakfast service, biscuits are best served within 10-15 minutes of coming out of the oven. For dinner service, they’re still excellent if served within 30-45 minutes, though reheating them briefly helps restore their warmth and texture.
Final Thoughts
Fluffy biscuits aren’t mysterious or dependent on secret ingredients. They’re dependent on understanding and executing specific techniques: cold butter cut into distinct pieces, minimal mixing, adequate chilling, and proper oven temperature. Master these fundamentals and you’ll make fluffy biscuits reliably.
The single most important thing to remember is that your instinct to keep mixing until the dough is smooth and polished is exactly the impulse that ruins them. Stop when your dough still looks rough. Embrace the shaggy texture. Trust that this imperfection is actually perfection.
Invest in an oven thermometer if you don’t have one—it’s the single best tool for consistent results. Keep your butter cold. Don’t skip the chilling step. Measure your flour properly. These small details compound into biscuits that genuinely deserve to be called fluffy.