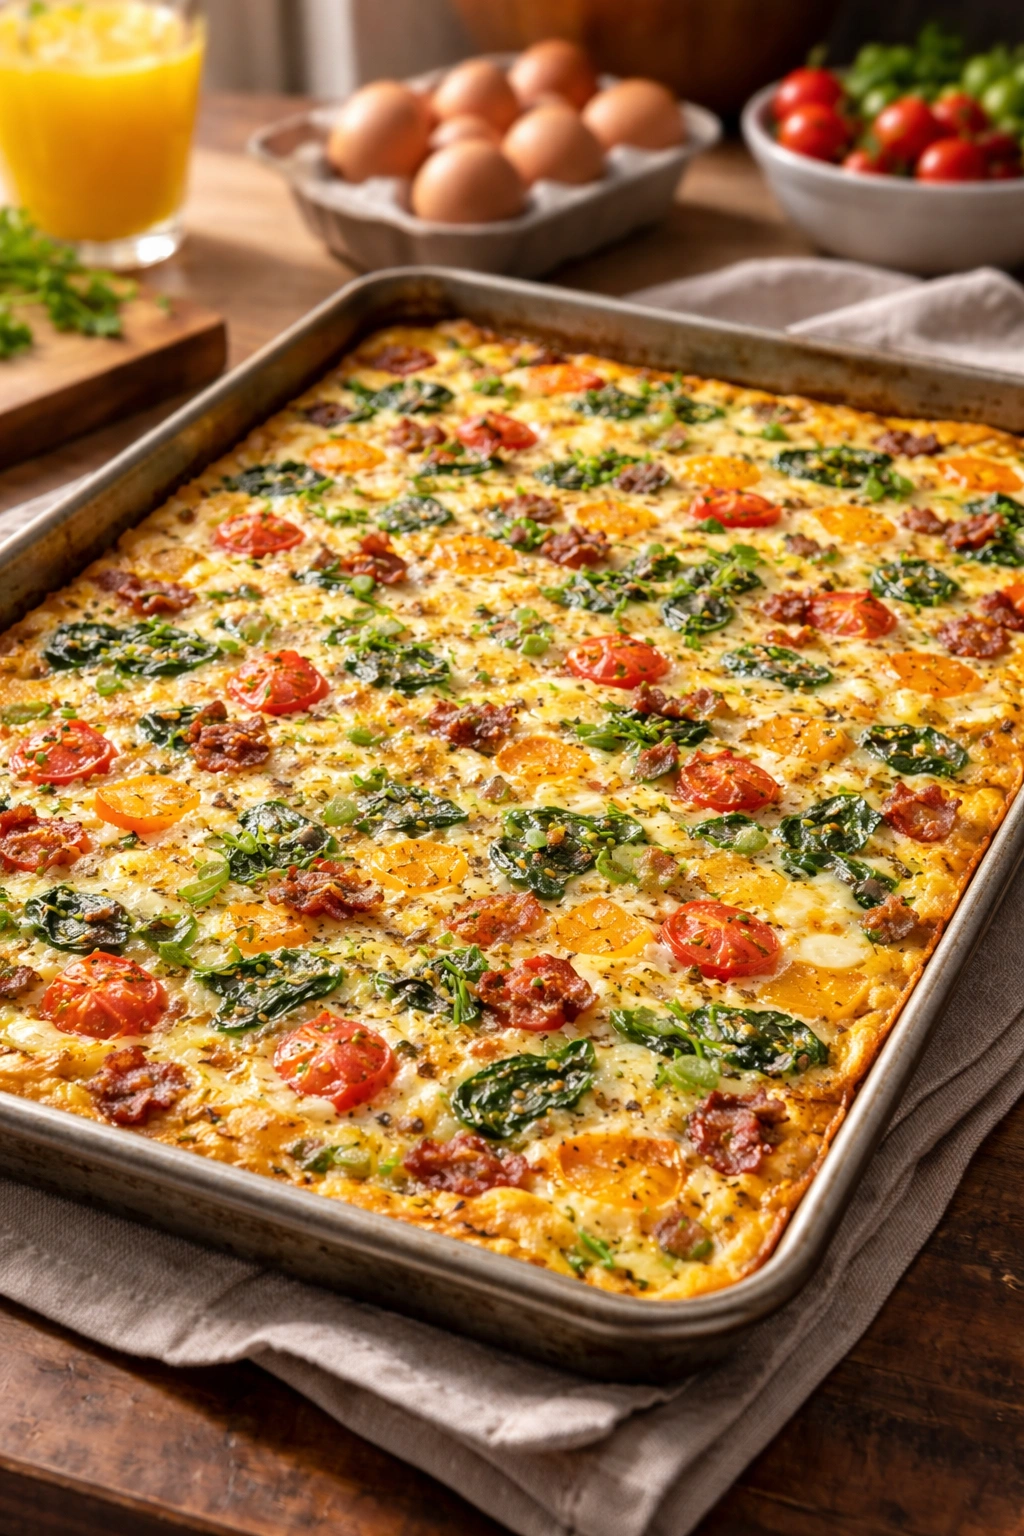
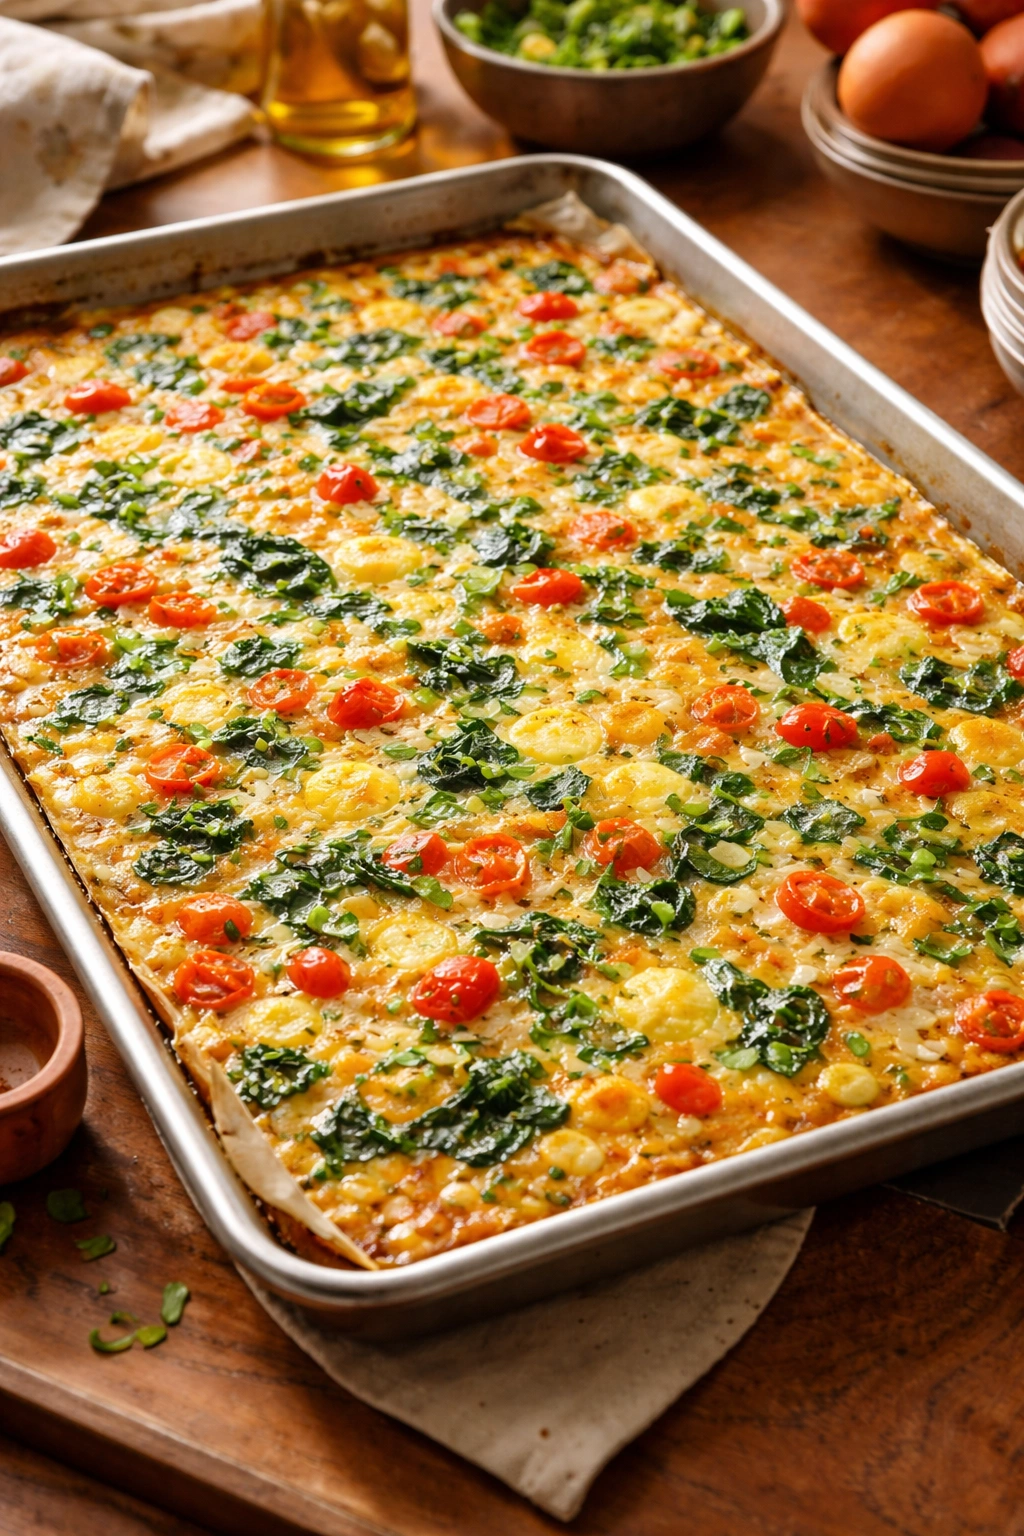
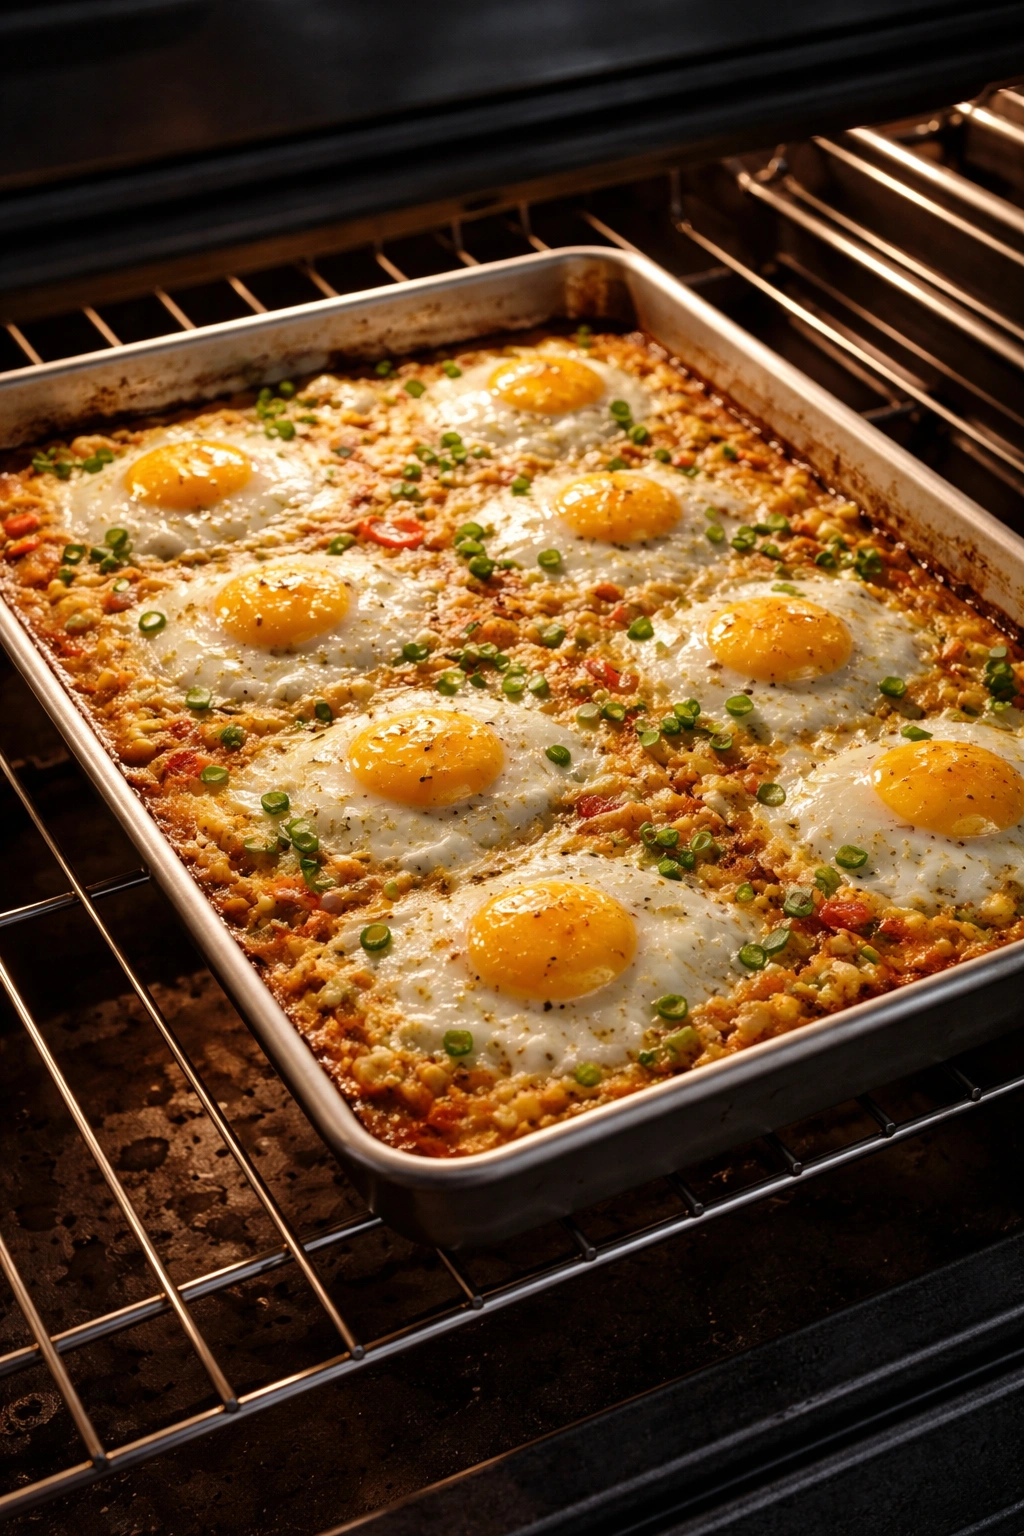
Sheet pan eggs deliver convenience and impressive results with minimal effort—a single baking dish replaces all those individual pans, and you’ve got breakfast for half a dozen people ready in under 30 minutes. Whether you’re feeding a crowd on Sunday morning, prepping meals for the week ahead, or hosting brunch without spending hours at the stove, this method transforms beaten eggs into a golden, fluffy casserole that’s far easier to manage than scrambling or flipping omelets one by one.
The beauty of this approach lies in its flexibility. You can keep it simple with just eggs and cream, or build elaborate combinations layered with vegetables, meats, cheeses, and herbs. The oven does the heavy lifting—no stirring required, no worrying about uneven cooking, no burnt edges while the center stays runny. Everything cooks at the same gentle, even heat, resulting in custardy depth and consistency throughout.
But sheet pan eggs aren’t quite as simple as pouring raw eggs onto a pan and hoping for the best. There’s genuine technique involved—how much filling to use, the precise oven temperature, how long to bake, and when to know it’s actually done. Get these details right, and you’ll have a foolproof breakfast that looks restaurant-quality. Miss them, and you risk a rubbery, overcooked mess or an undercooked center that nobody wants to eat.
Why Sheet Pan Eggs Are Your Secret Batch-Cooking Weapon
Sheet pan eggs solve a real problem: how to make a substantial breakfast for multiple people without spending the entire morning stationed at the stove. Instead of standing there scrambling eggs in batches—keeping early portions warm while finishing the last batch—you assemble everything ahead, slide it into the oven, and walk away.
The texture you get is genuinely different from stovetop scrambled eggs. Because the heat comes from below and radiates gently from above, the eggs cook more like a custard than a stirred dish. The result is tender, slightly creamy, and luxurious in a way that pan-scrambled eggs struggle to achieve. There’s no overcooking the edges while waiting for the center to set, no dry, tough curds.
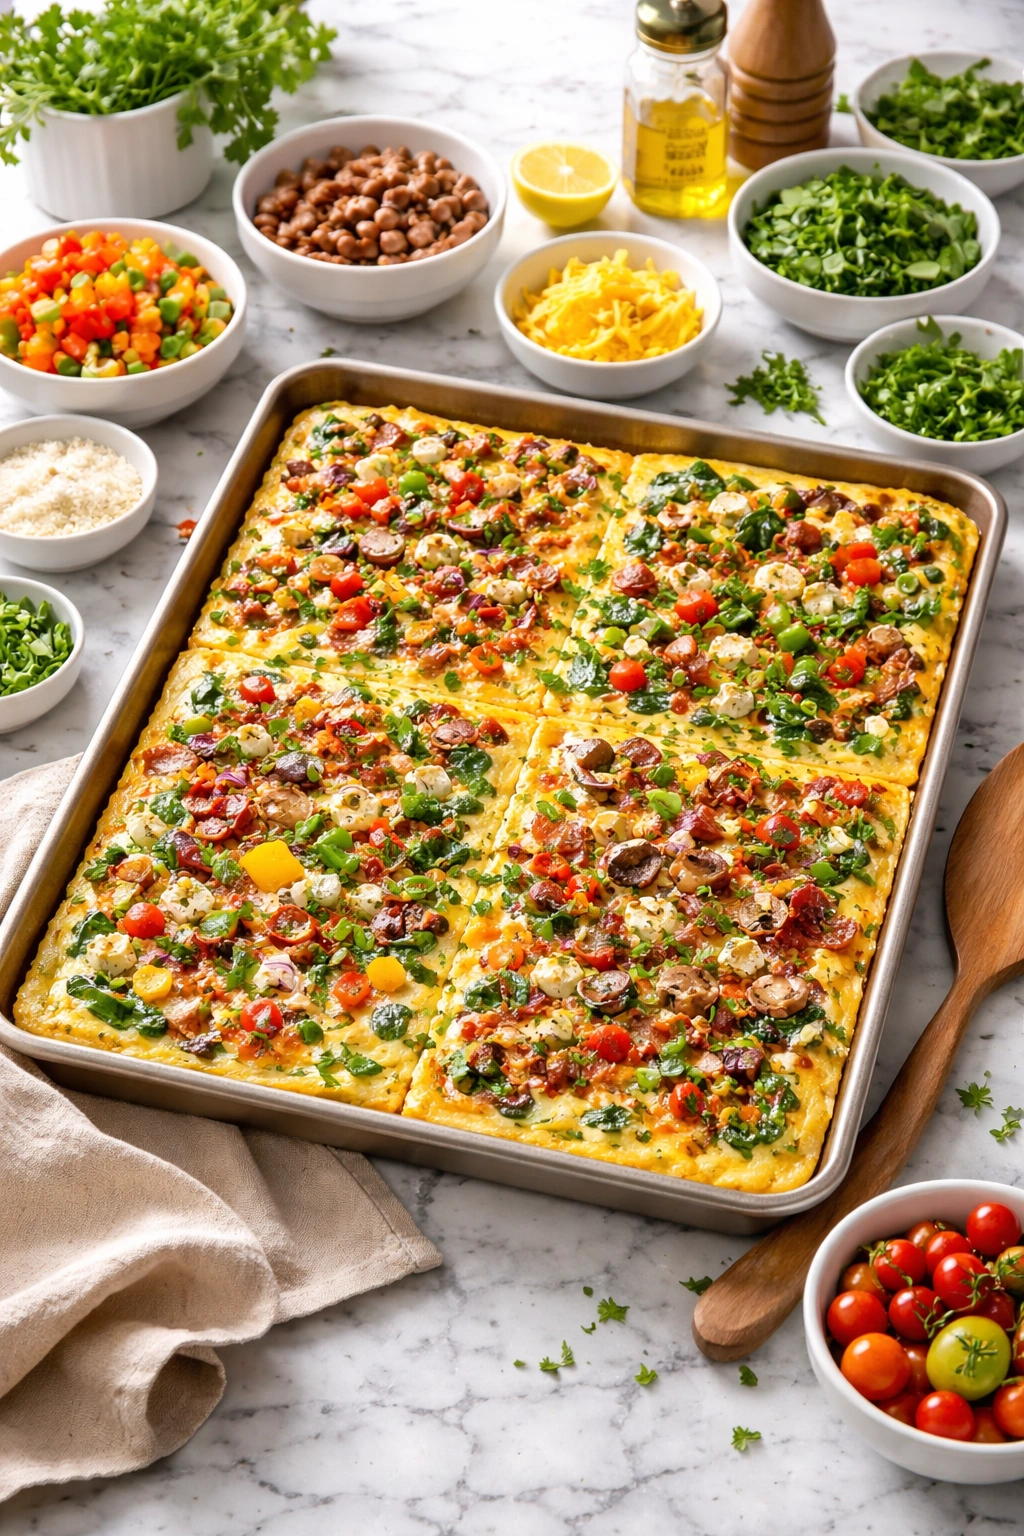
Beyond texture, there’s the flexibility factor. You can use whatever fillings appeal to you—leftover roasted vegetables, crumbled sausage, diced ham, sautéed peppers, caramelized onions, herbs, multiple cheeses. You’re not limited to what fits in a bowl with the eggs. You can layer components, create defined sections, or mix everything together. The oven handles all of it equally well.
Time matters too. From starting to put ingredients together to pulling a finished pan from the oven takes 20 to 25 minutes. Add 10 minutes of prep if you’re not using pre-cooked components, and you’re still looking at a full breakfast for a large group in under an hour. That’s faster than waiting in line at a brunch spot, and infinitely more customizable to what your specific crowd actually wants to eat.
The Basic Sheet Pan Egg Method Explained
The concept is straightforward: whisk eggs with cream or milk, add fillings and seasonings, pour into a buttered baking pan, and bake at moderate heat until set. Simple as that sounds, the execution determines whether you end up with something tender and perfect or something that tastes vaguely rubbery and regrettable.
The fundamental ratio is about one whole egg per person you’re feeding, plus a quarter cup of cream or milk for every four eggs. This creates enough liquid to keep everything custardy without making the final dish watery or fragile. If you’re using lots of water-releasing fillings like fresh vegetables, you might lean toward slightly less liquid. If you’re keeping it minimal and mostly just eggs and cheese, you might add a touch more.
The filling-to-egg ratio matters enormously. Too much filling and the eggs don’t bind everything together properly—you end up with distinct layers instead of a cohesive dish. Not enough, and you’ve just baked plain eggs in a sheet pan, which works fine but misses the point of customization. The sweet spot is roughly one-third filling to two-thirds egg base, though this varies depending on what you’re using.
Temperature precision prevents both underbaking and overdrying. Too hot and the edges set while the center remains liquid, or the whole thing becomes tough and separated. Too cool and everything takes forever while the flavors never quite develop fully. The optimal range is 350°F to 375°F (175°C to 190°C), depending on your specific oven and how thick your egg mixture is.
Essential Equipment and Ingredient Quality
A standard 9-by-13-inch baking dish is the go-to, though a larger quarter-sheet pan (about 9 by 13 inches) works equally well. If you’re doubling the recipe, two 9-by-13s are better than one massive pan because the thinner layer cooks more evenly. You’ll also want a whisk, a measuring cup, and whatever knives or prep equipment you need for your fillings.
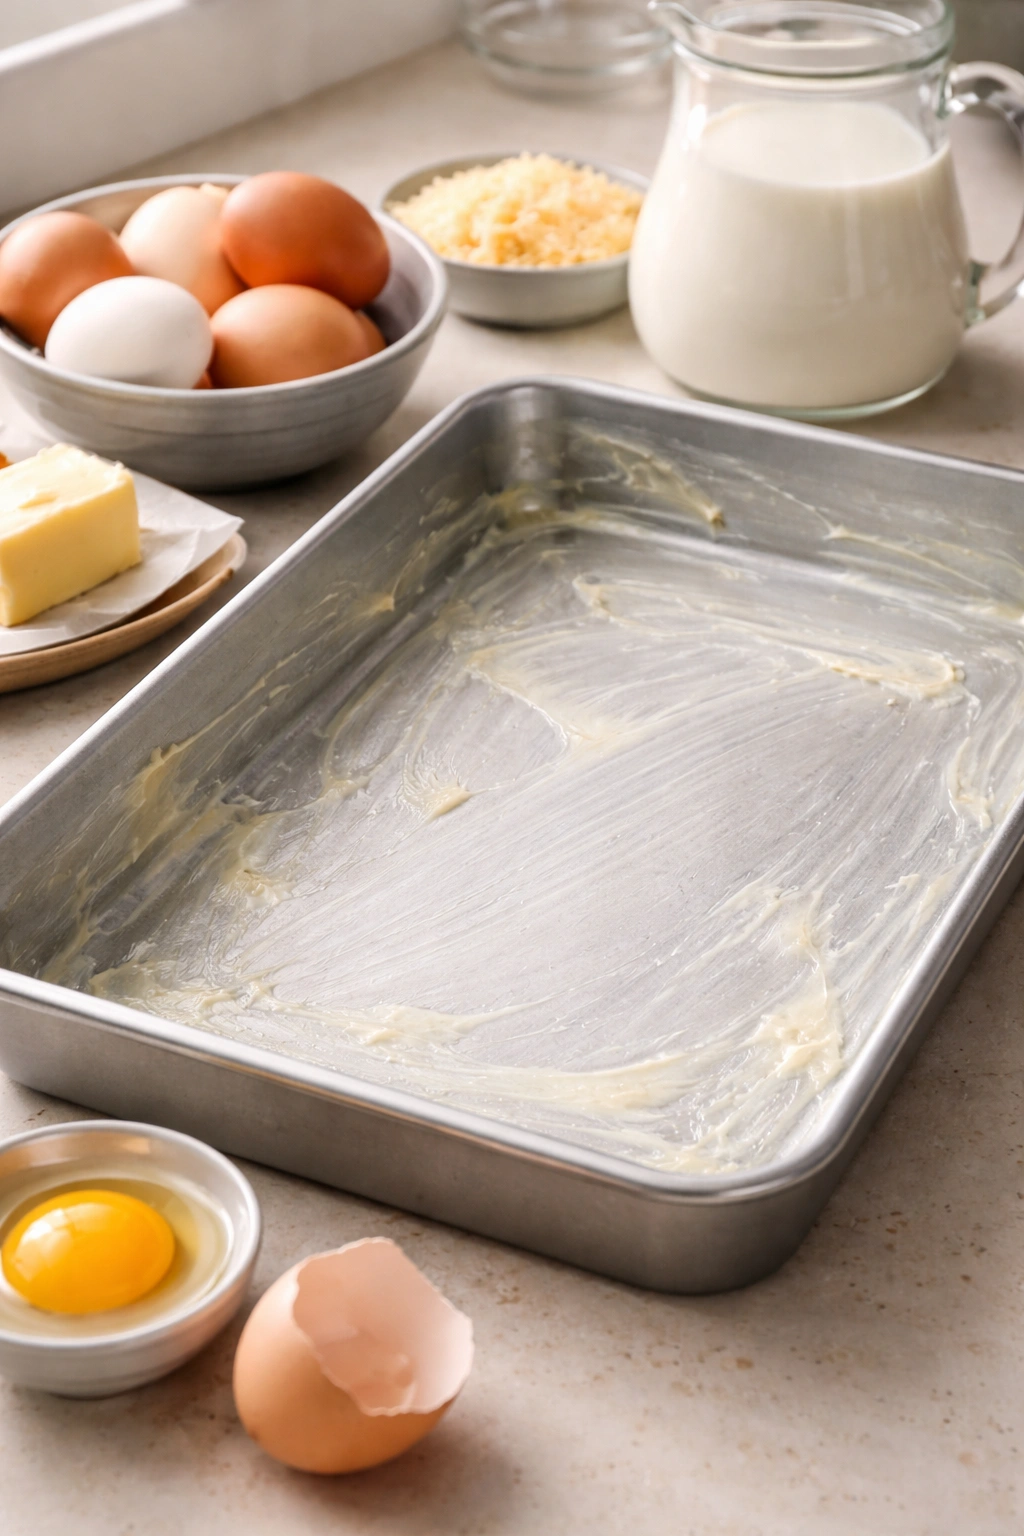
Butter your baking dish thoroughly—edges, corners, and the bottom. This prevents sticking and helps the edges brown slightly, creating a pleasant texture contrast with the tender center. Use a brush or paper towel, and don’t skip this step.
Your eggs matter more than you’d think. Fresher eggs have better flavor and cook slightly firmer than older ones. Room-temperature eggs incorporate more smoothly into the cream, creating a more homogenous base. Cold eggs straight from the fridge work fine—just plan a minute more baking time. Pasteurized eggs are perfectly safe and often easier to source than unpasteurized.
Heavy cream creates the most luxurious texture, but whole milk works fine and cuts the richness if that’s your preference. Half-and-half splits the difference. Don’t use skim milk—the fat carries flavor, and you need it for silky texture.
Salt matters. Use fine sea salt or kosher salt, and taste your mixture before it goes into the oven. A generous pinch of black pepper adds depth. Most people underseason egg dishes—season more confidently than you initially feel comfortable with. You can always taste the final baked dish and add a sprinkle of fleur de sel on top if needed.
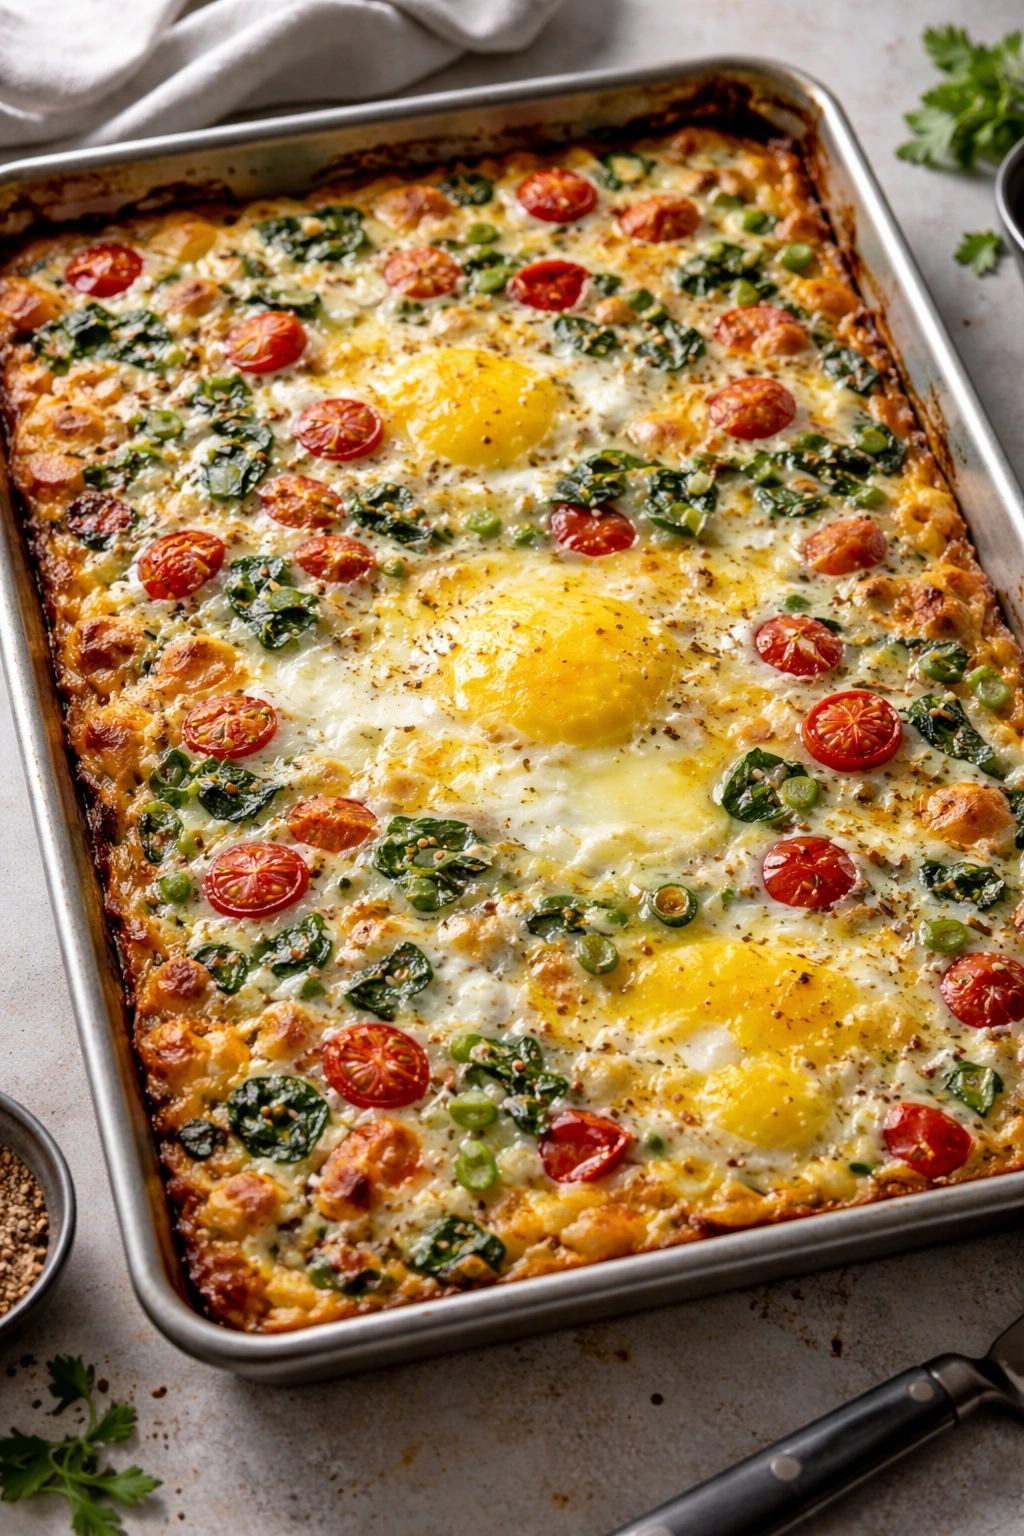
Classic Sheet Pan Eggs
Yield: Serves 6 to 8 | Prep Time: 15 minutes | Cook Time: 20 to 25 minutes | Total Time: 35 to 40 minutes | Difficulty: Beginner — no special skills required, straightforward ingredient list, and hands-off baking.
For the Eggs:
- 12 large eggs, room temperature
- ¾ cup heavy cream or whole milk
- ½ teaspoon fine sea salt
- ¼ teaspoon freshly ground black pepper
- ¼ teaspoon garlic powder (optional, but adds nice depth)
- 2 tablespoons unsalted butter, softened, for greasing the pan
- ½ teaspoon red pepper flakes (optional, for subtle heat)
For the Filling (choose your combination or use all):
- 1 cup sharp cheddar cheese, shredded
- ½ cup Swiss cheese, shredded
- 4 ounces breakfast sausage, browned and crumbled, or 6 ounces ham, diced
- ½ cup roasted bell peppers (jarred is convenient), chopped
- ½ cup fresh spinach, roughly chopped
- ¼ cup fresh chives, finely sliced
- 2 tablespoons fresh flat-leaf parsley, chopped
- 2 tablespoons unsalted butter, for sautéing vegetables (if using fresh)
Prepare the Pan and Preheat:
-
Preheat the oven to 375°F (190°C) and position the rack in the center of the oven.
-
Generously butter a 9-by-13-inch baking dish with the softened butter, paying particular attention to the corners and edges. Use a pastry brush or clean fingers to ensure even coverage — this prevents sticking and helps the finished edges brown pleasantly.
Make the Egg Base:
-
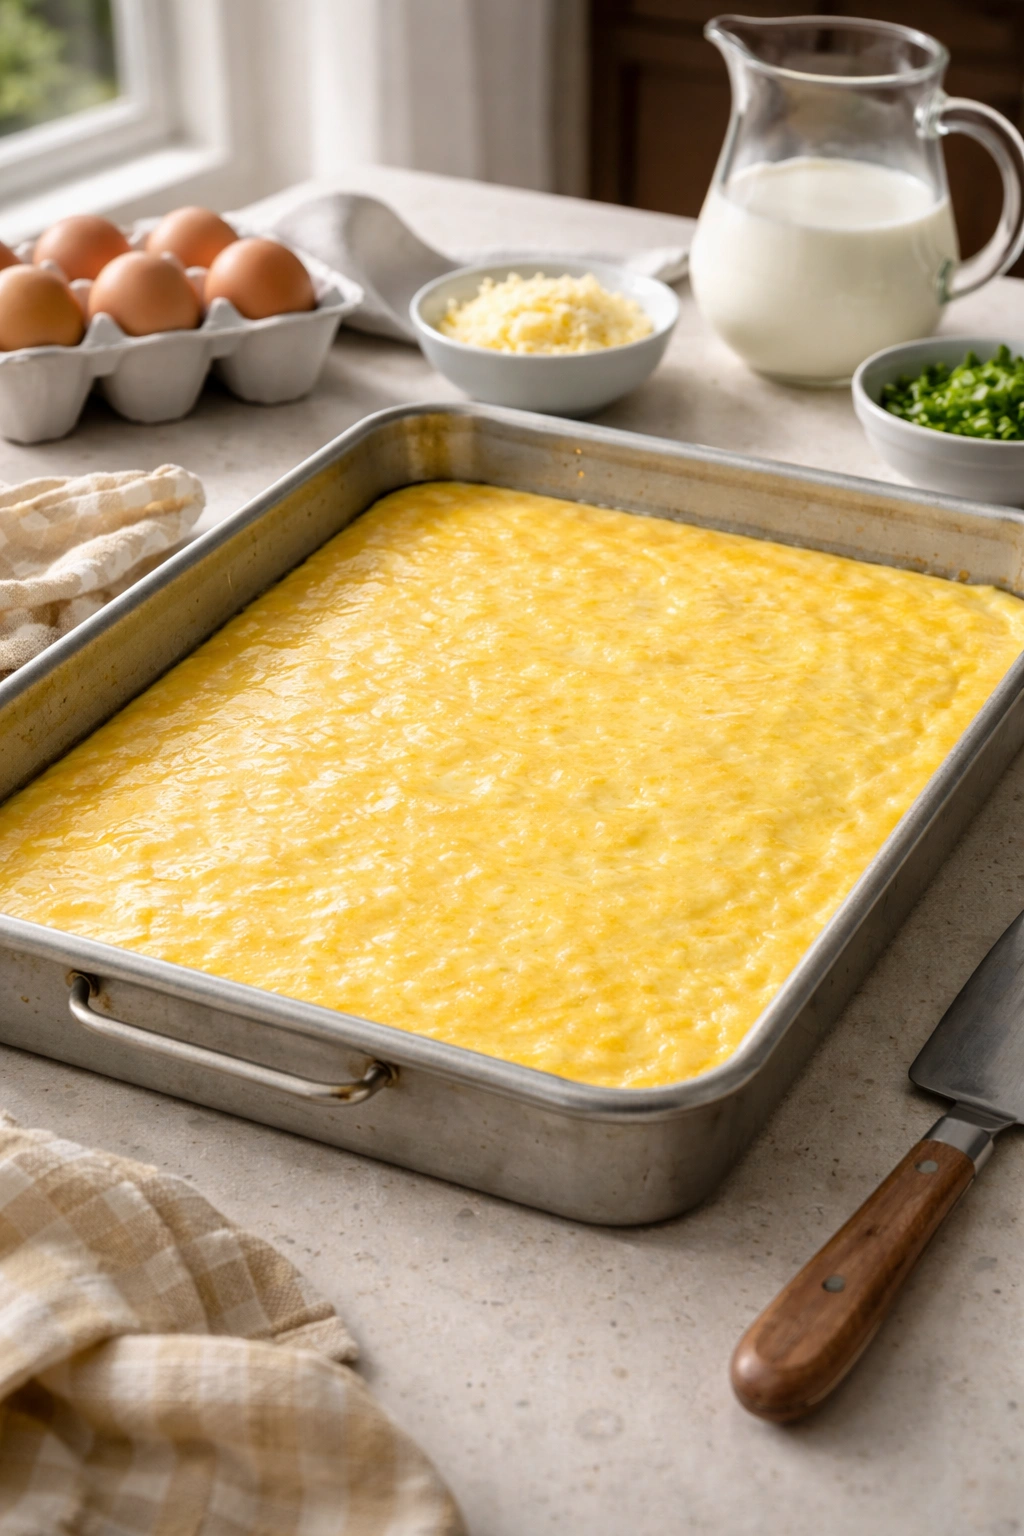
Crack all 12 eggs into a large mixing bowl. Add the heavy cream, salt, black pepper, and garlic powder if using. Whisk vigorously for 1 to 2 minutes, until the mixture is completely homogenous, the color is a uniform pale yellow, and no visible strands of egg white remain. Don’t be timid here — proper whisking incorporates air and creates a lighter, fluffier final dish.
-
If you’re using any fresh vegetables like spinach or additional herbs, chop them now and set aside. If you’re browning sausage or preparing any proteins, do that now as well and allow them to cool slightly before adding to the eggs. Pre-cooked components (ham, roasted peppers, cured meats) can go straight into the pan.
Assemble the Pan:
-
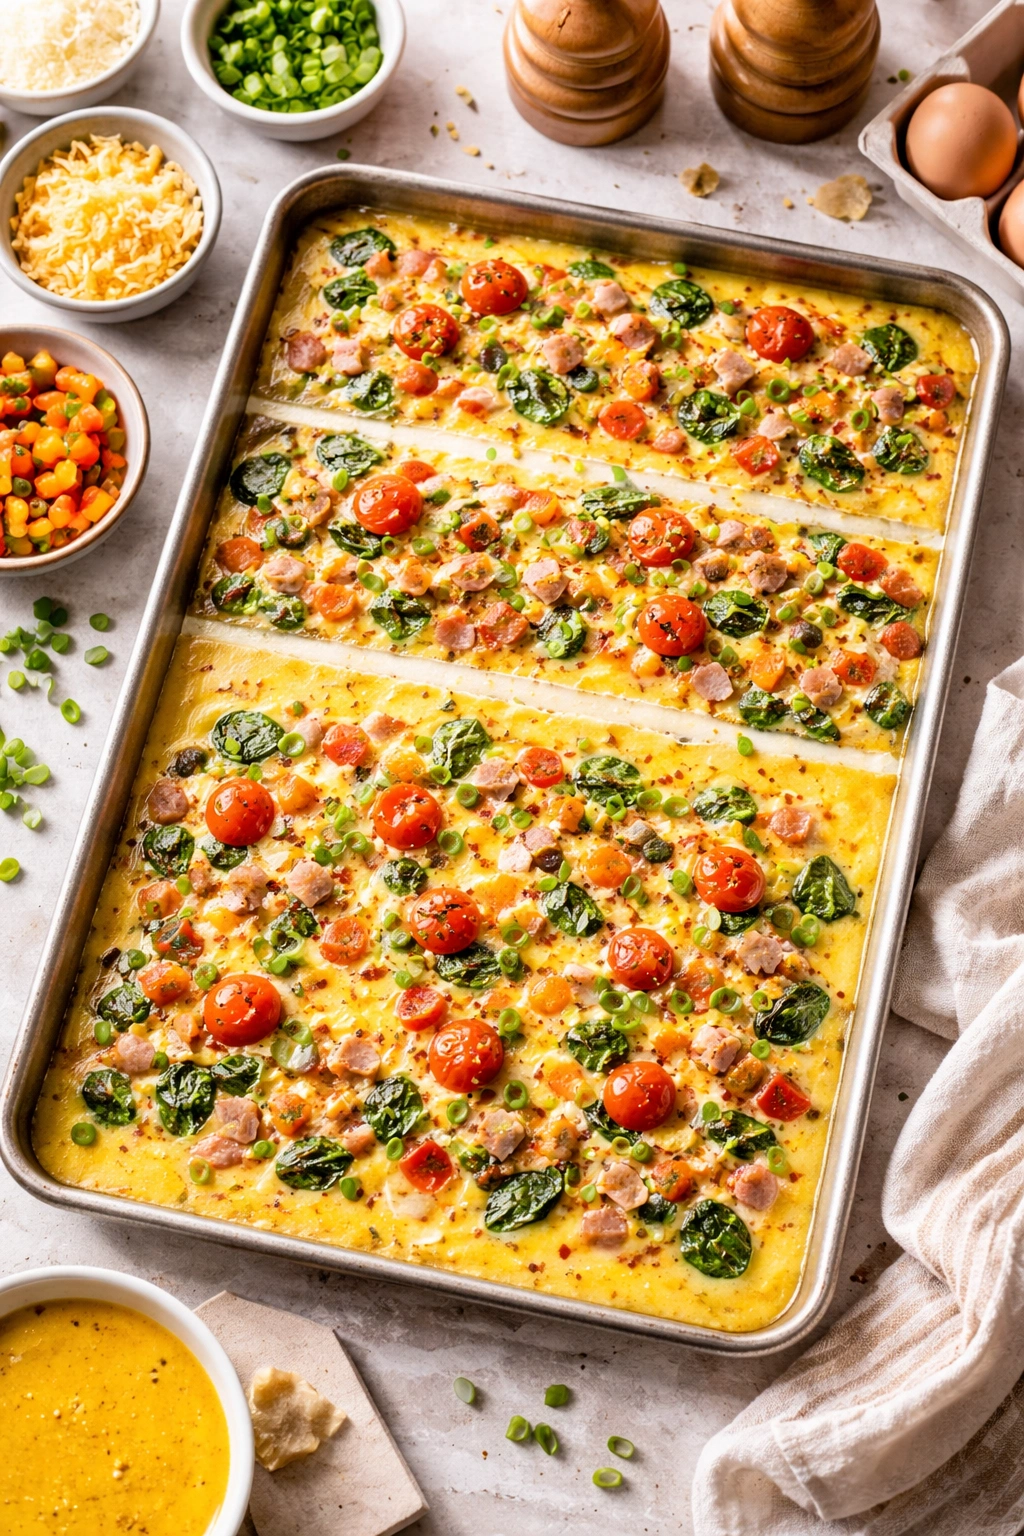
Pour about one-third of the egg mixture into the buttered baking dish. Spread it into an even layer — it doesn’t need to cover the bottom completely, but try for relatively even coverage.
-
Scatter half of your filling components over this first layer of eggs: half the cheese, half the sausage or ham, half the vegetables, a portion of the herbs. Don’t pack everything in densely — distribute it so the fillings can be embraced by the egg mixture rather than sitting in distinct clumps.
-
Pour half of the remaining egg mixture over the filling layer. This second layer of eggs binds everything together and ensures that forks will encounter a consistent texture throughout instead of hitting dry pockets of filling.
-
Add the remaining fillings — the second half of the sausage, the remaining vegetables, the rest of the cheese. Distribute these components evenly across the surface.
Advertisements -
Pour the remaining egg mixture over the top, ensuring that all visible filling is covered or mostly covered. Some small pieces of cheese or herbs peeking through are fine and will brown nicely. Avoid large bare patches of visible filling, as these will dry out or brown too much during baking.
Bake and Cool:
-
Place the baking dish in the preheated oven on the center rack. Set a timer for 20 minutes and do not open the oven door — oven heat loss during early baking can affect the final texture.
-
After 20 minutes, check for doneness: the edges should be set and pulling slightly away from the sides of the baking dish, the top should appear set but still very slightly jiggly in the very center when you gently shake the pan, and a toothpick inserted 2 inches from the center should come out clean. If the very center is still quite liquid, return it to the oven for 2 to 3 additional minutes. Slight jiggle is good; obvious liquid is not.
-
Remove the baking dish from the oven and place it on a wire cooling rack or heat-safe surface. Allow the sheet pan eggs to rest for 5 minutes before cutting — this allows the residual heat to set the very center completely and makes cutting cleaner.
-
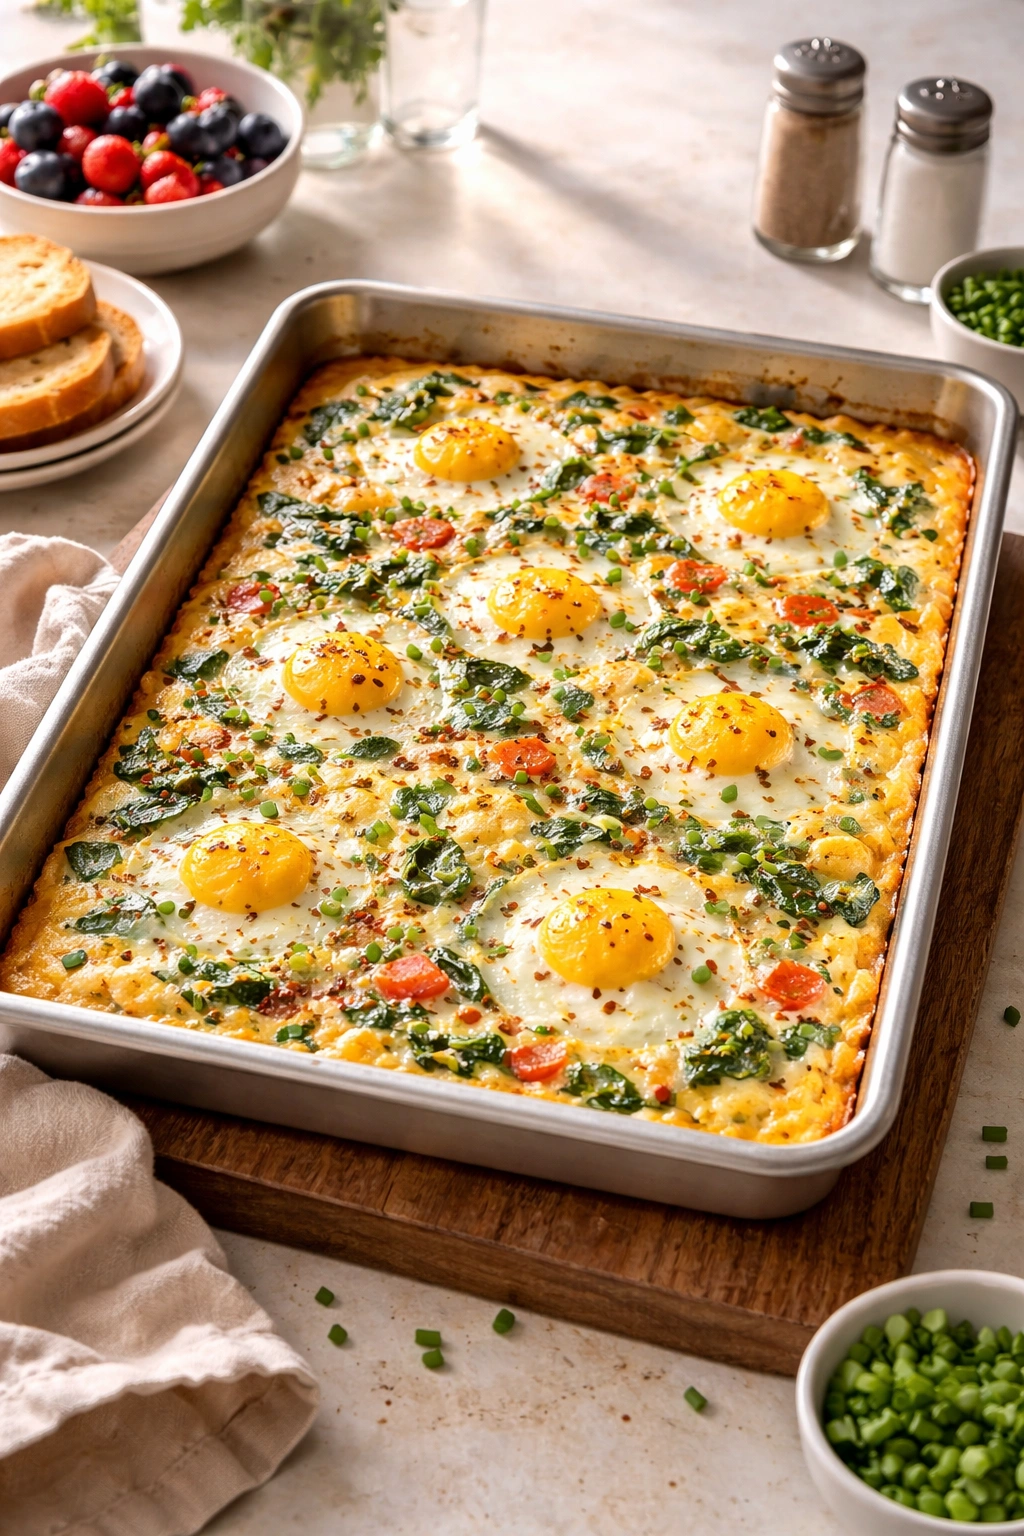
Slice into squares and serve warm or at room temperature. Garnish with additional fresh herbs, a sprinkle of fleur de sel, or a crack of fresh black pepper if desired.
The Filling-to-Egg Ratio and Density Secrets
Finding the sweet spot between “enough fillings to make this interesting” and “so much filling that the eggs can’t bind everything together” is the key to consistent success. Aim for about one-third of the total volume to be fillings and two-thirds to be the egg mixture itself.
If you’re using dense fillings like cubed ham, browned sausage, or shredded cheese, they pack down more tightly and you need slightly less volume. If you’re using lighter fillings like fresh herbs, sautéed spinach, or roasted peppers, you can afford to be more generous because they take up space without adding density.
Water-releasing vegetables like fresh tomatoes, zucchini, or mushrooms require special handling. Either cook them down first to remove excess moisture, or use them in moderation—no more than ½ cup total. Raw vegetables release liquid during baking, and that liquid can make the eggs watery and prevent them from setting properly. Roasted or jarred vegetables, sautéed vegetables, and cured or cooked proteins are all safe to use in larger quantities.
The texture of what you choose matters too. Chunky, distinct pieces create interesting bites but can feel separated. Finely minced fillings integrate more smoothly into the egg base, creating a more cohesive bite. Most successful sheet pan eggs use a mix: some distinct, recognizable pieces (like visible herbs, larger cheese shreds, or chunks of ham) combined with finely minced or smaller components (like minced garlic, finely diced peppers, or crumbled sausage) that integrate throughout.
Don’t overpack any single area of the pan. Uneven filling distribution creates hot spots where some parts of the sheet pan eggs cook too quickly while other areas stay underdone. Spread fillings evenly across layers, and use the three-layer assembly method (eggs, fillings, eggs, fillings, eggs) to ensure that every forkful contains a mix of everything.
Flavor Combinations and Customization Ideas
The beauty of sheet pan eggs lies in your ability to build exactly what you’re craving. Think of it like building a breakfast sandwich—the protein, the vegetables, the cheese, the herbs all work together or against each other in predictable ways.
Breakfast Meat Directions: Sausage pairs beautifully with sage, thyme, cheddar, and sautéed peppers. Bacon works magic with caramelized onions, sharp cheddar, and fresh chives. Ham goes elegant with Swiss cheese, Dijon mustard stirred into the cream, sautéed spinach, and fresh dill. Spiced sausage (chorizo or Italian) shines with roasted red peppers, fresh cilantro, pepper jack cheese, and a pinch of cumin.
Vegetarian Power: A combination of roasted mushrooms, caramelized onions, fresh spinach, gruyere cheese, and fresh thyme creates something rich and deeply satisfying. Or go lighter with fresh asparagus (blanched first to avoid excessive moisture), fresh dill, feta cheese, and lemon zest stirred into the cream. Roasted broccoli with cheddar, garlic, and red pepper flakes appeals to anyone who loves bold flavors.
Herbal Sophistication: Fresh herbs make an enormous difference. Fresh dill with smoked salmon and cream cheese, fresh basil with roasted tomatoes and mozzarella, fresh tarragon with sautéed mushrooms and gruyere—these combinations elevate sheet pan eggs from weekday breakfast to something you’d serve at brunch for guests.
Garden-Forward: Roasted zucchini, roasted eggplant, roasted bell peppers, cherry tomatoes (roasted to remove moisture), caramelized onions, and fresh herbs create a Mediterranean flavor profile. Add goat cheese or feta for richness, and finish with a sprinkle of za’atar if you have it.
Spice-Forward: Add a tablespoon of mild curry powder to the egg base, then fill with sautéed spinach, caramelized onions, cilantro, and a combination of cheddar and paneer cheese. Serve with cilantro chutney on the side if you’re feeling fancy.
The key to successful flavor combinations is balance—don’t go overboard with intensity or you’ll exhaust your guests’ palates by the second bite. Aim for one dominant flavor direction (sausage and herbs, or Mediterranean vegetables, or Indian spices), then layer complementary components around that core idea rather than throwing every ingredient you like into a single pan.
Cheese, Herbs, and Seasoning Strategies
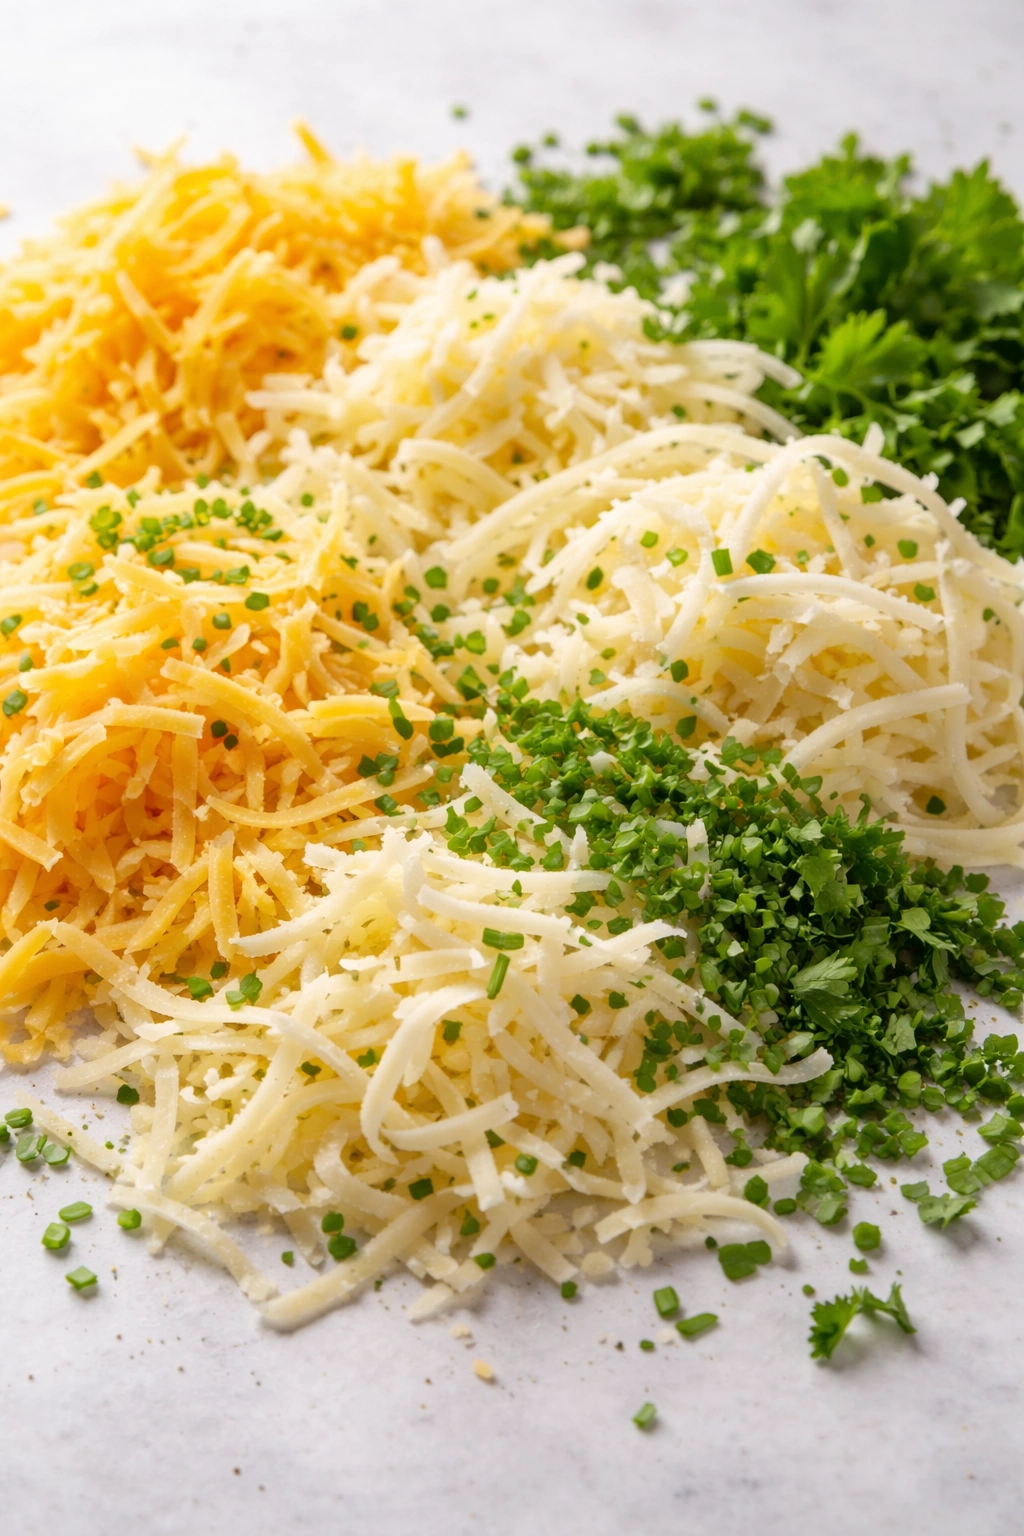
Cheese is not optional—it adds flavor, helps bind the dish, and creates pleasantly browned spots on the surface. Choose cheeses that melt smoothly and won’t become grainy during baking. Cheddar, gruyere, Swiss, fontina, and mozzarella all work reliably. Avoid hard cheeses like Parmesan unless you’re using them as a finishing sprinkle rather than a primary component—they can become tough during the extended baking time.
Shred your cheese yourself rather than using pre-shredded if possible. Store-bought shredded cheese contains anti-caking agents that can make it cook unevenly. If you do use pre-shredded, toss it with a tablespoon of cornstarch before adding it to prevent clumping.
Use a combination of cheeses for complexity. Sharp cheddar plus Swiss, or gruyere plus a smaller amount of fontina, creates more interesting depth than a single cheese type. Aim for about 1 to 1½ cups total cheese per 9-by-13 pan of eggs—enough to coat the fillings and create a cohesive dish without making it overwhelmingly cheesy.
Fresh herbs added after baking retain their brightness and aromatic quality. Fresh chives, parsley, dill, basil, or cilantro sprinkled on the finished warm dish taste infinitely more vibrant than the same herbs baked for 25 minutes. Dried herbs that cook throughout (thyme, oregano, sage) work fine baked into the dish, but reserve your delicate herbs for garnish.
Seasoning the cream mixture itself is critical. Salt your egg base generously—you need enough salt to season not just the eggs but all the fillings as well. Taste a drop of raw mixture on your finger before it goes into the oven, and season more aggressively than feels comfortable. You can always add finishing salt on top, but you can’t pull salt back out.
Black pepper, garlic powder, paprika, and cayenne all work as base seasonings. Smoked paprika adds subtle depth. A teaspoon of Dijon mustard stirred into the cream creates an almost imperceptible richness that makes people ask “what is that flavor?” Nutmeg—just a tiny pinch—echoes classic French egg cookery and adds dimension most people can’t quite identify.
Step-by-Step Assembly Techniques That Matter
How you layer your sheet pan eggs affects how they cook and how they taste. The three-layer approach—eggs, fillings, eggs, fillings, eggs—ensures that every bite contains a mix of everything and prevents fillings from floating to the top or sinking to the bottom.
Pour your first third of eggs carefully into the buttered dish. You want to cover the bottom fairly evenly without gaps, but you don’t need complete coverage. This first layer prevents fillings from sitting directly on the hot baking dish bottom and browning too dark.
Distribute your first set of fillings across this base layer. Don’t arrange them in neat lines or patterns—random distribution leads to more consistent results. Finely minced components like garlic, herbs, or crumbled sausage can go in fully concentrated; larger pieces like ham chunks or roasted pepper strips should be spread throughout.
Pour your second third of egg mixture over these fillings and spread it gently to create an even layer. Use a spatula or the back of a spoon. You’re not trying to achieve absolute perfection here—just reasonable evenness so no filling is left exposed and stranded.
Add your second set of fillings over this layer. If you have components you particularly want to showcase (whole roasted pepper strips, cheese you want to brown nicely on top, fresh herbs if you’re doing some baking time), reserve those for this top layer where they’ll be visible and caramelized.
Pour your final third of egg mixture over the top. This is your finishing layer, and it should cover as much of the fillings as possible. Spread it gently and ensure that large pieces of filling aren’t protruding through the top layer where they’ll brown too much or dry out.
If you’re finishing with a cheese topping or herb garnish that you want to bake in, sprinkle it now. If you’re using delicate fresh herbs that you want to keep bright green, hold them for garnish after baking instead.
Oven Temperature and Timing for Perfect Texture
Temperature precision matters more than you might expect. At 350°F (175°C), sheet pan eggs bake gently and emerge incredibly tender, but they can take 25 to 30 minutes and the edges might brown less than you’d like. At 400°F (205°C), they bake quickly but risk becoming rubbery or overbaking before the center sets. The sweet spot for most standard 9-by-13 pans is 375°F (190°C).
Oven variation is real. Some ovens run hot, others cool. If you know your oven tends to brown quickly, try 365°F. If your oven runs cool, 385°F might suit you better. The first time you make sheet pan eggs, use 375°F as your baseline and note how long they actually take to set in your specific oven. From then on, you’ll be much more confident.
Baking time depends on a few factors: the thickness of your egg mixture (thicker mixtures take longer), the proportion of fillings (heavier fillings take slightly longer to heat through), and your oven’s actual temperature. Start checking at 18 minutes if you’re using 375°F, and plan for a total of 20 to 25 minutes. The finished sheet pan eggs should have slightly jiggly centers when you gently shake the pan, and edges that are set and pulling slightly from the sides.
A toothpick test works, but the shake test is often more reliable. Gently rock the baking dish side to side—if only the very center moves like liquid, you’re close. If the whole surface jiggles and sloshes, you need more time. If nothing moves at all, you’re likely slightly overdone.
The carry-over cooking matters too. As the sheet pan eggs sit out of the oven during the five-minute rest, residual heat continues to cook the very center. This is why stopping slightly before they look completely set actually leads to better results. You’re aiming for “slightly more done than seems necessary” when you remove the pan from the oven, and then that residual heat finishes the job perfectly.
Common Mistakes and How to Avoid Undercooked Centers
The most frequent complaint about sheet pan eggs is an undercooked or runny center while edges are properly set. This happens when the edges heat up faster than the center, setting before the middle gets hot enough. A few strategies prevent this entirely.
Use a room-temperature or slightly warm egg mixture rather than cold eggs straight from the refrigerator. Letting your eggs sit on the counter for 15 minutes while you assemble fillings makes a real difference. The starting temperature matters because you’re fighting less of a temperature gradient across the pan.
Don’t overcrowd the baking dish with fillings. Too much mass in the center insulates the eggs there and prevents them from heating through at the same rate as the edges. Spread fillings evenly and don’t pack them densely.
Check for doneness more than once if you’re learning your oven. At 18 minutes, peek in to see how it’s progressing. You’ll learn to recognize the visual signs: the edges setting and pulling back, the surface developing a slight sheen as the eggs firm up, the color transitioning from glossy-wet to matte-set.
If your oven has heat hot spots (many do), rotate the pan halfway through baking. Pull it out at the 12-minute mark, rotate it 180 degrees, and return it. This ensures even heat exposure across the entire pan.
If the center remains runny after 25 minutes of baking, return the pan to the oven for 2 to 3 minutes more, but check obsessively so you don’t overshoot. Slight residual jiggle in the very center is fine and actually desirable; obvious liquid that moves in waves is not.
For extra insurance on a pan with a lot of fillings or a particularly thick mixture, cover the pan loosely with aluminum foil for the first 15 minutes of baking. This moderates surface browning and gives the interior more time to set without the exterior overcooking. Remove the foil for the final 8 to 10 minutes so the top can brown and finish cooking.
One more prevention strategy: don’t skip the rest period after baking. Five minutes out of the oven allows that residual heat to finish setting the center without further external heat. Cutting into the pan immediately after removing it from the oven often releases moisture from an insufficiently set center.
Storage, Reheating, and Make-Ahead Strategies
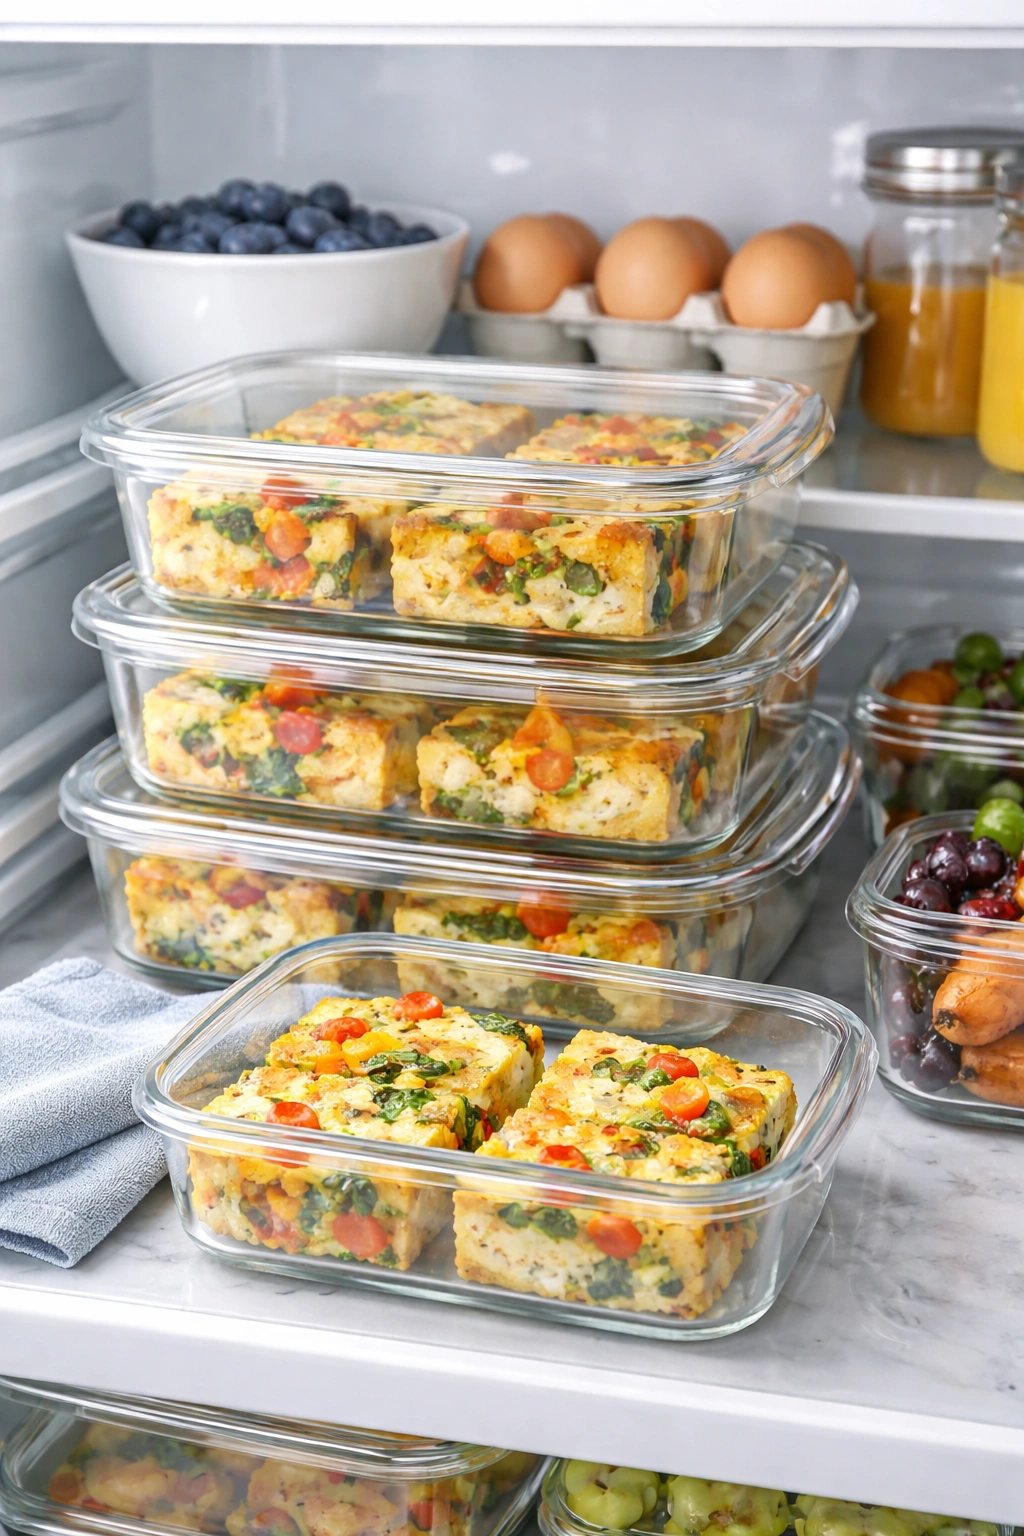
Sheet pan eggs keep exceptionally well, which is a major advantage for weekday meal prep. Store them covered in the refrigerator for up to five days. Cut them into whatever size portions you prefer—squares are traditional, but you can cut strips, triangles, or scoop them into containers in any shape.
The texture of reheated sheet pan eggs matters. Cold sheet pan eggs eaten directly from the refrigerator are pleasant—dense, custardy, and straightforward. Reheated sheet pan eggs should be warmed gently to restore their original tender quality.
Reheat in the oven rather than the microwave if you have time. Wrap the portion loosely in aluminum foil and warm at 350°F (175°C) for about 8 to 10 minutes, or until heated through. The foil prevents the edges from drying out while the center comes up to temperature.
If you’re in a hurry, the microwave works but requires care. Place your portion on a microwave-safe plate, cover it loosely (don’t seal it completely or steam will make it soggy), and microwave for 45 to 60 seconds at 50% power. Stop and check. Another 30 seconds if needed. The low power setting prevents the eggs from turning rubbery, which happens quickly with full microwave intensity.
You can absolutely assemble sheet pan eggs the night before and bake them in the morning. Mix the eggs and cream the night before and store them separately from the fillings. In the morning, pour the egg mixture into the prepared baking dish, add your fillings, and bake as usual. There’s no texture degradation with this approach, and the convenience of doing substantial prep the night before is enormous.
Freezing is possible but not ideal. Sheet pan eggs can be frozen for up to three months, but the texture becomes slightly grainier upon thawing. If you do freeze them, cut them into portions first, wrap each piece individually in plastic wrap, then place all of them in a freezer-safe container. Thaw in the refrigerator overnight and reheat gently in the oven.
Serving Ideas and Plating Suggestions
Sheet pan eggs are forgiving enough to serve warm, at room temperature, or even slightly chilled—they taste good across a wide temperature range. This flexibility makes them ideal for casual gatherings where precise timing isn’t possible.
Cut them while still warm from the oven for the cleanest edges. If the pan sits for too long before cutting, the eggs set firmly and cutting becomes trickier. Use a sharp chef’s knife dipped in hot water and wiped dry between cuts for clean lines.
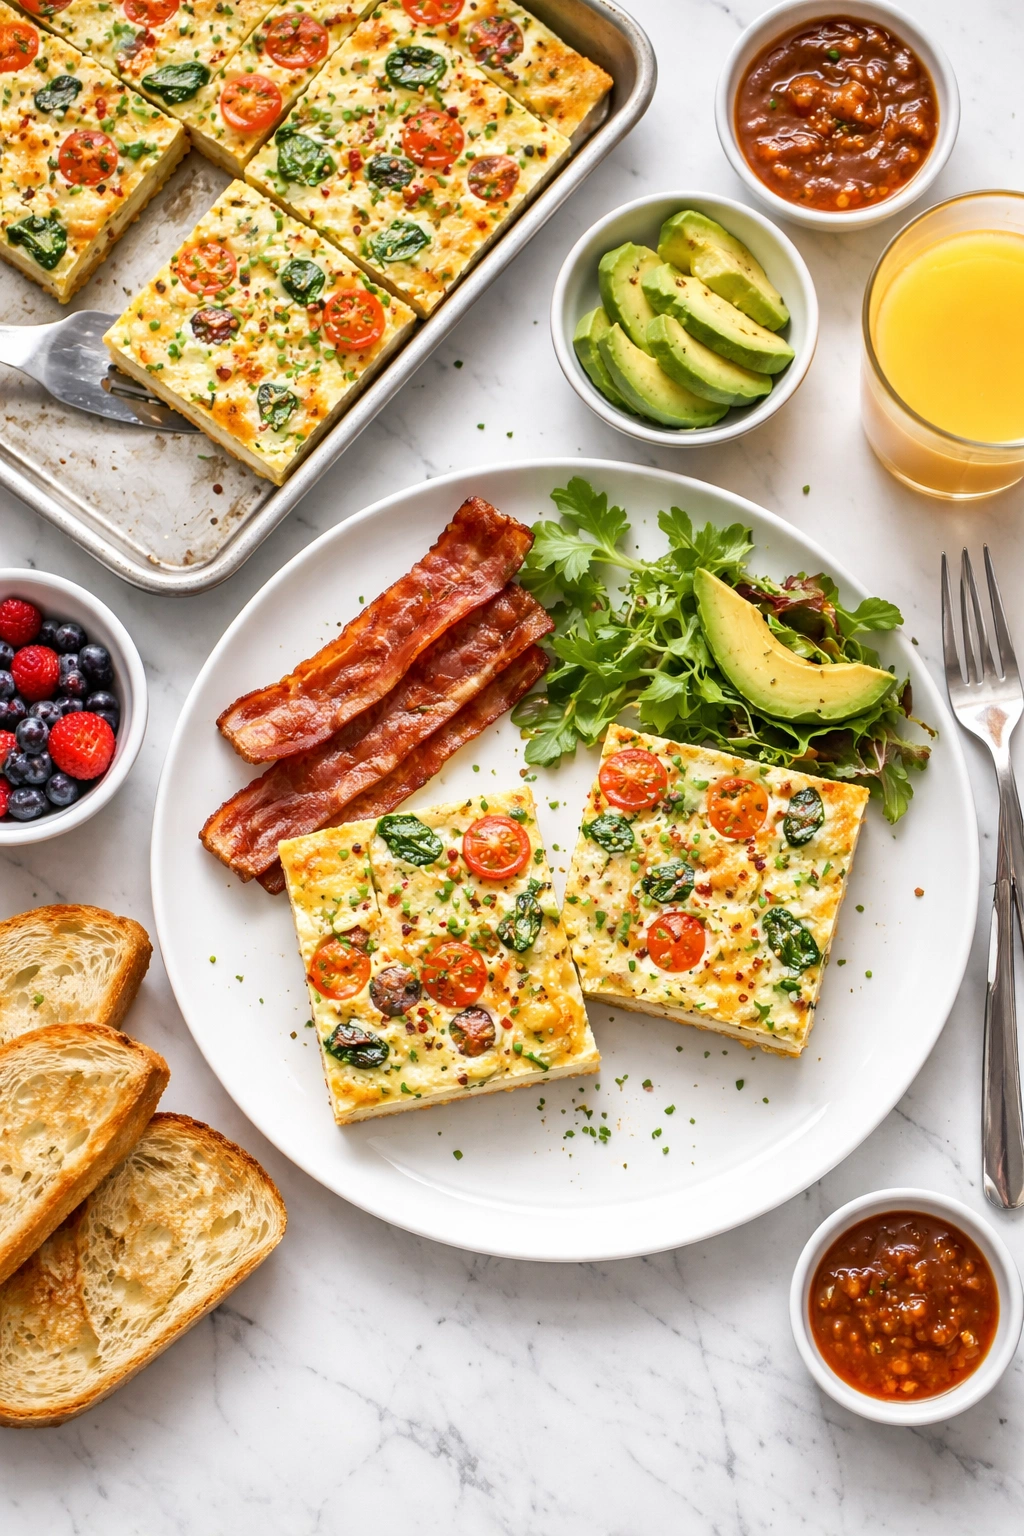
Serve with simple sides that don’t compete: crusty bread for soaking up any pan juices, fresh fruit, salad greens, or roasted vegetables on the side. A simple green salad with a lemony dressing provides brightness and contrast to the rich, savory eggs.
Condiments matter more than you’d expect. Hot sauce, salsa, pesto, hollandaise sauce, or a quick herb yogurt served on the side lets people customize their own plate. A squeeze of fresh lemon juice brightens everything. Fresh herbs scattered on top just before serving add visual appeal and aroma.
For a more substantial brunch, serve alongside breakfast potatoes (hash browns, roasted cubes, or home fries), cured meats, or toast. Sheet pan eggs are rich enough to be the centerpiece of the meal, but they also play nicely with other breakfast components.
Individual plating looks elegant: cut the sheet pan eggs into neat squares or rectangles, place one on a plate, add a handful of mixed greens or fresh herbs for color, and serve with toast or potatoes on the side. For casual family-style eating, bring the whole pan to the table, cut it into portions, and let people serve themselves.
Temperature considerations: If you’ve made the sheet pan eggs ahead and they’re refrigerated, you can serve them chilled or at room temperature without reheating, which works beautifully for casual meals. For more formal occasions, reheating gently in a 325°F oven for 10 to 12 minutes restores the custardy texture and makes them feel freshly prepared.
Final Thoughts

Sheet pan eggs deliver on their promise: a spectacular, personalized breakfast that feeds a crowd with minimal effort and maximum deliciousness. The technique is forgiving enough for beginners but flexible enough for adventurous cooks who want to build entirely custom combinations.
The real payoff comes when you realize you can prep nearly everything the night before, spend 10 minutes assembling components in the morning, and have a hot, impressive breakfast on the table while everyone’s still settling in. That’s the kind of win that makes weekday mornings feel less chaotic and weekend brunches feel genuinely special.
Don’t overthink it. Your first pan of sheet pan eggs will teach you more about your specific oven, your preferences for texture and flavor combinations, and the details that matter to you than any amount of reading will. Make a batch, take notes on timing and what you’d change next time, and build from there. Within three or four attempts, you’ll be making sheet pan eggs confidently enough to trust your instincts and improvise with whatever ingredients you have on hand.