There’s a mystique around grilling steak that keeps many home cooks intimidated. Yet the truth is simpler than you’d think: the difference between a dry, disappointing steak and one that’s genuinely juicy comes down to a handful of clear techniques and choices made before you even light the grill. Grilling steaks is absolutely achievable at home, and with the right approach, you’ll create restaurant-quality results that taste better than what you’re paying for elsewhere.
The challenge most people face isn’t that grilling is inherently difficult—it’s that they’re working against themselves from the very beginning. They’re choosing thin cuts that dry out instantly, they’re skipping the preparation steps that matter, and they’re treating temperature guesswork as acceptable when precision tools exist. This guide walks you through every single decision point where you can either lose or preserve that precious moisture, flavor, and tenderness that makes steak genuinely worth eating.
Selecting the Right Cut for Maximum Juiciness
Not all steaks are created equal when it comes to grilling. The cut you choose determines how forgiving your cooking process will be and how naturally juicy the final result tastes. Understanding the differences between cuts gives you real control over the outcome before you even begin cooking.
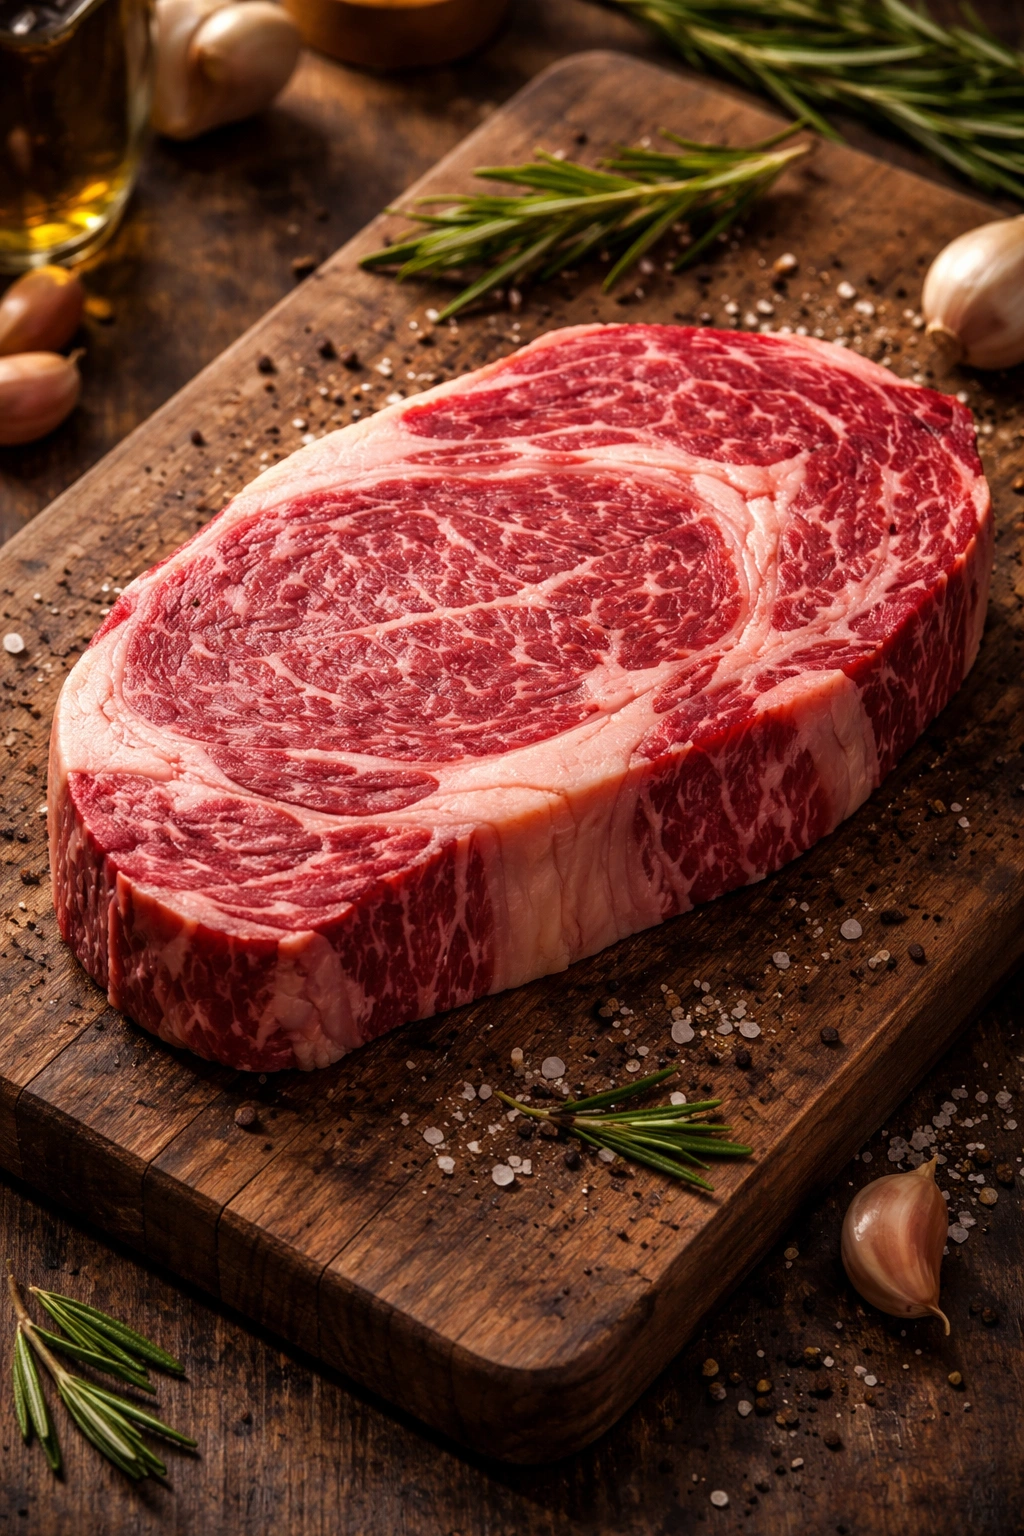
Ribeye is widely considered the grilling champion, and for good reason. This cut comes from the rib section of the cow and features extensive marbling—those visible white lines of fat running throughout the meat. This marbling is what keeps ribeye juicy even if you’re slightly off on your timing. The fat melts during cooking, infusing the meat with flavor and keeping it moist from the inside out. When you grill a ribeye with good marbling, you’re starting with fat that works in your favor rather than against it.
New York Strip steak is another excellent choice with a slightly leaner profile than ribeye. It offers great beefy flavor with a tender texture when cooked to medium-rare, though it has a bit less marbling. This means you have slightly less margin for error, but the muscle structure of the strip actually cooks quite evenly, making it a solid choice for grilling if you’re careful with your timing.
T-bone and Porterhouse steaks are essentially two steaks in one—a strip steak on one side and filet mignon on the other, separated by a T-shaped bone. The bone itself adds flavor to the meat during cooking, and these cuts are visually impressive on the plate. The main challenge is managing uneven cooking since the strip and filet sections cook at different rates. If you choose these cuts, you’ll need to pay extra attention to positioning and heat management.
Filet mignon is extremely tender and lean, which makes it less likely to cause flare-ups on the grill. However, its low fat content means you have to be particularly careful not to overcook it, since there’s less fat available to keep the meat moist. This cut is perfectly grillable, but it requires vigilance with your thermometer.
Top sirloin offers excellent value without sacrificing quality. It’s leaner than ribeye or strip, which means less risk of flare-ups, but you’ll want to select a cut with visible marbling and cook it carefully to avoid drying it out. For budget-conscious grilling, sirloin absolutely delivers flavor and juiciness when treated correctly.
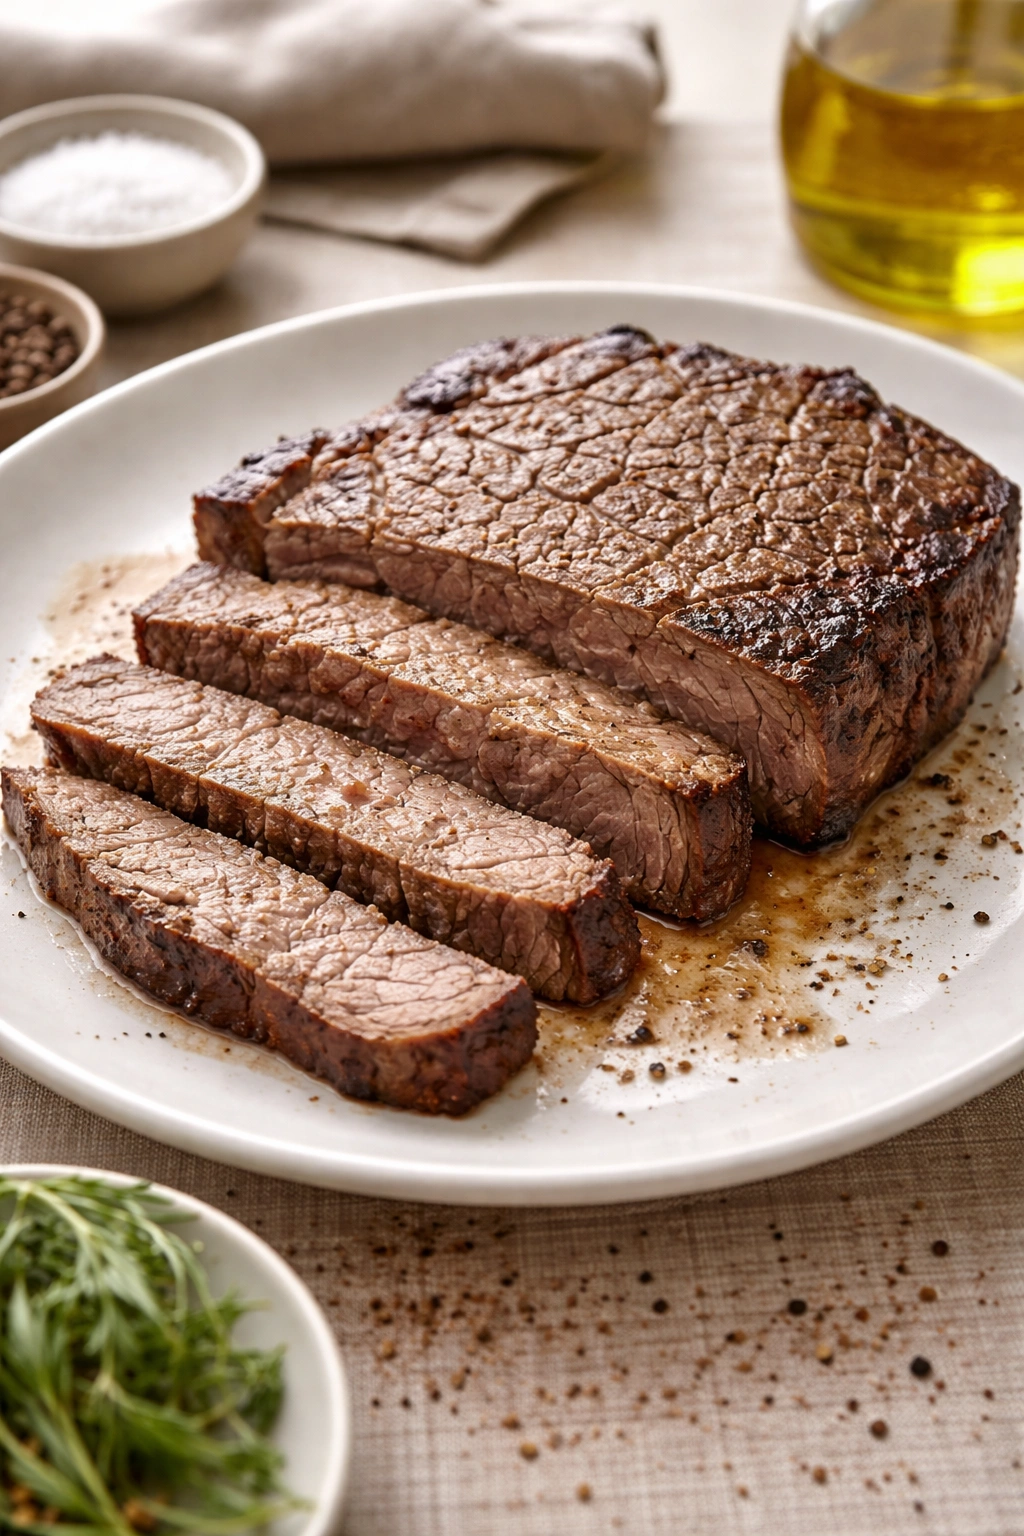
Flank and skirt steaks are thinner cuts that excel at quick, high-heat grilling. These cuts are naturally less tender than premium cuts, but they’re packed with beefy flavor. When you grill them, the high heat creates a flavorful crust while the interior stays relatively rare. The key with these thinner cuts is always slicing against the grain after cooking, which breaks up the muscle fibers and makes every bite more tender.
Understanding Beef Grades and How They Impact Juiciness
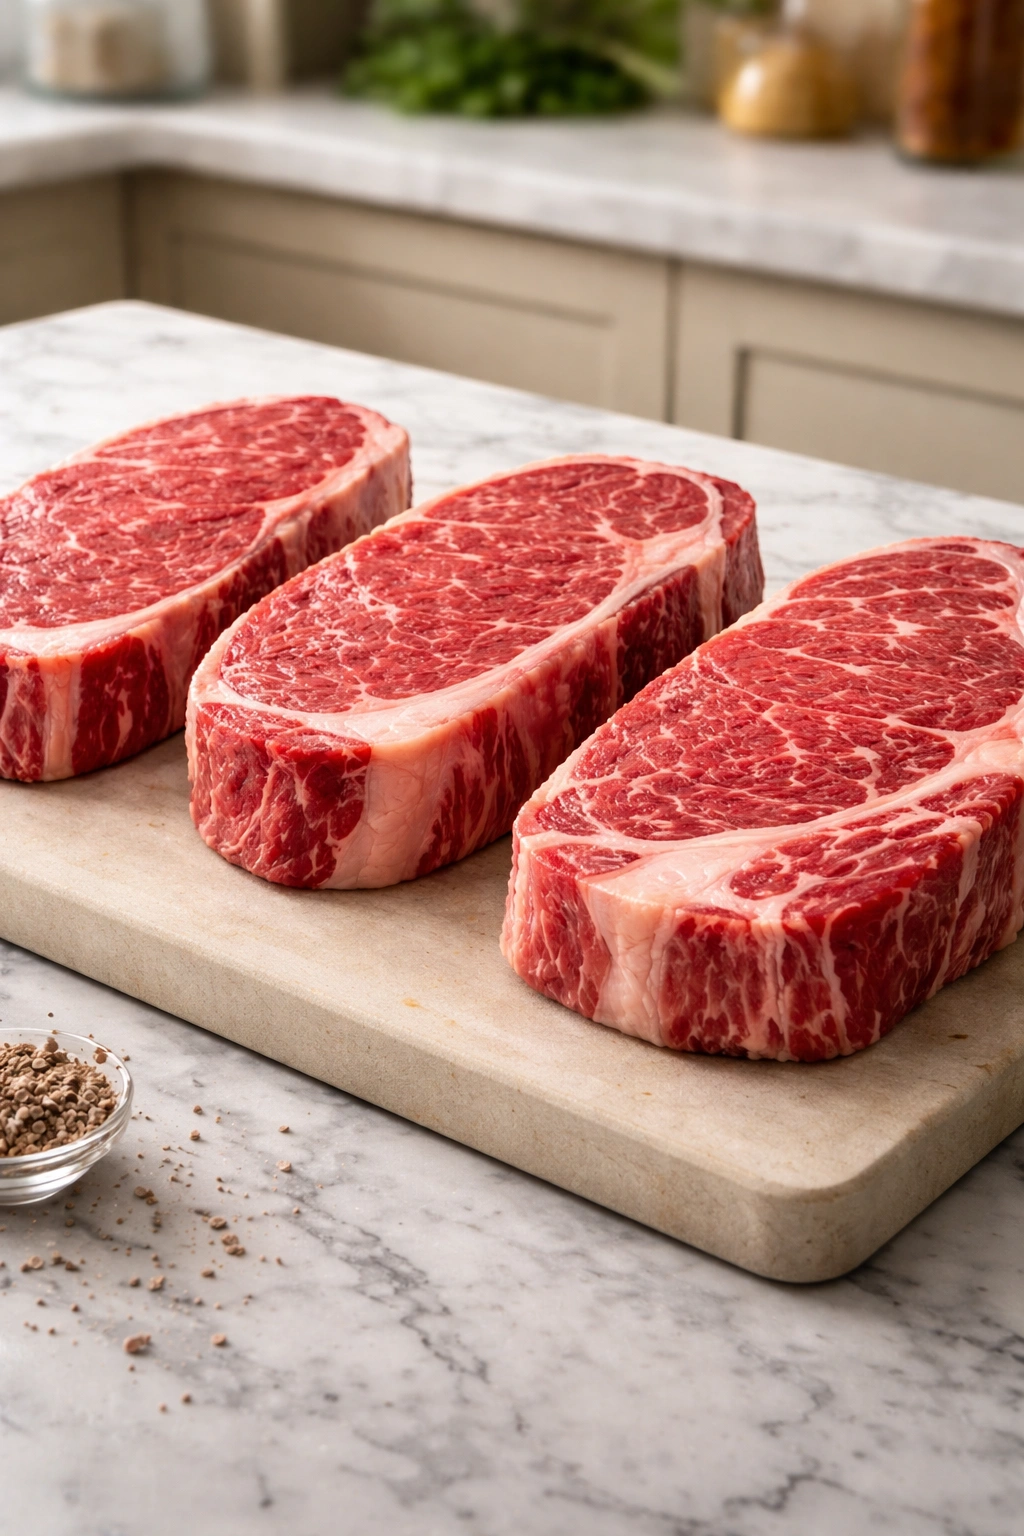
Walk into a supermarket and you’ll see three distinct grades of beef available to consumers: Select, Choice, and Prime. These grades are assigned by the USDA based on marbling—the amount of fat distributed throughout the meat—because marbling is the single biggest factor in how juicy your steak will be.
Select grade beef sits at the bottom of the consumer spectrum. It’s the meat you often see on sale or in advertised specials because it’s barely above what the USDA considers edible for sale. Select beef has minimal marbling, which means there’s less fat available to keep the meat juicy during cooking. When you grill a Select steak, you’re fighting against the meat’s own composition. It’s technically fine, but unless you’re working with an extremely tight budget, this grade will disappoint you compared to what the higher grades deliver.
Choice grade beef is where quality gets genuinely good. This is the standard you should be aiming for in most situations. Choice beef has noticeable marbling throughout—enough fat to keep the meat juicy and tender even if your cooking isn’t perfect. The price increase over Select is modest compared to the quality jump, and most grocery stores carry Choice grade across all their major cuts. If you want reliability and juiciness without the premium price tag, Choice is where to invest your money.
Prime grade beef is what restaurants prefer, and if your supermarket carries it, you’ve found something special. Prime beef has abundant marbling—so much intramuscular fat that it stays incredibly juicy and tender regardless of how you cook it. It’s also more forgiving if your timing is slightly off. Prime beef costs significantly more, but it’s worth seeking out for special occasions or when you want the absolute best possible result.
Here’s a rule that will serve you well: unless you’re buying Select beef specifically for budget reasons, Choose Choice or Prime every single time. The difference in eating experience far outweighs the modest price difference, and your grilled steak will thank you.
Preparing Your Steak Before the Grill
How you prepare your steak in the hours before grilling has an outsized impact on the final result. This is where many home cooks miss a crucial opportunity to improve their outcome. Proper preparation isn’t complicated, but it’s non-negotiable if you want maximum juiciness and a proper sear.
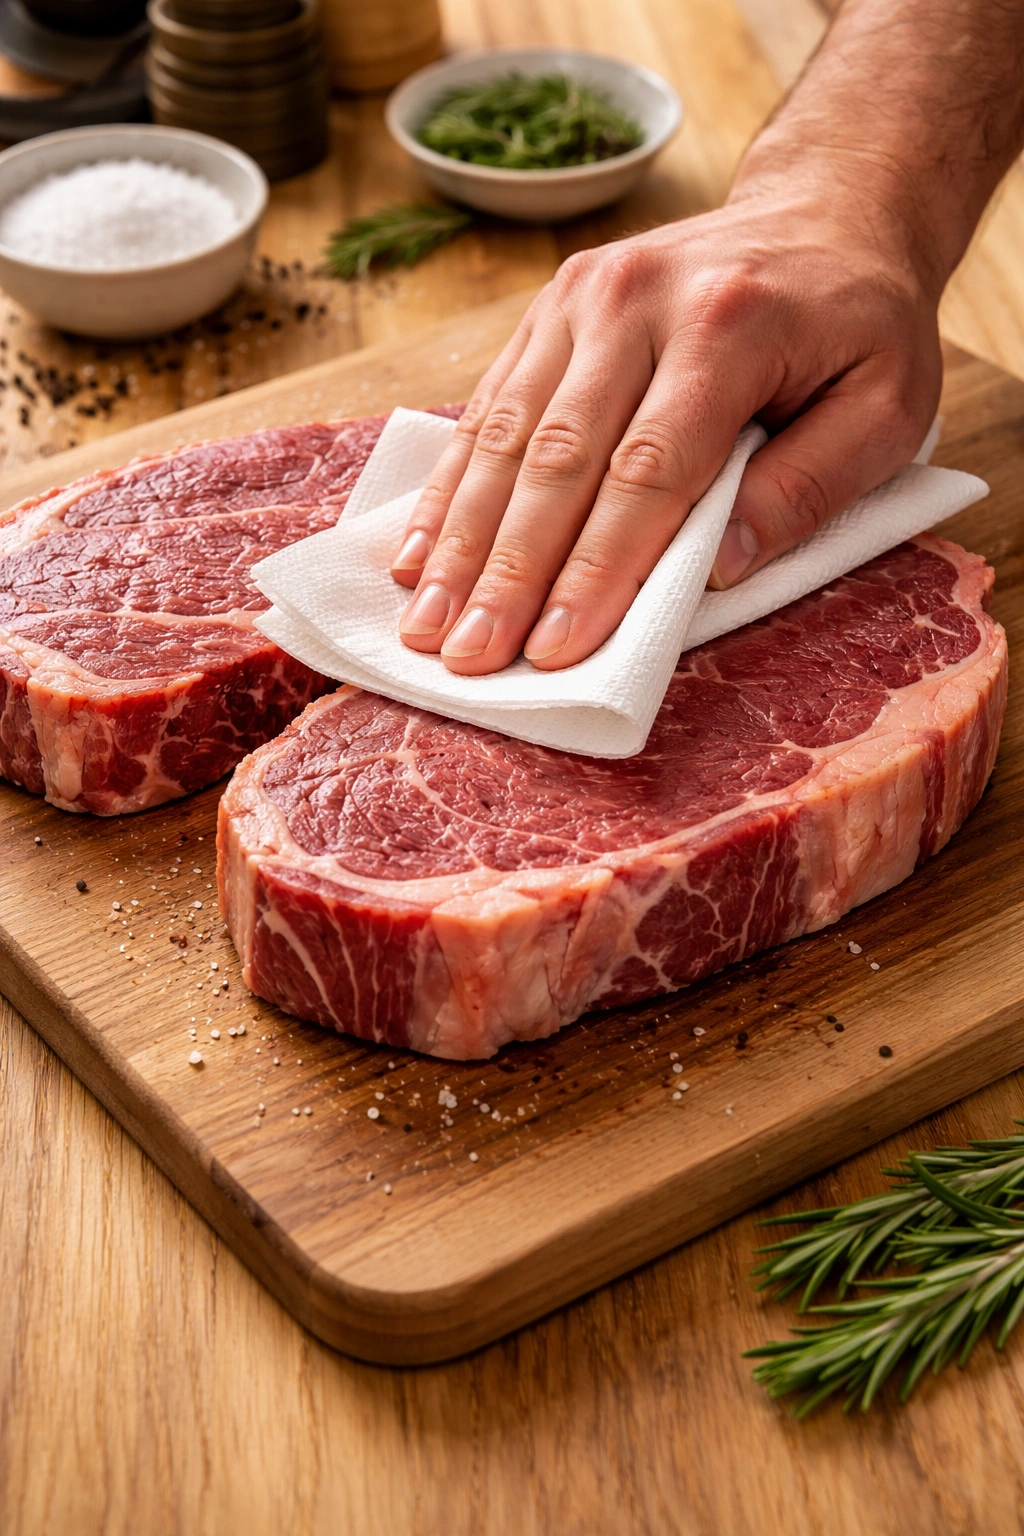
Pat your steaks completely dry with paper towels before you do anything else. Surface moisture is the enemy of browning—when water sits on the meat’s surface, it steams off during cooking instead of allowing the steak to develop that deep, flavorful crust. This single step makes a measurable difference. Don’t skip it even if you’re in a hurry.
Seasoning timing matters far more than most people realize, and this is where technique gets interesting. When you salt meat, the salt draws moisture to the surface, which can prevent browning if not given enough time to reabsorb. Here’s the key: either salt your steaks at least 40 minutes to an hour before cooking, or salt them right before they hit the grill. The middle ground—salting 15-30 minutes ahead—is the worst option because the salt has drawn out moisture that hasn’t had time to reabsorb into the meat.
Many high-end cooks prefer salting steaks the night before, which allows them to air-dry in the refrigerator. This dry-brining approach is absolutely valid and produces excellent results. The salt penetrates the meat, the surface dries out from air circulation in the fridge, and you end up with steak that’s seasoned throughout and ready to develop a gorgeous brown crust. If you have the fridge space and can plan ahead, this method is genuinely superior.
Bring your steaks to room temperature before grilling—this is essential. Remove them from the refrigerator 30 to 60 minutes before you plan to cook them. Cold steak coming straight from the fridge will cook unevenly, with the outside charred before the inside reaches the proper temperature. Room temperature steak cooks evenly from edge to center. If you’re using a marinade, you can let the steaks come to temperature while still in the marinade, which simplifies logistics.
Choosing Your Grill: Charcoal Versus Gas
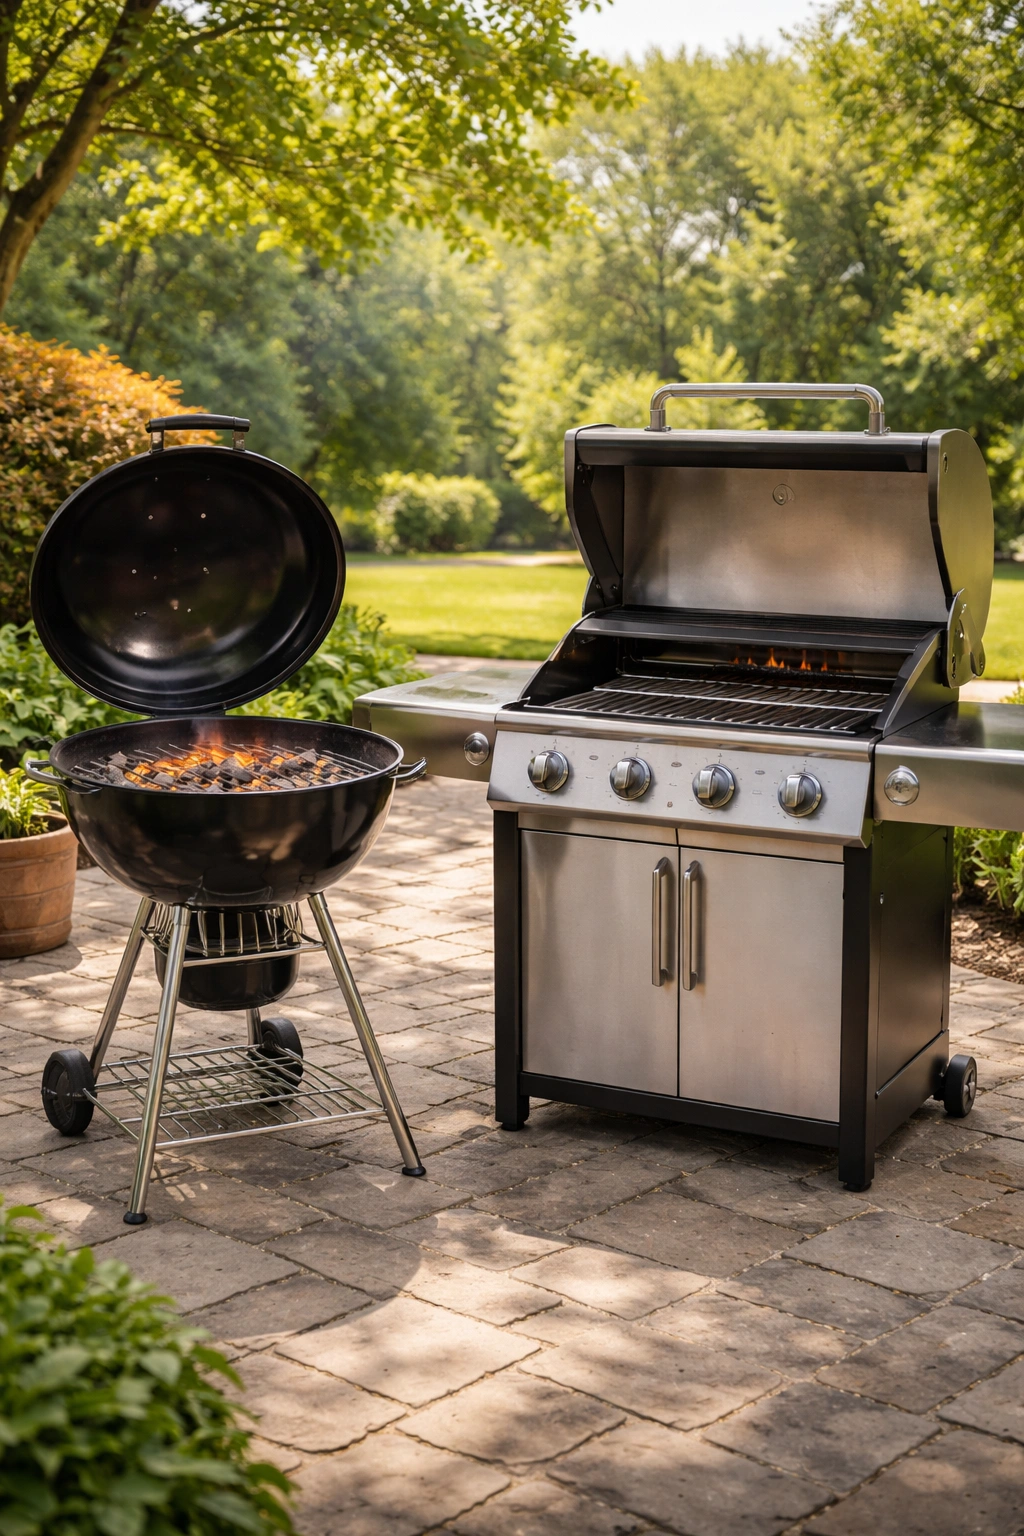
The debate between charcoal and gas grills is partly philosophical and partly practical, and both can produce phenomenal steaks. The difference isn’t in quality—it’s in flavor profile, convenience, and what you’re willing to invest in setup time.
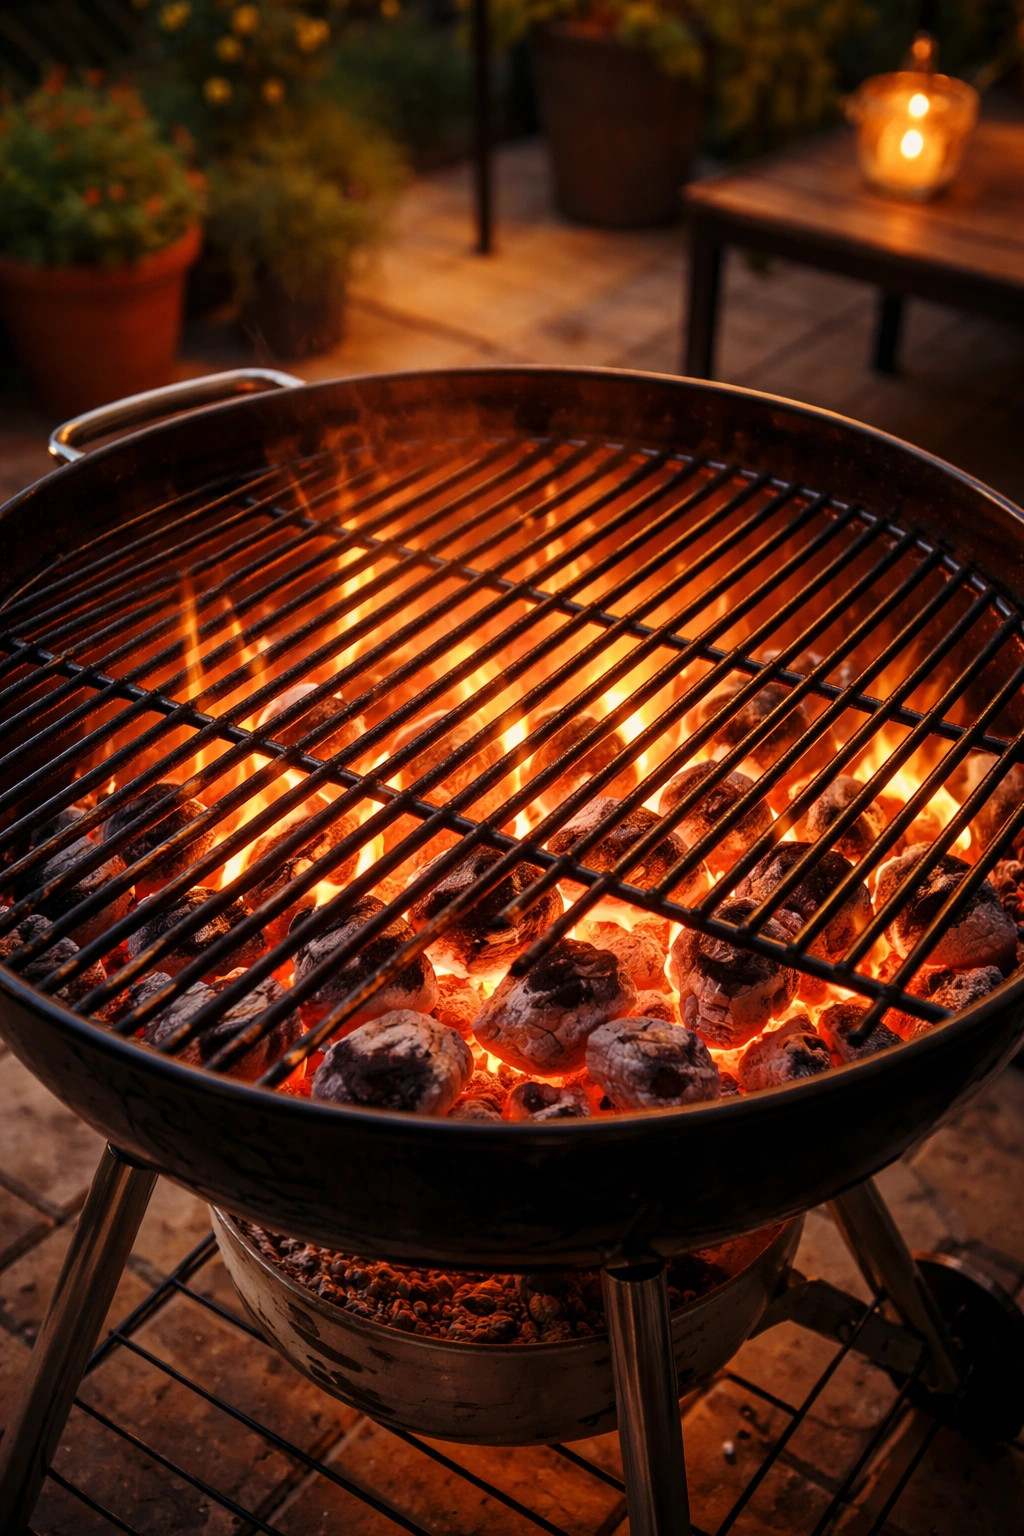
Charcoal grills impart a distinct smoky flavor that many grilling enthusiasts genuinely prefer. The natural wood smoke soaks directly into the meat, adding a layer of complexity and depth that gas alone can’t quite match. Charcoal grills also get hotter than gas grills, which can help you achieve an even better sear. The downside is setup time—charcoal takes 20 to 30 minutes to heat up properly, and you need to wait for the briquettes to develop a light gray ash coating before they’re ready. Temperature control on charcoal requires more skill and attention than gas, though it’s absolutely learnable.
Gas grills offer speed and convenience. They preheat in 10 to 15 minutes, heating is consistent and easily adjustable with a knob, and cleanup is straightforward. You won’t get quite as much smoky flavor as charcoal naturally provides, but you can add smoker boxes or wood chip trays to introduce smoke if you want that dimension. For busy weeknights or when you want maximum convenience, gas is hard to beat.
The honest truth: choose the grill that fits your lifestyle. If you value speed and consistency, gas works beautifully. If you have the time and enjoy the ritual of charcoal grilling, and you want maximum flavor, charcoal delivers. You’ll produce juicy, delicious steak on either one—what matters far more is the technique you apply regardless of heat source.
Setting Up Two Cooking Zones

This is the single most important setup choice you’ll make at the grill, and it’s what separates mediocre grilling from genuinely excellent results. You need two distinct heat zones: one very hot for searing and one medium for finishing. This two-zone approach lets you develop a beautiful crust quickly while finishing the interior to your desired doneness without burning the outside.
On a charcoal grill, create two zones by piling the majority of your coals on one side, leaving the other side with minimal or no coals. This creates a hot zone for direct cooking and a warm zone for indirect cooking. The temperature difference is substantial—you might have 450°F directly over the coals and 250–300°F on the cool side.
On a gas grill, turn one or two burners to high (depending on the size of your grill) and leave the other burners off or on medium. This creates a similar temperature differential. If your grill has burners along the front, back, and center, you have more flexibility in creating gradual temperature zones rather than a sharp boundary.
To determine whether your grill is hot enough, use the hand test: hold your hand about 3 inches above the grate on the hot side. If you can only hold it there for 1 to 2 seconds before the heat forces your hand away, you’ve got proper searing temperature. Anything longer than 2 seconds means the grill isn’t quite hot enough yet.
Getting Your Grill to the Right Starting Temperature
The temperature your grill reaches before the steak hits the grates is crucial, and most home cooks underestimate how hot they actually need to get. Your goal is a grill that’s genuinely hot—around 450–500°F on the hot side. This sounds extreme, but it’s exactly what you need to develop that flavorful brown crust.
A gas grill with burners on high should reach 450–500°F in about 15 minutes. Leave the lid closed during preheat so the heat builds and stabilizes. Check the grill’s built-in thermometer if it has one, though these are often inaccurate—if you have a separate grill thermometer, use that instead for accuracy.
Charcoal takes longer—allow 20 to 30 minutes for coals to light and ash over completely. You’ll know they’re ready when they’re covered in a light gray coating and glowing underneath. At this point, they should be around 400–500°F. If you’re impatient and cook when the charcoal is still flaming and bright red, the heat is actually less controllable and the surface of your steak might char excessively while the inside remains undercooked.
Before you place a single steak on the grill, clean the grates thoroughly. Old bits of charred meat and grease create hot spots and can impart off-flavors to your steak. Use a grill brush to scrub the grates, then lightly oil them. Pour a small amount of vegetable oil or avocado oil on a folded paper towel, then use tongs to rub the oiled towel across the grates. This prevents sticking and helps with browning.
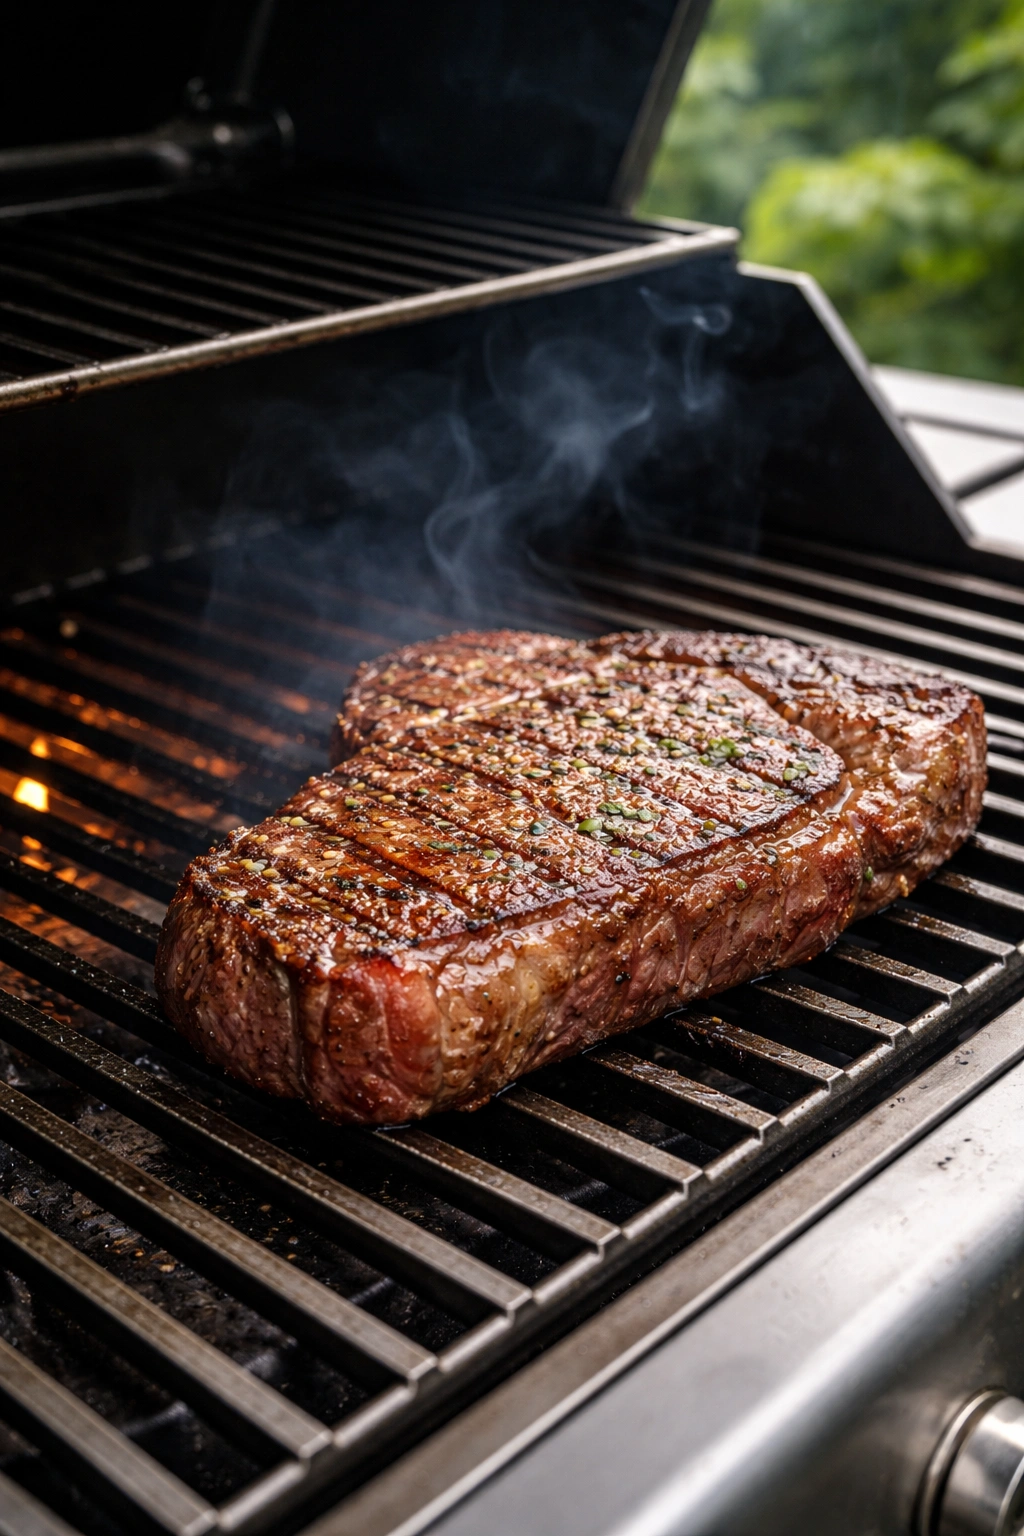
The Searing Technique That Creates the Perfect Crust
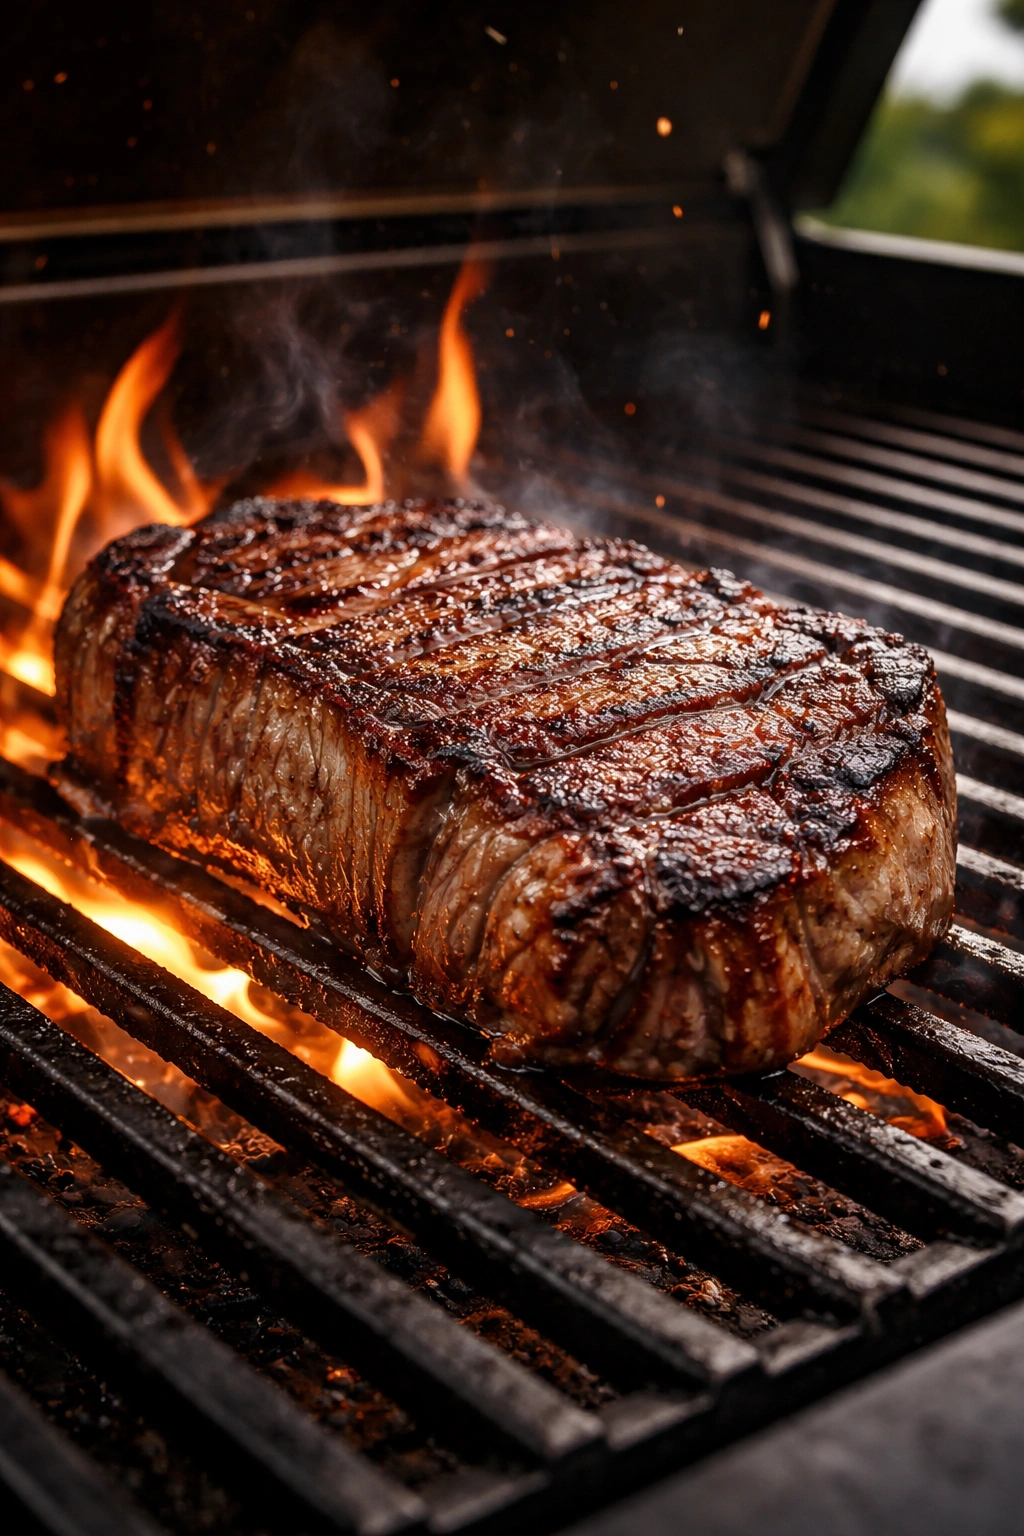
Searing is where the magic happens, and it’s deceptively simple once you understand what you’re doing. Your goal is to place the steak over direct heat and leave it undisturbed long enough to develop a golden-brown crust through a chemical reaction called the Maillard reaction. This reaction creates hundreds of new flavor compounds that make seared steak taste incomparably better than steamed steak.
Place your oiled and seasoned steak on the hot side of the grill and close the lid. Let it sit undisturbed for 2 to 3 minutes. Resist the urge to move it or poke it or flip it early. The steak needs contact time with the hot grate to develop that crust properly. If you keep moving it around, you interrupt the browning process and end up with pale, steamed meat instead.
After 2–3 minutes, flip the steak and sear the second side for another 2–3 minutes with the lid closed. You should see significant browning on the side that was down. If the steak is sticking to the grate, don’t force it—the crust hasn’t formed enough to release cleanly yet. Wait another 30 seconds and try again.
Some cooks create diagonal grill marks by turning the steak 45 degrees partway through the first sear, before flipping. If you want restaurant-style diamond marks, rotate about halfway through the first 2–3 minutes, sear for another minute, then flip. This creates that crossed-hatch pattern, though it does require slightly more attention. It’s purely aesthetic—the flavor is identical whether you rotate or just sear straight across.
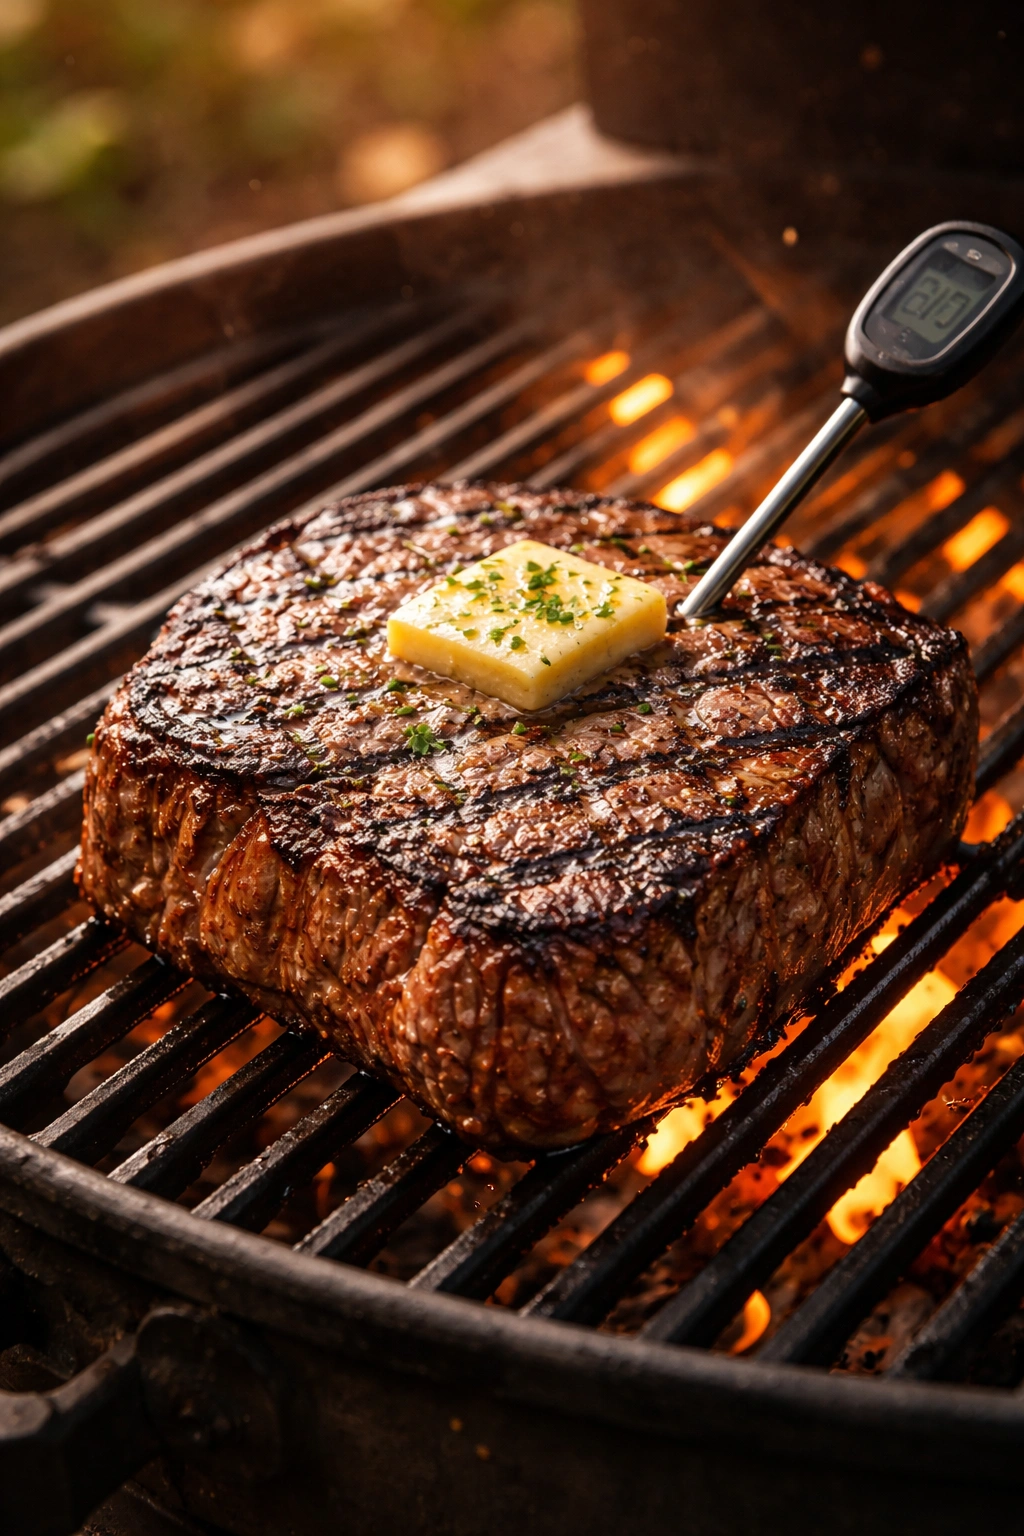
Monitoring Internal Temperature With Precision
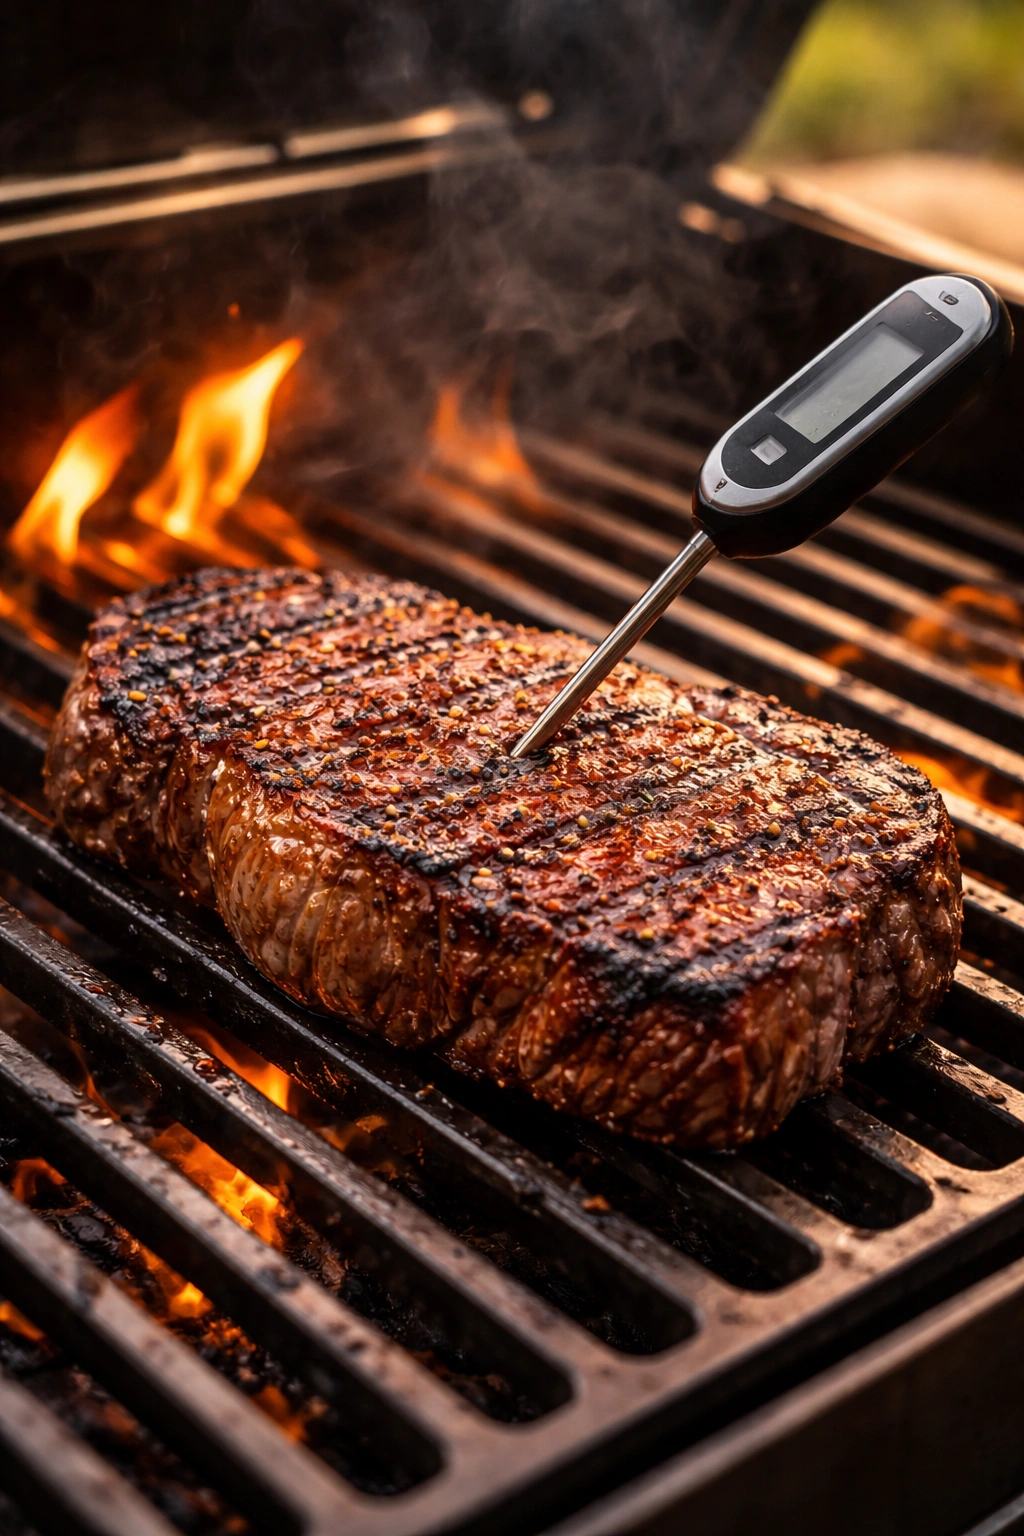
This is where most home cooks either lose steaks through overcooking or fail to cook them through properly. An instant-read thermometer removes all guesswork and is genuinely the most reliable way to know your steak’s doneness. Invest in a good one—it costs $15–30 and will improve your results dramatically.
Insert the thermometer into the thickest part of the steak, aiming for the very center. Avoid touching bone with the probe, as bone conducts heat differently than meat and will give you an inaccurate reading. Similarly, don’t let the probe hit a fat deposit exclusively—aim for actual meat.
Here’s the key insight: remove your steak from the grill about 5 degrees before your target internal temperature, because carryover cooking will raise the temperature another 5 degrees while the steak rests. If you like your steak medium-rare at 135°F, pull it off the grill at 130°F. Medium at 145°F means removing it at 140°F.
Target temperatures: Rare is 120–125°F, Medium-Rare is 130–135°F, Medium is 140–145°F, Medium-Well is 150–155°F, and Well-Done is 160°F and above. These temperatures represent the meat’s internal doneness—exterior crust is always darker and more cooked than the interior.
Managing Heat and Preventing Overcooking
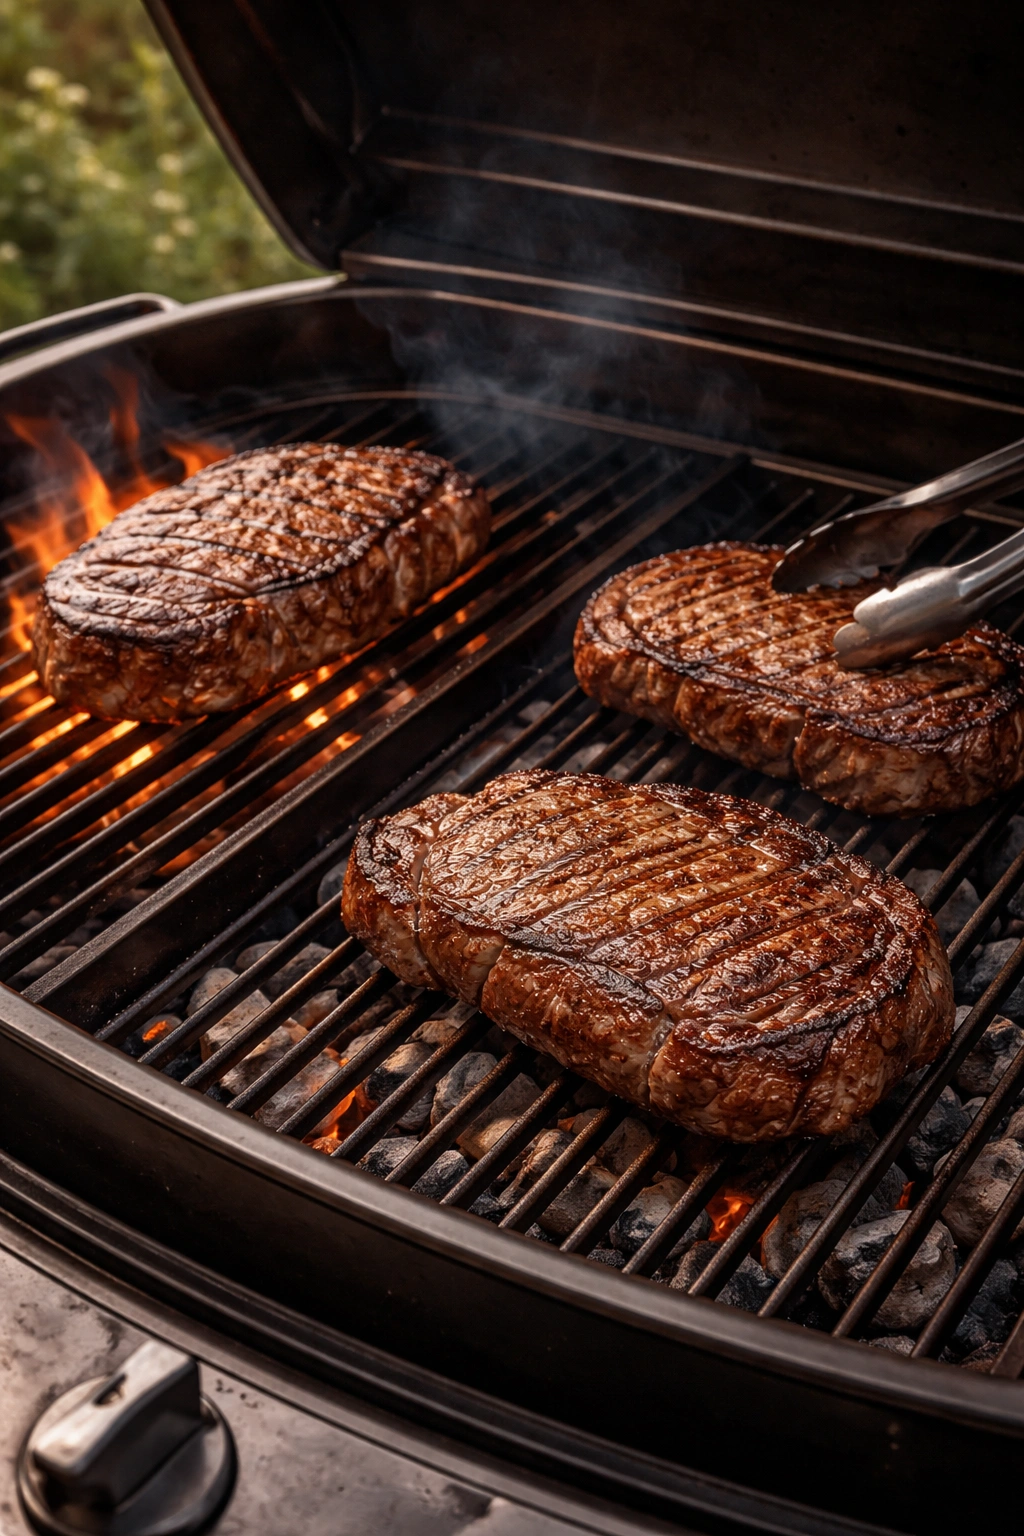
After you’ve seared both sides, it’s time to move your steak to the medium heat side of the grill. This is where you finish cooking to your target temperature without charring the outside. Close the lid and continue cooking, flipping the steak every 2–3 minutes. Some cooks flip more frequently—every 1–2 minutes—and research suggests frequent flipping actually cooks steak more evenly and slightly faster than the traditional single-flip method.
If the exterior is charring excessively while the interior isn’t reaching your target temperature, you’re running the grill too hot on the medium side. For a gas grill, turn the heat down further or move the steak to a spot between burners where the heat is lower. For charcoal, move the steak to an area with fewer coals underneath.
The lid should remain closed between flips to maintain consistent heat and cooking temperature. Opening it repeatedly lets heat escape and makes it harder to predict cooking times. Open the lid only to flip or check temperature.
For a 1.5-inch thick steak, expect 6–10 minutes total cooking time from sear to finish, depending on your target doneness and grill temperature. Thicker steaks take longer; thinner steaks cook faster. Thickness matters far more than actual time, which is why the thermometer is so valuable—it’s the only measure that truly accounts for your specific steak and grill setup.
Managing Flare-Ups Without Panic
Flare-ups happen when fat drips onto hot coals or burners and ignites. They’re normal, they’re manageable, and they don’t ruin your steak if you handle them correctly. Ribeyes and T-bones with their higher fat content are most prone to flare-ups, but they’re not catastrophic.
If flare-ups occur, immediately move the steak to the cooler side of the grill away from the flames. Close the lid to smother the flames and cut off oxygen. Most flare-ups die down within 15–30 seconds. You can also use a spray bottle of water to spritz the flames if needed, but be conservative—too much water creates steam and ash that’s unpleasant.
The best prevention is trimming excess surface fat before grilling. The thick fat cap on the outside of the steak can be trimmed without losing flavor, since the marbling inside the meat is what keeps it juicy and flavorful. The exterior fat just adds flare-up risk without proportional benefit.
Keep the grill lid closed as much as possible, which reduces oxygen and makes flare-ups less likely. Keeping coals at the right temperature (not too hot) also helps—very aggressive heat increases flare-up frequency.
The Critical Resting Period
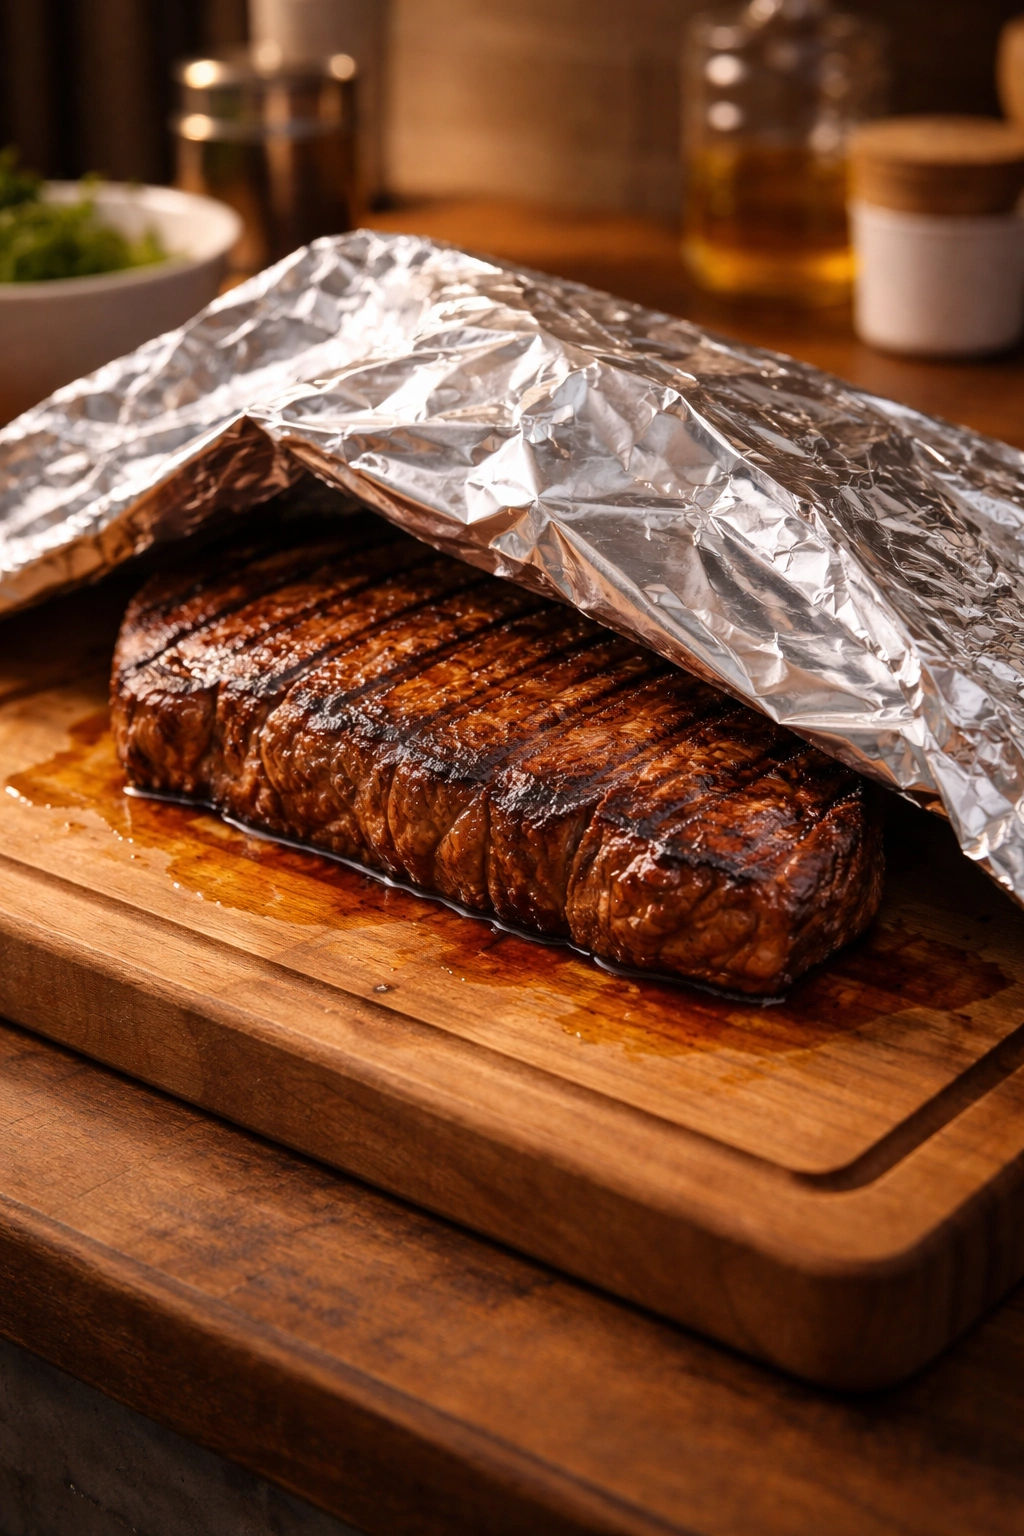
This is where many home cooks sabotage their own efforts by skipping or rushing this step. Resting is not optional—it’s when your steak becomes genuinely juicy instead of merely cooked. Here’s why: when steak cooks, the muscle fibers contract and force moisture toward the center of the meat. If you cut into the steak immediately, those juices pour out onto your cutting board instead of staying in your meat.
Transfer your finished steak to a clean plate or cutting board and tent it loosely with foil (the foil keeps it warm without trapping steam that would soften the crust). Let it rest for 5 to 10 minutes. During this time, the muscle fibers relax and the juices redistribute evenly throughout the meat instead of concentrating in the center.
You can place a pat of butter on top of the steak while it rests—this melts and adds richness and keeps the surface warm. Use high-quality butter or compound butter with herbs for extra flavor.
Do not skip the resting period to serve immediately. Those 5–10 minutes make a genuinely dramatic difference in how juicy the steak tastes when you bite into it. This is where you’re converting cooked meat into truly great steak.
Common Mistakes That Result in Dry Steak
Understanding what goes wrong helps you avoid these pitfalls. The most common culprit is overcooking—cooking the steak to higher internal temperatures than necessary, especially when you’re targeting rare or medium-rare. Use a thermometer and pull at the right temperature, accounting for carryover cooking.
Choosing thin steaks (under 1 inch) is another major mistake. Thin meat cooks too quickly, giving you almost no window for proper doneness before it overcooks. Thicker steaks—1.5 to 2 inches—are inherently more forgiving because you have more time between “just right” and “overcooked.”
Skipping the resting period compounds any overcooking issues and actually causes juices to escape the meat. Combined with slightly overcooked interior, this creates genuinely dry results.
Starting with low-quality beef (Select grade with minimal marbling) leaves you with meat that has less fat to retain moisture. The better the initial product, the more forgiving the process.
Not patting the steak dry before seasoning prevents proper browning. Moisture on the surface steams away instead of allowing crust development, and a steak with poor crust development tastes less flavorful.
Practical Tips for Grill Setup and Maintenance

Keep your grill clean and properly maintained for consistent results. A dirty grill with buildup from previous cookings creates hot spots and can impart off-flavors. Clean grates thoroughly before each grilling session using a grill brush.
Oil your grates after cleaning but before adding steaks. Cold grates are difficult to oil—do it when they’re hot (but after cleaning so you’re not oiling ash and char). The oil prevents sticking and improves browning.
Invest in an instant-read meat thermometer—this is non-negotiable for consistent results. A good thermometer costs $20–40 and will improve your steaks more than almost any other purchase.
Keep tongs and a spatula specifically for grilling, and never use a fork to flip steak. Forks pierce the meat and let juices escape, which directly contradicts everything you’re trying to accomplish.
Have a spray bottle of water nearby for managing flare-ups without needing to leave the grill to get one. A small plant mister or spray bottle works perfectly.
Create a “clean zone” on your grill grates if possible—a section where you put finished steaks to rest briefly before transferring to a plate. This keeps contamination from raw seasonings off finished meat.
Final Thoughts
Grilling a juicy steak isn’t magical—it’s a series of specific techniques executed with attention to detail. You’re managing heat deliberately, working with quality meat that’s properly prepared, searing correctly to develop flavor, monitoring temperature precisely, and letting the meat rest so juices stay inside rather than running onto the plate.
Each decision you make—from the grade of beef you buy to how long you let the steak rest—either preserves or compromises juiciness. The good news is that you control every single variable. There’s no need for elaborate sauces or complicated techniques. A juicy, properly grilled steak seasoned with salt and pepper, finished with a pat of quality butter, is restaurant-quality delicious because you’ve nailed the fundamentals.
Start by choosing Choice or Prime grade steak at least 1.5 inches thick. Prepare it properly by drying it and seasoning it with the right timing. Get your grill genuinely hot, sear aggressively, finish carefully with a thermometer, and rest it completely. Follow that sequence, and you’ll produce steak that’s consistently better than what most restaurants serve. The only real trick is showing up with the right approach—and now you have it.