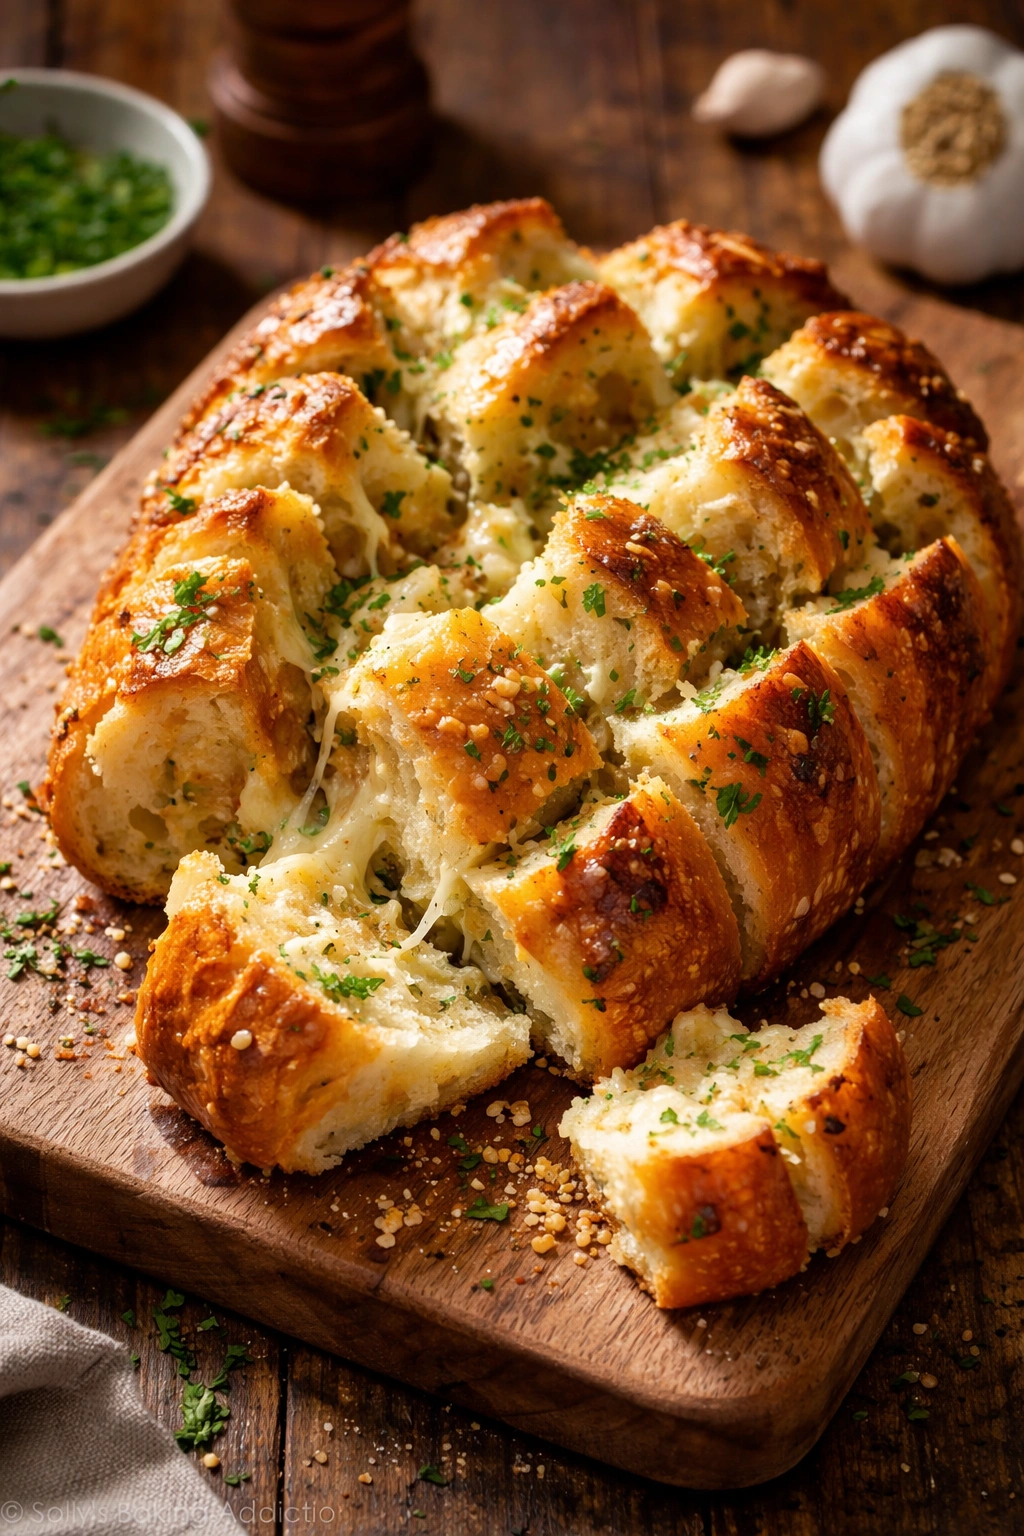
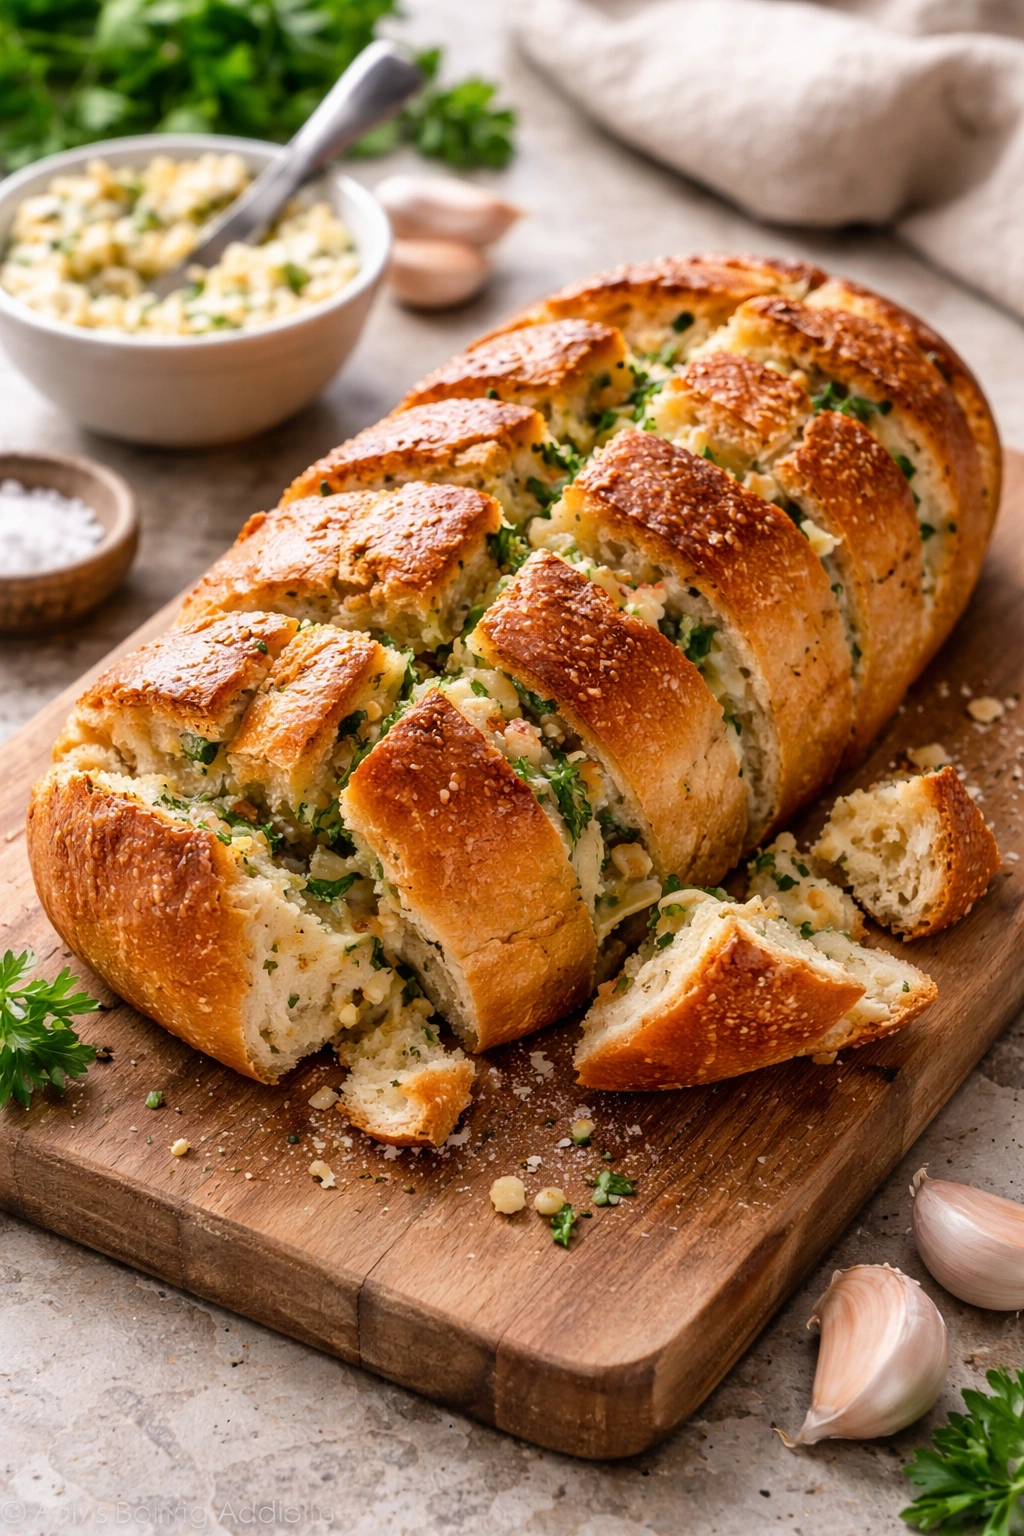
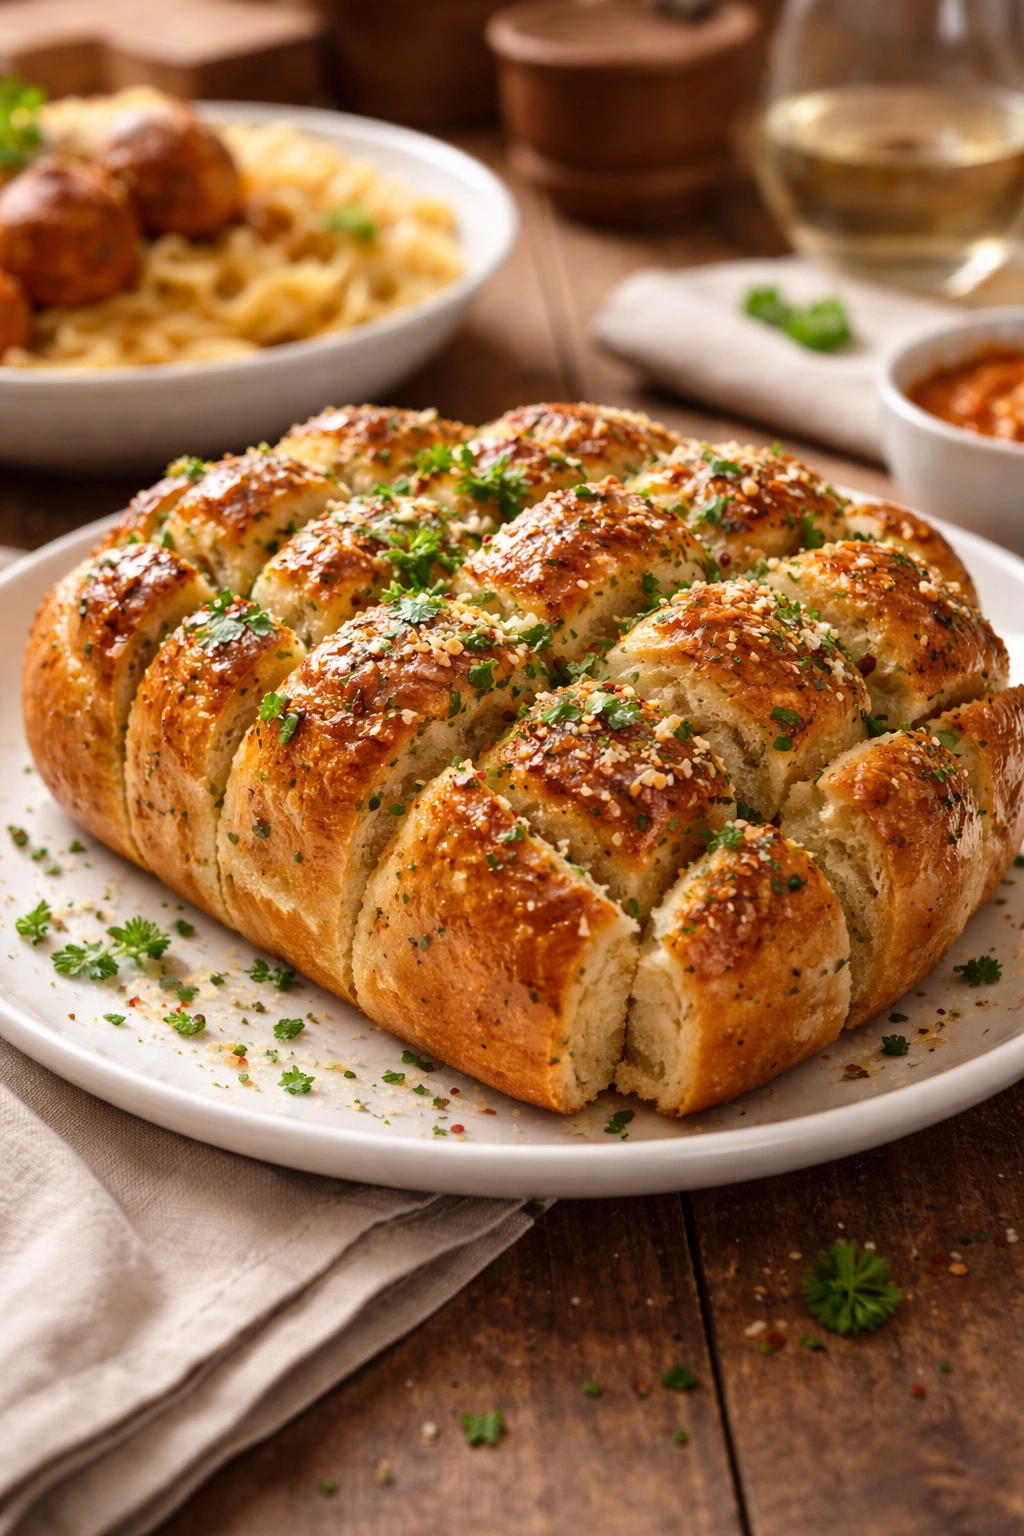
There’s a reason pull-apart garlic bread has become a centerpiece at dinner tables everywhere — it’s the rare side dish that steals attention from the main course. Unlike regular sliced garlic bread, which sits in neat layers that no one quite knows how to serve gracefully, pull-apart garlic bread transforms a simple loaf into an interactive, shareable experience. Guests naturally gravitate toward it, tearing off warm, buttery pieces that are golden on the outside and impossibly tender within. The garlic perfumes the entire kitchen while it bakes, filling your home with that unmistakable aroma that signals comfort and indulgence.
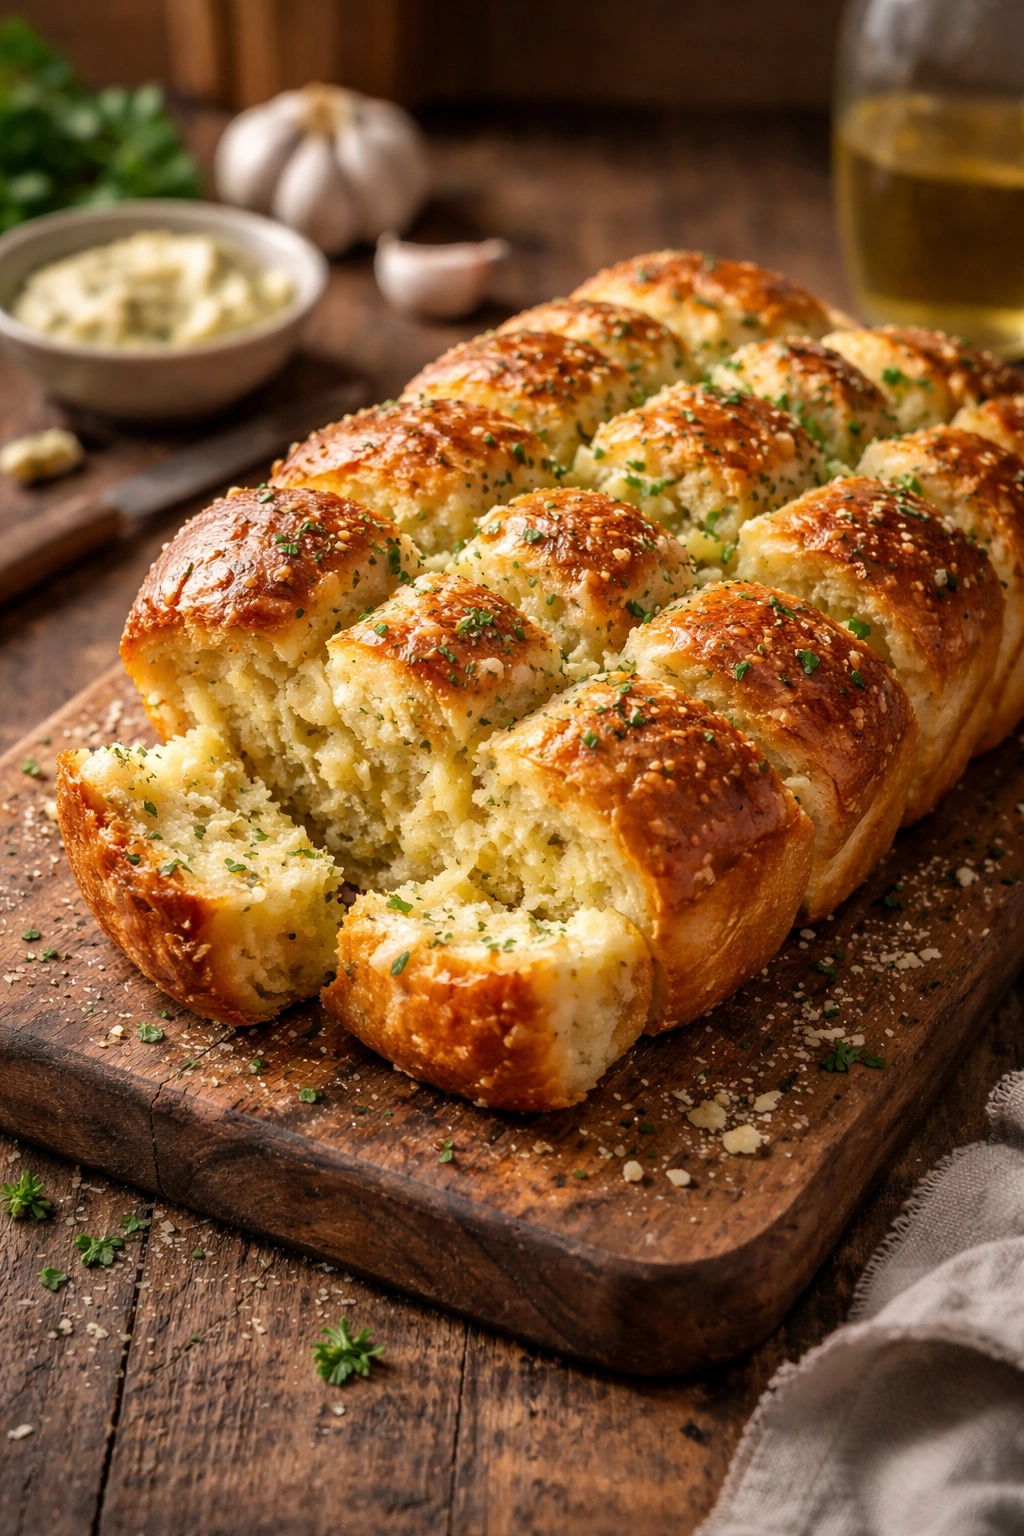
What makes this version so much more effective than the flat-bread alternative is the structure. When you slice partway through the loaf perpendicular to the grain and layer your garlic butter between those cuts, you’re creating dozens of pull-off points that make serving effortless and encourage people to take pieces. The exposed interior surfaces get maximum exposure to the heat and fat, creating a textural contrast between crispy exterior edges and soft, buttery centers that regular garlic bread simply can’t achieve. The butter seeps into every crevice, flavoring far more of the bread than a simple spread on top ever could.
The best part? This isn’t a fussy or complicated technique. Once you understand the principle of how the butter distributes, you can make this with confidence using ingredients you probably already have at home. A good quality loaf, fresh garlic, real butter, and a handful of herbs transform into something that tastes restaurant-quality but requires less than twenty minutes of hands-on time.
Why Pull-Apart Garlic Bread Becomes a Dinner Table Favorite
Pull-apart garlic bread has a psychology working in its favor that flat bread and traditional sliced loaves simply don’t. The moment you place it on the table, people don’t ask permission to take a piece — they just reach in and tear off a warm, buttery bite. That interactive quality creates engagement and conversation around food in a way that plated sides don’t. It’s also far more forgiving from a serving perspective; you don’t have to cut uniform slices or worry about presentation.
The other major advantage is how much surface area this technique creates. Every cut and every pull-off point becomes an edge that absorbs heat and butter, developing that crispy, caramelized exterior that makes people come back for more. A traditional garlic bread where you spread butter on top of a sliced-open loaf leaves the interior largely untouched. With pull-apart garlic bread, you’re surrounding each piece with fat and heat, which fundamentally changes the final texture.
From a practical standpoint, this loaf also solves a real problem with entertaining. You can assemble it completely in advance, wrap it tightly, and either refrigerate it for several hours or freeze it for weeks. Pop it directly from the fridge or freezer into the oven at the last minute, and it bakes up perfectly while you’re finishing other dishes. There’s no worry about last-minute assembly or keeping things warm — everything coordinates beautifully.
The Science Behind Crispy Exteriors and Soft Interiors
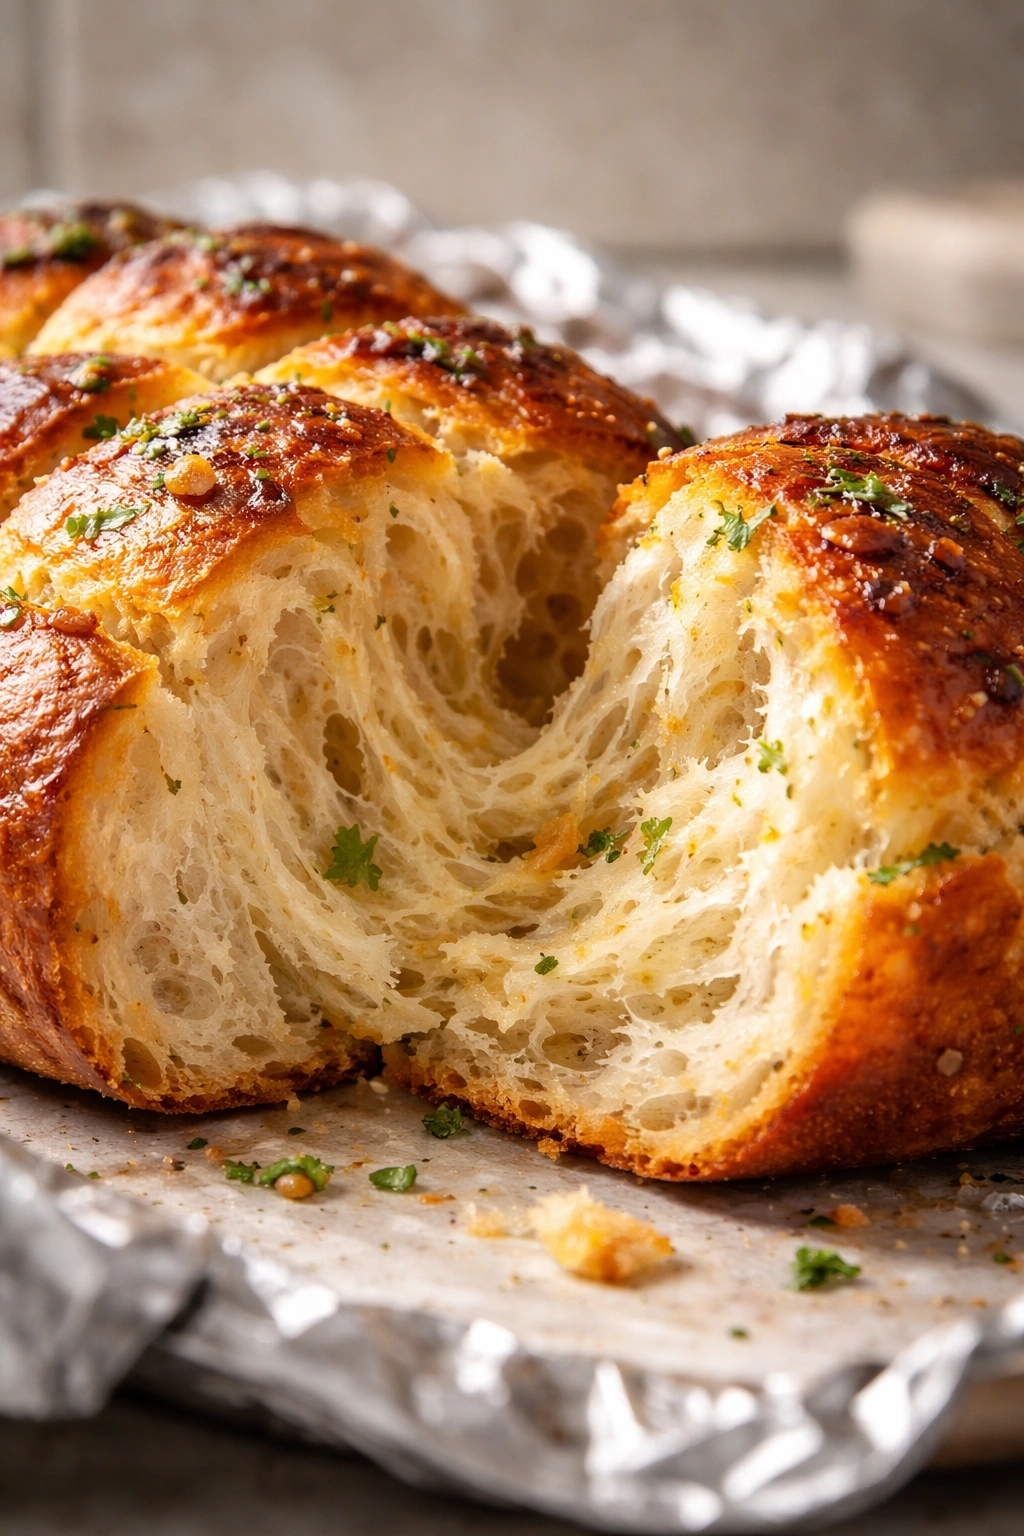
Understanding what’s actually happening during baking helps you avoid the most common mistakes with garlic bread. When you expose more surface area of the bread to both dry oven heat and butter fat, you create an environment for the Maillard reaction — that golden-brown reaction that develops complex, savory flavors. The butter acts as a heat conductor, allowing the cut surfaces to crisp and brown at a lower temperature than bread alone would require, and it protects the interior from drying out.
The starches in bread respond to heat by gelatinizing, which is what gives it structure and allows it to hold its shape when you tear off a piece. But if you apply too much dry heat for too long, you’ll continue past that gelatinization point into drying and hardening territory. That’s why covering your garlic bread loosely with foil for part of the baking prevents the top from over-browning while the interior comes up to temperature.
The water in your butter also plays a critical role. As it heats, it creates steam inside the bread, which keeps the crumb tender and pushes the exterior to brown. The fat in the butter then sets those browned edges as the bread cools slightly, creating that satisfying textural difference between outside and inside. This is also why chilled or frozen butter that’s solid works differently than melted butter — it distributes in distinct pockets rather than soaking evenly, which actually creates more interesting texture contrasts.
Building the Perfect Garlic Butter
The garlic butter is where this entire dish lives or dies. This isn’t a situation where you simply mince some garlic and throw it into soft butter — the approach, the technique, and even the form of garlic you choose all affect the final flavor profile. Fresh minced garlic provides bright, sharp garlic flavor that works well if you’re cooking it at a high temperature for a reasonable amount of time. Roasted garlic creates a sweeter, more mellow garlic note that’s less intense but more rounded.
The most important factor is not burning the garlic during baking. Raw minced garlic can scorch if the oven temperature runs hot or if your bread sits in the oven for longer than expected, turning acrid and unpleasant. Mixing the garlic into soft butter before baking, rather than scattering it on top, protects it from direct heat and allows the flavors to meld. Some bakers choose to heat the garlic briefly in the butter before mixing, which mellows it slightly and ensures more even distribution.
Butter quality actually matters more here than in many other recipes, because there’s not much else competing for attention. Unsalted butter gives you control over the salt level, while salted butter brings its own salt, which can be a advantage if you’re using fresh garlic. Cultured or European-style butter, with its higher fat content and tangy undertones, creates more complex flavor than standard American butter. Room-temperature butter incorporates the garlic, herbs, and seasonings far more evenly than cold butter, which chunks up and distributes unevenly.
Choosing Your Bread: What Actually Works Best
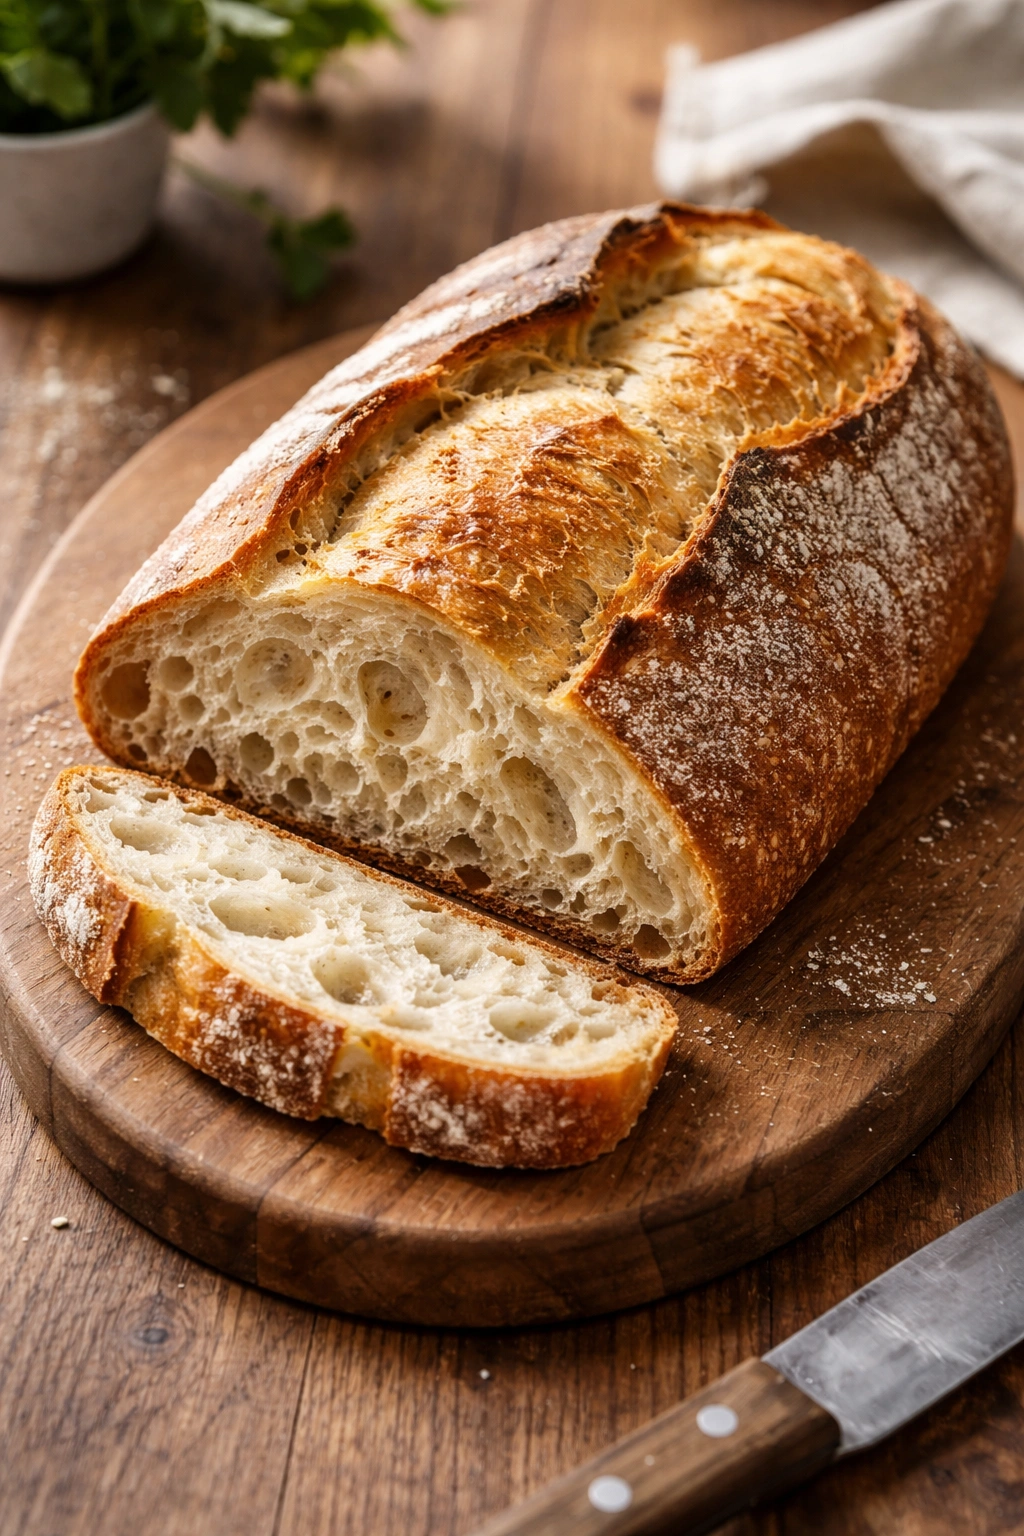
Your bread choice fundamentally determines how your finished garlic bread will taste and feel. Italian bread, ciabatta, or French bread are the classic choices, and for good reason — they have relatively open crumbs with larger air pockets, meaning they absorb garlic butter well without becoming soggy. These breads also have enough structure to support pulls and tears without disintegrating.
Sourdough works beautifully if you enjoy its tang; the acidity actually complements garlic and herbs really well. The tighter crumb of sourdough means it won’t absorb quite as much butter, which can actually be an advantage if you prefer your garlic bread less rich. White sandwich bread can work in a pinch but tends to absorb butter and become dense and heavy rather than developing that light, airy interior.
Avoid anything with seeds or very dense interior structure. Seeded breads risk having the garlic butter coat the seeds unevenly, and dense breads won’t give you that satisfying tender crumb contrast. The loaf should be fresh but not so soft that it falls apart when you cut into it; bread that’s a day old is actually ideal because it’s sturdy enough to cut cleanly but hasn’t dried out yet. Most bakery loaves, if purchased the same day, work beautifully for this.
Complete Ingredient List and Timing Block
Yield: Serves 6 to 8 as a side | Makes one 14-16 inch loaf
Prep Time: 15 minutes (hands-on active time)
Cook Time: 18 to 22 minutes
Total Time: 33 to 37 minutes (plus optional refrigeration)
Difficulty: Beginner — no special equipment required, straightforward assembly, and the technique is forgiving. Even first-time bakers get impressive results with this method.
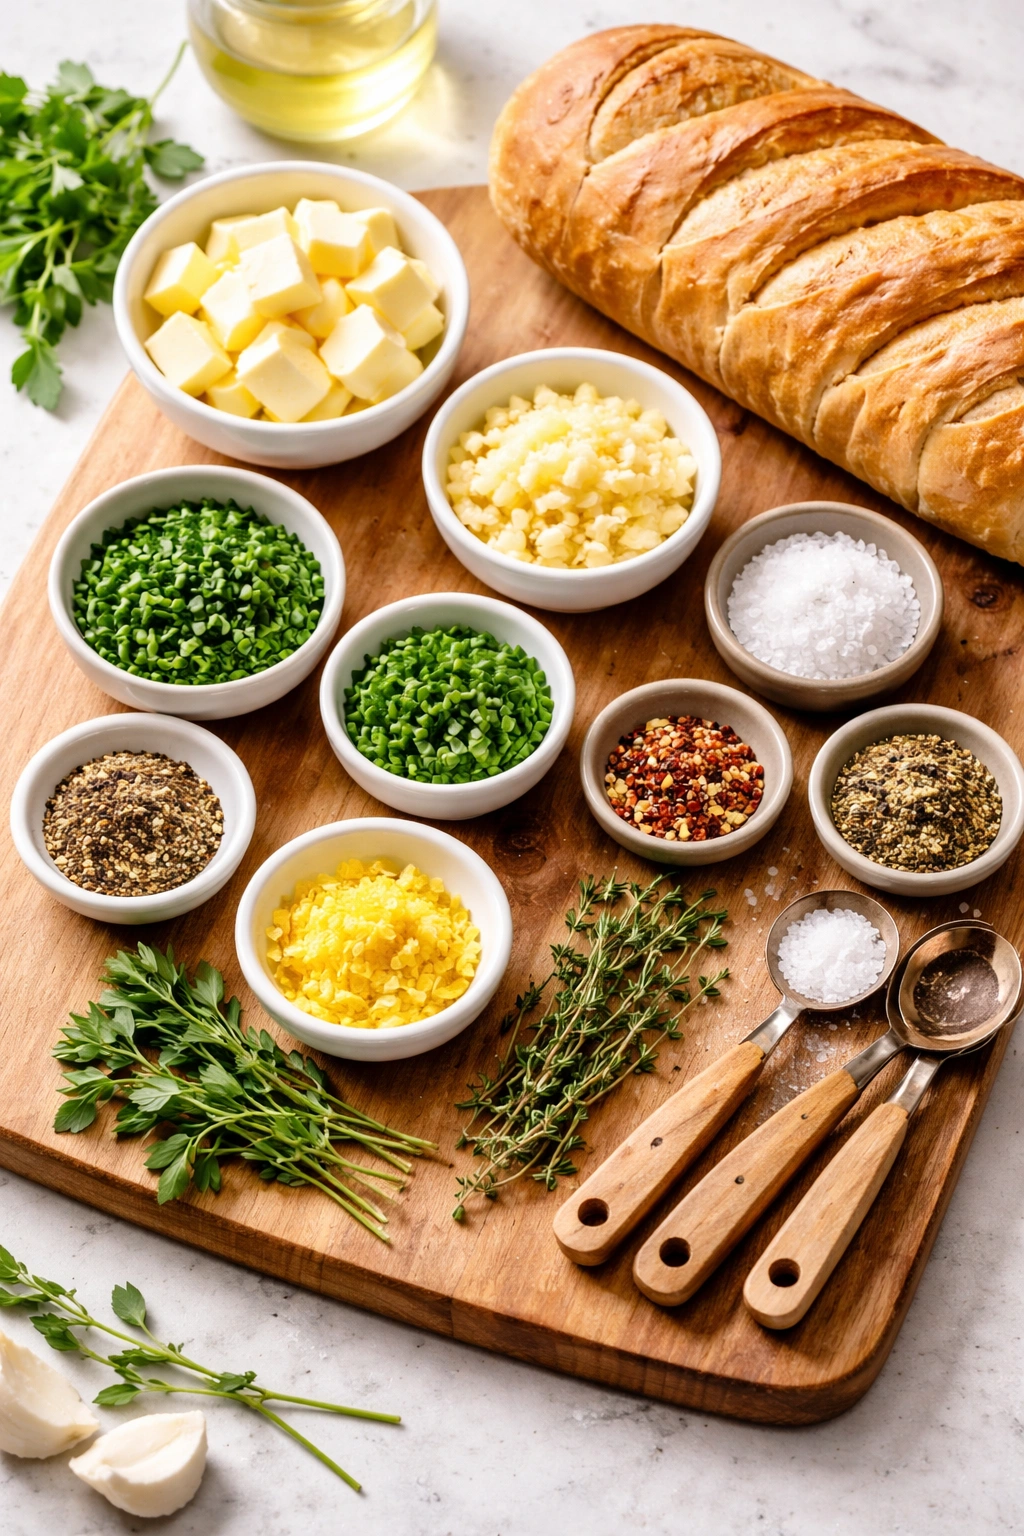
For the Garlic Butter:
- 6 tablespoons (¾ stick) unsalted butter, softened to room temperature
- 4 to 5 cloves fresh garlic, minced very finely (about 2 tablespoons), or ½ teaspoon garlic powder mixed with 1 tablespoon roasted garlic for a milder flavor
- 2 tablespoons fresh parsley, finely chopped (or 1½ teaspoons dried parsley if fresh isn’t available)
- 1 tablespoon fresh chives, finely minced (or ½ teaspoon dried chives)
- ¼ teaspoon fine sea salt, or ½ teaspoon if using unsalted butter and prefer a more pronounced salt presence
- ⅛ teaspoon freshly ground black pepper
- ⅛ teaspoon red pepper flakes (optional, for gentle heat)
- Optional add-ins: ⅛ teaspoon Italian seasoning, a small pinch of lemon zest, or ¼ teaspoon fresh thyme leaves
For Assembly:
- 1 loaf Italian bread or French bread (14 to 16 inches long, about 5 to 6 inches wide), fresh or one day old
- 2 tablespoons fresh parmesan cheese, finely grated (optional, for topping)
- Fresh parsley for garnish (optional)
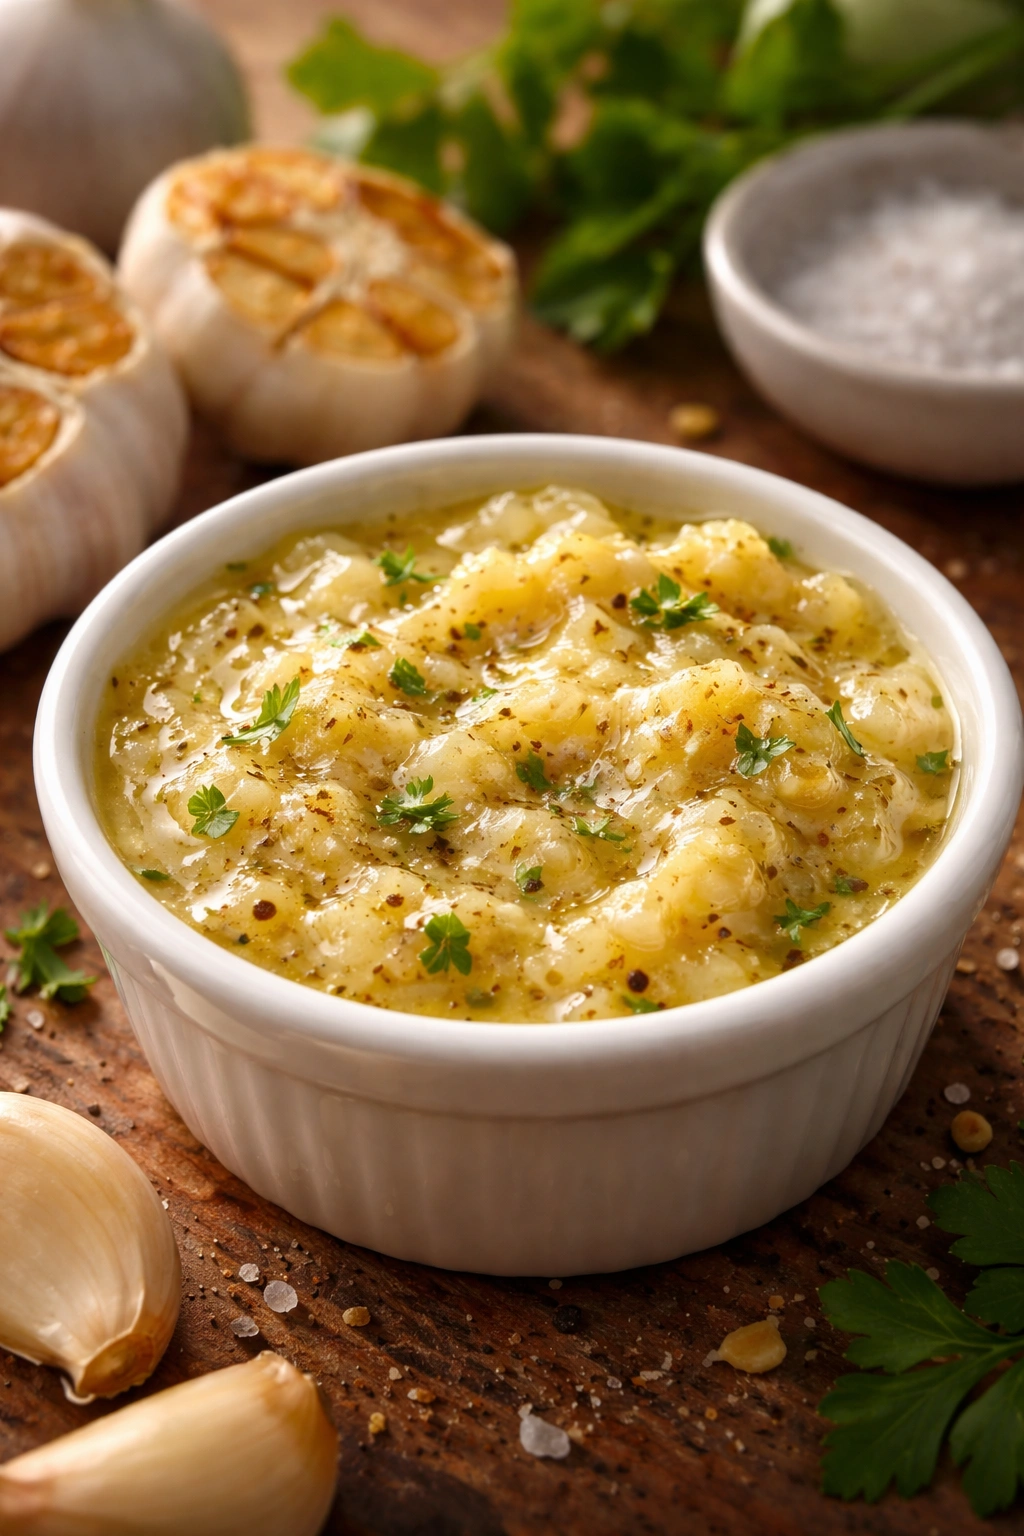
Preparing Your Butter Mixture Like a Professional Baker
The butter mixture itself only takes a few minutes, but how you approach it affects how evenly the garlic and herbs distribute throughout the bread. Start with softened butter — it should be soft enough to press your finger into without resistance, but not so warm that it’s greasy or beginning to separate. If your butter is too cold, the garlic will create distinct chunks rather than dispersing evenly. If it’s too warm, the mixture becomes oily and separates.
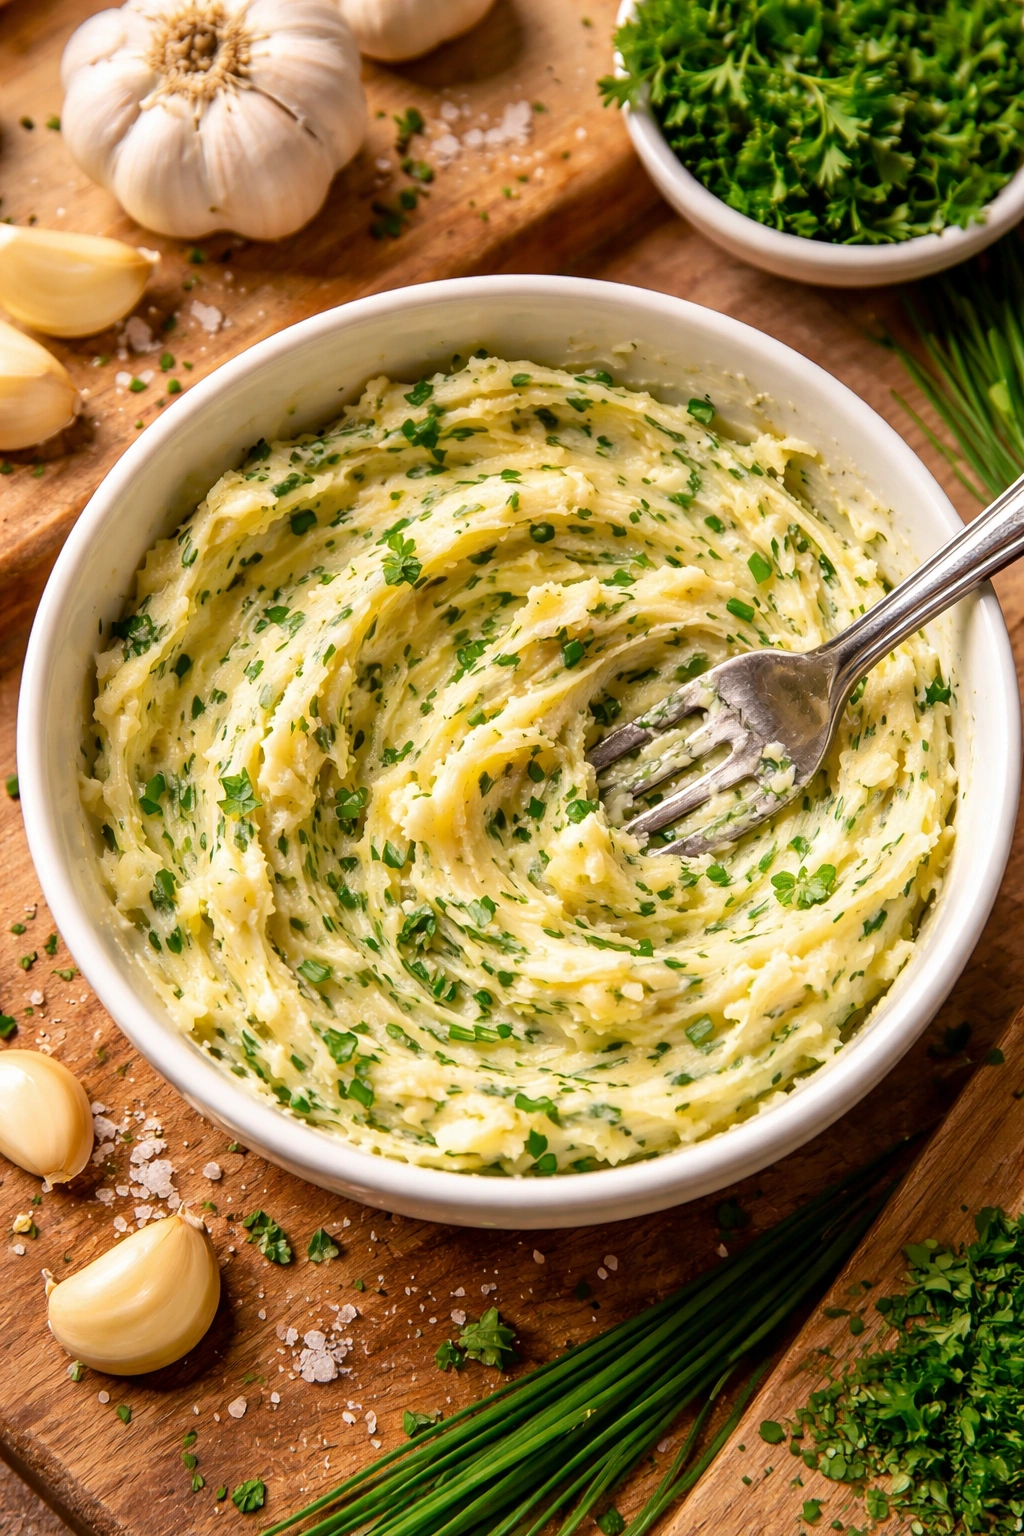
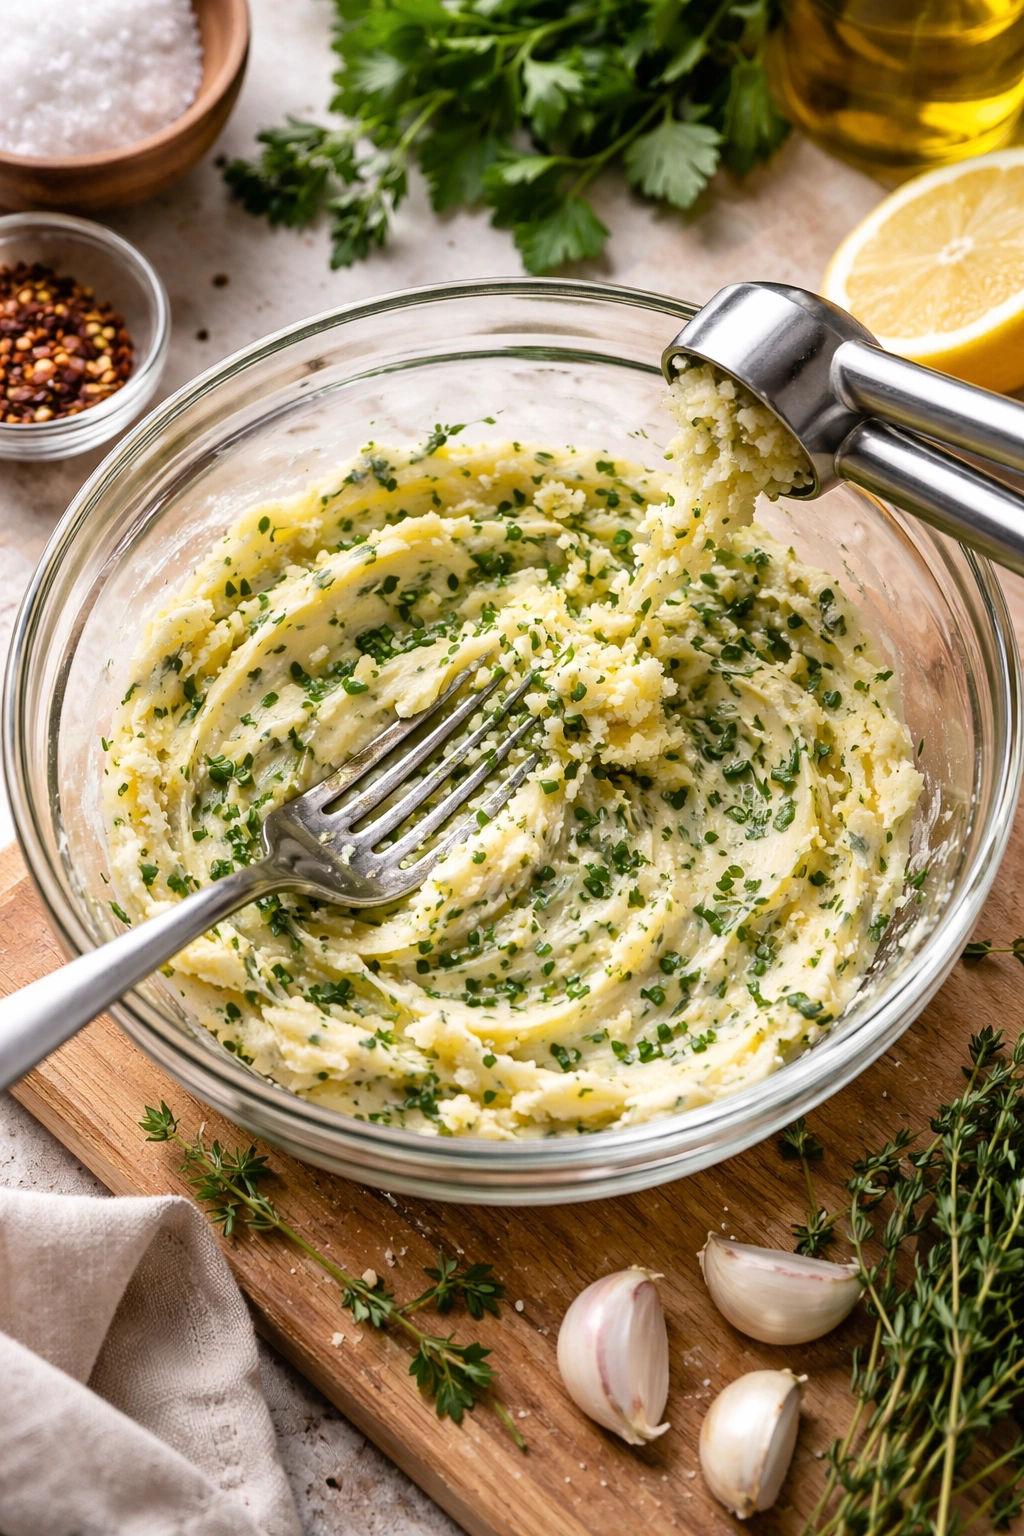
Place your softened butter in a small bowl and use a fork to mash it against the sides until it’s completely smooth and creamy. Add your minced garlic first, pressing it into the butter and mashing it together for about 30 seconds. This begins breaking down the garlic’s cell walls and releases its oils, which distribute the garlic flavor more evenly throughout the butter than if you simply dumped everything in at once.
Next, add the finely chopped fresh herbs — parsley and chives, if using them. Continue mashing and folding the mixture with your fork until everything is completely incorporated and the butter takes on a light green fleck from the herbs. Add your salt, pepper, and any optional seasonings. The mixture should smell intensely aromatic and herby; if it smells like butter with some herbs on top, you haven’t mixed thoroughly enough. Taste a tiny bit on your finger — it should taste boldly garlicky and herby, because this flavor will distribute through the whole loaf.
Assembling Your Loaf: The Technique That Matters Most
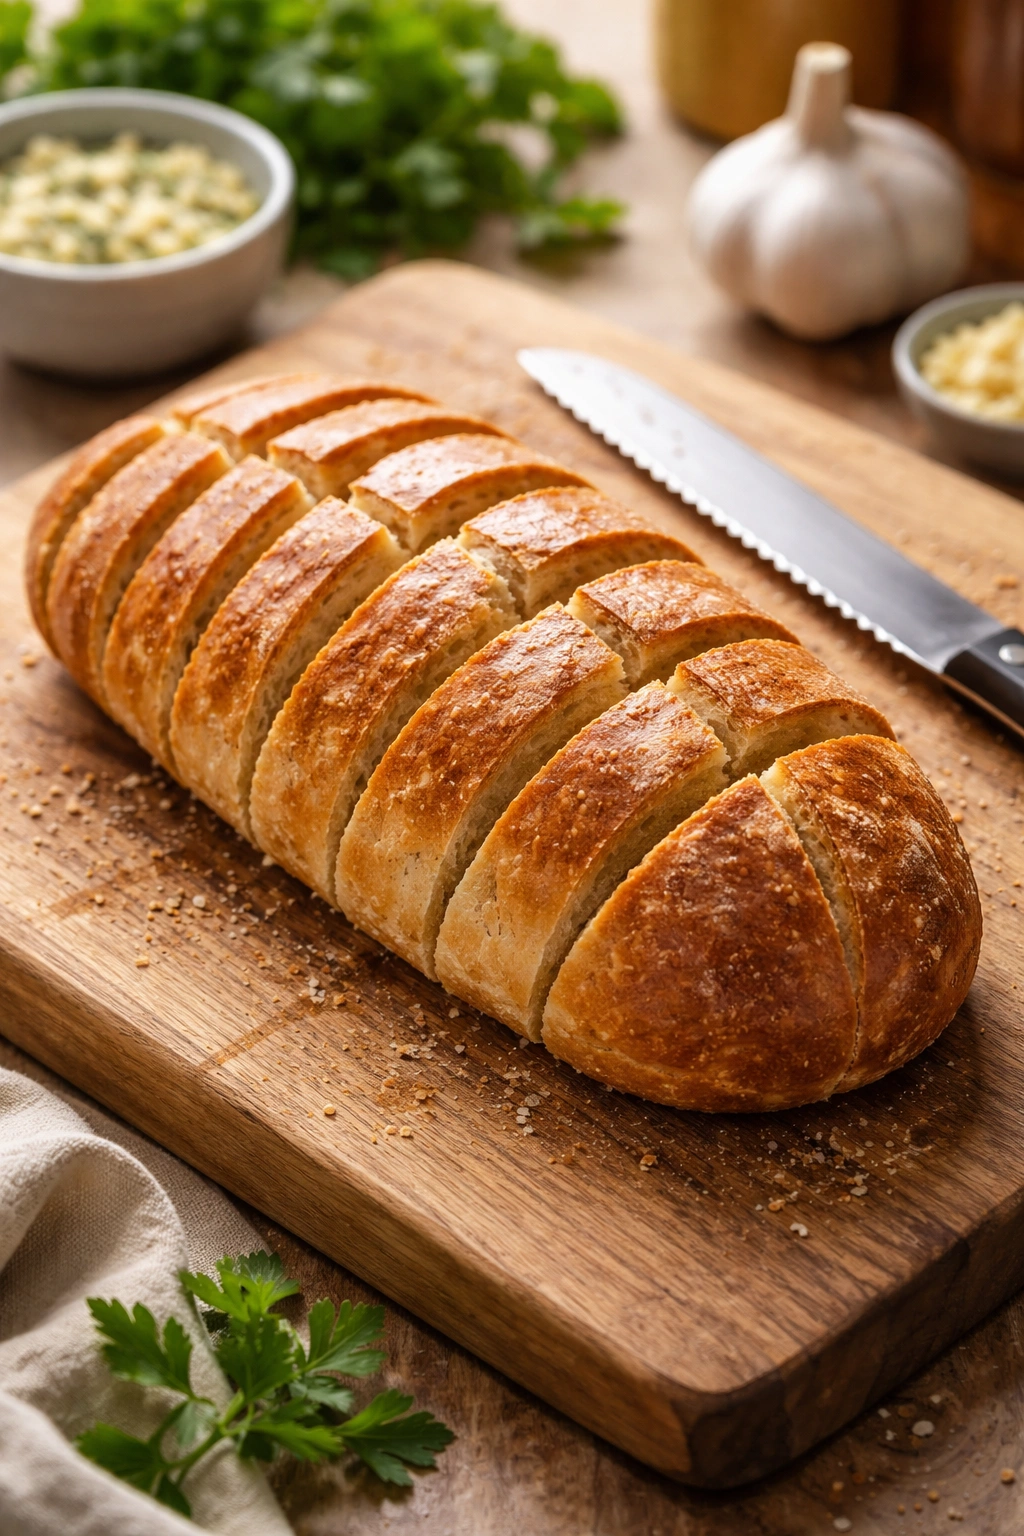
How you cut and assemble your pull-apart bread determines whether it pulls apart easily or falls apart completely. Lay your loaf on a cutting board with the longer side facing you. Using a sharp serrated knife, make cuts about ¾ to 1 inch apart, slicing from the top of the loaf down toward the cutting board. You’re aiming to cut most of the way through the loaf — approximately ¾ of the way down — without cutting all the way through the bottom. This keeps the loaf intact while creating distinct pull-off pieces.
If your loaf is particularly wide, you can also make cuts perpendicular to the first set, creating a cross-hatch pattern. This gives you smaller, more bite-sized pull-off pieces and exposes even more surface area to the butter and heat. The cross-hatch approach is especially effective if you’re serving this to a larger crowd where small, manageable pieces are more practical than large chunks.
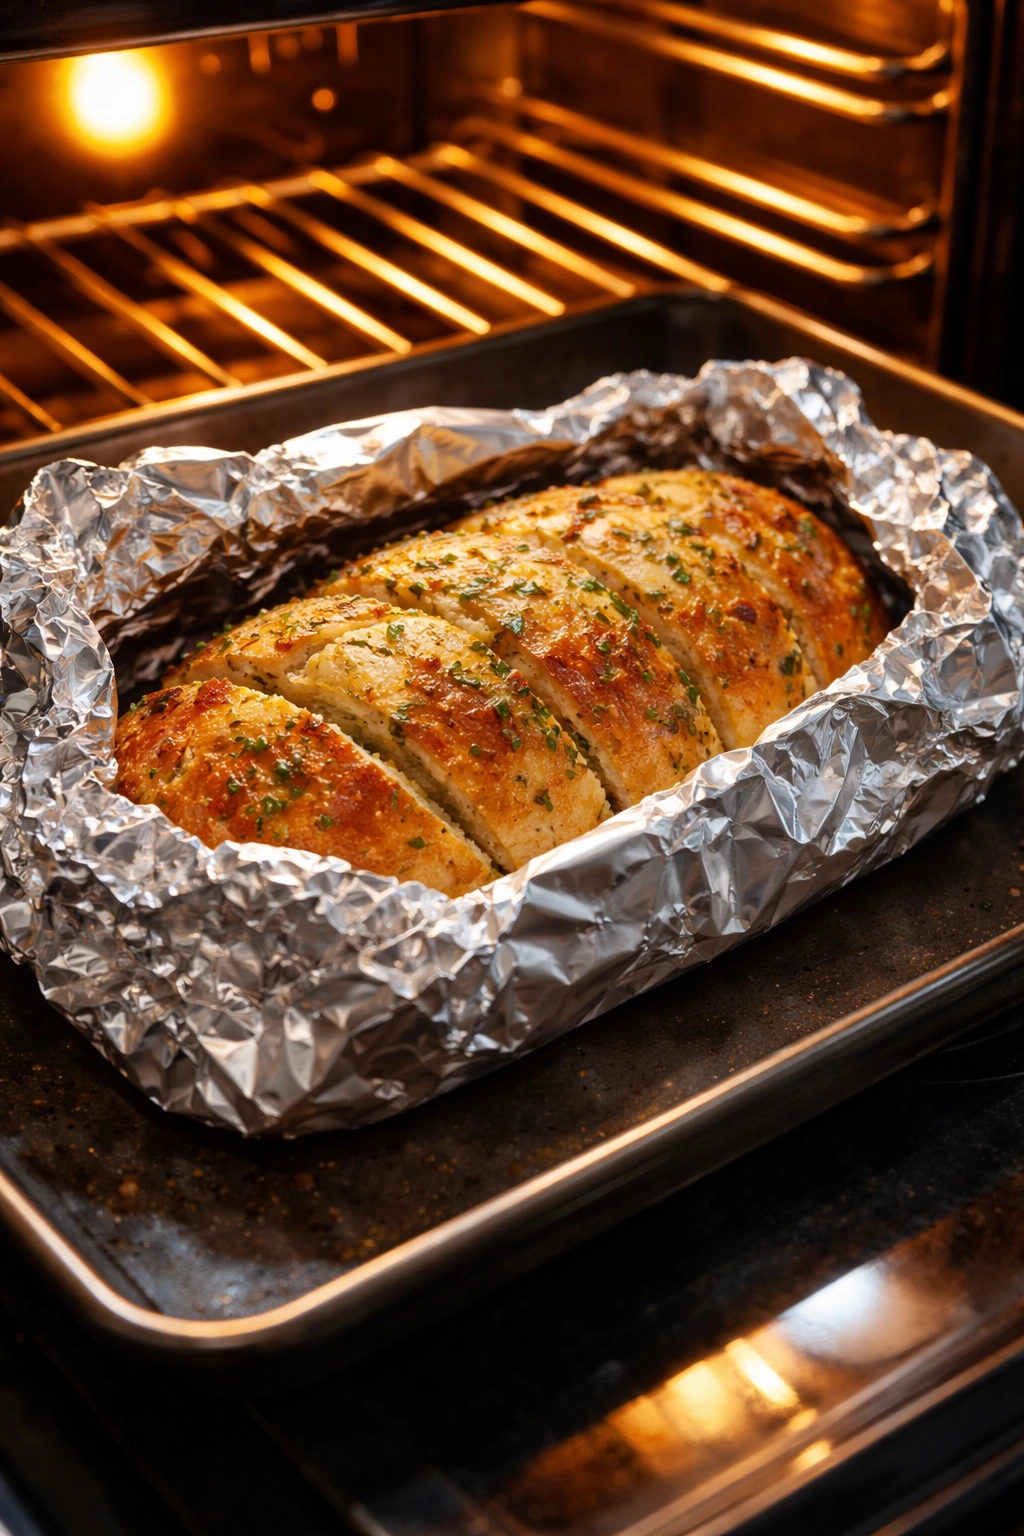
Once you’ve made your cuts, place the loaf on a piece of heavy-duty aluminum foil, using enough foil to wrap around the sides and bottom but leaving the top exposed. Using a butter knife or small offset spatula, spread your garlic butter thickly into the cuts, working from one end of the loaf to the other. Try to get butter into every crevice; this is where the flavor lives. Don’t be shy — you want each cut well-coated. If you made cross-hatch cuts, spend extra time getting butter into those intersections.
Sprinkle the grated parmesan cheese over the top of the loaf if using it, and loosely cover the entire loaf with another piece of foil, creating a tent that leaves an inch of space between the foil and the top of the bread. This loose covering prevents the top from browning too quickly while the interior comes up to temperature. At this point, you can immediately proceed to baking, refrigerate for up to 8 hours, or even freeze for up to three weeks.
Baking for Golden, Crispy Perfection
Preheat your oven to 375°F (190°C) and position your rack in the center of the oven, ideally 8 to 10 inches from the heating element. If you refrigerated your assembled loaf, remove it about 5 minutes before baking so it comes slightly closer to room temperature, though you don’t need to wait for it to warm completely.
Place the foil-wrapped loaf directly on the oven rack or on a baking sheet, whichever you prefer. Bake covered with foil for 12 to 14 minutes. You’re not looking for color at this point; you’re setting the structure and allowing the heat to penetrate to the center of the loaf. The internal temperature of the bread should reach about 180°F (82°C) at this point, though you won’t check it during the covered phase.
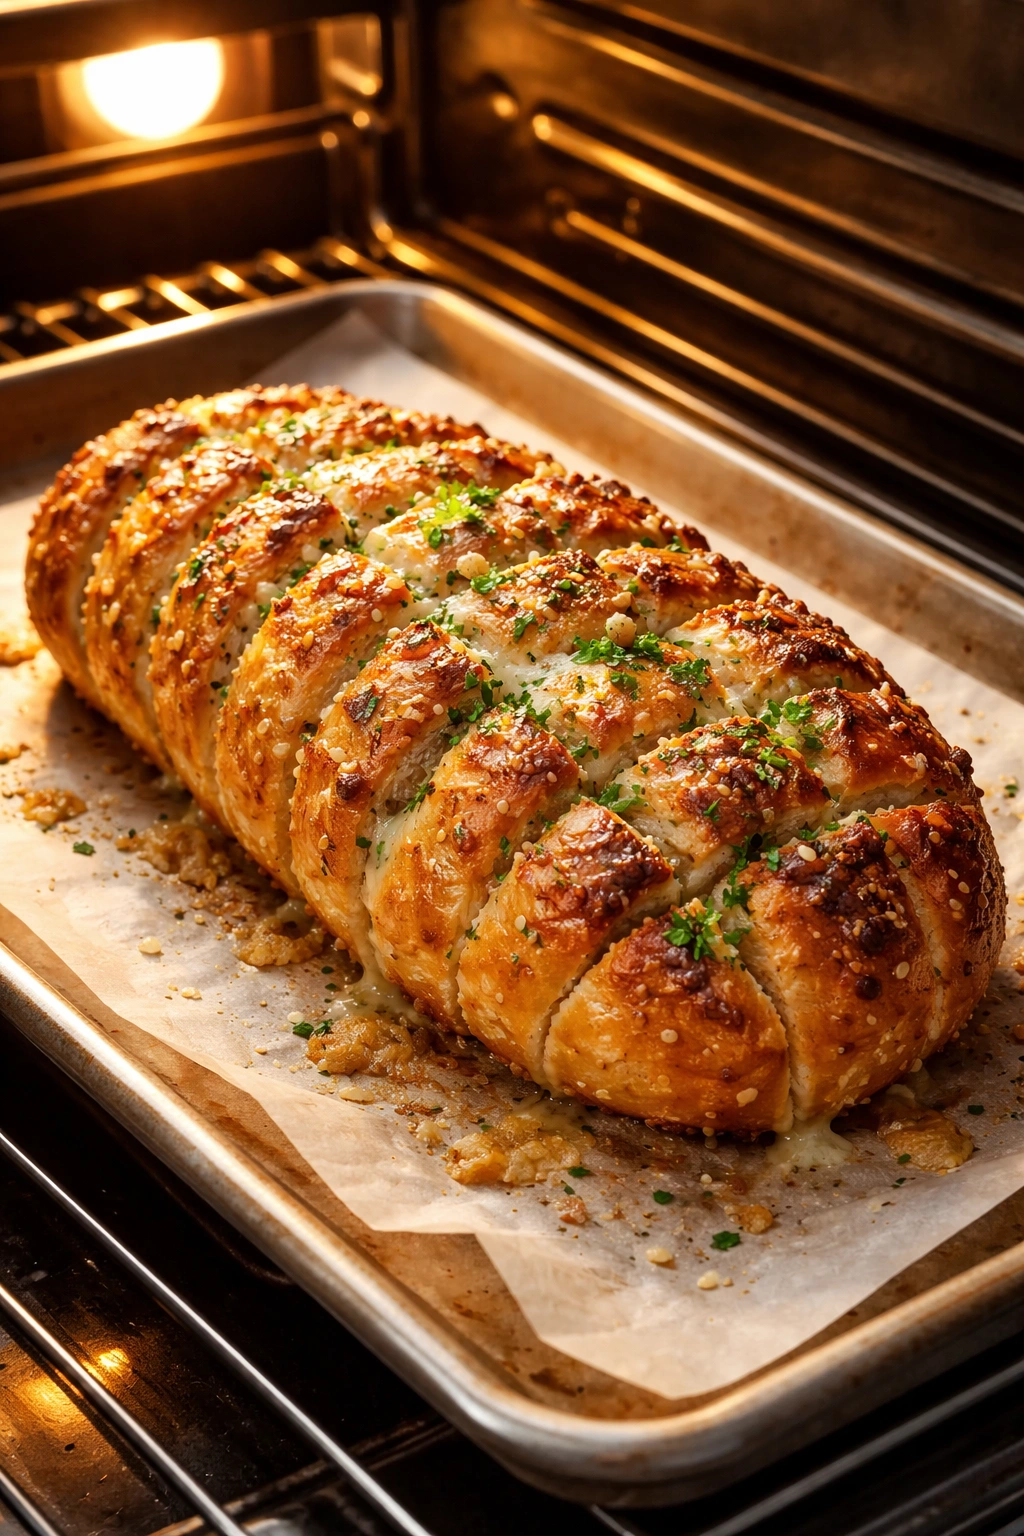
Carefully remove the top layer of foil — watch out for steam — and return the loaf to the oven uncovered for 6 to 8 minutes longer, until the top is golden brown and the exposed edges are deeply caramelized. The top should look inviting and smell intensely of garlic and herbs; if it’s still pale, give it another minute or two. The goal is golden-brown crust with slight caramelization on the edges where the garlic butter has concentrated.
Remove the loaf from the oven and let it rest for 2 to 3 minutes on the baking sheet or cooling rack. This brief rest allows the crust to set and firm up slightly, making the pieces pull off cleanly without the bread tearing. If you’re using foil underneath, you can leave it there for serving directly on the table, or slide the loaf onto a serving platter. Garnish with fresh parsley if desired.
Common Mistakes That Prevent Impressive Results
The most frequent error people make is cutting too deeply into the loaf, severing the bottom entirely. The loaf won’t hold together, and pieces will scatter across the plate rather than pull away gracefully. Aim for ¾ of the way through; your knife should be close to but not touching the cutting board.
Another common problem is using cold butter straight from the refrigerator and expecting it to spread evenly. Cold butter chunks up and distributes in clumps rather than coating every surface smoothly. Always take 10 minutes to let your butter soften on the counter first. Similarly, if your room is cold, the butter might harden again before you finish assembling the loaf, making spreading difficult. If this happens, microwave the butter for 5 to 10 seconds just to soften it again.
Burning the garlic is absolutely avoidable but happens often. Raw minced garlic browns at roughly 300°F, which is lower than the oven temperature you’re using. The combination of melted butter and direct oven heat can char garlic if it’s spread too much on top of the loaf or if the bread sits in a very hot oven. Embedding the garlic butter inside the cuts, where it’s protected, and covering the loaf with foil for the first portion of baking prevents this entirely.
Many people also remove the foil too early, allowing the top to brown before the interior is warm. Wait until at least the 12-minute mark before uncovering. If your oven runs particularly hot, you might even wait the full 14 minutes before removing foil. The inside should be steaming hot, and you should smell the intense garlic aroma before you consider pulling the foil.
Keeping Your Garlic Butter Aromatic
Garlic can shift from aromatic and delicious to acrid and unpleasant in mere minutes if it’s overcooked. The key to maintaining that perfect bright, fresh garlic flavor is understanding how different forms of garlic behave under heat. Fresh minced garlic cooked in butter for 18 to 22 minutes is right in that sweet spot; long enough to lose any raw edge but short enough to retain its distinctive bright character.
If you’re particularly worried about garlic burn, consider using a combination of roasted garlic (which is already heat-treated and mellowed) and fresh minced garlic. The roasted garlic contributes a sweet, almost caramelized note while the fresh garlic provides brightness. You can roast garlic yourself by wrapping whole cloves in foil and baking them at 400°F for about 30 minutes, or you can buy jarred roasted garlic for convenience.
The salt in your butter also affects how fast the garlic browns. Salt raises the temperature at which proteins denature, meaning garlic in salted butter actually browns slightly faster than garlic in unsalted butter. This is why some bakers prefer unsalted butter for garlic dishes — it gives them slightly more buffer against accidental burning. However, the difference is marginal, and the choice ultimately comes down to personal preference.
Making Garlic Bread Flavor Adjustments and Variations
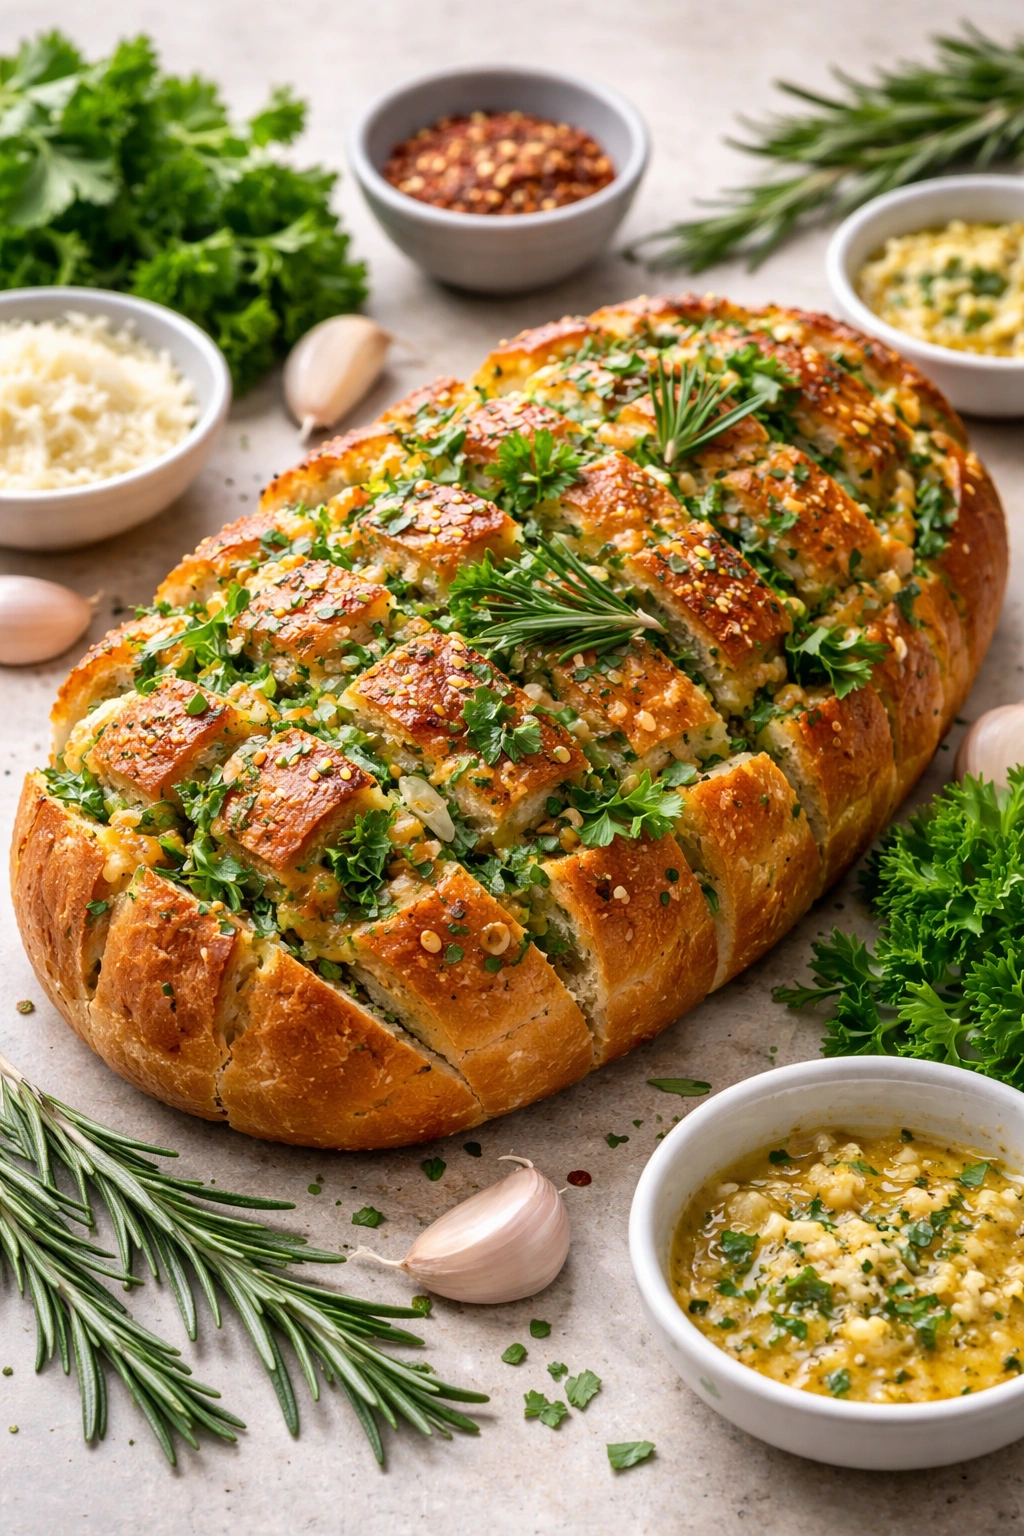
The beauty of garlic butter is how customizable it is while still tasting unmistakably like garlic bread. For a more aggressive garlic flavor, increase the minced garlic to six cloves, or use garlic paste from a tube, which concentrates the flavor more intensely than minced cloves. For a mellower, sweeter version, reduce the garlic to three cloves and add a full tablespoon of roasted garlic, or replace half the fresh minced garlic with roasted.
Herb variations completely change the character of this bread. Replace some or all of the parsley with fresh basil for an Italian herb bread that pairs beautifully with tomato-based dishes. Swap the chives for fresh thyme or rosemary if you’re serving this alongside heartier meats — the woody herbs complement beef and lamb differently than the bright herbs do. A mixture of herbs (parsley, chives, basil, and a touch of oregano) creates a more complex, Mediterranean flavor profile.
Add depth with a small squeeze of fresh lemon juice — just ¼ teaspoon — which brightens the garlic without making the bread taste citrusy. Red pepper flakes bring gentle heat, while a tiny pinch of smoked paprika adds subtle smokiness. Even just a single clove of minced garlic combined with three tablespoons of freshly grated parmesan and fresh basil creates an entirely different bread that tastes more like a savory herb loaf than garlic bread.
For a French-inspired version, use mostly parsley and a generous pinch of Dijon mustard mixed into the butter, which creates an unexpectedly sophisticated flavor. Or go in a completely different direction with an Asian-inspired version using minced garlic, a teaspoon of sesame oil, fresh cilantro instead of parsley, and a small pinch of white pepper. These garlic bread pieces become excellent alongside Asian noodle soups or stir-fry dishes.
Freezing Strategies: Make-Ahead Brilliance
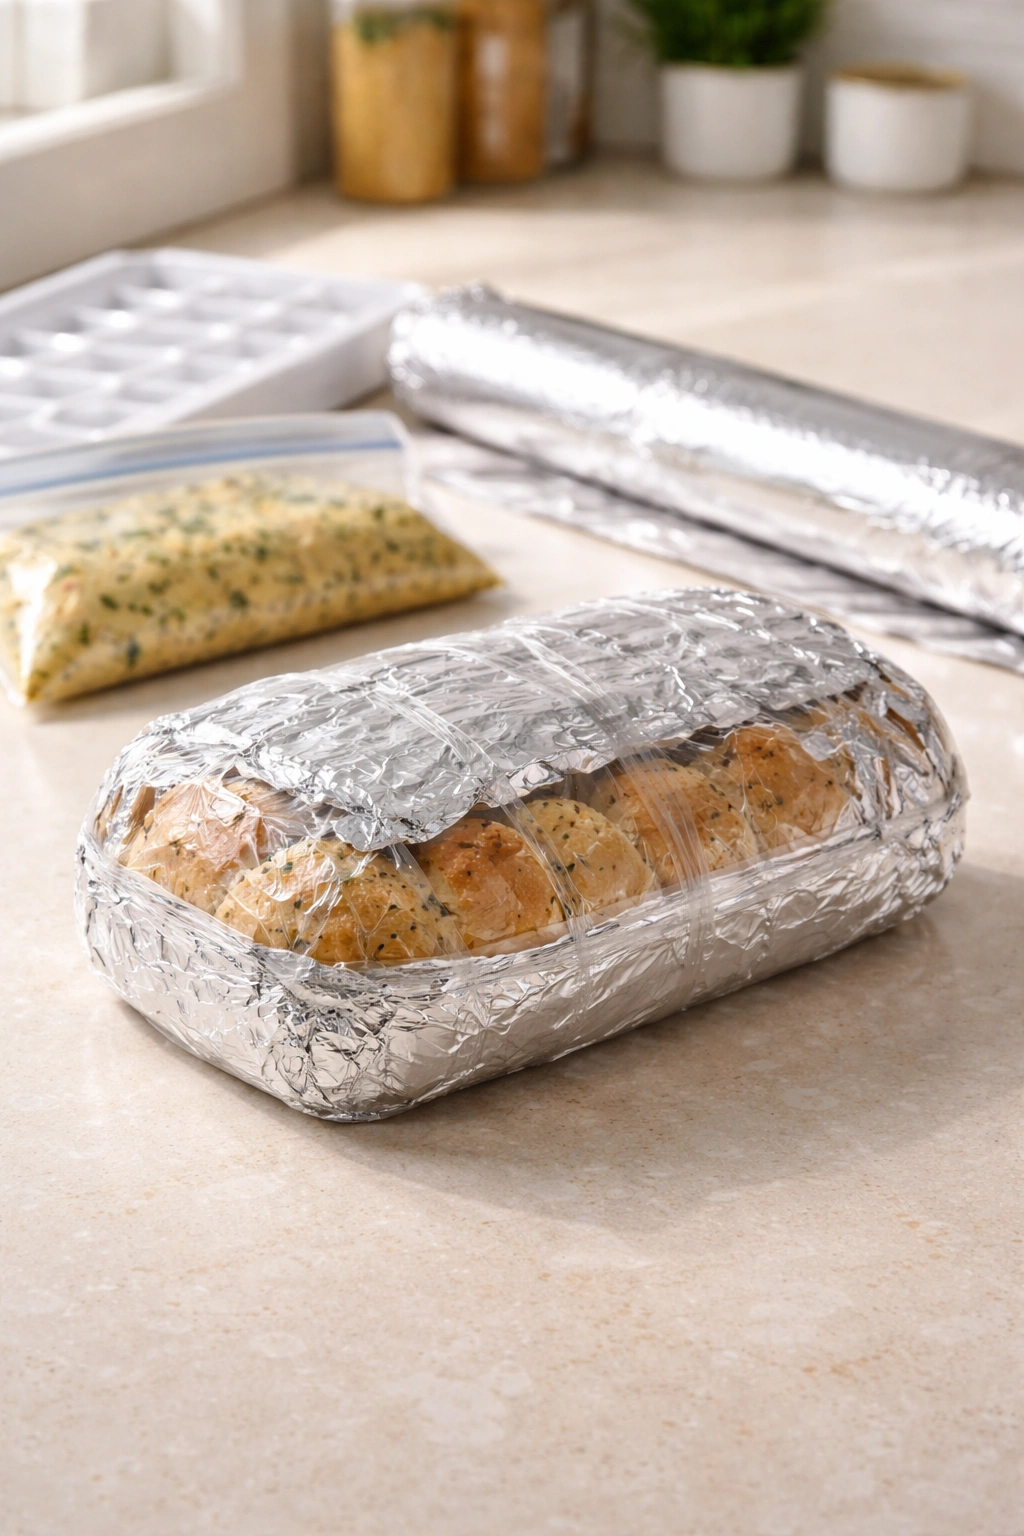
One of the best reasons to master this recipe is how beautifully it freezes. Assemble your entire loaf with the garlic butter, wrap it completely in plastic wrap (pressing out excess air), then wrap it again in a layer of foil. Label it with the date, and freeze for up to three weeks. When you’re ready to bake, pull it straight from the freezer — no thawing necessary.
Frozen loaves actually bake even more evenly than refrigerated ones because the cold interior resists browning while the exterior develops proper color. Add 5 to 7 minutes to your baking time — so instead of 18 to 22 minutes total, aim for 23 to 29 minutes. Start with the foil covering for the full time, then remove it for the last 6 to 7 minutes to brown the top. The timing varies depending on your oven’s characteristics and how densely packed your freezer is with ice, so just watch for the golden-brown exterior and steam escaping from the cuts.
Alternatively, you can freeze just the garlic butter itself in an airtight container for up to a month, keeping it ready to assemble fresh bread anytime you want warm garlic bread without advance planning. Soften it at room temperature for about 5 minutes before spreading. Some bakers even freeze the garlic butter in ice cube trays, popping out individual portions to spread on bread for smaller servings.
Reheating Without Drying It Out
Leftover garlic bread reheats beautifully if you approach it correctly, though honestly, it rarely makes it to the next day in most households. If you do have leftovers, wrap the bread loosely in foil and warm it in a 350°F (175°C) oven for 8 to 10 minutes, until it’s heated through and the crust re-crisps slightly.
Never microwave garlic bread if you can avoid it. Microwaves heat through moisture and radiation, which softens the crust and makes the bread rubbery. An oven, even a toaster oven, reheats the bread more evenly and restores the crust texture far better.
If your leftover bread has become hard or stale, you can actually salvage it. Brush the cut surfaces lightly with a little extra garlic butter, wrap it in foil, and warm it at 375°F for 10 to 12 minutes until it’s hot throughout. The added butter and gentle oven heat can restore a surprising amount of tenderness. Alternatively, slice the bread thin and toast the slices in a skillet with a touch of olive oil, creating garlic bread chips that are delicious crushed over soups or salads.
Serving Suggestions and Perfect Pairings
Pull-apart garlic bread is a natural companion to Italian pasta dishes, where it acts as both a vehicle for sopping up sauces and a standalone element that rounds out the meal. Pair it with marinara-based pastas, creamy Alfredo, or oil-and-garlic preparations. The bread’s garlic notes echo the garlic in the pasta, creating a cohesive meal.
It’s equally at home alongside hearty soups, particularly tomato-based or cream soups that benefit from something to dunk or tear up. Minestrone, tomato bisque, creamy mushroom soup — all of these gain dimension when served with warm, buttery garlic bread. The bread soaks up the soup slightly while the soup softens and enriches the bread.
For steakhouse-style entertaining, serve this with grilled steaks or chops, where it plays the role of a loaded side dish similar to garlic bread at upscale restaurants. It pairs beautifully with roasted vegetables or a simple salad. Mediterranean meals built around grilled seafood or chicken are enhanced by this bread, which echoes the flavors and oils of those dishes.
Even simpler scenarios work: garlic bread alone with a green salad and good wine makes a satisfying light meal. Serve it with a cheese board and cured meats for entertaining, or tear it into chunks to use as croutons in Caesar salad. The versatility is one of its greatest strengths; this bread adapts to almost any dinner context.
Final Thoughts
Pull-apart garlic bread succeeds because it solves multiple problems simultaneously: it’s more interactive and engaging than flat bread, it develops better texture and browning than traditional garlic bread, it’s forgiving enough for confident beginners, and it can be made completely in advance. The technique is straightforward — the only skill required is patience while it bakes — and the results consistently impress.
The real secret to excellent garlic bread is respecting the components: using good butter, mincing garlic finely, and not rushing the baking process. There’s no fancy technique or obscure ingredient that transforms this dish. What matters is attention to detail, proper cutting depth, and the confidence to let it bake until it’s truly golden rather than stopping at pale yellow.
This is the kind of recipe that works equally well for a casual weeknight meal and for entertaining guests. Your guests will gravitate toward it without thinking, tear off warm pieces unselfconsciously, and ask for the recipe. Once you’ve made it once, you’ll have the quiet confidence that comes from knowing you can reliably produce something delicious that brings people together.