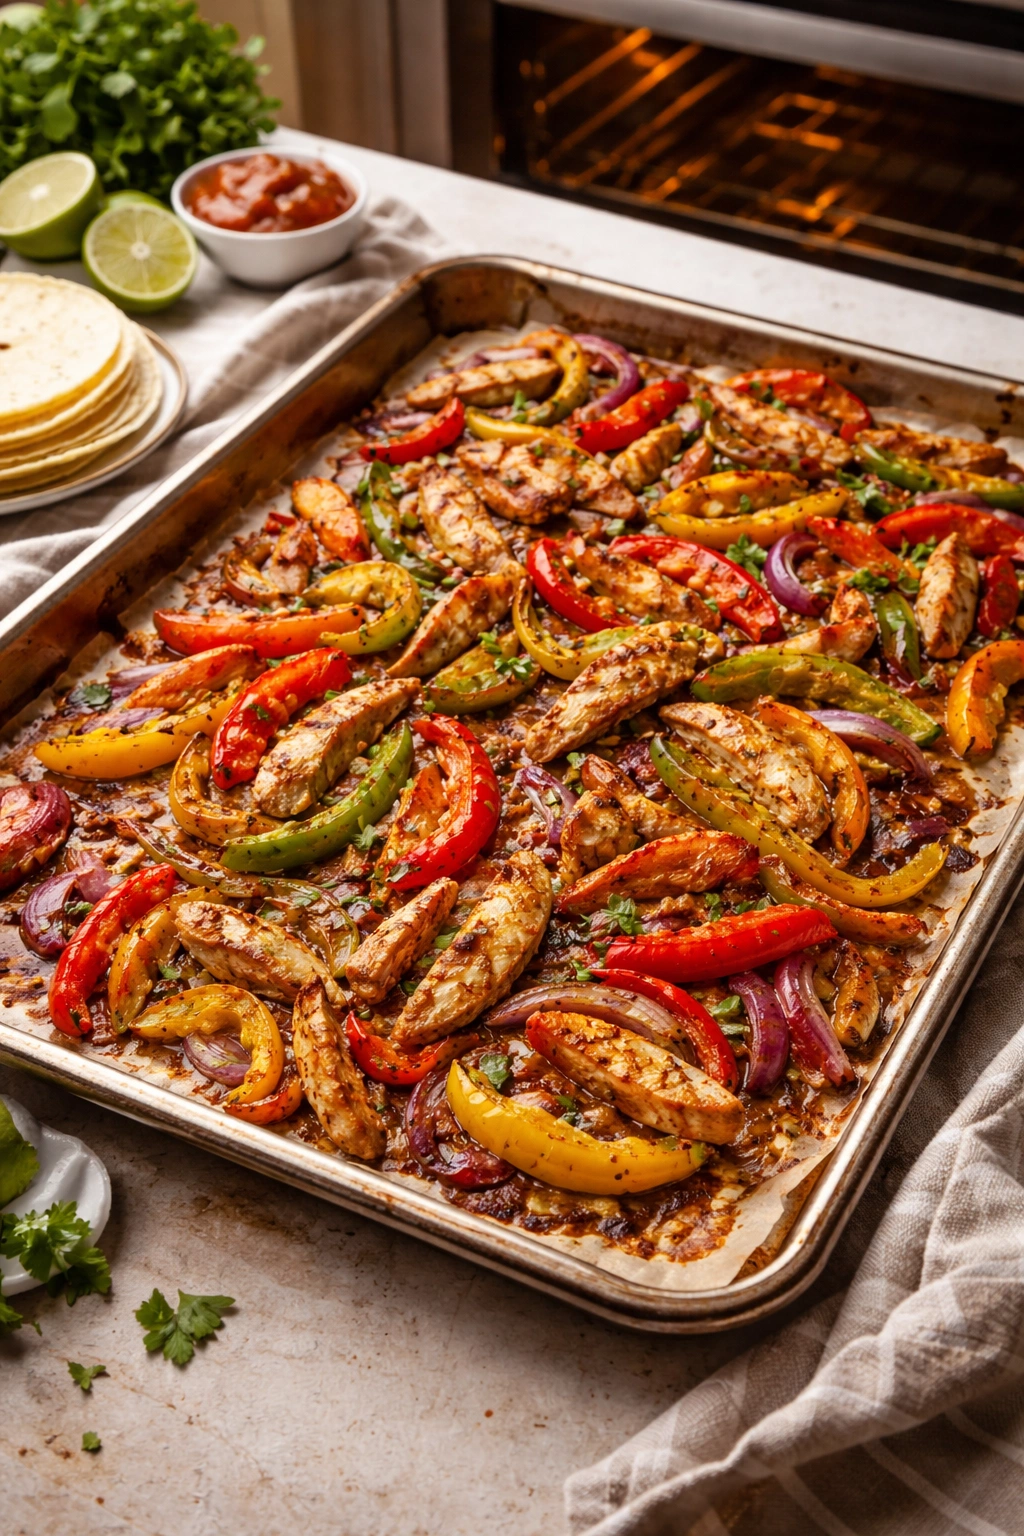
Sheet Pan Fajitas for an Easy Taco Night
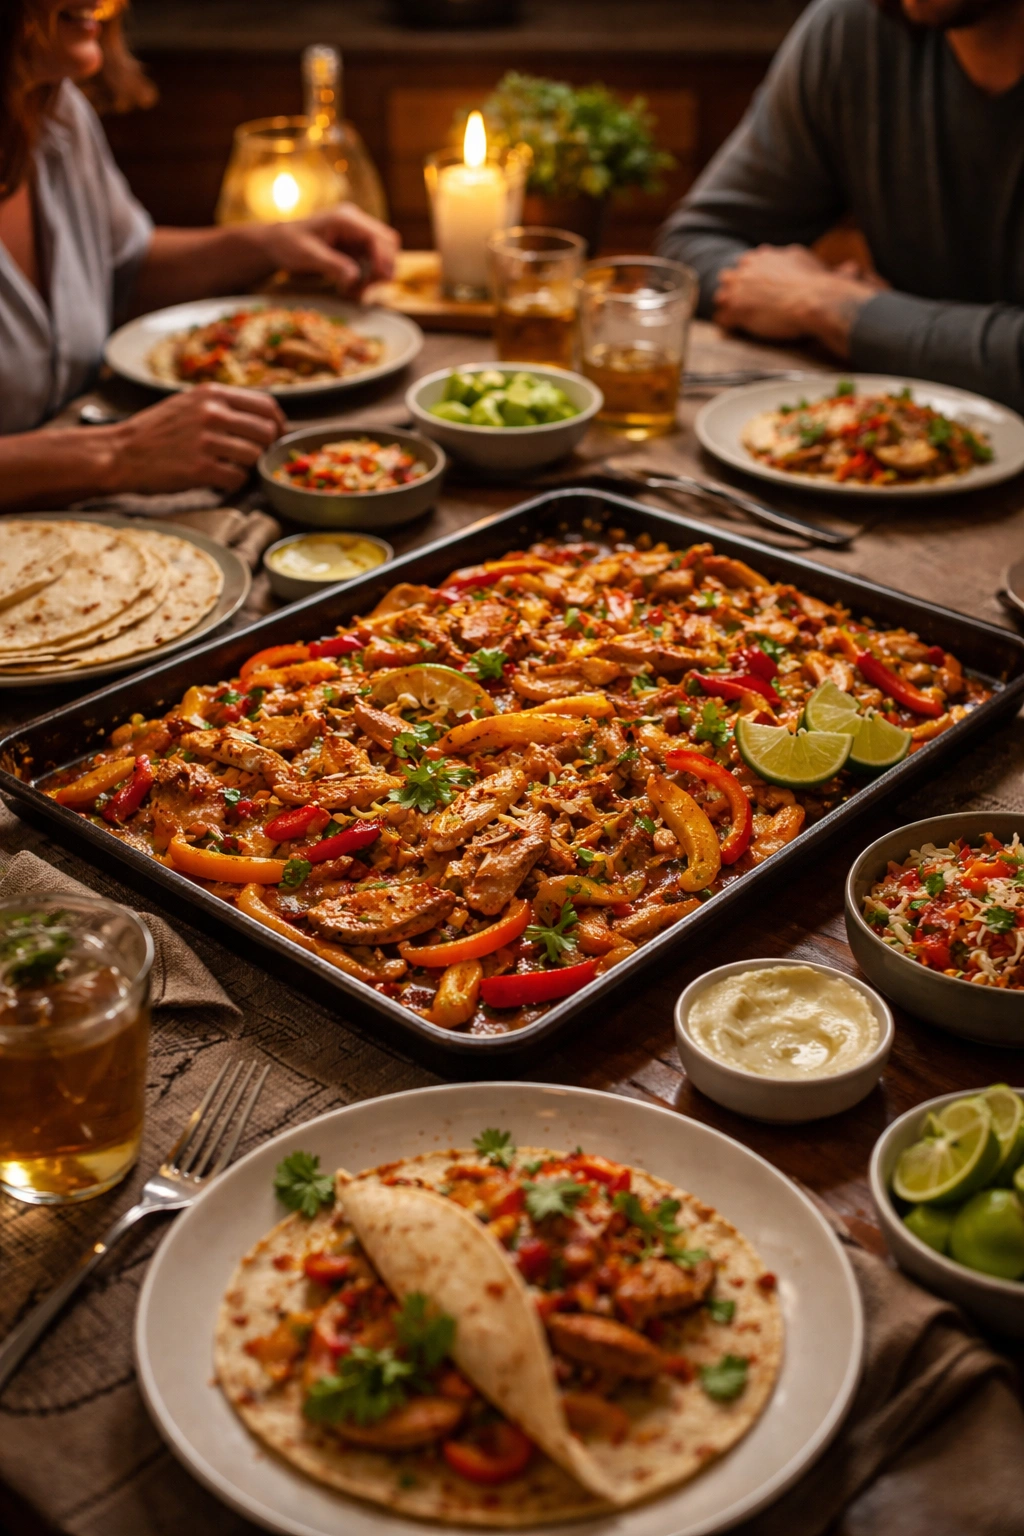
There’s something uniquely satisfying about gathering around the dinner table with sizzling, smoky fajitas that taste like you’ve been cooking all afternoon—except you haven’t. Sheet pan fajitas are the weeknight hack that actually delivers restaurant-quality results with minimal effort and maximum flavor. Gone are the days of juggling multiple skillets on the stovetop, constantly stirring, managing heat levels, and watching ingredients cook at different speeds. With sheet pan fajitas, you toss everything into one pan, slide it into the oven, and let the heat work its magic while you handle other tasks or simply relax until dinner hits the table.
What makes this approach so transformative is how the dry heat of the oven creates something the stovetop simply can’t replicate: beautifully caramelized edges on the chicken or steak, perfectly tender vegetables that aren’t steamed into submission, and seasoning that permeates every single ingredient evenly. The vegetables get charred in spots, developing deep, complex flavor, while the protein stays juicy and tender. It’s hands-off cooking at its finest, requiring only about 10 minutes of active prep work before the oven takes over completely.
Whether you’re feeding a hungry family on a busy weeknight, preparing a casual dinner for friends, or doing a bit of meal prep for the week ahead, sheet pan fajitas are infinitely adaptable. You can use chicken breast for a lean protein option, flank steak for something more substantial, shrimp for a lighter variation, or even load up on vegetables for a plant-based feast. The beauty of this recipe is that it scales easily, stores beautifully, and tastes just as good reheated as it does fresh from the oven.
Why Sheet Pan Fajitas Beat the Traditional Method
The traditional stovetop approach to fajitas requires constant attention and multiple pans. You’re managing heat levels, timing different ingredients, and often ending up with some components overcooked while others lag behind. Sheet pan fajitas completely eliminate this frustration by letting the oven do the heavy lifting.
When everything bakes together on one pan, the flavors meld in ways that separate cooking can’t achieve. The juices from the vegetables and protein intermingle, seasoning distributes evenly, and the oven’s dry heat creates caramelization that deepens every flavor note. You’re not steaming vegetables in a covered skillet—you’re actually roasting them, which brings out their natural sweetness and creates those desirable charred edges.
Cleanup is another game-changer that shouldn’t be underestimated. One sheet pan with parchment or foil means you can literally rinse it clean in seconds. No greasy stovetop, no multiple skillets soaking in the sink, no burnt-on residue to scrub. For busy nights when you’d rather spend time eating with your family than washing dishes, this alone makes the method worth adopting.
Perhaps most importantly, sheet pan fajitas free up your stovetop entirely. If you want to warm tortillas, make Mexican rice, or prepare a quick side salad simultaneously, you have all four burners available. The oven becomes your assistant instead of a limitation, which is exactly how efficient weeknight cooking should feel.
Choosing Your Protein: Chicken, Steak, or Shrimp
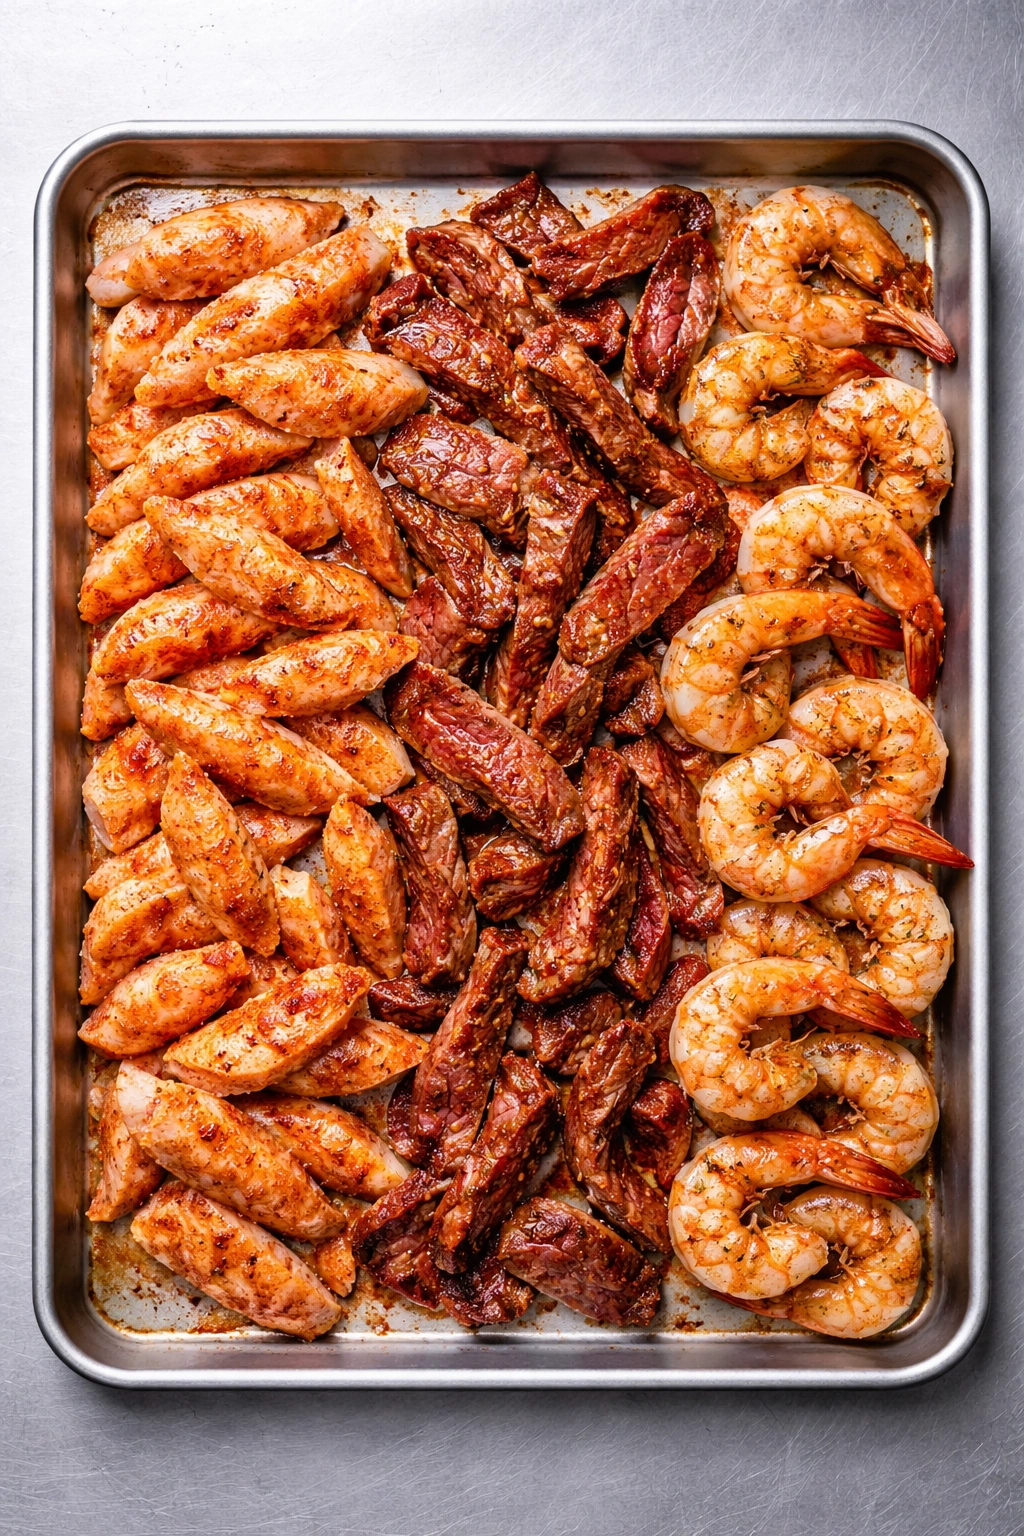
Each protein option brings its own strengths to sheet pan fajitas, and the choice often depends on what’s in your budget, how much time you have, and your personal preferences.
Boneless Skinless Chicken Breast is the leanest, most budget-friendly option, and it cooks quickly and evenly when sliced into thin, uniform pieces. This is the go-to choice for health-conscious cooking and for families watching their fat intake. The key to avoiding dry chicken is cutting slices no thicker than half an inch and being careful not to overcook—most chicken breast reaches safe internal temperature around the 15-to-20-minute mark. Marinating the chicken in the seasonings for even 10 minutes before baking helps ensure it stays tender and flavorful.
Flank Steak or Skirt Steak delivers rich, beefy flavor with a more substantial texture that many people prefer in fajitas. These cuts are traditional for a reason: they’re flavorful, relatively affordable, and become incredibly tender when sliced thin against the grain. Flank steak typically requires 15 to 20 minutes of baking at 400°F, and you can tell it’s done when it reaches medium-rare to medium doneness (130°F to 140°F internally). The key is slicing against the grain, which breaks up muscle fibers and ensures each bite is tender rather than chewy.
Boneless Chicken Thighs offer a middle ground—more forgiving than breast meat (they stay juicy even with slightly longer cooking) while still being relatively lean. Thighs can handle a bit longer cooking time without drying out, making them excellent for meal prep when you’re not sure exactly when you’ll eat.
Shrimp is the express option, cooking in just 5 to 8 minutes in the oven. Medium shrimp work best; they’re large enough to handle the oven heat without getting rubbery, but they cook quickly enough that you won’t risk overcooking them during the time the vegetables need. Shrimp fajitas tend to feel lighter and more elegant, making them perfect for company dinners or when you want something that feels a bit more special than a typical weeknight meal.
The Essential Vegetables and How to Prepare Them
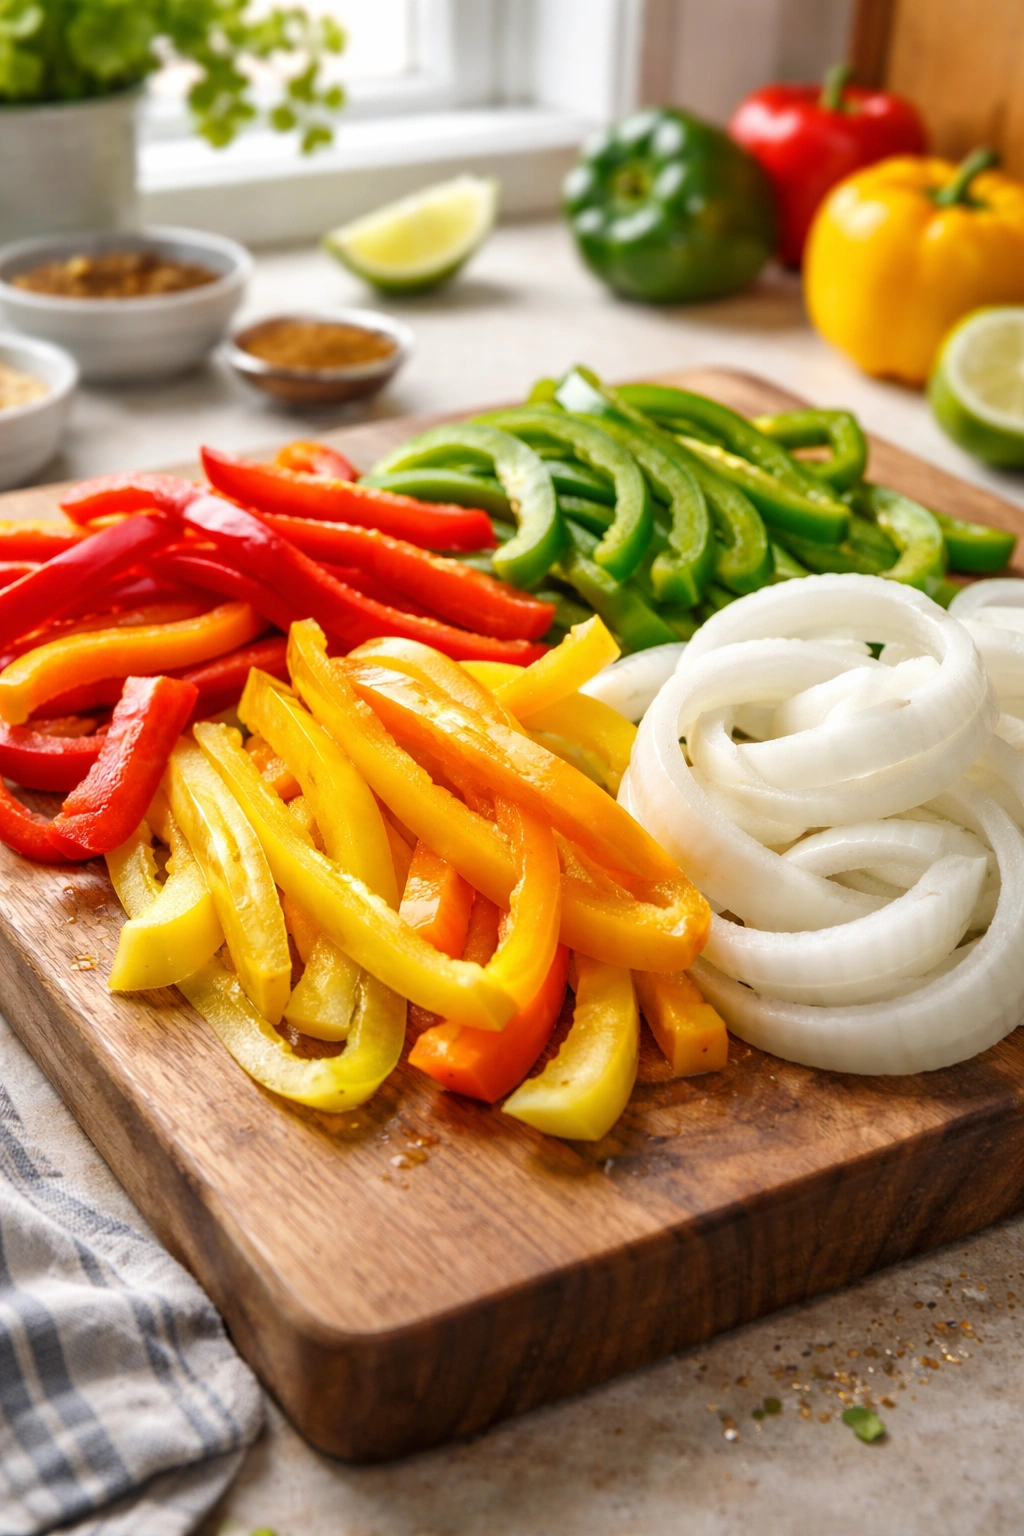
Bell peppers are non-negotiable in fajitas, and mixing colors—red, yellow, orange, and green—creates both visual appeal and subtle flavor variety. Red bell peppers are the sweetest, making them especially delicious when roasted. Green peppers bring an earthy, slightly grassy note that’s characteristic of more traditional fajita recipes.
Slice your bell peppers into strips about ½ inch wide, cutting lengthwise so you get long, elegant pieces that are easy to wrap into a tortilla. If you cut them too thin, they’ll become almost translucent during roasting; too thick and they’ll still be crunchy in the center when the protein is perfectly cooked.
Yellow or red onions are the standard choice, though white onions work equally well. Yellow onions are slightly sweeter, which balances the savory spices nicely. Slice them about ½ inch thick, going from root to tip so the layers hold together during cooking. This width is crucial—thinner slices can become papery, while thicker ones might still be raw in the center.
For added depth and complexity, consider including a poblano pepper, which is milder than a jalapeño but adds authentic Tex-Mex flavor. Some recipes include zucchini, which adds a subtle vegetable sweetness and helps bulk up the dish without overwhelming other flavors. Mushrooms, particularly cremini or portobello, are another wonderful addition that brings umami depth.
The secret to perfectly cooked vegetables is cutting everything to approximately the same size. When your bell pepper strips, onion slices, and any other vegetables are uniform in thickness and size, they cook at roughly the same rate, ensuring you pull the pan from the oven when everything reaches that perfect balance of tender and slightly charred at the edges.
Building Your Fajita Seasoning: Store-Bought vs. Homemade
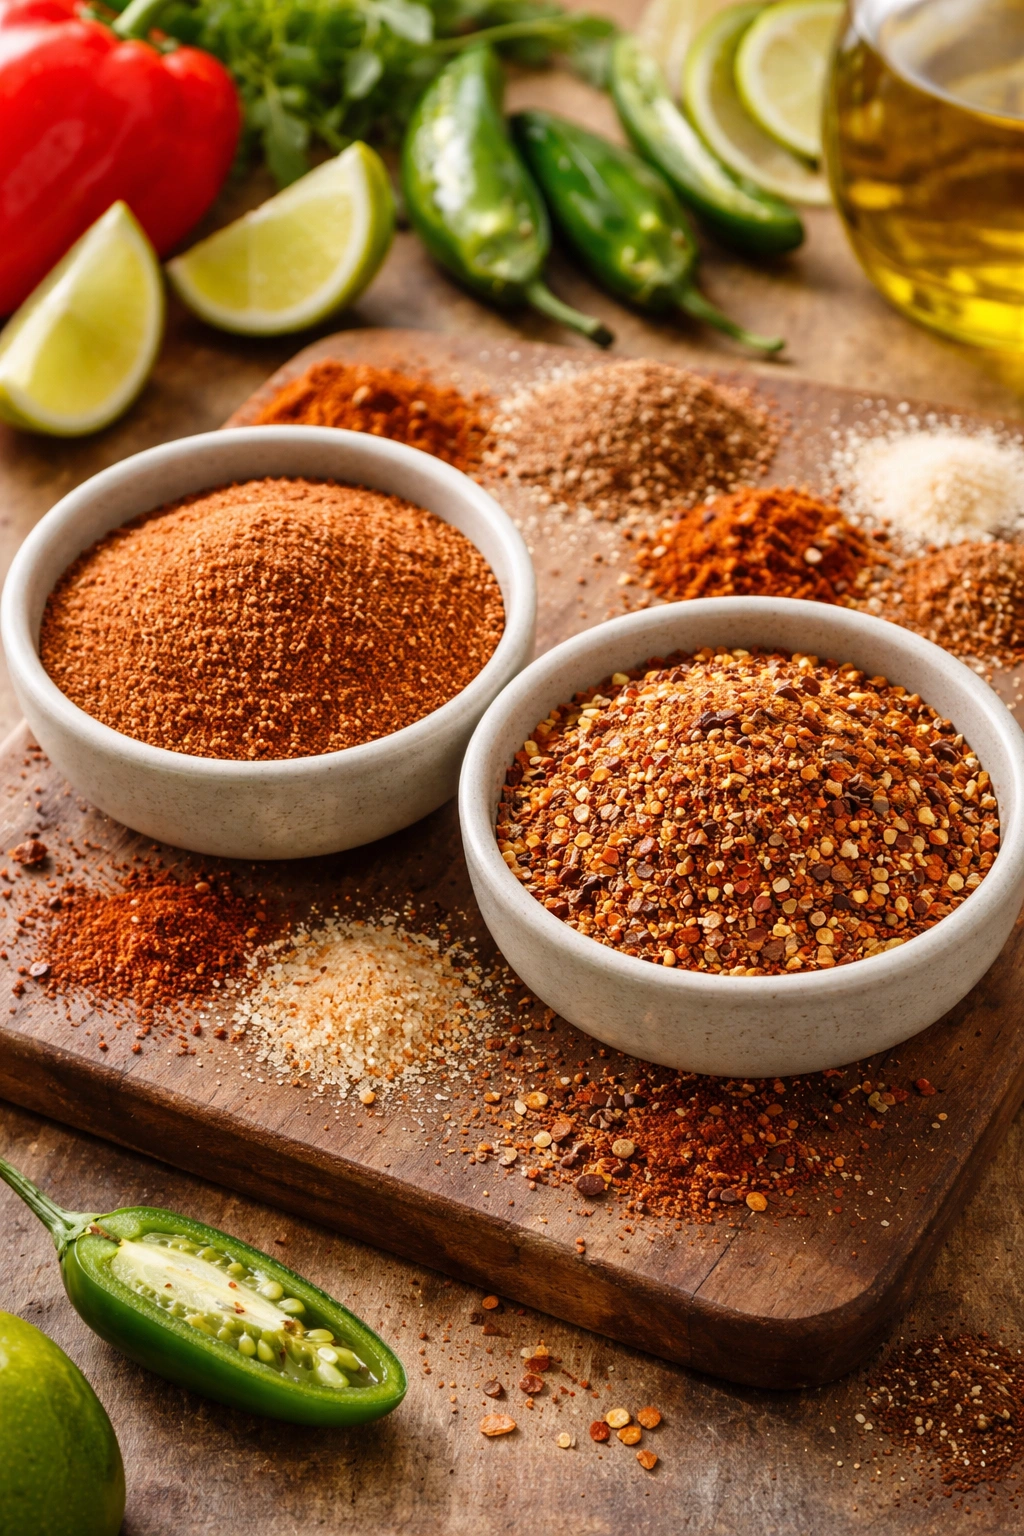
A good fajita seasoning blend is the backbone of the entire dish. While quality store-bought packets work fine when you’re in a genuine time crunch, homemade seasoning blends are superior in several ways: they have more complex flavor, zero fillers or anti-caking agents, and they cost a fraction of the price if you buy spices in bulk or already have them on hand.
The traditional fajita seasoning blend combines chili powder (the foundation), cumin (earthy warmth), garlic powder (savory depth), onion powder (sweetness), smoked paprika or regular paprika (smokiness and color), dried oregano (herbaceous notes), and salt and pepper to taste. Some recipes add a tiny pinch of cayenne pepper for gentle heat, though the amount should be minimal unless you’re making specifically spicy fajitas.
To make a homemade blend, combine 1 to 2 tablespoons of chili powder, 2 teaspoons of smoked paprika, 1 teaspoon each of onion powder and garlic powder, 2 teaspoons of ground cumin, 2 teaspoons of dried oregano, and ½ teaspoon of salt. This yields enough seasoning for a standard batch serving 4 to 6 people. Mixing this in a small bowl just before using ensures the spices are evenly distributed and haven’t settled or caked up.
Fresh lime juice is another critical component of fajita seasoning. Unlike bottled lime juice, which can taste plasticky or overly concentrated, fresh lime brings brightness and a subtle tartness that makes every other flavor pop. Squeeze the juice from one lime (typically 2 to 3 tablespoons) and combine it with your dried spices and olive oil to create a marinade paste.
The advantage of making your seasoning blend this way—rather than as a dry mixture you store—is that the lime juice and oil help the spices adhere to the meat and vegetables more effectively, ensuring even flavor distribution. This paste-like consistency also reduces the amount of liquid that accumulates in the pan during cooking, which means your ingredients roast rather than steam.
Marinating Versus Quick-Toss: Timing Your Fajitas
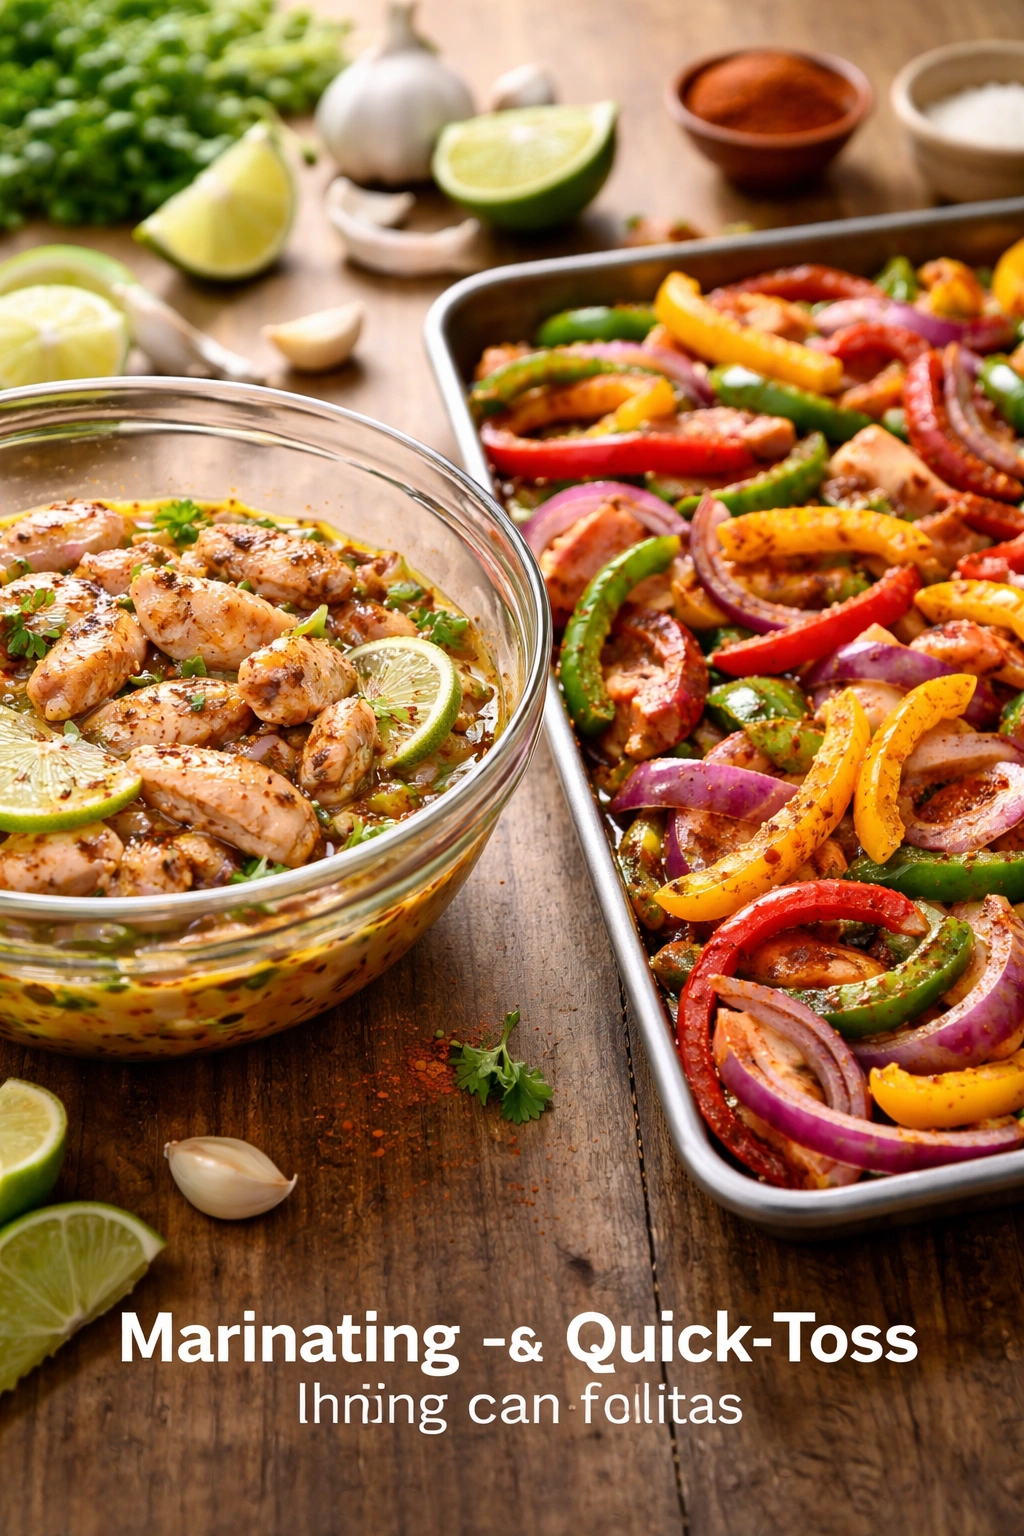
Marinating your fajita ingredients before baking isn’t absolutely necessary, but it’s one of the easiest ways to elevate flavor with almost no additional effort. Even a brief 15-to-30-minute marinate in the seasoning mixture helps the spices penetrate the protein and vegetables.
If you have the time, a 30-minute to 2-hour marinate in the refrigerator produces noticeably more seasoned results. The acid in the lime juice gently tenderizes the protein while the oil carries the fat-soluble flavors deeper into the meat. Don’t marinate longer than 2 hours, though—the lime juice will begin to break down the protein’s structure in ways that create an unpleasant mushy texture.
For truly busy nights, simply tossing everything together on the sheet pan and baking immediately works perfectly well. The seasoning still infuses during the roasting time, and you’ll still get delicious fajitas. The main difference is that they might be slightly less intensely seasoned and the vegetables might retain slightly more of their raw crunch, which some people actually prefer.
A practical middle-ground approach is prepping your marinade and vegetables the morning of your dinner (they’ll keep beautifully in an airtight container in the refrigerator for up to 24 hours), then tossing everything together and baking when you get home. This gives you the flavor benefits of marinating without requiring you to plan ahead by more than a day.
Perfect Oven Temperature and Timing

The ideal oven temperature for sheet pan fajitas ranges from 375°F to 425°F, depending on how much browning you want and how quickly you need dinner on the table. Understanding this range helps you adjust the recipe to fit your schedule.
At 400°F to 425°F (hot oven), chicken breast and vegetables cook in about 15 to 20 minutes, and steak cooks in approximately 15 to 18 minutes. This higher temperature creates more aggressive browning and caramelization on the vegetables, resulting in charred edges and deeper flavor development. The trade-off is that you need to stay relatively close to timing, as overcooking by a few minutes might dry out lean chicken.
At 375°F to 385°F (moderate oven), everything takes slightly longer—about 20 to 25 minutes—but the cooking is more gentle and forgiving. There’s less risk of overcooking delicate proteins, and the vegetables develop a more gentle roast rather than heavy char. This temperature is ideal if you’re using boneless chicken thighs or fattier cuts of steak, which can handle the longer time without drying out.
The single most important tool for ensuring perfectly cooked protein is an instant-read meat thermometer. Chicken breast is safely cooked at 165°F (74°C), though it will be most tender and juicy at 160°F to 162°F. Steak for fajitas is best served at medium-rare to medium, which means an internal temperature of 130°F to 140°F (54°C to 60°C). Shrimp should be opaque and just cooked through, typically when it reaches 145°F (63°C).
Arrange ingredients in a single layer on your sheet pan with space between pieces—if everything is crowded together, the items in the middle will steam rather than roast. If your sheet pan feels cramped, use two pans or divide the recipe rather than piling everything into one.
Practical Tips from Experienced Home Cooks
Freezing thin-cut steak for 10 to 15 minutes before slicing makes the meat firmer and far easier to cut into clean, thin pieces. This small step dramatically improves texture and presentation, especially if you’re not working with a particularly sharp knife. You don’t need a long freeze—just long enough that the meat is cold and firm but not actually frozen solid.
Always slice protein and vegetables against the grain (for meat) or into uniform sizes (for vegetables). Cutting against the grain breaks up the muscle fibers, making each bite more tender. For vegetables, uniform sizing ensures everything finishes cooking at the same time.
Don’t skip the parchment or foil. This single step makes cleanup almost effortless and prevents sticking. Even a nonstick sheet pan benefits from parchment, which means you can slide the finished fajitas directly onto a serving platter without any frustration.
Dry your protein before cooking. Pat chicken or steak dry with paper towels before tossing with the marinade. Excess surface moisture prevents browning and creates steam that keeps the exterior from developing that desirable golden-brown color.
Toss everything together in a bowl first. Rather than trying to evenly distribute the marinade on the sheet pan, combine your protein and vegetables in a large bowl, toss with the seasoning mixture, then transfer everything to the sheet pan. This ensures even coating and saves cleanup since you’re using one bowl instead of the sheet pan and a bowl.
If your pan looks liquidy at the 10-minute mark, drain it. Some vegetables release significant liquid during cooking. If you notice a visible amount of liquid in the pan halfway through, carefully pour it off (a slotted spoon or small colander works great). This allows the remaining cooking time to focus on browning rather than simmering.
For extra browning, use the broiler at the end. If everything is cooked through but you want more color and char on the vegetables, switch to the broiler for the final 2 to 3 minutes. Watch carefully—the difference between beautiful char and burnt-on edges is about 60 seconds.
Fresh cilantro and lime juice finish the dish. Adding these after cooking (rather than before) keeps the cilantro’s flavor bright and the lime’s acidity sharp. This finishing step is what takes the dish from “good” to “restaurant-quality.”
Making Sheet Pan Fajitas Your Own: Flavor Variations
The beauty of sheet pan fajitas is that they’re endlessly customizable. Once you understand the basic method, you can spin countless variations based on what sounds good, what’s on sale, or what dietary needs you’re accommodating.
Spicy Fajitas are perfect for heat lovers. Add ½ to 1 teaspoon of crushed red pepper flakes to the seasoning mixture, include sliced fresh jalapeños with the vegetables, and serve with hot sauce on the side. Some people even add a pinch of cayenne to the dry seasoning blend for layered heat.
Smoky Fajitas amplify the depth by using smoked paprika (which gives a campfire quality) and adding smoked salt instead of regular salt if you have it. A tiny splash of liquid smoke whisked into the oil before tossing also works beautifully, though go easy—a little goes a long way.
Cilantro Lime Fajitas emphasize brightness by bumping up the lime juice to 3 to 4 tablespoons, adding an extra ¼ cup of fresh chopped cilantro to the pan before baking, and finishing with even more cilantro and fresh lime wedges at the table.
Garlic-Forward Fajitas use 4 to 5 minced fresh garlic cloves instead of just garlic powder, which creates a more assertive, complex garlic flavor that some people prefer to the powder’s milder note.
Mushroom and Poblano Fajitas replace some of the bell peppers with sliced cremini or portobello mushrooms and at least one poblano pepper, creating an earthier flavor profile that feels more gourmet and works beautifully with vegetarian protein or chicken.
Pineapple-Chipotle Fajitas add a Teriyaki-influenced twist by stirring a tablespoon or two of honey or pineapple juice into the marinade and using chipotle powder instead of regular chili powder. Fresh pineapple chunks can be added to the pan during the final 5 minutes of cooking.
Fajita Bowls skip the tortillas altogether and serve the fajita mixture over cilantro lime rice, cauliflower rice, or a bed of greens, creating a more substantial, low-carb meal that’s meal-prep friendly.
Storage, Make-Ahead, and Reheating Instructions
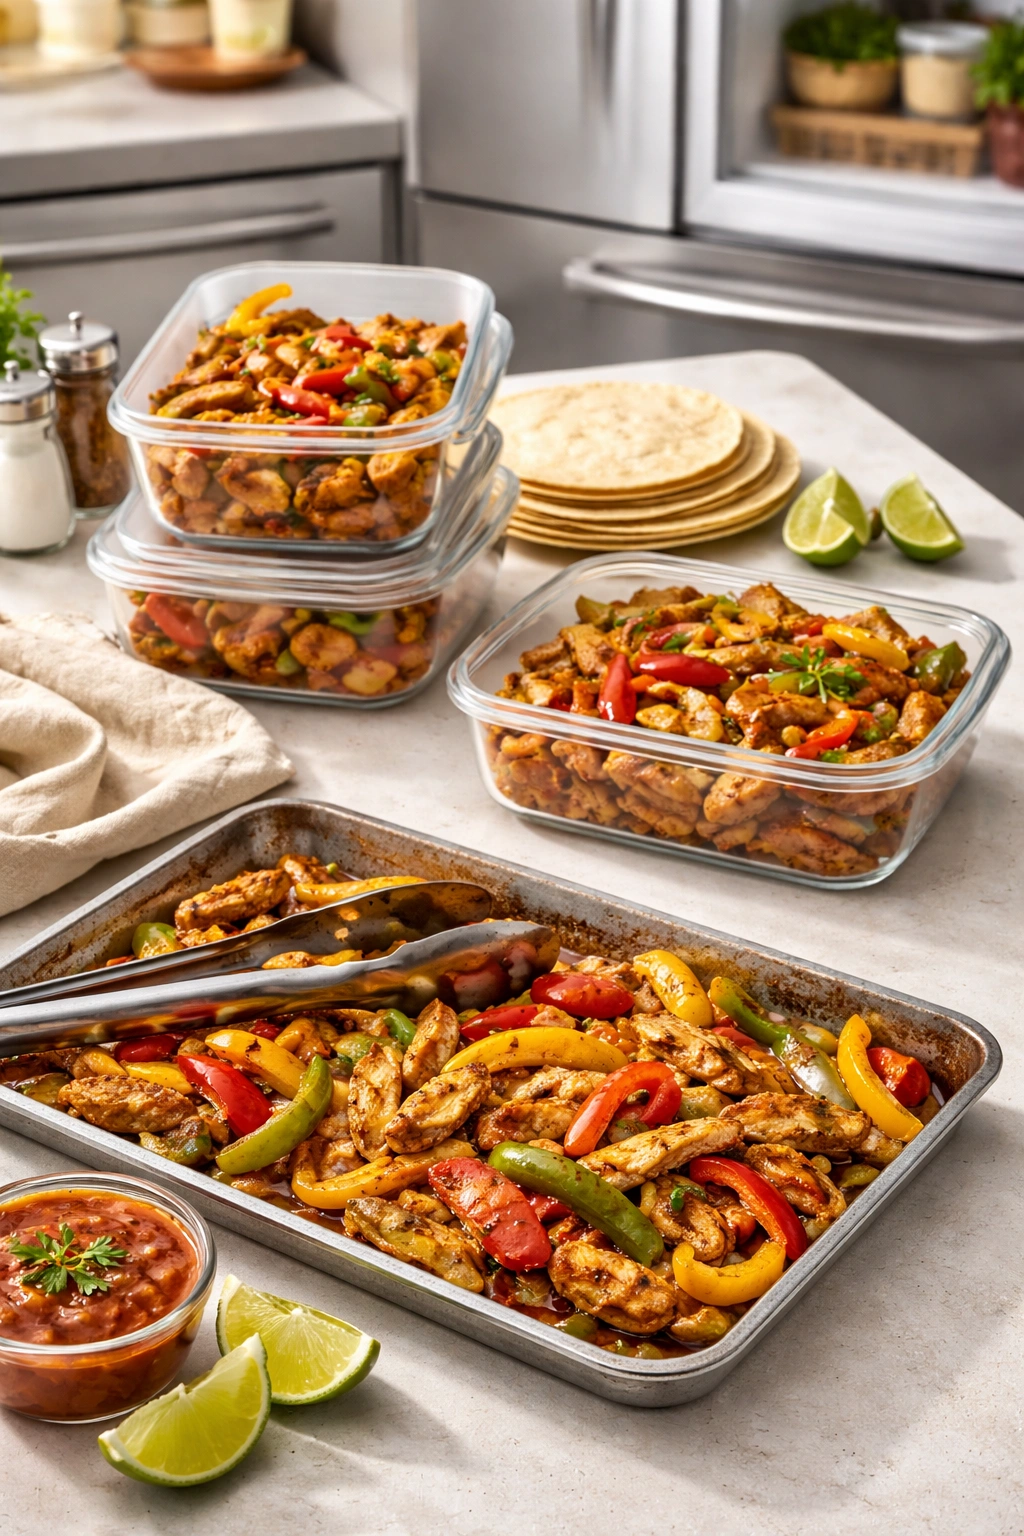
Sheet pan fajitas keep beautifully, making them excellent for meal prep or for having ready-made components for quick dinners throughout the week.
Refrigerator Storage works for 3 to 4 days in an airtight container. The flavors actually develop and improve after a day or two, so fajitas made on Sunday taste even better on Tuesday. Store the fajita mixture and tortillas separately so the tortillas don’t get soggy.
Freezing is also effective. Allow the cooked fajitas to cool completely, then arrange them on a parchment-lined baking sheet and freeze until solid (about 1 to 2 hours). Transfer the frozen fajitas to a zip-top freezer bag and label with the date; they’ll keep for 2 to 3 months. Thaw overnight in the refrigerator before reheating.
Reheating on the Stovetop is ideal. Heat a skillet over medium-high heat, add the fajitas, and cook for 5 to 8 minutes, stirring occasionally, until heated through. This method restores the slight crispness and prevents the vegetables from becoming too soft.
Oven Reheating works well for larger quantities. Spread fajitas on a sheet pan, cover with foil to prevent drying, and warm at 350°F for about 10 minutes until heated through. Remove the foil for the final 2 to 3 minutes if you want to re-crisp the edges slightly.
Make-Ahead Prep is where sheet pan fajitas truly shine. You can cut vegetables and slice protein the morning before, store both separately in airtight containers, and combine everything just before baking. The seasoning mixture can be made days in advance and stored at room temperature in a small jar. This means you literally have a dinner that takes 10 minutes of active work even if you wait until dinnertime to start cooking.
Serving Suggestions and Toppings Strategy
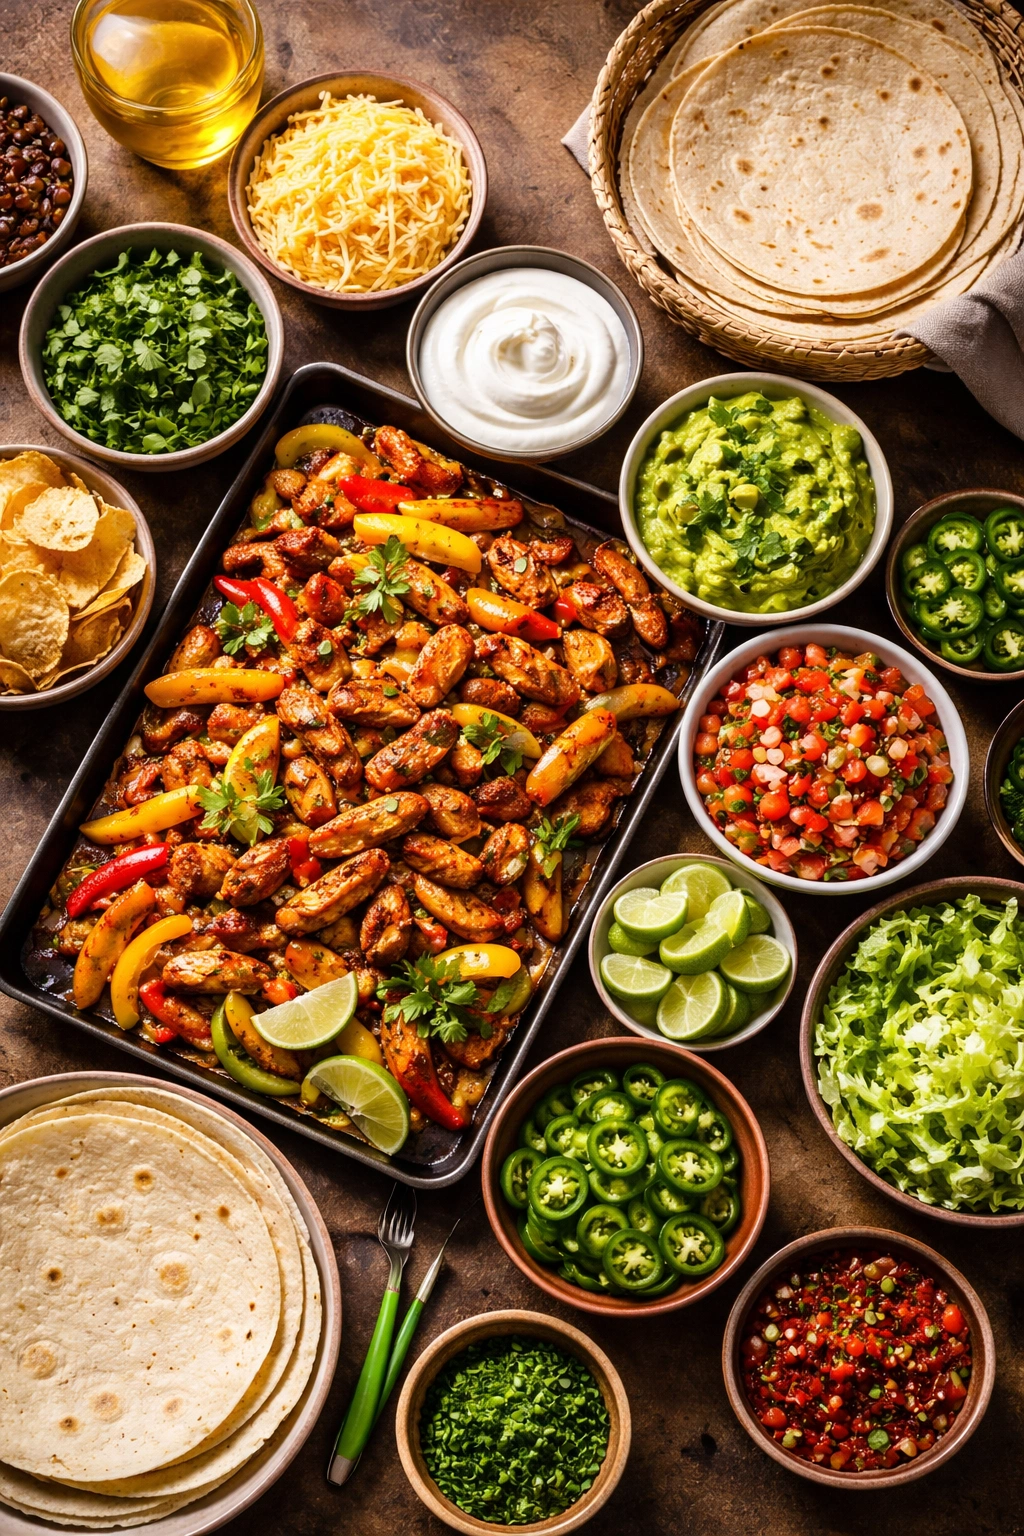
The magic of fajitas is in the customization—everyone builds their own based on what they love. Putting together a simple toppings station means each person can create exactly what they’re craving rather than eating what you decided for them.
The Classic Toppings Bar includes shredded cheese (cheddar, Oaxaca, or a Mexican blend), sour cream, guacamole or sliced avocado, salsa (fresh pico de gallo or a mild chunky salsa for vegetables, hot salsa for spice lovers), fresh cilantro, thinly sliced jalapeños, lime wedges, and shredded lettuce.
Sides That Pair Beautifully include Spanish rice or cilantro lime rice (which soaks up extra sauce and creates a more filling meal), black beans or refried beans, charred corn, Mexican street corn casserole, or roasted Mexican vegetables. These sides transform fajitas from a light dinner to a fully rounded, restaurant-style meal.
Tortilla Choices matter more than people realize. Warm flour tortillas are the traditional choice and work with any protein or vegetable combination. Corn tortillas are more traditional in Mexico and offer an earthy, slightly sweet flavor. For low-carb or gluten-free options, consider jicama tortillas, large lettuce leaves (which work wonderfully for a lettuce-wrap version), or almond-flour tortillas.
Ways to Warm Tortillas include wrapping them in foil and placing them in the oven during the final 5 to 10 minutes of fajita cooking (a passive approach that requires no extra attention), warming them individually in a dry skillet over medium heat for about 30 seconds per side, or charring them briefly over a gas flame for smoky flavor.
Serving for Guests is easier than you’d think. Transfer the hot fajita mixture to a serving bowl or platter, arrange warm tortillas on a separate dish, and set out all the toppings in small bowls. Guests build their own, which is more fun and means everyone eats exactly what they want rather than something you overestimated or underestimated.
Sheet Pan Fajitas Recipe
Yield: Serves 4 to 6 | Makes 8 to 12 fajitas
Prep Time: 15 minutes
Cook Time: 20 minutes
Total Time: 35 minutes (plus optional 30-minute marinate)
Difficulty: Beginner — No special equipment or techniques required; simply toss ingredients together and let the oven do the work.
For the Fajita Mixture:
- 1½ to 2 pounds boneless skinless chicken breasts, sliced ½ inch thick (or 1½ pounds flank steak, thinly sliced against the grain, or 1½ pounds large shrimp, peeled and deveined)
- 3 large bell peppers (red, yellow, orange, and/or green), sliced into ½-inch strips
- 1 large yellow onion, sliced ½ inch thick
- 2 tablespoons olive oil or avocado oil
- 1 tablespoon fresh lime juice (from 1 small lime)
For the Fajita Seasoning:
- 2 tablespoons chili powder
- 2 teaspoons smoked paprika
- 1 teaspoon ground cumin
- 1 teaspoon garlic powder
- ½ teaspoon onion powder
- 1 teaspoon kosher salt
- ½ teaspoon freshly ground black pepper
- ¼ teaspoon cayenne pepper (optional, for heat)
For Serving:
- 8 to 12 warm flour tortillas (6-inch or large, depending on preference)
- Fresh cilantro, finely chopped
- Lime wedges
- Shredded cheese (cheddar, Mexican blend, or queso fresco)
- Sour cream or crema
- Guacamole or sliced avocado
- Salsa (pico de gallo, chunky salsa verde, or hot salsa)
- Sliced jalapeños (optional)
- Shredded lettuce (optional)
Instructions
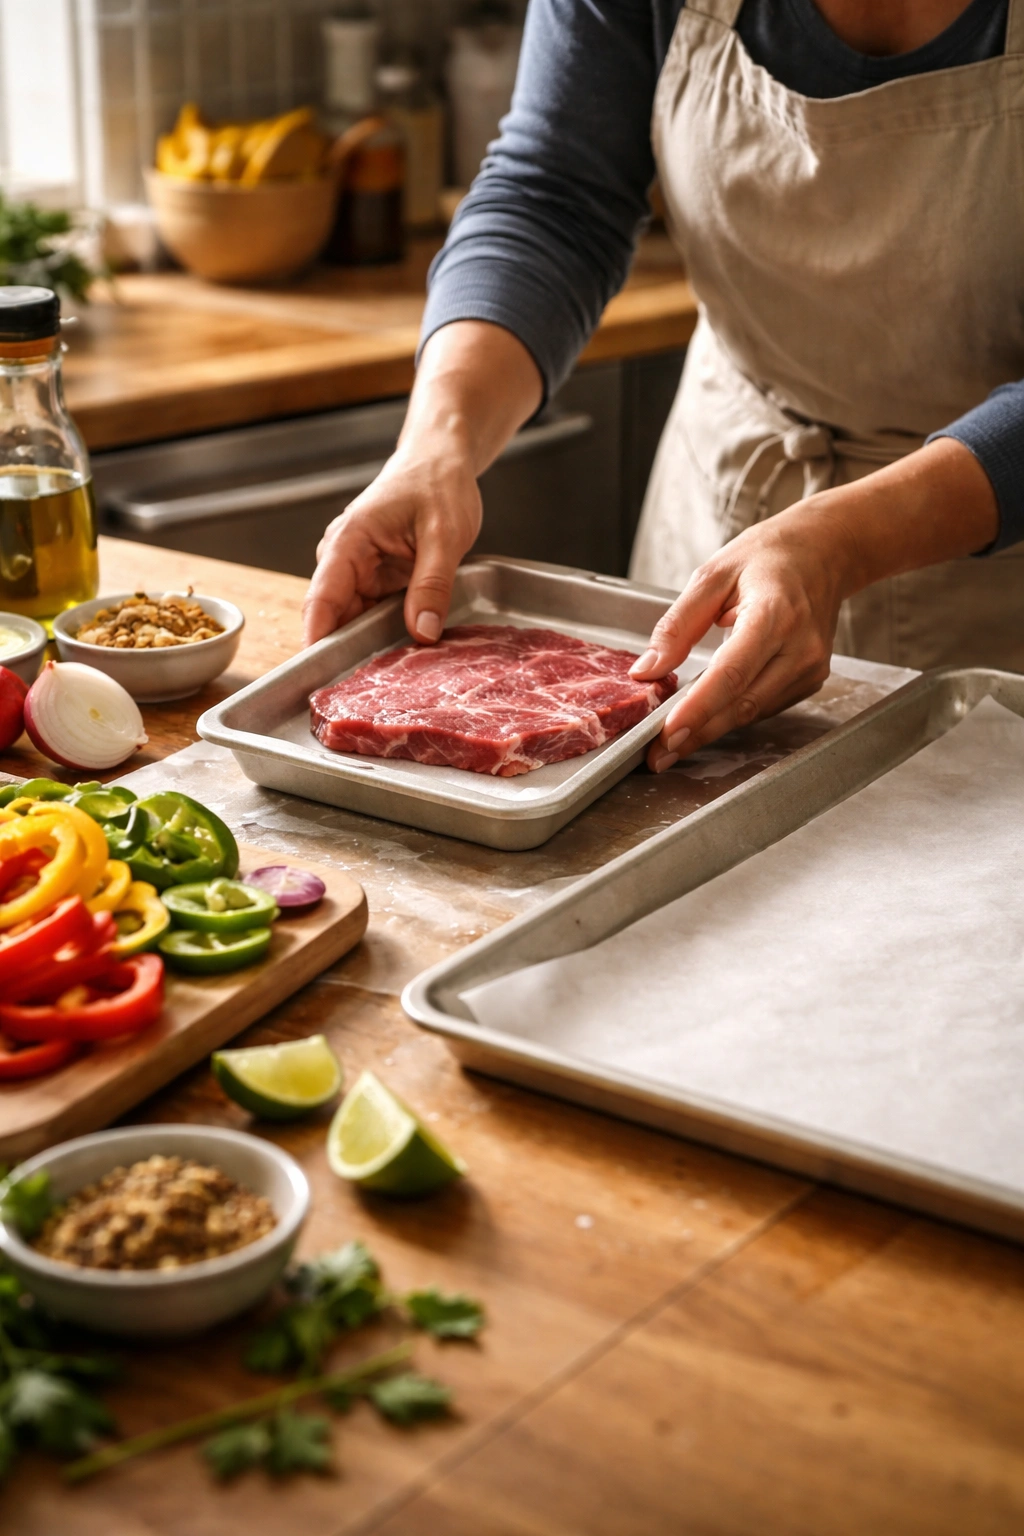
Prepare the Sheet Pan and Oven:
-
Preheat the oven to 400°F (204°C) and position a rack in the center of the oven.
-
Line a large rimmed sheet pan (at least 18×13 inches) with parchment paper or aluminum foil. If not using parchment, lightly spray the sheet pan with cooking spray or a thin coat of oil to prevent sticking.
Combine the Seasoning Blend:
-
In a small bowl, whisk together the chili powder, smoked paprika, cumin, garlic powder, onion powder, salt, black pepper, and cayenne pepper (if using) until evenly mixed. Set aside.
-
In the same small bowl (no need to wash), add the olive oil and lime juice to the seasoning mixture. Stir well to combine into a paste-like consistency. The paste should be thick enough that most of it clings to the spoon rather than running like a liquid.
Advertisements
Prepare and Season Ingredients:
-
Pat the chicken (or steak) dry with paper towels. Excess surface moisture will prevent browning, so this step makes a noticeable difference in the final texture and color.
-
In a large mixing bowl, combine the sliced chicken, bell peppers, onion, and the seasoning paste. Using tongs or two large spoons, toss everything together thoroughly until every piece of protein and vegetable is evenly coated with the seasoning mixture. This usually takes about 1 to 2 minutes of tossing.
Optional Marinating Step:
- If you have time, cover the bowl with plastic wrap and refrigerate for 15 minutes to 2 hours. This allows the flavors to deepen and the lime juice to gently tenderize the protein. If you’re short on time, skip this step and proceed directly to the next step—the fajitas will still be delicious.
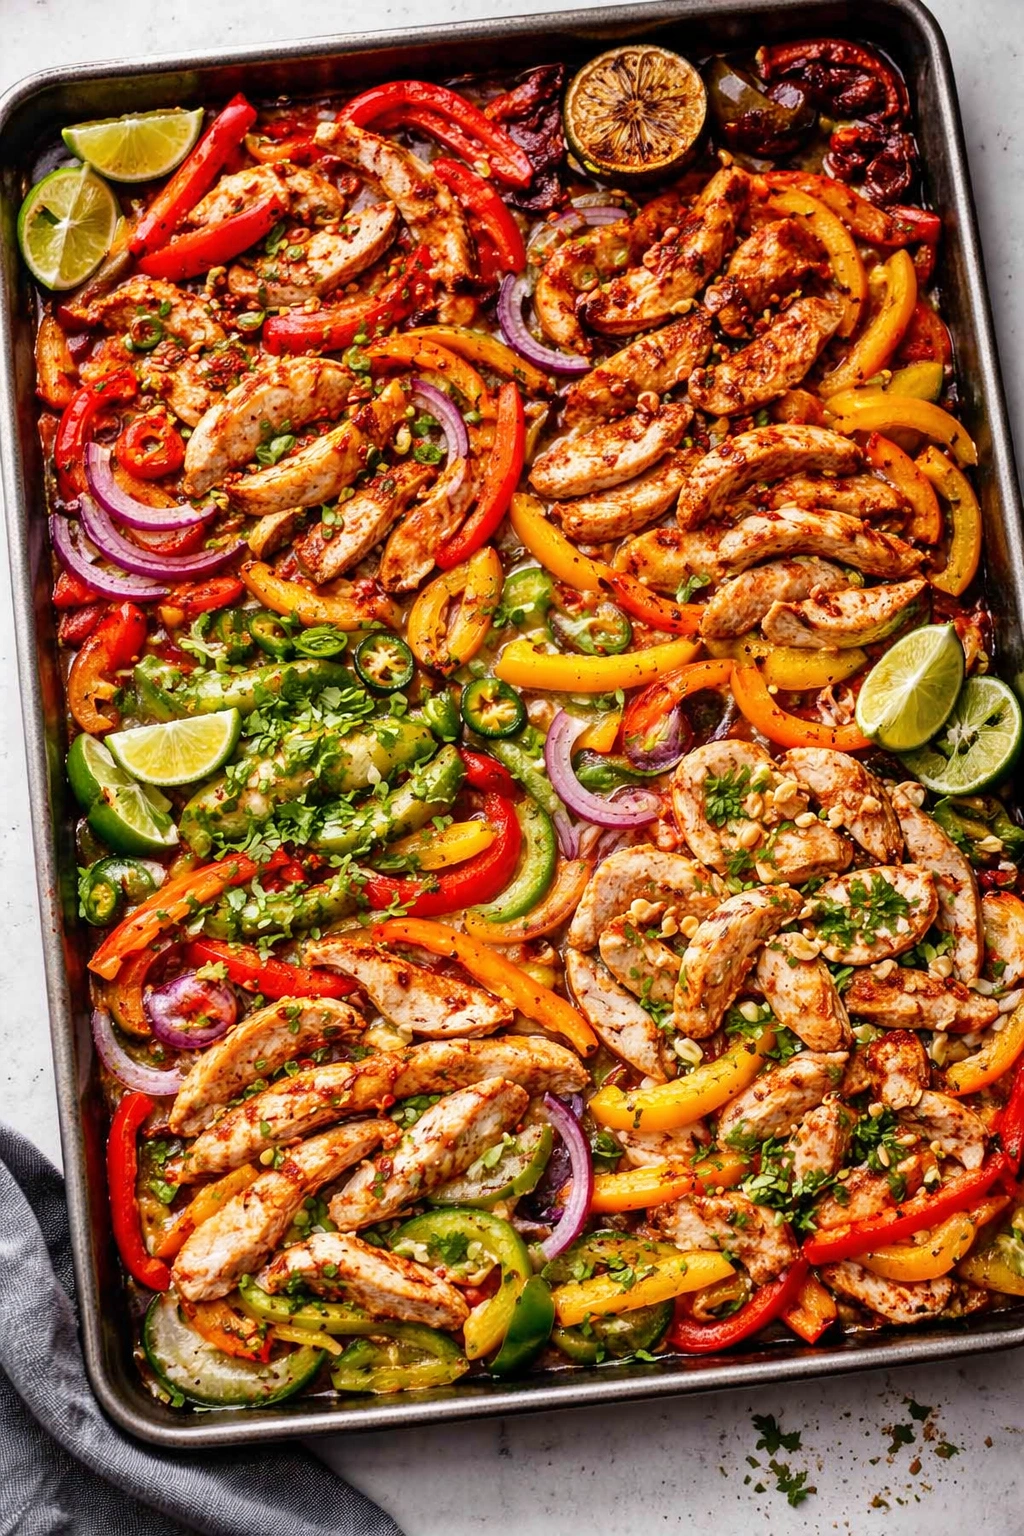
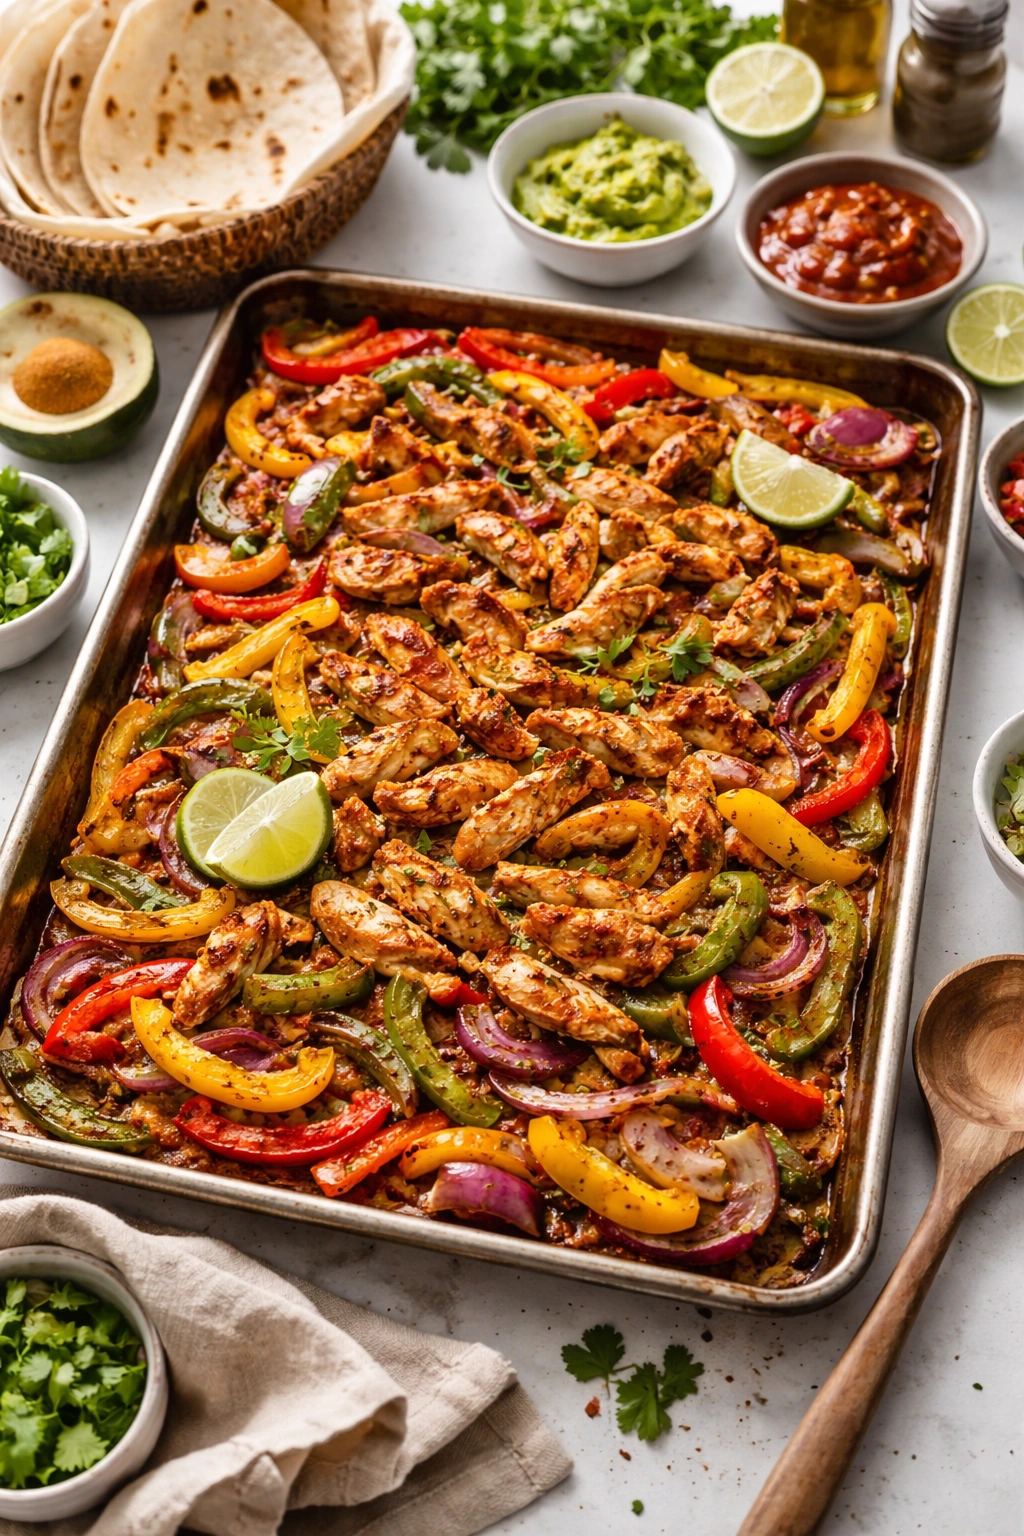
Arrange and Roast:
-
Transfer the entire contents of the bowl to the prepared sheet pan, spreading everything into a single, even layer. Make sure pieces aren’t piled on top of each other—proper spacing allows the oven heat to hit every surface and create browning rather than steaming.
-
If your sheet pan feels overcrowded (ingredients should be in a single layer with visible pan showing between pieces), divide everything between two sheet pans. Crowding prevents proper roasting.
-
Bake in the preheated 400°F oven for 15 to 20 minutes for chicken breast, 15 to 18 minutes for sliced steak, or 8 to 10 minutes for shrimp. For chicken and steak, insert an instant-read thermometer into the thickest piece: chicken should reach 160°F to 165°F (71°C to 74°C), and steak should reach 130°F to 140°F (54°C to 60°C) for medium-rare to medium doneness. For shrimp, the flesh should be opaque throughout and just cooked through.
-
Approximately halfway through cooking (around the 8 to 10-minute mark), open the oven and check the pan. If there’s visible liquid pooling on the pan, carefully drain it using a slotted spoon or small colander. This ensures the remaining cooking time focuses on browning rather than simmering.
-
If you prefer extra browning or char on the vegetables, switch the oven to broil for the final 2 to 3 minutes of cooking. Watch carefully during broiling—the line between beautiful char and burnt edges is just about 60 seconds. The vegetables should be tender-crisp with some charred spots, not blackened.
Advertisements
Finish and Serve:
-
Remove the sheet pan from the oven and immediately sprinkle the entire mixture with fresh chopped cilantro and a final squeeze of fresh lime juice. The heat of the just-cooked fajitas will gently warm the cilantro while keeping its bright flavor intact.
-
Transfer the fajita mixture to a serving platter or serve directly from the sheet pan for a casual presentation. Set out warm tortillas, lime wedges, and all desired toppings in small bowls so each person can build their own fajitas.
-
To assemble: Layer each tortilla with a small spoonful of guacamole or avocado, add the desired amount of fajita mixture (protein and vegetables), top with cheese, sour cream, salsa, and additional cilantro, then squeeze with fresh lime juice before eating.
Chef’s Notes and Pro Tips
Preventing Dry Chicken: The single biggest risk with chicken breast is overcooking. Using an instant-read thermometer removes all guesswork. The moment the thermometer reads 160°F to 162°F in the thickest piece, the chicken is ready. It will coast to 165°F during the 30 seconds it takes to remove the pan from the oven, and the carryover heat ensures it reaches safe temperature while staying tender and juicy.
Cutting Steak Thin and Against the Grain: Partially freezing the steak for 10 to 15 minutes before slicing makes it significantly easier to cut clean, thin pieces. Position your knife perpendicular to the direction the muscle fibers run, and aim for pieces about ¼ inch thick for maximum tenderness.
Make-Ahead Confidence: You can slice vegetables and protein the morning before, store both in separate airtight containers in the refrigerator, and combine with the seasoning mixture just before baking. This dramatically reduces active cooking time on busy evenings.
Customizing Spice Level: Not everyone at the table wants the same level of heat. Mix your seasoning blend without the cayenne pepper, then sprinkle extra cayenne on half the pan before baking, or let guests add hot sauce to taste at the table.
Vegetarian Version: Skip the protein and load the pan with extra vegetables—use additional bell peppers, add sliced mushrooms, zucchini, summer squash, and extra poblano peppers. The cooking time remains the same, and the result is just as satisfying.
Batch Cooking: This recipe doubles or triples easily. Use two sheet pans when doubling to ensure ingredients have space to roast properly. Cooking time remains the same since both pans are in the same oven.
Storage and Leftovers
Refrigerator: Store cooked fajitas in an airtight container for 3 to 4 days. Store tortillas separately to prevent sogginess. The flavors actually deepen and improve after a day or two, making cold-storage fajitas taste even better than fresh.
Freezing: Cool completely, then arrange on a parchment-lined sheet pan and freeze until solid (1 to 2 hours). Transfer to a zip-top freezer bag and freeze for up to 3 months. Thaw overnight in the refrigerator before reheating.
Reheating: Heat a skillet over medium-high heat and warm the fajitas for 5 to 8 minutes, stirring occasionally, until heated through. This method restores some of the crispy texture. Alternatively, cover with foil and warm in a 350°F oven for 10 minutes.
Leftover Ideas: Chop leftover fajitas and use them in nachos, quesadillas, burrito bowls, fajita fried rice, or scattered over a fresh salad with ranch dressing. They’re incredibly versatile.
Why This Recipe Earns Its Place at Your Table
Sheet pan fajitas represent the intersection of flavor, convenience, and flexibility that modern home cooking demands. They’re elegant enough for company, simple enough for busy weeknights, and accommodating enough for various dietary preferences without requiring you to cook multiple versions.
The combination of caramelized vegetables, tender protein, and balanced seasoning tastes like you’ve invested serious time and effort—but you’ve actually just spent 15 minutes of active work. The oven handles the rest, meaning you’re free to set the table, prepare sides, or simply take a breath before dinner.
Once you understand how this method works, you’ll find yourself making sheet pan fajitas regularly. They’re one of those recipes that becomes a trusted go-to because they deliver reliably every single time. Add them to your regular rotation, customize them to your preferences, and discover why so many home cooks have made this their favorite way to bring restaurant-quality fajitas to the table with minimum fuss and maximum flavor.