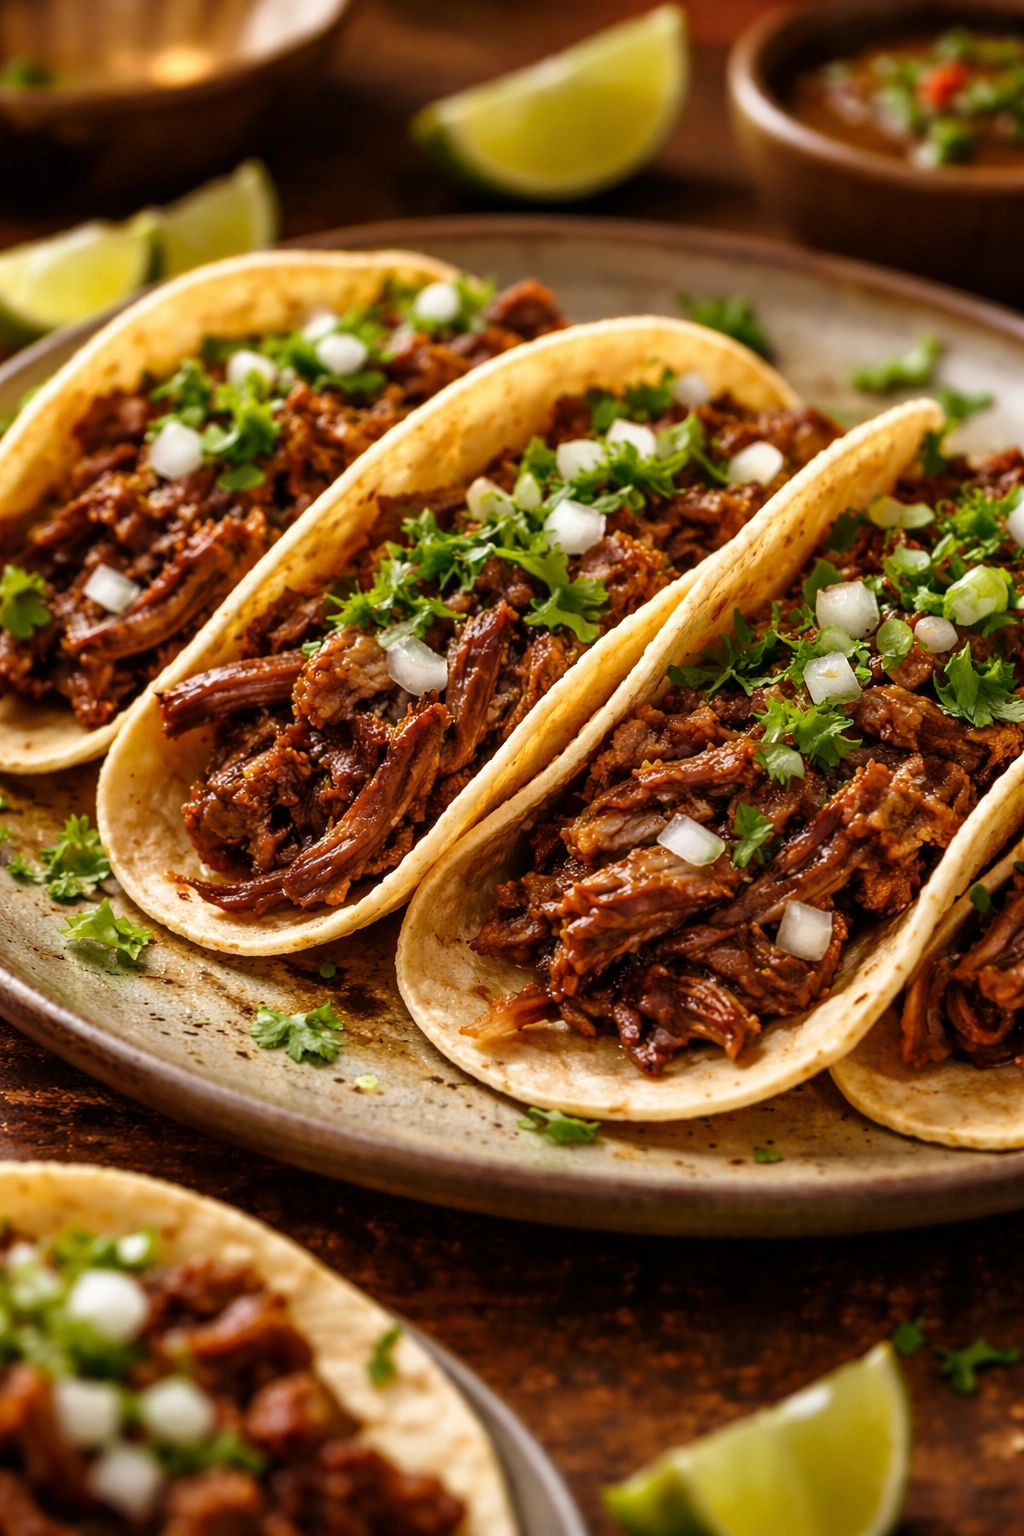
There’s a particular magic that happens when you set a slow cooker to work on a Sunday afternoon, knowing that by evening you’ll have the most tender, juicy shredded beef ready to transform into spectacular tacos. Unlike quick weeknight meals that demand constant attention, slow cooker shredded beef tacos are built for hands-off cooking—you get maximum flavor and restaurant-quality results with minimal effort. The beef practically dissolves into the sauce, absorbing every spice and savory note, creating meat so tender it shreds effortlessly with two forks. What makes this recipe truly special is how versatile it becomes: perfect for casual taco night with the family, impressive enough for entertaining friends, and even better the next day when the flavors deepen and mellow.
Slow cooker cooking transforms an affordable, humble cut of beef into something extraordinary through low, moist heat and time. The connective tissues and collagen that make chuck roast initially tough break down into gelatin, creating a sauce that clings to every fiber of shredded beef. This isn’t a shortcut version of beef tacos—it’s actually how many traditional Mexican preparations are made, with the beef braising low and slow in a deeply seasoned liquid until it reaches absolute perfection. If you’ve ever wondered why the shredded beef at your favorite Mexican restaurant tastes so much better than what you’ve made at home, slow cooking is likely part of the answer.
Why Slow Cooker Shredded Beef Tacos Are a Game-Changer for Taco Night
The appeal of slow cooker shredded beef tacos goes far beyond convenience, though that’s certainly part of it. When you’re planning taco night, you’re not just thinking about dinner—you’re orchestrating an experience. Everyone at the table gets to customize their meal exactly how they want it, building their perfect combination from an array of toppings and condiments. The slow cooker handles the heavy lifting while you manage everything else, eliminating the stress of timing and temperature monitoring.
This cooking method also delivers something impossible to replicate quickly: depth of flavor. Eight hours of gentle braising allows the spices to fully infuse into both the beef and the braising liquid, creating a sauce that’s complex, rich, and layered with flavor. The meat itself becomes so tender that it practically melts in your mouth, absorbing all those spices like a sponge. There’s no greasiness, no chewiness—just pure, juicy, fall-apart tenderness that makes even skeptical eaters ask for seconds.
Economically, this recipe makes tremendous sense for feeding a crowd. Chuck roast, one of the most affordable cuts of beef, becomes the star of the meal when treated with proper technique. A single three-pound roast feeds six to eight people generously when served as tacos, making it an incredibly cost-effective protein option. The leftovers are equally valuable—you’ll want to cook extra specifically for the days that follow.
The Science Behind Perfectly Tender Shredded Beef
Understanding what happens during slow cooking helps you appreciate why this method produces such exceptional results. Chuck roast contains significant amounts of collagen and connective tissue—the same elements that make the meat tough when cooked quickly over high heat. However, when exposed to low, moist heat over an extended period, something remarkable occurs. The collagen converts to gelatin, which dissolves into the braising liquid while also lubricating the muscle fibers, making them tender rather than tough.
Temperature control is crucial to this transformation. At around 160°F, the proteins in the beef begin to coagulate, becoming firm. But the collagen doesn’t fully convert to gelatin until temperatures reach 160-180°F and hold there for several hours. This is exactly the temperature range that slow cookers maintain, making them perfect for this specific cooking technique. The gentle heat ensures even cooking throughout the meat without causing the surface to toughen or dry out.
The braising liquid itself plays an equally important role. As the beef cooks, it releases moisture and fat into the liquid, which then recirculates and bastes the meat repeatedly, keeping it moist while infusing it with flavor. The spices and seasonings in the liquid penetrate the meat fiber by fiber, creating flavor that goes far deeper than surface seasoning ever could.
Choosing the Right Beef Cut and Prep
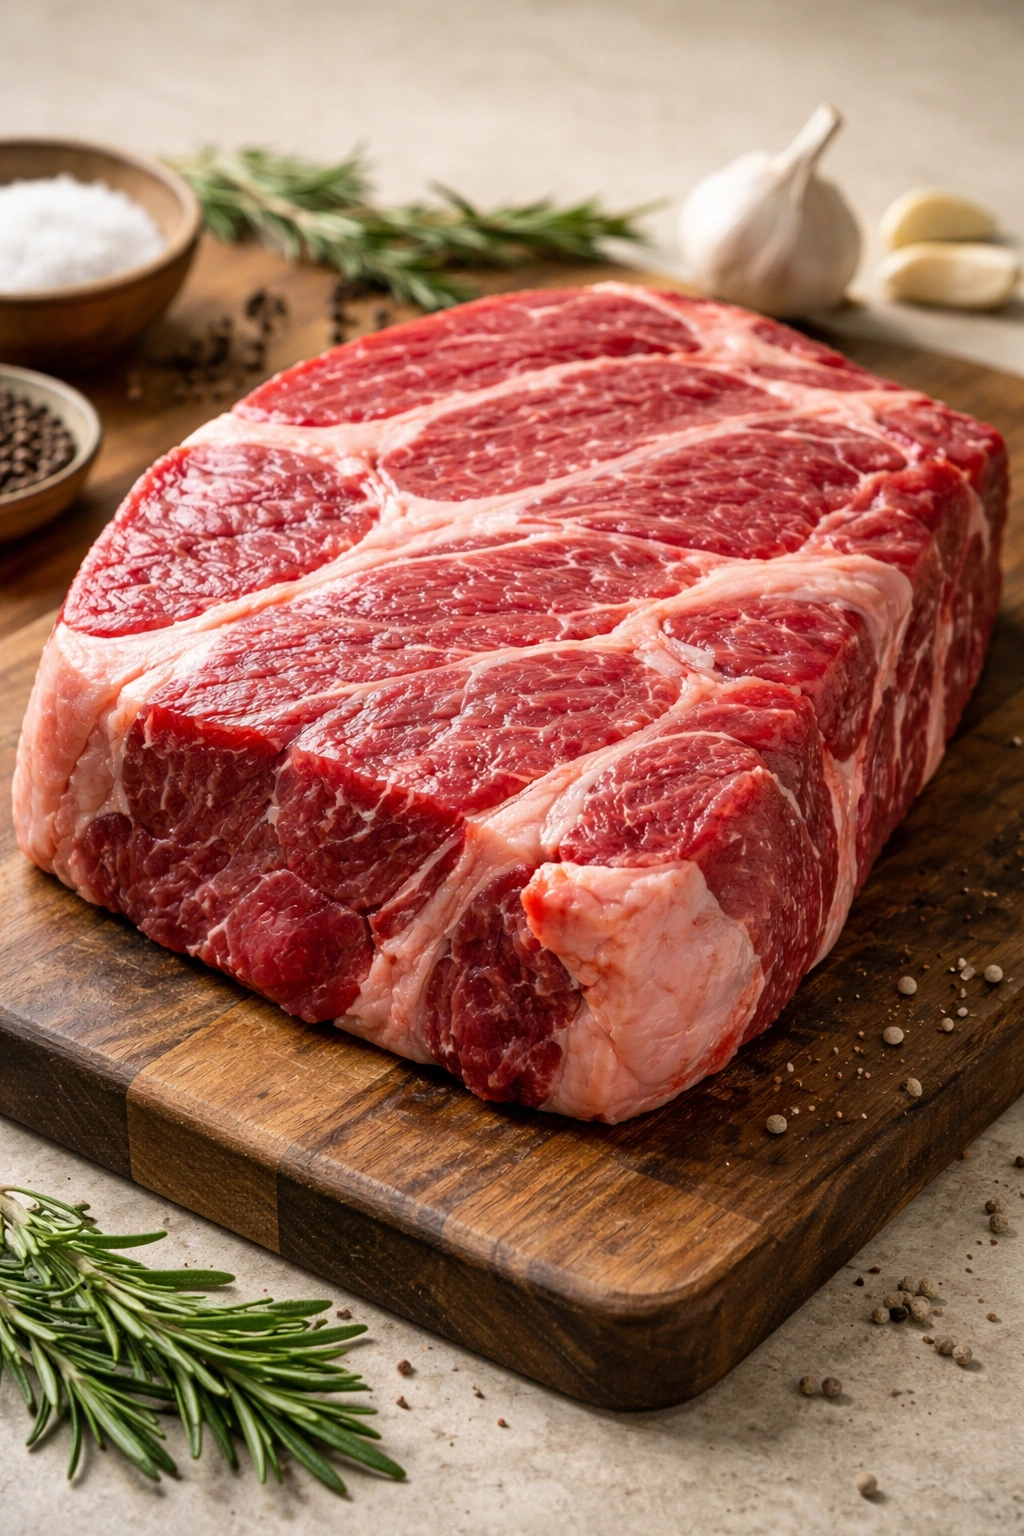
Chuck roast is unquestionably the best choice for this recipe, and understanding why makes you a smarter home cook. This particular cut, which comes from the shoulder of the cow, contains significant marbling—those tiny threads of fat distributed throughout the muscle. This marbling is essential because as it melts during the long cooking process, it keeps the meat moist and tender instead of becoming dry and stringy.
When shopping for your chuck roast, look for a piece with visible streaks of fat throughout, not just around the edges. Avoid anything that looks dense and lean—that will result in tough, disappointing meat no matter how long you cook it. A three-pound roast is ideal for most slow cookers; anything much larger won’t fit properly or will cook unevenly.
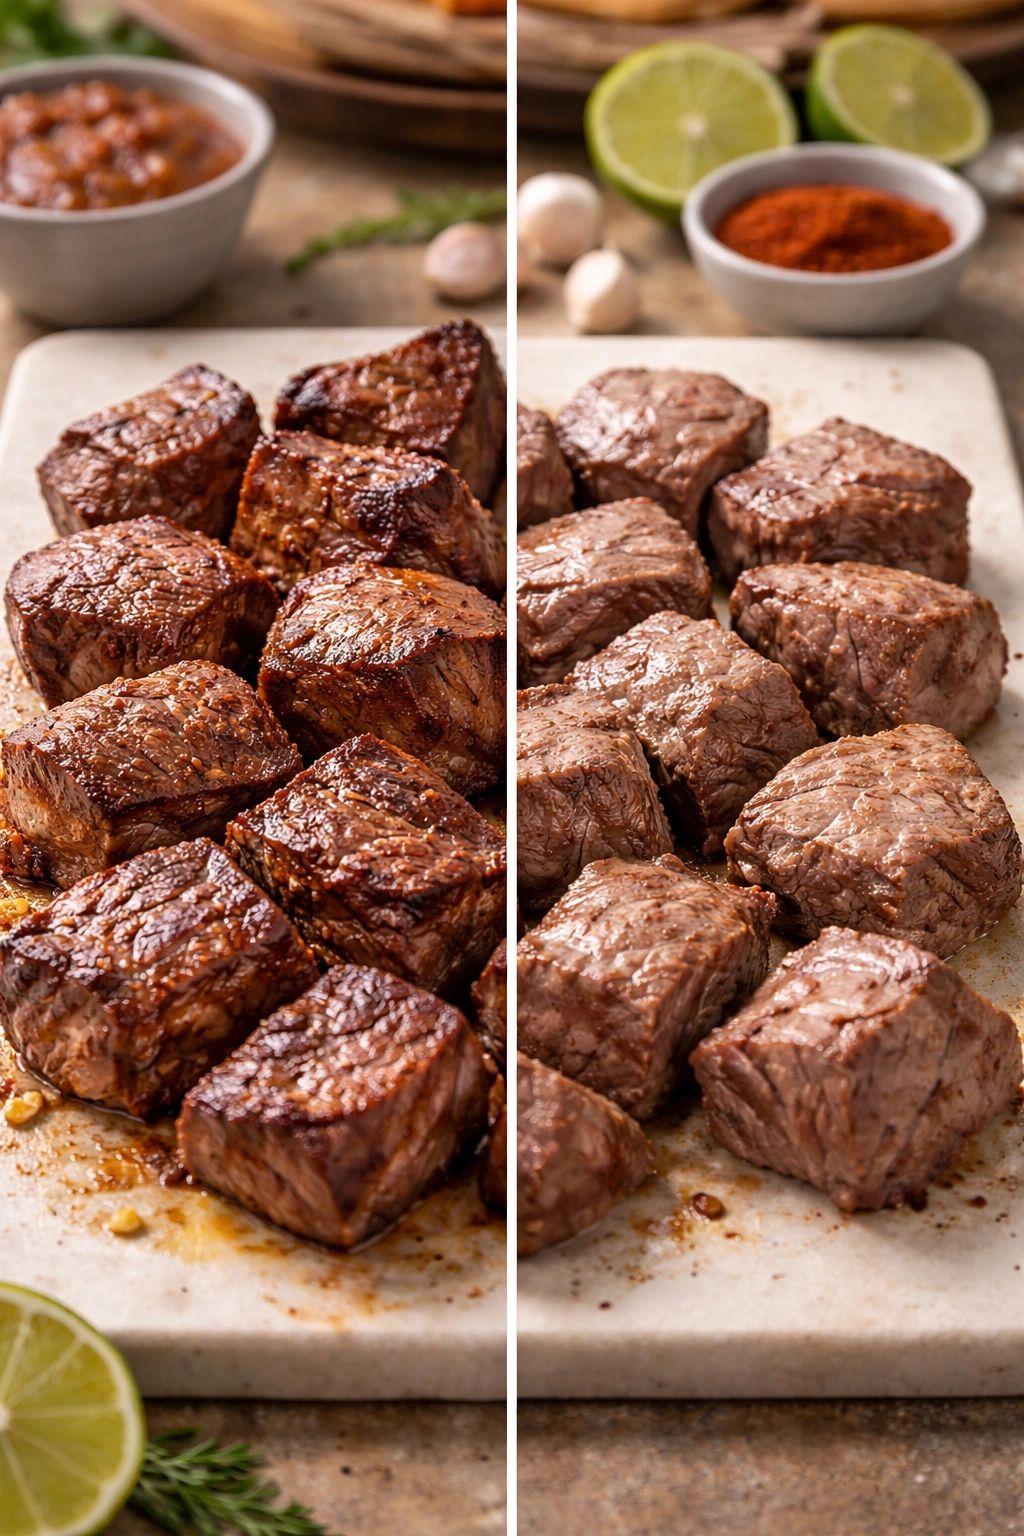
Pat your roast completely dry before searing—this step matters more than you might think. Moisture on the surface creates steam, which prevents proper browning. Paper towels work well for this, or you can let the meat sit uncovered in the refrigerator for a few hours before cooking. Searing the roast before adding it to the slow cooker is optional but genuinely worthwhile; the brown crust that forms adds incredible depth to the final sauce through a process called the Maillard reaction, which creates complex, savory flavors that simply can’t be achieved without this step.
Yield: Makes approximately 20-24 tacos, serves 6-8 people
Prep Time: 20 minutes
Cook Time: 8 hours on low
Total Time: 8 hours 20 minutes
Difficulty: Beginner — This recipe requires minimal hands-on work and is forgiving; even if you extend the cooking time, the beef will still turn out perfectly tender and delicious.
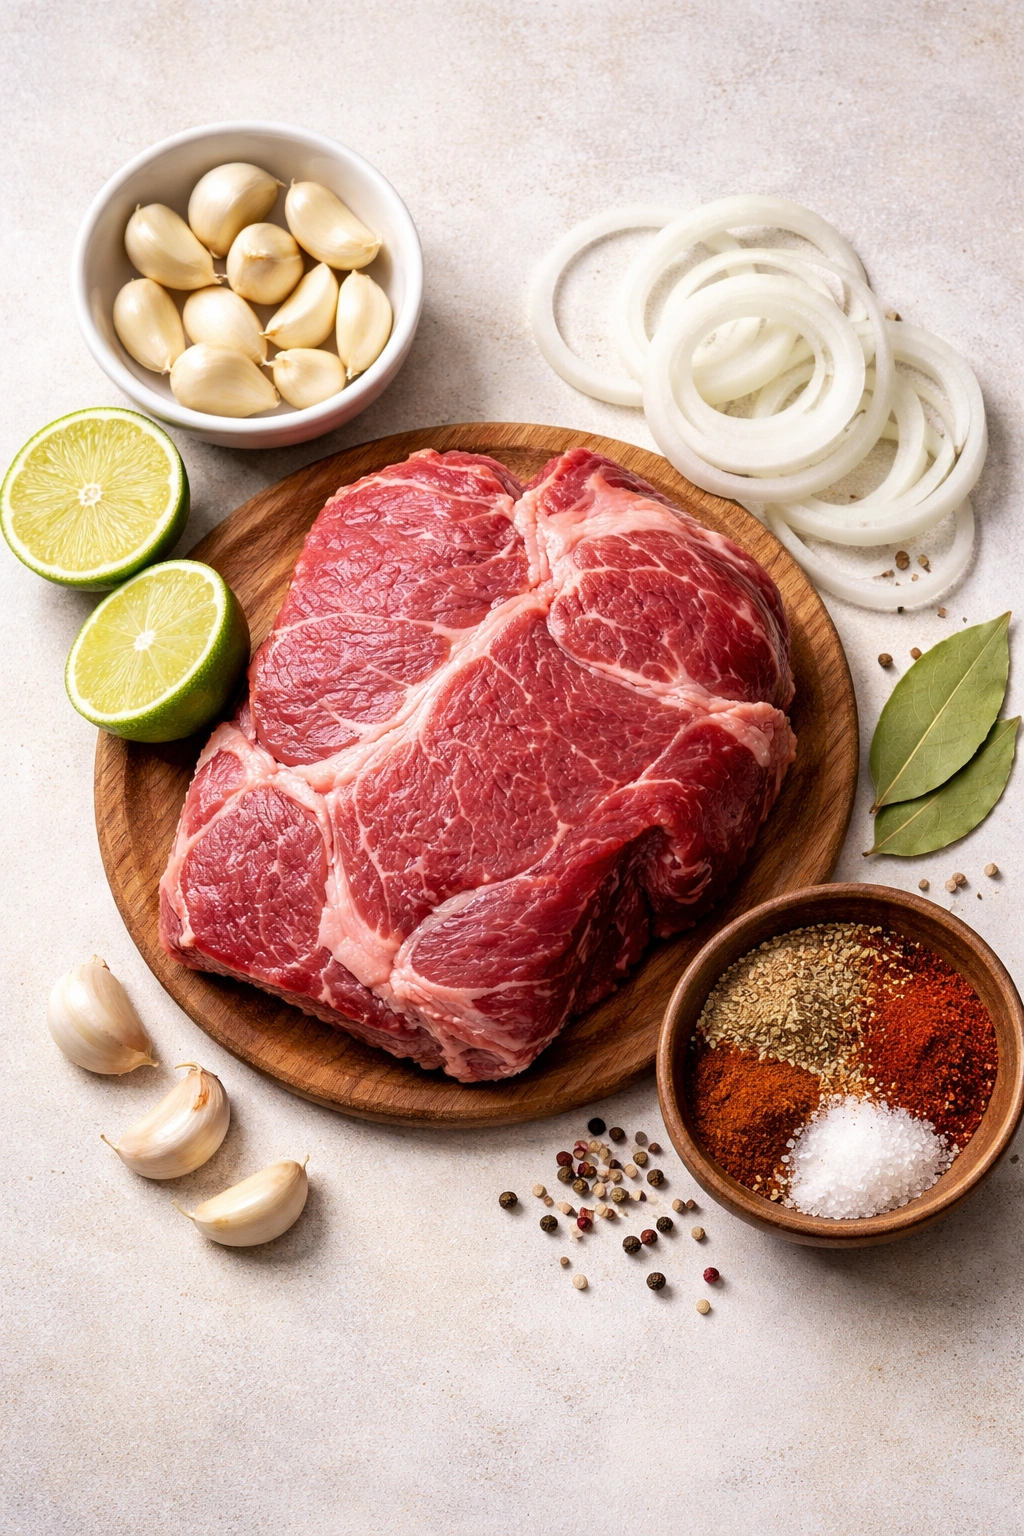
Essential Ingredients for Maximum Flavor
For the Shredded Beef:
- 3 pounds boneless chuck roast, cut into 4 large chunks
- 2 tablespoons olive oil, divided
- 1 teaspoon salt, plus more for seasoning
- 1 teaspoon black pepper, plus more for seasoning
- 2 cups beef broth (low-sodium works best)
- ¼ cup fresh lime juice (about 2 limes)
- 1 medium yellow or white onion, sliced
- 5 cloves garlic, minced
- 1 tablespoon chipotle powder (or reduce to ½ teaspoon if heat-sensitive)
- 2 teaspoons cumin
- 1 tablespoon paprika, preferably smoked
- 1 teaspoon dried oregano
- ½ teaspoon cayenne pepper (optional, adjust for desired heat)
- 1 dried bay leaf
- 2 tablespoons tomato paste
- ¼ cup orange juice (freshly squeezed is best, but bottled works)
For Assembling Tacos:
- 16-20 flour or corn tortillas (warm them on a skillet before serving)
- Shredded cheese (Oaxaca, Monterey Jack, or a Mexican blend)
- Fresh cilantro, coarsely chopped
- Sliced avocado or guacamole
- Diced red onion (raw or quickly pickled)
- Sour cream or Mexican crema
- Fresh lime wedges
- Pico de gallo or fresh salsa
- Hot sauce (your favorite variety)
- Shredded cabbage for crunch
- Cotija or feta cheese for a salty contrast
A Note on Chipotle Powder: This ingredient adds authentic smoky heat and depth to the beef. If you can’t locate it in your regular grocery store, check specialty sections, gourmet shops, or online retailers—it’s worth seeking out. If truly unavailable, you can substitute with a combination of ½ teaspoon smoked paprika, ½ teaspoon cumin, and a pinch of cayenne pepper, though the flavor profile will be slightly different.
Step-by-Step Instructions for Restaurant-Quality Tacos
Prepare and Sear the Beef:
-
Remove the chuck roast from the refrigerator and allow it to sit at room temperature for about 15-20 minutes—this helps it cook more evenly. Pat the meat completely dry with paper towels, using pressure to absorb all surface moisture.
-
Sprinkle the roast generously on all sides with salt and black pepper, pressing the seasonings into the meat so they adhere firmly. Cut the roast into 4 large chunks if it’s a solid piece; this helps it fit better in the slow cooker and cook more evenly.
-
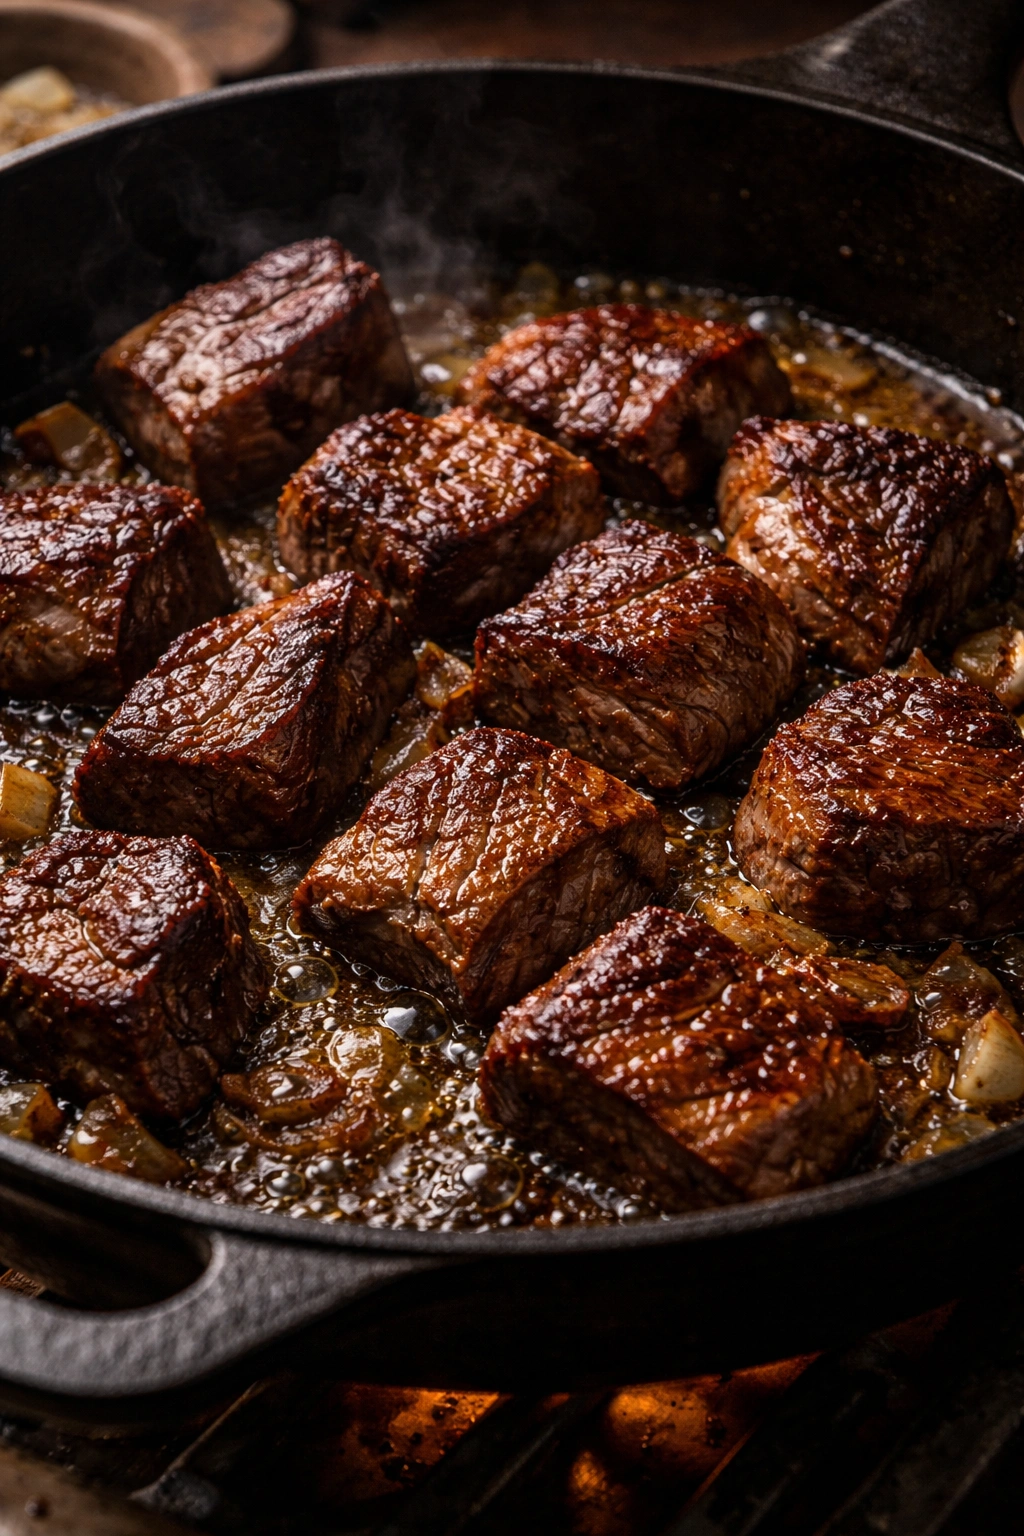
Heat 1 tablespoon of olive oil in a large heavy skillet over medium-high heat until the oil shimmers and moves easily across the pan—this typically takes 2-3 minutes. The pan must be hot; if it’s not, the beef will steam rather than sear, and you’ll lose the opportunity to develop that flavorful brown crust.
-
Carefully place the beef chunks into the hot skillet, arranging them so they aren’t touching each other. Sear without moving them for 3-4 minutes until a deep golden-brown crust forms on the bottom, then flip and sear the other side for another 3-4 minutes. Once both sides are browned, sear the remaining sides for 2 minutes each. Transfer the seared beef to a clean plate and set aside.
Build the Braising Liquid:
-
Reduce the heat under the skillet to medium. Add the remaining tablespoon of olive oil and the sliced onion to the pan. Sauté the onion for 3-4 minutes, stirring occasionally, until it softens and becomes slightly translucent and fragrant.
-
Add the minced garlic and cook for exactly 1 minute, stirring constantly—do not cook the garlic longer than this, as it can become bitter. The kitchen will smell incredible at this point.
-
Pour the beef broth and lime juice into the skillet, using a wooden spoon or spatula to scrape the bottom and sides of the pan, loosening all those browned bits that stick to the surface. This process, called deglazing, is essential—you’re dissolving concentrated flavor into the liquid. Continue scraping for about 1 minute, making sure you’ve gotten all the caramelized bits.
-
Add the tomato paste, orange juice, chipotle powder, cumin, paprika, oregano, cayenne pepper, and bay leaf to the skillet. Whisk everything together until the tomato paste is fully incorporated and no lumps remain. Let the mixture come to a gentle boil, then reduce the heat and simmer for 2-3 minutes, allowing the flavors to start melding together.
Slow Cook the Beef:
-
Transfer the seared beef chunks to your slow cooker, arranging them in a single layer on the bottom. Carefully pour the entire braising liquid and all the onions and aromatics over the beef, making sure the beef is submerged or mostly covered by liquid.
-
Place the lid on the slow cooker and cook on LOW for 8 hours. The recipe will also work on HIGH for 4-5 hours, but the beef will be more tender and the flavors more developed if you use the low setting. Eight hours is ideal, though anywhere from 7 to 10 hours is acceptable—the beauty of slow cooking is its forgiving nature.
-
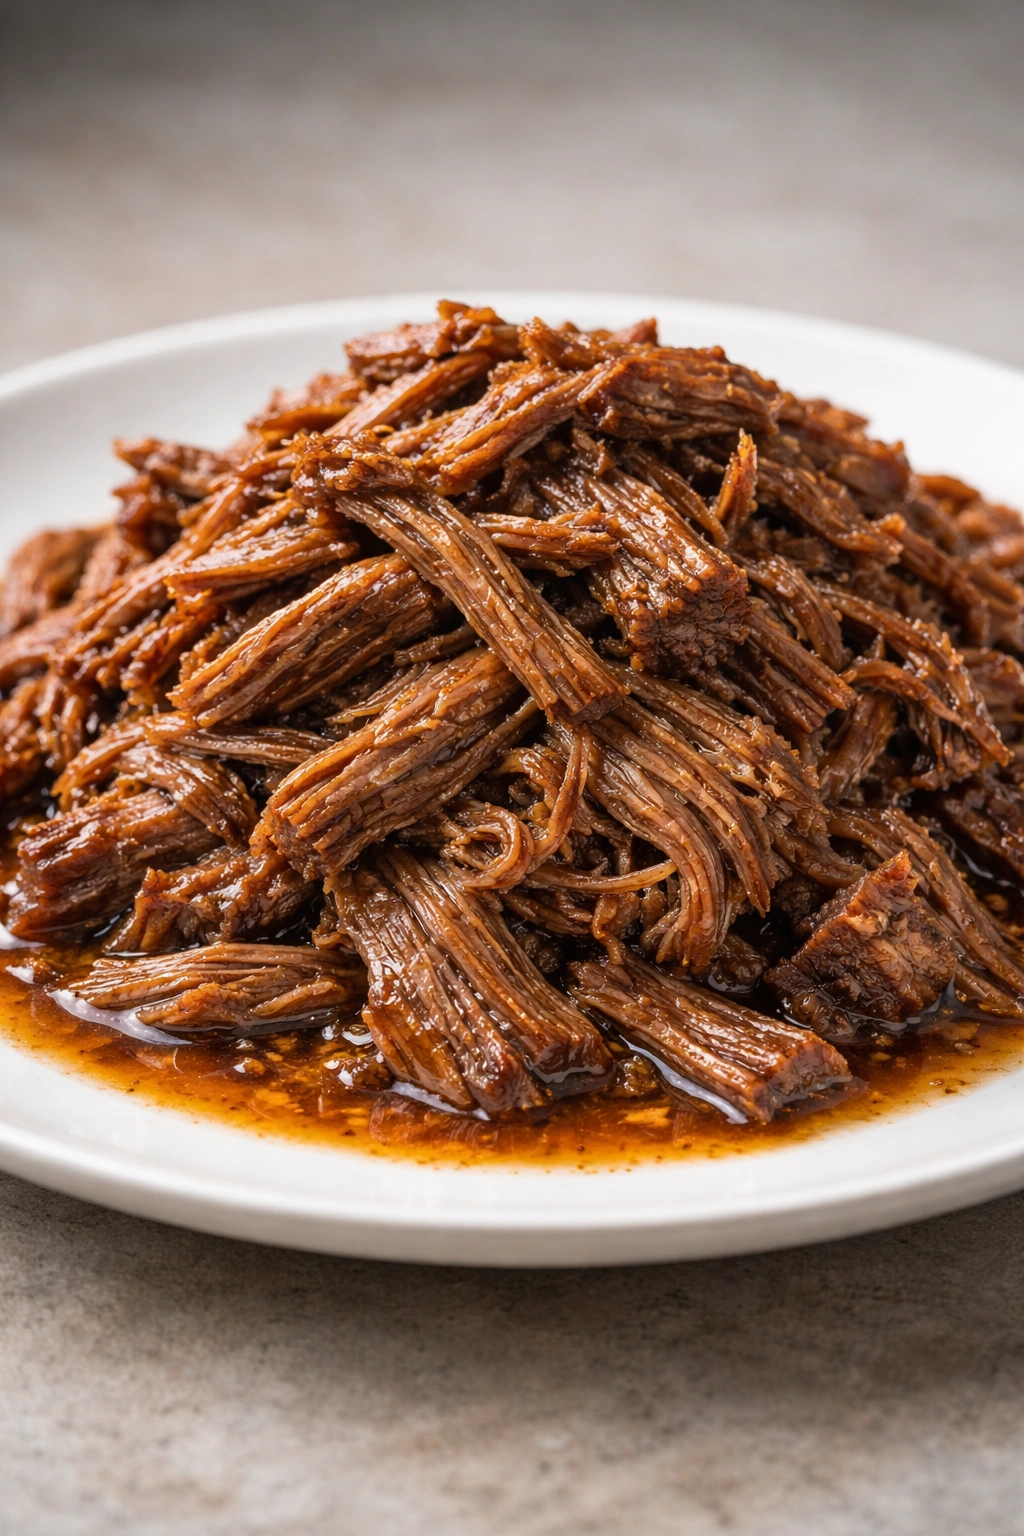
After 8 hours, the beef should be fall-apart tender, easily shredding when you press it with a fork. If it’s still somewhat firm, give it another 30 minutes to an hour on low. Remove the beef from the slow cooker using tongs or a slotted spoon.
Shred and Finish:
-
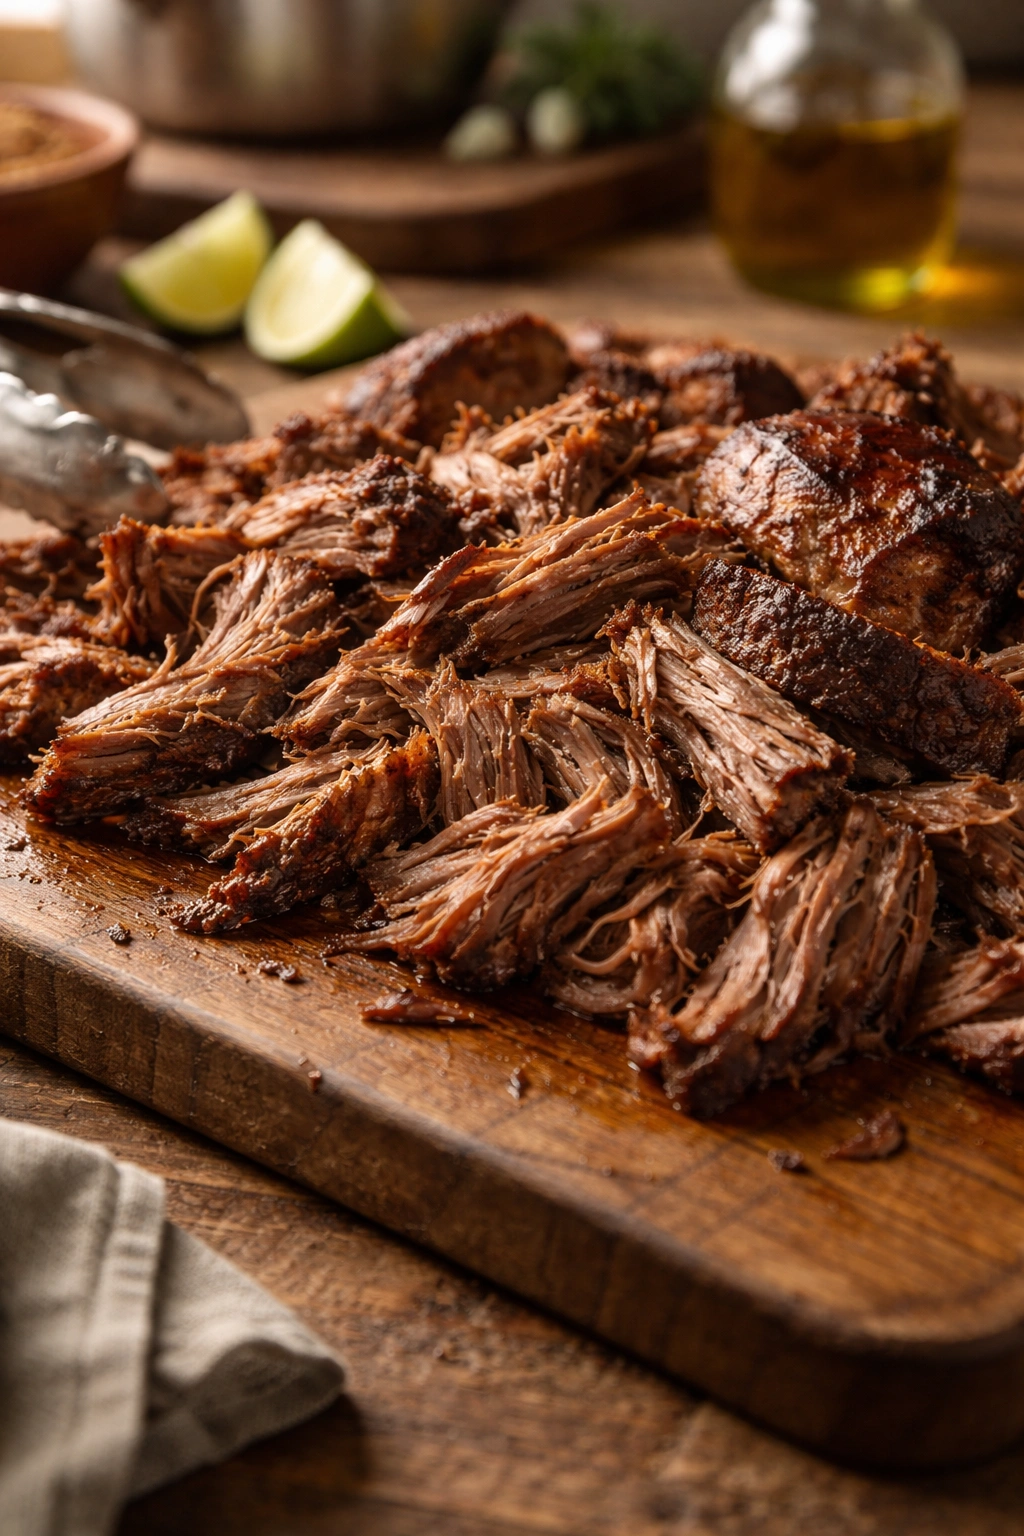
Place the cooked beef on a cutting board and, using two forks (or two sturdy wooden skewers), shred the beef into bite-sized pieces, discarding any large chunks of fat or gristle that didn’t cook down. This shredding process typically takes 5-10 minutes depending on how much meat you’re working with.
-
Return all the shredded beef to the slow cooker and stir it thoroughly to combine with all the cooking liquid. The beef should be completely coated in that savory, spiced braising liquid. Keep the slow cooker on the warm setting until you’re ready to serve—the beef will stay moist and delicious for several hours this way.
-
Taste the mixture and adjust seasonings as needed. If you want more heat, add additional cayenne or hot sauce. If you want more depth, add a pinch more cumin or a squeeze of fresh lime juice.
How to Build the Perfect Taco with Your Shredded Beef
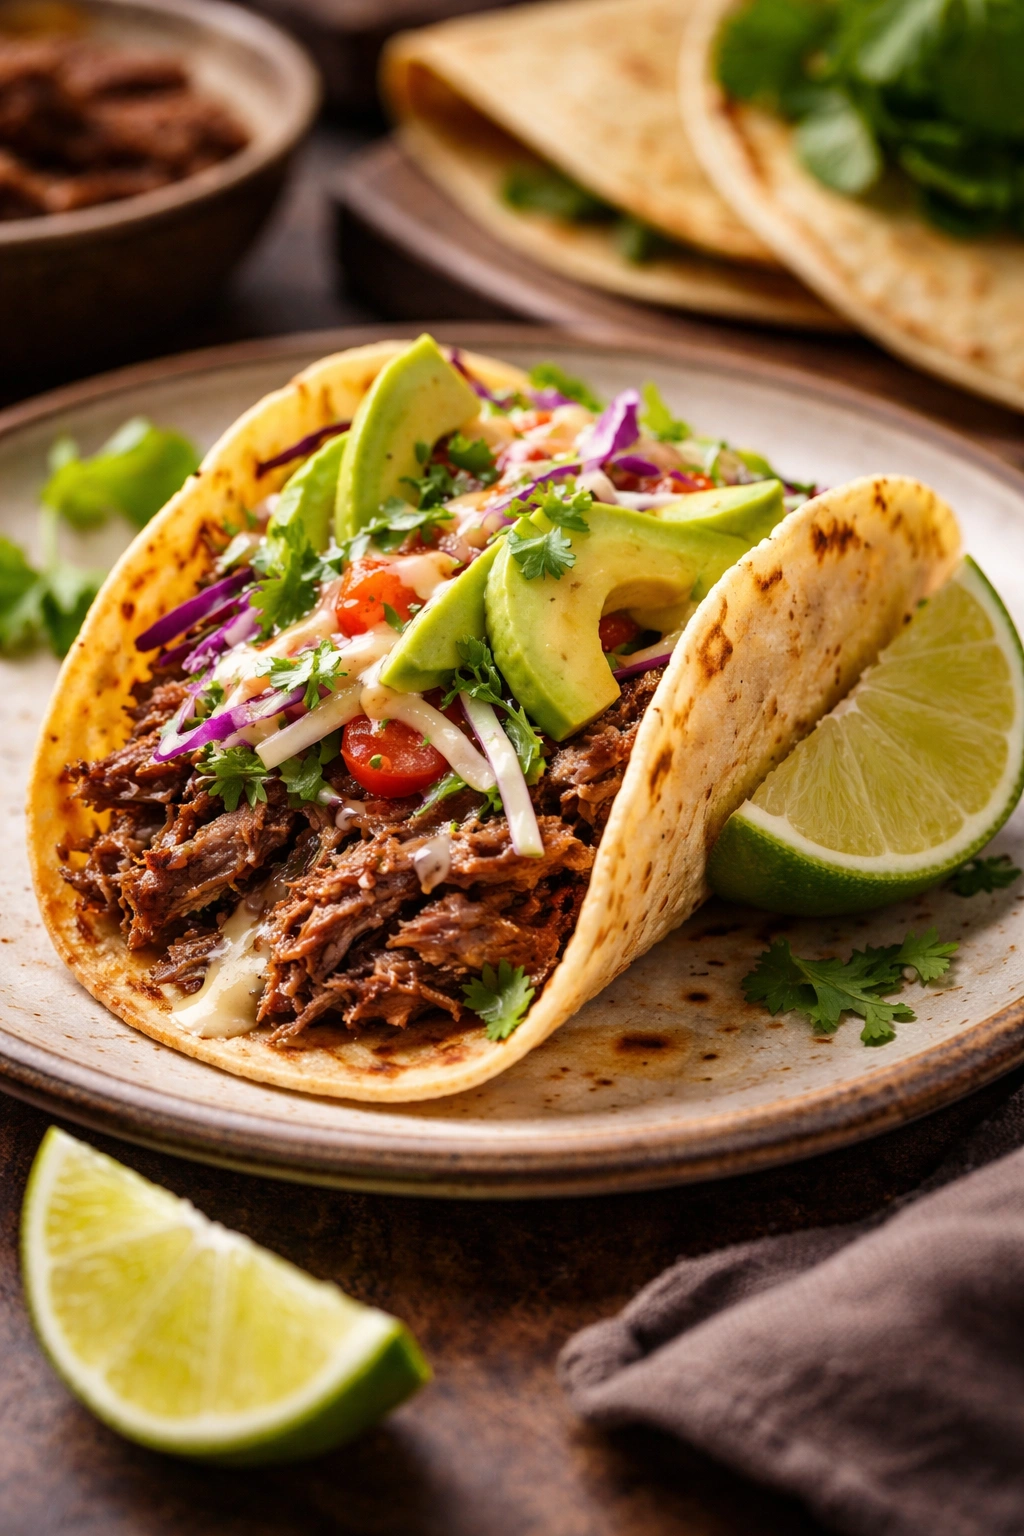
The beauty of taco night is that each person gets to create exactly what they want, but there’s an art to assembly that creates genuinely better tacos. Start with a warm tortilla—this matters more than you might think. Cold tortillas are stiff and prone to tearing; warm ones are pliable and develop a slightly charred, toasted flavor that complements the beef beautifully.
Warm your tortillas by placing them directly over a low flame on your stovetop, turning them with tongs until they’re warm and have light char marks, about 30 seconds per side. If you don’t have a gas stove, heat them in a dry skillet over medium heat for about 20 seconds per side. This small step completely transforms the taco experience.
Layer your taco strategically: start with a thin layer of cheese on the warm tortilla, then add a generous spoonful of shredded beef, followed by your chosen toppings. The cheese closest to the warm tortilla will slightly melt, creating a barrier that keeps the beef from making the tortilla soggy. Order the remaining toppings with texture and flavor balance in mind—pair creamy elements like avocado and sour cream with crunchy cabbage or fresh onion, then finish with bright acidic flavors like lime juice and cilantro.
Never skip the lime wedge—squeezing fresh lime juice over your finished taco at the very end brings all the flavors into sharp focus. The acidity cuts through the richness of the cheese and beef while brightening the spices. It’s the final note that makes the taco sing.
Topping Ideas That Elevate Your Taco Night
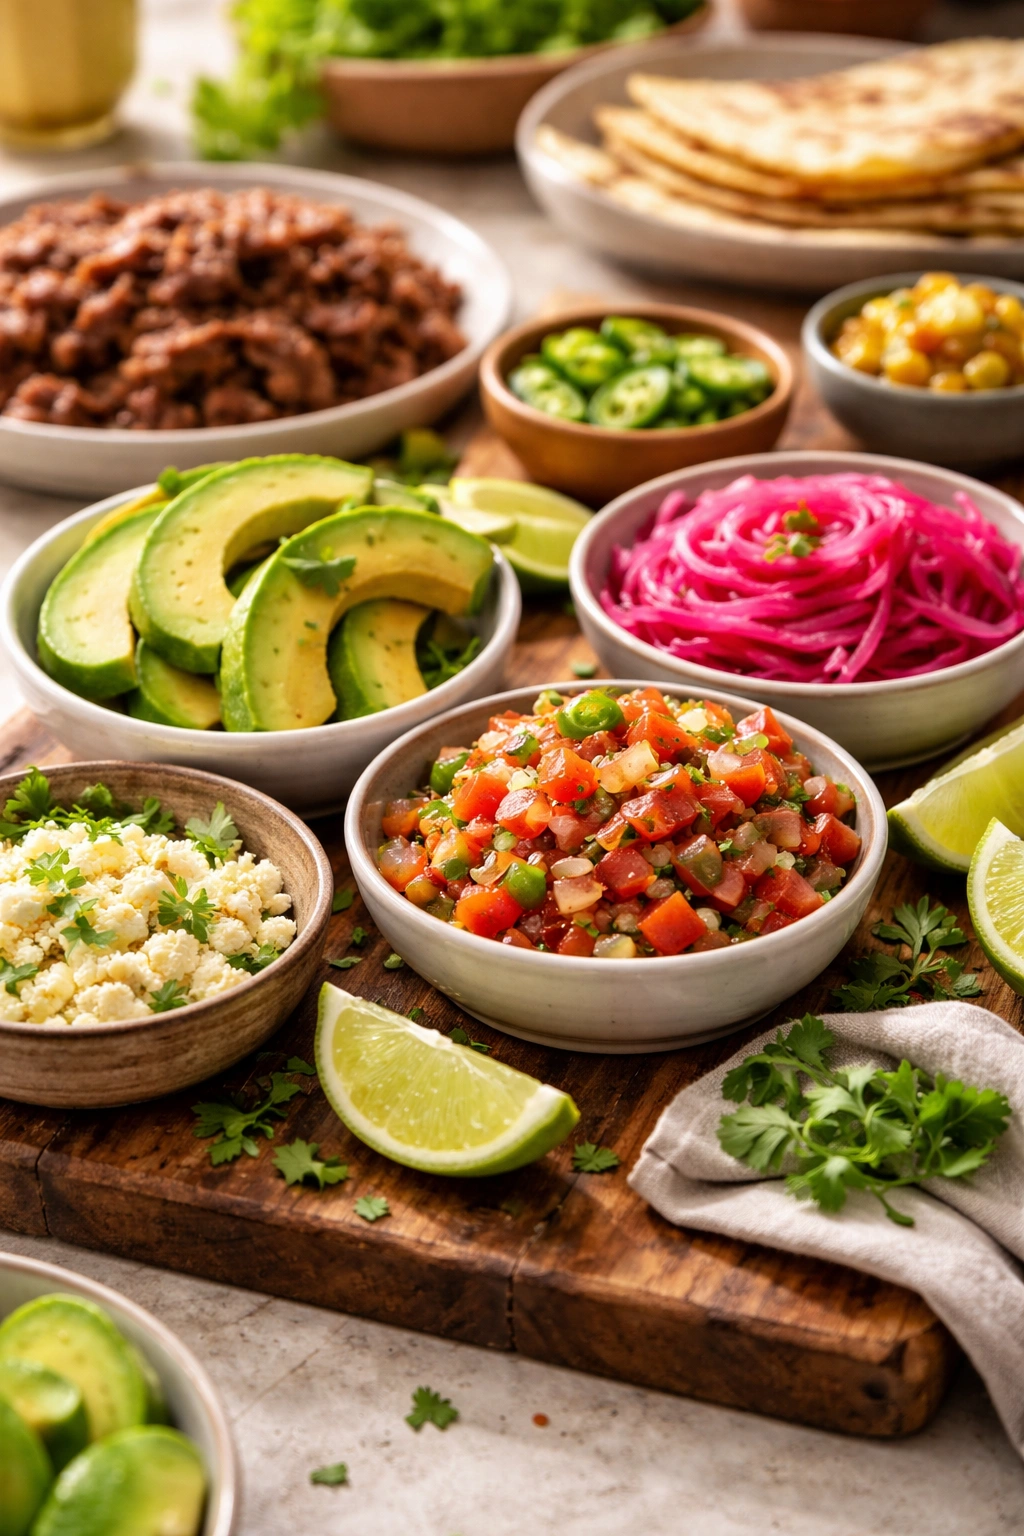
The genius of shredded beef tacos is how they serve as a canvas for endless combinations. Set up a taco bar and let everyone build exactly what appeals to them—this approach works perfectly for families with different preferences and makes the meal feel more interactive and fun.
For Creamy, Luxurious Tacos: Combine fresh sliced avocado or guacamole with Mexican crema or sour cream, adding a squirt of lime juice to the avocado to prevent browning. The richness of the avocado pairs beautifully with the deeply spiced beef. Top with a sprinkle of cotija cheese, which has a slightly salty, crumbly texture that contrasts perfectly with creamy elements.
For Bright and Fresh: Make quick pico de gallo by dicing tomatoes, red onion, fresh cilantro, and jalapeño, then tossing with lime juice and a pinch of salt. This fresh topping cuts through the richness of the beef and adds refreshing crunch. Layer it under the cheese so the juice doesn’t make the tortilla soggy.
For Pickled and Tangy: Create quick-pickled red onions by slicing red onion thinly and covering with lime juice, white vinegar, a pinch of salt, and a tiny bit of sugar. Let sit for at least 15 minutes—these keep in the refrigerator for a week. The pickle adds intense bright flavor and beautiful color, cutting through the richness of the beef.
For Spicy Heat: Keep bottles of your favorite hot sauce at the table—Cholula, Tabasco, Valentina, or jalapeño-based salsas all work beautifully. Add hot sauce directly to the taco right before eating so each person controls the heat level. Some people like to mix hot sauce into sour cream, creating a spicy crema to drizzle over the tacos.
For Extra Texture: Shredded purple or green cabbage adds satisfying crunch that contrasts with the tender beef. You can serve it raw for maximum crunch or quickly sauté it with a tiny bit of oil and lime juice for a slightly softer texture that still maintains some bite.
For Umami Depth: Crumble queso fresco or cotija cheese over the finished tacos. These aged Mexican cheeses have a salty, slightly tangy flavor that adds complexity without overwhelming the other flavors. They don’t melt like regular cheese, instead maintaining their distinctive texture and flavor.
Pro Tips for Foolproof Shredded Beef Every Time
The most common reason for tough shredded beef is impatience—stopping the cooking before the connective tissues have fully broken down. If the beef at 8 hours doesn’t shred easily with just a fork, it needs more time. The gorgeous thing about slow cooking is that you can’t really overcook it in the traditional sense; leaving it for 9 or even 10 hours will only make it more tender.
Temperature matters for slow cookers, though most modern ones maintain proper temperature automatically. If you have an older slow cooker or one without temperature controls, use a meat thermometer to verify the beef reaches at least 160°F in the thickest part. Higher is better—aim for 190-200°F if possible, as this is the optimal temperature range for collagen conversion.
Searing the beef before cooking is genuinely worth the extra step and pan to wash. The Maillard reaction—the chemical process that creates the brown crust—produces hundreds of complex flavor compounds that add depth to the entire dish. You can skip this step if you’re truly pressed for time, but the final result will taste noticeably less developed.
Fresh lime and orange juice make a genuine difference compared to bottled versions. The fresh citrus adds brightness and helps tenderize the beef slightly through the acidity. If you have only bottled juice available, it will work, but fresh is worth seeking out.
Don’t be tempted to increase the cooking temperature to save time. A slow cooker on high will cook faster but produces less tender meat. If you’re truly short on time, the Dutch oven method (see variations below) is faster but requires more monitoring.
Resist the urge to remove the lid and check on the beef constantly. Every time you lift the lid, you release heat and extend cooking time. Trust the process—set it and leave it alone.
Common Mistakes and How to Avoid Them
The single most common mistake is not searing the beef, thinking it will brown enough in the slow cooker. It won’t. Slow cookers operate at too low a temperature for proper browning, and while the beef will cook fine without searing, you’ll miss out on that crucial depth of flavor that makes this dish special.
Another frequent problem is cutting the beef into too-small pieces. Small chunks cook faster but dry out more easily because they have a higher surface-area-to-volume ratio. Large chunks, or even cooking the entire roast whole, yields more tender, moist results. You’ll shred it after cooking anyway, so starting with large pieces is the right approach.
Using insufficient liquid is another pitfall. Some people try to reduce the braising liquid to make room for additional ingredients, but you need enough liquid to properly braise the meat and create that gorgeous sauce. Two cups of broth plus the other liquids is the right amount; don’t try to skimp.
Overcrowding the slow cooker prevents even cooking. If you’re making a double batch, use two slow cookers rather than overloading one. The beef on top will cook at a different rate than the beef on the bottom, resulting in inconsistent texture.
Shredding the beef too early (more than a few hours before serving) can result in slightly drier meat, as the shredded pieces have more surface area exposed to the air. Shred it right before serving or just 30 minutes to an hour beforehand, then keep it submerged in the liquid.
Not adjusting seasonings after cooking is a missed opportunity. Taste the finished dish and add more lime juice if you want brightness, more salt if you want depth, or more chipotle powder if you want more heat. Home cooking should be about adjusting things to your exact preferences.
Storage, Freezing, and Make-Ahead Guidance
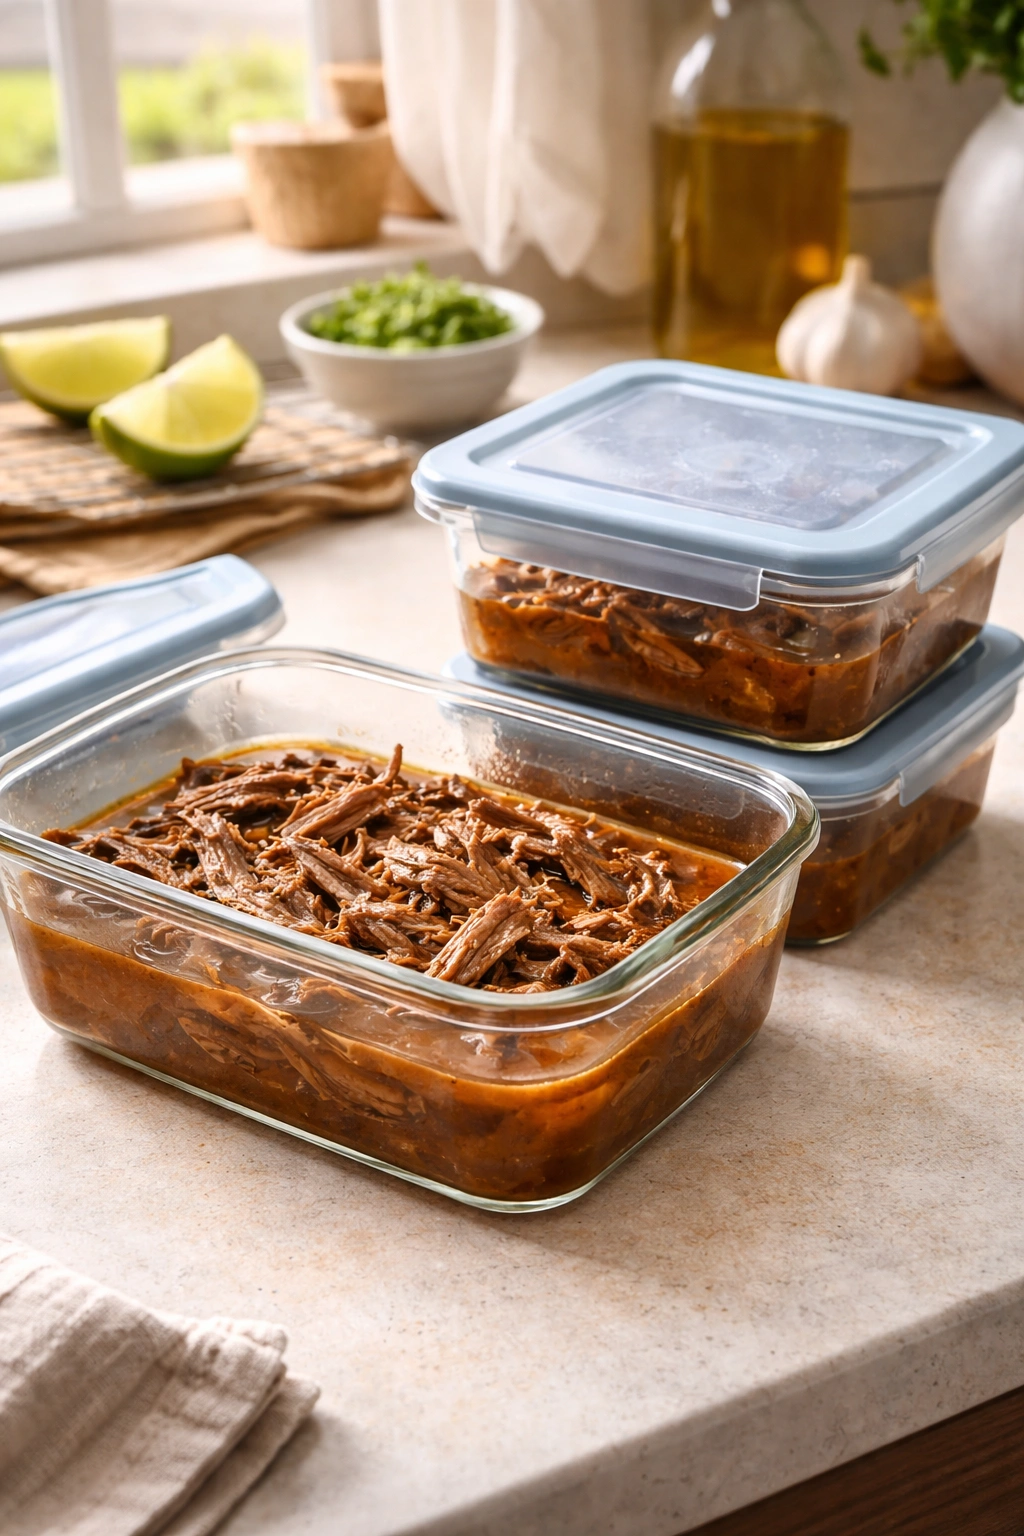
Shredded beef tacos are exceptionally practical for meal planning because the shredded beef keeps beautifully. Store leftovers in an airtight container in the refrigerator for up to four days. The flavors actually improve on day two as the spices continue to meld, so don’t hesitate to make this several days in advance for a weeknight dinner.
The key to storing without the beef becoming soggy is keeping the beef and liquid together. Don’t drain the liquid; the beef needs to stay submerged or at least partially covered to maintain moisture. If you prefer to separate them for storage, transfer the beef to one container and the liquid to another, but combine them before reheating.
Freezing is where this recipe truly shines as a meal-prep strategy. Cool the beef completely, then transfer it to freezer bags or airtight containers, making sure the beef is covered with braising liquid. It will keep frozen for up to three months. Label the bag with the date so you know how long it’s been stored.
Defrost frozen beef in the refrigerator overnight—never at room temperature, as this encourages bacterial growth. Once thawed, reheat gently either in the microwave (checking frequently to ensure even heating) or in a skillet over medium heat, stirring occasionally. You can also add it directly from frozen to a skillet over medium-low heat, allowing it to heat through slowly; this takes longer but produces excellent results.
If the reheated beef seems slightly drier than when you first made it, add a splash of beef broth, water with a squeeze of lime, or even salsa to restore moisture and brightness. A pinch of fresh lime juice does wonders for refreshing the flavor profile after freezing and reheating.
Make this recipe on a weekend when you have time to properly sear the beef, then you’ll have multiple weeknight dinners already prepared. The sheer convenience of simply warming the beef and assembling tacos can’t be overstated for busy families.
Creative Ways to Use Leftover Shredded Beef
While taco night is the obvious use, this shredded beef is genuinely versatile. The beauty is that you’ve already done the hard work of creating deeply flavored, perfectly tender meat, so you can apply it to countless other dishes with minimal additional effort.
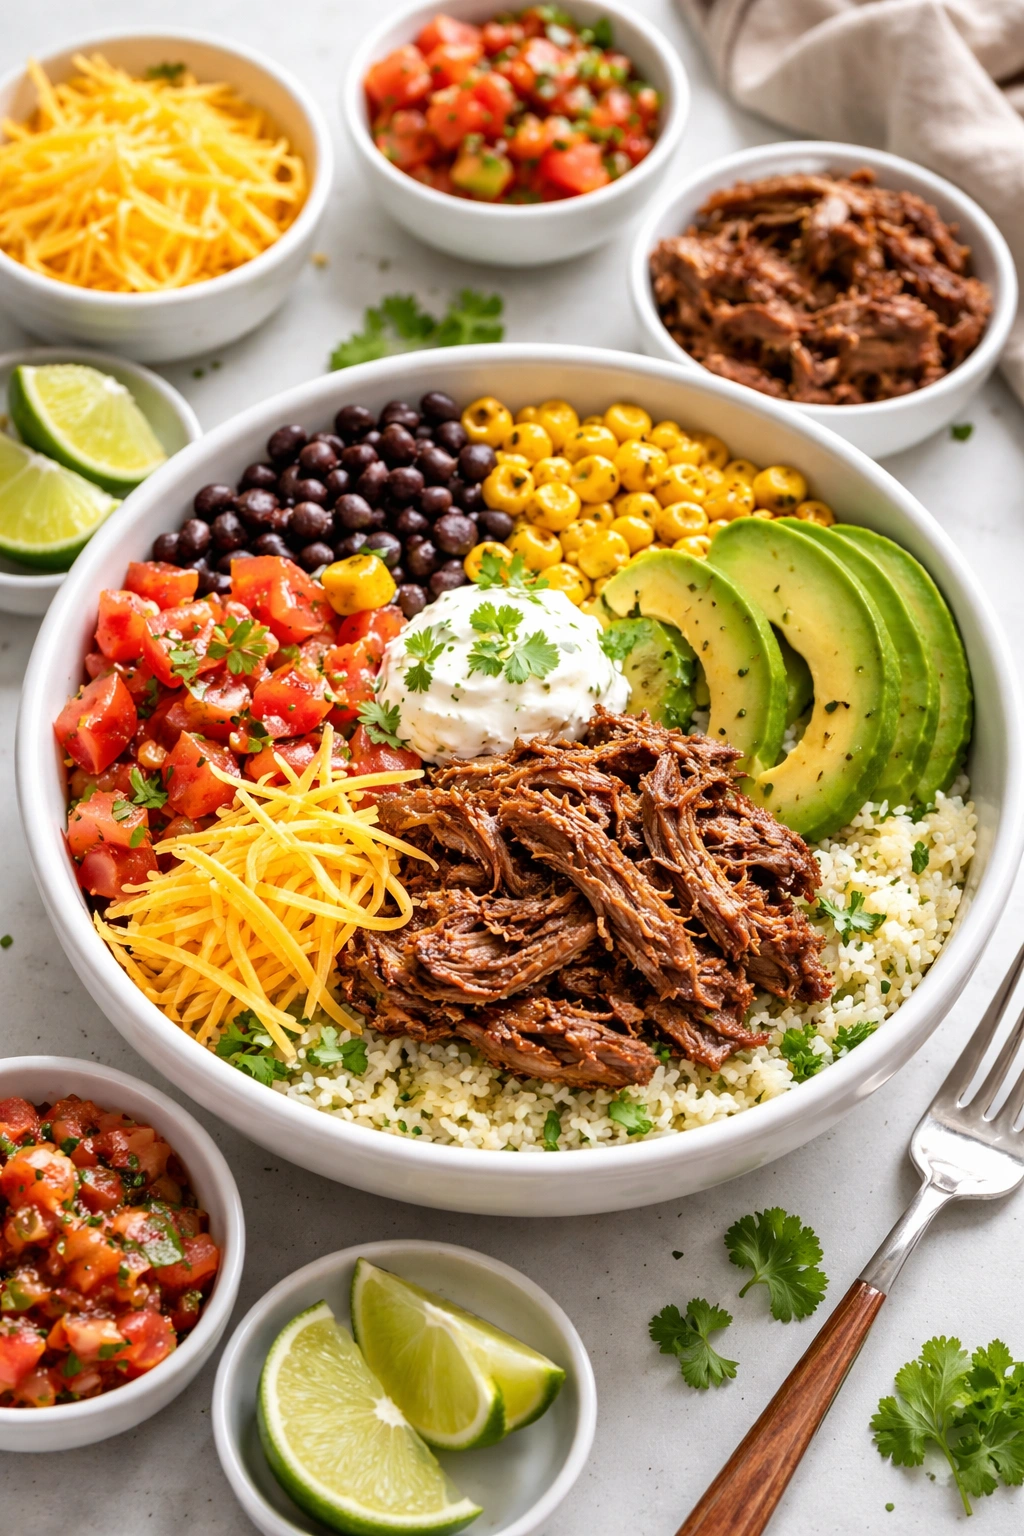
Burrito Bowls: Layer cilantro-lime rice (make this by cooking rice in broth and adding lime juice and cilantro), then top with shredded beef, black or pinto beans, roasted corn, diced tomato, avocado, cheese, and a dollop of sour cream. This creates a deconstructed burrito that’s easier to eat and beautiful to look at.
Quesadillas: Spread a flour tortilla with a thin layer of refried beans, add a generous spoonful of shredded beef and shredded cheese, top with another tortilla, then pan-fry until the cheese melts and the outside is golden and crispy. Serve with sour cream and salsa for dipping.
Enchiladas: Use the shredded beef as filling for enchiladas, rolling it in corn tortillas with cheese and sauce. The beef will be more flavorful than the traditional ground beef filling, creating genuinely memorable enchiladas.
Nachos: Layer crispy tortilla chips with shredded beef, melted cheese, jalapeños, sour cream, guacamole, and pico de gallo. The beef provides protein and flavor, turning a simple appetizer into a complete meal.
Tacos al Carbón (in a Salad): Serve the shredded beef over mixed greens with corn, black beans, tomato, cheese, and ranch or cilantro-lime dressing. The warm beef against cool greens creates beautiful temperature contrast.
Sandwiches or Sliders: Pile the shredded beef onto toasted rolls with pickled onions, jalapeños, and cheese, then broil until the cheese melts. These make fantastic party food or casual lunch.
Breakfast Scramble: Mix shredded beef into scrambled eggs with diced onions and peppers, then serve in warm tortillas with avocado and salsa for a protein-packed breakfast that’s ready in minutes.
Beef Tostadas: Fry or bake corn tortillas until crispy, then layer with refried beans, shredded beef, cheese, lettuce, tomato, sour cream, and avocado for a dish that’s better than most restaurant versions.
Final Thoughts

Slow cooker shredded beef tacos represent everything that’s excellent about home cooking: minimal hands-on time, maximum flavor, and the flexibility to please everyone at your table. The beef is genuinely restaurant-quality, yet costs a fraction of what you’d pay to buy it, and the entire process is forgiving enough for even inexperienced cooks to succeed.
The secret to consistently beautiful results is understanding the why behind each step—why you sear the beef, why you use warm liquid, why eight hours on low beats four hours on high. This knowledge allows you to troubleshoot if something seems off and to adapt the recipe confidently based on your preferences and what you have on hand.
Make this dish part of your regular cooking rotation. Taco night becomes infinitely easier when you know you can start the slow cooker in the morning and come home to perfectly cooked beef that just needs warming. Your family and guests will be impressed, and you’ll have the satisfaction of knowing you created something genuinely delicious from one simple, affordable cut of beef and a list of pantry spices.