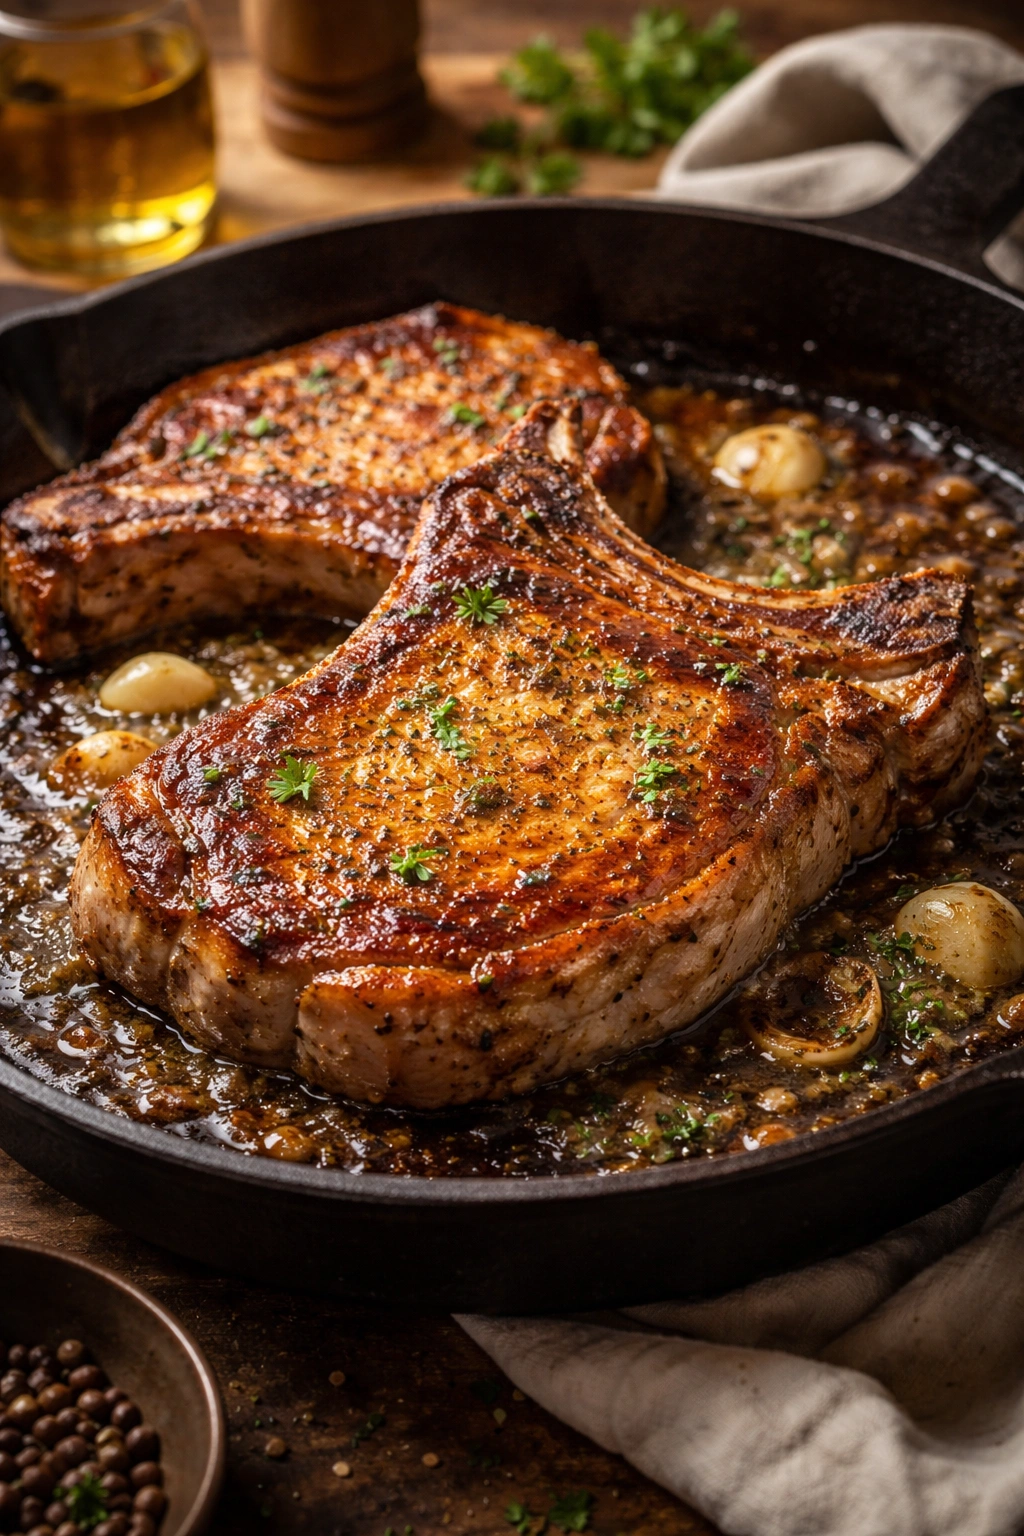
There’s something almost magical about the smell of pork chops sizzling in a hot skillet on a weeknight — that salty, savory aroma drifting through the house that tells everyone dinner is coming, and it’s going to be good. Southern-style pork chops are the kind of meal that feels indulgent and comforting without requiring hours of prep or complicated techniques. The real magic? You can have golden, juicy, utterly delicious pork chops smothered in rich gravy on the table in just 30 minutes, from the moment you pull ingredients out of the pantry to the second you sit down to eat.
This isn’t a rushed version of a classic dish — it’s the real deal, executed efficiently. The key is understanding that you don’t need to overcomplicate Southern comfort food to get authentic, deeply satisfying results. A heavy cast-iron skillet, a few pantry staples, a meat thermometer, and the right technique are all it takes. These pork chops come out with a crispy, golden-brown exterior and meat so tender and juicy inside that you’ll wonder why you don’t make them more often. The onion-based gravy that simmers while the meat rests is creamy, savory, and absolutely begging to be spooned over mashed potatoes.
What makes this 30-minute approach work is the combination of proper heat management, the right thickness of meat, and understanding that you don’t need heavy cream to achieve that classic creamy gravy. Whether you’re feeding a family on a hectic Tuesday or impressing guests with something that feels fancier than it actually is, this recipe delivers every single time.
Why Southern Pork Chops Are the Ultimate Quick Dinner
Southern cuisine has always understood that the best flavors don’t require fancy ingredients or hours of labor — they require technique, patience with the right steps, and an understanding of how to build flavor efficiently. Pork chops are the perfect vehicle for this philosophy. The meat itself is naturally tender when cooked properly, and it takes just minutes to develop the golden crust that seals in moisture and creates that satisfying textural contrast.
A properly cooked pork chop has a personality all its own. Unlike chicken breast, which tends toward blandness, or beef, which demands careful sourcing and trimming, pork chops from the loin are naturally flavorful, relatively lean, and forgiving. The bone (if you choose bone-in, which I recommend) adds both flavor and structural integrity — it helps the meat cook evenly and retain its juices, and it makes for a more impressive presentation on the plate.
The 30-minute timeline is achievable because you’re pan-frying rather than slow-cooking. You’re not building flavor through hours of braising or stewing. Instead, you’re creating it through heat, the Maillard reaction that browns the meat, aromatic vegetables like onions, and a simple gravy that pulls everything together. The result tastes like it simmered for hours, but tastes absolutely don’t lie about the actual time investment.
What Makes These Different From Everyday Pork Chops
The difference between decent pork chops and truly exceptional Southern-style pork chops is all about the treatment. You’re starting with seasoned meat that gets a proper sear in a hot skillet — that critical first step creates the flavorful crust that locks in moisture. You’re then finishing them in a rich, savory gravy that adds depth and keeps the meat from drying out during those final minutes of cooking.
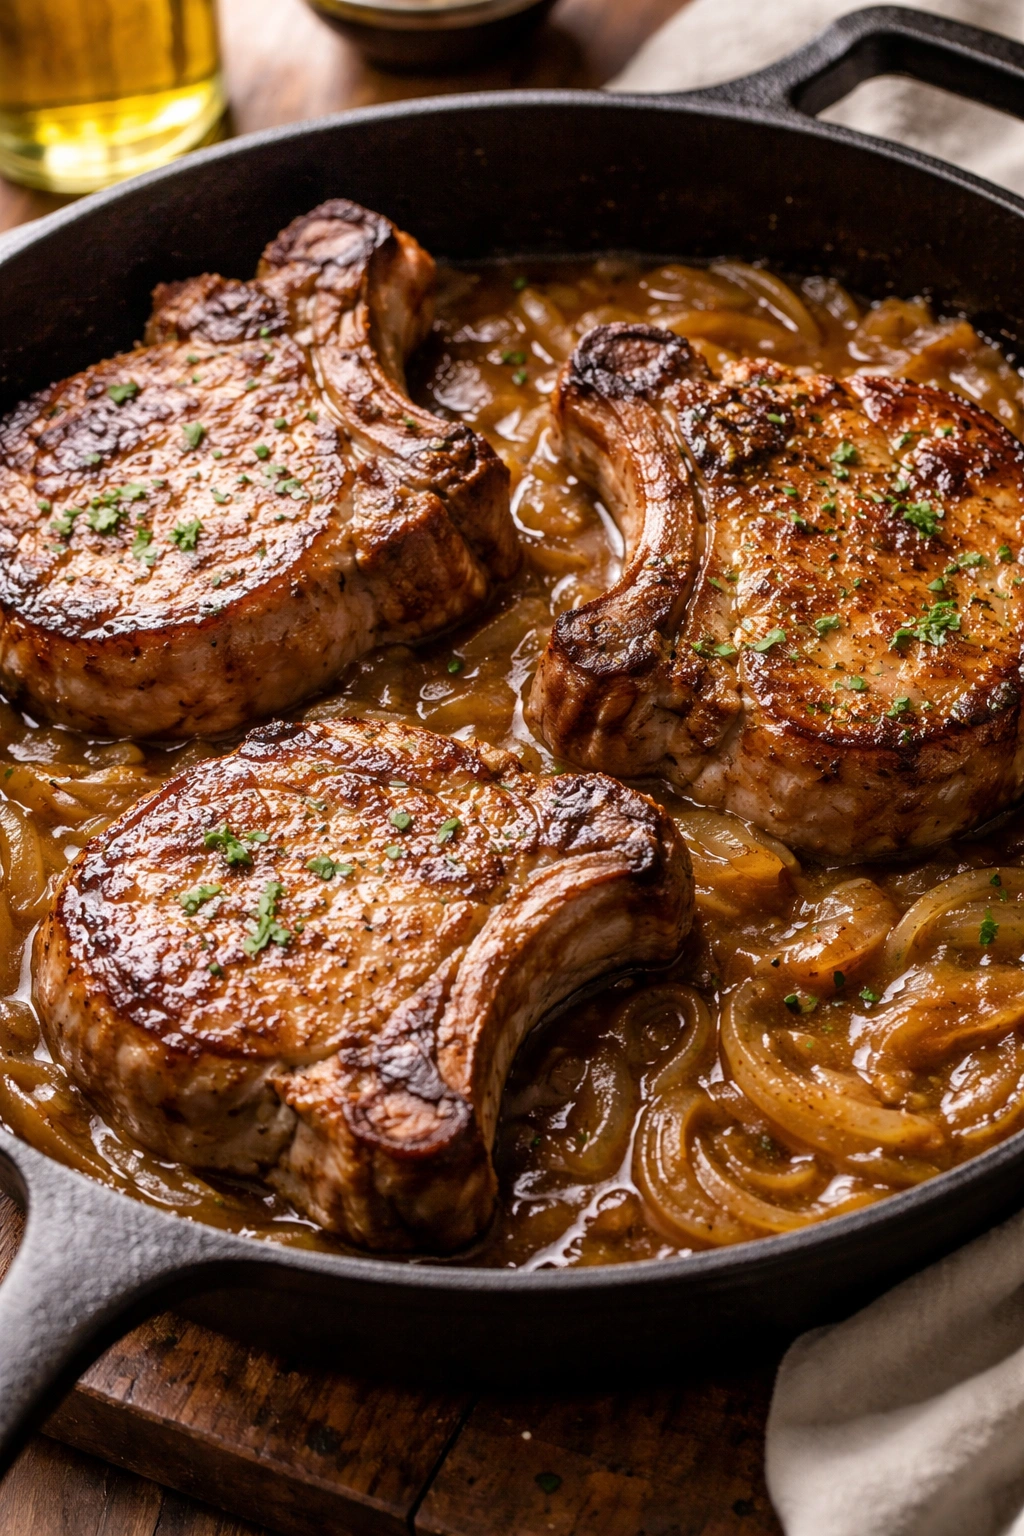
Southern cooking traditionally means onions. Not mushrooms, not peppers, but caramelized onions that have been cooked until they’re soft, golden, and naturally sweet. These onions form the foundation of the gravy. They’re sautéed until they break down completely, then a touch of flour is stirred in to create a roux that thickens the liquid. The result is a gravy that’s silky, not heavy, with actual texture and depth of flavor rather than being a one-note cream sauce.
The spice blend is deliberately restrained but impactful. You’re using garlic powder, onion powder, dried sage, salt, and black pepper — nothing exotic, nothing that requires a specialty store visit. These are the seasonings your grandmother probably already has in her cabinet. They work together to season the meat and ensure it tastes savory and complex without being spicy or overwhelming. The sage is particularly important here; it’s a traditional Southern herb that adds an earthy undertone that reads as deeply comforting to the palate.
The Critical Role of Thickness and Temperature
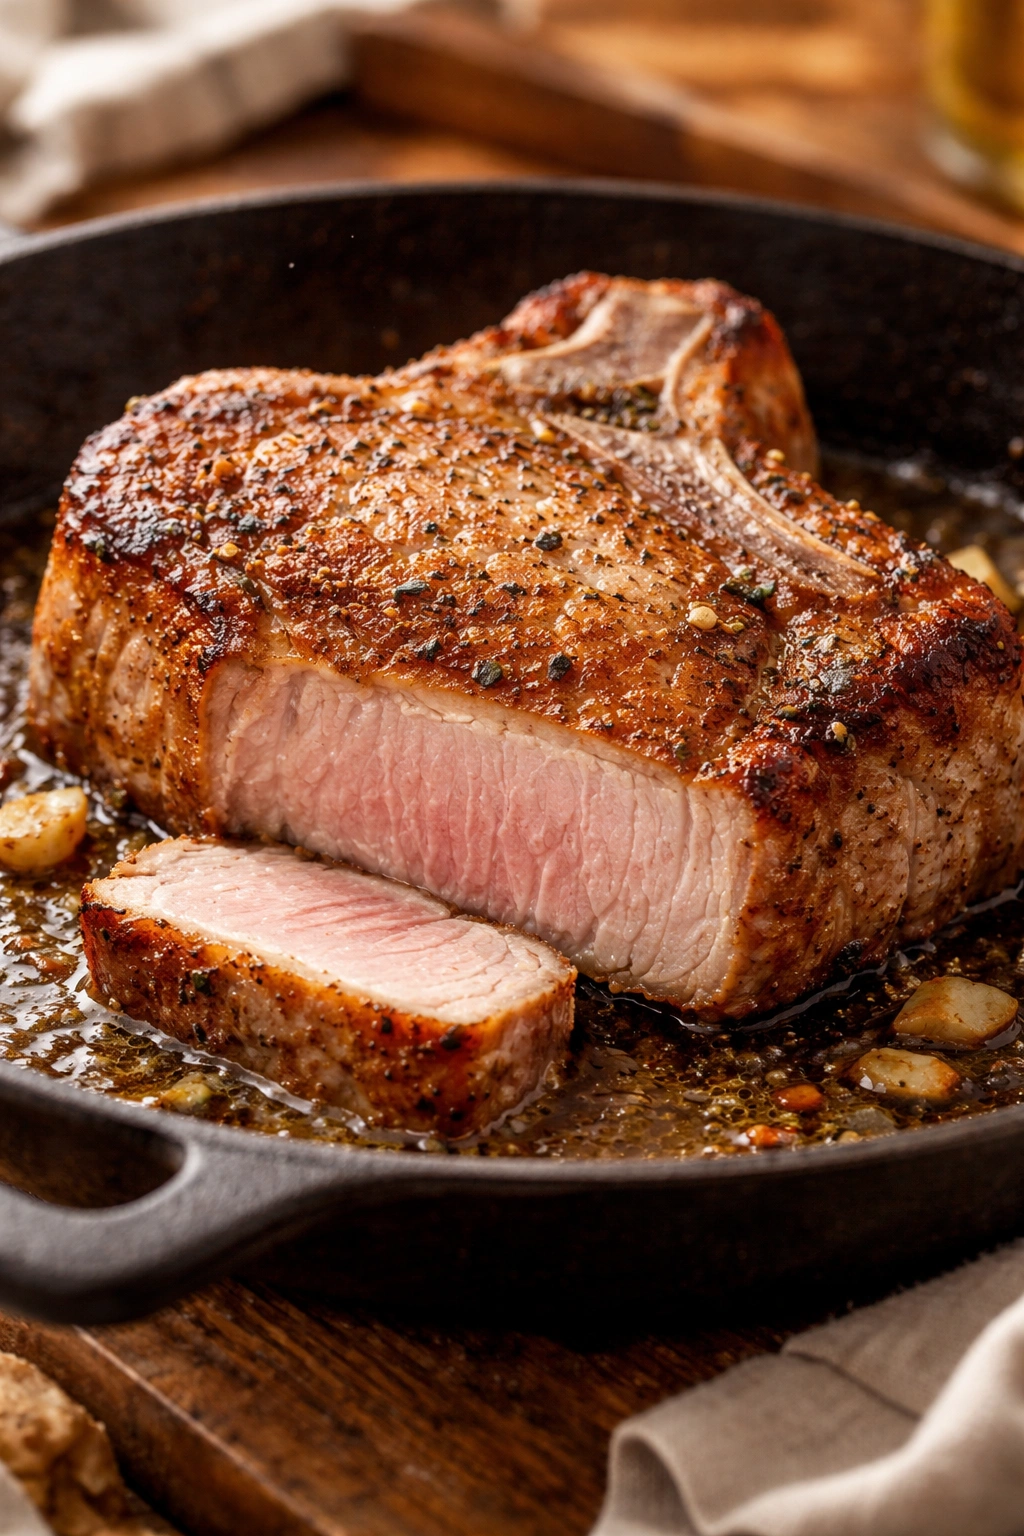
One of the biggest reasons people end up with dry, rubbery pork chops is because they buy chops that are too thin, cook them at too high a temperature, or simply don’t know when to stop. This recipe solves all three problems by starting with the right cut and using a meat thermometer as your guide. Pork chops that are ¾ to 1 inch thick are the sweet spot — thick enough that they have a fighting chance of cooking through without drying out on the outside, but thin enough that they cook quickly.
Thickness also gives you visual cues. When a thin pork chop cooks, it’s often done before you’ve built up any meaningful crust. A slightly thicker chop gives you time to develop that golden-brown sear while the interior cooks to the perfect temperature. The standard for pork safety is 145°F at the thickest point, measured with a meat thermometer at least one inch away from the bone. When you hit that temperature and stop cooking immediately, you’re guaranteed meat that’s safe, cooked through, and still juicy.
Temperature management in the skillet is equally important. You want the pan hot enough to create that sear (medium-high heat is ideal), but not so hot that the outside burns before the inside cooks. This is why bringing the pork chops to room temperature before cooking makes a measurable difference — cold meat straight from the fridge won’t cook evenly. Give them 20-30 minutes on the counter before you start, and the heat penetrates more uniformly.
The Two-Stage Cooking Method That Works Every Time
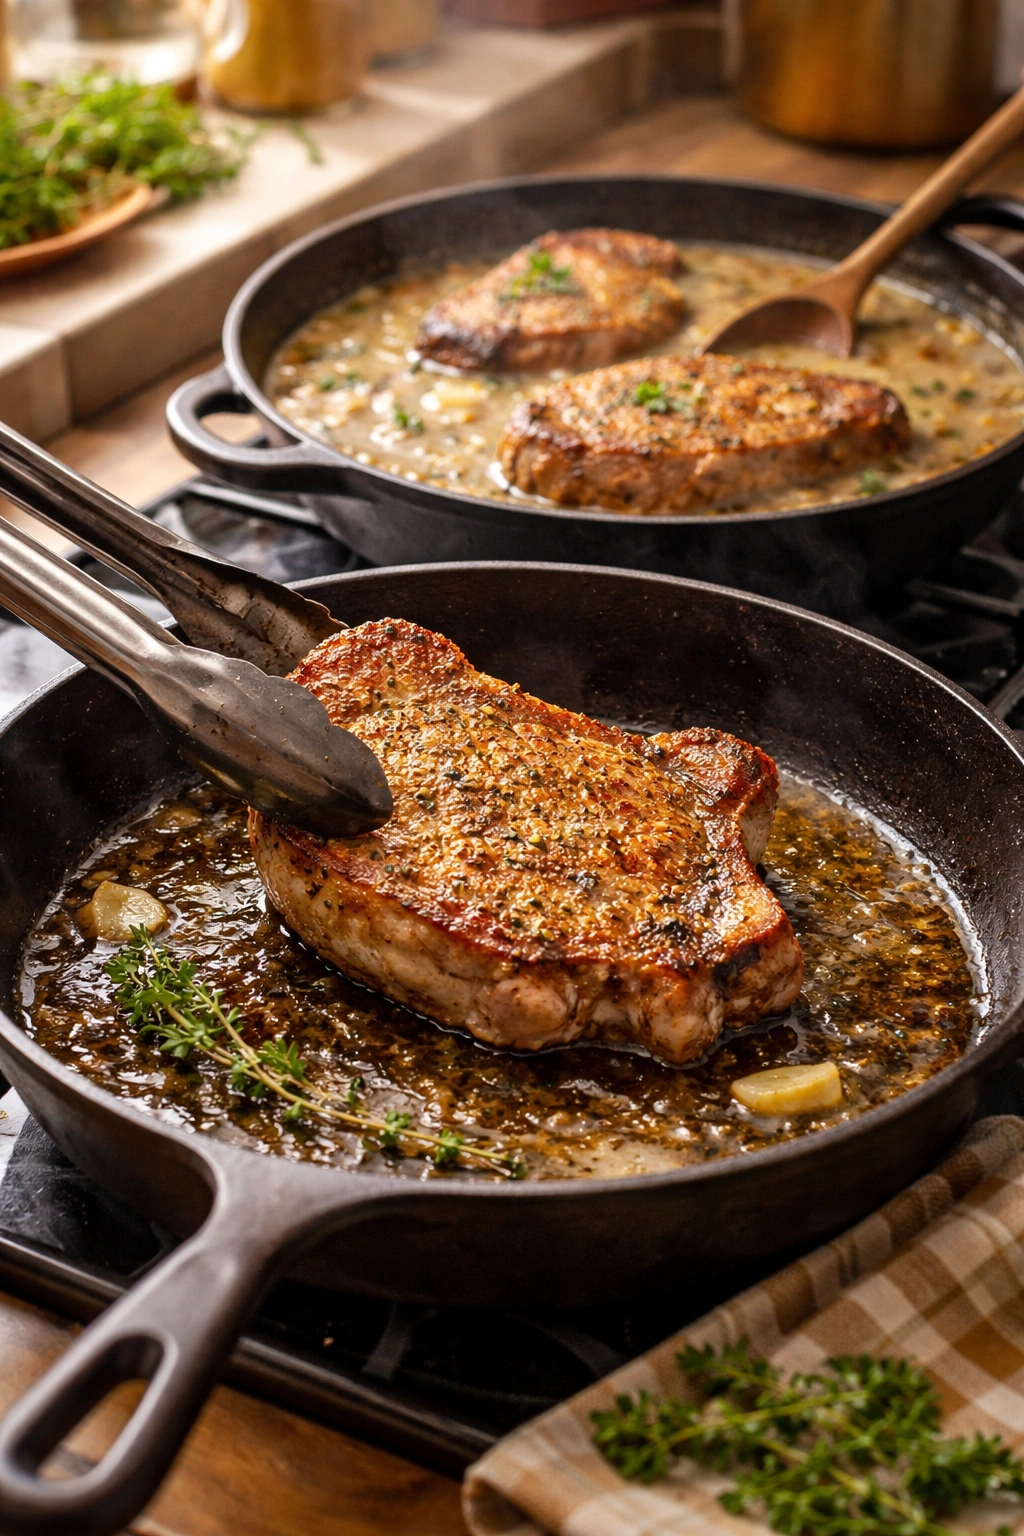
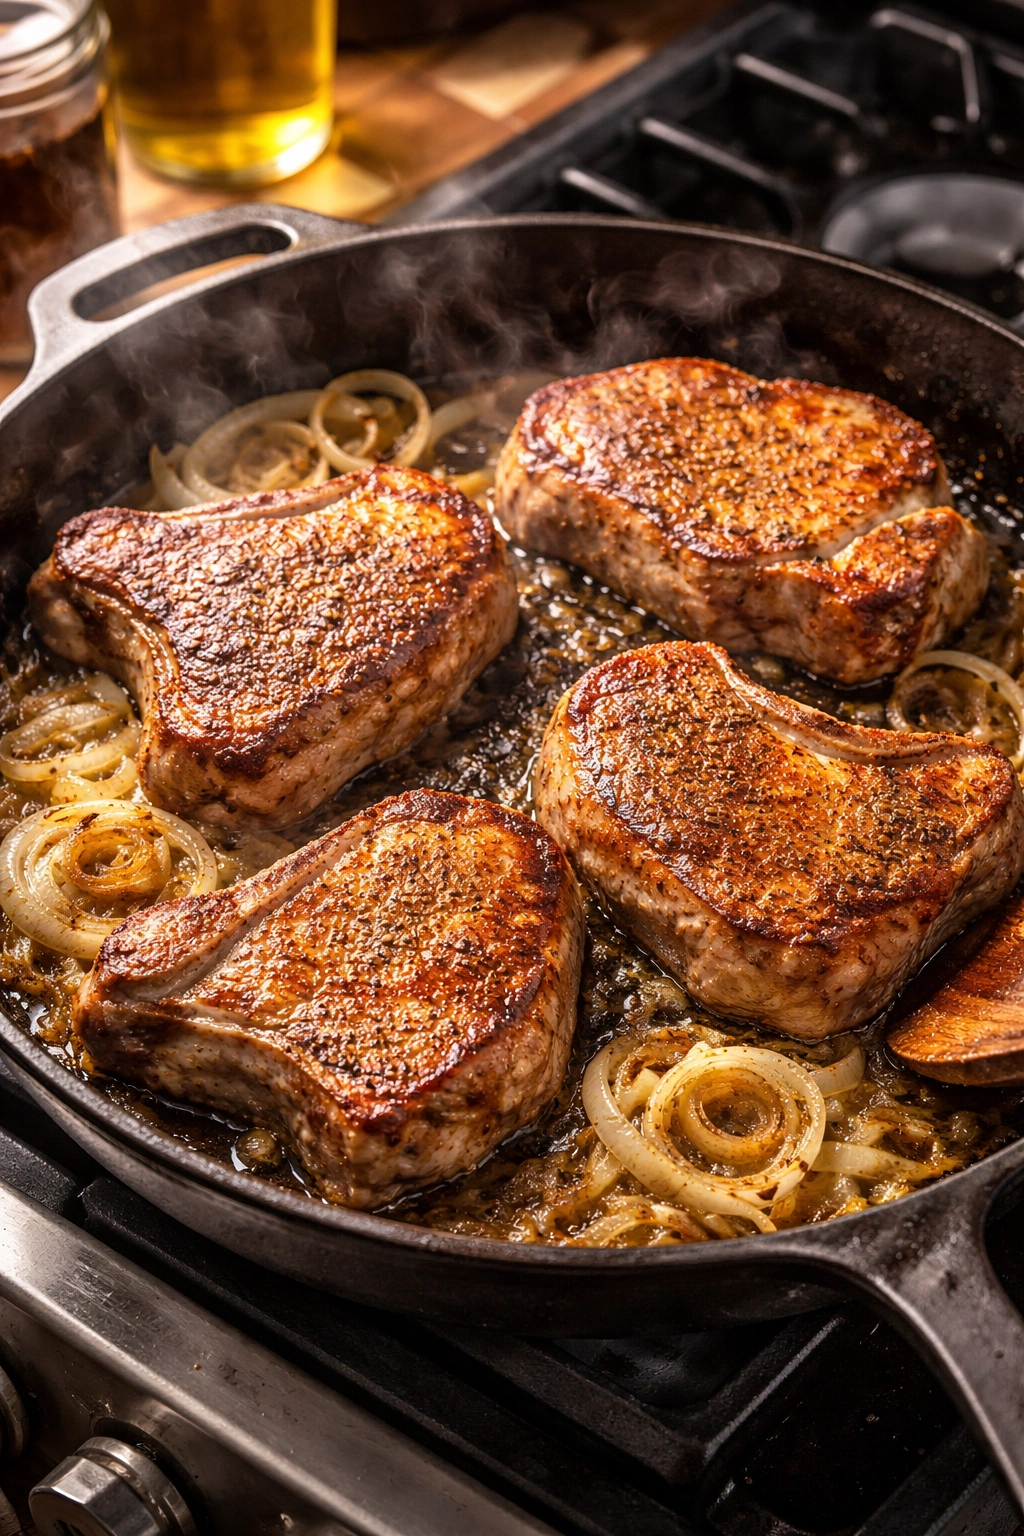
The technique used here is essentially two distinct cooking phases, and understanding the difference between them is what separates this recipe from hit-or-miss attempts. Phase one is the sear — this is where you get that beautiful golden crust that develops in 3-4 minutes per side over medium-high heat. Phase two is the simmer in gravy — this is where the pork chops finish cooking gently in a flavorful liquid, staying moist the entire time.
The genius of this two-stage approach is that you’re not overcooking anything. The pork spends only a brief amount of time over high heat — just enough to brown the outside. Then it comes out of the pan and you build the gravy base. While the onions are cooking and the roux is forming, the residual heat keeps the pork chops warm (covered with a plate) but doesn’t continue cooking them into submission. When you return them to the pan, they simmer for just a few more minutes until they hit that 145°F target. Total time in the pan is under 15 minutes of actual cooking, which is why 30 minutes total is completely realistic.
Choosing and Preparing Your Ingredients
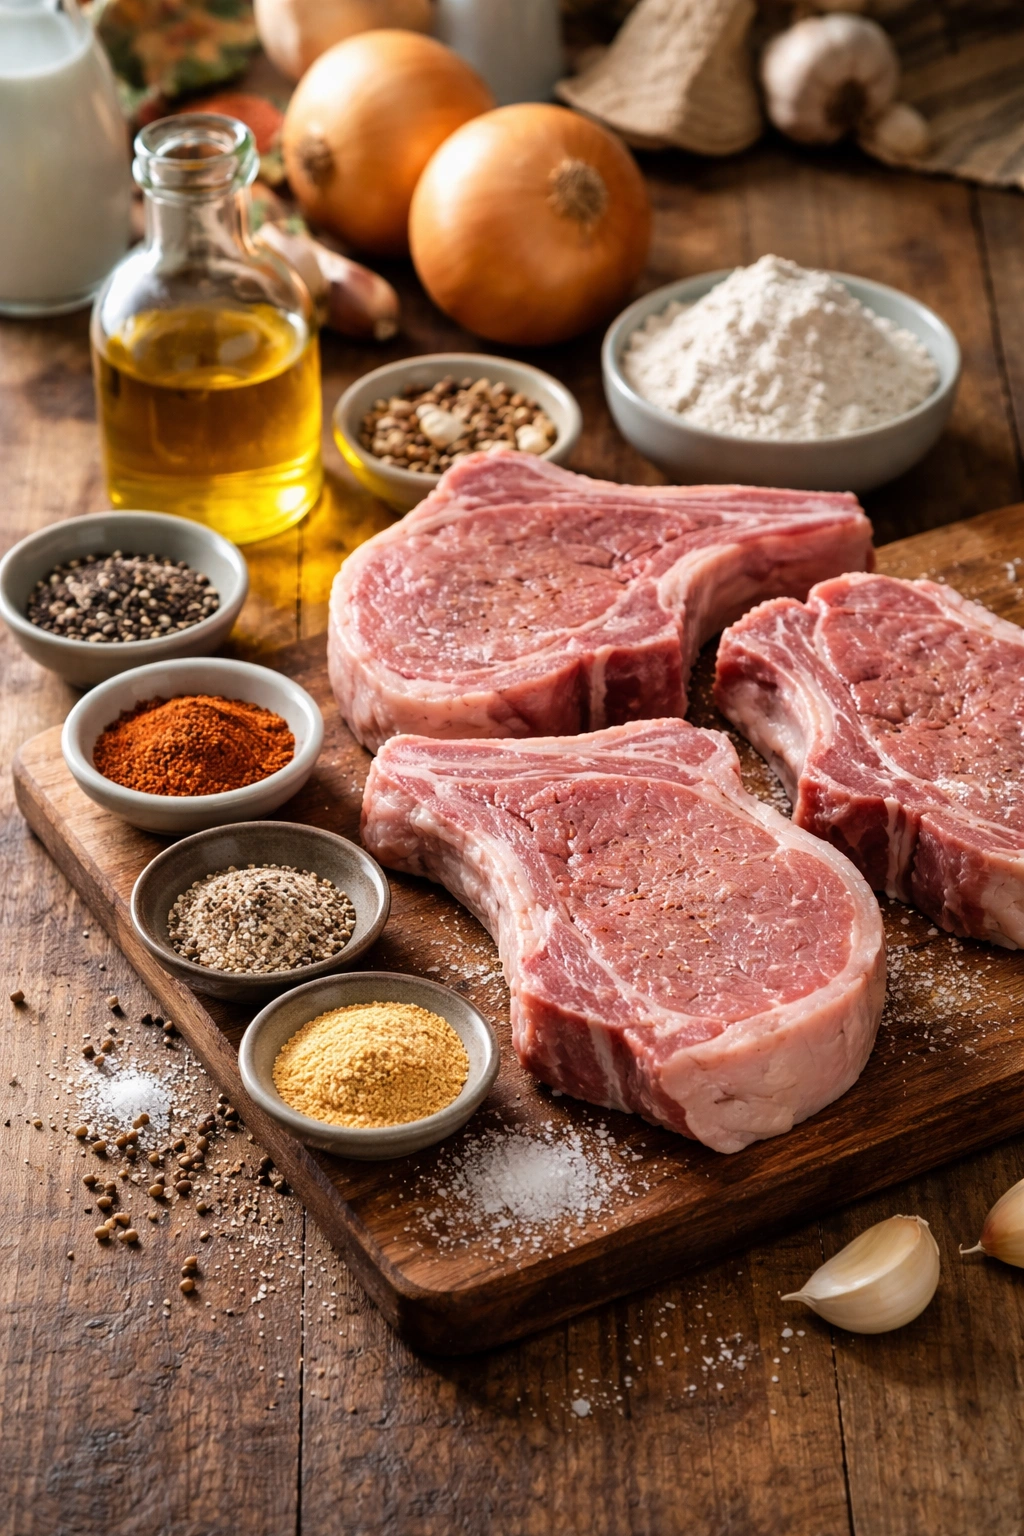
The beauty of this recipe is that every single ingredient is something you either have on hand or can grab at any grocery store without hunting. There are no specialty items, no hard-to-find components, nothing that requires a trip to three different stores. This makes it perfect for truly quick dinners when you haven’t planned ahead.
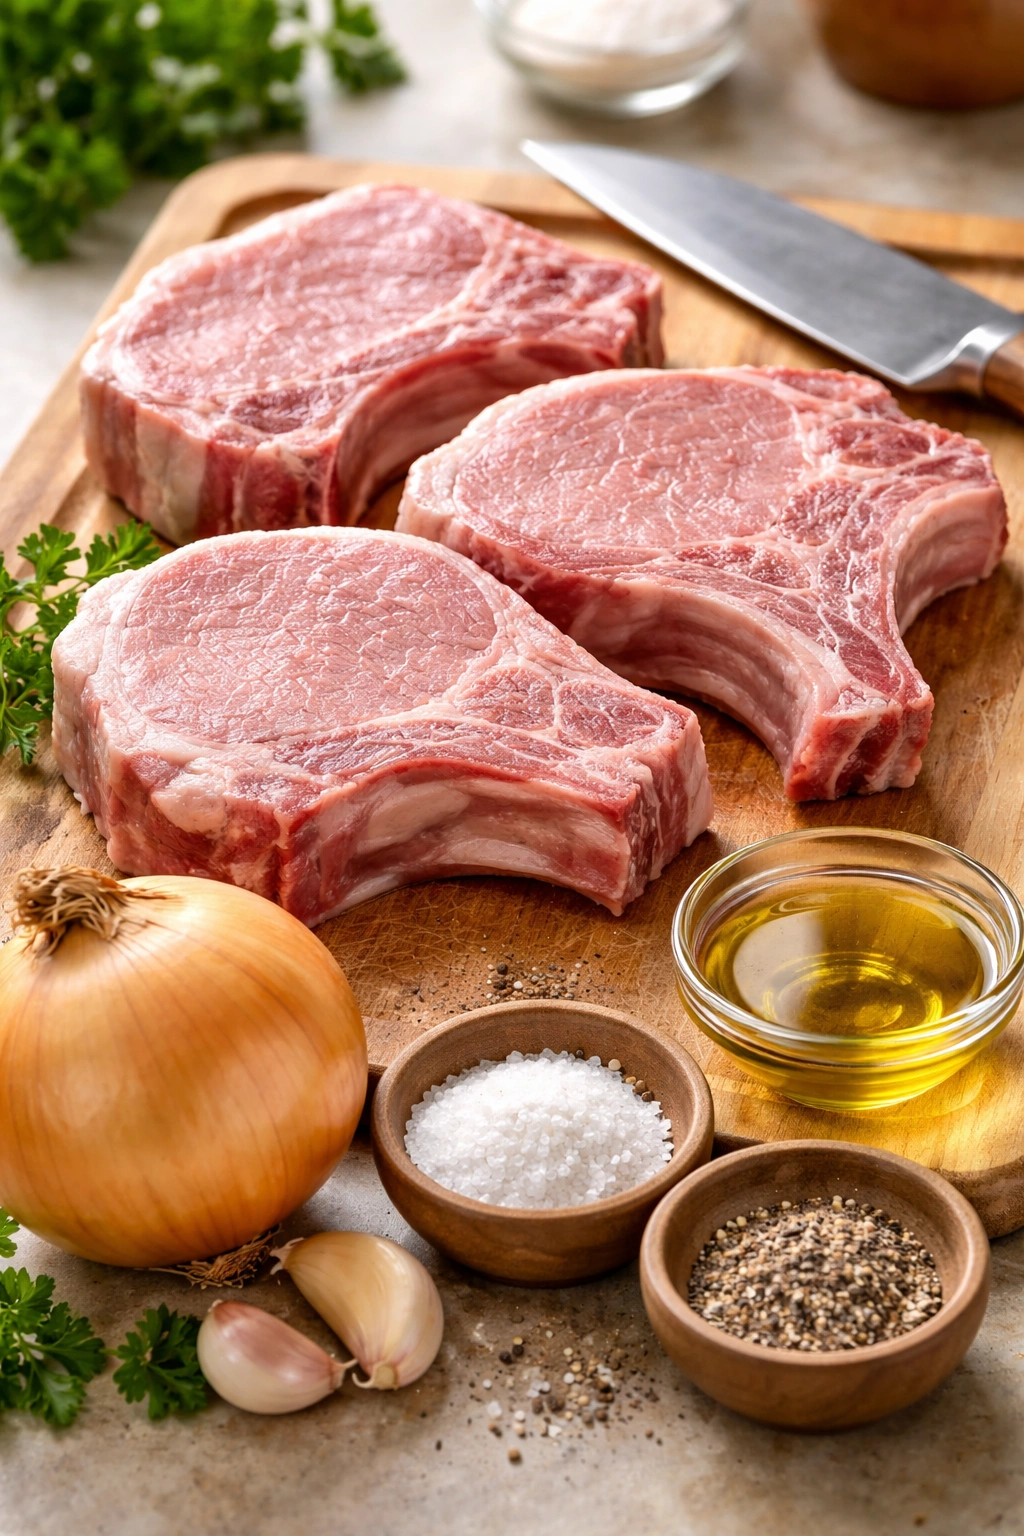
Start with the pork chops themselves. Bone-in chops are your best choice here because the bone adds flavor and helps retain moisture, but boneless will work if that’s what’s available. Look for chops with a bit of marbling — those thin streaks of fat running through the meat aren’t something to avoid, they’re actually your insurance policy against dryness. The fat in the meat is what keeps it flavorful and juicy as it cooks. Choose chops that are roughly uniform in thickness so they cook at the same rate. A good practice at the butcher counter is to ask them to cut your chops to a specific thickness rather than grabbing whatever’s in the case.
The onion should be a sweet yellow onion, sliced thin so it cooks quickly and breaks down completely into the gravy. You’ll be surprised at how much more flavorful even basic grocery store onions become when they’ve been sautéed until golden. A single medium onion is usually enough for the gravy — it’s not the star of the show, but rather a supporting player that adds sweetness, body, and depth.
For the liquid component, low-sodium chicken broth is ideal because you control the salt level. If you have homemade bone broth, use it — it will make the gravy richer and more flavorful. The amount is important too; 2 cups total gives you enough liquid to build a proper gravy without making the dish soupy. All-purpose flour is the thickening agent, and just a few tablespoons stirred into the onions creates a roux that brings everything together into a cohesive, silky sauce.
Getting the Seasoning Right
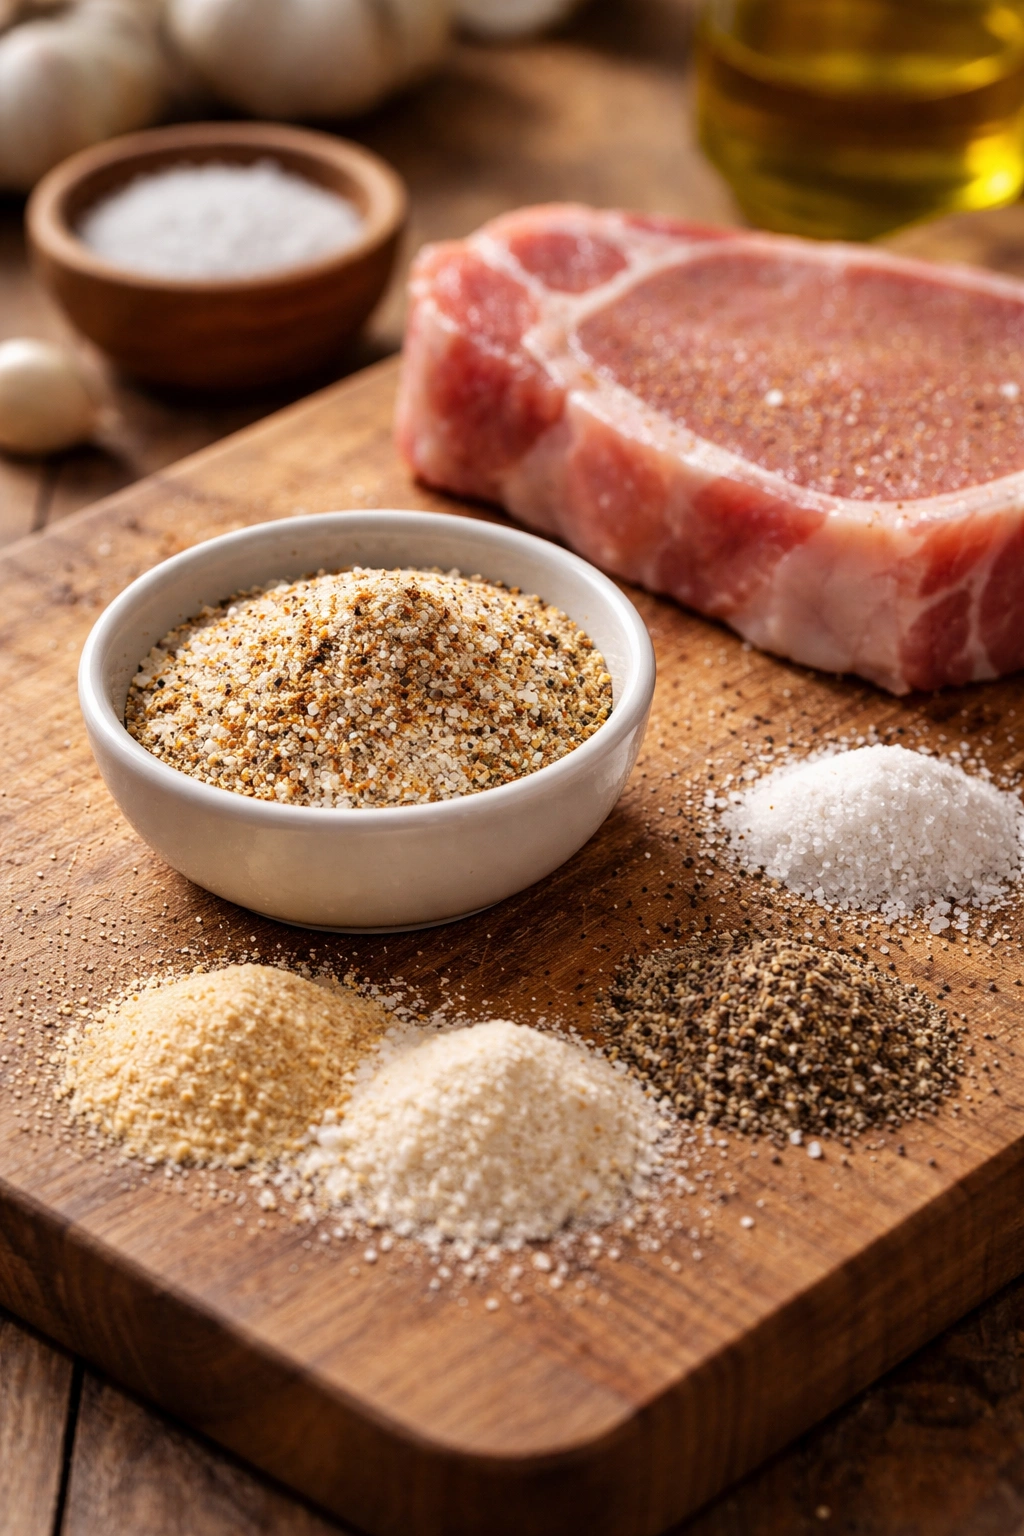
The dry seasoning mixture is where this recipe gets its personality without any fussiness. Combine 1 teaspoon each of garlic powder and onion powder, plus ½ teaspoon salt and ¼ teaspoon black pepper in a small bowl. That’s it. No exotic spices, no complicated proportions to remember. This mixture is applied generously to both sides of the pork chops before they hit the pan — you want a visible coating of seasoning, not a delicate dusting.
The reason this simple seasoning works so well is that you’re layering flavor throughout the cooking process. The pork chops themselves are seasoned and seared, which concentrates the flavors of the garlic and onion powders through heat. Then, as the onions cook, they add another layer of natural garlic and onion flavor to the gravy. The dried sage (added to the gravy) brings an herbaceous note that ties everything together. The result is a dish that tastes deeply savory and well-seasoned without any single ingredient tasting overwhelming.
One important note: if you’re sensitive to salt or watching your sodium intake, use regular salt instead of seasoned salt (seasoned salt contains sodium along with other minerals), and be conservative with how much you use. You can always taste and adjust the final gravy, but you can’t take salt back out. Start conservative and build up.
Why This Works as a 30-Minute Dinner
The clock really does work in your favor here. When you’re organized and ready to go, here’s how the timing breaks down: 5 minutes to prep ingredients (pork chops out, oil heating, onion sliced, flour measured). 8-10 minutes to sear the pork chops and build the gravy base. 3-5 minutes of simmering for the gravy to thicken. 5 minutes for the pork chops to finish cooking in the gravy. 2-3 minutes of resting time before serving.
The secret is that very little of this is active labor time. Once the pork chops are seared and removed from the pan, you’re sautéing onions and stirring in flour while everything else happens passively. The oven doesn’t need to preheat, you’re not waiting for water to boil, you’re not babying a complicated sauce. Everything happens in one pan, in sequence, with minimal cleanup at the end.
This recipe also scales beautifully for the 30-minute timeline whether you’re cooking for two people (2 pork chops) or six people (6 pork chops). The cooking time stays essentially the same because you’re not stacking the meat or crowding the pan. You just use a larger skillet and work in batches if necessary, keeping the first batch warm while you sear the rest.
The Importance of Rest and Carryover Cooking

Here’s a detail that home cooks often skip but professionals never do: after you’ve removed the pork chops from the heat, let them rest for 3-5 minutes before serving. During cooking, the heat pushes the meat’s juices toward the center of the chop. If you cut or eat immediately, those juices run right out onto the plate, leaving the meat drier than it should be. Resting allows the juices to redistribute throughout the meat. This is particularly important with pork, which has less fat than beef and is more vulnerable to appearing dry if not handled carefully.
This resting period doesn’t add much time to your overall 30-minute window — it happens while you’re finishing the gravy, plating the sides, or taking a breath before service. In fact, building in this short rest is part of why this timeline is realistic rather than wishful thinking. You’re not rushing from pan to plate to table with everything barely cooled enough to eat.
Yield: Serves 4 (4 pork chops + 2 cups gravy)
Prep Time: 15 minutes
Cook Time: 20 minutes
Total Time: 35 minutes
Difficulty: Beginner — No special equipment required beyond a large skillet and meat thermometer, and the steps are straightforward even if you’ve never made smothered pork chops before. This is an excellent recipe to build confidence with a classic technique.
Ingredients
For the Pork Chops:
- 4 bone-in pork chops (each about ¾ to 1 inch thick, approximately 1½ to 2 lbs total)
- 1 teaspoon garlic powder
- 1 teaspoon onion powder
- ½ teaspoon fine sea salt
- ¼ teaspoon freshly ground black pepper
- 2 tablespoons avocado oil or olive oil
For the Onion Gravy:
- 1 tablespoon additional oil or butter
- 1 medium sweet yellow onion, thinly sliced
- ¼ cup chicken broth (to deglaze the pan)
- 3 tablespoons all-purpose flour
- 1¾ cups low-sodium chicken broth (remaining amount)
- 1 teaspoon dried sage
- ½ teaspoon additional fine sea salt (to taste in the gravy)
- ¼ teaspoon freshly ground black pepper (to taste in the gravy)
Optional for Serving:
- Fresh thyme sprigs or finely chopped fresh parsley for garnish
- Mashed potatoes or rice as an accompaniment
Step-by-Step Instructions
Prepare the Pork and Season:
-
Remove the pork chops from the refrigerator and allow them to sit on the counter at room temperature for 20 to 30 minutes — this ensures they cook evenly throughout.
-
In a small bowl, combine the garlic powder, onion powder, salt, and black pepper. Stir together with a fork to break up any clumps.
-
Pat both sides of each pork chop gently with a paper towel to remove any surface moisture — this helps them brown more effectively in the skillet. Season both sides generously with the seasoning mixture, pressing it gently into the meat so it adheres.
Sear the Pork Chops:
-
Heat 2 tablespoons of oil in a large heavy skillet (cast iron or stainless steel both work beautifully) over medium-high heat. Allow the oil to heat for about 1 minute until it shimmers and a small piece of onion sizzles immediately when it touches the pan.
Advertisements -
Carefully place the pork chops into the hot oil without crowding the pan — they should have space between them so steam can escape rather than trapping moisture. If your skillet isn’t large enough, cook in two batches rather than overcrowding.
-
Allow the pork chops to sear undisturbed on the first side for 3 to 4 minutes. You’re looking for a deep golden-brown crust that releases easily from the pan — if it’s sticking, give it another 30 seconds before attempting to flip.
-
Using tongs, flip each pork chop carefully. Cook the second side for another 3 to 4 minutes until evenly browned.
-
Transfer the seared pork chops to a clean plate and cover loosely with an inverted plate or foil to keep them warm while you finish the gravy — do not let them steam under a tight cover, as that will soften the crust you just created.
Build the Onion Gravy:
-
Add the remaining 1 tablespoon of oil or butter to the same skillet (it should have flavorful browned bits stuck to the bottom — these are liquid gold for gravy).
-
Add ¼ cup of chicken broth to the pan and use a wooden spoon to scrape up all those browned bits from the bottom, stirring and loosening everything into the liquid. This is the deglazing step, and it’s where a huge amount of flavor comes from.
-
Add the sliced onion to the pan and reduce the heat to medium. Sauté the onion, stirring occasionally, for 8 to 10 minutes until the slices are completely soft, broken down, and have turned a light golden-brown color at the edges. The onions should look almost caramelized and will reduce significantly in volume — this is exactly what you want.
-
When the onions are soft and golden, sprinkle the flour evenly over them. Stir constantly for 1 to 2 minutes, coating the onions thoroughly with the flour. The mixture should look like wet sand and should have no visible white flour remaining — the flour is absorbing the oil and pan juices and will create the thickening agent for your gravy.
-
Pour the remaining 1¾ cups of chicken broth slowly into the pan while stirring constantly. Use a whisk or wooden spoon to combine, scraping up any browned bits and ensuring the flour dissolves completely and no lumps form.
Advertisements -
Add the dried sage and ½ teaspoon salt. Stir well to combine. Bring the mixture to a gentle simmer — you’ll see small bubbles breaking the surface — and let it cook undisturbed for about 1 minute, during which time the gravy will noticeably thicken as the flour does its work.
Finish Cooking and Bring Together:
-
Gently return the seared pork chops to the skillet, nestling them into the gravy and spooning some of the onions over the top of each chop.
-
Reduce the heat to medium-low and let everything simmer gently for 2 to 6 minutes more, depending on the thickness of your chops — the time varies because thicker chops need more time to cook through to the center.
-
Using a meat thermometer, check the internal temperature of the thickest part of each pork chop, inserting the thermometer at least 1 inch away from the bone, angling it into the meat without touching bone. When the thermometer reads 145°F, the pork is safely cooked and still juicy — remove the skillet from heat immediately to prevent overcooking.
-
Taste the gravy and adjust the seasoning with additional salt and pepper as needed — you’re looking for a balance of savory and slightly sweet from the caramelized onions, with no bitter or burnt flavors.
-
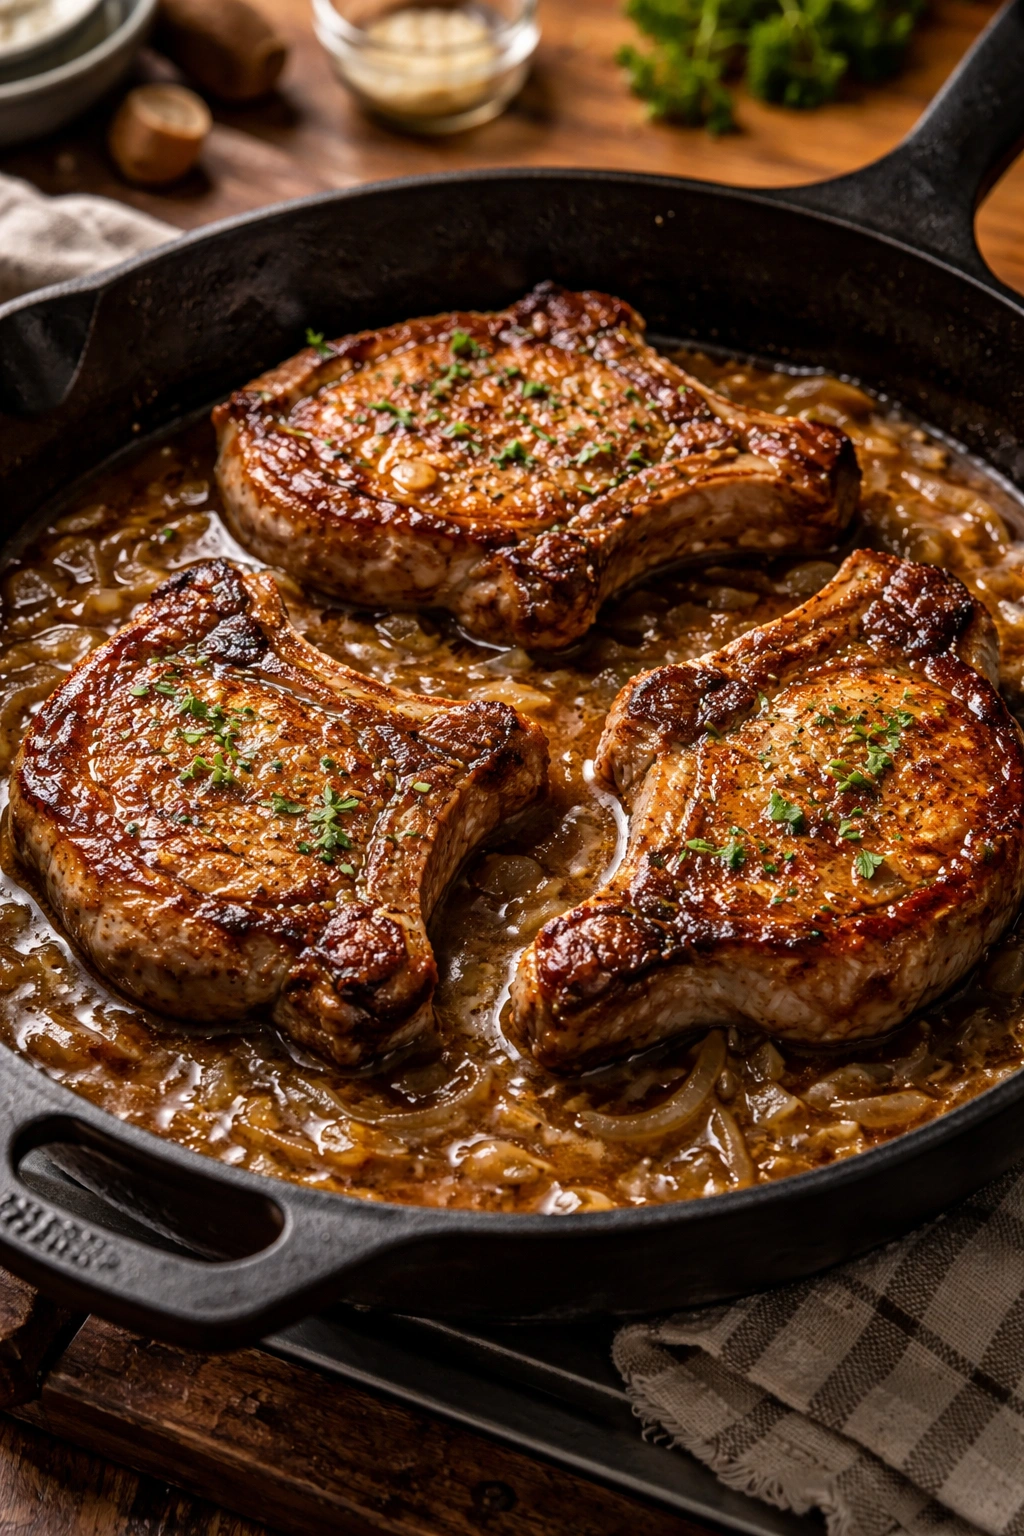
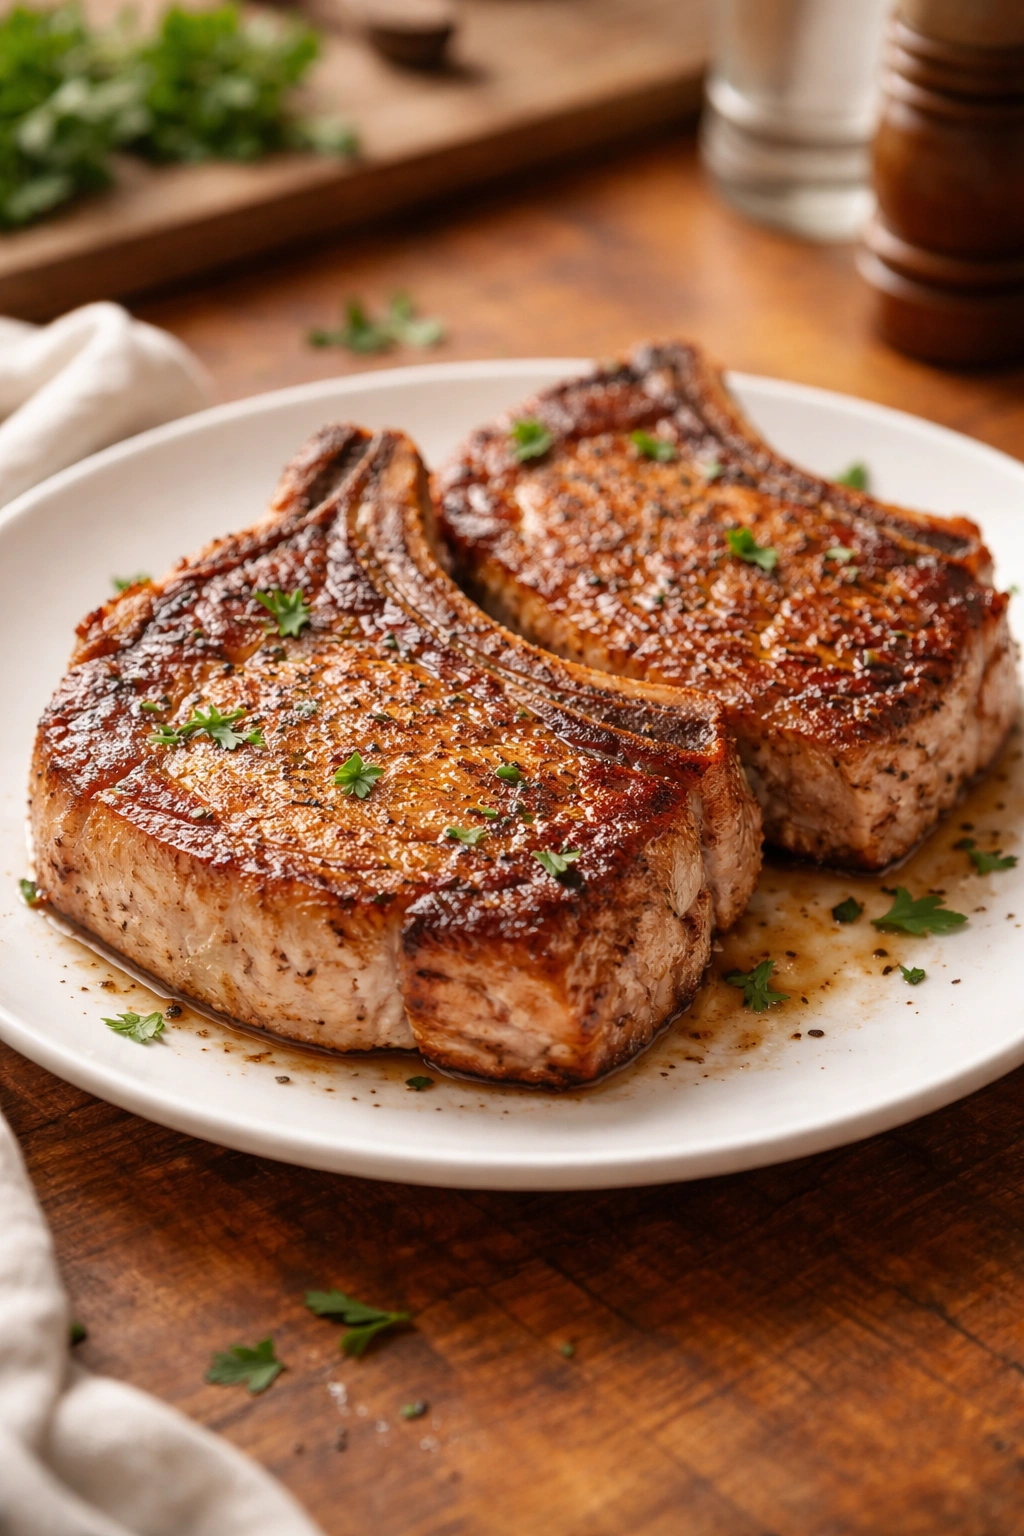
Transfer the pork chops to a serving platter or individual plates, spoon the gravy and onions generously over and around each chop, and garnish with fresh thyme sprigs or chopped parsley if desired.
-
Allow the pork chops to rest on the plate for 3 to 5 minutes before eating — this allows the juices to redistribute throughout the meat, ensuring maximum juiciness and tenderness.
Secrets to Perfectly Juicy, Tender Pork Chops
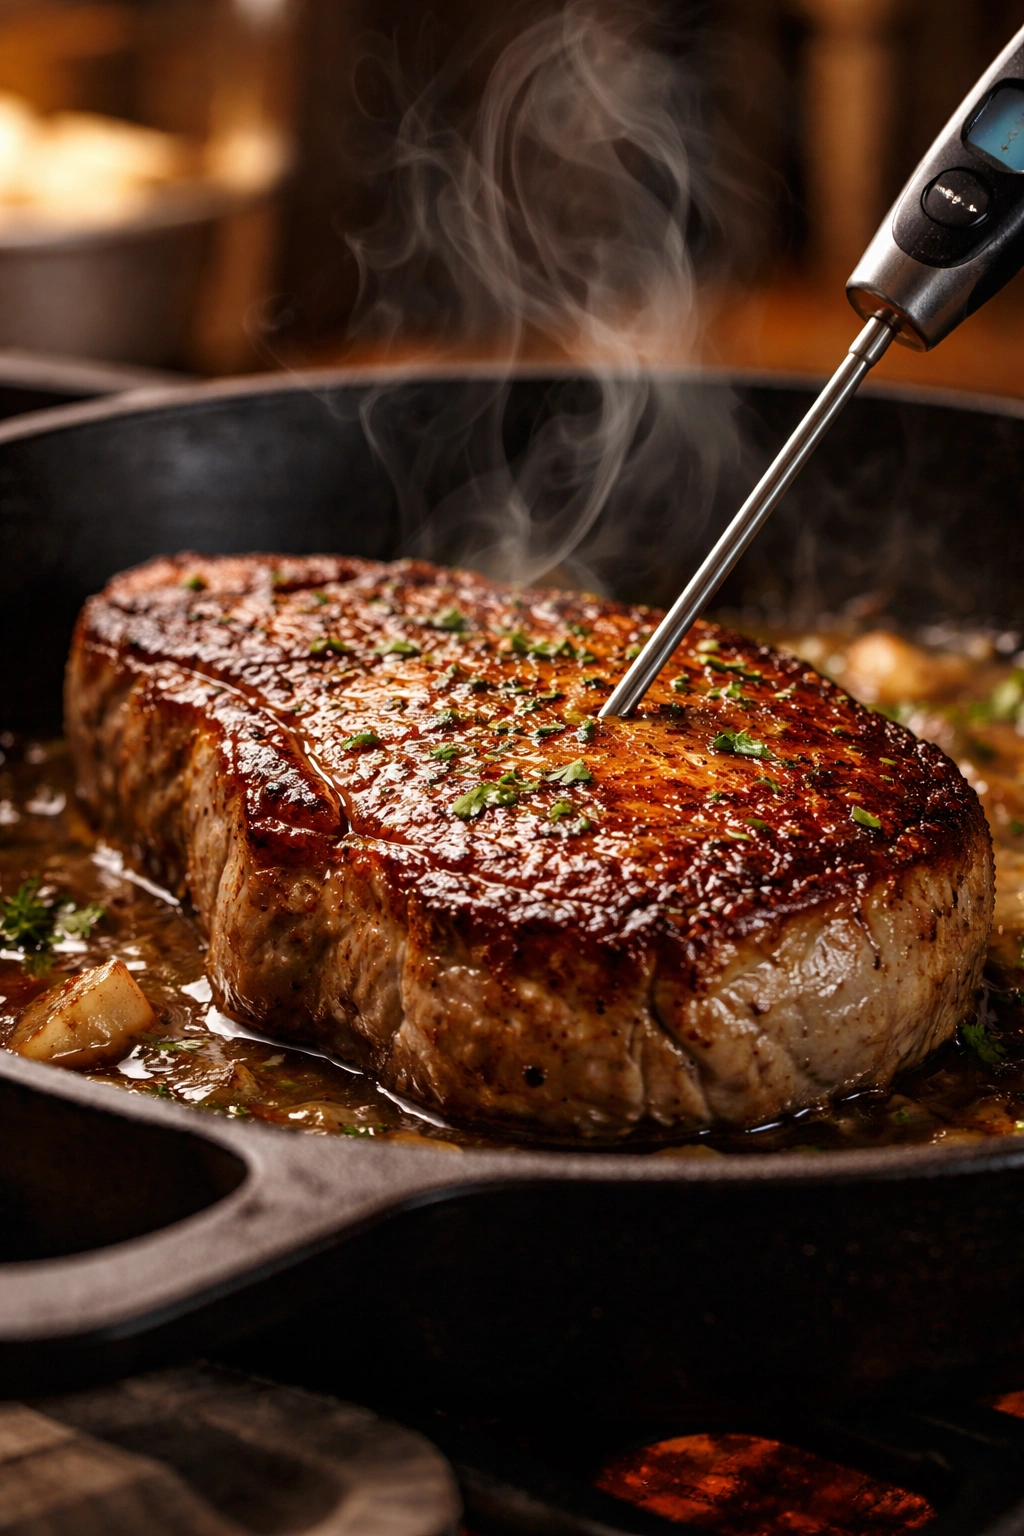
The difference between pork chops that disappoint and pork chops that people actually look forward to eating comes down to a few non-negotiable details. First, invest in a good instant-read meat thermometer — the kind with a digital readout and a thin probe. This single tool removes all guesswork from pork cooking. You can cook it perfectly every time, and you don’t have to worry about pink in the middle or dryness on the outside. A thermometer costs under $20 and will change your confidence in the kitchen forever.
Second, understand that the pork chops continue cooking slightly even after you remove them from the heat — this is called carryover cooking. So pull them off the heat at exactly 145°F, not at 150°F hoping they’ll stay at 145°F once rested. The internal temperature will actually rise a degree or two while the meat rests and redistributes its juices. This is why resting after cooking is non-negotiable; it’s an actual part of the cooking process, not something you do if you happen to have time.
Third, never skip the room-temperature step. Pork chops pulled straight from a 35°F refrigerator have cold centers that cook much more slowly than the outside. This creates a scenario where the exterior is overcooked and dried out by the time the center reaches safe temperature. Room-temperature meat cooks uniformly, which is the only way to achieve the ideal result — a deep golden crust combined with meat that’s cooked through but still tender and juicy.
Finally, use the thickest chops available. Thin pork chops (less than ½ inch) are extremely difficult to cook successfully because there’s no margin for error — they cook through so fast that you have maybe a 30-second window between perfectly done and overcooked. Chops that are at least ¾ inch thick give you more time and more forgiveness.
Understanding When to Use Different Cooking Methods
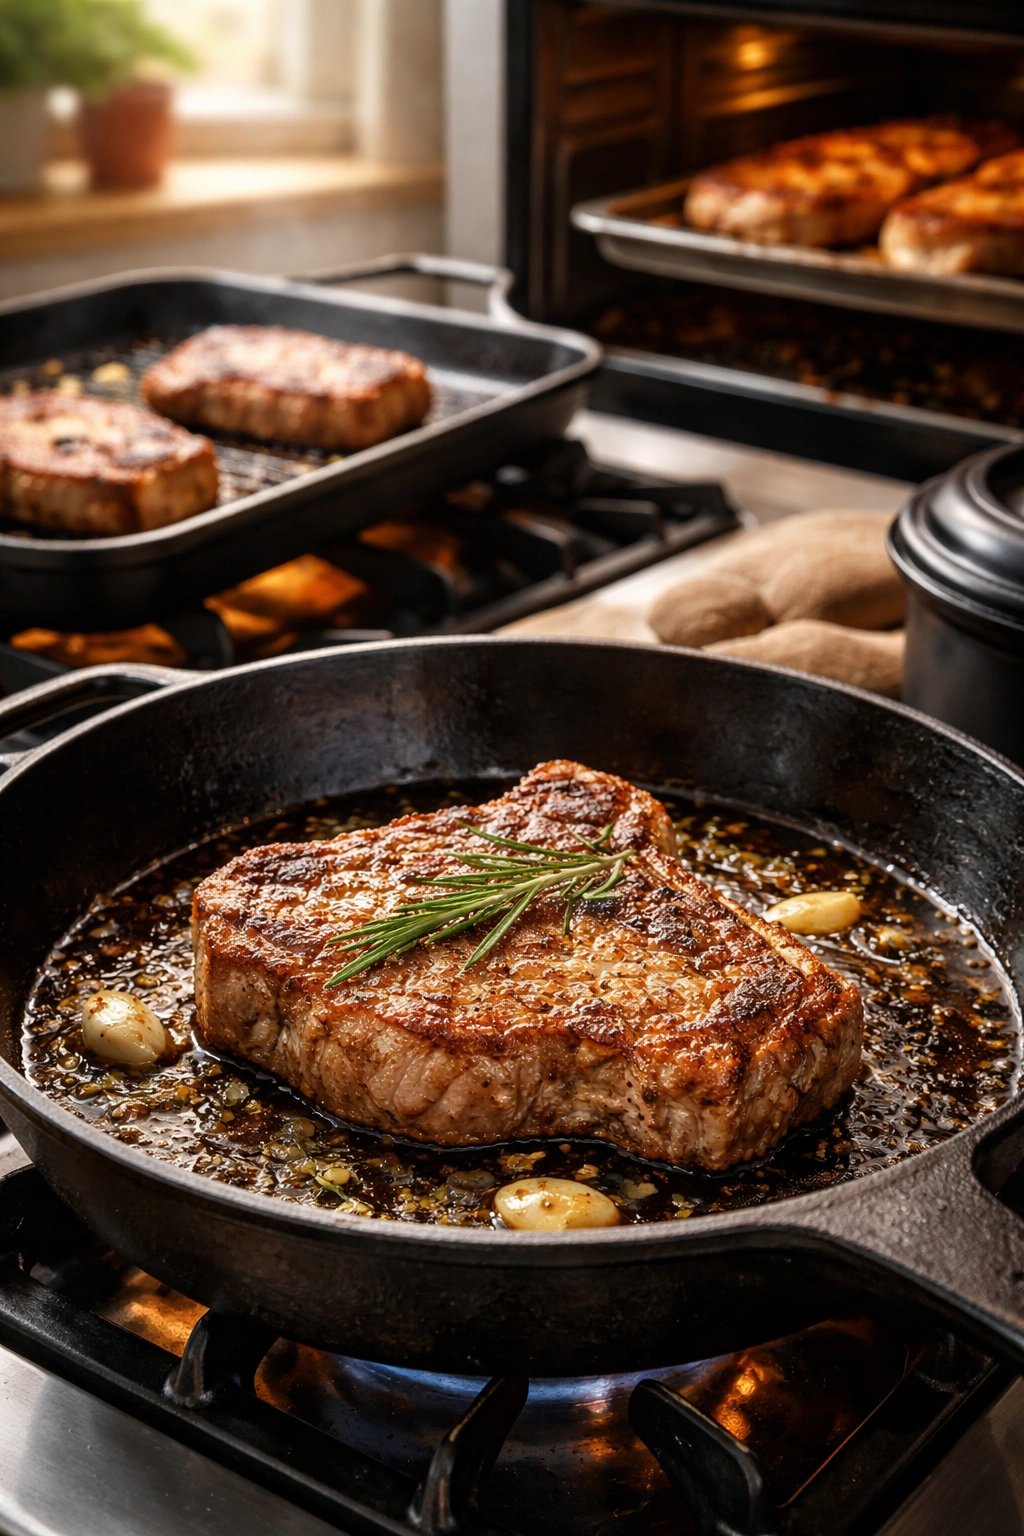
Pan-frying (the method used here) is the fastest way to cook pork chops and creates the best crust, so it’s ideal for weeknight dinners. Grilling works beautifully if you want those characteristic char marks and a smoky flavor, but requires your grill to be preheated and takes about the same amount of time. Baking is great if you’re cooking a large quantity of chops at once (for a crowd), but doesn’t develop the same crust and flavor. Slow-cooking creates incredibly tender meat but obviously doesn’t fit a 30-minute timeline.
This recipe uses pan-frying specifically because it’s the most efficient, most foolproof, and most reliable method for home cooks without special equipment. The skillet is already in your cabinet, the stove is already hot, and you get immediate visual feedback about how things are cooking.
Common Mistakes That Lead to Dry or Tough Pork Chops
The most common mistake is overcooking. Pork is much leaner than beef, and even a few degrees over 145°F creates a noticeable texture change. This is the single biggest reason people think they don’t like pork chops — they’re actually eating overcooked, dried-out meat. A meat thermometer is genuinely your best friend here.
The second mistake is not seasoning aggressively enough. The pork chops need to taste flavorful before they ever hit the pan. Season them generously, and taste the gravy when you’re done and adjust if needed. Underseasonned food tastes bland no matter how perfect the texture is.
The third mistake is cooking from cold. Those 20-30 minutes at room temperature aren’t wasted time; they’re essential prep that directly impacts your results. Plan ahead so you can make this happen.
The fourth mistake is crowding the pan. Pork chops need space around them so steam escapes and they brown properly. If your skillet is small or you’re doubling the recipe, cook in batches. It adds a few minutes to the total time but makes the difference between a crust and pale, steamed meat.
Making the Gravy Richer or Lighter Based on Preference
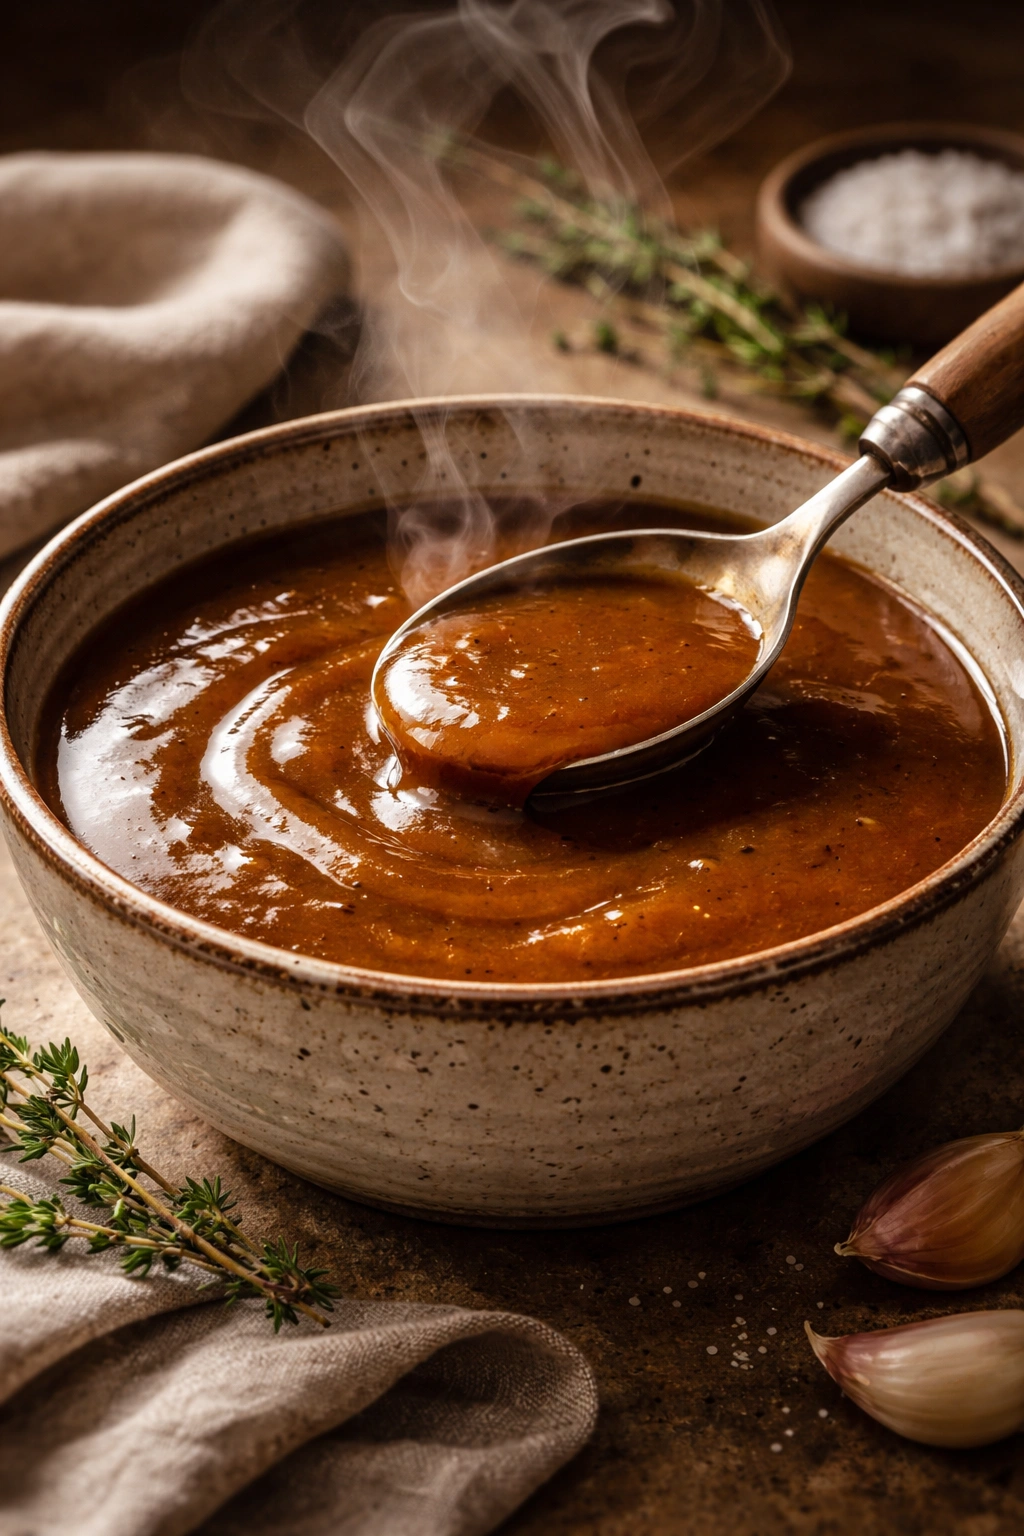
The gravy as written uses simple chicken broth and flour to create a savory sauce that’s silky without being heavy. If you prefer a richer, creamier gravy, you can replace ½ cup of the chicken broth with heavy cream or half-and-half. Add the cream in the last step, after the gravy has thickened with the flour, stirring it in and bringing everything back to a gentle simmer. This creates a gravy that’s closer to the versions you’d find in traditional Southern restaurants, though it’s absolutely delicious either way.
If you want a lighter gravy that’s still flavorful, you can add an extra ¼ cup of broth and use the same amount of flour — this creates a thinner sauce that’s wonderful for soaking into mashed potatoes. The key is understanding that flour and liquid ratios determine consistency, so adjust them together.
For a gravy with more umami depth, use beef broth instead of chicken broth, or use a combination of both. This creates a darker, more savory sauce that’s particularly good with bone-in chops.
Flavor Variations Worth Trying
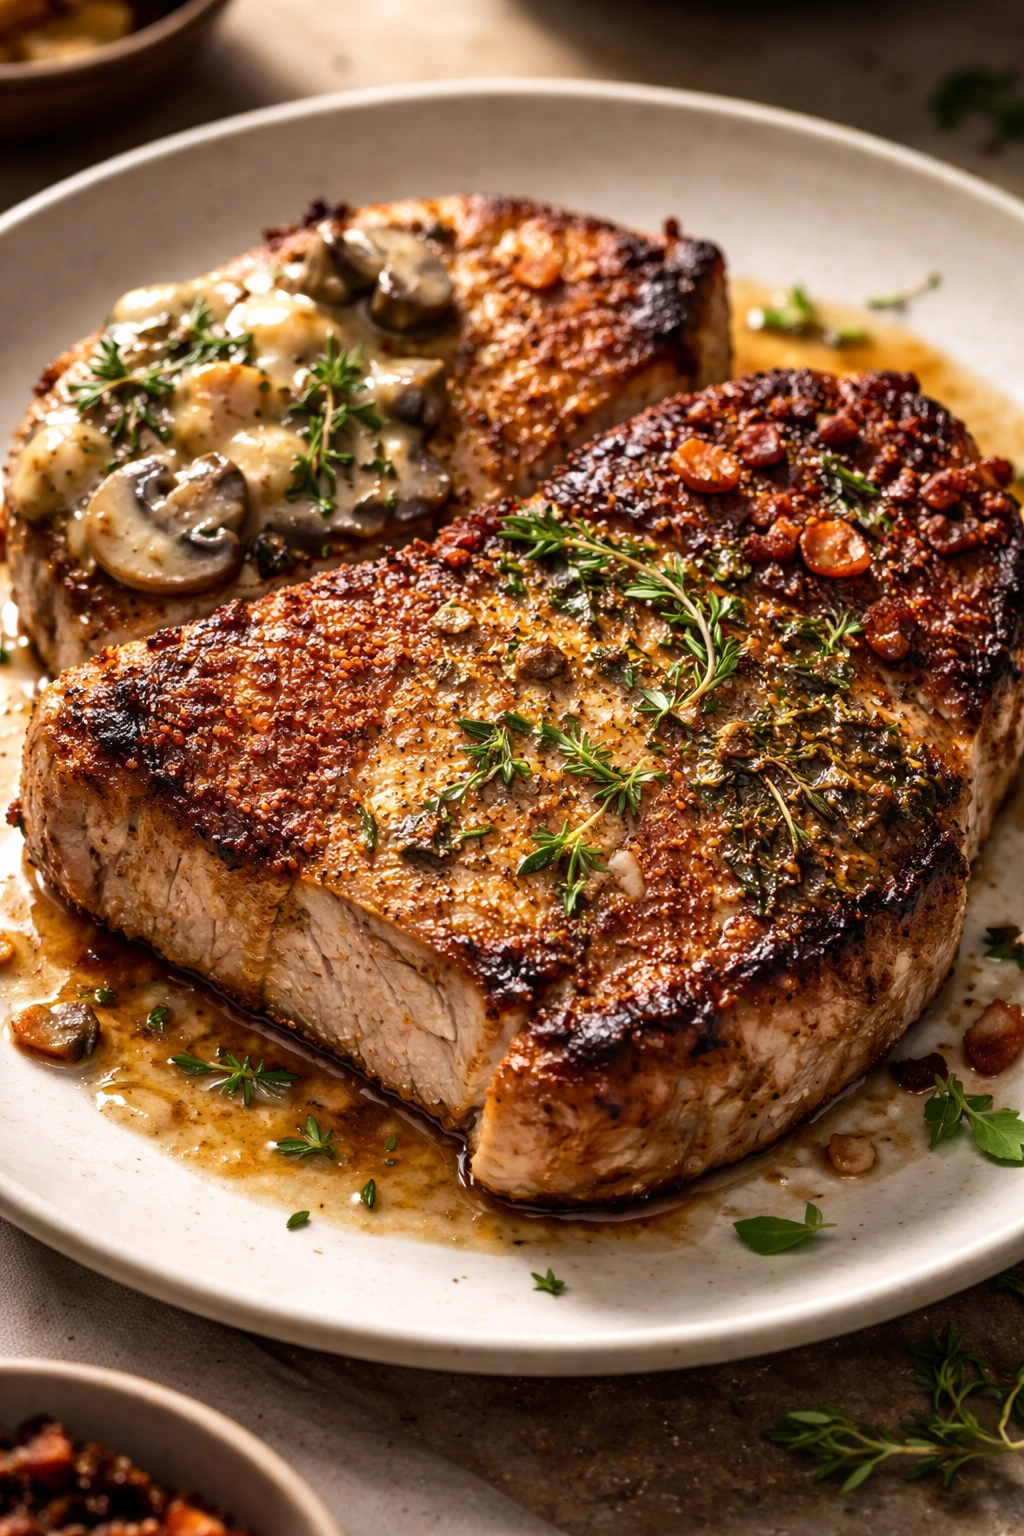
The beauty of this recipe is that once you master the basic technique, you can easily customize it to match whatever you’re craving. For a mushroom version, add 8 ounces of sliced mushrooms to the pan when you add the onions and let them cook together — the earthy flavor pairs beautifully with pork and the mushrooms release liquid that enriches the gravy. This adds about 5 minutes to the cooking time but is absolutely worth it.
For a Creole or Cajun twist, add ½ teaspoon cayenne pepper to the seasoning mixture for the pork, and add a chopped celery stalk to the onions as they cook. Some folks also include a pinch of smoked paprika in the gravy. This version is particularly good served over rice instead of mashed potatoes.
For a more herb-forward version, replace the sage with fresh thyme (½ teaspoon dried or 1½ teaspoons fresh), or mix sage with a pinch of dried rosemary. These herbs pair differently with the pork and onions and create a subtly different flavor profile that feels more elegant without being fussy.
For a bacon-forward version (this adds about 10 minutes to the timeline), cook 2 slices of thick-cut bacon in the pan first, then remove and set aside. Cook the pork chops in the bacon grease instead of oil, then chop the bacon and stir it into the gravy at the end. This adds a smoky, salty note that transforms the dish entirely.
Sides That Pair Beautifully With These Pork Chops
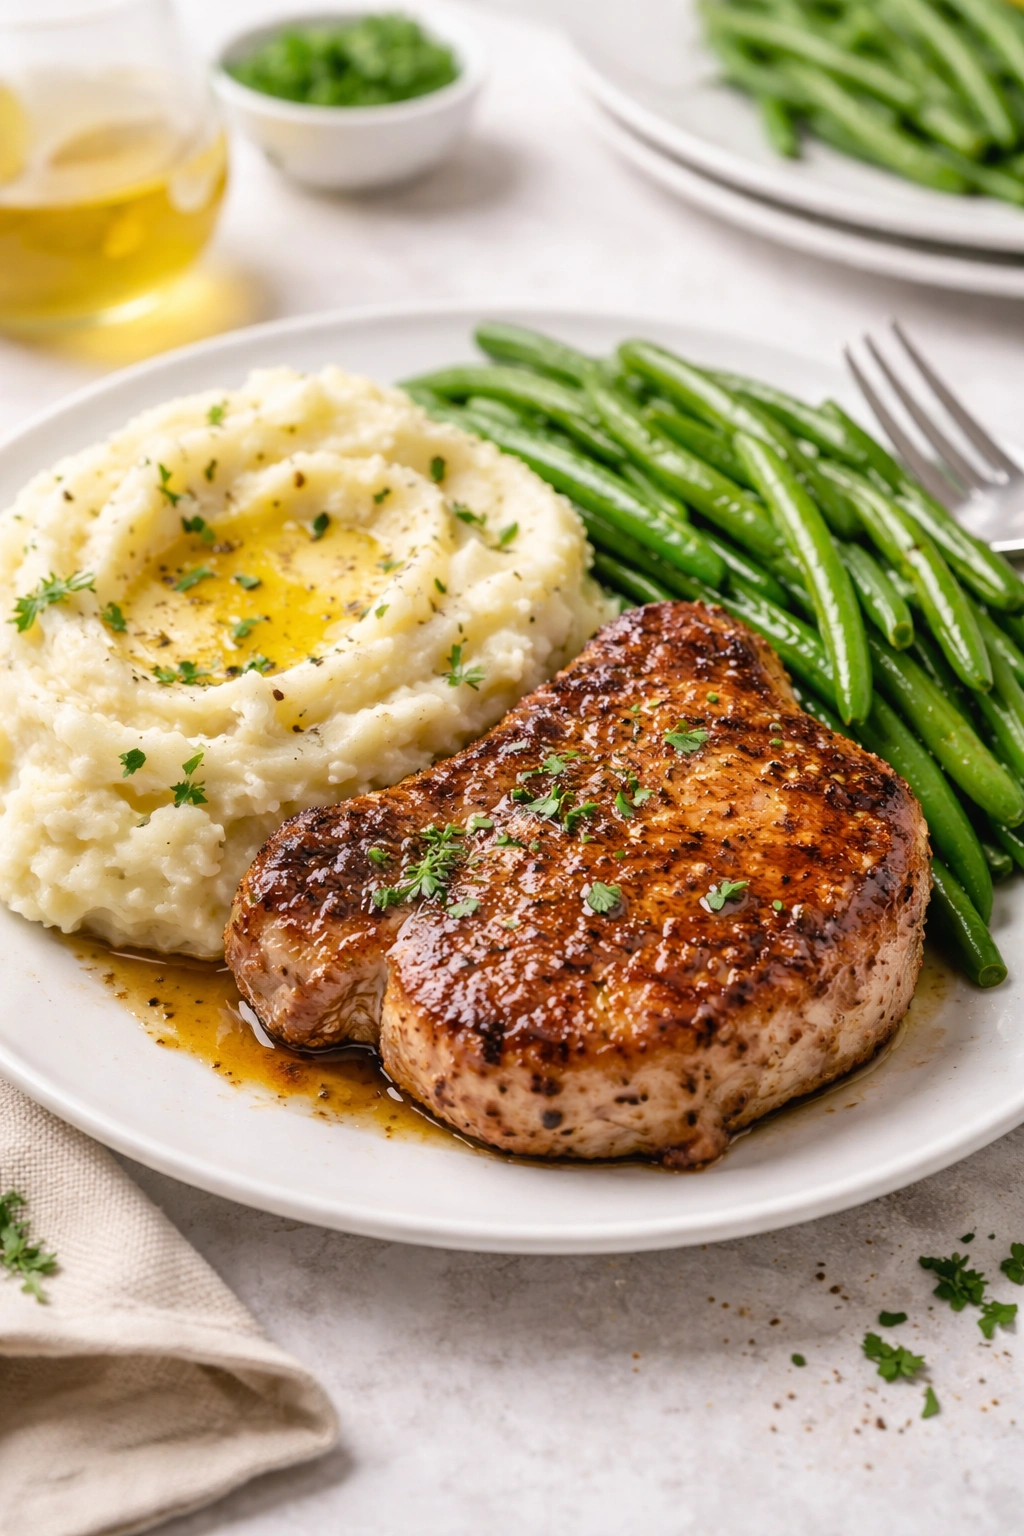
The traditional pairing is creamy mashed potatoes, and honestly, there’s a reason this combination has stood the test of time — you want something starchy and mild that can soak up the savory gravy without competing for flavor. If mashed potatoes feel too heavy, buttered egg noodles or simple white rice are lighter alternatives that still let you enjoy the gravy.
Green vegetables add brightness and balance the richness of the pork and gravy. Roasted green beans with just a little salt and butter are perfect, as are sautéed broccoli or roasted broccolini. These vegetables don’t fight with the flavors of the pork chops; they complement them.
A simple side salad with a vinegar-based dressing (not creamy) cuts through the richness nicely. Arugula with lemon vinaigrette, or mixed greens with a balsamic dressing, both work beautifully. The acidity refreshes your palate between bites.
Cornbread or buttermilk biscuits are indulgent additions that really complete a Southern meal. Even store-bought cornbread muffins, warmed, are a welcome addition to this dinner.
Roasted root vegetables like carrots, parsnips, or sweet potatoes add sweetness and texture without requiring much active cooking — just toss with oil, salt, and pepper, and roast while you’re making the pork chops.
Storage, Reheating, and Make-Ahead Options

These pork chops are genuinely better the next day once the flavors have melded and the gravy has had time to thicken and concentrate. Store the cooked pork chops and gravy together in an airtight container in the refrigerator for up to 4 days. The gravy will thicken quite a bit as it cools, which is actually perfect — it’ll be rich and cohesive rather than thin and soupy.
To reheat, place the pork chops and gravy in a saucepan over medium-low heat and warm gently, stirring occasionally, until everything is heated through. If the gravy seems too thick, add a splash of chicken broth to loosen it up. Never use the microwave for reheating pork chops — it dries them out and leaves the texture mealy and unpleasant.
For freezing, let the pork chops and gravy cool completely, then transfer to a freezer-safe container or zip-top bag (remove as much air as possible). They’ll keep frozen for up to 3 months. Thaw overnight in the refrigerator before reheating using the stovetop method described above.
You can also prepare components in advance if you’d like to break the work into steps. The seasoning mixture can be made several days ahead and stored in an airtight container. The onions can be sliced and stored in the refrigerator for a day. The pork chops can be brought to room temperature and seasoned in the morning, then kept on the counter for cooking in the evening. This kind of advance prep doesn’t reduce the actual cooking time, but it does reduce the feeling of rushing once you actually start cooking.
Why This Recipe Works as a Dinner Party Dish
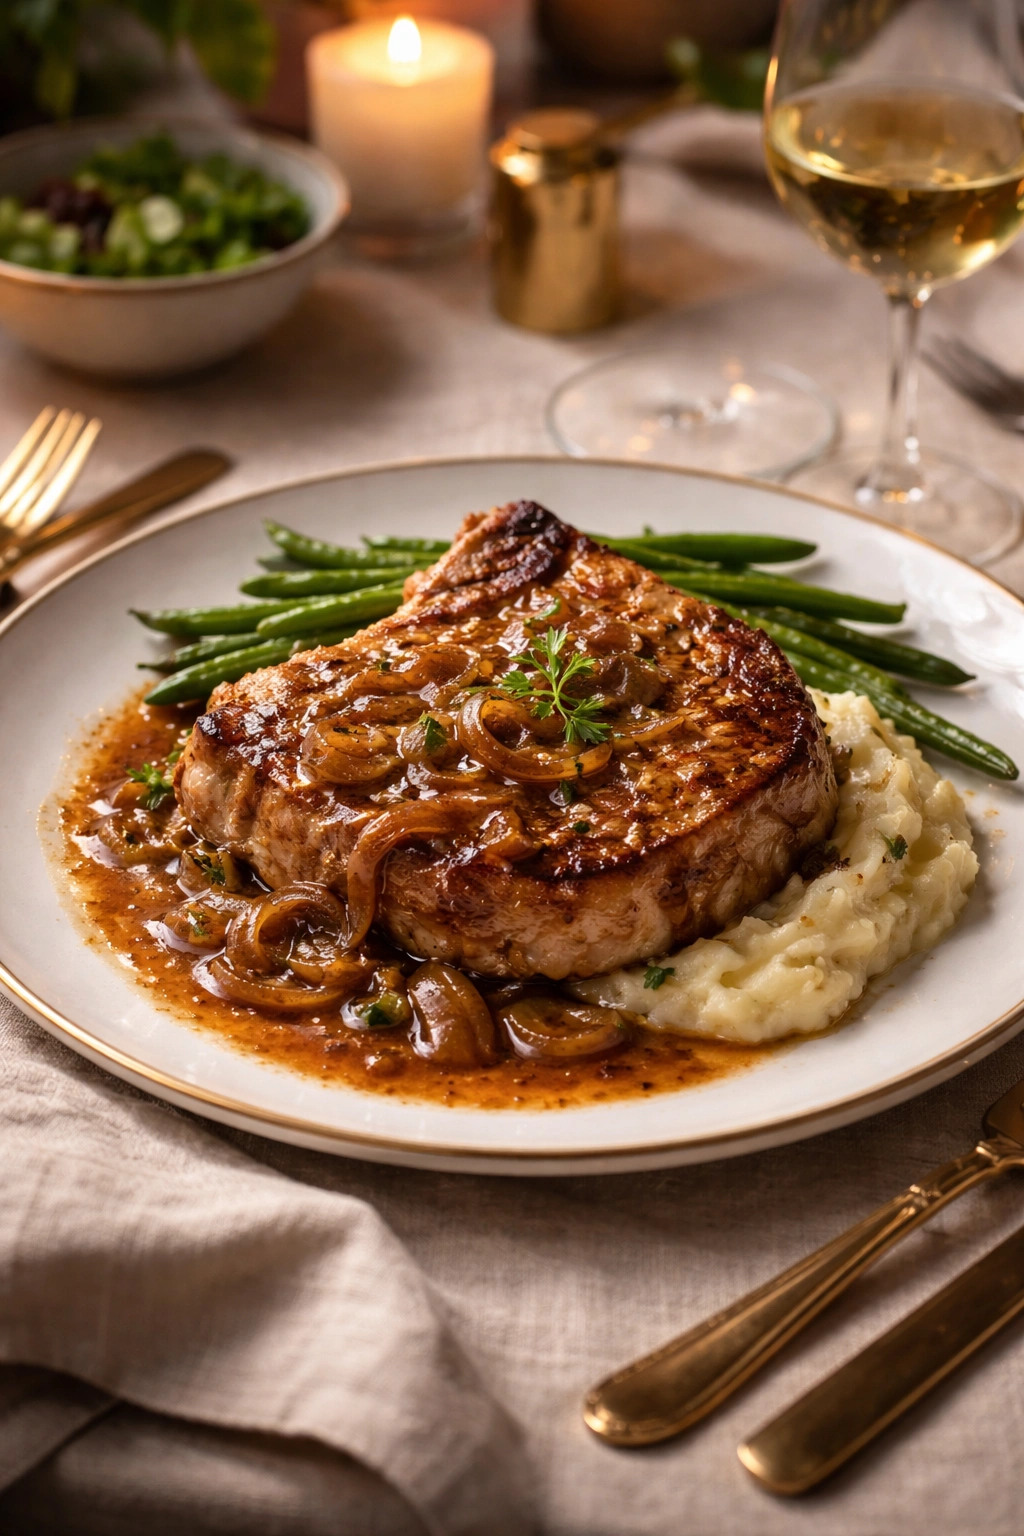
Don’t underestimate how impressive this dinner is to serve guests. The pork chops look elegant on the plate — a golden-brown chop surrounded by rich gravy with visible pieces of caramelized onion. It tastes sophisticated. But you’ll be the only person in the room who knows you invested maybe 15 minutes of actual active cooking time. This is the definition of a dish that punches above its weight in terms of perceived effort.
The great thing about feeding guests this meal is that it comes together at the last minute without stress. You can have everything prepped and ready to go, then cook it right before serving — the entire process from raw ingredients to finished dish happens in about 30 minutes, so your guests aren’t waiting around or getting hungry. You’re not tied to the kitchen the entire evening the way you would be with a more time-intensive recipe.
The flavor profile is familiar enough that even people with conservative palates will enjoy it, but the execution is refined enough that foodies will appreciate the technique and quality. It’s a bridge dish that works for almost any occasion and any crowd.
Final Thoughts
Southern-style pork chops made in 30 minutes aren’t a shortcut or a lesser version of the real thing — they’re the real thing, executed with care and understanding. Every element of this recipe serves a purpose: the thickness of the chops ensures they cook evenly; the seasoning creates depth without fussiness; the two-stage cooking method prevents overcooking while still building flavor; the onion gravy adds richness without heaviness. None of these choices are arbitrary or accidental.
What you’re really learning here is a fundamental cooking technique — how to properly sear meat, how to build a sauce from pan drippings, how to use heat and time efficiently. Once you’ve made these pork chops a few times, you’ll have the confidence to apply these same techniques to chicken, beef, or seafood. You’ll understand how a meat thermometer gives you control and precision. You’ll know why resting matters, why room temperature matters, why seasoning generously matters.
And best of all, you’ll have a dinner recipe that’s so reliable, so delicious, and so quick that you’ll find yourself making it again and again — not because you’re lazy, but because it’s genuinely worth making, and it fits into the rhythm of real life. That’s the real definition of a great recipe.