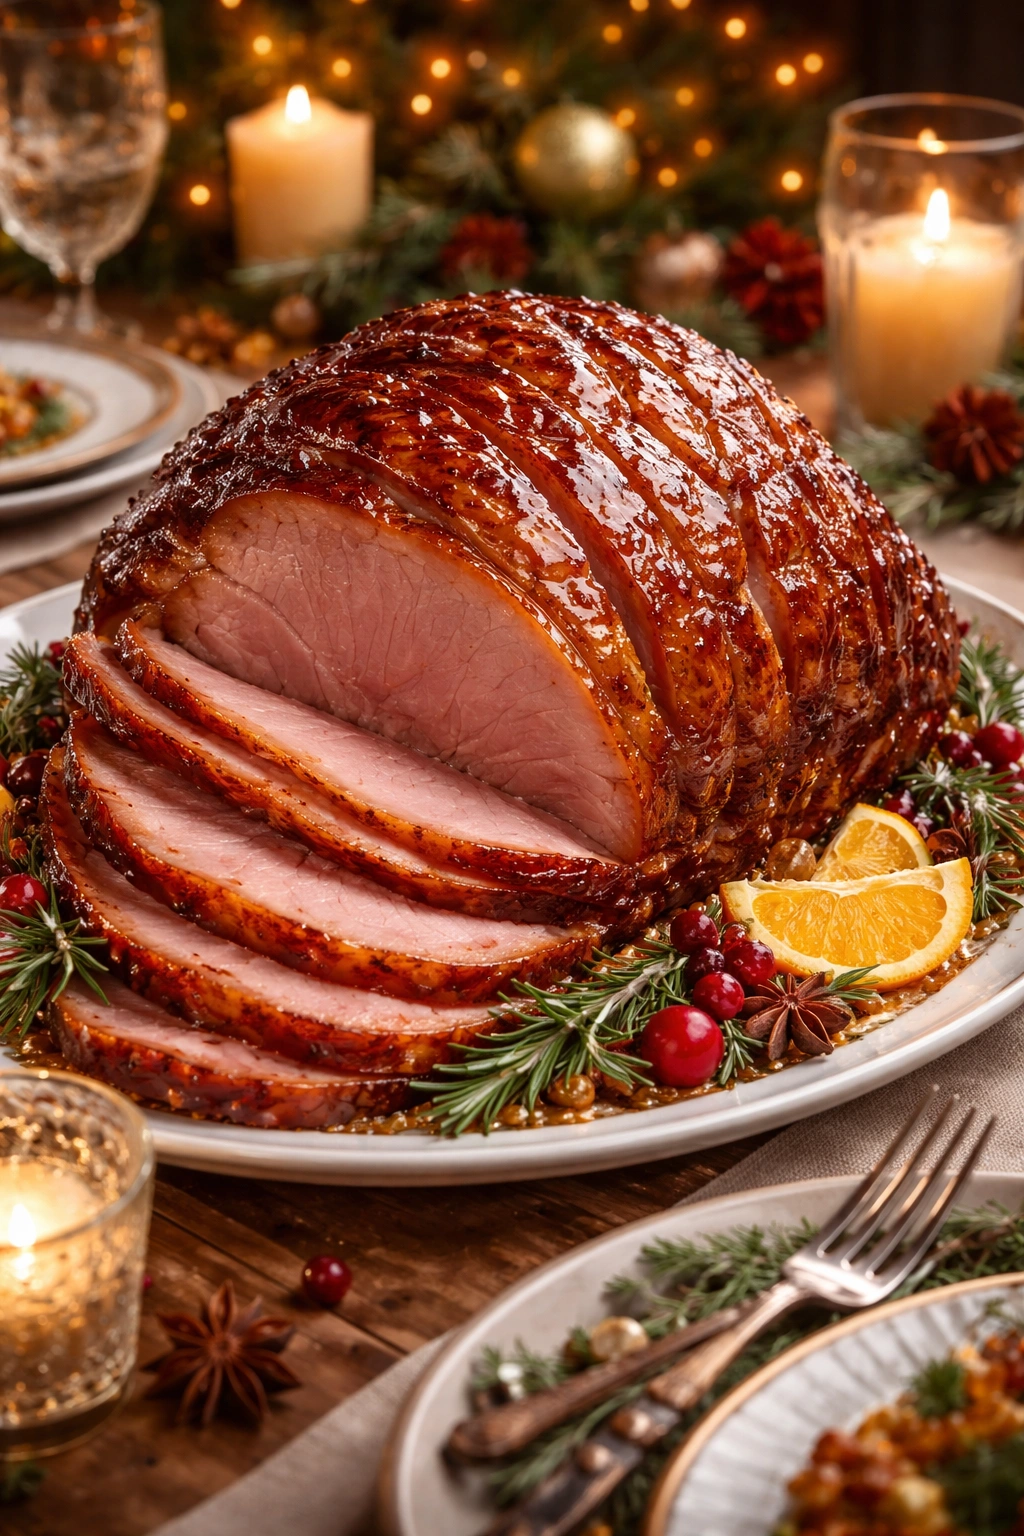
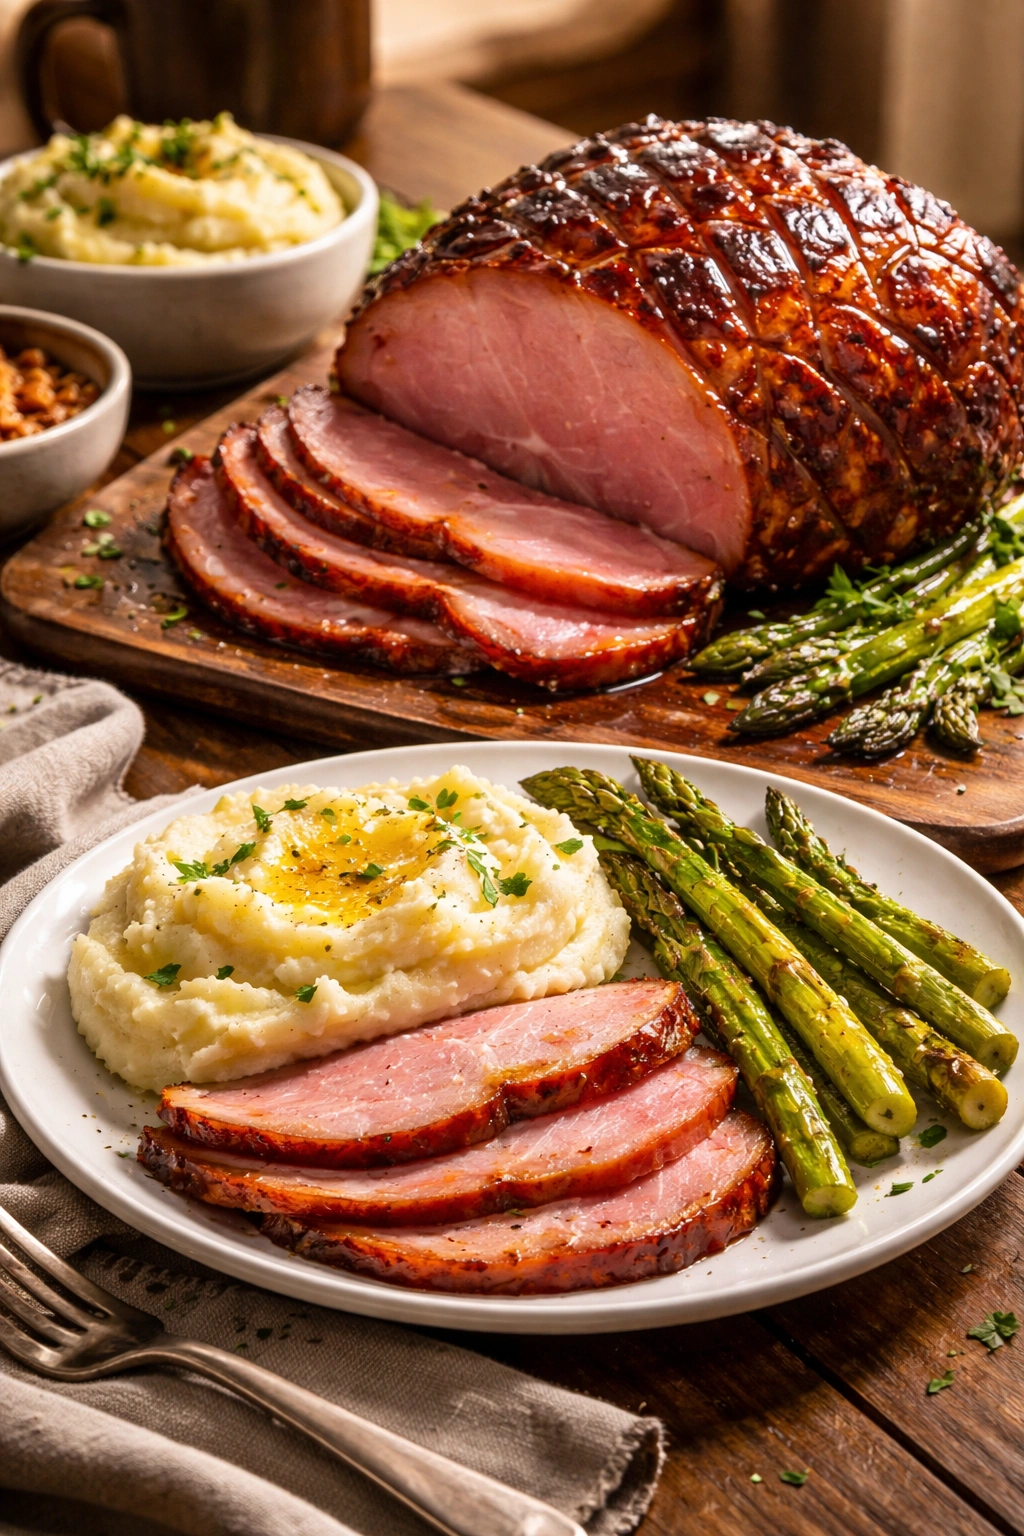
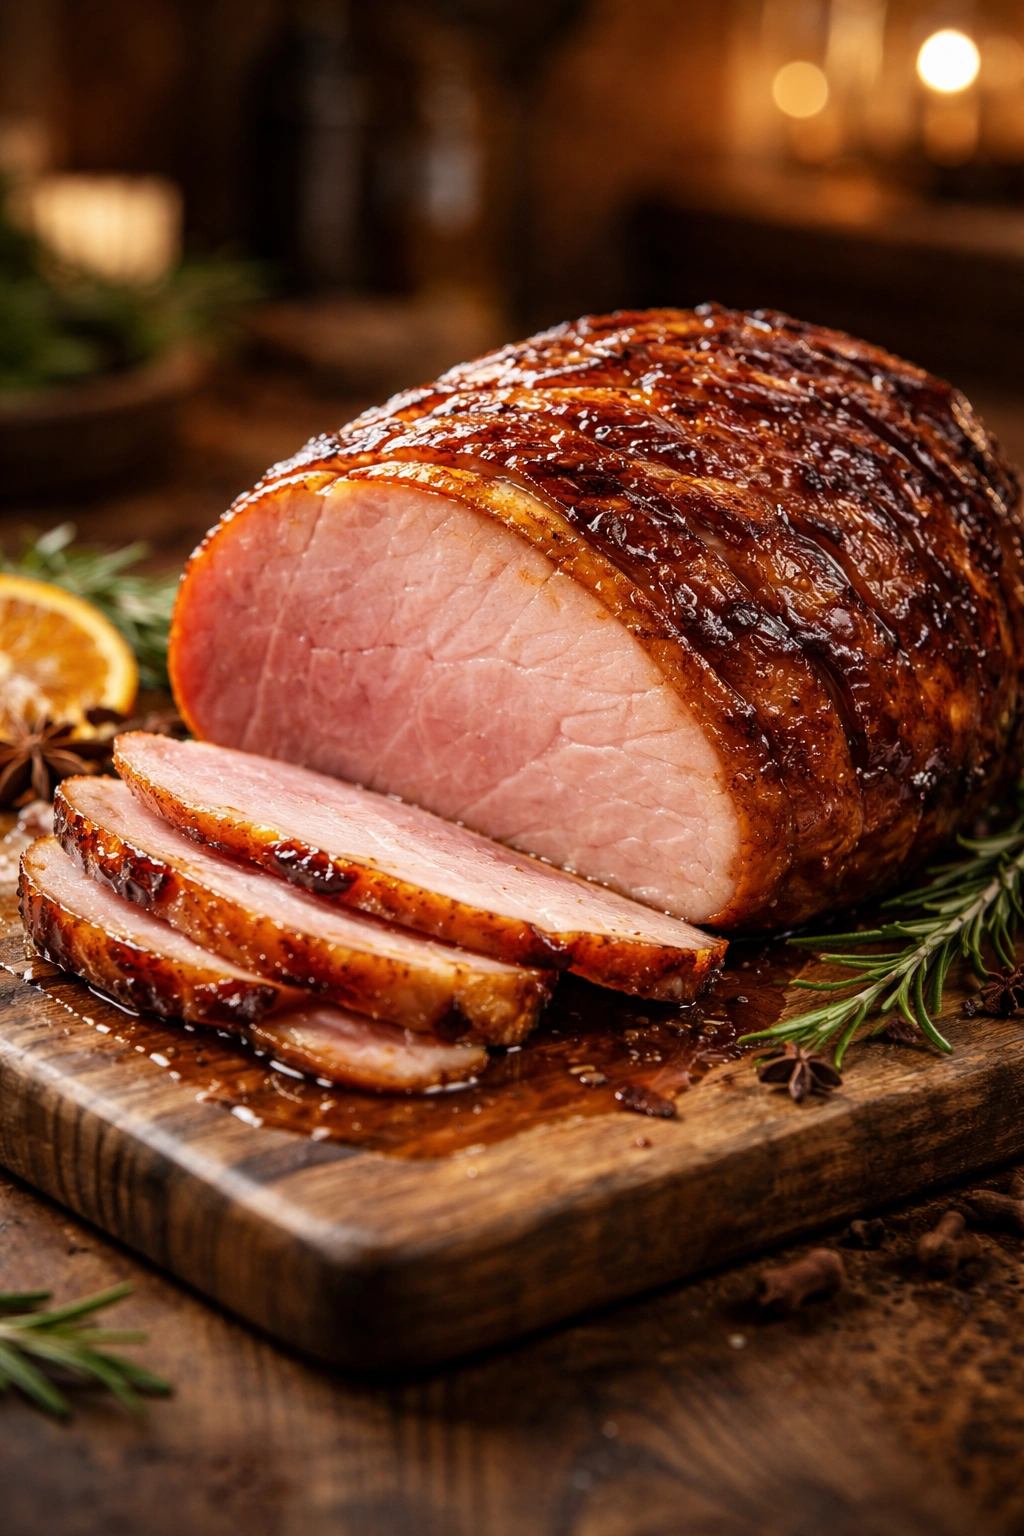
There’s something undeniably magical about a honey glazed ham taking center stage at a holiday table. The glossy, caramelized exterior catches the light. The sweet aroma fills the kitchen hours before guests arrive. When you slice into it, golden juices run across the plate, and that first bite delivers perfectly balanced sweetness with a savory undertone that makes everyone pause mid-conversation to ask for the recipe.
The best part? This show-stopping centerpiece is deceptively simple to make. You don’t need advanced culinary skills or exotic ingredients. A quality ham, a handful of pantry staples, and about two and a half hours in the oven transform a basic spiral-cut ham into a dish that tastes like you’ve been cooking all day. The real secret isn’t complexity—it’s understanding a few key techniques that keep the ham moist while building that gorgeous caramelized crust that everyone remembers long after the holiday passes.
Whether you’re planning Easter dinner, Christmas, Thanksgiving, or any special family gathering, this honey glazed ham delivers consistent, impressive results. More importantly, it frees up your oven time and mental energy for other dishes, because once the ham goes in, you can focus on sides and desserts. This recipe has become a trusted favorite in countless households precisely because it’s reliable, economical compared to pre-glazed versions, and virtually impossible to mess up once you know what to watch for.
Why Honey Glazed Ham Is the Ultimate Holiday Centerpiece
A honey glazed ham works as a holiday centerpiece because it strikes an elusive balance that most dishes struggle to achieve. The sweetness never tips into cloying—the savory elements and subtle tanginess keep everything grounded. The honey brings richness and shine, the brown sugar deepens into caramel notes, and a touch of mustard or spice cuts through to prevent the glaze from becoming one-dimensional.
Beyond flavor, there’s the practical advantage of feeding a crowd with minimal fuss. A single 8 to 10-pound ham easily serves 12 to 16 people with generous portions, and because it’s already fully cooked before you buy it, you’re simply reheating and glazing rather than managing raw pork timing during an already hectic day. This frees your oven for side dishes during the final hour, which matters when you’re juggling multiple components.
The aesthetic value shouldn’t be underestimated either. A properly glazed ham, sliced and arranged on a platter with those caramelized edges visible, becomes a visual statement. Guests respond to presentation, and a beautiful ham signals that effort went into the meal—even though you know the effort was minimal. It’s the kind of dish that makes people feel cared for, not because of hours spent laboring, but because it’s clearly special.
Cost-effectiveness makes ham particularly appealing during expensive holiday seasons. Compared to per-pound prices for beef or poultry, ham offers substantial protein at a lower price point. You’ll often find spiral-cut hams on sale before major holidays, and even at regular price, the cost per serving remains remarkably reasonable for a dish that impresses.
Choosing and Buying the Right Ham
The foundation of an exceptional honey glazed ham starts at the grocery store. Not all hams are created equal, and choosing the right one dramatically affects your final result in terms of juiciness, flavor depth, and how well the glaze adheres.
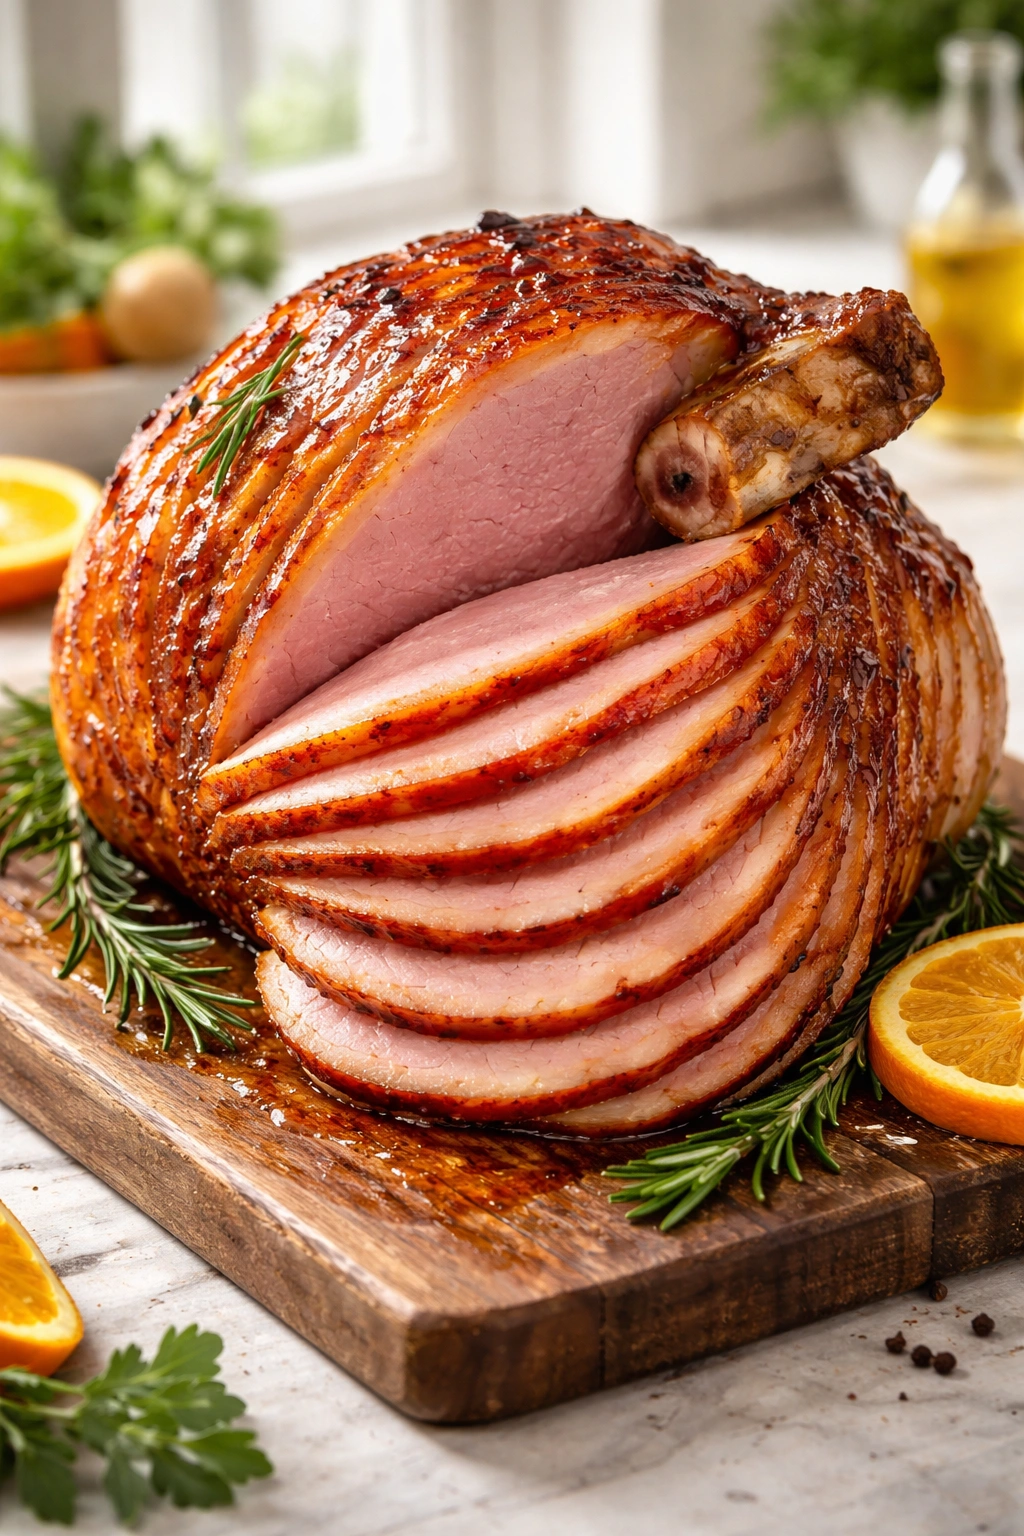
Look specifically for a bone-in, spiral-cut ham. The bone adds flavor through the meat and into the cooking liquid, and it’s easier to manage during baking than a boneless version. The spiral cutting means the ham comes pre-sliced around the bone, so plating and serving become effortless—guests simply pull slices away from the bone rather than waiting for you to carve. Boneless hams are easier to slice neatly and take up less space, but they dry out faster and lack the flavor depth that the bone contributes.
Pay attention to the label and look for lightly smoked country-style hams or simply labeled “bone-in spiral-cut ham.” The smoke provides subtle background flavor that pairs beautifully with honey and brown sugar. Some hams labeled “water added” or “up to 10% water” have been injected with water-based solutions to add weight and moisture. While this helps prevent drying during cooking, it can dilute the actual ham flavor. Seek out hams with minimal water addition if possible—look at the ingredient list and check for those with fewer additives.
The size matters for practical reasons. Plan on approximately ¾ pound per person for a bone-in ham, or ½ pound per person for boneless, accounting for the bone’s weight and inedible portion. For a gathering of 12 to 16 people, an 8 to 10-pound ham is ideal—large enough to feel impressive but small enough to fit comfortably in most standard roasting pans and ovens.
Choose a ham with a firm texture and a rosy color without excessive browning or soft spots. The exterior should feel solid when you press it gently. At the butcher counter, ask questions—butchers often have insights about which hams have arrived most recently and will offer the best quality.
Timing matters too. Purchase your ham 2 to 3 days before you plan to cook it, giving yourself a small buffer if plans change. Most fully cooked hams stay fresh in the refrigerator for up to a week, so you have flexibility without risking spoilage.
Understanding Ham Cooking Temperatures and Food Safety
This point bears emphasis because many people bake ham incorrectly, either drying it out by overcooking or leaving it at unsafe temperatures. Since the ham you’re buying is already fully cooked before packaging, your job isn’t to cook it—it’s to reheat it gently while applying the glaze.
The target internal temperature for a fully cooked ham is 145°F (63°C). An instant-read meat thermometer inserted into the thickest part of the ham, away from the bone, tells you precisely when it reaches this temperature. This single tool eliminates guesswork and prevents the common mistake of overcooking.
The baking temperature should be 325°F (165°C)—not hotter. High temperatures cause the exterior to brown and caramelize rapidly while the interior struggles to heat evenly, often resulting in dried-out meat around the edges. The 325°F approach is slower but steadier, allowing heat to penetrate to the center while the moisture stays locked inside.
As a general rule, budget approximately 15 minutes per pound for a fully cooked ham wrapped in foil. So a 10-pound ham takes roughly 150 minutes (2 hours 30 minutes) in the oven at 325°F. This timing allows the ham to come to temperature without excessive moisture loss, though you’ll check with a thermometer rather than relying purely on time, which varies based on your specific oven and the ham’s starting temperature.
The final 30 minutes of baking, after you remove the foil and apply the glaze, cook uncovered. This is when the sugars in the glaze begin to caramelize and brown, creating that desirable crispy, sticky exterior while the interior remains juicy. If the edges start browning too rapidly during this phase, loosely tent the ham with foil to slow the browning—you want caramelization, not charring.
The Perfect Sweet and Savory Glaze
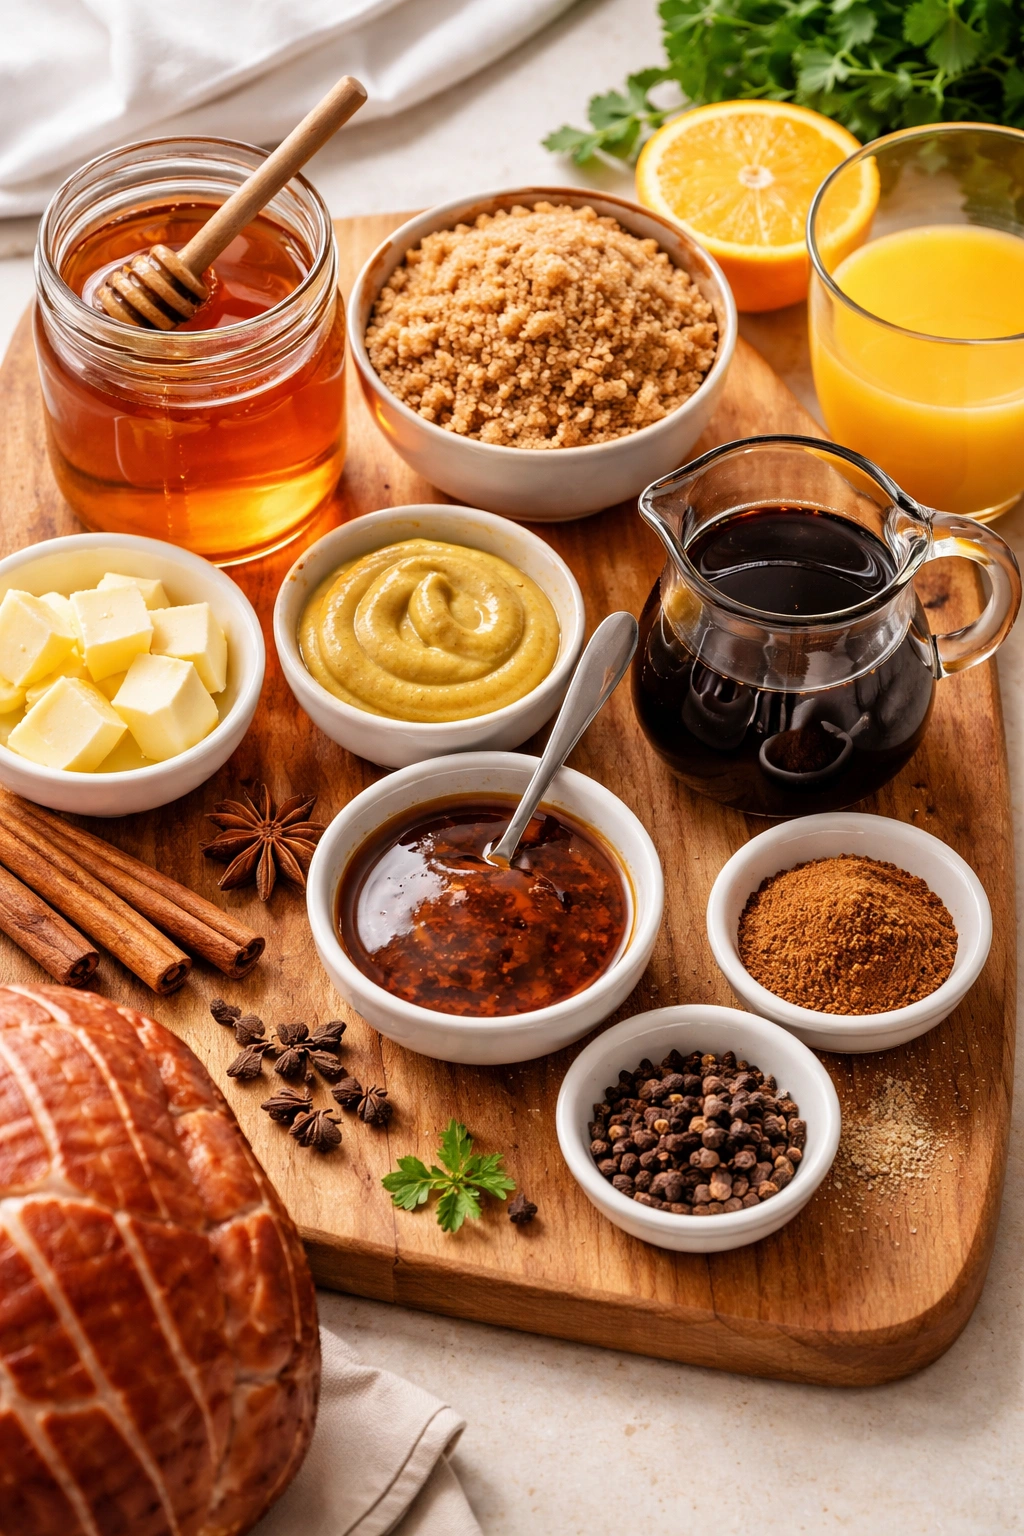
The glaze is where the magic happens. A great glaze has depth—it’s not just sugar poured over ham. The best versions balance multiple flavor notes, with honey bringing shine and body, brown sugar adding caramel complexity, and savory elements preventing the sweetness from overwhelming.
The classic ratio that works beautifully is ½ cup honey, ¼ cup brown sugar, 2 tablespoons Dijon mustard, and 3 tablespoons butter as a base. From there, you adjust based on what you have and what flavor direction you want. Some recipes add orange juice for brightness, others include soy sauce for depth, a pinch of cayenne for gentle heat, or ground cinnamon for warmth.
Dijon mustard is crucial—it’s not optional if you want a sophisticated glaze. Yellow mustard is too mild and one-note. Dijon’s creamy texture and slightly tangy bite cut through the sweetness, creating contrast that makes the glaze interesting rather than simply sugary. You taste the honey and brown sugar, yes, but you also taste something slightly sharp and complex that elevates the whole experience.
Honey quality matters more than most recipes admit. Real honey brings shine and depth; imitation honey products look flat and don’t caramelize the same way. If you have access to local honey, it’s worth using—the flavor variations from regional flowers mean your glaze becomes more distinctive and personal.
Brown sugar adds something white sugar cannot: molasses notes and a deeper caramel color. Light brown sugar leans toward vanilla undertones, while dark brown sugar has richer, almost woody molasses complexity. Either works, depending on whether you prefer subtle or pronounced caramel flavor.
The butter serves two purposes. It makes the glaze glossy and silky, and it helps the glaze cling to the ham rather than running off into the pan. Melt it gently over low heat before mixing with other ingredients—you’re not cooking butter until brown, just incorporating it into the glaze mixture.
Why Wrapping Then Unwrapping Works Better Than You’d Think
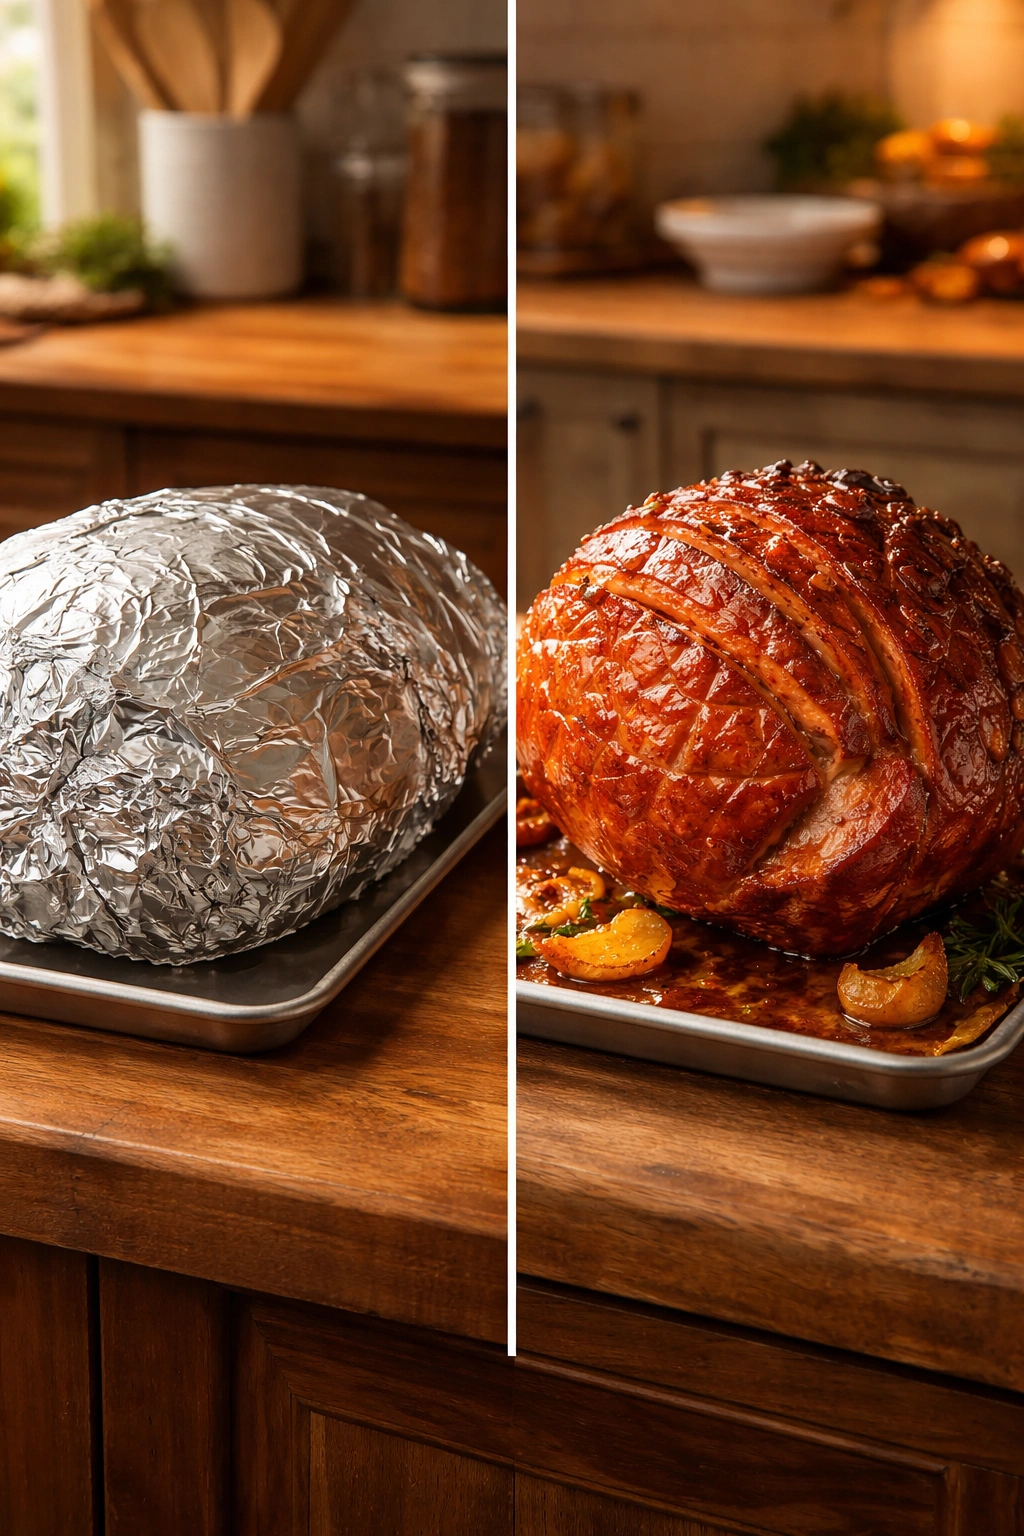
Many home cooks get confused about the wrapping strategy. Here’s the reasoning: the first hour of baking wrapped in foil creates a steamy environment that gently reheats the ham without drying the surface. The steam keeps moisture circulating, and the ham reaches temperature evenly.
Then you unwrap, apply the glaze, and bake uncovered for the final 30 to 45 minutes. Without the foil, the oven’s dry heat hits the glaze, causing the sugars to caramelize and brown. This creates that crispy, slightly sticky exterior everyone craves. If you glazed during the foil-wrapped phase, the glaze would soften in the steam and never develop that caramelized crust.
Some cooks skip the foil altogether to save steps, but that’s where many hams end up dry—the unprotected surface loses moisture during the entire bake. The two-phase approach—wrapped then unwrapped—gives you a moist, juicy interior with a caramelized, glossy exterior. It’s worth the small extra effort of unwrapping halfway through.
Yield: Serves 12 to 16 people | Makes approximately 8 to 10 servings as a main course
Prep Time: 15 minutes
Cook Time: 2 hours to 2 hours 30 minutes (depending on ham size)
Total Time: 2 hours 15 minutes to 2 hours 45 minutes active time, plus 10 minutes resting
Difficulty: Beginner — this recipe requires no special techniques, and the steps are straightforward even for first-time ham cookers. The most important tool is a meat thermometer to verify doneness, and basic kitchen equipment handles everything else.
Chill/Rest Time: 10 minutes resting before slicing to redistribute juices
Best Served: Immediately warm from the oven while the glaze is still glossy and the ham is at peak temperature
Ingredients for Perfect Honey Glazed Ham
For the Ham:
- 1 bone-in spiral-cut ham, 8 to 10 pounds
- ½ cup water (optional, to add to the roasting pan)
For the Honey Glaze:
- ½ cup real honey (not imitation honey product)
- ¼ cup packed light brown sugar (or dark brown sugar for richer caramel flavor)
- 3 tablespoons unsalted butter
- 2 tablespoons Dijon mustard
- 1 tablespoon fresh orange juice (or substitute apple juice, pineapple juice, or orange zest)
- 1 tablespoon soy sauce (use low-sodium if you prefer less salt)
- ½ teaspoon ground cinnamon (optional, but recommended for warmth)
- ¼ teaspoon ground cloves (optional, adds classic holiday aroma)
- Pinch of cayenne pepper (optional, for subtle heat)
How to Prepare and Bake Your Ham
Preparing the Ham and Oven
Preheat your oven to 325°F (165°C) and position the rack in the lower-middle area of the oven. This placement allows heat to circulate evenly around the ham and prevents the top from browning too rapidly. If you have a convection setting, standard bake works fine for this recipe—convection can brown the exterior too quickly.
Remove the ham from its packaging carefully. Some hams come in plastic sleeves with a plastic disc on the bottom—remove everything. Pat the surface dry with paper towels if it’s wet from packaging, though this isn’t essential.
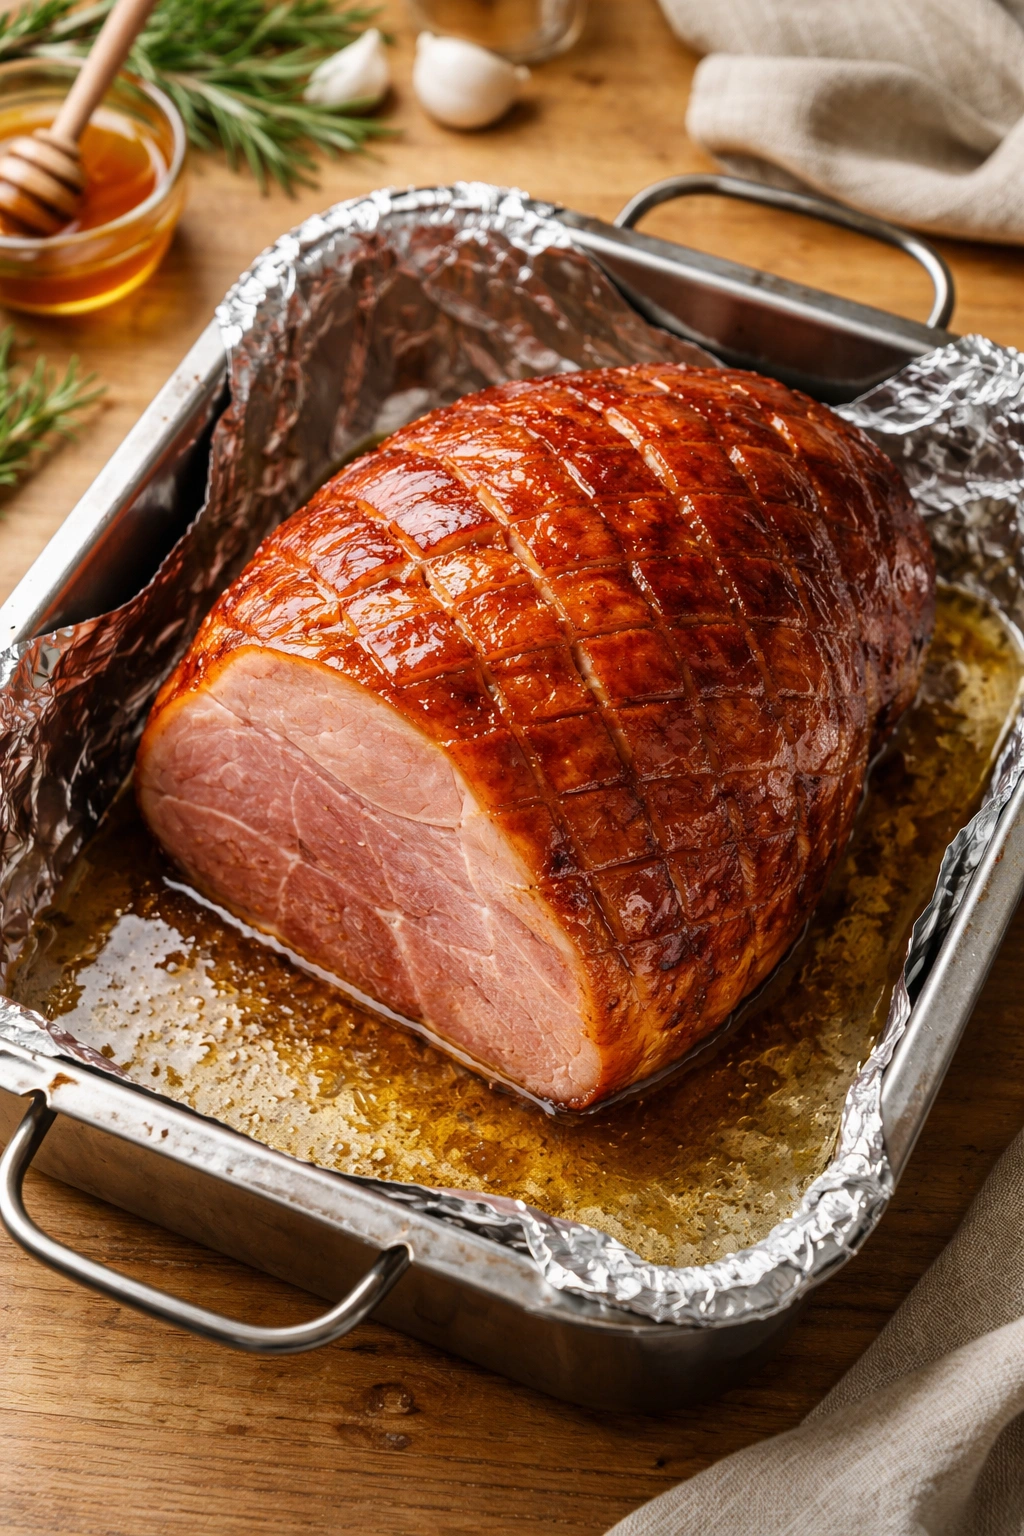
Line a large roasting pan with aluminum foil. The foil protects the pan and makes cleanup significantly easier since the honey glaze can caramelize onto bare metal. An 11 x 14-inch roasting pan or larger works well; if your pan is smaller, trim the ham’s dimensions slightly or purchase a slightly smaller ham rather than cramming it into inadequate space.
Place the ham cut-side down in the prepared pan. The flat cut side sits against the pan, which helps distribute heat evenly and keeps the ham stable during baking. Pour ½ cup water into the bottom of the pan around (not on) the ham. This water creates steam and helps prevent the bottom and sides from drying, and it becomes the base for your basting liquid.
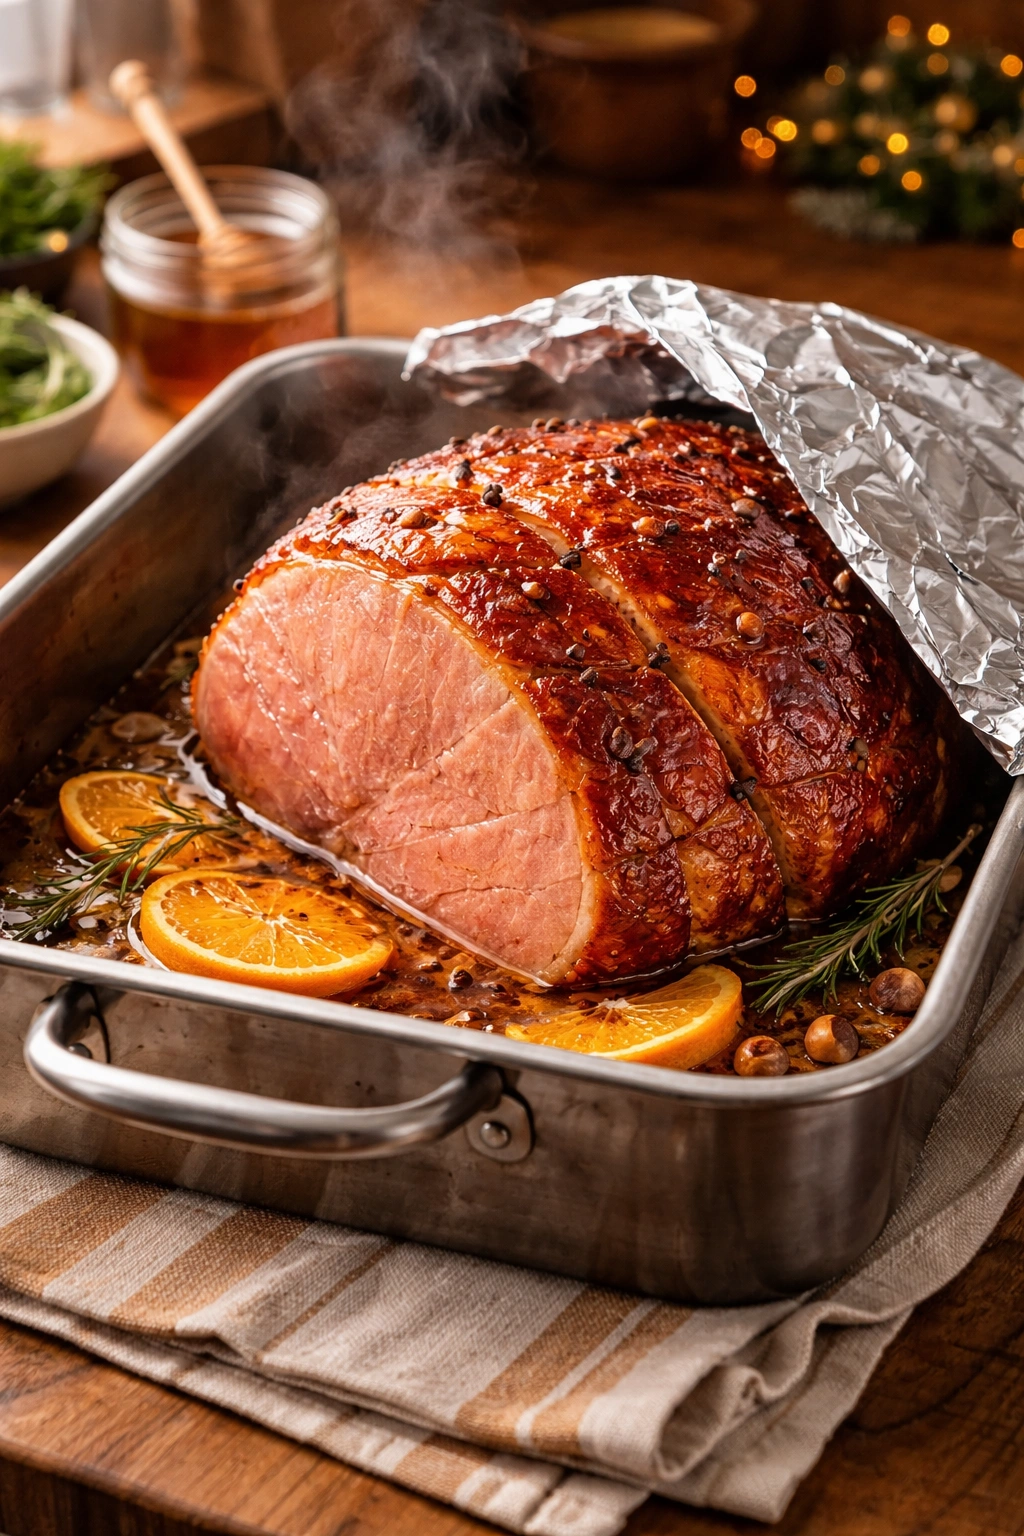
Wrap the ham tightly with aluminum foil, covering the top and sides. Fold the foil snugly so steam stays trapped inside but heat can still circulate. This wrapped phase is crucial—it’s what keeps the ham juicy.
The Initial Bake—Reheating Gently
Place the wrapped ham in the preheated 325°F oven. Set a timer for approximately 15 minutes per pound. For an 8-pound ham, that’s about 120 minutes (2 hours). For a 10-pound ham, it’s about 150 minutes (2 hours 30 minutes). Start checking the internal temperature at the lower end of this range to avoid overcooking.
After about 1 hour, check the pan. The bottom should show some liquid from the ham’s natural juices mixing with the water you added. If the pan looks dry, add another ¼ cup water. This basting liquid will become your basting sauce during the final glazing phase.
Use an instant-read meat thermometer to check the ham’s temperature at the thickest point, away from the bone. Insert the thermometer gently so it penetrates about 2 inches into the meat but doesn’t touch bone. The ham should read between 120°F and 140°F when you unwrap it. If it hasn’t reached at least 120°F, rewrap and continue baking, checking every 10 to 15 minutes.
Making the Glaze While the Ham Bakes
About 30 minutes before you plan to unwrap the ham, prepare the glaze. In a small saucepan, combine the honey, brown sugar, butter, Dijon mustard, orange juice, soy sauce, cinnamon, cloves, and cayenne pepper (if using). Place over medium-low heat.
Stir constantly as the mixture heats. You’re not cooking this aggressively—you want the butter to melt and all the ingredients to combine into a smooth, glossy liquid. This takes about 3 to 5 minutes. The mixture should look cohesive and well-blended, with no visible sugar crystals.
Taste the glaze and adjust. If it’s too sweet, add a splash more orange juice or a squeeze of fresh lemon juice. If it’s not sweet enough, add an extra tablespoon of honey. If it tastes too one-note sweet, add another ½ teaspoon of Dijon mustard. This isn’t a precise science—your palate matters more than the recipe.
Keep the glaze warm on very low heat until you’re ready to apply it. If it cools and thickens, you can reheat it gently or add a tablespoon of hot water to thin it back out. You want it warm and pourable so it spreads evenly over the ham.
The Critical Glazing Phase
Carefully remove the ham from the oven after the initial bake time. Watch for steam when you unwrap the foil—it will be hot and can cause burns. Unwrap the foil gently, rolling it back away from the ham rather than pulling directly upward.
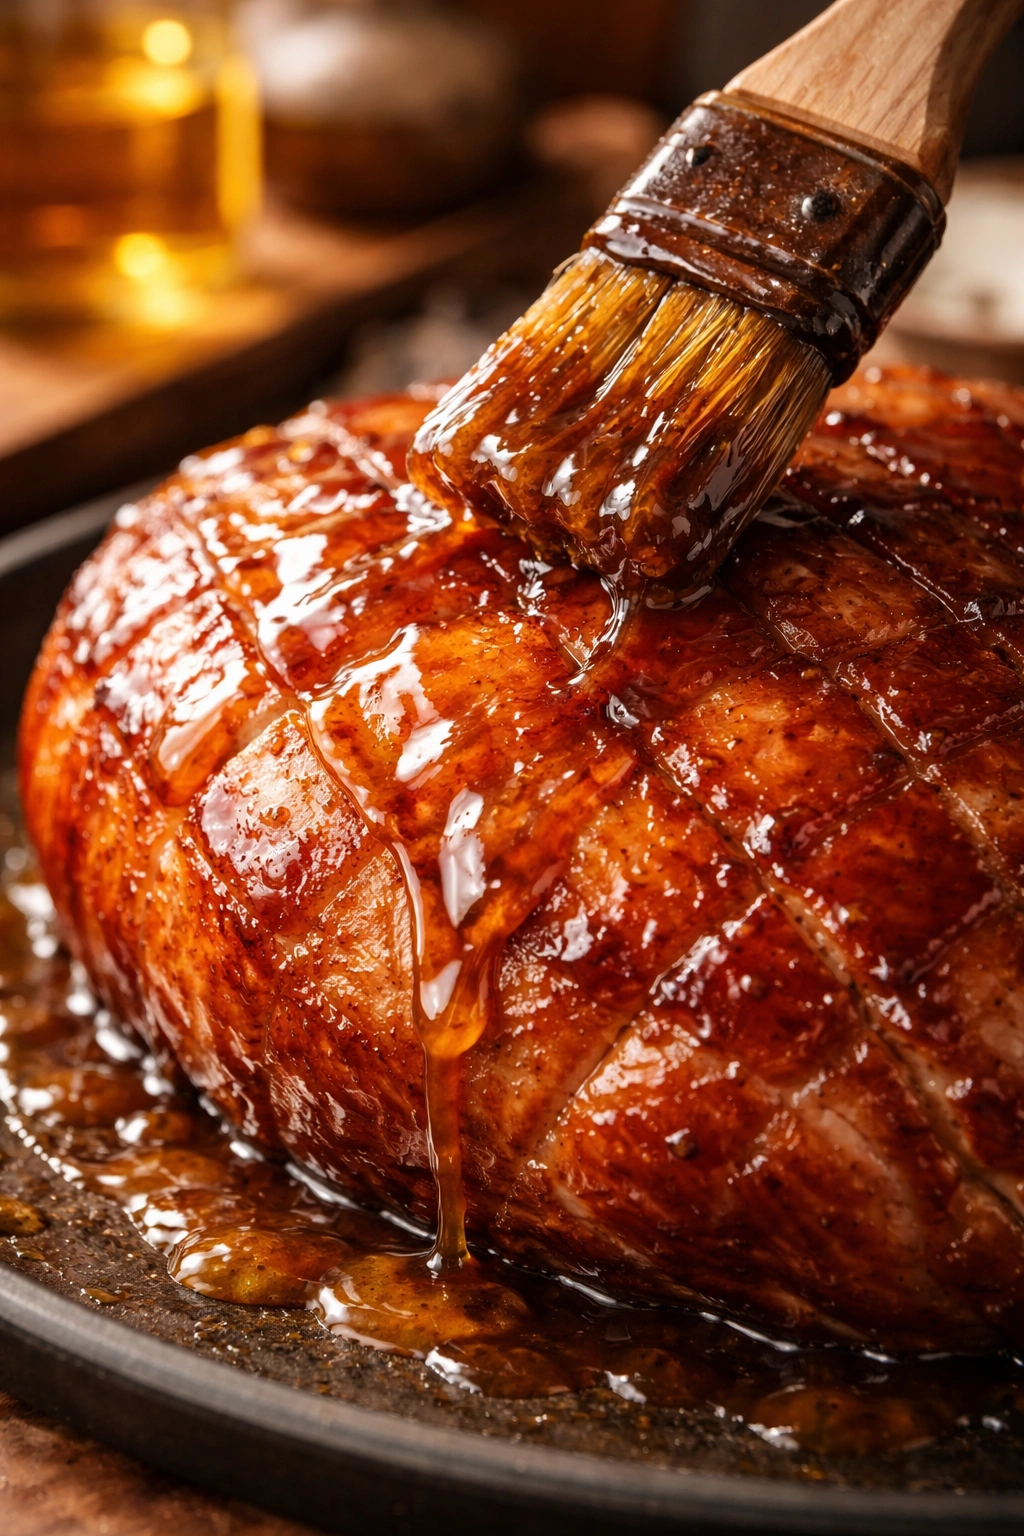
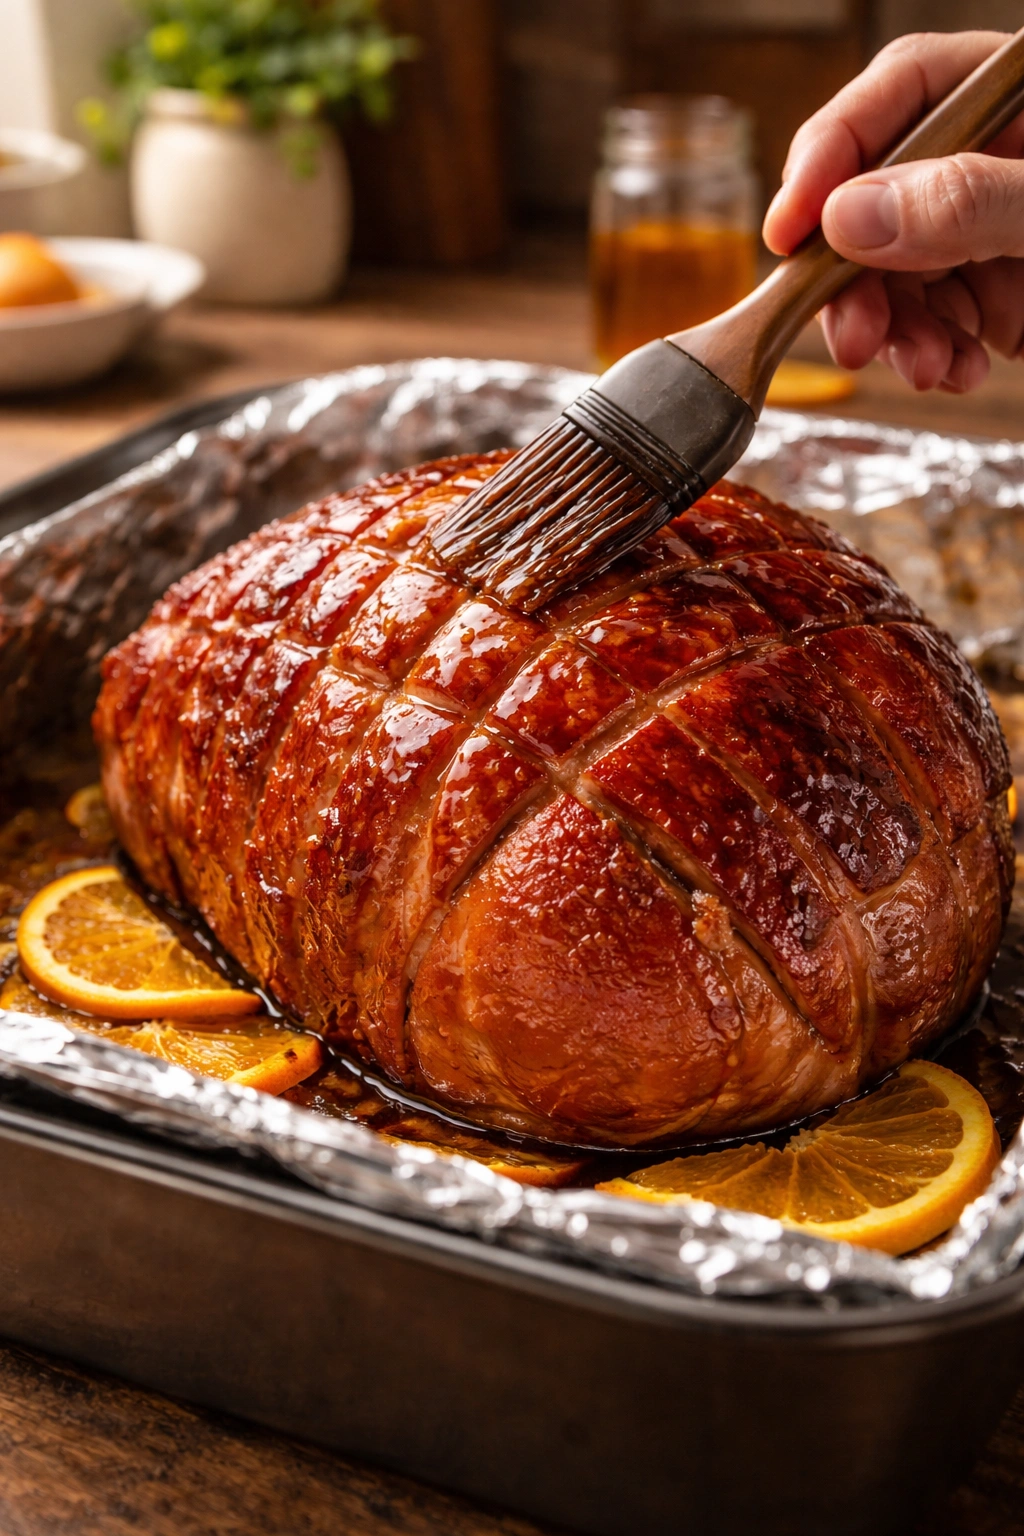
Brush the glaze generously over the entire surface of the ham. Use a pastry brush or silicone brush, working from the top down and into the curved areas between the spiral slices. Get the glaze between the slices as much as possible—that’s where it becomes most flavorful. Don’t worry about drips running down the sides into the pan; that liquid becomes part of your basting sauce.
Return the uncovered ham to the oven immediately. Set a timer for 30 minutes. This is when the transformation happens—the sugars in the glaze begin to caramelize, the edges start turning golden brown, and the aroma becomes almost unbearably good.
Baste the ham with pan juices every 10 minutes during this final phase. Use a turkey baster or large spoon to pull up the liquid from the pan and drizzle it over the ham. This keeps the glaze moist and ensures even caramelization. By the third or fourth basting, you’ll notice the glaze thickening slightly and coating the ham more richly.
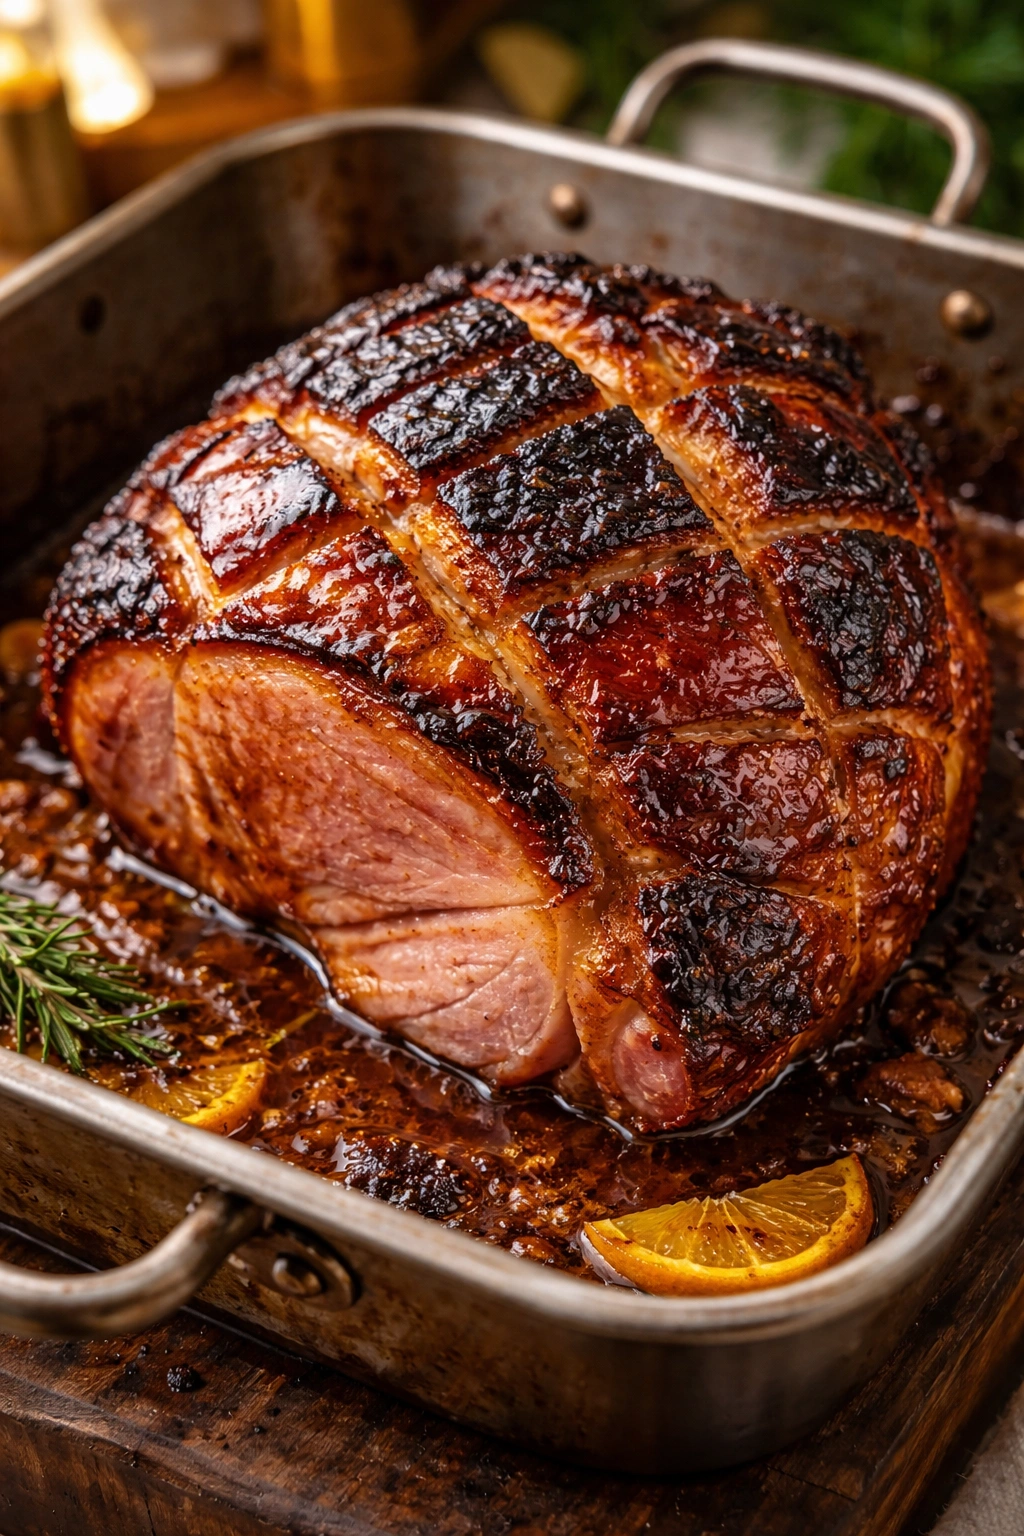
Check the internal temperature again after 25 minutes of the final bake. It should be approaching or at 145°F. If it’s reached that temperature but the glaze doesn’t look adequately caramelized, increase oven temperature to 350°F for the final 5 minutes to speed browning.
The ham is done when the internal temperature reaches 145°F and the glaze looks glossy, slightly sticky, and golden to dark brown at the edges. Some edges will appear almost burnt—this is correct. That’s caramelization at its most flavorful. If you want extra caramelization, you can broil the ham for the final 2 to 3 minutes under a preheated broiler, watching closely so the glaze doesn’t burn. This creates a crispy, crackling crust.
The Final Glazing Technique for Restaurant-Quality Results
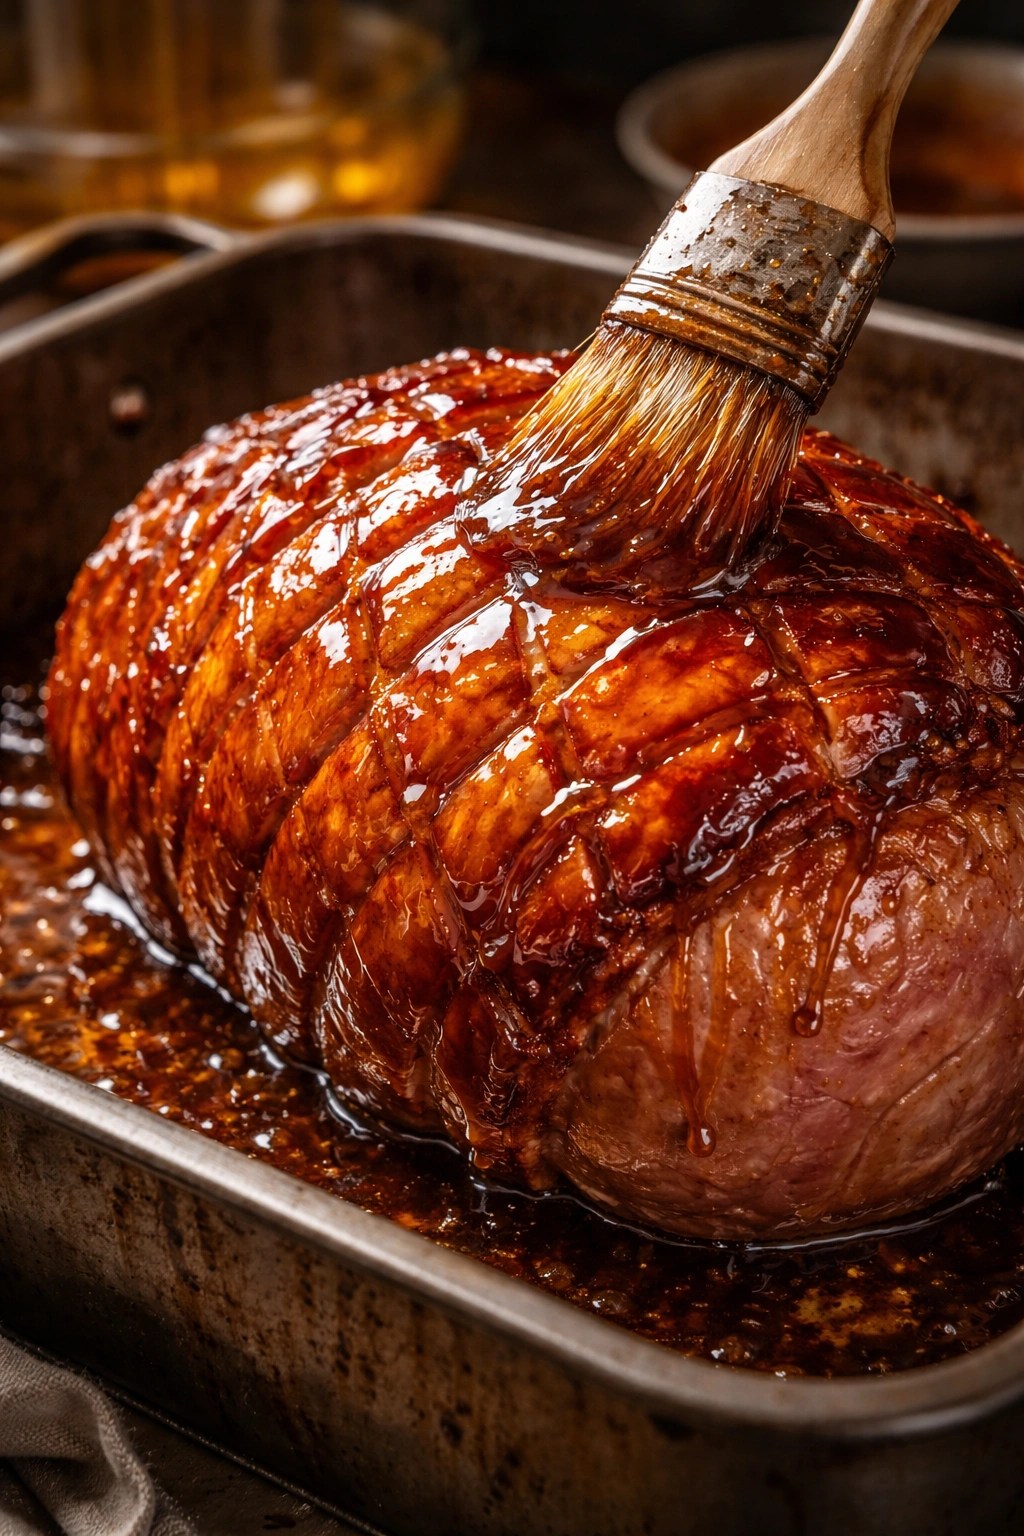
What separates a good honey glazed ham from a restaurant-quality one is how the glaze is built up in layers. Most home cooks brush on the glaze once at the end and hope for the best. Instead, think of glazing as a multi-layer process similar to varnishing wood.
First application: This goes on when you first unwrap the ham, roughly 30 minutes before serving. Brush generously over the entire surface. At this point, the ham is still cooling from the foil’s steam, so the glaze sets quickly without running off.
Second and third applications: Every 10 minutes during that final uncovered bake, brush another thin layer of glaze mixed with the pan juices. Each layer sticks to the previous one, building depth and gloss. The exterior should look increasingly caramelized with each basting.
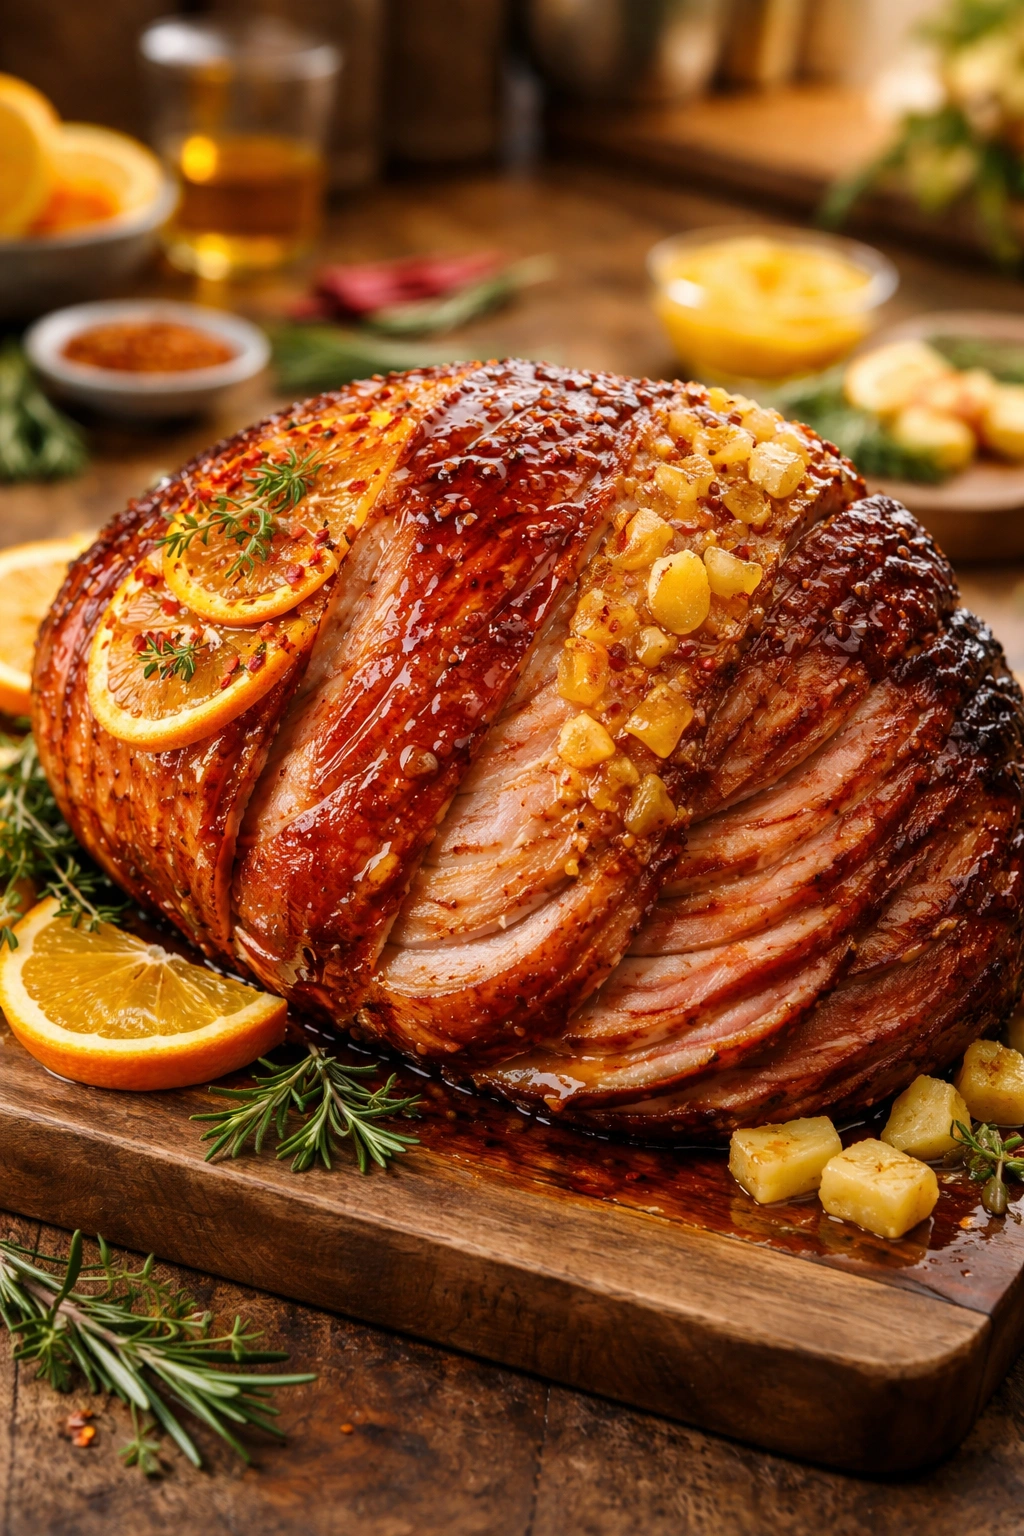
The pan drippings matter. By the time you finish basting, the bottom of the pan contains a luxurious sauce—a mixture of ham juices, the water you added, and the glaze. This isn’t accidentally created; it’s the reward for proper technique. Spoon this pan glaze over individual ham slices when serving. It tastes like liquid gold and transforms each plate.
If you’re serving the ham on a platter, transfer it to a cutting board first. Once carved, arrange the slices slightly overlapping on the platter. Use a spoon to drizzle some of that pan glaze over the top, letting it pool artfully between slices. This is the finishing touch that makes your ham look like it came from a professional kitchen.
Pro Tips to Prevent Drying and Ensure Perfect Results
The most common complaint about home-baked ham is that it comes out dry, tough, or stringy. Every single instance of this is preventable with attention to a few specific techniques. These aren’t suggestions—they’re the difference between ham people regret serving and ham people request the recipe for.
Never skip the initial foil wrapping. The steam environment during the first phase is what keeps the ham moist. An uncovered ham bakes unevenly with a dried-out exterior and potentially cold interior. The foil solves this completely.
Add water to the roasting pan. This single step prevents the bottom and sides of the ham from drying against the hot pan. The water also means you have juices to baste with; a dry pan forces you to baste with only glaze, which burns easily on its own.
Use a meat thermometer religiously. Don’t rely on time estimates alone. Ovens vary wildly in actual temperature and air circulation, and ham sizes vary too. A 9-pound ham and a 10-pound ham can cook at noticeably different rates. The thermometer tells you exactly when the ham has reached safe temperature, preventing both undercooking and the far-more-common problem of overcooking.
Don’t skip the resting period. After you remove the ham from the oven, let it sit for at least 10 minutes before cutting. During this rest, the residual heat continues gently equalizing temperature throughout the meat, and the juices redistribute throughout the tissue rather than running onto the cutting board. This 10-minute pause is the difference between a juicy ham and a dry one.
Tent loosely with foil if browning too quickly. If during the final 30 minutes of glazing you notice the edges browning darker than you’d like, place a loose tent of foil over the top to slow browning while maintaining oven heat. “Loose” is key—it shouldn’t seal tightly or trap steam; you just want to diffuse the direct heat slightly.
Lower your oven temperature if it runs hot. If your oven tends toward higher actual temperatures than the dial indicates (many do), bake at 315°F instead of 325°F. The 10-degree difference slows cooking enough to prevent drying without requiring significant time adjustments.
Common Mistakes That Ruin Holiday Ham
Learning from others’ mistakes saves time and prevents disappointment. These are the missteps that lead to dry, tough, bland, or burned ham—and how to avoid every single one.
Glazing too early. Applying the glaze during the foil-wrapped phase means it steams rather than caramelizes. The sugars soften, and you never develop that crispy, glossy exterior. The glaze must go on only during the final uncovered phase.
Glazing too late. Applying glaze only in the final 5 to 10 minutes means it doesn’t have time to caramelize properly and instead just sits on top in a syrupy layer. Start glazing with about 30 minutes of oven time remaining.
Using too much salt-heavy glaze without balance. Some recipes rely heavily on soy sauce or Worcestershire without enough honey to balance the saltiness. The result tastes funky—overly salty and slightly bitter. Remember that the ham itself is already salty, so glaze should complement, not compound, that saltiness.
Skipping the mustard. A glaze without mustard tastes one-dimensional and overly sweet. The mustard isn’t about making things spicy; it’s about adding complexity and preventing the sweetness from overwhelming. Even if you dislike mustard in general, you won’t taste “mustard” in the glaze—you’ll taste “something interesting that prevents this from tasting like pure sugar.”
Baking uncovered the entire time. This is where most drying occurs. The uncovered exterior loses moisture while the interior catches up, leaving the outer portions tough and stringy even if the center is okay.
Checking temperature only with a fork or by cutting into it. These methods are imprecise and invasive. A meat thermometer gives a definitive answer without compromising the ham. Use an instant-read thermometer and check at least twice—once during the foil-wrapped phase to monitor progress, and once near the end to verify doneness.
Choosing a boneless ham when a bone-in is available. Boneless ham cooks more unevenly and lacks the flavor depth that bone contributes. If you must use boneless, reduce the final uncovered baking time by 5 to 10 minutes since it heats faster.
Using imitation honey or honey-flavored products. The difference between real honey and imitation is dramatic. Imitation honey doesn’t caramelize the same way, doesn’t create the same shine, and tastes noticeably synthetic. Spend a few dollars more for real honey—it’s one of the few places where quality ingredients truly matter.
Flavor Variations You Can Try
Once you’ve made the basic version successfully, you understand the technique well enough to experiment confidently. The framework stays the same; only the glaze components change.
Orange and Thyme Version
Replace the basic glaze with a more citrus-forward approach: ⅔ cup honey, ¼ cup brown sugar, juice and zest of 1 fresh orange, 2 tablespoons butter, 1 tablespoon Dijon mustard, ½ teaspoon dried thyme, and ¼ teaspoon ground cloves. Simmer this mixture for 5 minutes to infuse the thyme before applying. The thyme adds an herbaceous note that lifts the sweetness, while the orange zest creates brightness.
Maple and Cayenne Version
For a slightly spiced, woodsy glaze: ⅓ cup honey, ⅓ cup pure maple syrup, ¼ cup brown sugar, 3 tablespoons butter, 1½ tablespoons Dijon mustard, ¼ teaspoon cayenne pepper, and ¼ teaspoon smoked paprika. The cayenne adds gentle heat that appears on the finish without overwhelming. This version appeals to people who like depth and slight complexity.
Pineapple and Ginger Version
Create a tropical twist: ½ cup honey, ¼ cup brown sugar, ¼ cup pineapple juice, 3 tablespoons butter, 2 tablespoons Dijon mustard, 1 teaspoon fresh ginger (minced or grated), and a pinch of ground cloves. The pineapple juice brings natural sweetness and slight tanginess, while ginger adds warmth and complexity. Stud the surface with a few fresh pineapple rings or maraschino cherries during the final baking phase if you want a more elaborate presentation.
Bourbon and Molasses Version
For a deeper, more sophisticated flavor: ⅓ cup honey, ½ cup dark brown sugar, 3 tablespoons butter, 2 tablespoons Dijon mustard, 1 tablespoon bourbon or rye whiskey (the alcohol cooks off), ½ teaspoon vanilla extract, ¼ teaspoon ground cinnamon, and ¼ teaspoon black pepper. The bourbon adds unexpected depth, while vanilla and cinnamon create a almost dessert-like quality. This version appeals to people who enjoy bolder, more unusual flavors.
Leftover Ham Ideas and Storage Guidelines
A properly stored honey glazed ham provides multiple meals, and the possibilities extend far beyond simple sandwiches.
Storage Instructions
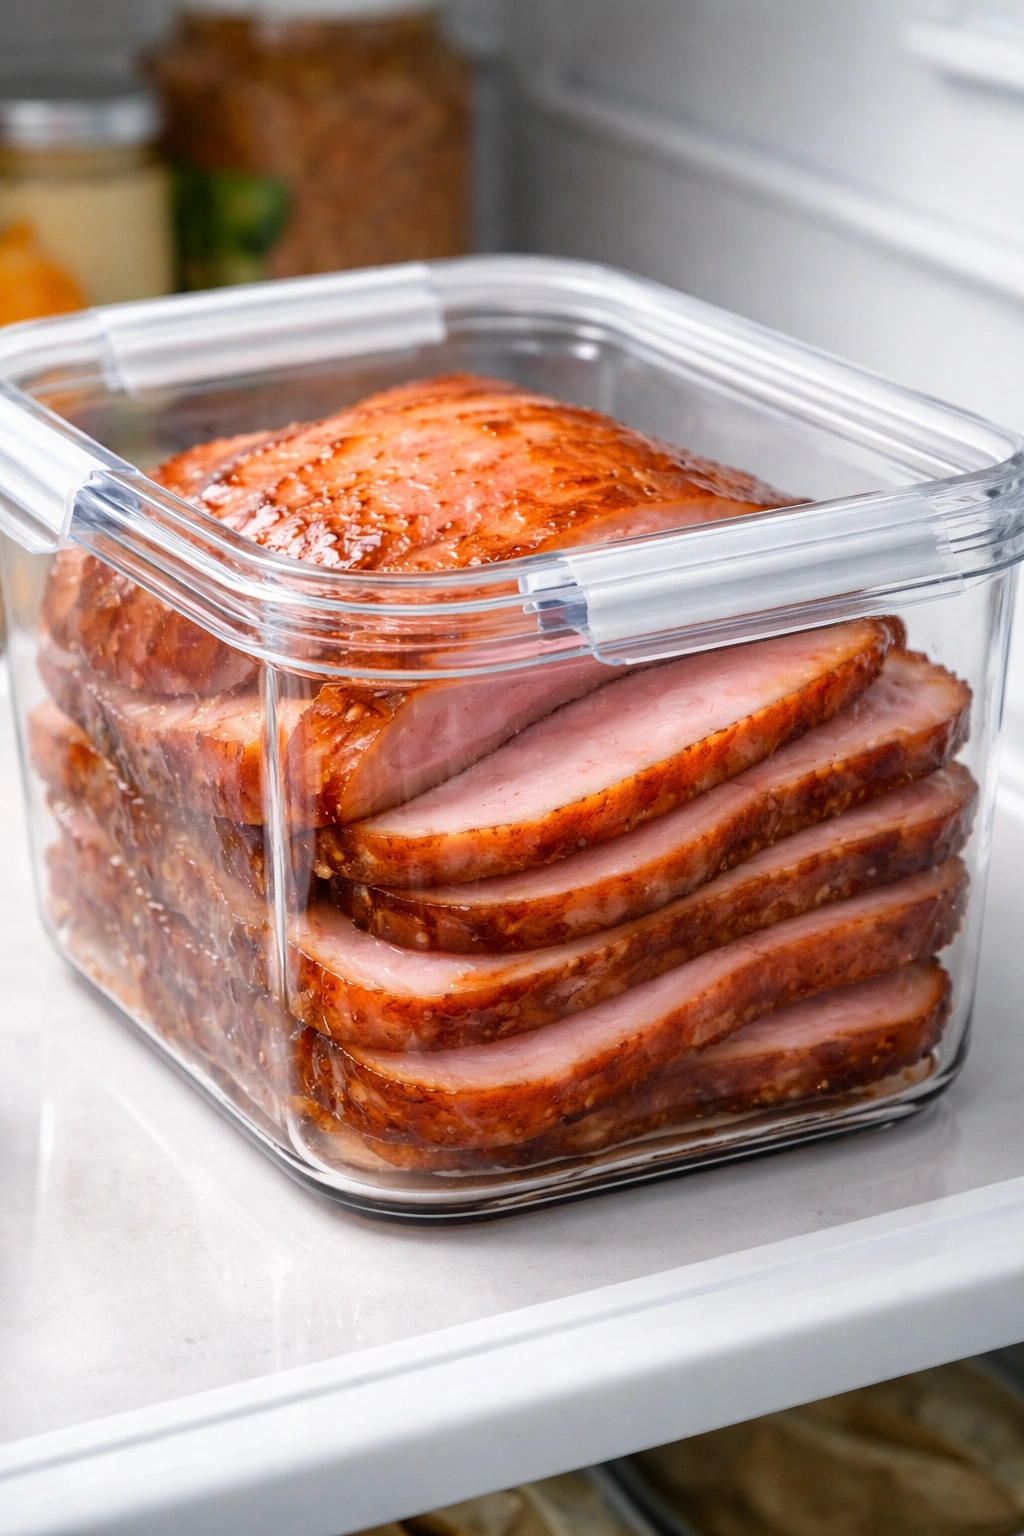
Refrigerator Storage: Wrap leftover ham tightly in plastic wrap or aluminum foil, or place it in an airtight container. Refrigerated ham stays fresh and safe for 4 to 5 days. For best results, slice the ham before storing so it cools quickly and reheats evenly. The glaze hardens as it cools, but a light touch of water when reheating softens it back to glossy consistency.
Freezer Storage: For longer storage, wrap sliced ham in plastic wrap, then place that wrapped ham in a freezer bag or rigid freezer container. Frozen ham maintains quality for up to 2 months. Label with the date so you remember when you froze it. Thaw in the refrigerator overnight before reheating or using in recipes.
Reheating: Arrange slices on an oven-safe plate, cover loosely with foil, and warm in a 325°F oven for 10 to 15 minutes until heated through. Add a tablespoon of water before covering to prevent drying. Alternatively, you can reheat individual portions in the microwave (covered, 30 to 60 seconds per portion), though the oven method produces better results.
Creative Leftover Uses
Ham Fried Rice: Dice leftover ham and fold it into fried rice along with scrambled eggs, cooked rice, frozen peas, and carrots. The ham’s saltiness means you’ll need less soy sauce than a traditional recipe.
Scalloped Potatoes with Ham: Layer thin-sliced potatoes with diced ham and a creamy sauce made from butter, flour, and milk. The ham flavors the entire dish while the sauce keeps everything moist.
Ham and Cheese Sandwiches: Layer ham slices on crusty bread with sharp cheddar, Dijon mustard, and crispy lettuce. The leftovers make superior sandwiches because the ham is already flavorful and needs no additional seasoning.
Soup or Chowder: The ham bone (if you have one) makes exceptional stock for split pea soup, bean soup, or corn chowder. Dice leftover meat and fold it in at the end. A single ham bone can flavor a large pot of soup.
Quiche or Breakfast Casserole: Dice ham and layer it in a quiche or morning egg casserole. The ham adds protein and distinctive flavor without requiring additional seasoning.
What to Serve Alongside Your Honey Glazed Ham
Ham’s sweetness and richness pair beautifully with certain categories of side dishes. The best pairings either balance the richness with acidity or complement the sweet-savory flavor profile.
Creamy, Rich Sides
Scalloped potatoes, au gratin potatoes, or creamy mashed potatoes provide textural contrast to the ham’s salty, caramelized exterior. The creaminess soothes the palate between ham bites.
Mac and cheese is classic for a reason—the cheese sauce complements ham’s salty richness while the pasta provides substance that feels complete alongside ham.
Bright, Acidic Sides
Roasted asparagus or green beans dressed with lemon juice and fresh garlic provide brightness and slight acidity that cuts through the ham’s richness. Roasting concentrates the vegetable’s natural sugars, which complements ham without competing for sweetness.
A fresh salad with vinegar-based dressing provides essential acidic contrast. Try a salad with arugula, thinly sliced red onion, and a lemon vinaigrette, or coleslaw dressed with a light vinegar-based dressing rather than cream.
Glazed carrots or other roasted vegetables work if you use orange juice or lemon in the glaze rather than additional sugar, keeping the sweet elements balanced across the plate.
Bread and Starch Sides
Dinner rolls (particularly buttered ones) allow guests to make small sandwiches or simply soak up the pan glaze. Warm rolls complement almost every holiday meal.
Cornbread or biscuits provide texture contrast to the ham’s tender sliced meat and caramelized exterior.
Rice pilaf (particularly one with herbs or dried fruit) works well if your meal needs more substance, and the rice absorbs pan juices beautifully.
What to Skip
Avoid overly sweet sides like candied yams with marshmallows or fruit-based sides with added sugar. The ham is already sweet from the glaze, and additional sweetness on the plate becomes cloying. Instead, let the ham be the sweet element and let other sides provide contrast.
Similarly, avoid sides with competing spice profiles. If you’ve used cinnamon and cloves in the ham glaze, don’t also serve a heavily spiced vegetable dish. Let the ham be the most interesting flavor on the plate.
Final Thoughts
A honey glazed ham sits at the intersection of impressive and achievable, which is precisely why it remains a beloved holiday centerpiece across generations. You’re not tackling a complicated technique or finding rare ingredients—you’re simply understanding a few key principles and applying them with intention.
The two-phase baking approach keeps ham moist while building that caramelized crust. The multi-layer glazing creates depth and glossiness that catches light beautifully. The strategic use of mustard and spices prevents sweetness from becoming overwhelming. These aren’t tricks or secrets; they’re applications of basic cooking logic that anyone can execute.
What makes the difference between ordinary ham and the ham people remember is usually not the recipe itself but the attention to detail. Using a meat thermometer rather than guessing. Wrapping initially rather than baking uncovered. Basting every 10 minutes rather than setting it and forgetting it. These small choices compound into a significantly better result.
The beauty of this recipe is that it frees you from the kitchen for most of the holiday. Once the ham goes into the oven, you can focus on final preparations for other dishes, set the table, and spend time with family rather than hovering over the stove. The ham bakes itself, and you spend maybe 30 minutes total on active prep and glazing. It’s the kind of centerpiece that makes you look like a devoted cook while allowing you to actually enjoy the day.
Next time you’re planning a holiday meal and considering ham, trust this approach. Start with a quality bone-in spiral-cut ham, make the glaze from real ingredients, wrap initially and glaze generously at the end, and let a meat thermometer tell you when it’s done. The results will make you confident enough to make this your signature dish—the one people specifically request because they remember how good it tasted.