Your favorite restaurant meal is just a kitchen away. There’s something deeply satisfying about recreating those dishes you crave—the ones that make you drive across town, wait in line, and spend money you’d rather keep in your pocket. Copycat restaurant recipes bridge the gap between restaurant cravings and home cooking reality, giving you back control over ingredients, portions, and cost while capturing that exact flavor you remember.
The beauty of making restaurant recipes at home extends far beyond saving money, though that’s certainly a welcome bonus. When you cook these dishes yourself, you understand exactly what goes into them—no mystery ingredients, no surprises about sodium content or additives. You can adjust recipes to match your preferences, swap in ingredient upgrades, and enjoy restaurant-quality meals whenever the craving strikes. Plus, there’s genuine pride in placing a plate on the table and hearing someone say, “You made this? I thought we were ordering takeout.”
The recipes below represent some of the most-loved and most-requested dishes from popular restaurant chains. These aren’t oversimplified versions or pale imitations—they’re detailed, tested approaches that capture the authentic flavors, textures, and techniques that make these dishes memorable in the first place. Let’s dive into dishes you can confidently recreate in your own kitchen.
1. Olive Garden Unlimited Breadsticks with Signature Marinara
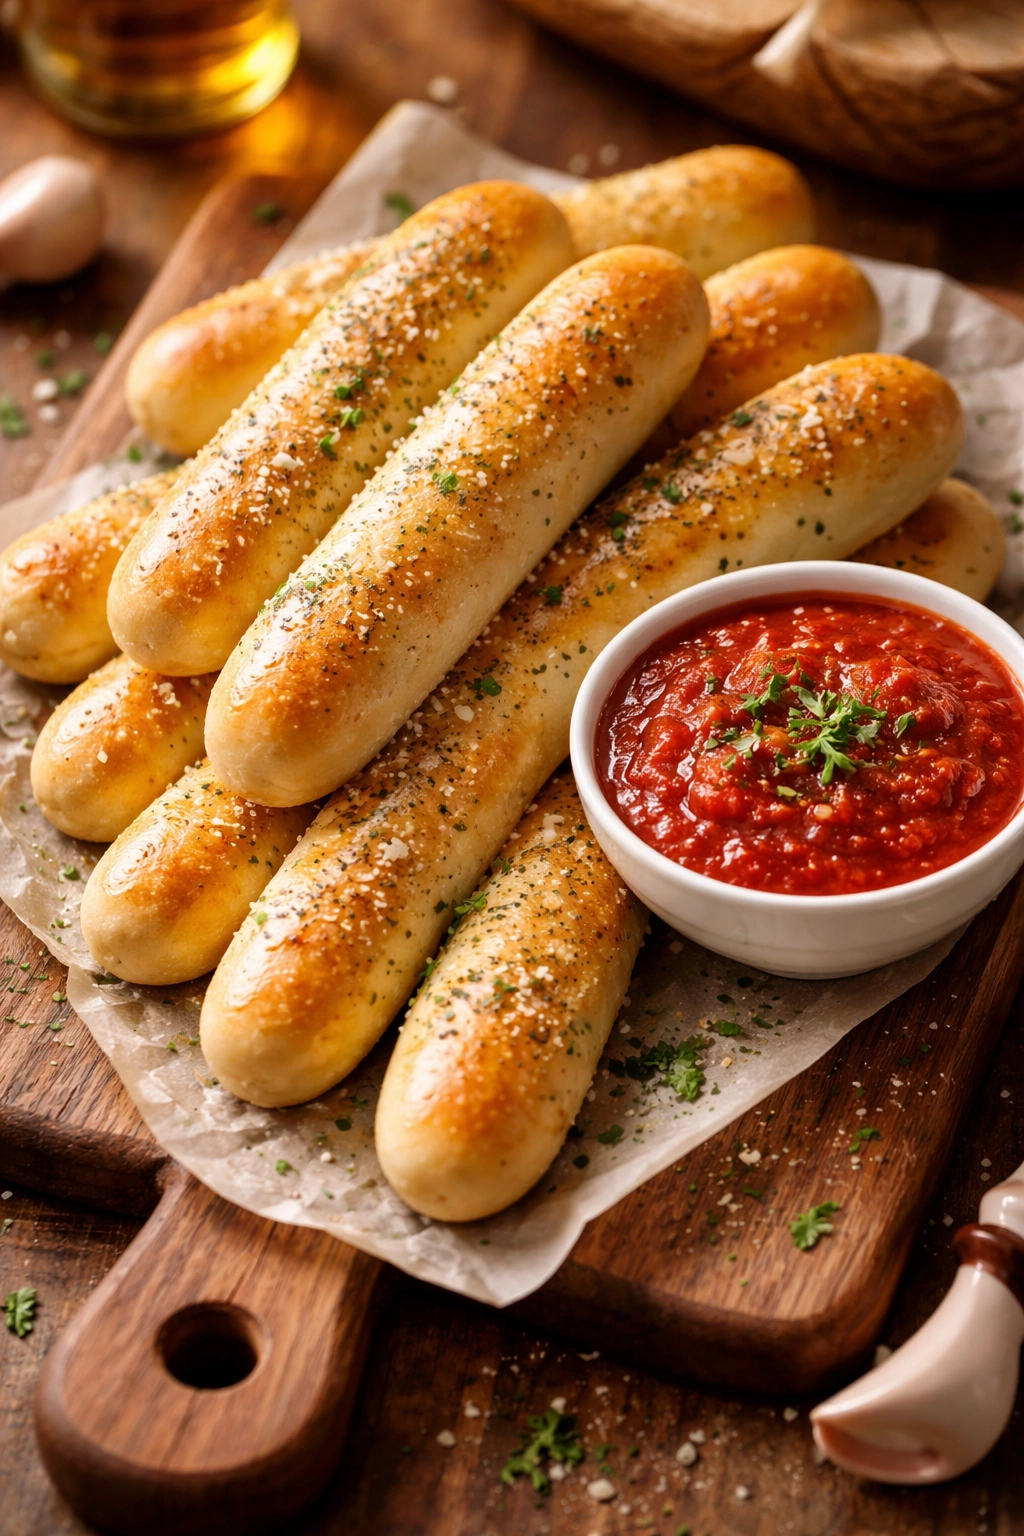
Those warm, soft breadsticks that arrive at your table before the salad aren’t some impossible culinary mystery. The secret lies in using the right dough technique and brushing them with a simple garlic butter that transforms basic bread into something irresistible. What makes Olive Garden’s version so memorable is their commitment to warmth and butter—the sticks are never dry, never dense, and always arrive at your table at the perfect temperature.
Why These Breadsticks Stand Out
The dough itself uses a combination of all-purpose flour and a small amount of sugar, which creates just enough sweetness to balance the savory garlic topping. The magic happens in two places: first, when you brush warm garlic butter over the breadsticks immediately after they come out of the oven, and second, when you serve them hot to your family before anyone even sits down. The breadsticks should be soft enough to tear with your hands, never requiring a knife.
How to Get Restaurant-Quality Results
Start with a basic bread dough using warm water, active dry yeast, all-purpose flour, salt, sugar, and a touch of olive oil. Mix and knead until smooth, then let it rise for about an hour until doubled in size. Divide the dough into strips roughly the width of your index finger—they should be long enough to fit on a standard baking sheet. For the signature topping, melt butter with minced fresh garlic, a pinch of salt, and finely chopped fresh parsley. Bake your breadsticks at 400°F for about 12-15 minutes until golden brown, then immediately brush with that garlic butter mixture while they’re still hot. The heat helps the butter absorb into the bread rather than sitting on the surface. Serve with a simple marinara sauce made from canned San Marzano tomatoes, garlic, olive oil, and Italian seasoning—simmered for at least 20 minutes so the flavors meld.
Pro tip: Make the dough ahead and refrigerate it overnight. The cold fermentation develops flavor and makes the dough easier to work with. You can portion and bake the breadsticks whenever you need them.
2. Panera Bread Broccoli Cheddar Soup in Bread Bowls
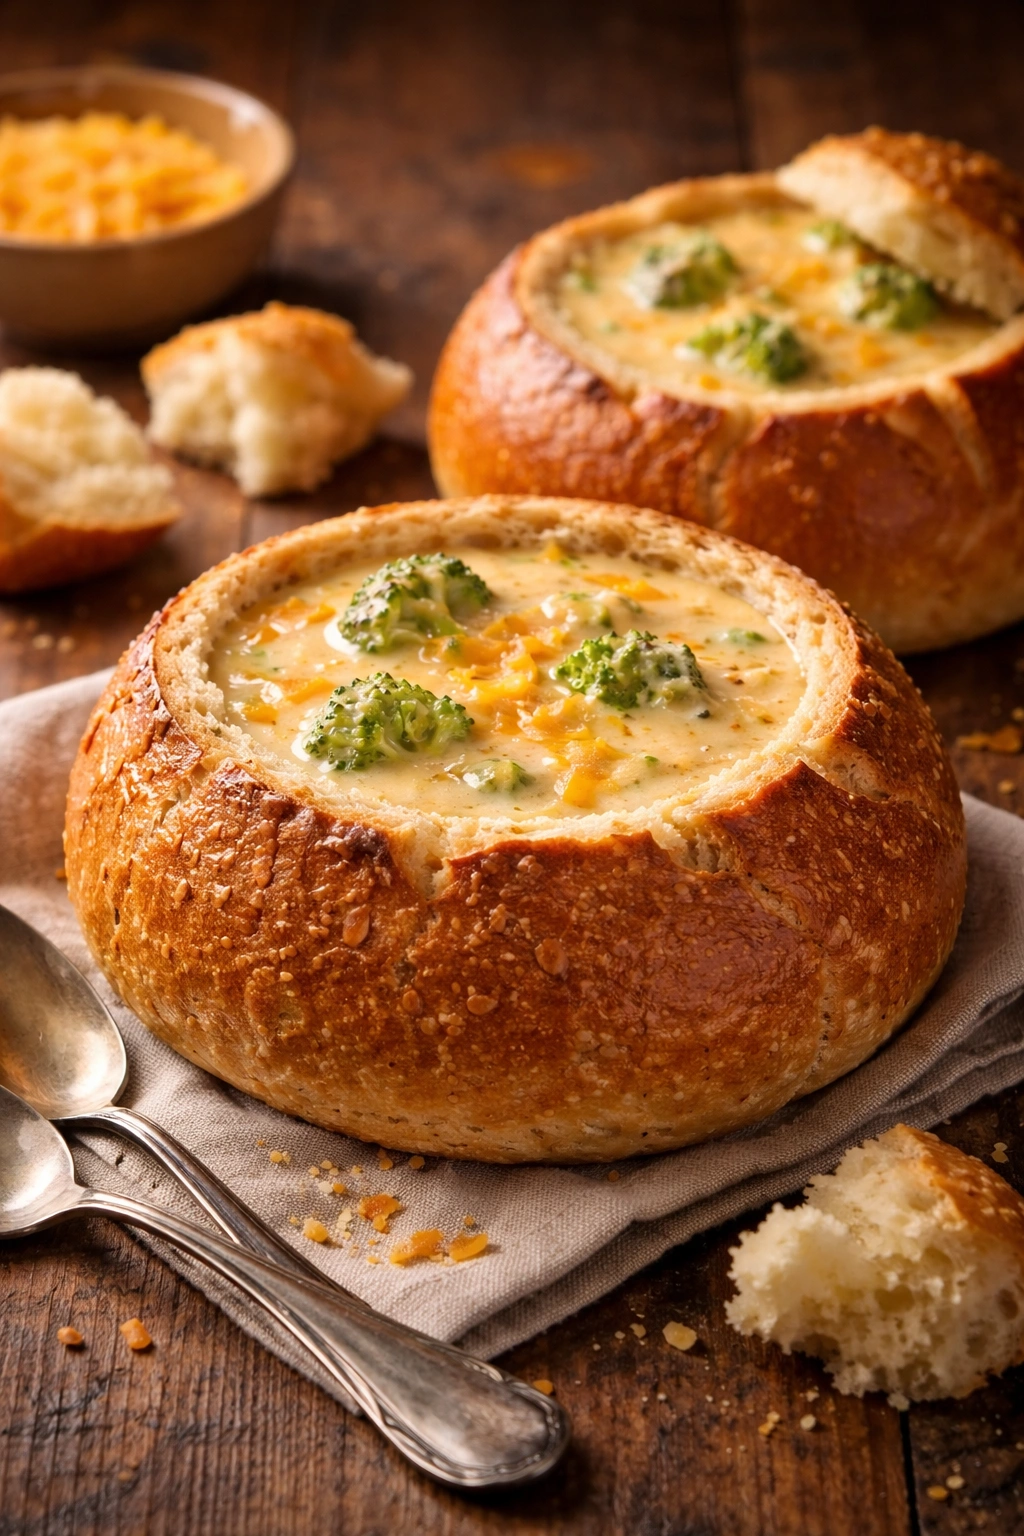
This creamy, deeply flavored soup represents comfort food at its finest. Panera’s version achieves a velvety texture without being heavy, balancing the sharp bite of aged cheddar cheese with the mild earthiness of fresh broccoli. The soup tastes like it’s been simmered for hours, though it comes together in just about 45 minutes of active cooking time.
The Foundation: Building Proper Flavor Depth
Start your soup by sautéing diced onion and minced garlic in butter until the onion is completely translucent and soft—this takes longer than most people expect, but those 5-7 minutes build the foundational flavor layer. Add chicken broth and bring it to a simmer, then add fresh broccoli cut into small florets. The broccoli should cook until completely tender, about 10 minutes, so that it breaks down slightly into the broth. This partial breakdown is what gives the soup its characteristic creamy quality without requiring heavy cream or flour.
Achieving That Signature Creamy Texture
Once the broccoli is tender, add a generous amount of shredded sharp cheddar cheese—roughly 2 cups for a pot that serves 6-8 people. Shred your cheese from a block rather than using pre-shredded cheese, since the latter contains anti-caking agents that prevent it from melting smoothly. Stir constantly until the cheese is completely melted and incorporated. Finish with a splash of heavy cream and a pinch of white pepper. The color should be a rich, golden yellow-orange, not the bright orange of processed cheese.
Worth knowing: This soup freezes beautifully for up to three months. Freeze it before adding the cream, then reheat gently on the stovetop and stir in the cream just before serving. Serving it in a hollowed-out bread bowl makes the presentation restaurant-worthy and lets you eat the bread as you finish the soup.
3. Chick-fil-A Chicken Sandwich with Signature Sauce
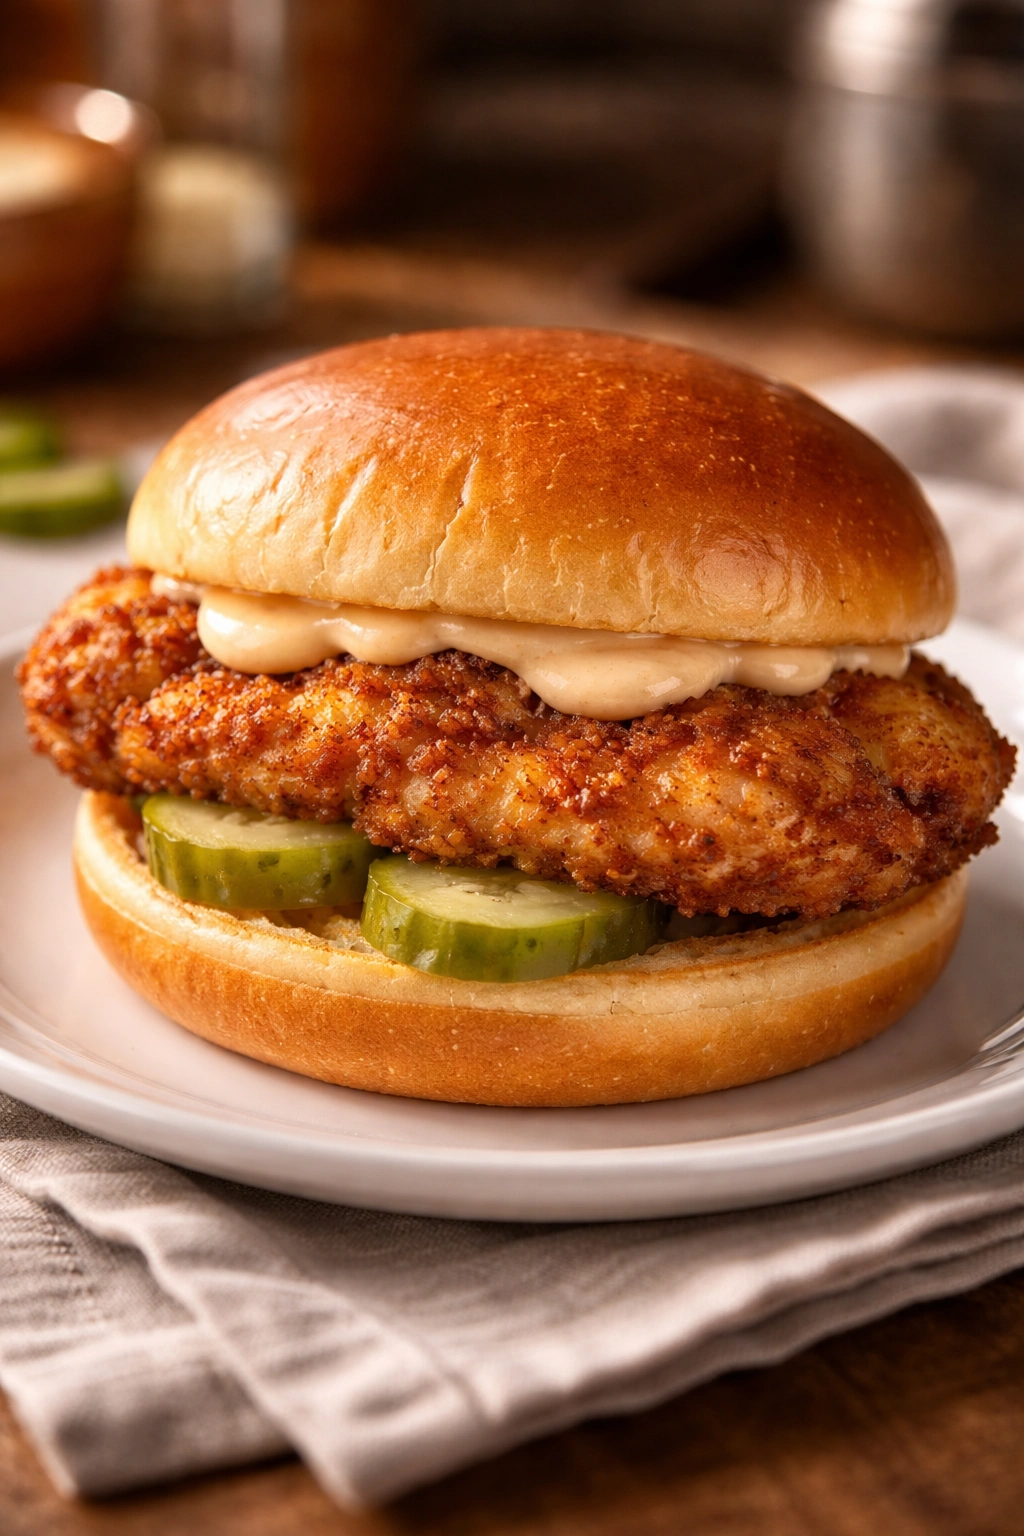
The elegance of Chick-fil-A’s chicken sandwich comes from remarkable simplicity: a perfectly cooked, seasoned chicken breast on a buttered bun with two dill pickle chips. Nothing else. The genius is in the execution—the chicken must be moist, tender, and properly seasoned, with a delicate exterior that’s golden without being greasy.
Mastering the Chicken Technique
The secret to tender, juicy chicken that matches Chick-fil-A’s version is brining. Dissolve kosher salt in warm water (about ¼ cup salt per quart of water), let it cool completely, then submerge boneless, skinless chicken breasts in the brine for at least 4 hours but preferably overnight. The salt penetrates the muscle fibers, allowing them to retain more moisture during cooking. Pat the brined chicken completely dry before seasoning.
Season the chicken with a simple blend: salt, pepper, paprika, and a touch of garlic powder. Cook in a cast iron skillet over medium-high heat with a small amount of oil. The chicken should take 6-7 minutes per side, creating a golden exterior while the interior stays moist. Use a meat thermometer—you’re aiming for 165°F at the thickest part. Let the cooked chicken rest for a few minutes before assembling your sandwich.
Building the Perfect Sandwich
Toast buttered buns lightly in the same skillet where you cooked the chicken—this adds a subtle richness that you can’t skip. Place the warm chicken breast on the toasted bun, add exactly two dill pickle chips (they provide crucial acidity and briny notes), and that’s it. The Chick-fil-A sauce is a blend of barbecue sauce, honey, mustard, and a touch of lemon juice mixed together in equal parts. This tangy-sweet sauce balances the savory chicken perfectly without overpowering it.
Pro tip: Make the Chick-fil-A sauce in batches and keep it in the refrigerator for up to two weeks. It’s perfect on sandwiches, nuggets, or even as a dipping sauce for crispy waffle fries.
4. Panda Express Orange Chicken with Fried Rice
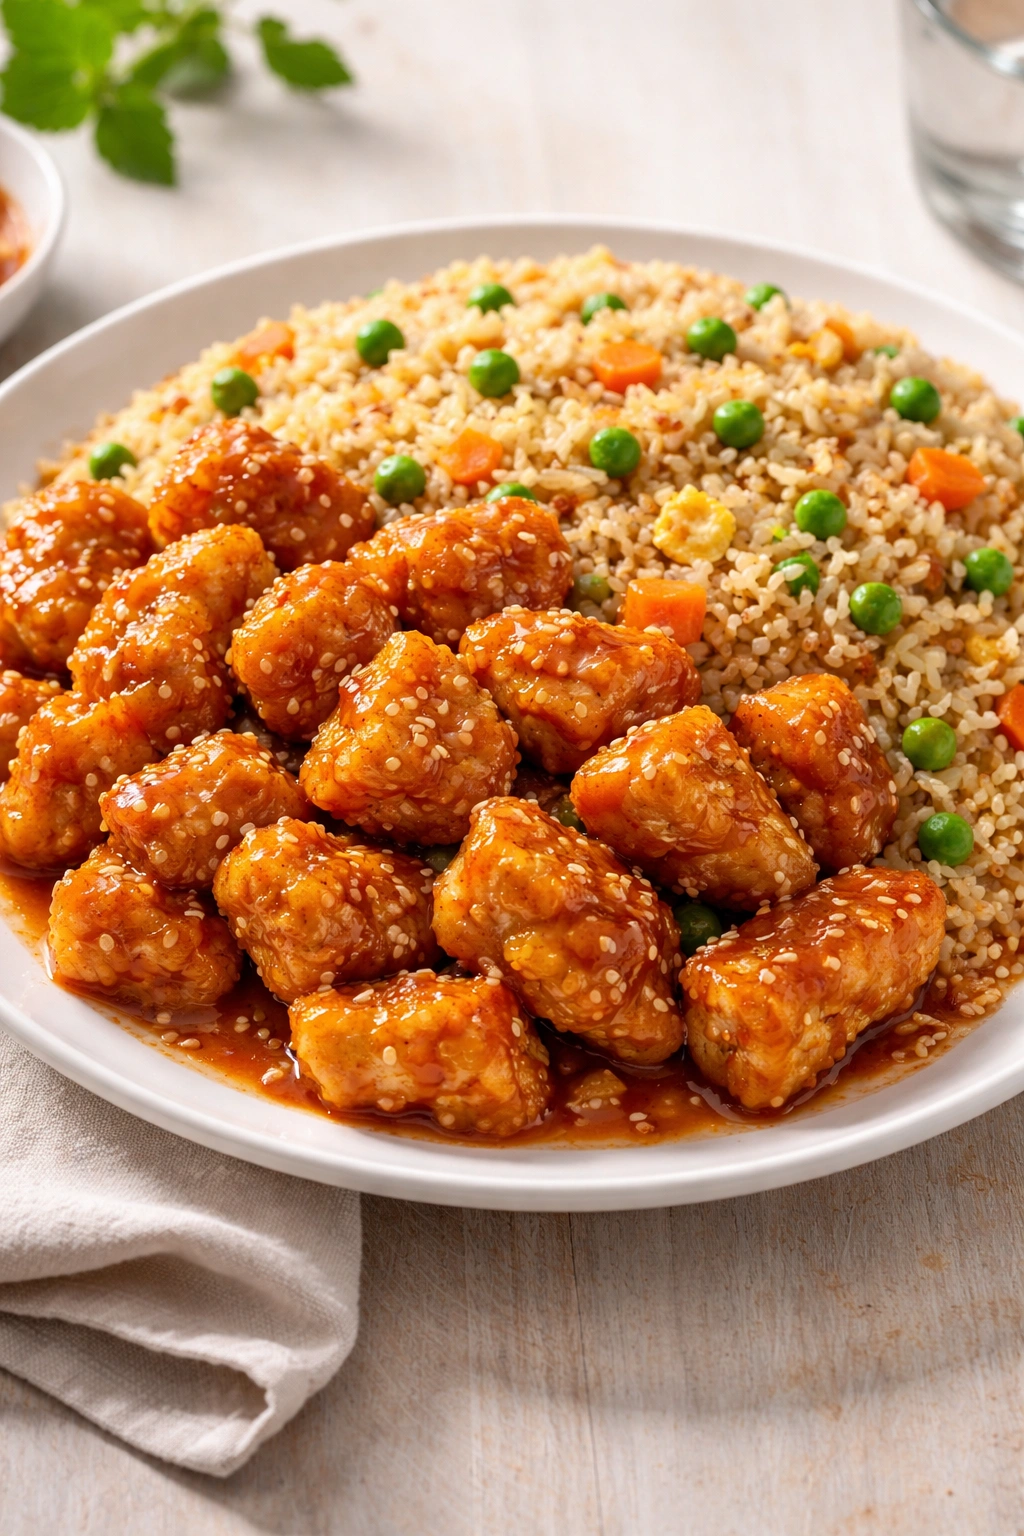
This sticky-sweet, crispy chicken dish became Panda Express’s signature for good reason. The chicken pieces are properly fried to golden perfection, then coated in a sauce that’s bright with citrus, slightly spicy, and balanced with just enough sweetness. Served alongside fluffy fried rice studded with eggs, peas, and carrots, it captures the essence of quick-service Asian cuisine done well.
Creating the Signature Orange Sauce
The orange sauce starts with fresh orange juice (not concentrate), which provides natural brightness without artificial tang. Combine the juice with soy sauce, rice vinegar, brown sugar, minced garlic, minced ginger, and a pinch of red pepper flakes. The proportion should create a sauce that’s aromatic, balanced between salty and sweet, with a gentle heat that builds on the finish. Thicken the sauce with a slurry of cornstarch and water added during the final minutes of cooking, whisking constantly to avoid lumps. The finished sauce should coat a spoon and cling to the chicken.
Perfecting the Fried Chicken
Cut boneless chicken breasts into bite-sized pieces, roughly 1½ inches each. Toss the chicken in a mixture of cornstarch, egg white, salt, and white pepper—this creates an incredibly light, crispy exterior when fried. Heat oil to 350°F and fry the chicken in batches, never crowding the pan. The chicken is done when it’s golden brown and floats to the surface, which typically takes 4-5 minutes. Drain on paper towels, then toss with the prepared orange sauce in a hot wok or large skillet just before serving.
Mastering Fried Rice
Use cold, day-old rice broken into separate grains—wet rice becomes mushy. Heat oil in a wok or large skillet over high heat, add beaten eggs and scramble them into small pieces, then remove and set aside. Add the cold rice, breaking it apart as it heats, then add diced carrots, peas, and diced onion. Season with soy sauce, white pepper, and sesame oil. The rice should be heated through but maintain its distinct grain structure. Return the scrambled eggs to the wok and toss everything together.
Quick facts:
- Day-old rice is essential—fresh hot rice won’t fry properly
- High heat is crucial for fried rice to develop flavor
- Keep ingredients prepped and ready before you start cooking
- The entire dish comes together in just 15-20 minutes once everything is prepped
5. Red Lobster Cheddar Bay Biscuits
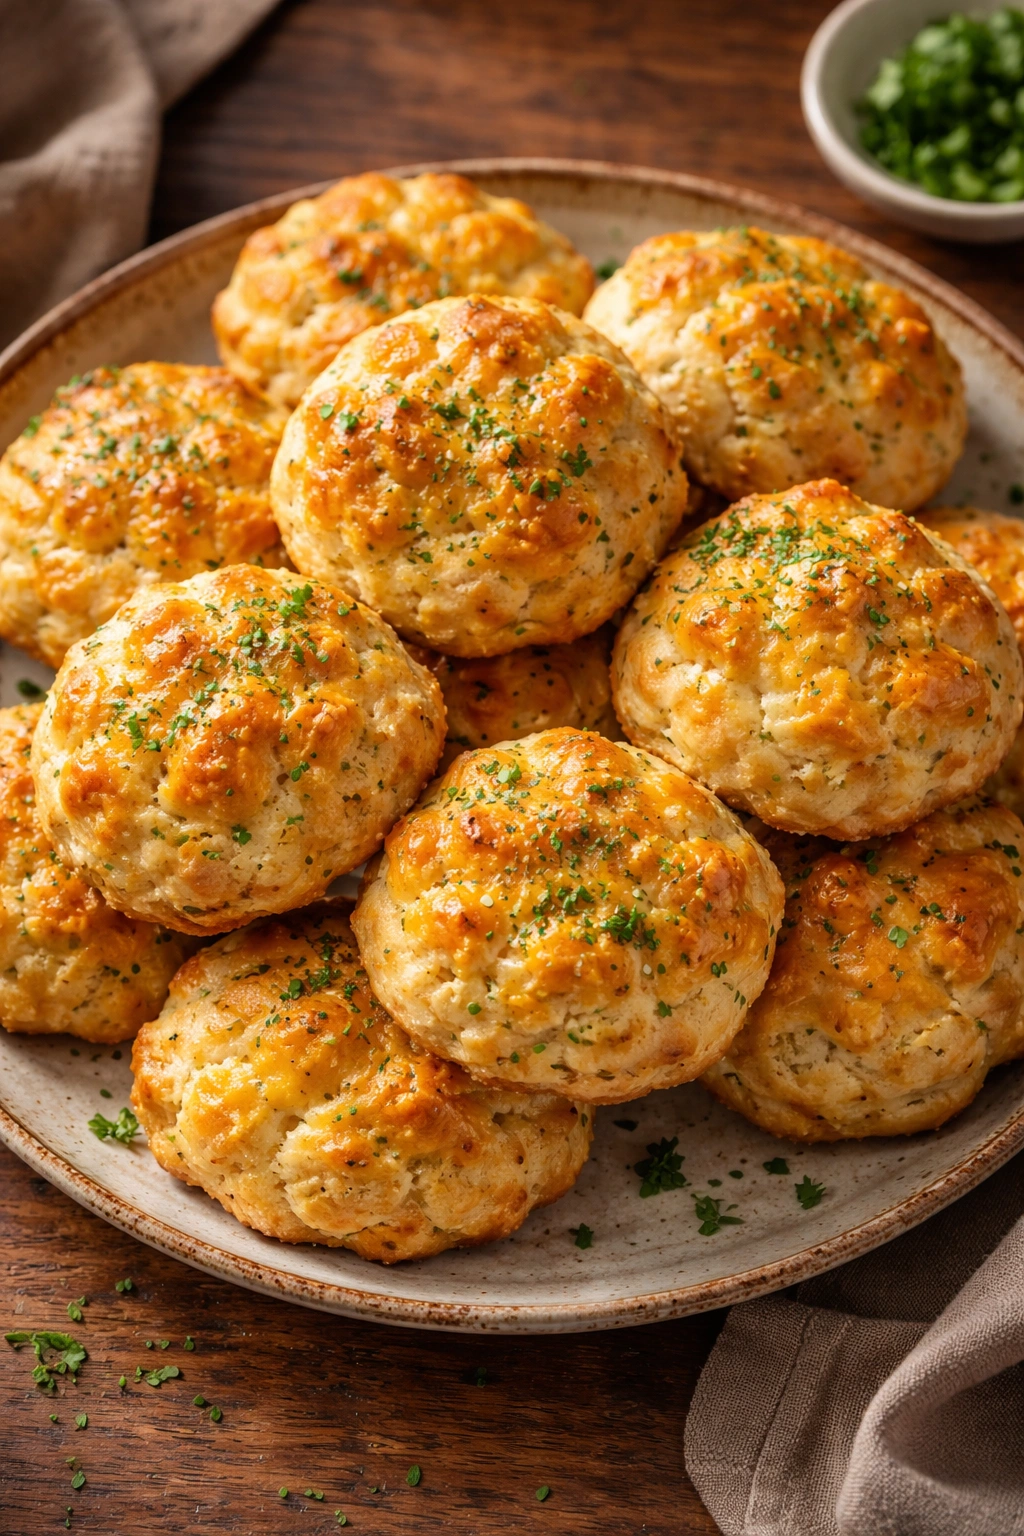
These buttery, cheesy biscuits with their distinctive herb topping are the reason many people arrive at Red Lobster early. They’re fluffy inside with a tender crumb, studded with sharp cheddar cheese, and finished with a topping of herbs, garlic, and more butter that makes them completely irresistible. The biscuits pull apart easily and taste best served warm from the oven.
The Foundation: Perfect Biscuit Dough
Quality biscuits require cold butter cut into flour, which creates small pockets that puff up during baking to make the biscuits light and flaky. Start with all-purpose flour, baking powder, salt, and cold unsalted butter cut into small cubes. Using a pastry cutter or your fingertips, work the butter into the flour until the mixture resembles coarse breadcrumbs with some pea-sized pieces of butter still visible. Add sharp cheddar cheese shredded from a block (not pre-shredded), then add buttermilk mixed with a beaten egg, stirring just until the dough comes together.
Don’t overwork this dough—overmixing develops gluten and makes biscuits tough and dense. Gently fold the dough together, shape it into a disk, wrap it in plastic, and refrigerate for at least 30 minutes. This resting time allows the flour to fully hydrate and helps the butter stay cold.
Shaping and Baking for Success
Turn your chilled dough onto a lightly floured surface and gently pat it to about ¾-inch thickness. Cut biscuits with a sharp biscuit cutter dipped in flour, pressing straight down without twisting—twisting seals the edges and prevents them from rising properly. Place biscuits on a parchment-lined baking sheet, brush the tops with beaten egg, and bake at 400°F for 12-15 minutes until golden brown.
The Signature Topping That Makes Them Special
While the biscuits bake, prepare the herb topping. Melt butter with minced garlic, and stir in a mixture of finely minced fresh parsley, dried thyme, and dried basil. As soon as the biscuits come out of the oven, brush generously with this herb butter. The warmth of the fresh-baked biscuits helps the butter absorb so it’s not sitting on the surface. A sprinkle of flaky sea salt finishes the biscuits perfectly.
Insider note: Biscuit dough can be frozen unbaked for up to three months. Bake them directly from the freezer, adding just 2-3 minutes to the baking time.
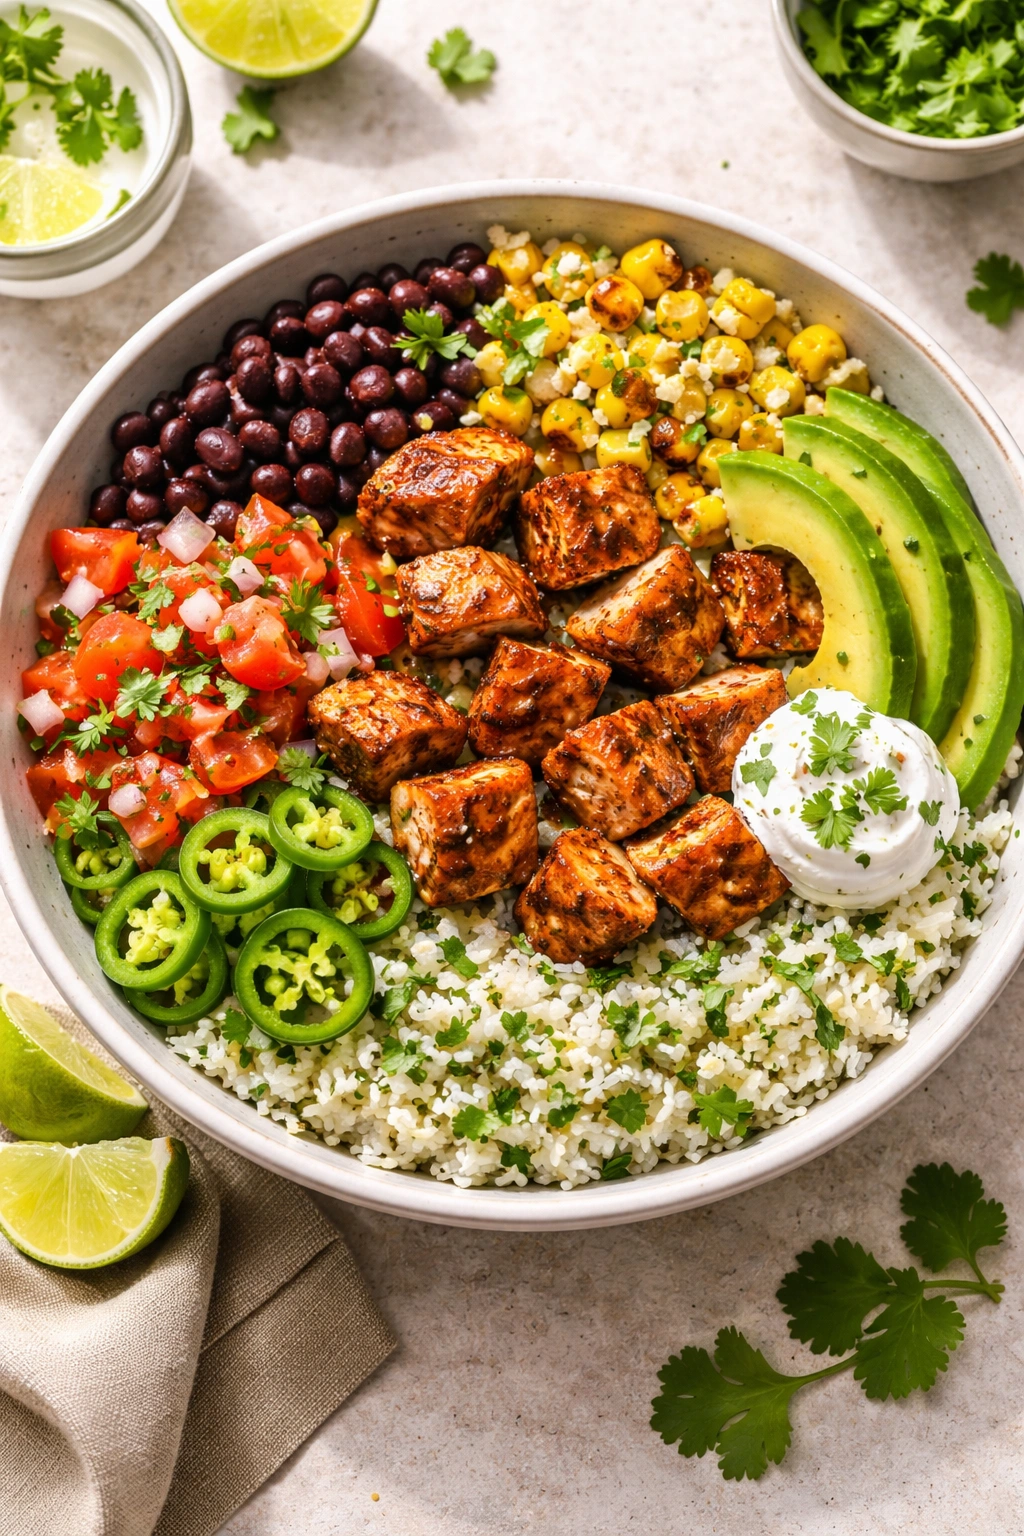
6. Chipotle Chicken Bowl with Cilantro-Lime Rice
This deceptively simple bowl showcases how proper technique with basic ingredients creates restaurant-quality food. The cilantro-lime rice provides brightness, the seasoned chicken brings savory depth, and when assembled with black beans, corn, and fresh toppings, the bowl becomes a complete, satisfying meal that tastes authentic.
Making Cilantro-Lime Rice That Tastes Fresh
Cilantro-lime rice seems straightforward until you realize that timing matters significantly. Cook your rice using the absorption method—typically 2 cups water to 1 cup long-grain white rice. Once the water is fully absorbed and the rice is tender, remove it from the heat and let it sit undisturbed for 5 minutes. While it rests, zest two limes and juice them separately. Fluff the cooked rice with a fork, then gently fold in the lime juice, lime zest, and fresh cilantro torn by hand (chopped cilantro bruises and releases bitter compounds). Season with salt to taste. The rice should taste bright and aromatic, never mushy.
Seasoning and Grilling the Chicken
Marinate chicken pieces in a blend of lime juice, olive oil, minced garlic, cumin, chili powder, and oregano for at least 30 minutes. Grill the chicken over medium-high heat until cooked through with nice char marks, or cook it in a cast iron skillet on the stovetop. The key is achieving flavor development through caramelization while keeping the interior tender and juicy.
Building Your Bowl
Layer the cilantro-lime rice as your base, then add portions of seasoned chicken, black beans that have been warmed and lightly seasoned, corn (fresh, frozen, or roasted), diced red onion, and fresh pico de gallo. Top with a generous dollop of sour cream, fresh cilantro, sliced jalapeños, and a squeeze of fresh lime juice. The bowl should look abundant and vibrant, with multiple colors and textures visible.
Worth knowing: Prep components ahead for weeknight bowls. Cook the rice and chicken in advance, storing them separately in the refrigerator. Assemble fresh components just before serving so you get the best texture and flavor.
7. KFC Fried Chicken with Secret Spice Blend
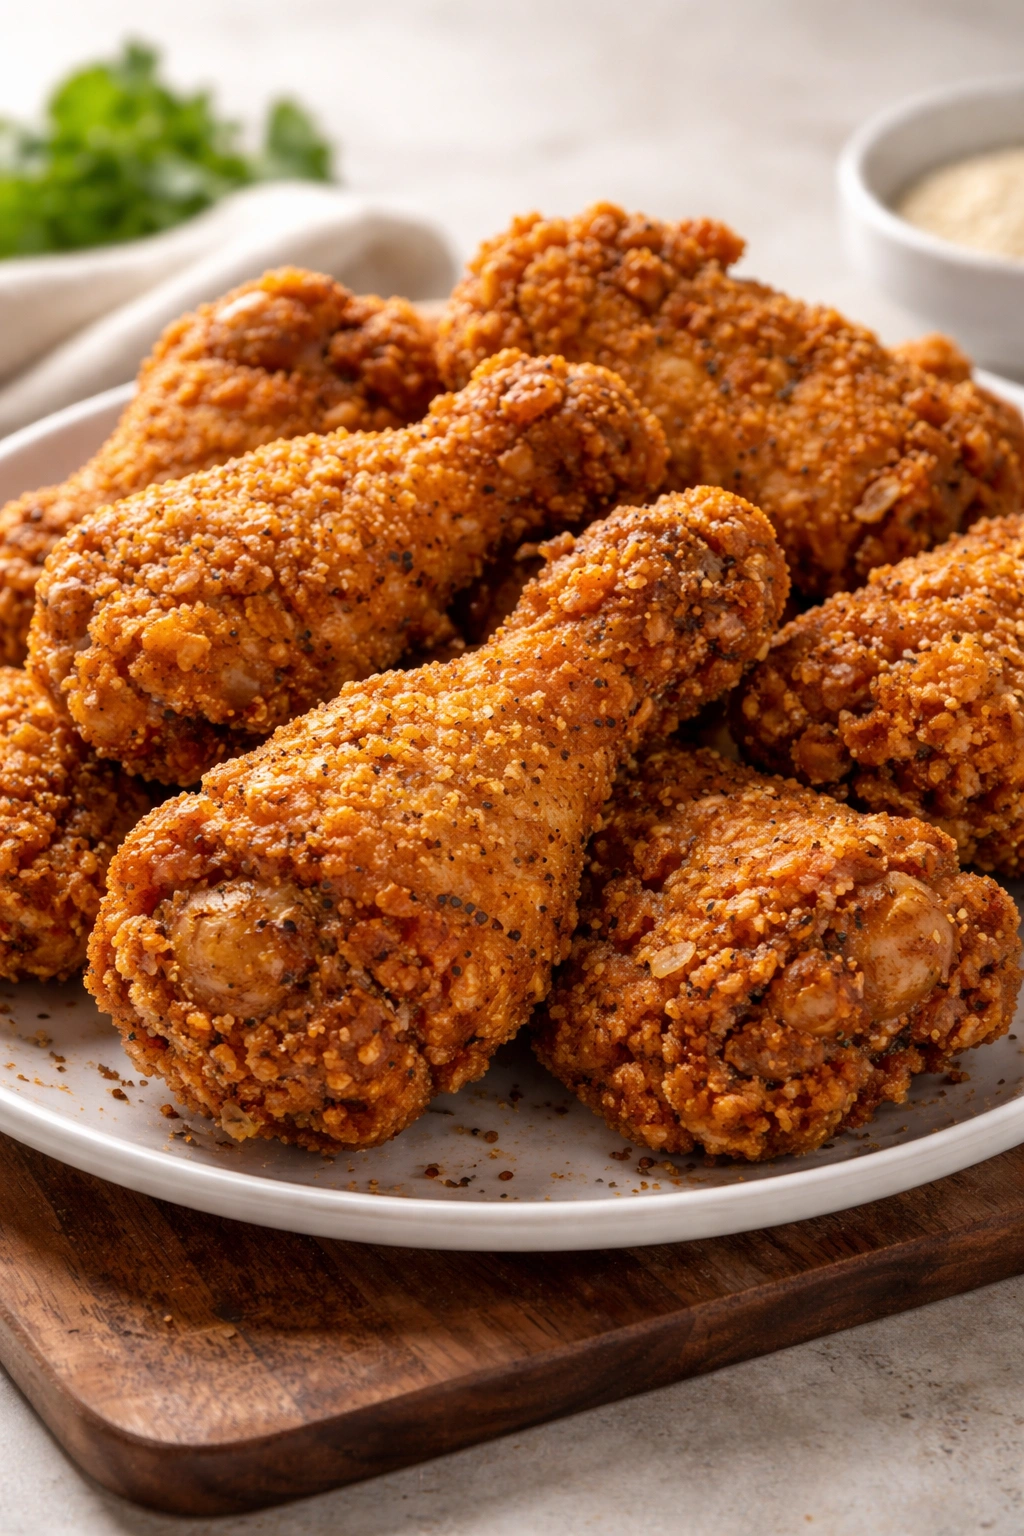
KFC’s fried chicken has inspired countless copycat attempts, but the key lies in understanding their technique rather than obsessing over the exact spice blend. The chicken is pressure-cooked in a proprietary blend of seasoned flour, creating an incredibly crispy exterior while keeping the meat inside impossibly moist and tender.
Reverse-Engineering the Coating
Start with all-purpose flour as your base, then add a blend of paprika, garlic powder, onion powder, cayenne pepper, black pepper, salt, white pepper, and MSG (yes, really—this ingredient is found in many restaurants’ seasonings and creates savory depth). Some versions include a touch of thyme and marjoram. The exact proportions are less critical than understanding that the blend should be heavily seasoned, with paprika providing the dominant color and flavor.
The Pressure-Cooking Technique
Marinate chicken pieces in buttermilk for at least 4 hours but ideally overnight. This breaks down the muscle fibers and allows the meat to retain moisture during cooking. Remove the chicken from the buttermilk and dredge thoroughly in the seasoned flour, pressing gently so the coating adheres. For the most authentic result, use a pressure cooker, but a deep fryer works beautifully too.
If using a pressure cooker, pour oil to the fill line, heat to 325°F, then carefully add floured chicken pieces. The chicken should be covered by oil or just barely not—never completely submerge it in a pressure cooker for safety. Cook for about 12 minutes at full pressure. If deep frying instead, heat oil to 350°F and fry for 12-15 minutes until the chicken is golden brown and cooked through.
Achieving Restaurant Crispiness
The exterior must be golden, crispy, and stay that way for at least 10 minutes after cooking. This requires the oil to reach proper temperature (use a thermometer—guessing leads to greasy chicken), and the chicken must drain on clean paper towels. Never place hot fried chicken directly into a container where steam can soften the coating.
Pro tip: Mixing white pepper with black pepper in the coating creates a more sophisticated, layered flavor profile than black pepper alone.
8. The Cheesecake Factory Original Cheesecake
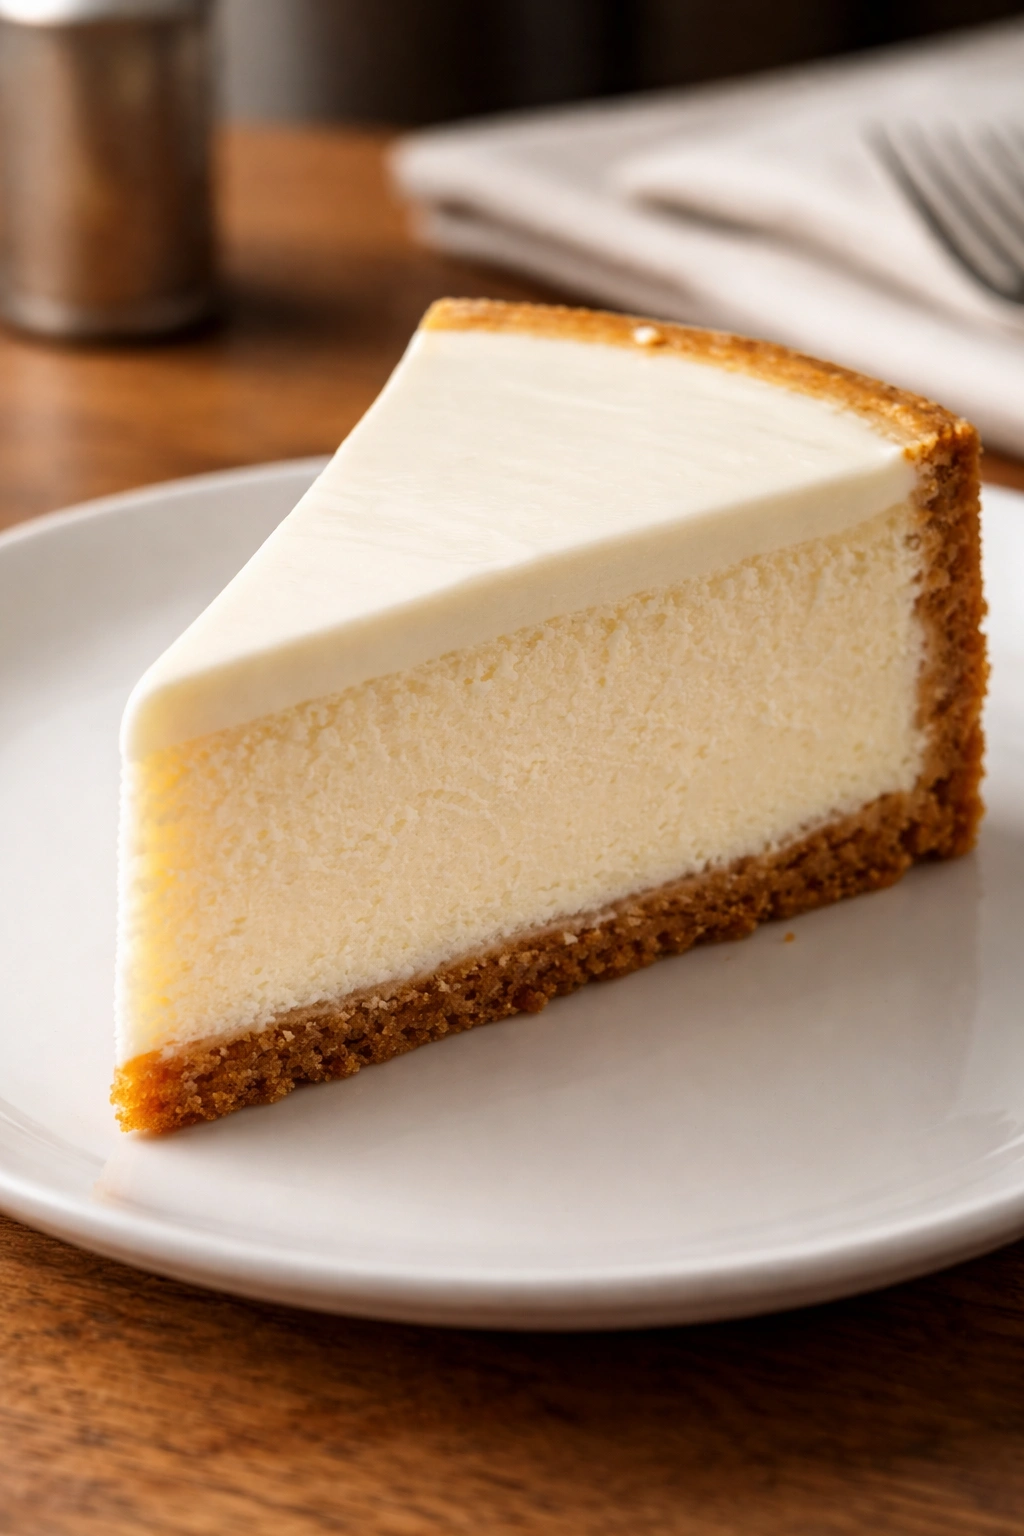
This iconic dessert is rich, dense, and intensely creamy—a serious cheesecake that doesn’t apologize for its decadence. The texture is smooth and slightly fluffy, never grainy or rubbery, and the flavor is pure cream cheese with subtle vanilla undertones. It’s topped with a simple sour cream layer that provides slight tanginess to balance the richness.
Building a Stable Foundation
The crust is made from crushed graham crackers mixed with melted butter and a touch of sugar. Press this mixture firmly into the bottom of a springform pan—the crust should be compact and even, providing structural support for the filling. Some recipes prebake the crust, but this isn’t always necessary. A crust that’s too thick will compete with the cheesecake itself, so aim for about ¼-inch thickness.
Creating Perfectly Smooth Filling
Beat softened cream cheese (room temperature is essential) until completely smooth and creamy, scraping down the bowl frequently. Overbeating at this stage creates air bubbles that can cause cracks, so mix just until smooth. Add sugar and beat until combined, then add eggs one at a time, beating after each addition and scraping down the bowl. The mixture might look slightly separated or curdled—this is normal and will come together. Add vanilla extract and beat until just combined.
Baking Low and Slow
Pour the filling over your crust and bake in a water bath (the springform pan set inside a larger roasting pan filled with hot water) at 325°F for 55-60 minutes. The cheesecake is done when the edges are set but the center still jiggles slightly when you gently shake the pan—about a 2-inch circle in the center should wobble. This residual heat will continue cooking the center as it cools.
Adding the Signature Sour Cream Topping
Once the cheesecake has cooled for 10 minutes, mix sour cream with a small amount of sugar and vanilla, then spread this mixture evenly over the still-warm cheesecake. Return to the oven for 5 minutes, then remove and let cool completely. The cheesecake must cool for at least 6 hours, preferably overnight in the refrigerator, before slicing.
Critical note: Never skip the water bath. The moisture creates gentle, even heat that prevents cracks and curdling. Cheesecake baked without a water bath often develops a cracked surface and grainy texture.
9. Applebee’s Spinach and Artichoke Dip
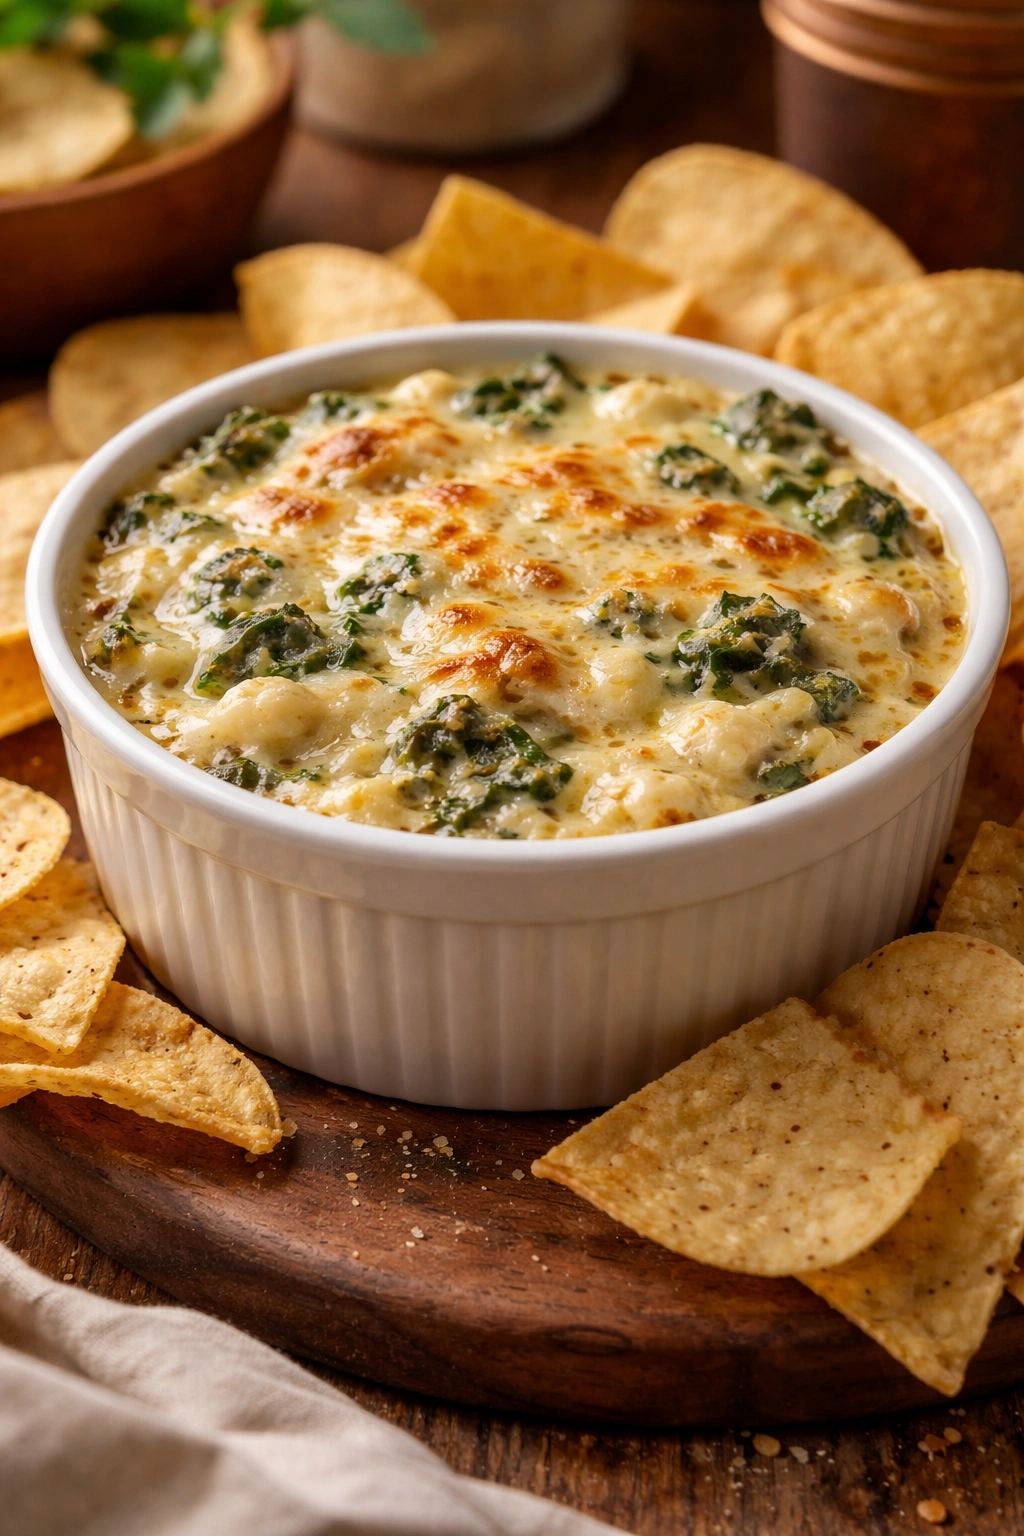
This creamy, spinach-loaded dip exemplifies comfort food—it’s warm, cheesy, indulgent, and disappears quickly whenever it appears. The combination of fresh spinach, tender artichoke hearts, and melted cheese creates a dip that tastes restaurant-quality but comes together in about 20 minutes of prep and cooking time.
Preparing Components for Best Results
Thaw frozen spinach completely and squeeze out every drop of moisture using a clean kitchen towel. Excess moisture is the enemy of creamy dips—it causes the dip to become watery and unstable. Drain canned or jarred artichoke hearts and chop them into bite-sized pieces. Shred your cheese from a block rather than using pre-shredded varieties, which contain anti-caking agents that prevent smooth melting.
Building Layered Flavor
Heat butter in a large skillet and sauté minced garlic until fragrant, about 30 seconds. Add the squeezed spinach and chopped artichokes, stirring to combine. Cook for 2-3 minutes, then add cream cheese in chunks, stirring until it melts and coats everything. Add shredded mozzarella and parmesan cheese, stirring until melted and smooth. Season with salt, pepper, and a pinch of garlic powder. The dip should be creamy and cohesive, with no graininess.
Final Touches and Serving
Transfer the dip to a baking dish and top with a mixture of panko breadcrumbs, melted butter, and minced fresh parsley. Bake at 375°F for 12-15 minutes until the top is golden brown. Serve hot with tortilla chips, crackers, or toasted bread slices.
Insider note: This dip can be assembled several hours ahead, covered, and refrigerated. Simply add 3-4 minutes to the baking time if baking from cold.
10. Olive Garden Chicken and Shrimp Carbonara
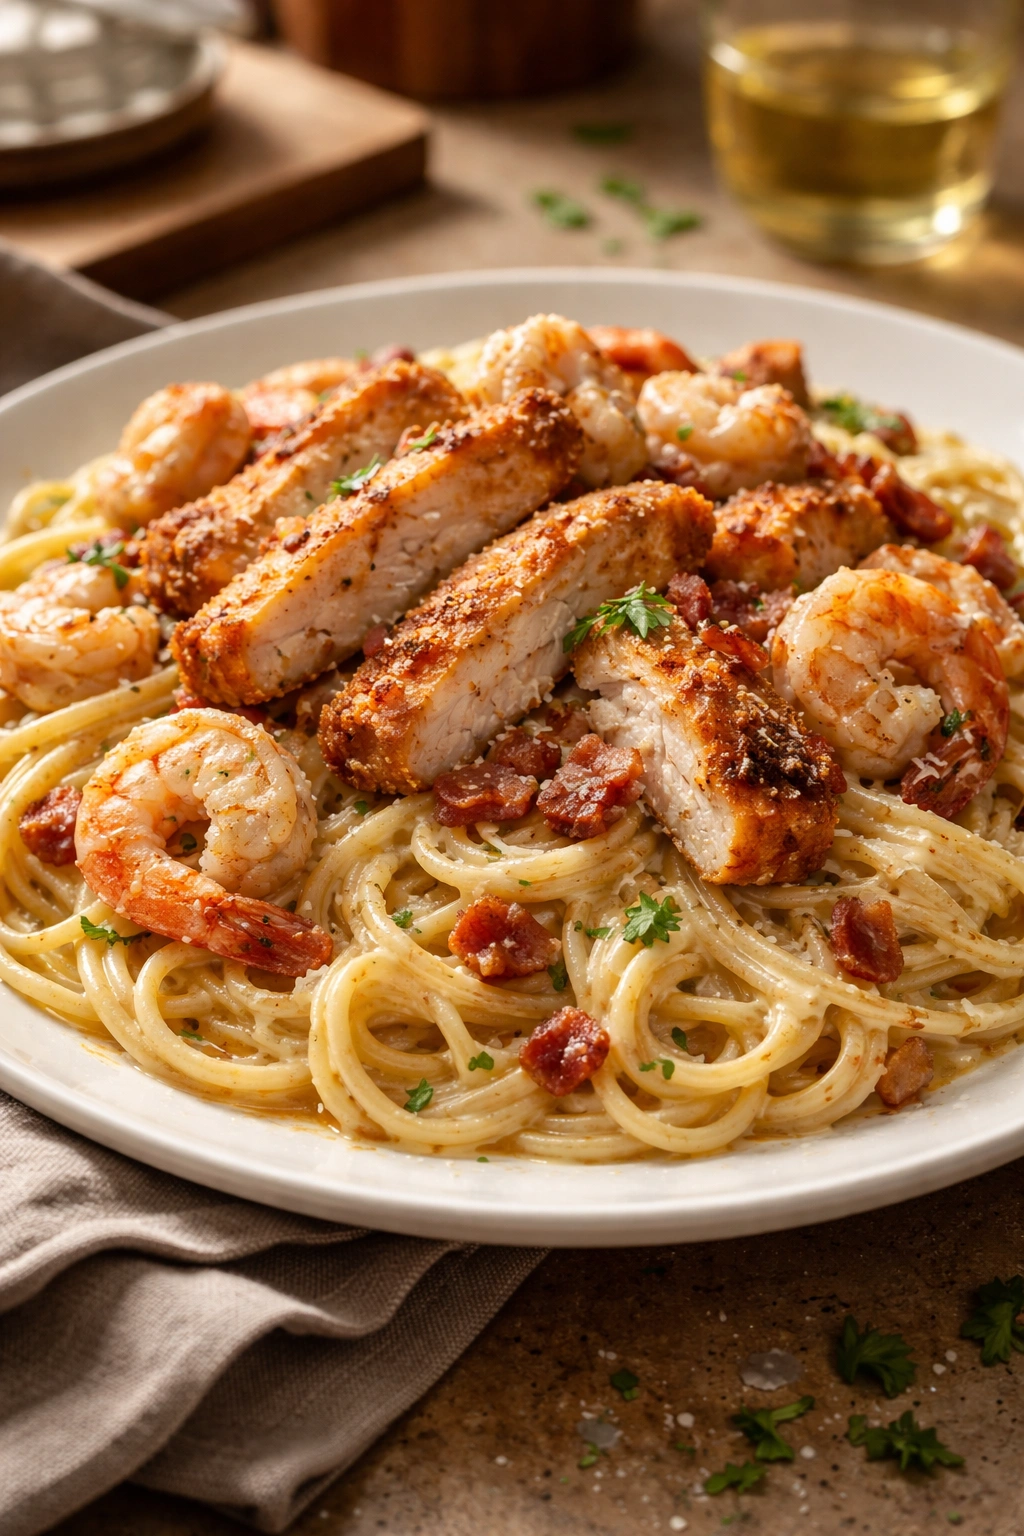
This pasta dish combines tender pasta, breaded chicken, bacon, shrimp, and a creamy sauce that’s luxurious without being heavy. The sauce clings perfectly to the pasta, and each component maintains its own texture and flavor while contributing to the whole.
Preparing Proteins for Success
Pound boneless chicken breasts to even thickness, season with salt and pepper, dredge in seasoned flour, then pan-fry in butter until golden and cooked through. Cut into bite-sized pieces and set aside. Cook bacon until crispy, crumble it, and reserve. Pat shrimp dry and season with salt, pepper, and garlic powder, then pan-fry in butter over medium-high heat until pink and cooked through, about 3 minutes total.
Making the Creamy Sauce
The sauce is a simple but elegant combination of butter, cream, and parmesan cheese. Melt butter in a large skillet, then add minced roasted garlic and cook briefly until fragrant. Add heavy cream and bring to a gentle simmer, then add grated parmesan cheese, stirring constantly until melted. Season with salt, white pepper, and a pinch of red pepper flakes. The sauce should be silky, not grainy, clinging to a spoon without being overly thick.
Bringing It All Together
Cook fettuccine or another long pasta according to package directions until just al dente, then drain, reserving about 1 cup of pasta water. Add the drained pasta to the cream sauce, tossing gently. The starchy pasta water helps the sauce coat evenly—add it a splash at a time until you reach the perfect consistency. Add the cooked chicken, bacon, and shrimp, tossing gently to combine. Taste and adjust seasoning, then plate immediately, garnishing with fresh parsley and additional parmesan.
Worth knowing: This dish is best served immediately after assembly. The residual heat keeps everything warm and the sauce maintains perfect consistency. Don’t let it sit, or the pasta will continue absorbing sauce and become overly thick.
Final Thoughts

Making restaurant recipes at home teaches you valuable skills while proving that restaurant food isn’t mysterious or impossible—it’s just food made with care and proper technique. Each of these dishes demonstrates that most restaurant magic comes from understanding fundamentals: using quality ingredients, taking time with preparation, and not rushing the cooking process.
The investment in recreating these dishes pays dividends beyond the initial meal. You’ll develop confidence in the kitchen, understand flavor combinations more deeply, and discover that your favorite restaurant meals are entirely within your reach. Start with the recipe that most excites you, follow the instructions carefully, and don’t hesitate to make small adjustments based on your preferences. The beauty of home cooking is the freedom to make these dishes exactly the way you love them, every single time.