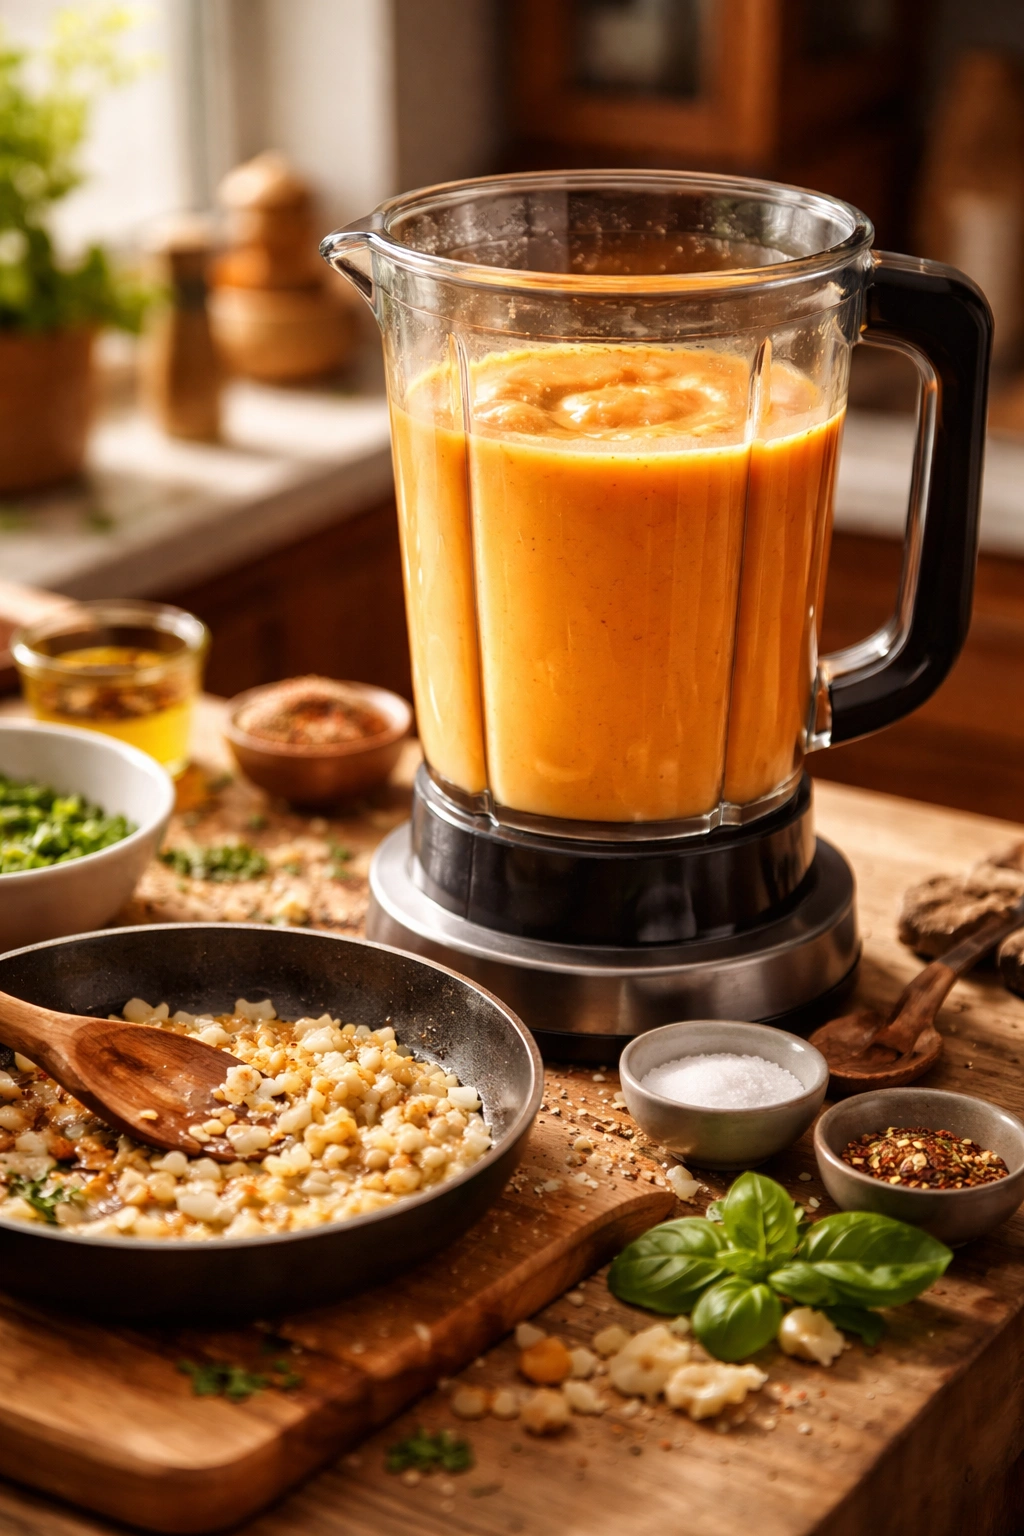
Making soup doesn’t have to mean spending hours hovering over a hot stove, stirring a massive pot and carefully monitoring temperatures. The truth is, some of the most delicious, silky-smooth soups come together in a blender in under fifteen minutes—with minimal cleanup and maximum flavor.
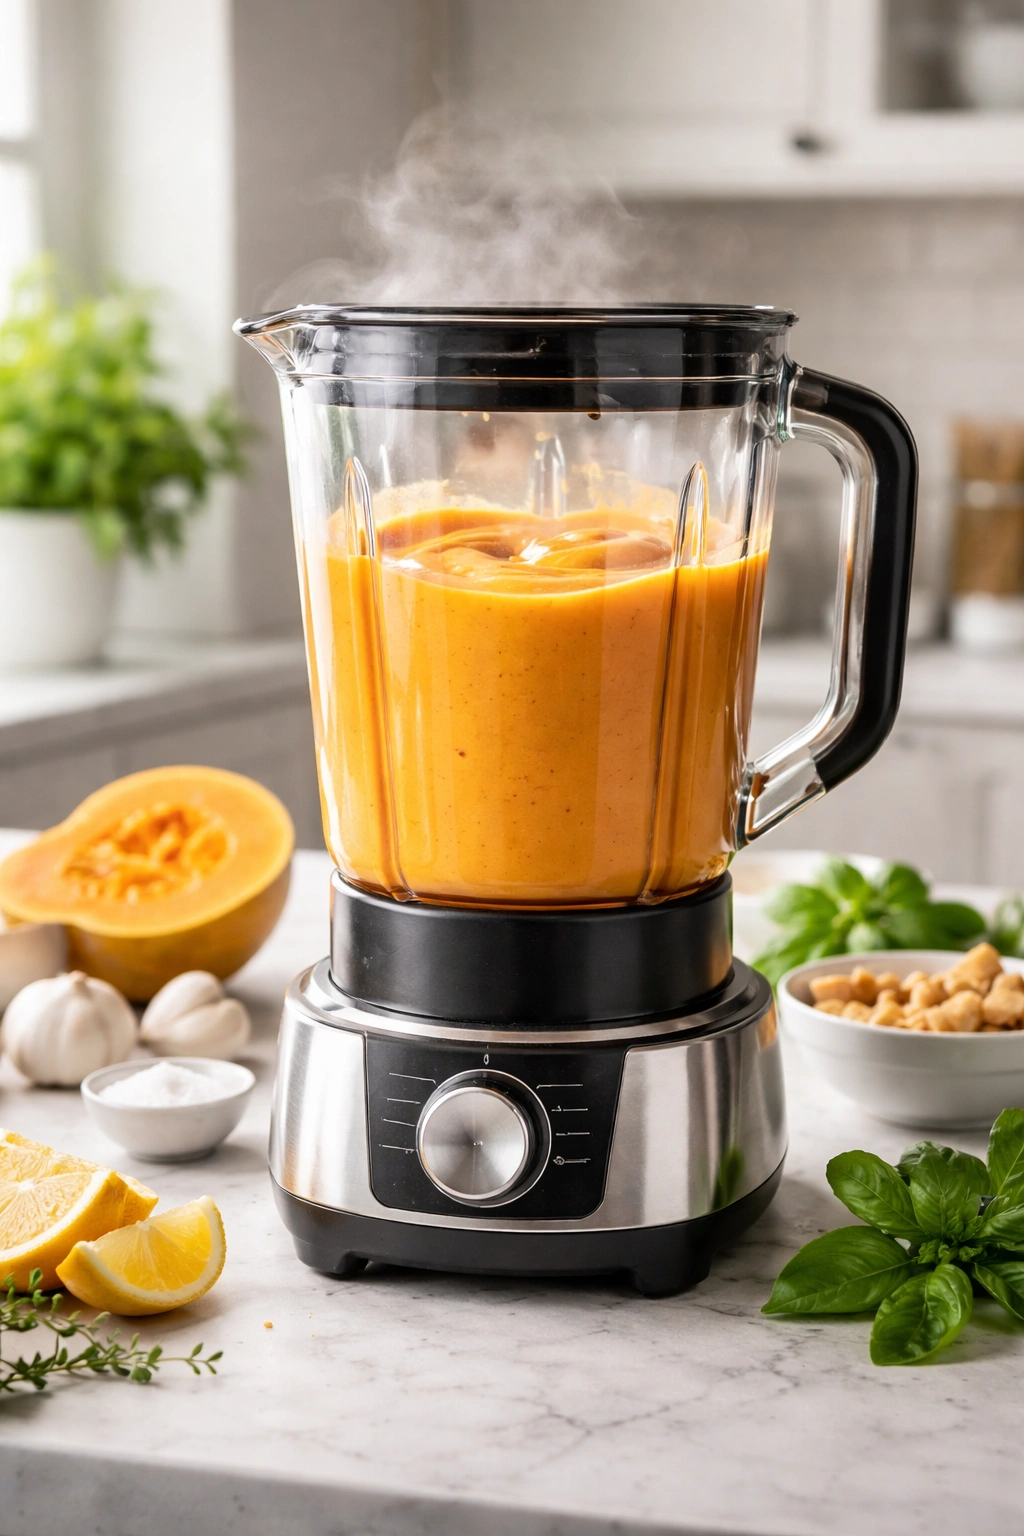
A blender is one of the most underrated soup-making tools in your kitchen. While most people associate blenders with smoothies and sauces, they’re actually powerhouses for creating restaurant-quality soups at home. The friction of the blades generates heat as they blend, meaning many high-powered blenders can actually cook and puree simultaneously. Even if your blender doesn’t have a dedicated soup setting, you can still make incredible soups by cooking ingredients on the stovetop briefly, then finishing them in the blender.
The beauty of blender soups lies in their simplicity. You take one exceptional seasonal ingredient—maybe roasted tomatoes, silky butternut squash, or fresh broccoli—combine it with some broth, add a handful of aromatics, blend until smooth, and you’ve transformed humble ingredients into something that tastes like it came from a professional kitchen. No immersion blender? No problem. No fancy equipment? Completely fine. Just grab whatever blender you have and let’s get cooking.
These five soups prove that you don’t need complicated techniques or endless ingredient lists to create something truly delicious. Each one comes together easily, tastes far better than canned alternatives, and stores beautifully for busy weeknights ahead.
1. Creamy Tomato Basil Soup
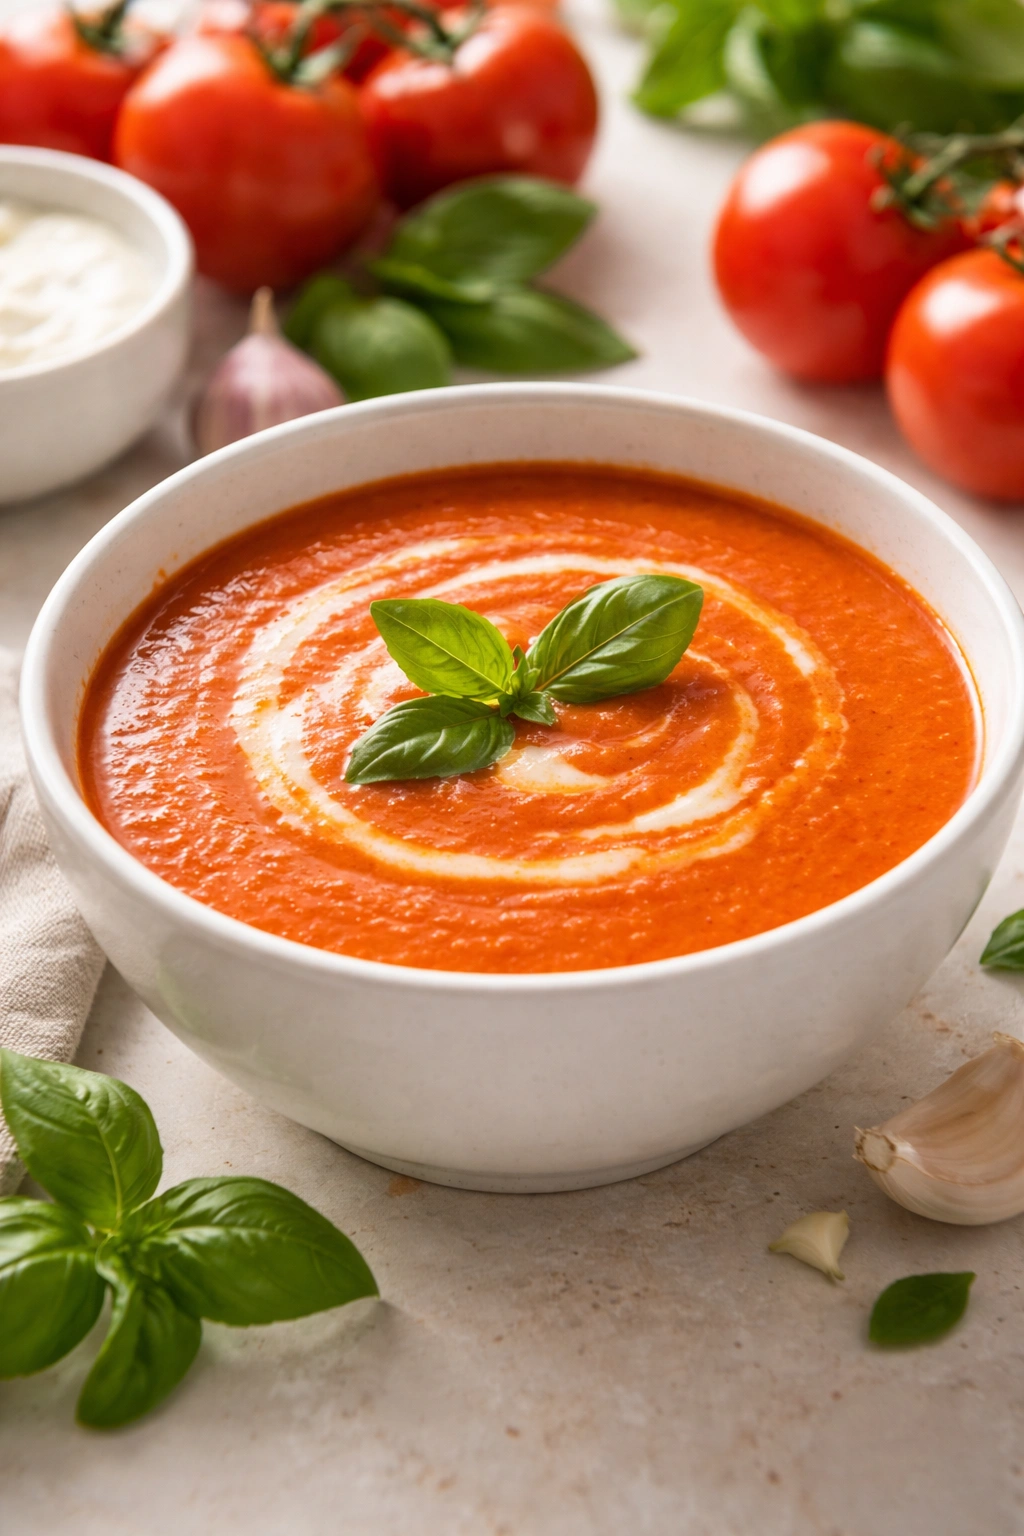
There’s a reason tomato soup is a classic—it’s the ultimate comfort food, and when you make it fresh, it’s light-years better than anything from a can. This version starts with a mix of fresh and canned tomatoes for maximum flavor, then gets pureed into silky oblivion with basil and a touch of cream.
The genius of making tomato soup in a blender is that you don’t need to spend an hour simmering. Fresh Roma tomatoes bring brightness, while canned tomatoes add concentrated sweetness and acidity. Sauté the aromatics—onions and garlic—until they’re soft and beginning to caramelize, then add your tomatoes along with vegetable broth. Let everything cook together for just ten minutes, and the flavors meld beautifully.
Why Fresh Basil Makes All the Difference
Fresh basil transforms this from a basic tomato soup into something special. Always add fresh herbs at the very end—they don’t need cooking time and will lose their brightness if blended too early. The peppery, aromatic quality of basil cuts through the richness of the tomatoes and any cream you add, creating a perfectly balanced bowl.
Building Depth With Better Ingredients
- Use San Marzano canned tomatoes if possible—they’re sweeter and less acidic than standard varieties
- Toast your basil briefly in the hot soup before blending if you prefer a slightly more muted flavor
- A pinch of sugar balances acidity without making the soup taste sweet
- Quality vegetable broth makes a noticeable difference in the final result
- A squeeze of fresh lemon juice brightens everything at the end
Pro tip: If your soup tastes too acidic, don’t reach for more sugar. Instead, add a splash of cream or a dab of butter—fat naturally masks acidic flavors and creates a more rounded taste.
2. Roasted Carrot and Ginger Soup
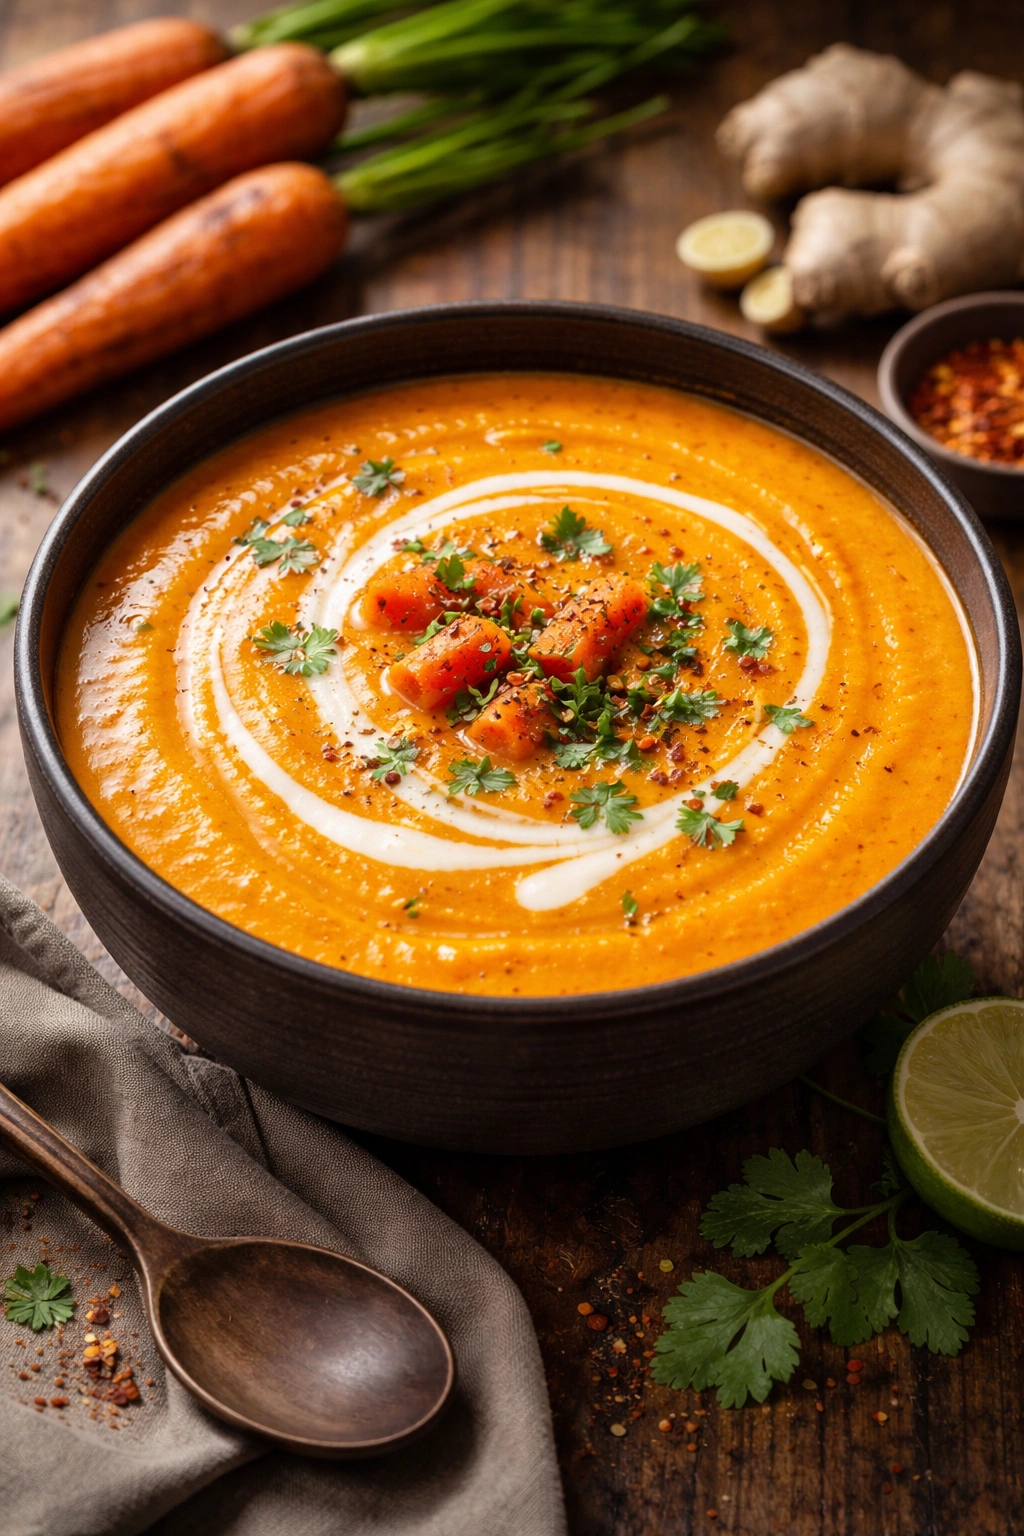
This soup is what happens when you let vegetables do the talking. Roasting carrots concentrates their natural sweetness, developing deep, complex flavors that simply boiling can’t achieve. Add fresh ginger, warming spices, and a touch of coconut milk, and you’ve got something that feels luxurious but comes together in under thirty minutes.
The roasting step is non-negotiable here. When carrots hit a hot oven, their sugars caramelize, creating an almost caramel-like depth. Pair that with the sharp, warming bite of fresh ginger, and your taste buds get a full experience. Unlike some soups that taste one-note, this one has multiple layers that unfold with each spoonful.
The Spice Foundation That Matters
Cumin and turmeric are the supporting players that make this soup remarkable. Cumin adds earthiness and warmth, while turmeric brings a subtle bitterness that prevents the soup from tasting cloying despite the carrots’ natural sweetness. These aren’t random additions—they’re the spices that appear in traditional carrot soups across multiple cuisines for good reason.
Customizing the Creaminess
- Full-fat coconut milk creates the richest texture, but coconut cream works too
- For a lighter version, use cashew cream or even oat milk
- A squeeze of fresh lime juice at the end brightens the spices beautifully
- Cilantro as a garnish echoes the warm spices and adds freshness
- A pinch of smoked paprika on top adds visual appeal and subtle depth
Worth knowing: If you don’t have fresh ginger, frozen works in a pinch—just use slightly less since freezing concentrates the flavor. Powdered ginger is drier and more concentrated, so measure carefully if substituting.
3. Butternut Squash Soup with Coconut

Butternut squash soup is practically synonymous with autumn comfort, but this version works beautifully year-round. Roasted squash becomes incredibly creamy when blended, and combining it with coconut milk creates a naturally smooth texture without needing heavy cream or butter.
The magic happens when you roast the squash until it’s deeply caramelized at the edges. This isn’t just about cooking—it’s about developing flavor. Roasting brings out the squash’s subtle nuttiness and complexity that would be lost if you simply boiled it. When you blend roasted squash with minimal other ingredients, you’re letting the vegetable be the star.
Building Richness Without Dairy
Coconut milk is your secret weapon here. Full-fat coconut milk creates a luxurious mouthfeel that rivals cream, but it brings its own subtle sweetness and depth. The coconut flavor is gentle enough that it doesn’t compete with the squash—instead, it amplifies the creamy texture and adds sophistication.
Flavor Additions That Elevate the Base
- Fresh sage or thyme during cooking adds savory notes that balance sweetness
- A pinch of nutmeg and cinnamon bring warmth without being obvious
- Apple adds subtle sweetness and complexity if your squash needs it
- Onion and garlic, caramelized first, create a savory foundation
- Sea salt and cracked black pepper are essential for bringing everything into focus
Insider note: Make a double batch and freeze it in portions. Butternut squash soup actually improves slightly over time as flavors meld, and having it on hand means you’ve got an elegant dinner ready whenever you need it.
4. Broccoli and White Bean Soup

This soup proves that vegetable-forward meals don’t have to feel light or insubstantial. White beans add protein and creaminess without any dairy, making the soup hearty enough to stand alone as a complete meal. The broccoli brings earthiness and nutrition, while the beans create the smooth, velvety texture you want in a blended soup.
The technique here is slightly different from simple vegetable purees. You’re cooking the broccoli and beans together in flavorful broth, then blending everything until silky. Some of the broccoli florets can be reserved and added back for texture—this gives you the best of both worlds, a smooth base with pleasant little pockets of vegetable throughout.
Why White Beans Are Better Than Cream
Canned cannellini beans are one of the most underrated soup ingredients available. When you blend white beans with broth, they create a naturally creamy texture that’s indistinguishable from cream-based soups. They’re also packed with fiber and protein, making the soup genuinely nourishing rather than just comforting.
Creating Flavor Depth in a Simple Soup
- Garlic and onion, cooked until golden, create the flavor foundation
- A bay leaf simmered with the broth adds subtle herbaceousness
- Lemon juice at the end brightens the earthy flavors
- Nutritional yeast (optional) adds a subtle cheesy note
- Crusty bread or homemade croutons transform the soup into a complete meal
Pro tip: Reserve some whole broccoli florets before blending, then add them back to the finished soup for texture. This prevents the soup from feeling too smooth and one-dimensional, and it’s a visual trick that makes the soup feel more substantial.
5. Cold Gazpacho for Warm Days
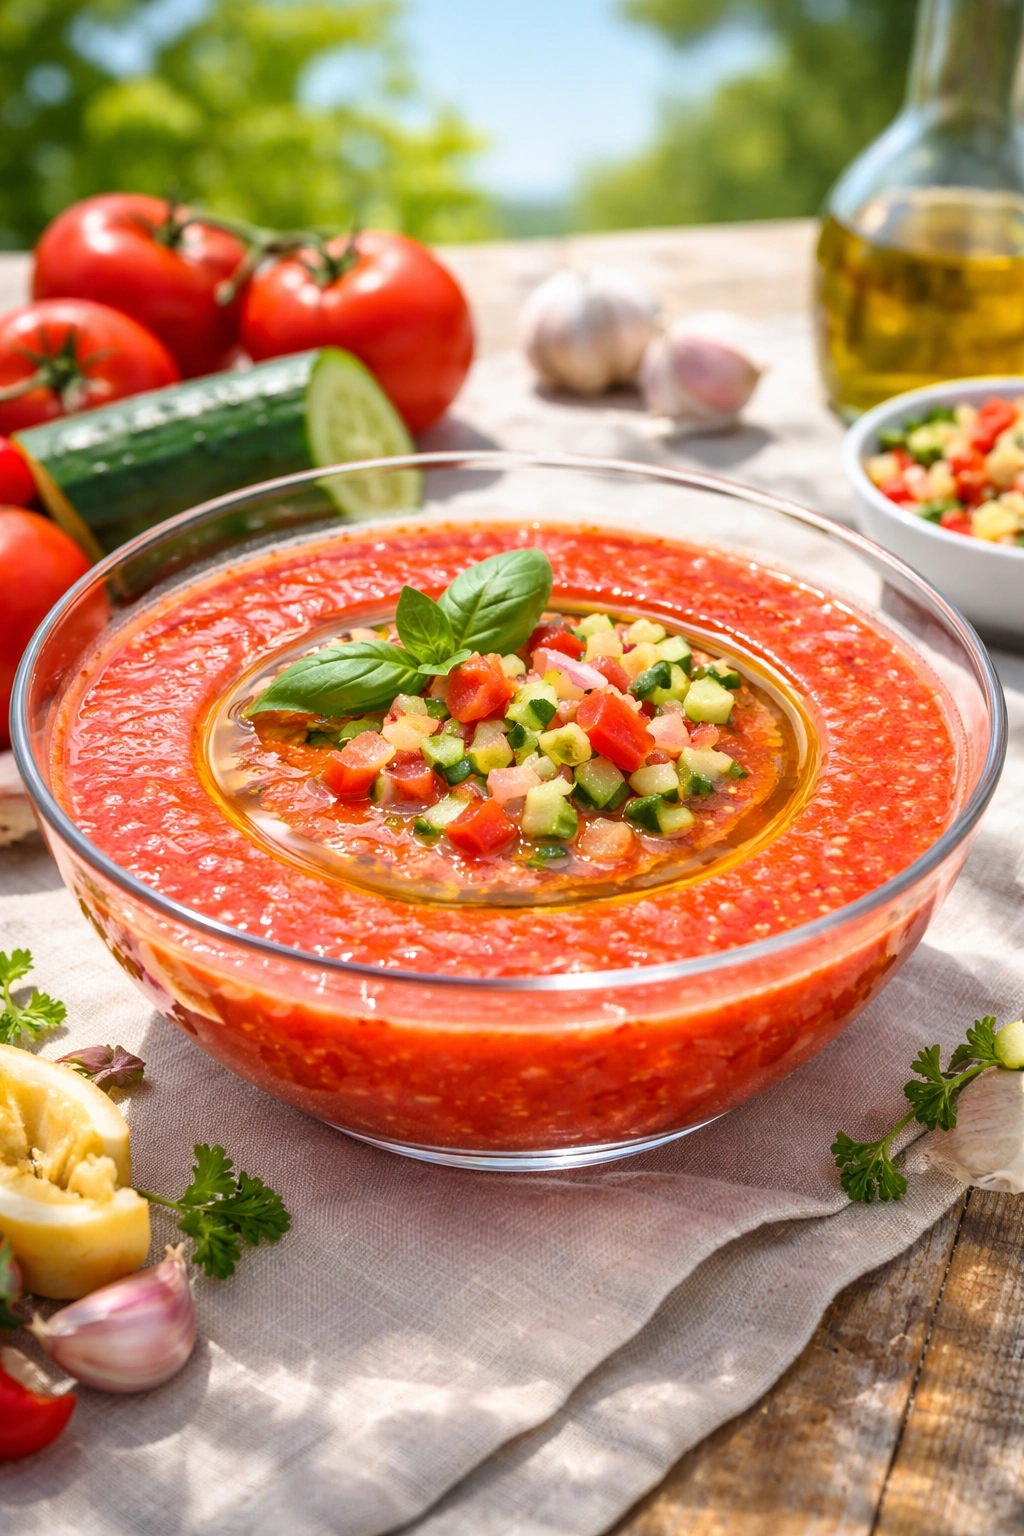
Not all blender soups are hot—sometimes the best version involves no cooking at all. Gazpacho is a Spanish chilled soup that’s basically blended raw vegetables, making it perfect for a blender and perfect for those days when you want something refreshing rather than warming.
Traditional gazpacho relies on quality tomatoes, olive oil, vinegar, and nothing much else. The beauty is that you’re not cooking anything, so every ingredient’s flavor comes through clearly. This means using the ripest, most flavorful tomatoes you can find, good quality olive oil, and real vinegar—shortcuts won’t work here since there’s nowhere for inferior ingredients to hide.
The Art of Raw Vegetable Blending
Raw vegetables blend differently than cooked ones. They’re firmer and don’t break down as easily, so your blender needs to do more work. A high-powered blender handles this beautifully, but even a standard blender can manage if you add the liquid gradually, allowing each batch of solids to incorporate before adding more.
Customizing Your Gazpacho
- Roasted red peppers add sweetness and depth to the tomato base
- Cucumber brings freshness and lightens the overall feel
- Jalapeño adds heat for those who want a kick
- A touch of honey balances acidity (optional, depending on tomato quality)
- Sherry vinegar is more complex than regular vinegar and worth seeking out
- Garnish with crispy croutons, diced vegetables, or a drizzle of olive oil
Worth knowing: Gazpacho tastes better the next day after flavors have had time to meld. Make it in the morning for an even better dinner-time payoff. It keeps refrigerated for up to four days, making it ideal for meal prep.
How to Master Blender Soup Techniques
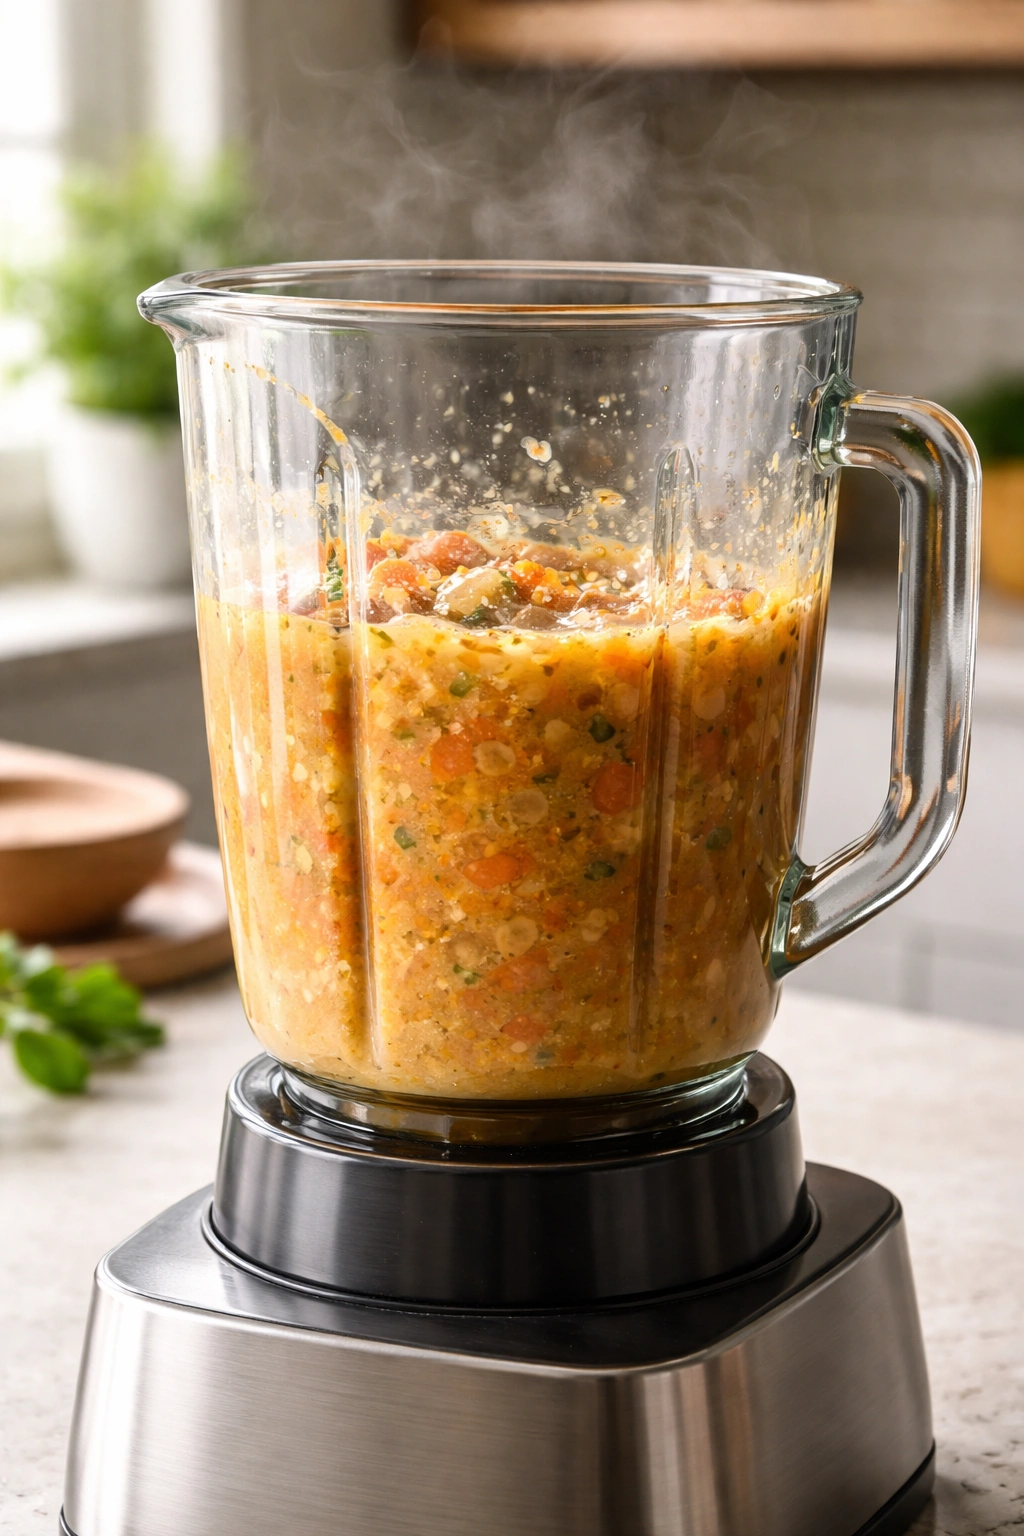
The key to making exceptional soups in a blender is understanding that the appliance isn’t just a mixing tool—it’s a heat-generating cooking device if you’re using a high-powered model, or a finishing tool if you’re using a standard blender. Either way, technique matters.
With a high-powered blender like a Vitamix or Blendtec, you can literally cook soup through friction. The blades move so fast they generate enough heat to bring ingredients from room temperature to steaming hot in just six to eight minutes. This is remarkable if you have one, but it’s not necessary for making great soup.
Working in Batches for Perfect Texture
Never fill your blender more than halfway with hot soup—this is a safety issue. Steam needs room to escape, and overfilled blenders can cause the lid to pop off spectacularly. If you’re making a large quantity, blend in batches and keep the finished soup warm in a pot.
The Liquid-to-Solid Ratio Matters
Too much liquid and your soup becomes broth. Too little and you’re making something closer to a spread. The ideal ratio depends on your preference and the vegetables you’re using, but generally aim for a consistency that coats the back of a spoon. You can always add more liquid afterward, but you can’t remove it.
Temperature Control Is Your Friend
If you’re using a regular blender, let your soup cool for a few minutes after cooking before blending. Hot liquid can be dangerous, and frankly, slightly cooler soup blends more effectively. If you’re using a high-powered blender’s soup setting, follow the manufacturer’s instructions—they’ve engineered it for safety.
Essential Tips for Perfect Blender Soups
Making soup in a blender is simple, but these details make the difference between good soup and soup that tastes professionally made. They’re the kinds of things you only learn from making soups repeatedly, so take advantage of this hard-won knowledge.
Start your aromatics—usually onions and garlic—with a fat like olive oil, butter, or coconut oil. This develops flavor through caramelization rather than steaming. Give yourself at least five to seven minutes for this step; don’t rush it. The deeper color and more complex flavor you develop here will carry through the entire soup.
The Importance of Seasoning in Stages
Season as you go, not all at once at the end. Add a pinch of salt to the onions while they cook—this draws out moisture and speeds up the caramelization. Add more salt to the broth mixture, and then taste and adjust one final time before serving. This method prevents the awkward situation where your soup needs too much salt to taste right.
Using Fresh vs. Dried Herbs Correctly
Dried herbs go into the pot during cooking—they need time to hydrate and release flavor. Fresh herbs go in at the very end, added to the pot after blending or scattered on top as garnish. They’re delicate and lose their brightness if exposed to heat or blending.
The Secret Ingredient in Savory Soups
A small splash of acid—lemon juice, lime juice, or vinegar—added at the very end transforms a soup that tastes flat into one that tastes bright and complete. This isn’t about making the soup sour; it’s about sharpening all the flavors and making them pop. Start with a squeeze or splash, taste, and adjust from there.
Common Mistakes to Avoid
Even with good ingredients and the best intentions, a few common errors can derail an otherwise excellent soup. Most of these are easy to prevent once you know what to watch for.
The biggest mistake is overblending. Unlike smoothies where you want everything completely liquefied, soups often benefit from a little texture. You want creamy, not baby-food consistency. Blend until silky but still full-bodied, then stop. If you’ve over-blended, there’s no fix, so err on the side of slightly less blending rather than more.
Blending Hot Soup Recklessly
This is the safety issue that bears repeating. Hot soup expands when blended due to the friction generating even more heat and steam. Lids pop, liquid escapes, and people get burned. Always blend in small batches, never fill past halfway, and keep a kitchen towel handy to hold the lid secure while blending.
Forgetting to Taste and Adjust
Your soup will taste different at serving temperature than it did right after cooking. Flavors mute slightly as things cool. Conversely, salt and spices intensify as the soup sits. Always taste before serving and adjust seasoning accordingly—a final pinch of salt or squeeze of lemon often makes all the difference.
Ignoring the Cooking Time for Vegetables
Some vegetables need more time to soften than others. Butternut squash and root vegetables take longer than leafy greens or soft squashes. Don’t skimp on the cooking or simmering time, or you’ll be blending partially cooked vegetables, which creates a grainy rather than silky texture.
Storing and Freezing Your Blender Soups
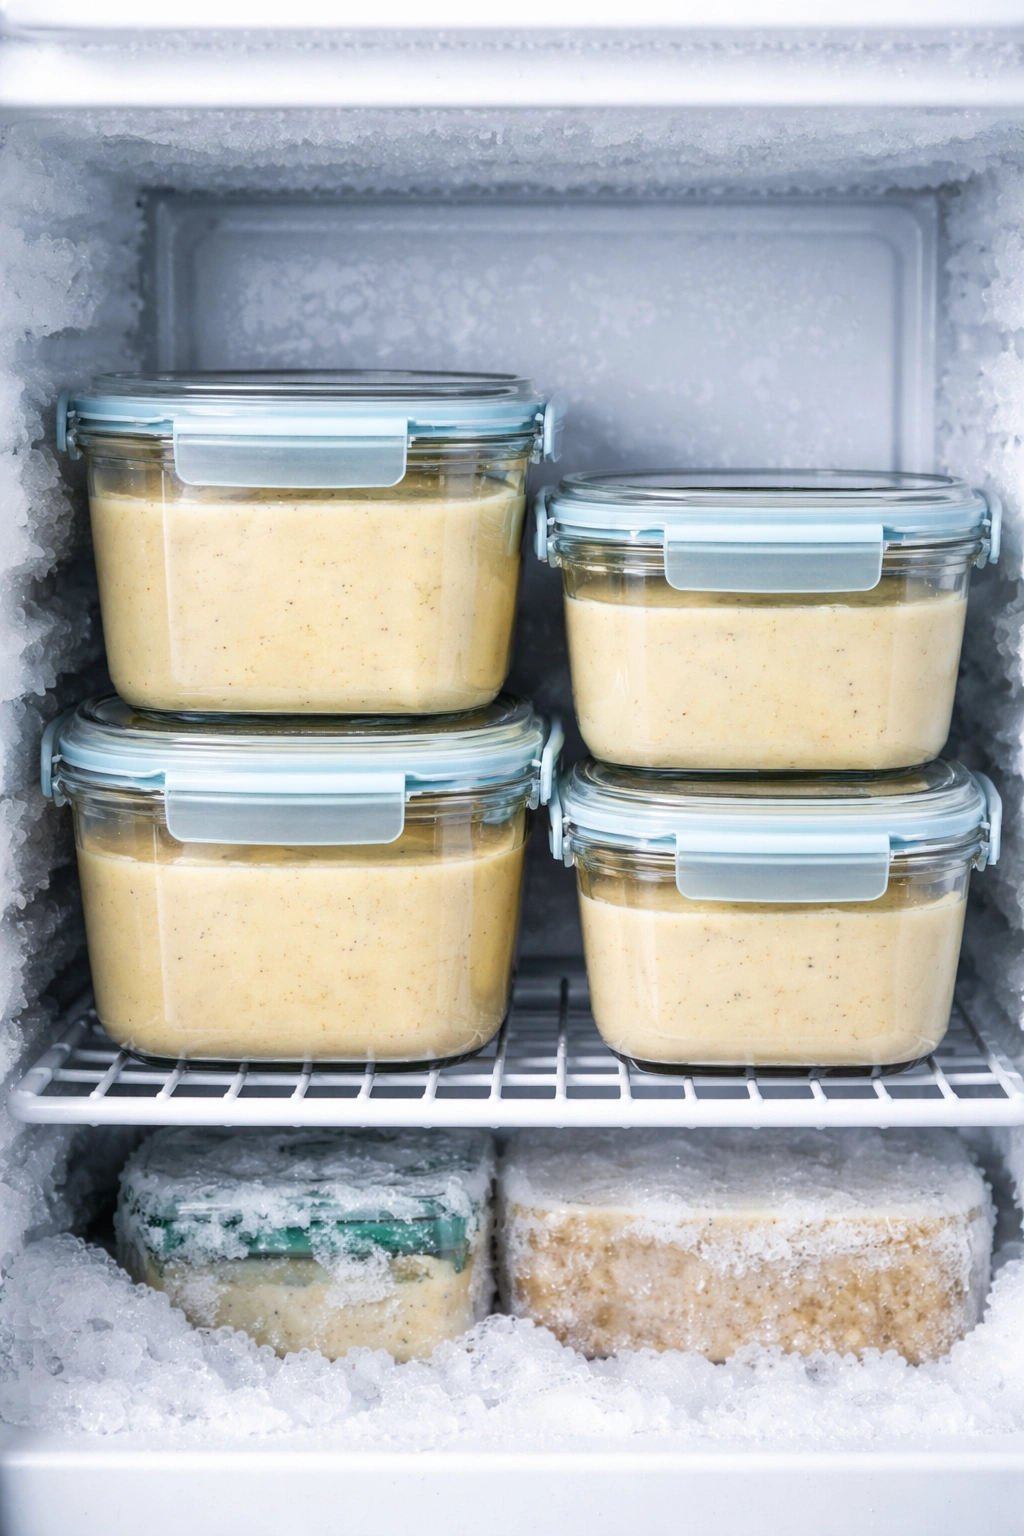
One of the greatest gifts you can give your future self is a freezer stocked with homemade soups. Most blended soups freeze beautifully for up to three months, and many actually improve as flavors meld over time. Knowing how to store them properly ensures you’ve always got a backup dinner plan.
Cool your soup completely before freezing—this prevents condensation and ice crystal formation. Transfer it to freezer-safe containers, leaving about an inch of headspace for expansion. Label each container with the soup type and the date you made it. Most soups thaw and reheat beautifully on the stovetop over medium-low heat, or in the microwave in a pinch.
Refrigerator Storage Basics
In the refrigerator, most soups keep for four to five days in airtight containers. Soups with dairy cream typically keep a bit less time than broth-based versions. If you notice any off smell or appearance, don’t take chances—discard it. Proper storage prevents foodborne illness and waste.
The Freezing Advantage for Meal Prep
Making a double or triple batch of soup takes only slightly longer than making a single batch. You’ve already done the chopping, cooking, and blending—why not make extra? Freezing portions in individual containers means that on nights when you’re exhausted, dinner is literally just a thaw-and-heat-away. This is one of the easiest ways to ensure you’re eating well even during chaotic weeks.
Thawing and Reheating Best Practices
Thaw soups in the refrigerator overnight if you’re planning ahead, or use the microwave defrost setting if you’re short on time. Reheat gently on the stovetop, stirring occasionally to ensure even heating. If the soup seems thicker after freezing, add a splash of broth or water to restore the original consistency. Avoid high heat, which can scorch the bottom and concentrate flavors unpleasantly.
Final Thoughts

Blender soups represent one of the easiest paths to restaurant-quality meals at home. They require minimal equipment—just a blender and a pot—yet deliver maximum flavor and satisfaction. Whether you’re making a creamy tomato soup on a Tuesday night or serving gazpacho at a summer dinner party, the basic technique remains the same: cook your ingredients until soft, blend until silky, taste and adjust, then serve.
The five soups outlined here are just the beginning. Once you understand the fundamental approach, you can apply it to virtually any vegetable. Roasted cauliflower, fresh asparagus, canned white beans, roasted poblano peppers—all of them become sublime when blended with the right broth, aromatics, and seasonings.
The real gift of learning to make blender soups is that you’ve unlocked the ability to transform whatever vegetables you have on hand into something delicious. That box of broccoli starting to wilt? Soup. Those carrots getting soft? Soup. The reality is that blender soups are forgiving, quick, and far more impressive than the effort they require. Start with one of these five, master the technique, and soon you’ll be improvising your own variations, discovering flavors you didn’t know were possible in something so simple.