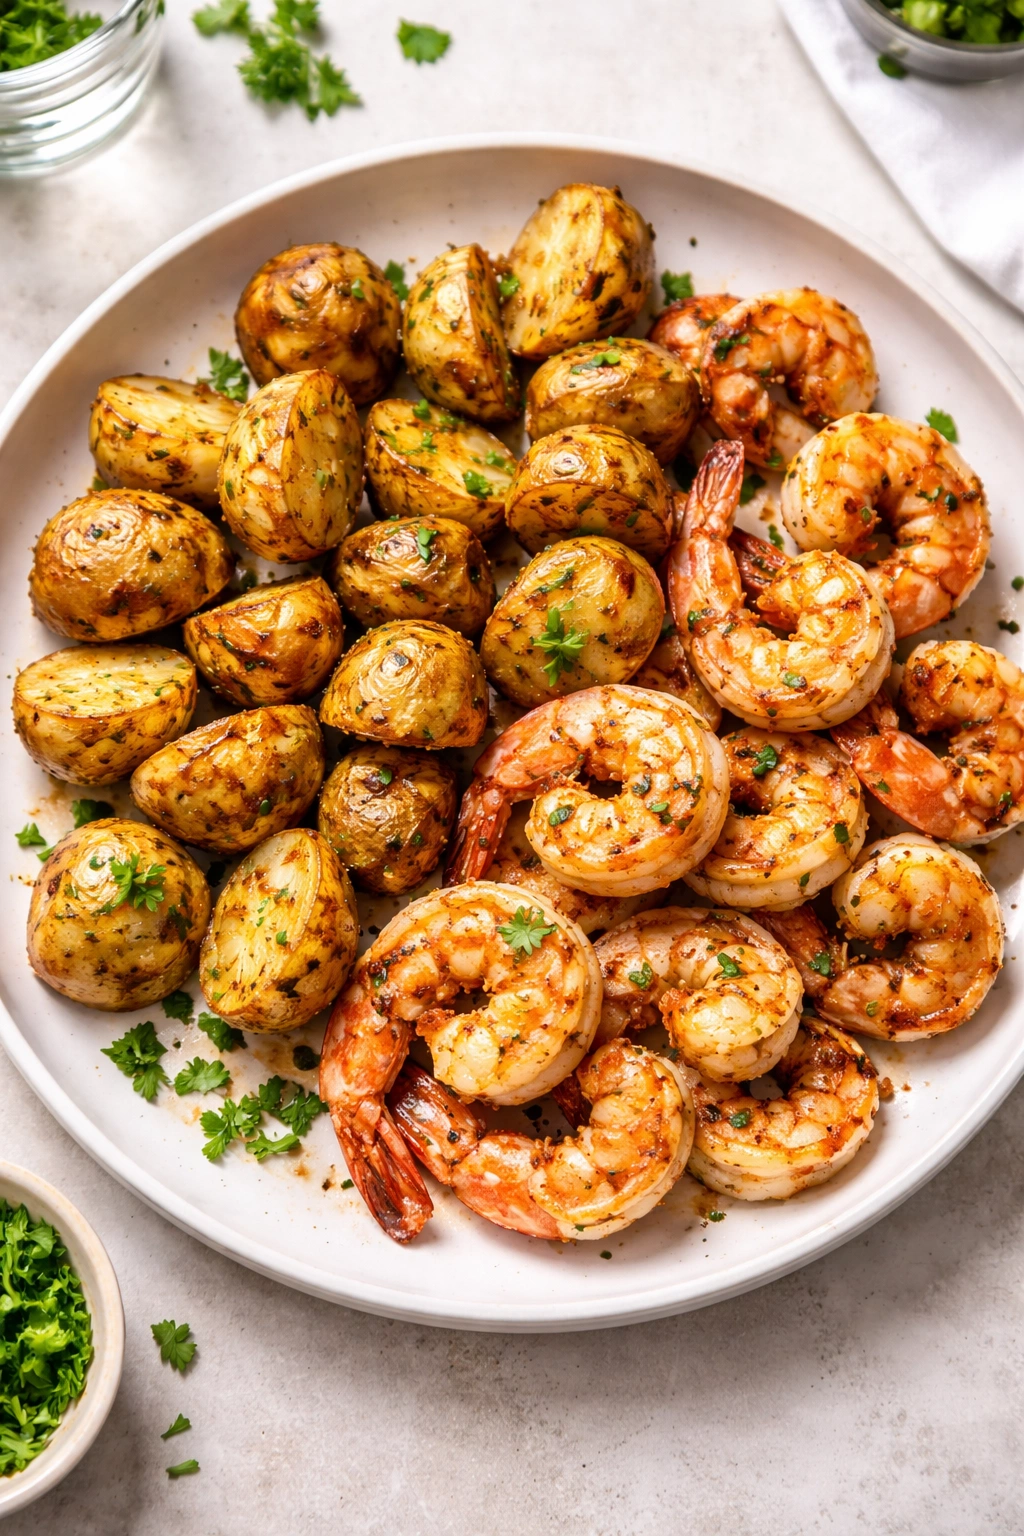
There’s something deeply satisfying about putting a complete dinner on the table in under 20 minutes without heating up your entire kitchen. Air fryer shrimp and potatoes delivers exactly that—a restaurant-quality meal that feels effortless to pull together, yet tastes like you’ve spent way more time than you actually have.
The magic here isn’t complicated. Shrimp cooks faster than almost any protein you can buy, hitting that sweet spot between raw and rubbery in about 5 to 8 minutes. Potatoes, when cut small enough, become tender and crispy-edged at the same temperature, meaning you’re not juggling multiple pans or staggered cooking times. Everything arrives at your table golden, buttery, and ready to eat simultaneously.
I’ve tested this recipe dozens of ways—different potato sizes, varying air fryer temperatures, multiple seasoning approaches. What consistently works is respecting the timing differences between ingredients. This means getting your potatoes started first, then adding shrimp strategically so nothing overcooks. It’s straightforward enough for a weeknight, flexible enough to accommodate whatever’s in your pantry, and genuinely impressive when you need to feed guests something quick that doesn’t taste quick.
Beyond the ease, air-fried shrimp simply tastes better than boiled or pan-fried versions in many ways. The circulating hot air creates a delicate exterior while keeping the interior impossibly tender. The potatoes caramelize at the edges without drying out. You’re using minimal oil compared to traditional frying, which means the shrimp’s natural sweetness shines without the heavy, greasy feeling you get from deep frying.
Why This Recipe Works
This isn’t just another shrimp dinner—it works because it solves real cooking problems. Most people either overcook shrimp into rubbery sadness or undercook it entirely. The air fryer’s consistent, circulating heat prevents both mistakes by cooking shrimp evenly from all angles in less time than it takes to scroll through your phone.
The potato component makes this a genuine complete meal rather than a protein with a side dish you have to conjure separately. When you cut baby potatoes into halves or quarters, they cook to fork-tender in roughly the same window as the shrimp, eliminating the frustration of components finishing at different times. You’re not standing there juggling timing or serving lukewarm potatoes while waiting for protein to finish.
Temperature matters immensely here. At 380 to 400°F, you’re hot enough to create that golden, slightly crispy exterior on potatoes while staying cool enough that shrimp won’t toughen in the extra 60 seconds it takes to finish cooking. Most air fryer shrimp recipes that fail are running too hot or too long. This approach walks that line precisely.
Understanding Air Fryer Cooking for Seafood
Air fryers function as compact convection ovens, circulating intensely hot air at high speed around whatever you’re cooking. This approach works exceptionally well for delicate proteins like shrimp because there’s no standing liquid (like in boiling) to leech flavor, and there’s no direct heat scorching the exterior before the interior cooks through.
The Maillard reaction—that chemical process that creates browning and complex flavor—happens faster at higher temperatures. Your air fryer creates that appealing golden exterior on potatoes while keeping the inside creamy, something boiling simply cannot achieve. Shrimp benefits from this same principle: the exterior develops that slightly caramelized quality that makes it taste noticeably better than steamed shrimp.
One critical difference from traditional cooking is that air fryer baskets have limited capacity. You can’t simply double this recipe and dump everything in. The air needs space to circulate around each piece of shrimp and potato, or you’ll end up with some pieces cooked perfectly and others barely warmed through. This isn’t a limitation if you respect it—it’s actually a feature that guarantees success if you avoid overcrowding.
How to Choose the Right Shrimp
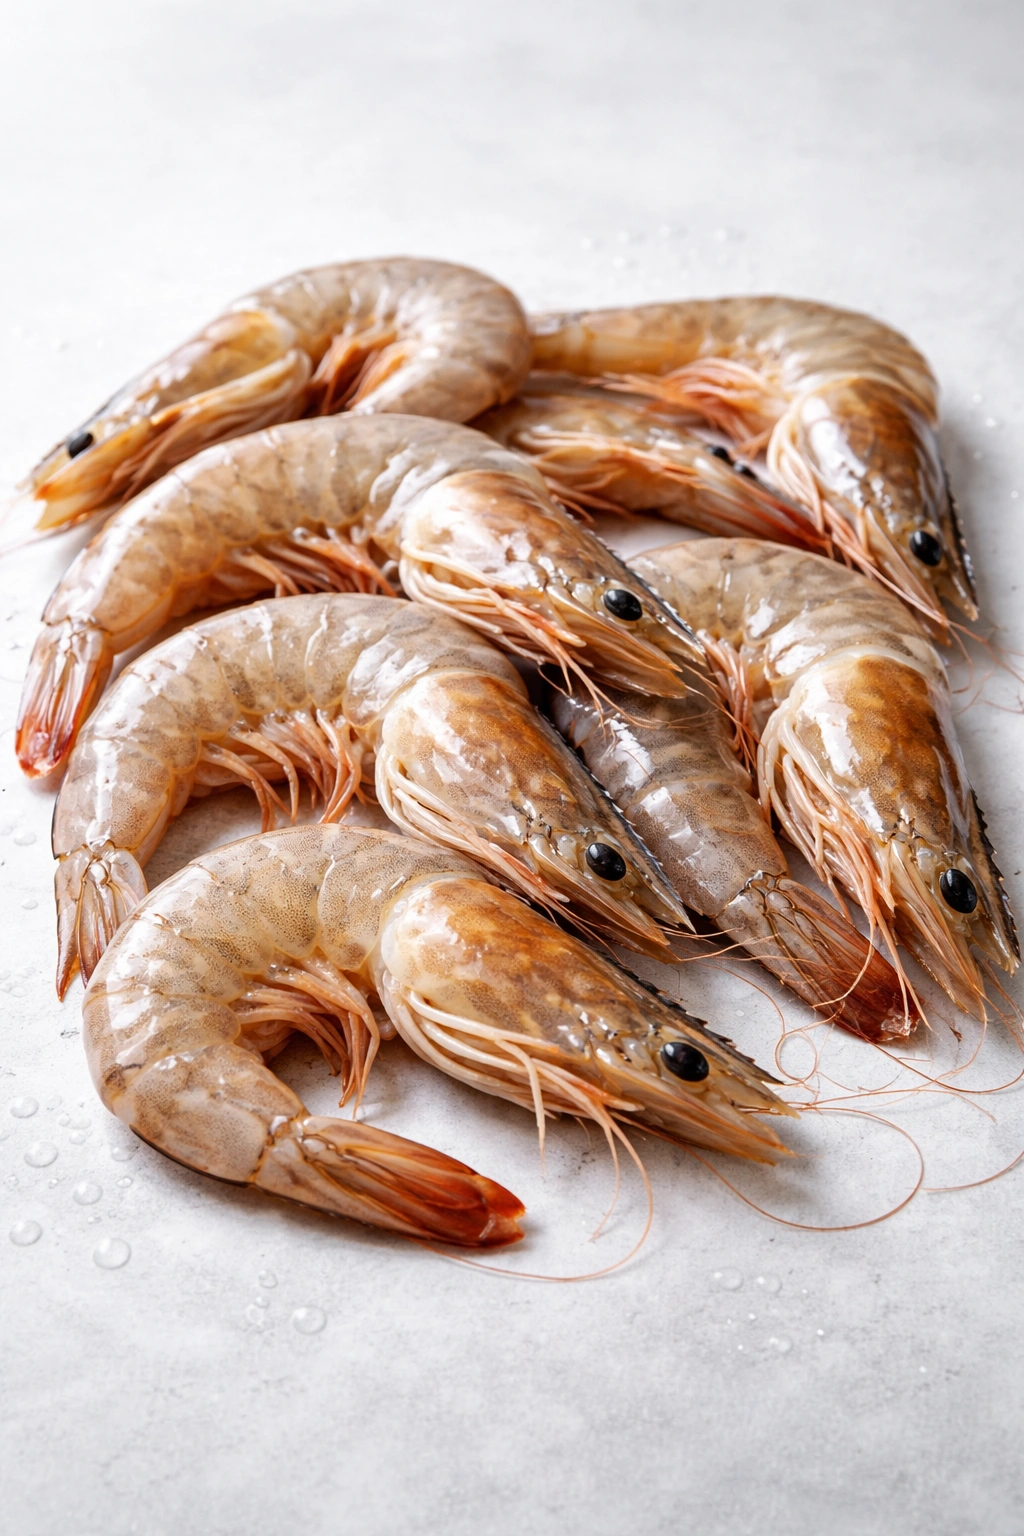
The quality difference between mediocre shrimp and excellent shrimp is night and day, and choosing correctly is your most important step. You want large or jumbo shrimp (16 to 20 count per pound, or 10 to 15 count for truly jumbo). Smaller shrimp cook so quickly that they’re nearly impossible to time correctly—they’ll cook in 4 minutes if you’re not watching closely, and by 5 minutes they’re overdone.
Buy frozen shrimp when possible, which contradicts what most people assume. Most shrimp sold as “fresh” at grocery stores are actually previously frozen and thawed, so you’re paying a premium for unknown thaw timing. Individually quick-frozen (IQF) shrimp are frozen at peak freshness and can sit in your freezer for months without quality loss. Thawing frozen shrimp takes just 5 to 10 minutes under cold running water—not a meaningful inconvenience for dramatically better results.
Look for shell-on shrimp if your grocery store carries them. The shell protects the delicate flesh during handling and storage, which means you’re getting less damaged meat. Yes, you’ll peel and devein them yourself, but this takes maybe 3 minutes with a sharp paring knife, and the quality difference is absolutely worth it. If peeling feels tedious, ask the seafood counter staff to do it for you—most are happy to oblige.
Avoid pre-cooked shrimp for this recipe. They’ll reheat unevenly and turn rubbery easily. You want raw shrimp that you’re cooking fresh. Make sure they’re genuinely deveined (that dark line running down the back is the digestive tract, and it tastes bitter if you miss it), and pat them completely dry with paper towels before cooking. Moisture prevents browning and causes uneven cooking.
Selecting and Preparing Potatoes
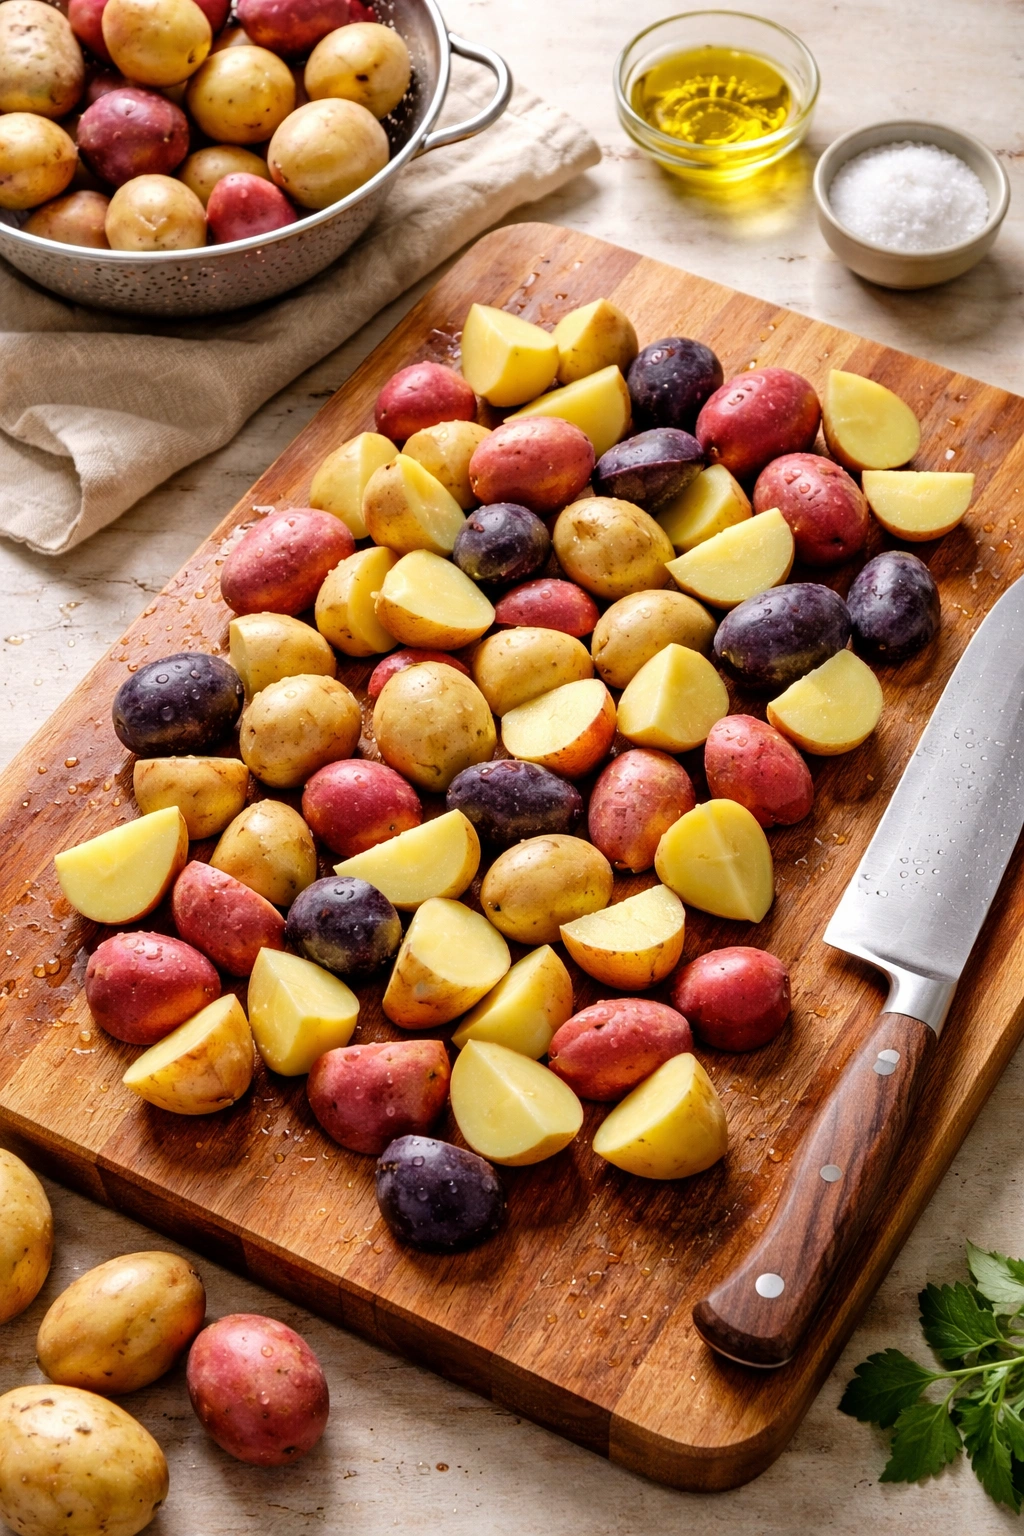
Baby potatoes are your best friend here—specifically the waxy varieties like red potatoes or gold potatoes rather than starchy russets. Waxy potatoes hold their shape when cut and cooked, whereas russets tend to fall apart. They’re also more forgiving if you accidentally cook them slightly longer than planned.
Cut your potatoes into halves or quarters depending on their starting size. You’re aiming for pieces roughly the size of a plum—large enough that they don’t cook to oblivion in the 12 to 14 minutes they spend in the air fryer, but small enough that the interior cooks through before the exterior burns. Uneven-sized potato pieces mean uneven cooking, so try to make them fairly uniform.
Pat the cut potatoes completely dry before seasoning and air frying. Any excess moisture on the surface interferes with browning and creates steaming instead of crisping. Use a clean kitchen towel or paper towels and get them genuinely dry. Then toss with oil and seasonings immediately so the coating sticks while the surface is still slightly tacky.
If you prefer, you can partially cook potatoes in boiling water for 5 to 8 minutes before air frying. This guarantees they’ll be tender inside, though it adds prep time. For truly tender potatoes in the finished dish, this pre-cooking step is worth it, especially if you prefer fully cooked potatoes over ones with a firm interior.
Essential Equipment and Prep
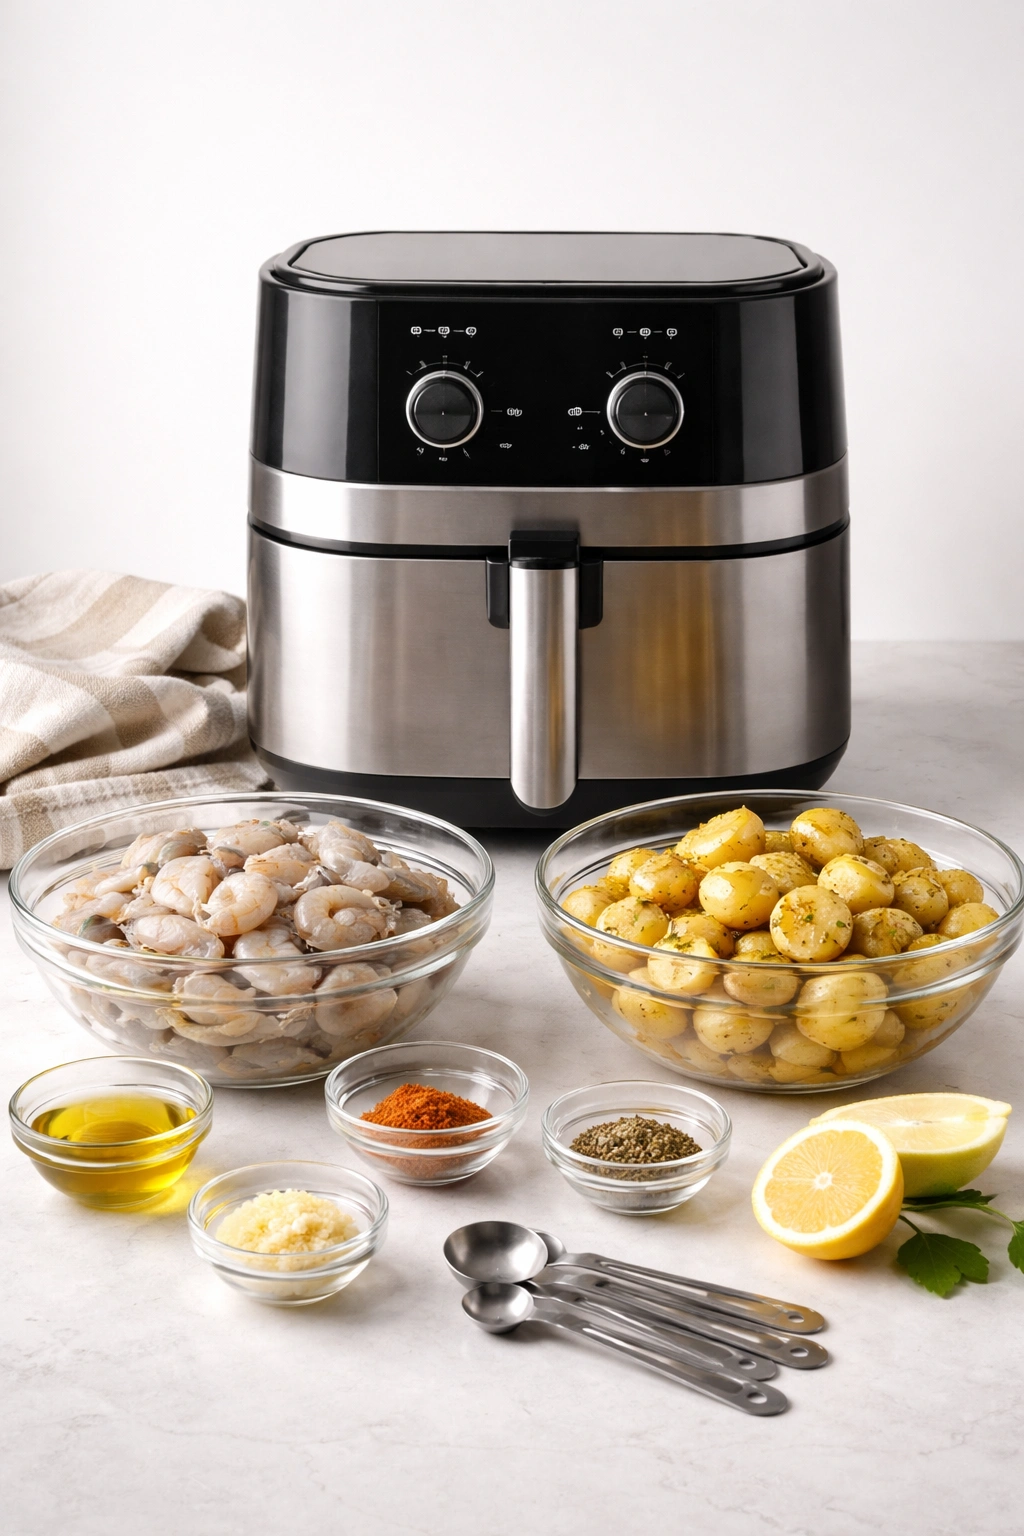
You’ll need an air fryer (obviously), a mixing bowl for tossing potatoes and shrimp with seasonings, paper towels for drying, and a sharp paring knife if you’re peeling and deveining shrimp yourself. A small bowl for mixing your butter or oil with seasonings keeps things organized and prevents accidentally overseasoning one component.
Parchment paper or silicone liners are entirely optional, but they make cleanup dramatically easier and prevent sticking on certain air fryer models. If using parchment, poke several holes in it so air still circulates around the food—solid parchment defeats the purpose of air frying. Skip parchment if your air fryer has a nonstick basket.
Measuring spoons matter more here than in many recipes because seasoning balance is crucial. A pinch of Old Bay is noticeably different from a quarter teaspoon. Having everything measured and ready before you start cooking keeps the process smooth and prevents last-minute scrambling.
Serving and Timing Information
Yield: Serves 2 to 3 (can easily be doubled and cooked in batches)
Prep Time: 10 minutes (includes peeling and deveining shrimp if doing it yourself)
Cook Time: 14 to 16 minutes (potatoes first, then shrimp added partway through)
Total Time: 24 to 26 minutes
Difficulty: Beginner — The steps are straightforward, timing is forgiving, and there’s minimal active cooking required. Even first-time air fryer users will succeed here.
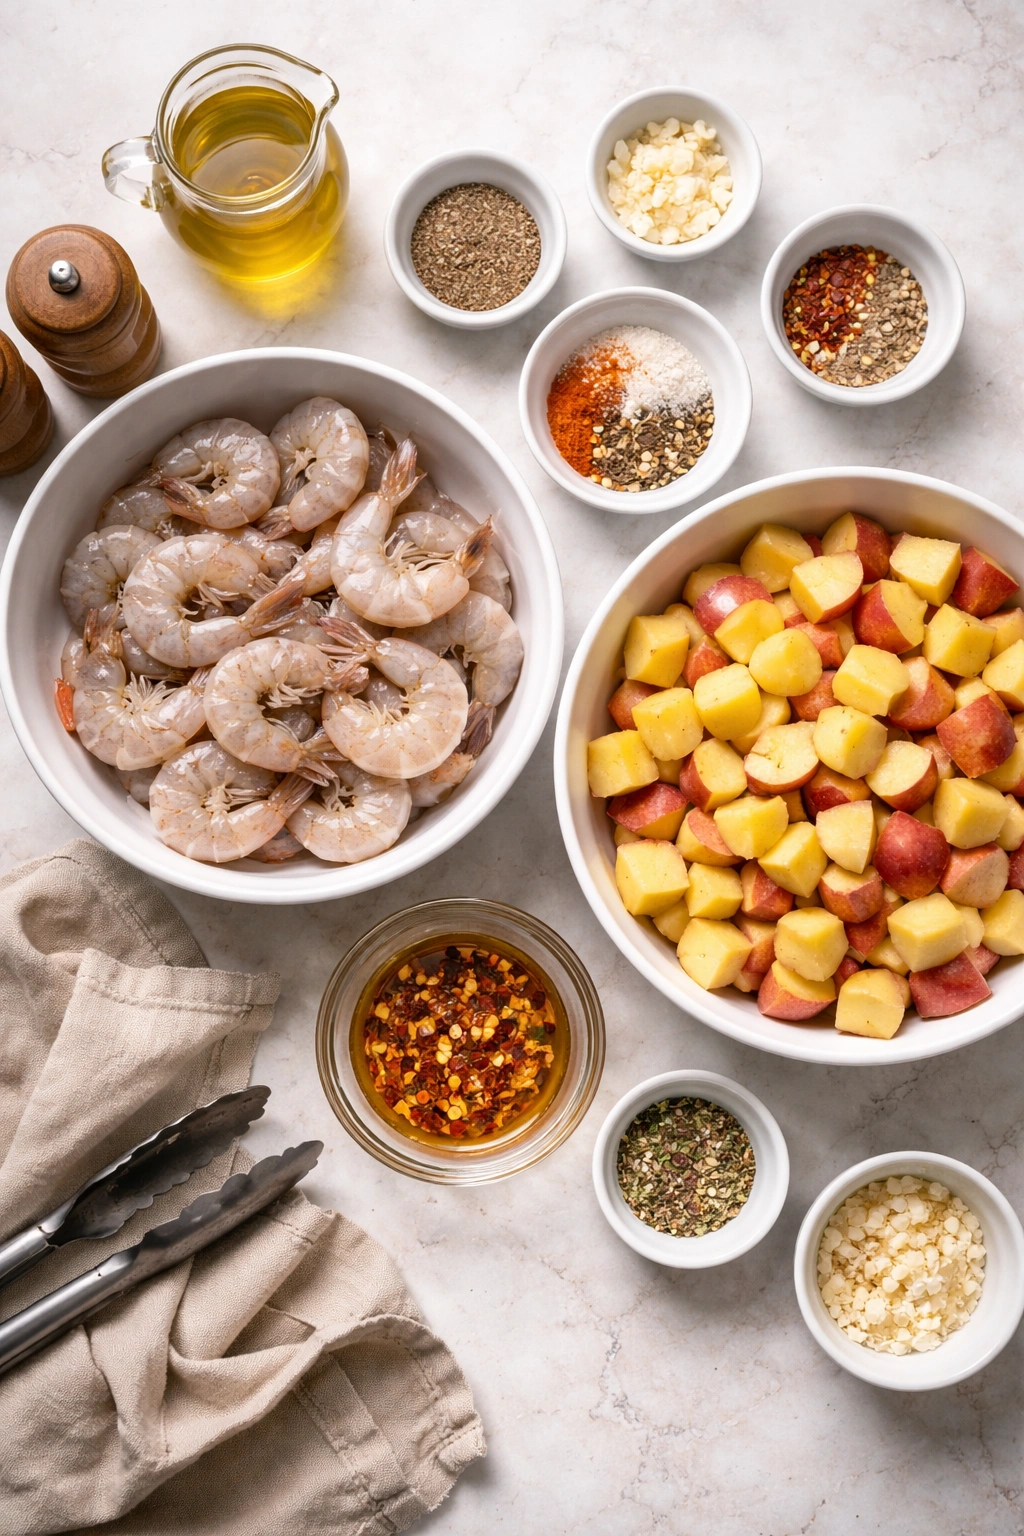
Complete Ingredient List
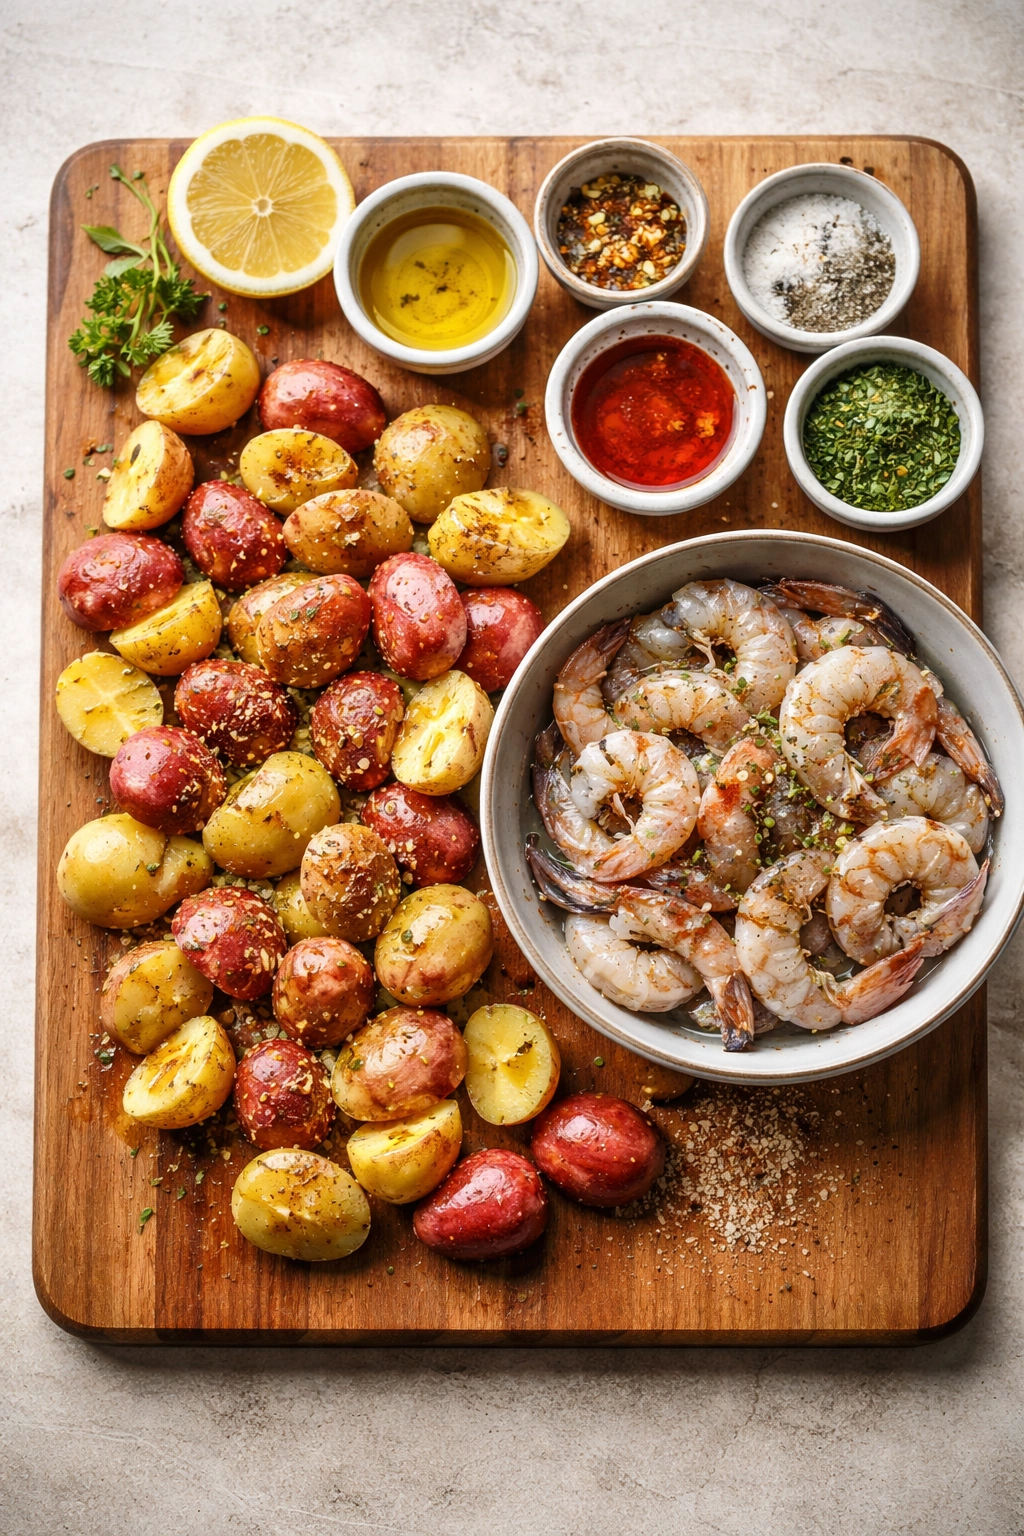
For the Potatoes:
- 12 ounces baby red or gold potatoes, halved or quartered
- 1½ tablespoons olive oil
- 1 teaspoon kosher salt (or sea salt)
- ½ teaspoon black pepper
- ½ teaspoon garlic powder
- 1 teaspoon Old Bay seasoning (or Cajun seasoning)
- ¼ teaspoon smoked paprika (optional, adds color and mild smokiness)
For the Shrimp:
- 1 pound large or jumbo raw shrimp (16 to 20 count), peeled, deveined, and patted dry
- 1 tablespoon olive oil
- ½ teaspoon kosher salt
- ¼ teaspoon black pepper
- ½ teaspoon garlic powder
- ¾ teaspoon Old Bay seasoning
- 1 tablespoon melted butter (for finishing)
- 1 lemon, cut into wedges (for serving)
- 2 tablespoons fresh parsley, chopped (optional garnish)
Step-by-Step Cooking Instructions
Prepare Your Ingredients:
-
Peel and devein the shrimp if you haven’t already, then pat them completely dry with paper towels. Set them aside in a small bowl.
Advertisements -
Place the halved or quartered potatoes in a separate bowl. Pat them dry with paper towels as well—moisture prevents browning, so don’t skip this step.
-
In a small mixing bowl, whisk together 1½ tablespoons olive oil with 1 teaspoon kosher salt, ½ teaspoon black pepper, ½ teaspoon garlic powder, 1 teaspoon Old Bay seasoning, and ¼ teaspoon smoked paprika. Taste the mixture with a clean spoon and adjust salt or spices if needed.
Season and Prepare for Air Frying:
-
Pour all but 2 tablespoons of the seasoning mixture over the potatoes and toss thoroughly until every piece is evenly coated with oil and seasonings. There should be no dry spots.
-
Preheat your air fryer to 380°F (193°C) for 3 to 4 minutes. A properly preheated air fryer is essential for even cooking and proper browning.
-
In another small bowl, whisk together 1 tablespoon olive oil with ½ teaspoon kosher salt, ¼ teaspoon black pepper, ½ teaspoon garlic powder, and ¾ teaspoon Old Bay seasoning. This is your shrimp seasoning mixture.
-
Add the shrimp to this seasoning mixture and toss gently until each shrimp is evenly coated. Do not overmix or squeeze the shrimp—they’re delicate and rough handling damages them before they even cook.
Cook the Potatoes:
-
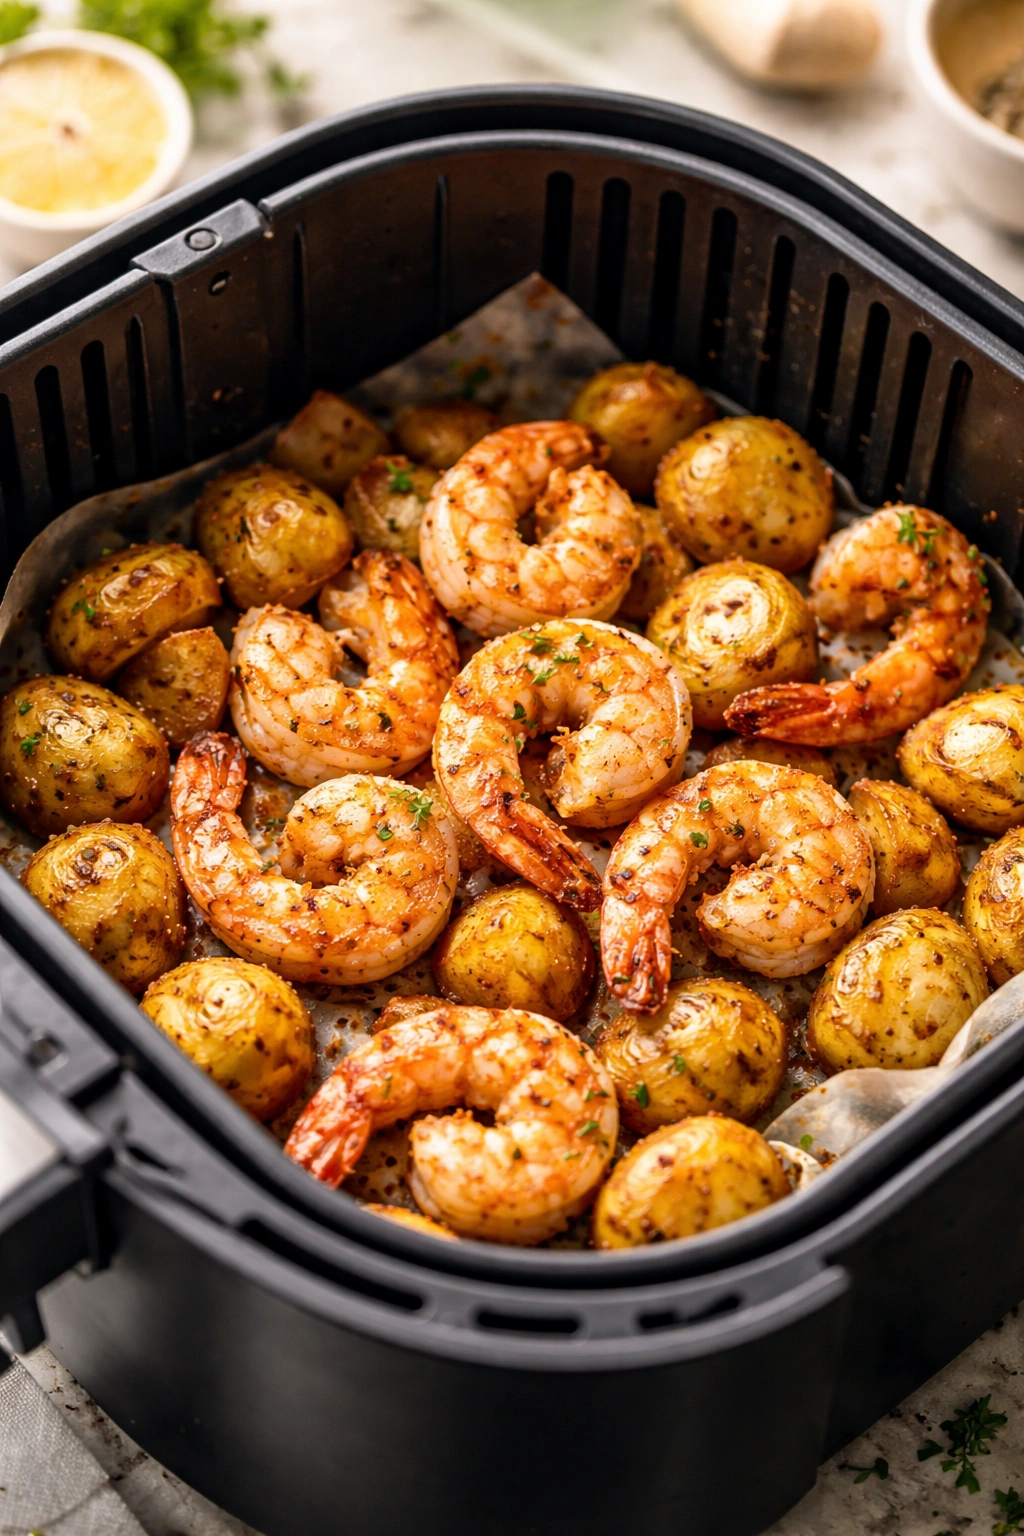
Once the air fryer is preheated, carefully arrange the seasoned potatoes in a single layer in the basket. It’s okay if a few pieces touch, but avoid stacking them or crowding them heavily—they need air circulation to crisp properly.
-
Air fry at 380°F (193°C) for 9 to 10 minutes, shaking the basket or stirring halfway through (around the 5-minute mark). This ensures even browning on all sides and prevents flat spots.
Advertisements -
At the 9-minute mark, check a potato piece—it should be soft when pierced with a fork but not falling apart. The edges should show light browning. If they’re still very firm, cook 1 to 2 minutes longer.
Add the Shrimp:
-
When the potatoes are nearly tender, carefully add the seasoned shrimp to the basket with the potatoes. Arrange them in a single layer as much as possible, though some overlap is inevitable in a crowded basket.
-
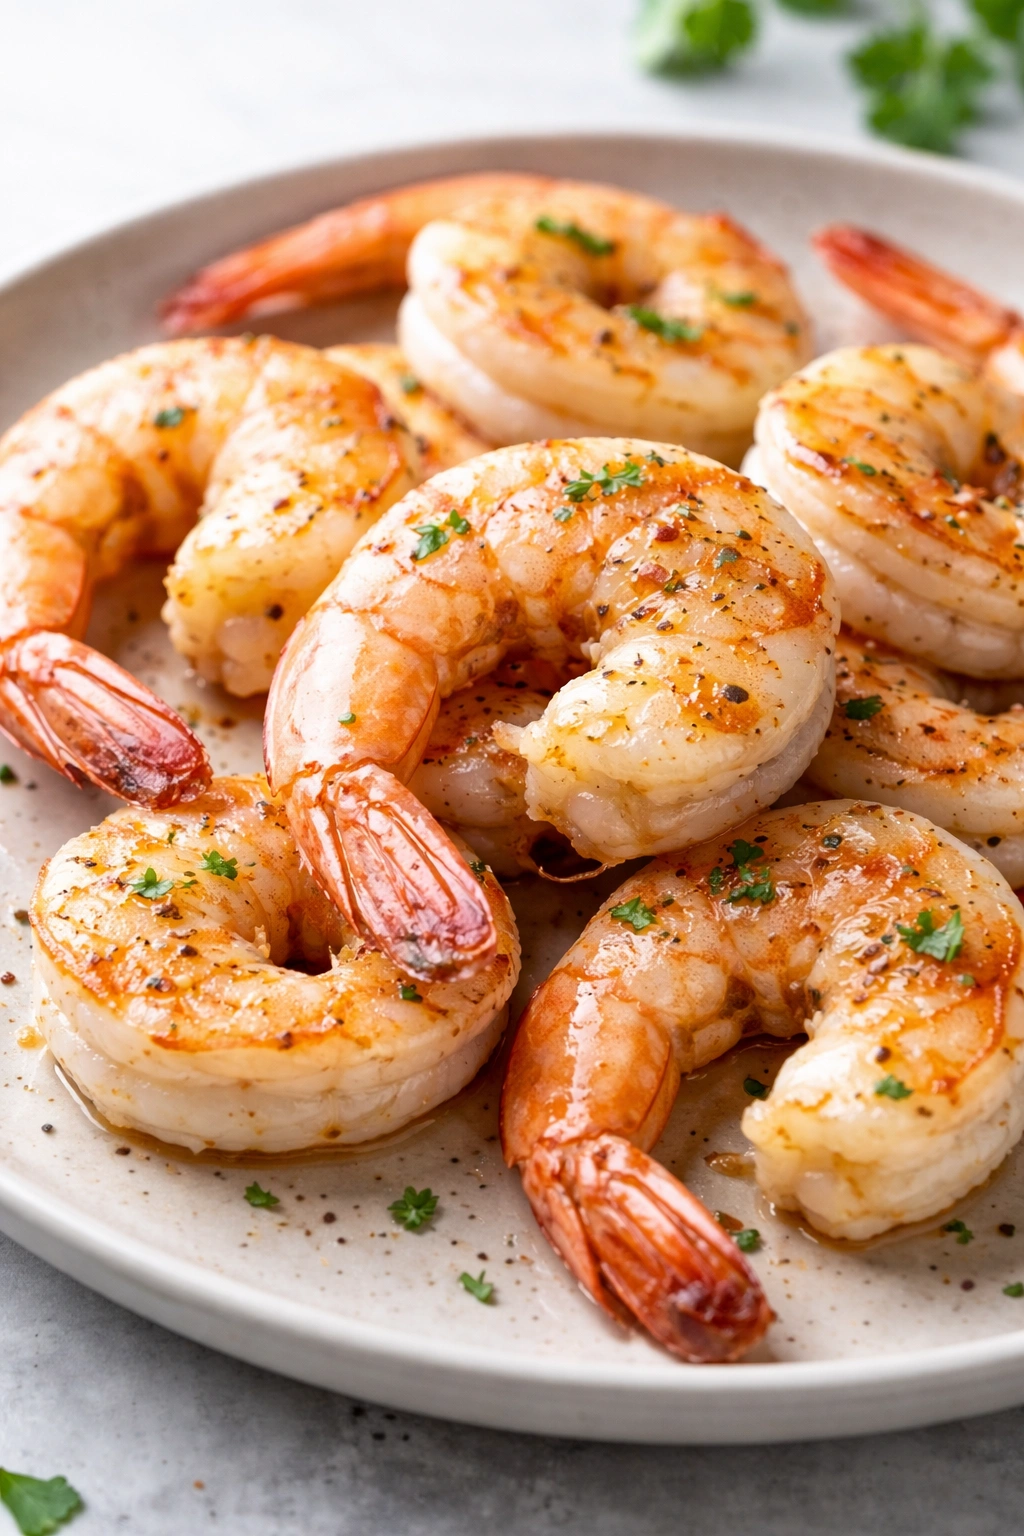
Continue air frying at 380°F (193°C) for 4 to 5 minutes. Do not leave the basket unattended during this stage—shrimp can shift from perfectly cooked to overdone in 60 seconds. Check at the 4-minute mark by looking at the shrimp color. They should be bright pink and opaque throughout, with just a slight curl into a “C” shape.
-
The shrimp are fully cooked when they’ve turned from gray and translucent to bright pink or orange, the flesh is opaque all the way through, and the internal temperature reaches 120°F to 125°F (if you’re checking with an instant-read thermometer). The exterior should feel slightly firm but still give a little when pressed gently.
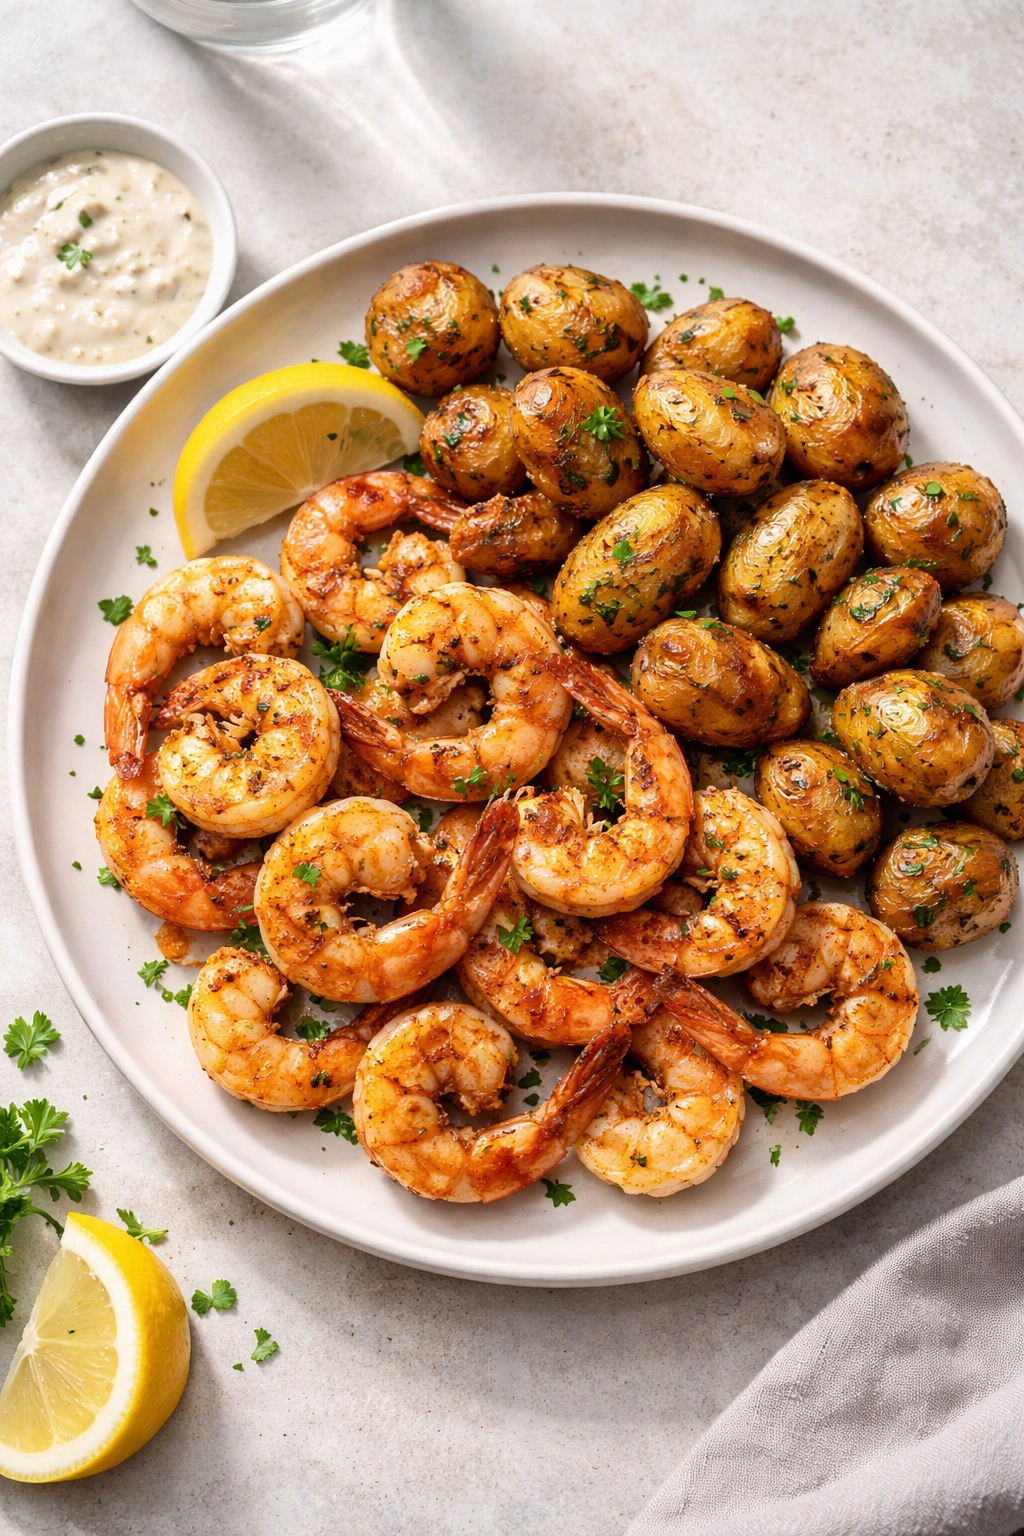
Finish and Serve:
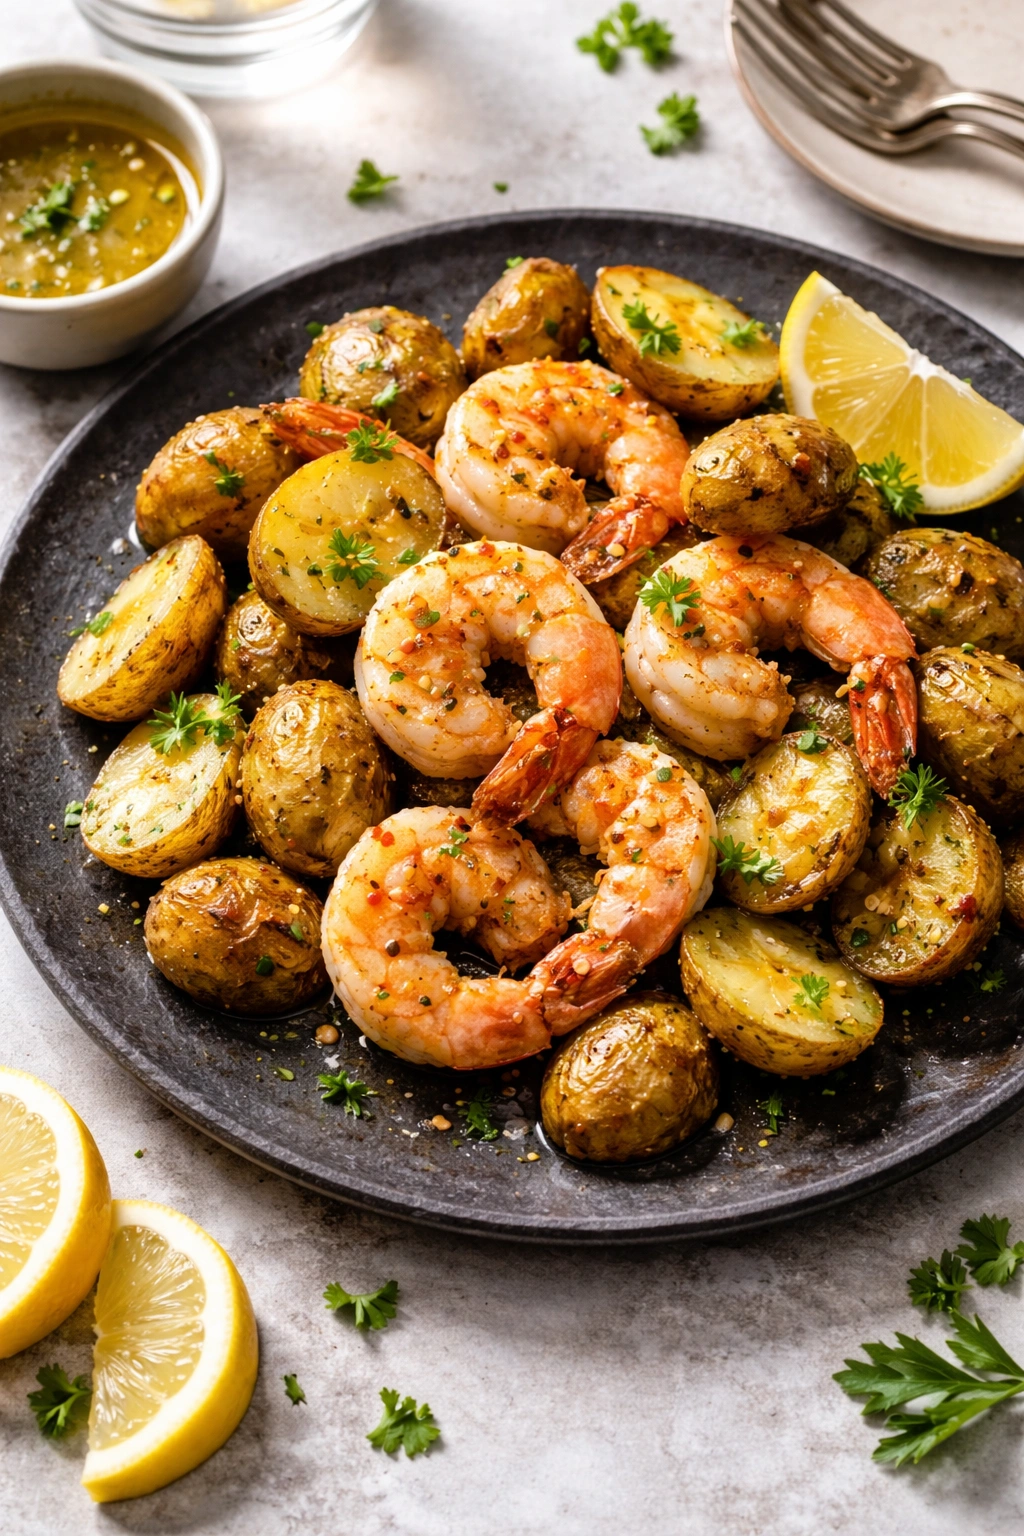
-
Transfer the cooked shrimp and potatoes to a serving plate or bowl. Pour the 1 tablespoon melted butter over the top and toss gently to coat everything with that buttery richness.
-
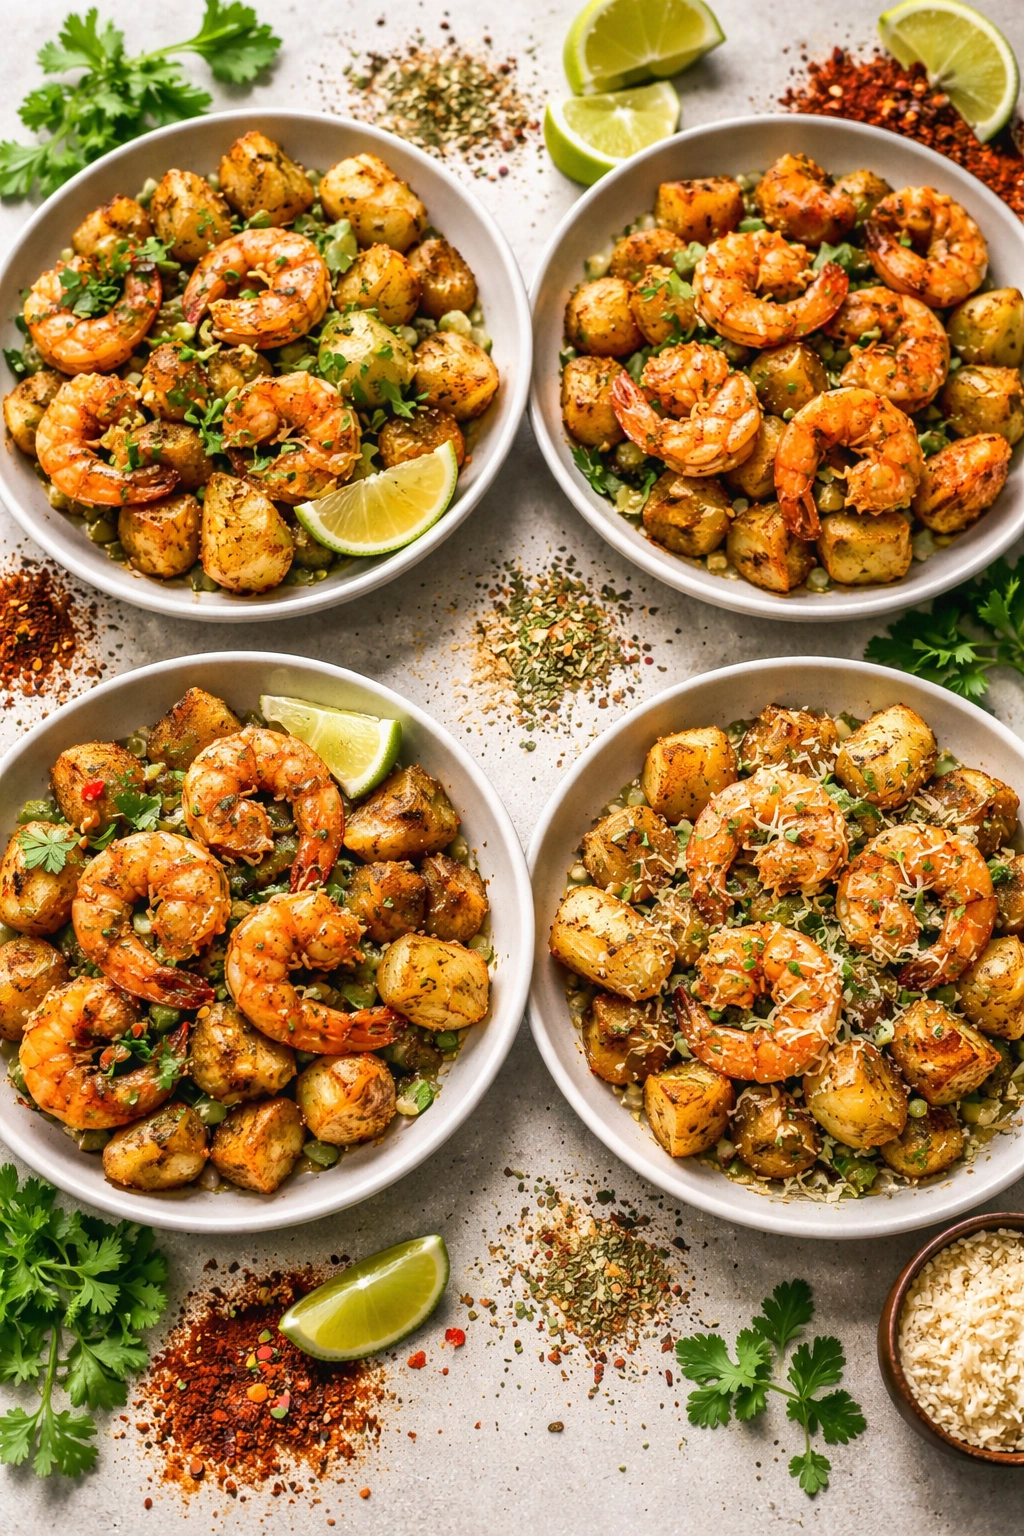
Taste a piece and adjust seasoning if needed—you can add more salt, squeeze of lemon juice, or a sprinkle of fresh parsley. Serve immediately with lemon wedges on the side for squeezing over the shrimp and potatoes.
Tips for Perfect Results
Temperature consistency across your air fryer matters more than you might think. If you notice some potatoes browning faster than others, your air fryer may have hot spots. Rotate the basket or stir the contents halfway through cooking to account for this. Some air fryer models run hotter than their display suggests, so your first batch might cook slightly faster—adjust the next batch accordingly.
The dry-brining approach used for shrimp in this recipe (salt, spices, and oil) works better than wet marinades because it doesn’t add excess moisture that steams instead of fries. If you want a more intensely flavored shrimp, apply the seasoning mixture 10 to 15 minutes before air frying and let it sit uncovered in the fridge. The salt will begin breaking down muscle proteins, resulting in juicier, more tender shrimp.
Don’t assume all potatoes are the same size even within the “baby” category. Sort them before cutting so your pieces are relatively uniform. This prevents the frustration of some pieces being mushy while others are still crunchy in the center.
If you’re cooking shrimp and potatoes together for the first time in your specific air fryer, take notes on timing. Every air fryer brand and model cooks slightly differently, and your second attempt will be perfect once you understand your machine’s personality. Some run 5 to 10 degrees hotter than the display suggests, while others are accurate. A quick test run takes the guesswork out of future meals.
Common Mistakes to Avoid

Overcrowding the basket is the number one reason this recipe fails. If you’re feeding more than three people, cook in batches rather than cramming everything in at once. Overcrowding prevents proper air circulation, leading to uneven cooking where some pieces are perfect and others are undercooked.
Not drying the shrimp and potatoes thoroughly sabotages browning from the start. Moisture creates steam, and steam prevents that golden crisping you’re after. This step takes 2 minutes and makes an enormous difference in the finished dish.
Skipping the halfway shake means you’ll get flat spots on potatoes that don’t brown properly while other areas char. Shake the basket or stir at the midpoint of cooking for even, all-over browning.
Adding shrimp too early is tempting when you want to simplify timing, but shrimp genuinely only needs 4 to 5 minutes. Adding it with the potatoes means it’ll be sitting in the air fryer for 10-plus minutes total, which is long enough to start turning tough and rubbery. The two-stage cooking approach feels like extra work but delivers vastly better results.
Using precooked shrimp transforms this into a reheating exercise rather than a cooking one. Precooked shrimp will never be as tender as raw shrimp cooked fresh—they’ve already been shocked by heat once, and reheating compounds that effect.
Flavor Variations and Seasonings
The Old Bay approach here is classic and foolproof, but seafood seasonings are wildly flexible. Cajun seasoning gives you more heat and slightly different spice notes—use the same amount as Old Bay and add a pinch of cayenne if you want extra kick. Lemon pepper seasoning works beautifully if you buy a quality version (homemade is even better: combine lemon zest, black pepper, and salt). Garlic-forward shrimp happens when you increase garlic powder to ¾ teaspoon and add fresh minced garlic to the oil before tossing the shrimp.
For a Mediterranean spin, skip the Old Bay entirely and use oregano, basil, and thyme instead. Toss everything with lemon juice and red pepper flakes for brightness and gentle heat. Ginger-sesame flavors work wonderfully too—substitute sesame oil for half the olive oil, add fresh ginger and garlic, and finish with a soy sauce drizzle and sesame seeds.
Herb finishes after cooking add freshness that seasoning alone can’t achieve. Chopped fresh parsley is standard, but dill, cilantro, or chives all work beautifully. Tear fresh basil over the top just before serving for an almost-Italian approach. The key is adding soft herbs at the end rather than during cooking, where heat destroys their fresh character.
Spicy versions are straightforward—add cayenne pepper to the seasoning mixture, finish with hot sauce drizzle, or sprinkle chili flakes over the cooked dish. Start with a quarter teaspoon of cayenne and taste before adding more, since heat builds quickly.
Pairing with Sides and Sauces

This dish is technically complete on its own, but it pairs beautifully with simple sides that don’t require cooking or that can air fry alongside (in a second basket if you have one). Crispy asparagus or green beans take about 8 minutes at the same temperature, so you could start them when you add the shrimp. Toss with the same seasoning blend for flavor cohesion.
A fresh salad provides textural contrast to the warm, seasoned shrimp and potatoes. Arugula with a lemon vinaigrette, a simple green salad, or a crisp coleslaw all work. The acidity cuts through the richness and makes the meal feel lighter and more balanced.
Garlic aioli is the move if you want an indulgent sauce. Whisk together mayo, minced garlic, lemon juice, and a pinch of salt—it takes 90 seconds and pairs incredibly with both shrimp and potatoes. Cocktail sauce is traditional and works here too, though it’s more effort if you’re making it from scratch (ketchup, horseradish, lemon juice, and hot sauce do the job).
A squeeze of fresh lemon juice right before eating is honestly perfect on its own—it brightens the dish without adding extra work. Keep lemon wedges on the table and let people adjust to their taste preference. Fresh herbs scattered on top (parsley, dill, or cilantro) add visual appeal and a subtle fresh note.
For something unexpected, try a spicy mayo—combine mayo, sriracha, lime juice, and a touch of honey. The sweetness balances heat, and the creaminess pairs beautifully with both components. This works especially well if you’ve used Cajun seasoning rather than Old Bay.
Storage and Reheating
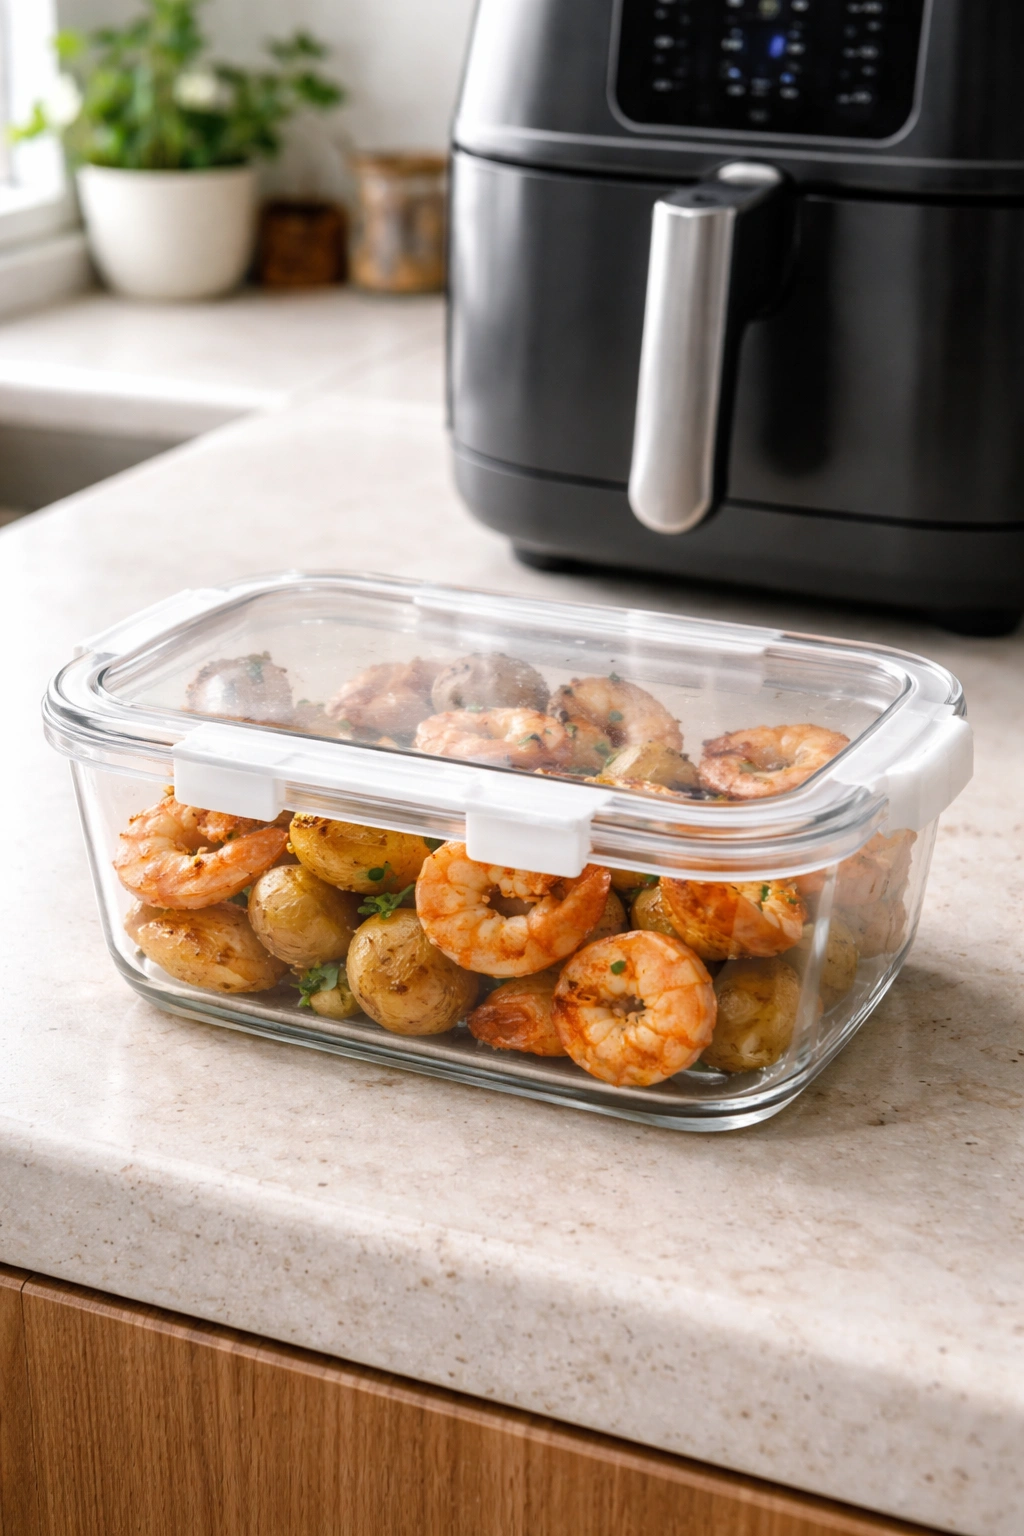
Leftovers keep in an airtight container in the refrigerator for up to 3 days, though they’re genuinely best eaten the same day they’re cooked. Do not freeze this dish once shrimp and potatoes are cooked together. Reheating frozen shrimp results in a rubbery texture, and potatoes become grainy when thawed.
To reheat, place everything in your air fryer at 350°F (175°C) for 3 to 4 minutes until warmed through. This method preserves the texture far better than microwave reheating, which tends to make shrimp extra rubbery. If you don’t have time for air frying, a covered pan over low heat on the stovetop works, but watch carefully so the shrimp doesn’t overcook.
If you want to prepare components in advance, cook the potatoes and shrimp separately, cool them completely, and store them in separate airtight containers. Reheat each component individually using the same temperature and timing, then combine and toss with melted butter just before serving. This approach prevents the shrimp from sitting in the air fryer any longer than necessary.
The seasoning actually improves if you store shrimp and potatoes together for a few hours—the flavors meld and intensify. So if you’re cooking for meal prep and eating leftovers over 2 to 3 days, the second day’s portions might actually taste better than the first.
Frequently Asked Questions
Can I use frozen shrimp directly without thawing?
Technically yes, but the results are inferior. Frozen shrimp release water as they thaw during cooking, which steams the shrimp rather than allowing it to brown properly. Thaw them first under cold running water (5 to 10 minutes) and pat completely dry. If you’re genuinely short on time, add 2 to 3 minutes to the cooking time and accept that browning won’t be as impressive.
What if my shrimp are smaller than jumbo size?
Small and medium shrimp cook much faster—typically 3 to 4 minutes instead of 4 to 5. Add them even later than you would jumbo shrimp, or watch extremely carefully and pull them at the first sign of pink coloring. The problem is that smaller shrimp go from perfect to overcooked in about 60 seconds, making timing tight and mistakes likely.
Can I double this recipe?
Yes, but cook in batches rather than doubling the basket contents. One batch at full capacity creates good results; two batches stacked or crowded doesn’t. Season and cook the first batch completely, transfer to a serving plate, and repeat with the second batch. It adds maybe 10 minutes to total time but guarantees perfect results.
What temperature should I use if my air fryer doesn’t go to 380°F?
Use 375°F or 385°F—the 5-degree difference won’t meaningfully change timing. If 400°F is closest, reduce the initial potato cooking time to 8 minutes and watch carefully, as things will cook slightly faster at higher temperature.
Is there a way to make this less salty?
Absolutely. The seasoning blend here assumes you’re using Diamond Crystal kosher salt, which is less salty by volume than table salt or other kosher salt brands. If you’re using table salt, cut the amount to ¾ teaspoon. Taste a piece of cooked potato and adjust salt at the finish stage rather than at the beginning—it’s easier to add salt than to remove it.
Can I peel the shrimp ahead of time?
Yes, but keep them cold and use them within 24 hours. Pat them dry and store in an airtight container on the coldest part of your fridge. Peeled shrimp are more delicate and deteriorate faster than shell-on, so use-it-soon is important.
Why is my shrimp tough even though I followed the timing?
Most likely, your air fryer runs hotter than the display suggests. The first batch is a test run—adjust downward by 5 to 10 degrees or reduce time by 1 minute for the next batch. You can also try cooking at 375°F instead of 380°F to give yourself a slightly wider window before overcooking occurs.
Final Thoughts
Air fryer shrimp and potatoes represents that rare intersection of genuinely quick, genuinely delicious, and genuinely easy. It’s the kind of meal that feels like a small victory on nights when you’re tired and hungry. You’re not standing over a pot waiting for water to boil. You’re not managing multiple pans or staggered cooking times. You’re putting dinner on the table in under 25 minutes total, from raw ingredients to plated dish.
The reason this works so well is that it respects the different cooking rates of its components rather than fighting them. Potatoes go in first because they need time. Shrimp goes in late because it cooks fast. The two-stage approach feels like extra work but actually simplifies everything by ensuring both components finish at exactly the right moment.
Once you’ve made this a handful of times, you’ll start riffing on it instinctively—trying different seasonings, different sides, different serving presentations. That’s the real magic: a recipe this solid gives you confidence to experiment because you know the foundation works.