Dips are the unsung heroes of entertaining. They transform a simple platter of crackers and vegetables into something guests actually gather around, and the best part? Most homemade dips come together in minutes with ingredients you probably already have in your kitchen. Whether you’re hosting a casual weeknight gathering, bringing something to a potluck, or just wanting a crowd-pleasing appetizer that doesn’t require hours of prep work, a great dip can absolutely save the day.
The secret to making impressive dips isn’t complicated techniques or exotic ingredients — it’s understanding how to balance flavors, how to get the texture just right, and knowing which flavor combinations will make people come back for seconds. Store-bought dips are convenient, sure, but homemade versions taste noticeably fresher, let you control the salt and quality of ingredients, and honestly cost a fraction of what you’d spend at the store. Plus, there’s something genuinely satisfying about serving something you made yourself.
What follows are eight dips that work beautifully with crackers, vegetable sticks, or even soft pretzels and pita chips. Some are creamy, some are chunky, some are warming and hearty, and a few are bright and fresh. The one thing they all have in common? They’re straightforward enough that even a beginner cook can nail them, yet impressive enough that guests will assume you spent way more time on them than you actually did.
1. Classic Spinach and Artichoke Dip That’s Infinitely Shareable
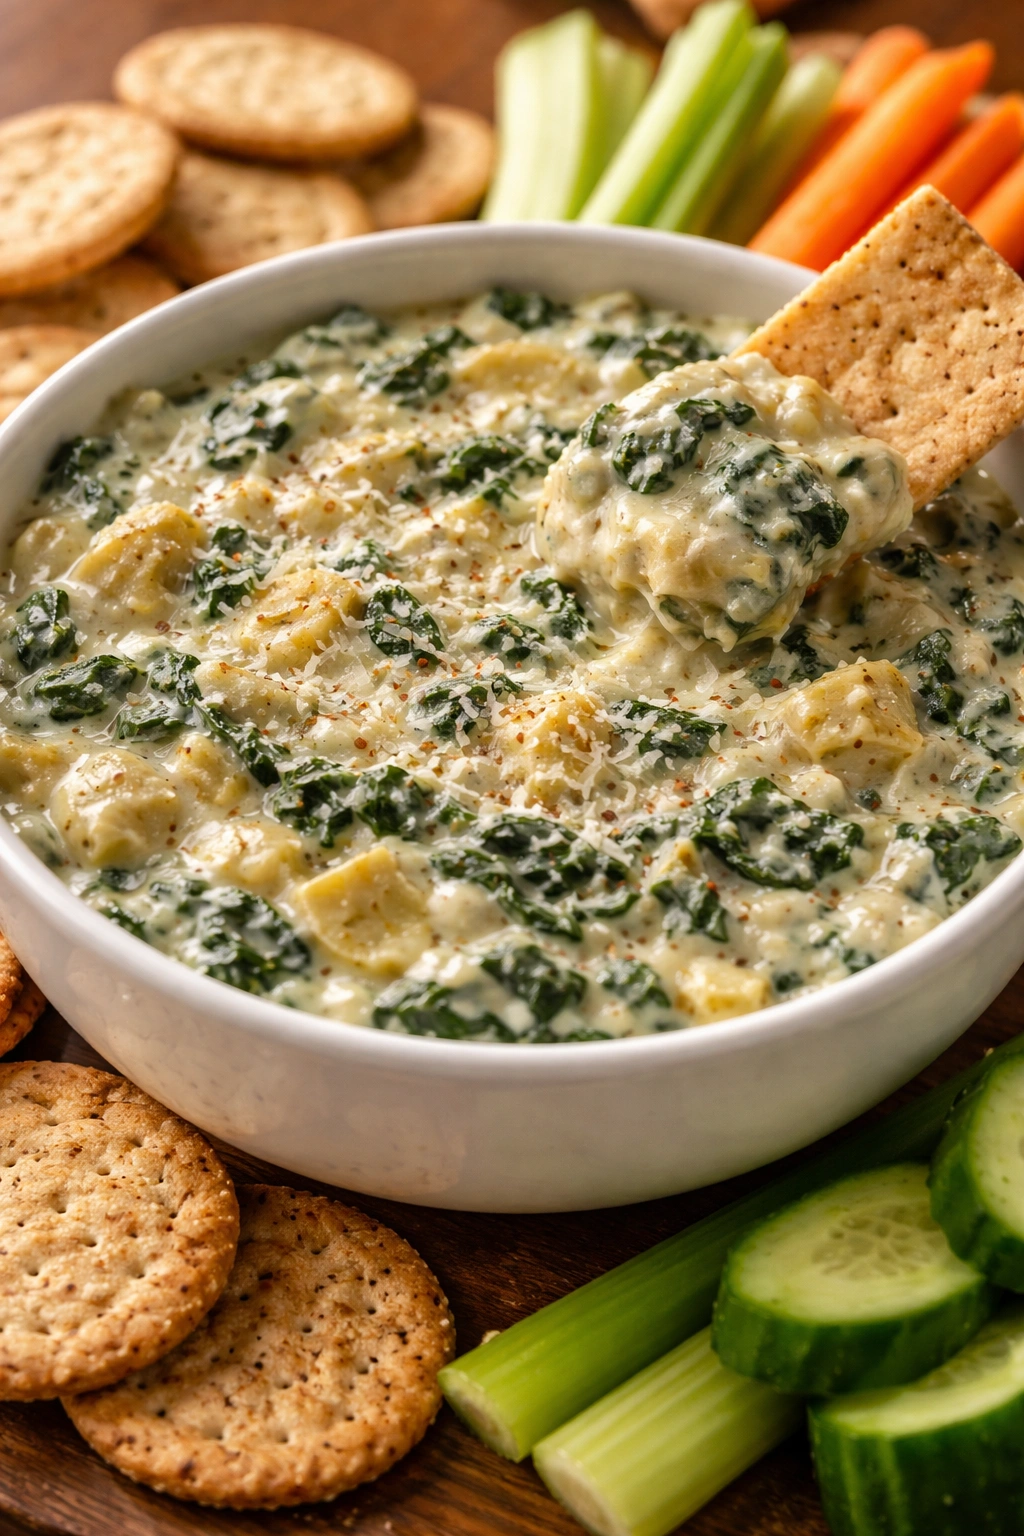
This is the dip people request by name. It’s warm, creamy, rich with Parmesan and cream cheese, and studies have consistently shown it’s one of the most popular appetizer dips served at gatherings. The combination of frozen spinach, canned artichoke hearts, and cheese creates a dip that’s greater than the sum of its parts — it somehow tastes fancy even though it requires virtually no special skill to make.
The magic happens when you blend the spinach with the artichokes in a way that creates a chunky-but-creamy texture. You don’t want it perfectly smooth; you want small pieces of spinach and artichoke throughout. The cream cheese base provides the richness and structure, while the Parmesan adds sharpness that keeps the dip from feeling one-note.
Why This Version Works Better Than Others
Most spinach artichoke dips are just fine, but they often taste one-dimensional — all cheese, no depth. The trick is adding sautéed garlic before you combine everything, which adds a subtle aromatic quality that elevates the whole dip. Some versions also lean too heavily on sour cream, making them taste tangy rather than creamy. This version uses mostly cream cheese with just a touch of sour cream, which gives you that restaurant-quality texture without any unwanted brightness.
How to Make It
Start by thawing one package of frozen spinach (around 10 ounces) and squeezing out every bit of excess liquid — this step matters because watery spinach will make your dip soupy. While the spinach drains, mince two garlic cloves and sauté them in butter for about one minute until fragrant but not browned. In a large bowl, combine 8 ounces of softened cream cheese, one-half cup of sour cream, and one-half cup of grated Parmesan cheese, stirring until smooth. Fold in the drained spinach, the sautéed garlic, one 14-ounce can of artichoke hearts (drained and chopped into bite-sized pieces), and a generous pinch each of salt, black pepper, and red pepper flakes. Transfer to a baking dish, top with an additional quarter cup of Parmesan mixed with two tablespoons of panko breadcrumbs if you want a crispy top, and bake at 375°F for 20 to 25 minutes until heated through and slightly golden at the edges. If you’re not baking it, the dip is equally delicious at room temperature or gently warmed on the stovetop.
Quick Serving Tips
Serve this dip warm in a shallow dish surrounded by sturdy crackers, toasted baguette slices, and hearty vegetables like celery and bell pepper slices. It holds beautifully for 30 minutes to an hour at room temperature, and any leftovers taste great the next day cold (or gently reheated). The dip also freezes well for up to three months if you’d like to make it in advance.
2. Creamy Garlic Herb Dip That Tastes Like Fresh Garden Herbs
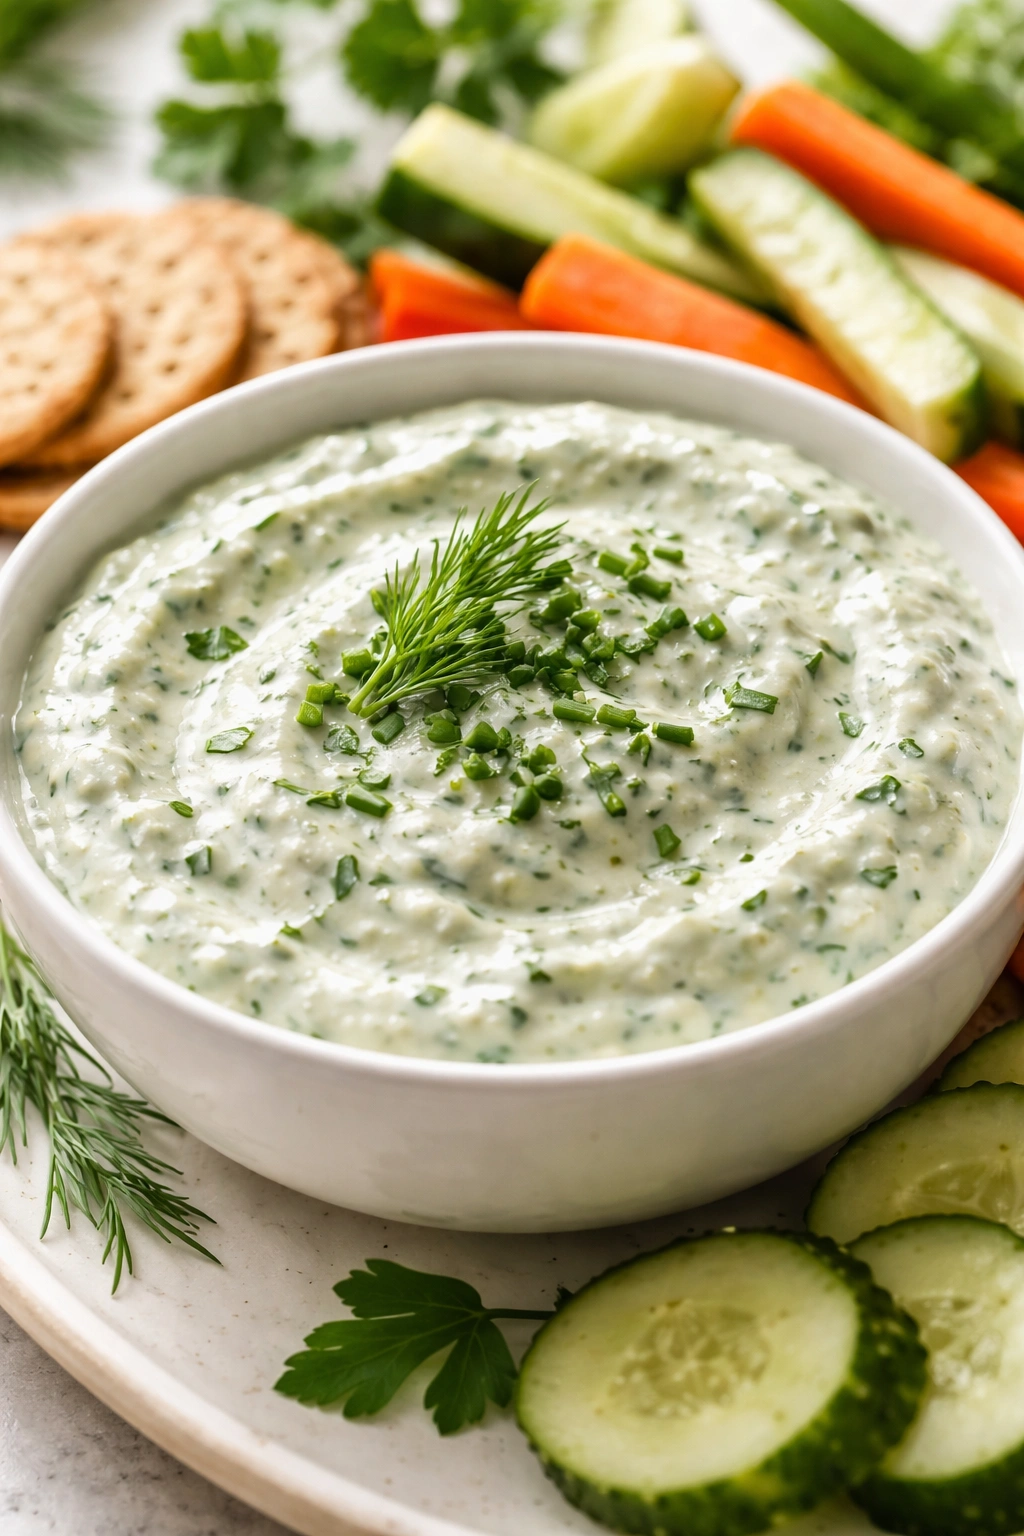
This is the dip you reach for when you want something a little lighter and fresher-tasting than the heavier cream cheese dips. It’s herbaceous and full of garlic flavor without being aggressively sharp, and it works with absolutely everything — crackers, vegetables, bread, chips, even spooned onto roasted potatoes. The beauty of this version is that it comes together in five minutes and tastes like you actually spent time making something homemade.
The base is Greek yogurt mixed with a touch of sour cream and mayonnaise, which creates a dip that’s tangy enough to be interesting but creamy enough to feel indulgent. Fresh herbs are what make this shine — you’re not using dried herbs stored in a cabinet for months, but actual fresh dill, parsley, and chives that you picked up at the store or grew yourself.
The Ingredient Balance That Makes All the Difference
The ratio of creamy base to herbs matters tremendously. Too little herbs and it tastes like plain yogurt dip. Too much and it becomes almost bitter and overwhelmingly green-tasting. The sweet spot is roughly one full cup of mixed fresh herbs (loosely packed) to every two cups of creamy base. Greek yogurt provides the protein and tangy flavor, sour cream adds richness, and a small amount of mayonnaise (just two to three tablespoons) prevents the dip from tasting too thin or too yogurt-forward. Minced fresh garlic or garlic powder both work, but minced gives you a more pronounced garlic presence that people notice.
How to Make It
Combine one and one-half cups of plain Greek yogurt, one-quarter cup of sour cream, and three tablespoons of mayonnaise in a bowl and whisk until completely smooth. Mince four garlic cloves (or use one-half teaspoon of garlic powder) and add them to the mixture. Finely chop one-quarter cup of fresh dill, one-half cup of fresh flat-leaf parsley, two tablespoons of fresh chives, and one tablespoon of fresh tarragon if you have it (it’s optional but adds a subtle anise note). Stir all the herbs into the creamy mixture along with one-half teaspoon of salt, one-quarter teaspoon of black pepper, and a pinch of paprika for color. Taste and adjust the seasoning — you might want more salt or more garlic depending on the intensity of your herbs. Refrigerate for at least 30 minutes before serving to let the flavors meld.
Making It Year-Round
During warmer months when fresh herbs are abundant, use whatever fresh herbs you have on hand — basil, mint, oregano, or cilantro all work. In colder months, you can substitute some of the herbs with what’s available, or use half fresh and half freeze-dried herbs. The dip never tastes quite as vibrant with dried herbs alone, but it’s still genuinely delicious and doesn’t require a farmers market run.
3. Spicy Queso Fundido That Melts Beautifully

Queso fundido — which simply means “melted cheese” in Spanish — is a warm cheese dip that’s deeply satisfying and surprisingly easy. This version includes chorizo for spicy sausage flavor, jalapeños for heat, and roasted poblano peppers for mild smokiness and body. It’s the kind of dip you want to keep warm in a slow cooker because people will keep coming back for more.
Unlike some queso dips that break or get greasy when reheated, this version holds together beautifully because it’s built on a small amount of cream cheese that acts as a stable base, combined with cheeses that actually melt smoothly together. The chorizo cooks down and distributes its spiced fat throughout the dip, which means every scoop tastes like it has meat in it without feeling heavy.
Why This Is Spicy Without Being Painful
The heat in this dip comes from three sources: chorizo sausage (which brings its own spice blend), fresh jalapeños, and the natural bite of aged cheeses like sharp Cheddar. Together, these create a dip that’s definitely spicy but not so fiery that people with a lower heat tolerance need to avoid it. The roasted poblano peppers add mild, earthy heat and a smoky note that rounds out the flavors. You can adjust the heat by using more or fewer jalapeños or by choosing a milder variety of chorizo.
How to Make It
Remove a half pound of chorizo sausage from its casing and crumble it into a large skillet over medium heat. As it cooks, break it up with a wooden spoon until it’s in small pieces. Once it’s cooked through (about five to seven minutes), remove it with a slotted spoon and set it aside, leaving about two tablespoons of the rendered chorizo fat in the pan. Add one diced onion and two minced jalapeños (seeds removed if you prefer less heat) to the pan and sauté for three to four minutes until softened. Add four minced garlic cloves and cook for one more minute. Reduce the heat to low and stir in eight ounces of softened cream cheese along with one roasted poblano pepper (or one roasted red pepper), peeled, seeded, and chopped. Once the cream cheese is mostly melted, stir in two cups of shredded sharp Cheddar cheese, one cup of shredded Oaxaca or mozzarella cheese, and the cooked chorizo. Stir constantly until all the cheese is melted and the dip is smooth and creamy. Season with salt and black pepper to taste. Transfer to a warm serving dish or slow cooker.
Serving and Storage Notes
Serve this dip warm with sturdy chips, flour tortillas, or cubed bread. It stays warm for a couple of hours in a slow cooker set to low. Leftovers can be refrigerated for up to four days and reheated gently on the stovetop with a splash of heavy cream to restore the creamy texture.
4. Smooth Hummus That’s Better Than Store-Bought
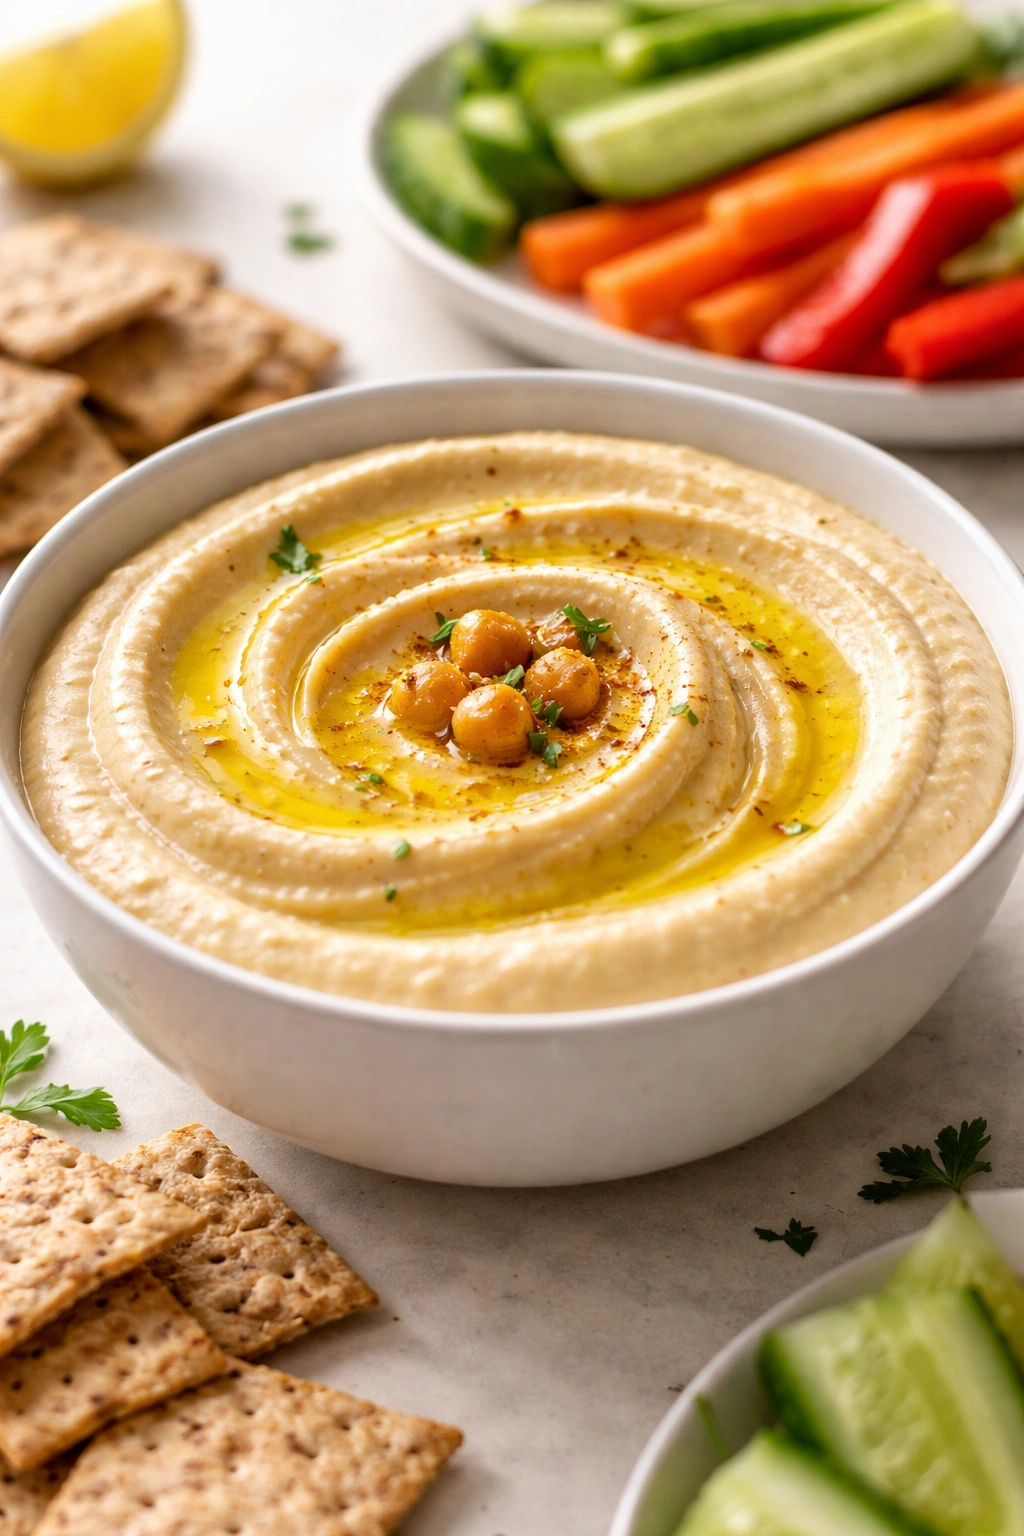
Hummus made at home tastes noticeably fresher and creamier than most store-bought versions, and it’s shockingly simple to make — literally just chickpeas, tahini, lemon juice, garlic, and olive oil blended until silky. The secret to hummus that’s fluffy and creamy rather than grainy and stiff is using plenty of olive oil and blending it properly, plus understanding that removing the skins from the chickpeas makes an enormous textural difference.
This dip is naturally vegan, protein-rich, and works beautifully with vegetable sticks, crackers, pita chips, and bread. It’s also incredibly versatile — the base recipe takes well to variations and add-ins without losing its essential character. You can make a big batch and it keeps beautifully in the refrigerator for up to a week.
The Two-Minute Trick That Changes Everything
Most people make hummus that’s either too thick and pasty or too thin and broken. The solution is adding the lemon juice and cold water slowly while the food processor is running, which allows you to control the consistency and incorporate air into the mixture. Starting the recipe with warm water also helps achieve a fluffier texture — the warmth helps break down the starch in the chickpeas slightly and makes the mixture whip up better. If you have access to canned chickpeas that have been soaked and had their skins removed (sometimes sold as “skinless chickpeas”), use those for the absolute smoothest result.
How to Make It
Drain and rinse two 15-ounce cans of chickpeas and add them to a food processor along with one-third cup of tahini, four garlic cloves, the zest of one lemon, and one-quarter teaspoon of salt. Pulse a few times to break down the chickpeas, then add one-quarter cup of fresh lemon juice and start the food processor. While it’s running, slowly drizzle in one-third cup of olive oil. Once the mixture looks mostly smooth, add three to four tablespoons of warm water, a little at a time, until the hummus reaches a creamy consistency — it should be thick enough to hold peaks but smooth enough to spread easily. Taste and adjust for salt and lemon juice. Transfer to a serving bowl and drizzle with additional olive oil and a sprinkle of paprika or sumac if desired. Serve immediately or refrigerate until ready to serve.
Flavor Variations Worth Trying
Make roasted red pepper hummus by blending in one cup of roasted red peppers along with one-half teaspoon of smoked paprika. Make spicy harissa hummus by stirring in one to two tablespoons of harissa paste (adjust based on how spicy you like it). Make herb hummus by adding one-half cup of fresh parsley, two tablespoons of fresh dill, and one tablespoon of fresh mint. Each variation takes the same amount of time but tastes completely different.
5. Buffalo Chicken Dip That’s Warm and Satisfying

This is the dip for people who want something with actual substance and protein — it’s warm, spicy, creamy, and loaded with shredded chicken and cheese. It tastes indulgent and restaurant-quality even though it comes together in about 20 minutes, and it’s the kind of dip that disappears fastest at any gathering. Serve it warm in a baking dish and watch people pile crackers and vegetable slices on top.
Buffalo sauce (the spicy, tangy, buttery sauce best known from Buffalo chicken wings) provides the flavor backbone here. When combined with creamy cheese and tender chicken, it creates a dip that’s complex and craveable without tasting heavy or greasy. The blue cheese adds a sharp, funky note that balances the heat from the hot sauce.
Why Rotisserie Chicken Changes Everything
Store-bought rotisserie chicken is legitimately one of the best kitchen shortcuts available, and it’s exactly what makes this dip feasible for a weeknight. Shredding a whole rotisserie chicken takes about three minutes and gives you incredibly tender, flavorful meat without any cooking effort on your part. You’ll need about three cups of shredded chicken, which is roughly what one and one-half rotisserie chickens yield. If you prefer to use home-cooked chicken, poach two boneless chicken breasts in simmering water for 12 to 15 minutes, then shred them.
How to Make It
In a large bowl, stir together eight ounces of softened cream cheese, one-half cup of blue cheese crumbles (or ranch dressing mix if you prefer to skip the blue cheese), and one-half cup of sour cream until well combined. Add three-quarters cup of buffalo sauce (Frank’s RedHot is the most common brand, or you can use any hot sauce you prefer mixed with a bit of melted butter), three cups of shredded rotisserie chicken, one-quarter cup of thinly sliced green onions, and one-quarter teaspoon of salt. Stir everything together until evenly distributed. Transfer to a baking dish and bake at 350°F for 15 to 20 minutes until the edges are bubbling and the top is slightly golden. If you want the top to be extra crispy, sprinkle two tablespoons of panko breadcrumbs mixed with two tablespoons of melted butter over the top before baking.
Make-Ahead Convenience
Assemble the dip in a baking dish, cover with plastic wrap, and refrigerate for up to two days before baking. When ready to serve, add five to ten minutes to the baking time since you’re starting from cold. This makes it perfect for entertaining — you can prep it hours in advance and just pop it in the oven when guests arrive.
6. Roasted Red Pepper and Feta Dip With Subtle Smokiness
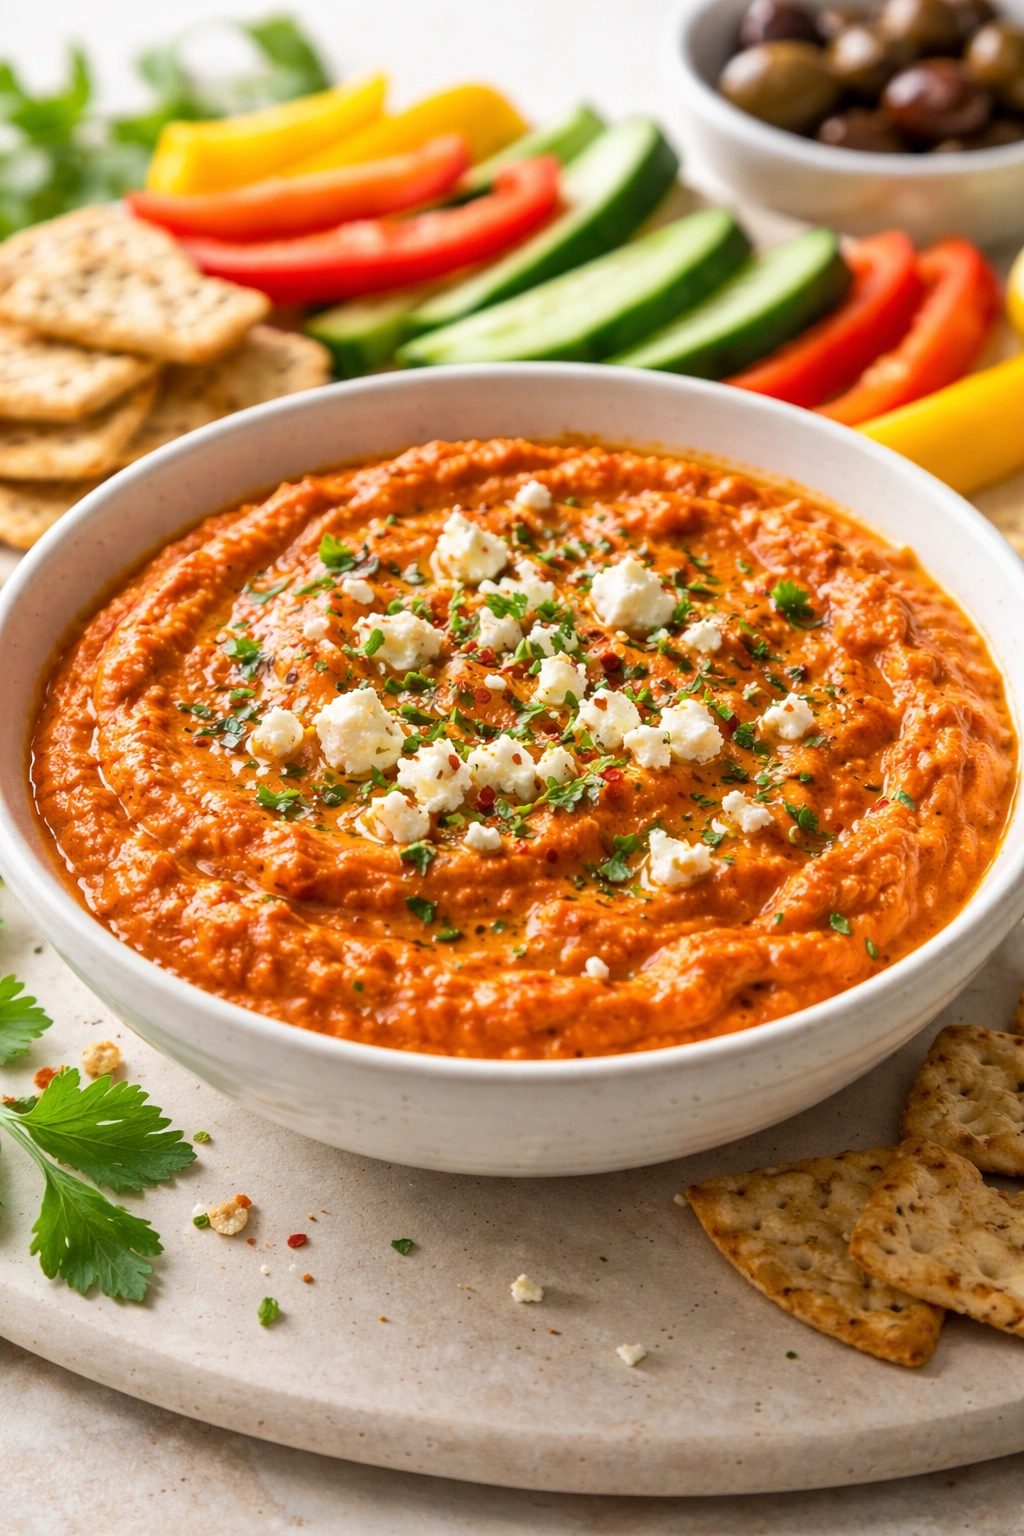
This dip is bright, Mediterranean-inspired, and tastes like something from a fancy restaurant even though it’s ridiculously simple to make. Roasted red peppers are naturally sweet and slightly smoky, and when combined with tangy feta cheese, lemon juice, and a bit of fresh garlic, they create a dip that’s sophisticated without feeling fussy. It’s beautiful to look at too — the peppers give it a warm orange-red color that looks appetizing on any platter.
Unlike some vegetable-based dips that taste lean or diet-oriented, this one feels indulgent because the feta and olive oil provide genuine richness and flavor depth. It works beautifully with crackers, bread, and raw vegetables, and it’s naturally vegetarian and gluten-free (as long as you’re serving it with gluten-free crackers or vegetables).
Using Jarred Roasted Peppers Without Guilt
Jarred roasted red peppers are genuinely convenient and taste wonderful — they’re picked at peak ripeness, roasted in commercial ovens that get much hotter than home ovens, and preserved quickly to lock in flavor. This isn’t a shortcut that compromises quality. If you want to roast your own peppers, you absolutely can: char two large red bell peppers directly over a gas flame or under a hot broiler, then seal them in a plastic bag for 10 minutes to steam, then peel away the charred skin. But jarred peppers are a totally legitimate and delicious option that saves you significant prep time.
How to Make It
Drain one 12-ounce jar of roasted red peppers (or use homemade roasted peppers) and pat them dry with paper towels. Transfer them to a food processor along with one cup of crumbled feta cheese, two tablespoons of tahini, three tablespoons of olive oil, two tablespoons of fresh lemon juice, two garlic cloves, one-half teaspoon of smoked paprika, one-quarter teaspoon of red pepper flakes, and one-quarter teaspoon of salt. Pulse until the mixture is mostly smooth but still has some texture — you don’t want it completely pureed into a paste. Taste and adjust the lemon juice and salt as needed. Transfer to a serving bowl and drizzle with a bit more olive oil. Serve at room temperature or slightly chilled.
What to Serve Alongside
This dip pairs beautifully with cucumber slices, bell pepper strips, crackers, grilled bread, and pita chips. It also works as a spread on crostini or inside grilled vegetables like zucchini or eggplant.
7. Crispy Bacon and Cheddar Dip With Ranch Undertones

This is the dip that makes people ask for the recipe because they can’t quite place the flavor — they know it’s smoky and cheesy and definitely bacon-forward, but there’s something subtly herb-flavored underneath that makes them go back for another scoop. The secret is starting with a base that includes a touch of ranch seasoning mix (or dried herbs), which creates that familiar flavor everyone loves, then building it up with real bacon, sharp Cheddar cheese, and sour cream.
This dip tastes best warm because the bacon is crispier and the cheese is melted and creamy, but it’s also pretty good at room temperature or even cold. People with a protein-forward palate absolutely love this one — it tastes substantial in a way that vegetable dips don’t.
Making Bacon That Stays Crispy in Dip
The biggest challenge with bacon in dips is that it tends to absorb moisture from the other ingredients and get soft and chewy instead of staying crispy. The solution is cooking the bacon until it’s extra-crispy (not just limp), then chopping it into small pieces and adding it at the very last moment. If you’re making the dip ahead and reheating it, hold back half the bacon and stir it in just before serving.
How to Make It
Cook one pound of bacon in a large skillet until it’s very crispy — about 12 to 15 minutes depending on the thickness of the bacon. Transfer the cooked bacon to a paper towel-lined plate to drain, then chop it into small bite-sized pieces. Pour off all but two tablespoons of the bacon fat from the skillet and set it aside. In a large bowl, combine eight ounces of softened cream cheese, one-half cup of sour cream, one tablespoon of dried chives (or one-quarter cup of fresh), one-quarter teaspoon of garlic powder, one-quarter teaspoon of onion powder, and one-eighth teaspoon of black pepper. Stir until smooth. Add two cups of shredded sharp Cheddar cheese and stir until fully combined. Fold in the chopped bacon (reserving a small handful for topping) and two tablespoons of sliced green onions. Transfer to a baking dish, drizzle with the reserved bacon fat, and top with the remaining bacon. Bake at 350°F for 12 to 15 minutes until heated through and slightly golden at the edges. Alternatively, warm it gently on the stovetop over low heat.
Easy Make-Ahead Option
Assemble the dip in a baking dish up to one day ahead, cover, and refrigerate. The bacon can be cooked several days in advance and stored in an airtight container. Just assemble and bake when you’re ready to serve.
8. Fresh Guacamole Dip That Stays Bright and Green
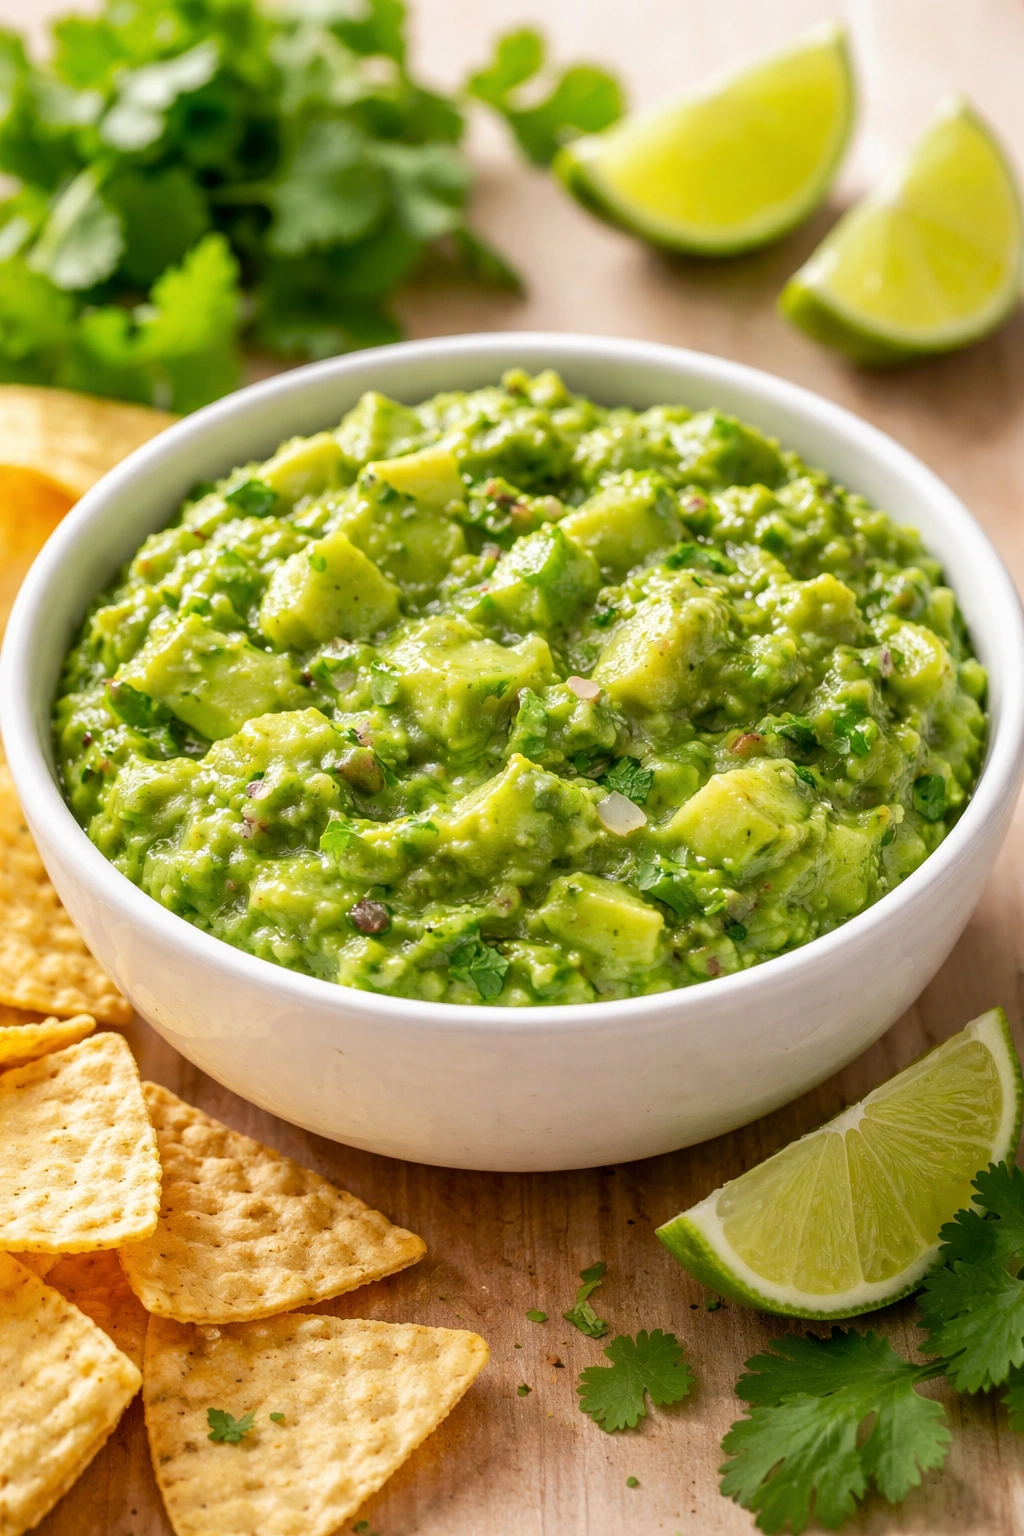
Guacamole is the dip that needs no introduction — when it’s made properly, with ripe avocados, bright lime juice, and just enough garlic and cilantro, it’s absolutely irresistible. The challenge with guacamole is keeping it from browning, understanding when avocados are perfectly ripe versus overripe, and getting the texture right — creamy but with some small chunks, not whipped into a mousse or mashed into a paste.
This version includes a small amount of sour cream or Greek yogurt, which sounds unusual but actually helps keep the guacamole bright and prevents that brownish tint from oxidation. It also makes the dip silkier without making it less flavorful. Some people skip this step, and that’s fine — it’s optional — but it genuinely helps with texture and color preservation.
Understanding Avocado Ripeness
An avocado that’s perfectly ripe should yield slightly when you press it gently in the palm of your hand, but it shouldn’t be mushy or soft. If you buy rock-hard avocados, place them in a paper bag at room temperature for one to three days until they’re ready. An avocado with a brown pit area inside is still fine to eat as long as the flesh is green — brown flesh means it’s past peak ripeness and should be discarded. For the absolute best guacamole, use avocados that are ripe today, not ones you’re planning to use later — the texture and flavor are noticeably better.
How to Make It
Cut three ripe avocados in half lengthwise, remove the pit, and scoop the flesh into a bowl. Using a fork, mash the avocado until you reach your preferred consistency — some people like a few small chunks remaining, others prefer it slightly smoother. Add the zest and juice of one lime, one-quarter cup of finely diced red onion, one-quarter cup of chopped fresh cilantro, one minced jalapeño (seeds removed if you prefer less heat), two minced garlic cloves, and one-quarter teaspoon of salt. Stir gently to combine. If you want to use the sour cream trick, fold in two tablespoons of sour cream or Greek yogurt at this point. Taste and adjust the lime juice, salt, and cilantro as needed. The guacamole is best served within 30 minutes of making it, but if you need to hold it longer, press plastic wrap directly onto the surface to minimize air exposure and oxidation.
Variations and Add-Ins
Add one-quarter cup of diced fresh pineapple or mango for a tropical twist. Add one-quarter cup of diced tomato if you want something closer to guacamole salsa. Add one-half teaspoon of cumin for earthy depth. Add a handful of pomegranate seeds for bright color and a sweet-tart crunch. Each variation keeps the dip interesting without requiring a completely different recipe.
Final Thoughts

The best appetizer dip is the one you actually make instead of buying pre-made. When you spend just 15 to 20 minutes assembling one of these eight dips, you end up with something that tastes infinitely fresher and more flavorful than anything mass-produced, and you get to feel genuinely proud of what you’re serving.
These dips share something important: they all rely on quality ingredients and basic flavor combinations rather than complicated techniques or hard-to-find specialty items. A good cream cheese base, fresh herbs, quality cheese, and proper seasoning can take you remarkably far. The beautiful part about having a small collection of reliable dip recipes in your back pocket is that you can pick one based on what you have on hand and what your guests might enjoy — whether they’re coming for the creamy and comforting, the fresh and bright, or the warm and indulgent.
Start with whichever dip sounds most appealing and make it exactly as written. Once you understand how these recipes work, you’ll feel confident tweaking them based on your preferences and what’s in your kitchen. That’s when dips stop being a recipe you follow and start becoming something you make your own.