There’s something genuinely magical about a meal that arrives on the table in under an hour, tastes like you spent your whole evening cooking, and leaves you with exactly one pot to wash. One-pot enchilada rice delivers on all three counts—and it’s become the secret weapon of home cooks everywhere who refuse to sacrifice flavor for convenience.
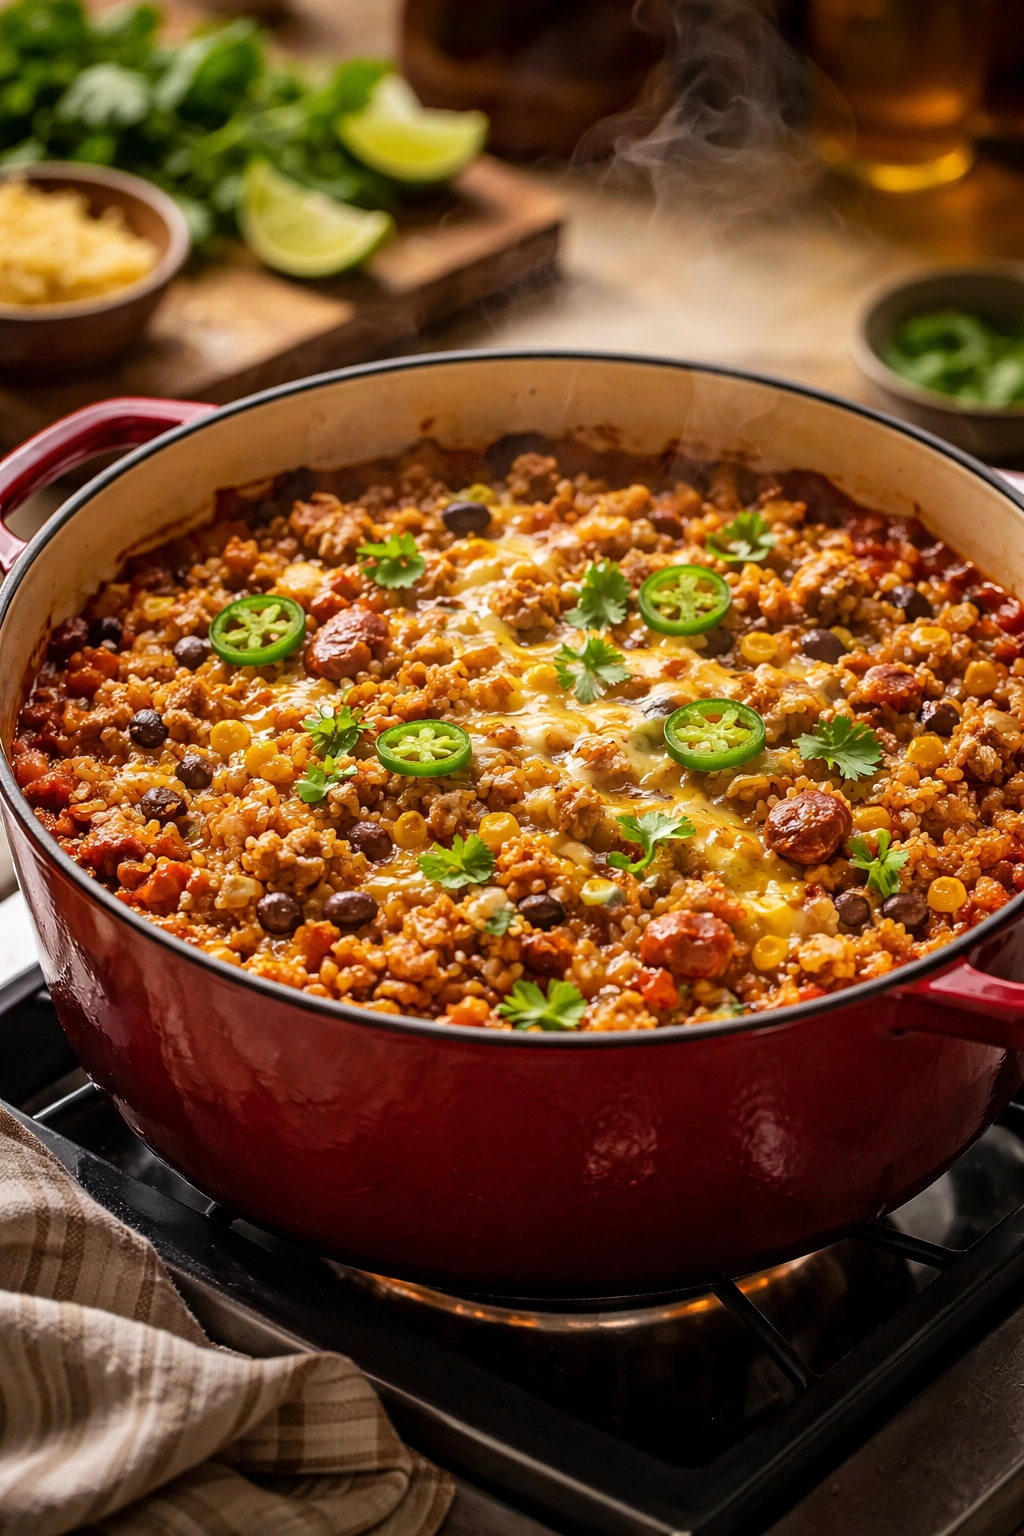
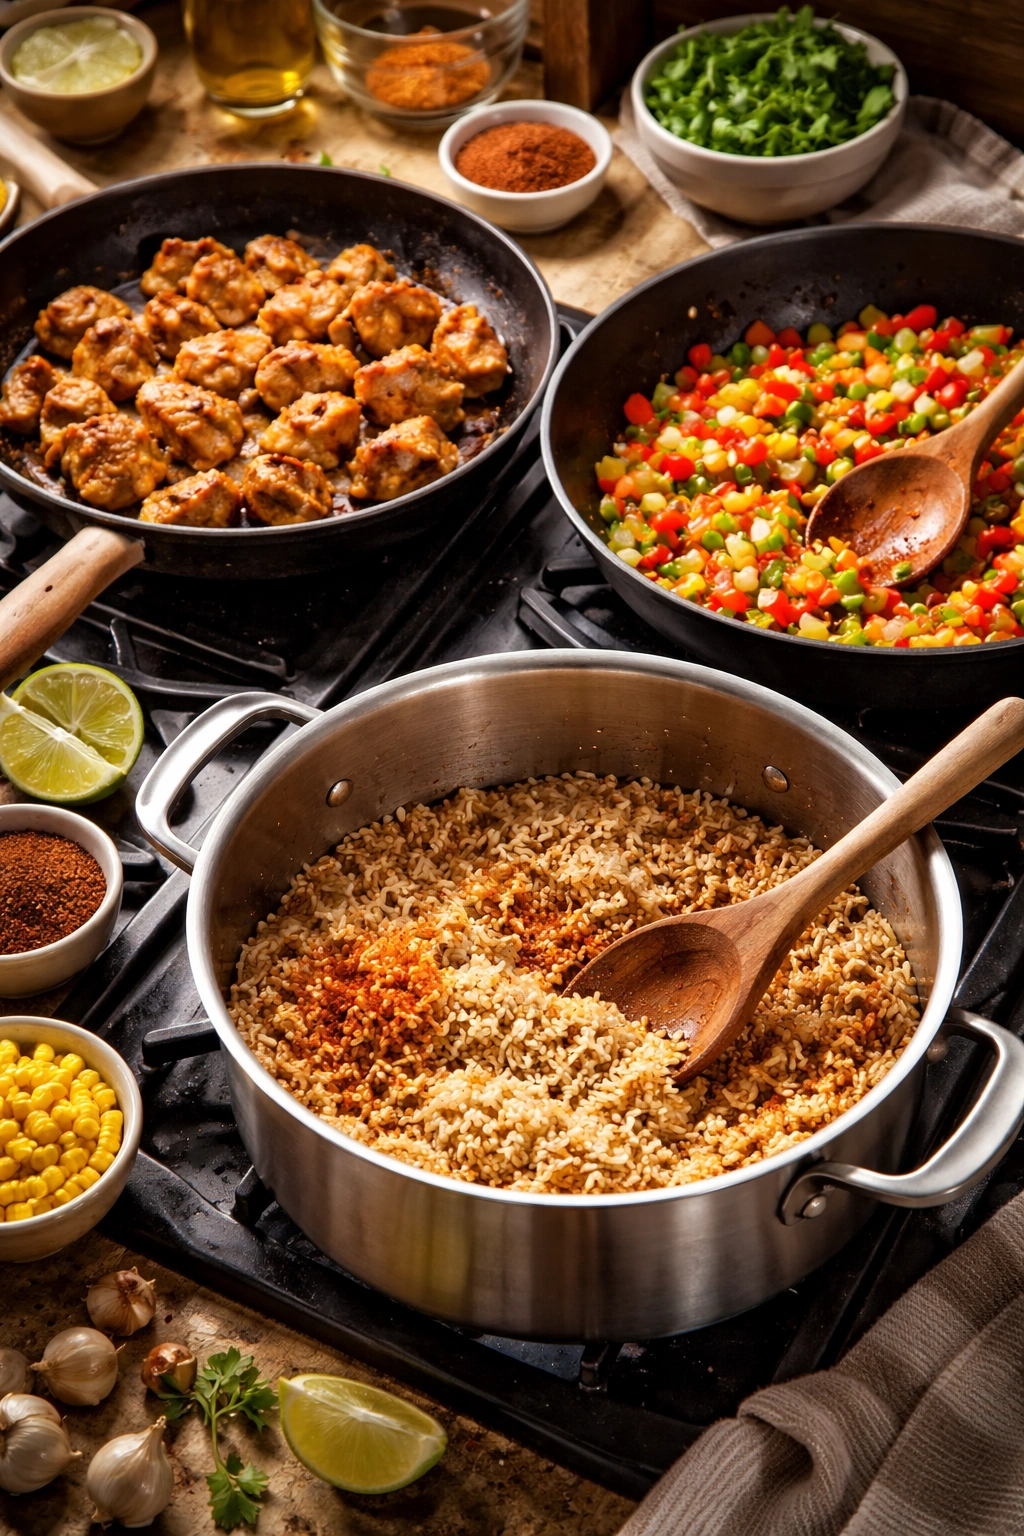
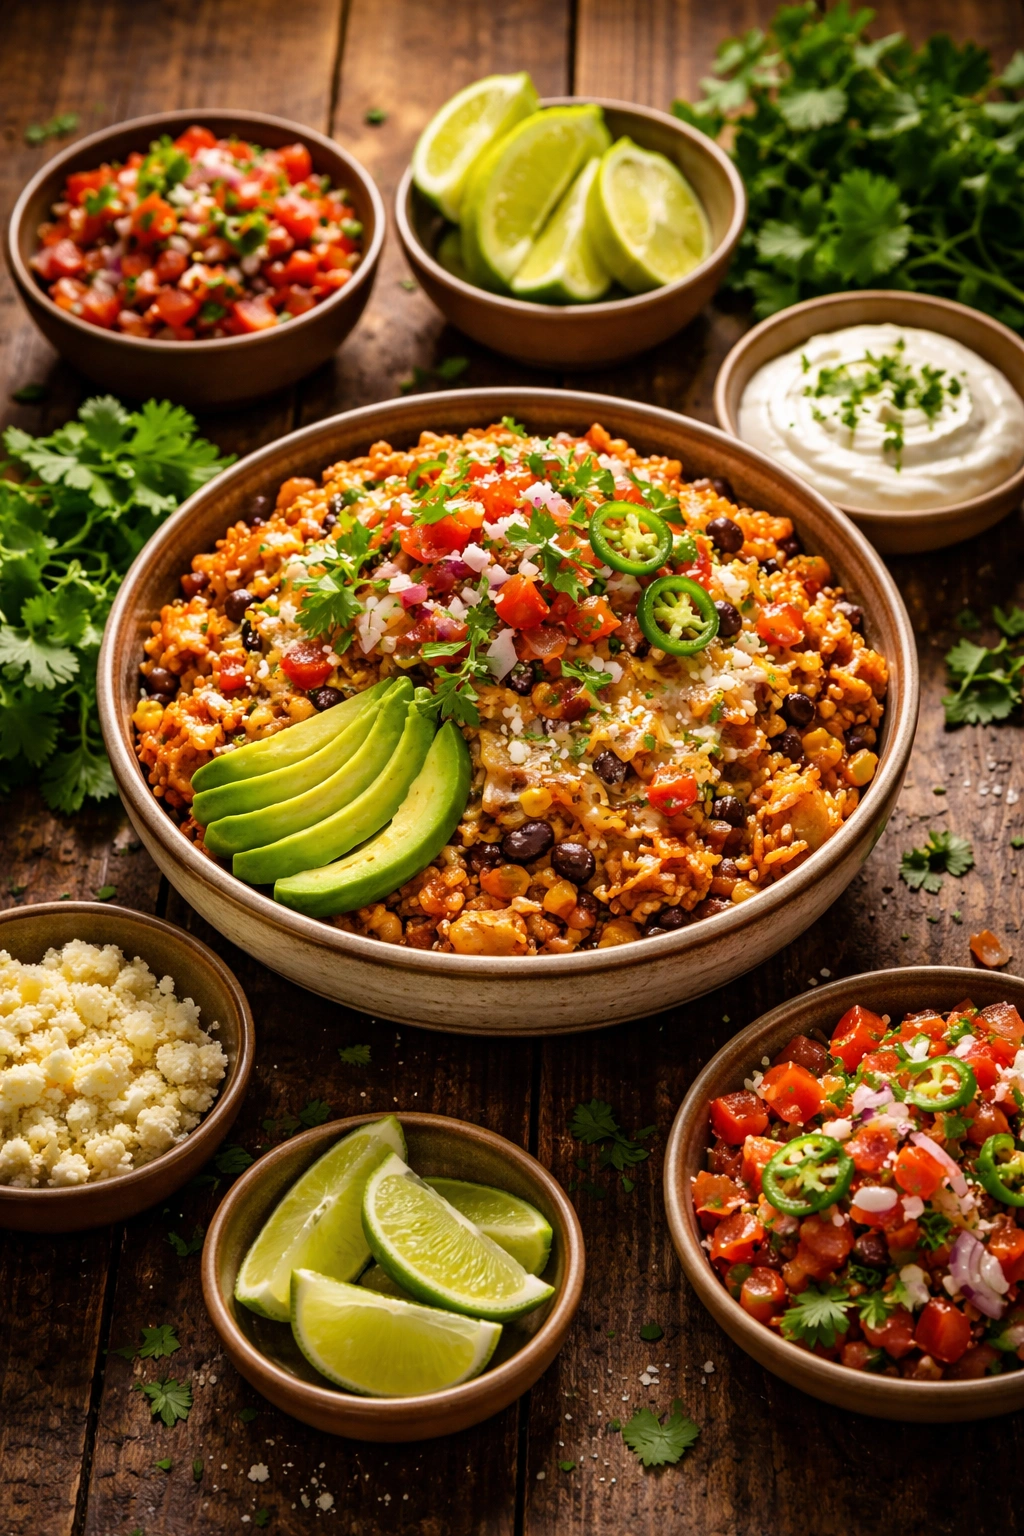
This dish captures everything you love about enchiladas: that intoxicating blend of earthy cumin, warm chili powder, the brightness of cilantro, melted cheese pulling away from the edges, and tender pieces of chicken nestled into fluffy rice. But instead of wrestling with tortillas, rolling them individually, layering them in a casserole dish, and then waiting for everything to bake, you get a complete meal that cooks entirely in one skillet or Dutch oven. No extra pans. No assembly required. Just straightforward, delicious food.
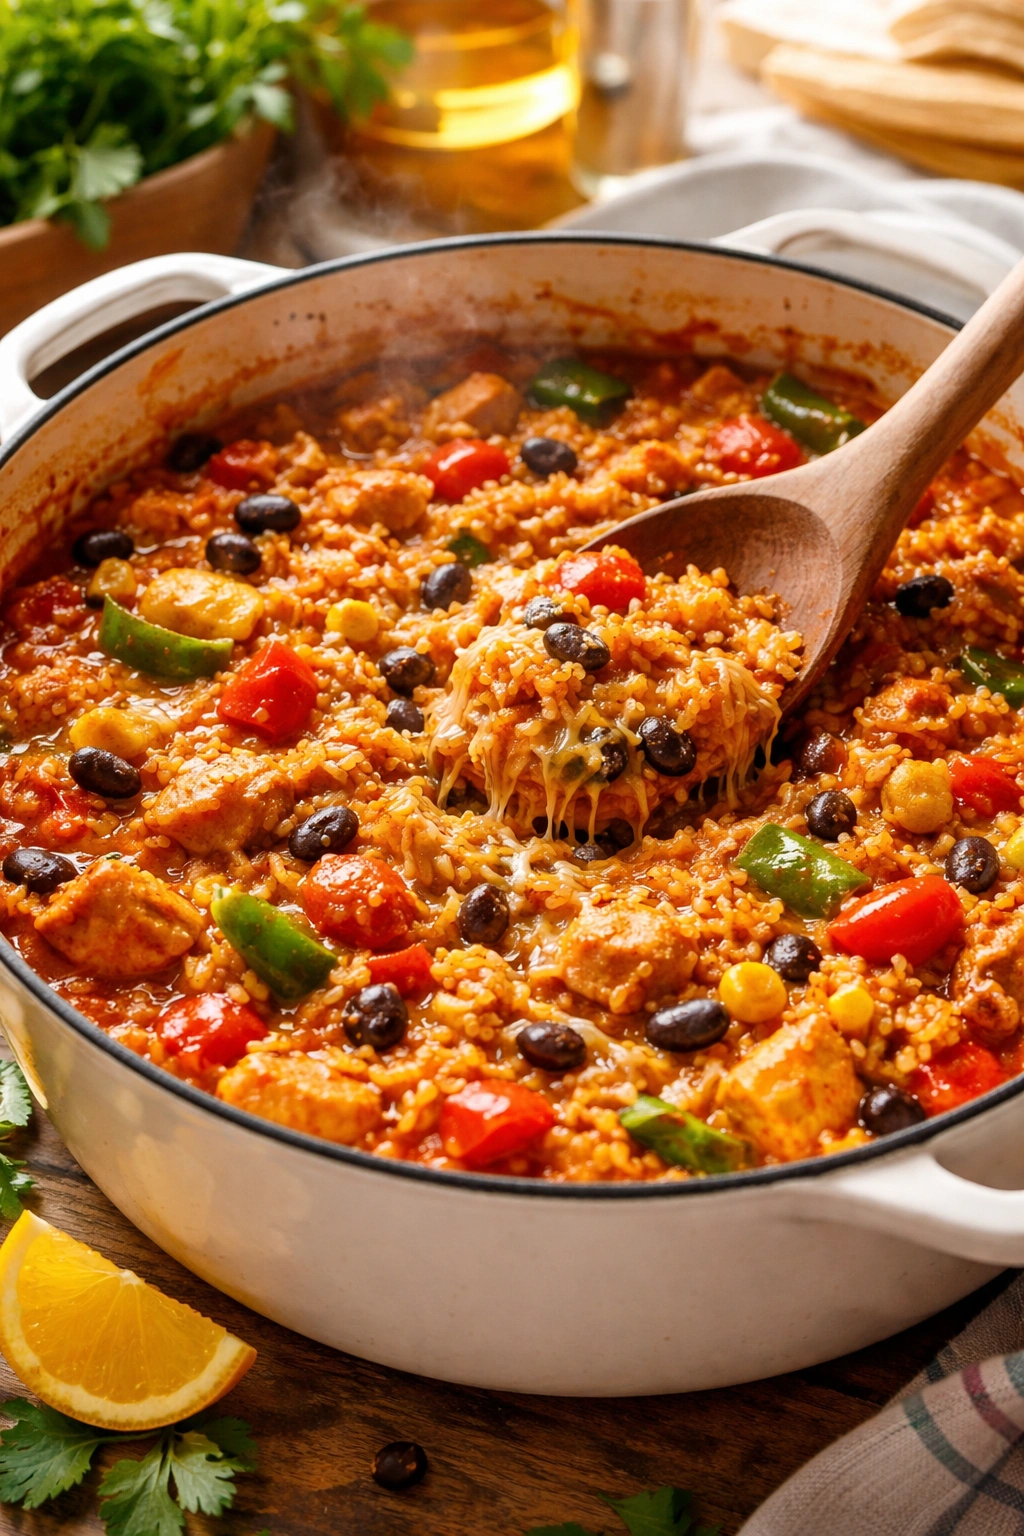
What makes this recipe truly special isn’t just the time it saves—it’s that the flavors somehow taste better when they all cook together. The rice absorbs the enchilada sauce as it cooks, every grain picking up the layered complexity of the spices and the chicken. The corn and black beans soften and sweeten. The cheese melts throughout rather than sitting in a concentrated layer on top. You end up with a cohesive, incredibly flavorful dish that feels like comfort food but tastes like you actually know your way around Mexican cuisine.
This is the meal you make when you’ve had a brutal day at work and need something satisfying on the table by 6:30. It’s what you reach for when you’re feeding a family of four on a budget without compromising on taste. It’s the recipe you bring to potlucks because it travels beautifully, reheats perfectly, and somehow disappears faster than everything else on the table. Once you master the basic technique, you’ll find yourself making variations with different proteins, vegetable swaps, and spice levels depending on what’s in your pantry and who’s at your table.
Why Busy Nights Need This Meal
The core appeal of one-pot enchilada rice comes down to one simple truth: this is a complete dinner, not a side dish that requires accompaniments or a protein you still need to figure out. You’ve got carbohydrates from the rice, protein from the chicken and beans, vegetables woven throughout, and calcium from the cheese. There’s literally nothing else you need to cook unless you want to—though a simple salad, some tortilla chips, or fresh lime wedges are lovely additions that take zero effort.
The mental load shrinks dramatically when you’re not juggling multiple pans. You’re not tracking different cooking times for different components. You’re not doing mental math about whether the chicken is done while the rice is still crunchy. Everything cooks together in a single vessel, which means less cognitive overhead when you’re already exhausted.
The cleanup factor shouldn’t be underestimated either. One pot means one thing to wash instead of the usual cascade of mixing bowls, cutting boards, a skillet for the protein, another pot for the rice, and whatever casserole dish you’d normally use. For many people, that alone is worth choosing this over a more complicated version of the same dish.
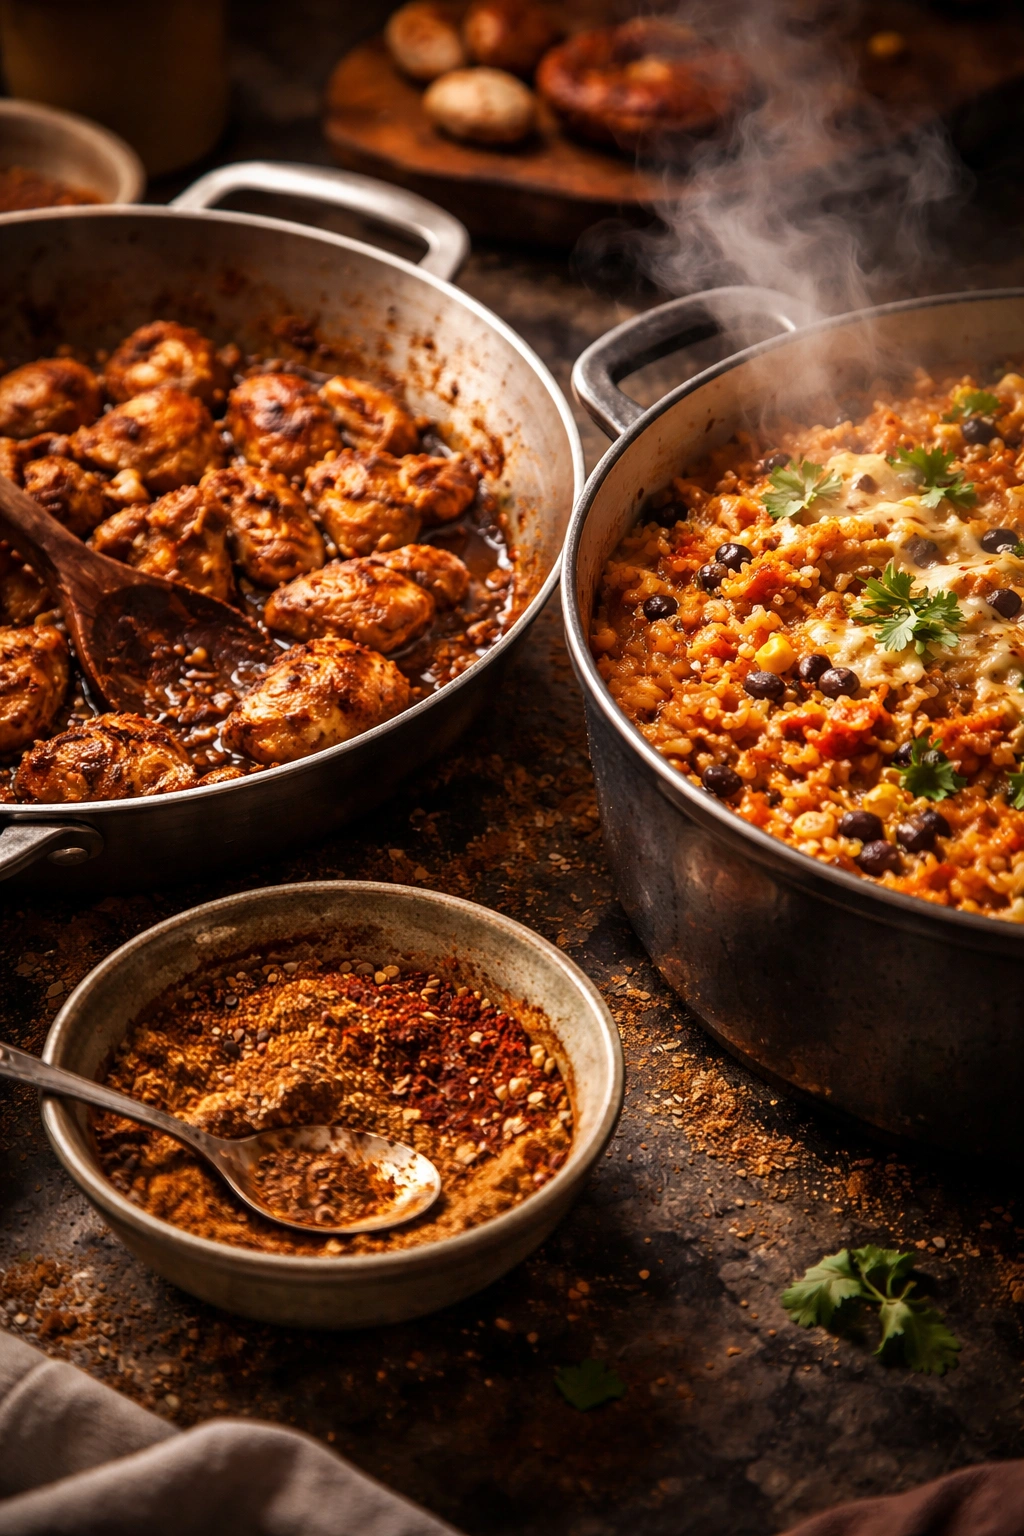
The Magic of Building Flavor in One Pot
When all your ingredients cook together from the start, something genuinely different happens chemically and flavor-wise compared to cooking components separately. The rice doesn’t just absorb water—it absorbs all the richness of the enchilada sauce, the sautéed aromatics, and the spice profile you’ve built. Every single grain gets seasoned throughout rather than sitting neutral until you mix everything together at the end.
The vegetables undergo a gentle transformation as well. Diced peppers and onions lose their raw edge while maintaining some texture. Corn kernels soften and release a subtle sweetness that balances the savory sauce. Black beans meld seamlessly into the overall texture rather than feeling like discrete additions. The result is unified and cohesive in a way that feels more sophisticated than the sum of its parts.
The cheese situation also deserves attention. Instead of scattering shredded cheese over the top and hoping it melts evenly, you’re either stirring it in at the end (where it distributes throughout) or broiling the top after it’s been added (where you get both melty pockets throughout and those irresistible golden, crispy edges). Either approach tastes better than cheese that’s sat on top of hot food too long.
The Beauty of Cooking with Enchilada Sauce
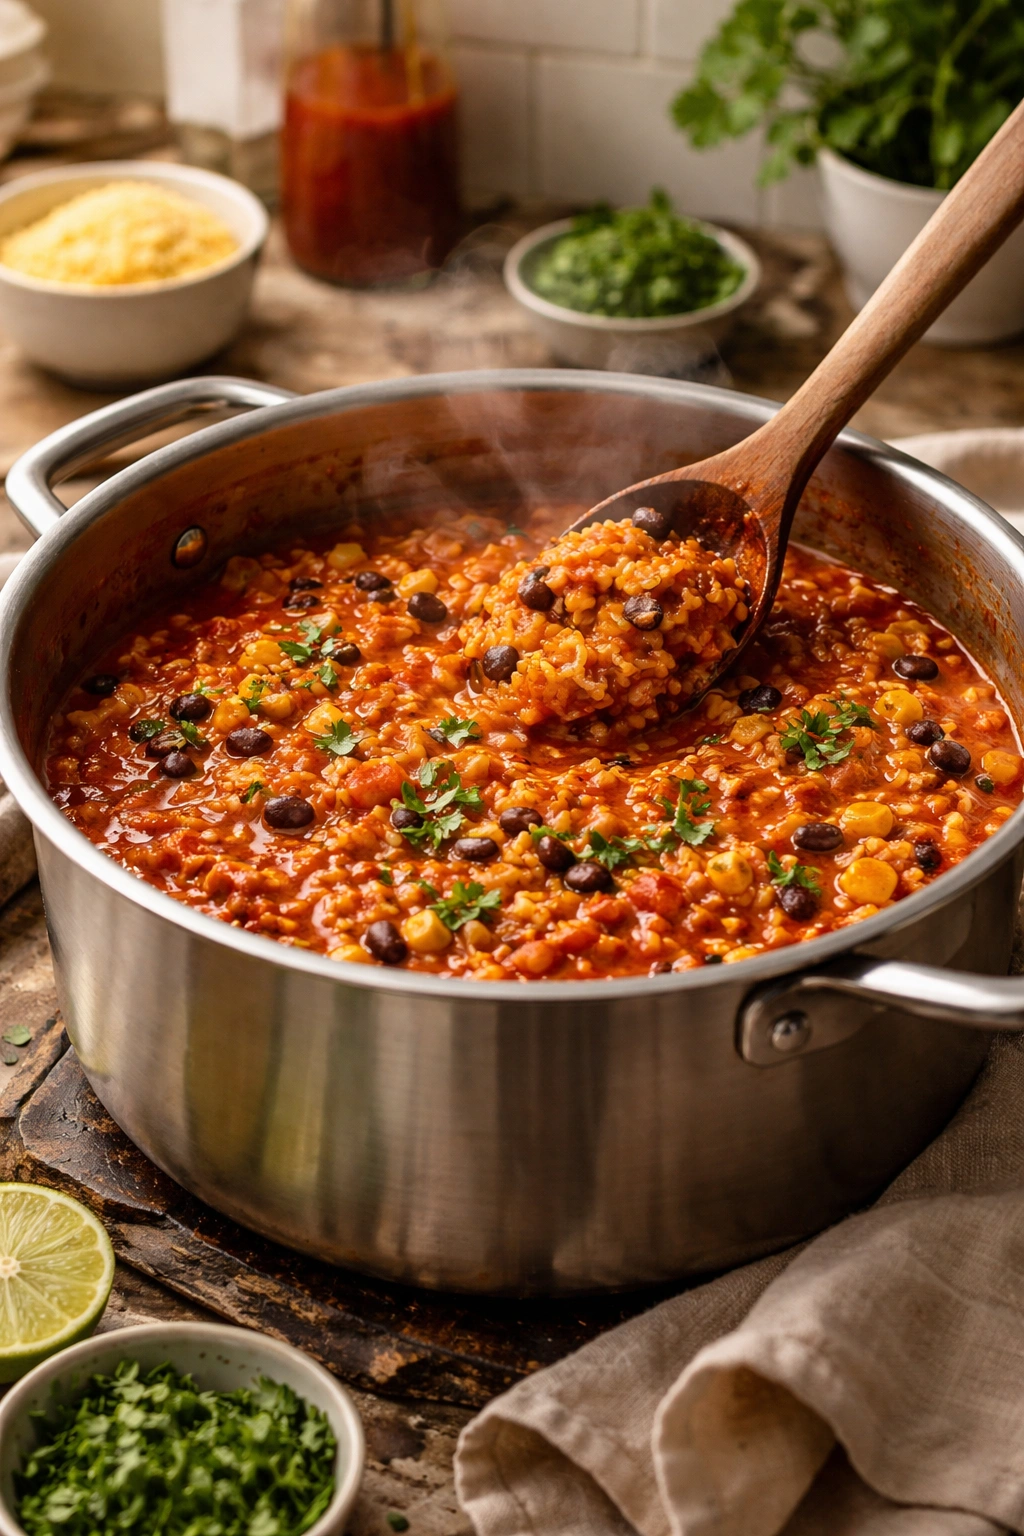
If you’ve never used enchilada sauce as a cooking medium rather than just a topping, you’re missing out on one of the easiest flavor shortcuts in the kitchen. Enchilada sauce—whether store-bought or homemade—becomes the liquid that cooks your rice, which means you’re not diluting flavor with plain water or neutral broth.
A single 10-ounce can of enchilada sauce contains concentrated layers of chile peppers, spices, tomatoes, and often a touch of vinegar. When it becomes your cooking liquid, it flavors every element of the dish from the inside out. You can absolutely use half enchilada sauce and half chicken broth (or water) if you want a lighter approach, or go predominantly with the sauce if you want bold, assertive flavors that’ll carry through even if you’re feeding someone who thinks “spicy” is relative.
The choice between red and green enchilada sauce is entirely personal. Red sauce tends to be earthier and slightly deeper, while green sauce (made from tomatillos) brings a fresher, tangier brightness. Many home cooks split the difference and use both, which gives you the best of each flavor profile. Some prefer mild sauce and adjust heat with fresh jalapeños instead, while others go with the medium or hot versions. There’s genuine flexibility here.
Choosing the Right Rice for This Dish
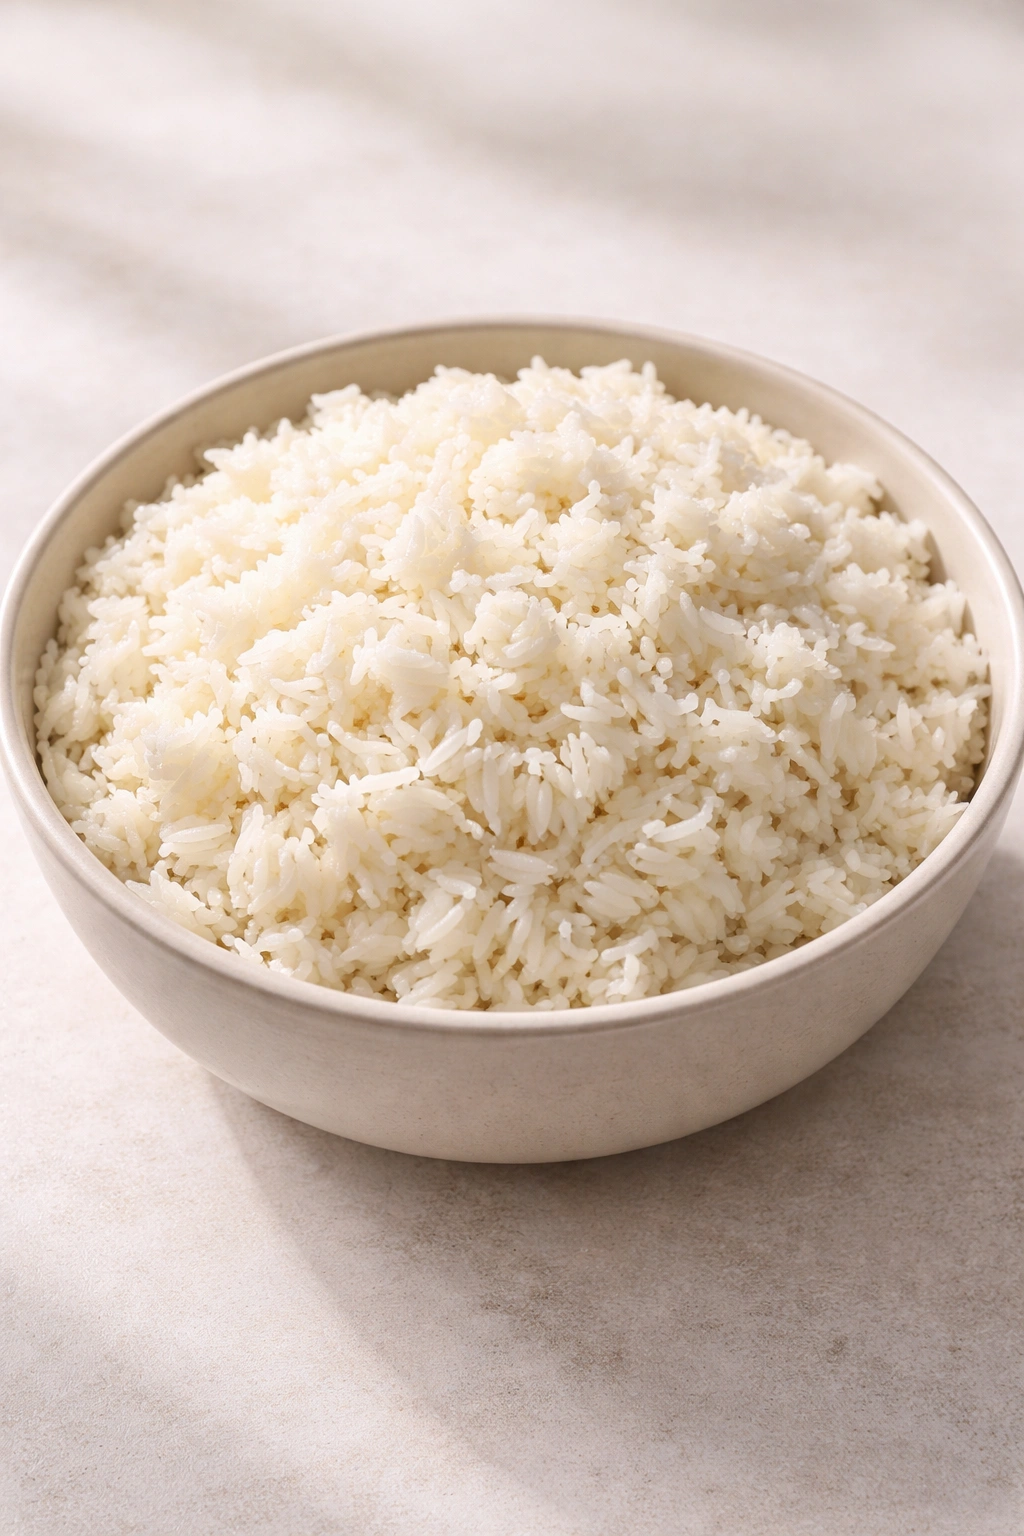
Not all rice behaves the same way, and choosing the right type makes a measurable difference in how your final dish turns out. Long-grain white rice is the most common choice for enchilada rice, and for good reason. It has a higher starch content that tends to absorb liquid steadily and evenly, and it finishes with individual, separate grains rather than clumping together. White rice also cooks faster than brown rice, which matters when you’re working with a 30-45 minute total timeline.
Instant rice (also called minute rice) will work if that’s what you have on hand, and it’ll be ready faster—usually in about 10 minutes rather than 15-20. The tradeoff is that instant rice has a slightly softer, less distinct texture, and some people find it a bit mushy. If you’re using instant rice, reduce the liquid slightly and watch it carefully so you don’t end up with porridge.
Brown rice is an excellent option if you want whole grains and don’t mind the longer cooking time. You’ll need about 25-30 minutes instead of 15-20, and you’ll want to increase your liquid ratio slightly (roughly 2¼ cups liquid to 1½ cups brown rice instead of the 2:1 ratio for white rice). Brown rice delivers a nuttier flavor and more substantial texture that works beautifully with the earthy spices in enchilada sauce.
Jasmine rice is another viable option—it has a subtle floral aroma and cooks similarly to white rice. Basmati rice will also work, though its distinct, slightly nutty flavor might compete with the enchilada sauce rather than complement it. Avoid arborio or other risotto rices, as they’re designed to release starch and create creaminess, which isn’t what you want here.
Building Your Enchilada Sauce Base
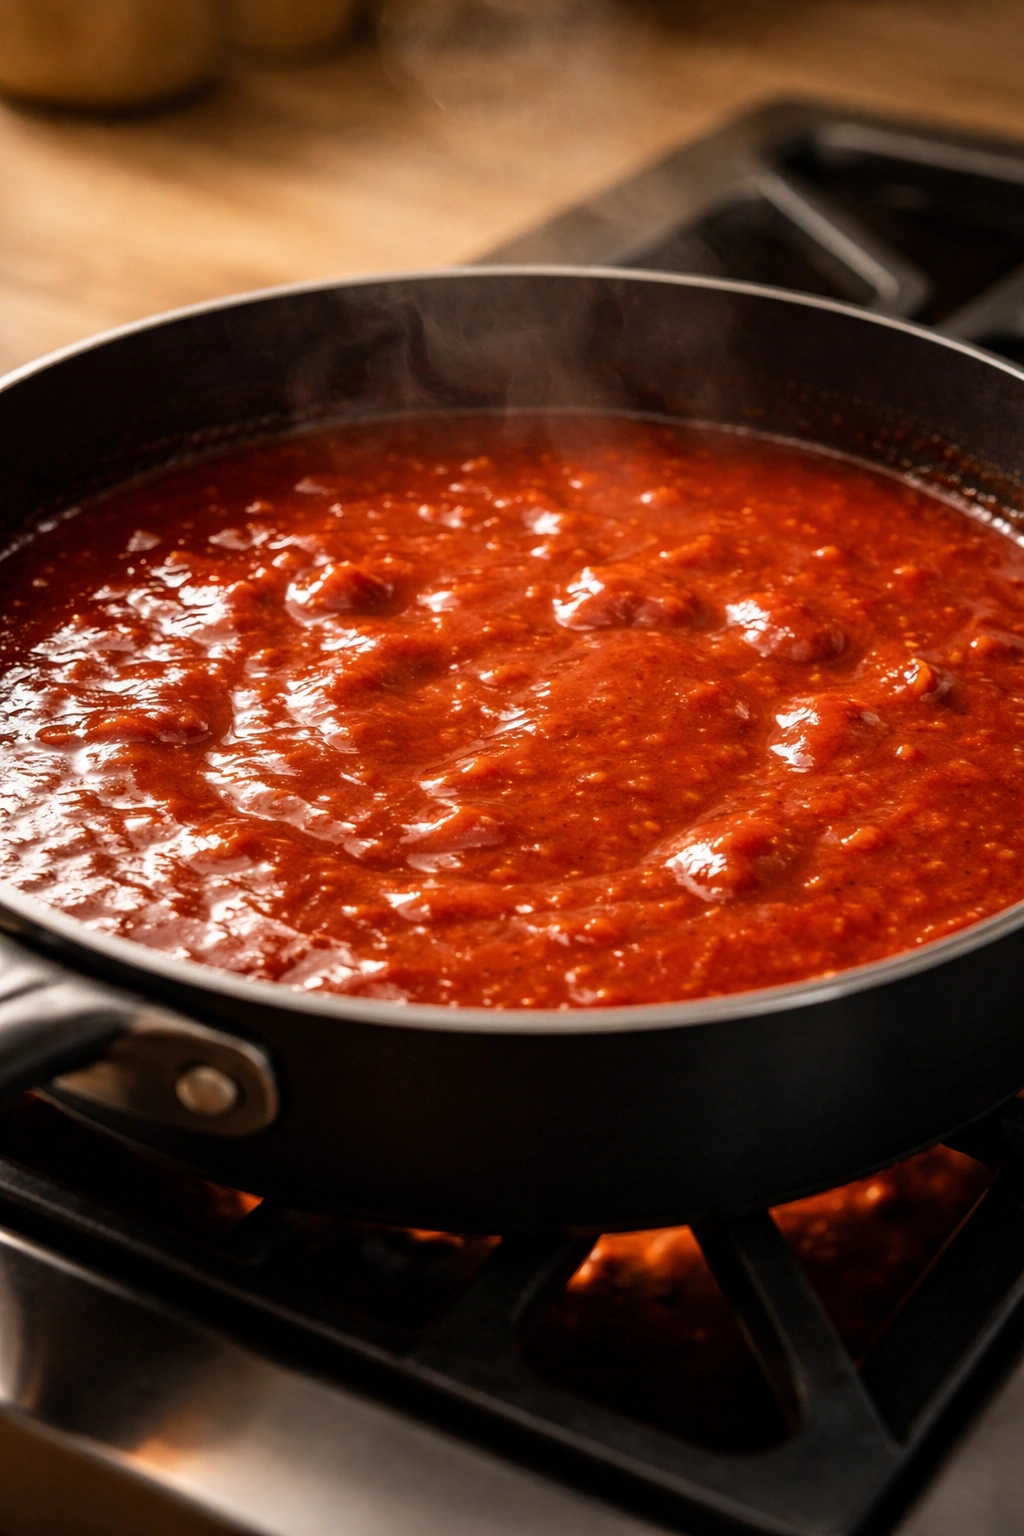
The enchilada sauce you choose—or make—forms the flavor foundation for your entire dish. If you’re using store-bought sauce, which is perfectly respectable and honestly preferable to many home cooks, you have some excellent branded options available. Look for sauces where the first ingredient is actually peppers or tomatoes rather than water, and taste test if possible before committing. Different brands have genuinely different flavor profiles, and finding one you love makes future batches even better.
Red enchilada sauce typically contains dried red chiles, often ancho or guajillo peppers blended with tomatoes, spices like cumin and garlic, and sometimes a touch of vinegar for brightness. It has an earthy, slightly smoky quality that pairs beautifully with chicken and cheese.
Green enchilada sauce (salsa verde) is made from tomatillos, fresh cilantro, green chiles, and garlic. It’s brighter and tangier than red sauce, with a fresher flavor profile that some people find more interesting. Green sauce works particularly well if you’re adding fresh cilantro and lime at the end.
If you want to make your own enchilada sauce, you’re looking at maybe 10 extra minutes of work: toast dried chiles, soak them in hot water, blend with garlic and spices, strain, and simmer briefly. Many home cooks swear by their homemade versions, and it’s absolutely worth trying if you’re comfortable blending raw peppers and spices. That said, there’s zero shame in using a quality store-bought sauce, especially on nights when you’re already stretched thin.
Essential Ingredients and Smart Substitutions
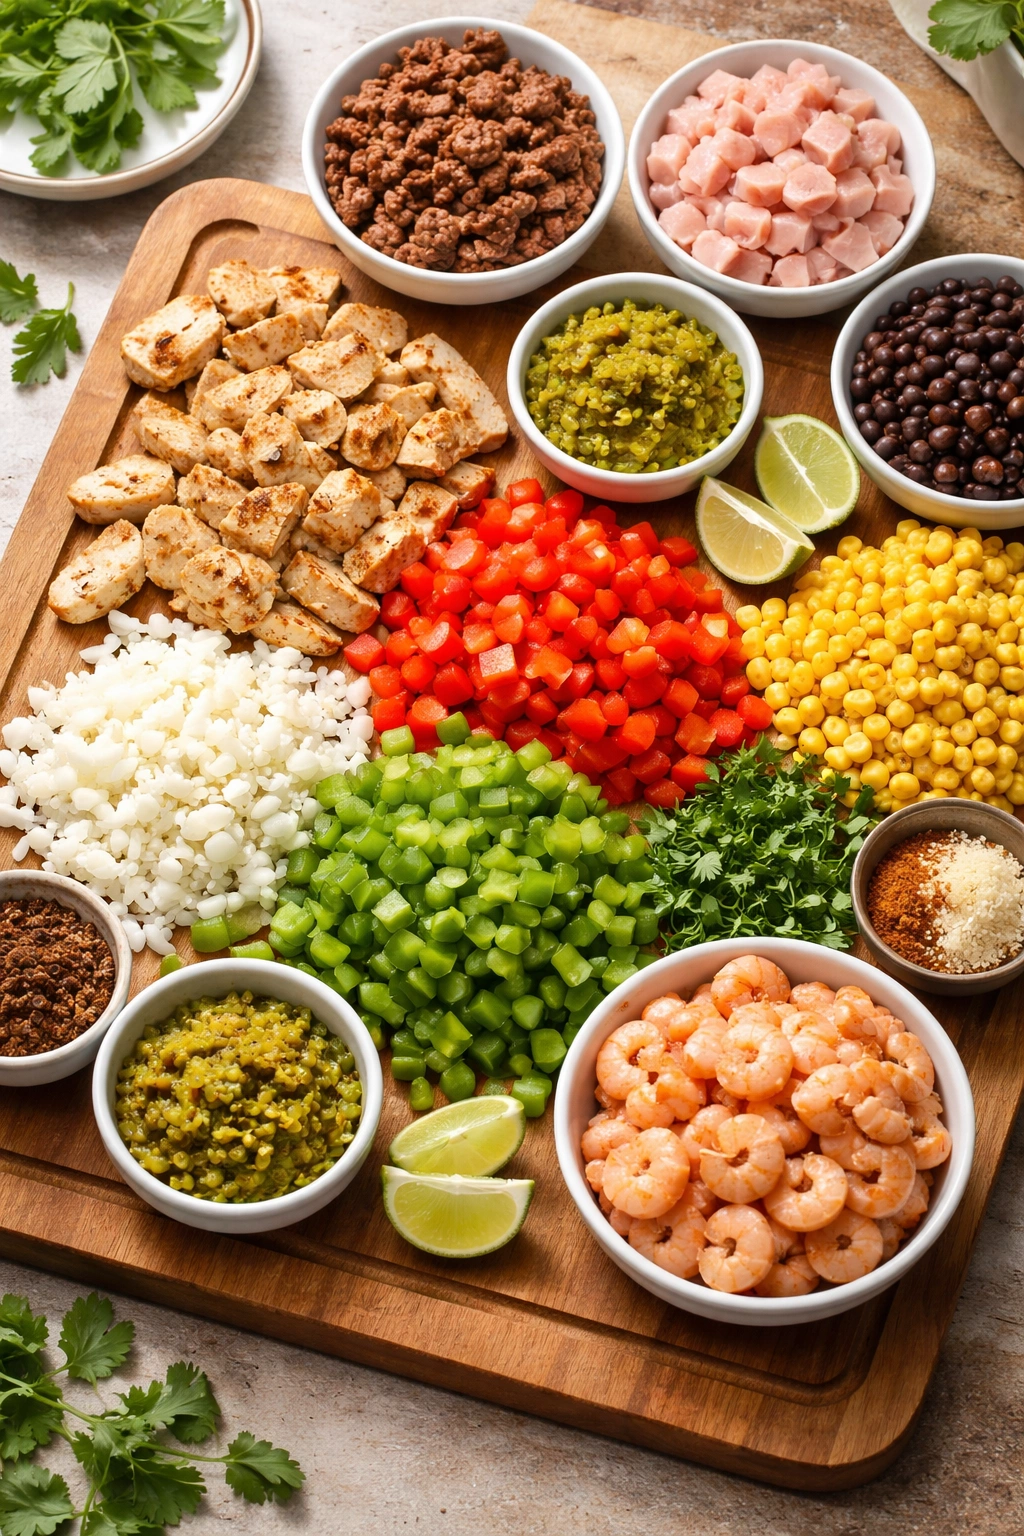
Every version of one-pot enchilada rice you’ll find shares a common backbone of ingredients, though the specifics vary based on preference and dietary needs. Understanding what each ingredient contributes helps you make informed substitutions without compromising the final dish.
Chicken is the protein in most versions, typically boneless, skinless chicken breasts cut into bite-sized pieces or thin horizontal “steaks” that cook faster. Some recipes use rotisserie chicken, which is brilliant if you’ve already got some in the house or want to skip the raw cooking step. Dark meat chicken thighs are more forgiving if you’re worried about dryness, though they add a few minutes to the cooking time. Ground chicken, shredded beef, ground turkey, or even chorizo will all work beautifully here. The only constraint is that whatever you choose needs to be cooked through by the time the rice is tender, so adjust sizes accordingly.
Diced peppers and onions provide aromatic sweetness and are typically sautéed for a few minutes before adding the rice. This brief cooking mellows the raw bite and allows them to flavor the oil before everything else joins the pot. Bell peppers in any color work—red and yellow are slightly sweeter, while green is more vegetal. Fresh jalapeños add genuine heat; dried chipotle peppers contribute smokiness along with spice.
Black beans and corn add fiber, plant-based protein, and textural interest. Both work beautifully from cans (rinse the beans thoroughly; drain the corn). Frozen corn works equally well and might actually taste fresher than canned. Pinto beans, kidney beans, or no beans at all are all viable if that’s what you have or prefer.
Cheese is non-negotiable for authenticity, and you want to use something that melts well. Mexican cheese blend is excellent; sharp cheddar brings a bite; Monterey Jack is creamy and mild. Avoid pre-shredded cheese that contains anti-caking agents if possible—it doesn’t melt as smoothly. If you need dairy-free cheese, there are increasingly good options available now, though they don’t all melt identically.
Spices and seasonings like cumin, chili powder, garlic powder, and onion powder build the enchilada flavor profile. These are typically layered in at the beginning when you’re sautéing the vegetables, which allows them to bloom and become more aromatic. If you don’t have individual spices, a quality taco seasoning blend can substitute for most of the spice mixture.
Making the Recipe Your Own

The most basic version of one-pot enchilada rice follows a simple pattern: sauté aromatics, add rice and remaining ingredients, cook covered until the rice is tender, stir in cheese. From that foundation, you have freedom to customize.
Want to dial up the heat? Add fresh jalapeños, use medium or hot enchilada sauce instead of mild, or include a pinch of cayenne pepper or smoked paprika. Cook it slowly on the stovetop where you can adjust the spice level as you go, rather than all at once in a pressure cooker.
Want more vegetables? Diced zucchini, mushrooms, spinach, or even chopped broccoli will add nutrition and volume. Keep in mind that some vegetables (like spinach) cook down dramatically, so you can be generous. Others (like zucchini) maintain their volume, so adjust quantities accordingly.
Want to make it vegetarian? Simply omit the chicken and increase the beans and vegetables. The enchilada sauce, cheese, and spices provide more than enough flavor that you won’t miss the protein from meat.
Want it lighter? Use less cheese or low-fat cheese, choose white rice over cream-based variations, skip any sour cream or guacamole garnishes, and load up on the fresh vegetables and cilantro instead.
Yield, Prep Time, and Difficulty Level
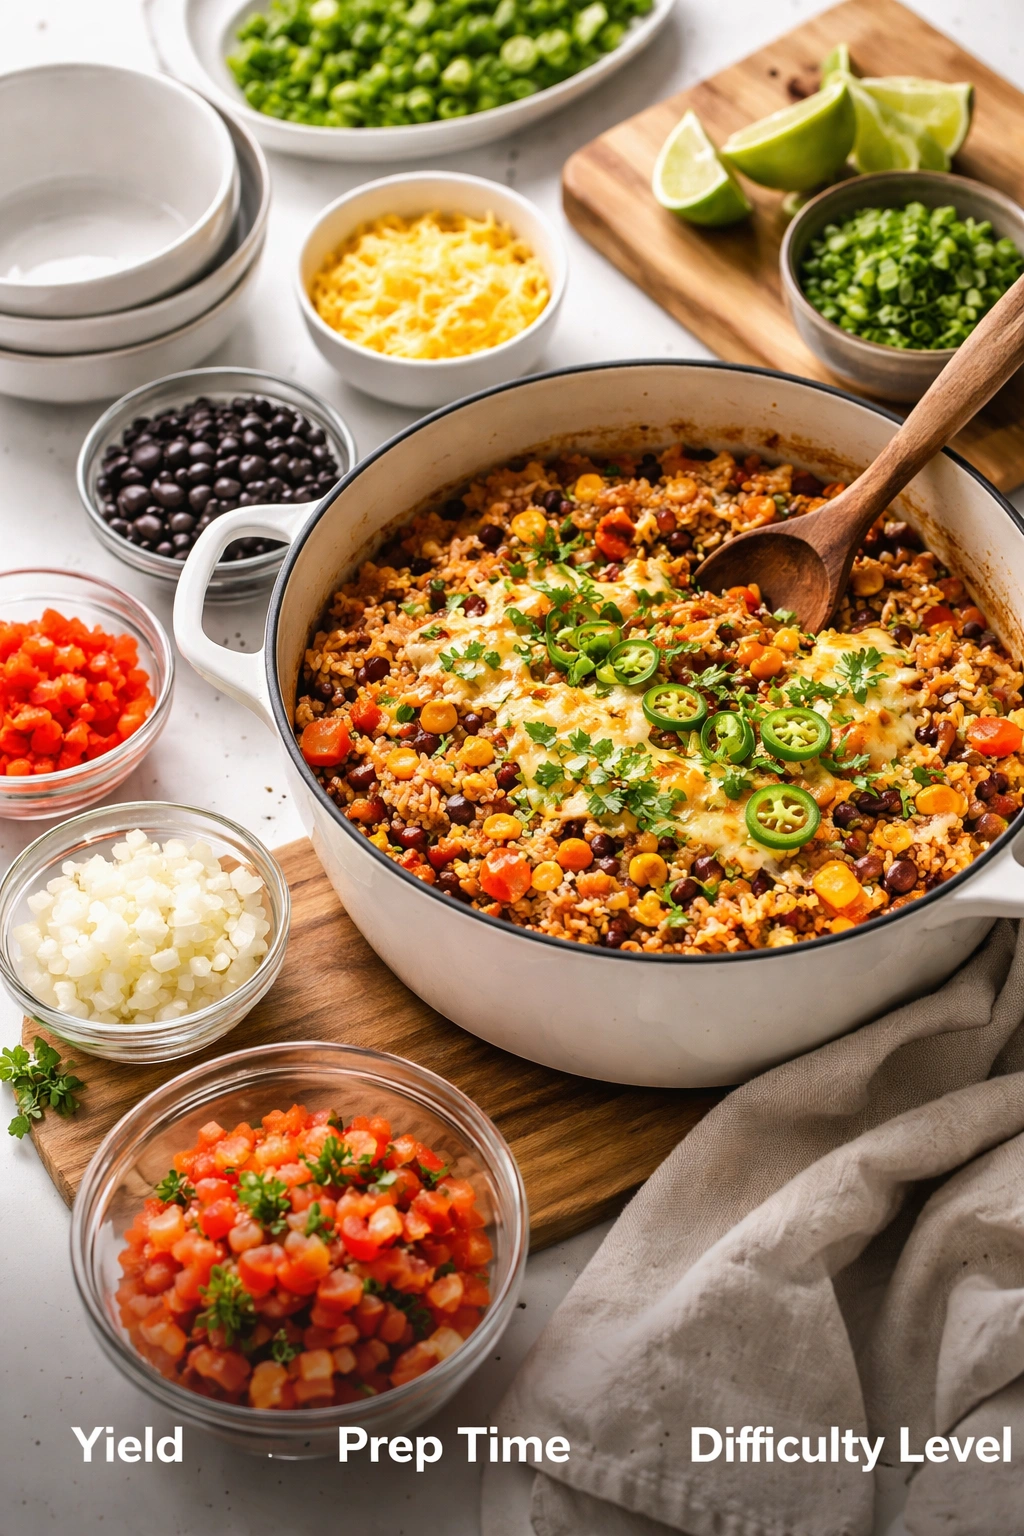
Yield: Serves 4 to 6 | Makes approximately 6 cups total
Prep Time: 15 minutes (hands-on active preparation)
Cook Time: 30 minutes (stovetop method) or 20 minutes (Instant Pot method, including pressure release)
Total Time: 45 minutes active cooking time (stovetop); 35 minutes with Instant Pot
Difficulty: Beginner to Intermediate — No special cooking techniques required; the most demanding part is accurate measuring and making sure the rice doesn’t burn on the bottom, which is easily avoided with proper heat management and the occasional stir.
The Complete Ingredient List
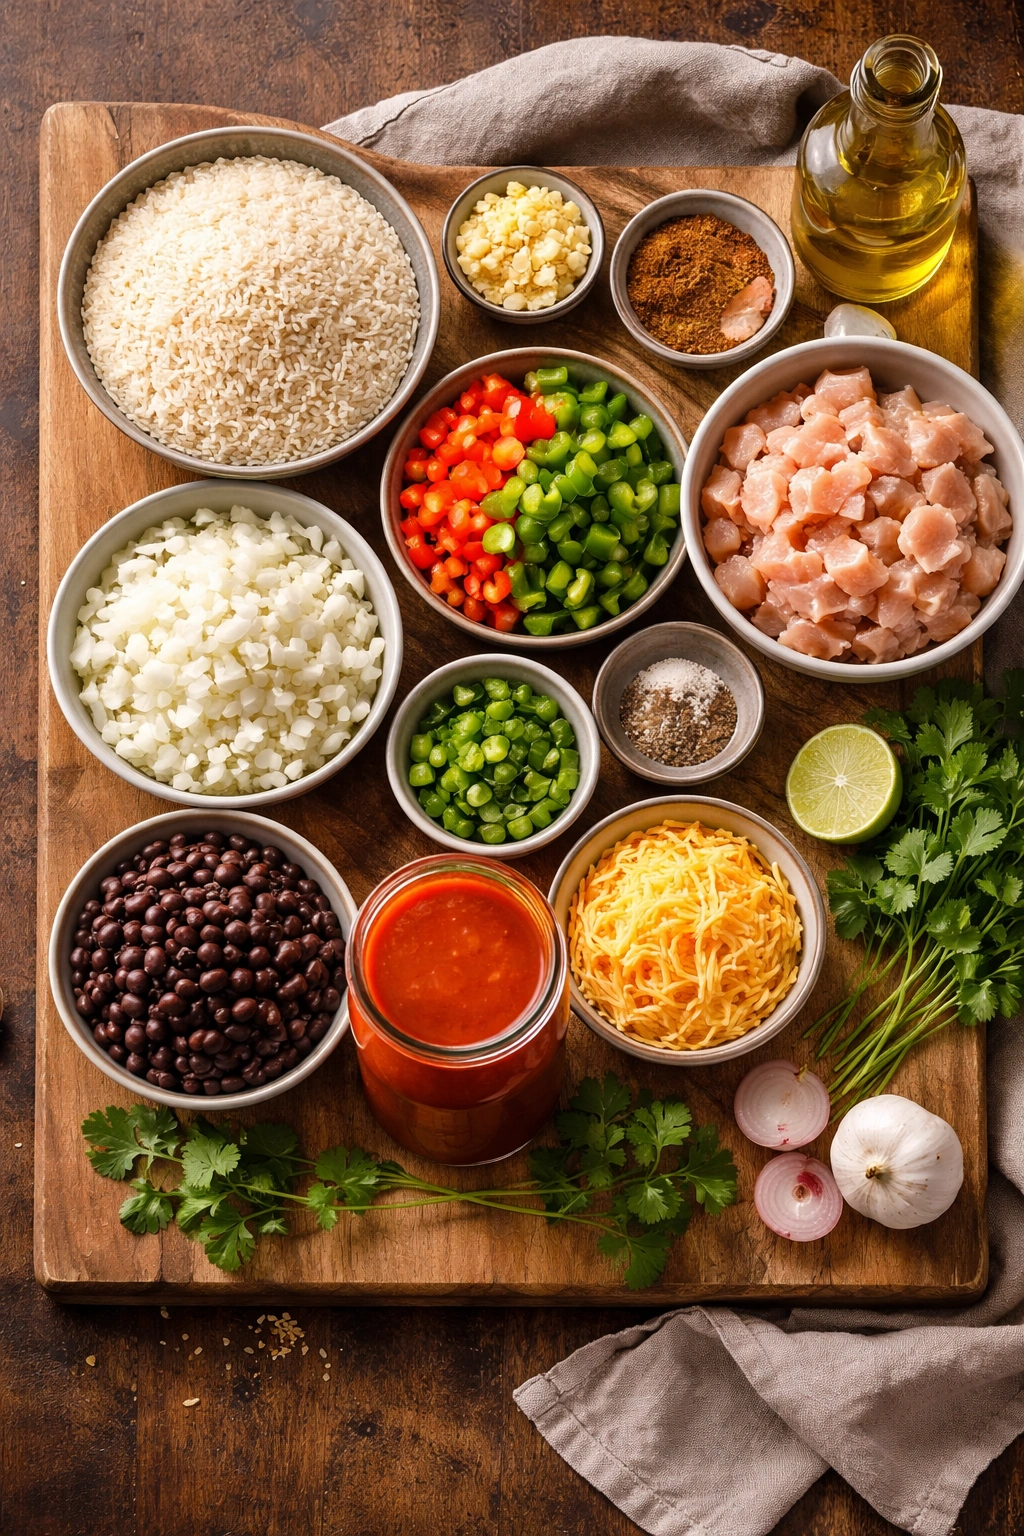
For the Rice Dish:
- 1½ cups long-grain white rice, uncooked (or 1½ cups brown rice if preferred, which requires slightly more liquid and longer cooking)
- 2 tablespoons olive oil or vegetable oil
- 1 medium yellow or white onion, diced into roughly ¼-inch pieces
- 3 to 4 large cloves fresh garlic, minced (or 1½ teaspoons garlic powder if using instead)
- 1 large red or green bell pepper, diced (approximately 1 to 1½ cups)
- 1 to 2 fresh jalapeños, de-seeded and minced (omit if you prefer milder heat)
- 2 to 2½ cups chicken broth or low-sodium vegetable broth (use water if you prefer a more sauce-forward flavor)
- 1 can (10 ounces) red enchilada sauce, or ½ cup red plus ½ cup green enchilada sauce for complexity
- 1 teaspoon ground cumin
- 1 teaspoon chili powder (use smoked paprika for a different flavor note)
- ½ teaspoon dried oregano
- 1 teaspoon onion powder
- ½ to 1 teaspoon salt, or to taste (start with ½ teaspoon, taste at the end, and adjust)
- ¼ teaspoon black pepper, freshly ground
- 2 to 3 cups cooked, shredded chicken (roughly 1 pound boneless, skinless chicken breast; see cooking notes below)
- 1 can (15 ounces) black beans, drained and rinsed thoroughly (or 1¾ cups cooked fresh beans)
- 1 cup frozen corn kernels, or 1 can (15 ounces) corn, drained (fresh corn cut from the cob is excellent in season)
- 1½ to 2 cups shredded cheese, divided (use a combination of sharp cheddar and Mexican blend, or your favorite melting cheese; this amount is divided—half stirred in at the end, half scattered on top)
For Serving and Garnishing (Optional but Recommended):
- ¼ cup fresh cilantro, roughly chopped
- 2 to 3 green onions (scallions), sliced thin
- 1 lime, cut into wedges
- Sour cream or crema for dolloping
- Sliced avocado or guacamole
- Tortilla chips for scooping
- Extra diced tomatoes or pico de gallo
- Red pepper flakes for additional heat
Step-by-Step Cooking Instructions
Prepare Your Ingredients:
-
If you’re using raw chicken breast, cut it into ½-inch cubes or thin horizontal steaks (place the breast flat on a cutting board and slice horizontally to create thinner pieces that cook faster). Pat the chicken dry with paper towels—this helps it brown better. Alternatively, if you’re using rotisserie chicken, shred it completely and set it aside.
-
Dice your onion and bell pepper into roughly ¼-inch pieces so they cook evenly. Mince your garlic finely. If using fresh jalapeños, cut them in half lengthwise, use a small spoon to scrape out the seeds and white membrane (this removes most of the heat while keeping the flavor), and mince finely.
-
Drain and rinse your canned black beans thoroughly in a fine-mesh strainer, running cool water over them and gently rubbing them between your fingers. This removes excess sodium and starch.
-
Have your enchilada sauce measured and your spices pre-measured into a small bowl so you’re not fumbling with jars while things are cooking.
Cook the Chicken and Build the Flavor Base:
-
Heat the olive oil in a large skillet, Dutch oven, or heavy pot over medium-high heat. Once the oil is shimmering (you’ll see it flow easily across the pan), add your diced chicken pieces in a single layer if possible. Do not stir immediately—let them sit undisturbed for 2 to 3 minutes so they brown rather than steam.
-
After the first side has developed some color and is no longer sticking to the pan, stir and cook for another 3 to 5 minutes, continuing to stir occasionally, until the chicken is no longer visibly pink on the outside. The chicken doesn’t need to be completely cooked through at this point—it will finish cooking when the rice cooks. Remove the cooked chicken to a clean plate.
-
In the same pot with the remaining oil and chicken drippings, add your diced onion and bell pepper. Cook over medium heat, stirring frequently, for 4 to 5 minutes, until the vegetables have softened and the onion is turning translucent at the edges. You’re looking for some color on the peppers and a slightly golden quality to the onions.
-
Add your minced garlic and minced jalapeños (if using), and stir constantly for about 1 minute. You’ll smell the garlic become fragrant—that’s when you know it’s ready. Be careful not to let the garlic scorch; if you have high heat and you’re worried, drop the heat to medium for this step.
Combine Everything and Cook the Rice:
-
Add your pre-measured spices (cumin, chili powder, oregano, onion powder, salt, and pepper) directly to the pot and stir constantly for 30 seconds to 1 minute. This brief toasting blooms the spices and makes them more aromatic. You’ll smell a noticeable shift in fragrance.
-
Add the uncooked rice to the pot and stir continuously for 2 minutes. This toasts the rice grains, which helps them stay separate when cooked and adds a subtle nuttiness. The rice will start to smell slightly toasted.
-
Pour in your chicken broth and enchilada sauce. Scrape the bottom of the pot with a wooden spoon to release any browned bits stuck to the surface—these are pure flavor and you want them incorporated. Stir everything together thoroughly so the spices are distributed and nothing is clumped at the bottom.
-
Return the cooked chicken to the pot and add the drained black beans and corn. Stir well to combine. Taste a spoonful of the liquid right now and adjust salt and spices if needed—it should taste flavorful but not overly salty, as the rice will absorb more flavor as it cooks.
-
Bring the pot to a gentle boil over medium-high heat. Once you see active bubbling around the edges, reduce the heat to low, cover with a lid (or tightly with foil if you don’t have a lid that fits), and cook for 15 to 20 minutes for white rice. The rice is done when all the liquid is absorbed and a grain, when bitten, is tender but not mushy. Start checking around the 12-minute mark by lifting the lid (be careful of the steam) and testing a grain between your teeth.
-
Remove from heat. Do not stir immediately—let it rest, covered, for 5 minutes. This allows carryover cooking and gives the grains time to firm up slightly after absorbing all that liquid.
Finish with Cheese and Final Touches:
-
After the 5-minute rest, lift the lid carefully (the steam will be hot). Stir the rice thoroughly with a fork, gently breaking up any clumps that might have formed. The texture should be fluffy, with individual grains visible.
-
Stir in half of your shredded cheese (about ¾ to 1 cup, depending on your total amount). Fold it in gently until it’s distributed throughout. The residual heat will begin melting the cheese.
-
Scatter the remaining cheese evenly over the top of the rice. Cover the pot with the lid for 2 to 3 minutes so the cheese melts from residual heat. Alternatively, if you want a more golden, crispy top, transfer the pot (if it’s oven-safe) under a preheated broiler for 2 to 3 minutes, watching carefully so the cheese melts without burning. Some of the rice will crisp up at the edges, which is wonderful.
Advertisements -
Remove from heat and let it sit, uncovered, for 1 to 2 minutes before serving. This allows the cheese to set slightly and the whole dish to firm up just a bit.
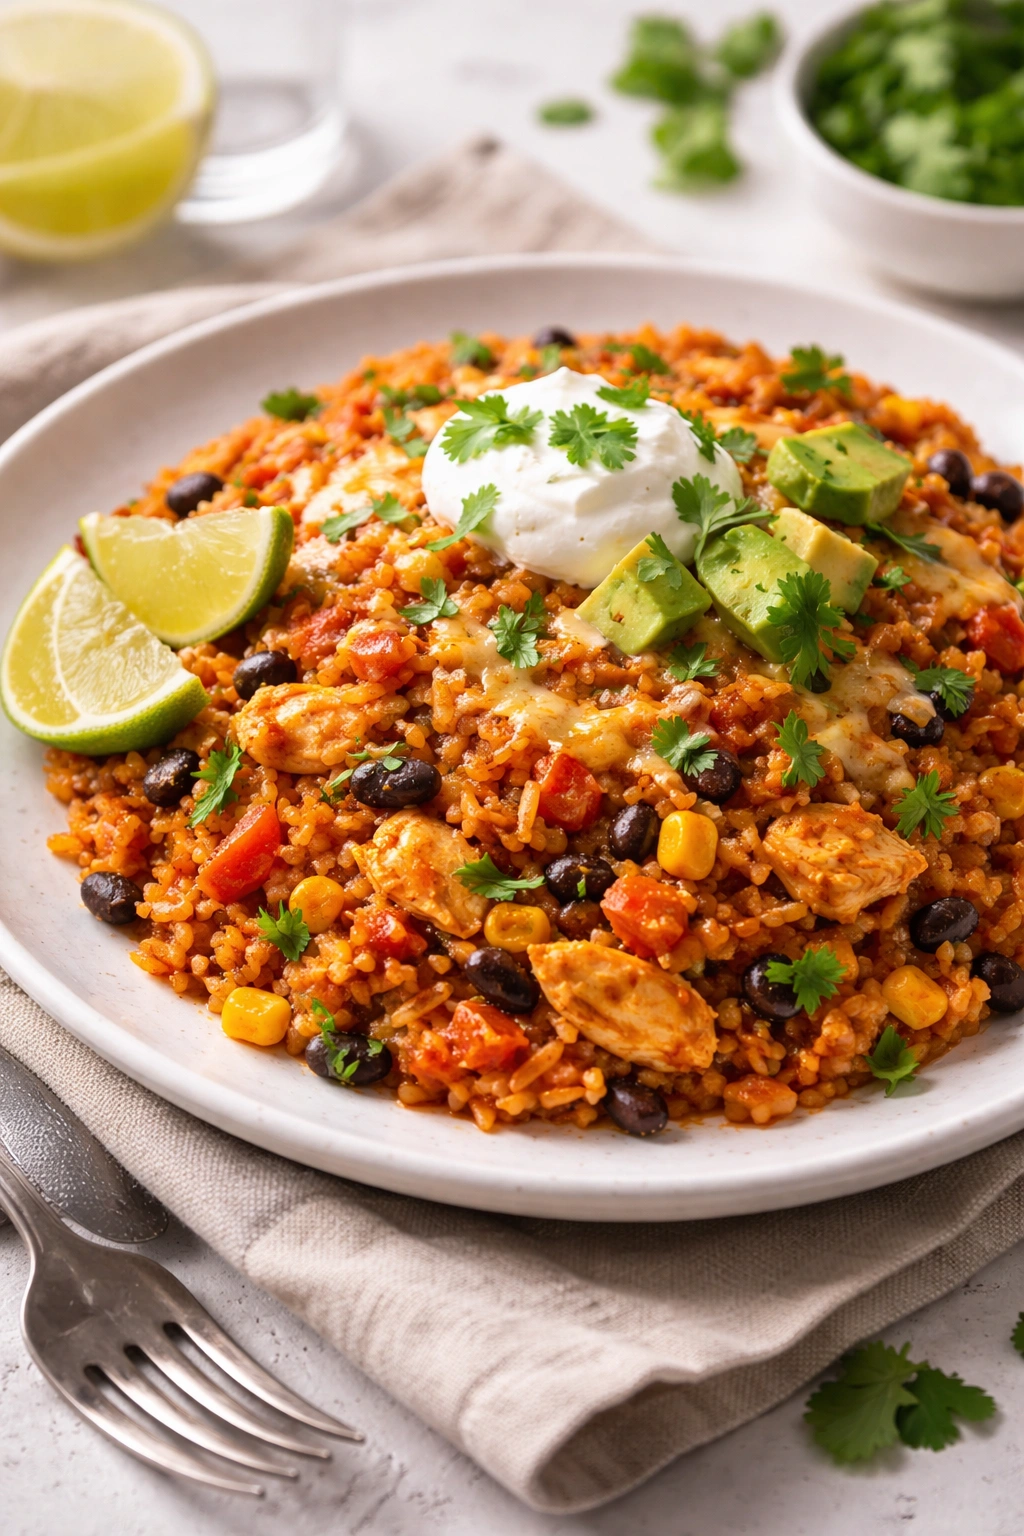
Serve:
- Garnish generously with fresh cilantro, green onions, and a squeeze of lime juice. Serve in bowls with sour cream, avocado slices, tortilla chips, and extra lime wedges on the side. Each person can customize their bowl to their preference.
Instant Pot Version (for those with a pressure cooker)
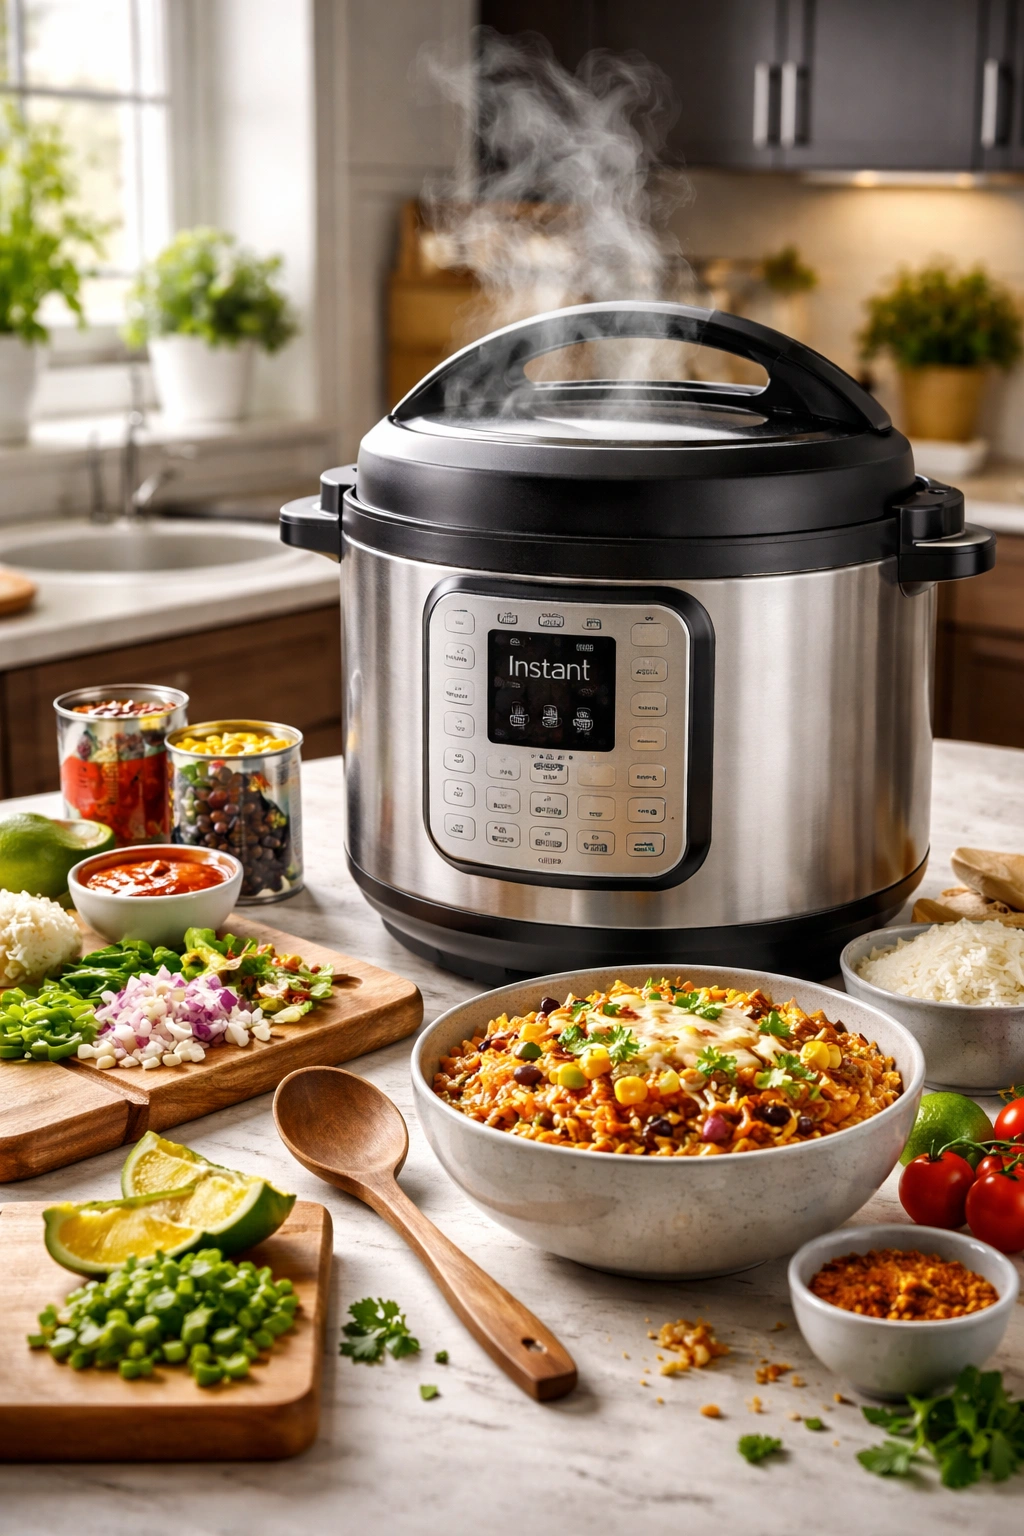
If you’re using an Instant Pot or similar electric pressure cooker, the method is slightly different:
Sauté Phase:
-
Press the Sauté button on your Instant Pot and set it to Normal heat. Once it displays “Hot,” add your oil, then immediately add the raw chicken pieces in a single layer. Let them sit for 2 minutes to brown, then stir and cook for another 3 minutes until no longer pink on the outside. Transfer to a plate.
-
In the remaining oil, add your diced onion, bell pepper, garlic, and jalapeños. Sauté for 2 to 3 minutes, stirring frequently, until softened and fragrant.
-
Add your spices (cumin, chili powder, oregano, onion powder, salt, pepper) and stir constantly for 30 seconds.
-
Add the uncooked rice and stir for 1 minute. This toasts the grains slightly.
Pressure Cook Phase:
-
Pour in your chicken broth and enchilada sauce. Use a spatula to scrape the bottom of the pot, ensuring nothing is stuck. Add the cooked chicken, black beans, and corn.
Advertisements -
Seal the lid (make sure the pressure release valve is set to Sealing, not Venting). Press the Manual or Pressure Cook button and set to high pressure for 5 minutes. The Instant Pot will take a few minutes to come to pressure before the timer actually starts counting down.
-
When the timer beeps, allow the pressure to release naturally for 5 minutes (during which time the rice continues cooking slightly from residual heat). After 5 minutes, manually release any remaining pressure by carefully moving the valve to Venting.
-
Carefully open the lid, lifting it away from your face to avoid the steam. The rice should be tender and most of the liquid absorbed. If there’s still visible liquid, you can let it sit with the lid off for a minute or two to evaporate.
-
Stir gently with a fork, breaking up any clumps. Stir in half the cheese, then scatter the remaining cheese on top and cover with a glass lid for 2 to 3 minutes to let it melt.
-
Garnish with cilantro, green onions, and lime, and serve as directed above.
Secrets to Perfect Results Every Time
The difference between adequate enchilada rice and truly excellent enchilada rice often comes down to technique details that seem small but compound into better results. Don’t skip the step of browning the chicken first. Those browned bits (called fond) dissolve into the liquid and add real depth. Raw chicken added directly to liquid poaches instead of browning, and you lose that layer of flavor.
Bloom your spices by toasting them. When you add spices to hot oil or fat and let them toast for 30 seconds before adding other ingredients, their essential oils release and become more concentrated and aromatic. This is a technique that transforms good food into great food, and it takes literally no extra time.
Toast the raw rice for a minute or two. This step is not just fluff—it helps the grains stay separate and distinct rather than clumping together, and it adds a subtle nutty quality that rounds out the enchilada flavors beautifully.
Don’t stir constantly while the rice cooks. Once you’ve covered the pot, resist the urge to lift the lid and stir. Every time you lift that lid, steam escapes and the cooking time extends. Trust the process. The rice knows what to do.
Start checking the rice at the 12-minute mark, not at 15. Different stovetops, different pot sizes, and different rice brands all cook at slightly different rates. Checking early means you catch it at perfect tenderness rather than accidentally overcooking it.
Taste the liquid before covering the pot. This is your only real chance to adjust seasoning before everything cooks down. Taste a spoonful of the broth, and if it doesn’t taste flavorful enough, add a pinch more salt, a splash more enchilada sauce, or an extra pinch of cumin. What tastes good at this stage will taste even better once the rice absorbs it.
Use fresh garlic if possible. Garlic powder is excellent in a pinch, but fresh minced garlic brings a brightness and complexity that powder can’t quite match. If you do use powder, reduce the amount slightly—powder is more concentrated.
Make sure your black beans are well-drained. Canned beans contain a lot of liquid and excess sodium. Running them under cool water and gently rubbing them removes that starchy liquid, which keeps your rice from becoming gummy and reduces the overall sodium content significantly.
Don’t overcrowd the pan when browning chicken. If you dump all the chicken in at once and it’s packed tightly, the pieces steam and stick together rather than browning. Work in batches if necessary, or choose a larger pot.
Flavor Variations Worth Exploring

Once you’ve made the basic version a few times and have the technique in your muscle memory, experimenting with variations keeps the recipe fresh and interesting. The beauty of this template is that it’s infinitely adaptable.
Spicy Chipotle Version: Replace half the red enchilada sauce with a mixture of 2 to 3 canned chipotle peppers in adobo sauce (finely minced) stirred into a bit of tomato sauce. Add an extra ¼ teaspoon of cumin and ½ teaspoon of smoked paprika. The result is deeper, spicier, and more complex.
Green Tomatillo Version: Use green enchilada sauce as your primary liquid and omit the red entirely. Add fresh cilantro (a full ¼ cup) at the beginning instead of just as a garnish. Finish with crema instead of sour cream and jalapeño slices. This version is brighter and fresher.
Beef and Chorizo Version: Brown ½ pound ground beef and ½ pound fresh chorizo (removed from the casing) in place of chicken. Drain excess fat, then continue with the recipe. The chorizo adds a spicy, deeply flavorful element that’s harder to replicate with chicken.
Vegetarian Loaded Version: Omit the chicken, increase the beans to 2 cans, and add corn, diced zucchini, mushrooms, and spinach. Everything stays the same otherwise. The vegetables plus extra beans provide plenty of substance and protein.
Creamy Poblano Version: Add 1 cup heavy cream or half-and-half with the broth. Roast 2 poblano peppers, peel off the skin, dice them, and add to the pot. This creates a creamier, richer dish that’s decadent without being overwhelming.
Slow Cooker Version: Sauté the chicken, onion, and bell pepper on the stove in a separate skillet as directed. Transfer everything to a slow cooker with the broth, enchilada sauce, spices, beans, corn, and uncooked rice. Cook on low for 3 to 4 hours or on high for 1½ to 2 hours. Add cheese and fresh cilantro just before serving. This is perfect if you want everything ready by dinnertime without any last-minute cooking.
Breakfast Enchilada Rice: Cook the rice with sausage (crumbled) instead of chicken. Stir in 6 scrambled eggs along with the cheese at the end. Top with avocado, cotija cheese, and cilantro. Serve for breakfast or brunch.
Making This Recipe Ahead and Storing Leftovers
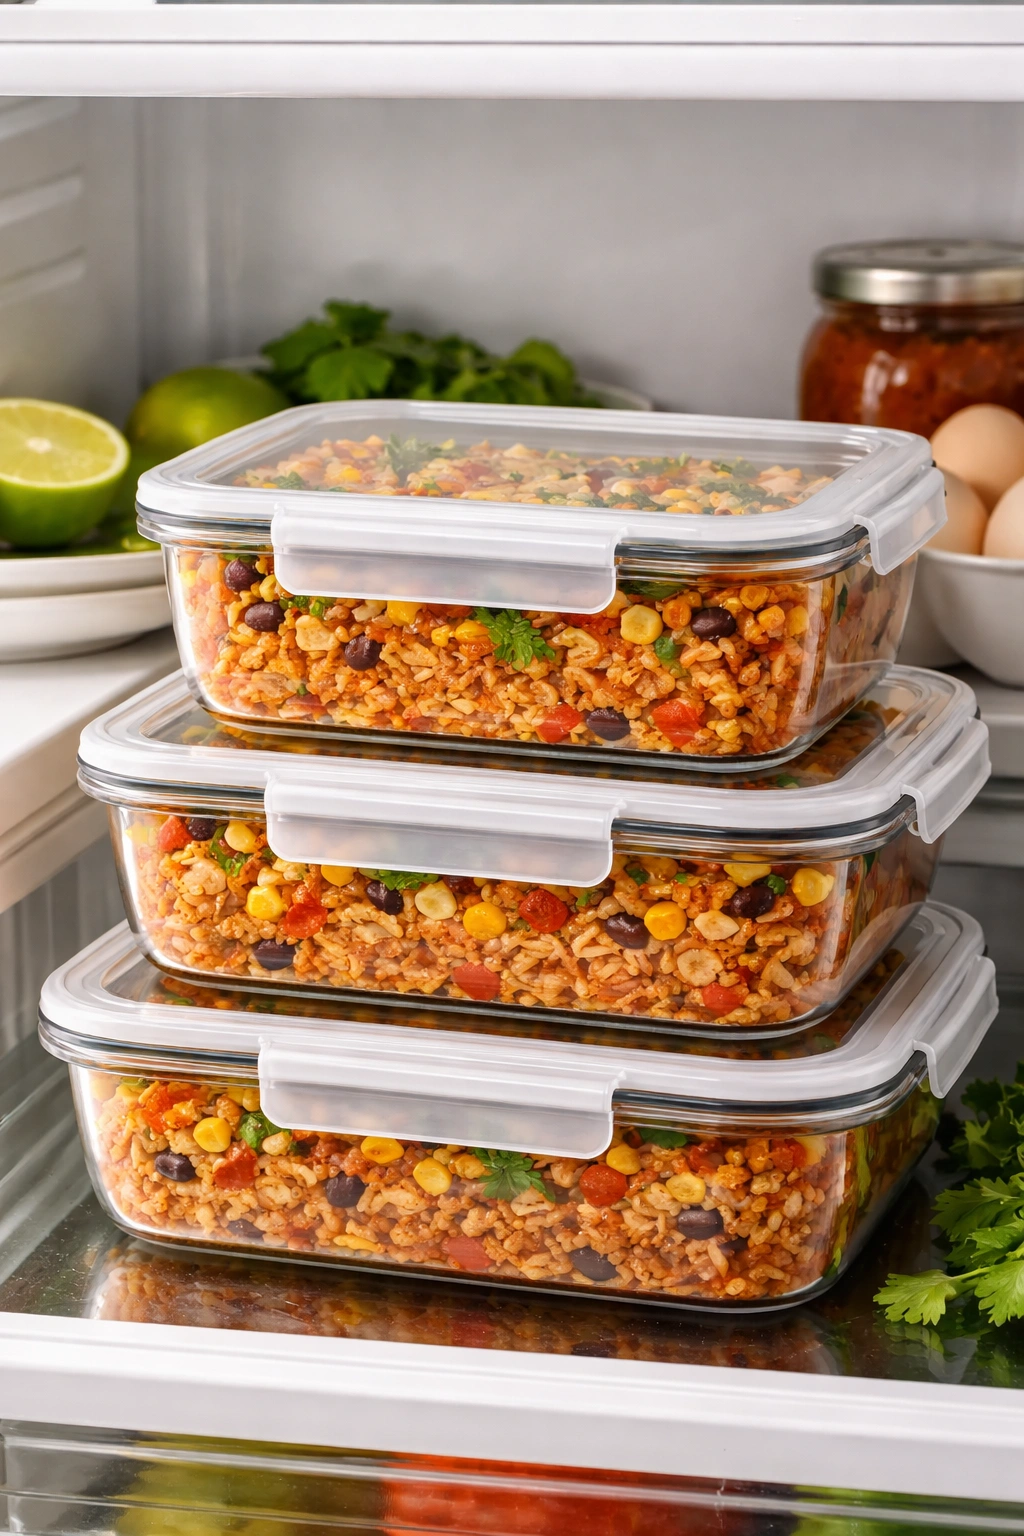
One-pot enchilada rice reheats beautifully, which makes it genuinely one of the best dishes for meal prep or making ahead for the week. You have genuine flexibility in how you approach this.
Cooking and Storing: Once the rice is fully cooked and cooled to room temperature, transfer it to an airtight container and refrigerate for up to 4 days. The flavors actually deepen slightly overnight, so day-two servings often taste better than day-one.
Freezing: This dish freezes extremely well for up to 3 months. Transfer cooled rice to a freezer-safe container or portion it into individual servings in smaller containers. Leave about ½ inch of headspace at the top to allow for expansion. You can also use large freezer bags if you lay them flat—they thaw faster and take up less space. Remove as much air as possible before sealing.
Thawing: For best results, thaw overnight in the refrigerator before reheating. You can also reheat directly from frozen, but it takes longer and sometimes the edges heat faster than the center.
Reheating: The gentlest method is stovetop reheating. Scoop the rice into a pot, add a splash of broth or water to restore moisture (about 2 to 3 tablespoons), cover, and warm over low heat for 5 to 10 minutes, stirring occasionally. Microwave reheating works too—place in a microwave-safe bowl, add a splash of liquid, cover with a damp paper towel, and heat in 2-minute intervals, stirring between intervals, until warmed through.
Make-Ahead Prep: You can prepare all your ingredients the night before—dice your vegetables, shred your cheese, measure your spices into a bowl, drain your beans. Store everything in separate containers in the fridge. Come dinnertime, you’re literally just combining and cooking, which brings your active time down to about 5 minutes of hands-on work before you can just let the pot do its thing.
Leftover Transformations: Leftover enchilada rice is incredibly versatile. Stuff it into bell peppers or poblano peppers, top with cheese, and bake for 20 minutes for enchilada rice-stuffed peppers. Use it as a filling for burritos with fresh cilantro, beans, and avocado. Layer it in a casserole dish with tortilla strips, additional enchilada sauce, and cheese, then bake for a baked enchilada rice casserole. Serve it in lettuce cups as a taco filling. Crumble any crunchy bits that form on the bottom and use them as a base for nachos.
Serving Suggestions and Perfect Pairings
Enchilada rice is genuinely complete on its own, but a few strategic additions elevate the meal and let people customize to their preference. The best serving approach is to put the rice in a large bowl or pot in the center of the table and let people build their own plate.
Essential Toppings:
Fresh cilantro is non-negotiable—the bright, herbal quality cuts through the richness beautifully. Fresh lime juice adds acidity and brightness that makes every flavor pop. Sour cream or Mexican crema provides creaminess and coolness that balance the warm spices. Sliced avocado or guacamole adds richness and a buttery texture. All of these should be available, even if not everyone uses all of them.
Nice-to-Have Additions:
Tortilla chips alongside (for scooping or crumbling on top) add crunch. Diced fresh tomatoes or pico de gallo add freshness. Thinly sliced radishes add peppery crunch. Green onions add a subtle allium sharpness. Queso fresco (crumbly fresh cheese) adds a salty, tangy note that’s different from melted cheese. Jalapeño slices for those who want extra heat.
Side Dishes That Work Well:
A simple green salad with lime vinaigrette is perfect for balance. Mexican street corn (elote) is wonderful if you have time. Black bean soup as a first course sets a nice Mexican theme. Cilantro lime rice (if you want a second starch, though honestly this dish is filling enough on its own). Fresh fruit salad with lime and tajín seasoning for dessert.
Beverage Pairings:
Mexican beer is a classic pairing—light and crisp. Margaritas (frozen, on the rocks, however you like them) work beautifully. Horchata provides sweetness and richness. Agua fresca (a light, refreshing beverage made with fruit and water) is perfect for a lighter meal. Even simple lime water or club soda with lime is lovely.
Occasions This Works For:
Weeknight family dinner where you need something fast but satisfying. Casual potluck where the dish travels easily and reheats beautifully. Meal prep for the week where you cook once and eat multiple times. Game day or casual entertaining where you want something flavorful but low-stress. Lunch at your desk using leftovers—it’s actually more flavorful the next day.
Final Thoughts
The beauty of one-pot enchilada rice isn’t just that it saves time or dishes, though those are real advantages. It’s that this particular combination of ingredients, when cooked together, creates something that tastes like you genuinely know your way around Mexican cuisine. The flavors layer and build. The rice tastes distinctly of enchilada sauce rather than just being a carrier for toppings. Every element belongs to a cohesive whole rather than feeling like separate components.
This is the recipe you’ll return to again and again because it delivers on every level—it’s genuinely easy, genuinely delicious, and genuinely satisfying. You can make it exactly the same way every time and be happy. You can also experiment with proteins, vegetables, and spice levels and never get bored. It reheats beautifully, which means your meal prep efforts actually pay off.
Most importantly, it proves that you don’t need hours in the kitchen to create food worth celebrating. You need good ingredients, sound technique, and the understanding that some of the best dishes are the simplest ones—the ones that let each component shine while working in harmony. Welcome this dish into your regular rotation, and watch how often it becomes the answer to “what’s for dinner?”