If you’re tired of ordering wings from restaurants, watching them arrive lukewarm and underwhelming, it’s time to discover why crispy baked garlic parmesan wings belong in your regular dinner rotation. These wings deliver the crispiness you’d expect from a deep fryer, the garlicky, buttery richness that makes you want to lick your fingers, and a genuine wow-factor that belies their surprising simplicity. The best part? They bake in your oven while you handle other things, with no splatter, no oil burns, and no guilt about deep frying. Once you nail this recipe—and you will—you’ll find yourself making them for game day, casual weeknight dinners, party spreads, and any excuse to gather people around food worth remembering.
What makes these wings so special isn’t complicated. It’s the combination of one often-overlooked ingredient (baking powder) that triggers the scientific magic that creates that shatteringly crispy skin, paired with a garlic-forward butter sauce that clings to every inch of the wing, and finished with fresh Parmesan that adds both flavor and additional textural interest. The wings themselves come out juicy and tender on the inside, a stark contrast to that audible crunch on the outside. It’s the exact opposite of what you might assume about baked wings—they taste and feel like they’ve been lovingly fried, not like a compromise or a lighter alternative.
This is the kind of recipe that works equally well whether you’re cooking for four people or forty. Scale it up, use multiple baking sheets, and you’ve got an effortless entertaining solution. Leftovers reheat beautifully (in an oven or air fryer, never the microwave). The prep is genuinely quick—maybe ten minutes of hands-on time before the oven takes over. And once you understand the mechanics of what makes these wings happen, you can riff on them endlessly: swap in different seasonings, add heat with hot sauce or red pepper flakes, introduce lemon zest for brightness, or keep them simple and let the garlic and Parmesan shine. This is a recipe that opens doors.
Why These Wings Are Worth Every Minute
There’s a reason garlic parmesan wings have become a staple at restaurants, sports bars, and wing shops everywhere—they’re universally loved. Unlike spicy Buffalo wings or heavily sauced options, these wings appeal across the board. The garlic provides a savory depth, the Parmesan adds a salty, umami punch, and the butter brings richness and texture. They’re substantial enough to feel indulgent but not so heavy that you can’t enjoy multiple pieces.
What sets homemade garlic parmesan wings apart from takeout is control. You choose the quality of the butter, decide how much garlic to use (more is rarely wrong), and finish them with freshly grated Parmesan instead of the pre-shredded stuff that’s been sitting on a shelf. Fresh parmesan melts more completely and tastes brighter and more complex. You also avoid any mysterious ingredients or preservatives that chain restaurants might include. Beyond taste, there’s the simple pleasure of making something restaurant-quality in your own kitchen. The aroma alone—garlic and butter mingling with roasting chicken—fills your home with the kind of smell that makes people ask what you’re cooking before they even walk into the kitchen.
These wings also offer built-in flexibility for dietary needs. They’re naturally gluten-free (assuming you use aluminum-free baking powder without additives), naturally grain-free, paleo-friendly, and even keto-compatible when you do the math on portions. They work for meal-prep situations, casual entertaining, and the kind of cooking where you want to impress without showing visible effort.
The Secret to Restaurant-Quality Crispy Skin
The revelation that changed wing-baking forever is aluminum-free baking powder. This ingredient isn’t a gimmick—it’s actual food science. When baking powder (which is alkaline) coats the chicken skin, it raises the pH of the surface. This pH shift triggers what’s called the Maillard reaction, a chemical process where amino acids and reducing sugars in the protein break down and recombine under heat, creating hundreds of new flavor compounds while also turning the surface golden brown and crispy. Additionally, baking powder has a dehydrating effect on the skin, pulling out moisture that would otherwise create steam and prevent crispiness.
This is why baking powder wings come out so dramatically different from wings made without it. The difference isn’t subtle—it’s the contrast between genuinely crispy skin that shatters when you bite into it versus skin that’s merely dried out. You can taste the Maillard reaction. The wings develop depth and complexity that feels earned, not artificial.
The critical detail: use aluminum-free baking powder, not the standard kind. Many conventional baking powders contain sodium aluminum sulfate, which can leave a metallic or slightly off aftertaste. Aluminum-free brands (Rumford is widely available) contain different ingredients like calcium acid phosphate or monocalcium phosphate. The difference in final taste is noticeable enough that it’s worth seeking out specifically. Check the ingredient label before buying—it should say “aluminum-free” prominently and the ingredient list should not include “sodium aluminum sulfate.”
Serving and Timing Information
Yield: Serves 4 to 6 people | Makes approximately 24 to 30 wing pieces
Prep Time: 15 minutes
Cook Time: 50 minutes
Total Time: 1 hour 5 minutes (plus optional chilling time)
Difficulty: Beginner — The process is straightforward, no special cooking techniques required, and even a first-time wing-baker will see excellent results. The hardest part is remembering to pat the wings dry.
Chill/Rest Time: Optional but highly recommended—if you have time, refrigerate the seasoned wings for at least 45 minutes or ideally overnight before baking. This drying time contributes noticeably to crispiness. Even a 15-minute rest at room temperature makes a difference.
Best Served: Immediately while hot and the butter sauce is still glossy and warm. The contrast between temperature and texture is part of the appeal.
Complete Ingredient List
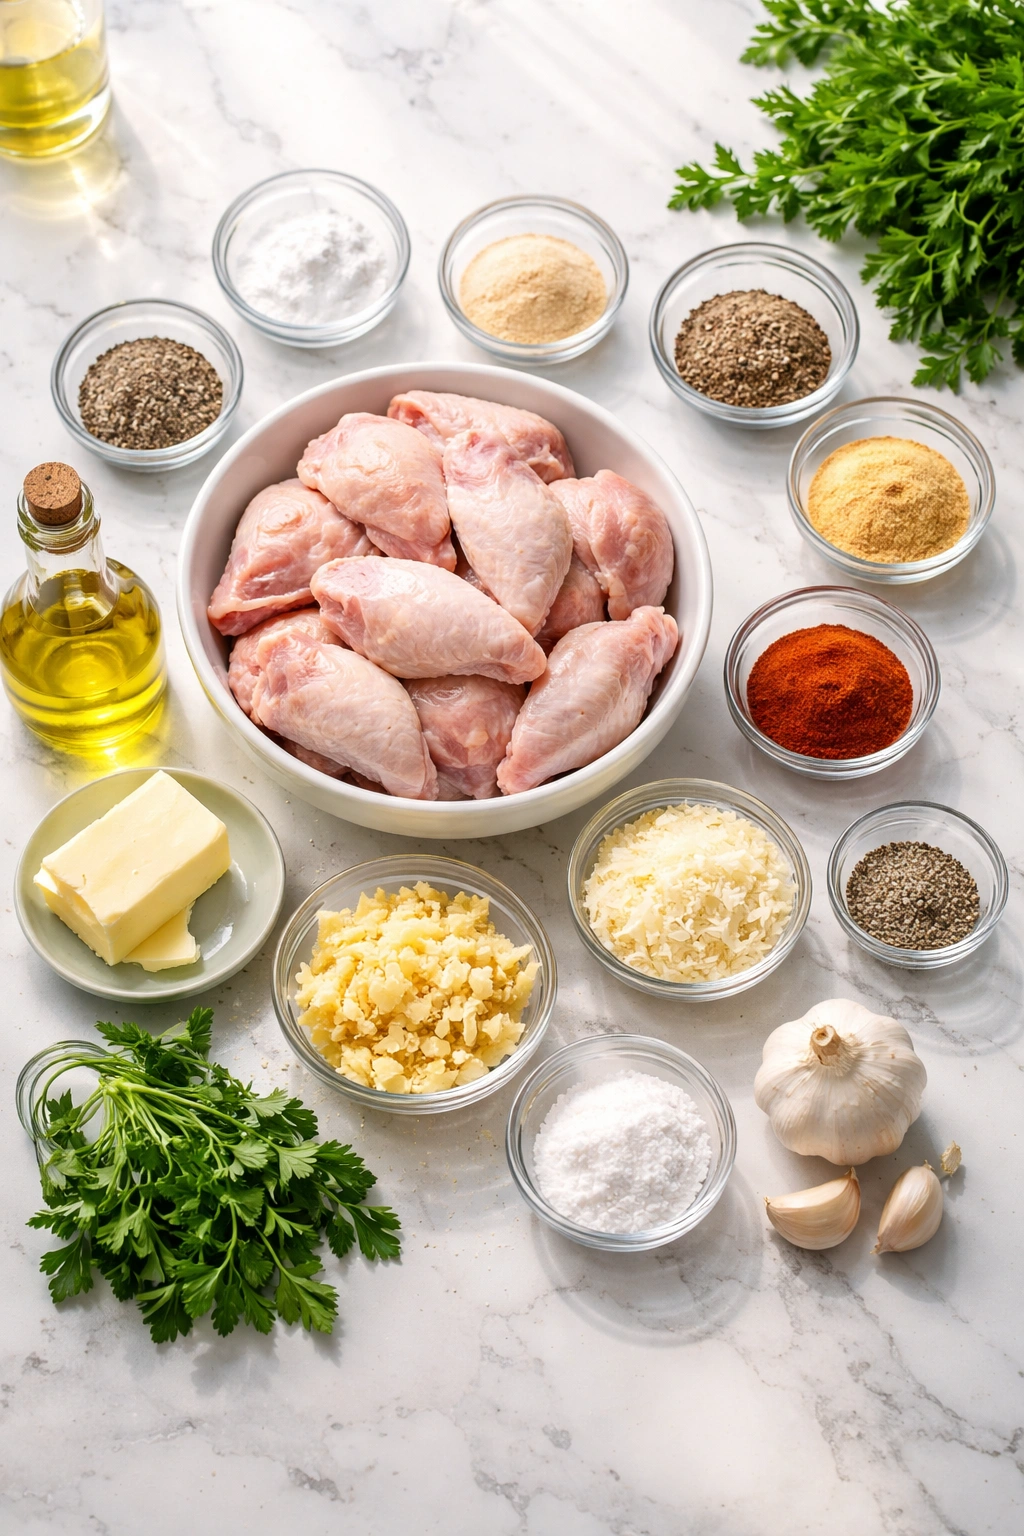
For the Wings and Dry Seasoning:
- 2.5 to 3 pounds skin-on chicken wings (a mix of wings and drumettes), patted completely dry
- 1 tablespoon aluminum-free baking powder
- 1 teaspoon kosher salt (Diamond Crystal or Morton’s work well)
- ½ teaspoon freshly ground black pepper
- 1 teaspoon garlic powder
- ½ teaspoon onion powder
- ½ teaspoon smoked paprika (this adds color and mild flavor—use regular paprika if you prefer)
- 1 to 2 tablespoons olive oil or avocado oil
For the Garlic Parmesan Butter Sauce:
- 4 to 5 tablespoons unsalted butter, melted
- 4 to 6 fresh garlic cloves, finely minced (or 2 tablespoons pre-minced jarred garlic if convenience matters more than peak flavor)
- ¼ cup freshly grated Parmesan cheese (use a box grater or microplane for the best texture)
- 2 to 3 tablespoons fresh flat-leaf Italian parsley, finely chopped (or 1½ teaspoons dried parsley if fresh isn’t available)
- ¼ teaspoon salt (or adjust to taste)
- Pinch of freshly ground black pepper
Optional Additions and Variations:
- ¼ teaspoon red pepper flakes (if you want a subtle heat note)
- Zest of ½ lemon (adds brightness without making the wings tangy)
- ¼ teaspoon crushed red pepper flakes (substitute for or in addition to the black pepper for a different heat profile)
How to Prepare Your Wings for Maximum Crispiness
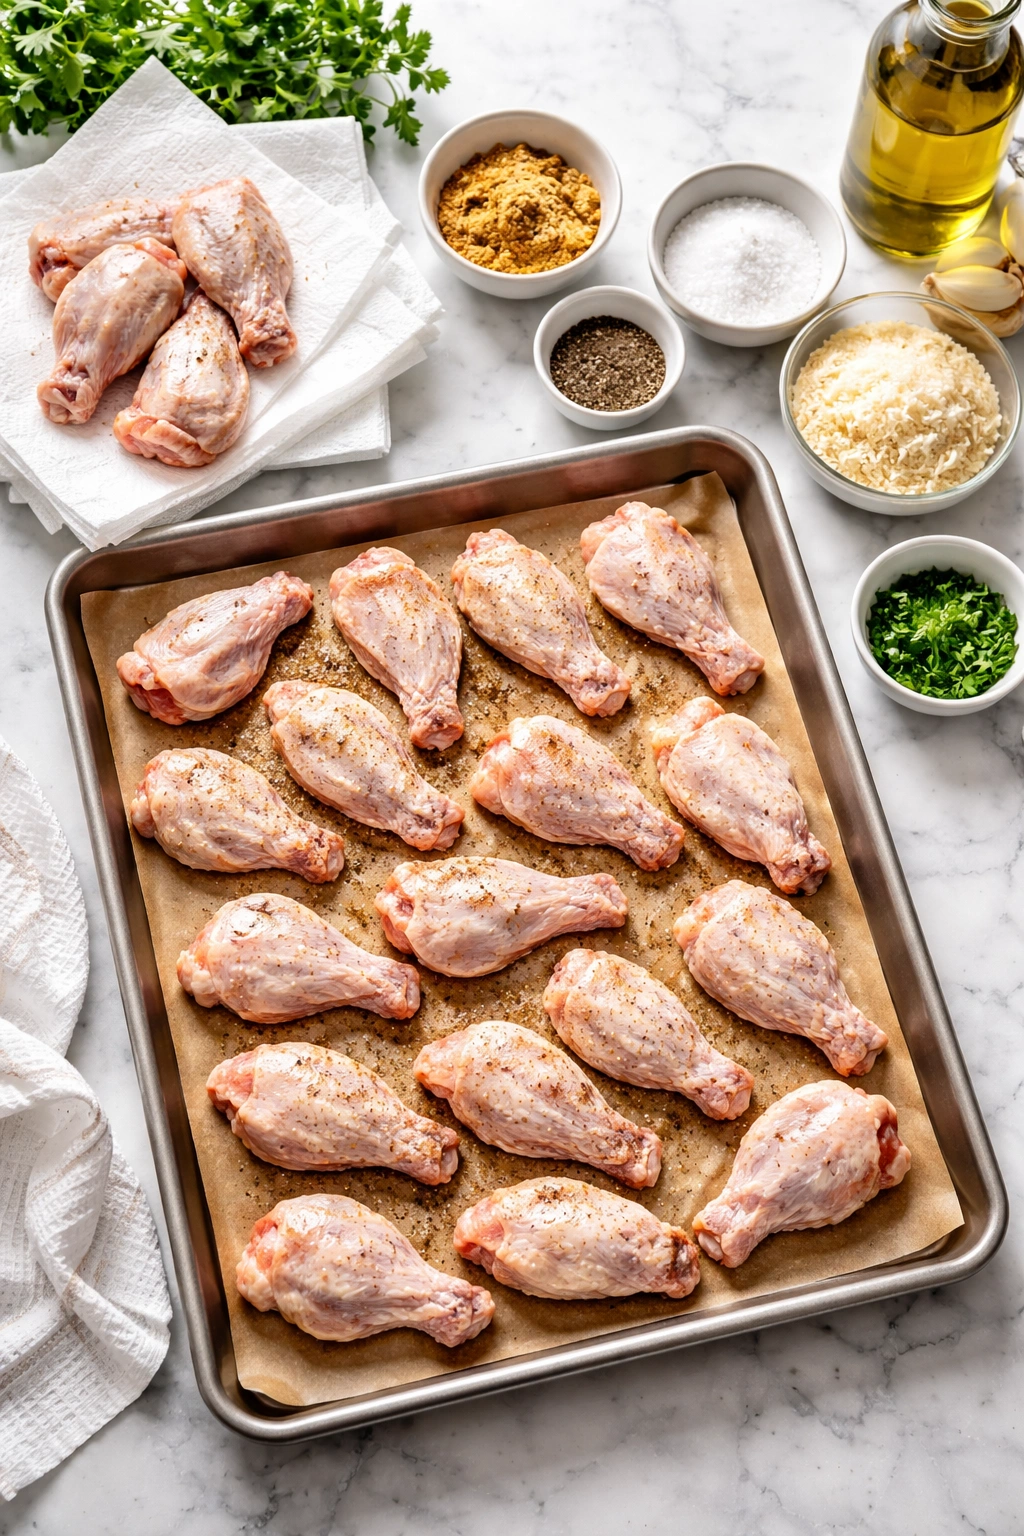
The foundation of crispy wings begins long before they hit the oven. Start by making sure your chicken wings are completely dry. When wings come packaged, they often have surface moisture from the packaging or from being stored on ice. This moisture is the enemy of crispiness. Take paper towels—and don’t be shy about using multiple sheets—and blot every wing thoroughly. Work in batches if needed. You want them so dry they almost feel chalky.
If your wings came as whole wings (the flat, the drumette, and the tiny tip still joined together), separate them at the joints. The wing tips can be saved for stock, and separating the flat from the drumette ensures even cooking. Discard the tips or reserve them in the freezer for making chicken stock later.
Place your dried wings in a large mixing bowl. Drizzle them with just 1 to 2 tablespoons of oil—olive or avocado both work. The oil doesn’t need to be generous; its job is to help the seasoning stick and to facilitate crisping as the wings cook. A light coating is all you need.
In a separate small bowl, combine the baking powder, salt, garlic powder, onion powder, pepper, and paprika. Mix these thoroughly so the baking powder distributes evenly. Pour this mixture over the oiled wings and toss everything together using your hands or tongs, making sure every piece gets coated on both the skin side and the flesh side. This thorough coating is crucial—any bare spots will cook differently from seasoned areas.
At this point, you have a choice: bake the wings immediately, or let them sit and dry out further. If you have the time, this is where preparation pays dividends. Arrange the seasoned wings on a baking sheet or wire rack in a single layer (not touching each other) and place them uncovered in the refrigerator for at least 45 minutes, or even better, overnight. This resting period allows the baking powder to continue drawing moisture from the skin while the seasonings penetrate the meat. Overnight refrigeration produces noticeably crispier wings than baking immediately. If you’re short on time, a 15-minute room-temperature rest still helps.
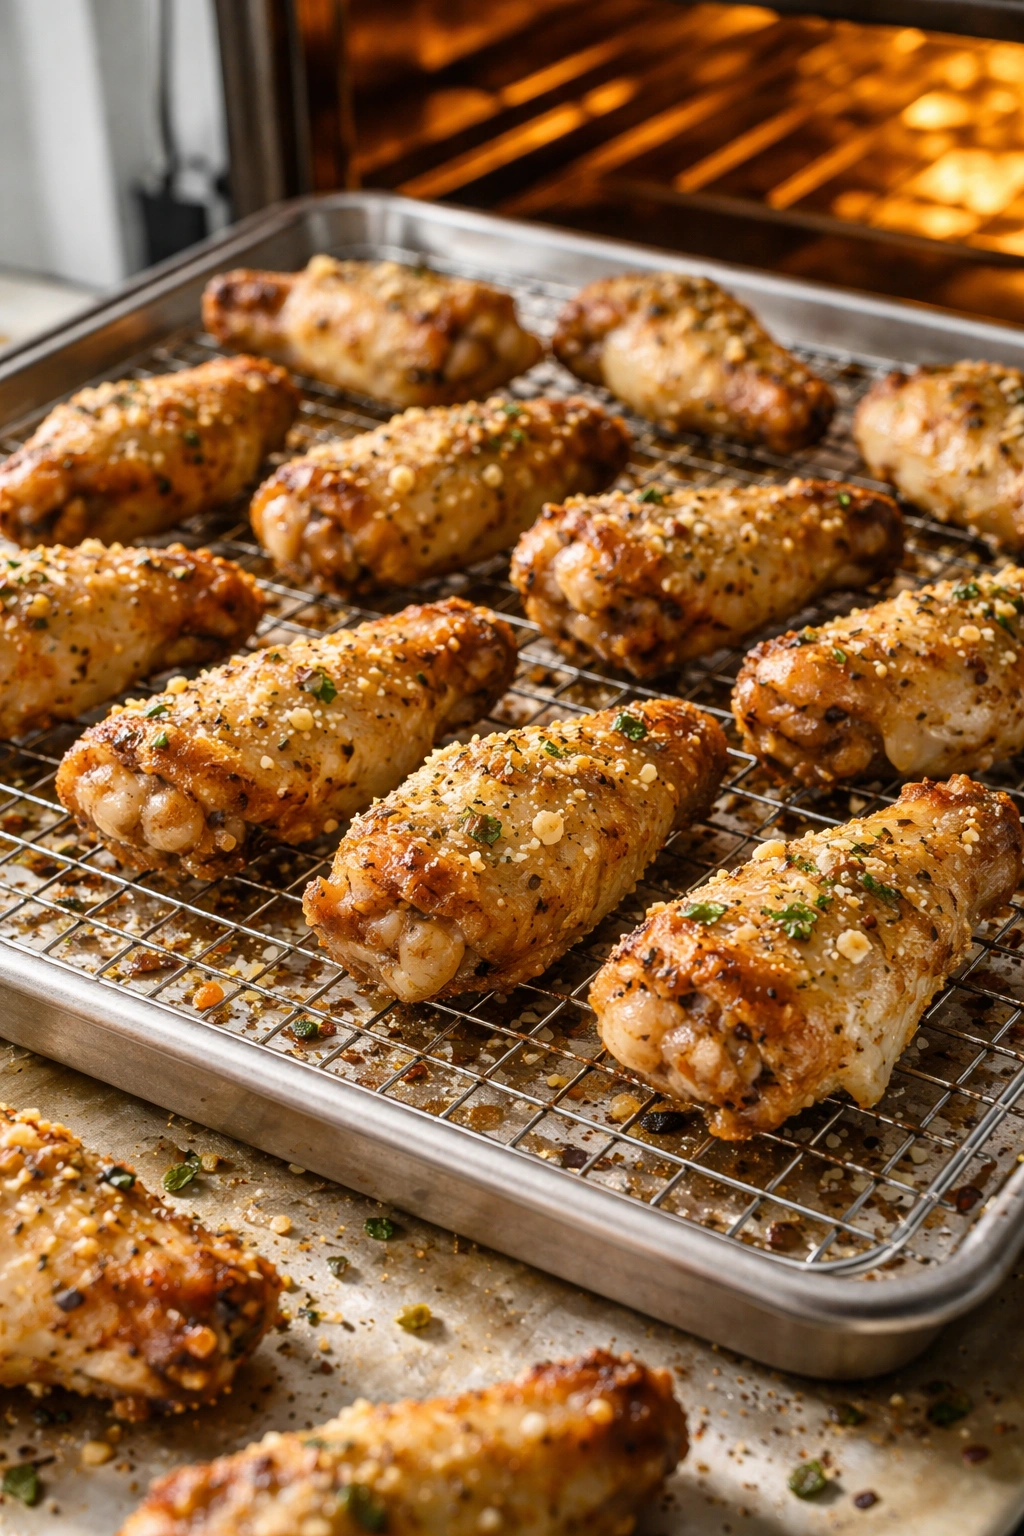
Baking Your Wings to Golden Perfection
Preheat your oven to 400°F to 425°F (204-218°C) and position your racks in the middle of the oven. There’s a range here because different ovens run at slightly different temperatures; if your oven runs hot, use 400°F; if it runs cool, bump it to 425°F. The precise temperature matters because you’re trying to render the chicken fat and crisp the skin without cooking the meat too fast.
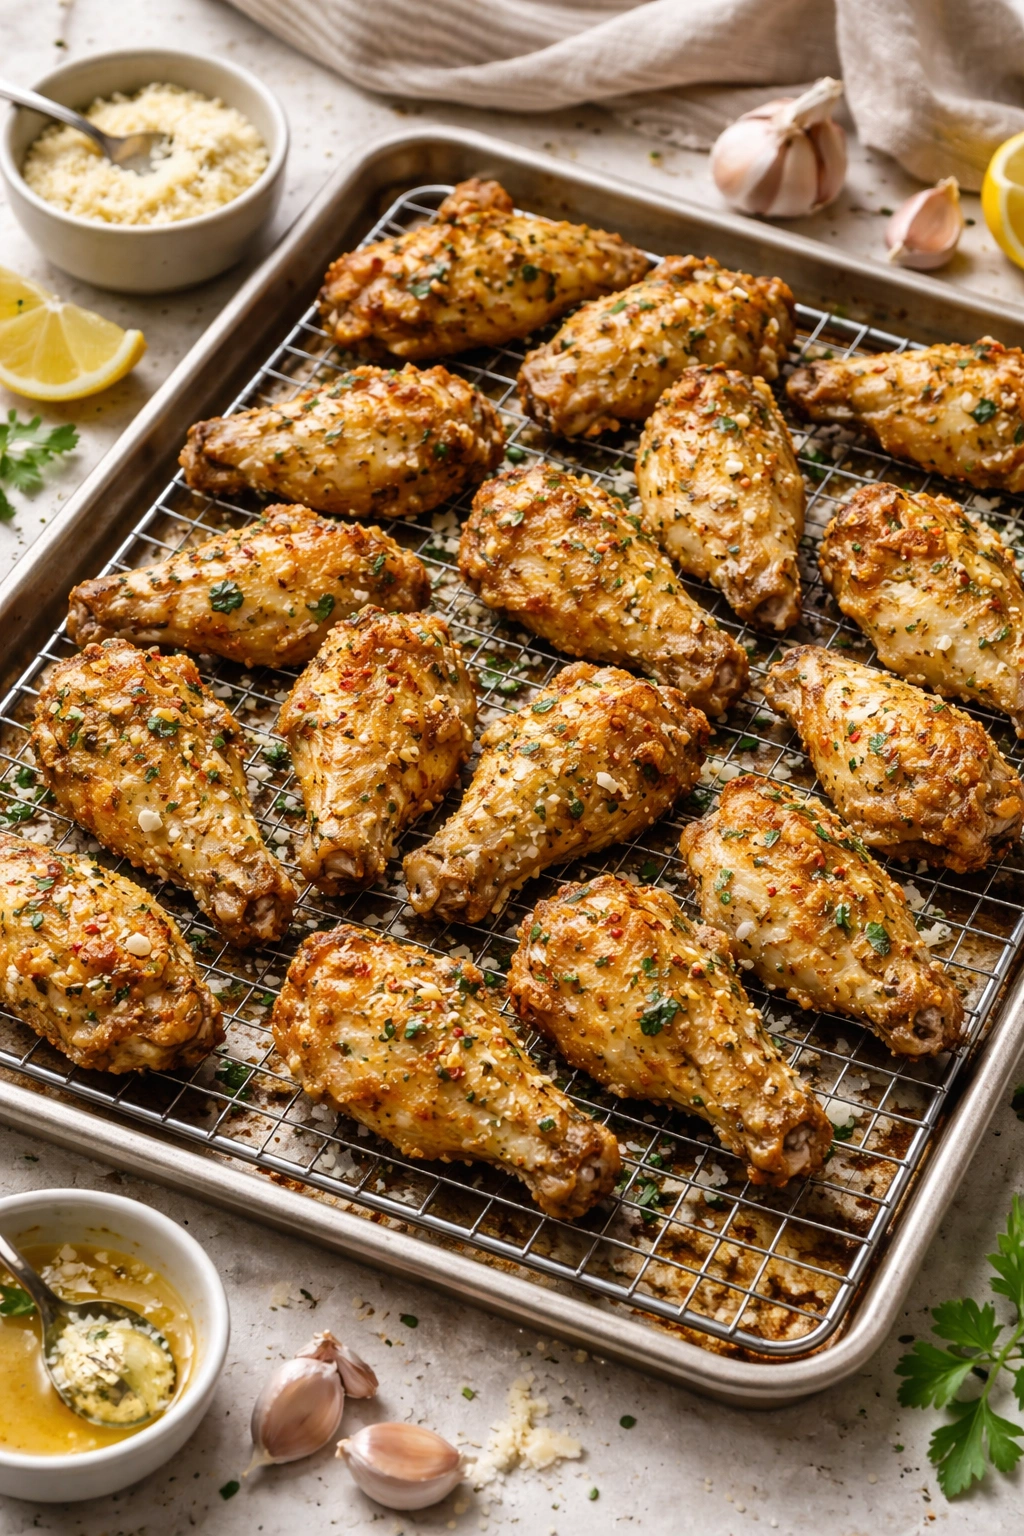
Line a large baking sheet (or two, depending on how many wings you’re making) with parchment paper or aluminum foil for easy cleanup. Place an oven-safe wire rack on top of the baking sheet and spray it lightly with cooking spray to prevent sticking. The wire rack is genuinely important—it allows hot air to circulate beneath the wings, crisping them on all sides rather than letting them steam in contact with the pan.
Never overcrowd the pan. Each wing should have at least an inch of space between it and its neighbors. If you have too many wings, use two baking sheets and bake them simultaneously on different racks, rotating them halfway through. Crowding causes the wings to cook unevenly and prevents air circulation, which means less crispy results.
Arrange your seasoned wings on the prepared rack, skin-side up, and slide the baking sheet into the preheated oven. Set a timer for 25 minutes. At the 25-minute mark, use tongs to flip each wing so the flesh side is now facing up. Return the baking sheet to the oven and bake for another 20 to 25 minutes, depending on the size of your wings and your oven’s exact temperature. You’re looking for the skin to be deeply golden brown and crispy, and for an instant-read thermometer inserted into the thickest part of the wing (without touching bone) to read 165°F (74°C).
The total baking time is roughly 50 minutes, give or take 5 minutes depending on wing size and oven variance. Don’t worry about the exact timing—watch the wings themselves. When the skin is golden and crispy-looking and the meat pulls away slightly from the bone, they’re ready.
Some people prefer to finish the wings under a broiler for 2-3 minutes after the main baking time to deepen the browning and crispiness, but this is optional. If you do broil, watch carefully because broilers vary dramatically in intensity and you don’t want to scorch anything.
Creating the Garlic Parmesan Butter Sauce
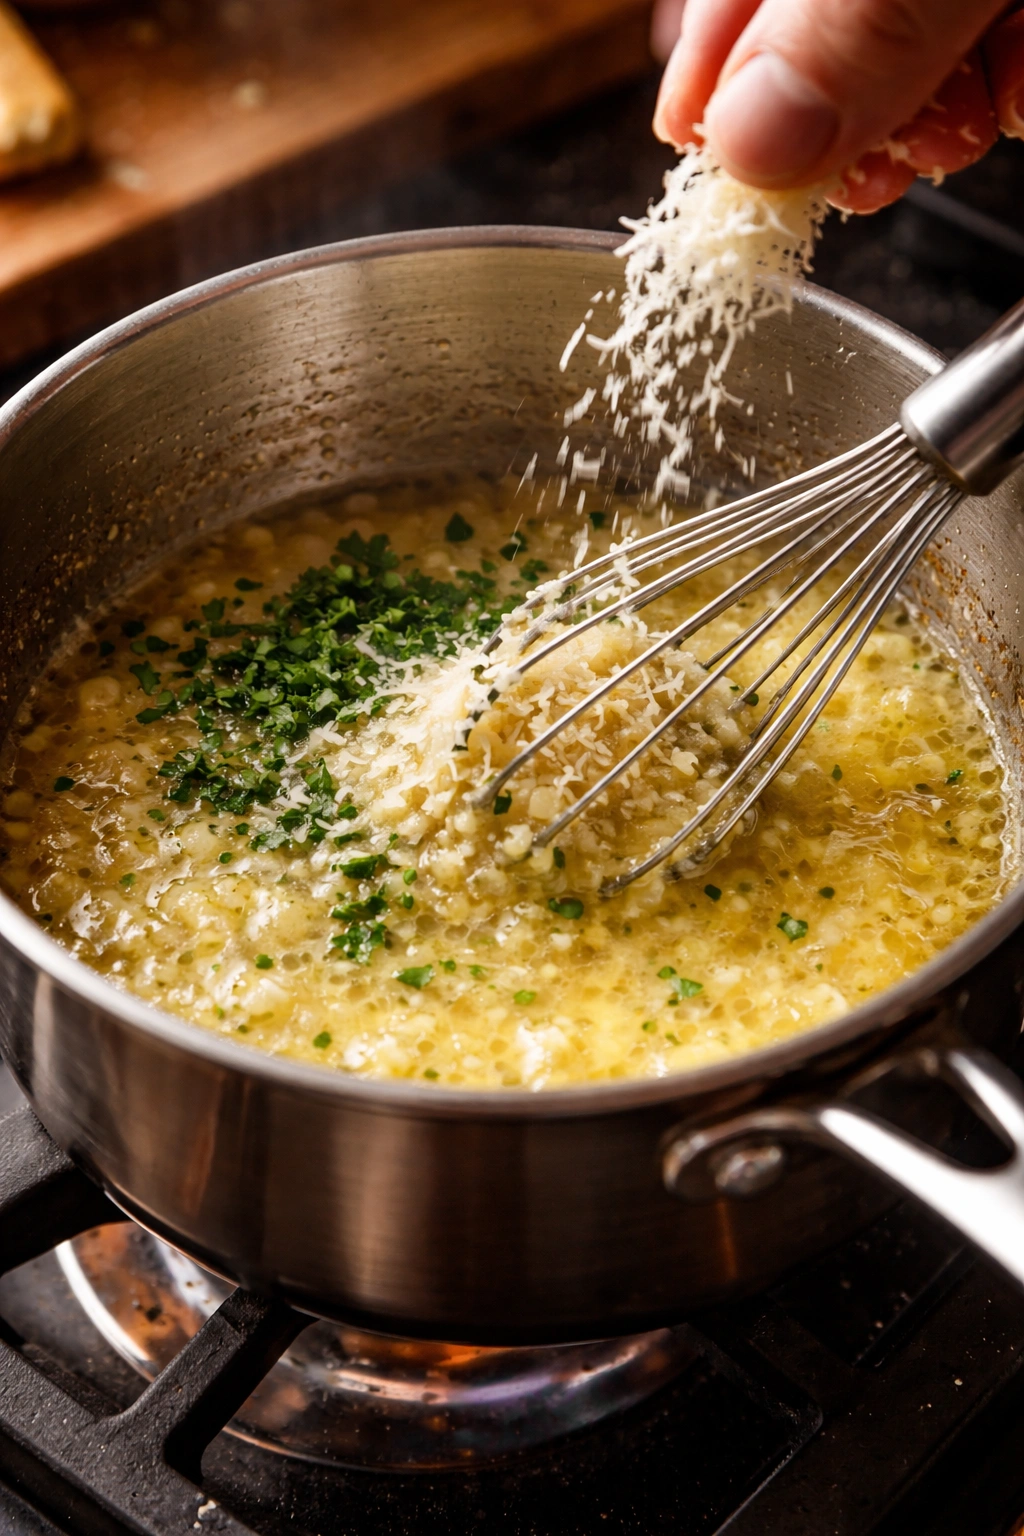
While your wings are in the second half of their baking time (around the 35-minute mark), prepare the sauce. Melt your 4 to 5 tablespoons of unsalted butter in a small saucepan over medium-low heat. You want the butter warm and fluid, but not bubbling—this is gentle heat.
Once the butter is melted, add your minced garlic. Stir it gently and let it cook in the warm butter for 2 to 3 minutes. The garlic should become fragrant and turn very pale golden, almost creamy-looking. This gentle cooking mellows the raw, sharp bite of fresh garlic and infuses the butter with all its subtle sweetness. Do not let it brown or scorch—burnt garlic turns bitter and will ruin the sauce.
Remove the pan from heat. Add your freshly grated Parmesan cheese, the finely chopped parsley, salt, and pepper. Stir until everything is combined. The Parmesan will incorporate into the warm butter, creating a loose, silky sauce. If you’re using fresh lemon zest or red pepper flakes, add them now. The sauce should smell absolutely incredible at this point—garlicky, buttery, herbaceous.
If the sauce sits for more than a few minutes and cools, just pop it back on low heat briefly to warm it through again before tossing with the wings. The sauce works best when it’s warm because it adheres better to the hot wings and keeps everything glossy and appetizing.
The Final Toss and Finish
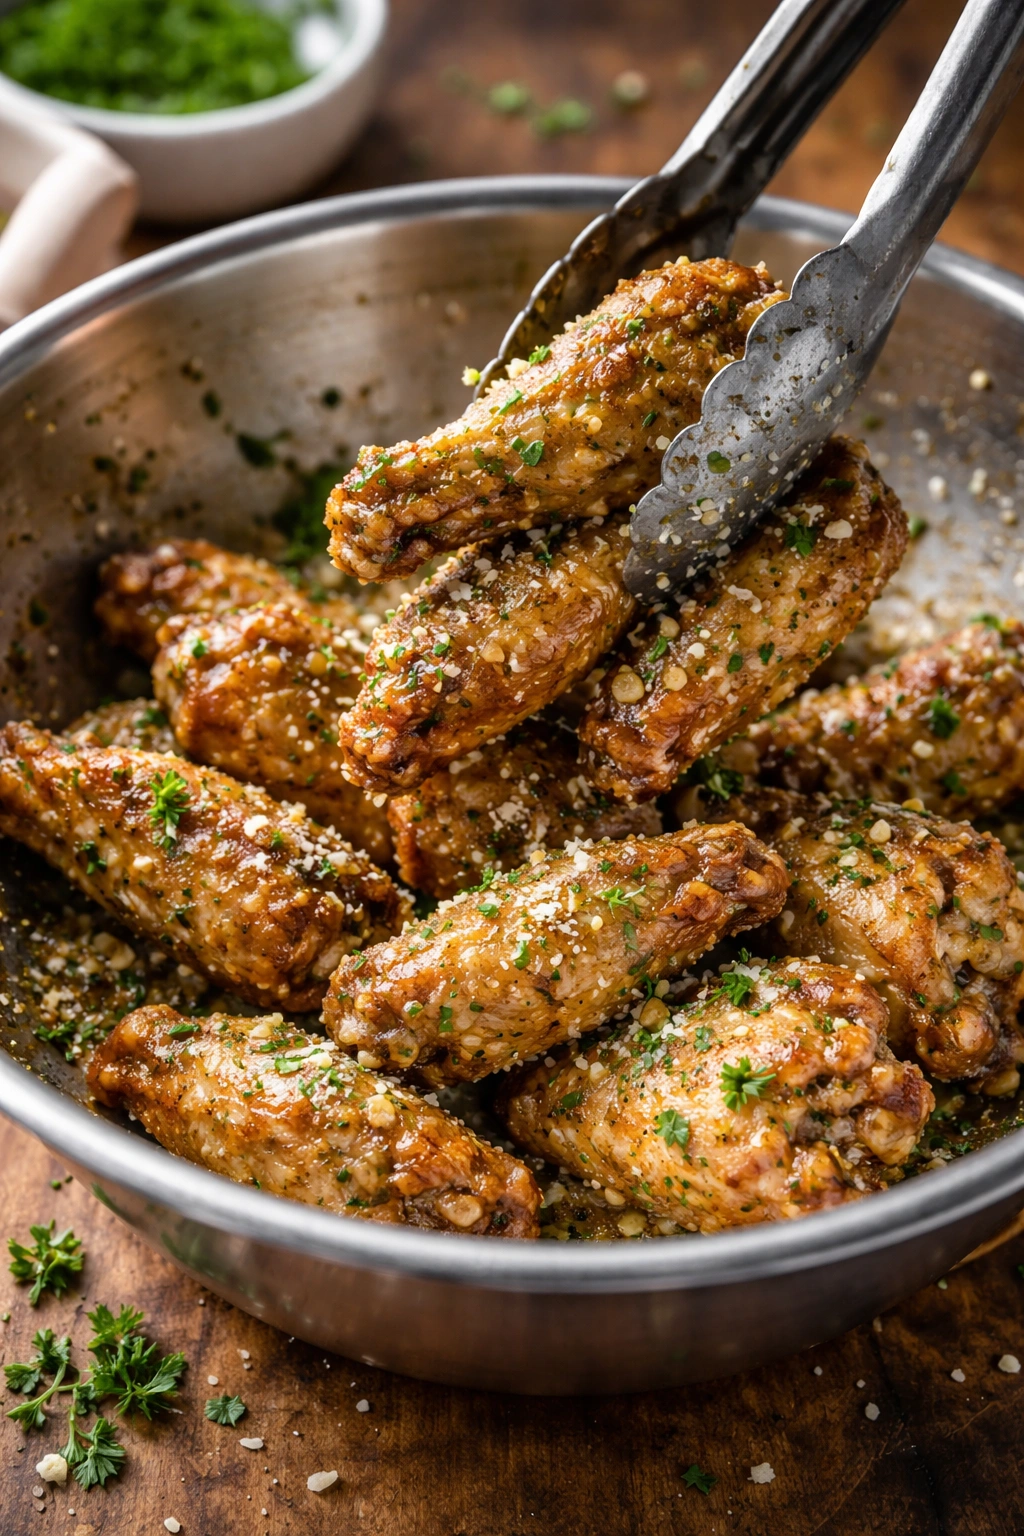
This is the moment where everything comes together. As soon as your wings come out of the oven, transfer them to a large bowl—a metal bowl is ideal because it holds heat well, but any large bowl works. Pour your warm garlic parmesan butter sauce over the hot wings.
Using tongs or two spoons, toss the wings thoroughly, making sure every piece gets coated in the sauce. This isn’t a gentle toss—you want to be thorough and confident. If there’s extra sauce pooling at the bottom of the bowl, keep tossing until it’s distributed across all the wings.
Sprinkle additional freshly grated Parmesan over the top and toss once more. Transfer the wings to a serving platter or return them to the baking sheet if you prefer. A final light sprinkle of fresh parsley on top adds color and a fresh herbal note that contrasts beautifully with the richness of the butter and cheese.
Serve immediately while hot. The contrast between the crispy exterior, the juicy meat inside, and the warm, glossy sauce is part of what makes these wings special. As they sit and cool, the sauce sets and the experience changes slightly—still delicious, but different.
Expert Tips That Actually Make a Difference
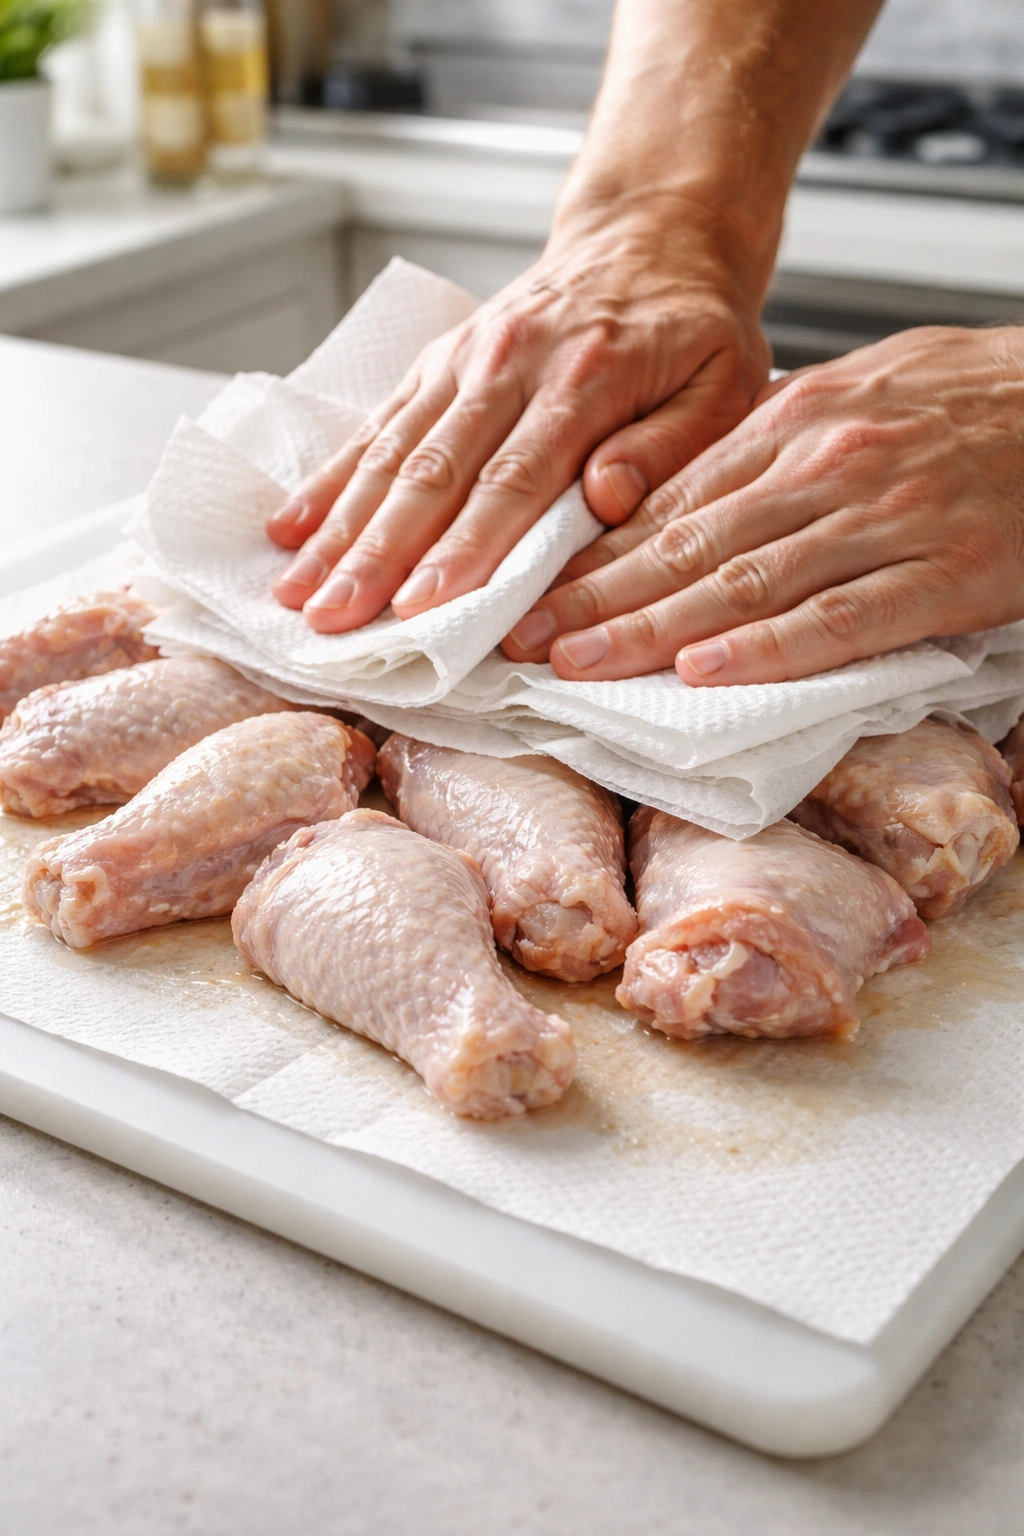
Pat the wings truly dry, not just surface-level dry. This single step determines whether your wings are merely cooked or genuinely crispy. Don’t rush it. Use multiple sheets of paper towels if needed. Think of it as investing five extra minutes to get dramatically better results.
Use Diamond Crystal kosher salt specifically if you can find it. It has larger crystals and a different composition than Morton’s kosher salt, which affects how evenly it distributes and how it dissolves. If you can only find Morton’s, reduce the quantity slightly (use slightly less) because its crystals are denser and saltier by volume.
Don’t skip the wire rack. Yes, you can bake wings directly on a parchment-lined sheet, and they’ll still turn out fine. But the wire rack genuinely does make a difference in crispiness because it creates air circulation on all sides. This is worth the minimal effort of cleaning it afterward.
The fridge rest time is your secret weapon if you’re making wings for company or a specific time. Refrigerating seasoned wings overnight means you can bake them fresh in the morning or afternoon without any prep—just pull them out, let them come to room temperature for 30 minutes, and bake. This also removes the temptation to rush the baking process.
Make the sauce while the wings bake so everything is ready at the same time. Cold sauce on hot wings is disappointing. Warm sauce on hot wings is magic. This timing detail matters more than you’d think.
If you’re doubling or tripling the recipe, use two baking sheets and rotate them halfway through. Most home ovens have hot spots and cool zones, so rotating ensures even cooking. The wings on the top rack might cook slightly faster than those on the bottom rack, so swapping them halfway through levels the playing field.
Fresh garlic is genuinely worth the effort of mincing. Pre-minced jarred garlic (sometimes called “jarlic”) works in a pinch, but fresh garlic in this sauce tastes noticeably brighter and more complex. If you find mincing tedious, buy pre-peeled garlic cloves and mince those—still fresh, less work.
Don’t be timid with the Parmesan. More Parmesan is almost never wrong here. The cheese adds flavor depth, provides additional crispiness when it hits the hot wings, and creates visual appeal. If you like Parmesan, use the full amount or even go slightly over.
Variations Worth Trying
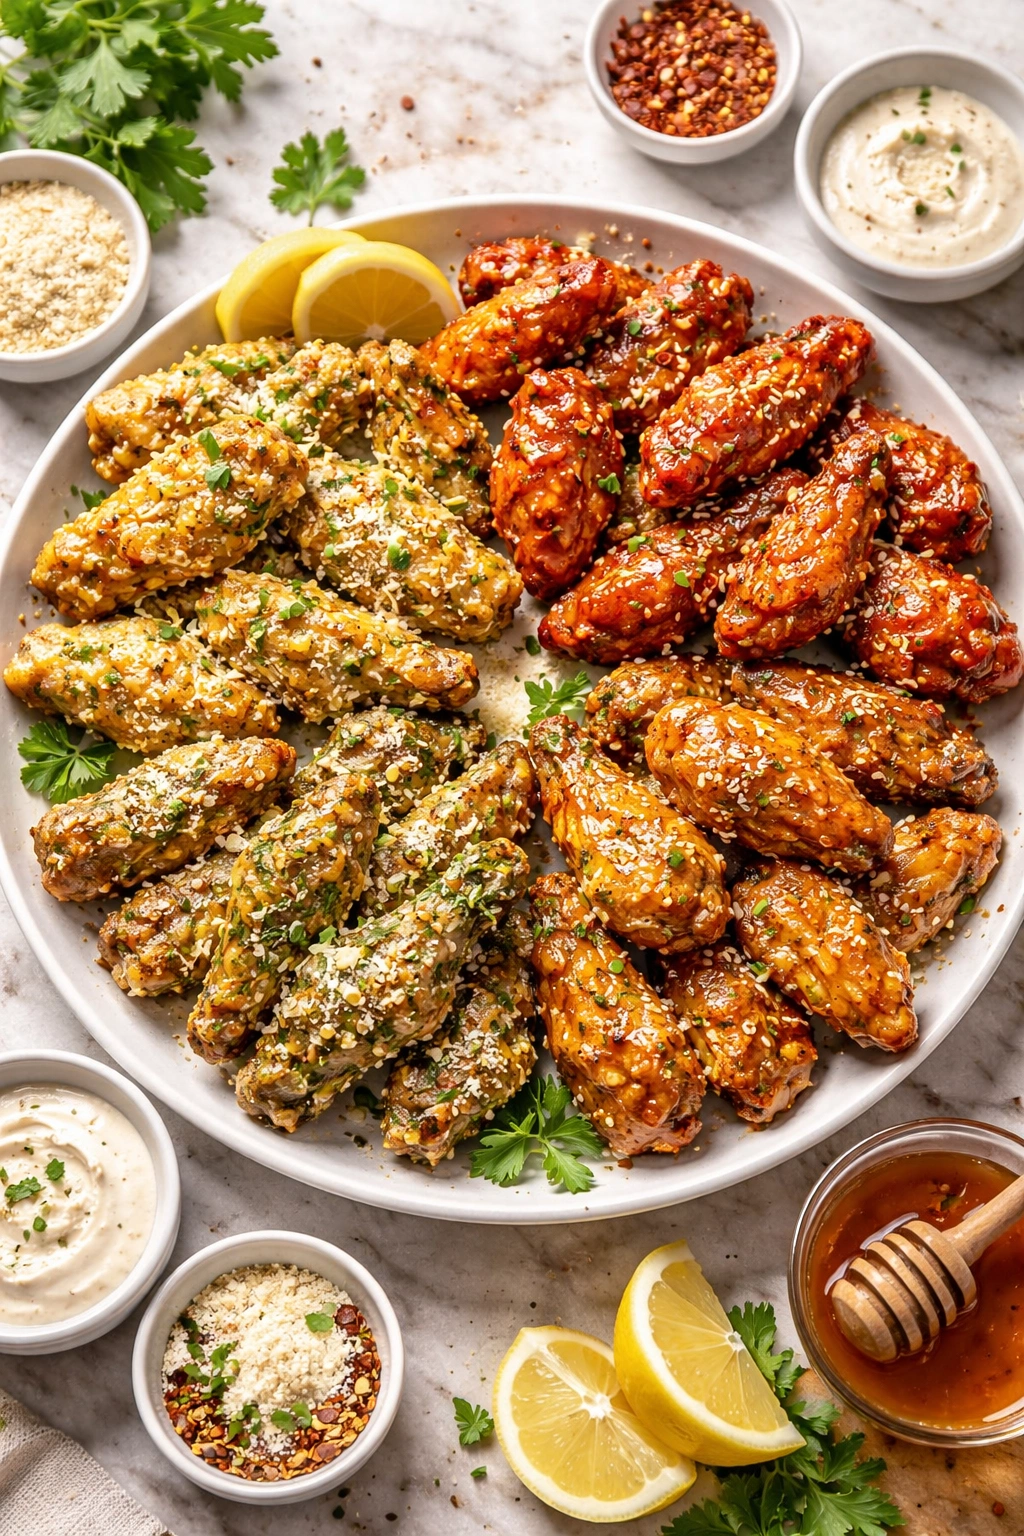
Once you’ve made this basic version a few times and know it by heart, here are genuine variations that expand the recipe without losing what makes it special.
Lemon Garlic Parmesan Wings: Add the zest of one lemon to the butter sauce along with the garlic. The acidity brightens everything and prevents the wings from feeling heavy. Some people also add a teaspoon of lemon juice to the sauce (add it after removing from heat so the heat doesn’t cook off the fresh flavor). This version is particularly good served with a fresh salad.
Spicy Garlic Parmesan Wings: Increase the red pepper flakes in the sauce to ¼ to ½ teaspoon, depending on your heat tolerance. Alternatively, add a tablespoon of hot sauce (Frank’s RedHot or similar) to the butter sauce. The heat should linger pleasantly on your palate without overwhelming the garlic and Parmesan flavors.
Herbier Garlic Parmesan Wings: Use a combination of parsley, fresh basil, and a small amount of fresh thyme. Add them to the butter sauce or scatter them on top just before serving. This variation tastes more restaurant-refined and works beautifully for dinner parties.
Honey Garlic Parmesan Wings: Whisk a tablespoon of honey into the warm butter sauce before tossing. The honey adds subtle sweetness and helps the sauce cling to the wings. This version appeals to people who find straight savory flavors too intense.
Truffle Garlic Parmesan Wings: If you have truffle oil on hand, drizzle a small amount (start with a teaspoon) into the butter sauce after removing from heat. Truffle oil is intensely flavored, so you need very little. This elevates the wings into fancy-dinner territory.
Cajun Garlic Parmesan Wings: Add Cajun seasoning (or a mix of cayenne, paprika, garlic powder, and oregano) to the dry seasoning mixture. Use the basic Parmesan sauce but add a dash of hot sauce to it. This creates wings with more heat and complexity.
Ranch Garlic Parmesan Wings: Make the wings as directed, but toss them with the butter sauce plus 2 tablespoons of dried ranch seasoning. Top with both Parmesan and chopped fresh dill. Serve with a small bowl of ranch dressing for dipping.
Buffalo Garlic Parmesan Wings: Toss the baked wings with a mixture of hot sauce (½ cup) and butter (3 tablespoons) instead of the garlic sauce, then finish with Parmesan and parsley. This bridges the gap between Buffalo and garlic Parmesan styles.
For any of these variations, the core technique stays exactly the same—only the sauce and final seasonings change.
Storage, Reheating, and Make-Ahead Strategies
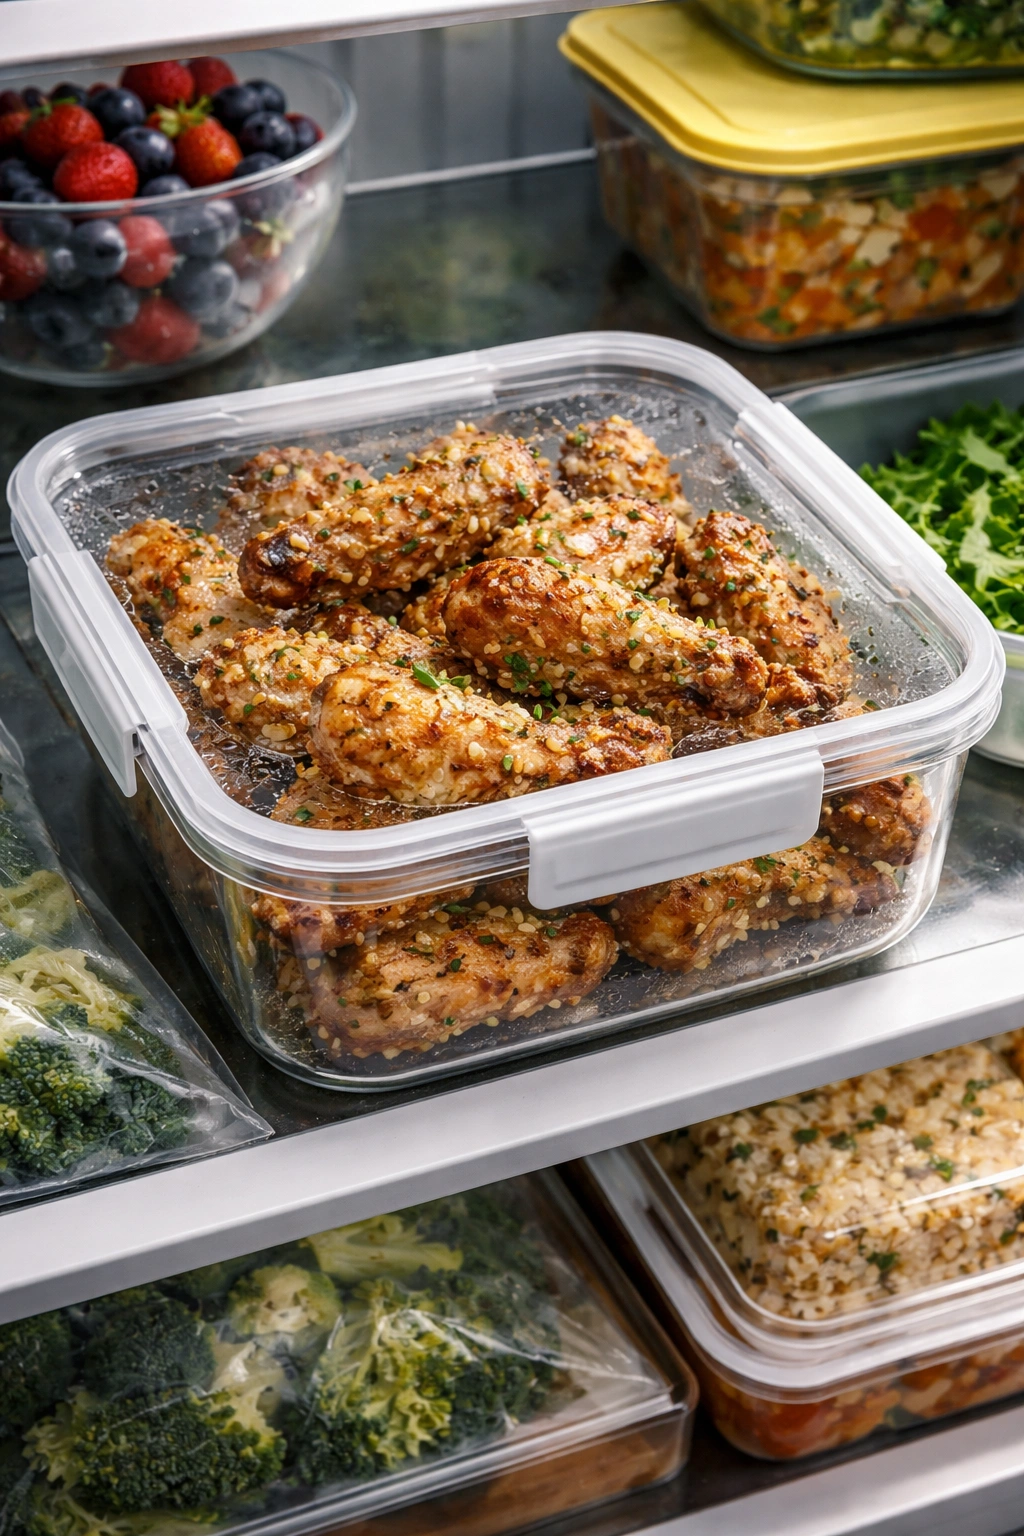
How to store leftovers: Once the wings have cooled to room temperature, transfer them to an airtight container and refrigerate for up to 3 to 4 days. The wings are best eaten fresh and hot, but they hold up reasonably well in the fridge. The butter sauce will solidify slightly when cold, but that’s normal and doesn’t mean anything is wrong.
Can you make the wings ahead? Yes, and here’s the most practical approach: Season the raw wings with the dry seasoning mixture and refrigerate them on a wire rack, uncovered, for up to 24 hours. This is actually preferable because the extended drying time makes them crispier. When you’re ready to cook, pull them out, let them reach room temperature for 30 minutes, and bake as directed. You can make the butter sauce up to 2 days ahead and store it in a small jar in the refrigerator; gently reheat it before tossing.
Can you freeze them? Yes. Once cooked and cooled, freeze them in an airtight container or freezer bag for up to 2 months. Frozen wings will keep their quality, though the texture after reheating won’t be quite as perfect as freshly baked. Thaw in the refrigerator before reheating.
How to reheat for best results: This is critical because improper reheating turns crispy wings into disappointing mush.
-
Oven method (best for quality): Preheat your oven to 350°F. Place the wings on a baking sheet in a single layer. Warm them for 10 to 15 minutes until they’re heated through and the skin firms up slightly. This method restores most of the original crispiness.
-
Air fryer method (fastest and excellent results): Preheat your air fryer to 350°F to 375°F. Place wings in a single layer (don’t overcrowd). Cook for 5 to 8 minutes until heated through and re-crisped. The air fryer actually does a better job than the regular oven of restoring that shattered-skin texture.
-
Toaster oven method: Same as regular oven but watch the timing—toaster ovens have less space and may reheat faster. Check at 8 minutes and go from there.
-
Microwave method (acceptable if desperate, but not ideal): Microwave on 50% power for 1 to 2 minutes, checking halfway through. The skin won’t be crispy, but the wings will be hot and still taste good. This is the quickest option if you’re in a rush.
Never use high-heat microwave reheating—the wings will heat unevenly and the butter sauce can get too hot while the wings are still cold in the center.
Serving Suggestions and Perfect Pairings
These wings are substantial and flavorful enough to be the star of the plate, but they pair beautifully with specific accompaniments that complement rather than compete with their richness.
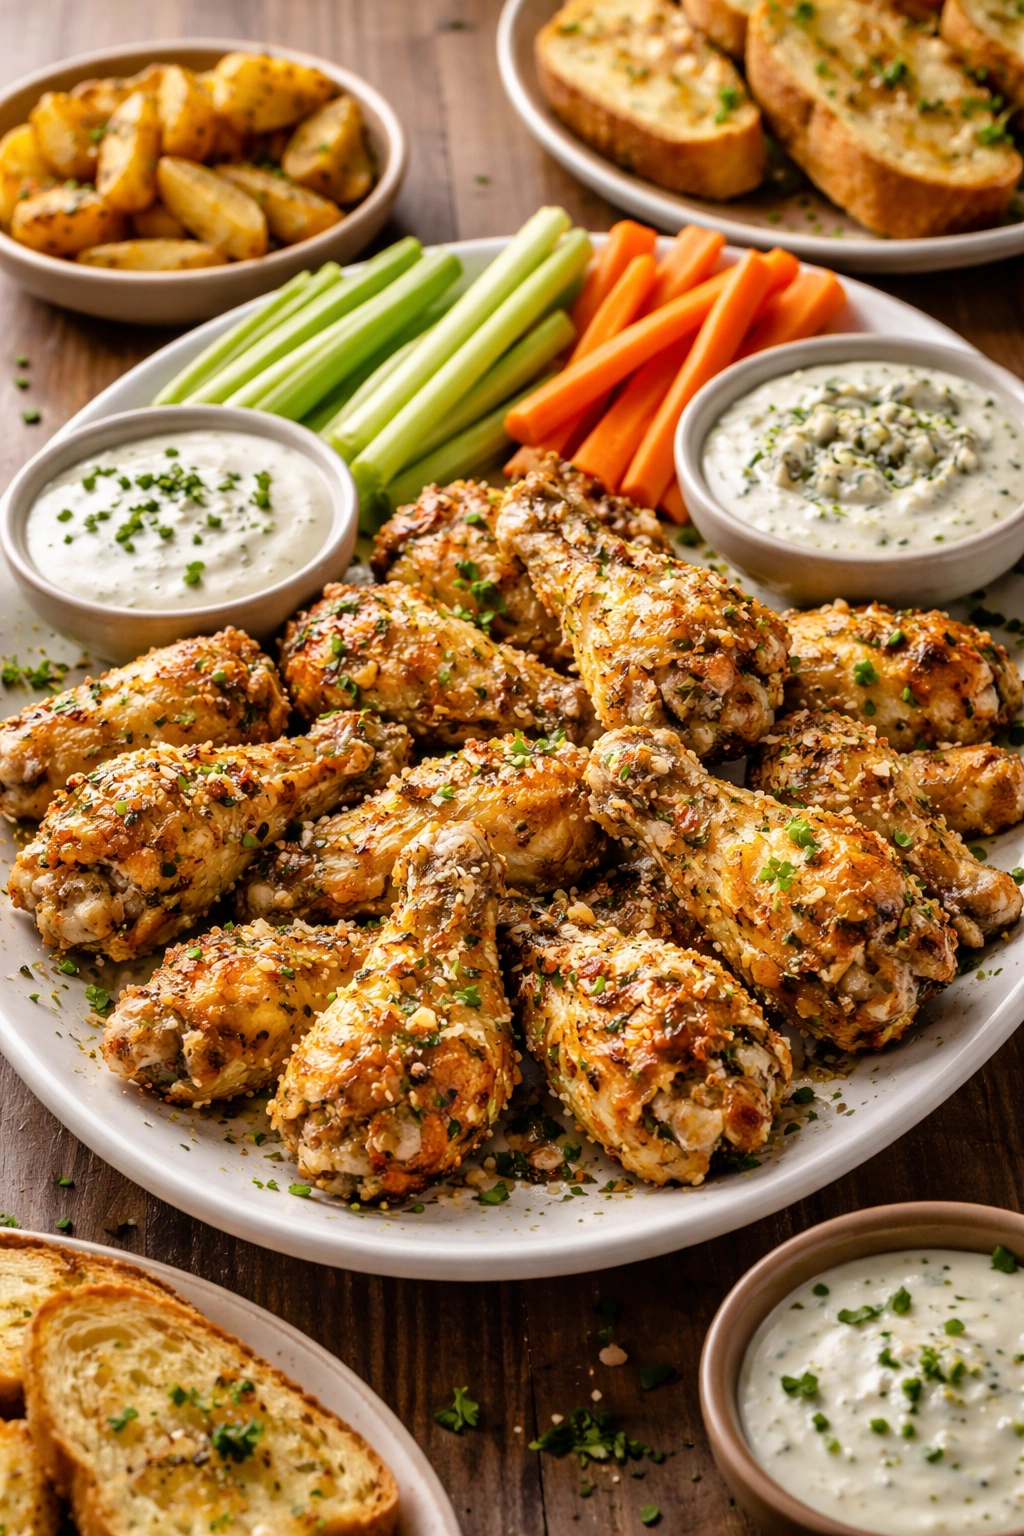
Dipping sauces: Serve with ranch dressing (homemade or store-bought) as the classic pairing—the cool, herbaceous tang balances the buttery richness. Blue cheese dressing is an equally excellent choice if you want more intensity and funk. Honey mustard works if someone prefers something sweeter. For heat lovers, hot sauce (Frank’s RedHot, Tabasco, or sriracha) adds another dimension.
Vegetable sides: Serve alongside fresh celery sticks and carrot sticks (this combination is traditional for a reason—the vegetables’ mild crunch and slight sweetness refresh your palate between bites). Roasted broccoli or cauliflower with garlic and olive oil provides a warmer vegetable option that echoes the garlic flavors in the wings.
Substantial sides: If you’re serving these as a main course rather than an appetizer, pair them with crispy roasted potatoes or shoestring fries (the starchy vehicle for sauce is essential here). Garlic bread is also unsurprisingly good. A simple green salad with lemon vinaigrette provides freshness and lightness.
Beverages: These wings taste incredible with cold beer (lagers and IPAs both work, depending on the beer style). Iced tea works perfectly if you want non-alcoholic. Sparkling water with lemon keeps things simple and lets the wings be the focus. Creamy tomato soup is an unexpectedly good pairing for a casual dinner.
Occasions: Garlic Parmesan wings are perfect for game day gatherings, Super Bowl parties, tailgates, casual weeknight dinners, date nights at home, and any gathering where you want to impress without fussing. They’re impressive enough for company but casual enough for a regular Tuesday night.
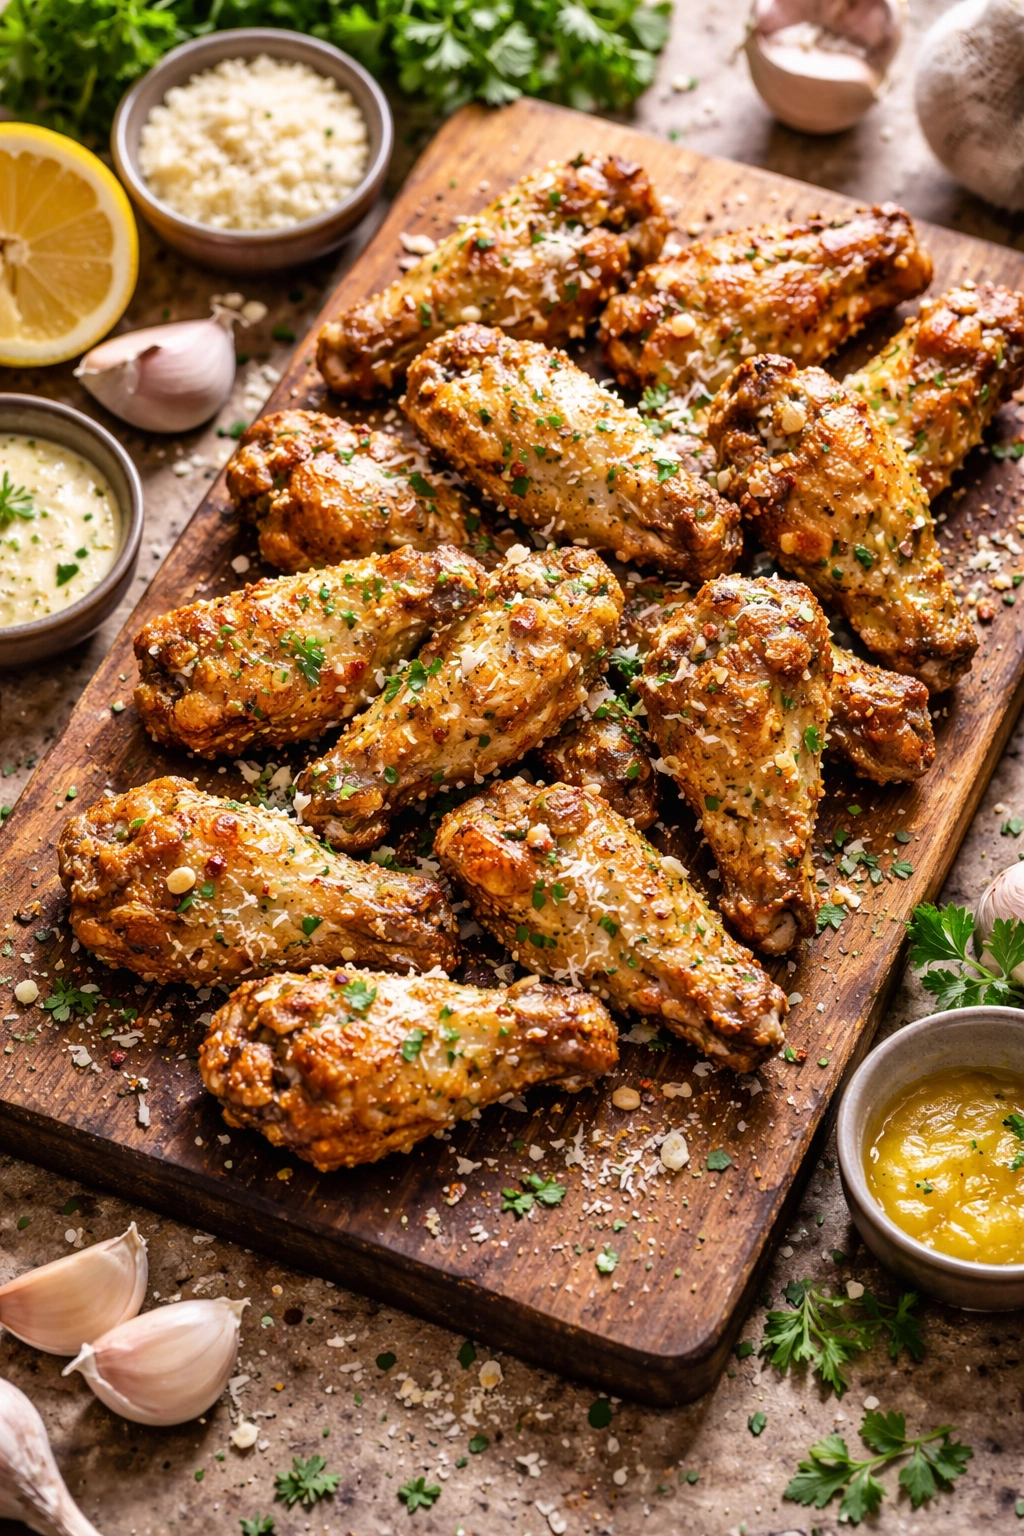
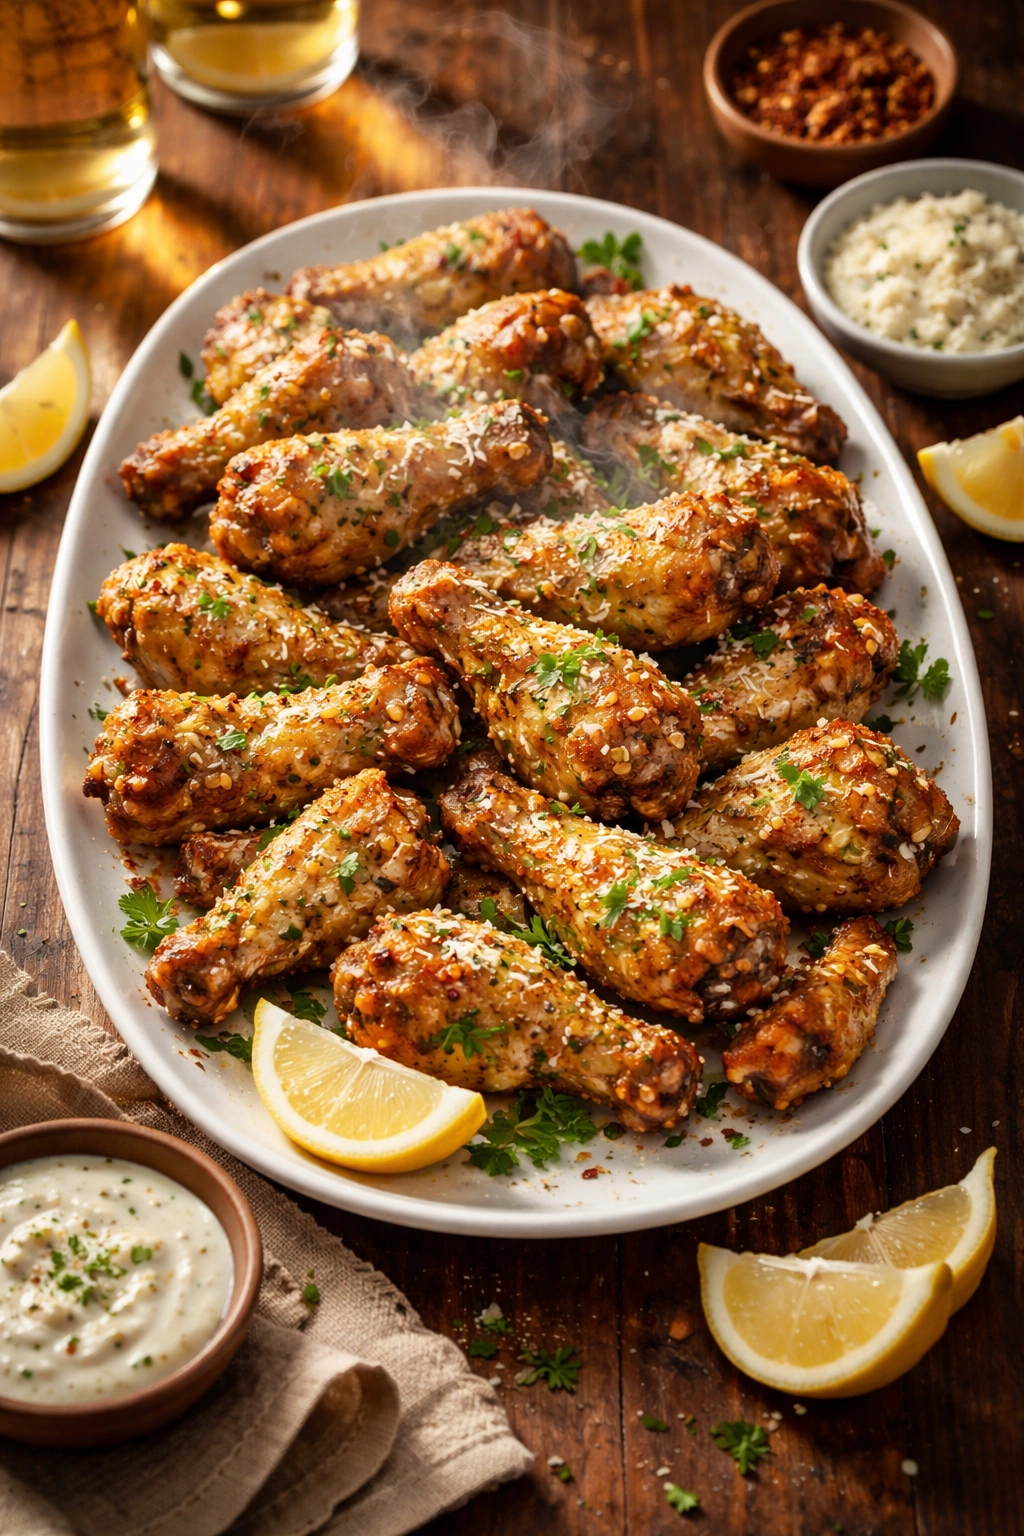
Plating for presentation: Serve the wings on a large platter lined with parchment paper or on a wooden cutting board, garnished with a final sprinkle of Parmesan and a handful of fresh parsley. Set small bowls of dipping sauce around the platter with small cocktail napkins nearby. This setup looks intentional and appetizing without requiring any special plating skills.
Final Thoughts

What makes garlic Parmesan wings worth making isn’t some secret technique or hard-to-find ingredient—it’s the intersection of simplicity and results. The method is straightforward enough that a complete beginner can execute it confidently. The ingredients are things most people either have or can pick up easily. The time investment is minimal. But the outcome tastes like you’ve put in way more effort than you actually have.
These wings deliver the kind of meal-memory that sticks around. People will ask for the recipe. They’ll tell you these are better than the restaurant version (because they often are). Kids will eat them eagerly, adults will keep reaching for one more, and you’ll find yourself making them again sooner than you expected.
The beauty of mastering this one recipe is that it opens doors. Once you understand how the baking powder creates crispiness, how the timing works, and how the sauce comes together, you can riff endlessly. You can adjust spices, add heat, introduce brightness with citrus, or lean into different herbs. You can scale up for parties or keep it intimate for two. You can make them on a random Tuesday or have them ready for a crowd without stress.
Start with the basic version as written. Make them exactly once, taste what you’ve created, and understand why this combination works so well together. Then, armed with that knowledge, start playing. Add things. Change things. Make them yours. That’s when these wings stop being just a recipe and become part of your cooking repertoire—the thing you make when you want something delicious that’s also genuinely easy.