Mornings are chaos. You’re groggy, your kids are hungry, you’re already running late—and breakfast somehow always becomes an afterthought scrambled together in five panicked minutes. But what if you could eliminate that entire stressful equation the night before?
Make-ahead breakfasts aren’t just a time-saver; they’re a complete mental shift. When you’ve already done the planning, the prep, and the heavy lifting, you’re not fighting yourself in the morning. You’re simply reaching into the fridge, grabbing something that’s already delicious and nutritious, and moving on with your day. No decisions. No stress. No reaching for something sugary or skipping breakfast entirely because there’s no time.
The real magic happens when you shift your thinking from “breakfast is something I make in the morning” to “breakfast is something I prepare strategically the night before.” This isn’t about restrictive meal prep or eating the same thing every day. It’s about having options ready—a rotation of different flavors, textures, and nutrition profiles that suit your actual schedule and taste preferences. Whether you’re looking for something you can grab and go, something hearty enough to fuel you through a workout, or something sweet enough to feel like a treat, these eight breakfast ideas solve that problem in advance.
1. Overnight Oats
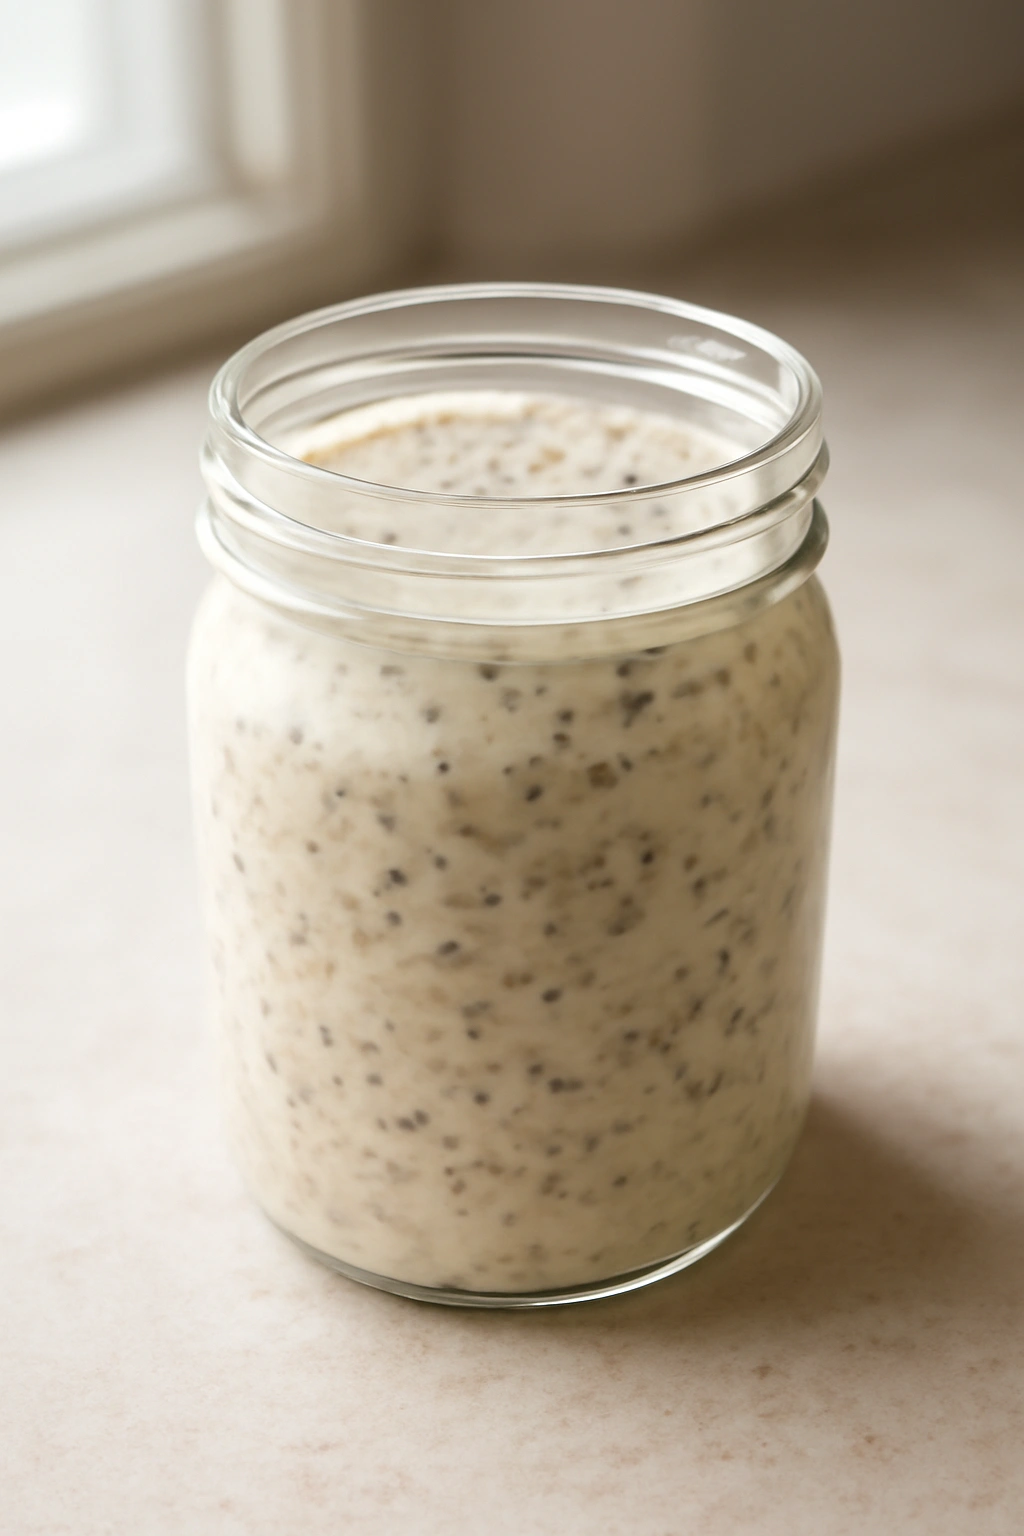
Overnight oats are breakfast in its most forgiving, adaptable form. You literally just combine oats with liquid the night before, let them sit in the fridge while you sleep, and wake up to something that’s already the perfect texture—creamy, thick, and ready to eat straight from the jar or a quick microwave warming.
How to Build the Base
The formula is straightforward: combine one-half cup of rolled oats (not instant) with three-quarters cup of milk—dairy, almond, oat, or whatever works for you. Add one tablespoon of chia seeds or ground flaxseed for extra nutrition and texture, then one tablespoon of nut butter (peanut, almond, tahini) for protein and richness. The nut butter also prevents the mixture from getting watery overnight, which is the one thing that separates perfectly creamy overnight oats from a soupy disappointment.
Add one-half teaspoon of vanilla extract and a pinch of salt. This seems small, but vanilla and salt are what make overnight oats taste intentionally delicious rather than like hospital food. If you want sweetness, add one-half to one tablespoon of maple syrup or honey—hold back slightly here because you’ll add more sweetness with your toppings.
Flavor Combinations Worth Making
- Berry and lemon: Stir in one-quarter cup of fresh or frozen berries and one-half teaspoon of lemon zest when you mix it. Top with granola, a drizzle of yogurt, and extra fresh berries in the morning.
- Pumpkin pie: Replace one-quarter cup of the milk with pumpkin purée, add one-quarter teaspoon of pumpkin pie spice, and top with pecans and a dollop of whipped cream.
- Chocolate and banana: Stir in one tablespoon of unsweetened cocoa powder and one mashed banana. Top with sliced banana, chopped dark chocolate, and a sprinkle of flaky sea salt.
- Apple cinnamon: Add one-half teaspoon of cinnamon and one grated apple mixed in. Top with toasted pecans, a drizzle of almond butter, and a few more apple slices.
Make-Ahead Strategy and Storage
Overnight oats will keep for up to five days in the refrigerator, which means you can make a batch of four to five jars on Sunday and have breakfast sorted through the week. Use clear mason jars or glass containers so you can see what you have and feel motivated to eat them. Layer your toppings—granola, nuts, coconut flakes—on top rather than mixed in, so they don’t get soggy. In the morning, stir well, add a splash more milk if you prefer it thinner, and eat it cold or microwave for 60 to 90 seconds for a warm version.
Pro tip: If you’re freezing overnight oats for later in the week, skip the granola and crunchy toppings—freeze the base only, then add toppings after thawing. Frozen overnight oats thaw beautifully in the fridge overnight or at room temperature in about two hours.
2. Breakfast Burritos (Make and Freeze)
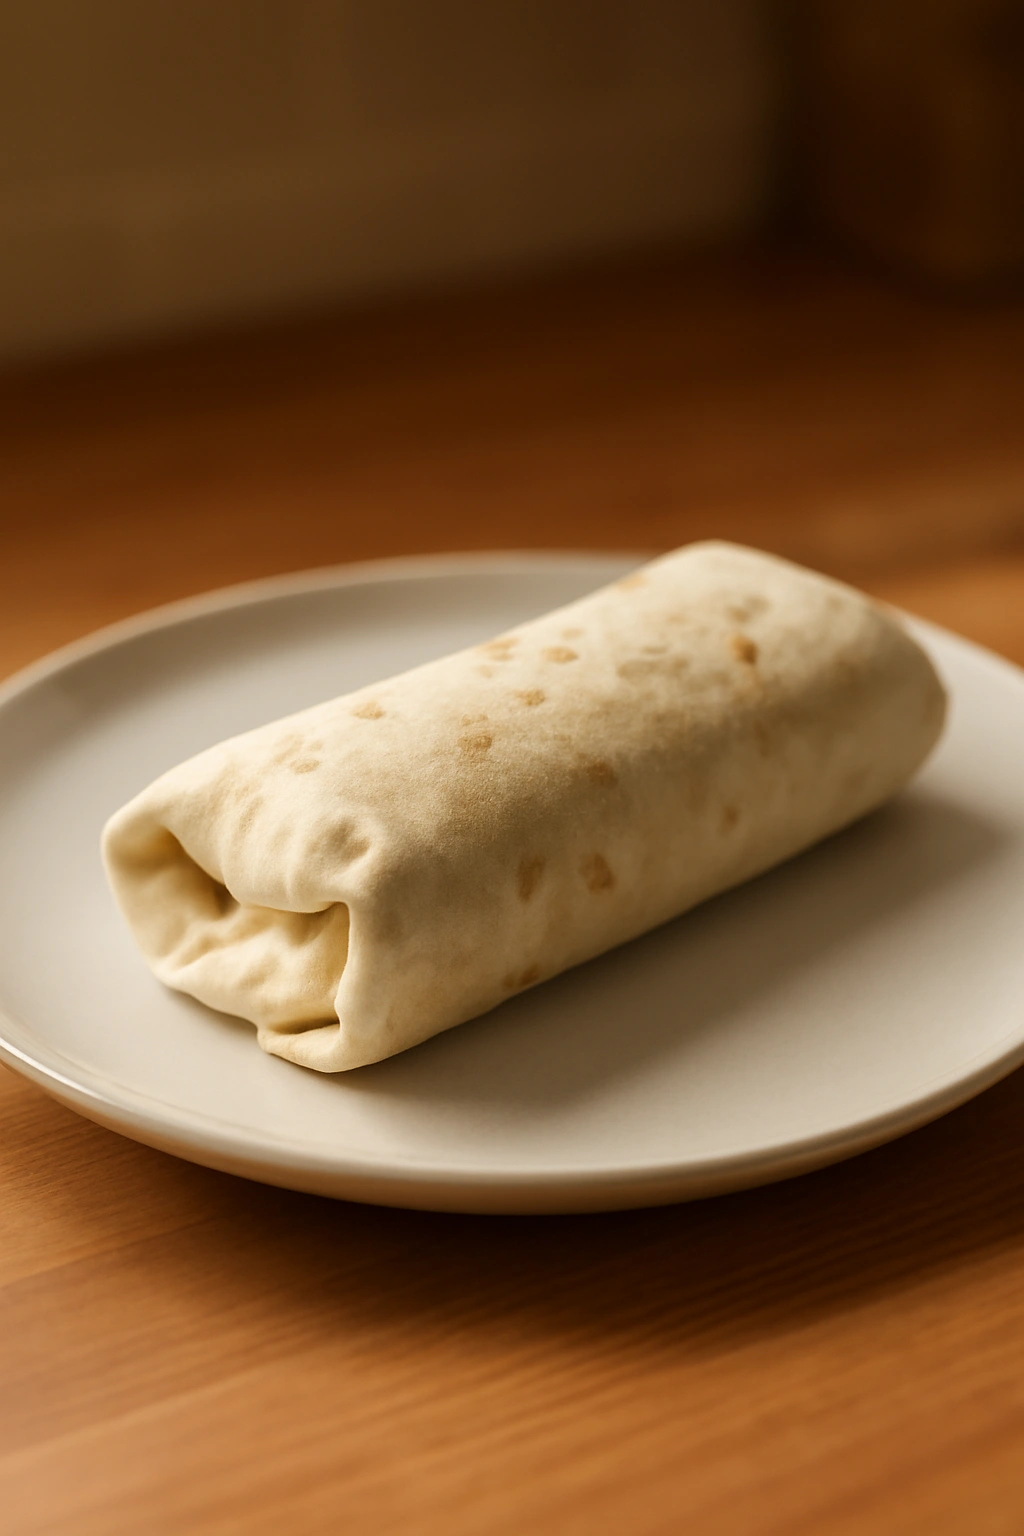
Breakfast burritos are the ultimate make-ahead vehicle because they freeze beautifully, defrost quickly, and taste completely delicious whether you eat them straight or reheat them. You get protein, carbs, vegetables, and fat all wrapped up in one thing you can hold in your hand while you’re literally doing anything else.
Assembly and Ingredient Layering
Start with a large flour tortilla (10-inch is ideal). In the center of the tortilla, layer your components in this specific order to maximize the burrito’s structural integrity: a thin smear of refried beans or black beans on the bottom, then scrambled eggs or a cooked egg mixture, then crumbled cooked breakfast sausage or bacon, then shredded cheese, then diced bell peppers and onions that you’ve sautéed until soft, then a handful of fresh spinach or arugula, then diced tomatoes or salsa, then avocado slices or guacamole.
The key is not overstuffing. A properly filled burrito has components that come about two-thirds of the way up the tortilla, not crammed to the edges. Fold the left and right sides inward first, then roll tightly from the bottom up, wrapping firmly so everything stays enclosed as you eat.
Smart Flavor Variations
- Southwest style: Use black beans, scrambled eggs with chorizo, pepper jack cheese, diced jalapeños, cilantro, and lime crema (sour cream mixed with lime juice and salt).
- Mediterranean: Swap the beans for hummus, use scrambled eggs with crumbled feta, add sun-dried tomatoes, spinach, and a sprinkle of za’atar seasoning.
- Breakfast hash: Use scrambled eggs, diced crispy potatoes, sautéed mushrooms and onions, sharp cheddar, and fresh herbs like dill or parsley.
- Veggie-forward: Layer black beans, scrambled eggs, diced bell peppers, mushrooms, spinach, avocado, cotija cheese, and salsa verde.
Freezing and Reheating Method
Wrap each burrito tightly in aluminum foil, then place all of them in a freezer bag labeled with the date. They’ll freeze for up to two months. To reheat, unwrap the foil and wrap the burrito loosely in a damp paper towel, then microwave for 90 seconds to two minutes until warmed through. Alternatively, bake wrapped burritos at 350°F for about 12 to 15 minutes. The paper towel method keeps the tortilla from drying out while the burrito heats—this detail makes a huge difference in the final texture.
Worth knowing: You can also refrigerate assembled burritos for up to three days before freezing them. This is useful if you want to make a batch on Sunday but eat fresh ones Monday and Tuesday before freezing the rest for later.
3. Egg Muffin Cups
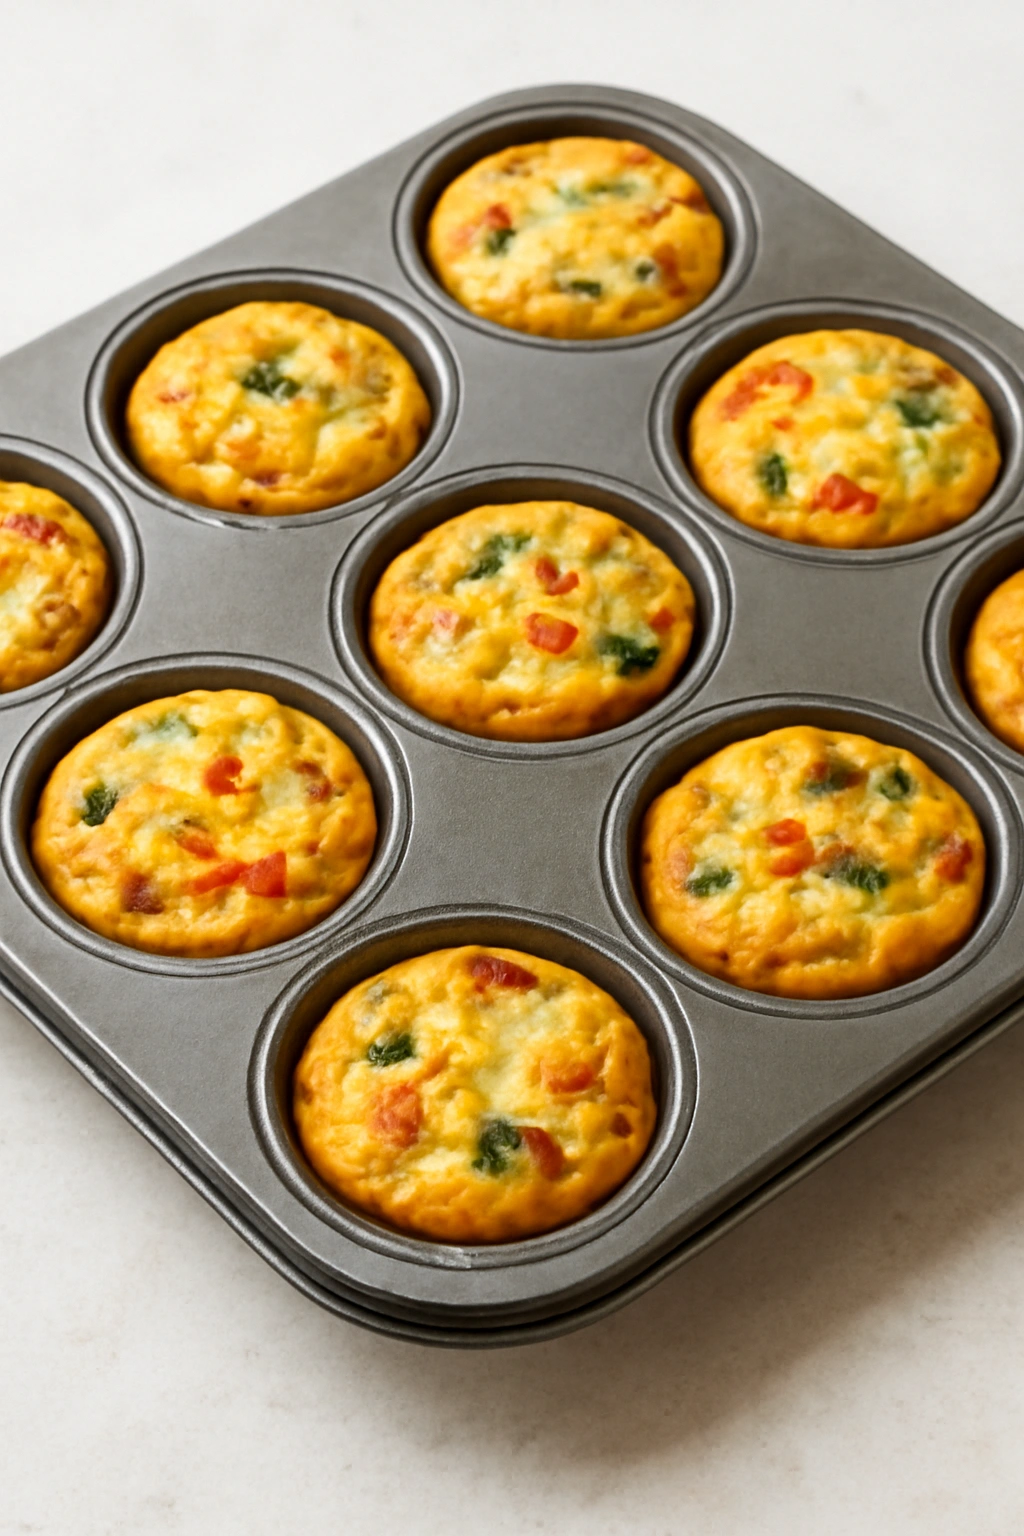
Egg muffin cups—sometimes called frittata muffins—are handheld, portion-controlled, and customizable to an absurd degree. Make a batch of 12 on Sunday and you have grab-and-go breakfasts for two weeks (eating one per day), or grab two on busy mornings when you need something more substantial.
The Base Formula for Success
Whisk together 8 large eggs with one-quarter cup of heavy cream or milk, one-half teaspoon of salt, and one-quarter teaspoon of black pepper. That’s your base. Grease a standard 12-cup muffin tin thoroughly with butter or cooking spray—this is non-negotiable because eggs stick ferociously to metal. Divide your add-in ingredients evenly among the cups, then pour the egg mixture over them, filling each cup about three-quarters of the way full (they puff slightly as they bake).
Bake at 375°F for about 18 to 22 minutes, until the eggs are set in the center and the tops are just lightly golden. Let them cool in the pan for five minutes, then run a thin knife around each cup and pop them out. They should release cleanly if you greased properly.
Mix-in Ideas That Actually Work
- Spinach and feta: Sautéed spinach, crumbled feta, diced red onion, and fresh dill.
- Bacon and cheddar: Crumbled cooked bacon, shredded sharp cheddar, diced green bell pepper, and a pinch of smoked paprika.
- Sausage and mushroom: Crumbled cooked breakfast sausage, sautéed mushrooms, diced onion, and gruyere cheese.
- Italian: Diced roasted red peppers, fresh basil, pine nuts, crumbled Italian sausage, and mozzarella.
- Western: Diced ham, diced bell peppers (both colors), diced onion, and American or cheddar cheese.
The ratio is roughly one cup of combined add-ins per dozen cups. You don’t want the muffins overloaded; they should still be primarily egg or they’ll be tough and dense.
Storage and Reheating Tips
Egg muffin cups refrigerate for up to five days in an airtight container or freeze for up to three months individually wrapped or in a freezer bag. Reheat from cold: microwave for about 45 seconds on high for a single muffin, or reheat from frozen at 350°F in a covered baking dish for about 12 minutes. They’re perfectly good eaten cold too—great if you’re literally eating standing up at the kitchen counter before heading out.
Pro tip: Make two batches of different flavors to avoid breakfast fatigue. Nothing kills the appeal of make-ahead food faster than eating the exact same thing 12 days in a row.
4. Chia Pudding

Chia pudding sits somewhere between overnight oats and a dessert you’re somehow allowed to eat for breakfast. It’s got a subtly bouncy, pudding-like texture that comes from chia seeds absorbing liquid overnight, making it feel more luxurious and special than regular oatmeal. It’s also naturally high in fiber and omega-3 fatty acids, which is the bonus of choosing something that actually tastes like a treat.
Building the Pudding Base
Combine one-quarter cup of chia seeds with one cup of milk (the thinner the milk, the more liquid and spoonable the final pudding; the richer the milk, the creamier and more indulgent). Add one-half teaspoon of vanilla extract, one-quarter to one-half teaspoon of honey or maple syrup depending on your sweetness preference, and a tiny pinch of salt. Stir very well—chia seeds have a tendency to clump, so break up any clusters as you stir.
The mixture will look too liquid at first. Don’t panic. Let it sit at room temperature for 15 minutes, stirring once or twice, and it will absorb enough liquid to become a thick, spoonable pudding. Once you reach that texture, refrigerate overnight. If it becomes thicker than you like by morning, just stir in a splash more milk until it’s back to pudding consistency.
Topping Combinations Worth the Effort
- Tropical: Coconut milk base, topped with fresh mango chunks, shredded coconut, and a squeeze of lime.
- Berry and dark chocolate: Almond milk base with almond butter swirled in, topped with fresh mixed berries and shaved dark chocolate.
- Matcha white chocolate: Oat milk mixed with matcha powder, topped with crushed pistachios, white chocolate shards, and freeze-dried raspberries.
- Maple and pecan: Use maple syrup instead of honey, top with candied pecans, a drizzle of maple syrup, and a sprinkle of fleur de sel.
Make-Ahead Storage and Batch Prepping
Chia pudding keeps in the refrigerator for up to five days in individual mason jars or glass containers. The beauty here is that you can assemble four to five jars on Sunday night, and they’re ready to eat straight from the jar every morning. Pack toppings separately if you’re prepping them more than a day or two in advance—keep granola, nuts, chocolate, and fresh fruit in separate containers so toppings stay crunchy and fresh.
Worth knowing: You can make chia pudding with literally any milk, including coconut cream for something ultra-rich, or even yogurt thinned with milk for extra protein. Experiment with what you have.
5. French Toast Casserole
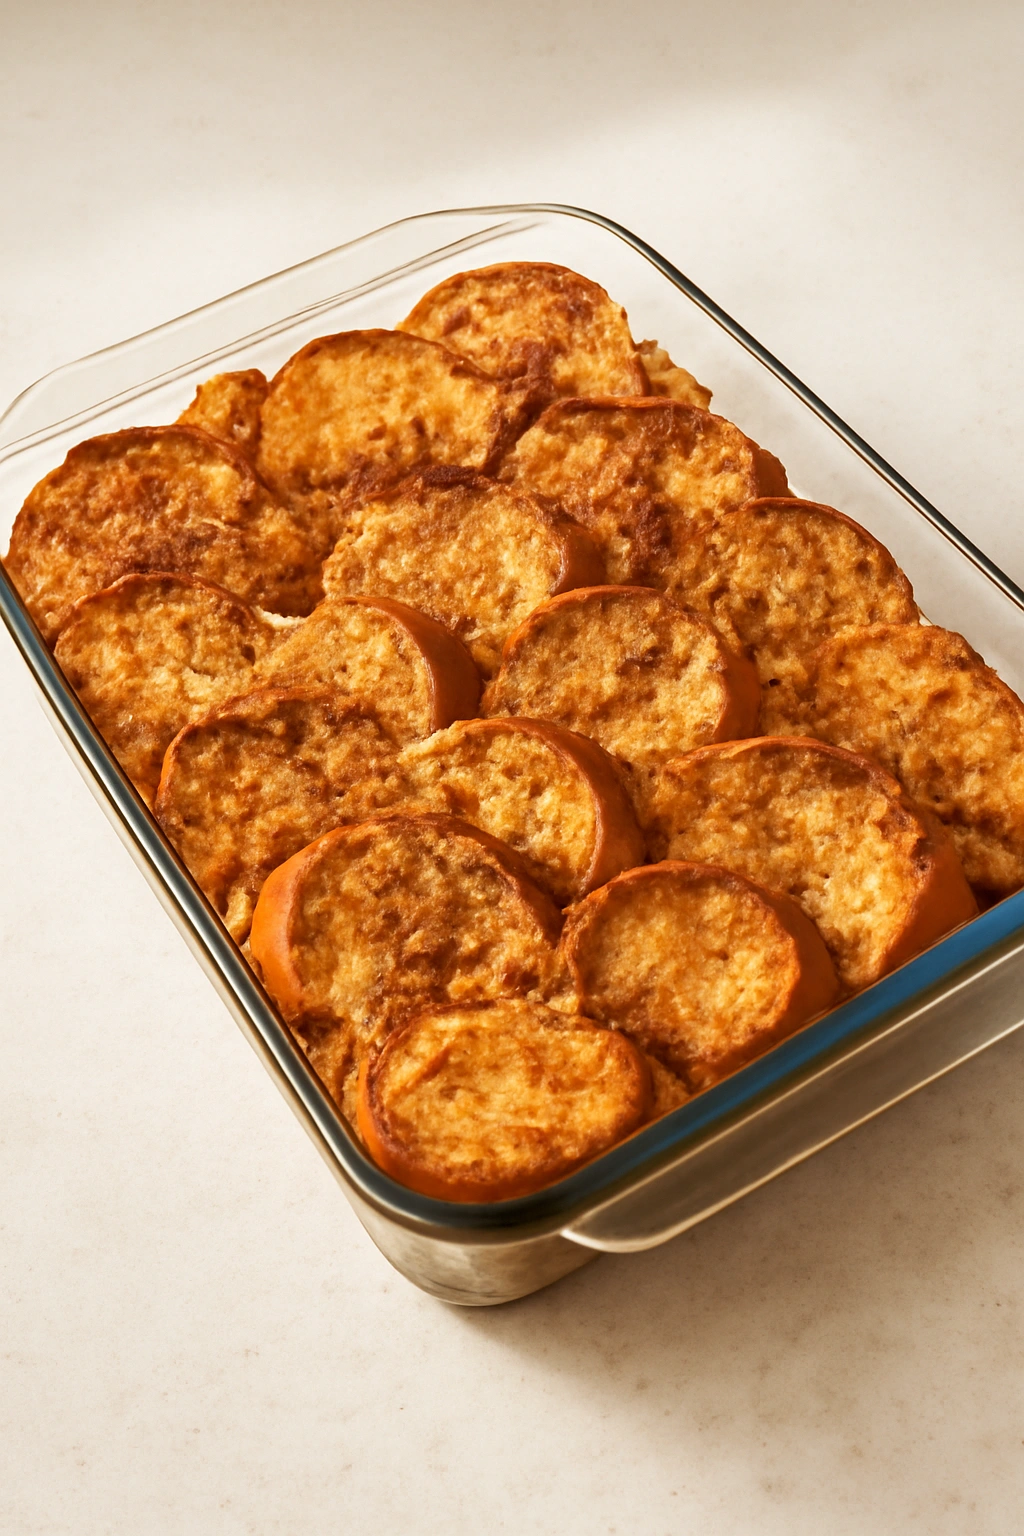
French toast casserole is a make-ahead breakfast that actually impresses people—which matters if you’re hosting overnight guests, serving a crowd on a weekend morning, or want to feel like you’ve made something special even when you’re mostly just sleeping while it cooks.
The Assembly-the-Night-Before Method
You’ll need a 9-by-13-inch baking dish and about eight slices of bread—brioche, challah, or thick-cut white bread work best because they absorb the custard without falling apart. Cut the bread into one-inch cubes and spread them in the prepared baking dish in a single layer.
Whisk together six large eggs, one and one-half cups of whole milk, one-quarter cup of granulated sugar, one teaspoon of vanilla extract, one-half teaspoon of cinnamon, one-quarter teaspoon of nutmeg, and a pinch of salt. Pour this custard over the bread cubes and press gently so the bread absorbs the liquid evenly. Cover the dish with plastic wrap and refrigerate overnight (or up to 24 hours).
In the morning, remove the casserole from the refrigerator 30 minutes before baking. Bake uncovered at 350°F for 35 to 45 minutes, until the custard is set, the edges are golden, and a knife inserted in the center comes out clean (a few moist crumbs are fine; custard should not be liquid).
Flavor Variations to Make It Your Own
- Classic: Make the base recipe and top with maple syrup, powdered sugar, and fresh berries before serving.
- Chocolate and orange: Add one-quarter cup of unsweetened cocoa powder to the custard and one tablespoon of orange zest. Top with chocolate chips and candied orange peel.
- Eggnog: Replace the milk with eggnog and add one-half teaspoon of ground nutmeg and one-quarter teaspoon of allspice. Omit the cinnamon.
- Caramel apple: Layer diced caramelized apples in the pan with the bread. Add one-half teaspoon of cinnamon to the custard. Serve with warm caramel sauce.
Baking and Serving Strategy
You can prepare the casserole up to 24 hours ahead, which makes it perfect for holiday mornings or when you’re hosting. Bake it fresh that morning—it doesn’t freeze well after baking. Serve it warm from the oven with maple syrup, fresh berries, whipped cream, or a combination of toppings. One 9-by-13-inch casserole feeds six to eight people comfortably.
Pro tip: If you’re short on time in the morning, you can let the assembled casserole sit at room temperature for 30 minutes instead of chilling overnight, then bake it. It won’t absorb quite as much custard, but it’s still delicious—you’re just skipping the overnight rest phase.
6. Breakfast Cookies or Granola Bars
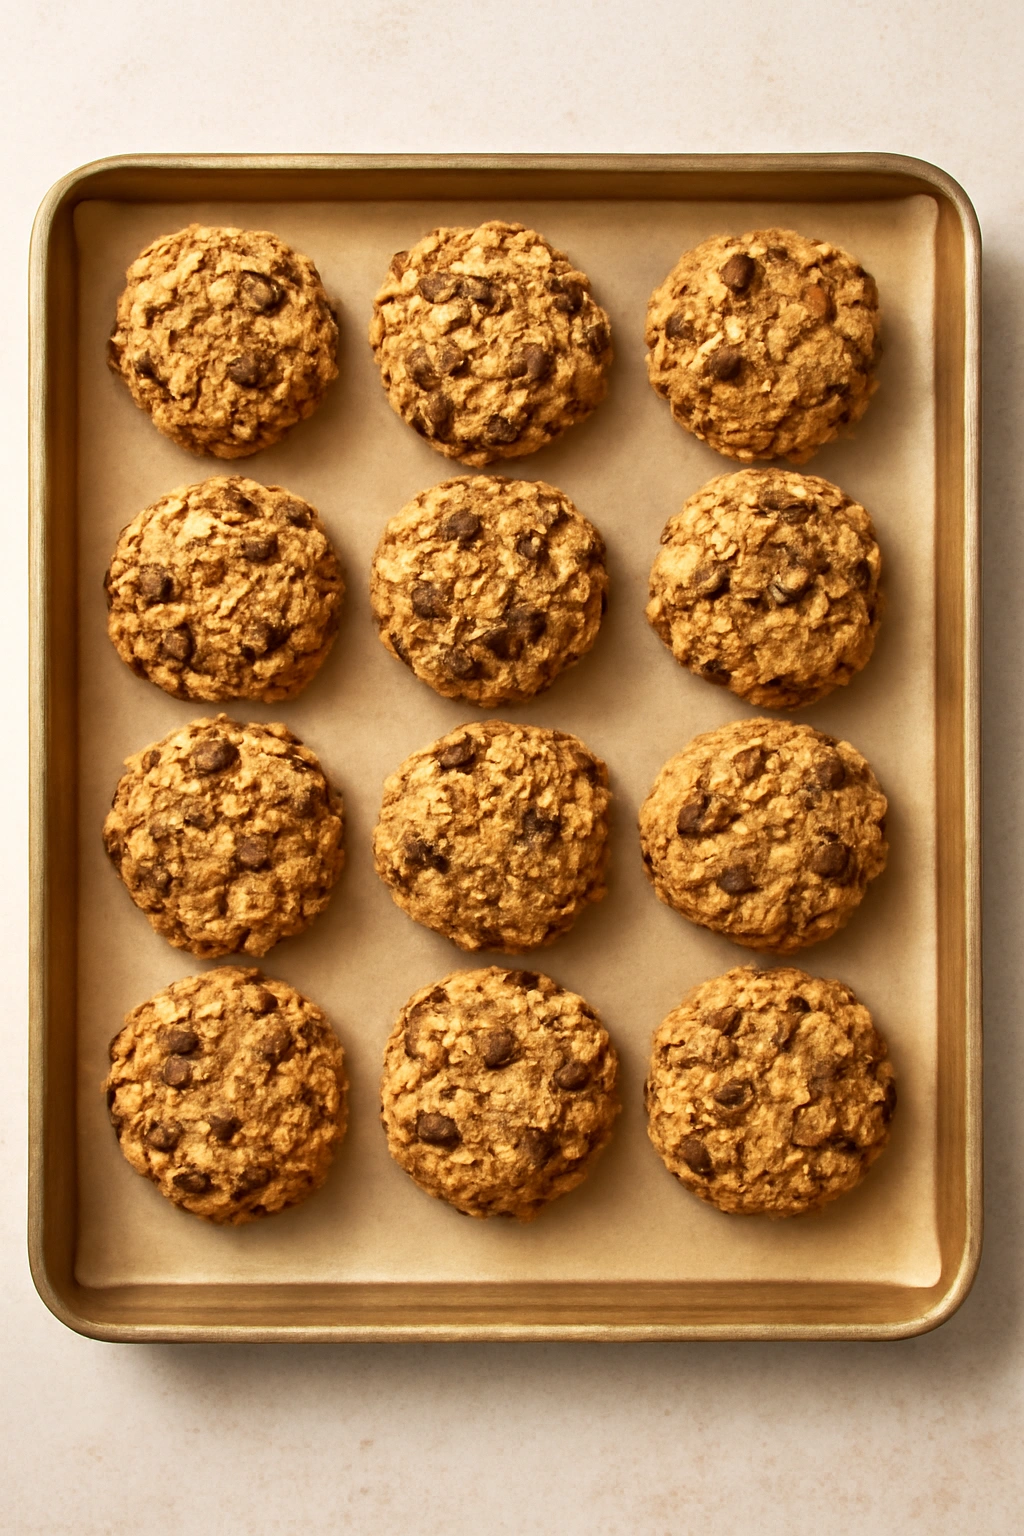
Breakfast cookies and granola bars occupy a weird space between dessert and responsible nutrition, which is precisely why they’re so successful as a make-ahead breakfast. They taste like a treat, they’re portable enough to eat in the car or between meetings, and a batch of 24 means you’ve got nearly a month of breakfasts sorted.
The Basic Breakfast Cookie Formula
Start with two cups of rolled oats, one-half cup of all-purpose flour or almond flour, one-half teaspoon of baking soda, one teaspoon of cinnamon, one-half teaspoon of salt, and one-quarter teaspoon of nutmeg. In a separate bowl, cream together one-half cup of softened butter with one-half cup of brown sugar and one-quarter cup of granulated sugar until fluffy, about two minutes. Add one large egg and one teaspoon of vanilla extract and beat until combined.
Fold the dry ingredients into the wet ingredients until just combined—don’t overmix. Fold in one cup of mix-ins: chopped nuts, chocolate chips, dried fruit, seeds, or a combination. Drop heaping tablespoons of dough onto a parchment-lined baking sheet and bake at 350°F for 12 to 15 minutes until the edges are golden and the centers are still slightly soft (they continue cooking after you remove them from the oven).
These cookies are intentionally underbaked. They’ll feel slightly soft when they come out of the oven, but they firm up as they cool. This is what makes them perfect for eating cold—they have a slightly chewy, cake-like texture rather than being hard as rocks.
Mix-In Combinations That Work
- Apple cinnamon walnut: Diced dried apple, toasted walnuts, one-half teaspoon of vanilla, and one-quarter teaspoon of cardamom.
- Peanut butter and chocolate: Two tablespoons of peanut butter mixed into the wet ingredients, plus chocolate chips and roasted peanuts.
- Maple pecan: One tablespoon of maple syrup in the wet ingredients instead of some of the sugar, plus chopped pecans and a light sprinkling of fleur de sel on top of each cookie before baking.
- Cherry almond: Dried cherries, sliced almonds, one-half teaspoon of almond extract instead of vanilla, and a tiny pinch of almond essence.
Storage for Maximum Freshness and Convenience
Breakfast cookies keep at room temperature in an airtight container for up to five days, in the refrigerator for up to two weeks, or frozen for up to three months. Make a batch on Sunday, and you can grab one every morning without thinking. They’re also the kind of breakfast food that tastes exactly the same whether it’s fresh or been frozen and thawed, which is rare and wonderful.
Worth knowing: You can make granola bars using the same base formula, pressing the dough into a parchment-lined 8-by-8-inch or 9-by-9-inch baking dish instead of making individual cookies. Bake for 20 to 25 minutes, cool completely, then cut into 16 bars. Store exactly the same way.
7. Yogurt Parfait Jars
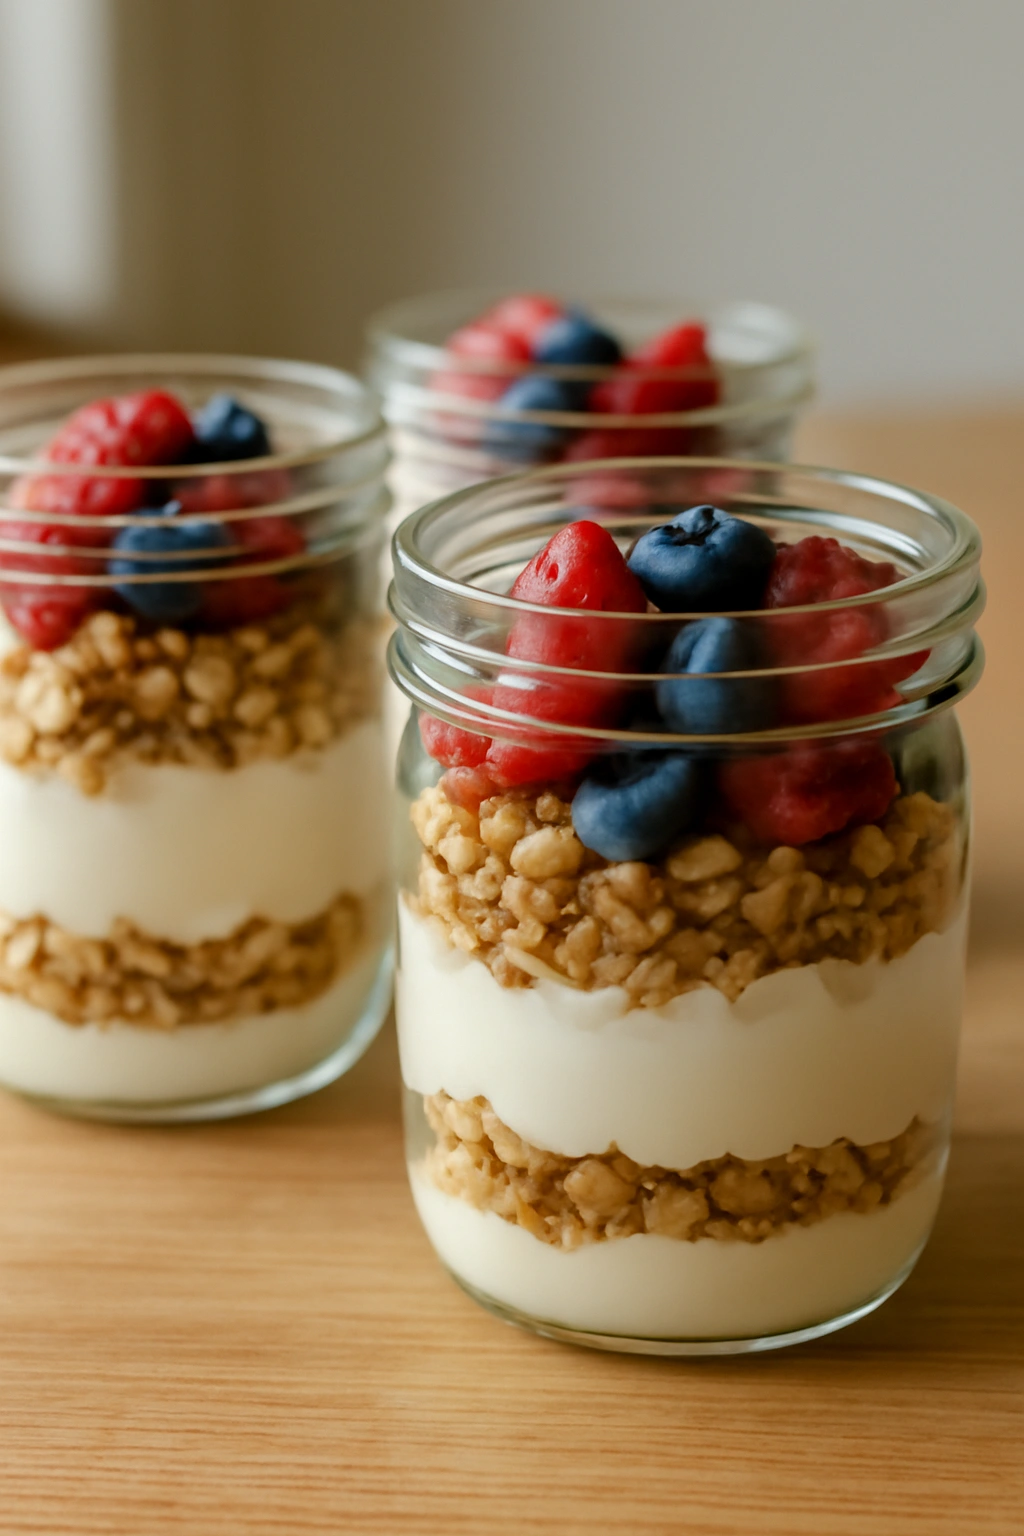
Yogurt parfaits are the breakfast of someone who has their act together—or at least wants to appear to. In reality, they’re barely more than layering a few things in a jar, but they look intentional, feel fancy, and you can make an entire week of them in about 15 minutes.
Layering Strategy for Maximum Appeal
Choose a thick, creamy yogurt—Greek yogurt gives you the most protein, but any full-fat yogurt works beautifully. In a glass jar or container, start with a one-inch layer of yogurt on the bottom. Add a thin layer of granola, crushed nuts, or coconut flakes. Add a layer of fruit (fresh, frozen, or dried), then another layer of yogurt, then another layer of texture (granola or nuts), then a final layer of fruit on top. This visual contrast—yogurt, crunch, fruit, yogurt, crunch, fruit—is what makes parfaits look appetizing.
The key is making sure every spoonful has elements of all three components. Nobody wants a spoonful of pure granola, and nobody wants a mouthful of yogurt with no texture. Intentional layering fixes this.
Flavor and Texture Combinations
- Berry and honey: Plain yogurt layered with granola, mixed berries (fresh or frozen), drizzle of honey, and candied pecans on top.
- Tropical: Greek yogurt mixed with a tiny bit of vanilla, layered with toasted coconut flakes, diced fresh mango and pineapple, macadamia nuts, and a squeeze of lime.
- Chocolate and raspberry: Greek yogurt mixed with unsweetened cocoa powder and a touch of honey, layered with crushed chocolate granola or chocolate chunks, fresh raspberries, and sliced almonds.
- Fig and walnut: Plain yogurt, crushed walnuts, fresh or dried figs, a drizzle of honey, and a tiny pinch of sea salt.
Make-Ahead Timing and Storage
Yogurt parfaits can be assembled up to three days ahead. Keep granola and crunchies separate from the yogurt if you’re making them more than one day in advance—add them in the morning so they stay crispy. Frozen fruit thaws beautifully in yogurt overnight and actually helps keep the whole parfait cold, which is useful if you’re eating it at your desk a few hours after breakfast.
Pro tip: Buy a variety pack of individual yogurts in different flavors and use those as your base instead of making all of them plain. It adds variety without extra work, and you have built-in portion control.
8. Breakfast Sandwiches (Make and Freeze)
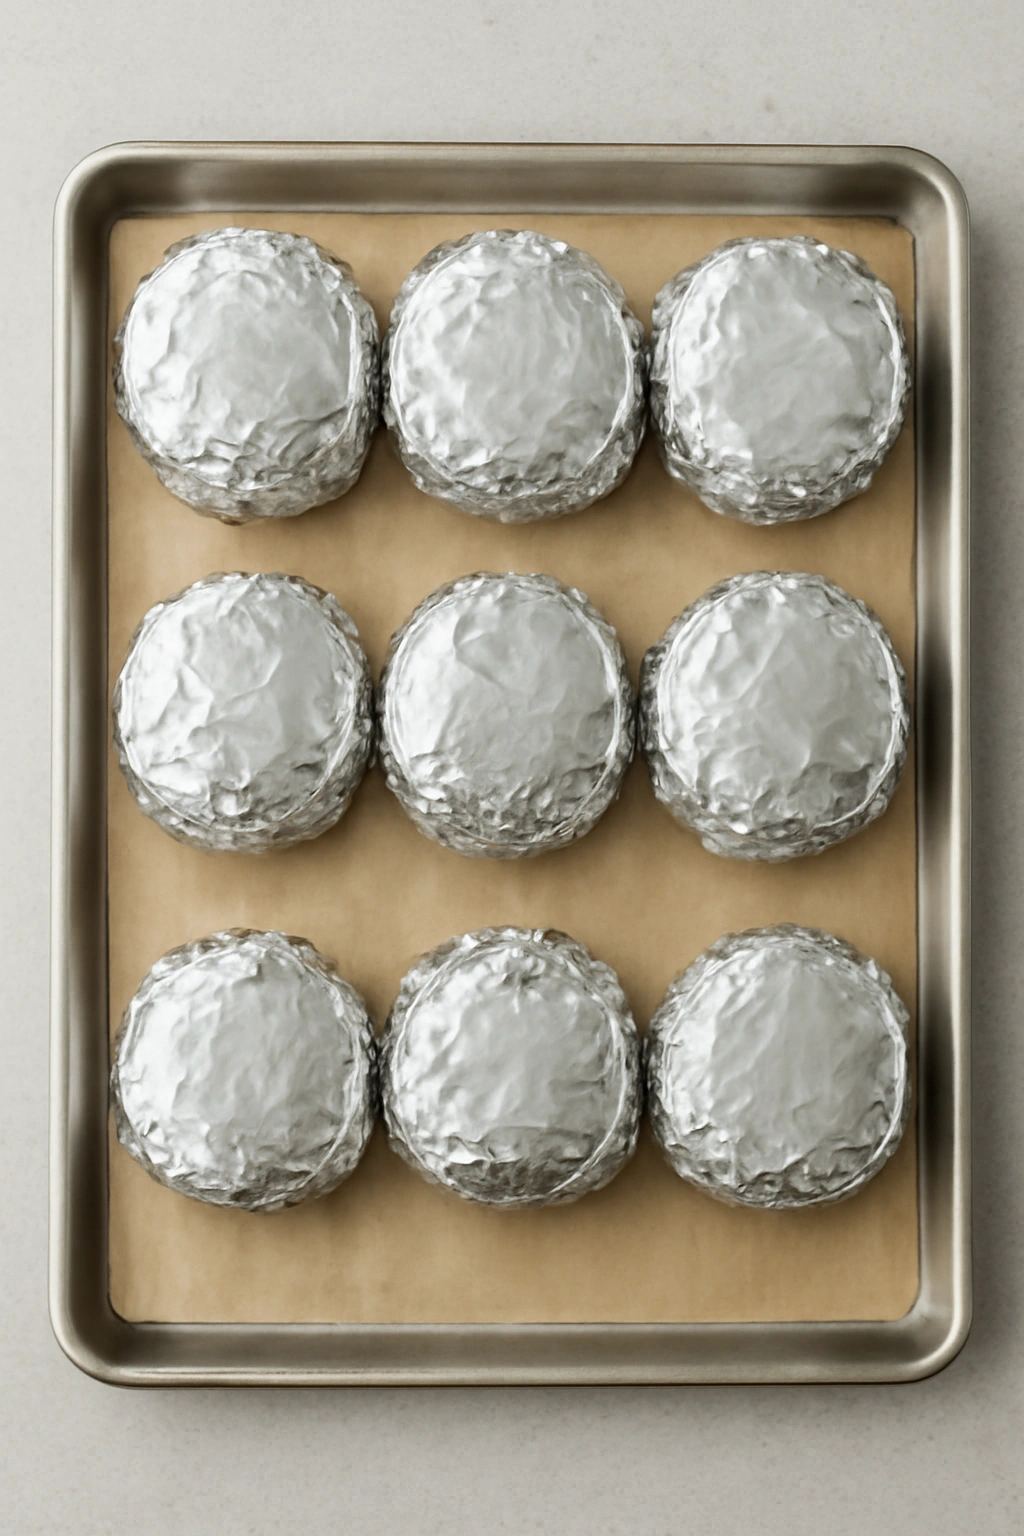
Breakfast sandwiches are the breakfast equivalent of a professional restaurant serving, and you can make a batch of eight to ten on Sunday, wrap them in foil, and have grab-and-go breakfasts for two weeks. They’re sturdy enough to survive a commute, freezing won’t destroy them, and they taste just as good reheated as they do fresh.
Assembly for Maximum Stability
Choose a sturdy bread base—English muffins, bagels, thick-cut toast, or biscuits work far better than soft white bread, which gets mushy when thawed. Toast your bread lightly so it has structural integrity and won’t absorb moisture from the other components.
Spread a thin layer of mayonnaise or butter on the inside of both halves (this creates a barrier that prevents the bread from getting soggy). Layer your components in this order: a slice of cheese on the bottom half, then your protein (cooked bacon, sausage patty, or ham), then scrambled eggs or a fried egg, then any vegetables (sliced tomato, leafy greens, caramelized onions), then the top half of the bread. The cheese directly against the warm egg will melt slightly, sealing the sandwich together.
Flavor Combinations Worth Making in Batches
- Classic breakfast: Cheddar cheese, crispy bacon, scrambled eggs, and a tiny bit of mayo on an English muffin.
- Everything bagel: Cream cheese, smoked salmon, scrambled eggs, thinly sliced red onion, and capers on a toasted bagel.
- Sausage and pepper: Italian sausage patty, sautéed bell peppers and onions, provolone cheese, and marinara on a toasted biscuit.
- Veggie-forward: Crumbled feta, fresh spinach (raw is fine), diced tomato, sliced avocado, and everything bagel seasoning on toasted whole wheat bread.
Freezing and Reheating Without Destroying Them
Wrap each sandwich individually in foil, then place them all in a freezer bag labeled with the date. They freeze for up to two months. To reheat, unwrap the foil partially (keep the sandwich wrapped loosely), wrap in a paper towel, and microwave for about 90 seconds to two minutes until warmed through. The foil and paper towel combination prevents the bread from drying out while the filling heats up.
Worth knowing: Avoid mayo-based sauces when freezing—they can separate and get slimy. Stick with butter, cheese, or mustard. You can spread mayo on when you reheat if you want it.
Final Thoughts

The breakfast dilemma—too hungry to skip it, too busy to make it—disappears entirely when you’ve done the work the night before. These eight options give you actual variety: something cold and creamy, something you can grab with one hand, something that impresses houseguests, something that freezes beautifully for future weeks, something that tastes like dessert but isn’t.
The real win isn’t saving time on any individual morning (though you absolutely will). It’s the mental shift from treating breakfast like a daily emergency to treating it like a solved problem. You walk into the kitchen, reach into the fridge or freezer, and breakfast is already there waiting for you. No scrambling, no skipping, no regret at 10 a.m. when your energy crashes because you didn’t eat.
Start with whichever of these sounds most appealing to you, make a single batch, and eat them all week. Once you’ve got one routine working, add another. Before long, you’ll have a rotation happening automatically, and mornings will feel dramatically easier. That’s the entire point.