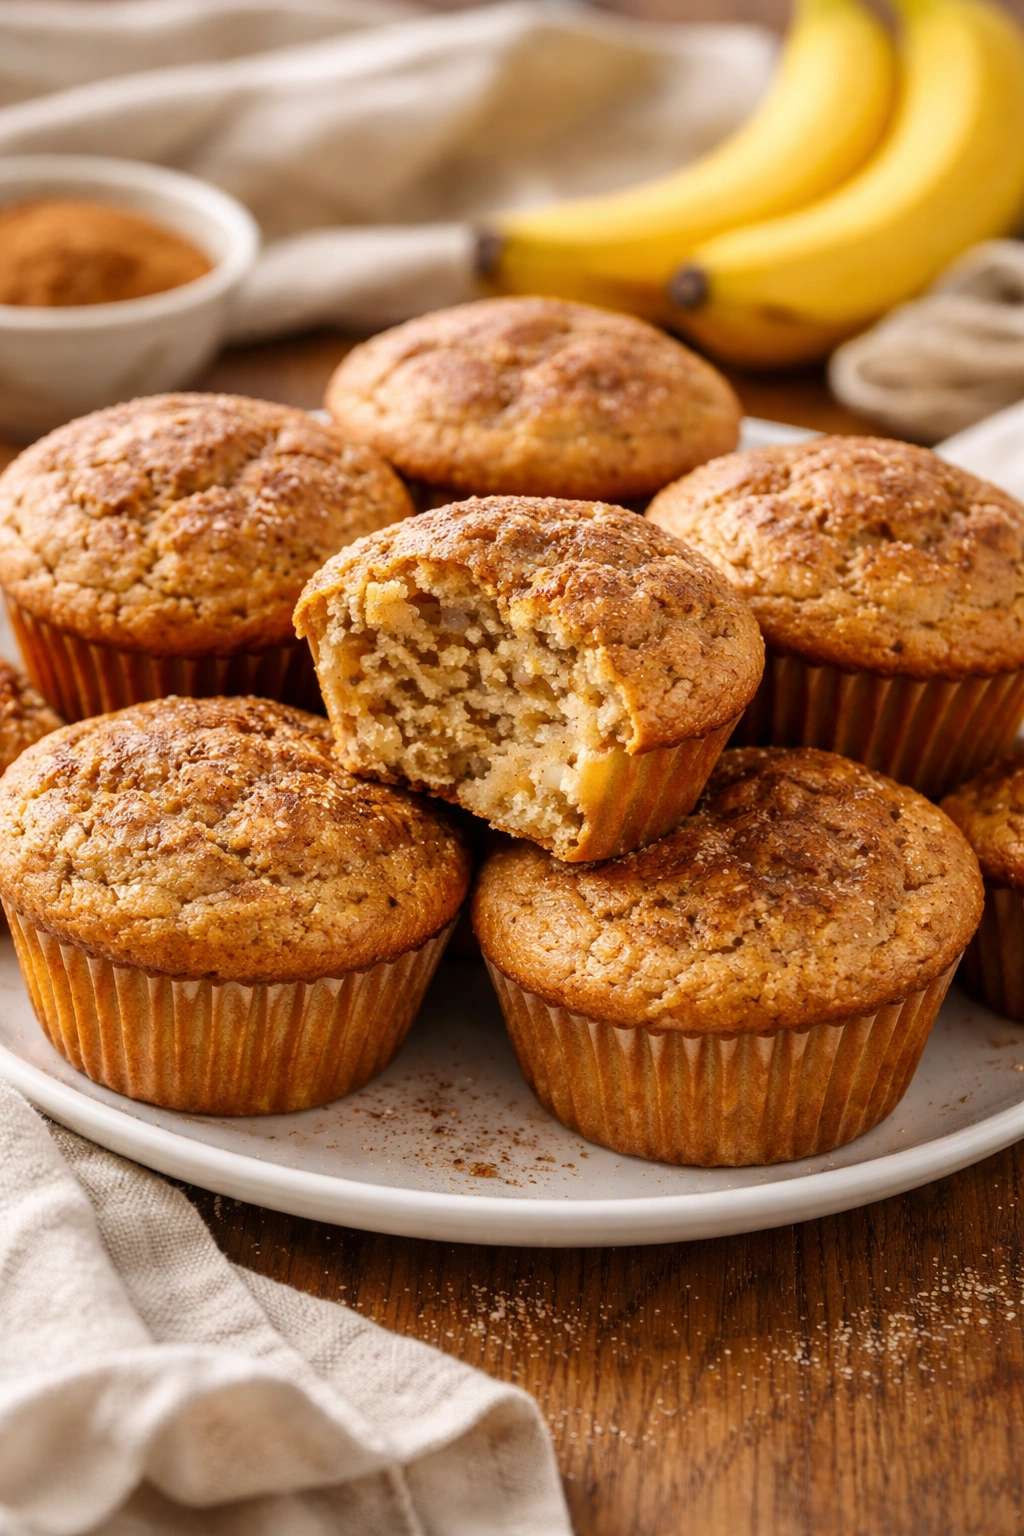
There’s nothing quite like the aroma of cinnamon-spiced banana muffins baking in your oven, and here’s the best part: you don’t need to carve out an entire morning to make them happen. These banana cinnamon muffins are designed to go from craving to fresh, warm muffin in just 25 minutes flat—no overnight preparation, no complicated techniques, just straightforward baking that delivers genuine results. The magic lies in working with what banana bread has been perfecting for generations, then stripping away everything that slows you down.
This recipe has become a weekend staple in countless kitchens because it answers a real, practical need. Kids wake up hungry. Guests arrive earlier than expected. You want something homemade without the production. What you’ll discover here isn’t a shortcut that sacrifices quality for speed—it’s a recipe that achieves both simultaneously. The crumb stays tender and moist, the cinnamon flavor comes through distinctly, and the tops bake up with that perfect golden-brown exterior that tells you something real has just come out of the oven.
The approach works because every step has been intentionally simplified without cutting corners on what actually matters to your final muffin. You’re using accessible ingredients, straightforward techniques, and equipment you already have. This isn’t fussy baking. It’s confident, efficient baking that tastes like you spent far more time on it than you actually did.
What Makes These Muffins Special
These aren’t ordinary muffins—they’re engineered for speed without sacrificing the qualities that make banana cinnamon muffins worth baking in the first place. The defining characteristic is that they come together in a single bowl with minimal fuss, yet the texture turns out impossibly tender and the flavor feels sophisticated, not rushed.
The combination of banana and cinnamon works through complementary mechanisms. Bananas provide natural sweetness and inherent moisture, which means you need less added sugar and fat than traditional muffin recipes. Cinnamon amplifies the banana’s warmth and creates a flavor complexity that tricks your brain into thinking this is a more elaborate recipe than it actually is. Together, they create a muffin that tastes indulgent while actually being quite straightforward to execute.
What distinguishes this recipe from other banana muffin variations is the ratio balance. Too much banana and they become dense. Too little cinnamon and they taste one-dimensional. This version hits the exact proportion where the banana acts as both flavor and structural component, while cinnamon serves as both spice and secondary flavor anchor. The result is a muffin with genuine character—not overly sweet, properly textured, and finished with a crumb that stays tender even after cooling.
The speed element comes from removing barriers without removing technique. You’re not using cake mix or shortcuts that compromise flavor. You’re simply being strategic about what actually requires time and what doesn’t. Creaming butter and sugar? Unnecessary—the banana itself provides moisture and the eggs provide enough lift. Complicated folding techniques? Skipped. Measuring cocoa or other secondary flavorings? Not here. Every element serves the goal of speed plus quality.
Why This Recipe Comes Together So Fast
The 25-minute timeline breaks down into three phases: mixing (about 8 minutes total including prep), baking (18-20 minutes depending on your oven), and minimal cleanup throughout. Understanding why each step moves quickly helps you execute confidently and recognize when something’s actually done without second-guessing yourself.
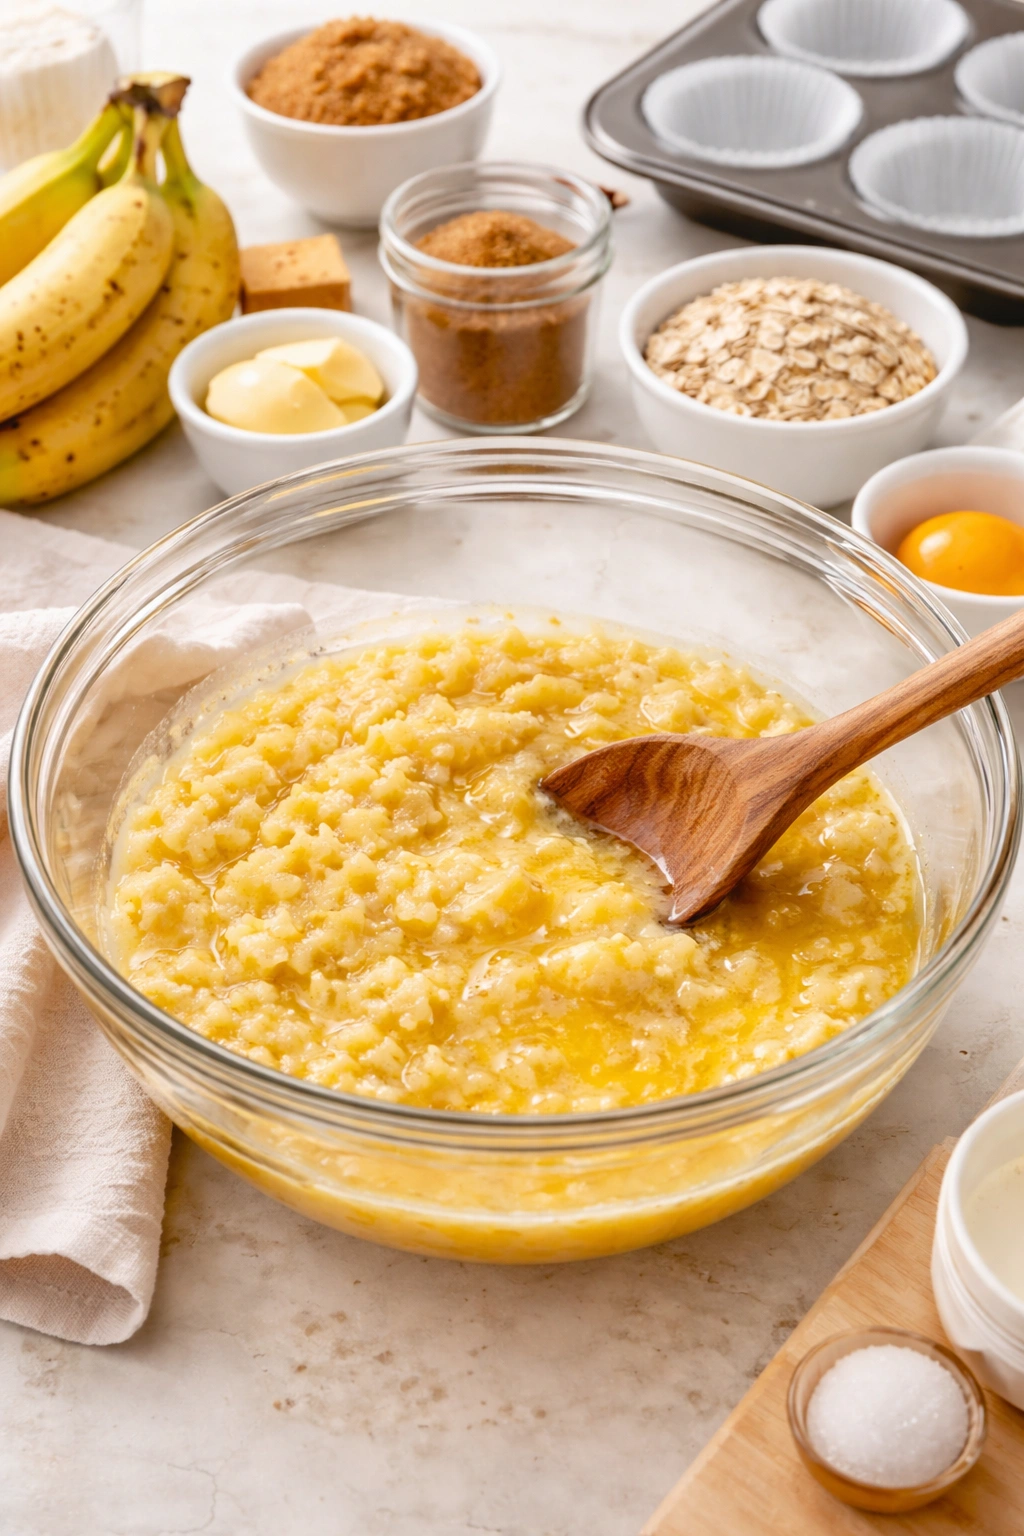
Banana-based batters naturally mix faster than traditional muffin batters because the banana’s moisture and sugar content mean you don’t need to cream butter and granulated sugar separately until pale and fluffy. Instead, you’re mashing extremely ripe bananas—the ones with brown spots are perfect—and that mashing process incorporates air while developing the banana flavor at the same time. Melted butter combines more quickly with mashed banana than solid butter ever would with granulated sugar.
The dry ingredients are minimal. You’re looking at all-purpose flour, baking soda (not baking powder, which requires longer rest times to activate), cinnamon, and salt. That’s it. No cornstarch, no cake flour blend, no specialty additions that require precision measurement and careful folding. These dry ingredients mix together in literally 20 seconds with a whisk in a separate bowl. When you combine wet and dry, there’s no complex folding required because there’s no whipped egg whites to preserve and no elaborate structure to maintain. A simple stirring motion is actually all you need—overmixing is not a concern with this particular approach because there’s no significant gluten development happening.
The fast baking time comes from using a properly preheated oven. Standard muffin pans conduct heat efficiently, especially if they’re dark metal (which bakes slightly faster) rather than light aluminum. The muffins reach full bake-through in 18-20 minutes at 375°F because you’re working with batter that’s already room temperature and not thick or gloppy. You’re not waiting for a dense batter to conduct heat to its cold center.
The Secret to Perfectly Moist Banana Muffins
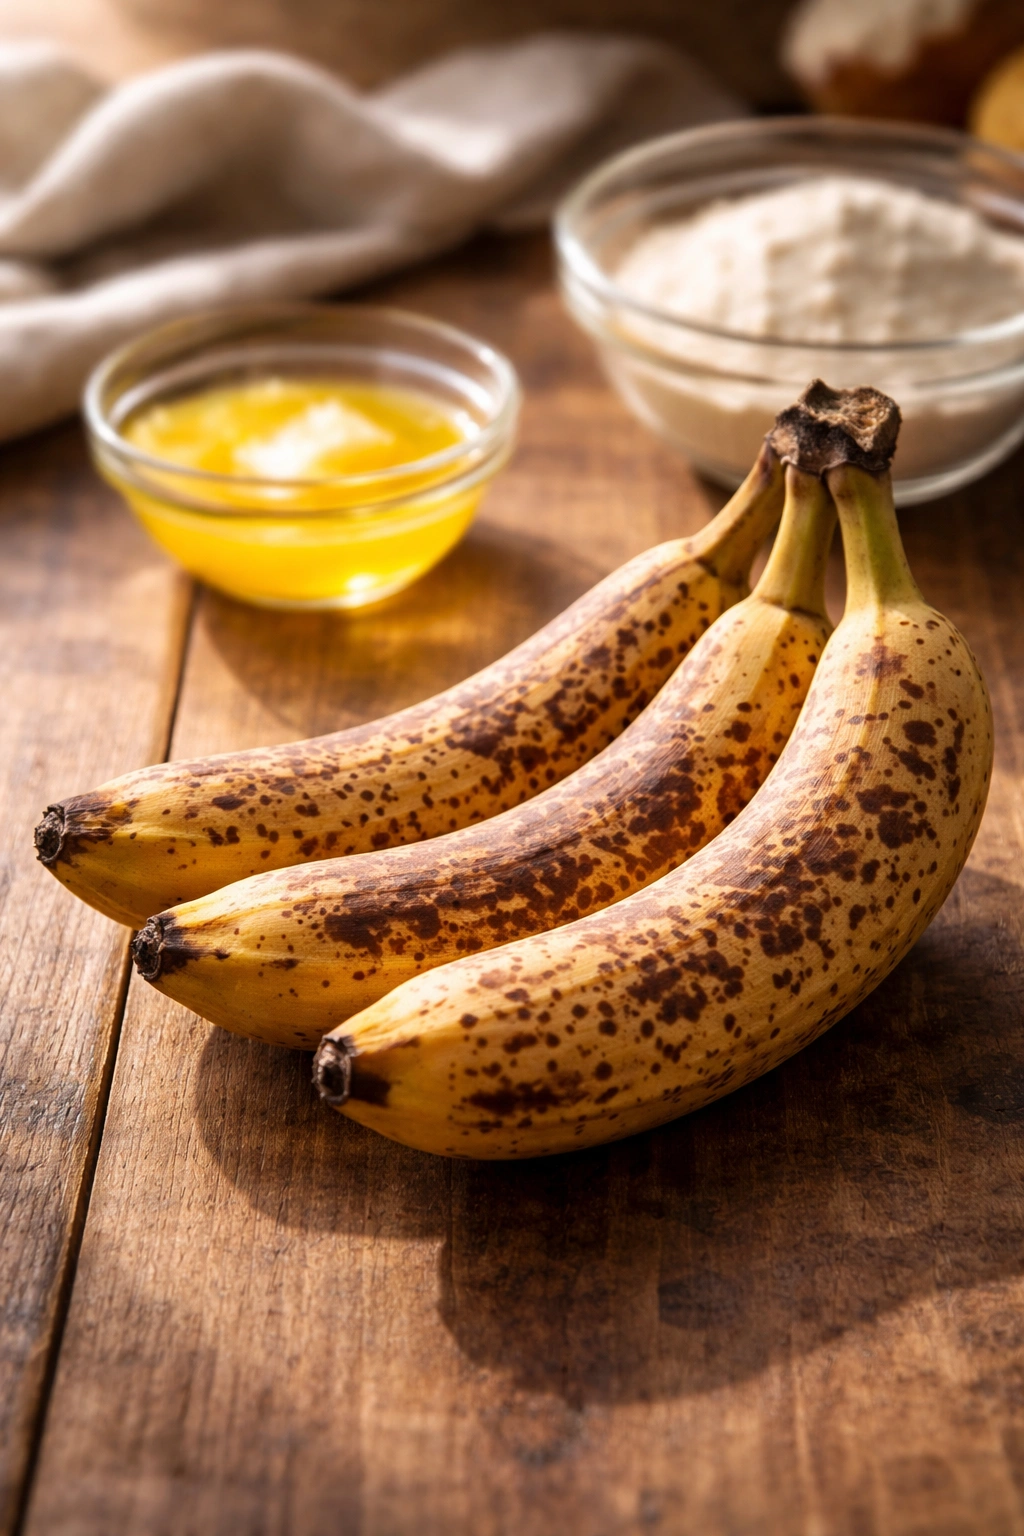
The single most important factor in achieving moist muffins is using bananas at exactly the right ripeness level—not overripe to the point of mushiness, but well past the yellow stage where the starches have converted to sugars and the structure is breaking down. This isn’t a matter of preference; it’s a matter of chemistry and texture.
Here’s what happens: as bananas ripen, their starch converts to sugar (which is why very ripe bananas taste sweeter), and their pectin structure breaks down, making them softer and more prone to crushing into an even paste. This matters because when you mash them, you want to reach a texture that’s smooth and uniform but still retains enough structure to maintain a paste, not a liquid. Bananas with brown spots—not brown skin, but actual speckled browning on the surface—have reached the precise ripeness where their moisture is at maximum and their flavor is most developed.
The second factor is using melted butter instead of solid butter. Melted butter distributes throughout the batter more evenly and has greater contact with the flour particles, meaning the fat coating on the flour is more complete. This fat barrier around flour particles prevents water absorption from taking place too aggressively, which keeps the crumb tender rather than dry and mealy.
The third element is not overbaking. This recipe hits full bake-through at around 18 minutes. A toothpick inserted in the center should come out clean or with just one or two tiny crumbs clinging to it. Baking an extra 2-3 minutes—which might seem inconsequential—actually removes a noticeable amount of moisture from the crumb. The longer these muffins bake past their done point, the drier they become. Watching for the visual cues (golden top, slight spring-back when pressed gently at the center) is more reliable than following time alone.
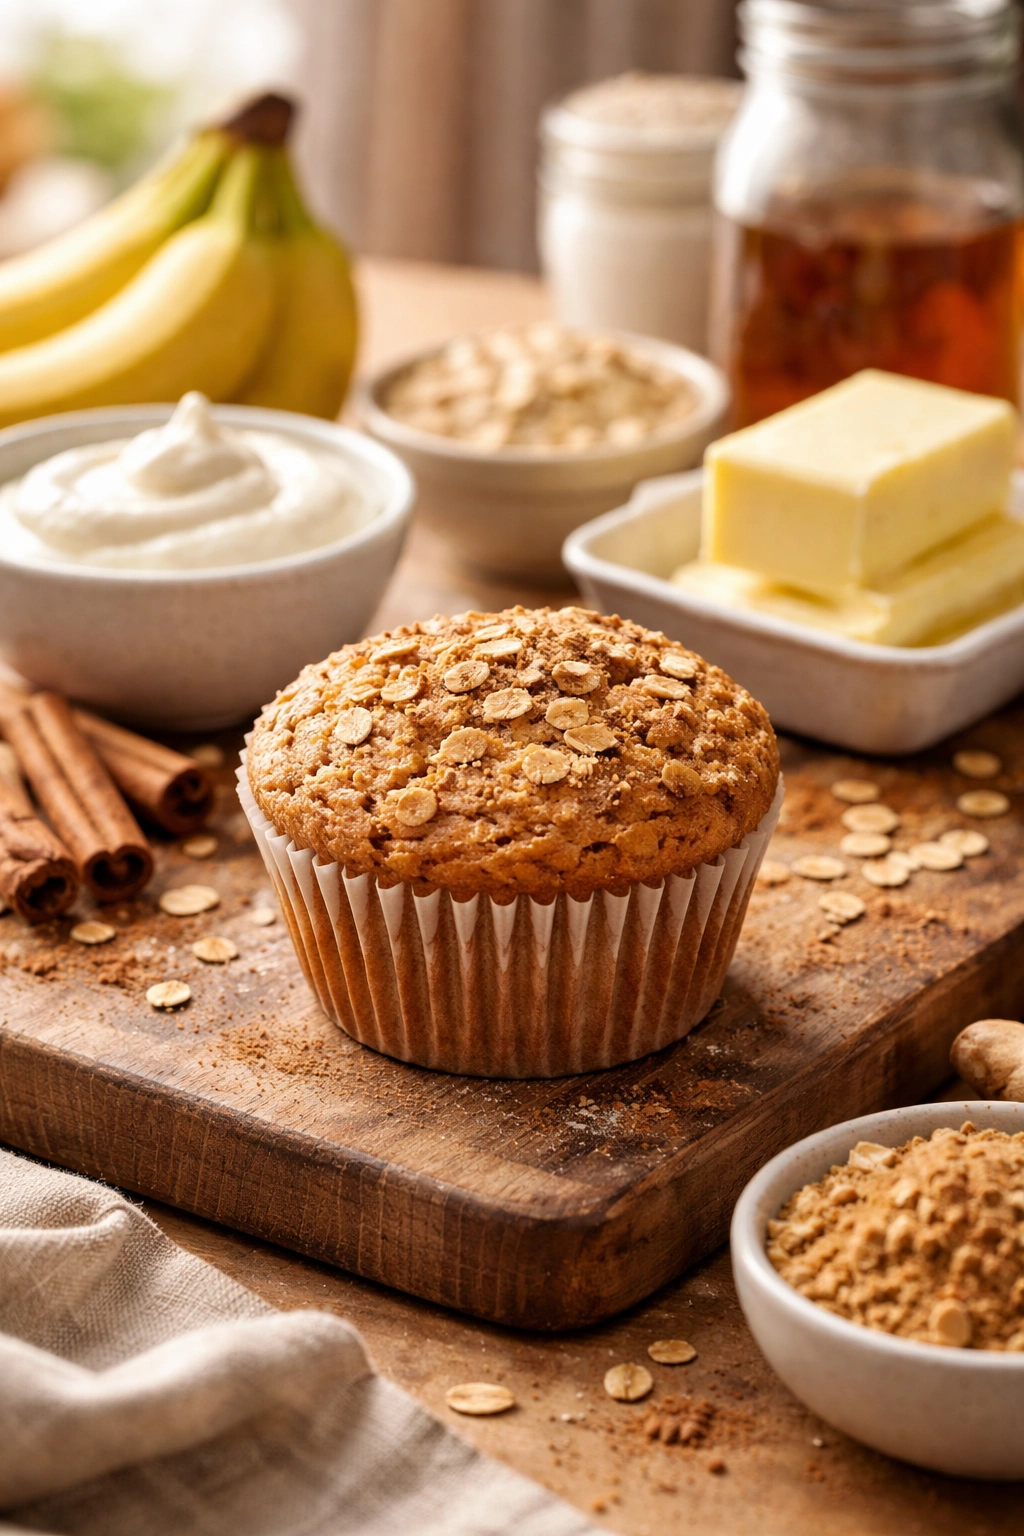
Gathering Your Ingredients
Yield: Makes 12 standard muffins
Prep Time: 8 minutes (hands-on mixing and prep)
Cook Time: 18–20 minutes (baking)
Total Time: 26–28 minutes active time
Difficulty: Beginner — This recipe requires no special equipment beyond a standard muffin tin, whisk, and mixing bowls. The mixing process is straightforward one-bowl method with no complex techniques.
Best Served: Warm from the oven or at room temperature the same day. These are best enjoyed within a few hours of baking when the crumb is at its most tender.
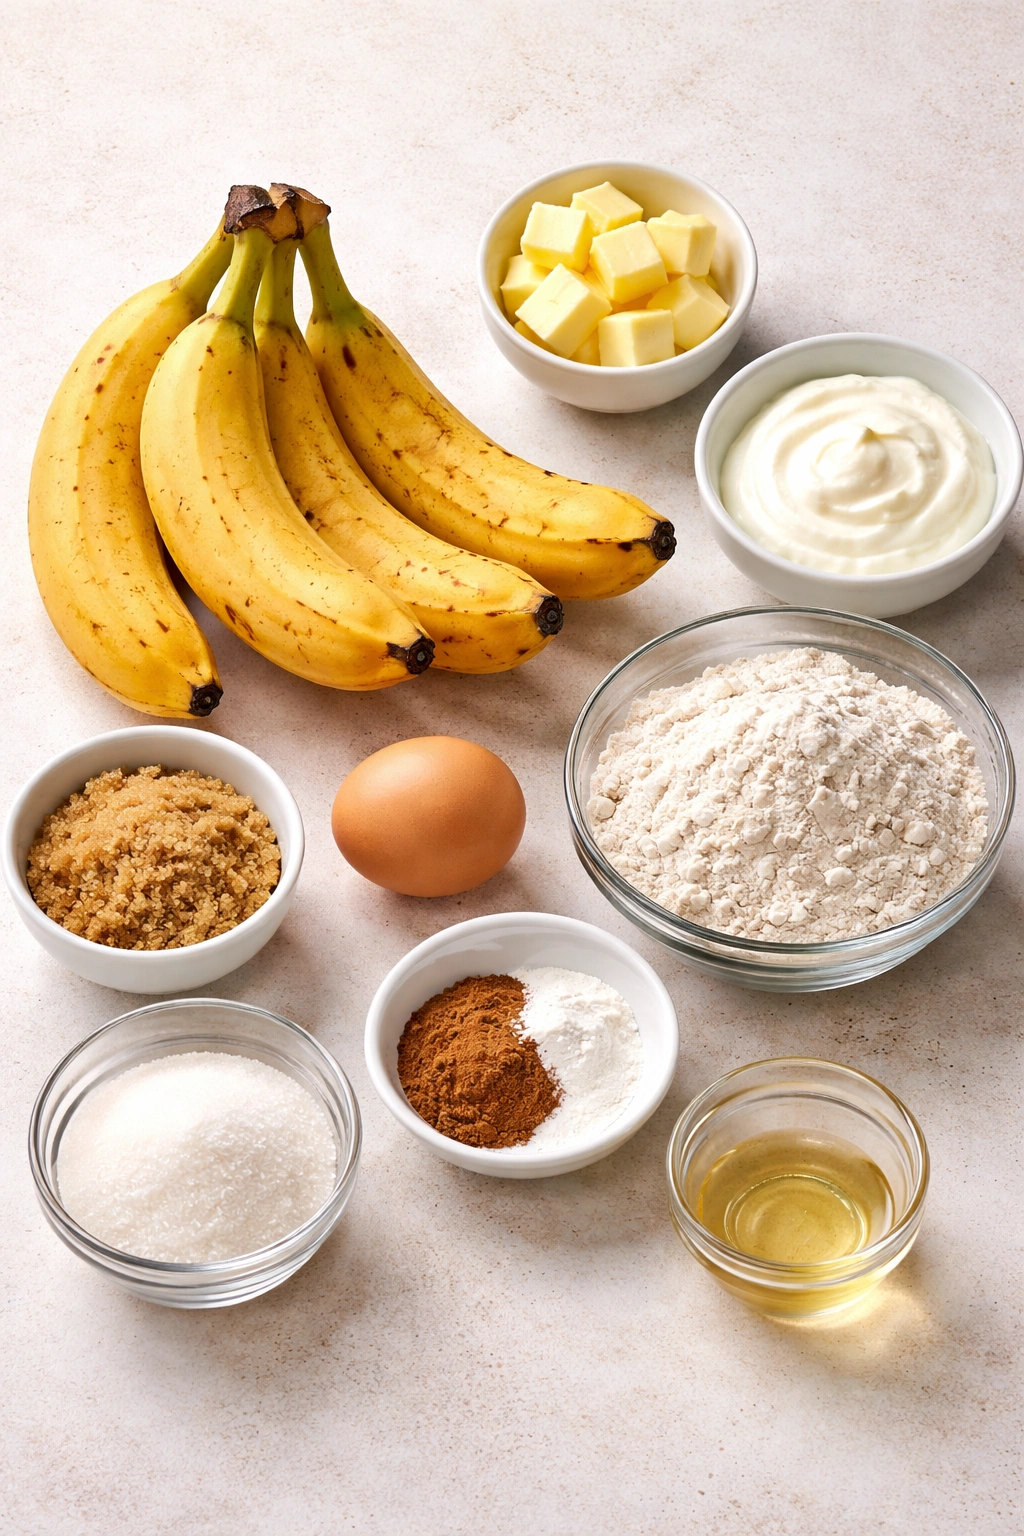
For the Muffins:
- 3 medium bananas, very ripe with brown spots (about 1 cup mashed, roughly 12 ounces)
- ⅓ cup unsalted butter, melted and slightly cooled
- ¾ cup granulated sugar
- 1 large egg, room temperature
- ⅓ cup plain Greek yogurt (or regular whole-milk yogurt; sour cream works too)
- 1 teaspoon pure vanilla extract
- 1½ cups all-purpose flour
- 1 teaspoon baking soda
- 1½ teaspoons ground cinnamon
- ¼ teaspoon fine sea salt
For the Cinnamon-Sugar Topping:
- 2 tablespoons granulated sugar
- ¾ teaspoon ground cinnamon
- ½ tablespoon unsalted butter, melted
Step-by-Step Instructions
Prepare the Oven and Pans:
- Preheat your oven to 375°F (190°C) and position the rack in the center. Line a standard 12-cup muffin tin with paper liners or grease each cup lightly with butter or nonstick spray. If using paper liners, this helps them bake evenly and release cleanly when cooled for 5 minutes.
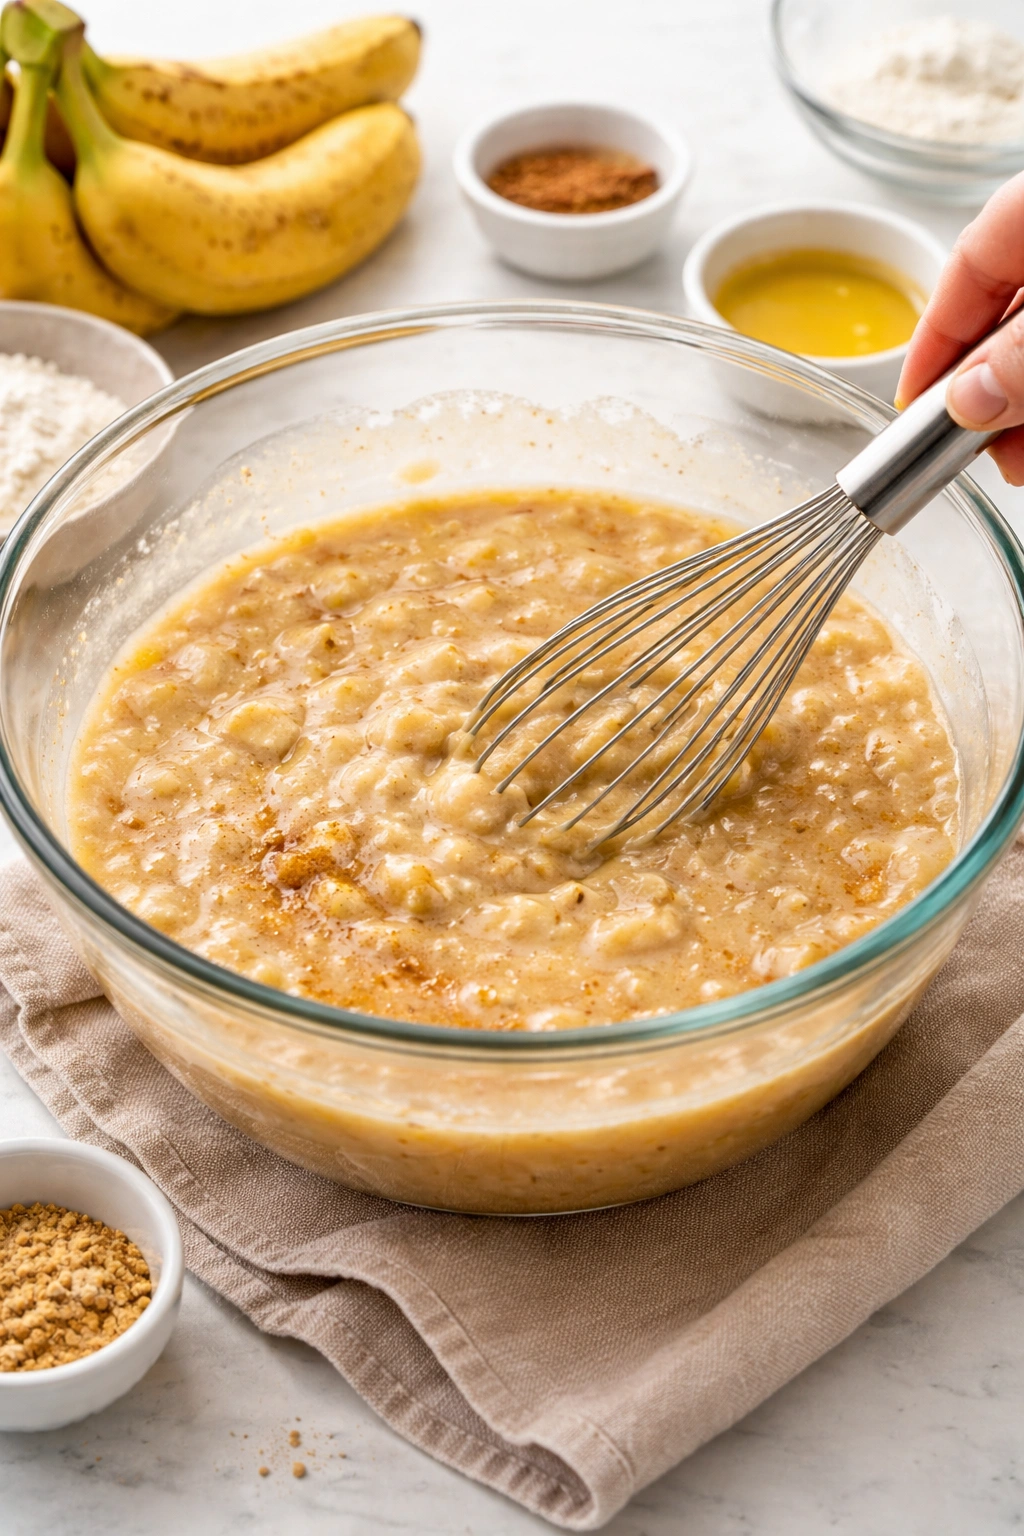
Mix the Wet Ingredients:
-
Peel the three ripe bananas and place them in a medium bowl. Using a fork, mash them thoroughly until you achieve a mostly smooth paste with just tiny lumps—you’re aiming for the consistency of thick applesauce. This should take about 1 minute of firm mashing.
-
Add the melted butter to the mashed bananas and stir until the mixture is combined and slightly uniform in color. The butter will have cooled slightly, so it won’t cook the banana.
-
Stir in the sugar until fully combined and the mixture looks slightly gritty from the sugar crystals. Add the egg and mix vigorously with a fork for about 30 seconds until the egg is fully incorporated and the batter looks slightly paler.
-
Add the yogurt and vanilla extract and stir until the batter is completely uniform and smooth. The mixture should be thick but pourable, with a consistency similar to loose pancake batter.
Combine the Dry Ingredients:
- In a separate bowl, whisk together the flour, baking soda, cinnamon, and salt. Whisk for 20 seconds until the baking soda and cinnamon are evenly distributed throughout the flour—this is important because baking soda can clump and you want even leavening throughout all the muffins.
Combine Wet and Dry:
- Pour the dry ingredients into the wet ingredients and gently stir with a wooden spoon or spatula until just combined. This should take only 10–15 seconds of stirring. Stop as soon as you no longer see streaks of dry flour—the batter should look slightly lumpy, not smooth and fully blended. Overmixing here is actually not a problem, but gentle stirring creates a slightly more tender crumb.
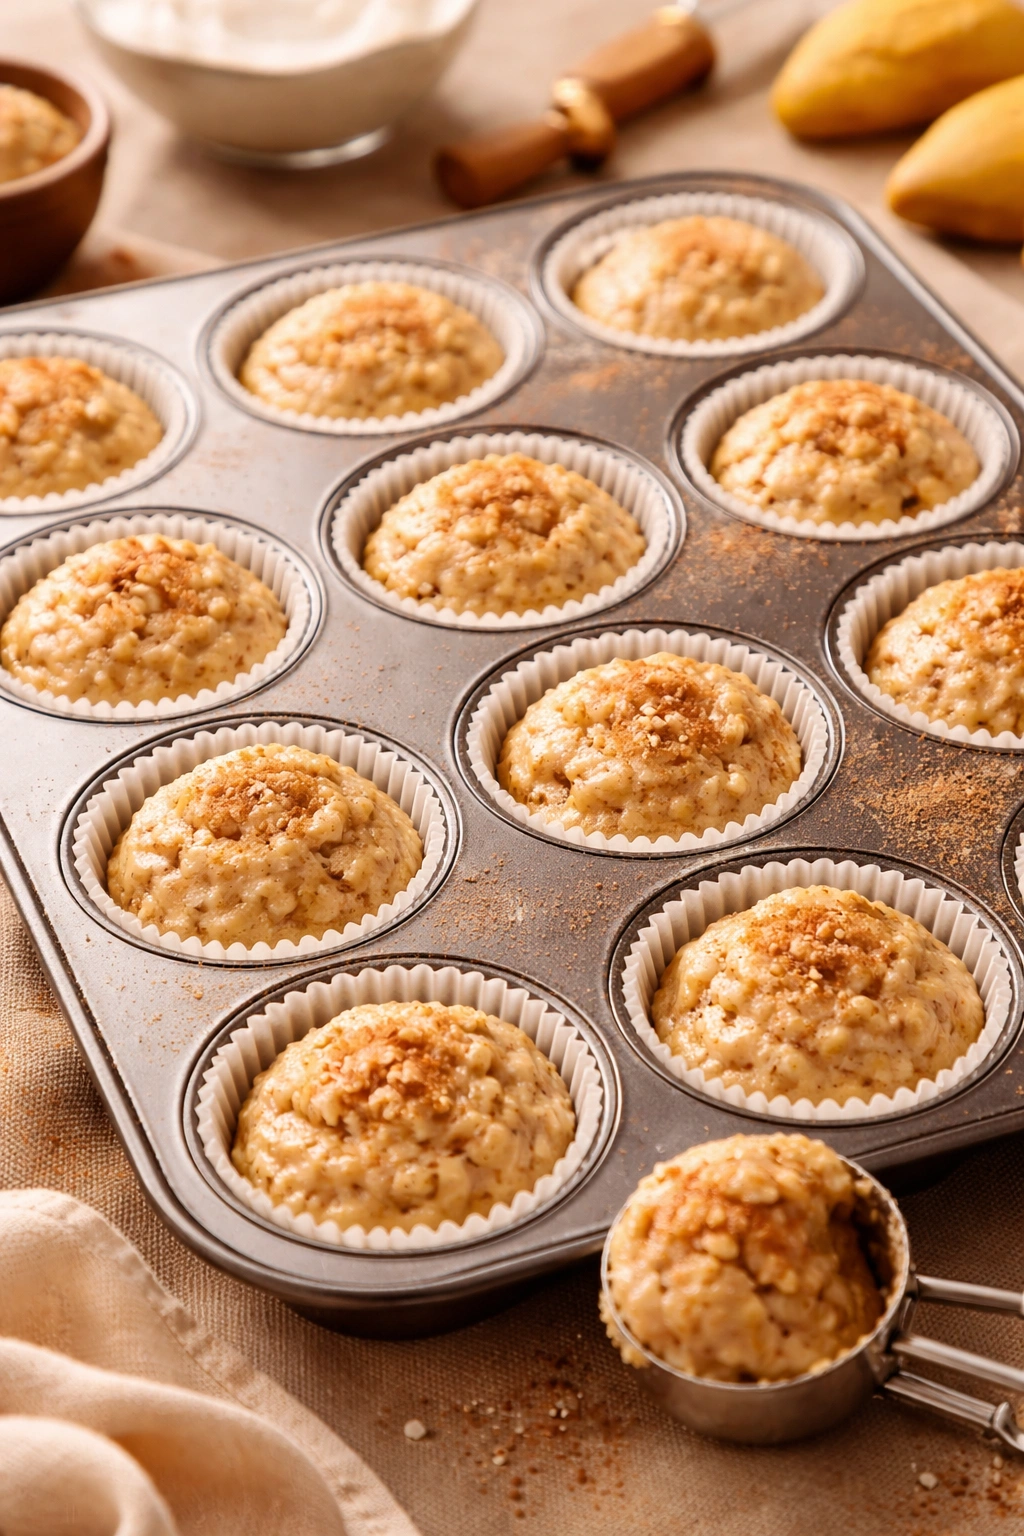
Fill the Muffin Tin:
- Using an ice cream scoop or a ⅓-cup measure, fill each muffin cup about three-quarters full. The batter should come about three-quarters of the way up the sides of the cup. If using an ice cream scoop, one scoop per cup is the right amount. Fill any empty cups halfway with water—this helps them bake evenly and prevents the tin from warping.
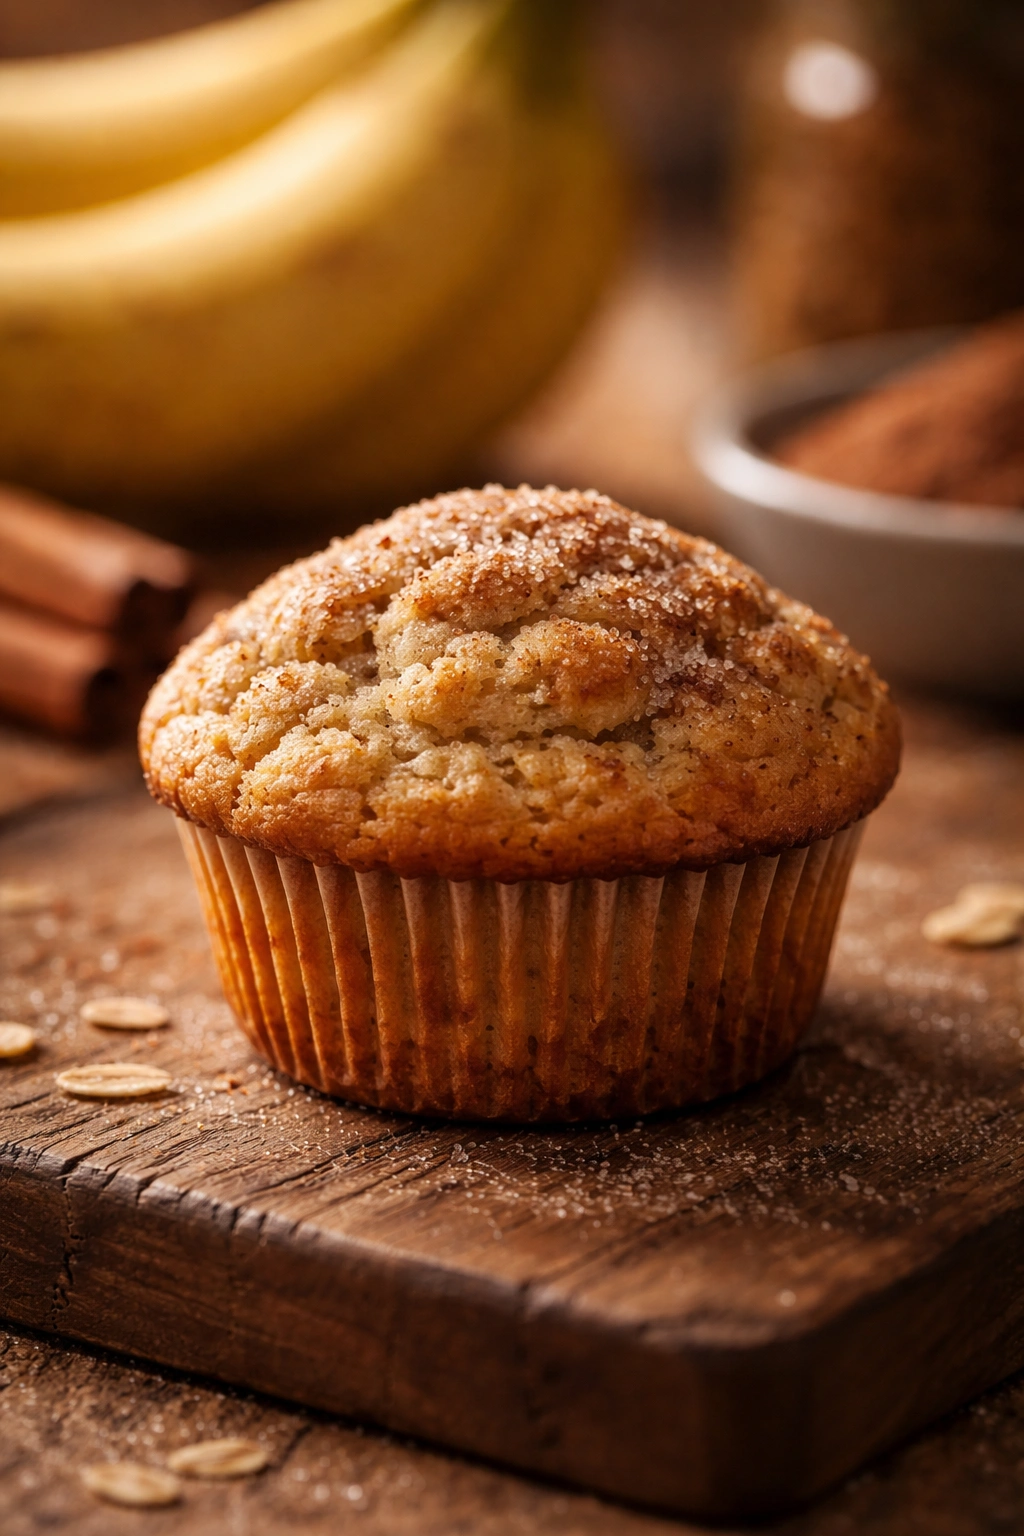
Add the Topping:
- In a small bowl, stir together the 2 tablespoons sugar, ¾ teaspoon cinnamon, and ½ tablespoon melted butter until you have a moist, crumbly topping. Sprinkle about ½ teaspoon of this mixture on top of each muffin, distributing it evenly across the surface.
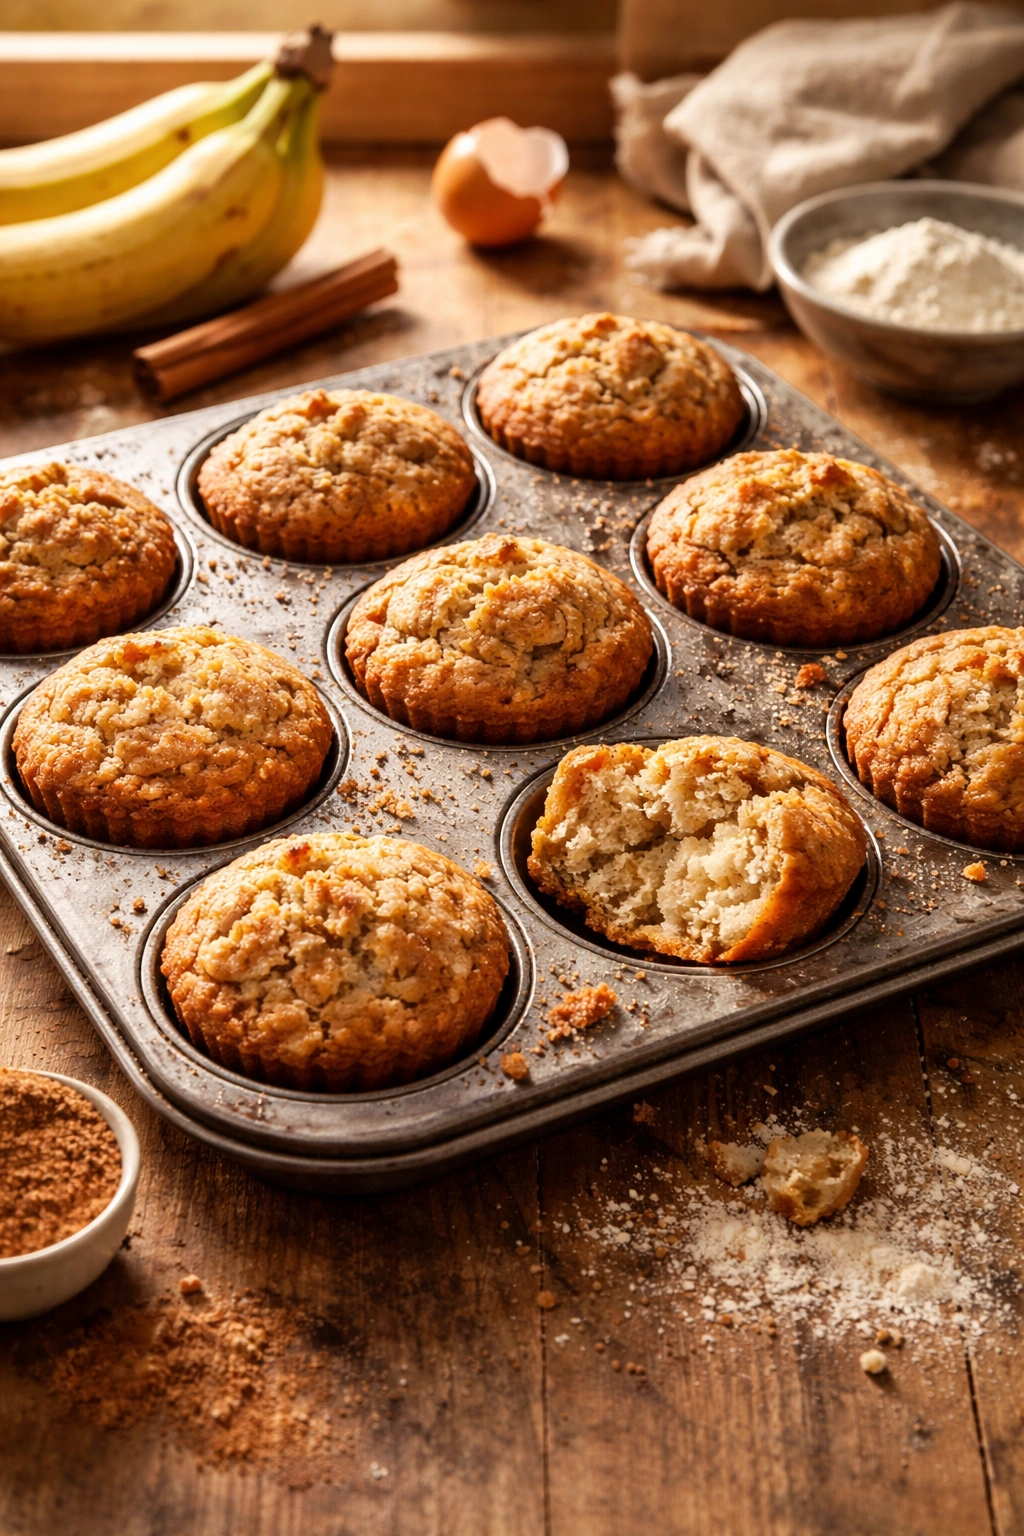
Bake:
-
Place the muffin tin in the preheated oven on the center rack. Bake for 18–20 minutes, until the tops are deep golden brown and a toothpick inserted in the center of a muffin comes out clean or with just one or two tiny crumbs clinging to it. The muffins should feel slightly springy when you press gently at the center, and the edges should be just barely pulling away from the sides of the cups.
-
Remove from the oven and let the muffins cool in the tin for exactly 5 minutes. This resting period allows the structure to set slightly so they’ll release from the cups cleanly without tearing apart.
-
Turn the muffin tin on its side and gently twist each muffin to release it from the cup, then place on a wire cooling rack. Serve warm or at room temperature. The muffins are actually best enjoyed within the first few hours while the crumb is at peak tenderness.
Tips for Golden, Tender Muffins Every Time
The difference between an okay batch and an exceptional one often comes down to a handful of details that seem small but actually compound into noticeably better results. These are hard-won observations from making this recipe repeatedly.
Use a muffin scoop instead of eyeballing: This ensures every muffin gets exactly the same amount of batter, which means they all bake at the same rate and finish with consistent size and texture. If some cups are filled three-quarters full and others are almost to the rim, the fuller ones will bake faster and potentially overbake while you’re waiting for the smaller ones to finish. A standard ice cream scoop or ⅓-cup measure solves this entirely.
Never skip the water in empty cups: If you have a standard 12-cup tin but only fill 10 cups, fill the remaining 2 with water to the same level as the batter. This prevents the empty cups from heating up excessively and creating hot spots that can burn the outer muffins. The water also helps distribute heat more evenly throughout the pan.
Invest in an oven thermometer: Most home ovens run hotter or cooler than the dial indicates, sometimes by 25 degrees or more. An inexpensive oven thermometer ensures you’re actually baking at 375°F rather than guessing. If your oven runs hot, you might need to reduce the temperature to 365°F. If it runs cool, you might need 385°F.
The banana ripeness absolutely matters: Too yellow and the muffins will be drier and less flavorful. Too dark and they’ll be almost mushy and overly sweet. The sweet spot is when you see brown speckles across the banana skin. If you’re storing bananas and want them at this stage, place them in a paper bag on the counter for a day or two, checking them daily once you start seeing spots appear.
Room temperature ingredients mix more smoothly: If your egg is cold from the fridge, it won’t blend as evenly into the banana mixture. Let it sit on the counter for 5 minutes before mixing. Same goes for the yogurt—if you have time, let it come to room temperature. This isn’t essential, but it does create slightly more uniform batter with fewer lumps.
Don’t open the oven door to check on them: The sudden temperature drop can disrupt the baking process and potentially cause the muffins to collapse. Trust the visual cues—at about 18 minutes, peek in just once to check the color. If the tops are already deep golden, they might be done. If they’re pale golden, give them another minute or two.
The cooling rack is not optional: If you cool them directly on a solid surface, the bottom absorbs steam and becomes slightly soggy. A wire rack allows air circulation underneath, which keeps the bottom crispy while the interior stays tender.
Common Mistakes That Ruin the Batch
Every mistake I’m listing here comes from actual baking experiments where something went slightly wrong and the results taught valuable lessons about what to avoid.
Mistake: Using bananas that are still partly yellow. The starches haven’t fully converted to sugar, which means the bananas won’t provide as much sweetness or moisture. The muffins will turn out drier and less flavorful, and you’ll notice they’re a bit chalky in texture. Always wait for those brown spots to appear.
Mistake: Mixing the batter too much or too vigorously. This is the opposite of what you might expect—muffins benefit from slightly undermixed batter because it creates a tender crumb with small air pockets. If you stir the batter for 30 seconds past the point where you see the last streak of flour disappear, you’re developing gluten and the muffins will turn out tougher and slightly dense. Mix just until combined, then stop.
Mistake: Baking in a cold or unpreheated oven. If your oven isn’t fully preheated, the muffins won’t rise properly and the tops won’t develop that golden color. Give your oven a full 15 minutes to preheat and reach temperature. The preheating time matters.
Mistake: Using oil instead of butter. Oil works in some muffin recipes, but not this one. Butter carries the vanilla and cinnamon flavors much more distinctly, and it creates a better texture in the crumb. If you must use oil due to dietary restrictions, use light olive oil or a neutral vegetable oil at the same quantity, but know the flavor and texture will be slightly different.
Mistake: Overbaking by even 2–3 minutes. At 18 minutes with a toothpick test showing just one or two moist crumbs, the muffin is done. Continuing to bake removes moisture and dries out the crumb noticeably. Underbaked is far better than overbaked—if a muffin is slightly underbaked, it stays tender and moist. If it’s overbaked, it’s tough and there’s no remedy.
Mistake: Not filling empty muffin cups with water. Those empty cups heat up and create hot spots that burn the muffins on the ends of the tin, particularly the corner muffins. Always fill them with water to the same level as the batter.
Mistake: Using old baking soda. Baking soda has a shelf life of about 3 years. Old baking soda won’t leaven properly, and your muffins will be dense and short. If you’re not sure how old your baking soda is, buy a fresh box.
Flavor Variations to Try
Once you’ve made this recipe once or twice and are comfortable with the base technique, these variations let you pivot toward specific flavor preferences while maintaining the speed and ease of the original.
The Brown Butter Cinnamon version adds depth by using brown butter instead of plain melted butter. To make brown butter, melt your butter in a small saucepan over medium heat and let it foam and bubble for 3–4 minutes, swirling occasionally, until it turns nutty brown. Watch carefully so it doesn’t burn. Let it cool slightly before using. The brown butter adds a toasted, almost caramel-like note that deepens the cinnamon.
The Cardamom-Cinnamon blend uses three-quarters of the cinnamon specified in the base recipe and adds ¼ teaspoon of ground cardamom. Cardamom has a floral, slightly citrus-like note that plays beautifully with banana and creates a more sophisticated flavor profile. It’s excellent if you enjoy spiced chai-type flavors.
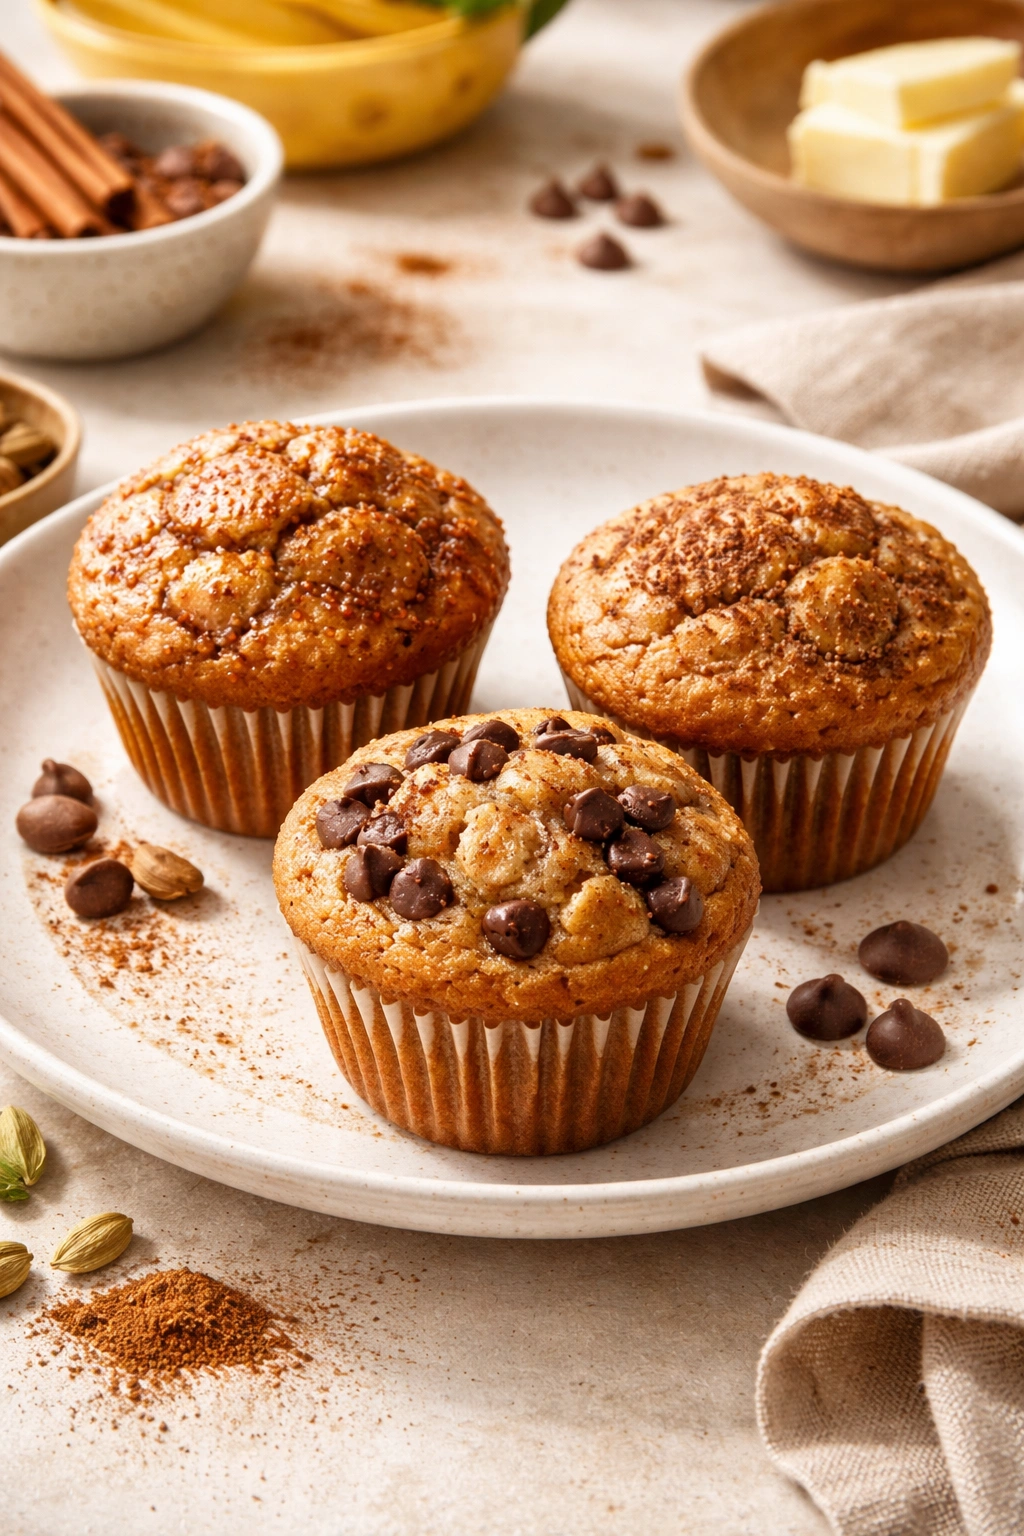
The Chocolate Chip Banana Cinnamon keeps everything identical but stirs in ¾ cup of mini chocolate chips into the batter just before filling the muffin cups. The chocolate melts slightly during baking and creates little pockets of richness throughout. Use good-quality chocolate chips, not the waxy commercial variety.
The Honey-Sweetened version replaces the granulated sugar with ½ cup plus 2 tablespoons of honey. You’ll need to reduce the yogurt to ¼ cup because honey already contributes liquid. The result is a slightly denser, more complex sweetness that tastes less like sugar and more like baked banana naturally. The muffins stay incredibly moist for longer with this version.
The Maple-Pecan version adds ⅓ cup of finely chopped pecans to the dry ingredients and replaces the vanilla extract with ½ teaspoon of maple extract (or use vanilla and add a drizzle of maple syrup to the cinnamon-sugar topping). Pecans add textural contrast and a subtle earthiness that complements cinnamon beautifully.
The Whole Wheat twist replaces ½ cup of the all-purpose flour with whole wheat flour. The muffins will be slightly denser and have a nuttier, more complex flavor. Don’t replace more than half the flour with whole wheat or they become too dense for this quick-bake method.
Dietary Swaps and Substitutions
If you’re working with dietary restrictions or preferences, these substitutions maintain the recipe’s integrity and speed while accommodating different needs.
For a gluten-free version: Replace the all-purpose flour with a high-quality gluten-free all-purpose flour blend that includes xanthan gum (or add ¼ teaspoon of xanthan gum to the flour if your blend doesn’t include it). Gluten-free flour absorbs liquid differently, so reduce the yogurt to ¼ cup. The baking time may extend slightly to 20–22 minutes because gluten-free batters rise a bit more slowly. The texture will be slightly less tender than the original, but still quite good.
For dairy-free: Replace the yogurt with non-dairy yogurt (coconut, almond, or oat-based all work well) in the same quantity. The muffins will be virtually identical in taste and texture. The butter is already dairy-free in this recipe since it’s unsalted butter with no milk solids—wait, butter does contain milk. For dairy-free, use plant-based butter or coconut oil instead of dairy butter.
For vegan: This requires a few adjustments. Replace the egg with a “flax egg” (1 tablespoon ground flaxseed mixed with 3 tablespoons water, let sit 5 minutes to thicken). Replace the dairy yogurt with non-dairy yogurt. Replace the butter with coconut oil or plant-based butter. The muffins will be slightly less tender than the original, but still quite good with a more crumbly texture.
For lower sugar: Replace half of the granulated sugar with monk fruit sweetener or erythritol. Do not replace all the sugar—sugar serves structural functions beyond just sweetness, and replacing it entirely changes the texture significantly. With half replacement, the muffins stay tender but taste less sweet overall.
For eggless (but not vegan): Replace the egg with 3 tablespoons of applesauce or ¼ cup of mashed avocado. The muffins will be slightly denser and less structured, but still delicious. You may need to add 1 teaspoon of baking powder to compensate for the lift that the egg provides.
Storage and Make-Ahead Options
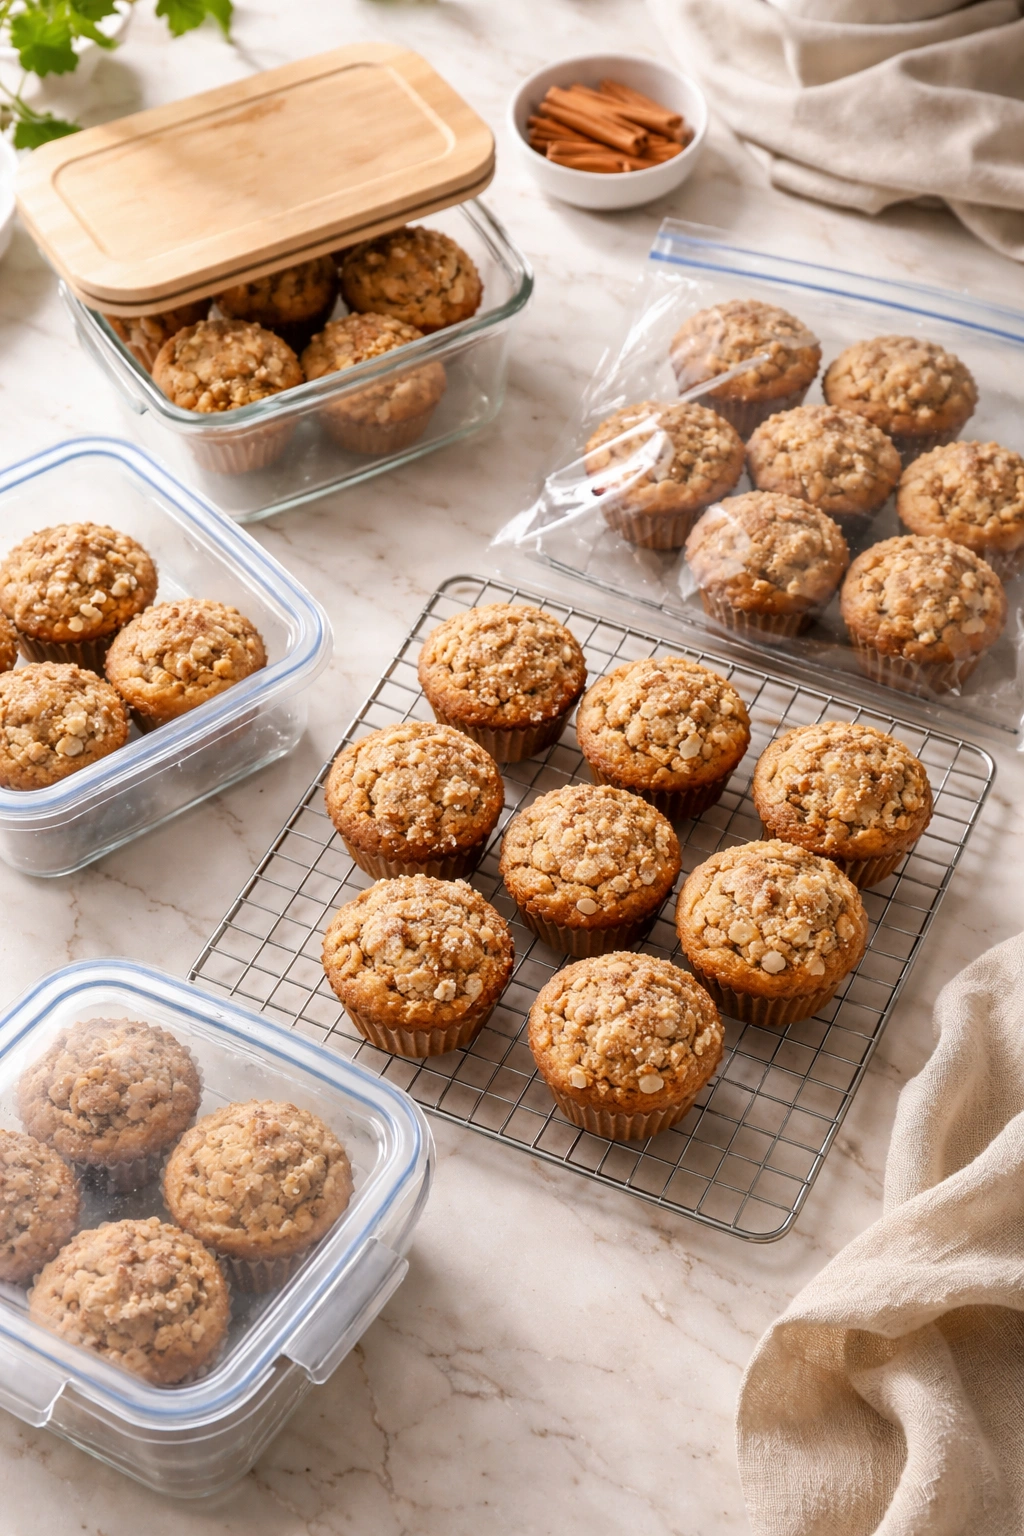
These muffins are most tender and flavorful on the day they’re baked, but they store well if you use the right method.
Storing at room temperature: Place cooled muffins in an airtight container or a sealed plastic bag at room temperature for up to 2 days. They’ll stay tender but will gradually dry out slightly after 24 hours. After 48 hours, they’re still edible but noticeably less tender than fresh.
Refrigerating: Place cooled muffins in an airtight container and refrigerate for up to 5 days. Refrigeration actually preserves them better than room temperature because the cool environment slows staling. Before eating refrigerated muffins, warm them gently: wrap in a damp paper towel and microwave for 15–20 seconds, or pop them in a 300°F oven for 5 minutes.
Freezing: This is where banana cinnamon muffins really shine. Wrap each cooled muffin individually in plastic wrap, then place them in a freezer-safe zip-top bag with the air pressed out. Frozen muffins keep beautifully for up to 3 months. To reheat, unwrap and microwave for 30–45 seconds (frozen muffin) or place on a baking sheet in a 300°F oven for 8–10 minutes until warmed through.
Make-ahead batter: You can prepare the batter up to 4 hours in advance and refrigerate it in an airtight container. The batter will be slightly thicker when cold, which is actually fine—it’ll still distribute evenly into the muffin cups. Add 1–2 minutes to the baking time since the batter is cold when it goes into the oven.
Pre-portioned muffin cups: For maximum convenience, fill the muffin tin with batter, add the cinnamon-sugar topping, cover with plastic wrap, and refrigerate overnight. The next morning, place the tin directly into a preheated oven and bake for 20–22 minutes. This is an excellent approach if you want fresh-baked muffins for breakfast but want to minimize morning prep.
Perfect Pairings and Serving Ideas
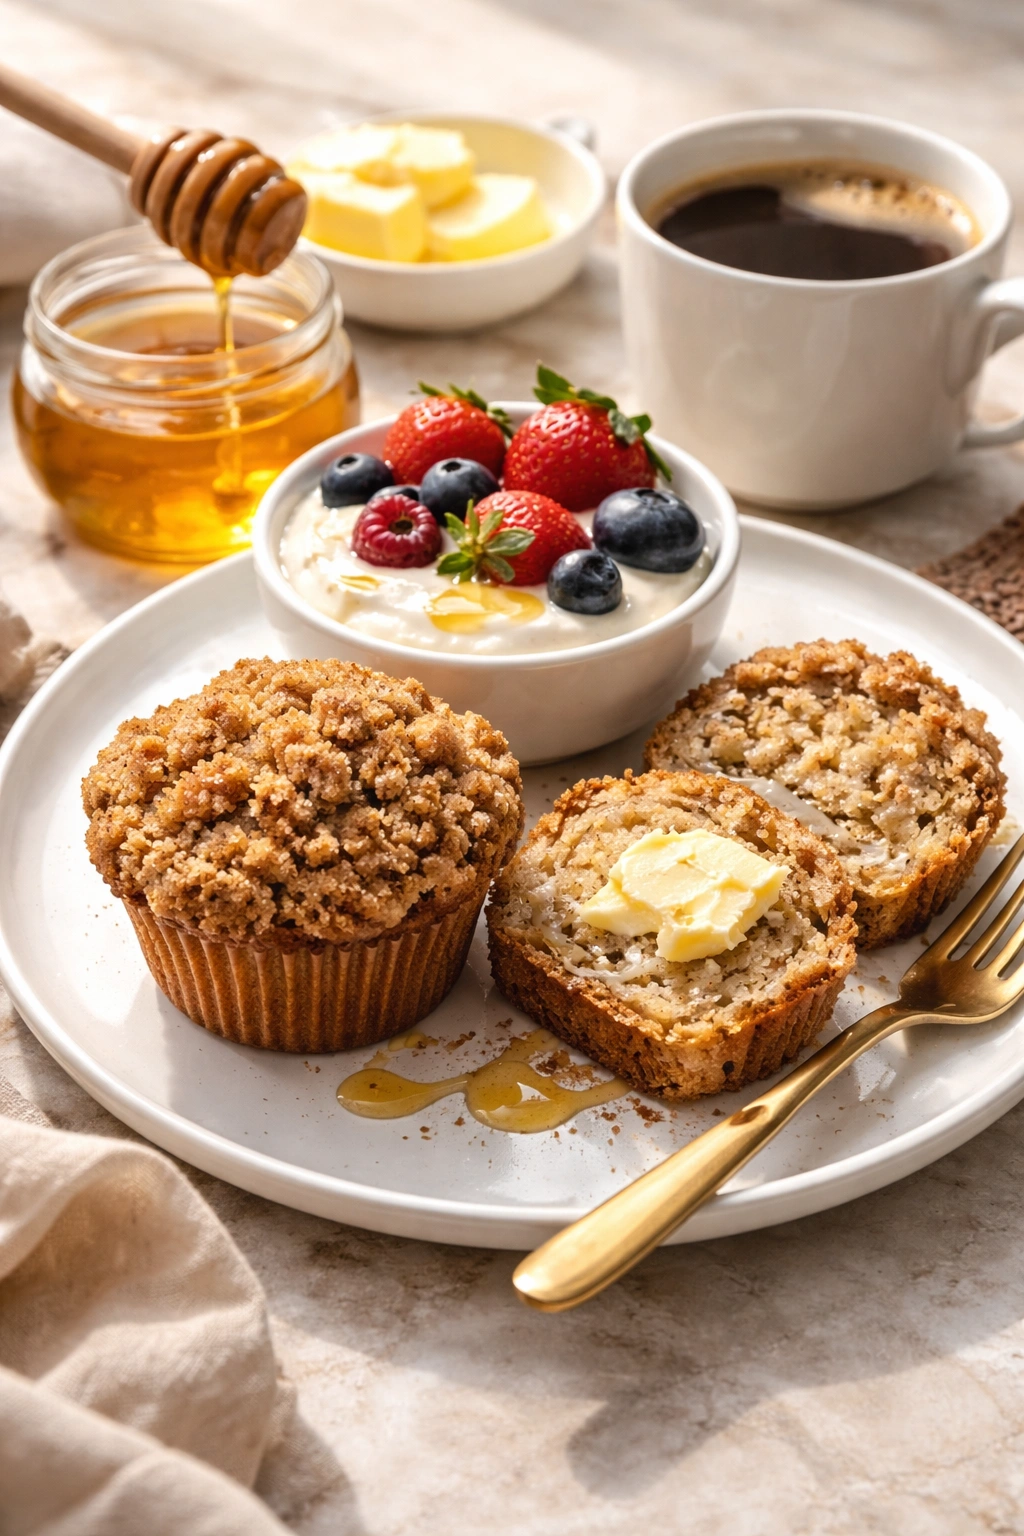
Banana cinnamon muffins work beautifully as a standalone breakfast, but a few thoughtful pairings elevate them into something more interesting.
The morning spread: Serve warm muffins with unsalted butter, honey, or almond butter on the side for spreading. A cup of black coffee or a warm mug of cinnamon-spiced tea complements the muffin’s flavors perfectly. The warmth of both the beverage and the muffin creates a cohesive, comforting breakfast experience.
The yogurt and fruit approach: Split a muffin, toast it lightly if it’s been sitting out for an hour or more, and serve alongside a bowl of Greek yogurt mixed with a touch of honey and topped with fresh berries. The tartness of the yogurt balances the sweetness of the muffin beautifully.
The dessert application: Never overlook banana cinnamon muffins as a dessert. Serve one slightly warm with a small scoop of vanilla ice cream or whipped cream on top. The combination of warm muffin and cold ice cream creates a texture contrast that feels like intentional dessert rather than “just a muffin.”
For guests and gatherings: Arrange muffins on a wooden board lined with parchment paper and set them out on a buffet table. They can be eaten with fingers, so they’re ideal for informal entertaining. Offer small plates and napkins nearby.
As a gift: Banana cinnamon muffins are an excellent homemade gift for neighbors, teachers, or colleagues. Wrap them individually in parchment paper, then place them in a small box or tin. They stay fresh for 2 days unrefrigerated, making them perfect for gifting even if the recipient doesn’t have immediate access to refrigeration.
Pairing with beverages: Beyond coffee and tea, these muffins pair well with fresh-squeezed orange juice, a cold glass of milk, or an herbal tea like chamomile or lavender. The banana provides enough sweetness that you probably won’t want additional sweetened beverages.
Final Thoughts
What makes these muffins worth making repeatedly isn’t complexity—it’s the fact that they deliver genuine, from-scratch quality in less time than it takes to run to a bakery. You’re building real flavor through bananas that have ripened properly, cinnamon that’s distributed evenly, and a crumb structure that stays tender through careful technique, not shortcuts.
The 25-minute timeline is achievable because every step serves a purpose. There’s no creaming butter and sugar for 5 minutes when mashed banana does the job in 1 minute. There’s no complicated folding when simple stirring works just fine. There’s no mystery about doneness when you know exactly what to look and feel for.
Start with the base recipe exactly as written once or twice so you understand how it works, what the batter should look like at each stage, and what the finished muffin should feel like when you press it gently. After that, the variations open up naturally—brown butter one weekend, chocolate chips the next, maple-pecan the week after. You’ll find yourself reaching for this recipe on mornings when you want something warm and homemade but don’t have hours to spend baking.
The real win here is confidence. Once you’ve made these muffins, you know you can produce a genuinely delicious baked good faster than most people can frost a box-mix cake. That’s not a small thing.