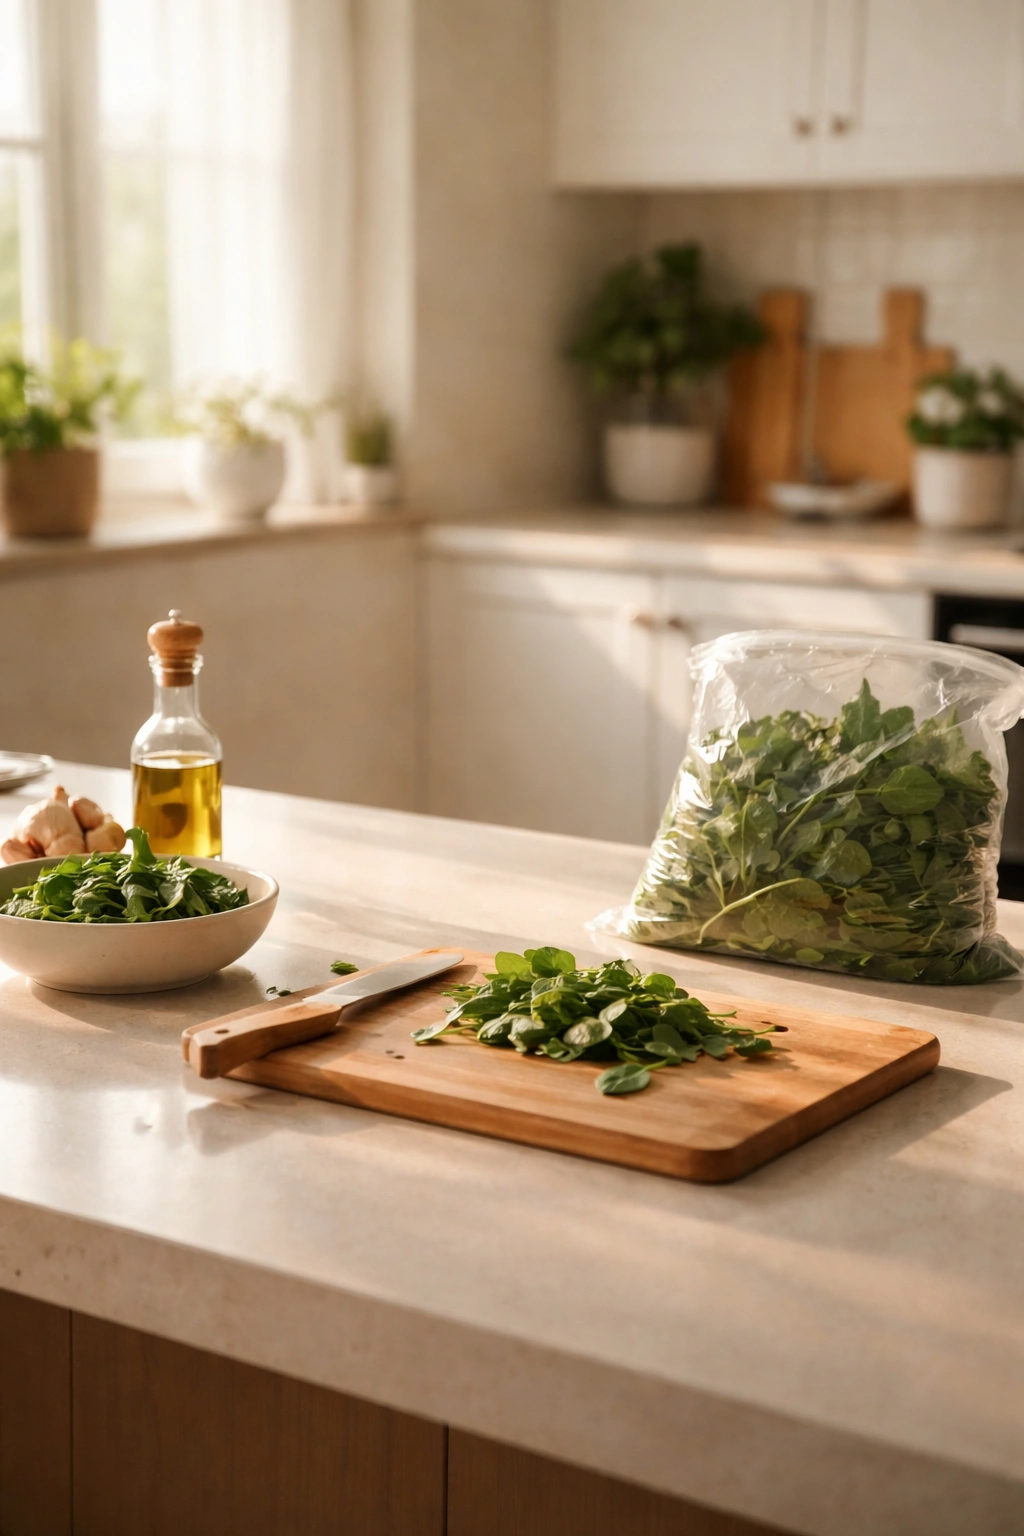
If you’ve ever bought a bag of fresh spinach with grand plans, only to watch it wilt into a slimy mess in your crisper drawer, you’re not alone. A single grocery store bag of spinach looks impossibly large, but it cooks down dramatically — sometimes by as much as 80% — which means you need real solutions to actually use it all. The good news? Spinach is one of the most versatile ingredients in your kitchen, and it disappears quickly once you know where to put it.
The real key to using a whole bag isn’t cramming spinach into one dish or forcing yourself to eat massive salads for a week. Instead, it’s having a collection of recipes where spinach plays a starring role — dishes that taste genuinely delicious, not like you’re just trying to get greens down. Whether it’s stirred into creamy pasta, layered into egg dishes, baked into breads, or folded into dips, spinach adds nutrition and mild flavor without overwhelming a meal. Most of these recipes actually taste better with spinach than without it.
The eight recipes below were chosen specifically because they use generous amounts of spinach in ways that make sense — you’re not using a tablespoon as garnish, but rather a few full cups as a core component. Make a couple of these in succession, and you’ll move through that whole bag faster than you’d expect.
1. Creamy Garlic Spinach Pasta
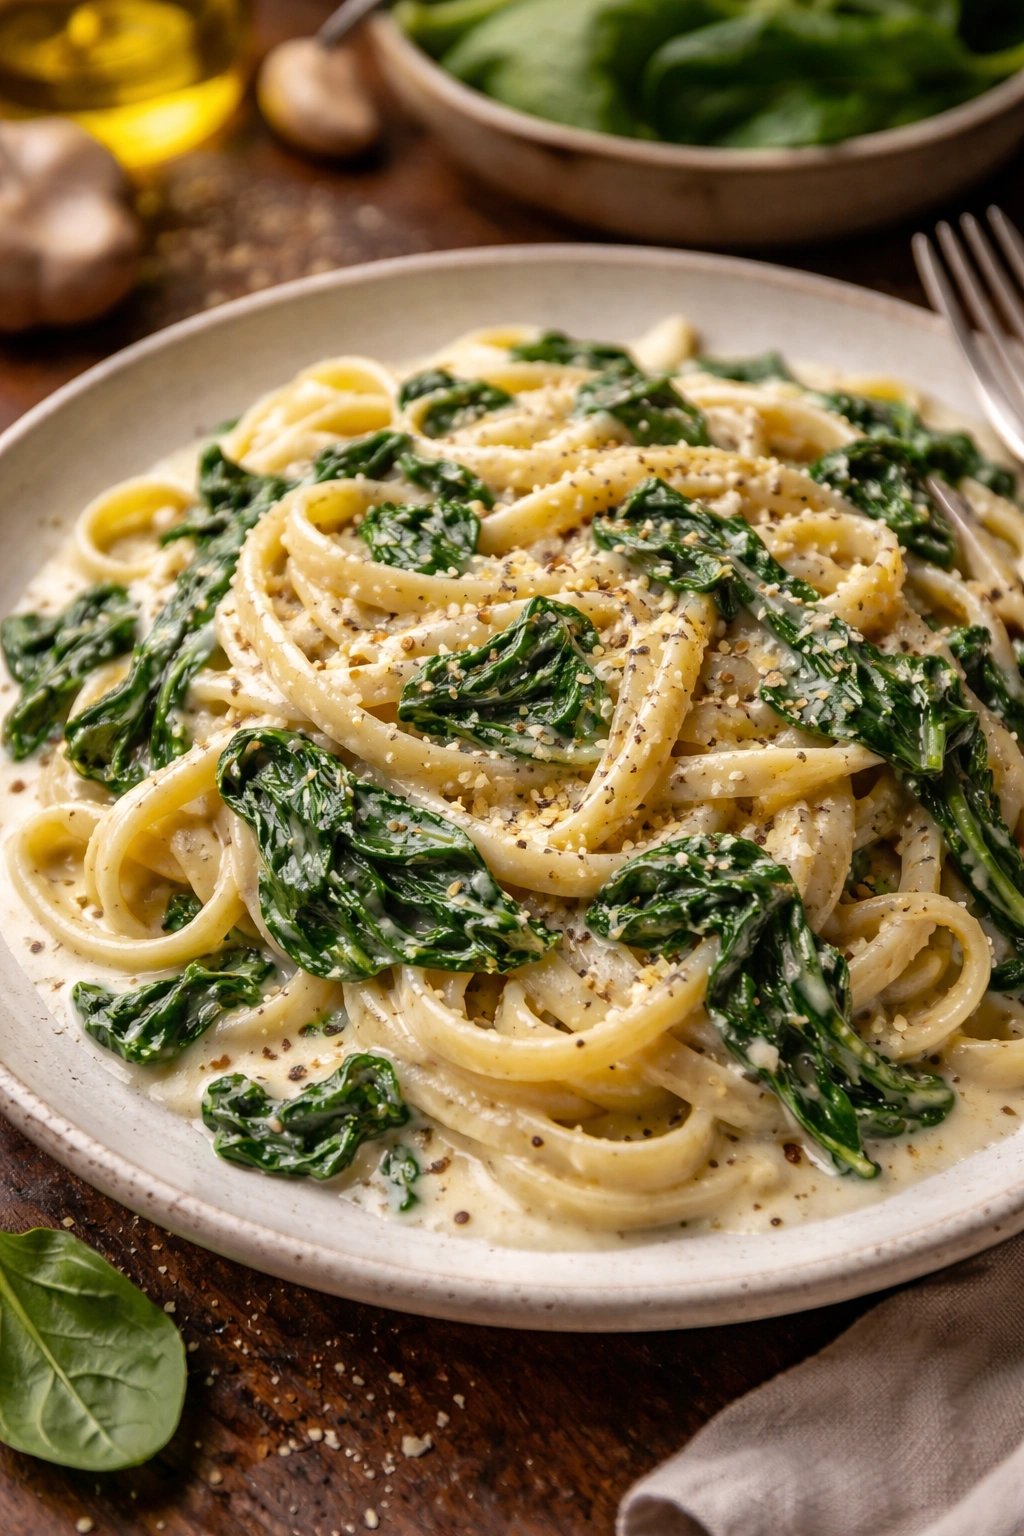
This is the recipe you make when you need to feel like a confident cook while clearing spinach from your fridge. The cream sauce is silky and garlicky, and the spinach wilts directly into it, turning the pasta into something luxurious and satisfying. It comes together in about 25 minutes from start to finish, and it’s equally good served warm or eaten cold the next day.
Yield: Serves 4 as a main dish | Serves 6 as a side dish
Prep Time: 10 minutes
Cook Time: 15 minutes
Total Time: 25 minutes
Difficulty: Beginner — straightforward technique, no special equipment, and very forgiving timing.
For the Pasta:
- 1 pound pasta (any shape: penne, fettuccine, fusilli, or linguine all work beautifully)
- Salt for pasta water
- 4 tablespoons unsalted butter
- 5 cloves garlic, minced finely
- 1 cup heavy cream (or half-and-half for a lighter version)
- ¼ teaspoon red pepper flakes (optional, for subtle heat)
- ½ teaspoon fine sea salt
- ¼ teaspoon black pepper
- 5 to 6 cups fresh spinach, loosely packed (about half a standard grocery bag)
- ½ cup whole milk
- ½ cup grated Parmesan cheese, freshly grated if possible
- Zest of one lemon (about 1 teaspoon)
- 2 tablespoons fresh lemon juice
Prepare the Pasta:
-
Bring a large pot of salted water to a rolling boil — the water should taste like the sea. Add pasta and cook according to package directions until just barely al dente (about 1 minute under the suggested time). Do not overcook the pasta — it will continue cooking slightly when added to the warm sauce.
-
Reserve 1 cup of pasta cooking water before draining. This starchy water is essential for adjusting the sauce consistency and helping it coat the pasta beautifully.
-
Drain the pasta and set aside, but do not rinse it — the starch on the pasta helps the sauce cling to each strand.
Advertisements
Make the Sauce:
-
In the same pot (no need to wash it), melt the butter over medium heat. Once melted and foaming, add the minced garlic and red pepper flakes if using. Stir constantly for about 1 minute, until the garlic is fragrant and just beginning to turn pale golden. Stop before the garlic browns, which would make it bitter.
-
Pour in the heavy cream and whole milk, stirring constantly. Bring the mixture to a gentle simmer — you should see small bubbles breaking the surface around the edges. Do not let it reach a rolling boil, which can cause the cream to curdle.
-
Reduce the heat to medium-low and let the sauce simmer gently for 2 to 3 minutes, stirring occasionally, until it thickens just slightly and coats the back of a spoon.
-
Add the spinach in big handfuls, stirring after each addition. The spinach will wilt dramatically — this is normal and exactly what you want. It should take 2 to 3 minutes total for all the spinach to wilt completely and become evenly distributed throughout the sauce.
-
Stir in the Parmesan cheese, salt, and black pepper. Taste the sauce — adjust salt and pepper as needed. The sauce should taste noticeably cheesy and well-seasoned.
-
Add the lemon zest and lemon juice, stirring until combined. The lemon brightens the entire dish and cuts through the richness of the cream beautifully.
Combine and Finish:
-
Add the cooked pasta to the sauce, using tongs or two forks to toss everything together gently until every strand is coated. The sauce should cling to the pasta and look creamy, not pooled at the bottom of the pot.
-
If the sauce seems too thick, add reserved pasta water a splash at a time (about 2 to 3 tablespoons usually does it) until the consistency is smooth and fluid. The sauce should coat the pasta but not be soupy.
Advertisements -
Divide among bowls or plates and serve immediately, with additional grated Parmesan at the table.
Why This Works for Large Quantities of Spinach
Fresh spinach reduces to an almost negligible volume when cooked, meaning you can fit an enormous amount into this sauce without it tasting oversized or wrong. The cream base is rich enough to stand up to the earthiness of spinach without needing heavy compensation through extra salt or spices.
Storage and Variations
This pasta keeps well refrigerated in an airtight container for up to 3 days. Reheat gently on the stovetop over low heat, adding a splash of milk to restore the creamy consistency. You can also prepare the sauce and spinach entirely in advance, then toss with freshly cooked pasta when you’re ready to eat.
Variation with spinach:
Add 8 ounces of diced fresh mozzarella or crumbled goat cheese when you stir in the Parmesan for additional richness and tang. You can also use thawed frozen spinach (squeeze out all excess moisture first) if fresh isn’t available — you’ll need about 3 cups thawed and drained.
Pro tip: Make a double batch of just the sauce and spinach mixture without the pasta, then freeze it in ice cube trays. Pop out cubes whenever you need a quick spinach addition to soups, risotto, or scrambled eggs.
2. Spinach and Feta Frittata with Sun-Dried Tomatoes

A frittata is essentially a thick, custardy omelette that you start on the stovetop and finish in the oven. It’s one of the smartest vehicles for spinach because you can load it with vegetables and cheese without worrying about flipping or folding, and a single frittata serves 4 to 6 people comfortably. This version combines spinach with tangy feta and sun-dried tomatoes for brightness and depth.
Yield: Serves 4 to 6
Prep Time: 15 minutes
Cook Time: 20 minutes
Total Time: 35 minutes
Difficulty: Beginner — no special technique beyond whisking eggs and managing oven temperature.
For the Frittata:
- 2 tablespoons olive oil
- 1 medium yellow onion, diced into small, even pieces
- 5 cloves garlic, minced
- 6 cups fresh spinach, loosely packed
- ½ cup sun-dried tomatoes (packed in oil preferred), roughly chopped
- 8 large eggs, room temperature
- ¼ cup heavy cream or whole milk
- ½ teaspoon fine sea salt
- ¼ teaspoon black pepper
- ¼ teaspoon dried oregano
- ¾ cup crumbled feta cheese
- 2 tablespoons grated Parmesan cheese
- Fresh basil or flat-leaf parsley for serving (optional)
Prepare the Vegetables:
-
Preheat your oven to 375°F (190°C). Position the rack in the middle of the oven so the frittata bakes evenly.
Advertisements -
Heat the olive oil in a 10-inch cast iron or oven-safe non-stick skillet over medium-high heat. Once the oil is shimmering and hot, add the diced onion and a small pinch of salt.
-
Cook the onion for 4 to 5 minutes, stirring occasionally, until it becomes translucent and very lightly golden at the edges. Do not rush this step — the sweetness from caramelizing the onion slightly adds depth to the entire frittata.
-
Add the minced garlic and stir constantly for about 1 minute, until fragrant. The garlic will immediately start to soften.
-
Add the spinach in large handfuls, stirring after each addition, until all of it is wilted and has released its moisture into the pan. This takes about 2 to 3 minutes. Once wilted, the spinach will have reduced to a small amount of volume — this is completely normal.
-
Scatter the chopped sun-dried tomatoes throughout the pan and stir until evenly distributed. Let everything cool slightly while you prepare the egg mixture.
Make the Egg Mixture:
-
In a large bowl, whisk the eggs, cream, salt, pepper, and oregano together until the eggs are pale yellow and homogeneous throughout. Do not overbeat — you’re not trying to incorporate excessive air, just to combine the ingredients evenly.
-
Stir in the crumbled feta cheese gently so it remains in distinct pieces rather than fully mixing in.
Assemble and Bake:
-
Pour the egg mixture into the skillet over the cooked spinach and vegetables, using a spatula to gently ensure the eggs flow into an even layer. Scatter the grated Parmesan on top.
Advertisements -
Place the skillet in the preheated oven and bake for 15 to 18 minutes, until the edges are set and the center still has a slight jiggle when you gently shake the pan — about the size of a quarter in the very center. Do not overbake, or the frittata will be rubbery. The residual heat will continue cooking the center as it cools.
-
Remove from the oven and let rest in the pan for 2 to 3 minutes before slicing. This allows the frittata to set completely without drying out.
-
Slice into wedges, transfer to plates, and serve warm or at room temperature, optionally garnished with fresh basil.
Why Spinach in Frittata Makes Sense
A frittata’s custard-like structure actually demands vegetables to add textural interest and prevent it from feeling one-note. The spinach distributes throughout the egg base and becomes almost invisible, but it adds minerals and visual interest. Because spinach wilts so dramatically, you can fit a surprising amount without the final dish feeling oversized.
Make-Ahead and Storage
Frittata is one of the rare dishes that improves after sitting overnight. The flavors meld, and the texture becomes more settled. Make the frittata up to 2 days in advance and refrigerate it covered. It’s delicious cold, or reheat individual slices gently in a 300°F oven for about 5 minutes until warmed through.
Variation:
Replace sun-dried tomatoes with 6 ounces of fresh mushrooms (cremini, shiitake, or a mix), sliced thin and sautéed until golden. Or add ½ cup of diced roasted red peppers and substitute crumbled goat cheese for the feta.
Pro tip: Make individual frittatas in a muffin tin — divide the spinach mixture evenly among greased muffin cups, pour the egg mixture over top, and bake at 375°F for 12 to 14 minutes. You’ll have grab-and-go portions that reheat beautifully and are perfect for meal prep.
3. Spinach and Ricotta Stuffed Shells

These are the kind of pasta shells you make when you want to impress people but don’t actually want to spend hours in the kitchen. Jumbo pasta shells hold a generous ricotta and spinach filling, then get covered in tomato sauce and cheese before baking. You can assemble them hours ahead, refrigerate, and bake just before serving.
Yield: Serves 4 to 6 (makes about 20 stuffed shells)
Prep Time: 20 minutes
Cook Time: 30 minutes
Total Time: 50 minutes
Difficulty: Intermediate — mostly because of the manual assembly, but the technique is straightforward and forgiving.
For the Shells and Filling:
- 1 pound jumbo pasta shells (about 20 to 24 shells)
- Salt for pasta water
- 15 ounces whole-milk ricotta cheese
- 2 cups fresh spinach, chopped finely
- 1 cup grated mozzarella cheese, divided
- ½ cup grated Parmesan cheese
- 1 large egg
- 3 cloves garlic, minced finely
- ½ teaspoon fine sea salt
- ¼ teaspoon black pepper
- ¼ teaspoon ground nutmeg
- Zest of one lemon (about 1 teaspoon)
For Assembly:
- 2½ cups marinara or tomato sauce (store-bought is perfectly fine)
- 2 tablespoons olive oil
- ½ cup grated mozzarella cheese (reserved from above)
- 2 tablespoons fresh basil, torn or chopped (optional but recommended)
Cook the Pasta:
-
Bring a large pot of salted water to a rolling boil. Add the pasta shells and cook for about 1 minute less than the package directions, since they’ll cook a bit more in the oven. You want them al dente and still firm enough to hold their shape when filled.
-
Drain the shells carefully and spread them out on a clean kitchen towel to dry slightly. Do not rinse them — any residual starch helps the filling adhere.
Make the Filling:
-
In a large bowl, combine the ricotta, chopped spinach, ¾ cup of the mozzarella, Parmesan, egg, minced garlic, salt, pepper, nutmeg, and lemon zest. Stir until everything is evenly incorporated. Taste the filling and adjust salt and pepper — it should taste noticeably savory and well-seasoned.
-
Transfer the filling to a pastry bag fitted with a large plain tip, or simply use a spoon. The pastry bag makes the work less messy and fills the shells more evenly, but a spoon works perfectly well.
Assemble the Shells:
-
Preheat your oven to 375°F (190°C).
-
Spread ½ cup of the marinara sauce on the bottom of a 9×13-inch baking dish, creating a thin base layer.
Advertisements -
Pipe or spoon about 2 tablespoons of filling into each pasta shell — fill generously but not so much that the filling oozes out when baked. The shells should be fully packed but not bursting.
-
Arrange the filled shells in the baking dish in a single layer, seam-side down, fitting them snugly but without overlapping.
-
Pour the remaining 2 cups of marinara sauce over the shells, ensuring each one is covered. If some shells look dry, spoon sauce specifically over them.
-
Drizzle the olive oil over the sauce, then scatter the remaining ½ cup mozzarella evenly across the top.
Bake:
-
Cover the baking dish tightly with aluminum foil and bake for 25 to 30 minutes, until the sauce bubbles around the edges and the cheese on top is melted. The shells should be heated through completely — you can tell by inserting a knife into one of the center shells; it should slide in with no resistance.
-
Remove the foil in the last 5 minutes of baking if you want the cheese on top to brown slightly, though this is entirely optional.
-
Let the shells rest for 5 minutes before serving — this allows the sauce to set slightly so the shells hold together when transferred to plates.
-
Serve garnished with fresh basil if desired.
Why This Dish Uses So Much Spinach
Two cups of fresh spinach seems substantial until you realize that spinach cooks down dramatically. In this recipe, the spinach is finely chopped when raw, then combined with ricotta which dilutes its intensity further. You get all the nutritional benefit and some pleasant green flecks without the spinach tasting overwhelming or meaty.
Make-Ahead Strategy
Assemble the entire dish up to 24 hours in advance, cover it tightly with foil, and refrigerate. When ready to serve, bake straight from the refrigerator, adding about 5 extra minutes to the total baking time if the dish is cold when it goes in the oven.
Variation:
Add 6 ounces of crumbled Italian sausage (cooked and cooled) to the filling for a heartier version. You can also use fresh spinach or frozen spinach (thawed and drained) interchangeably — use about 1 cup thawed frozen spinach if that’s what you have.
Pro tip: Use a small cookie scoop to portion the ricotta mixture uniformly into the shells — it’s faster and messier-free than using a spoon, and every shell gets exactly the same amount.
4. Green Smoothie Bowls with Spinach Base
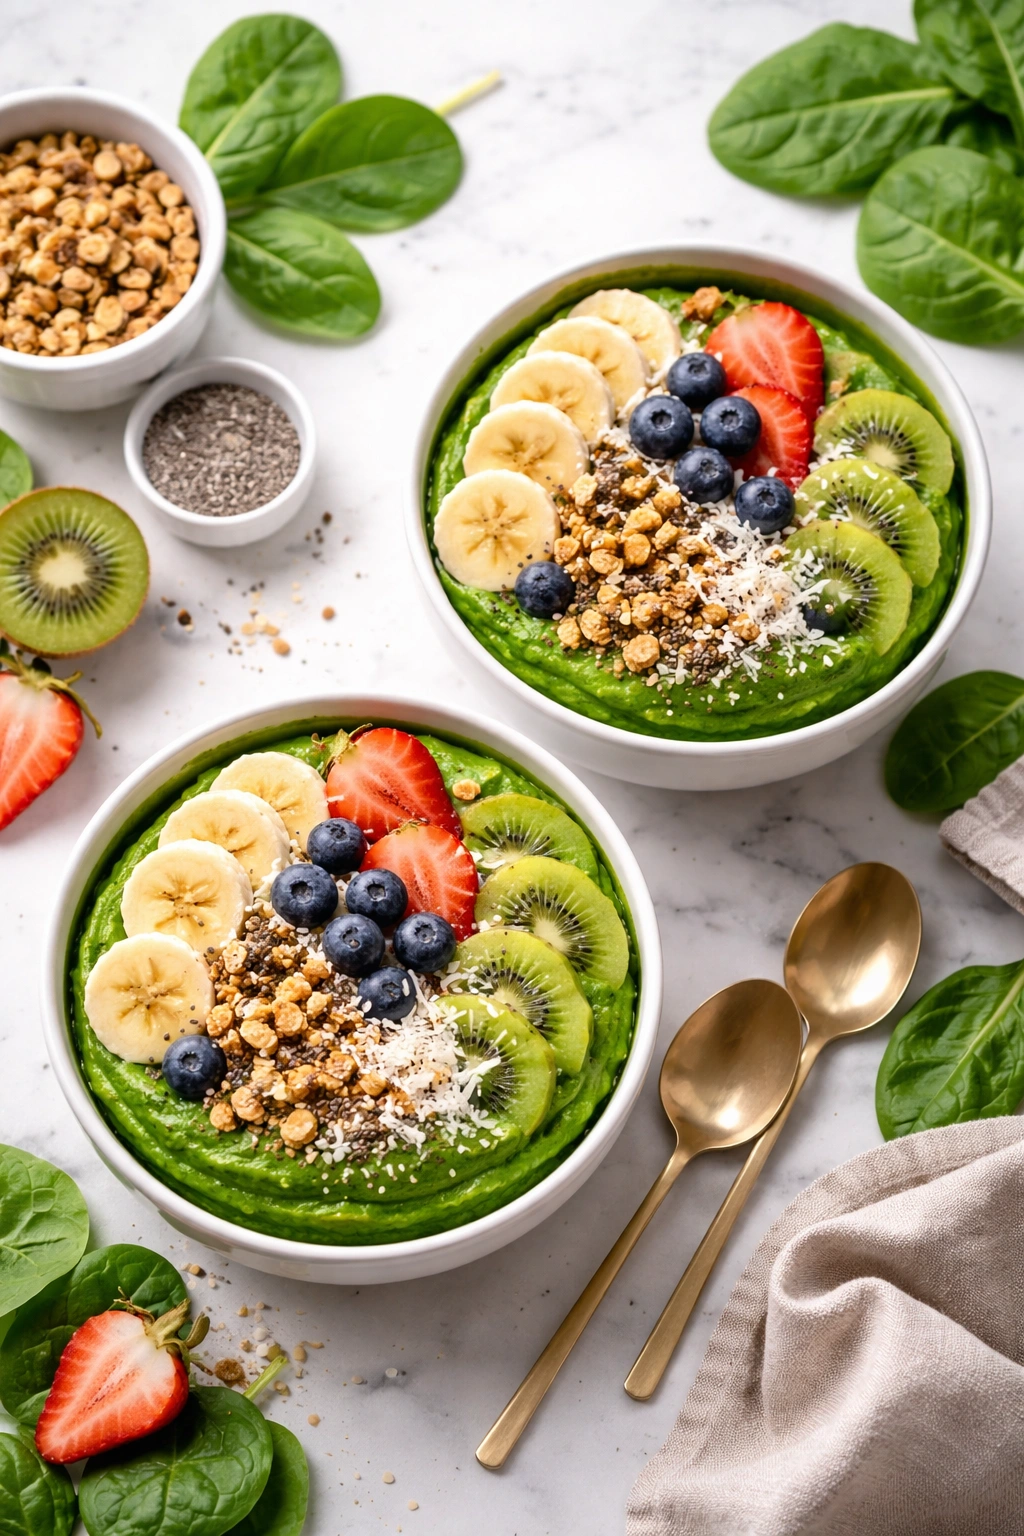
A smoothie bowl is basically a thick smoothie served in a bowl with toppings rather than drunk from a cup. The base is spinach-heavy, which means you can easily use 2 to 3 cups of fresh spinach in a single bowl. Because the spinach is blended with fruit and yogurt, it becomes virtually invisible flavor-wise while adding nutrition and a beautiful green color.
Yield: Makes 2 smoothie bowls
Prep Time: 10 minutes
Total Time: 10 minutes (no cooking required)
Difficulty: Beginner — just blending and arranging toppings.
For Each Smoothie Bowl Base:
- 2 cups fresh spinach, loosely packed
- 1 frozen banana, broken into chunks
- 1 cup frozen pineapple chunks (or frozen mango)
- ¾ cup plain Greek yogurt (or coconut yogurt for a dairy-free version)
- ½ cup unsweetened almond milk (or any milk of choice)
- ½ tablespoon raw almond butter (optional but adds creaminess)
- ½ tablespoon honey or maple syrup (optional, for sweetness)
- ¼ teaspoon pure vanilla extract
- Pinch of fine sea salt
For Toppings (choose your own):
- Sliced fresh fruit (banana, berries, kiwi, or pineapple)
- Granola or clusters (about 3 tablespoons per bowl)
- Unsweetened coconut flakes (about 2 tablespoons per bowl)
- Raw almonds or other nuts, roughly chopped
- Raw sunflower seeds or chia seeds (about 1 tablespoon per bowl)
- Drizzle of almond butter or honey
Blend the Smoothie:
-
Add the spinach, frozen banana, frozen pineapple, Greek yogurt, milk, almond butter, honey, vanilla, and salt to a high-powered blender in that order.
-
Blend on high speed for 45 to 60 seconds, stopping once or twice to press down any frozen fruit stuck to the sides with the back of a spoon. The mixture should become a thick, creamy, bright green liquid that is barely pourable — much thicker than a regular smoothie.
Advertisements -
If the mixture is too thick and the blender is struggling, add an extra splash of milk (1 to 2 tablespoons). If it’s too thin and pourable, add another ¼ cup of frozen pineapple or banana and blend again.
-
Divide the smoothie between two bowls.
Top and Serve:
-
Working quickly (smoothie bowls melt as they sit), arrange your chosen toppings in sections on top of each smoothie base. Be generous — part of the appeal is the visual abundance and textural variety.
-
Serve immediately with a spoon, eating through the creamy base and into the toppings with each bite.
The Spinach Advantage Here
When blended with fruit and yogurt, spinach adds nothing but benefits — it extends the nutritional profile without changing the fundamental flavor, which remains fruity and slightly sweet. Most people drinking or eating this won’t detect the spinach at all, which makes it a smart way to use large quantities.
Variations for Every Taste
Berry base:
Use 1 cup frozen mixed berries instead of pineapple, and reduce the almond butter to ¼ tablespoon. Add ¼ teaspoon of fresh lemon juice for brightness.
Tropical base:
Use 1 cup frozen mango instead of pineapple, and add ¼ teaspoon of coconut extract if you have it.
Creamy vanilla base:
Increase the Greek yogurt to 1 cup, reduce the almond milk to ¼ cup, and increase the vanilla extract to ¾ teaspoon for a less fruity, more dessert-like bowl.
Pro tip: Prep smoothie bowl bases in advance by blending the mixture without the toppings, then freezing the blended smoothie in individual containers. In the morning, thaw slightly at room temperature (about 5 minutes), transfer to a bowl, add toppings, and eat. This is an excellent meal-prep strategy.
5. Wilted Spinach and Cheese Bread
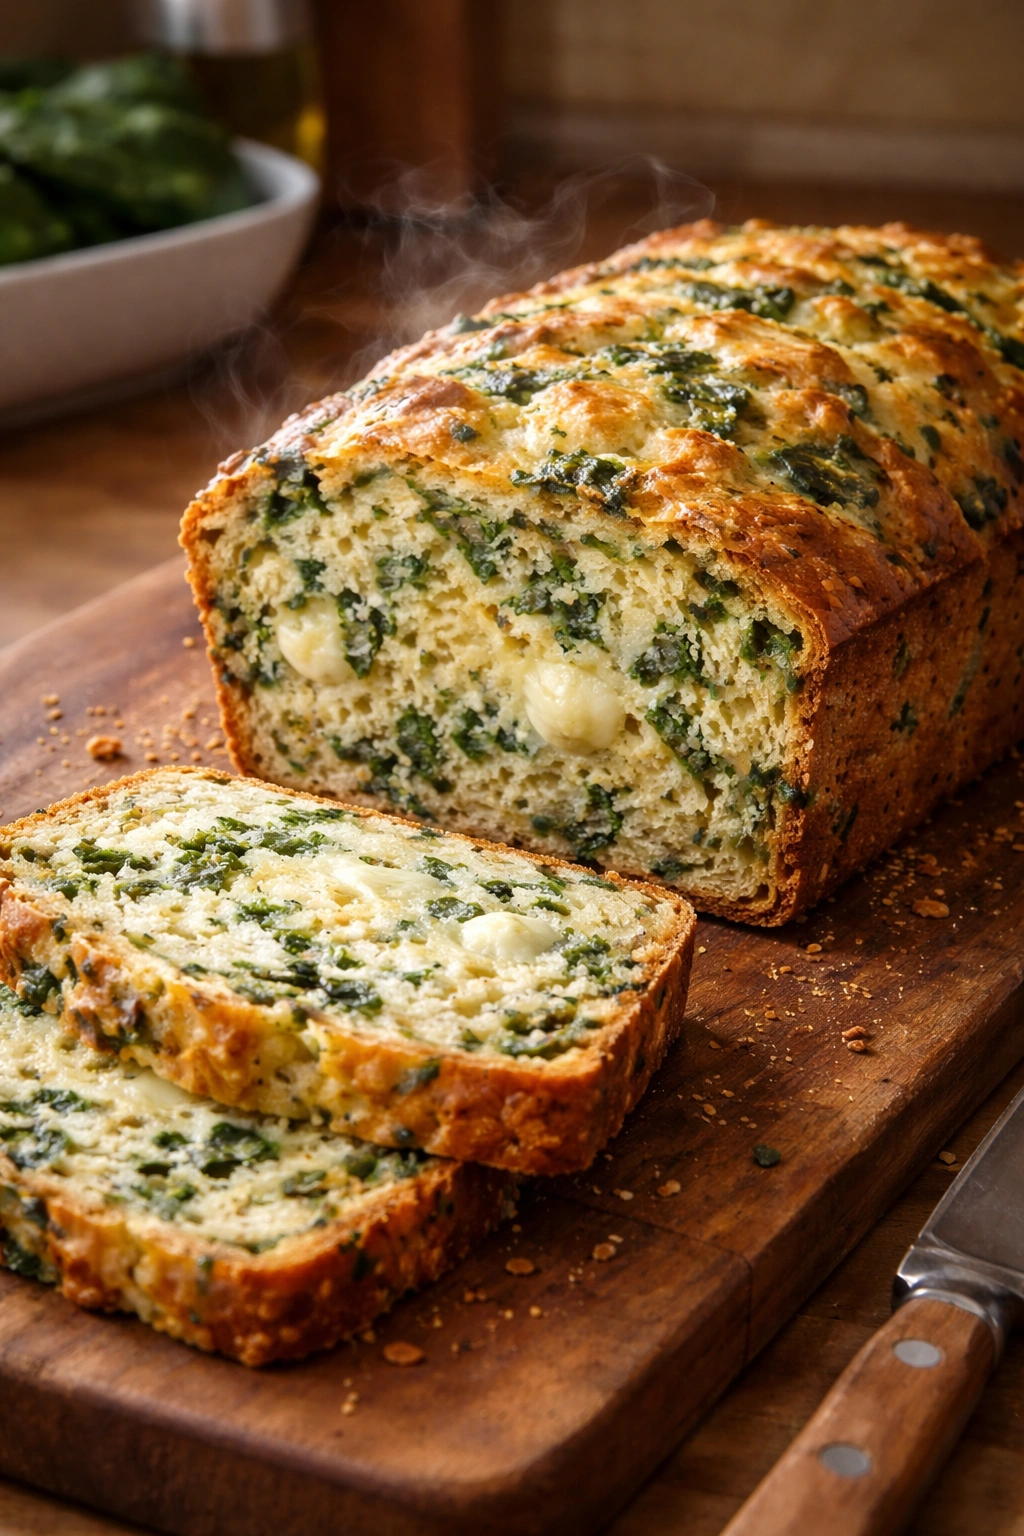
This is savory quick bread — somewhere between a muffin and a biscuit — studded with spinach and cheese. It’s wonderful served alongside soup, with a salad, or simply sliced and toasted for breakfast. Because it’s baked, the spinach doesn’t cook down the way it does in pasta or frittata, so you get distinct spinach pieces throughout every slice.
Yield: Makes one 8×4-inch loaf (about 10 slices) or about 12 muffins
Prep Time: 15 minutes
Cook Time: 35 minutes (45 minutes for a loaf)
Total Time: 50 minutes (60 minutes for a loaf)
Difficulty: Beginner — standard muffin-mixing technique with no special skill required.
For the Bread:
- 2 cups all-purpose flour
- 1½ teaspoons baking powder
- ½ teaspoon baking soda
- ½ teaspoon fine sea salt
- ¼ teaspoon black pepper
- ¼ teaspoon ground nutmeg
- 3 cups fresh spinach, loosely packed
- 1 cup sharp cheddar cheese, grated
- ½ cup grated Parmesan cheese
- 3 large eggs, room temperature
- ¾ cup plain Greek yogurt (or sour cream)
- ¼ cup whole milk
- 3 tablespoons unsalted butter, melted
- 3 cloves garlic, minced very finely
- ½ teaspoon red pepper flakes (optional)
Prepare and Preheat:
-
Preheat your oven to 350°F (175°C). Grease an 8×4-inch loaf pan generously with softened butter or non-stick spray, then dust lightly with flour, tapping out the excess. Alternatively, line a muffin tin with paper liners.
-
Roughly chop the fresh spinach into bite-sized pieces. You don’t need to be precise — just break it down enough that you don’t end up with enormous spinach fronds in the finished bread.
-
In a medium bowl, whisk together the flour, baking powder, baking soda, salt, black pepper, and nutmeg until the dry ingredients are evenly distributed. Set aside.
Combine Wet Ingredients:
-
In a large bowl, whisk the eggs, Greek yogurt, milk, melted butter, minced garlic, and red pepper flakes (if using) until everything is smooth and combined. The mixture should be thick but pourable.
-
Fold the spinach, cheddar cheese, and Parmesan cheese into the wet mixture using a rubber spatula or wooden spoon, stirring until evenly distributed. A few spinach pieces sticking out is fine — the goal is just to combine everything, not to completely integrate it.
Advertisements
Combine and Bake:
-
Add the dry ingredients to the wet ingredients and fold together gently using a rubber spatula, stirring only until the dry flour is no longer visible. Stop as soon as you don’t see any white streaks — overmixing activates gluten and makes the bread tough and dense.
-
Pour the batter into the prepared loaf pan (or divide evenly among muffin cups if making muffins), smoothing the top gently with a spatula.
-
Bake for 40 to 45 minutes for a loaf (25 to 30 minutes for muffins), until a toothpick inserted in the center comes out clean and the top is golden brown. The edges will pull away slightly from the sides of the pan.
-
Let cool in the pan for 10 minutes, then turn out onto a wire cooling rack and cool completely.
-
Slice and serve warm or at room temperature. The bread is actually better the next day once the flavors have melded.
Why Spinach Works in Quick Breads
Unlike leafy greens that need to be cooked down in wet-heat applications, spinach in a quick bread stays somewhat intact and adds visual appeal, nutrition, and subtle flavor. The dense, moist crumb of quick bread is an ideal vehicle for tender spinach leaves.
Storage and Freezing
Wrap the cooled loaf tightly in plastic wrap and refrigerate for up to 4 days. It also freezes beautifully for up to 2 months — thaw at room temperature for about 2 hours before slicing and serving, or reheat slices directly from frozen in a 300°F oven for about 8 minutes.
Variation:
Add 4 ounces of crumbled goat cheese along with the cheddar and Parmesan for additional tang. You can also use sun-dried tomatoes (chopped), caramelized onions, or crispy bacon bits mixed into the batter.
Pro tip: Make this as muffins and freeze them individually. Thaw one or two in the morning for a quick, protein-rich breakfast, or reheat from frozen in a 300°F oven for about 10 minutes.
6. Creamy Spinach Soup with White Beans
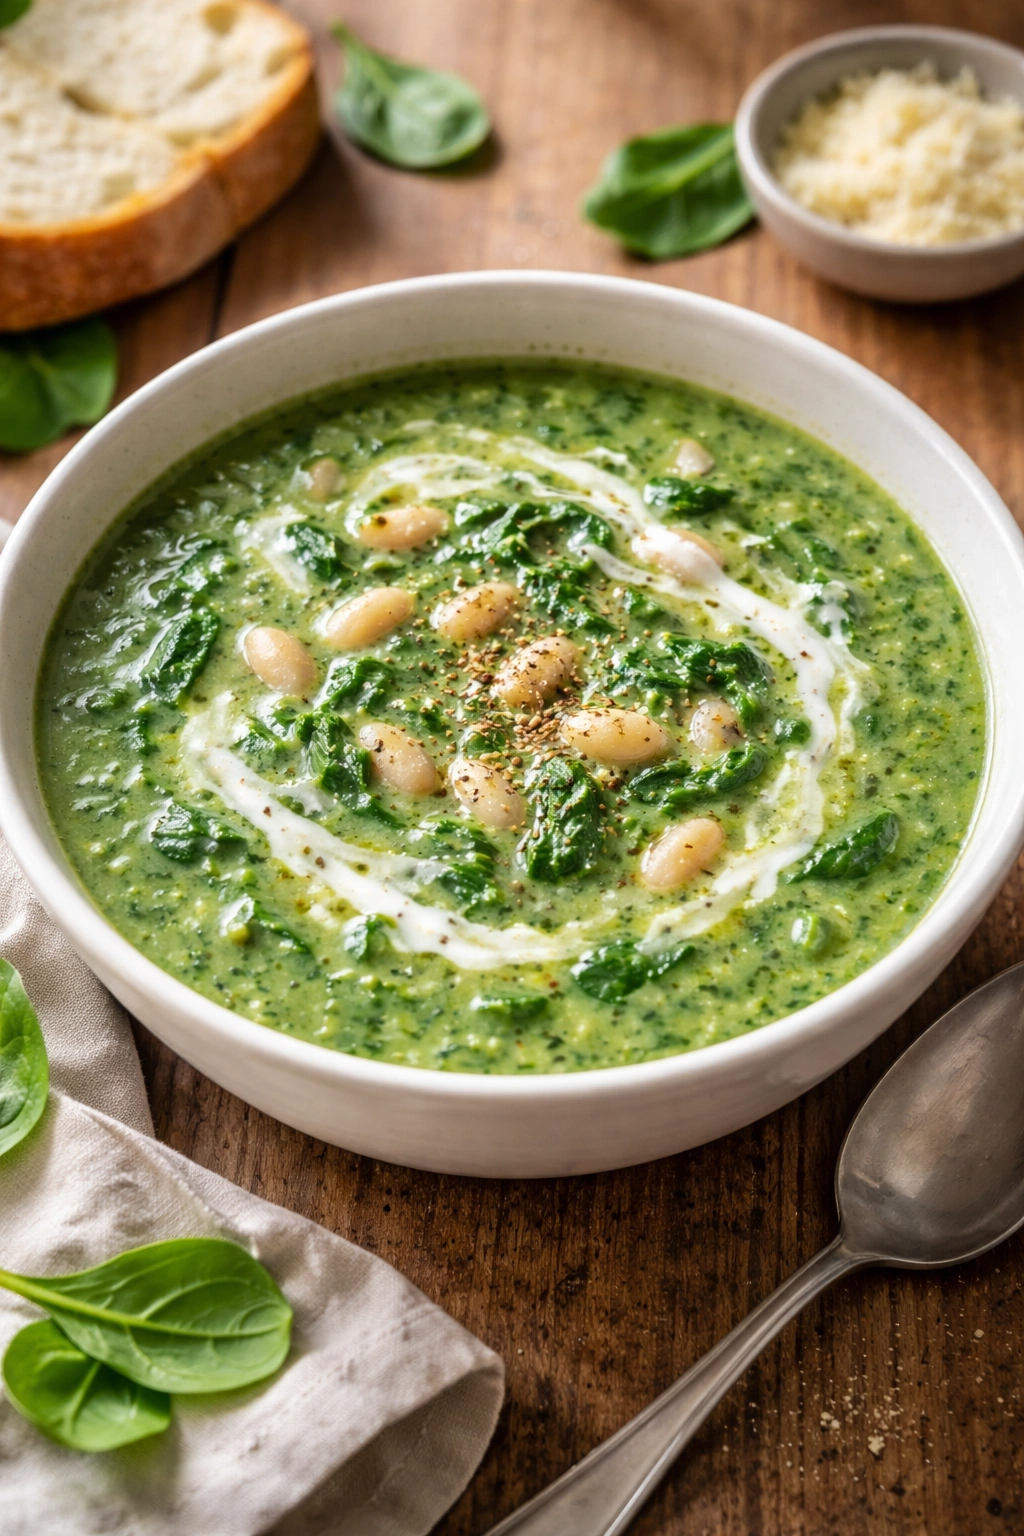
This is a hearty, nourishing soup that makes an excellent light dinner or substantial lunch. The spinach gets blended directly into the base, creating a silky, naturally green-hued soup that’s warming and filling. White beans add protein and substance, while a splash of cream at the end makes it taste special.
Yield: Serves 4 to 6 (makes about 6 cups)
Prep Time: 10 minutes
Cook Time: 20 minutes
Total Time: 30 minutes
Difficulty: Beginner — no special technique, just sautéing, simmering, and blending.
For the Soup:
- 2 tablespoons olive oil
- 1 large yellow onion, diced
- 4 cloves garlic, minced
- 4 cups vegetable or chicken broth
- Two 15-ounce cans white beans (cannellini or great northern), drained and rinsed (or about 3 cups cooked fresh beans)
- 6 cups fresh spinach, loosely packed
- ½ cup heavy cream (or half-and-half for lighter version)
- 1 tablespoon fresh lemon juice
- 1 teaspoon fresh thyme leaves (or ½ teaspoon dried)
- ½ teaspoon fine sea salt
- ¼ teaspoon black pepper
- Pinch of ground nutmeg
- Red pepper flakes for serving (optional)
Build the Soup:
-
Heat the olive oil in a large pot over medium-high heat. Once shimmering, add the diced onion and a small pinch of salt. Cook for 5 to 6 minutes, stirring occasionally, until the onion becomes translucent and soft but not browned.
-
Add the minced garlic and stir constantly for about 1 minute, until fragrant. The garlic should soften but not brown.
-
Pour in the broth and bring it to a simmer — you should see small bubbles breaking the surface. Add the drained beans and stir.
-
Let the soup simmer gently for about 5 minutes, allowing the beans to warm through and the flavors to meld slightly.
-
Add the fresh spinach in large handfuls, stirring after each addition, until all of it is wilted and submerged. This takes about 2 to 3 minutes.
Blend and Finish:
-
Remove the pot from heat and let cool for 2 to 3 minutes. Using an immersion blender, blend the soup until silky and uniform — a few flecks of beans are fine, but the soup should be smooth and creamy-looking. If you don’t have an immersion blender, carefully transfer the soup in batches to a regular blender, blend until smooth, and return it to the pot.
-
Stir in the heavy cream, lemon juice, thyme, salt, pepper, and nutmeg. Taste the soup and adjust seasonings — it should taste rich, herbaceous, and noticeably savory.
-
Heat the soup gently over low heat just until steaming, about 2 to 3 minutes. Do not boil, which can cause the cream to separate.
-
Ladle into bowls and serve hot, optionally topped with a drizzle of good olive oil and red pepper flakes.
Spinach’s Role in Creamy Soup
Spinach in soup gets completely incorporated into the liquid, adding color, nutrients, and subtle earthiness without any “spinach” texture. Because it’s blended, you can use much more spinach than you could in a chunky soup, making this an excellent way to clear through your bag.
Make-Ahead and Freezing
This soup freezes beautifully for up to 3 months. Cool it completely, then transfer to freezer containers or bags. To reheat, thaw overnight in the refrigerator or heat directly from frozen on the stovetop over medium-low heat, stirring occasionally, until heated through. The cream may separate slightly if the soup boils when reheating — simply stir vigorously and it will re-emulsify.
Variation:
Add 4 ounces of diced Italian sausage (browned) or crumbled bacon for additional richness. You can also roast the onion and garlic before adding them to the pot for deeper caramelization and flavor.
Pro tip: Make a big batch and freeze in ice cube trays, then pop out cubes to reheat whenever you want a quick, warm lunch. Three cubes thawed and reheated makes a satisfying single serving.
7. Spinach and Herb Pasta Dough
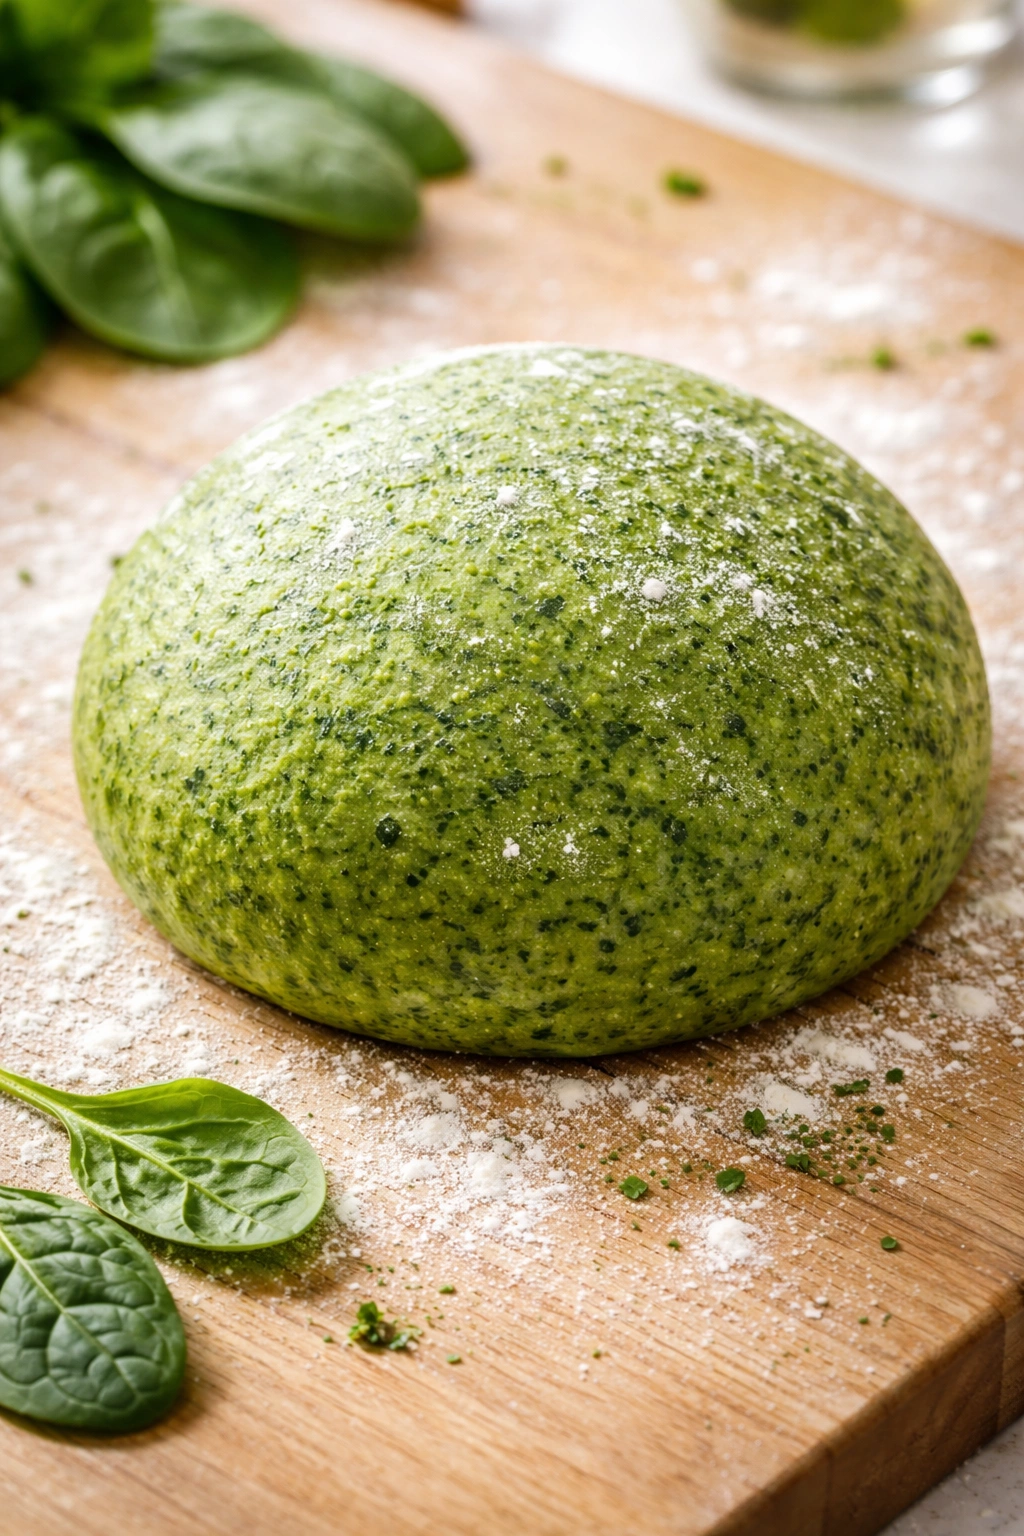
This is fresh pasta dough — the kind you roll out and cut into sheets, ribbons, or shapes. Making pasta from scratch sounds intimidating, but it’s actually just flour, eggs, salt, and a mixture of puréed spinach and herbs. The result tastes and feels incomparably better than dried pasta, and you can use an entire bunch of spinach in the dough itself.
Yield: Makes enough dough for 4 servings (about 1 pound fresh pasta)
Prep Time: 20 minutes (plus 30 minutes resting time)
Cook Time: 2 to 3 minutes once dough is cut (fresh pasta cooks almost instantly)
Total Time: 50 minutes plus resting
Difficulty: Intermediate — requires a food processor and basic kneading technique, but nothing technically difficult.
For the Dough:
- 3 cups fresh spinach, loosely packed
- ¼ cup fresh basil leaves (or 2 tablespoons dried basil plus 2 tablespoons dried parsley)
- 2 cloves garlic, peeled
- 2 tablespoons fresh lemon juice
- 2 cups all-purpose flour
- 2 large eggs, room temperature
- ½ teaspoon fine sea salt
- Extra flour for dusting
- 1 tablespoon olive oil
Make the Spinach Mixture:
-
Add the fresh spinach, basil, garlic, and lemon juice to the bowl of a food processor. Pulse until everything is finely chopped and broken down — it should look like a thick, bright green paste.
-
Strain this mixture through a fine-mesh sieve, pressing on the solids with the back of a spoon to extract as much liquid as possible. Discard the liquid (or save it for vegetable broth). You should be left with about 3 to 4 tablespoons of dry spinach-herb mixture.
Make the Dough:
-
On a clean, dry counter or large cutting board, mound the flour into a rough circle, then use your fingers to create a well in the center — think of it like a volcano with the flour as the rim and the center completely hollow.
-
Crack the eggs into the center of the well, add the salt, and use a fork to beat the eggs together lightly, just to combine the whites and yolks. Then, using the fork, begin pulling flour from the inner walls of the well into the egg mixture, stirring gently to create a thick paste.
-
Once the mixture becomes too thick to work with a fork (after pulling in about half the flour), use your hands to bring the remaining flour into the mix, kneading gently until a shaggy dough forms.
-
Knead the dough for about 8 to 10 minutes by hand, working it vigorously and pushing it away from you with the heel of your hand, then folding it back over itself. The dough will be stiff and your arm will get tired — this is normal. The dough should become smooth, elastic, and feel slightly satiny. Dust with flour only if it sticks excessively.
-
Once smooth, add the spinach-herb mixture in small amounts, kneading it in completely before adding more. The dough will turn a beautiful pale green. Knead for another 2 to 3 minutes until the green is evenly distributed and the dough is smooth again.
Advertisements -
Form the dough into a ball, wrap it in plastic wrap, and let it rest at room temperature for at least 30 minutes, or up to 2 hours. This resting period allows the gluten to relax and the dough to become more extensible.
Roll and Cut:
-
After resting, the dough is ready to roll. If using a pasta machine: Cut the dough into 4 pieces. Flatten one piece gently with your hand, then feed it through the pasta machine on its widest setting. Fold the resulting sheet in thirds and feed it through again, repeating 3 to 4 times. This lamination step strengthens the dough.
-
Continue feeding the dough through the machine, moving the setting progressively thinner each time, until the sheet is paper-thin enough that you can almost see your hand through it (about the thickness of a dime).
-
Lay the sheet out on a flour-dusted kitchen towel and let it dry for 5 to 10 minutes until it’s no longer sticky to the touch, then cut it into your desired shape — wide ribbons for fettuccine, thin ribbons for tagliatelle, or squares for ravioli.
-
If rolling by hand (with a rolling pin): Place the rested dough on a lightly floured work surface and roll from the center outward, rotating the dough occasionally as you work, until you reach ⅛-inch thickness. This takes patience but produces excellent results.
Cook the Fresh Pasta:
-
Bring a large pot of salted water to a rolling boil. Add the fresh pasta and cook for 2 to 3 minutes — it will float to the surface and cook remarkably quickly. Taste a strand; it should be tender but with a slight firmness to the bite (al dente).
-
Reserve 1 cup of pasta water before draining. Drain the pasta gently and toss with a simple sauce.
Why Fresh Spinach Pasta Is Worth Making
Compared to dried pasta, fresh pasta has an entirely different texture — tender, slightly delicate, and almost silky. Spinach in the dough adds subtle herbaceous flavor while creating a beautiful color. You’ll use an entire big handful of spinach in this single batch.
Storage and Make-Ahead
Fresh pasta refrigerated on a tray in a single layer lasts about 3 days. You can also freeze it: lay the cut pasta on a baking sheet in a single layer, freeze until solid (about 1 hour), then transfer to a freezer bag. Frozen fresh pasta takes about 1 minute longer to cook than fresh.
Variation:
Skip the herbs and use just spinach for a purer green flavor. Or add 2 tablespoons of grated Parmesan cheese to the dough for additional savory depth.
Pro tip: Use a pasta machine if you have one — it dramatically simplifies the rolling process and produces more consistent thickness.
8. Spinach and Garlic Sautéed as a Side Dish
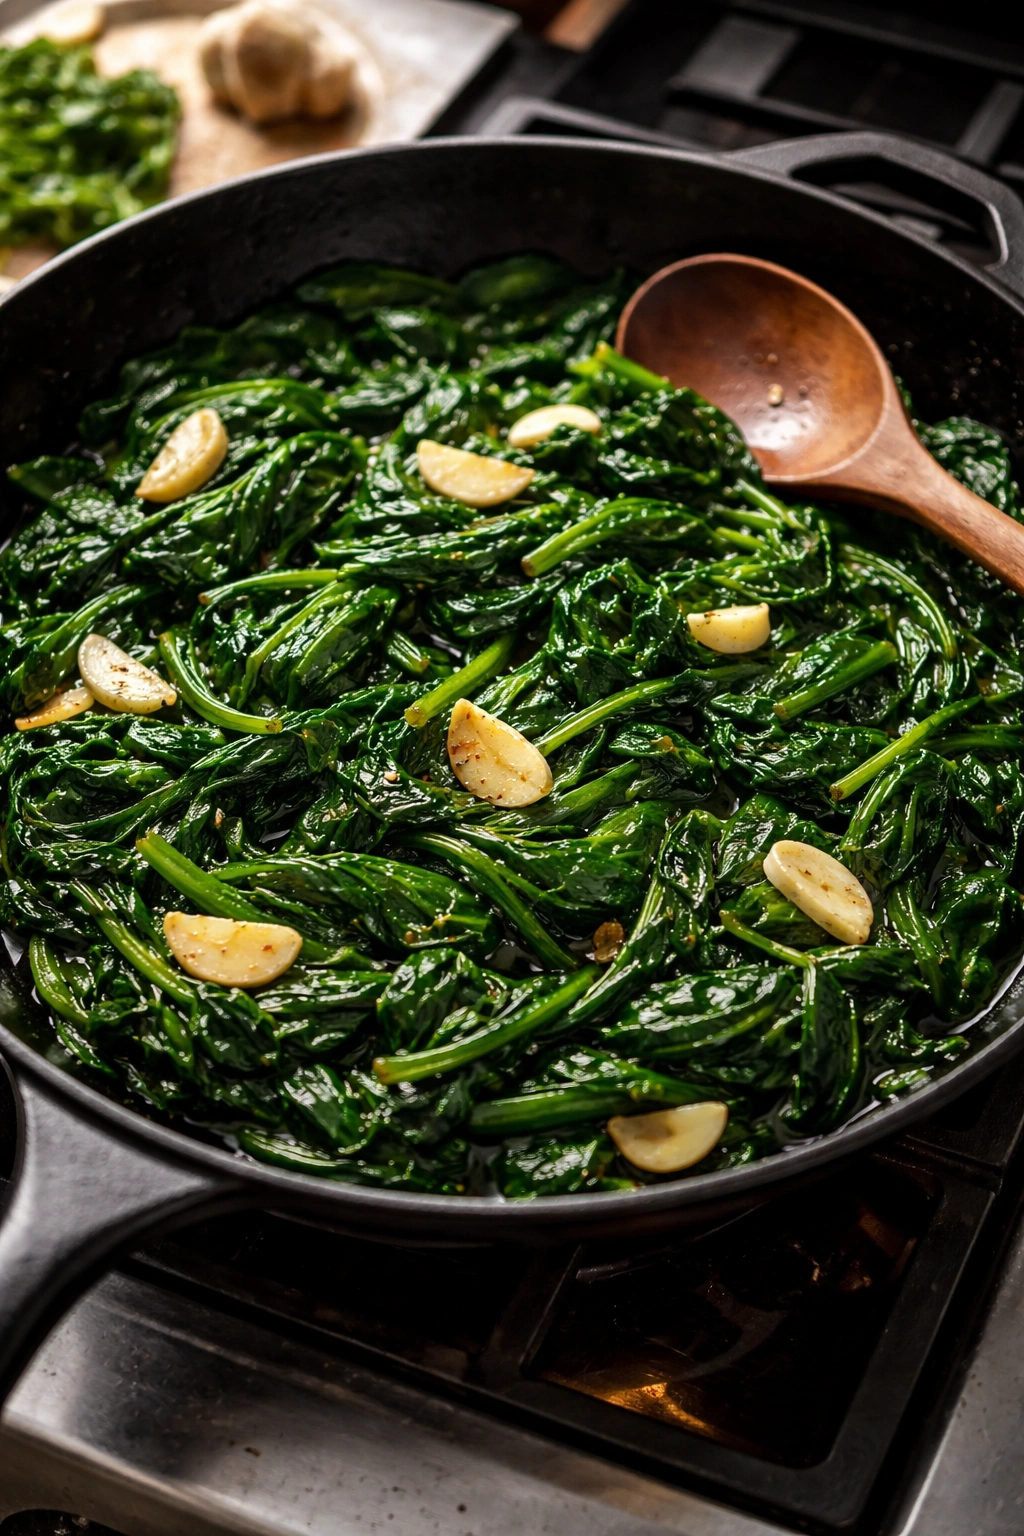
Sometimes the answer to using up spinach is the simplest one: just cook it. A basic sautéed spinach — gently wilted in olive oil with lots of garlic — becomes a versatile side dish that pairs with literally anything. Make a big batch and use it alongside roasted chicken, grilled fish, pasta, rice bowls, or eggs all week.
Yield: Serves 4 as a side dish
Prep Time: 5 minutes
Cook Time: 8 minutes
Total Time: 13 minutes
Difficulty: Beginner — just sautéing and wilting, no special technique.
For the Spinach:
- 2 tablespoons olive oil
- 6 cloves garlic, sliced thin (use a mandoline or knife, or mince finely)
- ½ teaspoon red pepper flakes (optional, for subtle heat)
- 8 to 10 cups fresh spinach, loosely packed (about three-quarters of a standard grocery bag)
- ½ teaspoon fine sea salt
- ¼ teaspoon black pepper
- 1 tablespoon fresh lemon juice
- Optional: ¼ teaspoon ground nutmeg, or 2 tablespoons grated Parmesan cheese
Sauté:
-
Heat the olive oil in a large skillet (a 12-inch skillet is ideal) over medium heat. Once the oil is warm and shimmering, add the sliced garlic and red pepper flakes if using.
-
Cook the garlic for about 1 to 2 minutes, stirring frequently, until it’s fragrant and just barely turning golden at the edges. Stop before it browns significantly, which makes it bitter. The goal is softened, sweet garlic.
-
Add the spinach in large handfuls, stirring after each addition with tongs or two forks. The spinach will wilt dramatically — from a massive pile to a small amount in just 2 to 3 minutes. This is completely normal and exactly what you want.
Advertisements -
Once all the spinach is wilted and any liquid it released has mostly evaporated (tilt the pan to check), remove from heat.
-
Season with salt, pepper, and lemon juice, stirring to combine. Taste and adjust — you should taste bright lemon and savory salt alongside the garlic.
-
If desired, add ground nutmeg or grated Parmesan at this point, stirring until evenly distributed.
-
Transfer to a serving bowl and serve warm or at room temperature.
The Practicality of Simple Cooked Spinach
This is genuinely the fastest way to use a large quantity of spinach. You can multiply the recipe endlessly — a 20-person dinner needs only about 15 to 20 cups of raw spinach, which sounds like an enormous amount until you realize it cooks down to fill a single serving bowl. Make this once and you’ll find yourself doing it regularly.
Storage and Reheating
Cooked spinach keeps refrigerated in an airtight container for up to 4 days. Reheat gently over medium-low heat with a splash of water or broth, stirring occasionally, until warmed through. You can also eat it cold straight from the fridge as a component in grain bowls, salads, or on sandwiches.
Variation:
Add 4 to 6 anchovy fillets along with the garlic for a classic Italian preparation that’s deeply savory (skip the Parmesan if using anchovies). Or stir in a splash of heavy cream and some grated Parmesan to make it more of a creamed spinach side dish.
Pro tip: Make a big batch on Sunday and portion it into small containers for quick additions to weekday meals. A couple of spoonfuls adds nutrition and flavor to eggs, rice, pasta, soups, or grain bowls throughout the week.
Final Thoughts
A whole bag of fresh spinach doesn’t have to feel like an obstacle. With these eight recipes in your rotation, you can work through an enormous quantity of spinach in just a few cooking sessions, and every dish will taste genuinely good rather than like you’re forcing yourself to eat greens. Some of these recipes are entirely cooked (meaning the spinach fully breaks down), while others showcase spinach as visible pieces — this variety helps you use spinach in different ways so no single meal feels repetitive.
Start with whichever recipe sounds most appealing in the moment. If you’re in the mood for something warm and comforting, make the creamy garlic pasta or the spinach soup. If breakfast is on your mind, the frittata and the quick bread both deliver. For meal-prep purposes, the sautéed spinach side dish is your secret weapon because you can make it in enormous batches and add it to virtually anything throughout the week.
The beautiful thing about spinach is that it’s nearly impossible to overcook into complete tastelessness — it just gets softer and smaller. Use these recipes as permission to buy that big bag without hesitation, knowing you have real, tested ways to finish every last leaf.