Want to know the best part about banana muffins? They’re basically breakfast magic — golden, moist, and sweet enough to feel indulgent but wholesome enough to eat without guilt. The problem is most recipes require a parade of mixing bowls: one for dry ingredients, another for wet, then the careful fold-together while you pray you don’t overmix the batter. It’s annoying cleanup for something that should be dead simple.
Here’s what changed everything for me: one bowl, one spoon, and about five minutes of actual hands-on time. These banana maple muffins come together in a single bowl, no whisking, no separate steps, no pretending you have the patience to wash multiple mixing bowls before 7 a.m. The method is nearly foolproof because there’s nowhere to hide mistakes — and somehow, skipping all the fussy technique steps produces muffins that are actually better than the complicated versions. Softer crumb, more even rise, better flavor distribution. The simplicity isn’t a shortcut; it’s the secret.
The maple here isn’t a mild background note — it’s a genuine flavor player that somehow deepens the banana without making the muffins taste like you dumped syrup into them. Just enough to make people stop mid-bite and ask what you did differently. The one-bowl method lets the maple flavor stay bright because you’re not overworking the batter, which can muddy flavors. You’re going to make these constantly once you taste them.
Why These Muffins Are Different
Most banana muffin recipes treat the batter like it’s some delicate thing that needs protecting. They separate eggs, cream butter and sugar, fold in dry ingredients with the care of someone defusing a bomb. It’s respectful to batter science, sure, but it creates a texture that’s often too crumbly or too dense depending on which step you overthought. These muffins flip that script entirely.
By mixing everything in one bowl without any creaming stage, you’re actually preventing the overdevelopment of gluten that makes muffins tough and cottony. There’s no temptation to overmix because the mixing process is so quick and straightforward. You mash bananas, add wet ingredients, add dry ingredients, and you’re done stirring. What you get is a tender crumb with actual structural integrity — not the dense hockey puck that happens when someone gets overzealous with the mixer.
The maple syrup here serves two purposes. First, it adds moisture that keeps these muffins soft for days without any special technique or oil tricks. Second, it brings a subtle depth that makes people taste these and think they’re more complicated than they actually are. It’s not the heavy maple-heavy flavor that can taste artificial — just enough to whisper sophistication while the banana stays the star.
These muffins stay genuinely moist without becoming greasy or gummy the way oil-heavy recipes sometimes do. That’s because the bananas themselves contribute liquid, and the maple syrup has its own hygrometric properties that help the crumb stay tender. You’re not fighting structure here; you’re working with it.
The Magic of the One-Bowl Method
The one-bowl method sounds like it shouldn’t work because we’ve been taught that baking requires separation and control. Dry ingredients on one side, wet on the other, a careful fold to bring them together. That’s the formula we’ve internalized. But muffins — quick breads in general — don’t actually need that theatricality.
Here’s what’s actually happening: you’re mixing mashed bananas, eggs, and maple syrup first. These ingredients are all wet but they’re doing different things. The banana adds moisture and flavor. The egg adds binding power and structure without needing to be creamed. The maple adds sweetness and moisture. Together, they make a cohesive wet base that’s completely different from just dumping everything together.
Then you stir in your flour, baking powder, salt, and spices directly into that mixture. The wet ingredients coat the flour particles immediately, which means the flour hydrates evenly and you get less of the lumpy consistency that happens when dry ingredients are mixed separately. Because you’re stirring by hand and not using a mixer, you naturally stop when the batter just comes together. You’re not tempted to overmix because the mixing is done.
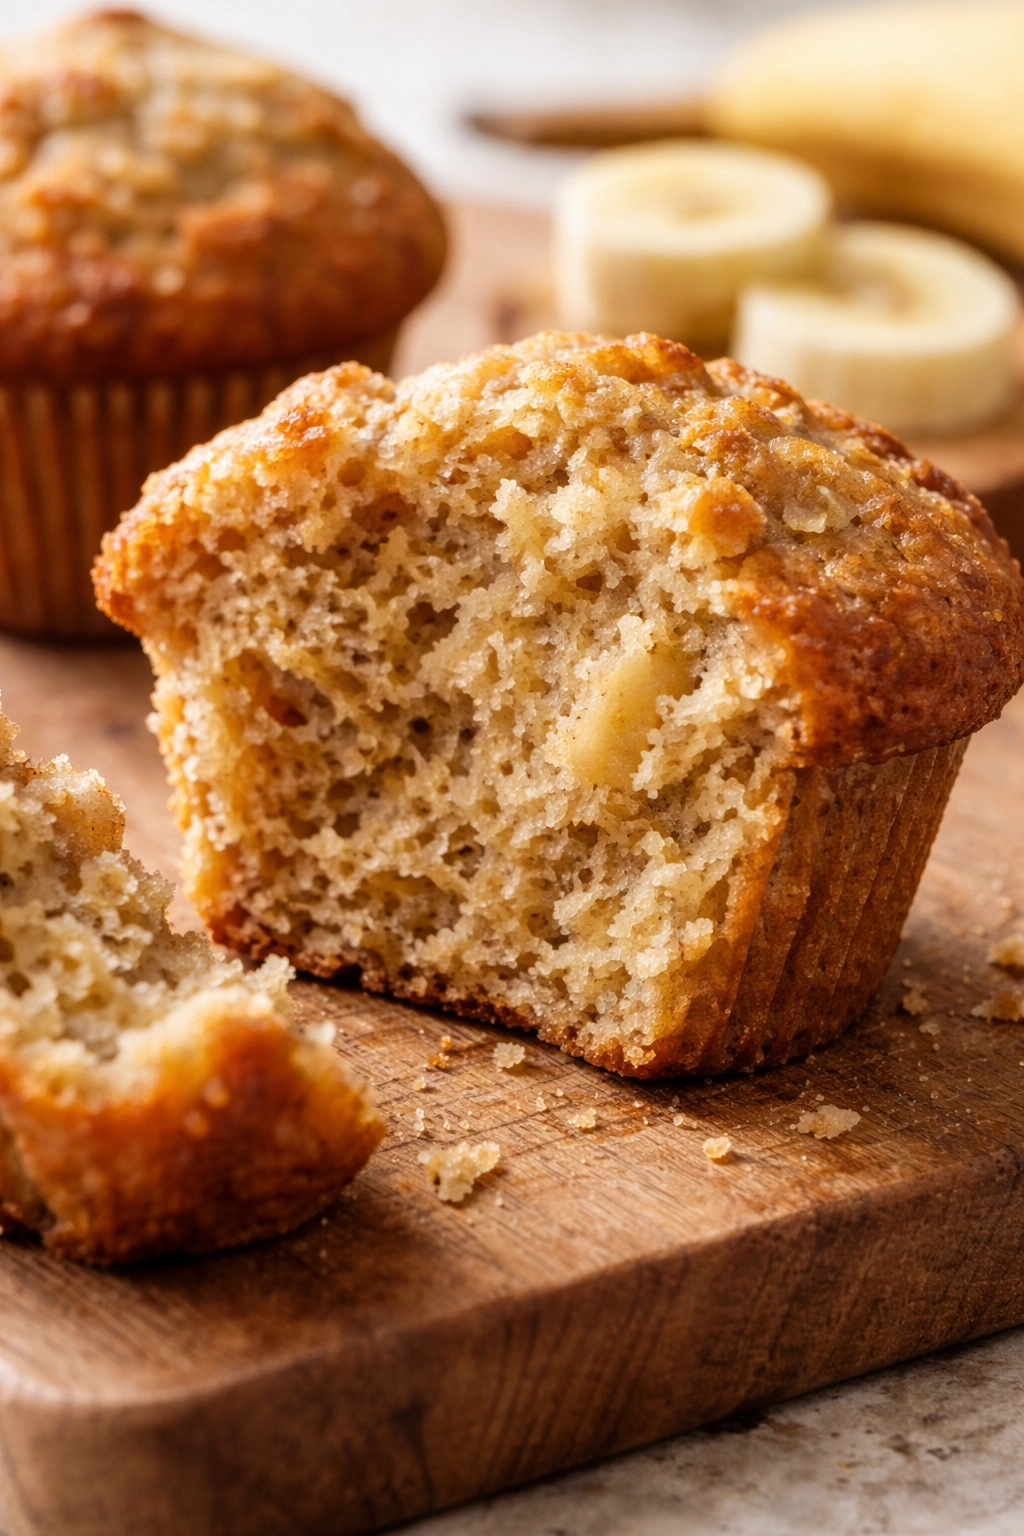
The actual muffins bake up with a delicate, tender crumb that’s almost buttery even though there’s no butter (well, technically there is in most of these, but not nearly as much as traditional recipes). They rise evenly in the pan, develop a gentle golden crust on top, and smell like the best breakfast decision you’ve ever made.
This method also means you can make the batter in literally any bowl you have — a large measuring cup, a cereal bowl, a baking pan lined with parchment if you’re desperate. You don’t need fancy equipment. You don’t need to plan. That’s the actual magic.
How to Choose the Right Bananas
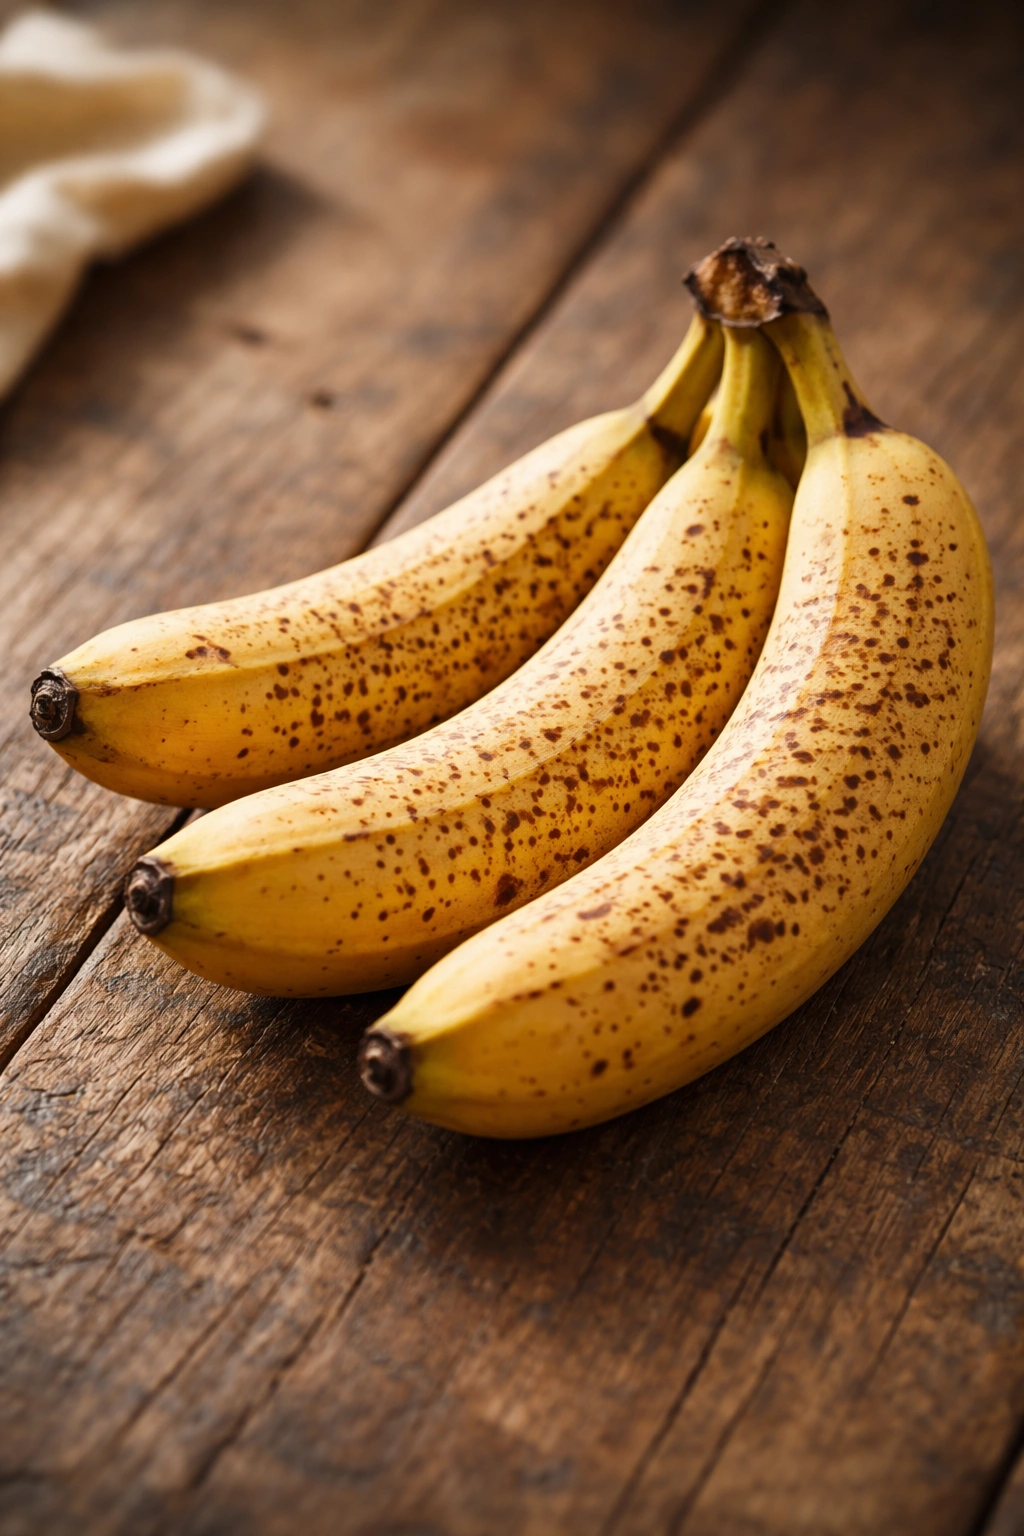
The banana is the entire foundation here, so this matters more than you might think. You’re looking for bananas that are very ripe — spotted, soft enough that they yield to gentle pressure, almost to the point where you’d normally feel bad leaving them in the fruit bowl. Those brown freckles aren’t a sign of decline; they’re a signal that the starches have converted to sugar and the banana will mash into a smooth, sweet base.
If your bananas are still mostly yellow, they’re not yet ready. They’ll make the muffins dry and less flavorful because under-ripe bananas are starchier and less sweet. You can absolutely let them sit on the counter for a few days while you wait for them to develop those freckles. Actually, plan ahead: bananas ripen fastest in a paper bag on your counter, away from the fridge. They should soften and develop their spots within 3-5 days.
Overripe bananas — the ones that are almost entirely brown with a few yellow patches — are actually perfect. I know that sounds wrong, but they’re sweeter and will mash more easily. The only issue is if they’ve started to split open or actively ferment, which you’d smell immediately.
Use three medium bananas, roughly seven to eight ounces each, peeled and mashed with a fork. Don’t aim for perfectly smooth — chunky banana mash is fine and actually creates nice flavor pockets in the baked muffins. If you mash them too aggressively, you’re not gaining anything. A few small lumps are genuinely better than a completely uniform paste.
If you’re using frozen bananas (which is totally reasonable), thaw them completely and drain off any excess liquid before mashing. Frozen bananas release more water when they thaw, and you don’t want soggy batter.
The Secret to Moist, Fluffy Texture
Moisture in a muffin is a balancing act. Too little and they’re dry and crumbly. Too much and they collapse in the middle and stay gummy. These muffins walk that line perfectly through three specific decisions.
First, mashed bananas contribute significant moisture without being liquid the way melted butter or oil would be. Bananas are about 75 percent water, but that water is bound up in the fruit structure, so it releases into the batter gradually during mixing and baking. This is different from just adding liquid; the banana particles actually hydrate the flour and create a more stable crumb structure.
Second, the maple syrup adds both sweetness and moisture, but it also has a slightly thicker consistency than water or regular sugar syrups. This means it hydrates the flour more slowly and evenly, which helps prevent the dense, gummy center that happens when too much liquid gets absorbed in one spot. The maple also contains compounds that help the crumb stay tender even after the muffins cool.
Third, we’re using a small amount of melted butter or oil combined with a leavening technique that’s aggressive enough to create steam quickly. Baking powder creates immediate lift in the oven, which means the muffins rise fast and set their structure before they can compress from the weight of moisture. A muffin that rises fast is a muffin with open, light crumb.
The specific flour matters here too, though most all-purpose flours work. If you use cake flour, your muffins will be even softer and more tender — but they might not rise quite as high. If you use bread flour, they’ll be sturdier but slightly tougher. All-purpose is the Goldilocks choice because it has just enough protein to create structure without being so sturdy that you get a dense crumb.
Yield: Makes 12 standard muffins | Prep Time: 15 minutes | Cook Time: 22-25 minutes | Total Time: 40 minutes | Difficulty: Beginner — no special equipment required, just a bowl and a spoon. The recipe practically makes itself.
For the Muffins:
- 3 medium ripe bananas (about 1¼ cups mashed, with some small lumps is fine)
- ½ cup pure maple syrup (not pancake syrup, which is thinner and mostly corn syrup)
- 1 large egg
- ⅓ cup vegetable oil or melted unsalted butter, cooled slightly
- 1 teaspoon pure vanilla extract
- 1¾ cups all-purpose flour
- 1½ teaspoons baking powder
- ½ teaspoon baking soda
- ½ teaspoon fine sea salt
- ½ teaspoon ground cinnamon (optional, but recommended)
- ¼ teaspoon freshly grated nutmeg (optional)
For the Optional Topping:
- 2 tablespoons coarse sugar or regular granulated sugar
- ¼ teaspoon fleur de sel or flake salt (if using coarse sugar, skip the salt)
Step-by-Step Instructions
Prepare Your Pan and Preheat:
-
Preheat your oven to 375°F (190°C) and position the rack in the center of the oven.
-
Line a 12-cup standard muffin tin with paper liners, or grease the cups lightly with neutral oil or cooking spray. If you’re using paper liners, this also helps you remove the muffins more easily while they’re still slightly warm — they’re infinitely more delicious that way.
Make the Batter in One Bowl:
-
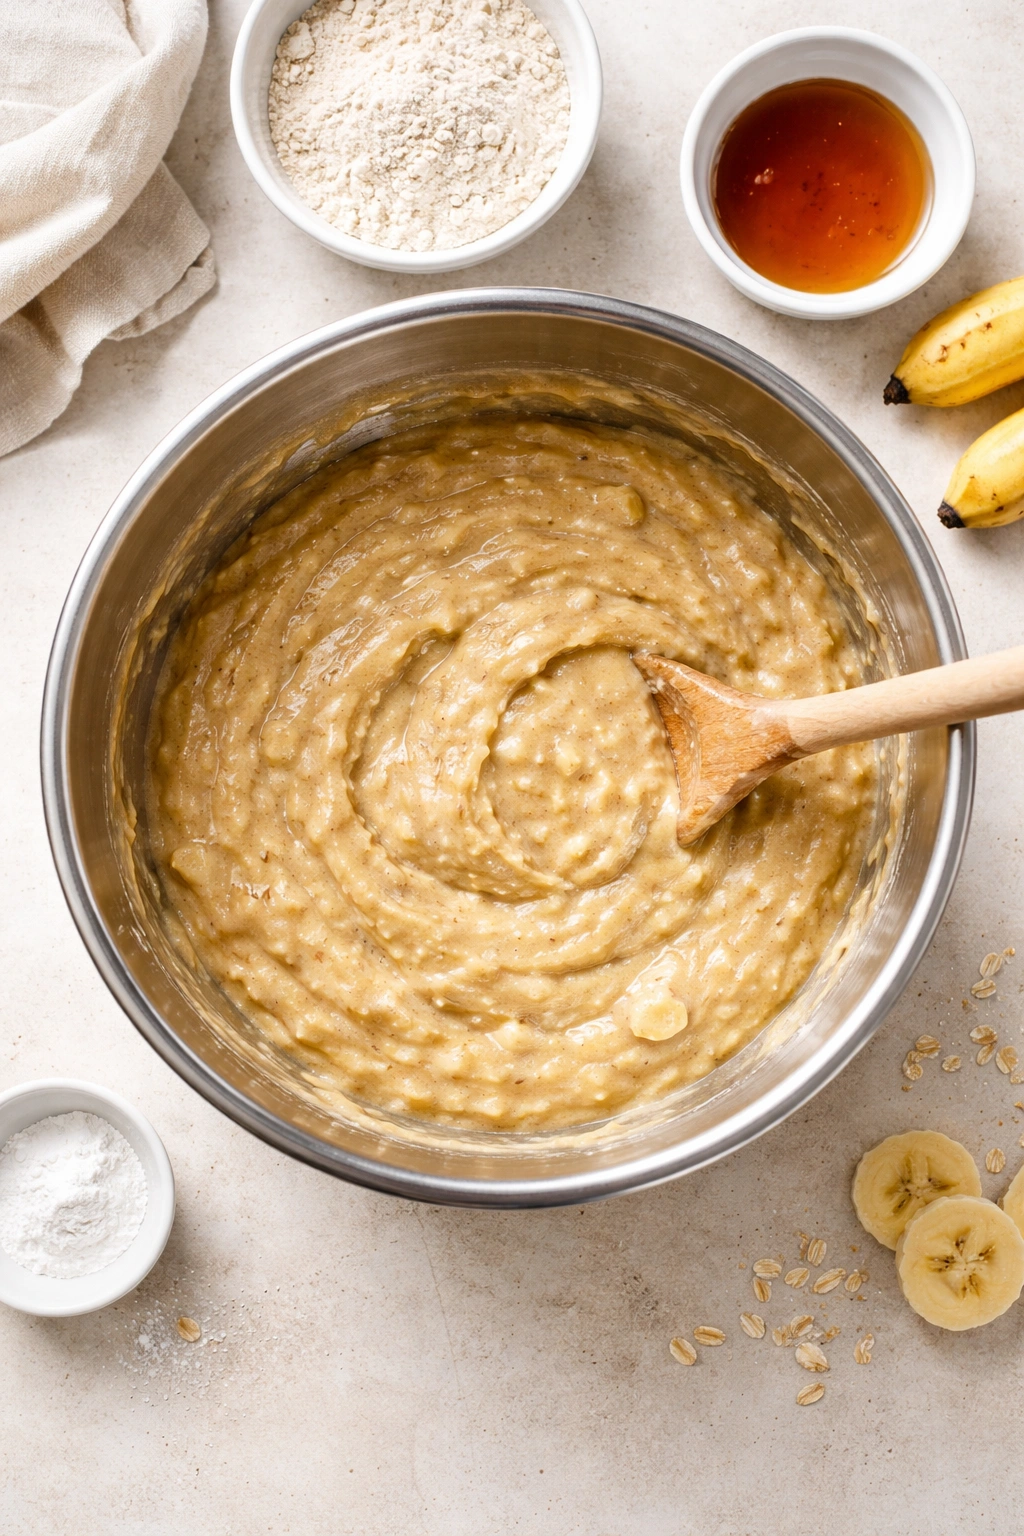
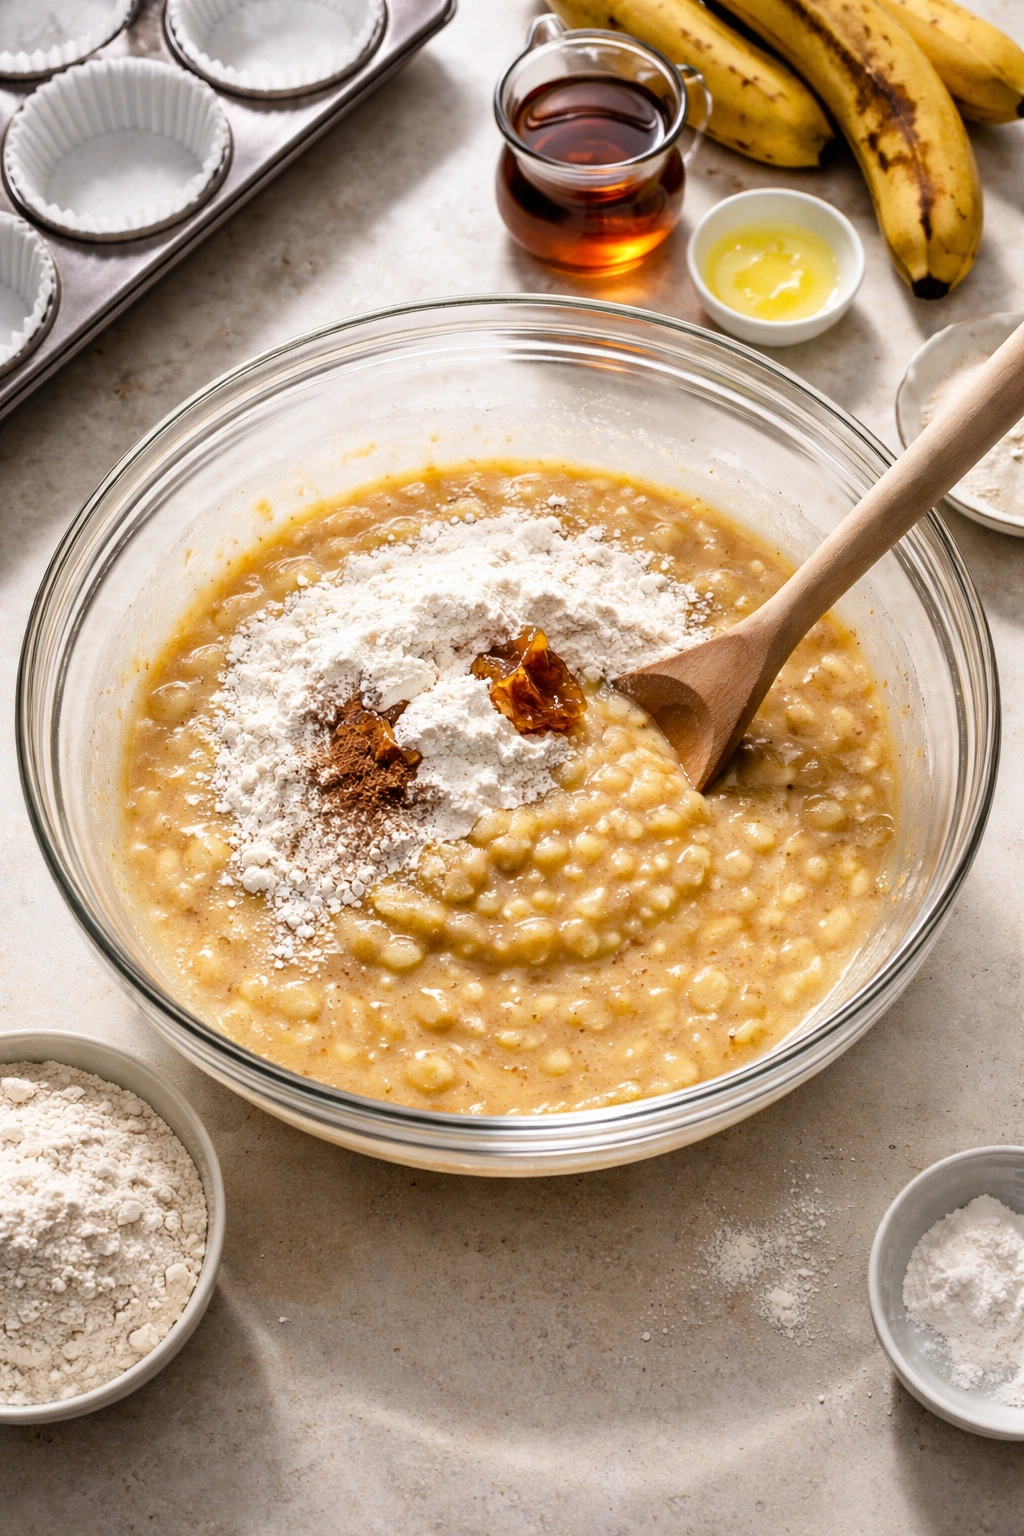
In a large mixing bowl (any size bowl that fits your mixing spoon comfortably — this doesn’t require fancy equipment), add the 3 mashed bananas. Use a fork to break them down into small pieces, but don’t aim for a completely smooth consistency. A few small lumps are perfect and will add nice texture to the baked muffins.
Advertisements -
Add the maple syrup, egg, cooled melted oil or butter, and vanilla extract directly to the mashed bananas. Stir with a spoon until everything is well combined — the mixture should look creamy and slightly thick, not watery. This should take about 30 seconds of stirring.
-
In the same bowl, add the flour, baking powder, baking soda, salt, cinnamon, and nutmeg directly on top of the wet mixture. Do not stir yet. Let the dry ingredients sit on top of the wet ingredients for about 10 seconds — this is the most important step for preventing overmixing.
-
Now stir with a spoon, scraping the bottom of the bowl, until the flour just disappears into the batter. You should see no streaks of dry flour, but you should stop as soon as the flour is incorporated. The batter will look chunky and slightly rough — this is exactly right. Do not overmix. Overmixing develops gluten and creates tough, dense muffins. The entire mixing process should take 45 seconds maximum.
Fill the Pan:
-
Divide the batter evenly among the 12 prepared muffin cups, filling each about three-quarters full. I use an ice cream scoop (a 2-tablespoon scoop works perfectly) to keep the portions consistent, which helps the muffins bake evenly. Each cup should have a slightly domed mound of batter.
-
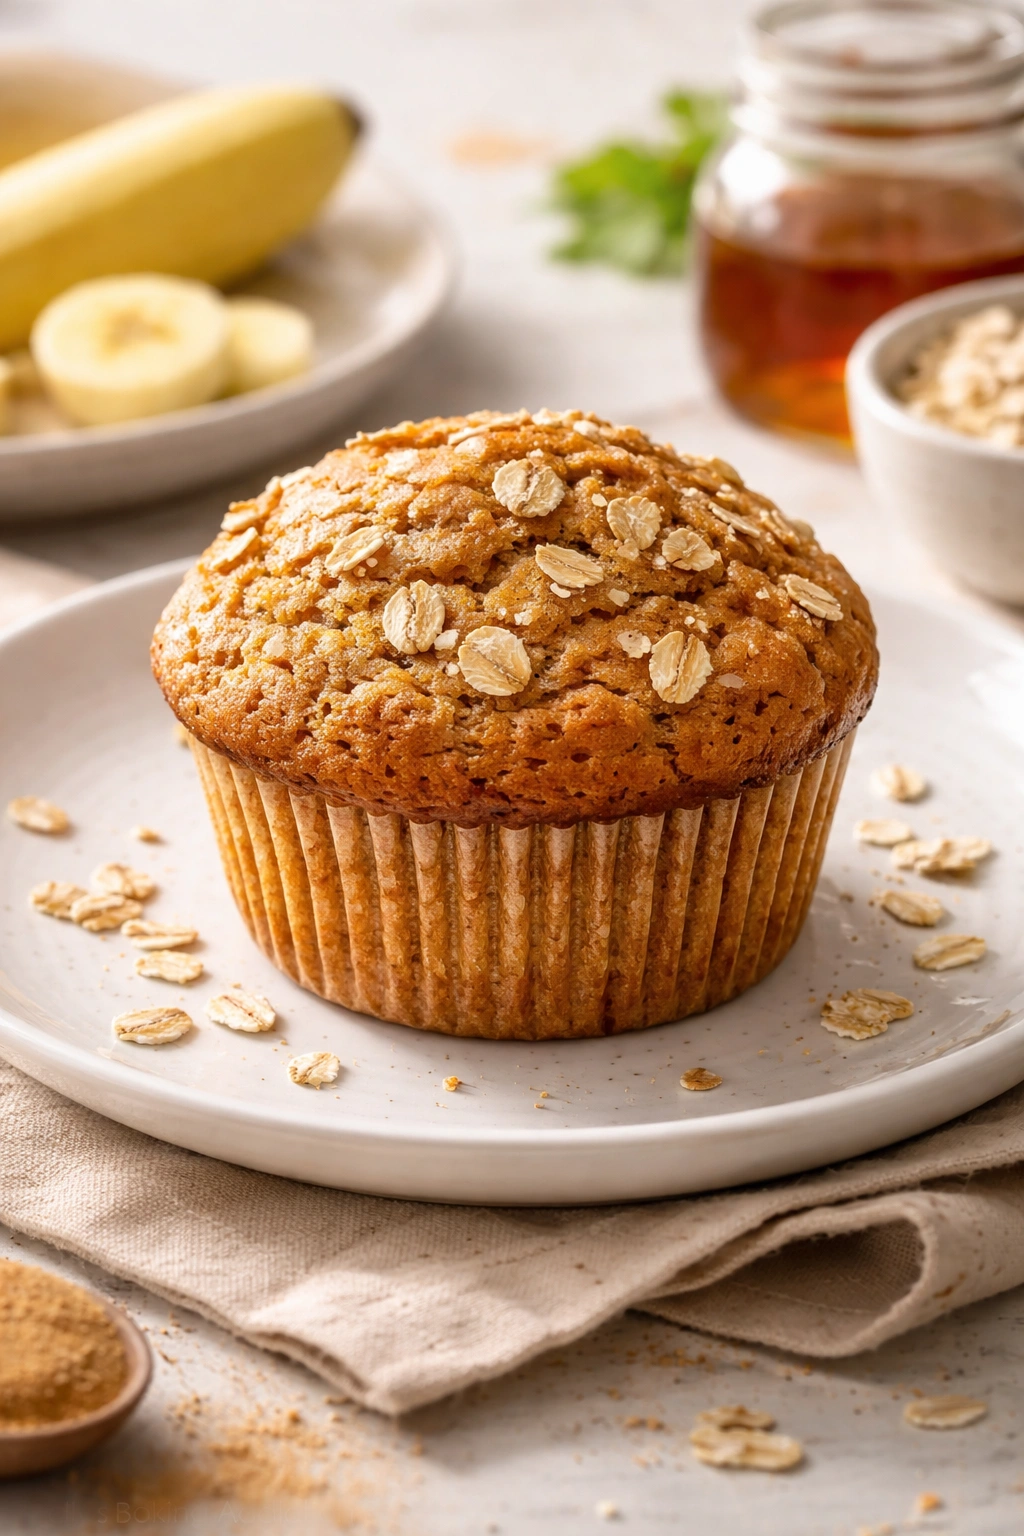
If you’re using the optional topping, sprinkle a pinch of coarse sugar (and a tiny pinch of salt if using plain sugar) over each muffin cup immediately after filling, while the batter is still exposed.
Bake:
-
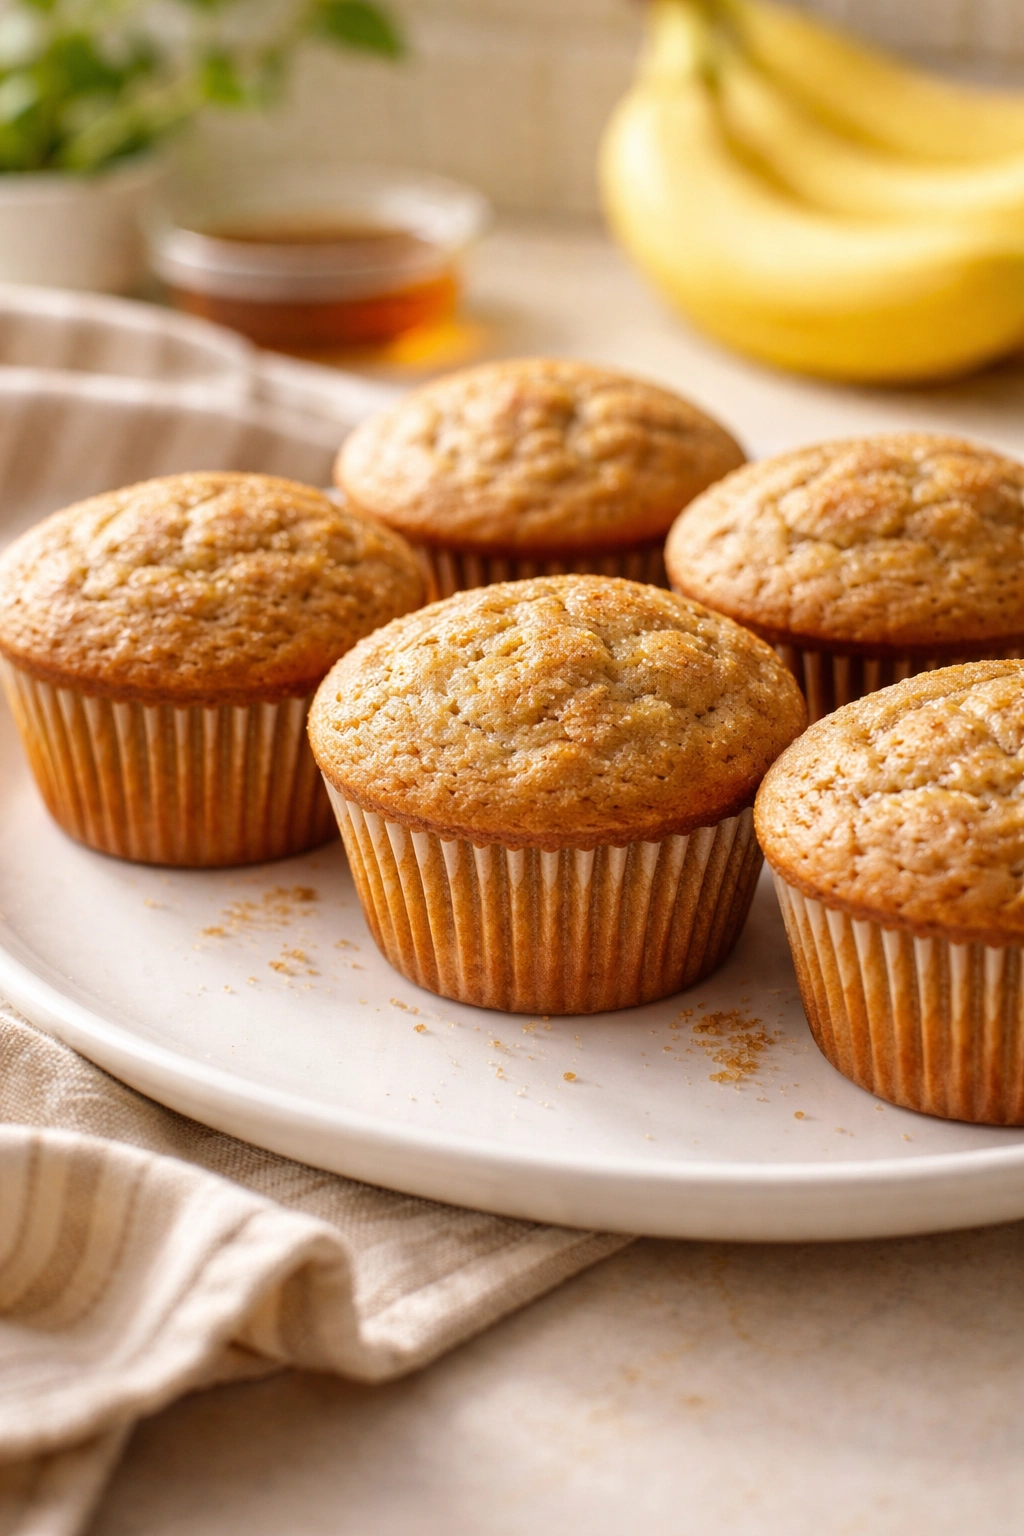
Bake for 22 to 25 minutes, until the muffin tops are golden brown and a toothpick inserted into the center of one of the middle muffins comes out clean or with just one or two moist crumbs clinging to it. The muffins will look done before they actually are — watch for golden brown color as your signal, not just the rise. They should feel gently firm when you press the top of one with your finger.
-
Remove the muffin tin from the oven and let the muffins cool in the pan for exactly 5 minutes. This is crucial: it gives them time to firm up just enough to remove cleanly, but they’re still warm enough that they taste best and the paper liners peel away easily. After 5 minutes, turn them out onto a wire cooling rack.
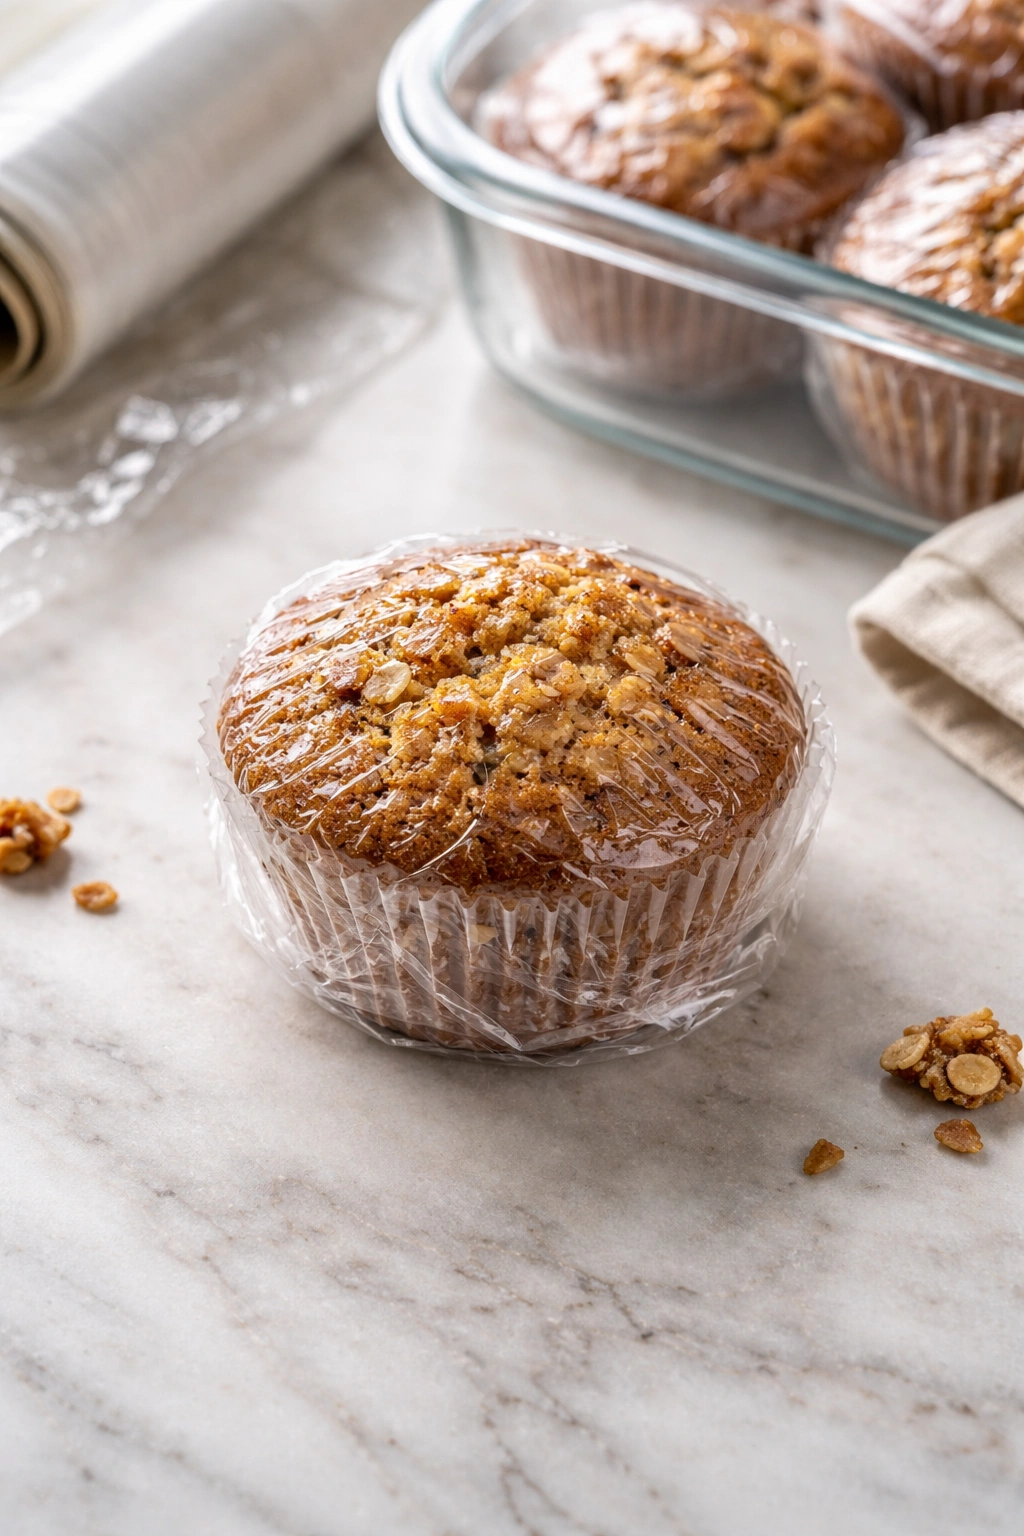
-
The muffins are best eaten while still warm or at room temperature, preferably the same day they’re baked — but they stay delicious for up to 3 days in an airtight container at room temperature.
Advertisements
Tips for Perfect Muffins Every Time
Temperature matters more than most home bakers realize. If your egg is cold from the fridge, it can seize up the melted butter or oil and create a slightly separated, less cohesive batter. The fix is simple: let your egg sit on the counter for 15 minutes, or place it in a bowl of warm water for a few minutes. Same with the melted butter or oil — it should be cooled to lukewarm before mixing with the egg and banana. If it’s piping hot, it can actually cook the egg partially, which is a disaster for texture.
Don’t underestimate the power of that 10-second pause after adding dry ingredients. This tiny moment lets the flour begin to hydrate slowly and evenly, which means you need less stirring to combine everything. You’re fighting physics if you skip this step — you’ll need to stir more aggressively to fully incorporate the flour, which develops gluten and makes tougher muffins.
The baking soda is there because maple syrup is slightly acidic, and baking soda reacts with that acid to create additional lift in the oven. If you were using just baking powder, you’d get decent rise, but adding baking soda bumps it up and creates muffins with a more open, fluffy crumb. Don’t skip it.
Fill any empty muffin cups halfway with water before baking. This keeps the tin heating evenly and helps the muffins on the edges bake at the same rate as the ones in the center. It’s a small thing, but uneven heating creates muffins that are overdone on the edges and underdone in the middle.
If you don’t have a muffin tin, you can bake these in a loaf pan instead — just extend the baking time to 35-40 minutes and check with a toothpick starting around minute 30. It won’t be as pretty as individual muffins, but it tastes identical and slices cleanly if you let it cool completely first.
Why Your Muffins Might Be Dense
A dense muffin is almost always one of three problems, and knowing which one you have means you can fix it next time.
The first suspect is overmixing. If you stirred the batter after adding the flour and kept going past the point where you could see dry flour, you’ve developed the gluten in the flour too much. Gluten is a network of proteins that provides structure, which is great for bread but works against you in muffins. When you overwork it, the crumb becomes tight and compact instead of light and fluffy. The fix is obvious — stir less. Stop mixing the exact moment you see no streaks of flour.
The second problem is underripe bananas. If your bananas were still mostly yellow, they’re higher in starch and lower in sugar. Starch doesn’t dissolve into the batter the way sugar does; it creates a denser structure. You also probably added extra flour trying to compensate because the batter seemed too wet. Always use very ripe, spotted bananas. This is non-negotiable if you want light muffins.
The third issue is moisture imbalance. If you mashed your bananas and they released a lot of liquid, you might have accidentally added too much moisture to the batter. The fix is to drain the excess banana juice that pools at the bottom of your mashing bowl before mixing. Alternatively, if you used frozen bananas that released water when they thawed, pour off that liquid. You want mashed banana, not banana juice and pulp.
A fourth possibility, less common but worth mentioning: your oven temperature might be running cool. If the muffins didn’t brown much and the bake time ran long, your oven might not be reaching 375°F even though the dial says it is. Use an oven thermometer (they cost $10 and are genuinely useful) to verify. A cool oven means slower rise, which means the muffins have time to compress before they set their structure.
Sweet Variations and Flavor Twists
These muffins are delicious as written, but they’re also endlessly customizable depending on what you have in your kitchen and what mood you’re in.
Brown butter version: Brown your butter before cooling it and adding it to the batter. Browning butter creates nutty, caramelized notes that make these muffins taste sophisticated without changing a single other ingredient. Let the browned butter cool completely — about the time it takes you to measure the other wet ingredients — before adding it to the bowl.
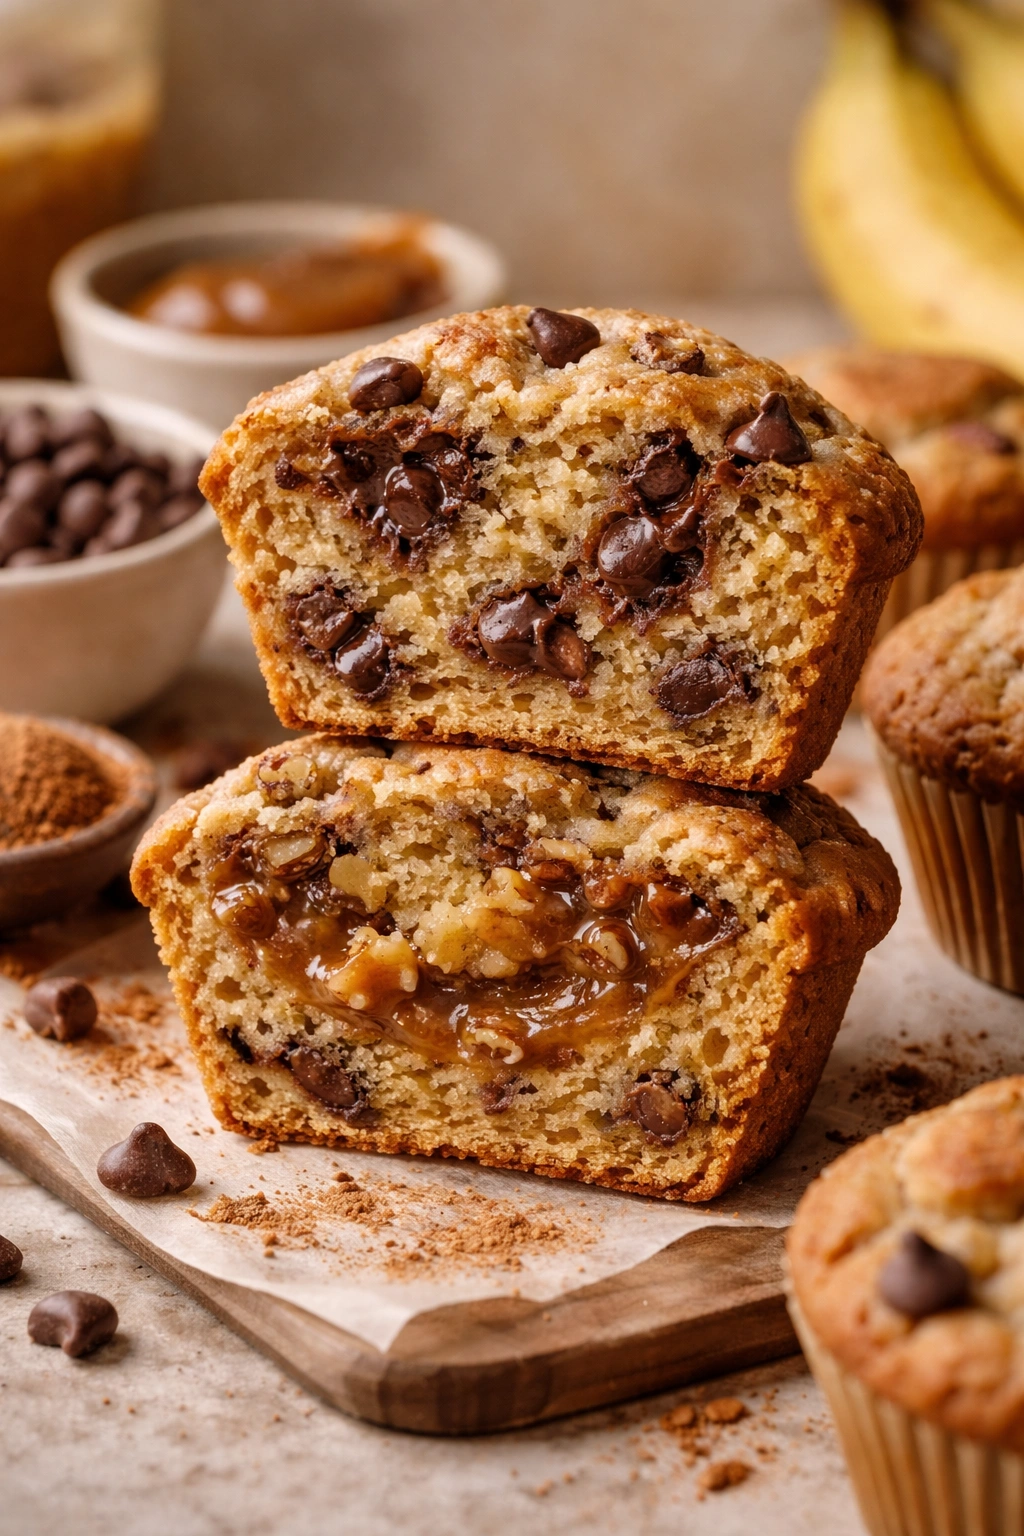
Chocolate chip muffins: Fold ¾ cup of semi-sweet or dark chocolate chips into the finished batter just before filling the muffin cups. The chocolate adds richness without overpowering the banana-maple flavor. Try it with dark chocolate if you want a less sweet result.
Bourbon maple version: Replace ¼ cup of the maple syrup with ¼ cup pure bourbon whiskey. This creates deeper, more complex flavor that’s genuinely sophisticated. The alcohol cooks off entirely during baking, but the flavor remains. This version is definitely an adult treat.
Spiced ginger muffins: Add 1 tablespoon of fresh grated ginger and increase the cinnamon to 1 teaspoon, plus add ¼ teaspoon of ground ginger. The fresh ginger adds brightness that plays beautifully off the maple and banana.
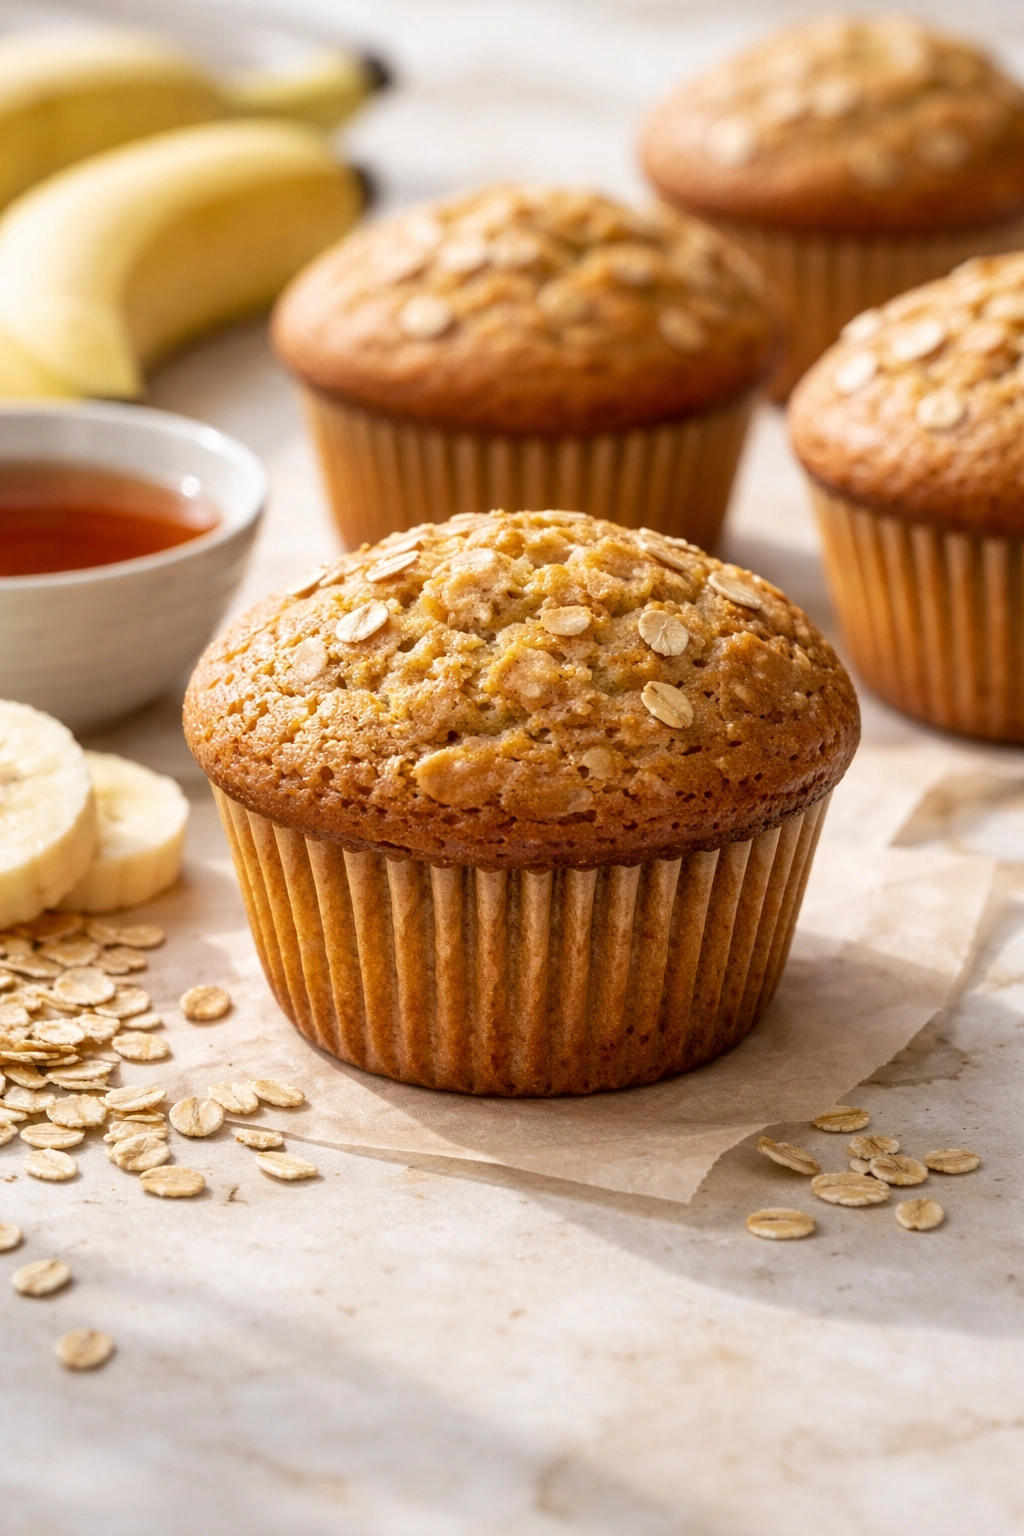
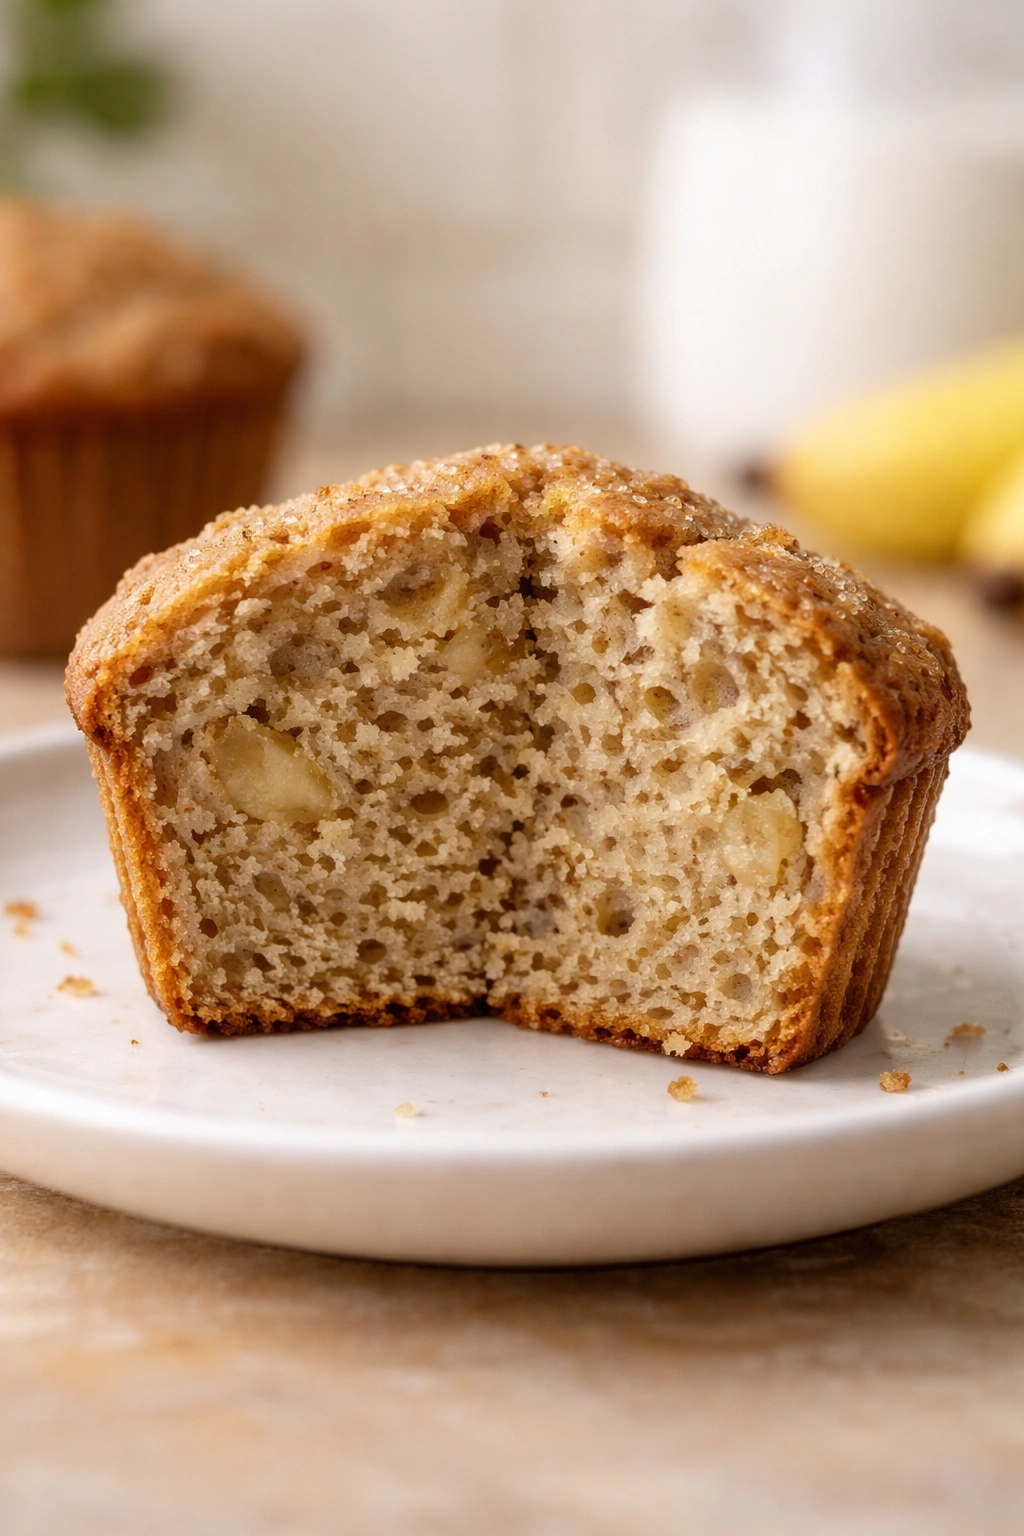
Banana walnut version: Fold ¾ cup of chopped toasted walnuts into the finished batter. Toast the walnuts in a dry pan over medium heat for 3-4 minutes first — this brings out their flavor and makes them less bland. Pecans work beautifully here too.
Healthier grain swaps: You can replace up to ½ cup of the all-purpose flour with whole wheat flour or spelt flour without majorly affecting the texture, though the muffins will be slightly denser and more “wholesome” tasting. Oat flour doesn’t work as well as a 1:1 swap because it’s thirsty and will create dry muffins — if you want to use oat flour, replace only ¼ cup of the all-purpose flour and add 1 extra tablespoon of maple syrup.
Gluten-free version: Use a quality gluten-free all-purpose flour blend that includes xanthan gum (or add ¼ teaspoon of xanthan gum to regular gluten-free flour). The texture will be nearly identical to the wheat version as long as you don’t substitute with something terrible. Bob’s Red Mill and King Arthur Baking Company both make excellent gluten-free blends that work beautifully here.
Vegan version: Replace the egg with either ¼ cup of unsweetened applesauce or 1 flax egg (1 tablespoon ground flaxseed mixed with 3 tablespoons water, let sit 5 minutes). Use vegetable oil instead of butter. Everything else stays the same. The texture will be nearly identical.
Healthier Ingredient Swaps
If you’re looking to tweak these muffins to fit specific dietary goals, here’s exactly how to do it without sacrificing flavor or texture.
Lower sugar: You can reduce the maple syrup to ⅜ cup without noticing a huge difference in sweetness — the bananas provide plenty of natural sugar. Don’t go lower than that or the texture will suffer because you’re removing moisture that the syrup provides. If you want it sweeter, the optional sugar topping gives you extra sweetness without changing the crumb.
Higher protein: Add 2 tablespoons of unsweetened protein powder (vanilla or unflavored works best) and reduce the flour to 1½ cups. This adds protein without making the muffins taste chalky or weird. It also helps them stay tender longer because protein helps hold onto moisture.
Whole grain version: Replace ½ cup of the all-purpose flour with whole wheat flour. The muffins will be slightly more substantial and nuttier tasting, which actually works great with the maple and banana. Don’t go higher than ½ cup whole wheat or the texture gets dense.
Oil reduction: You can use as little as ¼ cup of oil without sacrificing moistness too much — the bananas and maple syrup carry a lot of the moisture load. Less oil means a slightly less tender crumb, but still delicious.
Dairy-free: Butter is the only dairy in this recipe, and you can simply use any neutral oil (vegetable, canola, or coconut oil all work). The muffins will taste almost identical.
How to Store and Freeze Your Muffins
These muffins stay fresh at room temperature in an airtight container for up to 3 days. The crumb actually stays moister on day 2 and 3 than it is the very first day, which is unusual but delightful. Something about how the maple syrup redistributes overnight keeps them from drying out.
If you want them to last longer, freeze them. Let the muffins cool completely first, then wrap each one individually in plastic wrap or place them in a freezer bag with as much air pressed out as possible. They’ll keep frozen for up to 3 months. Thaw at room temperature for about 1 hour, or pop a frozen muffin into the microwave for 30 seconds (unwrapped) for instant breakfast.
For make-ahead convenience, you can prepare the batter up to 24 hours in advance and store it in the fridge in an airtight container. When you’re ready to bake, the batter might be slightly stiffer because the flour continues to absorb moisture, so add 1-2 tablespoons of milk to loosen it back to the right consistency before filling the pans. The baking time stays the same.
You can also freeze the batter itself in an ice cream scoop-sized portion on a baking sheet, then transfer the frozen portions to a freezer bag. Bake directly from frozen, adding 3-5 minutes to the baking time. This is genuinely convenient if you want fresh muffins multiple times a week without mixing every time.
Best Ways to Serve and Enjoy Them
These muffins are perfect eaten plain and still warm, which is honestly the best way to experience them. The crumb is tender, the banana-maple flavor is bright and real, and there’s nothing competing for attention.
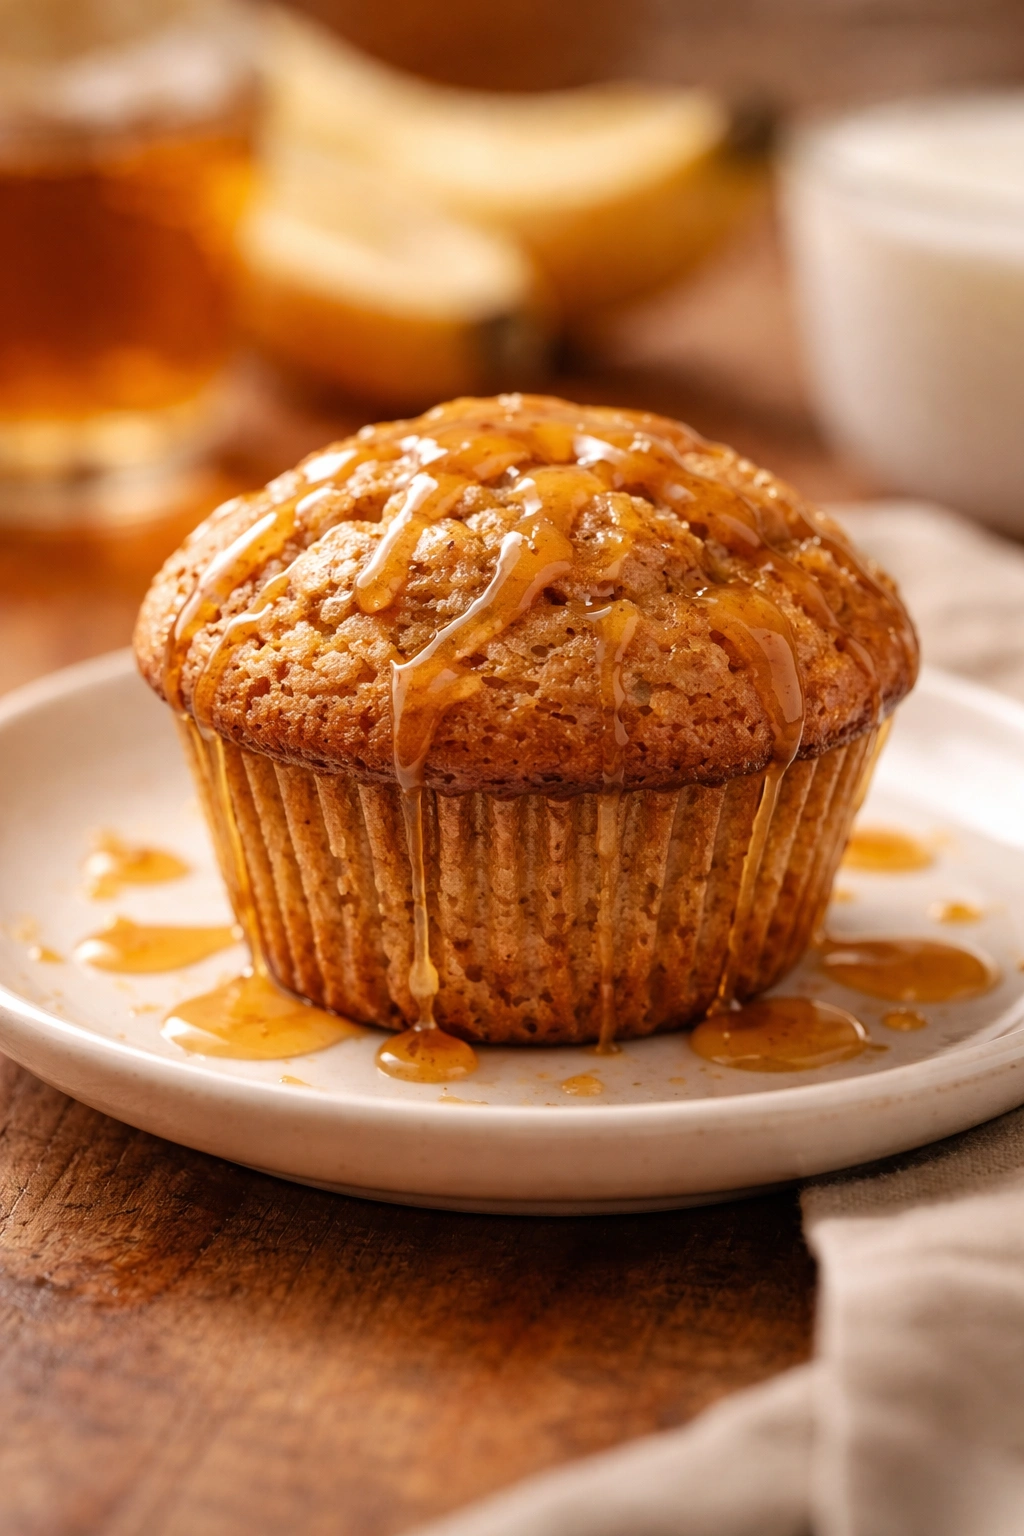
If you want to dress them up slightly, slice them horizontally and spread them with softened cream cheese or a smear of butter while they’re still warm. The butter melts into the warm crumb and adds richness that’s genuinely luxurious. A tiny drizzle of additional maple syrup over the top is not excessive — it’s called knowing yourself.
They pair beautifully with strong morning coffee or tea. The slight acidity of coffee actually brightens the banana flavor, and the warmth of the beverage makes the muffin taste even better. If you’re serving them to guests at brunch, have good butter available; everyone’s going to want it.
For a more substantial breakfast, serve these alongside Greek yogurt or cottage cheese and fresh berries. The tartness of the yogurt balances the sweetness of the muffin perfectly, and the contrast is genuinely delicious.
These also work as a snack or dessert. Pair them with a glass of cold milk or a cup of tea in the afternoon. They’re not overly sweet like a cupcake, so they don’t create that sugar crash feeling. They’re the kind of thing you can eat without guilt and then think about the rest of the day.
Troubleshooting Your Muffins
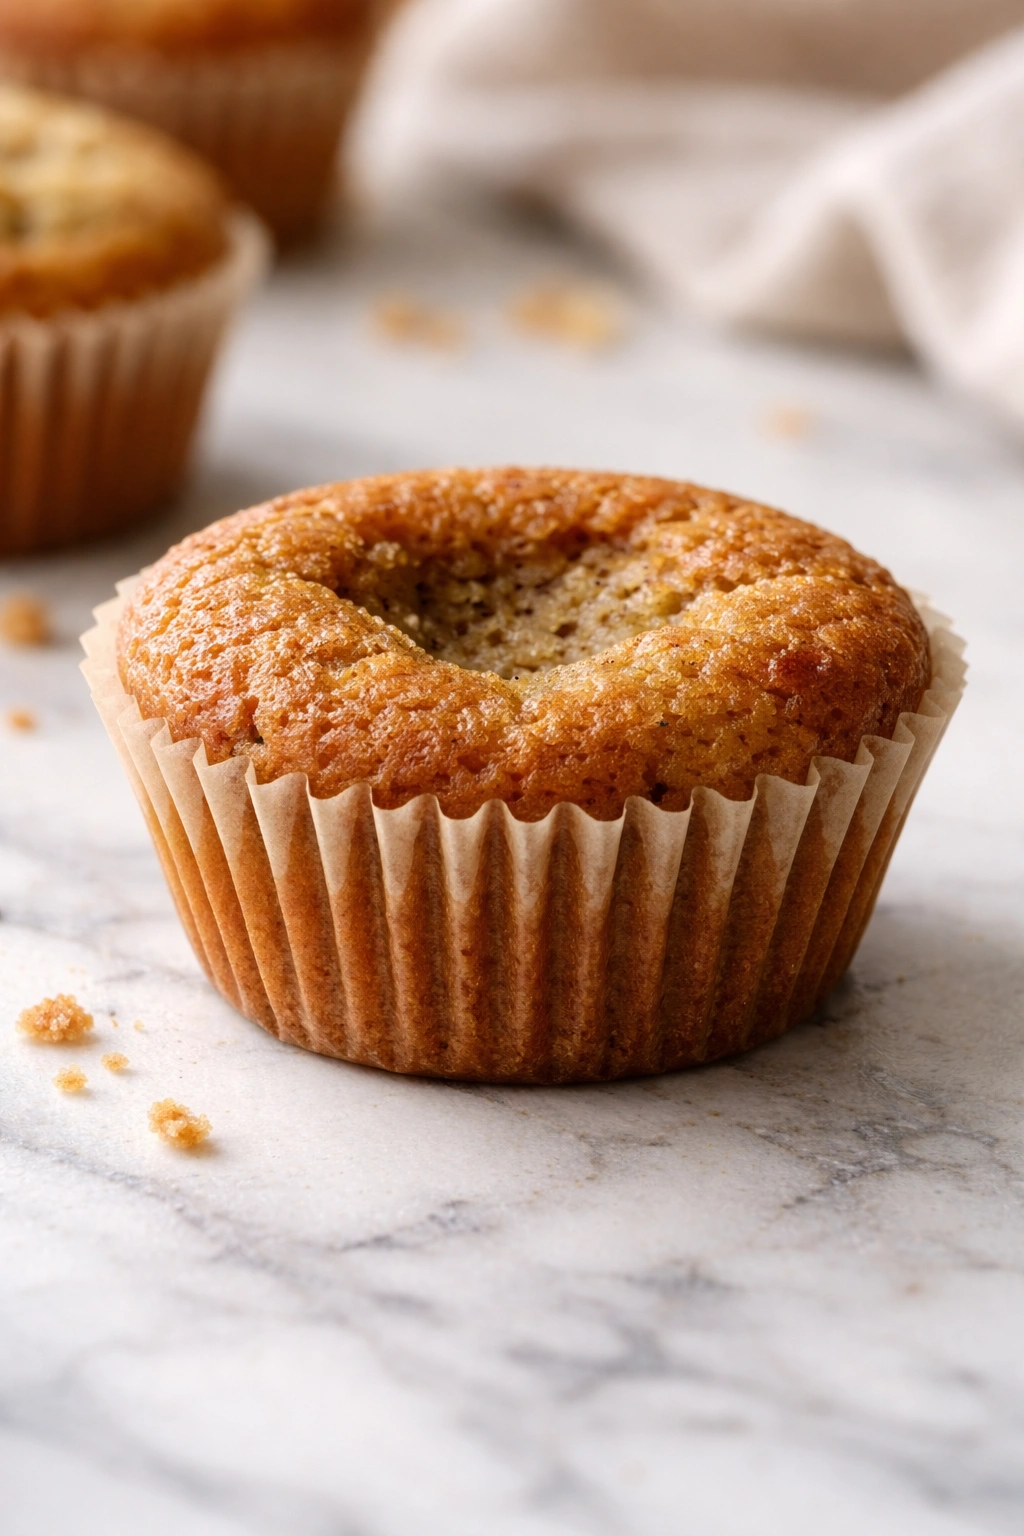
Domed tops that cave in as they cool: This happens when the tops rise too quickly and then the structure collapses. Your oven is probably running hot (verify with an oven thermometer), or you’re using too much baking powder. Try reducing the baking powder to 1¼ teaspoons and baking at 375°F. You can also try lowering the rack position slightly so the muffin bottoms bake faster and set the structure before the tops dome.
Muffins stuck in the tin: This usually happens when you let them sit too long before removing them. Take them out after exactly 5 minutes while they’re still slightly warm — they’ll release cleanly. If you forgot and they’re now completely cool and stuck, warm the tin in a 300°F oven for 3-4 minutes, then run a thin knife around the edge and try again.
Tunneling (big holes running through the muffin): Tunneling happens from overmixing, but it also happens when you have too much baking soda reacting with acidic ingredients and creating bubbles that aren’t small and evenly distributed. Check that you’re not adding extra baking soda beyond what the recipe calls for. Also make sure you’re not stirring the batter excessively after adding the flour.
Muffins are gummy in the center: This is almost always moisture imbalance. Check that your bananas weren’t releasing excess liquid that you didn’t drain off. Also verify that you’re baking at 375°F and that your oven is actually reaching that temperature. A cooler oven means slower baking and a gummy center because the muffins don’t set fast enough.
Muffins are crumbly and dry: You either used underripe bananas (which are starchier and less moist), or you forgot the oil or butter, or both. Check that you measured both components correctly. Also make sure your bananas were actually very ripe and soft. Going forward, use bananas with plenty of brown spots.
They taste a bit bitter or weird: This usually means one of two things. The first is that your baking soda wasn’t fresh — baking soda loses potency over time, so if your container is years old, buy a fresh box. The second is that you used pancake syrup instead of pure maple syrup — pancake syrup is mostly corn syrup with maple flavoring and it tastes noticeably different and less pleasant when baked into muffins.
Muffins are too sweet: You can reduce the maple syrup to ⅜ cup next time without major texture changes. Or swap ¼ cup of the maple syrup for an additional ¼ cup of oil or melted butter — you’ll keep the moisture and lose some sweetness. The optional sugar topping is also completely optional.
Final Thoughts

These banana maple muffins are genuinely the easiest good muffins you’ll ever make. There’s no learning curve, no special technique, no stress. You dump everything in one bowl, stir briefly, fill a muffin tin, and 25 minutes later you have breakfast that tastes like you care.
The one-bowl method isn’t a shortcut in the traditional sense — it’s not like you’re losing quality for convenience. You actually get better muffins because you’re not overmixing and because the method is so straightforward that it’s nearly impossible to mess up. The banana stays bright, the maple comes through clearly, and the texture is tender without being crumbly. These are muffins that people ask for the recipe for, and then they’re shocked at how simple it is.
Make these when you have ripe bananas sitting on your counter. Make them on Sunday for the week ahead. Make them for brunch or as a grab-and-go breakfast. Make them for friends and let them be charmed by how good something so simple can be. They freeze beautifully, they taste better the next day, and they require nothing from you except a bowl, a spoon, and 15 minutes of actual attention. That’s the whole deal.