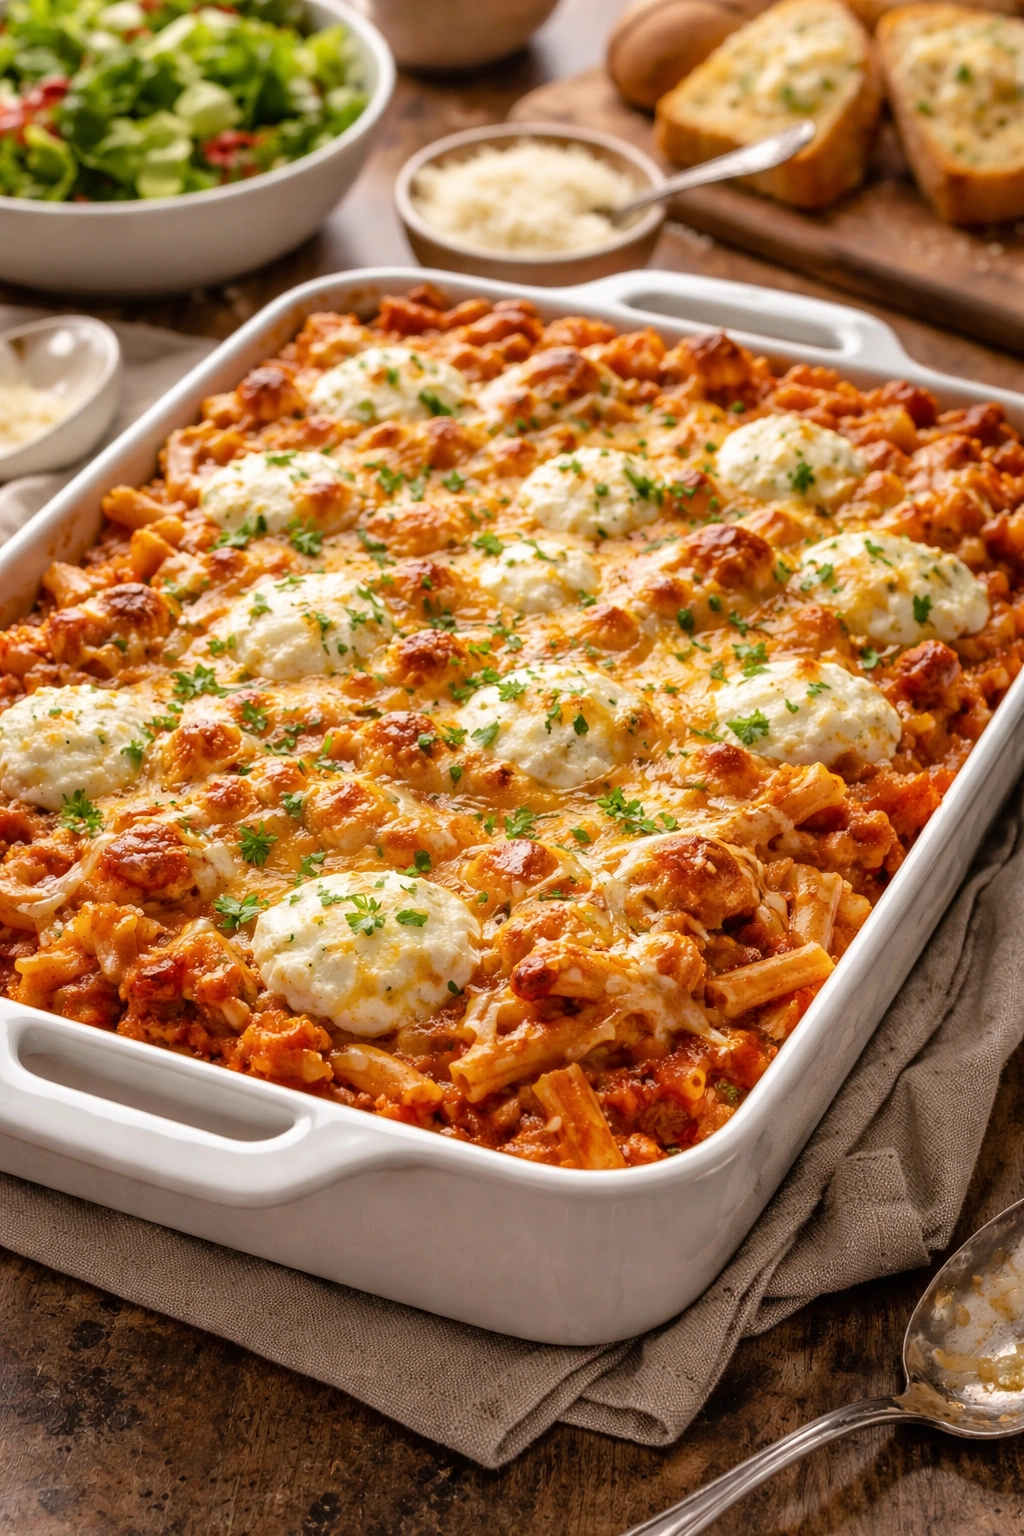
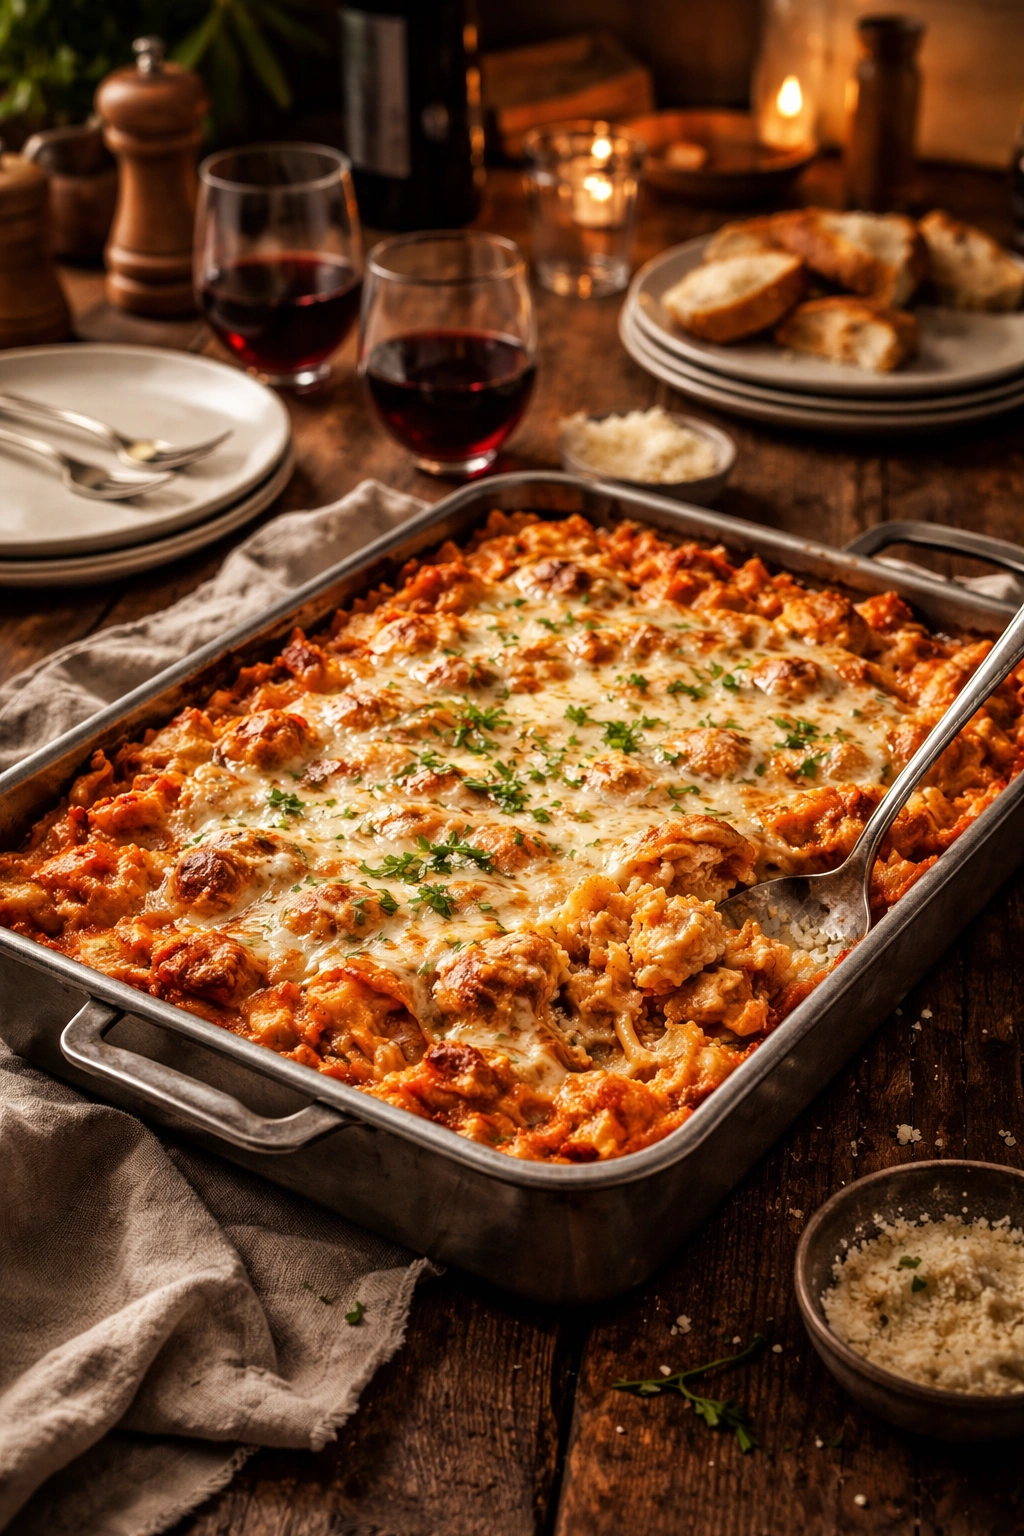
Baked Ziti With Ricotta That Feeds a Crowd
If you’re looking for a single dish that practically guarantees a room full of satisfied, contented guests, baked ziti with ricotta is your answer. This isn’t fancy restaurant food that requires hours of labor or obscure ingredients. It’s the kind of honest, hearty Italian-American comfort that makes people linger at the table longer than expected, their forks scraping the plate for just one more bite of melted cheese and tangy-sweet tomato sauce.
What makes this dish special isn’t complexity—it’s the smart layering of quality ingredients and flavors that build on one another. When you combine creamy ricotta, sharp mozzarella, and salty Parmesan with a properly seasoned meat sauce and tender pasta, something magical happens. It becomes more than the sum of its parts. The ricotta pockets soften and meld with the sauce, the mozzarella turns golden and bubbly, and every forkful delivers a perfect balance of textures and flavors.
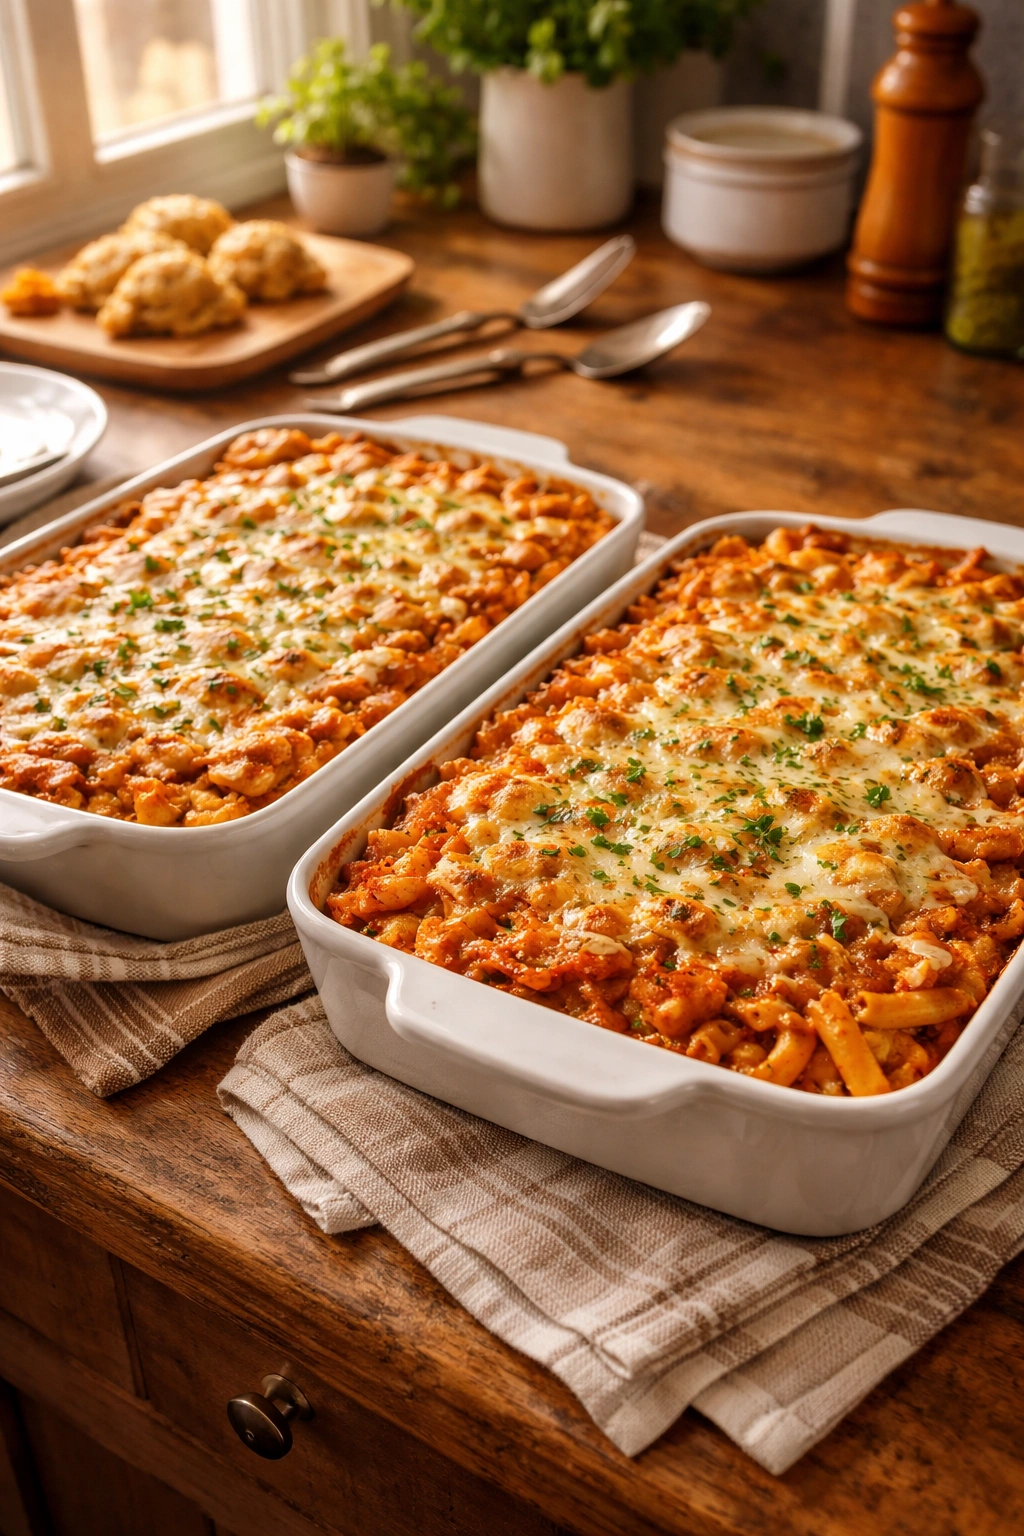
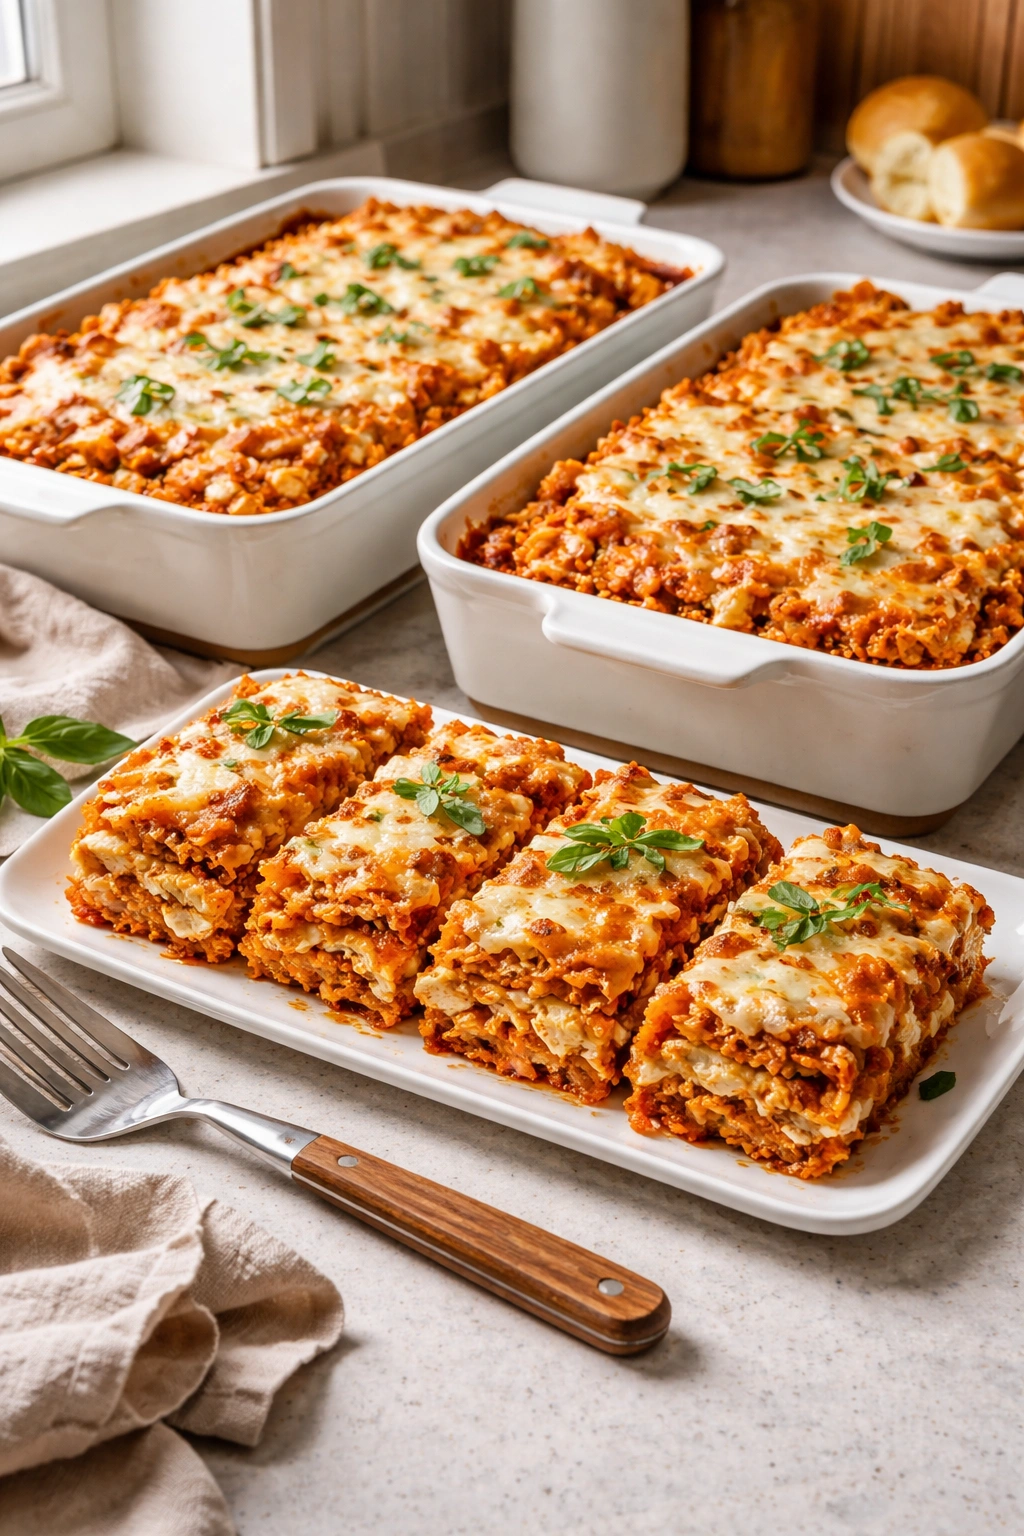
The beauty of serving baked ziti to a crowd is that it checks every practical box. You can assemble it hours—even days—before your guests arrive. You can make two casseroles and freeze one for later. It looks impressive and abundant when you pull it from the oven, yet it requires surprisingly minimal active work. Whether you’re feeding 8 people or 20, whether it’s a casual weeknight with family or a more formal dinner party, this recipe scales beautifully and never disappoints.
Why This Baked Ziti Is Perfect for Feeding a Crowd
Baked ziti earned its reputation as a crowd-pleaser for reasons that go beyond just tasting delicious. This dish has practical advantages that make feeding multiple people genuinely easier, not harder.
First, consider the logistics. A single 9×13-inch casserole serves 8 to 10 people comfortably, which means a modest gathering needs just one pan. For larger crowds, you simply double the recipe and bake two casseroles side by side. Compare this to cooking multiple individual entrees or fussing with plating each component separately. Baked ziti comes out of the oven complete and beautiful, ready to serve immediately.
The hands-on time is remarkably short. You’ll spend perhaps 20 minutes on actual active work—chopping vegetables, browning meat, stirring sauce—and the rest happens passively while things cook and the oven does the heavy lifting. This means you’re not stuck in the kitchen while your guests arrive. You can greet people, set the table, mix drinks, and then slide the casserole into a preheated oven just before everyone sits down.
What many home cooks discover is that baked ziti actually improves when made ahead. The flavors deepen and meld together overnight in the refrigerator. The pasta absorbs sauce gradually, becoming more flavorful without turning mushy. If you need to simplify your cooking timeline, you can assemble the entire casserole a full day before baking, cover it tightly, and refrigerate it. Then bake it fresh on the day you’re serving. This alone makes entertaining less stressful.
The crowd-feeding advantage extends to variety of taste and dietary preferences. Unlike a single-protein entrée, baked ziti works for almost everyone. Vegetarians can skip the meat. People who prefer less sauce can serve themselves smaller portions. Those who want extra cheese can add more to their serving. It’s inherently flexible in a way that doesn’t require you to make multiple versions of the same dish.
Finally, there’s the economics of scale. Baked ziti uses inexpensive, pantry-friendly ingredients that don’t require specialty shopping. A double batch that feeds 20 people might cost less than $35 total. The ingredient list is predictable—no hunting for unusual spices or pricey proteins. You’re likely to find everything you need at any ordinary grocery store.
Building Your Foundation: Understanding the Three Layers
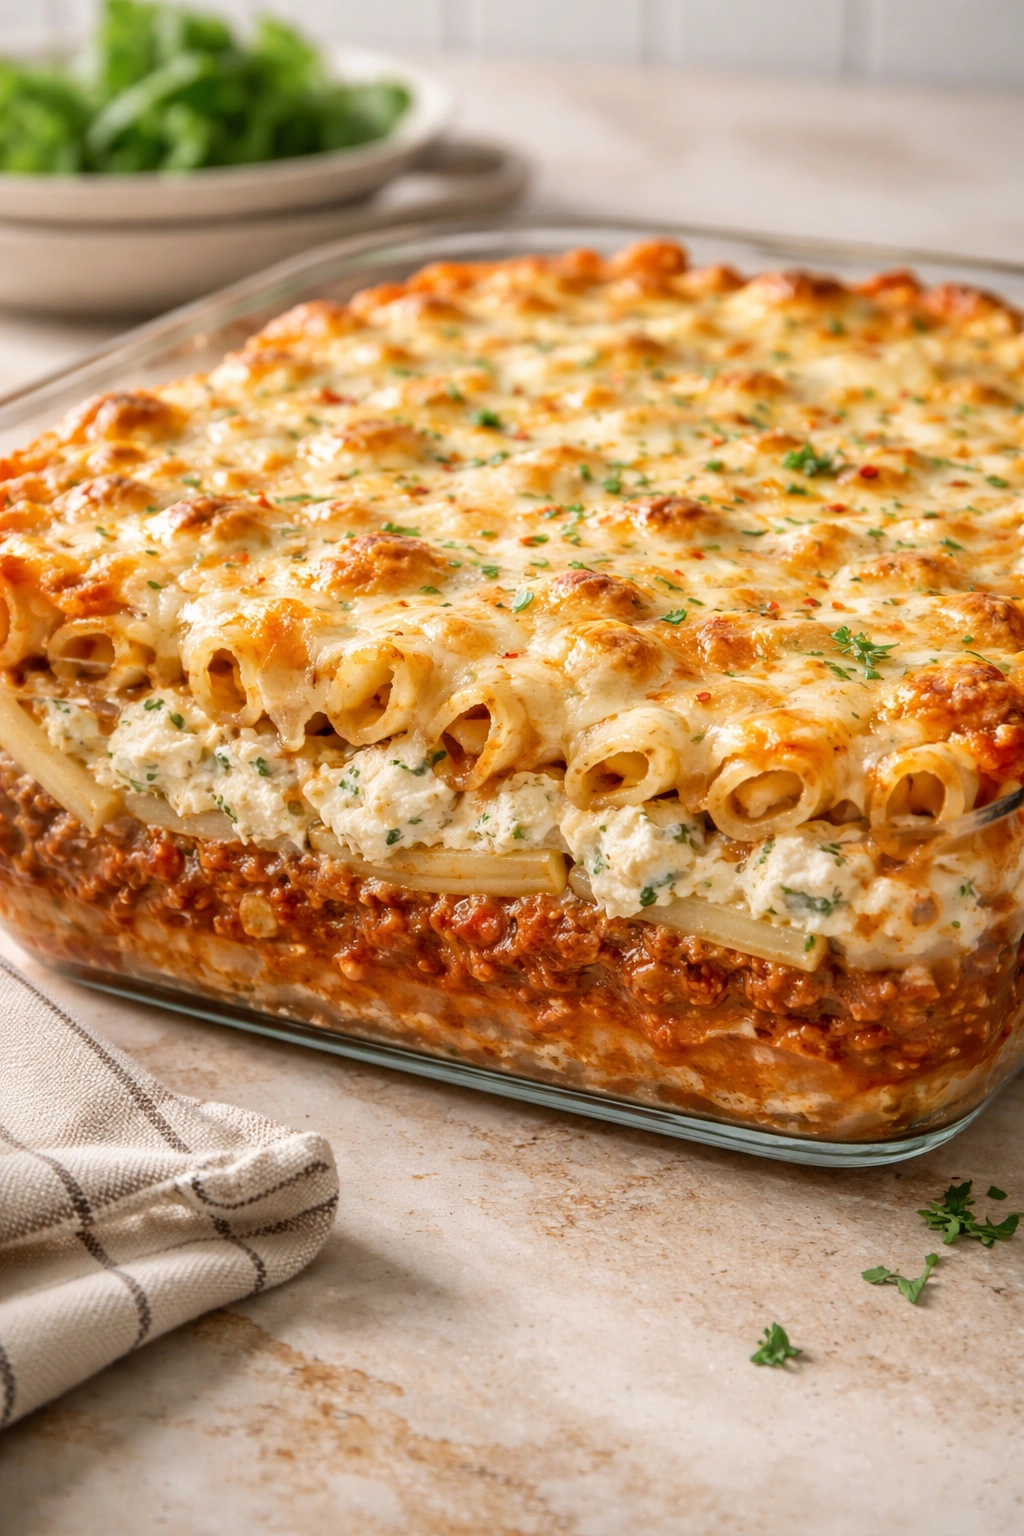
The magic of baked ziti lies in understanding how its three distinct layers work together—the meat sauce, the pasta with ricotta filling, and the melted cheese topping. Each layer plays a specific role.
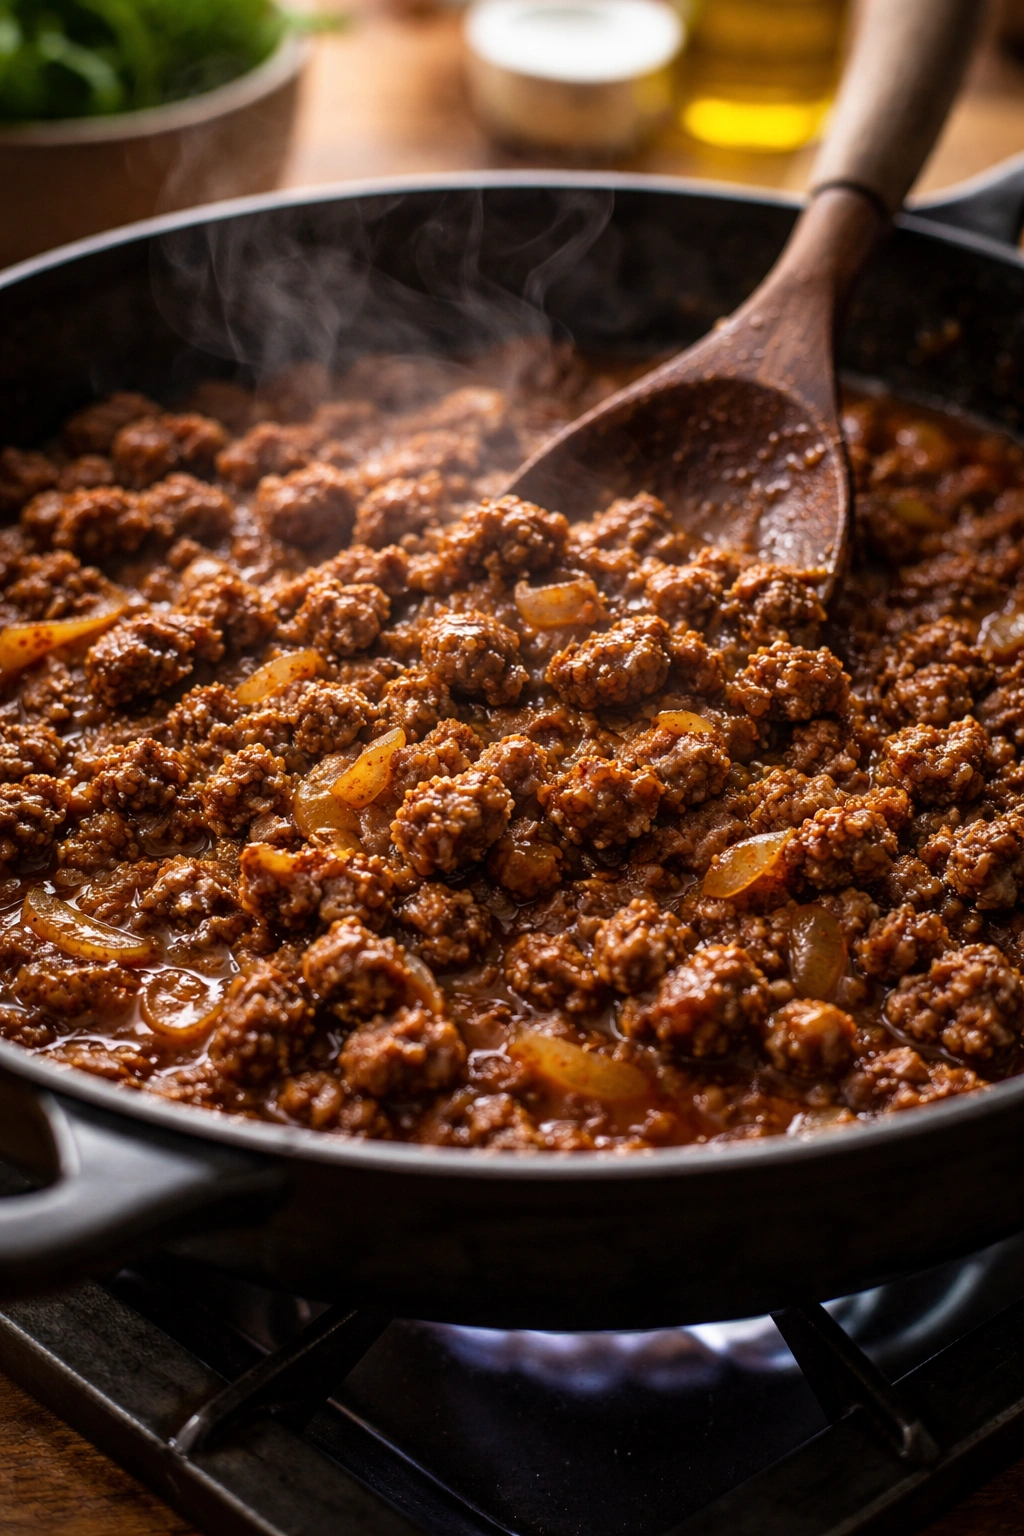
The meat sauce forms the flavor foundation and adds moisture to keep everything from drying out during baking. This isn’t a thin, watery sauce. You want something that clings to the pasta and has body. When you simmer the sauce long enough, it reduces slightly and concentrates in flavor. The combination of ground beef and onion, cooked until deeply browned, creates an umami-rich base that makes people keep coming back for more, even if they can’t quite identify what they’re tasting.
The pasta layer becomes the structural element. Ziti’s tubular shape isn’t just aesthetic—those hollow centers capture sauce inside and around each piece, so every bite delivers flavor. When you mix the hot pasta with the ricotta mixture and some of the meat sauce, you’re creating a cohesive component that won’t separate or fall apart when you slice the finished casserole. This is why cooking the pasta to al dente (still slightly firm) matters. It continues cooking in the oven and won’t turn to mush.
The ricotta and cheese layers provide creaminess and richness. This is where you get those pockets of cool, creamy ricotta that contrast beautifully with the hot, saucy pasta. The ricotta also acts as a binder, helping everything stay together when you serve it. The mozzarella on top creates the golden, bubbly crown that signals doneness and provides that essential textural contrast between crispy-edged cheese and soft interior.
Understanding these three components helps you troubleshoot if something doesn’t work as expected. A dry casserole usually means your sauce wasn’t thick enough to begin with. A soupy casserole might mean you used too much liquid or the pasta was overcooked. A center that stays cold while the edges brown means your oven temperature is uneven or your casserole dish is too large for the amount of filling.
Choosing Quality Ingredients for the Best Results
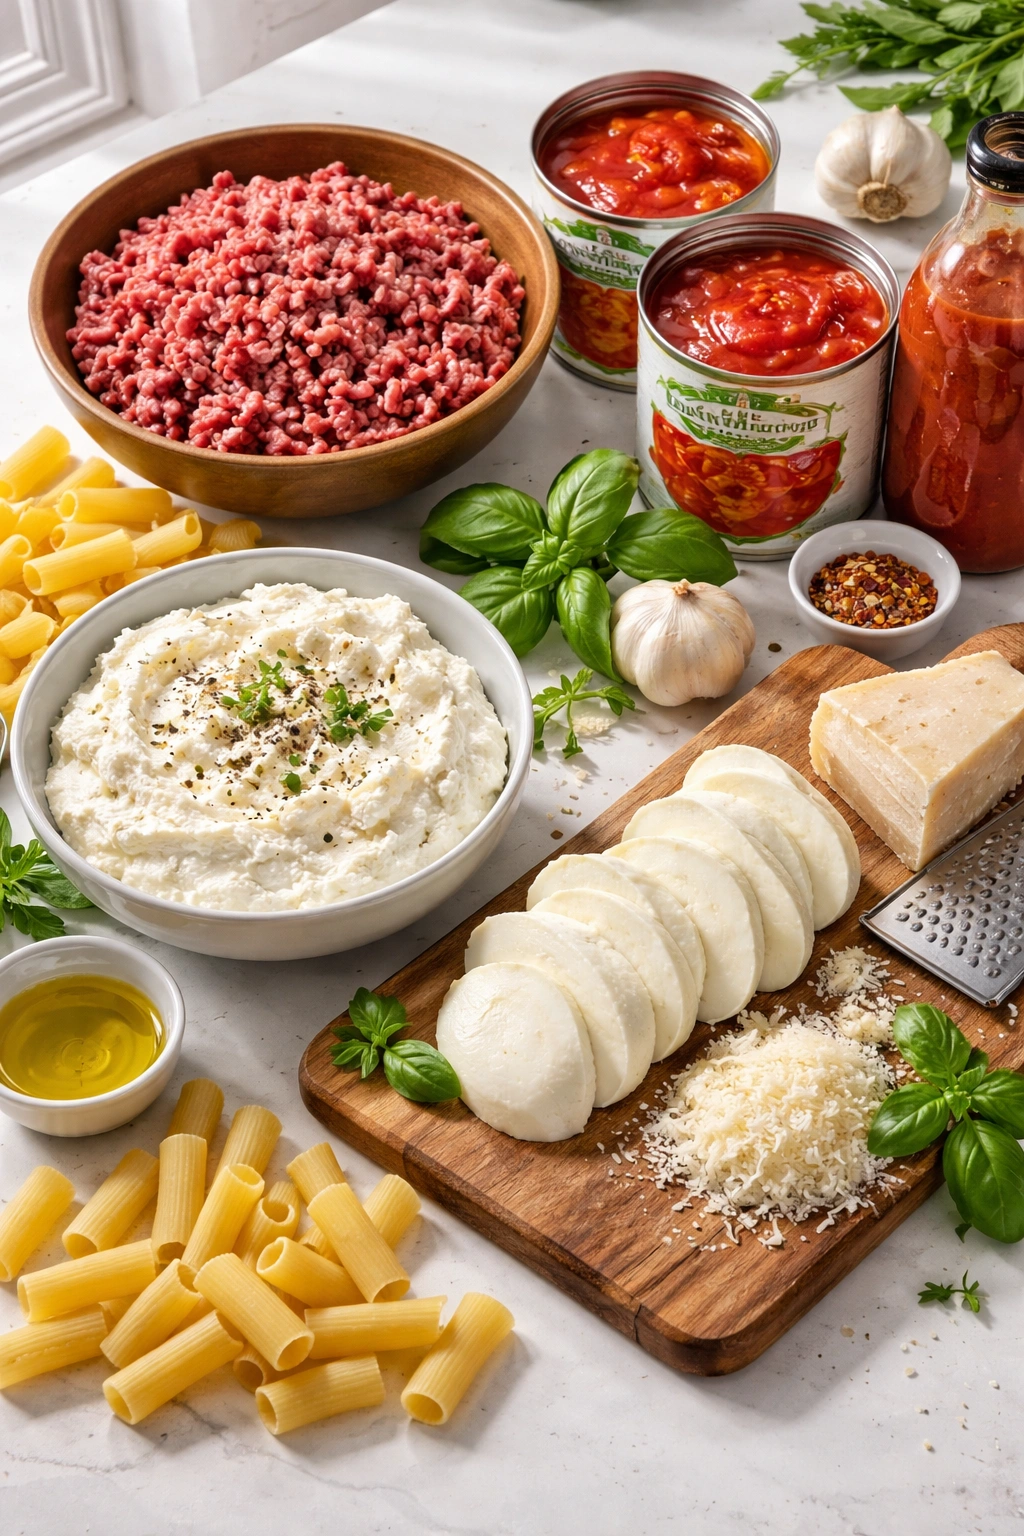
The ingredient list for baked ziti reads like a grocery list of basics, yet the quality of those basics dramatically affects the final dish. This is one recipe where ingredient choice genuinely matters.
For the meat sauce, choose ground beef with at least 15 to 20 percent fat content (85/15 lean-to-fat ratio). Leaner ground beef will produce a drier, less flavorful sauce. The fat carries flavor and keeps the sauce from becoming lean and stringy. Don’t shy away from fat here—the sauce will taste noticeably better. If you’re concerned about calories, the serving size is generous enough that the fat is diluted across a reasonable portion.
The pasta sauce you choose (whether homemade or jarred) sets the tone for the entire dish. If you’re using store-bought marinara, invest in a quality brand. Inexpensive sauces often contain too much sugar and less-pleasant tomato flavor. Brands like Rao’s, Victoria, or San Marzano are worth the small price increase. They taste more like tomatoes and less like sweetened ketchup. If you make your own sauce from canned tomatoes, use San Marzano tomatoes when possible—they have fewer seeds and a cleaner flavor than standard canned tomatoes.
For cheese, buy whole-milk ricotta, not low-fat or fat-free versions. The texture difference is significant. Whole-milk ricotta is creamy and smooth, while low-fat versions tend toward grainy or chalky. You’ll find whole-milk ricotta costs only slightly more than low-fat versions, and the improvement in the finished dish justifies the small difference. Similarly, buy a block of mozzarella and shred it yourself rather than using pre-shredded cheese. Pre-shredded cheese is coated with anti-caking agents that interfere with smooth melting. Fresh-shredded mozzarella melts into a glossy, cohesive layer on top.
For Parmesan, buy it freshly grated from the deli counter or shred it yourself from a wedge. The pre-grated stuff in the green can has cellulose added and doesn’t melt or integrate as pleasantly. Fresh Parmesan has a sharp, crystalline quality that adds complexity to every bite.
The onion and garlic are simple, but choose onions that are firm and fresh, not soft or sprouted. Fresh garlic from a garlic bulb is far superior to jarred minced garlic. The difference in flavor is noticeable. If you’re making this for a crowd, fresh ingredients become even more important because you’re multiplying the recipe, and any off-flavors get magnified.
Finally, salt your pasta water properly. This is non-negotiable. The pasta absorbs water as it cooks, and if that water isn’t well-seasoned, your finished dish will taste bland no matter how good your other ingredients are. Use about 1 to 2 tablespoons of salt per gallon of water—enough that it tastes pleasantly salty, like the sea.
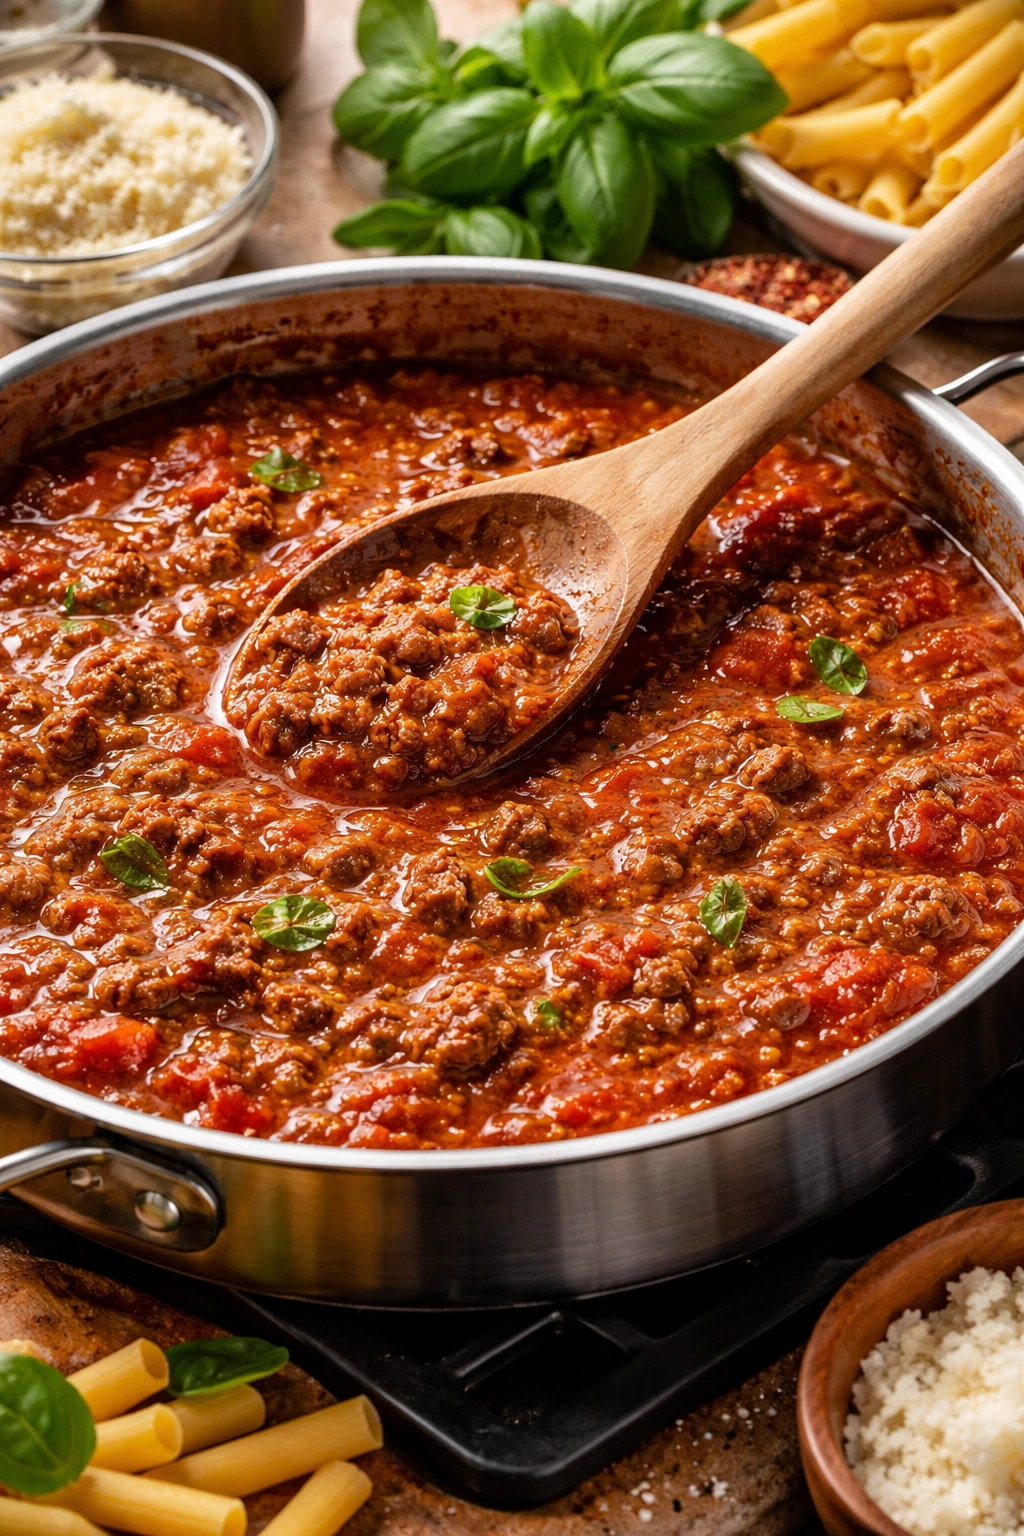
The Secret to a Rich, Flavorful Meat Sauce
The meat sauce is where you can elevate this dish from “good” to “people-ask-for-the-recipe” status. Here’s what separates an ordinary baked ziti from an exceptional one: taking time with the sauce.
Start by chopping your onion into small, even pieces—about ¼-inch cubes. Heat a large, heavy-bottomed skillet over medium-high heat and add olive oil. When the oil shimmers, add the onion and let it cook undisturbed for 2 minutes. This initial sear develops caramelization on the cut surfaces. Then stir it and let it cook for another 3 to 4 minutes until the onion is translucent and beginning to soften. The goal is to cook out the onion’s raw bite and bring out its natural sweetness. Don’t rush this step—low, slow caramelization builds flavor that high heat simply won’t achieve.
Add your ground beef to the pan while it’s still at medium-high heat. Use a meat chopper or wooden spoon to break it apart as it cooks, keeping the pieces small and even. This increases surface area and allows more browning. Let it cook for 8 to 10 minutes, stirring occasionally, until the meat is fully cooked and has lost its pink color. You’re looking for the meat to brown, not just turn gray. A deep brown color signals that the Maillard reaction has occurred, creating complex, savory flavors.
Once the meat is browned, add minced garlic and cook for another minute until fragrant. Then add your tomato sauce and stir to combine. At this point, some recipes suggest simmering for just 15 minutes, and while that will work, you’ll get better results by simmering for 25 to 30 minutes. This extended simmer allows the sauce to reduce slightly—losing excess liquid and concentrating flavor—and gives the flavors time to deepen and marry together.
The finished sauce should coat the back of a spoon. If you run your finger across the spoon, the line should hold for a moment before the sauce flows back together. This consistency is key. Too thin, and your baked ziti will be soupy. Too thick, and it might become dense.
Don’t add salt until the end, and add it in small increments. The tomato sauce already contains salt, and as the sauce reduces, the salt becomes more concentrated. You can always add more salt, but you can’t remove it. Taste as you go and season to your preference.
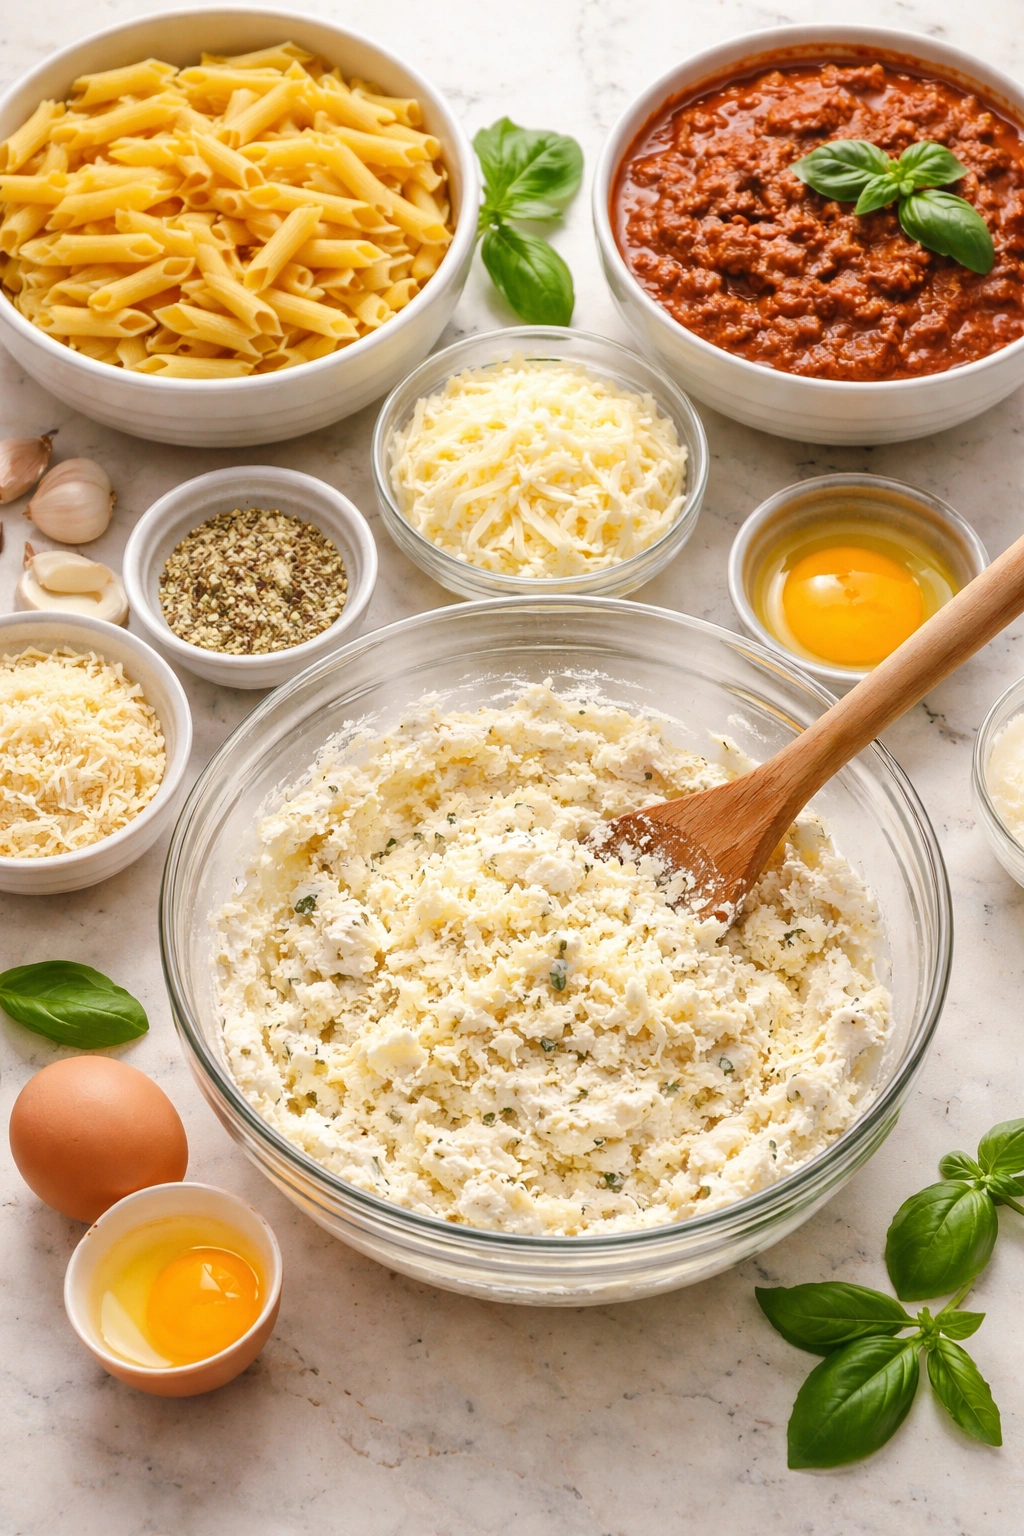
Preparing Your Ingredients and Making the Ricotta Filling
While your sauce simmers, you’ll prepare everything else. Start the pasta water in a large pot—you need enough water that the pasta can move freely without sticking together. Add salt to the water once it boils, then add the pasta and cook according to the package directions, but remove it about 1 minute before the package suggests. You’re aiming for al dente—tender outside but still slightly firm in the very center. The pasta will continue cooking in the oven, so slightly underdone is exactly what you want.
Drain the pasta in a colander and set it aside. Don’t rinse it. You want the starch on the surface to help it stick together and absorb sauce. While the pasta cooks, make your ricotta filling.
In a large bowl, combine your whole-milk ricotta, an egg (beaten), half of your shredded mozzarella, and half of your grated Parmesan. Add a pinch of salt and freshly ground black pepper. Mix until just combined. The egg acts as a binder, holding everything together. At this point, you’ll fold in about 1½ cups of the cooled meat sauce. This incorporated sauce flavors the ricotta mixture and adds moisture.
Finally, add the hot pasta to the ricotta mixture and fold everything together gently but thoroughly. The goal is to coat every piece of pasta with the creamy ricotta mixture. The heat from the pasta will warm the ricotta slightly, but that’s fine. You’re building a cohesive mixture that will hold together when the casserole bakes and cools.
Layering Technique That Makes the Difference
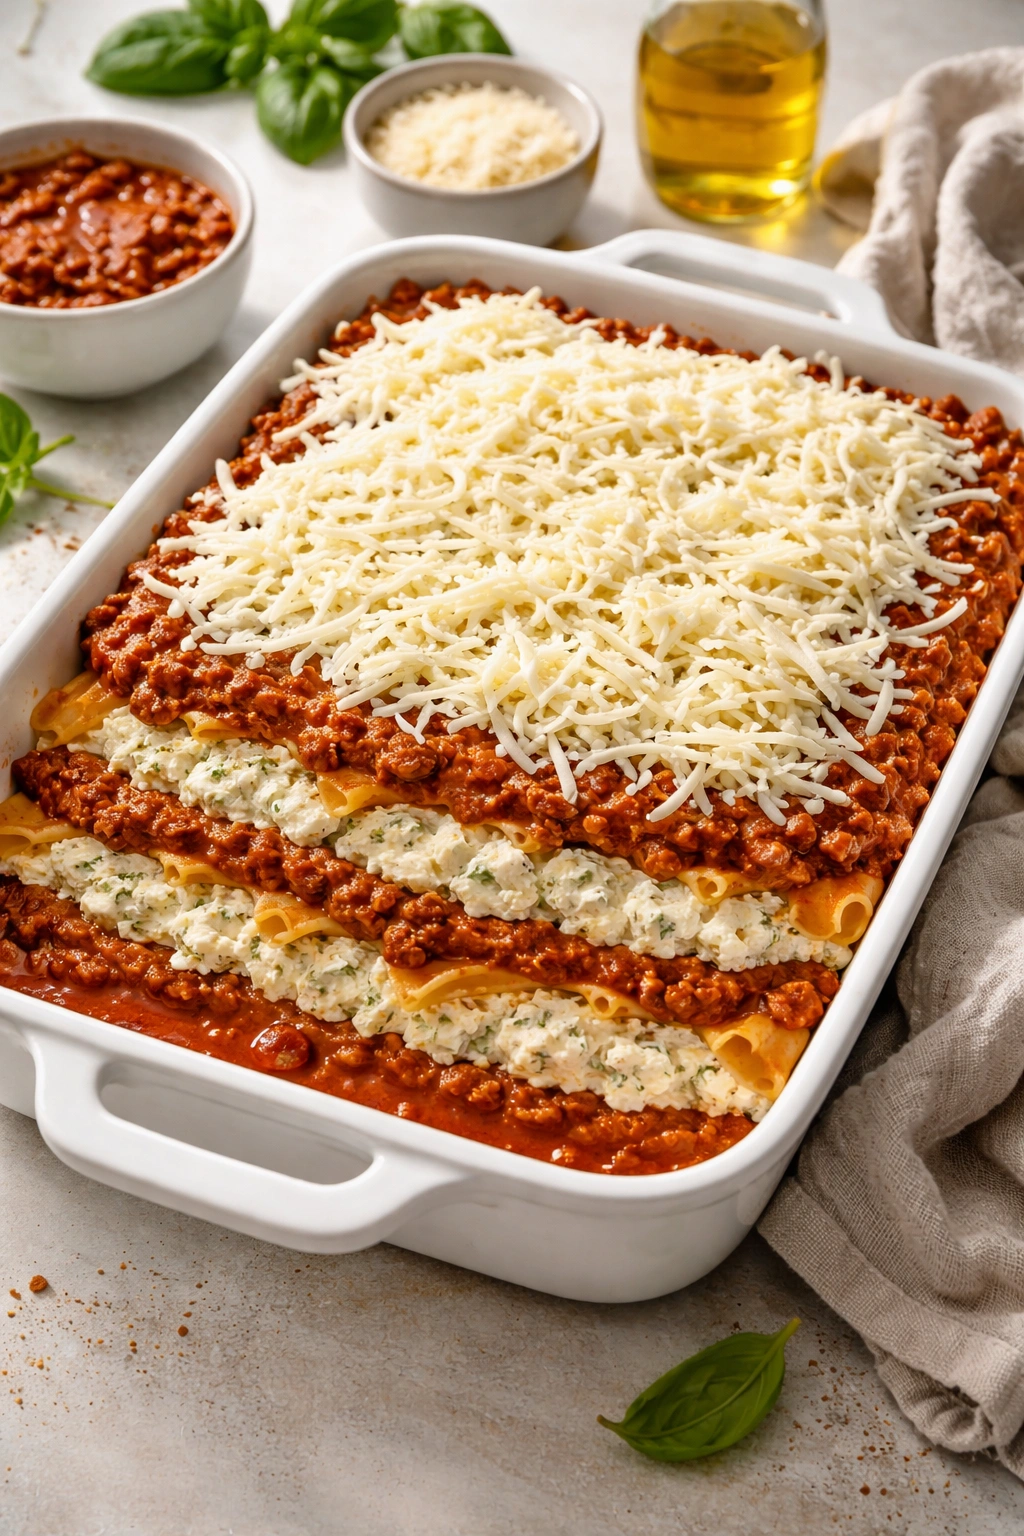
How you layer the casserole genuinely matters. Proper layering ensures even distribution of sauce and cheese throughout, so every portion tastes consistent.
Start by spreading about ½ cup of meat sauce directly on the bottom of your casserole dish. This prevents the pasta from sticking. Then add half of your ricotta-pasta mixture, spreading it into an even layer. Top this with half of your remaining meat sauce, again spreading to cover evenly.
Repeat the layers: the remaining ricotta-pasta mixture, then the remaining meat sauce. The structure should be: sauce on bottom, pasta mixture, sauce, pasta mixture, sauce on top. This ensures that you get pasta, sauce, and ricotta in every bite.
Finally, top with the reserved mozzarella you didn’t mix into the ricotta layer. The cheese on top should create a complete covering, but it doesn’t need to be thick—just enough to melt and turn golden. The Parmesan you reserved can be sprinkled over the mozzarella if you’d like extra cheesy flavor on the surface.
For crowd-sized recipes where you’re making two casseroles, maintain this same layering pattern in each one. Consistency matters. Don’t compensate for having two pans by making one thin and one thick. Level them out so they bake at roughly the same rate.
Baking and Timing for Perfect Results
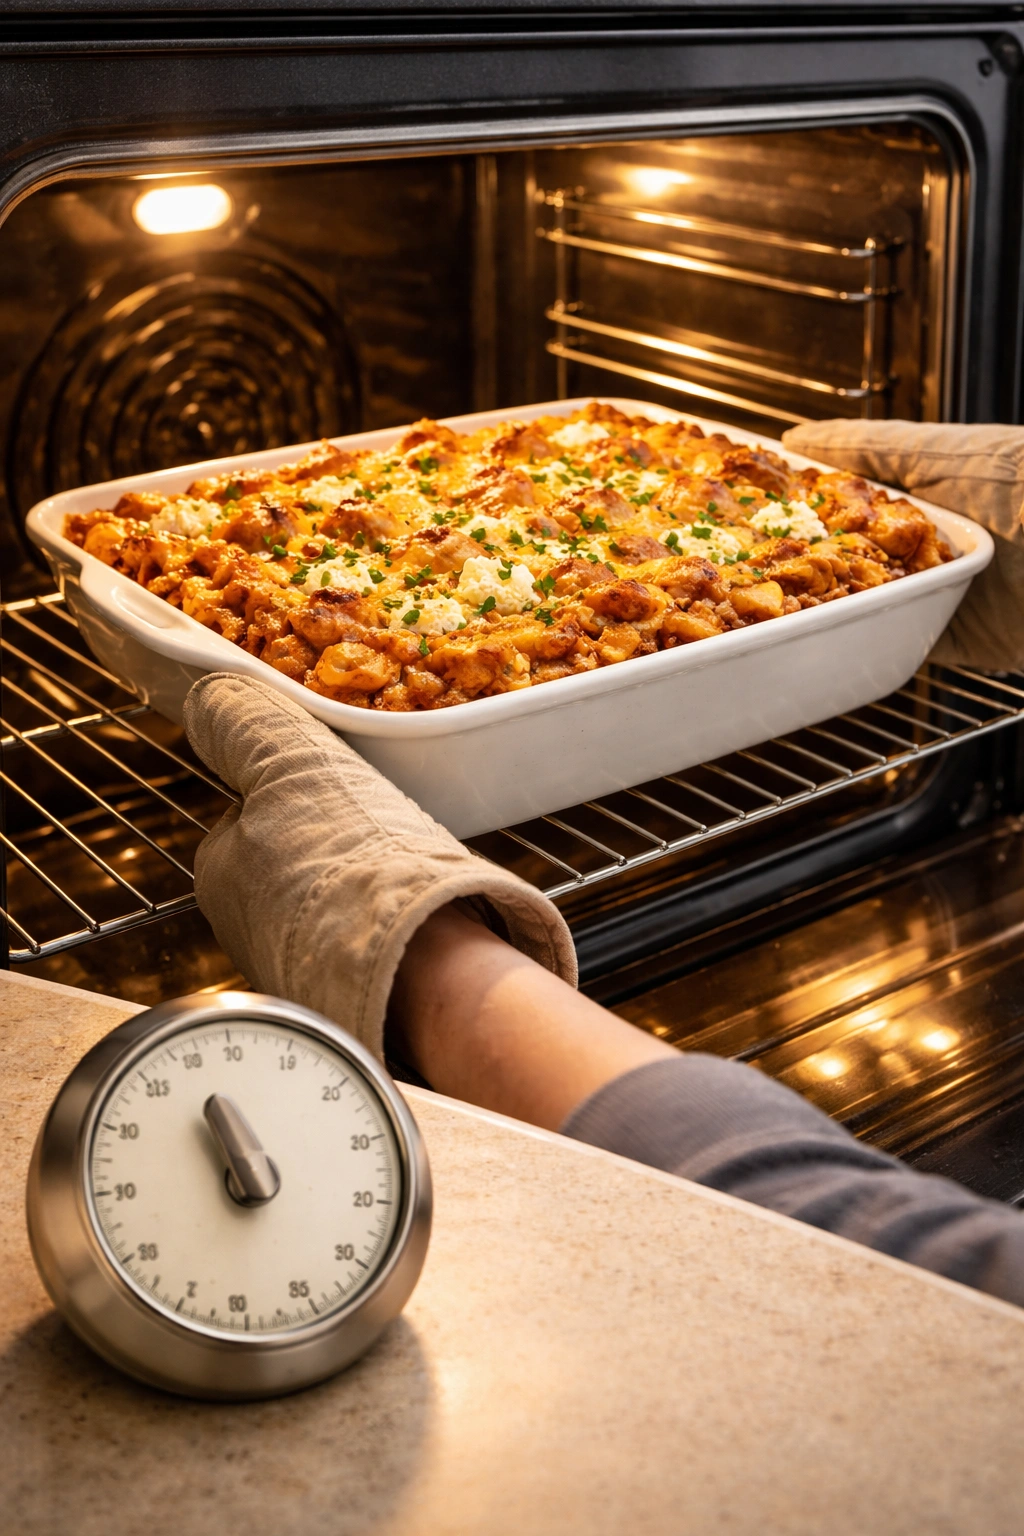
Preheat your oven to 375°F (190°C). Position the rack in the center so the casserole bakes evenly. If you’re baking two casseroles, position one on the center rack and one on the lower rack, and swap them halfway through baking to ensure even cooking.
Bake the casserole uncovered for 25 to 30 minutes, until the cheese on top is melted and beginning to turn golden brown. The top should look creamy and bubbly around the edges. If after 30 minutes the top is still pale, you can increase the heat to 425°F for the final 5 minutes, or use your oven’s broiler for 1 to 2 minutes, watching carefully so it doesn’t burn.
Let the baked ziti rest for 10 to 15 minutes before serving. This isn’t optional, and it’s not just folklore. During this rest period, the cheese sets up, the filling firms slightly, and you can cut neat, layered portions instead of getting a soupy mess. The residual heat also continues to gently cook any components that aren’t quite set.
Serving and Timing Block
Yield: Serves 8 to 10 | Two casseroles serve 16 to 20
Prep Time: 30 minutes (includes browning meat, cooking pasta, and assembling)
Cook Time: 30 minutes (baking time)
Total Time: 1 hour plus 15 minutes rest
Difficulty: Beginner — The steps are straightforward and require no special techniques. The assembly is simple layering, and the oven handles the cooking.
The Complete Recipe
For the Meat Sauce:
- 2 tablespoons olive oil
- 1 medium onion, finely chopped
- 2 pounds lean ground beef (85/15)
- 4 garlic cloves, minced
- 2 (24-ounce) jars marinara sauce (or 48 ounces total)
- 2 teaspoons dried Italian seasoning
- 1 teaspoon kosher salt
- ½ teaspoon freshly ground black pepper
- ¼ teaspoon red pepper flakes (optional, for gentle heat)
For the Pasta and Assembly:
- 1 pound ziti pasta
- 2 tablespoons kosher salt (for pasta water)
- 2 cups whole-milk ricotta cheese
- 1 large egg, beaten
- 2 cups shredded mozzarella cheese, divided
- ½ cup freshly grated Parmesan cheese, divided
- Fresh basil leaves for garnish (optional but recommended)
Make the Meat Sauce:
-
Heat 2 tablespoons olive oil in a large, high-sided skillet over medium-high heat. Once the oil is hot and shimmers, add the chopped onion and cook for 2 minutes without stirring to allow a slight caramelization on the cut surfaces.
-
Stir the onion and continue cooking for another 4 to 5 minutes, until it’s translucent and softening. Keep the heat at medium-high so the onion begins to take on a light golden color at the edges—this deepens flavor.
-
Reduce the heat to medium. Add the ground beef to the pan, breaking it apart with a meat chopper or wooden spoon into small, even pieces. Cook for 8 to 10 minutes, stirring occasionally, until the beef is fully cooked and deeply browned. Do not drain the meat—the fat carries flavor that will enrich your sauce.
-
Add the minced garlic and cook for 1 minute, stirring frequently, until fragrant.
-
Pour in both jars of marinara sauce and stir to combine. Add the Italian seasoning, 1 teaspoon kosher salt, ½ teaspoon black pepper, and the red pepper flakes if using.
-
Reduce the heat to low and allow the sauce to simmer gently for 25 to 30 minutes, stirring occasionally. The sauce will reduce slightly as liquid evaporates, and the flavors will deepen and marry together. Taste the sauce at 25 minutes and adjust the salt and pepper as needed—remember that the sauce will be distributed throughout the casserole, so it should taste flavorful but not aggressively salty.
Advertisements -
Remove from heat and allow the sauce to cool slightly. You’ll use about 3 cups of this sauce in your casserole, plus an additional ½ cup mixed into the ricotta layer.
Cook the Pasta:
-
While the sauce simmers, bring a large pot of water to a rolling boil. Add 2 tablespoons of kosher salt once the water boils. Add the ziti pasta and cook according to package directions, but remove it 1 minute before the package suggests for al dente texture.
-
Drain the pasta in a colander. Do not rinse it—the starch on the surface helps the pasta absorb sauce and stick together. Set aside.
Prepare the Ricotta Mixture:
-
In a large bowl, combine 2 cups ricotta cheese, the beaten egg, 1 cup of the shredded mozzarella, ¼ cup of the Parmesan, and a pinch of salt and freshly ground black pepper. Fold together gently until just combined.
-
Measure out approximately ½ cup of the cooled meat sauce and fold it into the ricotta mixture.
-
Add the hot drained pasta to the ricotta mixture and fold everything together gently but thoroughly until the pasta is evenly coated. The warmth from the pasta will gently warm the ricotta, which is fine.
Assemble the Casserole:
-
Preheat your oven to 375°F (190°C). Lightly grease a 9×13-inch casserole dish (or two dishes for a crowd recipe doubled).
-
Spread approximately ½ cup of the remaining meat sauce on the bottom of the prepared casserole dish in an even layer.
-
Add half of the ricotta-pasta mixture and spread it into an even layer with a spatula.
-
Top with approximately half of the remaining meat sauce, spreading to cover evenly. You should have about 1 cup of sauce remaining.
Advertisements -
Add the remaining ricotta-pasta mixture and spread evenly. Top with the remaining meat sauce, again spreading to cover.
-
Sprinkle the reserved 1 cup mozzarella evenly over the top. Then sprinkle with the reserved ¼ cup Parmesan cheese. Drizzle lightly with olive oil if desired—this helps the cheese brown.
Bake:
-
Place the casserole in the preheated 375°F oven and bake uncovered for 25 to 30 minutes. The top should be melted, creamy, and turning golden brown. The edges should bubble gently. If the top hasn’t browned after 30 minutes, increase the oven temperature to 425°F for 3 to 5 minutes, or use your oven’s broiler for 1 to 2 minutes, watching carefully to prevent burning.
-
Remove from the oven and allow the casserole to rest for at least 15 minutes before cutting and serving. This resting period is essential—it allows the cheese to set slightly and the layers to firm up so you can serve neat, beautiful portions.
-
Garnish with fresh basil if desired, and serve hot.
Pro Tips for Avoiding Common Mistakes
Watery baked ziti is almost always the result of sauce that wasn’t reduced enough before assembling the casserole. If your finished dish seems soupy, simmer your meat sauce longer next time—aim for 30 to 35 minutes rather than the minimum 25. The sauce should coat a spoon and reduce in volume by about 10 to 15 percent.
Mushy pasta happens when you overcook the pasta before assembling the casserole or when you bake for too long. Remove the pasta when it’s still slightly firm, with just a little bite in the very center. Trust that the oven will finish cooking it. If you’re making this ahead and refrigerating before baking, add 3 to 5 minutes to the baking time, but watch carefully.
Dry casserole usually means either the dish is too large for the amount of filling (which spreads ingredients too thin) or you didn’t include enough sauce to begin with. Use a standard 9×13-inch dish for the single recipe, and a 10×14-inch or similar-sized dish for a double batch. If your casserole seems dry after baking, you can add a splash of warmed sauce or even a bit of warmed broth on top when serving, and cover it loosely with foil for a few minutes to rehydrate.
Uneven browning often indicates your oven has hot spots. If one side of your casserole is browning much faster than the other, rotate the pan halfway through baking. If the edges are browning too quickly while the center is still pale, cover just the edges with a strip of aluminum foil and continue baking.
Not enough cheese melting can happen if your oven temperature is off. Verify with an oven thermometer that your oven is actually at 375°F. Ovens are notoriously inaccurate. If your cheese isn’t melting after the suggested time, increase the temperature by 25 degrees.
Making This Dish Ahead: Prep and Freezing Strategies
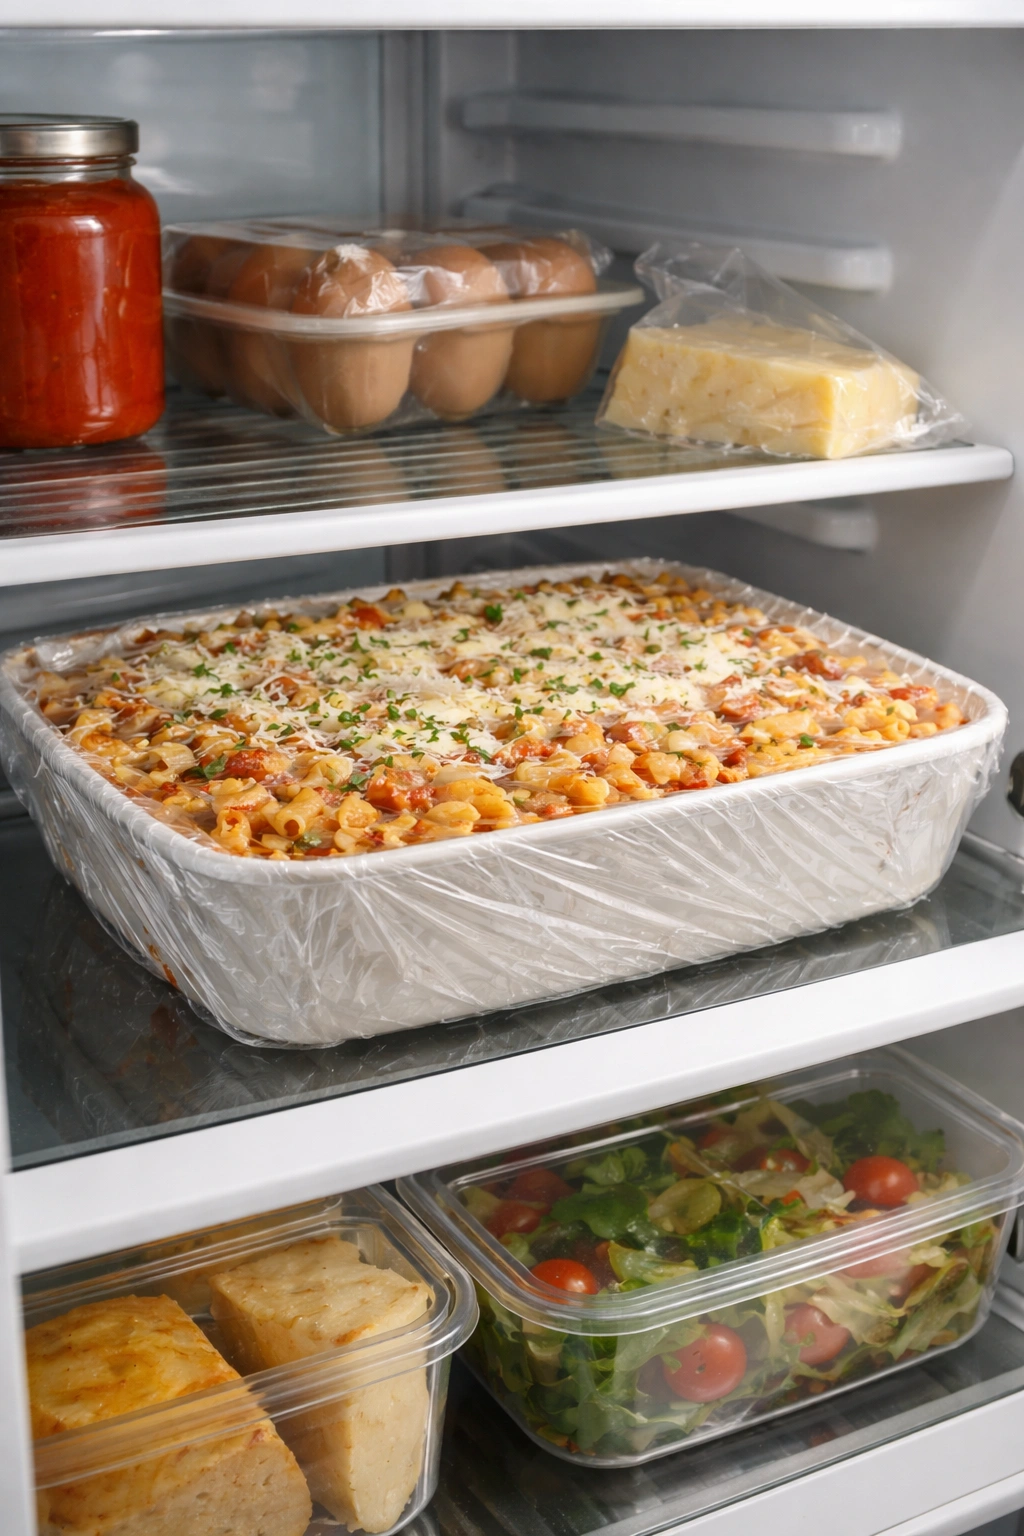
One of the greatest advantages of baked ziti is how beautifully it accommodates advance preparation. You can assemble it days ahead and bake it fresh, or bake it and reheat later.
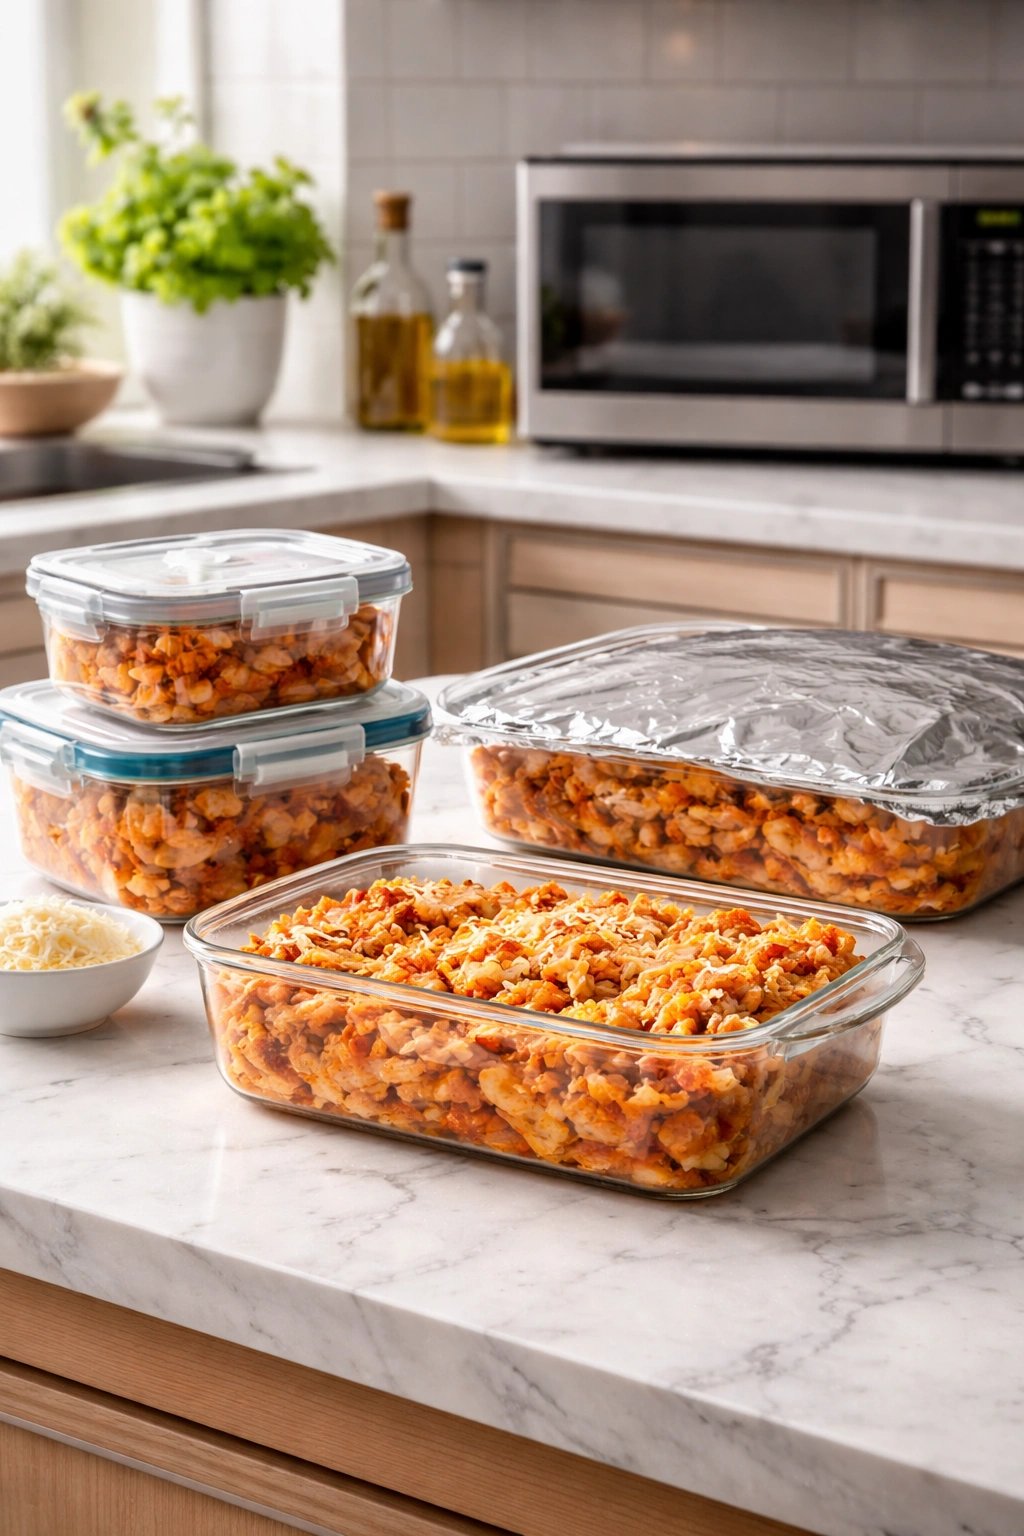
Option 1: Assemble, then refrigerate and bake. Prepare the casserole completely as described above, but don’t bake it. Cover the casserole dish tightly with plastic wrap, then top with aluminum foil to prevent freezer burn. Refrigerate for up to 24 hours. When you’re ready to bake, remove it from the refrigerator and let it sit at room temperature for 20 to 30 minutes before baking. This helps the center cook evenly. Bake at 375°F for 30 to 35 minutes (adding about 5 minutes to the original time since it’s starting from a cold state) until the top is golden and bubbly.
Option 2: Make ahead and freeze unbaked. Prepare the casserole completely, cool it to room temperature, then cover tightly with plastic wrap and aluminum foil. Freeze for up to 3 months. To bake from frozen, remove the plastic wrap but leave the foil loosely covering the top. Place the frozen casserole directly in a 375°F oven and bake for 45 to 55 minutes, removing the foil in the last 10 to 15 minutes to allow the cheese to brown. The center may need an additional 5 to 10 minutes to heat through completely. A food thermometer inserted in the center should read 165°F when fully heated.
Option 3: Make ahead, bake, then reheat. Bake the casserole as directed, cool it to room temperature, then cover and refrigerate for up to 3 to 4 days. To reheat, cover with foil and warm in a 325°F oven for 15 to 20 minutes until heated through and the edges begin to bubble. Uncover for the last 5 minutes if you’d like to re-crisp the cheese on top.
For crowd-sized entertaining where you’re doubling the recipe, make one casserole to bake fresh and freeze the second one unbaked. This gives you a ready-made casserole for another meal with zero additional work.
Make-ahead sauce strategy: You can also make the meat sauce up to 3 days ahead and refrigerate it in an airtight container. When you’re ready to assemble the casserole, cook the pasta, make the ricotta filling, and assemble—the sauce is already prepared. This breaks the work into two sessions and is helpful if you’re managing a busy schedule.
Scaling for Different Crowd Sizes
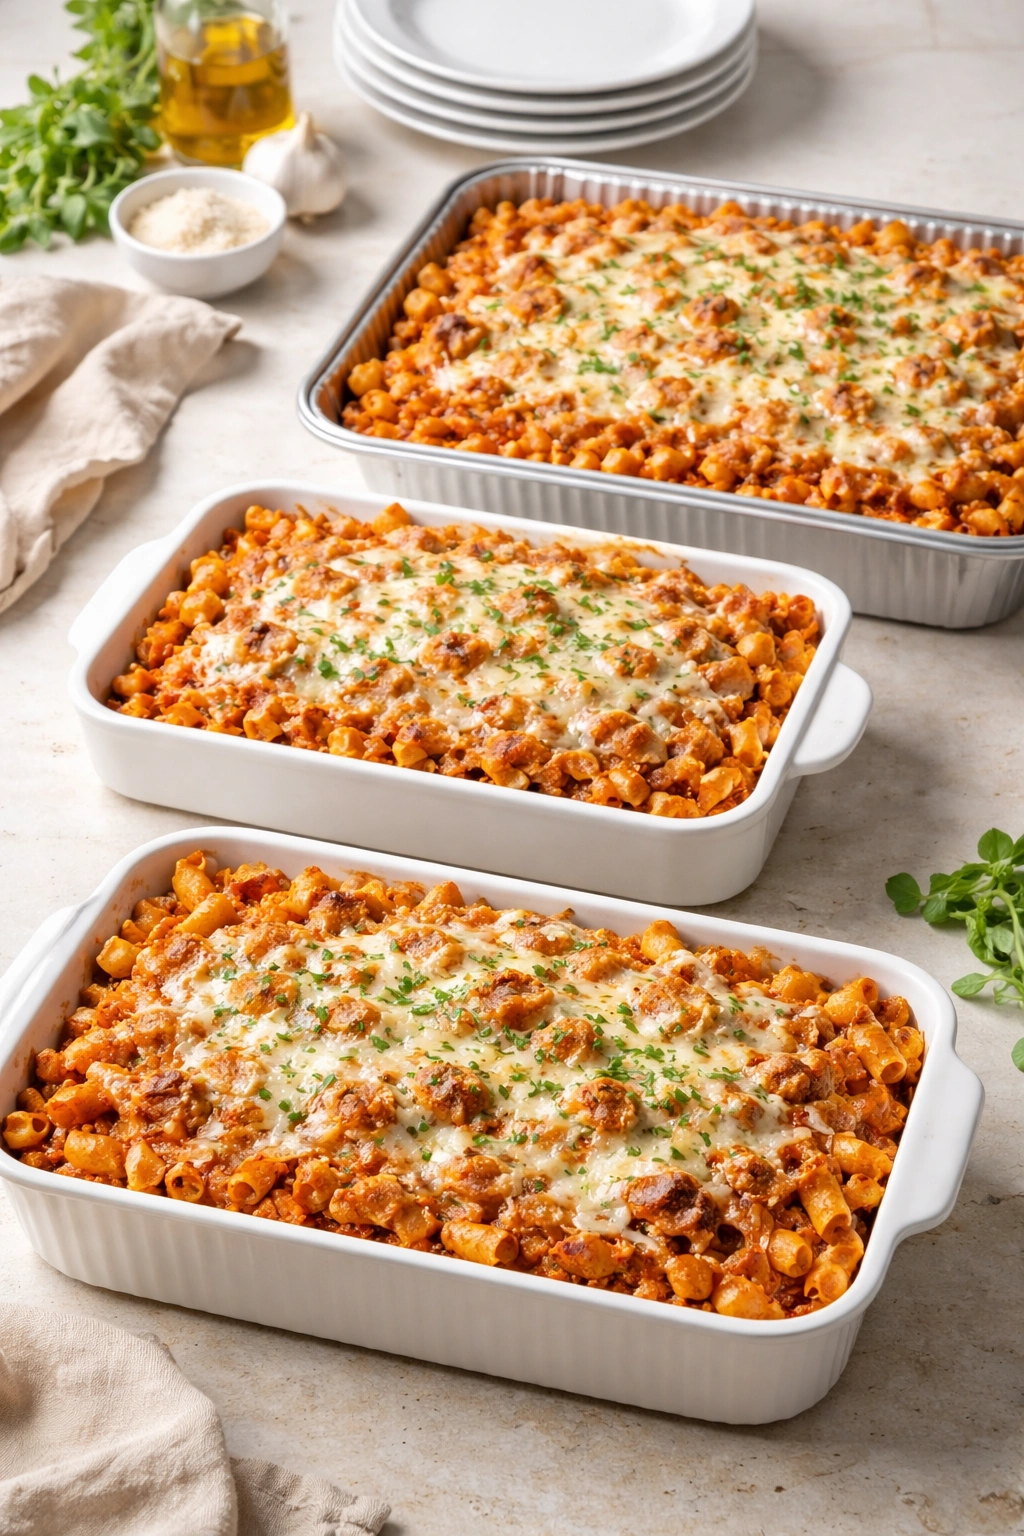
The beauty of baked ziti is that it scales linearly. Double all ingredients for two casseroles, triple them for three, and so on.
For 8 to 10 people: Use the recipe as written, yielding one 9×13-inch casserole.
For 16 to 20 people: Double all ingredients. Bake in two 9×13-inch casseroles, or use one 10×15-inch hotel pan if you have access to commercial-style cookware. If using two separate casseroles, place them side by side in the oven and swap rack positions halfway through baking so they cook evenly. They should take the same 25 to 30 minutes as a single casserole.
For 25 to 30 people: Triple all ingredients and bake in three casseroles, or use two 10×15-inch hotel pans plus one regular 9×13-inch dish. When baking multiple casseroles, you may need additional time—check the largest casserole first, as it may bake slightly slower than a single dish.
For 40+ people: At this scale, consider whether baked ziti is truly the best vehicle. You could make baked ziti, but you’d also want to offer one or two additional sides to round out the meal and ensure sufficient quantity. Alternatively, divide your crowd and prepare multiple casseroles to bake in batches, or ask if you have access to large-capacity ovens at a catering kitchen.
When scaling, maintain the same ingredient ratios and layering pattern. Don’t try to make one huge thin casserole—the resulting dish will bake unevenly, with dry edges and a cold center. Multiple casseroles bake much more reliably.
Serving Suggestions and Perfect Pairings
Baked ziti is hearty enough to stand alone as a main course, but serving it thoughtfully with complementary dishes creates a complete, memorable meal.
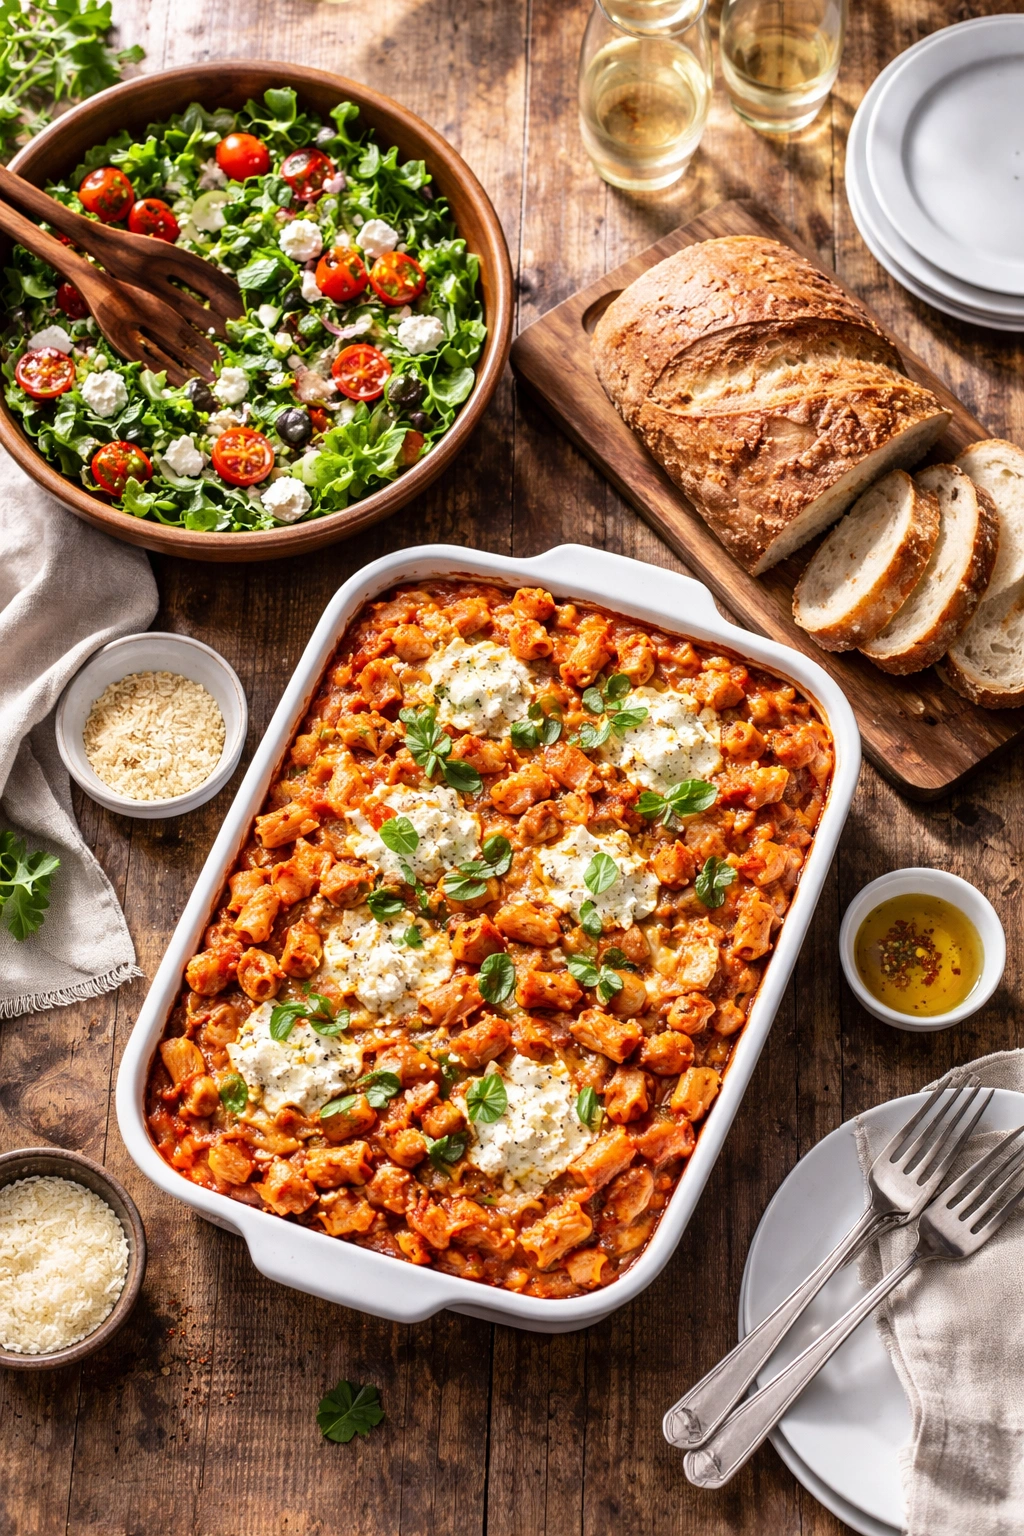
Salads provide the most natural pairing, offering brightness and acidity to balance the rich, creamy casserole. A simple mixed green salad tossed with a light lemon vinaigrette works beautifully. More substantial options include a Caesar salad (which echoes Italian flavors), an arugula salad with shaved Parmesan and lemon, or even a chopped Italian salad with tomatoes, cucumbers, and red wine vinegar. For crowd sizes, prepare salad in a large bowl so guests can serve themselves.
Bread is essential when feeding a crowd because people instinctively want something to soak up sauce. Warm, crusty artisan bread from a bakery is ideal. If you’re baking at home, garlic bread is classic—split a baguette lengthwise, brush with a mixture of softened butter, minced garlic, and parsley, wrap in foil, and warm in a 375°F oven for 10 minutes alongside the ziti. For larger crowds, you might also consider bread sticks, rolls, or even focaccia.
Vegetables add color and nutritional balance. Roasted broccoli with olive oil and garlic, sautéed green beans with garlic and a squeeze of lemon, or roasted zucchini all work well. For simplicity with crowds, roast vegetables ahead and reheat them while the baked ziti bakes.
Garlic knots or dinner rolls are less formal than artisan bread but beloved by many, especially children. These can often be purchased from a bakery and warmed before serving.
Wines that pair well include medium-bodied reds like Barbera, Chianti, or Sangiovese—Italian wines that echo the dish’s heritage. If serving white wine, a crisp Italian white like Pinot Grigio or Vermentino works nicely with the acidity cutting through the richness.
Dessert can be as simple or elaborate as you’d like. A classic tiramisu echoes the Italian theme, but a chocolate dessert, fruit salad, or even simple Italian cookies offer satisfying endings. If you’re managing time carefully, a store-bought dessert that you plate attractively is perfectly acceptable for a crowd meal.
Storage and Reheating Instructions
Leftover storage: Allow the finished casserole to cool to room temperature, then transfer portions to airtight containers or cover the casserole dish tightly with plastic wrap. Refrigerate for up to 3 to 4 days. Label the container with the date and contents.
Reheating refrigerated portions: In the microwave, place a portion in a microwave-safe dish, cover loosely, and heat for 2 to 3 minutes, stirring halfway through, until heated through. In the oven, place a portion or the entire casserole on a sheet pan, cover loosely with foil, and warm in a 325°F oven for 15 to 20 minutes until heated through and beginning to bubble at the edges.
Freezing baked portions: Cool the casserole completely, then cut it into portions and freeze in individual airtight containers or freezer bags for up to 2 to 3 months. Alternatively, freeze the entire unbaked casserole as described above. Baked portions thaw overnight in the refrigerator and reheat in a low oven as described above.
Freezing pasta water: Don’t—the pasta has already absorbed what it needs. Any extra starch in water will make the dish slick and less pleasant.
Texture after freezing: Baked ziti freezes and thaws remarkably well. The ricotta, mozzarella, and sauce all handle freezing gracefully. Expect texture to be nearly identical to fresh, with the possible exception of the very top layer of cheese, which might be slightly less crispy after thawing, but this is minor and only noticeable if you’re looking for it.
Variations and Adaptations
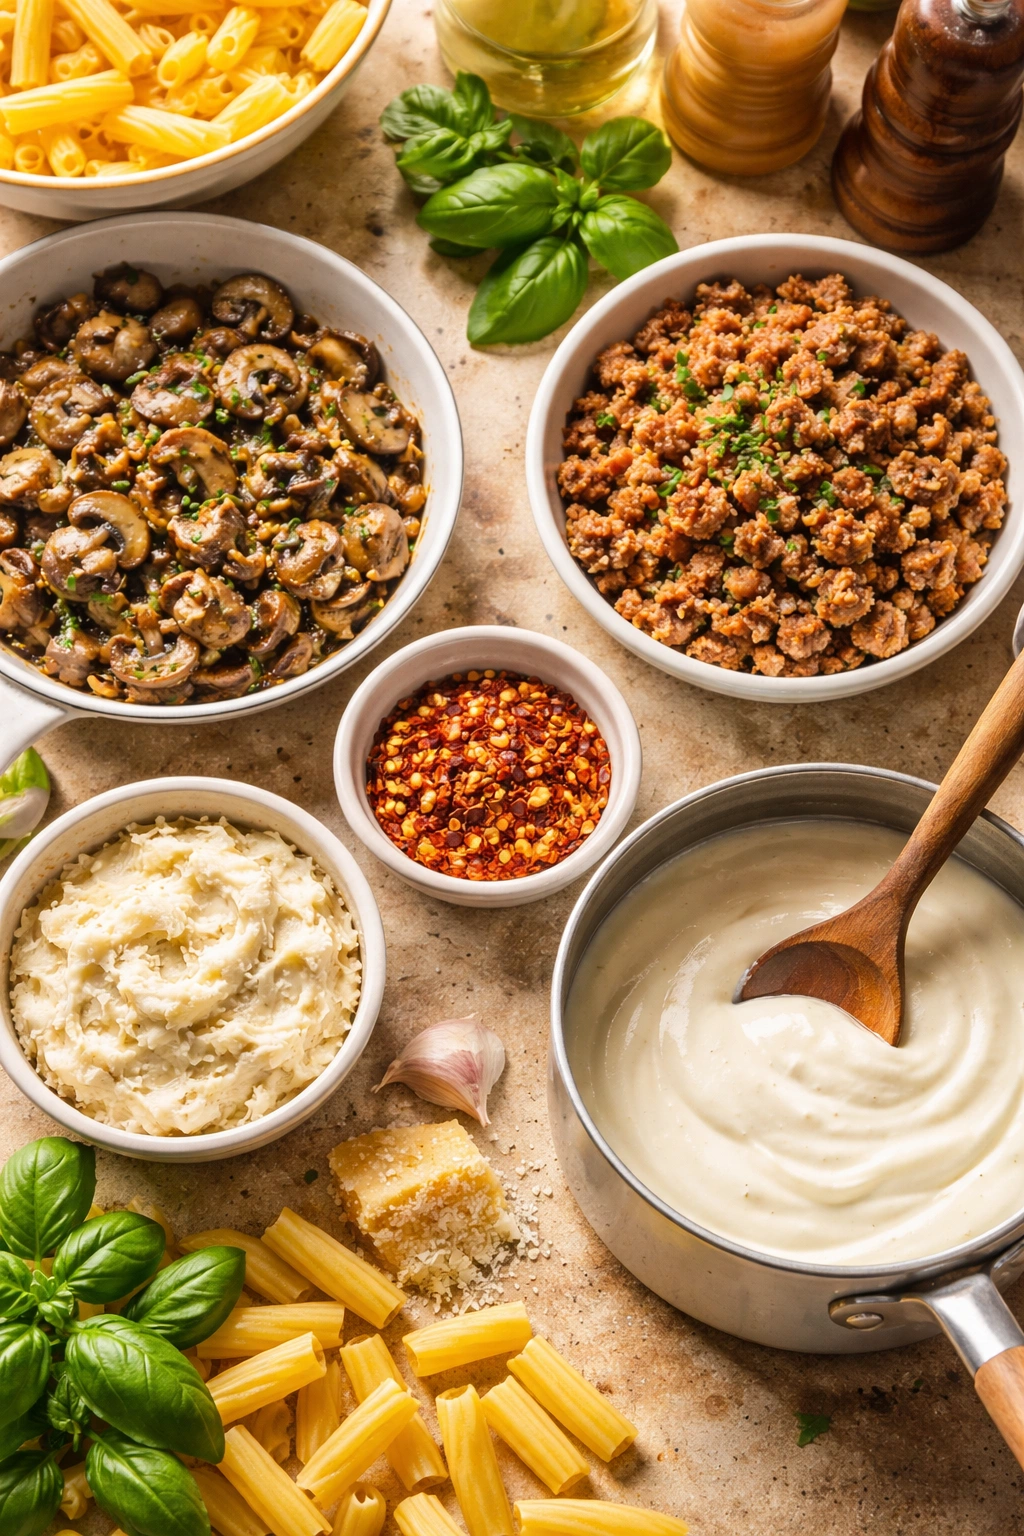
Vegetarian version: Omit the ground beef entirely. Sauté diced mushrooms (cremini, baby bella, or a mix) in the olive oil along with the onion and garlic. Use a full 48 ounces of marinara sauce. The mushrooms provide umami and body that compensates for the missing meat. Some cooks add finely chopped spinach or zucchini to bulk up the vegetable content.
Sausage variation: Replace half the ground beef with 1 pound of Italian sausage (mild or hot, depending on preference). Remove the sausage from its casing and crumble it into the pan with the beef. This adds a more distinct herbal flavor and is traditional in many family recipes.
Spicy version: Increase the red pepper flakes to ½ to ¾ teaspoon, and consider adding a pinch of cayenne pepper to the meat sauce. You can also use hot Italian sausage in place of mild sausage.
White sauce version: Instead of marinara sauce, make a simple béchamel sauce by melting 4 tablespoons butter, whisking in 4 tablespoons flour to form a paste, then gradually whisking in 4 cups whole milk. Add salt, white pepper, and a pinch of nutmeg. Combine this white sauce with the cooked meat and use it in place of the marinara sauce. This creates a richer, more decadent casserole sometimes called baked ziti Alfredo.
Seafood variation: Replace the ground beef with 1½ pounds of peeled, deveined shrimp, or a combination of shrimp and crabmeat. Sauté the seafood briefly in the pan before adding the sauce. Use a seafood-friendly marinara or make a light white sauce as described above.
Lighter version: Use part-skim ricotta, low-fat mozzarella, and ground turkey instead of beef. The flavor will be slightly less rich, but it’s still delicious and significantly lighter in calories.
Pesto variation: Stir ½ to ¾ cup fresh pesto into the meat sauce after it’s finished simmering. Reduce the amount of marinara sauce accordingly to maintain the right consistency. This adds brightness and a distinct herbal note that transforms the dish in a wonderful way.
Final Thoughts
Baked ziti with ricotta has earned its place as a beloved crowd-pleaser because it delivers consistently delicious results, requires manageable effort, and scales beautifully. Whether you’re feeding your immediate family or preparing for a gathering of 20, whether you’re cooking on a weeknight or planning ahead for a special occasion, this recipe adapts to your needs.
The real beauty lies in how the simple act of layering quality ingredients creates something greater than the sum of its parts. Creamy ricotta, tangy tomato sauce, tender pasta, and melted cheese combine in a way that feels both comforting and special—the kind of food that makes people linger at the table, asking if there’s enough left for a second serving.
Now that you understand the technique, the reasoning behind each step, and the variations available to you, you can make this dish with confidence. Trust your instincts, taste as you cook, and remember that the dish is remarkably forgiving. Small adjustments in seasoning or baking time won’t derail you. With a little practice, this will become one of your most reliable go-to recipes for feeding people you care about.