What Makes Chicken Marsala So Special
There’s something almost magical about the moment a simple skillet of chicken and mushrooms transforms into a silky, wine-infused masterpiece. Chicken marsala isn’t an authentic Italian dish—it’s an Italian-American creation born from ingenuity and longing. When Italian immigrants arrived in the United States, they couldn’t easily find the lamb and pork that dominated their homeland cooking, so they adapted. They turned their scaloppine (“thin cuts of meat”) technique to chicken, combined it with the fortified wine from their Sicilian roots, and created something that would become a beloved restaurant staple. What makes this dish remarkable isn’t just its history, though. It’s the fact that despite its elegant presentation and restaurant-worthy flavor, you can have it on the table in under 30 minutes without any special skills or exotic ingredients.
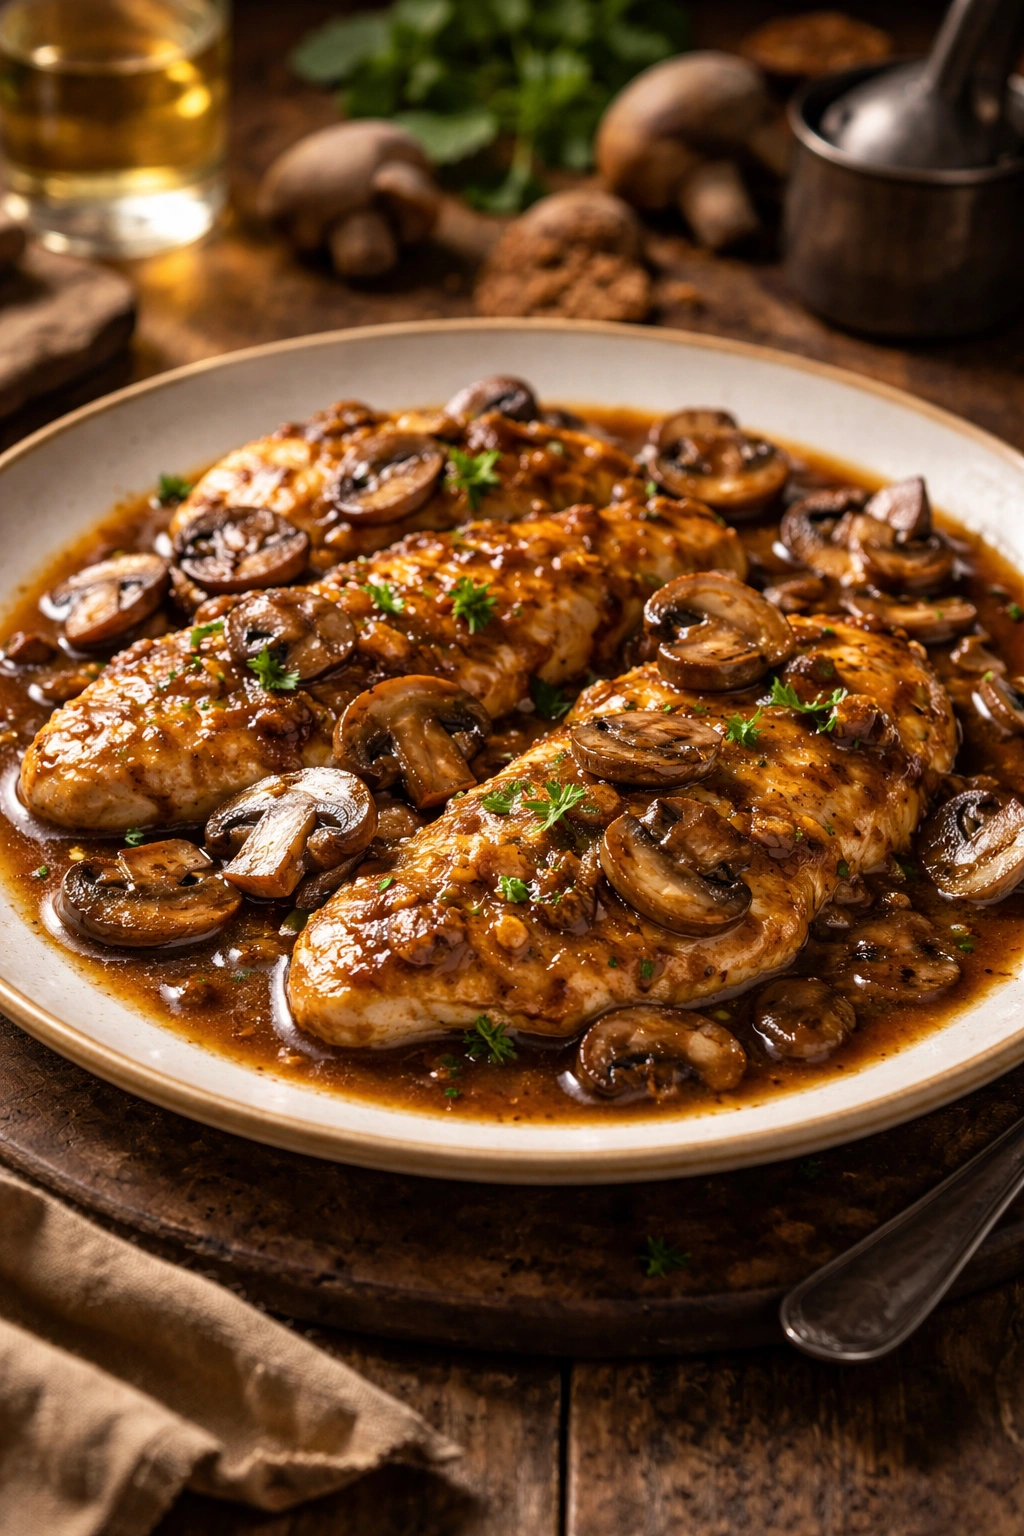
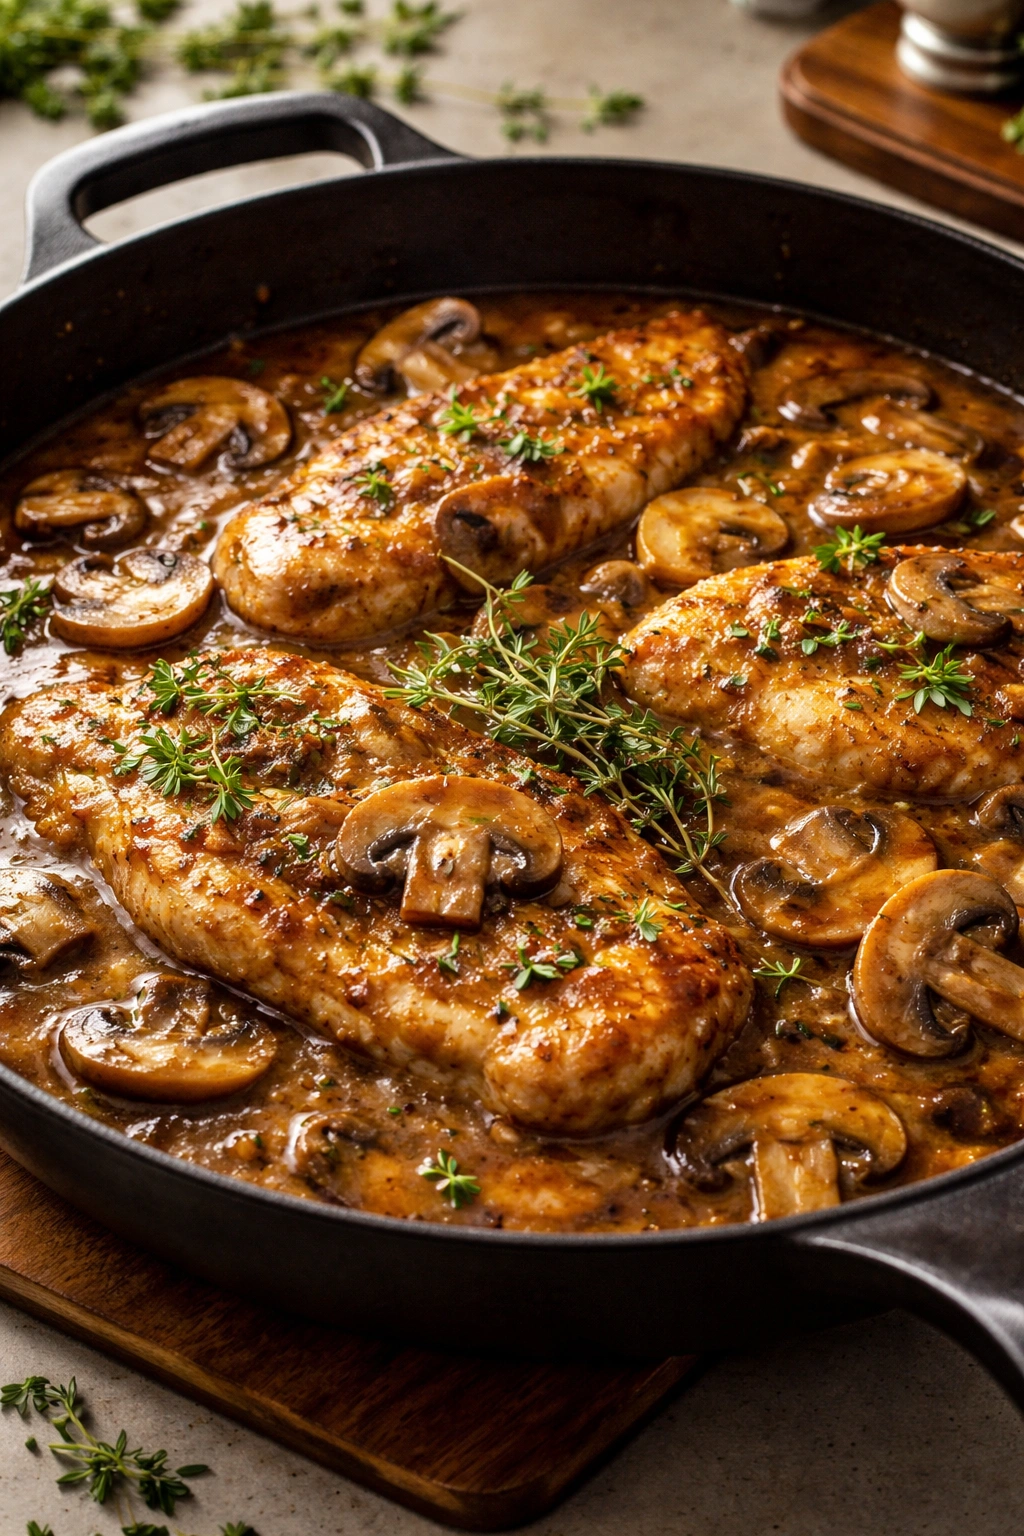
The beauty of chicken marsala lies in its simplicity paired with sophistication. Golden-seared chicken cutlets meet an earthy, wine-rich sauce studded with tender mushrooms. That sauce—velvety and deeply flavorful—clings to every bite, creating layers of taste that feel far more complex than the ingredient list suggests. The marsala wine brings a subtle sweetness and caramelized depth that ordinary white wine simply cannot achieve. Mushrooms add umami richness and a tender texture that perfectly complements the crispy-edged chicken. When you finish the dish with heavy cream and a final swirl of butter, you create a sauce that’s both rich and balanced, never heavy or overpowering.
What really sets this dish apart is that it genuinely tastes like you spent hours in the kitchen. Your family or dinner guests will be convinced you’ve mastered some complex French technique, when in reality you’ve just become skilled at one pan, high heat, and knowing exactly when to add each ingredient. The recipe rewards confidence and precision in equal measure. Once you understand the mechanics of searing chicken, building a pan sauce, and reducing wine to concentrate its flavors, you’ll have a technique that extends far beyond this single dish.
Understanding Marsala Wine and Why It Matters
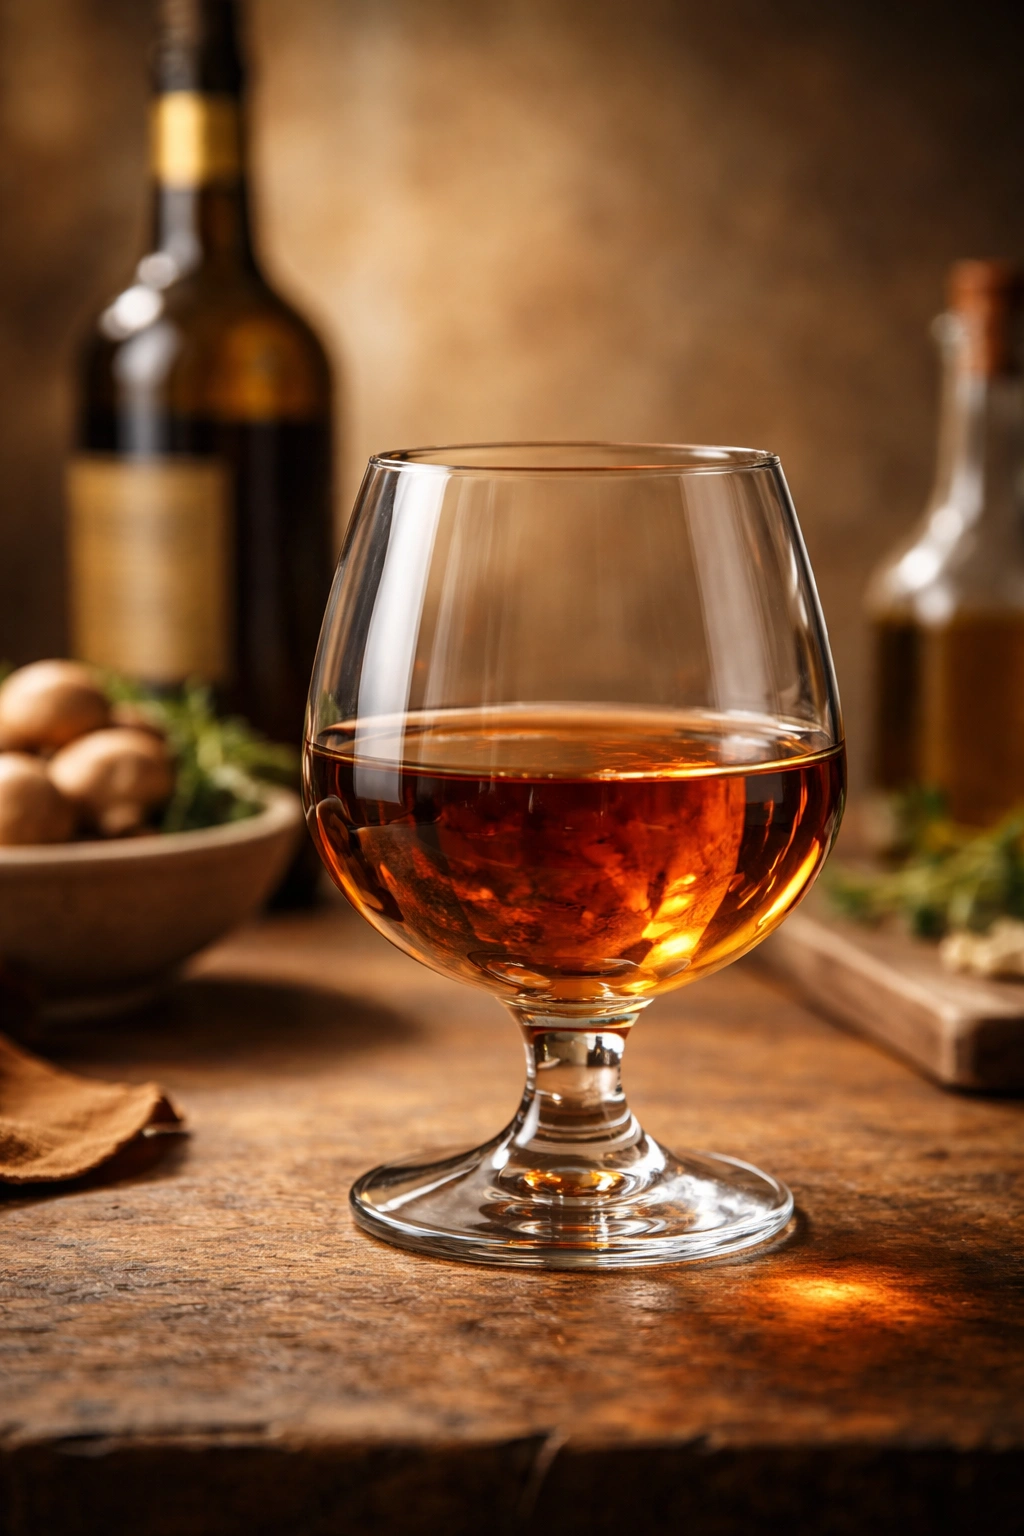
Marsala wine is the soul of this dish, and choosing the right bottle makes the difference between a good chicken marsala and an exceptional one. This fortified wine comes from the town of Marsala on the island of Sicily, crafted from white and black Sicilian grapes. Unlike regular wine, marsala has brandy added to it, which raises its alcohol content and creates a richer, more complex flavor profile. The result is a wine with deep, smoky notes and a hint of caramel that can’t be replicated by any other ingredient.
Here’s where most people make their first mistake: marsala comes in three sweetness levels—secco (dry), semisecco (semi-sweet), and dolce (sweet)—plus varying quality grades based on aging and alcohol content, ranging from Fine (lowest) to Vergine (highest). For chicken marsala specifically, you absolutely must use dry marsala wine. Sweet marsala belongs in tiramisu and other desserts, not in a savory sauce. If you grab the wrong bottle, your sauce will taste cloying and unbalanced, oversweetening the mushrooms and overwhelming the chicken.
The quality of your marsala matters because it becomes the dominant flavor in the sauce. You can get away with using inexpensive ingredients in dishes with long ingredient lists and bold seasonings, but chicken marsala isn’t one of them. Since you’re only using 2/3 to 3/4 cup of wine in the entire recipe, that wine needs to be something you’d actually enjoy drinking. A good dry marsala should taste smooth and intentional, never chemical or harsh. Expect to pay between $12 and $20 for a reliable bottle—look for brands like Paolo Lazzaroni Fine I.P. Marsala or Cantine Pellegrino. These bottles will keep for months in a cool, dark pantry, so you can use the remainder in other recipes like creamy pork marsala or chicken madeira.
If marsala simply isn’t available to you or you have a strong preference not to cook with wine, madeira wine is the closest substitute. Sherry, port, or even a dry white wine will work in a pinch, though the final sauce won’t carry quite the same sophisticated depth. In a true crisis, you can use additional chicken broth mixed with a splash of balsamic vinegar, but this shifts the flavor profile noticeably. The alcohol content matters less than you might think—it burns off during the first few minutes of simmering, so this dish is completely safe for children to eat.
The Essential Ingredients You’ll Need
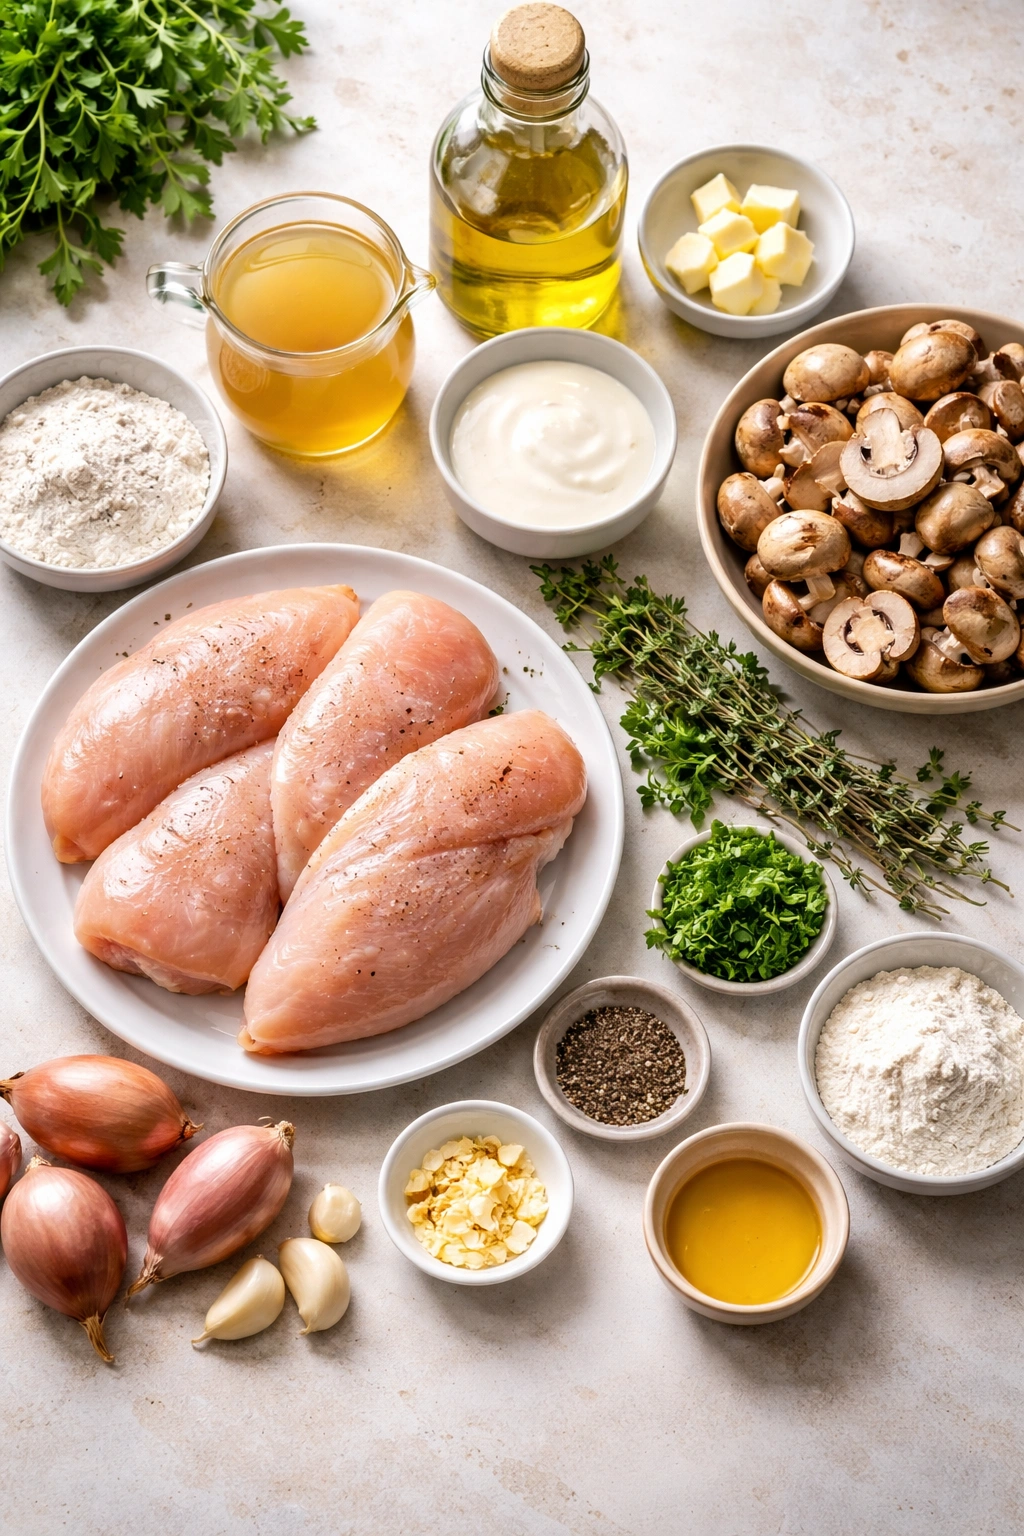
Chicken marsala proves that exceptional food doesn’t require an overwhelming ingredient list. Everything here is accessible, familiar, and worth buying quality versions of. Here’s what you’ll gather before you start cooking:
For the Chicken and Coating:
- 1½ pounds boneless, skinless chicken breasts (or 4 pre-sliced chicken cutlets)
- ½ cup all-purpose flour
- ¾ teaspoon kosher salt (plus extra for seasoning)
- ¼ teaspoon freshly ground black pepper (plus extra for seasoning)
- ¼ teaspoon garlic powder
For Cooking:
- 3 tablespoons extra-virgin olive oil, divided
- 3 tablespoons unsalted butter, divided
For the Sauce:
- 8 ounces fresh mushrooms (cremini, button, or a mix), thinly sliced
- 1 medium shallot, finely minced (or use a small onion if shallots aren’t available)
- 3 cloves garlic, minced (preferably fresh, not pre-minced)
- ⅔ cup dry marsala wine
- ⅔ cup low-sodium chicken broth
- ½ cup heavy whipping cream (or heavy cream)
- 2 sprigs fresh thyme (or ¼ teaspoon dried thyme)
- 2 tablespoons fresh Italian parsley, chopped (for garnish)
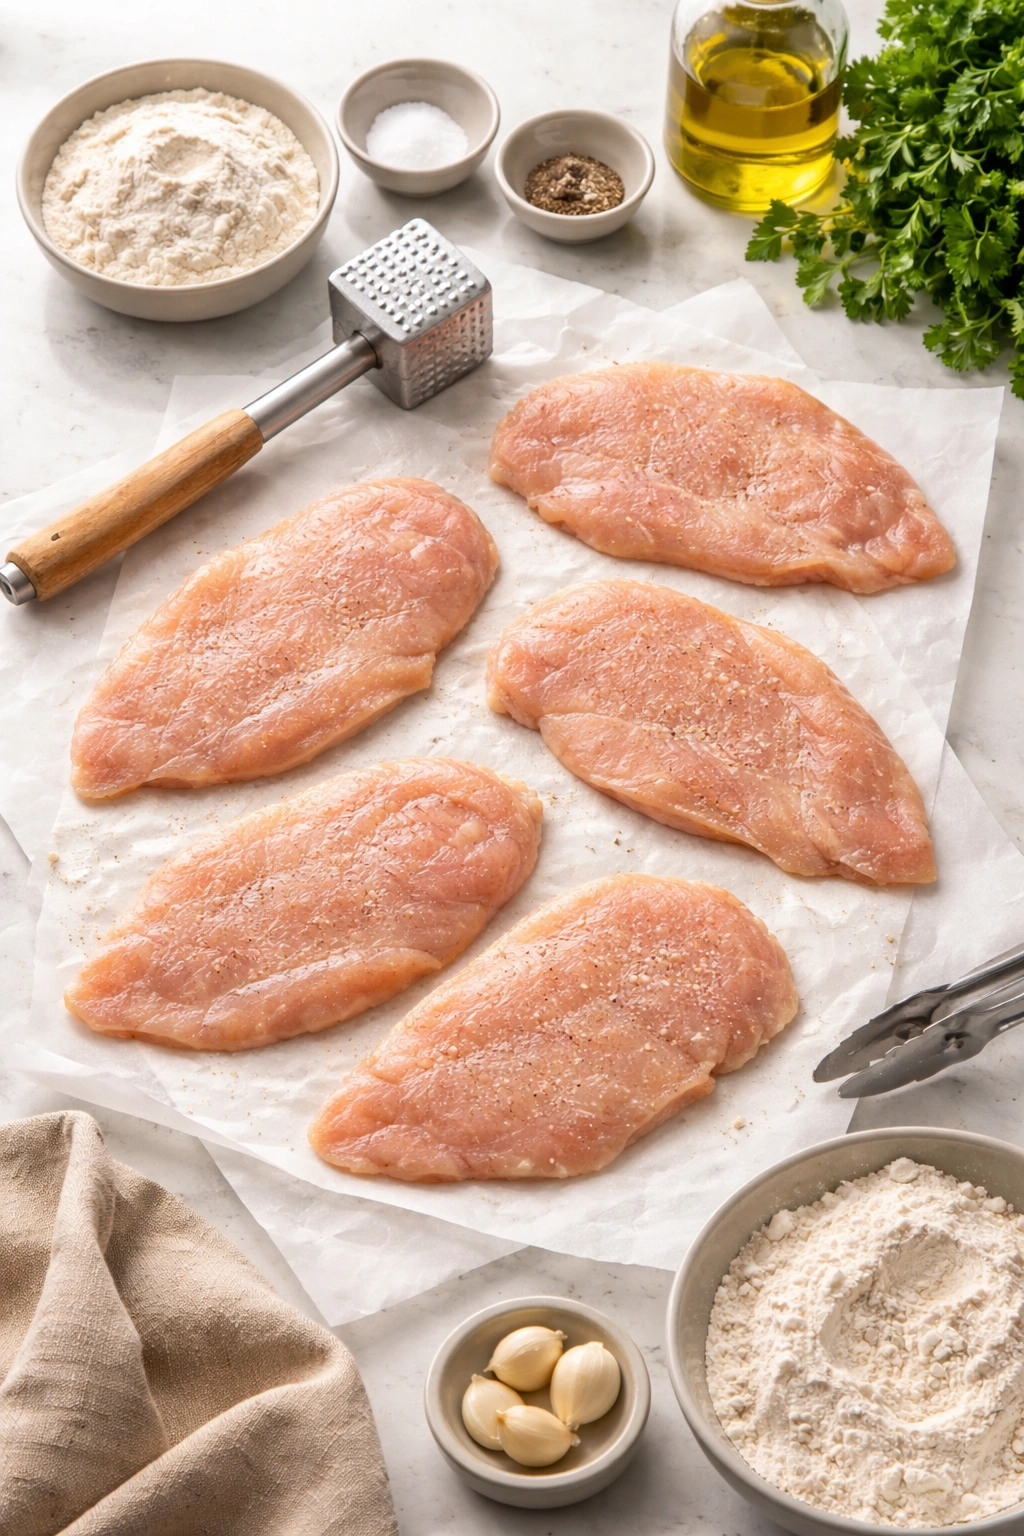
The chicken is your centerpiece. Boneless, skinless chicken breasts work best because they cook quickly and turn out tender when handled properly. If your grocery store has a meat counter, the butcher can cut and pound the chicken for you—this is a legitimate time-saver that costs nothing extra. If you’re doing it yourself, buy chicken breasts that are roughly the same size so they cook evenly.
Mushrooms deserve special attention because they’re more than just a supporting ingredient—they’re a crucial flavor element. Cremini mushrooms (also called baby portobellos) have an earthy, slightly rich flavor that pairs beautifully with marsala wine. White button mushrooms work perfectly well too and are more budget-friendly. Some cooks use a combination of both. Avoid pre-sliced mushrooms from those plastic containers if they look darkened or wet; fresh mushrooms should smell earthy and feel firm. Slice them yourself, keeping the pieces relatively uniform so they brown evenly. If mushrooms aren’t available or you genuinely dislike them, you can make this dish without them—it becomes creamy chicken with a wine sauce rather than the traditional preparation, but it’s still delicious.
The butter is non-negotiable. Real, unsalted butter creates an emulsion with the cream and helps thicken the sauce while adding richness. The combination of olive oil (which won’t burn at high heat) and butter (which adds flavor) is the technique used in restaurant kitchens. Some cooks argue for all butter or all oil, but this combination gives you the best of both worlds.
Equipment That Makes a Difference
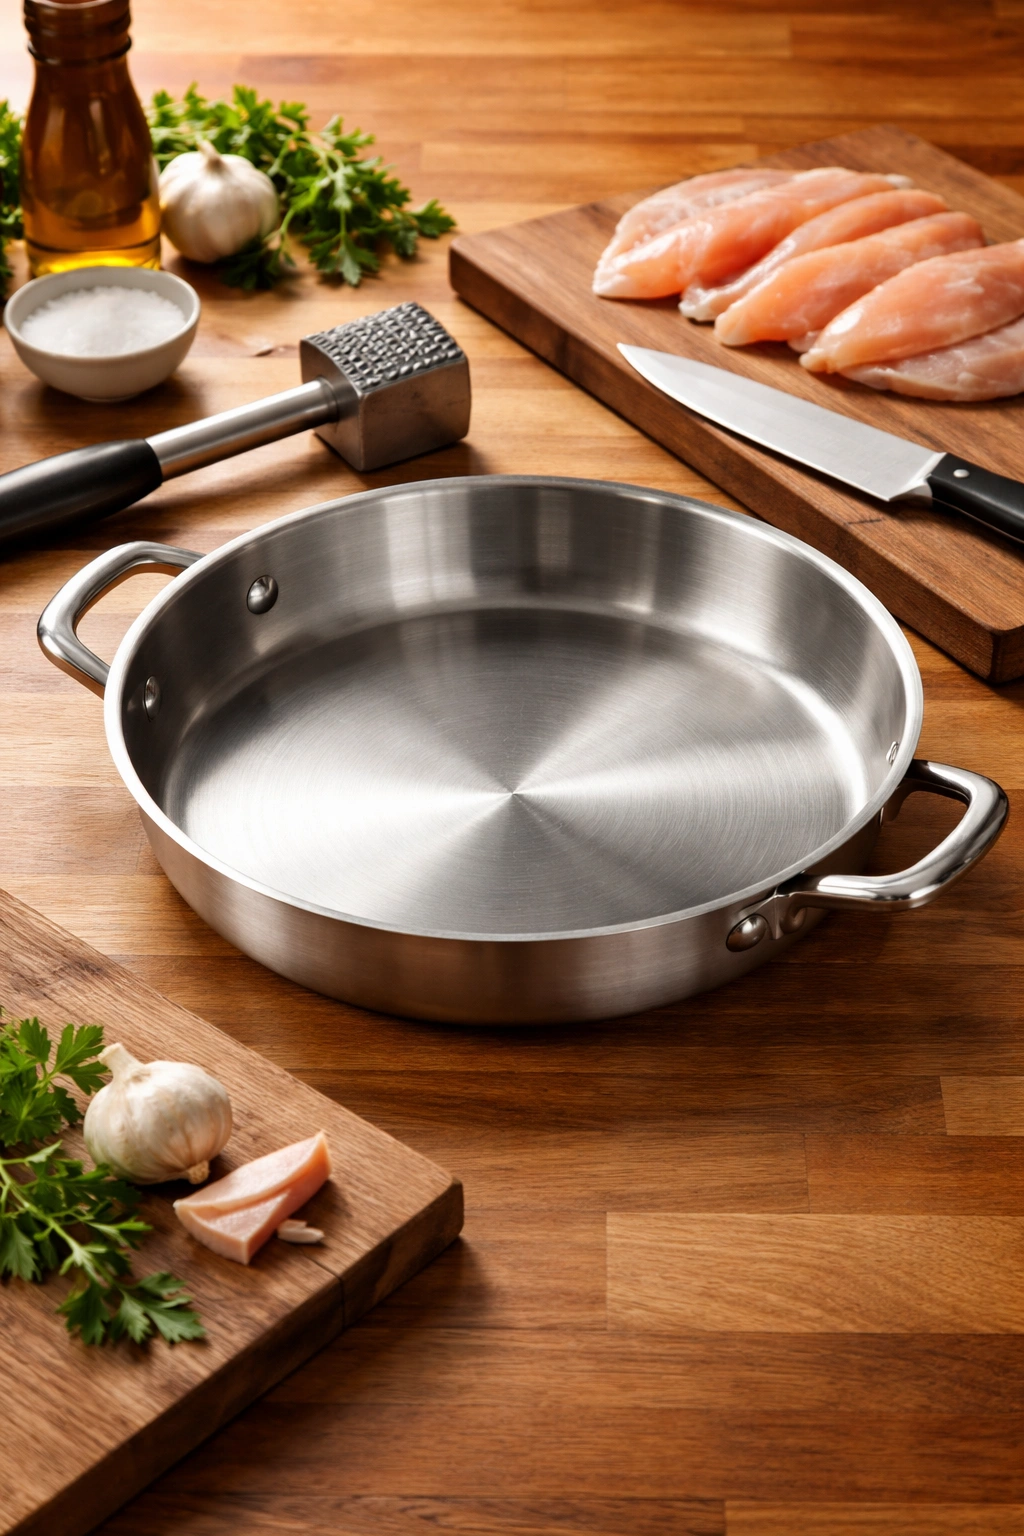
You don’t need a kitchen full of gadgets to make chicken marsala, but having the right tools makes the process smoother and more enjoyable. A large skillet or sauté pan is essential—something between 10 and 12 inches that has sides tall enough to accommodate the sauce without splattering. Stainless steel gives you the best browning (nonstick works but won’t develop the same golden color), and the pan should be heavy enough that it doesn’t develop hot spots that burn the butter.
A meat mallet or meat tenderizer transforms whole chicken breasts into uniform cutlets. If you don’t own one, a rolling pin works in a pinch, or you can ask the butcher to do this for you. The goal is chicken that’s about ¼ inch thick and relatively even throughout—thinner in some spots means those parts will overcook before the thicker sections are done.
A sharp knife makes slicing chicken easier and safer. A dull knife requires more pressure, which increases the chance of the knife slipping and cutting your hand instead of the chicken. One of my favorite shortcuts is to partially freeze chicken for 15 to 20 minutes before slicing—it becomes much easier to cut cleanly.
A wooden spoon is perfect for scraping those flavorful browned bits (called fond) off the bottom of the pan as you build the sauce. These caramelized bits are liquid gold flavor-wise, and gently dissolving them into the wine and broth multiplies the sauce’s complexity. Don’t skip this step.
A meat thermometer removes guesswork from chicken doneness. Chicken is safe to eat at 165°F (74°C) internal temperature. If you don’t own a thermometer, you can cut into the thickest piece of chicken—there should be no pink anywhere, and the juices should run clear—but a thermometer is more reliable.
Yield: Serves 4 people | 1 complete meal Prep Time: 15 minutes Cook Time: 20 minutes Total Time: 35 minutes Difficulty: Beginner to Intermediate — The steps are straightforward and require no special techniques, but success depends on managing heat properly and not overcooking the chicken. Anyone comfortable cooking chicken on the stovetop can handle this.
Preparing Your Chicken for Perfect Results
How you prepare the chicken determines whether you end up with tender, evenly cooked cutlets or dry, tough pieces. This step isn’t complicated, but it matters.
Start by removing the chicken from the refrigerator 10 to 15 minutes before cooking. Room-temperature chicken cooks more evenly than cold chicken straight from the fridge. While the chicken is resting, pat it completely dry with paper towels. Moisture is the enemy of browning—it creates steam, which prevents that gorgeous golden crust from forming. If your chicken breasts are large (roughly ¾ pound or larger), cut each one in half horizontally to create two thinner pieces. Place the chicken between two sheets of parchment paper and pound gently with the flat side of a meat mallet until the pieces are about ¼ inch thick and relatively uniform in thickness.
Once your chicken is pounded thin, it’s ready to dredge. In a shallow bowl or on a small plate, combine the flour, salt, pepper, and garlic powder. The garlic powder adds a subtle savory note directly to the chicken. Dredge each piece on both sides, making sure it’s evenly coated but not caked with flour—shake off any excess. The flour serves two purposes: it helps the chicken develop that crispy, golden exterior, and it will later thicken the sauce. Set the floured chicken on a clean plate or piece of parchment paper.
Here’s a key point many home cooks miss: don’t let the floured chicken sit for more than a few minutes before cooking it. Once flour gets wet from the raw chicken, it starts to clump and won’t brown evenly. You want to dredge and cook in quick succession. If you’re cooking in batches, dredge each batch right before it goes into the pan.
The Step-by-Step Cooking Process
This is where the magic happens. Success comes from understanding what’s happening at each stage and why timing matters. Read through the entire process once before you start cooking so nothing catches you off guard.
Searing the Chicken:
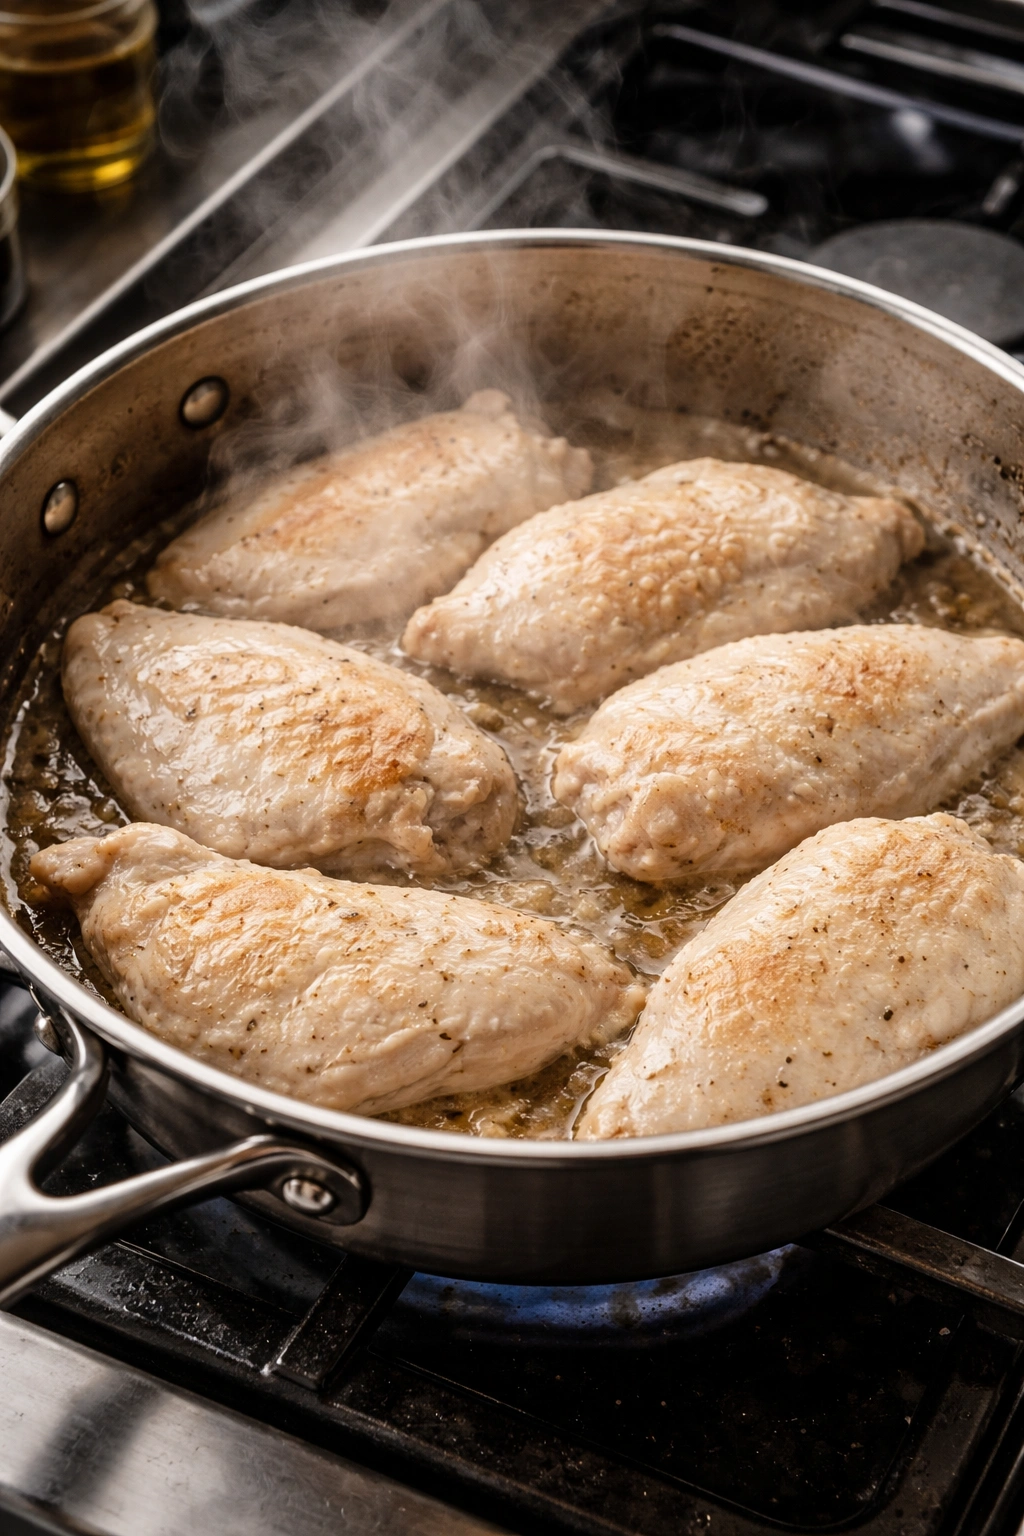
Heat the olive oil and 1 tablespoon of the butter in your large skillet over medium-high heat. You want the pan genuinely hot—when you place a piece of chicken in it, it should sizzle immediately and audibly. This sizzle is the sound of the chicken’s exterior moisture turning to steam and creating that golden crust. If the pan isn’t hot enough, the chicken will steam instead of sear, and you’ll end up with pale, rubbery meat.
Once the butter has melted and the pan is visibly hot, carefully add the chicken cutlets in a single layer. Don’t overcrowd the pan—if the pieces are touching, they’ll steam each other rather than brown. You may need to cook them in two batches. Let the chicken sear undisturbed for 4 to 5 minutes. Resist the urge to move it around or flip it prematurely. The chicken needs time to develop that crust. You’ll see the edges turning golden and feel less resistance when you try to lift it—that’s your signal that it’s ready to flip.
Flip the chicken and cook the other side for another 4 to 5 minutes until golden brown and cooked through. The chicken should be just barely cooked through at this point—when you cut into the thickest part, it should be white with no pink, and the juices should run clear. You’re not fully cooking it; you’re finishing it in the sauce later, so it’s better to err on the side of slightly underdone here than to overcook it now. Transfer the cooked chicken to a plate and tent it loosely with foil to keep it warm.
Building the Sauce:
Add the remaining 1 tablespoon of butter and 1 tablespoon of the remaining olive oil to the same skillet. When it’s melted and shimmering, add the sliced mushrooms and a pinch of salt and pepper. Let them cook, stirring occasionally, for 5 to 8 minutes until they’ve released their moisture and begun to brown at the edges. The mushrooms will go through phases: first they’ll release liquid and look wet, then they’ll reabsorb that liquid as it evaporates, and finally they’ll start to brown slightly. This browning develops their flavor tremendously, so don’t rush this step.
Add the minced shallot and garlic to the mushroom mixture and cook for 1 to 2 minutes, just until fragrant. You’re not trying to brown the garlic heavily—you want it softened and aromatic but not dark or burnt, which would make it bitter. This is where the pan’s residual heat from cooking the chicken is your friend.
Add the remaining 1 tablespoon of olive oil to the pan, then sprinkle the remaining 1 tablespoon of flour over the mushroom mixture. Stir constantly for about 1 minute. This flour will thicken the sauce as it cooks, and stirring it through the oil and vegetables helps eliminate lumps before you add the liquid. This is called making a roux, and it’s the secret to a silky sauce without lumps.
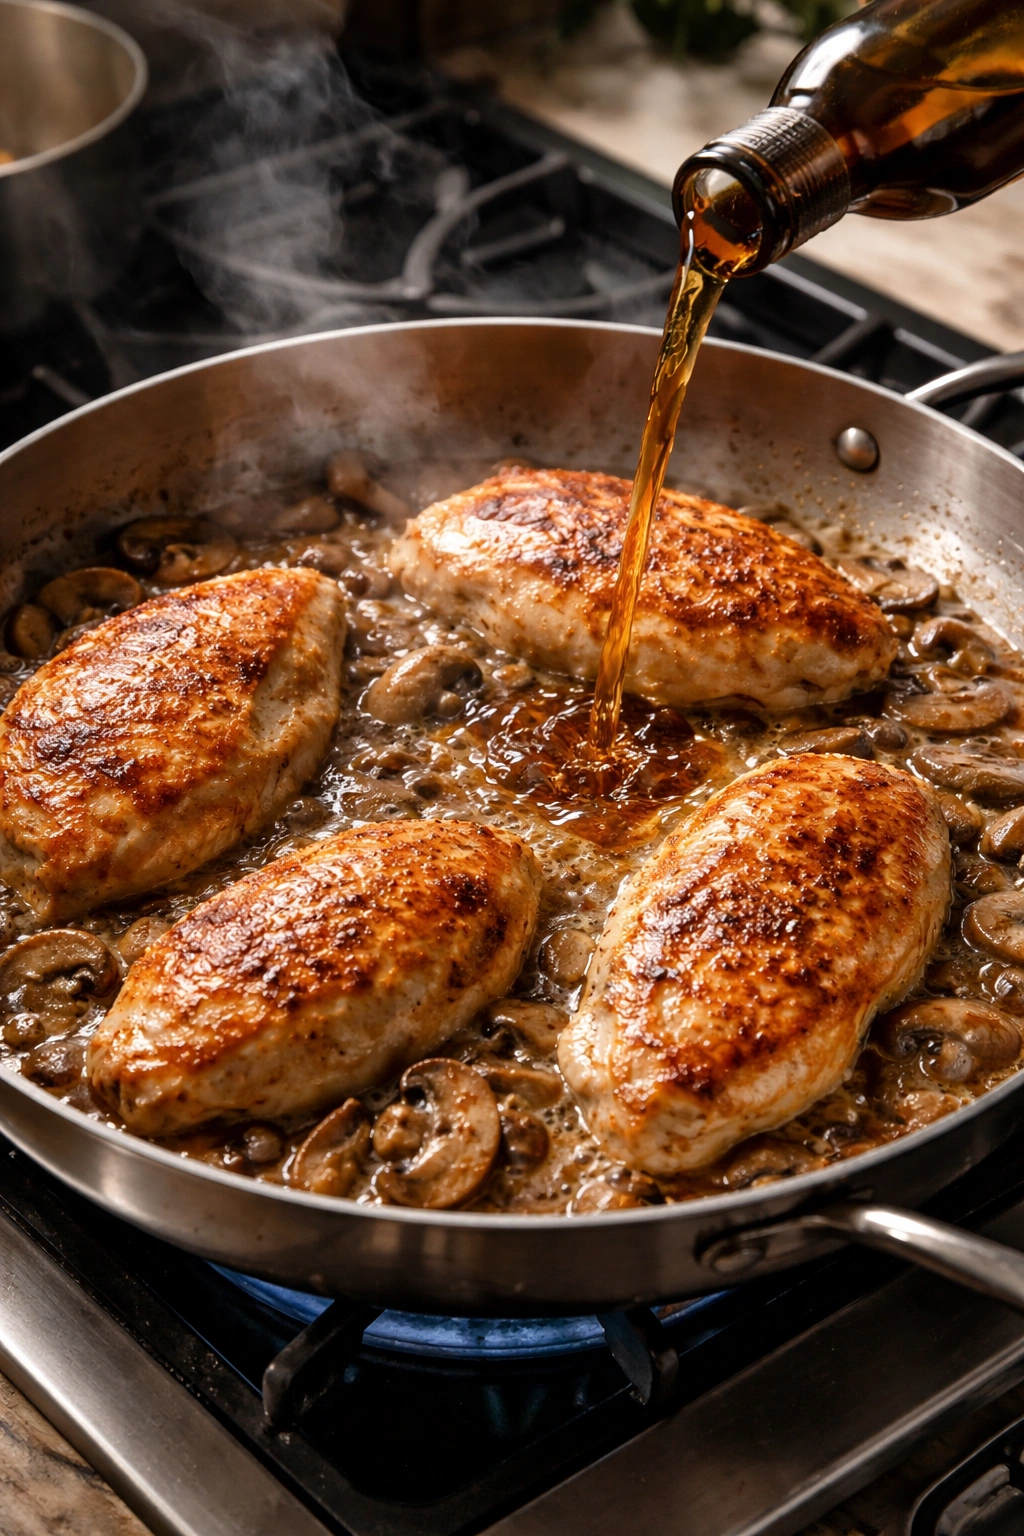
Pour the marsala wine into the pan and use a wooden spoon to scrape up all those browned, flavorful bits from the bottom—this is the fond, and it’s liquid gold. The wine will bubble and steam, which is exactly what you want. Let it simmer for 2 to 3 minutes, allowing some of the alcohol to burn off and the wine to concentrate slightly. You should see the liquid reduce noticeably.
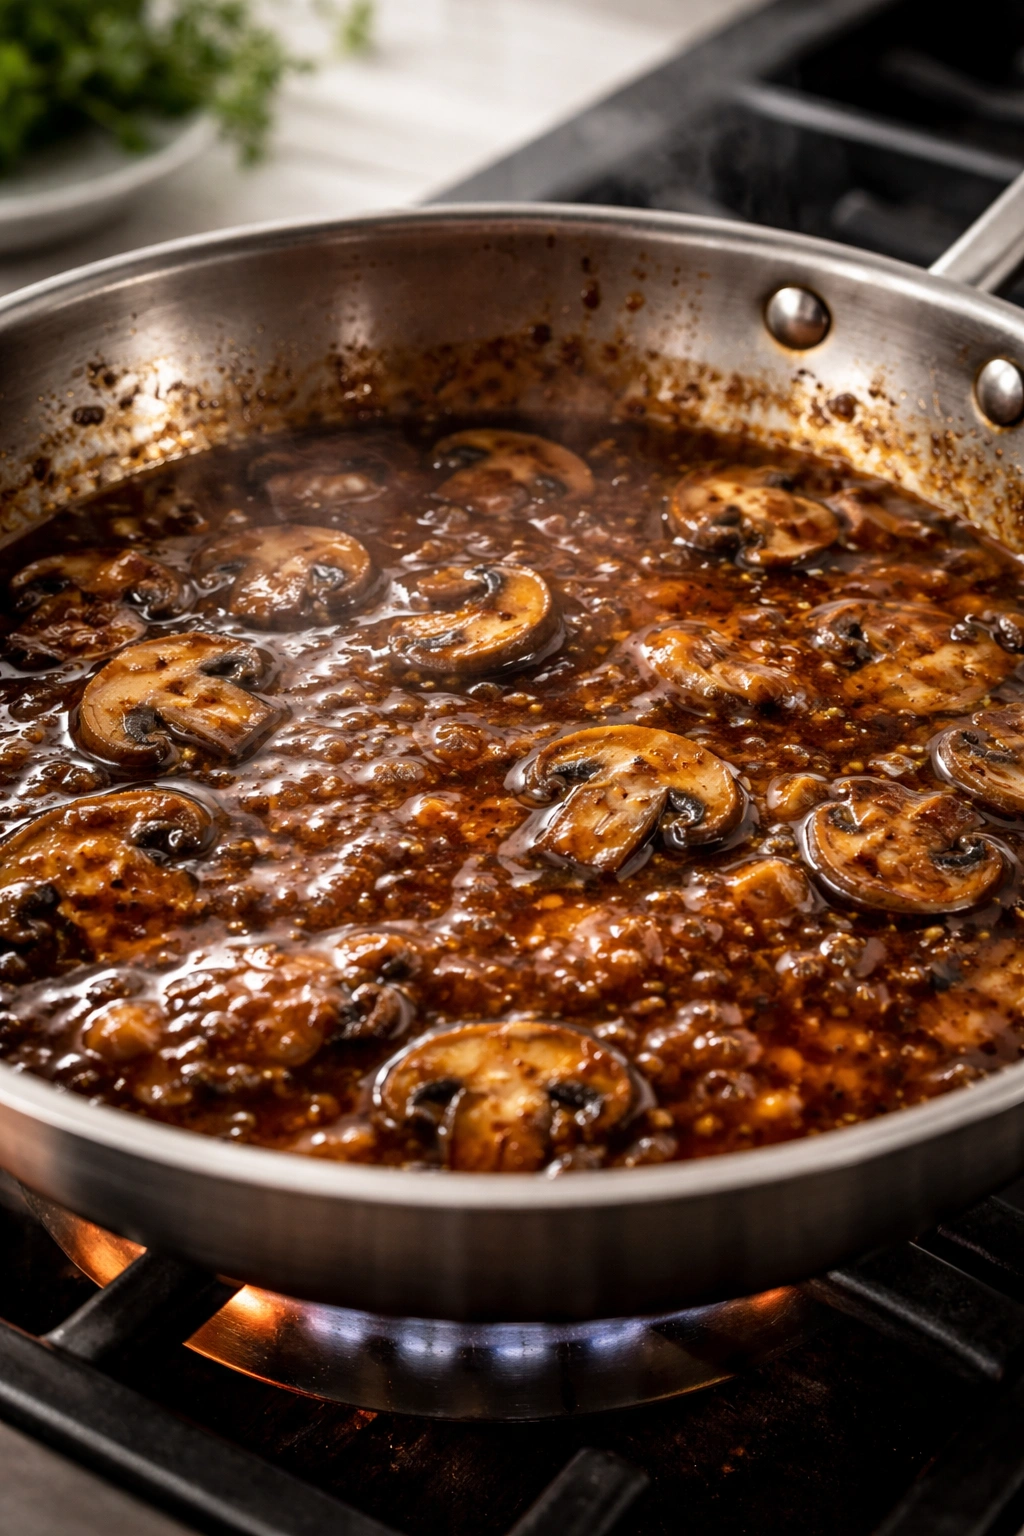
Add the chicken broth and fresh thyme to the pan. Stir everything together, scraping the bottom as you go. If you’re using dried thyme instead of fresh, crumble it between your fingers as you add it to release more flavor. Bring the mixture to a gentle boil, then reduce the heat to medium and let it simmer, uncovered, for about 10 to 12 minutes. You’re looking for the sauce to reduce by roughly one-third, becoming darker in color and slightly thickened. It should thicken much more visibly near the end of cooking.
Pour in the heavy cream and stir to combine. The sauce will look lighter for a moment, then as you continue simmering, it will deepen and thicken further. Continue simmering for another 2 to 3 minutes until the sauce reaches the consistency you want—it should coat the back of a spoon and not pool thinly on the plate.
Finishing and Serving:
Return the chicken (along with any juices that have accumulated on the plate) to the skillet. Reduce the heat to low and simmer gently for 2 to 3 minutes, spooning the sauce over the chicken as it heats through. The chicken should be warmed through completely but not simmering vigorously—vigorous bubbling can toughen it.
Taste the sauce and adjust seasoning with additional salt and pepper if needed. Spoon into serving dishes or plates, ensuring each portion gets chicken, mushrooms, and plenty of sauce. Garnish with fresh parsley and serve immediately while the sauce is still hot and silky.
Secrets to a Restaurant-Quality Sauce
The difference between homemade sauce and restaurant-quality sauce often comes down to technique and patience rather than ingredients. Here are the insider tricks that transform this from “pretty good” to “where did you learn to cook?”
The Importance of High Heat Early: Start with a genuinely hot pan for searing the chicken. Restaurant kitchens use extremely hot equipment, and that intense heat is what creates the flavorful fond that becomes the sauce’s base. A moderately warm pan produces a pale, thin crust and minimal fond. You can always reduce heat later if splattering gets aggressive, but you can’t recover from insufficient browning.
Deglaze Properly: When you add the marsala wine to the hot pan, those browned bits should release and dissolve into the liquid. The wooden spoon should scrape them up gently—you’re not trying to force them off violently, just encourage them to loosen and dissolve. These are the flavors you’ve built through browning, and they’re non-negotiable for depth.
Reduce the Wine: Marsala wine is sweet and strong, and reducing it concentrates those characteristics. If you skip this step and move directly to adding broth and cream, the sauce tastes diluted and flat. Give the wine 2 to 3 minutes of simmering time—you’ll taste the difference. The sauce will smell noticeably richer and more developed.
Use Real Cream: Heavy whipping cream is crucial. Half-and-half or milk will create a thinner sauce that won’t thicken properly as the sauce reduces. If you must use a substitute for dietary reasons, use full-fat coconut milk or a heavy dairy-free cream alternative, but understand that the texture and mouthfeel will be noticeably different.
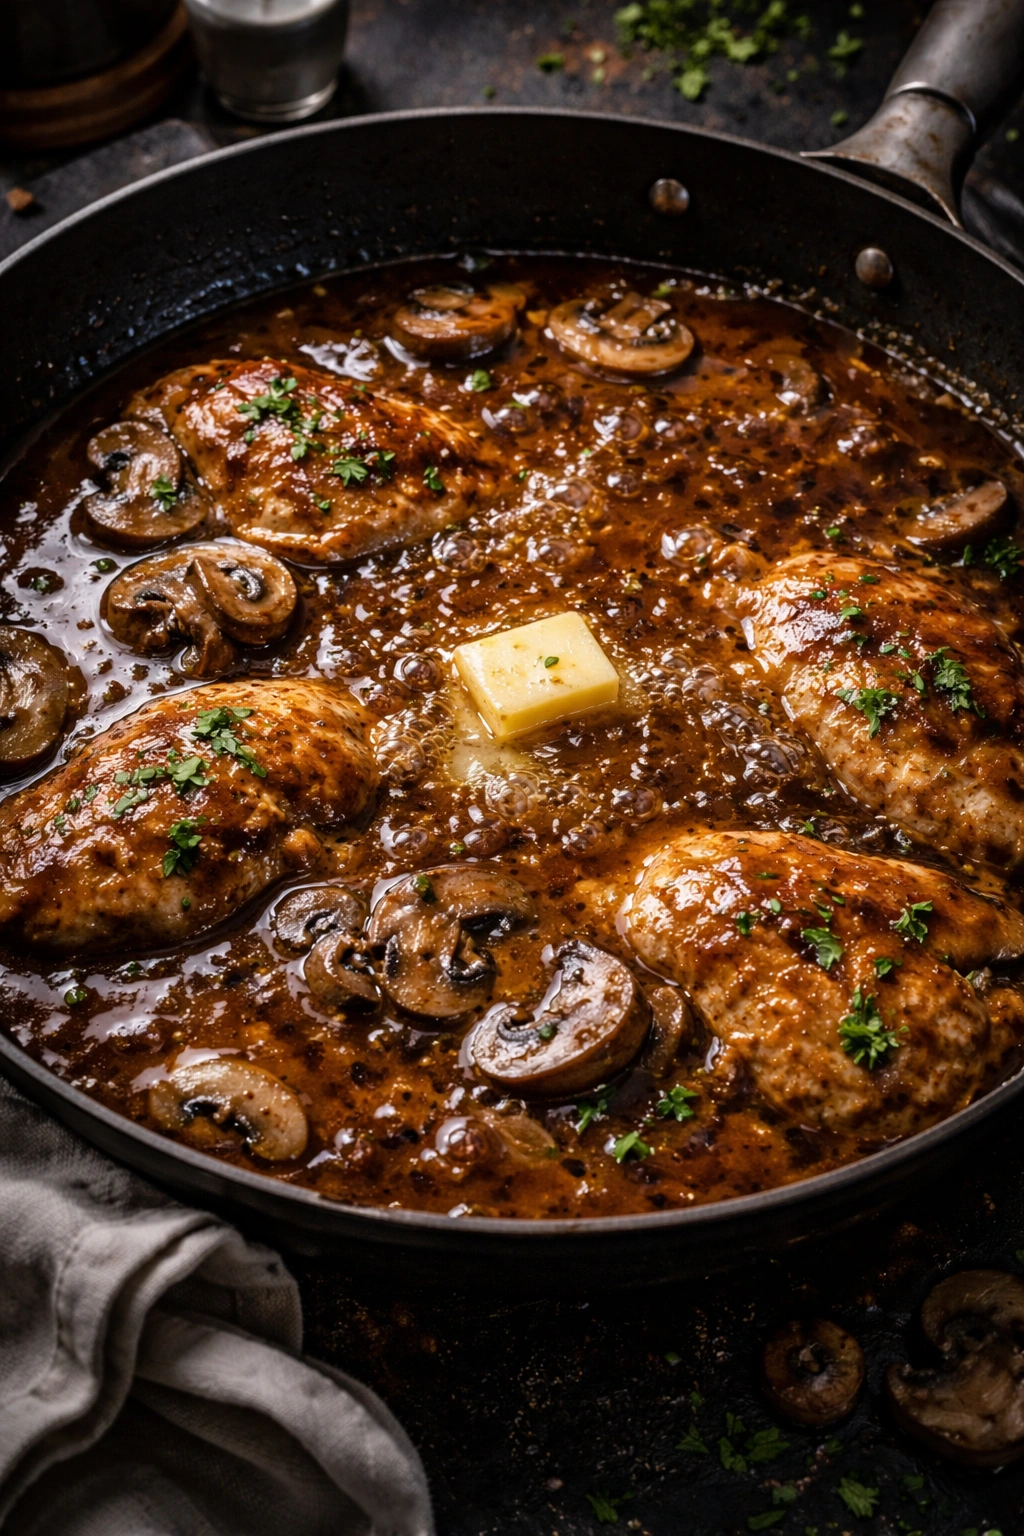
Swirl in Butter at the End: Just before serving, some cooks add an extra tablespoon of cold butter to the pan and swirl it in. This technique, called “monter au beurre,” emulsifies the sauce and creates a silkier, more luxurious texture. It’s not essential but is a true restaurant trick.
Don’t Overcook the Chicken: The biggest reason homemade chicken marsala turns out dry is overcooking the chicken while the sauce is reducing. That’s why you only partially cook the chicken during the initial sear—you finish it gently in the sauce for just 2 to 3 minutes at the end. This approach keeps it tender and juicy no matter your skill level.
Common Mistakes to Avoid
Understanding what goes wrong helps you avoid it the first time. Here are the pitfalls that trip up even experienced cooks:
Using Sweet Marsala: This is the most common and most consequential error. One sip of sweet marsala in a savory sauce will make you understand immediately why it’s wrong. The sauce becomes cloyingly sweet and loses balance. When you’re at the store, hold the bottle up to the light and read the label carefully. It should say “Dry,” “Secco,” or “Fine I.P.”—never “Sweet,” “Dolce,” or “Cooking Wine.”
Overcrowding the Pan: When you add too much chicken at once, the temperature drops and the pieces steam rather than sear. You end up with pale, mushy chicken and no fond for sauce building. Even if it takes two batches, it’s worth the extra few minutes.
Not Drying the Chicken: Wet chicken steams instead of browns. Always pat it dry with paper towels immediately before cooking. This single step makes more difference than you’d expect.
Moving the Chicken Constantly: The urge to flip and fuss with chicken is strong, but resist it. Let the chicken sit undisturbed for those first 4 to 5 minutes. The moment you move it, you interrupt the browning process. Once it’s golden, flip once and leave it alone until it’s cooked through.
Burning the Garlic: Garlic goes from fragrant to burnt shockingly fast, especially when it’s directly touching a hot pan in a mostly-dry environment. Add it when the mushroom moisture is being released, stir it constantly, and remove it from direct high heat within a minute or so. If your pan is splattering aggressively, reduce the heat slightly.
Not Reducing the Wine Enough: Marsala wine is strong and needs concentration. Those 2 to 3 minutes of simmering alone before adding broth are non-negotiable if you want a sauce with depth rather than one that tastes watered down.
Adding Cold Cream to Hot Sauce: Always use cream straight from the refrigerator, but add it slowly and stir constantly. Adding cold cream to a boiling-hot sauce can cause it to break or separate. Keep the sauce at a gentle simmer when you add the cream, not a rolling boil.
Overcooking During the Final Finish: Once the chicken is back in the pan, keep the heat at low and simmer gently for just 2 to 3 minutes. Vigorous boiling at this point will toughen the chicken and can cause the cream to break down slightly.
Flavor Variations and Adaptations
Once you’ve made this dish a few times and understand its bones, you can play with variations. Here’s where chicken marsala becomes truly yours:
A Creamier Version: Some people love the sauce thicker and richer than the classic preparation. If that’s you, increase the heavy cream to ¾ cup instead of ½ cup. Add it slowly and taste as you go—you can always add more, but you can’t remove it. Be aware that more cream means a less pronounced wine flavor, which some prefer and others find less interesting.
Adding Fresh Herbs: While parsley is traditional, consider adding fresh thyme or basil to the sauce itself (not just as garnish). Tear fresh basil and stir it in at the very end so it doesn’t darken. Fresh thyme can go in earlier with the other aromatics.
Lighter Version with Broth: If you want to cut down on cream, replace ¼ cup of the cream with additional chicken broth. This creates a more delicate sauce that’s still luxurious but lighter on the palate. Some people genuinely prefer this version.
Added Vegetables: Asparagus works beautifully in this dish. Blanch fresh asparagus in boiling salted water for 2 to 3 minutes, then shock it in ice water to stop the cooking. Dry it well and add it to the pan during the final finish so it warms without overcooking. Sautéed spinach stirred in at the end adds color and nutrition without changing the flavor profile.
Peppercorn Version: Add ½ teaspoon of cracked black peppercorns or pink peppercorns to the sauce as it simmers. Peppercorns add a subtle heat and complexity that complements the mushrooms beautifully.
Using Chicken Thighs: If you prefer darker meat, chicken thighs work wonderfully in this preparation. They’re more forgiving because they’re less prone to drying out. Pound them the same way or cut them into bite-sized pieces. They may take slightly longer to cook through—check for doneness at 165°F.
Make-Ahead Sauce: You can make the marsala-mushroom sauce (everything up through the final simmering step) up to 2 days ahead. Store it in the refrigerator in an airtight container. When you’re ready to serve, reheat the sauce gently, add fresh cream, then cook fresh chicken to add at the end. This is a smart approach for dinner parties because it lets you focus on perfectly cooking the chicken while guests are around.
Storage, Reheating, and Make-Ahead Options
Chicken marsala is excellent as leftovers, and the sauce actually tastes even better the next day as flavors marry and deepen. The dairy in the sauce is the limiting factor for long-term storage, but handled properly, you have several days of eating ahead.
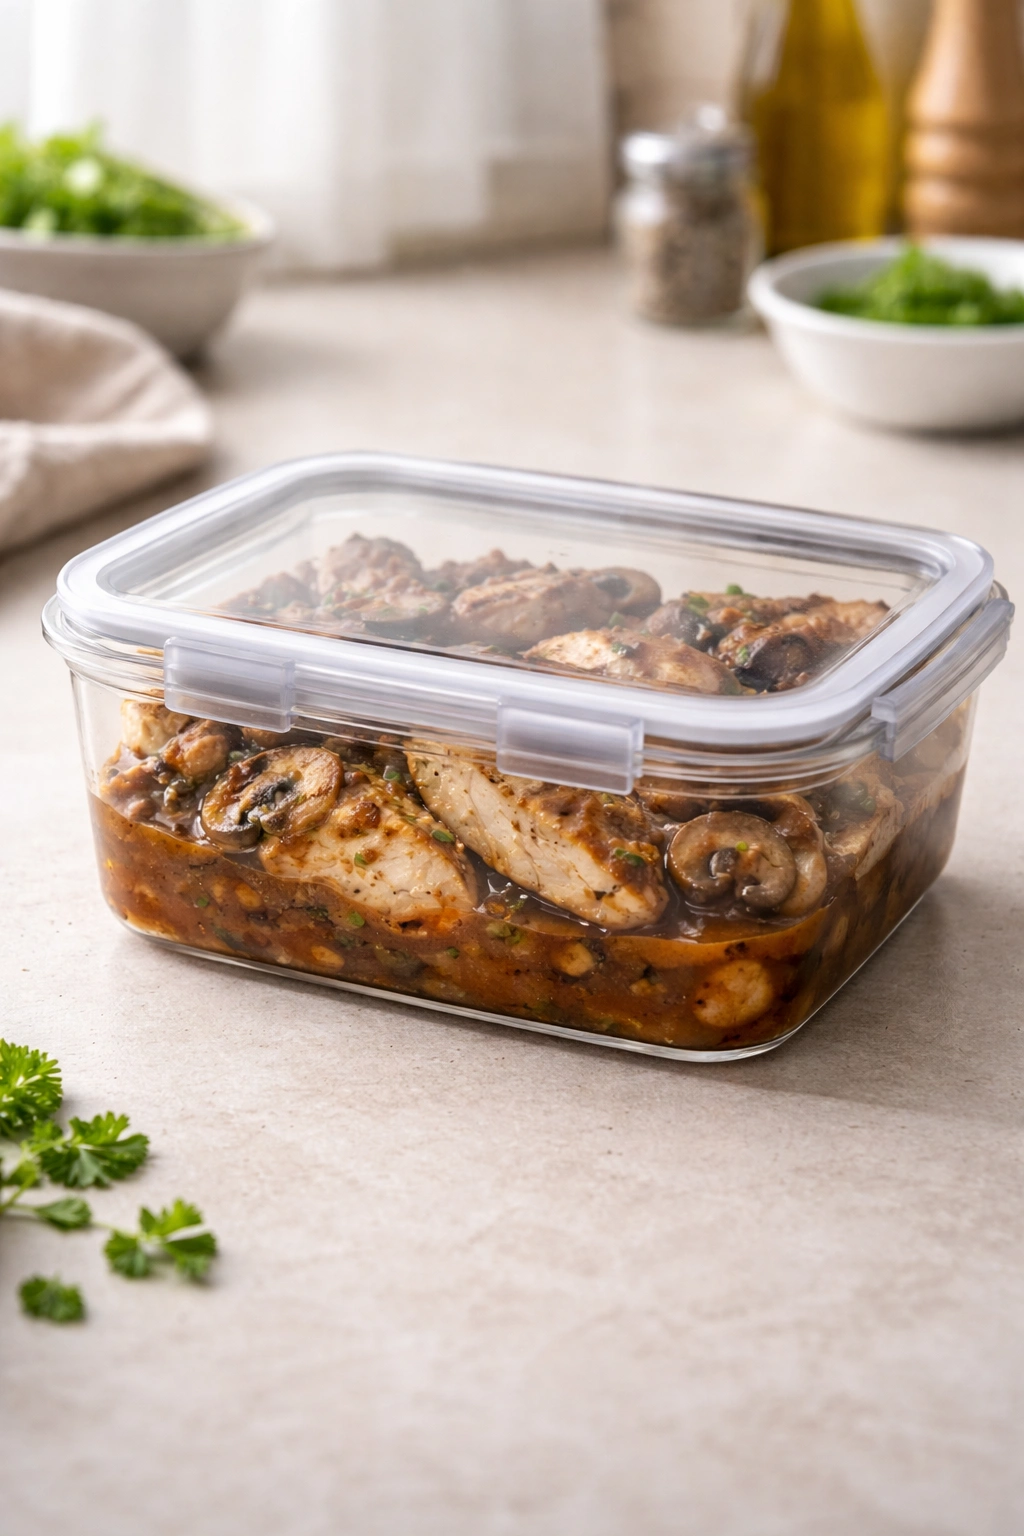
Refrigerator Storage: Let the cooked chicken and sauce cool to room temperature (about 15 to 20 minutes), then transfer to an airtight container. Stored this way, it keeps for 3 to 4 days in the refrigerator. The sauce will thicken slightly as it cools due to the fats solidifying—this is completely normal and actually means the sauce will seem richer the next day.
Freezing: Because of the heavy cream, freezing is not ideal, but it is possible. Let the chicken cool completely, then freeze in an airtight freezer bag for up to 2 months. When you thaw it (overnight in the refrigerator), the cream sauce may look slightly separated or broken. Reheat gently over low heat, stirring constantly, and add a splash of fresh heavy cream if needed to smooth it out. The texture won’t be quite as silky as freshly made, but the flavor is still excellent.
Reheating on the Stovetop: This is the best method. Transfer the chicken and sauce to a skillet or saucepan and heat over medium-low heat, stirring occasionally, until warmed through—usually about 5 to 7 minutes. Keep the heat moderate and don’t let it boil vigorously or the cream may separate. Cover the pan with a lid to hold in moisture and heat.
Reheating in the Microwave: Individual portions reheat well in the microwave. Transfer to a microwave-safe dish, cover loosely with a paper towel, and heat at 50% power for 1 to 2 minutes, stirring halfway through. Use lower power to prevent overheating the cream sauce.
Make-Ahead Strategies: For dinner parties, prepare the sauce completely (through the final simmering step, before adding chicken) earlier in the day. Refrigerate it in a covered container. About 20 minutes before guests arrive, cook the chicken, then add the warm sauce, cream, and return the chicken to the pan for the final finish. Alternatively, cook the chicken cutlets ahead of time and reheat them gently in the finished sauce right before serving.
Perfect Pairings and Serving Ideas
Chicken marsala is a complete meal on its own, but choosing the right accompaniments elevates it from good to memorable. The sauce is the star here, so pair it with sides that complement rather than compete.
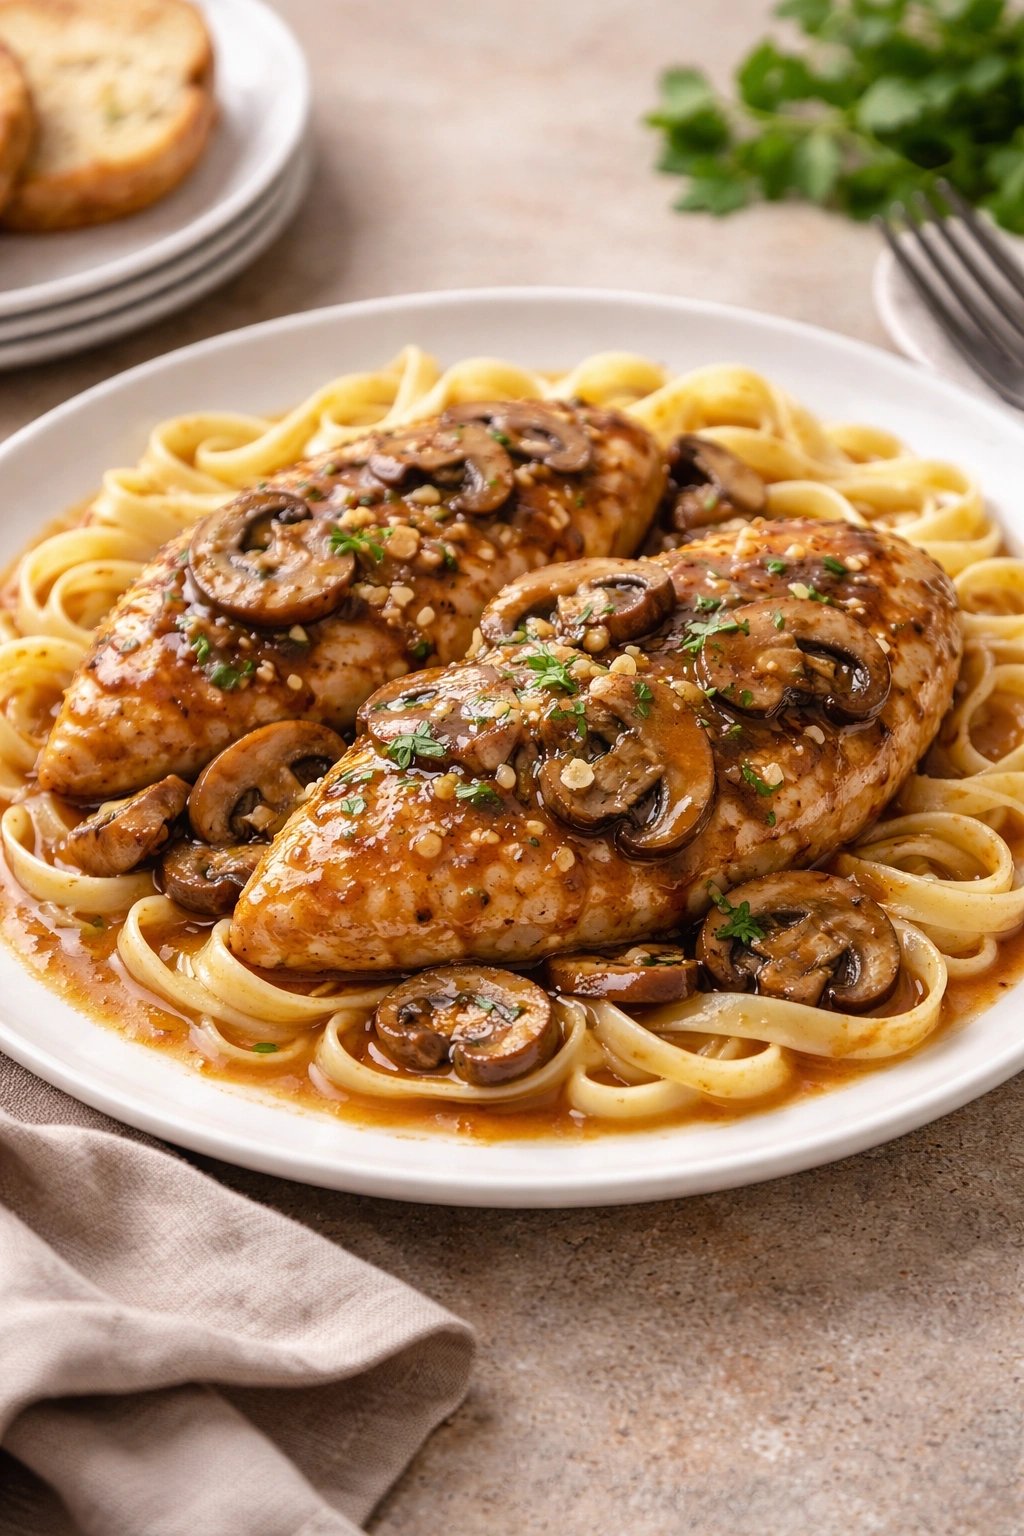
Pasta: This is the traditional pairing, and for good reason. The sauce clings beautifully to noodles, and every forkful delivers a bite of chicken, mushroom, and silky sauce. Thin egg noodles, fettuccine, or angel hair pasta are ideal. You can also serve over a simple pasta tossed with butter and parmesan, letting the marsala sauce be the only sauce on the plate.
Mashed Potatoes: Creamy mashed potatoes are perhaps the ultimate companion—they absorb and showcase the sauce like nothing else. A rustic mash with the skins left on contrasts nicely with the refinement of the marsala sauce. Some cooks make garlic-infused mashed potatoes, which adds another layer of flavor.
Rice Pilaf or Risotto: For a different texture, serve over a simple rice pilaf or creamy risotto. The rice absorbs the sauce while maintaining its own distinct texture. Butter-based or mushroom risotto creates an interesting flavor echo without being repetitive.
Polenta: Creamy polenta offers another elegant option. The mild, buttery flavor doesn’t compete with the marsala sauce, and the creamy texture mirrors the sauce nicely.
Roasted or Sautéed Vegetables: A green vegetable on the side keeps the meal balanced. Sautéed spinach with garlic, roasted asparagus, sautéed green beans, or a simple arugula salad all work well. The slight bitterness of greens cuts through the richness of the sauce beautifully.
Crusty Bread: Thick slices of crusty bread or garlic bread are perfect for soaking up every drop of sauce. This is not fancy, but it’s real.
Salad: A simple green salad dressed with a light vinaigrette cleanses the palate between bites and adds freshness that balances the richness of the cream sauce. Caesar salad is traditional and excellent, or opt for a simple mixed greens salad with a red wine vinaigrette.
Wine Pairing: Pinot noir is the classic choice—its moderate tannins and red fruit notes complement both the chicken and the marsala sauce without overwhelming delicate flavors. A lighter-bodied red wine works better than something bold and heavy. If you prefer white wine, a dry sauvignon blanc or unoaked chardonnay works surprisingly well, especially if you’ve made a lighter version of the sauce with less cream.
Final Thoughts
Chicken marsala proves that restaurant-quality cooking at home isn’t about difficult techniques or exotic ingredients—it’s about understanding a few key principles and executing them with intention. Get your pan hot, develop flavor through browning, respect the wine by letting it reduce, and finish with cream and butter. These fundamentals work far beyond this single dish.
The first time you make this, follow the recipe exactly as written. Learn how the chicken should sound when it hits a properly heated pan, how the mushrooms go through their phases of release and reabsorption, and how the sauce deepens and thickens as it reduces. Notice these things, and by the third time you make it, you won’t need to check the recipe. You’ll know instinctively when each step is complete.
What makes this dish special—what keeps people requesting it again and again—is that combination of elegance and accessibility. It tastes like something you’d order at a nice restaurant, yet it’s completely manageable on a weeknight. That’s not luck; it’s a recipe that’s been perfected by countless home cooks over generations. You’re inheriting that knowledge, and now it’s yours to share with people you care about.