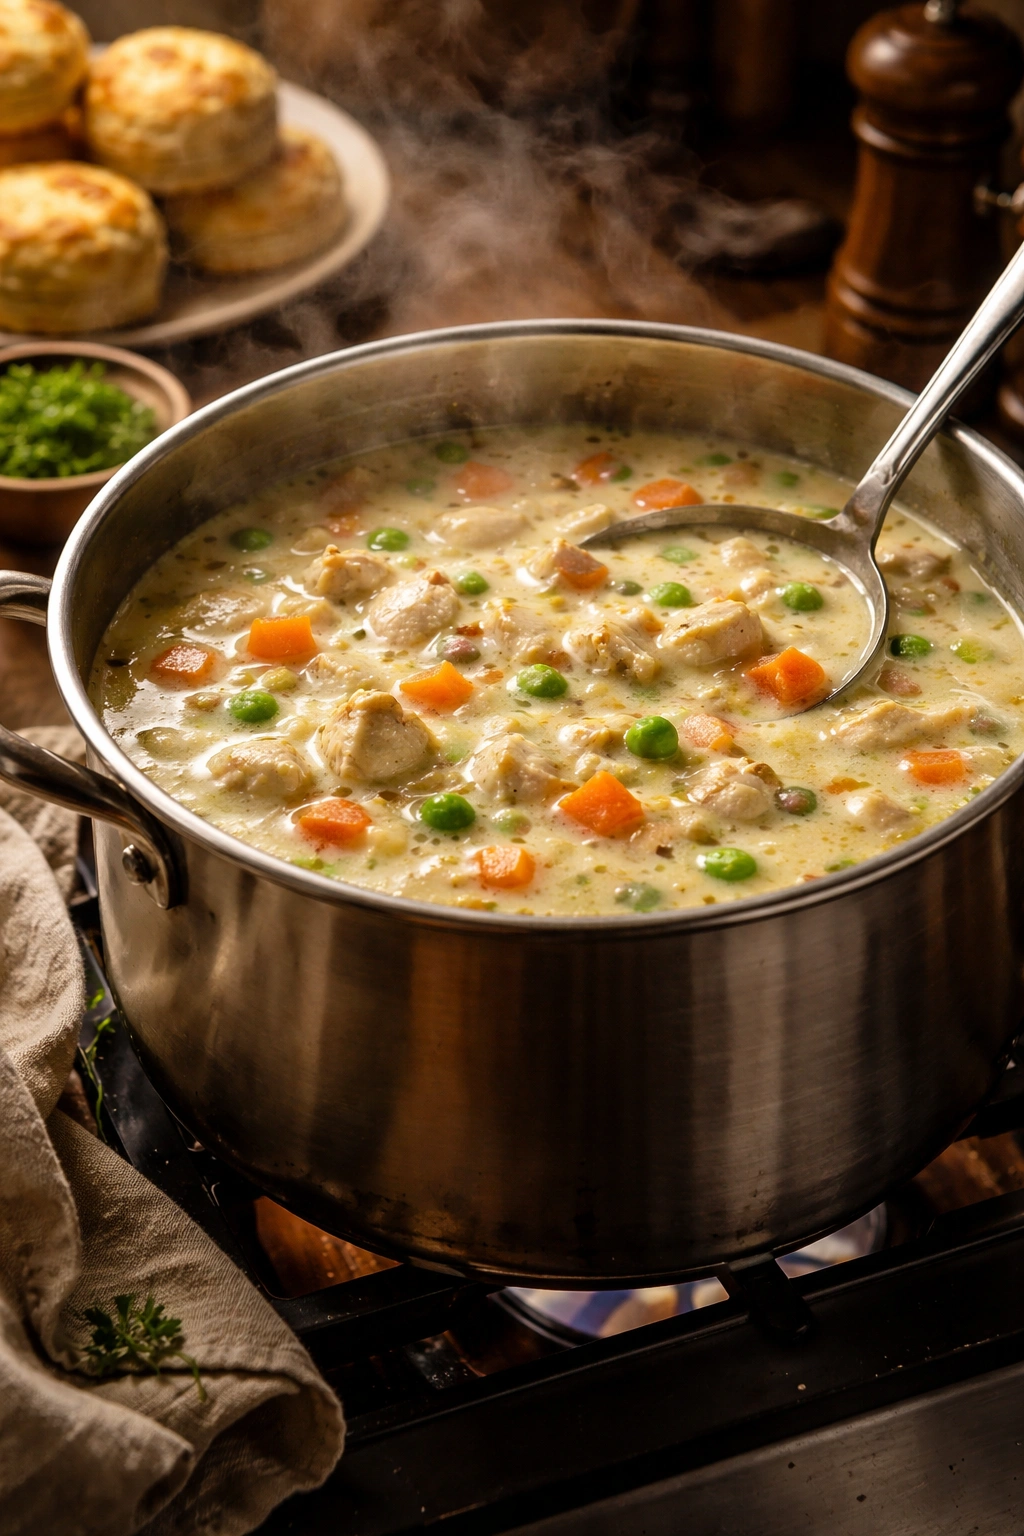
When the temperature drops and the wind starts rattling your windows, there’s a specific kind of hunger that only one thing can satisfy. It’s not just wanting to eat — it’s the body’s instinctive call for warmth, comfort, and the kind of deeply satisfying nourishment that seeps into your bones and settles there like a long-overdue homecoming. That’s precisely what this chicken pot pie soup delivers. It combines everything beloved about the classic pot pie — the tender shredded chicken, the buttery richness, the vegetables cooked until they’re almost creamy, and that unmistakable savory depth — but reimagined as a soul-warming soup that somehow feels even more luxurious and infinitely easier to make.
The beauty of this dish lies in its simplicity wrapped in sophistication. Unlike traditional pot pie, which demands pie dough, careful assembly, and precise baking time, this soup comes together in a single pot in about an hour. Yet it tastes like you’ve spent all afternoon in the kitchen, coaxing flavors into something extraordinary. The chicken becomes impossibly tender, virtually melting on your tongue. The broth transforms into liquid silk — rich without being heavy, flavorful without any sense of effort. Every spoonful delivers exactly what your body was craving: genuine warmth, genuine comfort, and genuine flavor that reminds you why this particular combination has been beloved for generations.
This soup has become a staple in my kitchen during the colder months, and I’ve made it enough times to understand exactly which moves matter and which ones don’t. I’ve burned the roux and learned why even heat distribution is non-negotiable. I’ve oversalted and underseasoned and discovered the precise moment to taste and adjust. I’ve tested it with different cuts of chicken, different vegetables, different broths, and found the versions that consistently deliver the most magnificent results. What I’m sharing with you is the distilled wisdom of all those experiments — the foolproof method that works every single time, the ingredient ratios that deliver perfect flavor balance, and the specific techniques that transform ordinary ingredients into something genuinely restaurant-quality.
Why Chicken Soup Becomes Your Cold-Night Ritual

There’s something almost mystical about the way this particular combination of ingredients works together. It’s not just comfort food because it tastes good — though it absolutely does. It’s comfort food because it triggers something deeper, something almost biological. The warm broth increases your core body temperature while simultaneously triggering the release of serotonin, the neurochemical responsible for feelings of calm and contentment. The protein from the chicken supports stable blood sugar and sustained energy. The fat from the butter and cream creates that sense of satiation that makes you feel genuinely nourished rather than just temporarily full.
But beyond the physiology, there’s the pure sensory experience. The steam rising from a bowl, carrying those savory, buttery aromas directly to your senses. The weight of a warm spoon in your hand. The way each spoonful coats your mouth with silky richness while the tender vegetables give way under minimal chewing. The experience itself — not just the nutrition — is fundamentally restorative. On nights when the weather is harsh and the world outside feels unwelcoming, a bowl of this soup creates a small island of genuine warmth and safety right in front of you.
The Foundation That Separates Great Soup From Ordinary
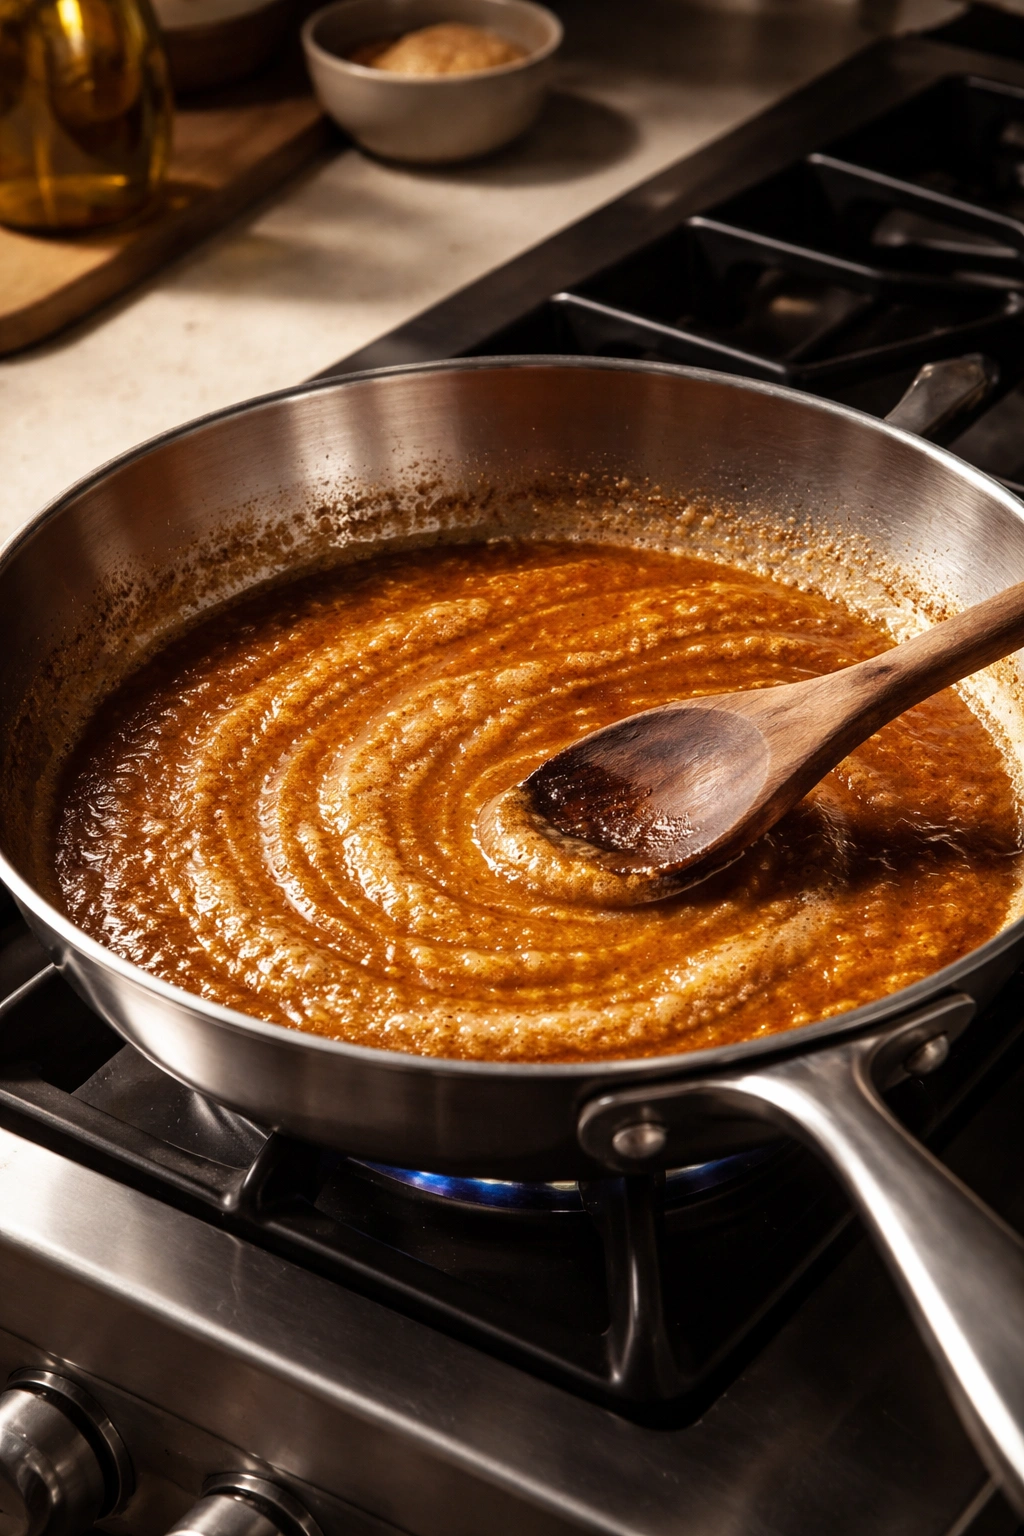
The most crucial moment in making exceptional chicken pot pie soup happens before you add a single vegetable. It’s the moment you create the roux — that mixture of butter and flour that becomes the thickening agent and the base of your broth’s flavor. This is where patience and attention matter enormously. You’re not simply combining two ingredients; you’re using heat to chemically transform butter and flour into something with entirely different properties and flavor characteristics.
The roux must cook low and slow over medium-low heat, stirred almost constantly, until it turns a deep golden color — roughly the shade of a penny or slightly darker. This takes about 3 to 4 minutes, and it cannot be rushed. When you rush this step, your soup tastes flat and floury. When you allow it proper time, the flavors develop into something rich and almost nutty, something that forms the aromatic foundation everything else builds upon. This is the difference between a soup that tastes good and one that tastes like someone who genuinely knows what they’re doing made it.
After the roux reaches that perfect golden color, the magic moment arrives: you slowly whisk in the chicken broth while the pan is still over heat. Pour too quickly and you’ll create lumps — those microscopic flour clusters that won’t dissolve no matter how much you stir. The proper technique is to add the broth gradually while whisking constantly, allowing each addition to incorporate fully before adding more. This slow process creates a broth that’s perfectly smooth and silky, with no grittiness or lumps to detract from the experience.
Complete Recipe with Yield and Timing Information
Yield: Serves 4 to 6 | Makes approximately 8 to 10 cups of soup
Prep Time: 20 minutes
Cook Time: 40 minutes
Total Time: 60 minutes
Difficulty: Beginner — The steps are straightforward and forgiving; the only skill required is basic knife work and the ability to stir regularly. No special equipment needed beyond a standard pot and cutting board.
For the Soup:
- 3 tablespoons unsalted butter
- 1 medium yellow onion, diced into roughly ½-inch pieces
- 3 medium carrots, cut into ½-inch coins or slightly larger pieces
- 3 stalks celery, diced into ½-inch pieces
- ½ teaspoon fine sea salt (plus more to taste)
- ¼ teaspoon freshly ground black pepper
- 3 tablespoons all-purpose flour
- 6 cups low-sodium chicken broth
- 1 pound boneless, skinless chicken breasts (or thighs for more flavor; see tip below)
- 1 cup frozen peas (or fresh if available)
- ½ cup heavy cream or whole milk (use cream for maximum richness, milk for lighter version)
- ½ teaspoon dried thyme (or 1½ teaspoons fresh thyme leaves, stripped from the stems)
- ¼ teaspoon dried sage (optional but recommended — sage and chicken are an exceptional pairing)
- 2 tablespoons fresh parsley, finely chopped
- Salt and black pepper to taste (for final seasoning adjustment)
Building and Cooking Your Soup Step by Step
Prepare Your Ingredients:
-
Cut the boneless chicken breasts into roughly 2-inch chunks — not too small, as they’ll shrink during cooking. Pat them dry with a paper towel; this helps them cook more evenly. Set aside.
-
Dice your onion, carrots, and celery into roughly uniform ½-inch pieces. Uniform size matters because vegetables of similar size cook at similar rates, ensuring everything reaches that perfect tender texture at the same moment. If one carrot piece is twice as large as another, it will take longer to cook, and you’ll end up with some vegetables overcooked and falling apart while others remain slightly firm.
Create the Roux and Build the Base:
-
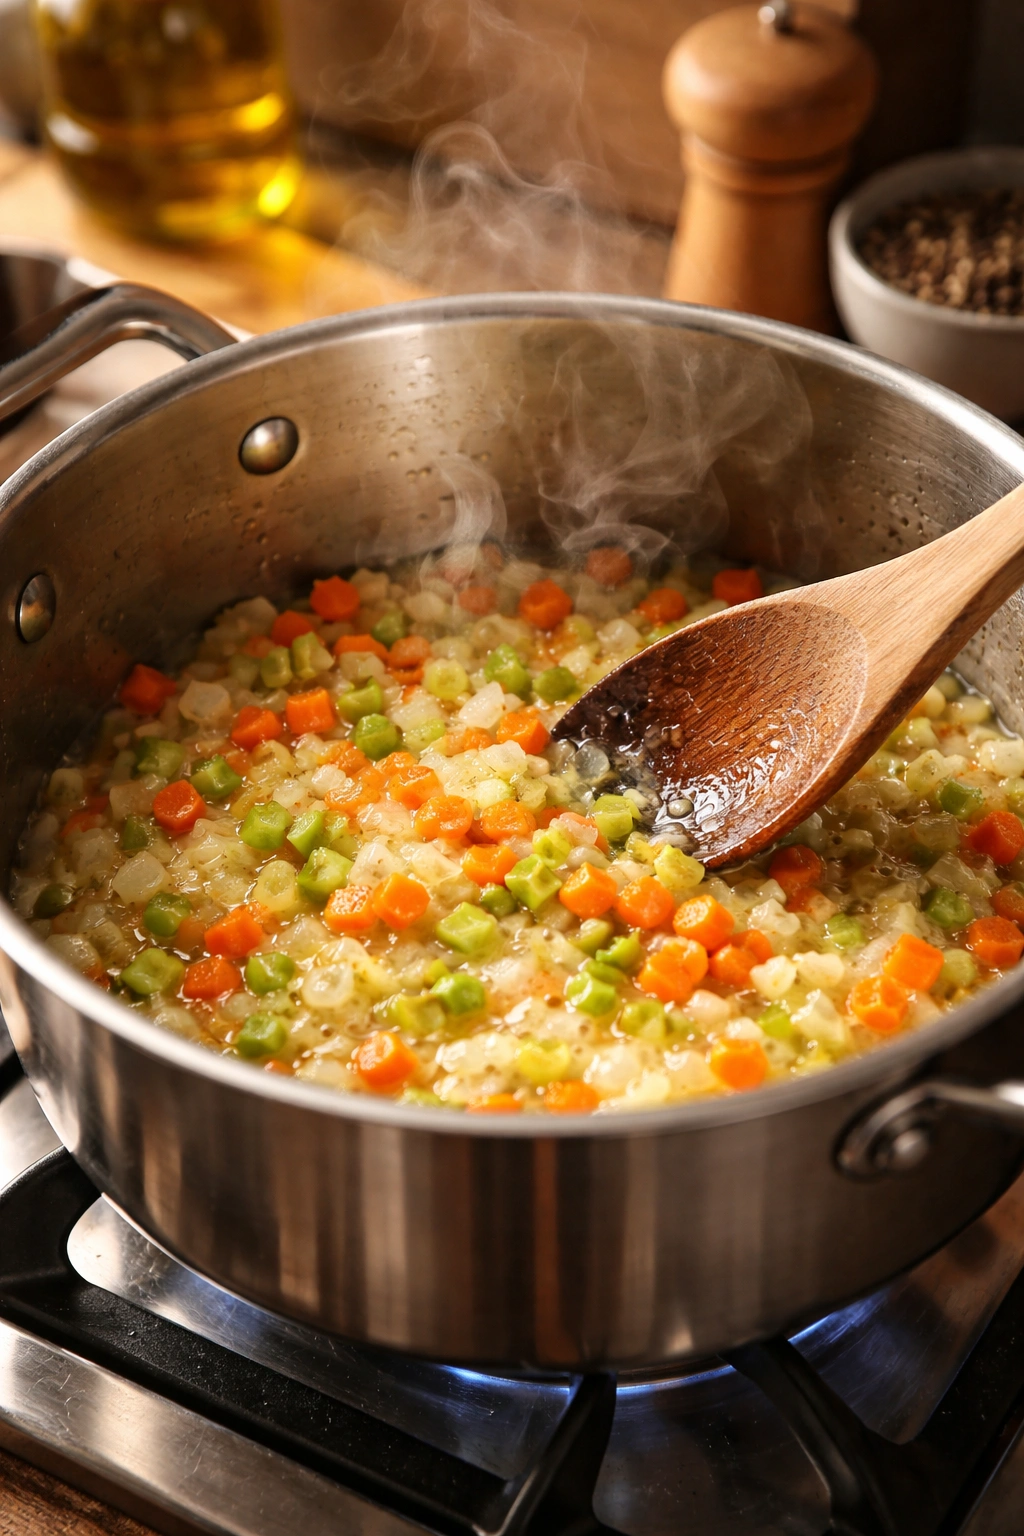
Place a large pot (at least 6-quart capacity) over medium-low heat and add the butter. Allow it to melt slowly — this takes about 1 minute. Once melted, add the diced onion, carrot, and celery to the butter. Sprinkle with the ½ teaspoon salt and ¼ teaspoon pepper.
-
Sauté the vegetables over medium-low heat for 5 to 6 minutes, stirring occasionally, until they’ve begun to soften slightly and the onion becomes translucent and lightly golden at the edges. You’re not trying to cook them all the way through at this stage — you want them to release their flavors into the butter while still retaining some structure. The vegetables will cook further when the broth is added.
-
Sprinkle the flour over the softened vegetables and stir thoroughly, coating every piece with the flour. The mixture will look quite dry at this point. Continue stirring constantly over medium-low heat for 3 to 4 minutes, until the mixture turns a deep golden color — approximately the shade of a penny. This is the most important step and cannot be rushed. The longer you cook the roux, the deeper and richer the flavor becomes. Your kitchen should smell noticeably toasted and nutty when you’ve reached the correct color.
Advertisements -
Remove the pot from heat briefly. Pour ½ cup of the chicken broth into a measuring cup or small bowl. Slowly pour this broth into the roux while whisking constantly. The mixture will bubble and steam; keep whisking to break up any lumps that form. Once this first addition is incorporated and smooth, return the pot to medium heat and slowly pour in the remaining broth while continuing to whisk. This gradual process prevents lumps and creates a silky, smooth base.
Add Chicken and Simmer:
-
Once all the broth has been whisked in, bring the mixture to a gentle simmer over medium heat. You should see small, lazy bubbles breaking the surface — not a rolling boil. Add the chicken pieces and stir to distribute them evenly throughout the pot.
-
Maintain the gentle simmer and cook for 12 to 15 minutes, until the chicken is completely cooked through. To test for doneness, remove the largest piece with a fork or spoon, place it on a cutting board, and cut it open. There should be no pink interior — the inside should be completely white and opaque throughout. The chicken will be quite tender at this point, and many pieces will fall apart when you remove them.
-
Stir in the dried thyme and dried sage (if using). If you have fresh thyme and sage, add those in step 11 instead, just before serving, so the fresh flavors aren’t lost to prolonged cooking.
-
Add the frozen peas and stir. Continue simmering for 2 minutes — just enough to warm the peas through. Do not cook the peas longer than this, as they’ll become mushy and lose their bright color and slight firmness.
Finish with Cream and Final Seasoning:
-
Pour in the heavy cream or milk and stir thoroughly until it’s fully incorporated and the broth has a cohesive, creamy appearance. If using fresh herbs, add them now. Taste the soup carefully.
-
Add more salt and pepper as needed. This is the moment to trust your palate. Season gradually in ¼-teaspoon increments of salt, stirring well and tasting after each addition. Remember that the broth you used was likely already salted, so err on the side of caution. The soup should taste balanced and savory — rich and warming, with no one flavor dominating. When it tastes exactly right to you, it’s ready to serve.
The Mistakes That Most Home Cooks Make
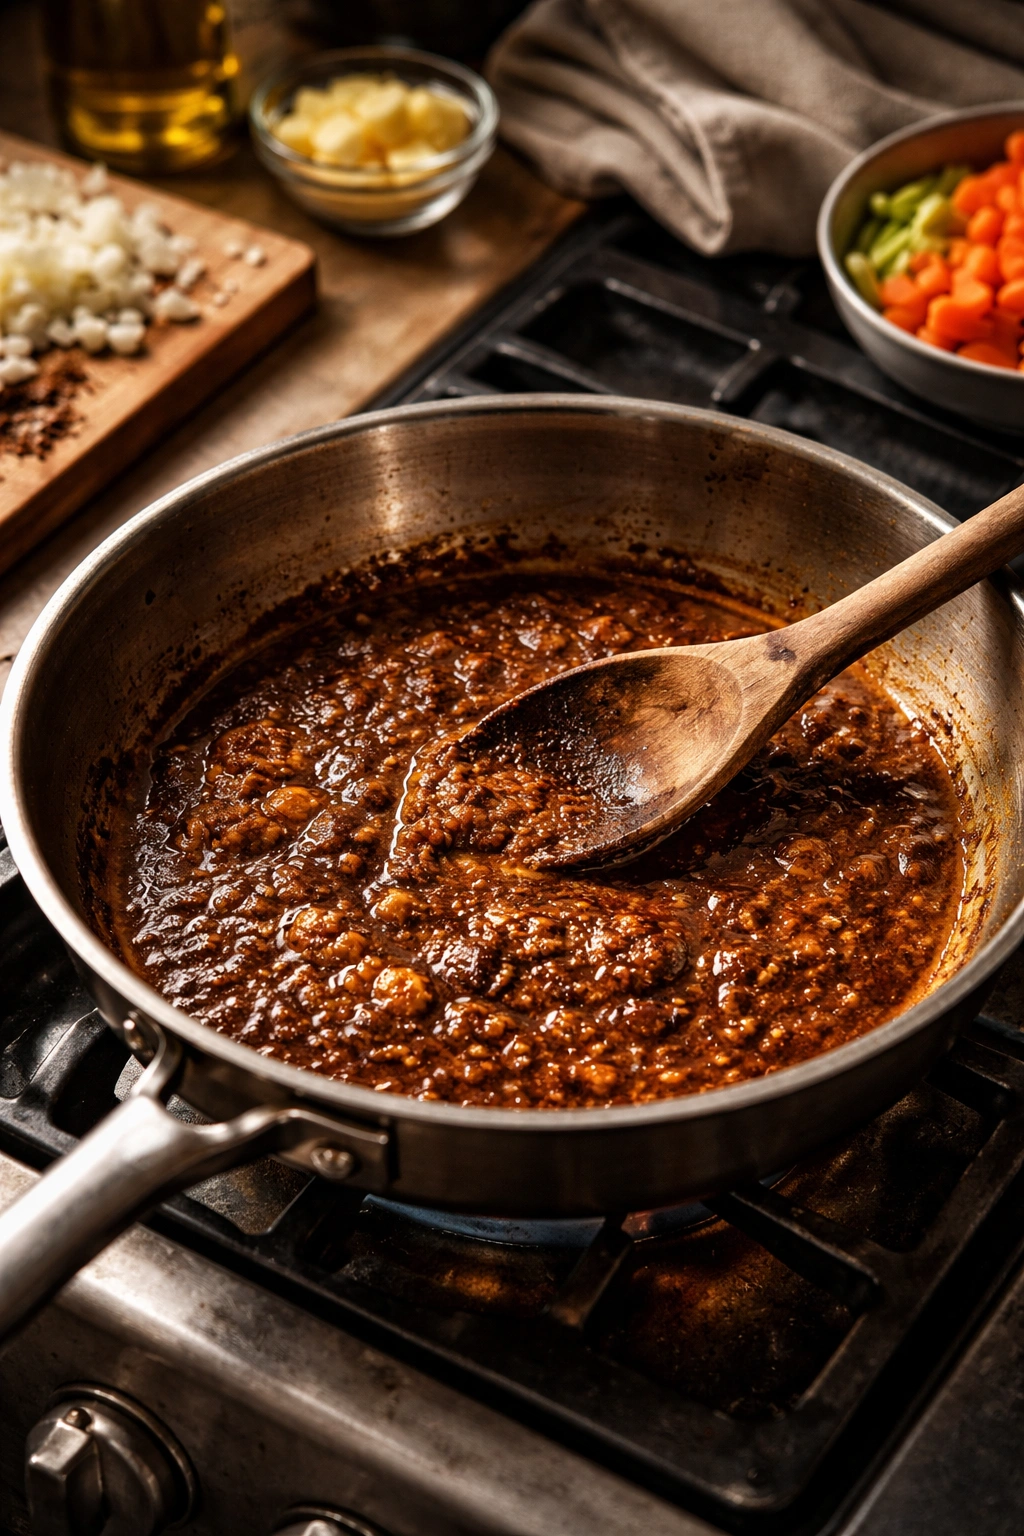
The first mistake, and the one that most commonly derails this soup, is using a roux that’s not brown enough. When the roux is pale and only lightly colored, the soup tastes vaguely floury and lacks depth. It tastes like something that might come from a can, not something made with care from scratch. Commit to cooking that roux until it’s genuinely golden-brown — this is not optional if you want the soup to taste restaurant-quality. The deeper the color, the deeper and richer the flavor. You’re using heat to develop flavor compounds through a chemical reaction called the Maillard reaction, and that reaction intensifies as the temperature increases and browning deepens.
The second mistake is cooking the vegetables too long before adding the broth. Many cooks soften the vegetables until they’re nearly cooked through, thinking this saves time later. In reality, it means your vegetables finish cooking unevenly. The onion, being softer, cooks faster and begins to break apart while the carrots are still firm. By the time the carrots are tender, the onion is disintegrating. Keep the initial sauté brief — just 5 to 6 minutes — so all the vegetables finish cooking together in the broth.
The third mistake is adding the broth too quickly to the roux. I’ve seen home cooks pour the entire broth in at once, then wonder why their soup is lumpy and grainy. Slow, patient whisking is genuinely required here. The flour particles need time to hydrate and distribute evenly. When you rush, you inevitably create those flour clusters that never fully dissolve.
Another common misstep is overcooking the peas. Frozen peas are already partially cooked, and they cook through almost instantly once added to hot broth. If you stir them in and then let them simmer for 5 or 10 minutes, they become mushy and lose their bright green color and slight texture. Add them near the very end and cook for just 2 minutes — they’ll be perfectly cooked, bright green, and adding a textural contrast to the creamy broth.
Finally, many cooks undersalt or oversalt at the final seasoning stage because they don’t taste as they go. Taste the soup in the pan before it goes into bowls, while you still have the opportunity to adjust. Start with a spoonful, let it cool slightly if needed, and assess. Is it flavorful and savory, or does it taste flat and dull? Does it taste too salty, or are you hungry for more salt? Adjust in small increments, tasting between adjustments, until it tastes exactly right to you.
Pro Tips for the Most Luxurious Results

Use chicken thighs instead of breasts if you want even richer, more flavorful soup. Thighs have more fat than breasts, and they remain tender and forgiving during cooking — they’re almost impossible to overcook. Breasts are leaner, which makes them slightly less flavorful, but they cook quickly and are often what people reach for by habit. Either works beautifully; thighs simply deliver a step richer result.
Add fresh herbs at the very end. Fresh parsley, fresh thyme, and fresh tarragon all add a brightness that dried herbs can’t match. Dried herbs should go in during the simmering phase so their flavors have time to develop and distribute. Fresh herbs should be added just before serving, stirred in, and allowed to release their aromas as the soup sits in the bowl.
Make this soup a day ahead if you want maximum flavor. Soups genuinely improve when flavors have time to meld and develop overnight in the refrigerator. Simply reheat gently on the stovetop over medium heat, stirring occasionally, until it reaches your desired temperature. You may need to add a splash of broth or milk when reheating, as the soup will thicken slightly when refrigerated and may need loosening slightly.
Don’t skip tasting as you go. Professional cooks taste constantly throughout cooking, not just at the end. Taste after you add the broth. Taste after you add the cream. Taste after you add the herbs. This way, you catch any imbalances early and can correct them before they become significant problems.
Toast your dried herbs before adding them. If you have a small skillet, warm your dried thyme and sage over low heat for about 30 seconds, just until fragrant, before adding them to the soup. This brief toasting releases their essential oils and intensifies their flavor — a technique that makes a noticeable difference in the final soup.
Creative Variations Worth Exploring
This soup is endlessly adaptable once you understand the basic technique. The structure remains exactly the same, but you can play with flavors and textures in almost limitless ways.
Roasted Garlic and Herb Version
Add 4 to 6 cloves of roasted garlic (or roast them yourself at 400°F until completely soft and caramelized, about 30 minutes) to the broth after whisking it in. The roasted garlic dissolves slightly into the broth, adding a sweet, mellow garlic flavor that’s completely different from raw garlic. Add 1 teaspoon of fresh rosemary leaves along with the thyme for an almost Mediterranean interpretation.
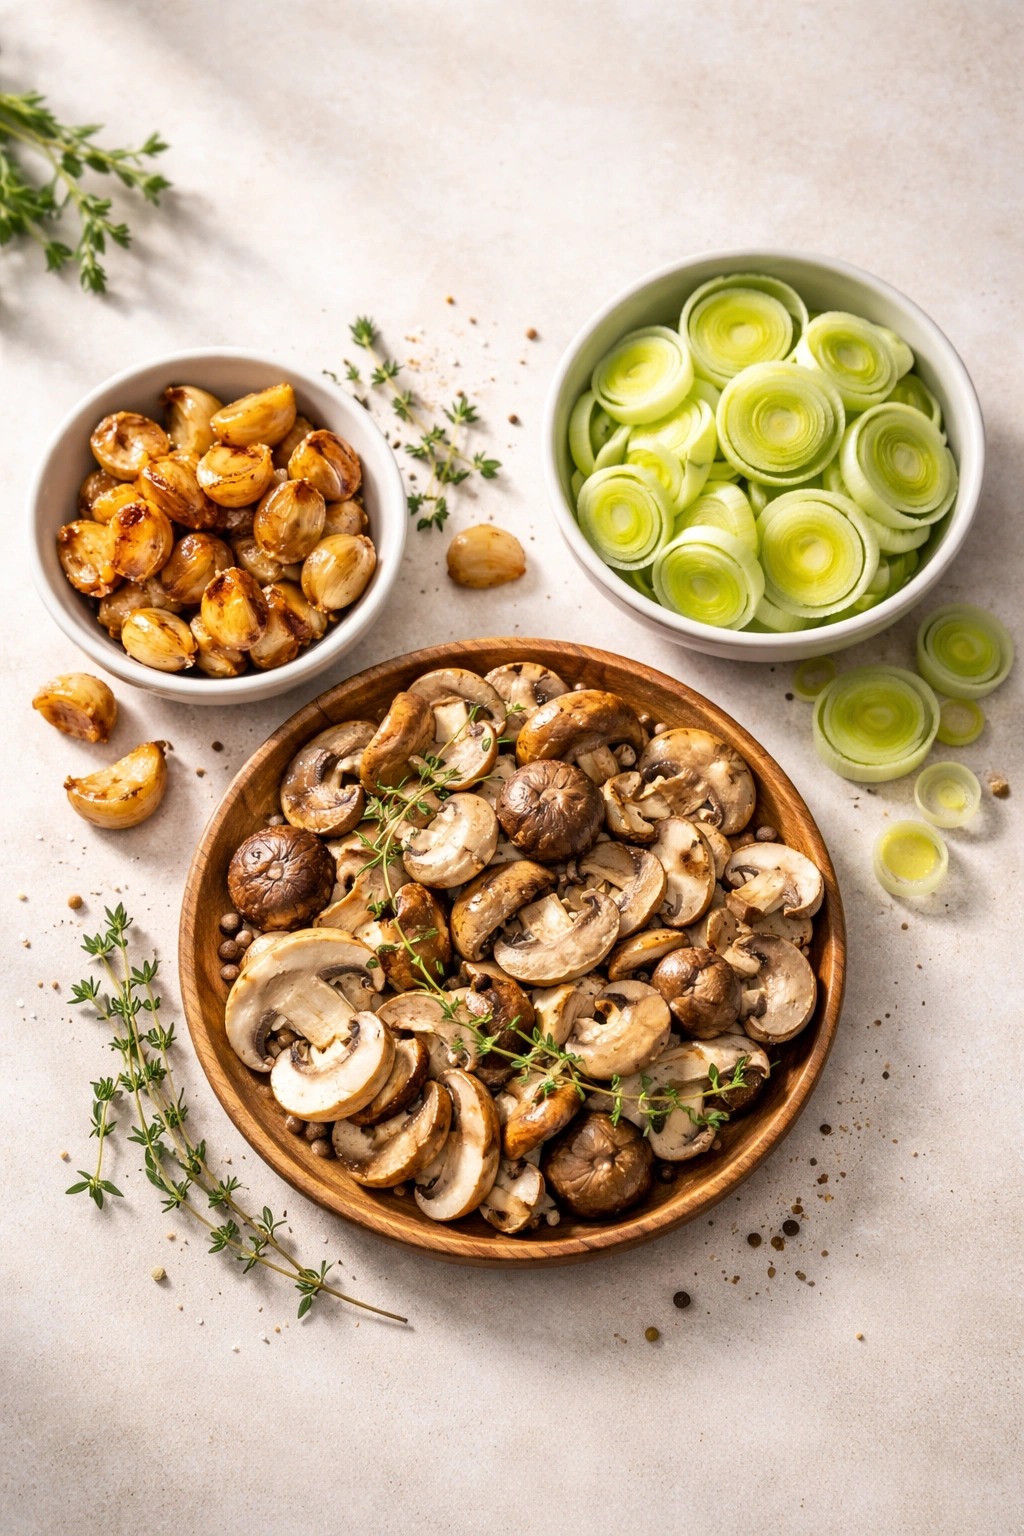
Wild Mushroom Variation
Sauté 8 ounces of sliced mushrooms (cremini, baby bella, or wild mushrooms if you can find them) with the onion, carrot, and celery. The mushrooms add umami depth and an earthy complexity that feels almost luxurious. Use cremini for a more delicate flavor or portobello for something more robust and meaty. The mushrooms will soften considerably during cooking and partially break down, adding body to the broth.
Creamy Leek Version
Replace half the carrots with 2 medium leeks, white and light green parts only, cleaned thoroughly and sliced into ½-inch half-moons. Leeks have a more delicate flavor than onions and add a subtle sweetness. They make the soup feel slightly more elegant and refined, and they pair beautifully with tarragon if you add it as a fresh herb at the end.
Root Vegetable Harvest Version
Use a mix of diced carrots, diced parsnips, and diced celery root instead of the standard vegetables. Parsnips add sweetness, and celery root adds earthy depth. You can even add a single small diced potato if you want the soup to be slightly thicker and more substantial. The different vegetables create interesting flavor layers that evolve as you eat.
Smoky Bacon Chicken Version
Before cooking anything else, dice 4 slices of bacon and cook them in the pot over medium heat until crispy. Remove with a slotted spoon and set aside. Pour off all but 2 tablespoons of the bacon fat, add your butter to that fat, and proceed with the recipe as written. Crumble the cooked bacon and stir it in at the very end, right before serving. The smoke and salt from the bacon add incredible depth to an already rich soup.
Dijon and Thyme Version
After whisking in the broth and before adding the chicken, whisk in 2 tablespoons of whole-grain Dijon mustard. The mustard adds tang, slight heat, and a complexity that feels sophisticated. Increase the fresh thyme to 1½ teaspoons to complement the mustard’s sharpness.
Storage, Reheating, and Make-Ahead Strategy
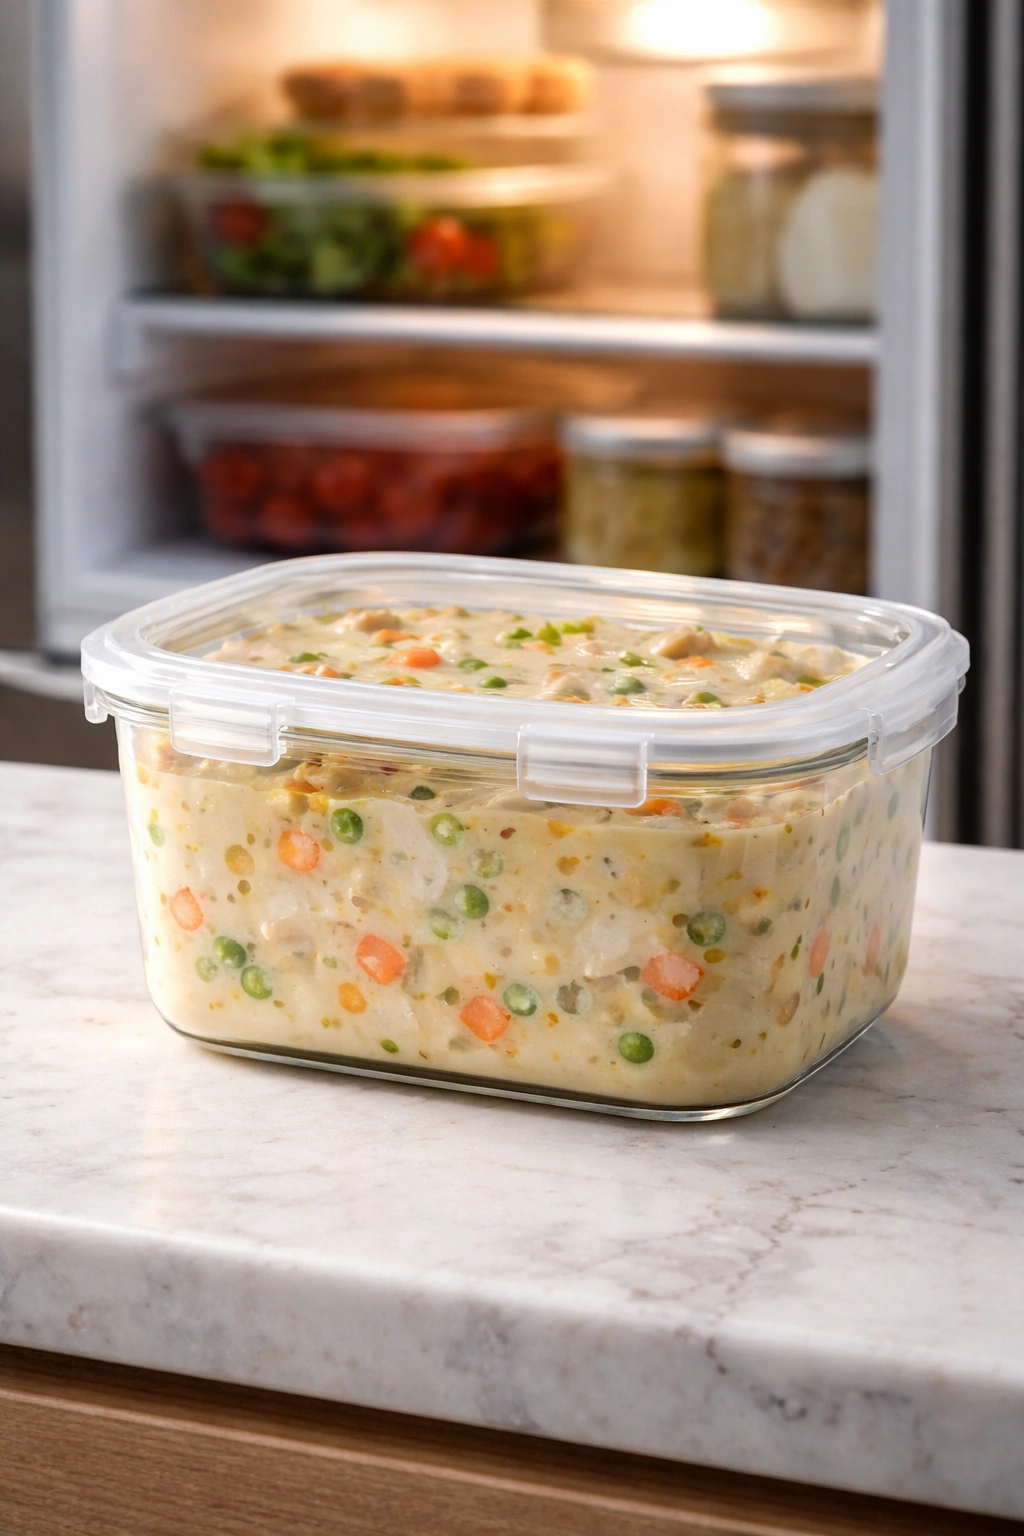
This soup keeps beautifully for up to 4 days in an airtight container in the refrigerator, making it perfect for batch cooking and having on hand for quick weeknight meals. The flavors actually deepen and improve as the soup sits, so if you have time and planning capability, make it a day ahead.
To reheat: Place the soup in a pot over medium heat and stir occasionally until it reaches your desired temperature. Soup reheats faster than you might expect — usually 5 to 8 minutes is sufficient if you’re starting with soup that’s cold from the refrigerator. If the soup seems thicker than you prefer after sitting in the fridge (the roux causes some thickening over time), whisk in a splash of chicken broth or milk to loosen it to your preferred consistency.
Freezer storage: This soup freezes exceptionally well for up to 2 months. Allow it to cool completely, transfer to freezer-safe containers, label with the date, and freeze. When you want it later, thaw overnight in the refrigerator, then reheat gently on the stovetop. Some cooks prefer to freeze the soup without the cream and add the cream only after reheating, but I find the soup reheats beautifully with the cream already incorporated.
Make-ahead flexibility: You can prepare and sauté the vegetables (onion, carrot, celery) the morning of the day you want to serve soup, store them in an airtight container in the refrigerator, and complete the cooking in the evening — this saves you the 20-minute prep time when you’re ready to cook. The roux is best made fresh (it can become grainy if made ahead), so save that step for the evening you’re serving.
Serving Suggestions and Complementary Pairings

Serve this soup in wide, shallow bowls rather than deep mugs — this allows the creamy broth to spread slightly and cools just enough to be comfortable to eat almost immediately, while retaining its warmth. Garnish generously with fresh parsley, a light grating of Gruyère cheese (if you like cheese in soup), a small handful of crispy croutons for textural contrast, or a simple drizzle of good olive oil and a crack of fresh black pepper.
The soup pairs beautifully with crusty bread. A fresh baguette torn into pieces and dunked into the broth becomes almost dessert-like in its comfort. Buttered dinner rolls are wonderful alongside. A simple green salad with a sharp vinaigrette provides contrast and balance to the soup’s richness — the acidity cuts through the cream and feels almost refreshing.
For a complete comfort meal, serve the soup with a grilled cheese sandwich on the side. There’s a reason this combination is beloved — the salty, melted cheese and toasted bread complement the creamy, savory soup perfectly. Add a simple dessert afterward: fresh fruit, a cookie, or even just a small piece of chocolate.
Alternatively, serve the soup as a weeknight dinner followed by nothing but a cup of tea or coffee and perhaps a small piece of fresh fruit. The soup is genuinely substantial enough to be a complete meal on its own.
Final Thoughts

This soup achieves something remarkable: it feels like pure indulgence and comfort, yet it’s fundamentally simple to make. There are no complicated techniques, no special equipment, no ingredients that are difficult to find. Everything is built from basics that most kitchens have on hand. The magic comes from patience during the crucial early steps — browning the roux properly, sautéing the vegetables just long enough, whisking the broth in slowly — and then from tasting and adjusting until the flavor is exactly right.
When you ladle this soup into a bowl on a cold night, you’re not just eating food. You’re wrapping yourself in warmth, in comfort, in the culinary equivalent of a favorite sweater and a good book. You’re giving yourself permission to slow down, to savor, to feel genuinely taken care of. That’s the real reason this soup matters — not because it tastes good, though it absolutely does, but because it reminds you that taking care of yourself through nourishing food is one of the most fundamental and worthwhile acts you can perform.