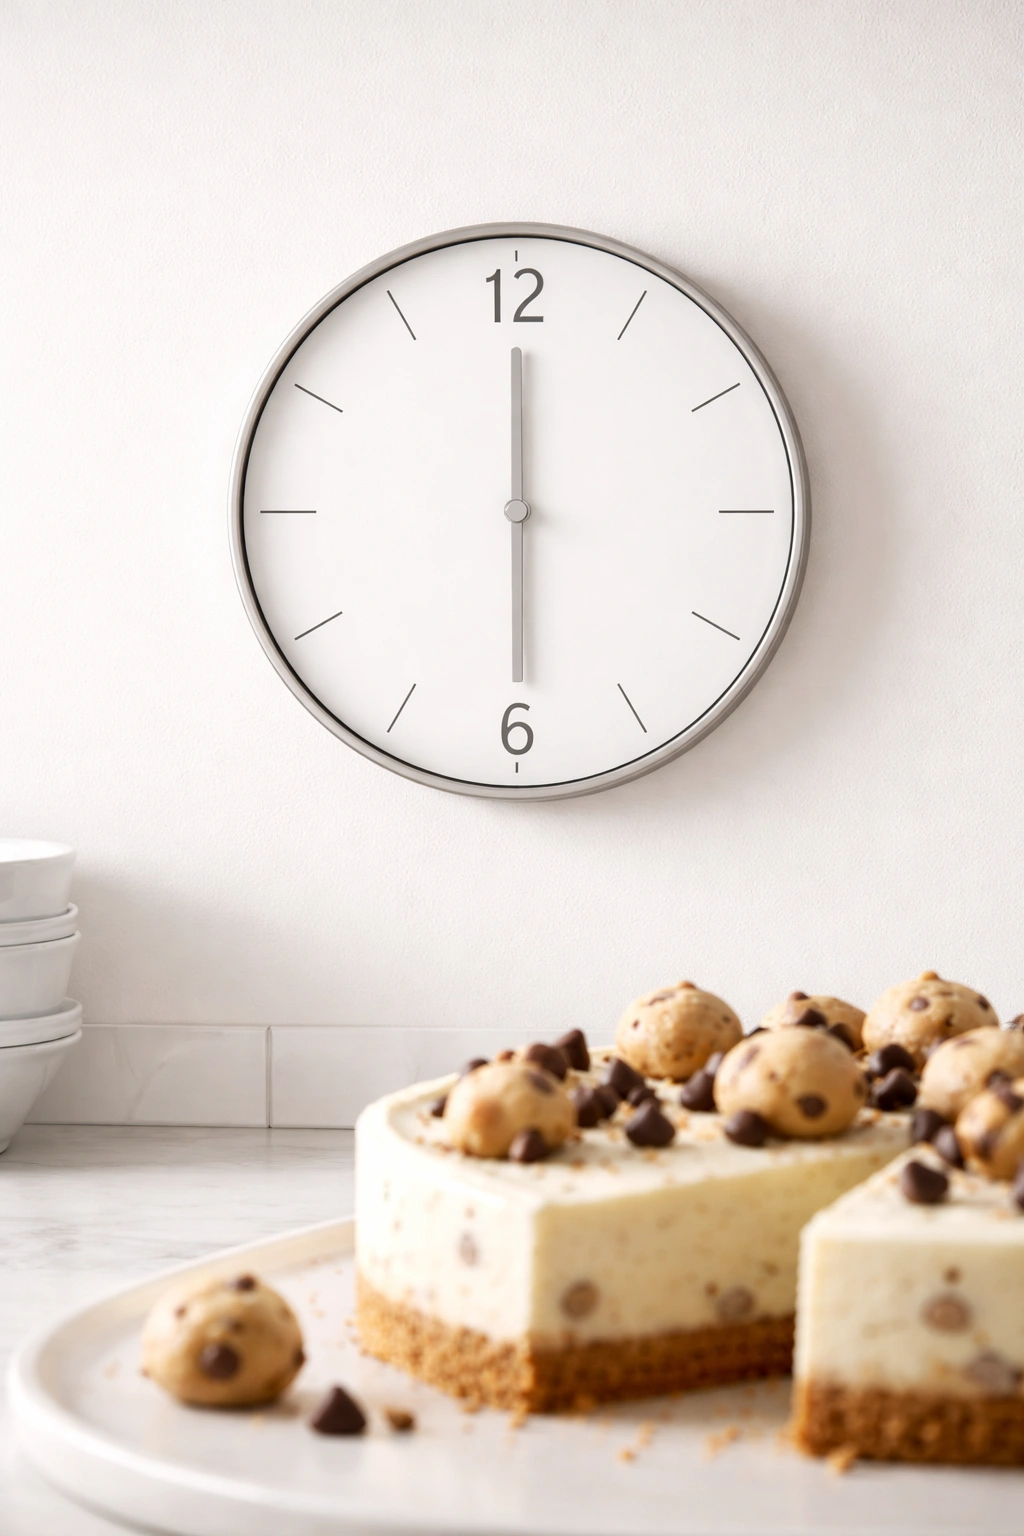
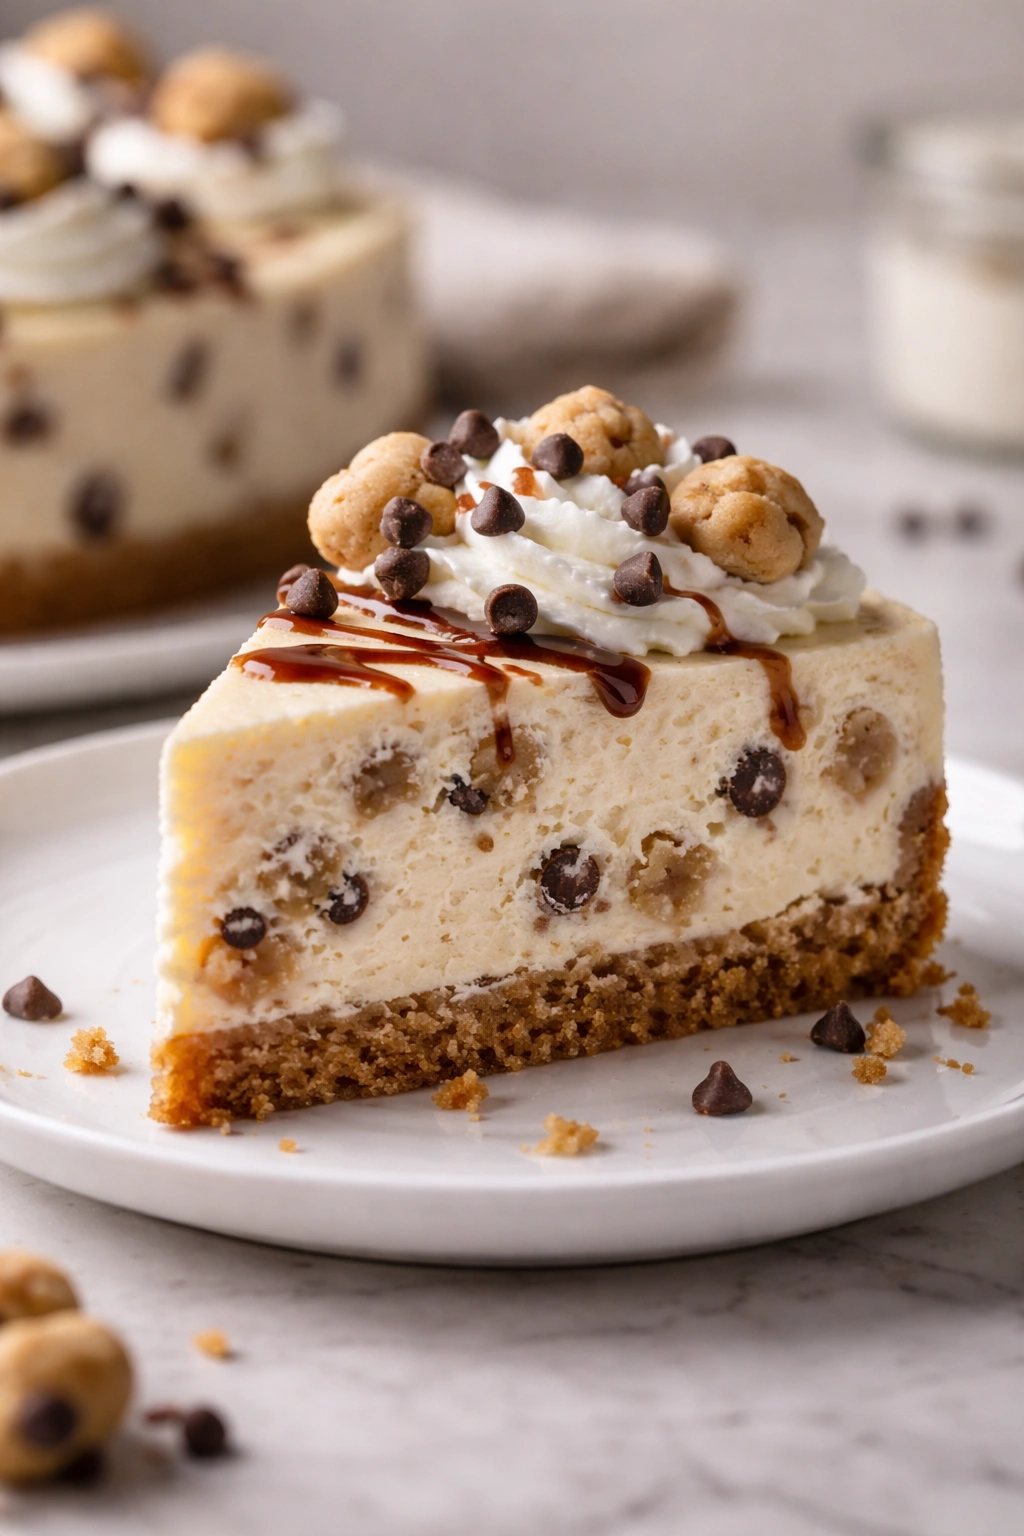
Cookie Dough Cheesecake Ready in Just 30 Minutes
There’s a reason cookie dough cheesecake has become a modern dessert obsession. It’s that magical collision of creamy, tangy cheesecake against pockets of edible cookie dough—the textural contrast, the nostalgia, the indulgence all hitting at once. But here’s where most recipes let you down: traditional cheesecake requires 6+ hours of baking and chilling, which means you can’t actually make it when the craving strikes. This no-bake version flips that entire paradigm on its head. You can have a fully set, restaurant-quality cookie dough cheesecake ready to serve in just 30 minutes of active work, with a quick final chill while you handle other things. No oven. No waiting. Just real cheesecake delivered with genuine speed.
The real secret isn’t some sketchy shortcut or inferior ingredient swap—it’s understanding that cheesecake doesn’t actually need baking to taste incredible. The dense, creamy texture people associate with cheesecake comes from the cream cheese, whipped heavy cream, and proper chilling, not from heat. Once you understand that shift in thinking, suddenly 30 minutes becomes not just possible but actually better, because you’re not battling potential cracks, overmixing, or the temperamental behavior that baked cheesecake demands.
What makes this formula work is the structural technique. You’re building layers in the right order, using the right ratios of cream cheese to cream, setting expectations for what “done” actually looks like, and incorporating edible cookie dough that’s both completely safe and genuinely delicious. This isn’t a thin mousse pretending to be cheesecake. This is the real thing—thick, sliceable, with that signature tang and richness—just delivered in a radically shorter timeline.
Why No-Bake Cheesecake Actually Wins

A lot of people assume no-bake means inferior, but the opposite is often true. Traditional baked cheesecake relies on heat to set the filling, and that same heat creates stress—cream cheese can curdle if it gets too warm, cracks form when the center cools faster than the edges, and you’re fighting an unpredictable oven the entire time. No-bake cheesecake uses the stability of whipped cream and proper chilling to achieve a texture that’s often silkier and more uniformly set than its baked counterpart.
The texture difference is profound once you experience it. Because you’re not exposing delicate cream cheese to heat, the finished cheesecake has a cloud-like quality—it’s still dense and rich, but with a creamy mouthfeel that baked versions sometimes lose. You’re not overworking ingredients through vigorous blending to get a smooth batter, either. You’re folding whipped cream into the cheese mixture gently, which means smaller air bubbles that create an exceptionally smooth, elegant texture.
Another honest advantage: you control the exact moment it’s done. No guessing whether it’s baked through. No mysterious carryover cooking happening in the cooling oven. You make it, set it, let it chill, and it’s ready. That’s it.
Why 30 Minutes Is Actually Achievable
When you break down what 30 minutes actually entails, it becomes clear why this timeline works. You’re spending roughly 5 minutes crushing and pressing the crust, 8-10 minutes mixing and assembling the filling layers, 5 minutes swirling in the cookie dough, and the remaining time letting it chill in the freezer. Notice what’s missing: zero baking time. That’s the entire game-changer.
The speed isn’t coming from skipping steps or using inferior ingredients—it’s coming from refrigeration doing the work instead of an oven. Because the cheesecake components are already soft and pliable, you’re not waiting for them to soften from a cold, brick-like state the way you would with baked cheesecake. You’re working with room-temperature cream cheese that’s actively whippable, and as soon as you’ve folded everything together with the whipped cream and set it, the freezer finishes the job in parallel while you’re doing something else.
The real time crunch happens only if you try to shortcut the freezing process. Thirty minutes in a standard freezer will get you to a sliceable firmness—it won’t be rock-solid like overnight cheesecake, but it’ll hold its shape and deliver the exact texture most people are after. If you’ve got 45 minutes or even an hour, even better. But the point is this isn’t a race that demands perfection in speed—it’s a dessert that’s genuinely ready when you need it most.
Ingredient Quality Actually Matters Here
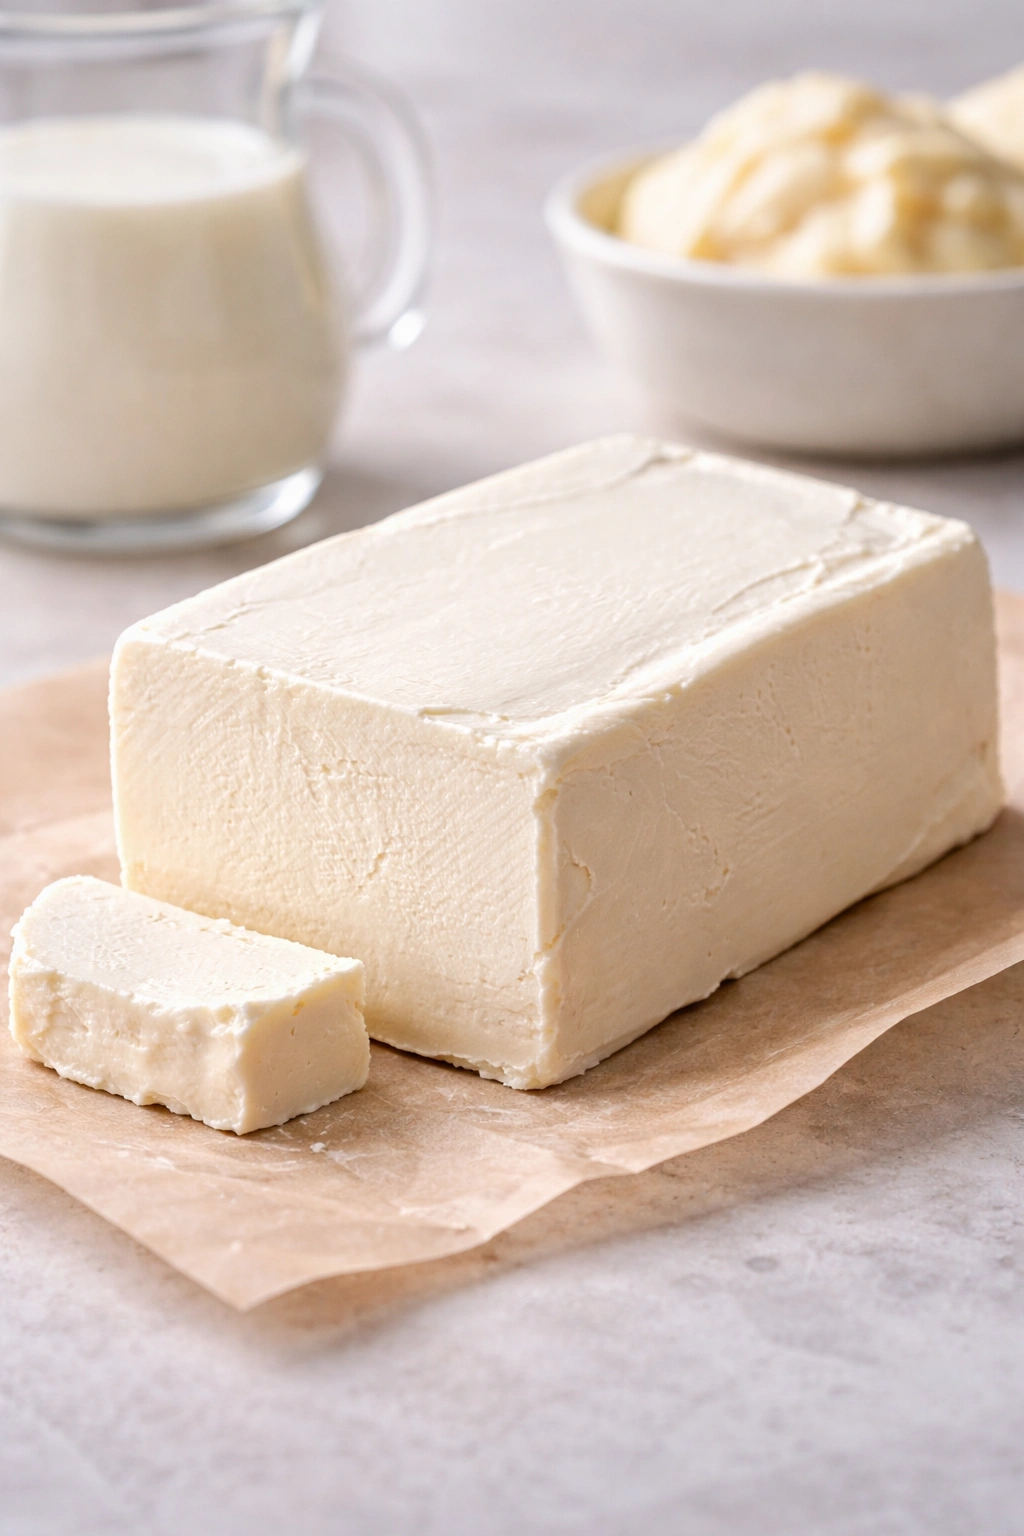
With a recipe this short and this simple, you cannot hide behind technique or complexity. Every ingredient shows up in the final texture and flavor, which means your ingredient choices become non-negotiable. This isn’t the recipe to use room-temperature cream cheese that’s been sitting in your pantry for three weeks. This isn’t where you use low-quality butter or substitute the heavy cream with whipped topping from a canister.
Start with Philadelphia or another full-fat, block-style cream cheese. Whipped or spreadable varieties contain stabilizers and added ingredients that behave unpredictably when you’re whipping them. You want the real thing—dense, tangy, and pure. It makes a measurable difference in both the texture and the flavor.
Heavy cream is equally important. Real heavy cream with nothing added will whip to soft peaks and fold into the cheese mixture without losing stability. Ultra-pasteurized cream (which you’ll see labeled on most store containers now) whips more sluggishly and can occasionally break if you overwork it. If you can find non-ultra-pasteurized, grab it. The difference is subtle but real.
The butter for the crust should be real butter—unsalted so you can control the salt level. Brown sugar adds moisture and caramel notes that white sugar can’t quite replicate. And if you’re using vanilla extract, use real vanilla, not the imitation kind. With such minimal ingredients, there’s nowhere for low-quality components to hide.
Understanding the Crust That Holds Everything Together

The crust needs to do two things: provide structure and taste delicious. You’re not baking it, so you’re relying on the cold to set it firm enough to support layers above it. This means you need enough butter to bind the crumbs and enough press to create a cohesive surface that won’t crumble when you add the cheesecake layer.
The standard ratio is roughly one part butter to two parts crushed cookies, which gives you enough fat to bind without making it greasy or slippery. You’re aiming for the texture of wet sand—if you squeeze it, it should hold together but not feel like dough. If it’s too dry, add a touch more melted butter. If it feels slick and buttery, you’ve gone slightly too far, but it’ll still work fine.
The press matters more than people realize. You want an even, compact layer roughly ¼-inch thick. A measuring cup or the bottom of a heavy glass works better than your hands, which tend to create uneven spots. Press down with steady, even pressure across the entire surface, then move the cup around the edges to ensure consistent thickness. A loose crust will crumble when you cut through it. A properly pressed one provides the structural support to deliver clean slices.
Let the crust set in the freezer while you’re making the filling. This 5-10 minute window is crucial. A firm crust won’t shift or compress when you’re layering the cheesecake mixture on top. If you skip this step and pour filling directly onto warm or room-temperature crust, the butter will soften and the crust will compress unevenly.
Creating the Silky Cheesecake Filling
The cream cheese needs to be soft enough to blend smoothly but cold enough that it hasn’t begun to separate. Room temperature is ideal—let it sit on the counter for 15-20 minutes while you’re prepping other ingredients. It should be soft enough that you can press your finger into it easily, but it shouldn’t be warm or oily.
When you’re mixing the cream cheese with the sweetener, use an electric mixer on medium speed for about 2-3 minutes. You’re looking for smooth, uniform color with no streaks of white cream cheese still visible. The texture should be light and fluffy—almost cloud-like. This is the moment where people often make a critical mistake: they overmix, trying to beat out every possible lump. Stop as soon as it’s smooth. Overmixing develops the gluten-like structure in cream cheese and creates an unnecessarily dense final product.
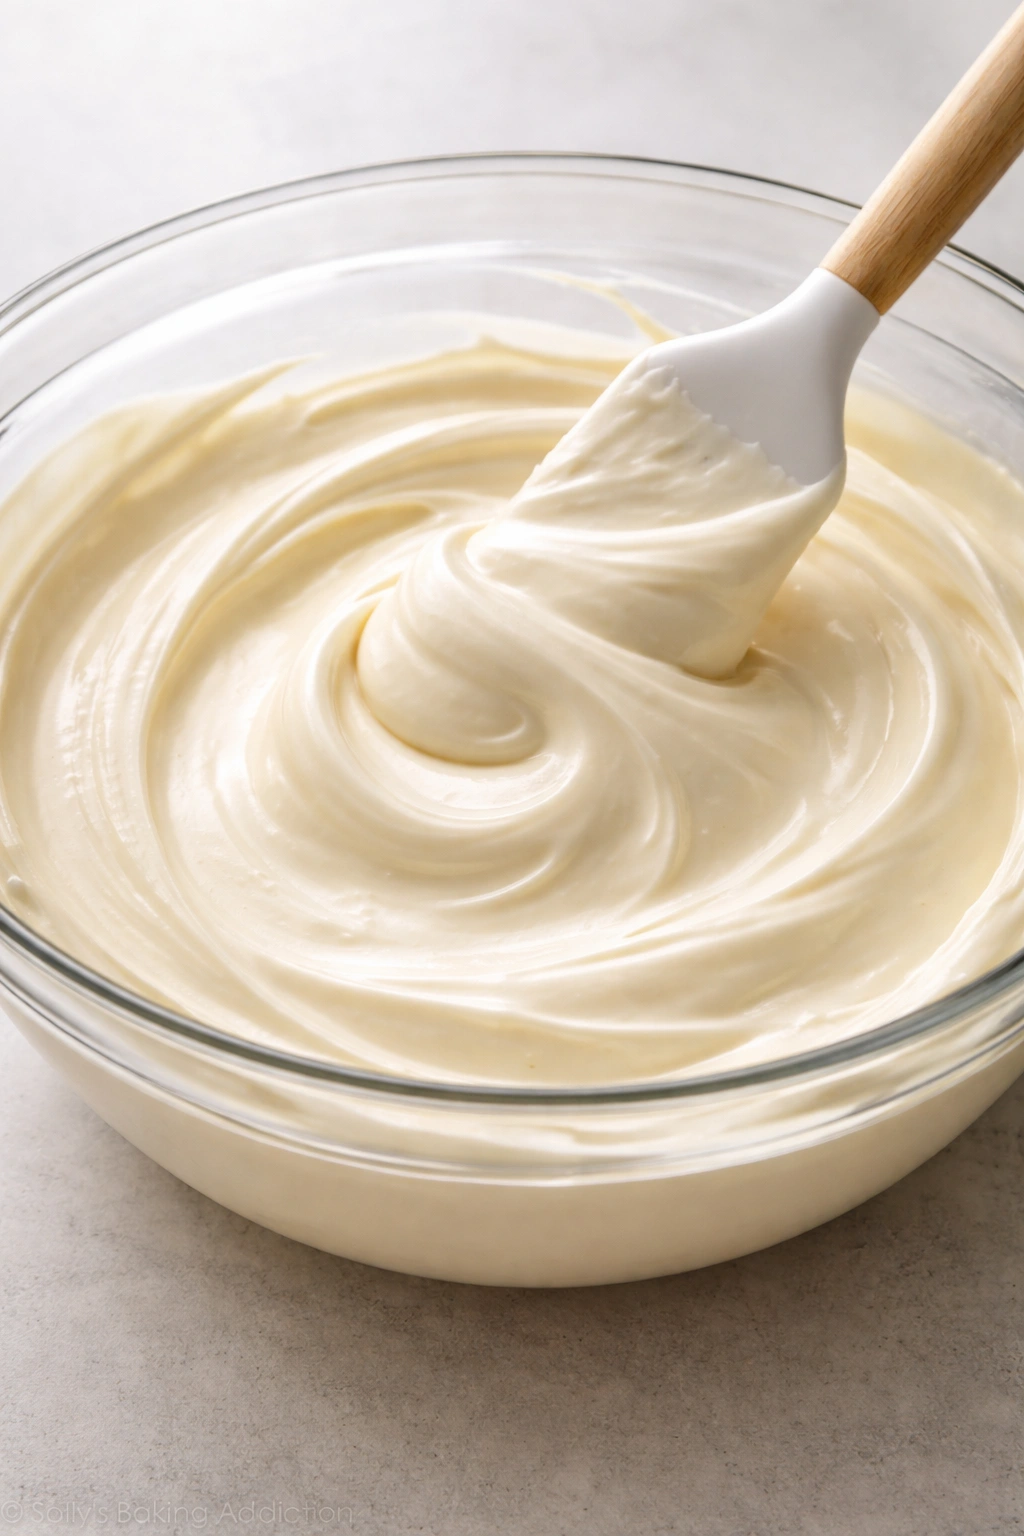
The whipped cream is what transforms the mixture from dense to ethereal. You’re making soft peaks—the cream should hold its shape but still have a gentle droop when you lift the whisk. If you go to stiff peaks, it becomes harder to fold smoothly and you risk breaking down the structure you’ve just built. Soft peaks fold in seamlessly and create that cloud-like texture without requiring excessive folding that deflates the whipped cream.
When folding the two together, use a large flexible spatula and a gentle hand. Scoop from the bottom of the bowl, bringing the heavier cream cheese mixture up and over the whipped cream, rotating the bowl a quarter turn with each fold. Three or four folds and most of the mixture should be combined. Some white streaks remaining are actually fine—one more fold will fully incorporate them. The goal is visible incorporation with minimal deflation of the whipped cream.
Cookie Dough Safety and Technique
Using raw cookie dough in cheesecake means you need to address the food safety side explicitly. Traditional cookie dough contains raw eggs, and while salmonella risk is genuinely low in eggs from modern, properly handled sources, it’s not zero. The safest approach is using heat-treated flour (which has become increasingly available and now shows up in regular grocery stores), pasteurized eggs (also available at most stores), or simply using egg-free dough formula.
This recipe uses pasteurized eggs, which are heat-treated to eliminate bacteria while still remaining raw in appearance and texture. You can find them in the egg section at most grocery stores, sometimes labeled as “pasteurized” or under brands like Davidson’s. If you can’t locate them, egg-free cookie dough formulas work beautifully—use aquafaba (the liquid from canned chickpeas) or simply use a recipe that relies on brown sugar moisture and butter fat for cohesion.
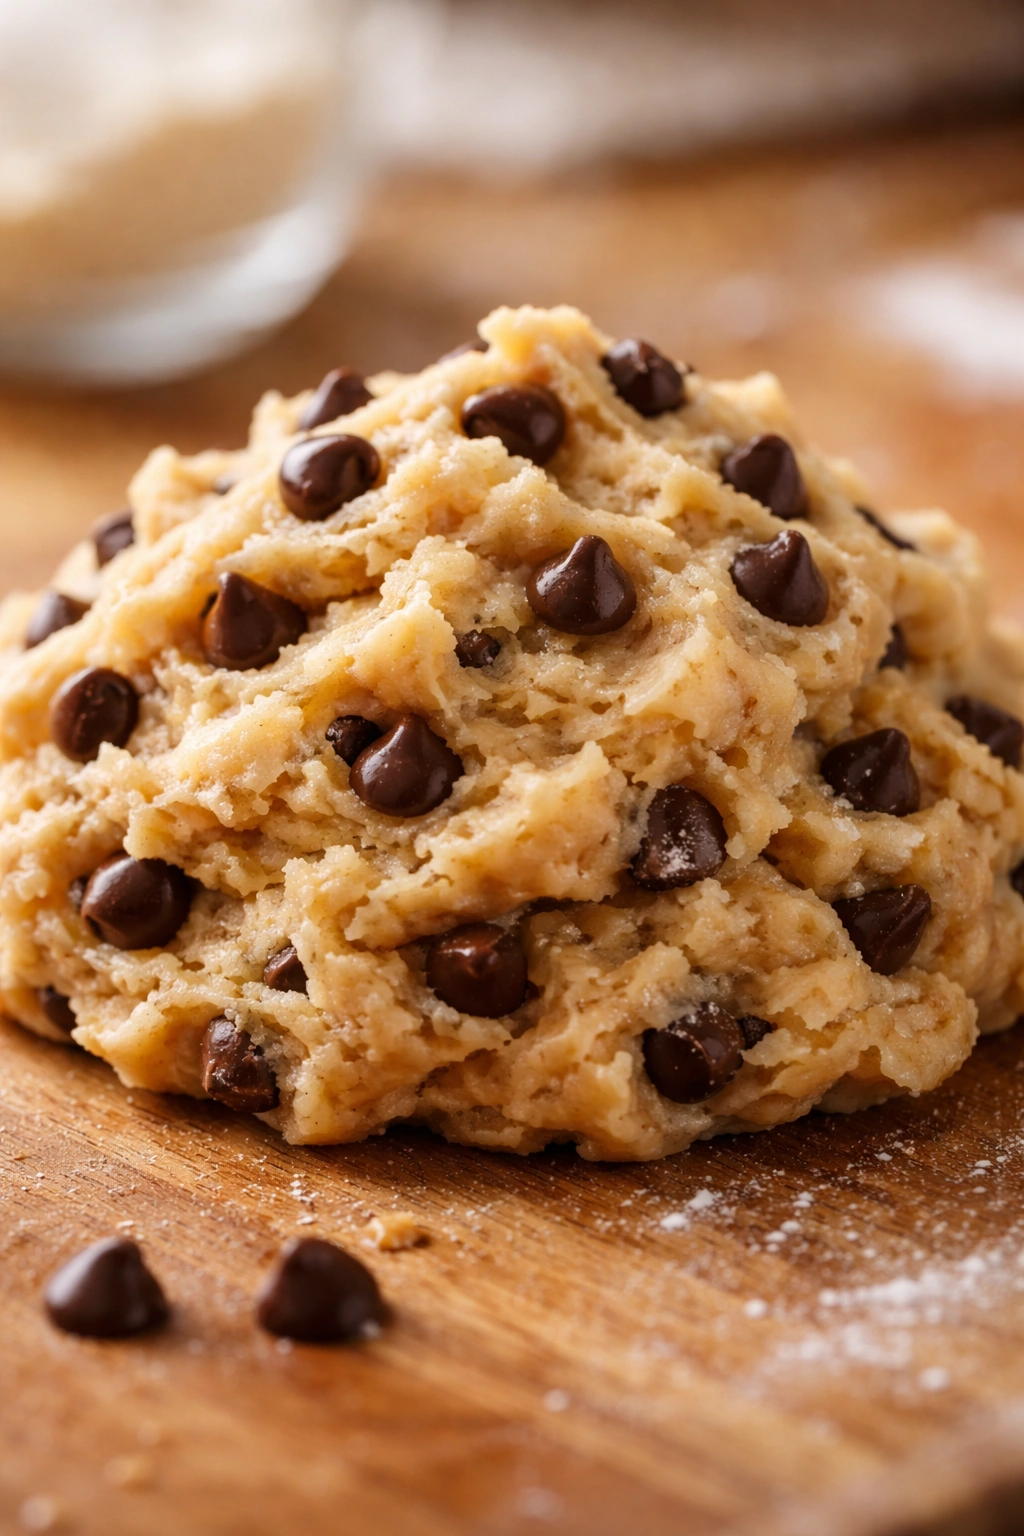
The dough itself shouldn’t be raw cookie batter—it needs to be richer and chunkier, with a higher ratio of mix-ins to structure. You’re not baking it, so you need enough butter and sugar to create a creamy, edible dough that feels indulgent when you bite into it. Brown sugar is essential here for moisture and flavor. The dough should be stiff enough to scoop in chunks but soft enough to bite through without cracking.
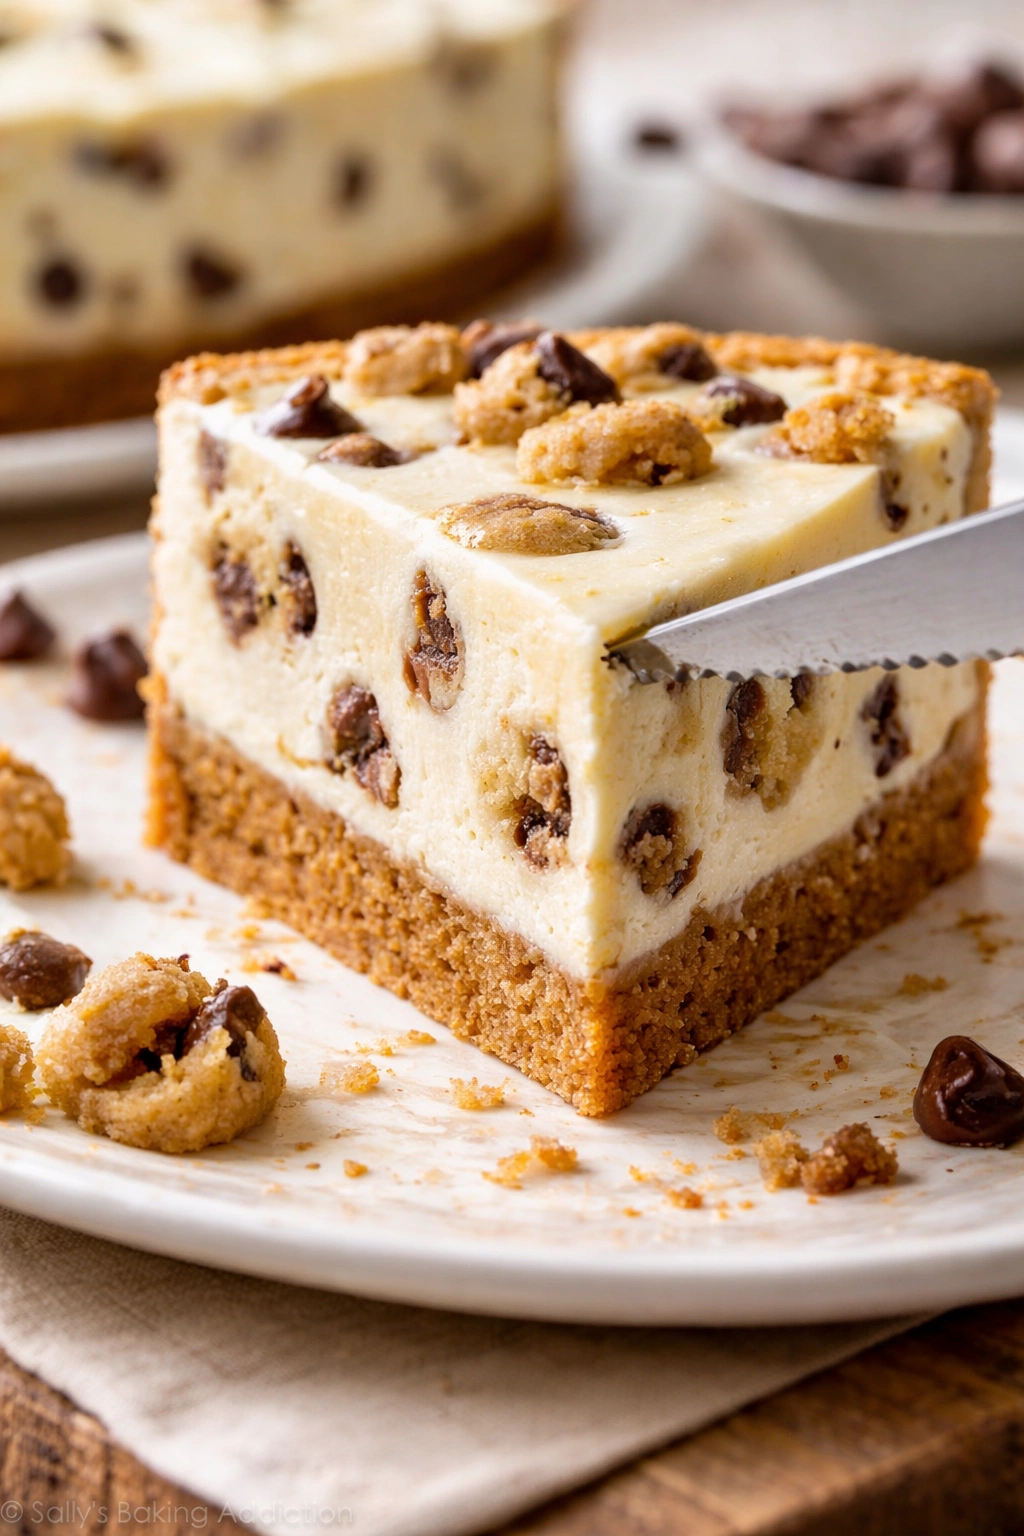
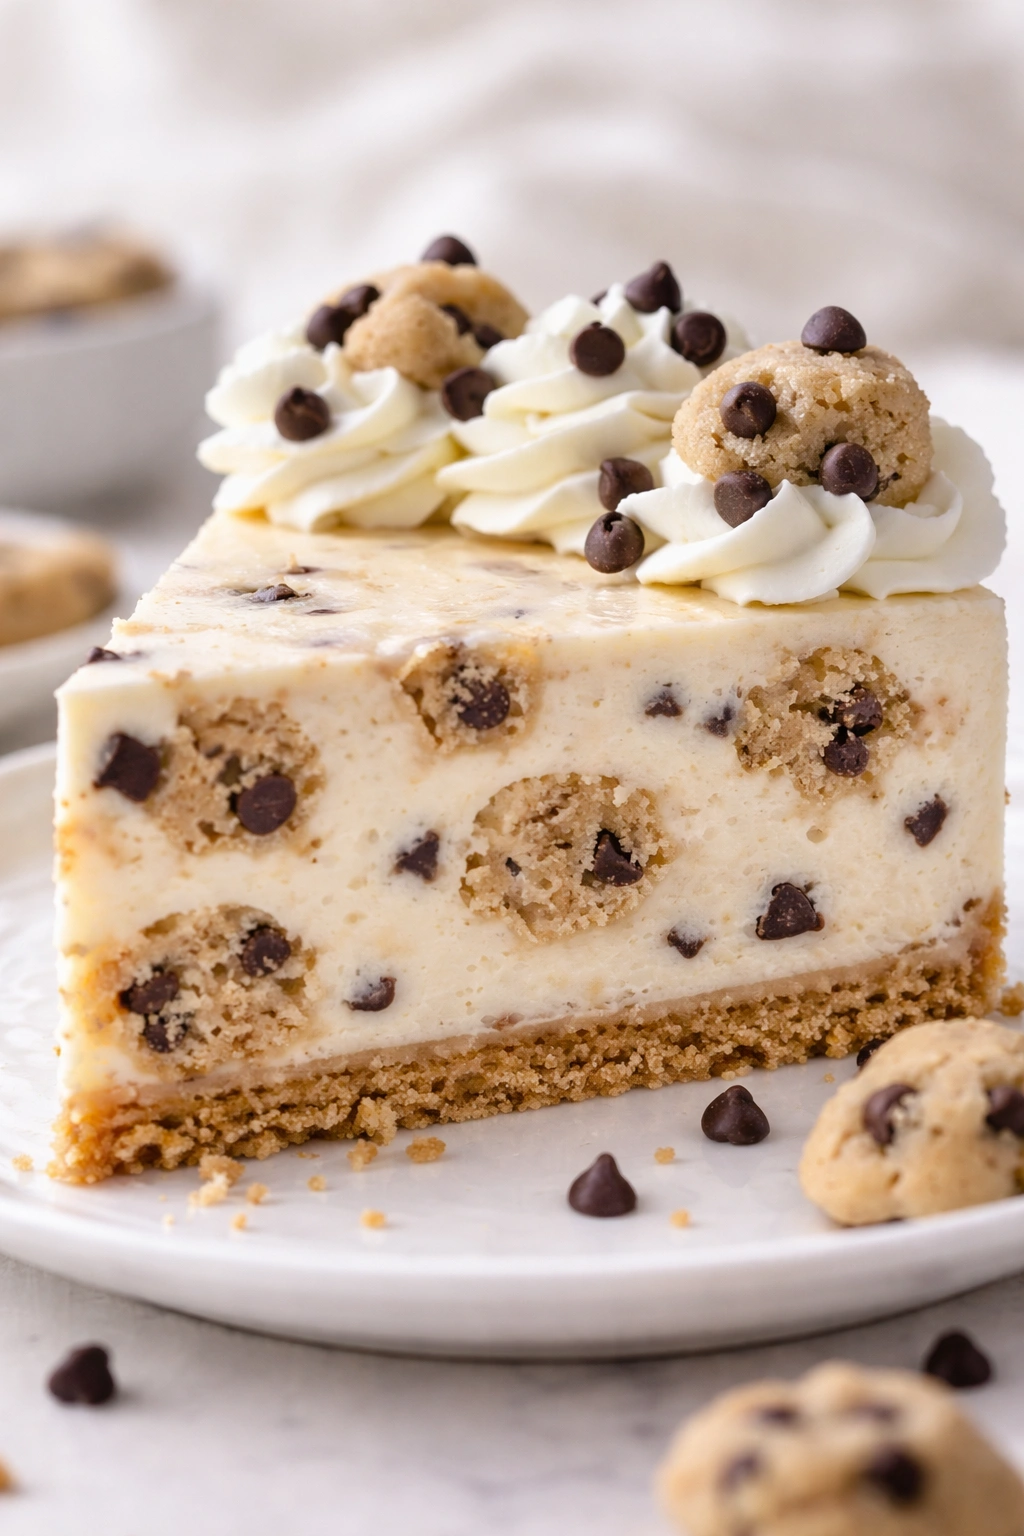
Fold the cookie dough into the cheesecake filling gently after the cream cheese mixture is set. You’re not blending it into a uniform swirl—you want distinct pockets of dough that you encounter while eating. Scoop rough chunks of dough throughout the filling, and use a fork or skewer to create visual swirls if desired, though heavy swirling breaks up those important pockets of texture.
Achieving Restaurant-Quality Results at Home
The difference between an okay no-bake cheesecake and a genuinely impressive one comes down to a few specific details. First, precise measurements matter. Cream cheese and heavy cream have different densities, and the balance between them determines whether your finished cheesecake will be dense, mousy, or that perfect in-between texture. Use a kitchen scale if you have one, or be very careful with measuring cups for accuracy.
Second, chill aggressively. The 30-minute timeline works because you’re relying on freezer cold (around 0°F/-18°C) to set the filling quickly. A regular refrigerator (around 40°F/4°C) would take several hours. Thirty minutes in a freezer creates a cheesecake that’s firm enough to slice but still has that creamy texture—not icy or rock-solid. This is actually the sweet spot. If you tried to freeze it longer, it would become harder and less pleasant to eat.
Third, invest in a good serrated knife and use it properly. An 8-10 inch serrated knife works better than a regular chef’s knife for cutting through cheesecake. Dip the blade in hot water, wipe it dry, and use a gentle sawing motion rather than pressing down. A hot, wet blade creates clean edges without dragging the layers. Make each slice decisively—hesitating or multiple passes creates ragged edges.
Fourth, let it sit at room temperature for 2-3 minutes before eating. Straight from the freezer, it’s good but slightly too firm. After a few minutes on the counter, it softens just enough that the texture becomes silkier and the flavors bloom more fully. You’re not waiting for it to melt—just enough time for the surface to thaw slightly.
Yield, Prep Time, and Difficulty Level
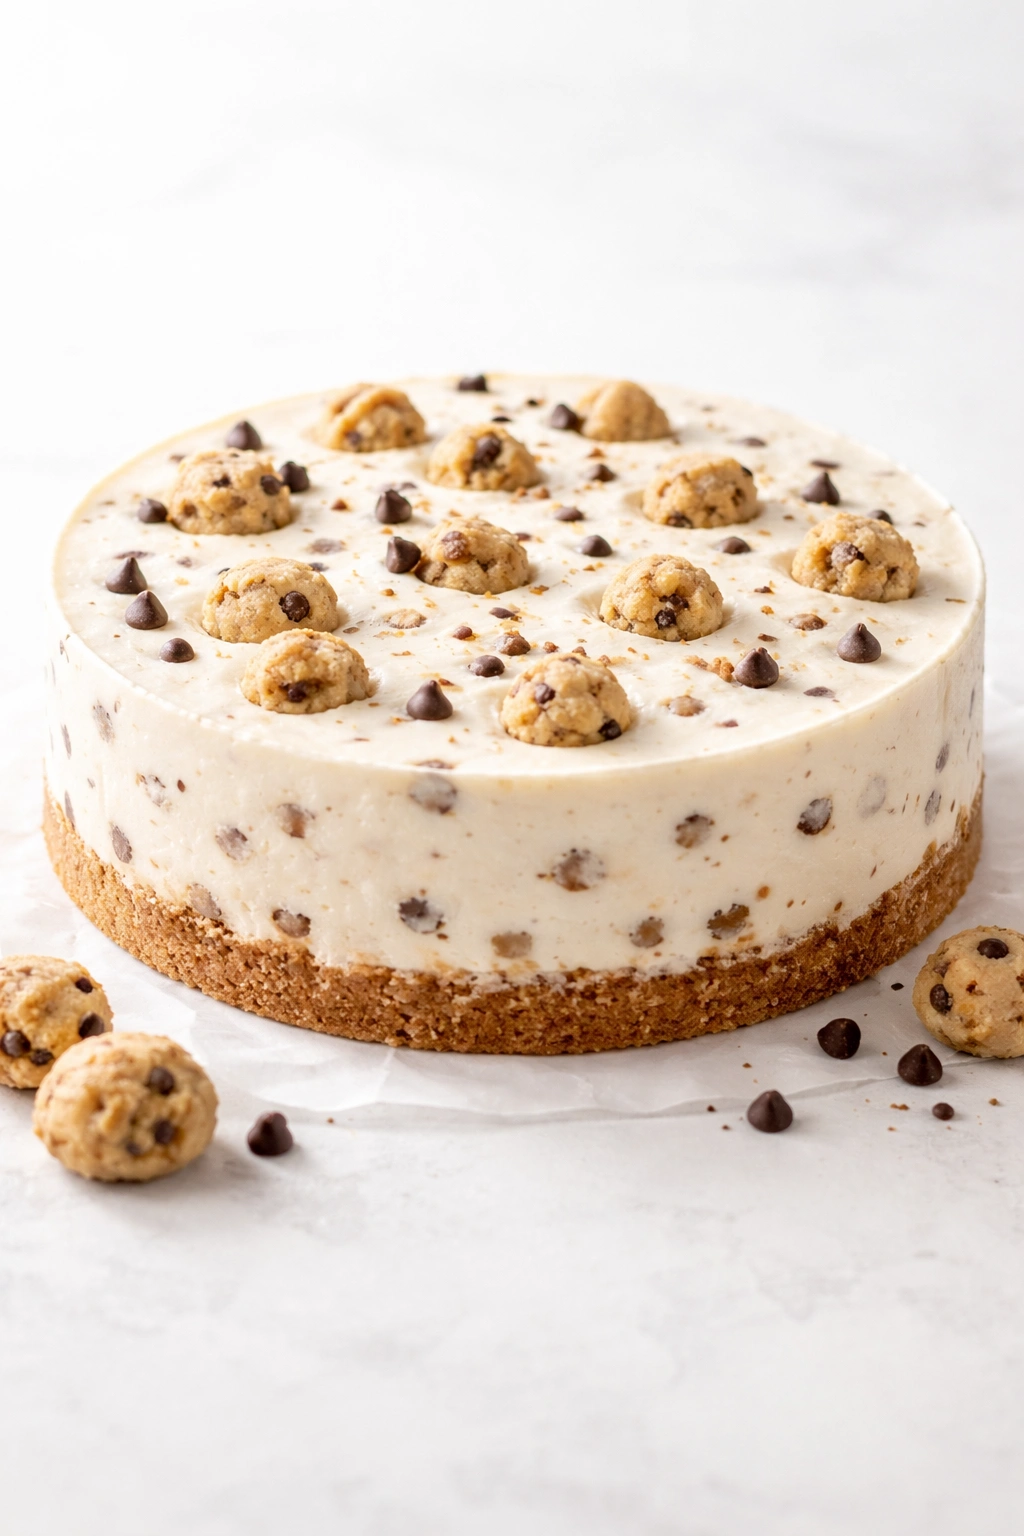
Yield: Serves 8 to 10 | One 9-inch cheesecake
Prep Time: 20 minutes (active mixing and assembly)
Cook Time: None (refrigeration instead)
Total Time: 30 minutes active + 30 minutes freezing (total 1 hour from start to serving)
Chill/Rest Time: 30 minutes in the freezer minimum for sliceable firmness; 2 hours for more traditional texture
Best Served: Immediately after the 30-minute freeze for a creamy texture, or up to 2 hours later straight from the freezer for a firmer, more traditional cheesecake experience
Difficulty: Beginner — No baking involved, straightforward ingredient list, and simple mixing techniques. The most critical skill is proper folding, which becomes intuitive after one or two attempts.
Complete Ingredient List
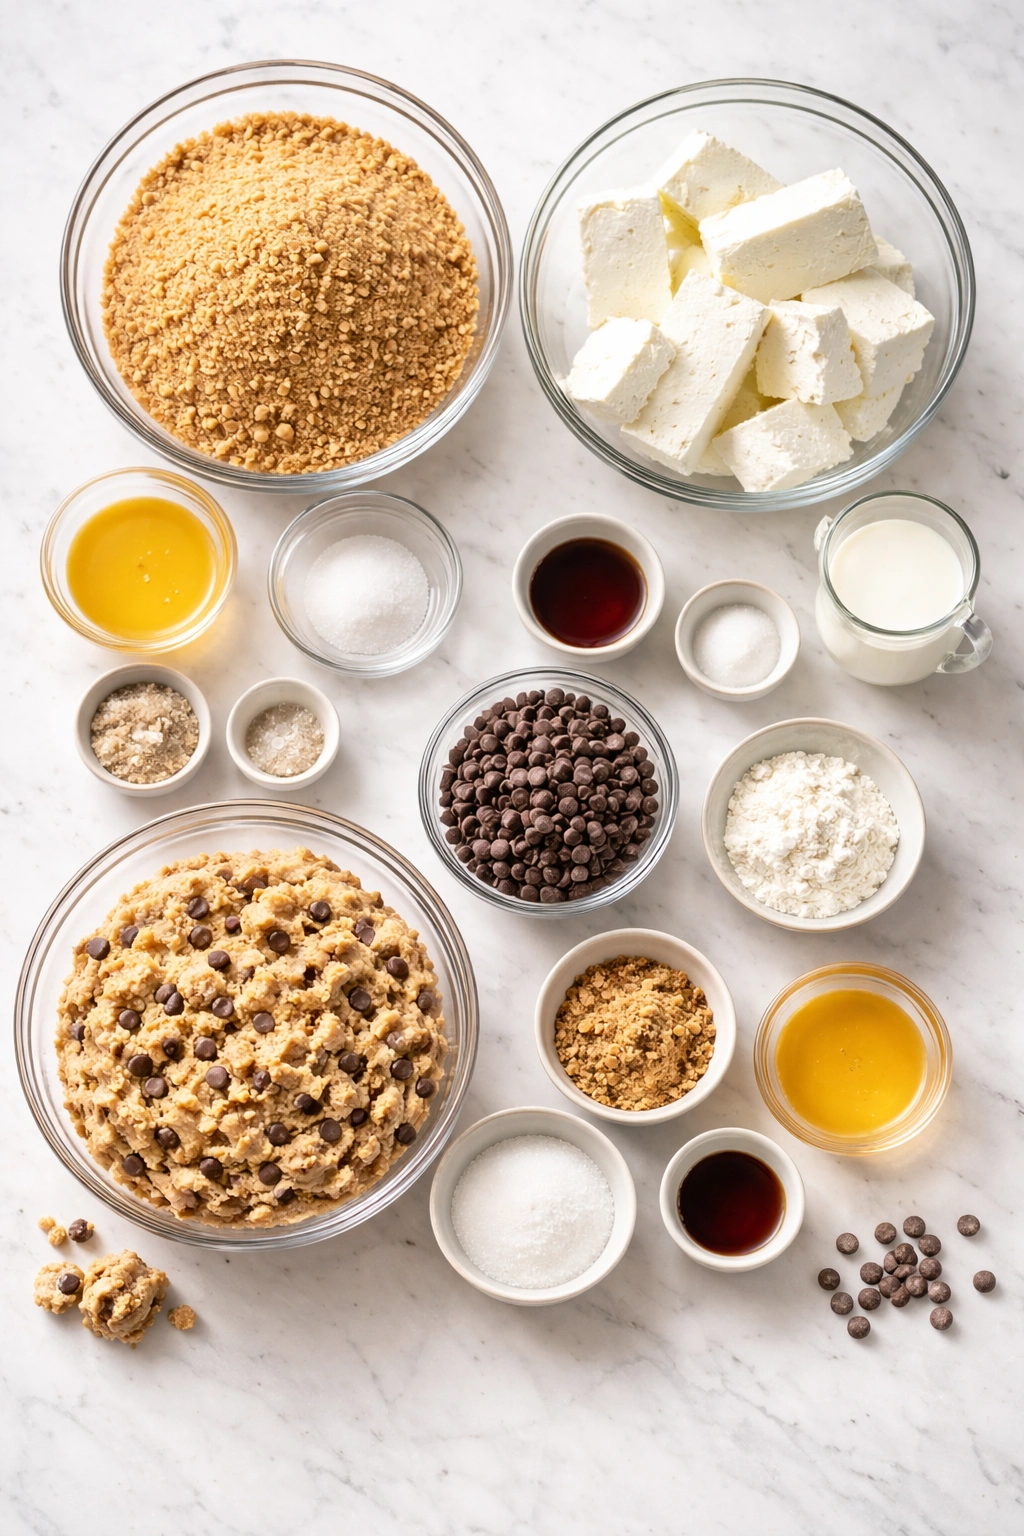
For the Cookie Crumb Crust:
- 1¼ cups vanilla sandwich cookie crumbs (about 15-16 cookies, processed to fine crumbs)
- 4 tablespoons unsalted butter, melted
- 1 tablespoon granulated sugar
- Pinch of fine sea salt
For the Cheesecake Filling:
- 16 ounces (one block) full-fat cream cheese, softened to room temperature for 15-20 minutes
- ¾ cup granulated sugar
- ½ cup sour cream, at room temperature
- 1 teaspoon pure vanilla extract
- ¼ teaspoon fine sea salt
- 1 cup heavy cream, cold
For the Edible Cookie Dough Swirl:
- 4 tablespoons unsalted butter, softened
- ¼ cup packed light brown sugar
- 2 tablespoons granulated sugar
- 2 pasteurized large eggs (or 3 tablespoons aquafaba mixed with 1 tablespoon cornstarch as an egg-free substitute)
- ½ teaspoon pure vanilla extract
- ¾ cup all-purpose flour (heat-treated flour preferred, or use standard flour)
- Pinch of fine sea salt
- ⅔ cup chocolate chips or chocolate chunks
- ⅓ cup mini chocolate chips (optional, for extra texture)
Optional Toppings:
- Additional chocolate chips
- Crushed vanilla sandwich cookies
- Caramel drizzle
- Sea salt flakes
Step-by-Step Instructions
Prepare the Pan and Crust:
-
Line the bottom of a 9-inch springform pan with parchment paper or foil for easy removal. Alternatively, you can skip the lining if you prefer—just be aware the cheesecake will be slightly harder to remove intact. If using parchment, press it flat against the bottom and smooth out any wrinkles.
-
In a small bowl, combine the crushed vanilla sandwich cookies, melted butter, granulated sugar, and salt. Stir until the mixture resembles wet sand—every crumb should be lightly coated with butter, but you shouldn’t see pools of excess butter at the bottom of the bowl. If it looks too dry, add ½ tablespoon more melted butter and stir again.
-
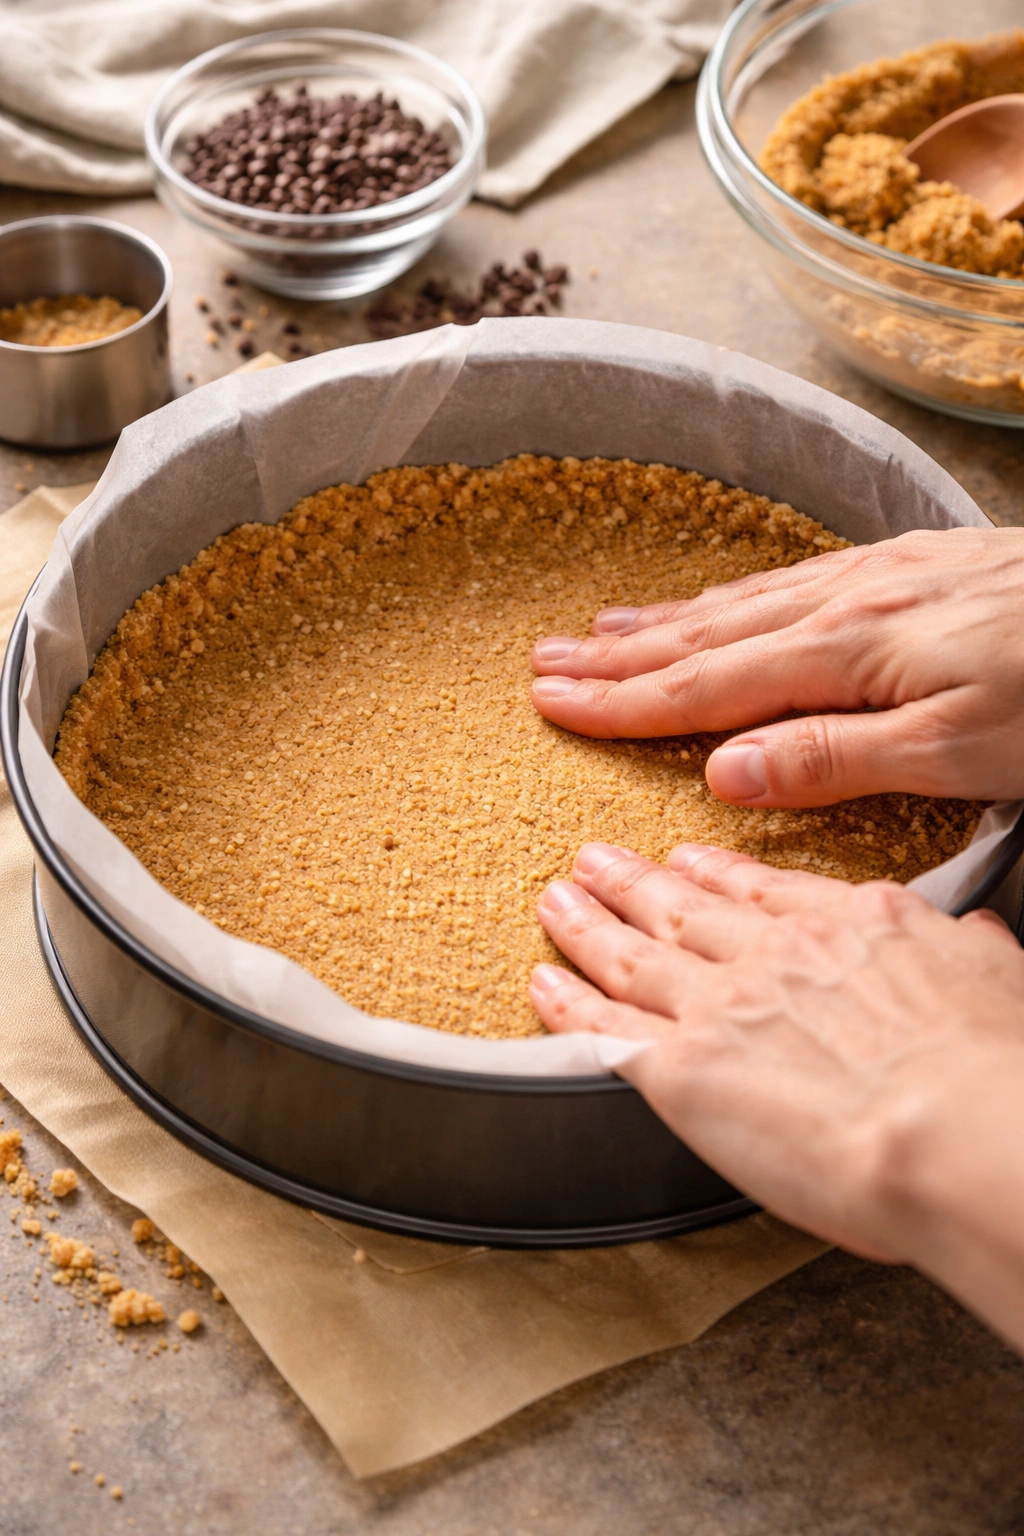
Transfer the mixture to the prepared springform pan and press down firmly and evenly using the bottom of a measuring cup or the base of a glass. Apply steady pressure across the entire surface, working your way around the pan until you’ve created an even, compact layer roughly ¼-inch thick. Pay special attention to the edges and corners—an uneven crust will create uneven layers in the finished cheesecake.
-
Freeze the crust while you prepare the filling—at least 5 minutes but up to 15 minutes is ideal. A chilled crust won’t compress or shift when you add layers on top.
Make the Edible Cookie Dough:
-
In a medium bowl, combine the softened butter, light brown sugar, and granulated sugar. Using an electric mixer on medium speed, beat for 1 to 2 minutes until light, fluffy, and noticeably paler in color. You’re incorporating air and dissolving the sugar crystals into the butter.
-
Add the pasteurized eggs (or aquafaba mixture) and vanilla extract. Beat on medium speed for 30 seconds until fully combined and the mixture looks uniform. Don’t overmix—30 seconds is sufficient.
-
In a separate small bowl, whisk together the flour and salt. Add the flour mixture to the wet ingredients and mix on low speed for just 20 to 30 seconds, until the flour completely disappears into the dough. Do not overmix—you’re just looking for even incorporation. The dough should look shaggy and uniform, with no visible flour streaks.
-
Fold in the chocolate chips and mini chocolate chips by hand using a spatula, stirring until they’re distributed throughout. The dough should be stiff and scoopable—like a thick cake batter that holds its shape when you scoop it. Set aside at room temperature.
Advertisements
Make the Cheesecake Filling:
-
In a large bowl, using an electric mixer on medium speed, beat the softened cream cheese for 2 to 3 minutes until smooth and light. You’re looking for a uniform color with no white streaks remaining. The mixture should look fluffy and increased in volume. Stop as soon as it’s smooth—do not overmix, as this will create a denser final texture.
-
Add the granulated sugar to the cream cheese and beat on medium speed for 1 minute until combined and distributed evenly. Scrape down the sides of the bowl with a spatula to ensure no pockets of unmixed sugar remain.
-
Add the sour cream, vanilla extract, and salt. Mix on low speed for just 30 seconds until combined—you want these ingredients folded in gently, not vigorously mixed.
-
In a separate medium bowl, using clean beaters or a whisk, whip the cold heavy cream to soft peaks. Soft peaks mean the cream holds its shape momentarily but still has a gentle droop when you lift the whisk out. Do not over-whip to stiff peaks, as this makes folding more difficult and creates unnecessary deflation.
-
Add one-third of the whipped cream to the cream cheese mixture and fold gently using a large flexible spatula. Use a bottom-to-top folding motion, rotating the bowl a quarter turn with each fold. This first addition loosens up the cream cheese mixture and makes it easier to fold in the remaining cream without breaking down the whipped cream too much.
-
Add the remaining whipped cream in two additions, folding gently after each addition until the mixture is mostly uniform. A few white streaks from the whipped cream are fine—they’ll disappear with one more gentle fold. The goal is visible incorporation with minimal deflation. The finished filling should be light, mousy, and spreadable.
Assemble the Cheesecake:
-
Remove the frozen crust from the freezer. Immediately spread about two-thirds of the cheesecake filling evenly over the crust, using an offset spatula or the back of a spoon to create a level layer. Work quickly so the crust doesn’t warm up significantly.
-
Using a spoon or small ice cream scoop, distribute the edible cookie dough throughout this first layer of cheesecake filling. You want distinct pockets of dough scattered throughout, not a uniform swirl. Place spoonfuls of dough at various points—roughly every 2 inches across the surface—and press gently to set them into the cheesecake.
Advertisements -
Top with the remaining cheesecake filling, spreading it smooth and even. You can swirl the top with a fork if desired for visual appeal, but this is entirely optional. The cheesecake is fully finished at this point—the swirling is just for presentation.
-
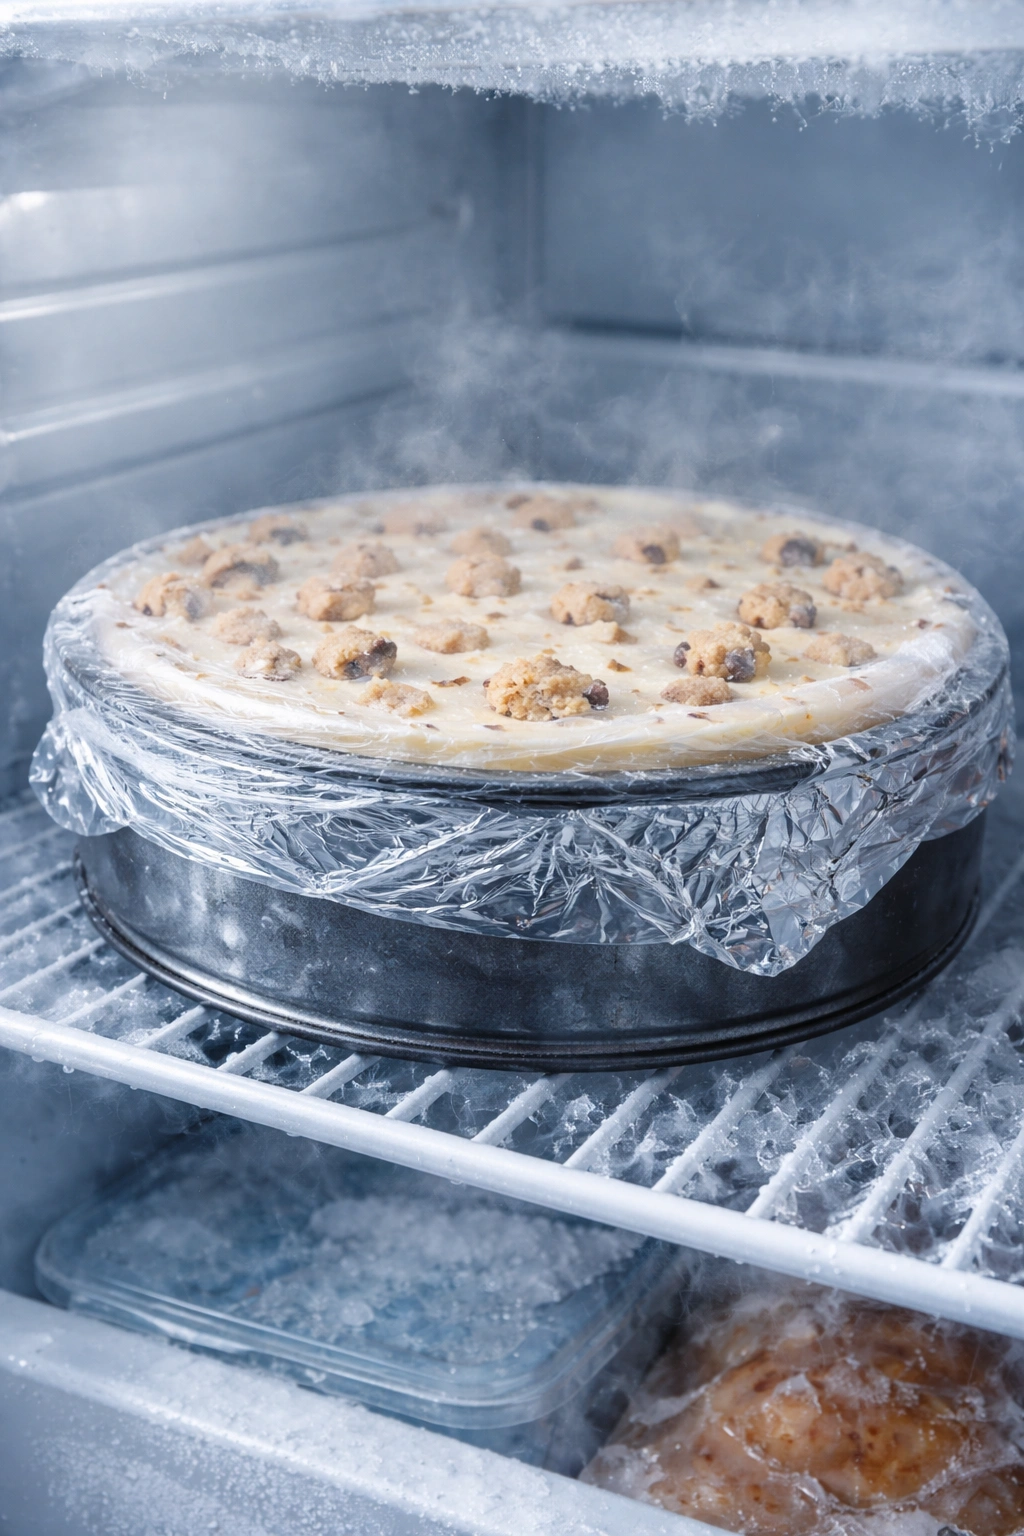
Freeze for at least 30 minutes. The cheesecake will become sliceable firm but still retain a creamy texture at 30 minutes. If you prefer a firmer, more traditional texture, freeze for up to 2 hours. Do not freeze overnight for this recipe—the ultra-cold temperature will make it rock-solid and less pleasant to eat.
Final Steps:
-
When ready to serve, run a thin knife around the edges of the pan to loosen the cheesecake from the sides. This prevents cracking when you release the springform. Gently release the springform latch and carefully lift off the ring.
-
Using a hot, wet serrated knife (wipe it dry between cuts), slice the cheesecake into 8 to 10 pieces. Use a gentle sawing motion rather than pressing down hard. A clean, deliberate cut through the entire cheesecake works better than multiple hesitant passes.
-
Serve immediately, or let slices sit at room temperature for 2 to 3 minutes to allow the texture to soften slightly. Garnish with additional chocolate chips, crushed cookies, caramel drizzle, or sea salt as desired.
Pro Tips and Common Mistakes to Avoid
The crust-to-filling ratio matters more than most recipes acknowledge. Too much crust overwhelms the delicate cheesecake flavor, and too little makes the structure feel fragile when slicing. The ratio here—about 1 part crust to 2.5 parts filling—is dialed in through repeated testing. If you find yourself wanting a thicker crust, increase it modestly, but understand that every quarter-inch of additional crust takes away from the cheesecake proportion.
Don’t skip the sour cream. It serves two purposes: it adds a subtle tang that balances the sweetness and makes the cheesecake taste like actual cheesecake, and it adds enough acid to help set the filling without requiring baking. A cheesecake made entirely from cream cheese and sugar tastes flat and one-dimensional compared to one with sour cream’s brightness.
The 30-minute freezing timeline is calibrated for a standard home freezer at 0°F (-18°C). If your freezer runs colder (some go to -10°F or below), you might hit the sliceable-firm point in 25 minutes. If it runs warmer (which is more common than people realize), you might need 35-40 minutes. You’re looking for a firmness where the cheesecake holds its shape when cut but has a slightly soft, creamy texture, not a rock-hard frozen block. Start checking at 25 minutes by carefully pressing the surface with your finger—it should hold the indentation but still have give underneath.
The edible cookie dough needs to be the right consistency. Too wet and it won’t scoop cleanly into the cheesecake. Too dry and it becomes grainy instead of creamy. The consistency should resemble thick cake batter—something you could scoop with an ice cream scoop and have it hold its shape for a moment before collapsing. If your dough feels too soft, chill it in the fridge for 5-10 minutes before adding it to the cheesecake.
Overmixing the cream cheese is the most common failure point. Once the cream cheese looks smooth and uniform, stop. Continuing to beat it develops a gluten-like network in the protein structure and creates a denser, more rubbery texture. The best cheesecake is mixed minimally—just enough to combine and smooth out, then stop immediately.
Don’t attempt to slice directly from the freezer without loosening the edges. When the cheesecake is ultra-cold, it shrinks slightly and bonds to the pan sides. Running a thin knife around the perimeter first releases it from the pan and prevents cracking across the top surface when you open the springform.
The hot knife technique actually works. Keep a tall glass of hot water nearby while you’re slicing. Dip your serrated knife in the hot water, wipe it completely dry, then make your cut. The warmth of the knife melts through the cheesecake cleanly without dragging or tearing. Dip and dry between every single cut for best results.
Cookie dough pockets stay intact if you don’t overmix. Resist the urge to swirl the dough evenly throughout. Those distinct pockets of dough are what make the texture exciting when you bite into a slice. Gentle placement of spoonfuls of dough, with minimal stirring or folding, preserves those textural surprises.
Flavor Variations to Try

Brown Butter Cookie Dough: Replace the regular butter in the dough with brown butter (butter heated until the milk solids turn golden brown, then cooled). This adds a nutty, caramel-like depth that elevates the dough significantly. Brown the butter in a small saucepan over medium heat, watching it carefully, and let it cool completely before mixing.
Salted Caramel Swirl: Drizzle a thin line of salted caramel sauce over the second layer of cheesecake filling before freezing, then add the edible cookie dough on top. The caramel adds richness and a slight bitterness that complements the sweetness beautifully.
Espresso Cheesecake Base: Mix 2 teaspoons of instant espresso powder (dissolved in 1 tablespoon hot water) into the cream cheese filling before folding in the whipped cream. This creates a subtle coffee undertone that plays beautifully against vanilla cookie dough. Use chocolate chips in the dough instead of vanilla sandwich cookies for the crust.
Brownie Chunk Dough: Replace half the all-purpose flour in the cookie dough with unsweetened cocoa powder and reduce the chocolate chips to ⅓ cup, then add ½ cup fudgy brownie chunks throughout the dough. This creates a chocolate-on-chocolate experience that’s genuinely luxurious.
Peanut Butter Dough: Swap half the butter in the cookie dough for smooth or chunky peanut butter (¼ cup peanut butter + 2 tablespoons butter). Keep the chocolate chips and add ¼ cup chopped roasted peanuts. This creates that beloved peanut-butter-and-chocolate combination.
Birthday Cake Version: Use crushed vanilla wafer cookies instead of sandwich cookies for the crust, add ½ teaspoon almond extract to the cheesecake filling (along with the vanilla), and fold rainbow sprinkles into the cookie dough instead of chocolate chips. Top with additional sprinkles for visual celebration.
Maple Walnut: Add 2 tablespoons of pure maple syrup to the cheesecake filling and replace the light brown sugar in the cookie dough with maple sugar (or increase the brown sugar if maple sugar isn’t available). Add ½ cup chopped toasted walnuts to the dough. This creates an autumn-friendly variation with warm, earthy notes.
Storage, Make-Ahead, and Keeping Guidelines
Room Temperature Storage: This cheesecake doesn’t hold well at room temperature. Eat it immediately after removing from the freezer or within 2-3 hours maximum. Beyond that, the crust begins to soften noticeably and the filling starts to weep slightly as the cream cheese and heavy cream separate.
Refrigerator Storage: Covered tightly with plastic wrap or stored in an airtight container, leftover cheesecake keeps for 3 to 4 days in the fridge. It will soften considerably and lose the creamy-but-firm texture you get straight from the freezer, taking on a texture more like traditional refrigerated cheesecake. This isn’t bad—it’s just different. It’s actually pleasant if you prefer an extra-creamy slice.
Freezer Storage: An uncut cheesecake in the springform pan, well wrapped in plastic wrap and then aluminum foil, keeps for up to 2 weeks in the freezer. An already-sliced cheesecake also freezes well for up to 10 days if you wrap individual slices in plastic wrap and then place them in a freezer bag. Thaw at room temperature for 20-30 minutes, or in the refrigerator for 1-2 hours, depending on thickness.
Make-Ahead Strategy: You can prepare the crust and freeze it up to 2 days ahead. You can also make the edible cookie dough and store it in an airtight container in the fridge for up to 3 days. Make the cheesecake filling no more than 2-3 hours before freezing, because the whipped cream component begins to break down and release liquid if it sits too long. The sour cream and cream cheese keep the filling stable longer than whipped cream alone would, but you’re still better off assembling close to serving time.
The Crust Question: If the crust softens while stored in the fridge, you can re-crisp it by spreading it in a thin layer on a baking sheet and toasting it at 300°F (150°C) for about 3 minutes, just enough to dry it out. Let it cool completely before crushing and using again. This is mostly a preventative measure—most people don’t encounter this issue if they’re serving within a reasonable timeframe.
Traveling with Cheesecake: If you need to transport this cheesecake, keep it frozen until the last possible moment. Transport it in the springform pan (don’t remove the ring) wrapped in multiple layers of plastic wrap and placed inside an insulated cooler with ice packs. It should maintain freezer temperature for up to 4-5 hours in a well-insulated cooler. Release the springform ring only when you’re ready to serve.
How to Serve and What Pairs Best
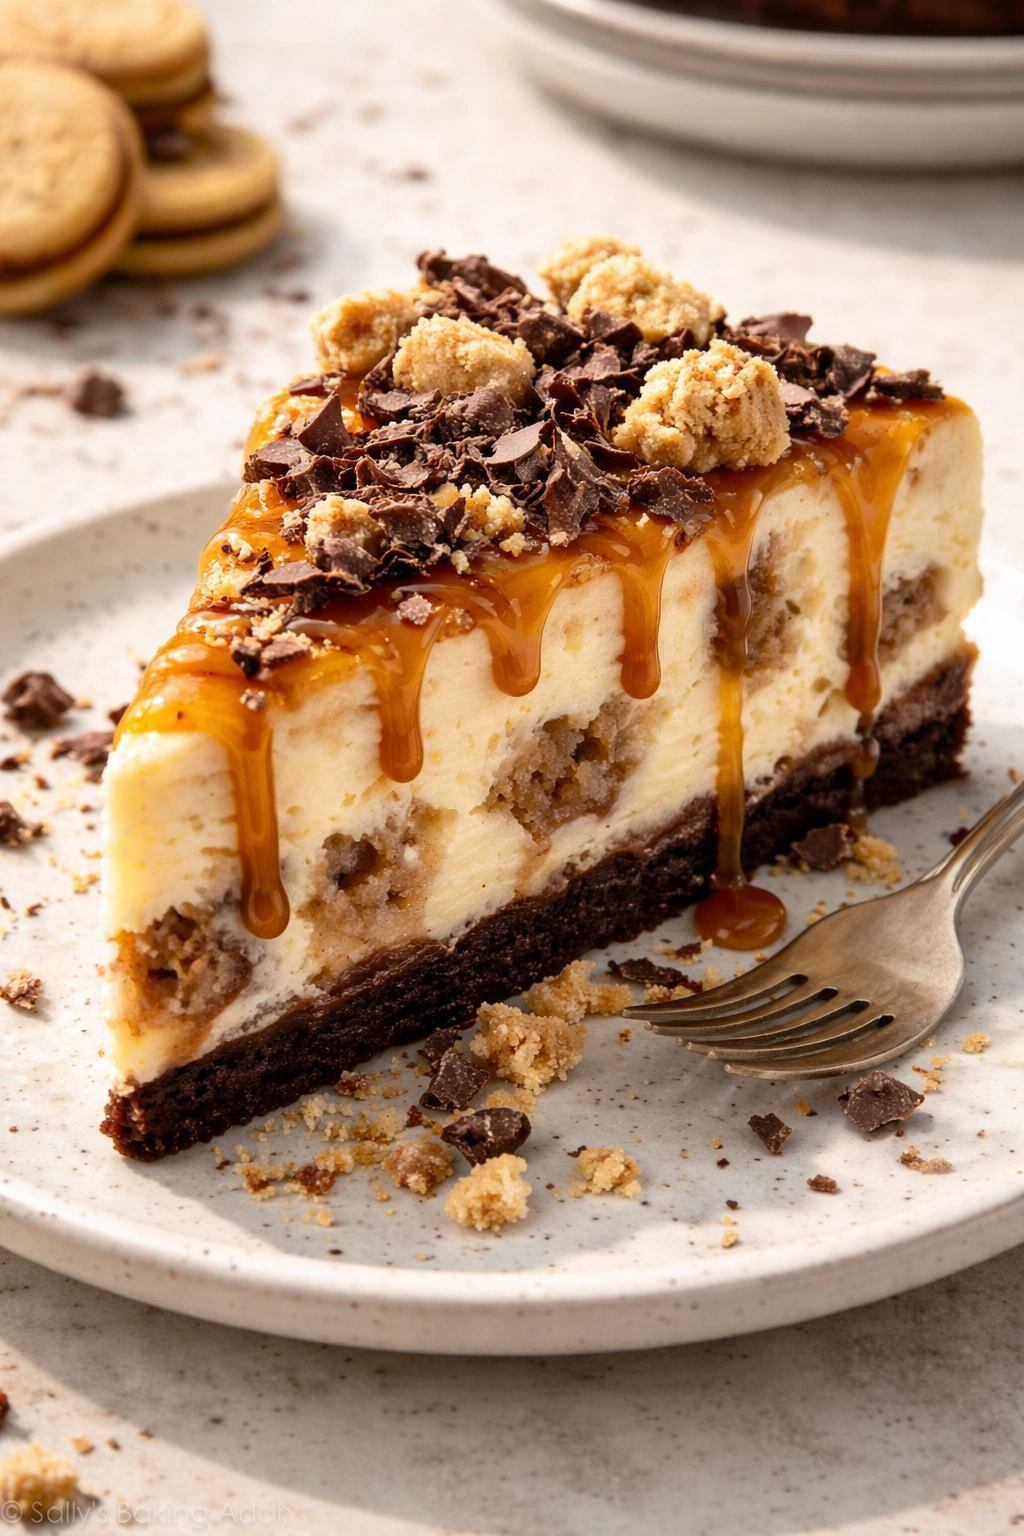
Garnish Options: A simple sprinkle of crushed vanilla sandwich cookies on top echoes the crust and adds textural interest. Chocolate shavings, made by using a vegetable peeler on a chocolate bar, look elegant and melt on your tongue. A drizzle of caramel sauce or chocolate sauce adds richness and visual appeal. A pinch of sea salt flakes on top highlights the sweetness of the cheesecake and plays off the salt in the crust. Any combination of these works beautifully.
Beverage Pairings: This cheesecake pairs wonderfully with cold milk—there’s something deeply satisfying about the creaminess of cheesecake against the cool simplicity of milk. Iced coffee complements the vanilla and chocolate notes beautifully, with the slight bitterness of coffee balancing the sweetness. A glass of sweet dessert wine like Moscato d’Asti or late-harvest Riesling adds sophistication. Hot coffee or tea works equally well if you’re serving this as a special afternoon treat.
Serving Occasion Ideas: This is an impressive enough dessert to bring to a potluck or small dinner party, yet casual enough to enjoy as a weekday treat. Because it requires zero baking time, it’s perfect for those moments when you want something that tastes like you spent hours in the kitchen but you actually just spent 20 minutes. Serve it at casual summer dinners alongside fresh berries or fresh fruit, or as a decadent ending to a more formal meal where you want something rich and satisfying.
Plate Presentation: Transfer each slice to a small dessert plate and serve as-is, or add a small dollop of whipped cream on the side. A light dusting of cocoa powder (if you’re using the espresso variation) or a small handful of crushed cookies adds a professional finish. If you’re being very fancy, use a palette knife or offset spatula to transfer the slice, then garnish around the plate with a small pool of sauce or a light drizzle.
Portion Consideration: This cheesecake is rich and substantial—8 to 10 generous slices is accurate, but if you’re serving it after a full meal, you might get 10 to 12 smaller slices. People tend to eat smaller portions than they think because the richness satisfies quickly. A slice roughly 1¼ inches wide is perfect for most situations.
Storage Between Slices: If you’re storing leftover slices, wrap each piece individually in plastic wrap before placing it in an airtight container. This prevents the exposed cut surfaces from drying out or absorbing odors from the fridge. The slices will keep for 3 to 4 days covered this way.
Final Thoughts
The beauty of this cookie dough cheesecake isn’t just that it’s fast—it’s that it tastes genuinely incredible despite the speed. There’s no weird texture, no suspicious shortcuts, no moment where someone bites into it and wonders if you cut corners. It’s legitimately creamy, genuinely rich, with textural surprises throughout and that essential tang of real cheesecake.
The no-bake approach actually delivers superior results to many traditional recipes. You’re not fighting oven temperature inconsistencies or stress cracks. You’re not waiting overnight to serve something you made on impulse. You’re getting restaurant-quality results in the time it takes to make a regular batch of cookies.
The edible cookie dough swirled throughout turns this from a good cheesecake into something special—those pockets of rich, creamy dough against the silky filling create a combination that tastes indulgent without being overwhelming. The vanilla sandwich cookie crust ties everything together with a nostalgic sweetness that brings the whole composition into harmony.
Once you’ve made this version, you’ll likely find yourself returning to it repeatedly. It’s the cheesecake for when you have a craving at 2 PM and want dessert by 2:30. It’s the cheesecake for surprise dinner guests. It’s the cheesecake that proves you can make something genuinely impressive without spending hours in the kitchen. Keep the ingredient ratios bookmarked, experiment with the variations, and enjoy the genuine satisfaction of creating something that tastes like it took all day—in just 30 minutes.