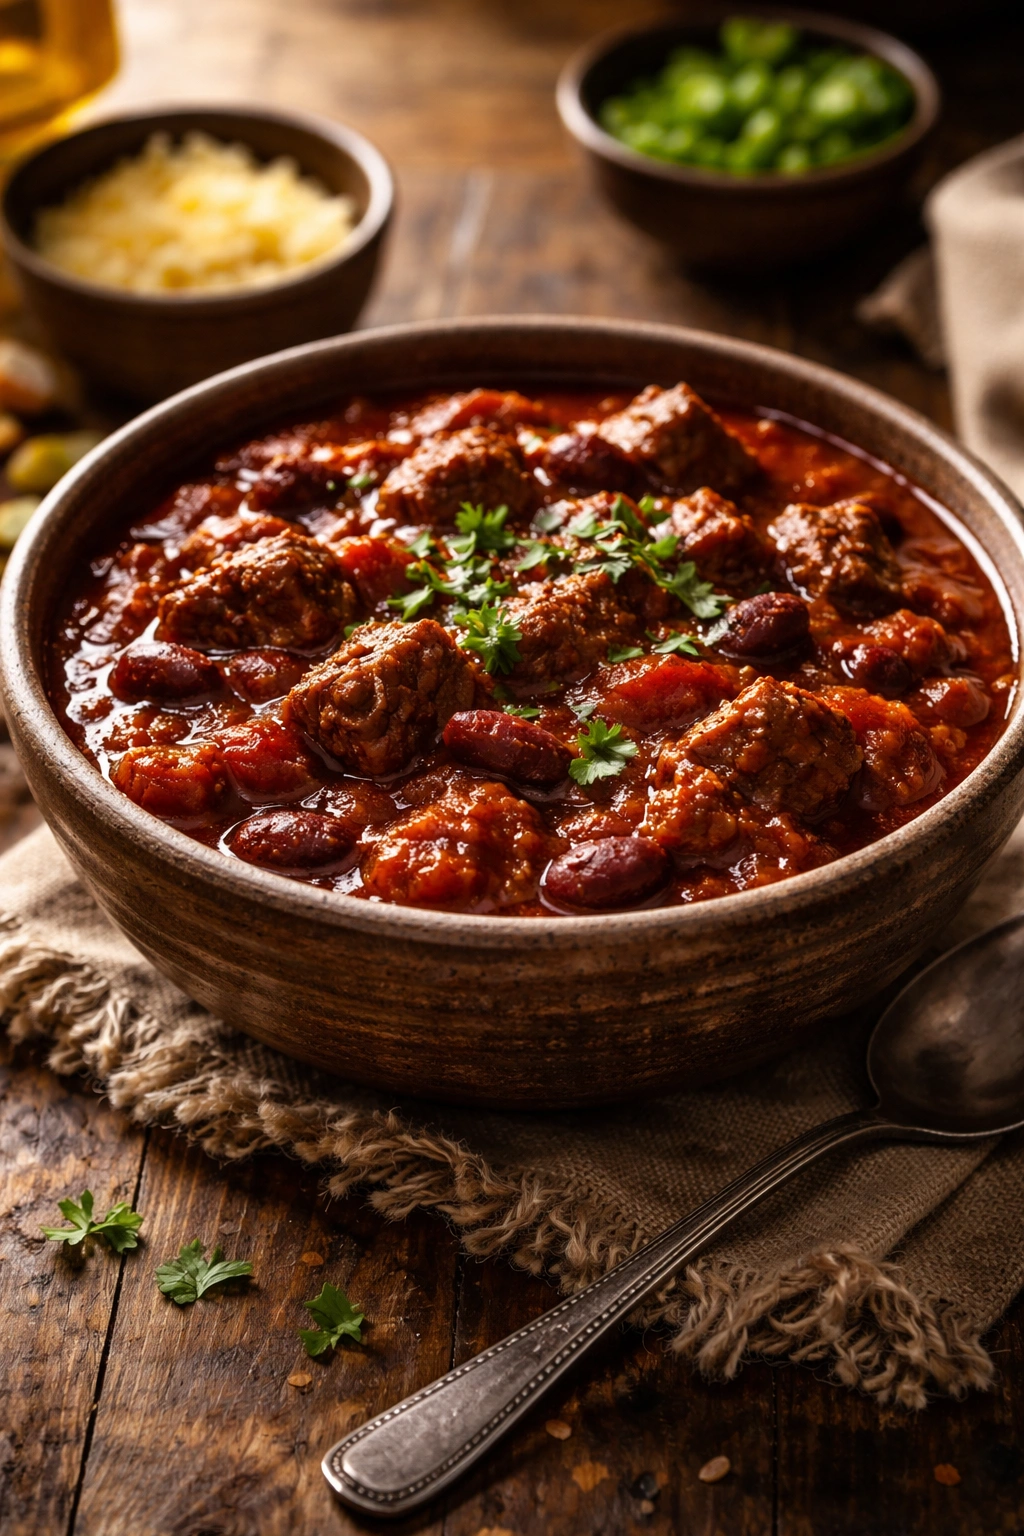
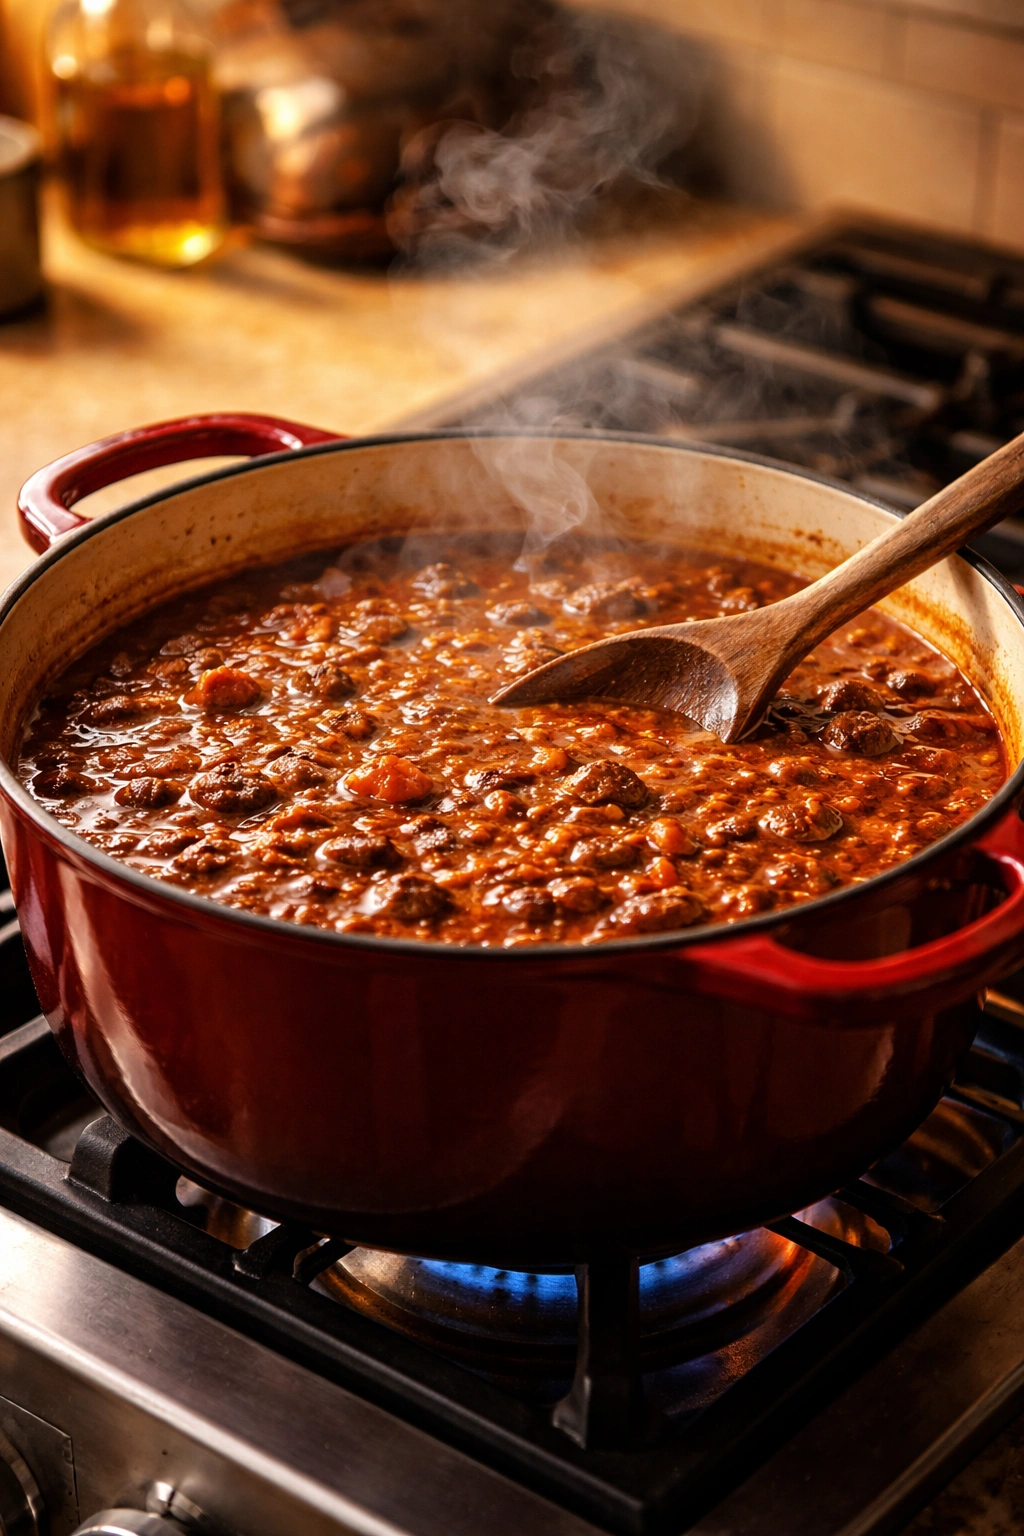
There’s something profoundly satisfying about the smell of chili simmering on your stove for hours. It’s the kind of aroma that fills your entire home, draws people into the kitchen, and promises that dinner will be deeply flavored, stick-to-your-ribs comfort food. Low-and-slow chili con carne isn’t a quick weeknight fix—it’s a deliberate, patient undertaking that rewards you with meat so tender it practically dissolves on your tongue and a sauce so rich and complex it tastes like it’s been perfected over generations.
The magic of low-and-slow cooking isn’t just about time—it’s about what actually happens to the chili as it simmers. The collagen in the meat breaks down into gelatin, creating natural body and richness without cream or thickening agents. The flavors have hours to marry and deepen, allowing each spice to make its presence known while still blending into a harmonious whole. Cheap cuts of beef that would be tough if braised quickly become utterly luxurious after hours at a gentle simmer. This is not the chili of a hurried cook; this is the chili of someone who understands that certain things simply cannot be rushed.
What matters most isn’t just the cooking method—it’s understanding the fundamentals. Which cut of beef delivers the best texture? How do you build complexity in the base without relying on tomato paste alone? When should you add which ingredients so nothing overcooks? Why does some chili taste one-dimensional while others seem to reveal new flavors with each spoonful? These are the questions this guide answers with the kind of specificity that transforms a decent chili into one that people ask you to make again and again.
The History and Soul of Chili Con Carne
Chili con carne has become so embedded in American food culture that many people assume it originated in the United States, but its true story is more complicated and interesting than that. The dish as we know it today likely emerged along the Texas-Mexico border, where Mexican cooking traditions met cattle ranching and frontier necessity. Cowboys needed food that could feed a crowd, keep well, and taste better the longer it sat. Indigenous ingredients—dried chiles, cumin, and chilies—combined with beef became the foundation of what eventually became iconic.
The dish spread northward through Texas, gaining regional variations as it went. San Antonio chili vendors in the 1800s sold their red stews from carts, building a following so devoted that the dish became part of the city’s identity. As chili migrated further north and east, it evolved. Some regions added beans (which traditional Texans argue vehemently against), others incorporated tomato more heavily, and some leaned hard into the spice heat. Each variation reflects the cook’s regional influences and personal philosophy about what chili should taste like.
What unites all versions is the acknowledgment that chili improves with time. Whether you’re simmering for two hours or six, the cooking process allows flavors to deepen and meld in ways that simple stovetop cooking at higher temperatures never achieves. The low heat prevents the delicate balance of spices from overwhelming the palate and allows the beef’s natural umami to shine through without harshness. This isn’t ancient tradition for tradition’s sake—it’s the result of generations of cooks understanding the actual science of flavor development and meat transformation.
What Makes Low-and-Slow Chili Different From Everything Else
The difference between regular chili and low-and-slow chili comes down to two factors: temperature control and time. Low-and-slow cooking means maintaining a gentle simmer—small, infrequent bubbles breaking the surface—rather than a rolling boil or a high heat simmer. This typically means cooking on the lowest setting on your stovetop, in a 275°F oven, or in a slow cooker on low. The chili should never boil hard; if you see aggressive bubbling, reduce the heat.
Why does this matter so much? At high temperatures, the proteins in the beef muscle denature too quickly, squeezing out moisture and creating a grainy, tough texture. At lower temperatures, those same proteins denature slowly and evenly, the collagen has time to convert to gelatin at its own pace, and the meat stays moist despite hours of cooking. Meanwhile, the spices and other aromatic compounds are gently infusing the sauce rather than being burned off or becoming bitter. The end result isn’t just tender meat—it’s meat with a silky, almost luxurious mouthfeel that only comes from the correct temperature combined with adequate time.
A low-and-slow chili typically simmers for 4 to 6 hours, though it can go longer. The longer the simmer, the more the flavors concentrate (though you’ll need to add a bit more liquid to account for evaporation). Many cooks find that 4 hours is the sweet spot—long enough for profound flavor development, short enough that you’re not committing an entire day to dinner. You’ll know the chili is done when you take a spoon and dip it in: the sauce should coat the back of the spoon, the meat should shred easily with just the spoon against the side of the pot, and the overall flavor should taste balanced and integrated rather than raw or sharp.
Yield and Timing Information

Yield: Serves 8 to 10 | Makes about 4 quarts (16 cups)
Prep Time: 30 minutes (hands-on active preparation)
Cook Time: 4 to 5 hours (mostly unattended simmering, though you’ll stir occasionally)
Total Time: 4 hours 30 minutes to 5 hours 30 minutes active (not including any optional overnight rest, which improves flavor but is not required)
Difficulty: Intermediate — This chili requires some attention and basic technique (browning meat, managing heat), but there’s nothing complicated about it. The main challenge is patience; once it’s simmering, you can leave it mostly alone.
Make-Ahead Note: This chili actually tastes better the next day or even the day after, once the flavors have melded. It reheats beautifully and freezes exceptionally well.
Complete Ingredients
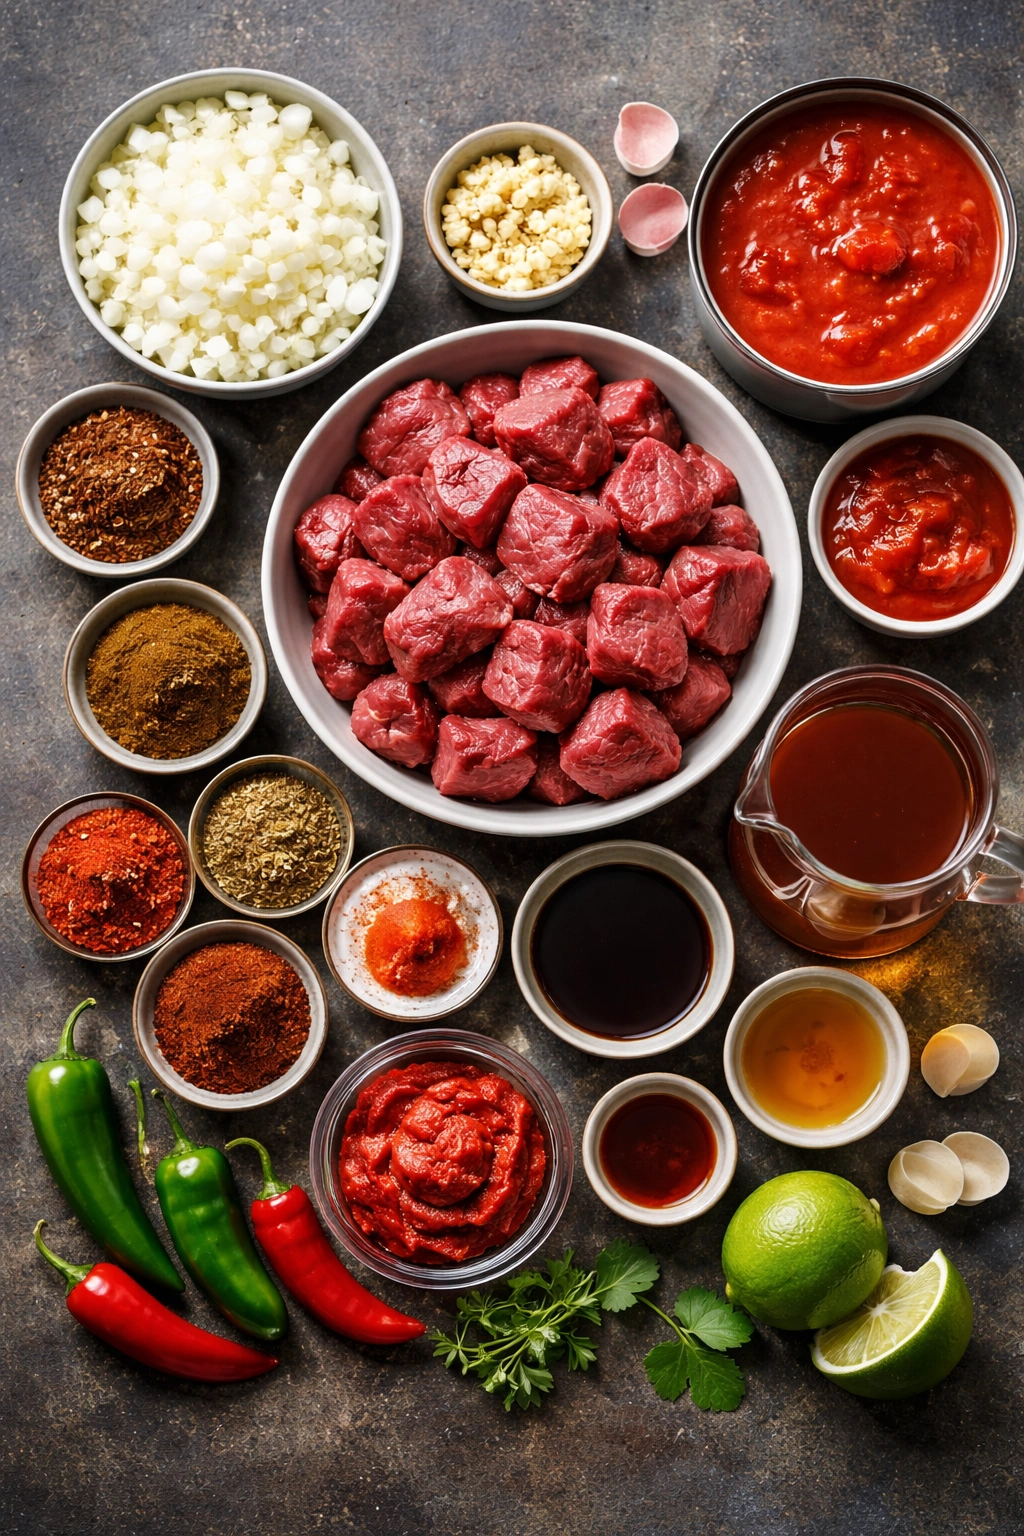
For the Chili:
- 4 pounds beef chuck, cut into ¾-inch pieces (chuck is ideal; avoid lean cuts like sirloin or tenderloin)
- 2 tablespoons neutral oil with a high smoke point (vegetable, canola, or avocado oil)
- 1 large yellow onion, diced into approximately ¼-inch pieces
- 6 cloves garlic, minced (about 2 tablespoons)
- 3 tablespoons chili powder (a good-quality chili powder blend, not cayenne; see tips for specifics)
- 2 tablespoons ground cumin
- 2 teaspoons dried oregano (Mexican oregano is traditional and more flavorful than Mediterranean oregano)
- 1½ teaspoons smoked paprika (adds depth without adding heat)
- ¼ to ½ teaspoon cayenne pepper (adjust based on your heat preference; start at ¼ teaspoon)
- 2 tablespoons tomato paste (concentrated umami and natural sweetness)
- 4 cups beef broth (use homemade or a good-quality store-bought; avoid the ultra-salty versions)
- 1 can (28 ounces) crushed tomatoes
- 1 can (15 ounces) tomato sauce (or use another can of crushed tomatoes if you prefer)
- 2 tablespoons apple cider vinegar (adds complexity and cuts the richness slightly)
- 2 tablespoons soy sauce (umami booster; adds savory depth)
- 1 tablespoon honey (balances acidity and adds subtle sweetness)
- 2 bay leaves
- Salt and black pepper to taste (start with ½ teaspoon salt; add more toward the end of cooking)
Optional but Recommended Additions:
- 1 teaspoon instant espresso powder or very finely ground dark roast coffee (deepens the savory flavors without making the chili taste like coffee)
- 1 teaspoon cocoa powder (adds complexity and slight sweetness; use a good-quality unsweetened cocoa)
Practical Tips Before You Begin
Invest in quality chili powder. This might sound obvious, but the difference between a fresh, well-balanced chili powder blend and one that’s been sitting in your cabinet for three years is enormous. Chili powder should smell vibrant and slightly spicy, never musty or dull. If you can, buy from a spice specialty store or online from a spice company that tests freshness. A stale chili powder won’t ruin your dish, but it’ll make it taste one-dimensional. Some cooks prefer to use whole dried chiles (ancho, guajillo, New Mexico chiles) ground into powder; if you go this route, use about 4 tablespoons of your homemade chile powder in place of the commercial chili powder, and reduce the cayenne to ¼ teaspoon since whole chiles vary in heat.
Choose the right cut of beef. Chuck roast has the perfect ratio of meat to fat and contains enough collagen that it transforms into silky gelatin during the low-and-slow process. Avoid lean cuts like sirloin or tenderloin—they’ll end up tough. Don’t use ground beef; the texture will be completely different, and you won’t get the same depth of flavor from the browned meat. Cut the beef into ¾-inch to 1-inch pieces; pieces larger than this may not cook through evenly, and smaller pieces will fall apart.
Brown the meat properly. This is non-negotiable. Browning develops flavor through the Maillard reaction, which creates hundreds of new flavor compounds that will enrich your entire pot of chili. Don’t skip this step or rush it. You’ll need to brown the beef in batches to avoid crowding the pan, which would cause it to steam instead of brown. This takes 15 to 20 minutes total for all the meat, but it’s worth every minute.
Manage the simmer heat with intention. Low-and-slow cooking means you need to find the exact spot on your stove where the chili maintains a gentle, barely-bubbling simmer. This might be on your stove’s lowest setting, or you might need to use a heat diffuser. If your chili is boiling rapidly, the temperature is too high. If there are no bubbles at all, it’s too low. Aim for small, irregular bubbles that surface maybe once every few seconds. On the stovetop, this usually requires starting on medium-low and then adjusting down after the first 15 minutes.
Taste and adjust in stages. Don’t add all your salt and pepper at the beginning—the flavors will concentrate as the chili simmers, and you could end up over-seasoned. Instead, taste at the 2-hour mark, again at 3 hours, and then at the final stage. Add seasoning in small increments, knowing that flavors will continue to develop.
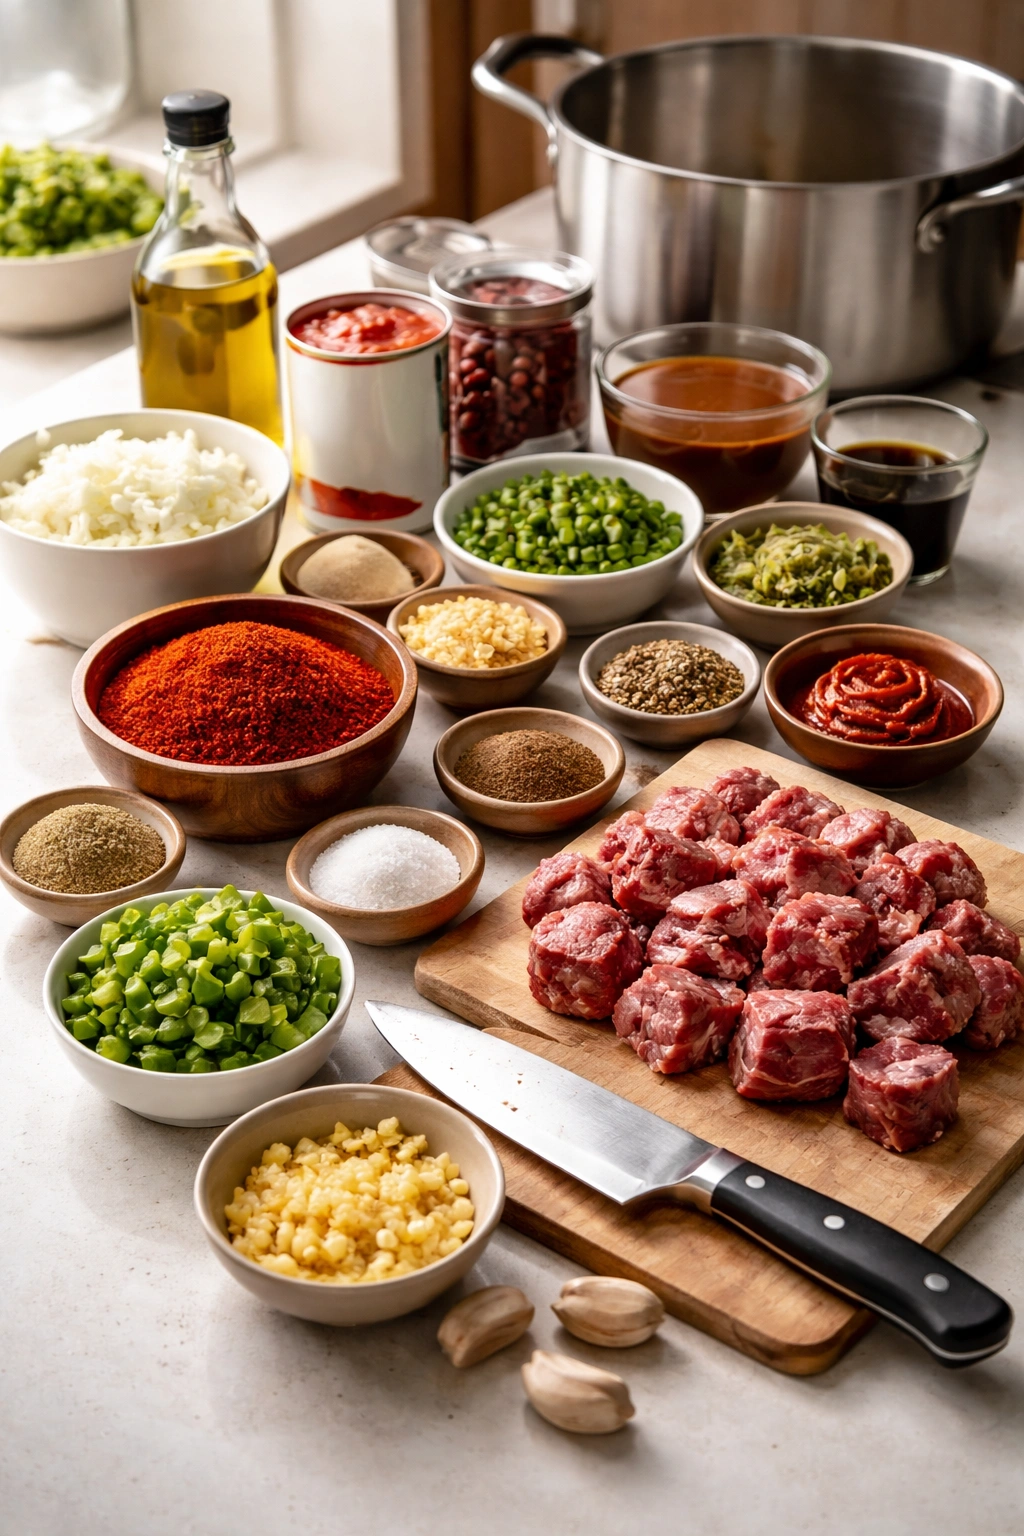
Prepare Your Ingredients and Equipment
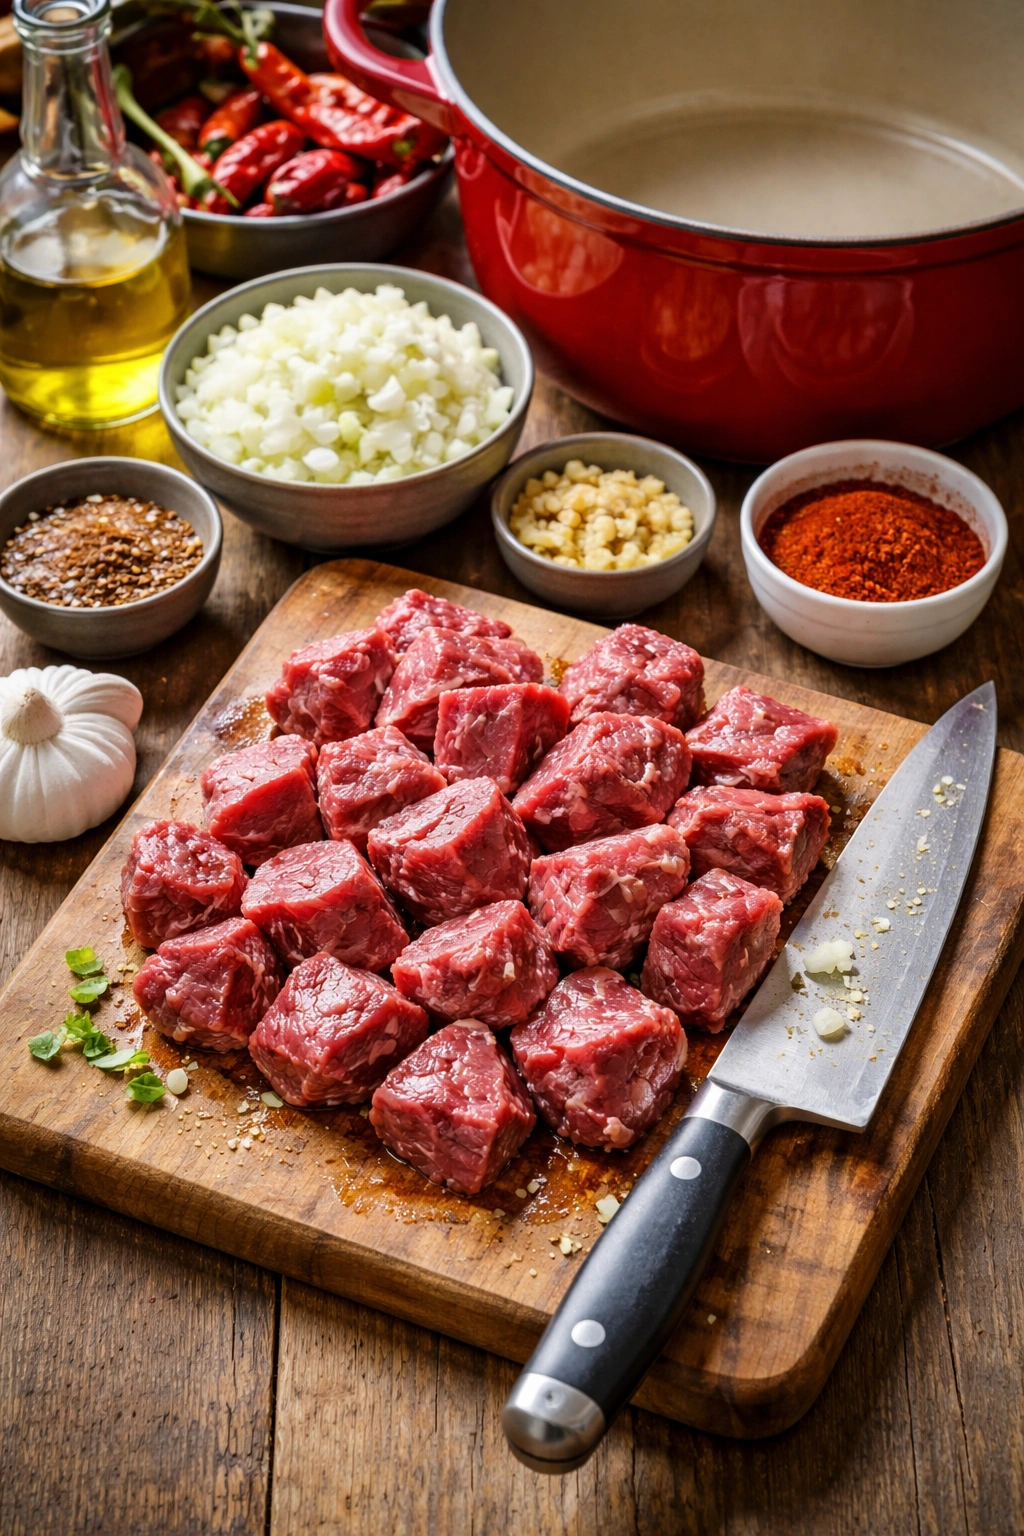
Before you start cooking, do your mise en place—gather and prepare all your ingredients so you’re not scrambling while the meat is browning. Cut the beef into ¾-inch pieces and pat it very dry with paper towels. Moisture on the surface prevents proper browning, so don’t skip this step. Dice the onion and mince the garlic. Mix your spices together in a small bowl: the chili powder, cumin, oregano, smoked paprika, and cayenne. This way, when you bloom them later, you can add them all at once without fumbling through your spice cabinet.
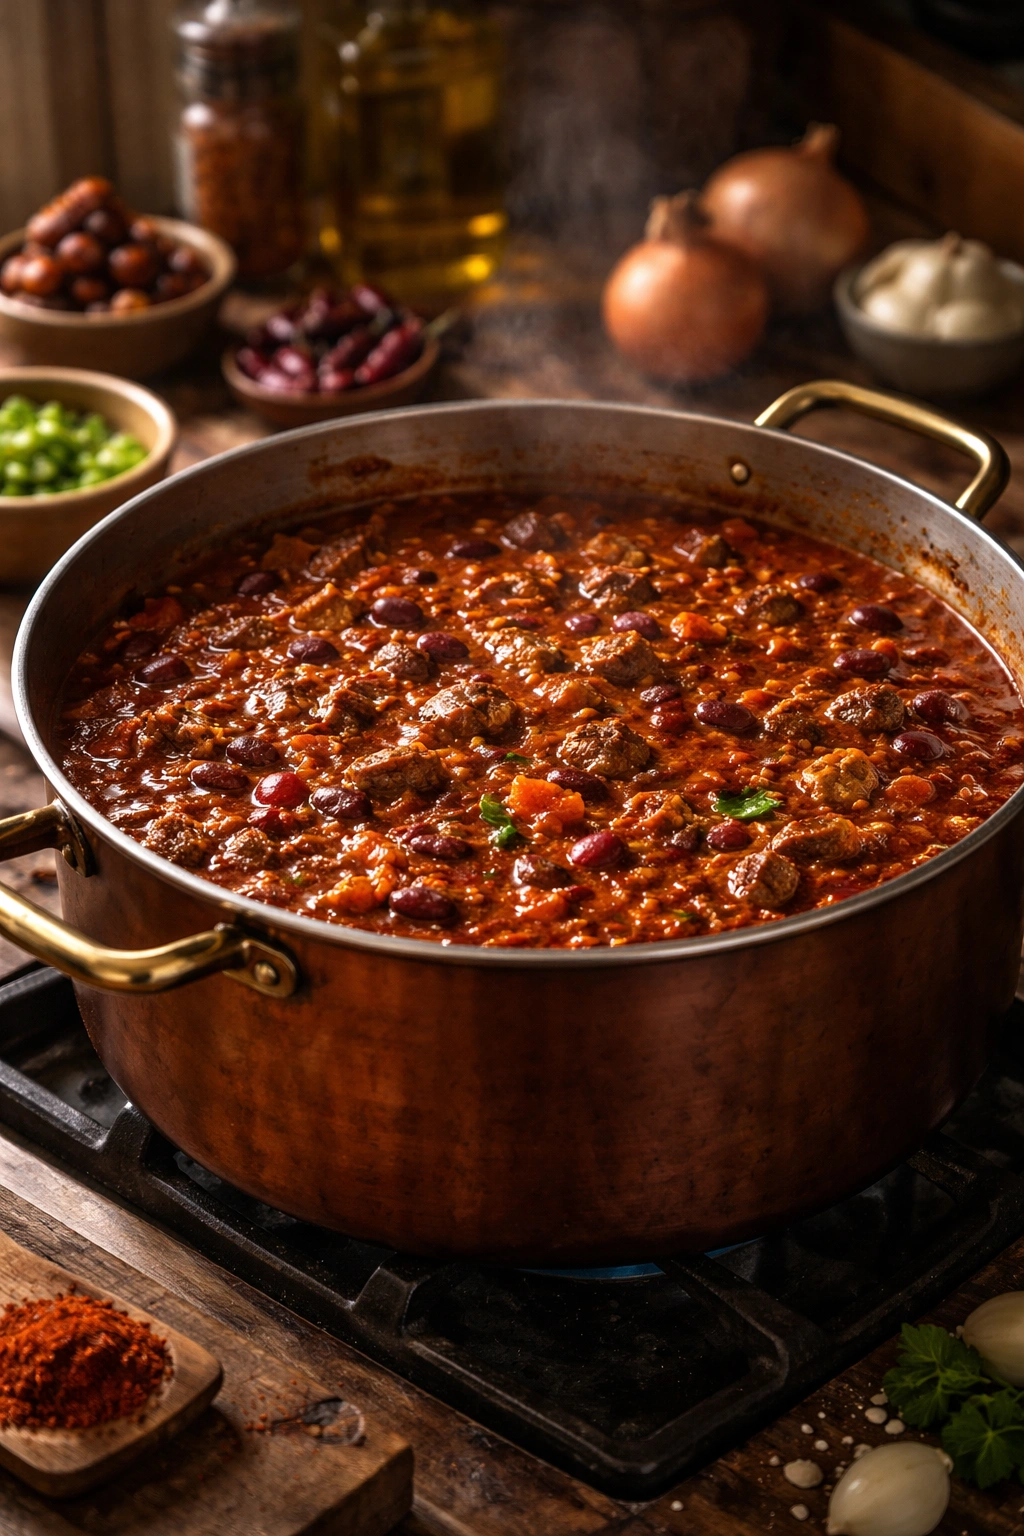
Choose your cooking vessel with care. A heavy-bottomed pot (like a Dutch oven) is ideal because it distributes heat evenly and prevents hot spots that could cause the bottom to scorch. If you don’t have a Dutch oven, a large, thick-bottomed stockpot works well. You need at least a 6-quart capacity to accommodate 4 pounds of beef plus all the liquid and give it room to simmer gently. An enameled cast-iron Dutch oven is traditional and excellent; a stainless steel pot works equally well.
If you’re using the oven method instead of the stovetop, preheat your oven to 275°F. Oven cooking is actually ideal for chili because the heat surrounds the pot and maintains an even, consistent low temperature much better than a stovetop, where hot spots can develop. The process is identical—just bring everything to a boil on the stovetop first, then transfer to the oven, covered, for the low-and-slow simmering phase.
Brown the Meat and Build Flavor
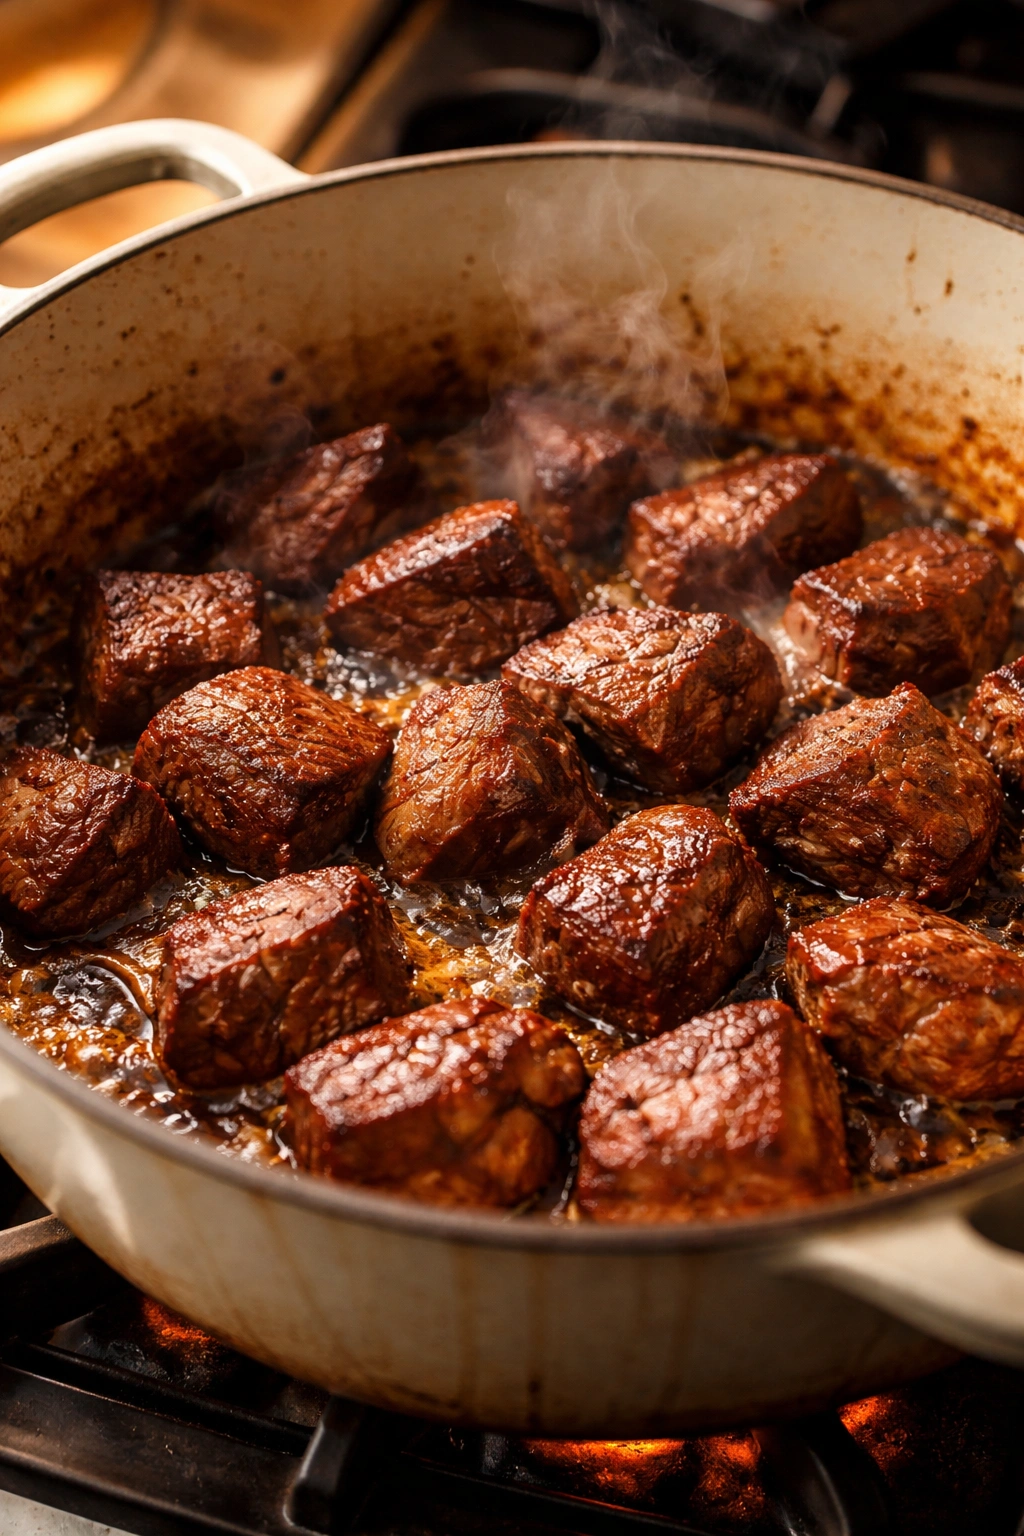
Set a large, heavy-bottomed pot (6-quart Dutch oven or stockpot) over medium-high heat. Once it’s hot, add 1 tablespoon of the oil and let it shimmer for about a minute. You’ll know it’s ready when the oil moves easily across the pan bottom and just begins to smoke slightly at the edges. Working in batches to avoid crowding, add about one-third of the beef pieces to the hot pot in a single layer.
Let the meat cook undisturbed for 2 to 3 minutes. Don’t stir or move it around—the goal is to develop a deep brown crust on the bottom surface. You’ll notice the meat releasing moisture, which is normal; that moisture prevents browning. After 2 to 3 minutes, stir the batch and cook for another 2 to 3 minutes until the meat is browned on most surfaces. The beef doesn’t need to be brown everywhere—just on the surfaces that were in contact with the hot pan. Transfer the browned batch to a clean plate using a slotted spoon (leaving any drippings in the pot).
Repeat this process with the remaining beef, browning it in two more batches. You might need to add a bit more oil between batches if the pan looks dry, but don’t add so much that the meat steams. Once all the beef is browned and resting on your plate, you should see flavorful browned bits stuck to the bottom of the pot. These are called the fond, and they’re liquid gold for flavor.
Sauté the Aromatics and Bloom the Spices
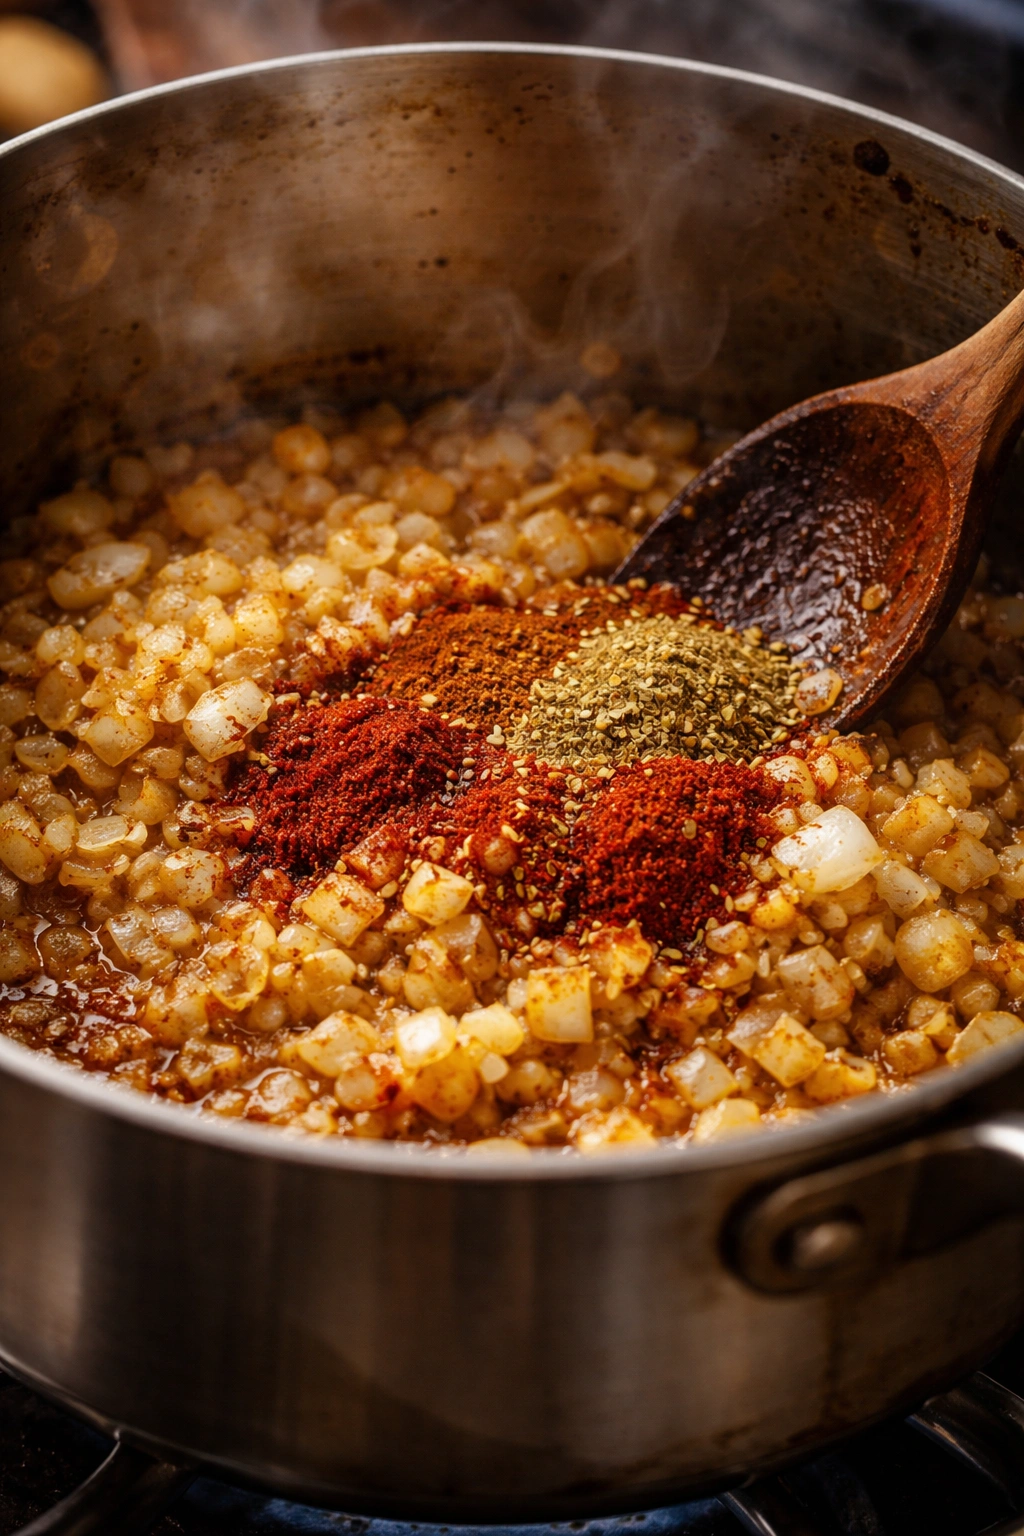
Add the diced onion to the same pot where you browned the meat. Do not wash the pot; those browned bits are essential flavor. Stir the onion around, scraping at the bottom to loosen those flavor-packed browned bits. Cook for 4 to 5 minutes, stirring occasionally, until the onion is softened and has picked up some of the color from the browned meat. You want the onion pieces to be translucent at the edges and light golden in spots.
Add the minced garlic and cook for another 30 seconds to 1 minute, stirring constantly. Garlic burns quickly, so watch carefully. You’re looking for the raw, sharp smell to mellow out and become fragrant and sweet. As soon as you smell toasted garlic, it’s time to move to the next step.
Lower the heat to medium. Add your mixed spices (the chili powder, cumin, oregano, smoked paprika, and cayenne) to the pot all at once. Stir constantly for about 45 seconds to 1 minute. This process is called “blooming,” and it’s crucial. The dry spices are roasting slightly in the residual heat of the pot, which wakes up their essential oils and deepens their flavors dramatically. You’ll smell the spices become more aromatic and complex. Do not let them cook too long or they’ll burn and taste bitter; if the bottom of the pot looks very dark or dry, add a splash of broth immediately.
Add Liquid and Bring to a Simmer
Stir in the tomato paste. Cook it in the pot with the spices for about a minute, stirring continuously, so the tomato paste caramelizes slightly and loses its raw taste. Add the beef broth slowly while stirring, making sure to scrape the bottom and sides of the pot thoroughly. All those flavorful browned bits should dissolve into the broth, creating a deep brown liquid.
Return the browned beef and any accumulated juices to the pot. Add the crushed tomatoes and tomato sauce, stirring well to combine. Add the apple cider vinegar, soy sauce, and honey. Drop in the bay leaves. Stir the chili thoroughly, making sure nothing is stuck to the bottom of the pot. If you want to add the espresso powder or cocoa powder for extra depth, stir them in now.
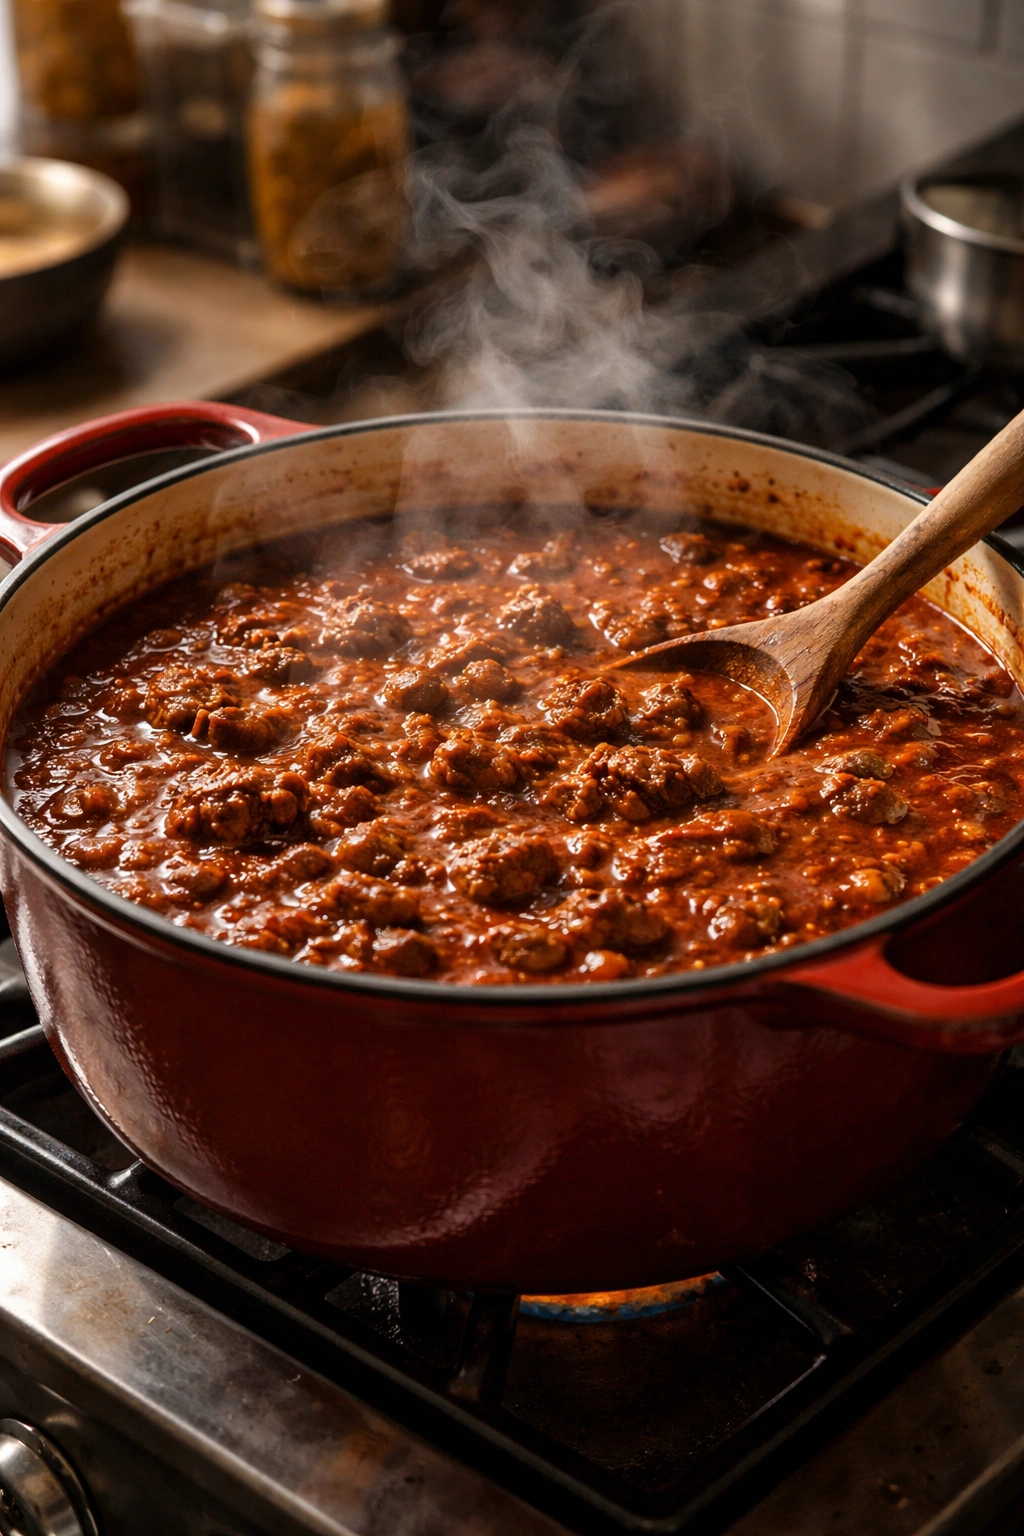
Increase the heat to medium-high and bring the chili to a full boil. You’ll see it bubble actively across the entire surface. Once it reaches a boil, immediately reduce the heat to low. This is the critical transition. The chili should settle into a gentle, barely-bubbling simmer. If it’s still boiling actively, reduce the heat further or use a heat diffuser under the pot. Place the lid on the pot, but leave it slightly ajar so steam can escape. You want the pot uncovered or nearly uncovered (maybe a quarter-inch gap) rather than fully covered, which would trap too much moisture and make the sauce overly thick.
The Low-and-Slow Simmering Process
Set a timer for 2 hours. Let the chili maintain that gentle simmer without touching it. You don’t need to stir it every 5 minutes or baby it. The whole point of low-and-slow cooking is that once it reaches that simmer, you can let it do its thing. Around the 2-hour mark, give it a good stir, making sure nothing is sticking to the bottom. At this point, you might taste it for the first time (let it cool for a minute first!). The beef should be getting tender, the spices should smell integrated and deep, and the overall flavor should be warming up nicely.
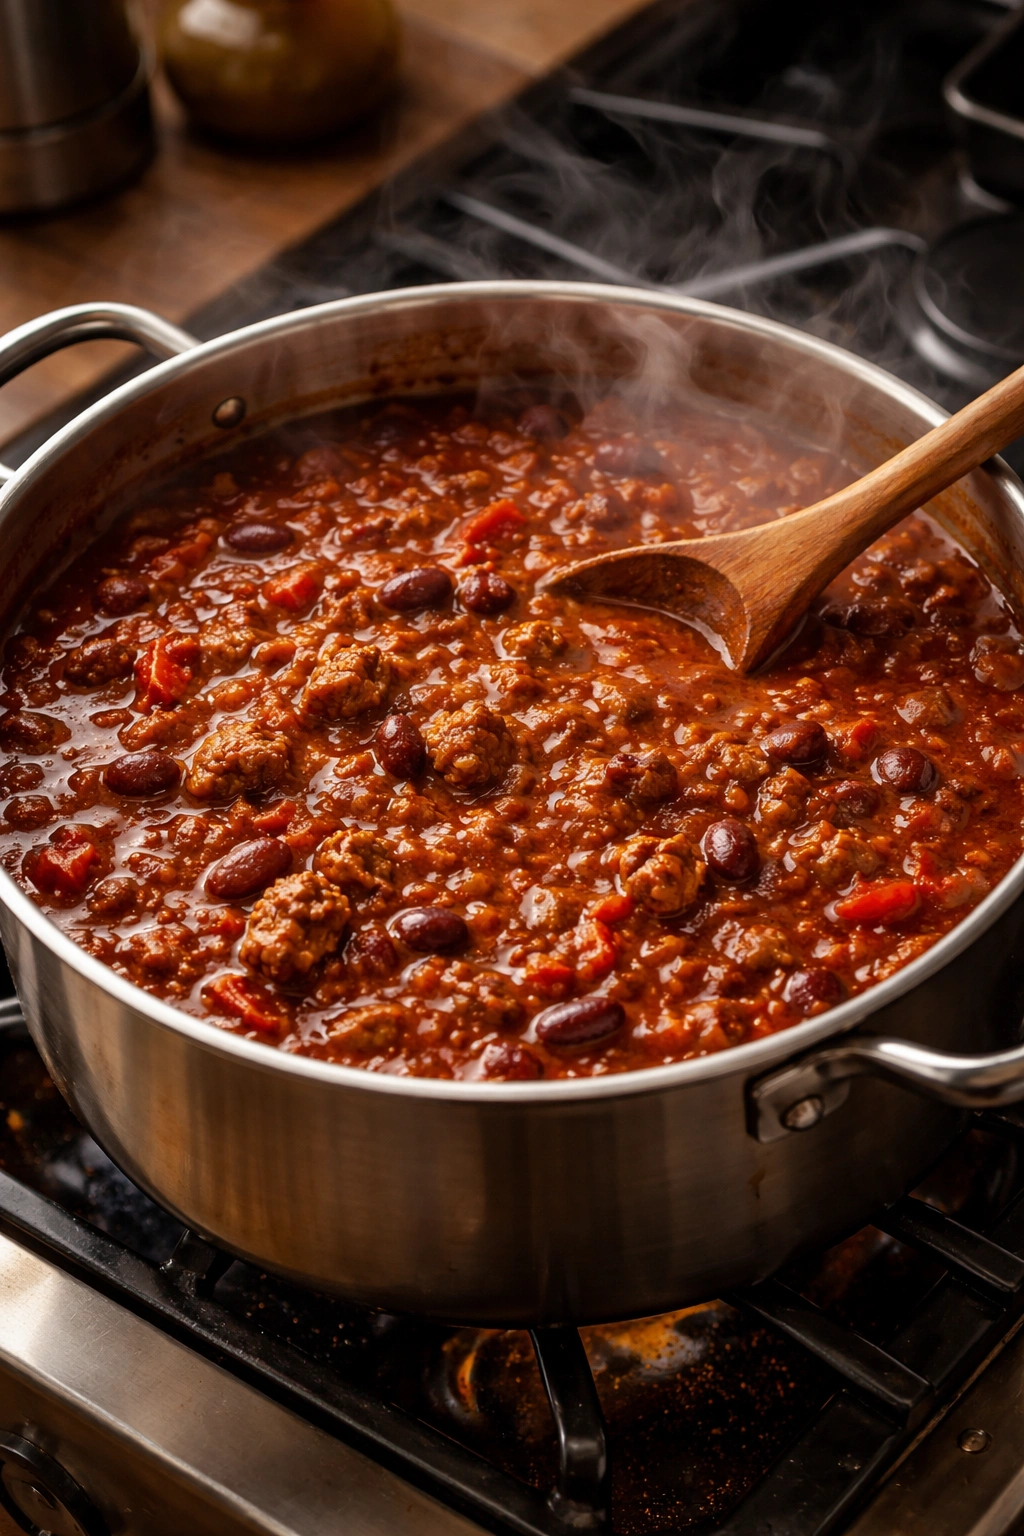
Return it to its gentle simmer and cook for another 2 to 3 hours, giving it a stir every 45 minutes or so. The total cooking time is 4 to 5 hours. You’re not just cooking the beef until it’s tender—you’re cooking it until it’s completely tender and practically shreds, and you’re giving the flavors time to marry and deepen. The longer you go (up to 6 hours), the more concentrated the flavors become, though you’ll need to add a bit more broth if the chili looks like it’s reducing too much (it shouldn’t reduce by more than about 15 to 20 percent).
About 30 minutes before you plan to finish, taste the chili. This is when you make your seasoning adjustments. Start by adding salt a pinch at a time; remember that flavors concentrated during simmering, so what tasted under-salted at the 2-hour mark might be perfect now. Taste after each pinch and add black pepper to taste. If the chili tastes sharp or acidic, the apple cider vinegar might be a bit strong; you can neutralize it slightly by adding another teaspoon of honey. If it tastes flat or one-dimensional, it might need a pinch more cayenne or a sprinkle of smoked paprika for complexity.
The chili is done when the beef shreds easily with the back of a spoon pressed against the side of the pot, the sauce coats a spoon, and all the flavors taste balanced and integrated rather than raw or harsh.
Taste, Adjust, and Perfect the Flavor
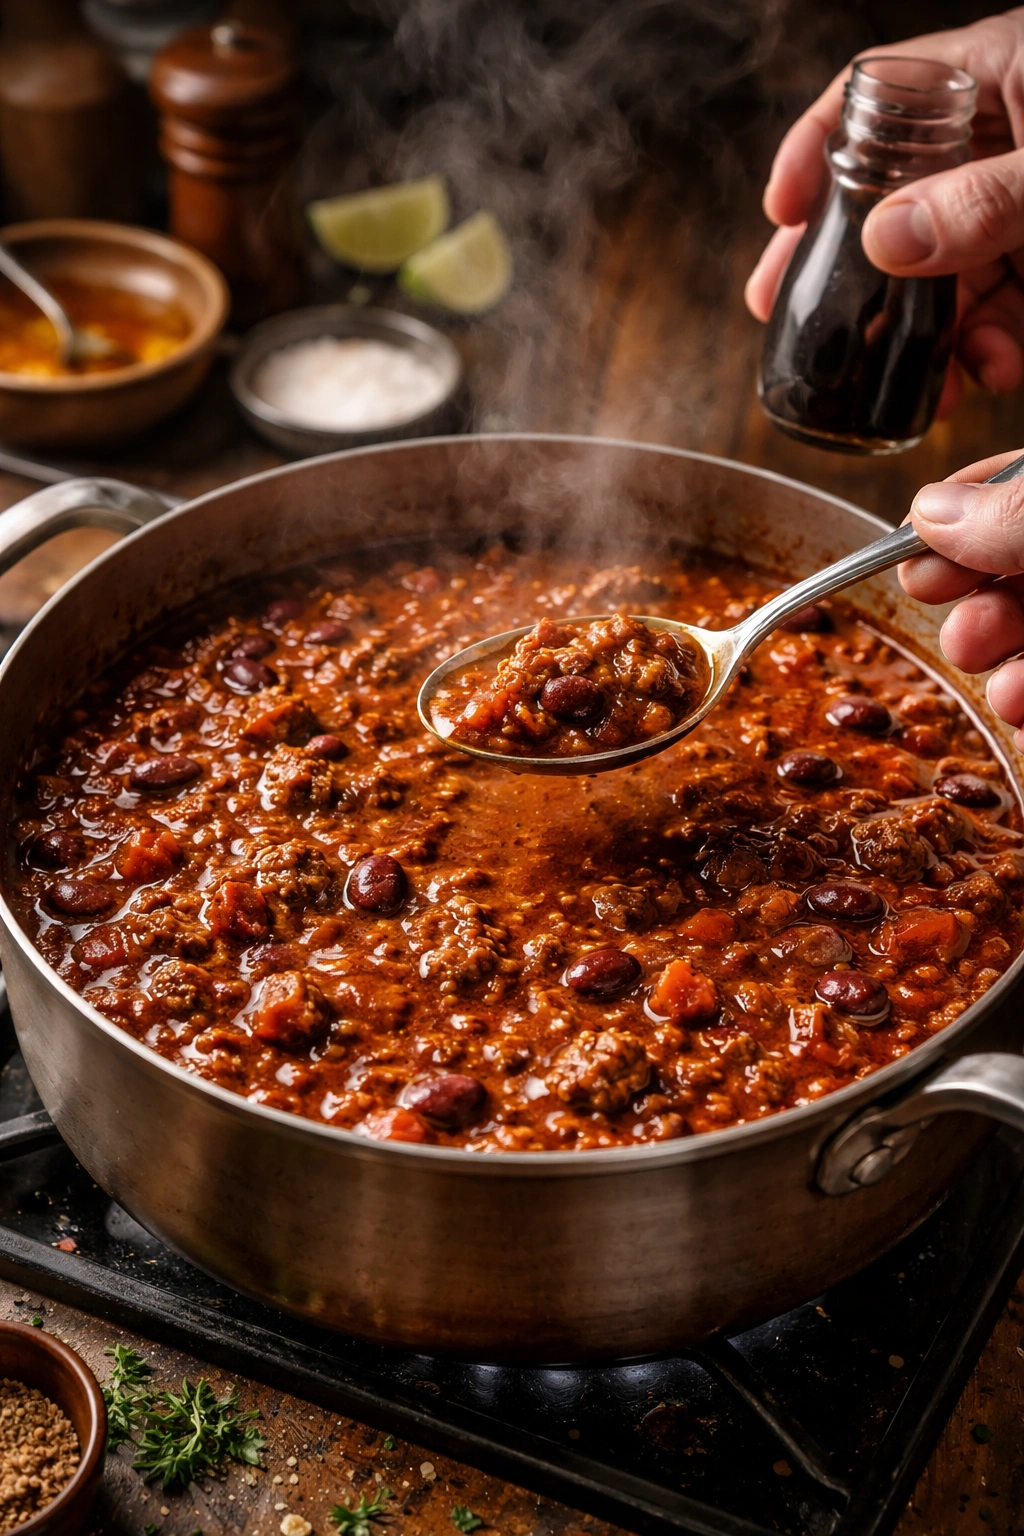
Achieving perfect flavor in chili is an art, and it usually requires tasting and adjusting. Set aside a small spoon just for tasting (don’t use a spoon that’s been in your mouth to taste multiple times in a row—use a clean spoon each time so you’re not introducing bacteria and you can taste freshly each time).
The chili should be savory and warming with a slow-building gentle heat from the cayenne. If you can taste each spice individually (the chili powder, cumin, oregano), the spices are probably too raw or you’ve added too much of something. If the chili tastes muddy or one-dimensional, the spices haven’t cooked together long enough. If it tastes too thin or watery, continue simmering without the lid to let moisture evaporate. If it tastes too thick, add a splash more broth.
Spice heat builds over time, so even if the chili seems mild when you first taste it, it might feel noticeably warmer after a few more minutes of simmering. Start conservatively with cayenne; you can always add more, but you can’t take it out. If the chili is too spicy, add a teaspoon of honey or a splash of soy sauce to balance the heat.
The depth of flavor comes from multiple sources: the browned beef, the soy sauce and tomato paste (umami), the apple cider vinegar (acid), the honey (balance), and the spices. Each of these should be present but not dominant. If one element is screaming for attention, adjust it back slightly. A perfectly balanced chili tastes savory, warming, slightly sweet, and slightly tangy, with no single flavor standing out.
Making It Your Own—Variations and Adaptations
The beautiful thing about chili is how adaptable it is. Once you understand the base recipe, you can make changes with confidence.
Spice heat level: Some people like chili hot enough to make them sweat; others prefer something milder. Start with ¼ teaspoon cayenne and taste at the final stage. If you want more heat, increase it by ¼ teaspoon at a time, stirring and tasting after 5 minutes so you don’t overshoot. If you want much more heat, add a diced jalapeño or serrano pepper during the onion-sautéing phase, or stir in a few dashes of hot sauce in the final minutes.
Meat choices and combinations: While beef chuck is traditional, you can experiment. Brisket makes exceptional chili—use the same weight and cut into the same size pieces. Pork shoulder creates a different flavor profile; use an equal weight but expect the cooking time to be about the same. Many cooks blend two meats: 2 pounds beef chuck and 2 pounds pork shoulder creates interesting complexity. Don’t substitute ground beef; the texture will be completely different.
Beans or no beans: Traditionally Texan chili doesn’t include beans, but many people prefer them. If you want to add beans, use 2 to 3 cans (15 ounces each) of kidney beans or black beans, drained and rinsed, stirring them in during the last 30 minutes of simmering so they warm through without falling apart.
Depth additions: Some cooks add a splash of bourbon, beer, or red wine (add about ¼ cup after browning the meat, let it reduce by half, then continue with the rest). Others add a pinch of cinnamon or a bit of unsweetened cocoa powder (1 teaspoon, stirred in at the final stage). A small can of chipotles in adobo sauce, finely chopped, adds smokiness and complexity.
Vegetable additions: While chili con carne traditionally focuses on meat, some cooks add diced bell peppers or poblano peppers during the onion-sautéing phase, or diced mushrooms (which add umami depth). Keep vegetable pieces small so they cook completely over the long simmer. Don’t add too many vegetables or the chili becomes less about the meat and sauce.
Cooking method: If you prefer oven cooking, bring everything to a boil on the stovetop, then transfer the covered pot to a 275°F oven for 4 to 5 hours. You can also use a slow cooker on low for 8 to 10 hours, though the browning step should still happen on the stovetop first. Slow cooker chili won’t develop the same depth, but it’s more hands-off.
Storage, Reheating, and Make-Ahead Tips
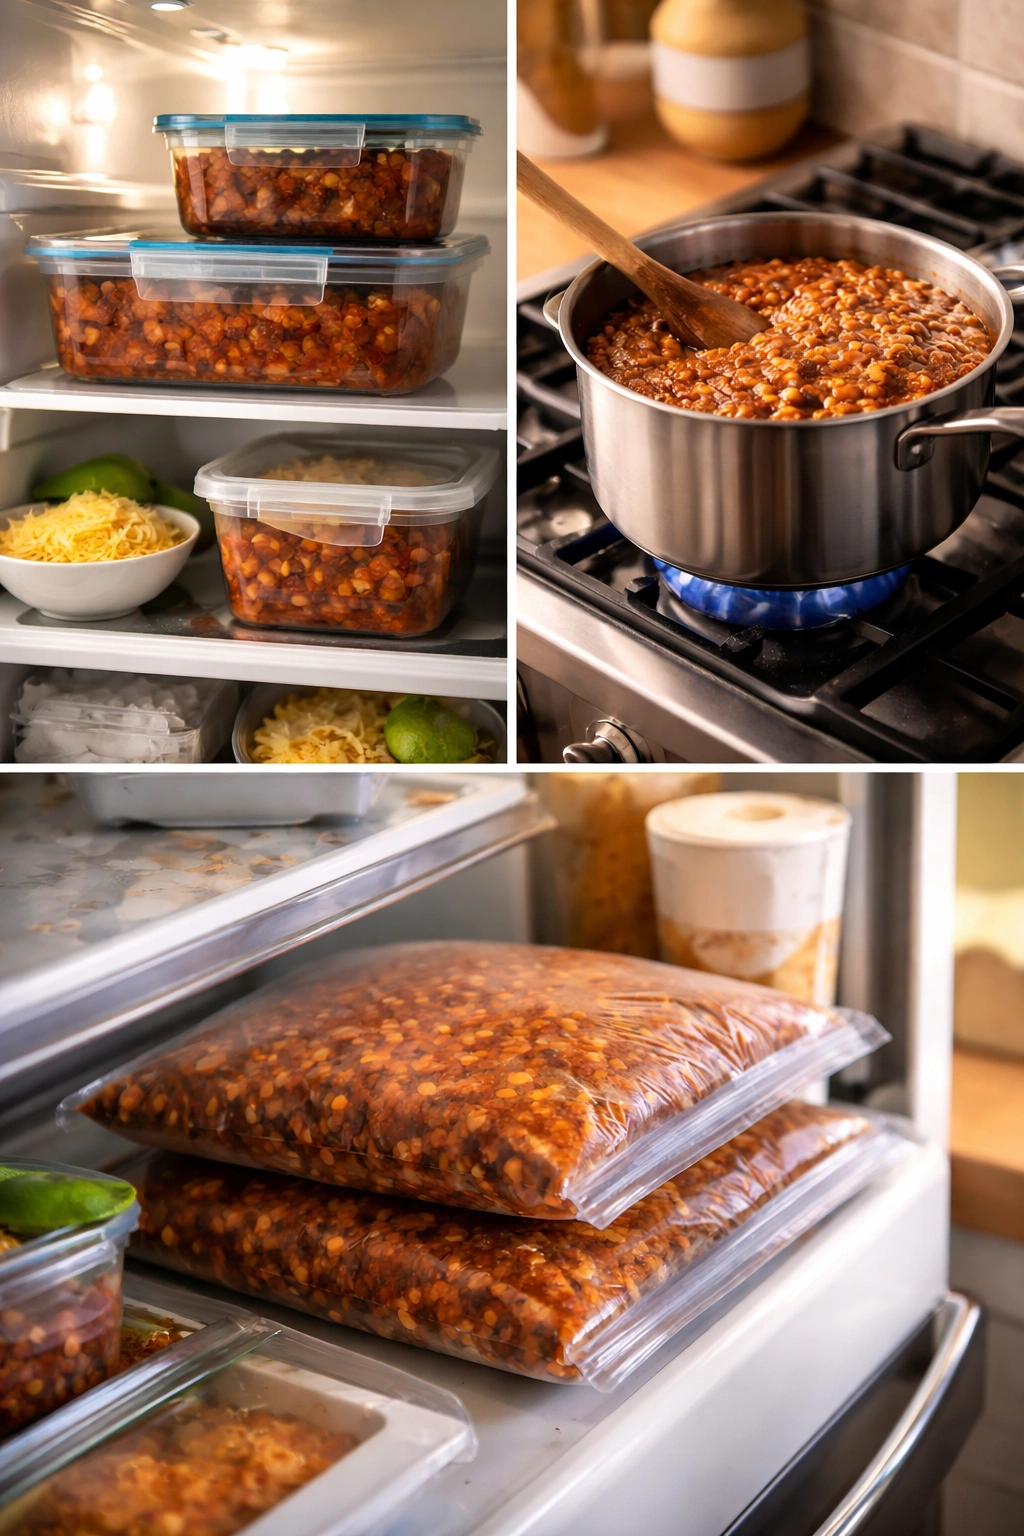
One of the best things about chili is that it actually improves after a day or two. The flavors continue to meld and deepen as it sits, so leftovers are a genuine gift. Let the chili cool to room temperature (about 30 minutes) before storing. Do not put hot chili directly into the refrigerator; it raises the temperature of the fridge and can affect food safety.
Refrigerator storage: Transfer the cooled chili to an airtight container and refrigerate for up to 5 days. It’ll taste noticeably better on day 2 or 3 than it did right after cooking.
Freezer storage: Chili freezes beautifully for up to 3 months. Freeze it in quart-sized containers (leaving about ½ inch of headspace for expansion) or in gallon-sized freezer bags. Thaw it overnight in the refrigerator, then reheat gently on the stovetop or in the microwave.
Reheating: The gentlest way to reheat chili is on the stovetop over low to medium heat, stirring occasionally, until it reaches your desired temperature. This takes about 10 to 15 minutes and helps the flavors warm evenly without any surface scorching. If you’re reheating a large batch, it’s worth taking the time. In a microwave, heat in 2-minute intervals, stirring between each, until hot throughout.
Make-ahead fully: Cook the entire batch the day before you plan to serve it. The chili will taste noticeably better, and all you’ll need to do is reheat it. This is perfect for entertaining or for making dinner easier on a busy night.
Make-ahead partially: You can brown the meat and sauté the aromatics a few hours ahead, let it cool, then refrigerate this base in a covered container. When you’re ready to finish, bring it to room temperature (about 15 minutes), add the remaining ingredients, and proceed with the simmering. This isn’t as flavorful as making it fully from scratch, but it does save some time.
Serving Suggestions and Pairings

Chili’s richness and complexity call for specific sides and toppings. The best toppings add freshness, texture, or acidity to cut through the heavy, savory flavors.
Classic toppings: Diced white onion (adds sharpness and crunch), shredded sharp cheddar or Monterey Jack cheese (adds richness and creaminess), sour cream (adds tang and cools the spice heat), diced jalapeños (adds fresh heat), cilantro (adds brightness), and diced tomatoes (adds freshness and acidity). Let guests build their own bowls with a selection of toppings.
Sides that work beautifully: Cornbread (the sweetness balances the savory chili perfectly), a simple green salad with sharp vinaigrette (the acidity cuts the richness), quesadillas or warm flour tortillas (for sopping up sauce), rice (a neutral base if you prefer a less-thick chili consistency), or nachos (for a heartier, more casual presentation).
Beverage pairings: The richness and spice of chili pairs wonderfully with cold beer (especially amber ales, Mexican lagers, or IPAs), which cuts through the fat. Mexican hot chocolate is traditional and delicious if you want something warming. Iced tea with lemon or a fresh lime agua fresca also works. For wine, a bold red like Zinfandel or Syrah stands up to the chili’s intensity.
Serving temperature and style: Chili is best served piping hot, in wide bowls with room for toppings. If you’re serving a crowd, ladle it into a slow cooker set to warm so it stays at the right temperature for a couple of hours. Never serve chili cold; the flavors flatten and the oil congeals, creating an unappealing texture.
Common Mistakes to Avoid

Boiling instead of simmering: This is the most common mistake, and it ruins the texture. Hard boiling toughens the meat and causes too much evaporation. If your chili is boiling, reduce the heat. You should barely be able to hear it cooking.
Skipping or rushing the browning step: Browning the meat creates the flavor foundation for everything that follows. If you skip it (by using slow-cooker chili without initial browning) or rush it by not letting each batch develop a proper crust, your chili will taste flat and meaty rather than deep and complex.
Not tasting and adjusting: Many people cook the chili, never taste it, and serve something under-seasoned or out of balance. Taste regularly, starting at the 2-hour mark and adjusting in the final 30 minutes.
Cutting the meat too small or too large: Pieces smaller than ½ inch fall apart during the long cook. Pieces larger than 1 inch don’t cook through evenly. Aim for a consistent ¾-inch size for the best texture.
Using the wrong cut of beef: Lean meat like sirloin or tenderloin becomes tough and dry. Fatty chuck roast is not just acceptable; it’s essential. Don’t listen to anyone telling you to use lean meat—they’re wrong.
Over-reducing the sauce: If you let the chili simmer uncovered without adding any liquid back, it might reduce so much it becomes paste-like. The sauce should coat a spoon but still be liquid enough to pour gently. If it’s looking thick toward the end, add a splash more broth.
Adding all the salt at the beginning: Salt is harder to adjust once it’s cooked in, and flavors concentrate during the long simmer. Add most of your salt in the final 30 minutes, tasting as you go.
Neglecting the aromatics: The smell of the onion and garlic cooking with the browned meat is part of the foundation. Don’t add them as an afterthought. Spend 5 minutes building this flavor base properly.
Final Thoughts

Low-and-slow chili con carne is patient cooking in the best sense. It rewards you not with speed but with depth, richness, and the kind of flavor that tastes like it took much more effort than it actually required. The technique is simple—brown, sauté, add liquid, simmer—but because you’re giving each step room to develop, the results feel restaurant-quality and far more complex than the ingredient list would suggest.
The 4 to 5 hours the chili spends simmering is largely unattended time. You’re not really cooking for 5 hours; you’re cooking for about 45 minutes of active work (browning meat, sautéing aromatics, assembling), then letting the chili simmer while you do other things. Plan to have it simmering in the afternoon and serve it at dinner, or make it the day before and reheat it when you’re ready.
Remember that chili improves with time, tastes better as leftovers, and freezes beautifully. Making a double batch is always a good idea—you’ll use the extra for quick meals over the next week or two. A bowl of chili with toppings is dinner. A cup of chili over rice or a baked potato is lunch. Chili mixed into a quesadilla is a completely different meal. The versatility, combined with how deeply flavored it becomes, makes it one of the most worthwhile dishes to master.
The key to chili that people ask you to make again and again isn’t a secret ingredient or an unusual technique. It’s patience, quality ingredients, and the willingness to spend time letting flavors develop. Start with a good cut of beef, don’t skip the browning, maintain a true low-and-slow simmer, and taste before you finish. These fundamentals are everything. Your version will be different from someone else’s, and that difference is part of the charm. This is food that improves with your personal touch.