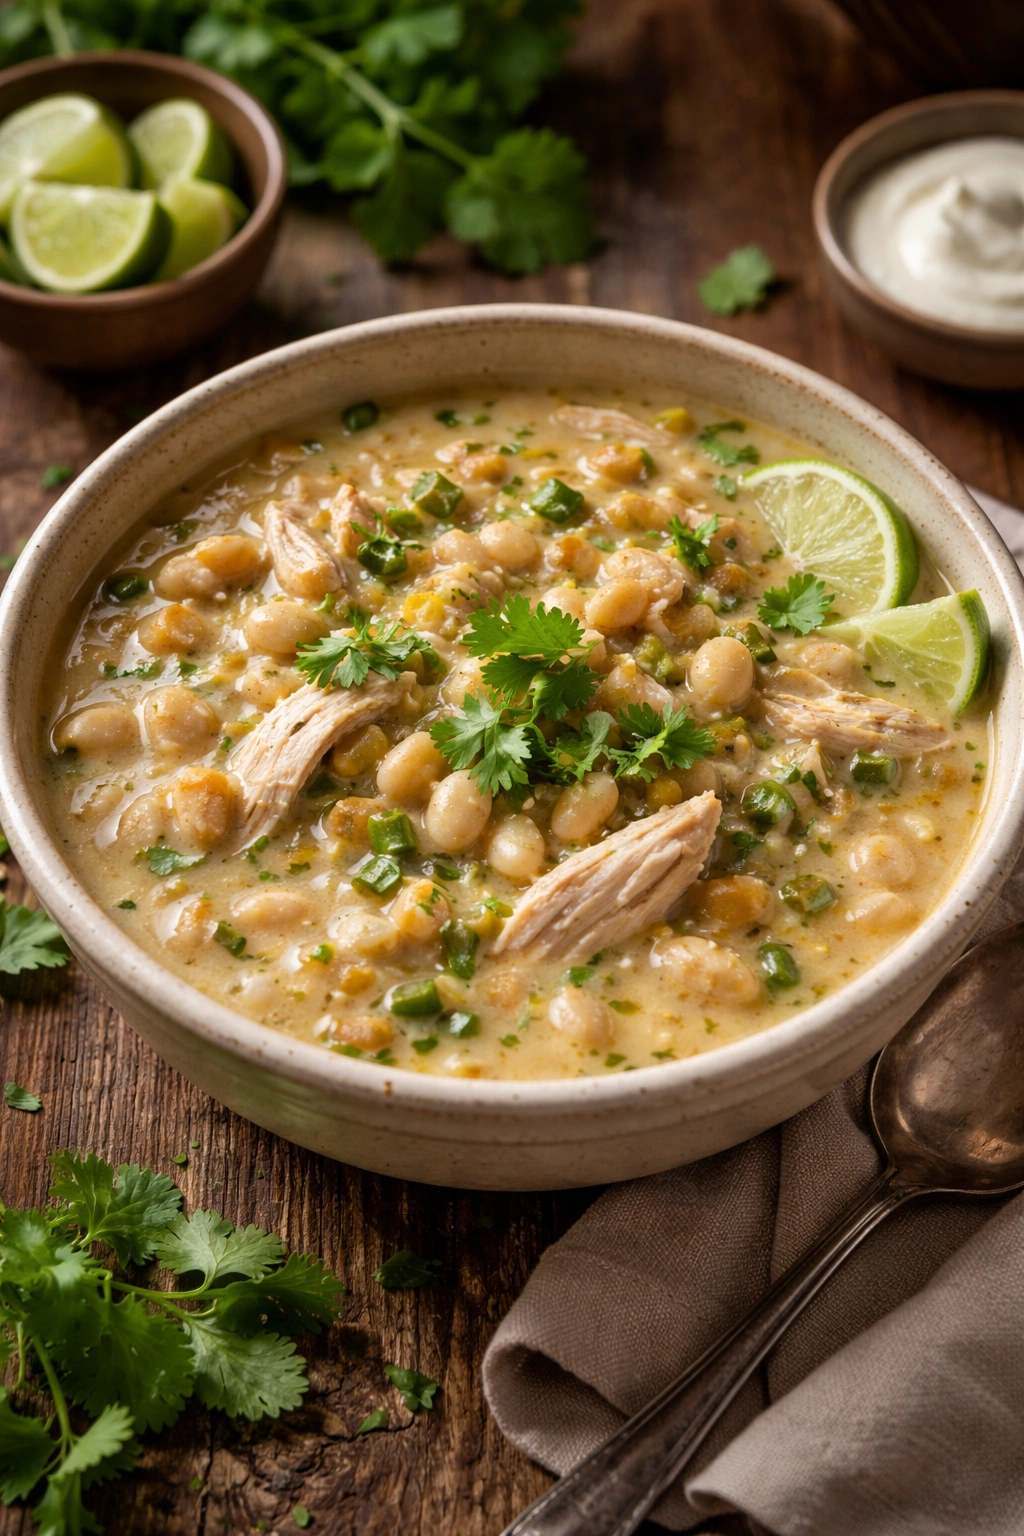
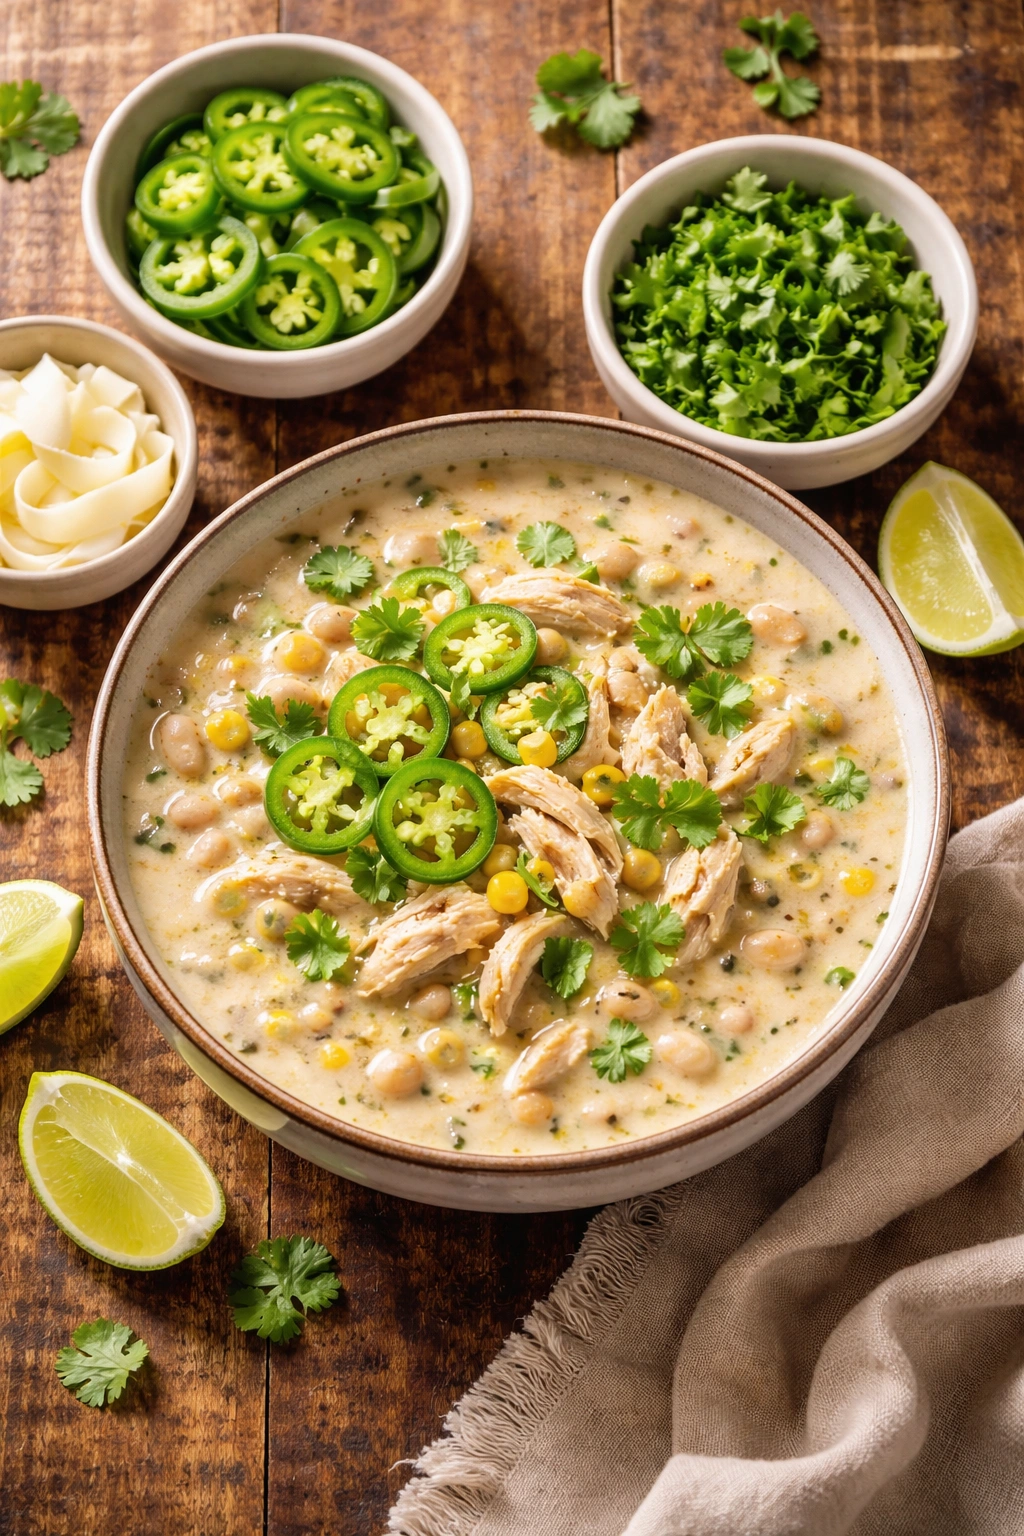
There’s something almost magical about a steaming bowl of white chicken chili on a cold evening—the creamy broth, tender chunks of chicken, and the subtle warmth of cumin and green chiles coming together in a dish that feels both comforting and surprisingly elegant. Unlike the traditional red chili with ground beef and tomatoes, this version trades those heavy flavors for something lighter yet equally satisfying: a savory, spiced broth built around white beans and chicken that somehow tastes richer and more nuanced than you’d expect from such a simple ingredient list. The beauty of this dish is that it hits that sweet spot between weeknight-easy and impressive-enough-for-guests, ready in under an hour with ingredients you likely already have in your pantry.
The History and Appeal of White Chicken Chili
White chicken chili emerged as a creative American interpretation of classic Mexican chicken soups, gaining mainstream popularity through home cooking and food magazines over the past few decades. The shift from the traditional beef-based red chili to this lighter poultry version reflects a broader move toward more accessible, less time-intensive comfort food that doesn’t sacrifice flavor for convenience. What makes this version distinctly appealing is that it bridges the gap between soup and chili—it’s brothy enough to feel warming and restorative, but hearty enough with beans and chicken to stand as a complete, protein-packed meal.
The genius of white chicken chili lies in how the white beans themselves contribute to the texture. Unlike the heavier kidney or black beans found in red chilies, white beans (whether cannellini, Great Northern, or navy) have a naturally creamy consistency that dissolves slightly into the broth, thickening it naturally without cream, heavy dairy, or flour. This means you get luxurious texture and richness from the ingredient doing the work rather than from added fats. Add the brightness of fresh cilantro and lime juice at the end, and what emerges is a bowl that feels indulgent and nourishing at the same time.
Why This Recipe Works for Busy Dinners
The reason white chicken chili has become such a go-to weeknight meal is straightforward: it requires minimal active cooking time and relies on ingredients that actually improve with a short simmer. You’re not browning meat for extended periods or waiting for dried beans to soften for hours. Instead, you’re building flavor quickly through sautéed aromatics and spices, then letting everything meld together while you handle other tasks.
This approach works particularly well because it accommodates multiple cooking styles. You can make it on the stovetop in 35-40 minutes, in a slow cooker for a hands-off afternoon meal, or in an Instant Pot when you’re genuinely pressed for time. Each method yields essentially the same result—a deeply flavored chili that tastes like it simmered all day, even when it hasn’t. The flexibility means you can choose your cooking method based on your day’s schedule rather than being locked into one approach.
Additionally, white chicken chili freezes beautifully and actually tastes better the next day as flavors continue to develop and meld. This makes it an ideal candidate for batch cooking and meal prep, which adds another layer of convenience that busy families genuinely appreciate.
The Perfect White Chicken Chili Recipe
Yield: Serves 6 | Makes approximately 8-10 cups
Prep Time: 15 minutes
Cook Time: 35 minutes
Total Time: 50 minutes
Difficulty: Beginner — The ingredients are simple, the steps are straightforward, and there’s very little that can go wrong. Even if you’ve never made chili before, this recipe guides you through each phase with confidence.
For the Base:
- 2 tablespoons extra-virgin olive oil
- 1 large yellow onion, diced (about 1½ cups)
- 4 cloves garlic, minced (or 1½ teaspoons garlic powder if pressed for time)
- 6 cups low-sodium chicken broth (or homemade if you have it)
- 2 (4-ounce) cans diced green chiles, with all their liquid (mild or hot, depending on your preference)
For the Protein and Beans:
- 3 boneless, skinless chicken breasts (about 1½ pounds), or 3-4 cups shredded rotisserie chicken, or cooked leftover chicken
- 3 (15-ounce) cans white beans (cannellini, Great Northern, or navy beans), rinsed and drained
For the Seasonings and Finishing Touches:
- 1½ teaspoons ground cumin
- 1 teaspoon dried oregano (or ½ teaspoon if using fresh oregano, added at the end)
- ½ teaspoon paprika (smoked paprika adds extra depth)
- ¼ teaspoon cayenne pepper (adjust to your heat preference, or omit if sensitive to spice)
- 1 cup frozen or fresh corn kernels
- Juice of 1 fresh lime (about 1-2 tablespoons)
- ½ teaspoon salt, plus more to taste
- Freshly cracked black pepper to taste
Optional but Highly Recommended for Creaminess:
- 4-6 ounces cream cheese or Neufchatel cheese, cubed and at room temperature (or Greek yogurt for a lighter version)
- ½ cup heavy cream or sour cream (optional, for a richer chili)
For Serving (Set Out a Generous Selection):
- Fresh cilantro, chopped
- Shredded Monterey Jack or sharp cheddar cheese
- Sour cream or Greek yogurt
- Sliced avocado or guacamole
- Crushed tortilla chips or tortilla strips
- Lime wedges
- Sliced fresh jalapeños (for extra heat)
- Diced red onion or green onion
Step-by-Step Instructions for Stovetop White Chicken Chili
Sauté the Aromatics:
-
Heat the olive oil in a large Dutch oven or heavy-bottomed pot (at least 5-quart capacity) over medium-high heat. The oil should shimmer and move freely across the pan within about 30 seconds.
-
Add the diced onion and cook, stirring occasionally, for 4-5 minutes until the onion begins to soften and turn translucent at the edges. You’re looking for the pieces to lose their raw crispness while still maintaining some texture—not mushy, just tender.
-
Add the minced garlic and cook for 30 seconds to 1 minute, stirring constantly, until the garlic becomes fragrant. Don’t walk away during this step—garlic burns quickly and can turn bitter, which would compromise the entire pot. You should smell that rich, warm garlic aroma filling your kitchen.
Build the Flavor Base:
-
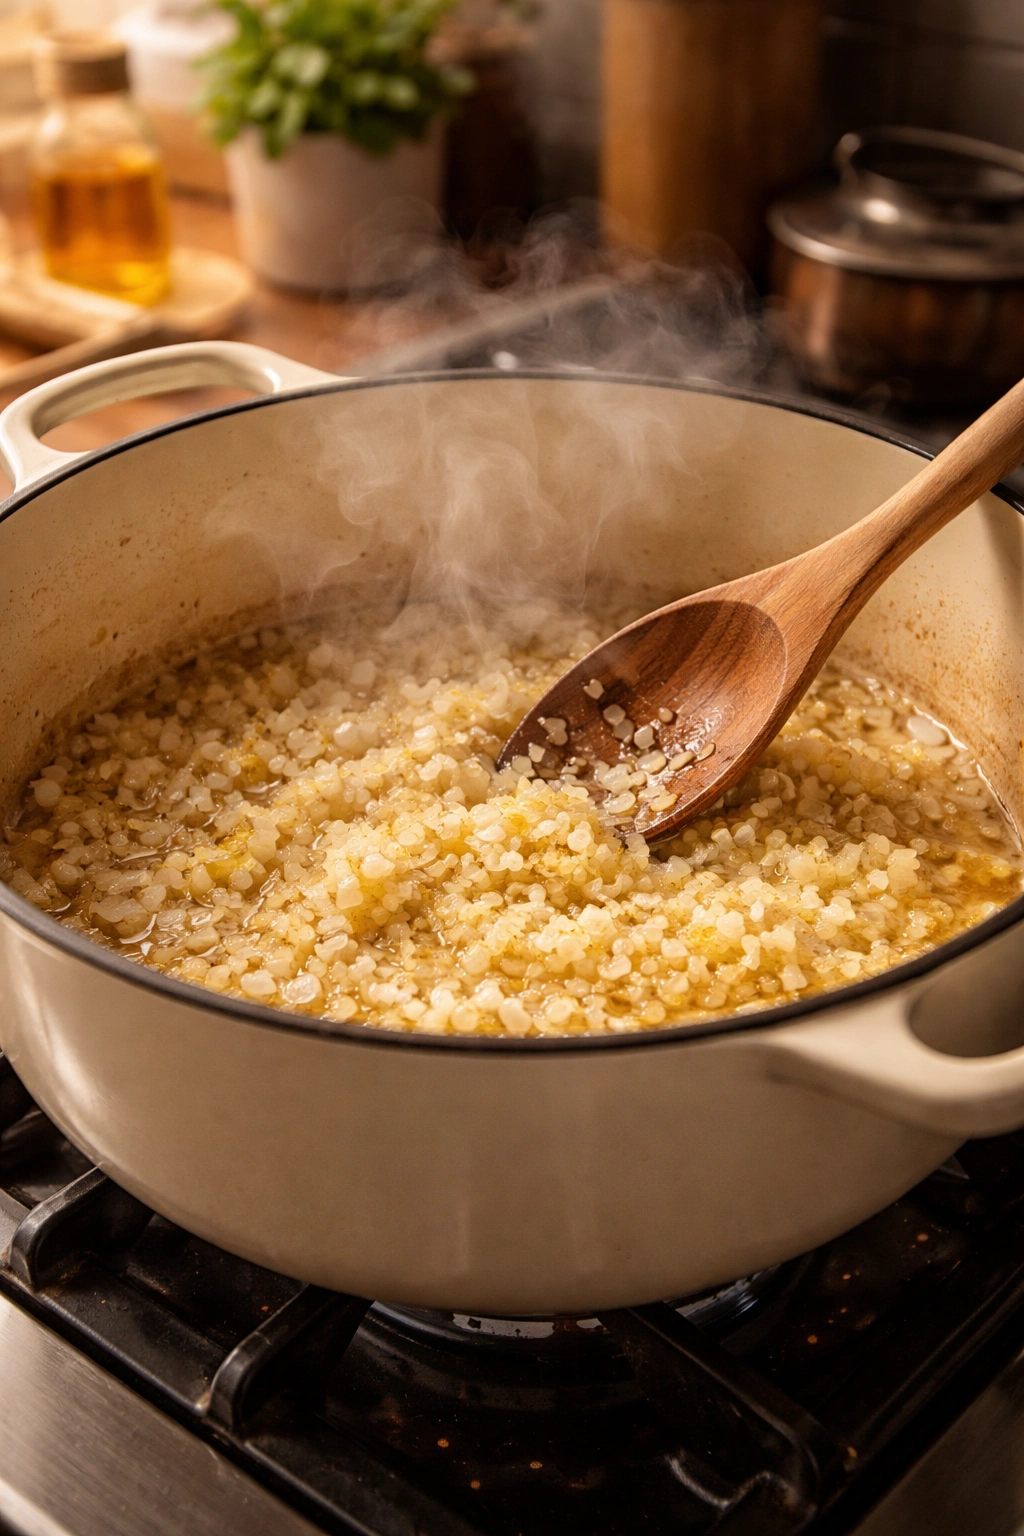
Sprinkle the cumin, oregano, paprika, and cayenne pepper over the onion and garlic mixture. Stir constantly for 30-45 seconds to toast the spices slightly. This step is crucial—toasting the spices in the oil releases their essential oils and intensifies their flavor, creating a much more complex, sophisticated taste than simply adding them to liquid.
-
Pour in the chicken broth and add the green chiles with all their liquid. Stir well to combine and scrape up any browned bits from the bottom of the pot (this is called deglazing, and those bits contain concentrated flavor). If you’re using raw chicken breasts, add them now to the broth and bring the mixture to a simmer. If you’re using cooked or rotisserie chicken, you’ll add it later.
Cook the Chicken and Simmer the Base:
-
If using raw chicken breasts: Bring the mixture to a gentle simmer over medium-high heat, then reduce the heat to medium-low and cover partially. Simmer for 15-20 minutes until the chicken reaches an internal temperature of 165°F when checked with a meat thermometer inserted into the thickest part of the breast. The chicken should be cooked through and tender, not rubbery.
Advertisements -
Remove the cooked chicken to a cutting board using tongs or a slotted spoon. Once it’s cool enough to handle (2-3 minutes), shred it using two forks—pull one fork toward you while the other pushes away, shredding the chicken into bite-sized pieces. The pieces should be irregular and roughly ¾-1 inch in size. Set the shredded chicken aside on a clean plate.
-
If using cooked rotisserie or leftover chicken: Skip ahead to step 9, and you’ll add the shredded chicken after the beans.
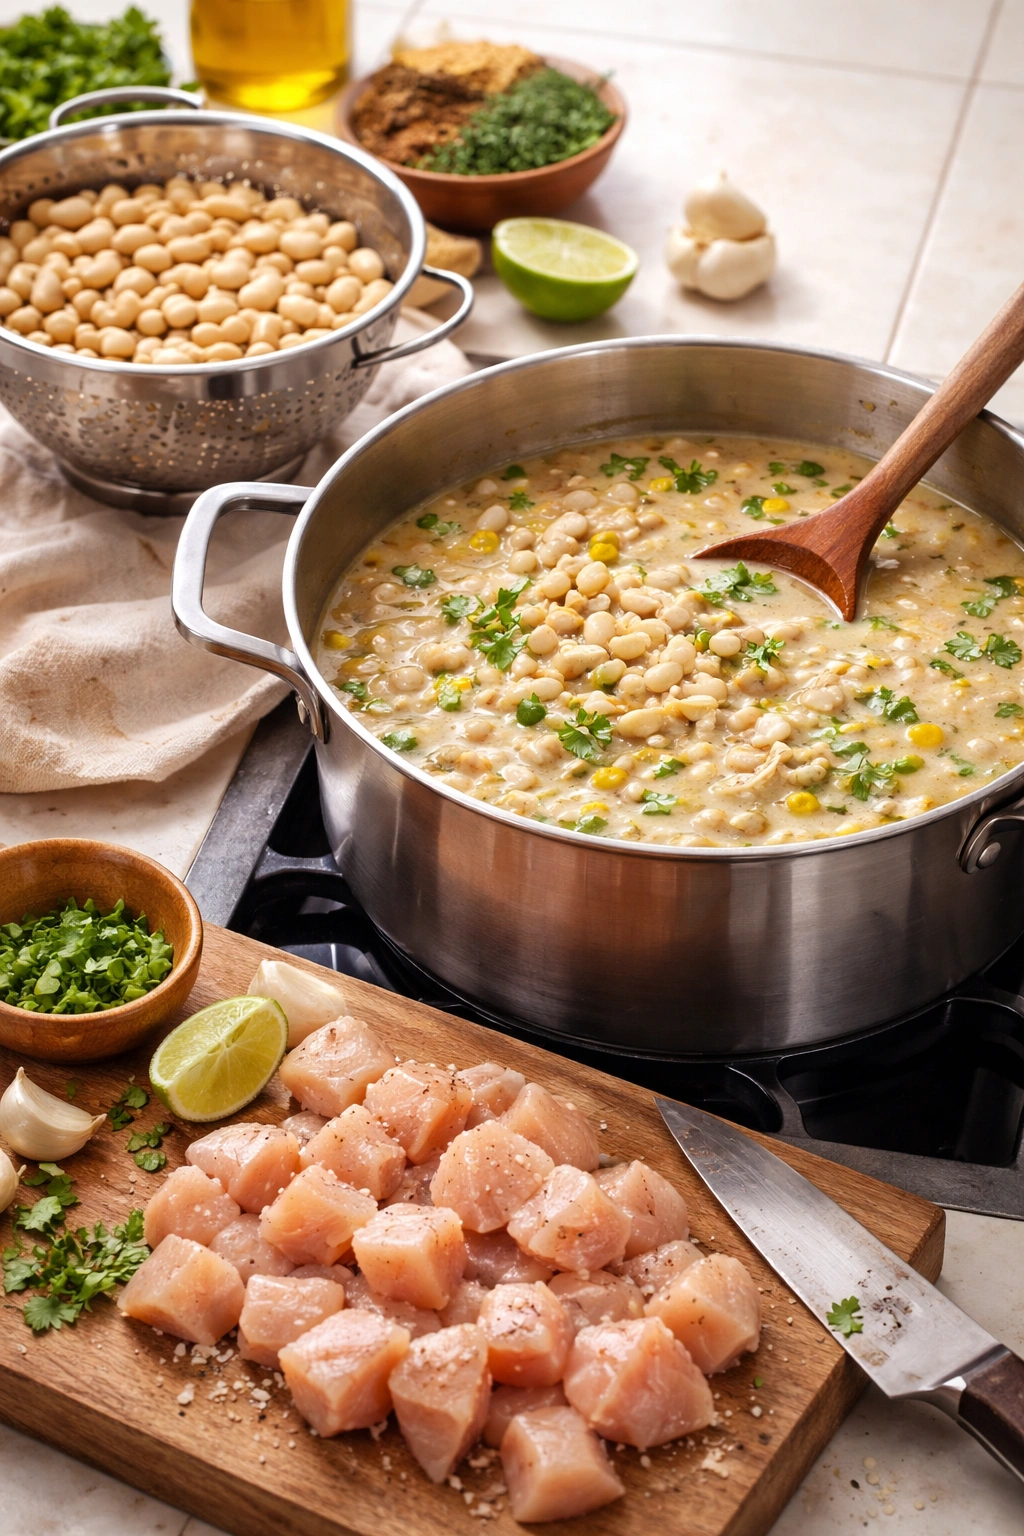
Add the Beans and Vegetables:
- Add the rinsed and drained white beans and the corn to the broth. Stir well to combine. Here’s a professional trick that many don’t know about: reserve about ¾ cup of beans before adding them to the pot. Add these reserved beans to a food processor or blender along with ¼ cup of the hot broth from the pot. Process or blend until the mixture is nearly smooth but still has a bit of texture. Pour this pureed bean mixture back into the pot and stir thoroughly.
Why does this matter? The pureed beans act as a natural thickener and emulsifier, creating a luxuriously creamy texture without requiring any cream or flour. The starch in the beans thickens the broth while adding body and richness. This technique, borrowed from professional cooking, transforms the chili from brothy and thin to thick and satisfying. If you don’t have a food processor or blender, simply mash some of the beans against the side of the pot with the back of a spoon until partially broken down, then stir them in. The result will be slightly less thick but still delicious.
- Bring the mixture back to a gentle simmer and cook, uncovered, for 10 minutes. This allows the flavors to meld and deepen. You’ll notice the broth becoming slightly thicker and more cohesive as you stir it.
Add the Chicken and Final Seasonings:
-
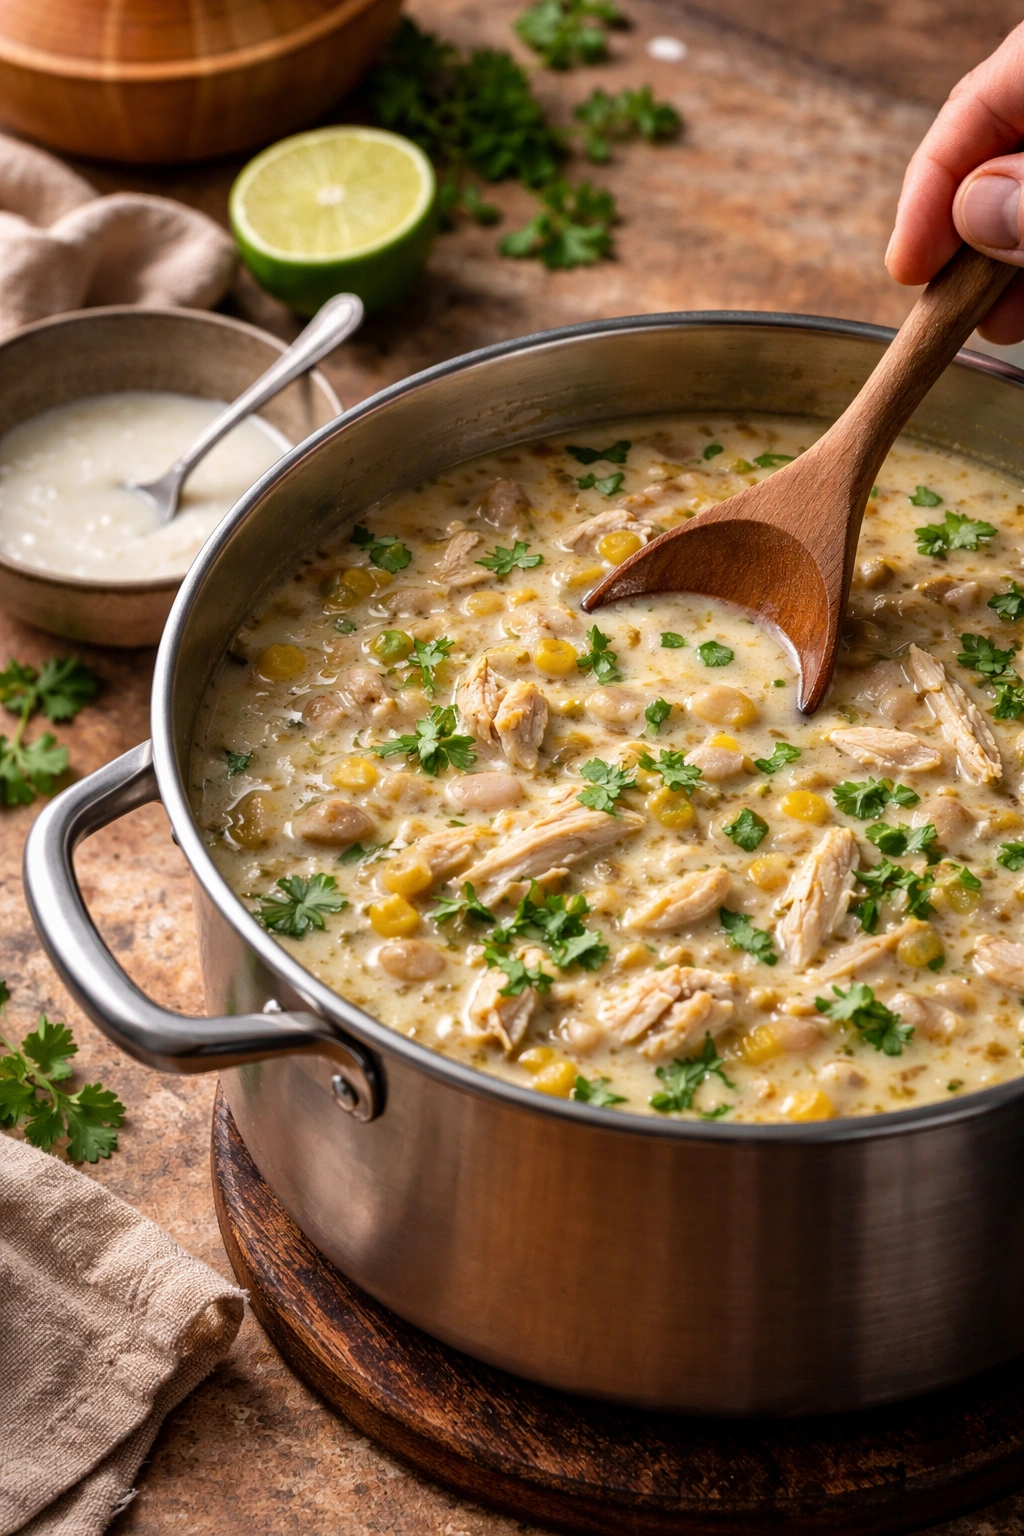
Stir in the shredded chicken (or the cooked rotisserie chicken if you didn’t add it earlier), lime juice, and any fresh oregano if using. Taste a spoonful and adjust the salt and pepper to your preference. Remember that the broth is already salted, and the beans and cheese toppings add additional salt, so be conservative—you can always add more, but you can’t remove it.
-
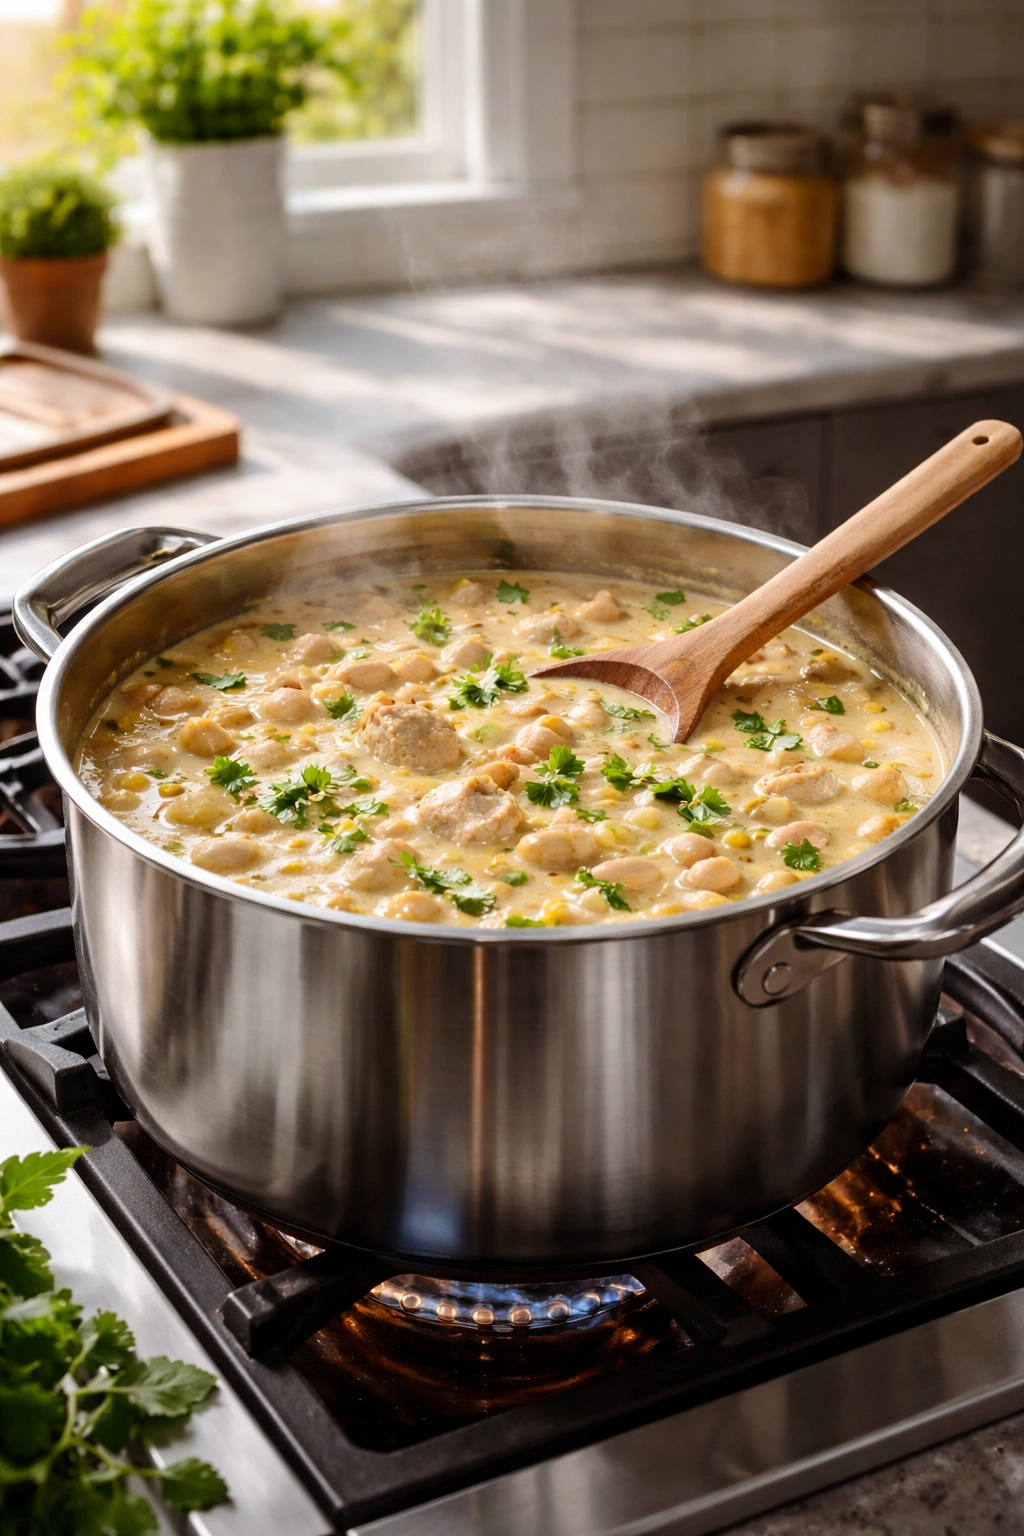
If making the creamier version: Reduce the heat to low and stir in the cream cheese cubes, a few at a time, stirring constantly until each batch melts completely into the broth. If the mixture seems too thick, add a splash of additional broth. If using heavy cream or sour cream, stir it in at the end, just before serving, to maintain freshness and prevent curdling.
-
Simmer gently for another 5 minutes, stirring occasionally, to ensure everything is heated through and the flavors are fully integrated. The chili should be steaming and fragrant, with visible wisps of steam rising from the surface.
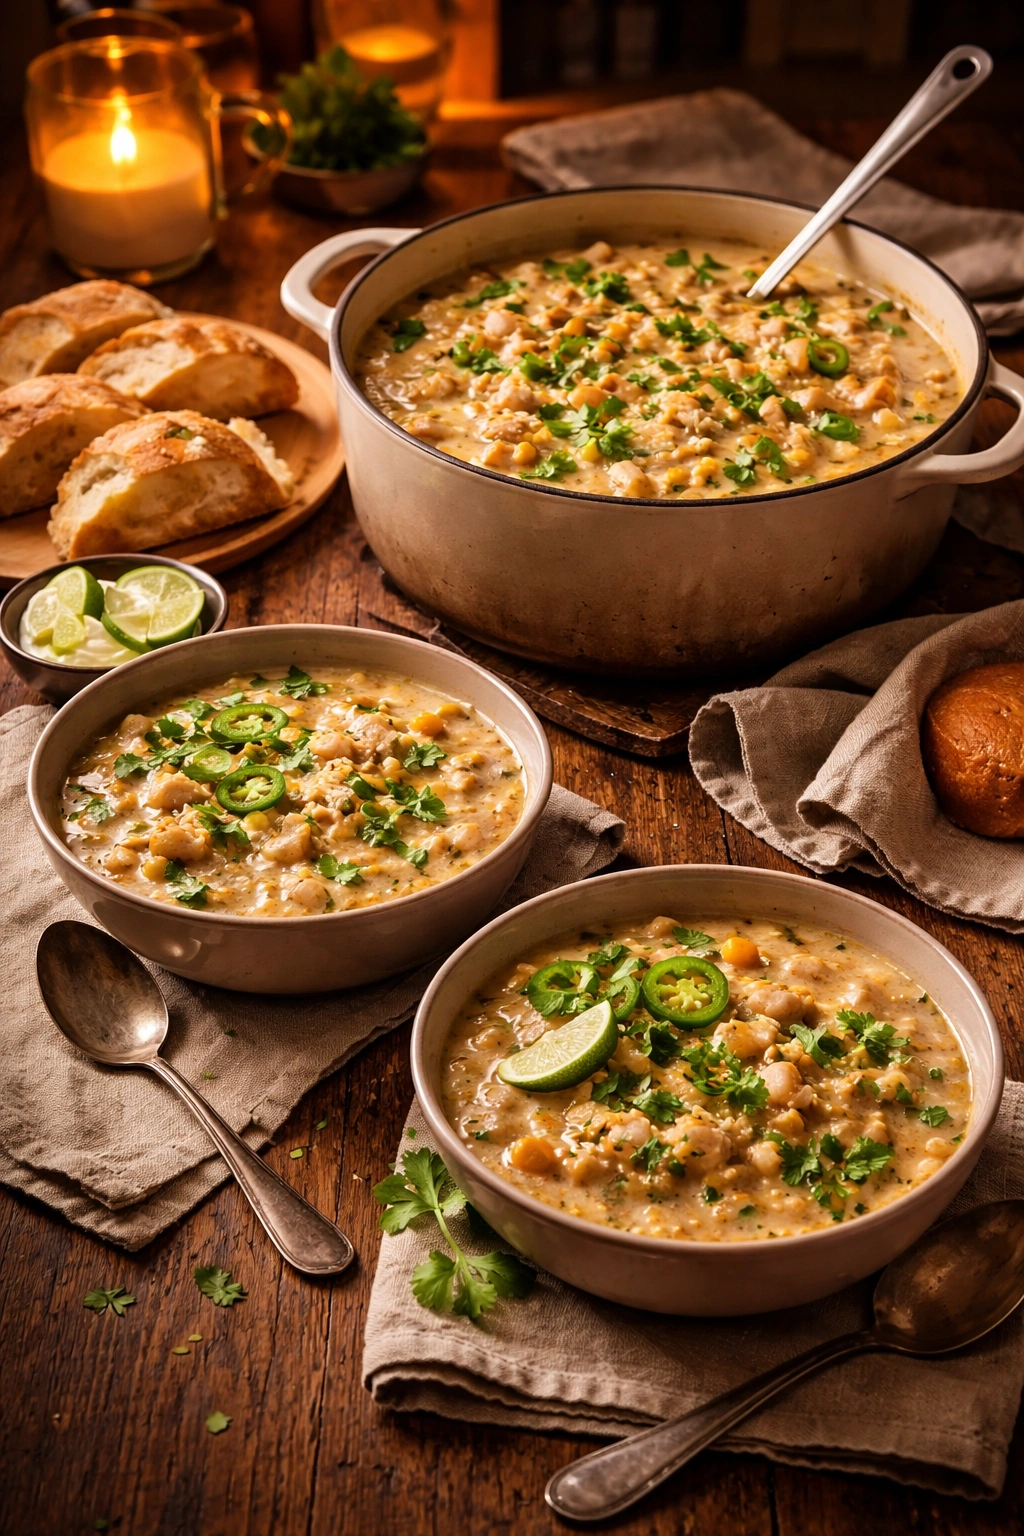
Serve:
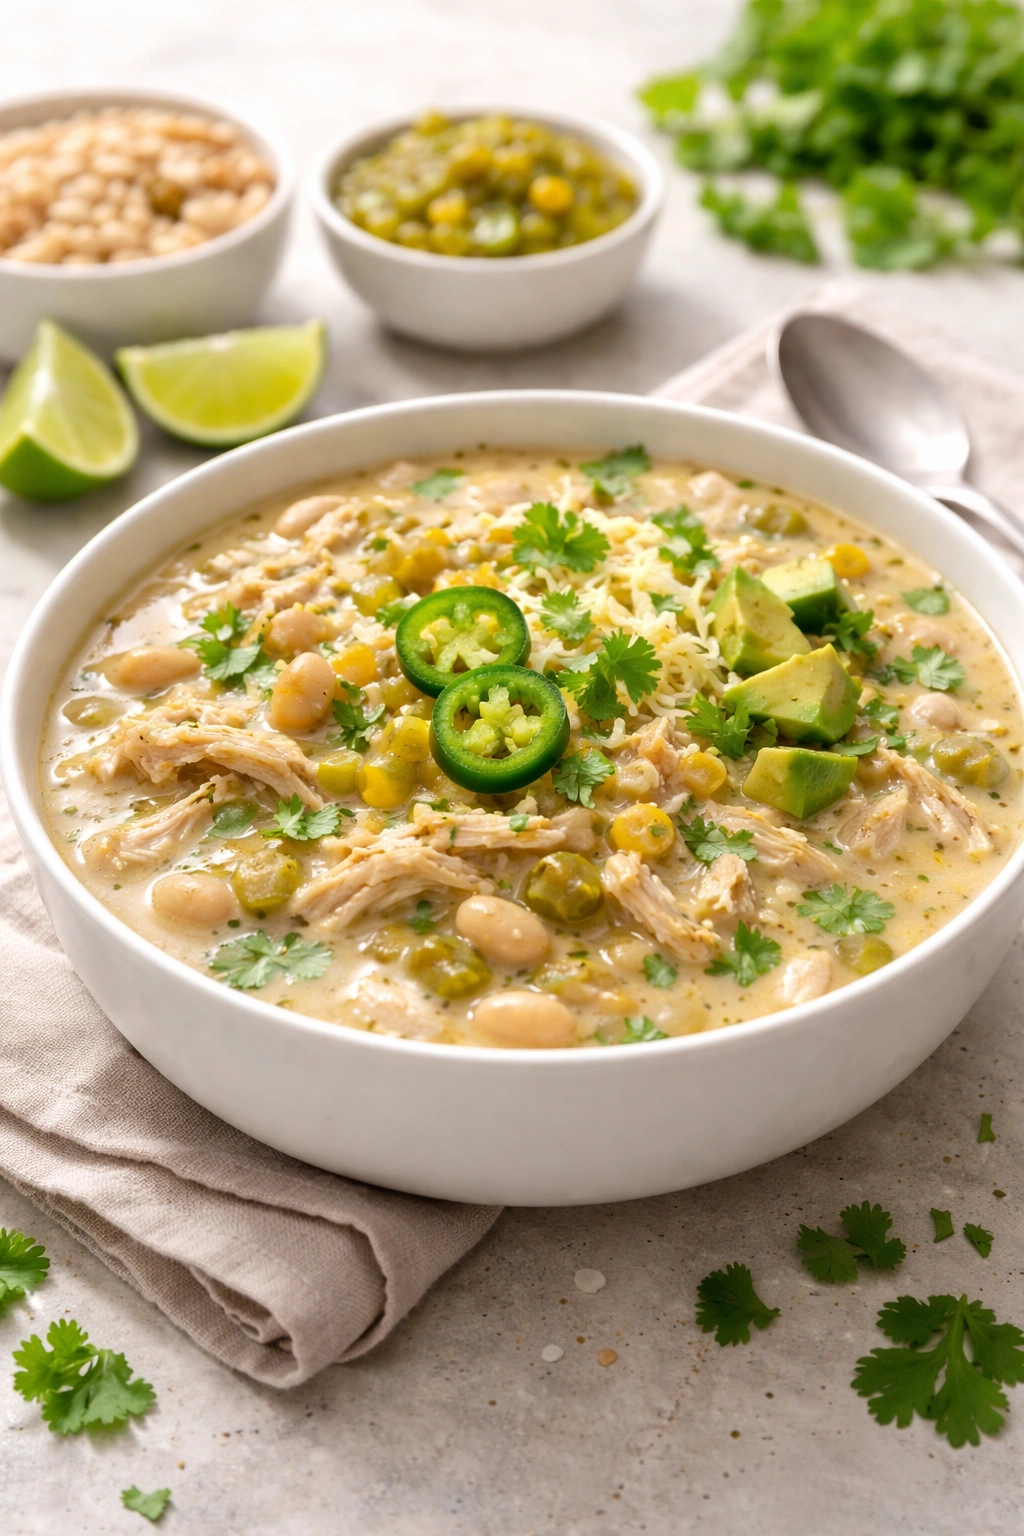
- Ladle the chili into bowls and set out all your toppings for people to customize their own. Start conservatively with toppings and let people add more—cilantro and cheese can quickly overpower the delicate spice balance if applied too heavily. A squeeze of fresh lime juice brightens every spoonful, so that’s my first recommendation for everyone.
Slow Cooker and Instant Pot Methods
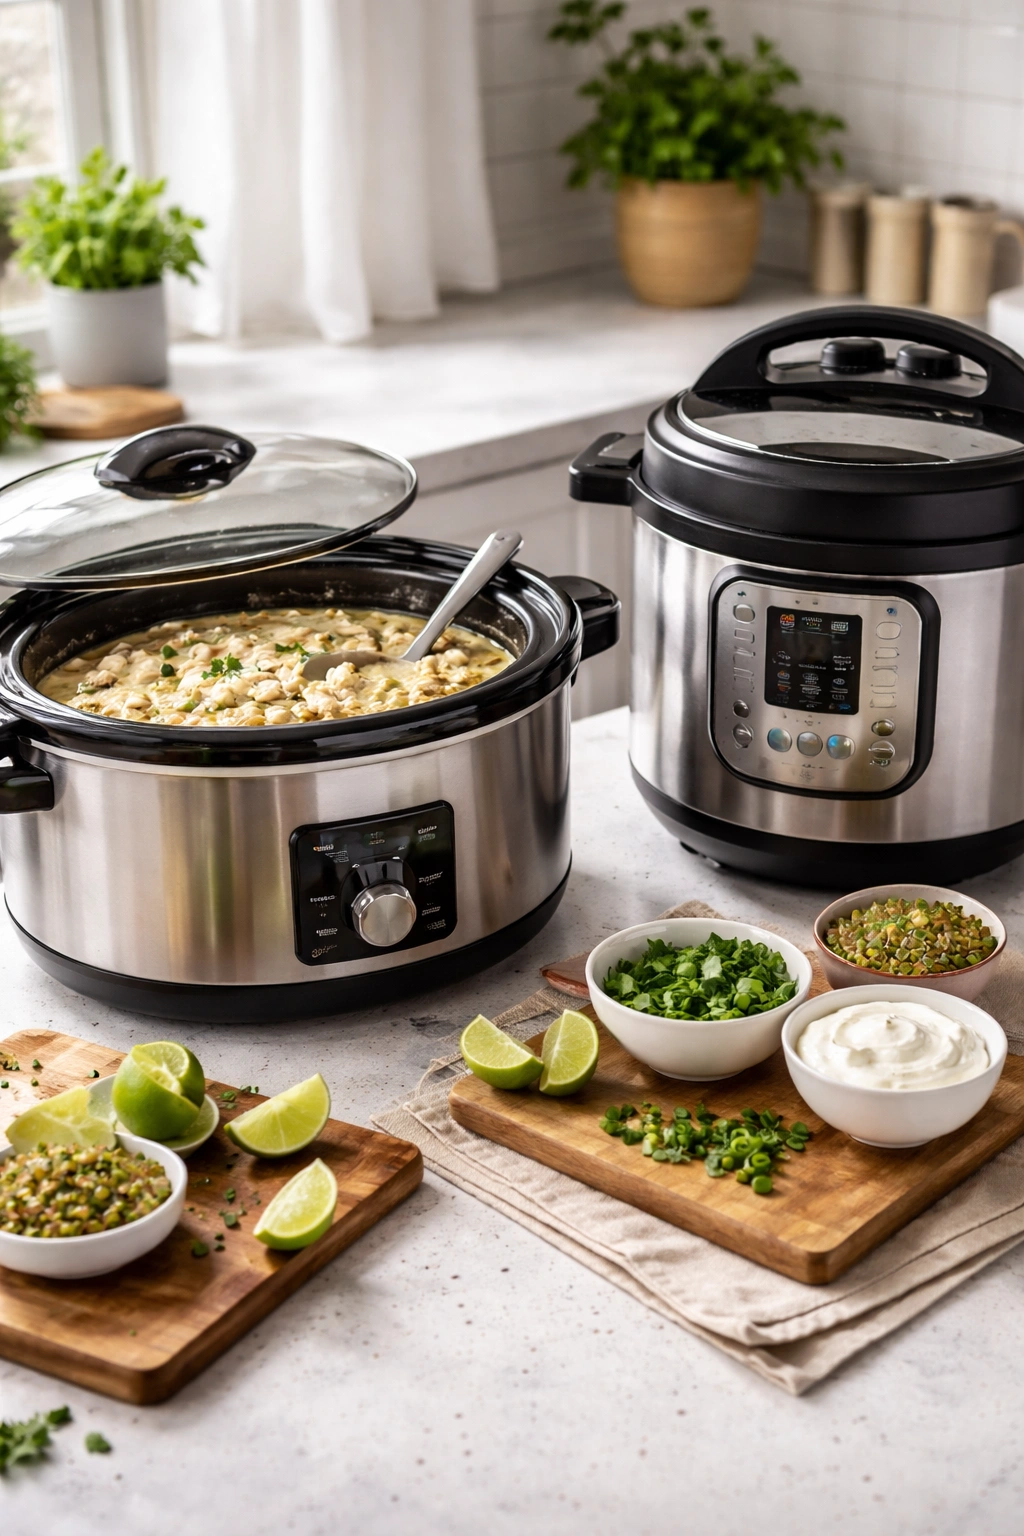
For Slow Cooker (Low and Slow):
Sauté the onion and garlic in the olive oil for 4-5 minutes on your stovetop in a separate skillet, then transfer to your 6-quart slow cooker along with the chicken broth, green chiles, cumin, oregano, paprika, cayenne, raw chicken breasts, and salt. Do not drain and rinse the beans yet. Cook on low for 5-6 hours or high for 3-4 hours, until the chicken is cooked through and shreds easily.
Remove the chicken to a cutting board and shred it. Add the drained and rinsed beans (including the pureed portion), corn, and lime juice back to the slow cooker. Stir in any optional cream cheese cubes if using, and cook for another 10 minutes until melted and fully incorporated. Stir in cilantro and fresh oregano if using, then serve with toppings.
For Instant Pot (Pressure Cooking):
Set the Instant Pot to the sauté setting and heat the oil. Add the onion and cook for 3 minutes until softened. Add the garlic and cook for 30 seconds. Add the cumin, oregano, paprika, and cayenne, and cook for 30 seconds to toast the spices.
Pour in the chicken broth, green chiles, and add the raw chicken breasts to the pot. Lock the lid and set the valve to sealing. Set to high pressure for 10 minutes. Once the timer sounds, allow the pressure to release naturally for 10 minutes, then carefully use the quick release valve. Remove the chicken and shred it.
Add the drained beans, corn, lime juice, and puréed beans back to the pot. Set to sauté and bring to a simmer, then stir in the cream cheese if using and cook for 3-5 minutes until melted and incorporated. Stir in cilantro, taste for seasoning, and serve with toppings.
The Secret Techniques That Make This Chili Special
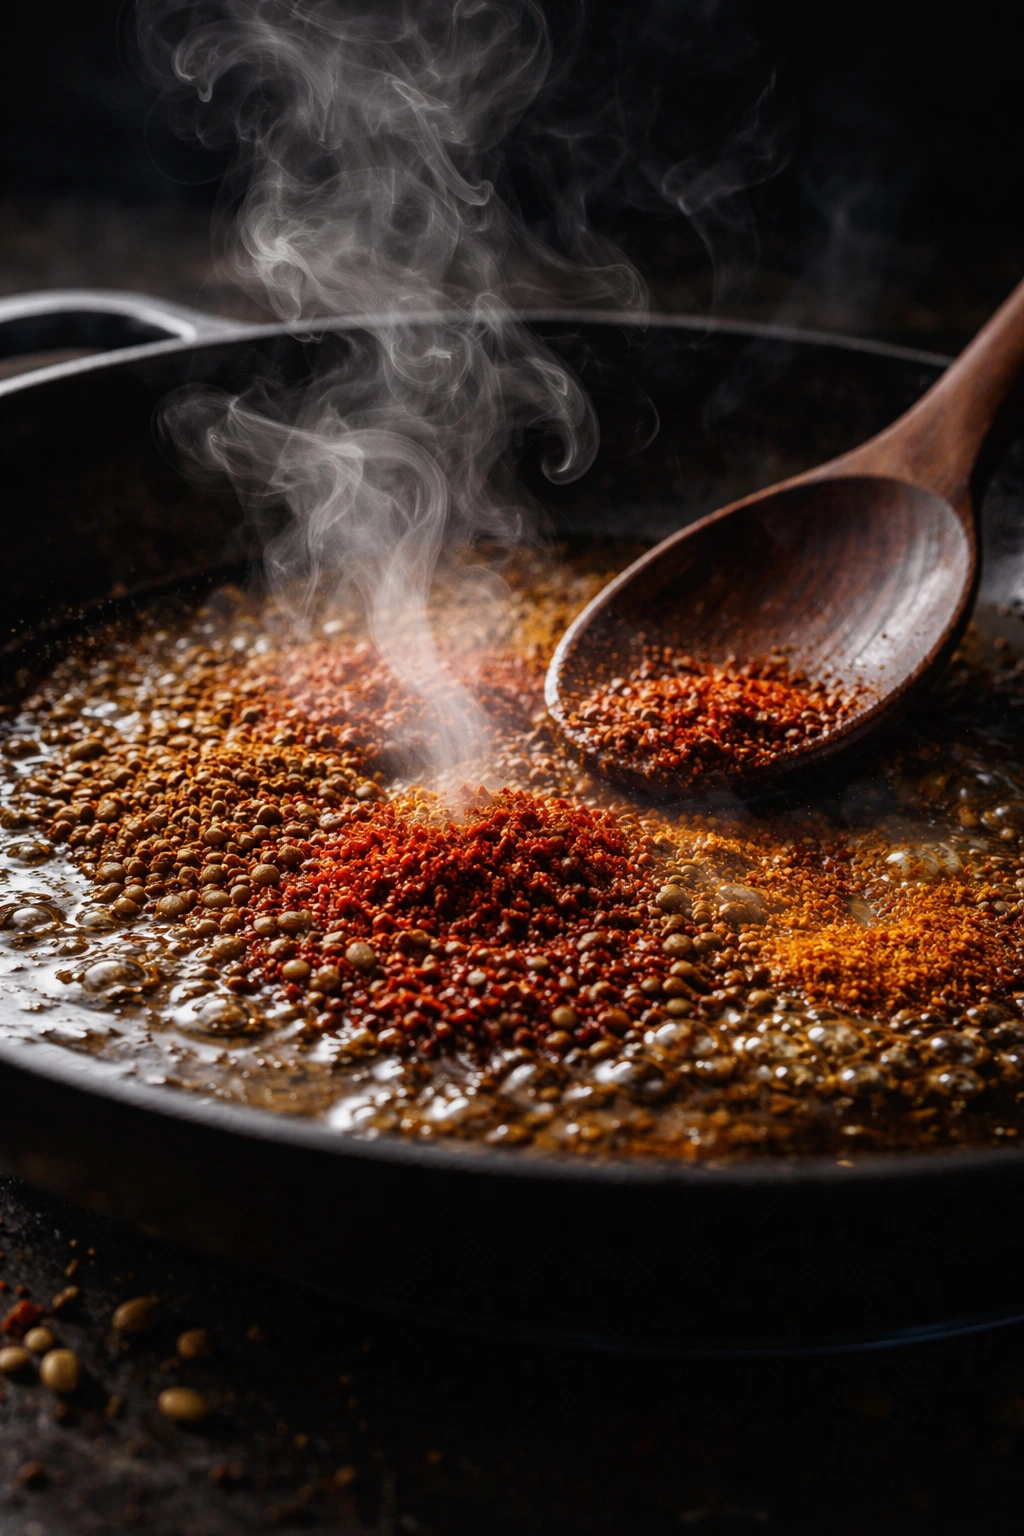
The difference between an okay white chicken chili and an exceptional one comes down to a few specific techniques that are easy to execute once you know about them.
Toasting your spices is the first. Many home cooks add dried spices directly to liquid, which results in a muted flavor. Instead, let your ground cumin, oregano, and paprika bloom in hot oil for just 30-45 seconds before adding liquid. The heat opens up their flavor compounds, making them dramatically more aromatic and complex. You’ll immediately notice the difference the first time you do this.
Pureeing some of the beans is the second game-changer. This isn’t just for texture, though the creaminess it creates is certainly valuable. When you process beans with some of the broth, you’re creating a bridge between the liquid and solid components—an emulsion that makes everything feel more cohesive and luxurious. It’s the same principle used in restaurant soups, and it’s remarkably simple to execute at home.
The lime juice at the end is the third secret. Don’t skip this. Lime doesn’t just add tartness; it acts as a flavor amplifier that makes every other ingredient taste more like itself. The cumin becomes more aromatic, the cilantro more vibrant, the chicken more tender-seeming. It’s subtle but absolutely transformative. Fresh lime is non-negotiable here—bottled lime juice simply doesn’t have the same brightness or complexity.
Finally, the layer-building approach. You’re not dumping everything in at once. You’re building flavor systematically: aromatics first, then spices to bloom those aromatics’ potential, then broth to carry everything, then beans for body, then chicken for protein, then finishing flavors for brightness. This methodical approach creates depth that feels much greater than the sum of its parts.
Variations to Make This Recipe Your Own
White chicken chili is remarkably adaptable, which is part of what makes it such a reliable weeknight go-to. Here are the variations that work best:
For a Spicier Chili: Add roasted jalapeños or increase the cayenne to ½ teaspoon. Some cooks add a splash of hot sauce or sriracha at the end, which adds heat without changing the fundamental flavor profile. Start conservatively—you can always add more heat, but you can’t remove it.
For Extra Creaminess (The Restaurant Version): Stir in 6-8 ounces of cream cheese and ½-1 cup of heavy cream in the last few minutes of cooking. This transforms the chili into something almost soup-like, silkier and more indulgent. Finish with extra cilantro and lime for brightness.
With Fresh Vegetables: Sauté diced bell peppers, poblano peppers, or even diced zucchini along with the onions at the beginning. Some cooks add cubed potatoes to make it more filling, cooking them in the broth for the full time so they become tender. For leafy greens like spinach or kale, add them in the last 2 minutes just before serving so they stay bright green and don’t over-cook.
With Different Proteins: Turkey can replace chicken and creates a slightly earthier flavor. Ground chicken or turkey works beautifully and speeds up cooking time since there’s no need to cook a solid piece of meat first—just brown the ground meat with the onions and garlic at the start. Shredded pork also works wonderfully, especially if you have leftover carnitas or pulled pork.
For a Vegetarian Version: Simply omit the chicken and use vegetable broth instead of chicken broth. Add extra vegetables to compensate for the missing protein—more corn, diced peppers, even cubed sweet potato adds substance. Some vegetarians add a second can of beans or stir in chickpeas for additional protein and heartiness. The chili loses nothing in terms of flavor; it simply becomes a different, equally satisfying dish.
With Different Bean Varieties: While white beans are the classic, black beans create a more traditional chili appearance with a slightly earthier flavor. Pinto beans work beautifully and offer a different texture. Some cooks use a mix—half white beans and half black or pinto for a more complex flavor profile.
With Salsa Verde Instead of Green Chiles: If you don’t have canned green chiles on hand, ¾-1 cup of salsa verde works as a direct substitute. It adds brightness and a slightly tangier note while maintaining that green chile character.
Tips That Prevent Common Mistakes
Even though white chicken chili is forgiving, a few common pitfalls show up repeatedly. Here’s how to avoid them:
Don’t Use Canned Chicken in Broth. You’ll sometimes see recipes that call for canned chicken for convenience. Avoid this—it has an unpleasant metallic aftertaste and mushy texture. Use fresh or rotisserie chicken, or even leftover turkey. The difference is remarkable.
Don’t Skip Rinsing the Canned Beans. The liquid in canned beans (called aquafaba) is starchy and can make the chili gummy if you don’t rinse it away. Simply open the can, pour into a colander, run cold water over them while stirring gently, and drain thoroughly. This one-minute step transforms the texture dramatically.
Don’t Cook the Chicken Too Long in the Broth. Overcooked chicken becomes stringy and tough. If using raw chicken breasts, pull them out as soon as they reach 165°F at the thickest part—even if they look slightly underdone on the outside. Carryover cooking continues as the chicken rests, and residual heat in the broth will finish cooking it perfectly. If you leave raw breasts simmering for 30+ minutes, they’ll be tough and dry.
Don’t Add the Cream Cheese to Hot Liquid Directly. Always cut it into cubes first and stir them in on low heat, adding a few cubes at a time. This allows them to melt smoothly and incorporate evenly rather than clumping up. If you dump a whole block of cream cheese into hot liquid, you’ll get lumps that won’t fully dissolve no matter how much you stir.
Don’t Forget to Taste and Adjust Salt. This might be the most important tip. Broth is often already salty, beans add salt, cheese adds salt, and canned green chiles add salt. Taste your chili before serving and adjust—but do this on your own bowl first, not in the whole pot. Add a pinch of salt, stir, taste, and repeat if needed. Many home cooks under-salt because they’re nervous about oversalting, but properly seasoned food tastes dramatically better.
Don’t Serve Without Lime. I cannot overstate this. A squeeze of fresh lime juice transforms every spoonful. It’s not just an acid—it’s a flavor amplifier that makes everything taste more vibrant and delicious. Some people think they don’t like cilantro or cumin until they taste them properly brightened with lime. It’s one of those ingredients that seems optional until you taste what it does.
Make-Ahead, Storage, and Freezing Guide
One of the best things about white chicken chili is how it improves over time. The flavors meld and deepen, and any sharp edges smooth out. This makes it ideal for planning ahead.
Refrigerator Storage: Store cooled chili in an airtight container on the refrigerator shelf for up to 4 days. The chili will thicken as it sits—this is normal and desirable. When reheating, you may need to add a splash of broth, milk, or water to restore it to the consistency you prefer. Reheat gently on the stovetop over medium-low heat, stirring occasionally, until steaming through. Alternatively, microwave in a bowl for 2-3 minutes, stirring halfway through.
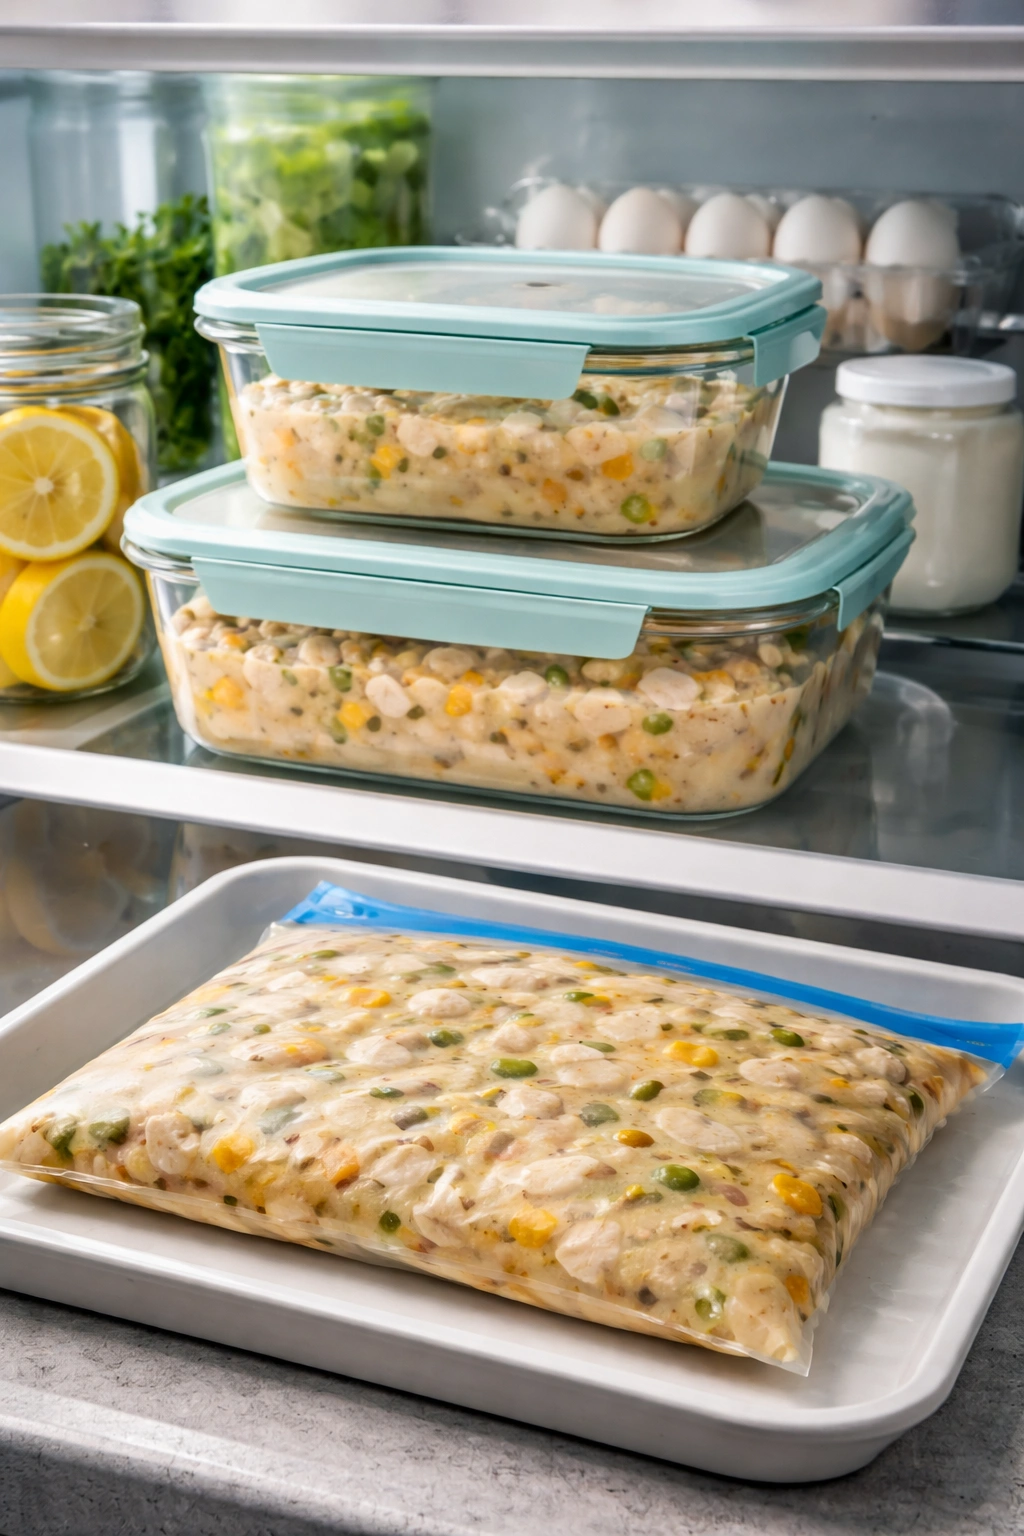
Freezer Storage: White chicken chili freezes beautifully for up to 3 months. Here’s the key: if you’ve added cream cheese or heavy cream, the texture may become slightly separated when thawed and reheated. For the best results, freeze the chili before adding cream cheese, then stir that in after reheating. Alternatively, portion the chili into flat freezer bags (which stack more efficiently than containers), lay them flat on a sheet pan to freeze, then stack them once solid.
To reheat from frozen: Thaw overnight in the refrigerator, then reheat on the stovetop as described above. Or, place a frozen block directly into a pot on low heat with a splash of broth, stirring occasionally as it thaws and heats through (this takes 15-20 minutes). If you froze it in a flat bag, you can defrost it under warm running water until it’s pliable enough to slip into a pot.
Make-Ahead Strategy: You can cook the entire chili through the bean-adding step the morning of the day you want to serve it, cool it completely, and refrigerate it. Add the chicken, lime juice, and cilantro just before serving for maximum freshness. Alternatively, brown the chicken and chop all your vegetables the day before, storing them separately, then assemble and cook the chili the evening you want to serve it. This breaks the cooking into manageable pieces and removes stress from weeknight cooking.
What to Serve Alongside Your White Chicken Chili
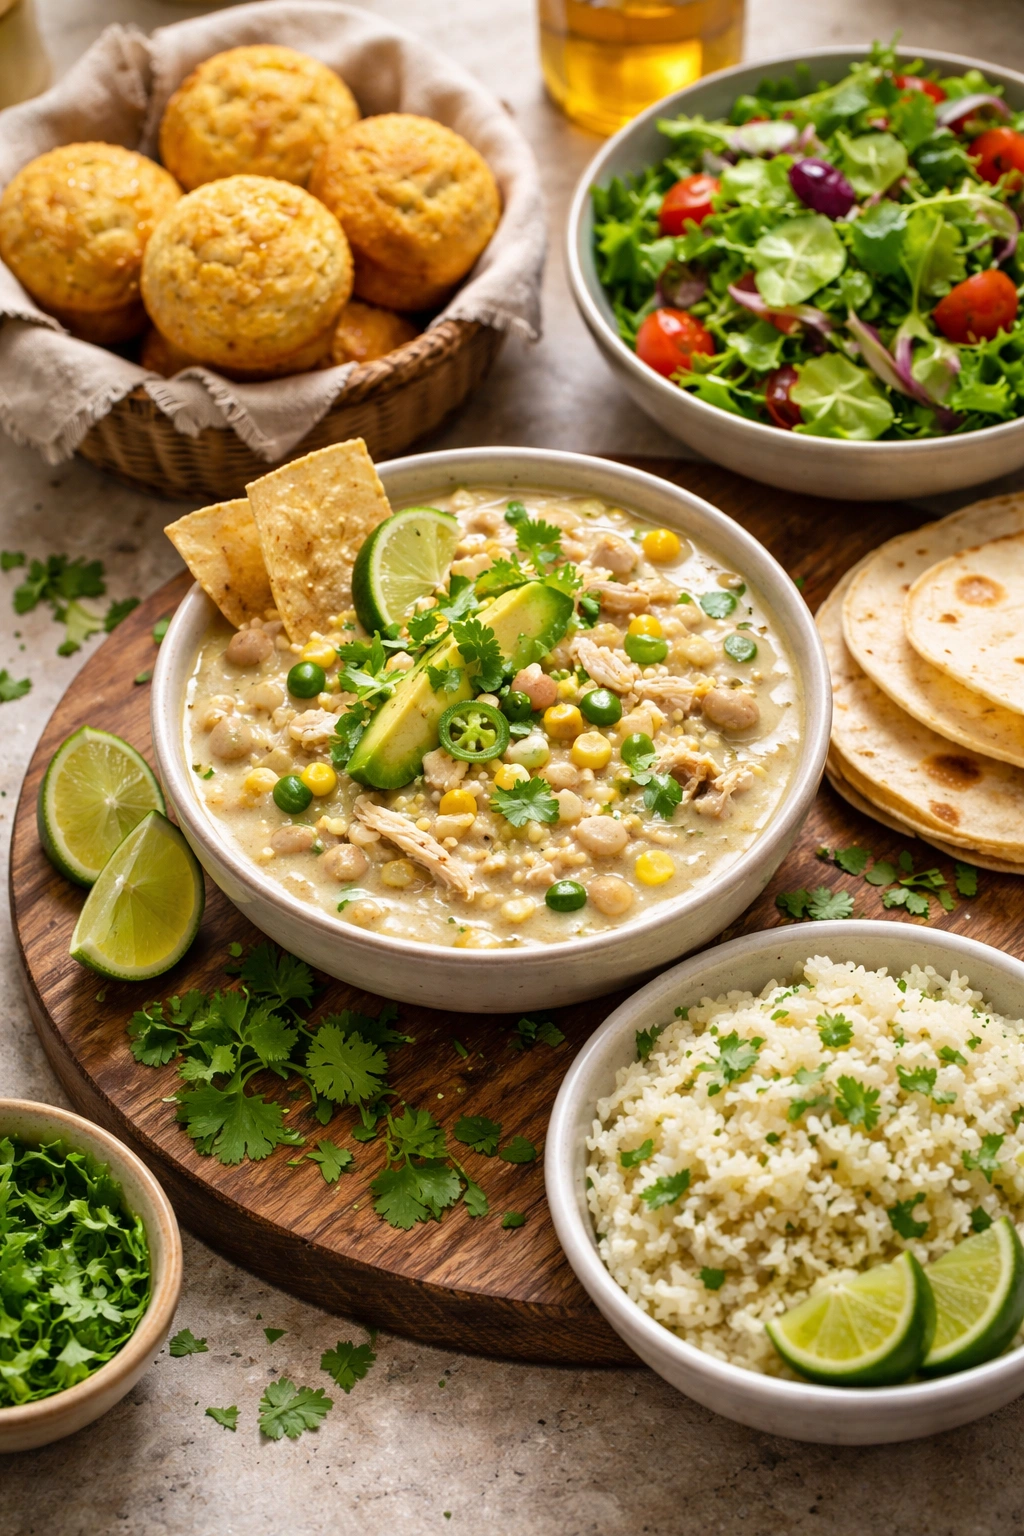
While white chicken chili is a complete meal on its own, a few carefully chosen sides elevate the experience into something memorable:
Cornbread is the classic pairing. The sweetness balances the savory spice, and the crumbly texture provides contrast to the smooth chili. Make it with jalapeños for heat, with cheddar for richness, or keep it simple and buttery. Serve it warm with a pat of butter melting into the crumb.
A Simple Green Salad cuts through the richness with bright acidity and provides vegetable freshness. Dress it simply with lime juice, olive oil, salt, and pepper. Add thinly sliced red onion and cilantro for extra flavor that echoes the chili’s spices.
Cilantro Lime Rice is another excellent option if you want something more substantial. Cook white rice with cilantro stirred in at the end and finish with lime juice. Serve alongside the chili and let people spoon some rice into their bowl if they want extra body.
A Wedge Salad with a cooling ranch or blue cheese dressing provides textural contrast and a crisp, cold element that balances the warm, spiced chili beautifully.
Tortillas or Tortilla Chips aren’t just toppings—they can become a side. Warm flour or corn tortillas and serve alongside so people can make little wraps with their chili, or simply provide a basket of tortilla chips for dipping and crunching into bowls.
Mexican Street Corn (Elote) makes an elegant side if you’re serving this to guests. The charred corn with mayo, cotija cheese, and chile powder complements the chili’s flavors without competing with them.
Common Questions and Troubleshooting
My chili is too thin/brothy. This is the most common issue. It typically means you haven’t pureed enough beans or the beans weren’t starchy enough. Next time, puree all of one can of beans with ½ cup broth. Alternatively, you can fix it in the current pot by stirring together 1 tablespoon cornstarch with 2 tablespoons cold water, then stirring this slurry into the simmering chili and cooking for 2-3 minutes until thickened.
My chicken is dry. You likely cooked it too long. Raw chicken breasts need only 15-18 minutes at a simmer to reach 165°F. If using an Instant Pot, follow the timing exactly—pressure cooking can render chicken overcooked incredibly quickly. Next time, use a meat thermometer to prevent overcooking.
It tastes bland or one-dimensional. This is almost certainly a salt issue or a missing lime. Taste it and add salt a pinch at a time. Then add a squeeze of fresh lime juice and taste again—it should suddenly come alive. If it still tastes flat, add a tiny pinch more cayenne to wake up the spice.
The cream cheese won’t melt smoothly. Make sure you’re using cubed cheese on low heat, adding it gradually, and stirring constantly. If it’s already clumped, remove the pot from heat, blend the clumpy portion separately with a splash of broth in a blender, then stir the smooth blend back into the pot.
Can I use fresh beans instead of canned? Absolutely, though you’ll need to cook them until completely tender first. If using dried beans, soak them overnight, then simmer in fresh water for 45-60 minutes until tender before adding them to the chili. Canned beans are already cooked and will fall apart if cooked too long, so they’re actually more reliable for this recipe.
Final Thoughts
White chicken chili represents everything that makes home cooking genuinely satisfying: a recipe that’s simple enough to pull together on a busy weeknight, adaptable enough to accommodate whatever you have on hand or prefer in your bowl, comforting enough to soothe your soul on a cold evening, and impressive enough that people ask for the recipe when you serve it. It’s the kind of dish that disappears quickly at potlucks and tastes even better the next day.
The real magic of this chili isn’t in any single ingredient—it’s in understanding how to layer simple flavors, build texture naturally, and finish with brightness. Master the technique of toasting spices, pureeing beans as a thickener, and always finishing with fresh lime, and you’ll have a chili that tastes like it’s been simmered for hours even when you made it in forty-five minutes. That’s the hallmark of good cooking: making something taste more complex than it is, making people feel genuinely nourished and cared for with straightforward, honest ingredients and solid technique.
Make a batch this week. Taste the chili before serving and adjust the salt and lime to your preference. Set out your favorite toppings and let people customize their own bowls. Notice how much brighter it tastes the next day. Then make another batch and freeze half for a future night when you need dinner to appear on the table with minimal effort. This recipe will become one of your reliable go-tos—one of those dishes you make when you want something delicious without fuss, something that brings people together around the table, and something that reminds you why you love cooking in the first place.