Street taco beef is deceptively simple, yet it’s one of the most craveable proteins you can make at home. The magic isn’t in fancy techniques or hard-to-find ingredients — it’s in understanding a few key principles that separate authentic street stand beef from the mediocre taco fillings you might grab on a weeknight. The best street taco beef tastes like it came straight from a food truck parked in Mexico City or San Diego, with meat that’s tender, deeply seasoned, and packed with character. Getting there is far easier than most home cooks realize, and once you nail it, you’ll never go back to ordinary tacos again.
The beauty of street taco beef is that it rewards technique and timing more than ingredient cost. You don’t need an expensive cut or a complicated recipe — you need to understand why every step matters and how to execute it with intention. Whether you’re marinating for hours, searing over high heat, or slicing against the grain, each decision shapes the final result. This guide walks you through every element of making street taco beef that genuinely tastes like the real thing.
What Makes Authentic Street Taco Beef Different
Walk up to an authentic taco stand and you’ll notice something immediately: the beef isn’t just seasoned meat tossed into a tortilla. It has depth, complexity, and a charred exterior that makes your mouth water before you even bite into it. That beef tastes different because it’s been treated differently from the start.
Authentic street taco beef is built on three foundations that most home cooks skip. First, it’s marinated in a mixture that includes acid (lime juice or vinegar) to tenderize the meat and develop flavor from the inside out. Second, it’s cooked quickly over high heat in a way that creates a beautifully caramelized crust while keeping the inside juicy. Third, it’s sliced thin and served immediately, capturing the meat at its peak.
The taco stands you admire didn’t invent anything mysterious — they simply understand that marination time, proper searing, and meat selection are non-negotiable. Every element works together. The acid in the marinade begins breaking down the muscle fibers hours before the meat hits heat. The high-heat sear creates Maillard browning, which adds savory complexity that seasoning alone can’t achieve. The thin slicing ensures the meat is tender even if you’re using a less-expensive cut. When these three things align, ordinary beef transforms into something crave-worthy.
Choosing the Right Cut of Meat
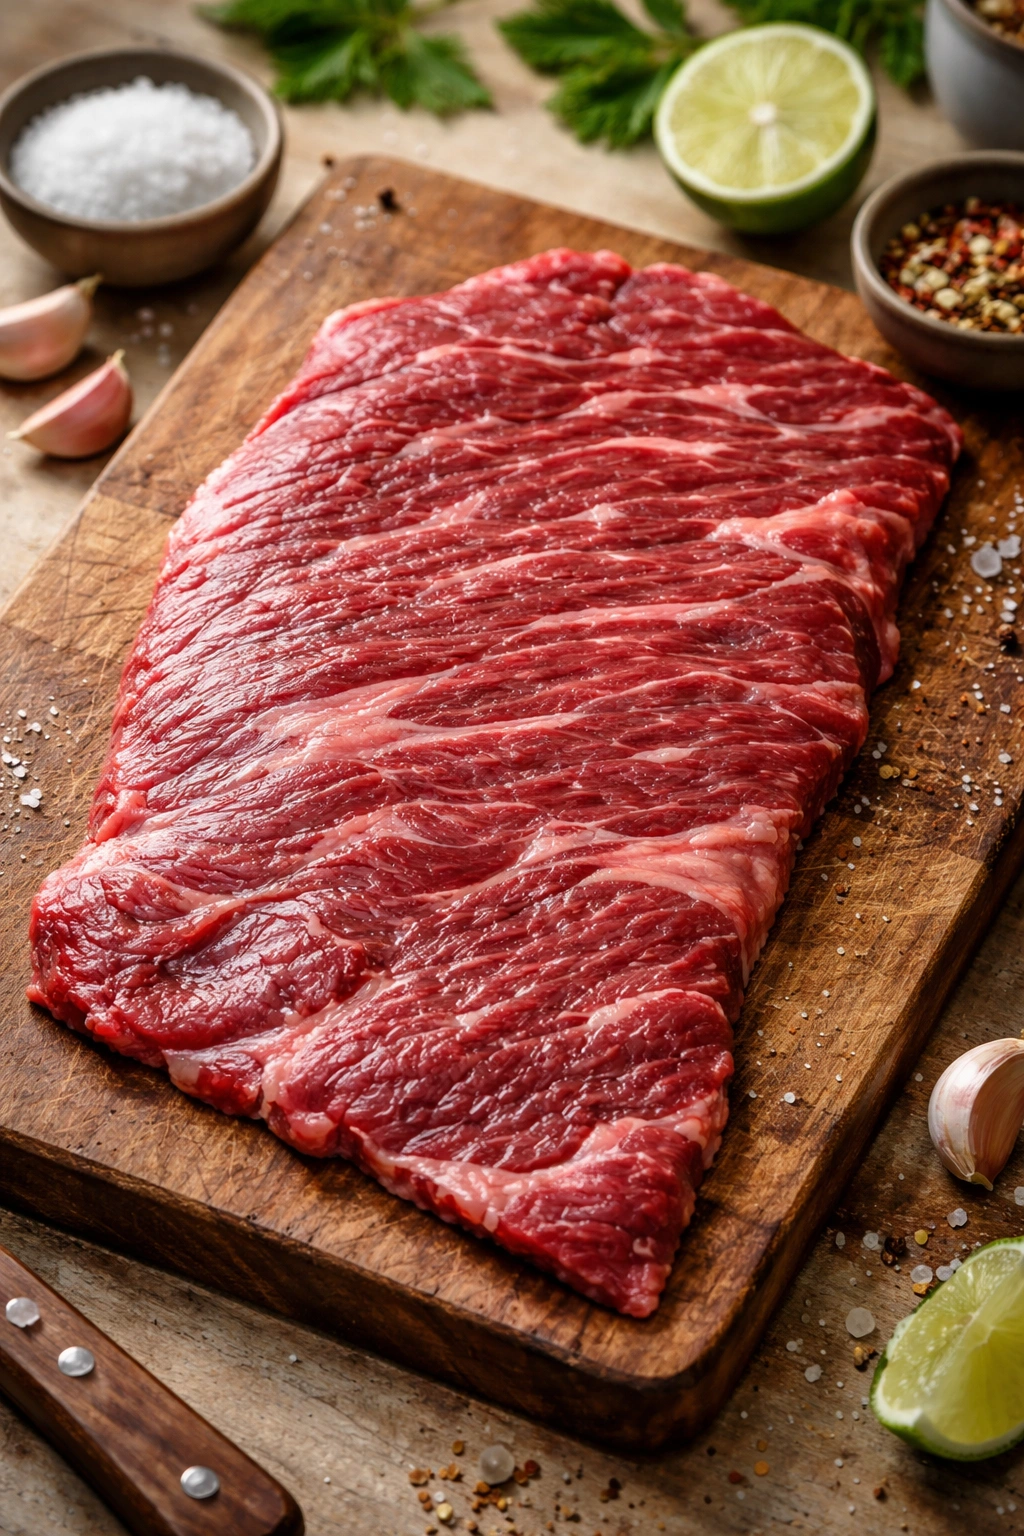
Not all beef cuts work equally well for street tacos, and picking the wrong one will undermine your entire effort, no matter how perfectly you execute the rest. The most traditional cuts used throughout Mexico and in authentic taco stands are skirt steak and flank steak — and there’s a reason these cuts dominate street taco culture.
Both cuts come from the lower chest and belly areas of the cow, which means they’re incredibly flavorful because those muscles contain a higher fat marbling and connective tissue. This fat and connective tissue is exactly what makes these cuts so appealing for street tacos. When marinated properly, the acid breaks down those connective tissues into gelatin, making the meat extraordinarily tender despite being from a tougher part of the animal. The fat keeps the meat juicy even when you slice it thin and cook it quickly.
Skirt steak is the gold standard for authentic street tacos. It has a pronounced grain running through it, which is actually ideal because slicing against that grain yields tender, succulent pieces. Skirt steak also has more visible marbling and a beefier flavor that stands up beautifully to bold seasonings. You can find it in most grocery stores in the beef section, though you may need to ask your butcher if it’s not displayed. If you can only find one package, that’s fine — it’s usually affordable, and a pound or so goes a long way.
Flank steak is essentially interchangeable with skirt steak in terms of results. It’s equally flavorful, equally responsive to marination, and has the same grain structure that makes for tender slices when cut properly. Some home cooks even prefer flank steak because it’s slightly more consistent in thickness, which can make cooking more even across your batch. The choice between skirt and flank really comes down to what your grocery store has available and your personal preference.
Avoid sirloin or any premium tenderloin cuts. While premium cuts are wonderful for steaks you want to eat whole, they’re wasteful for street tacos. The high price point doesn’t translate into better results — in fact, those cuts are less responsive to marination because they’re already so tender. You’re paying more for a quality you don’t need. Ground beef also won’t deliver the authentic flavor you’re after. Ground beef cooks into a crumbly texture that lacks the structure and sear quality of thin-sliced whole meat.
The Marinade That Changes Everything
The marinade is where street taco beef gets its distinctive flavor and its transformative tenderness. Without marination, even a perfect cut of skirt steak will be tougher and blander than it deserves to be. With marination, the same cut becomes something remarkable. The key is understanding what each component does.
Acid is non-negotiable. Fresh lime juice is the traditional choice — the citric acid denatures the muscle proteins and begins breaking down connective tissue long before heat ever touches the meat. This chemical process actually tenderizes the beef at the cellular level. You need enough acid to make a difference, but you also need to respect the limits. Over-marinate (more than eight hours in pure acid), and the meat will become mushy. The sweet spot is usually two to eight hours, with four to six hours being ideal for maximum flavor without crossing into texture problems.
Garlic and spices build the flavor profile. Minced fresh garlic adds pungency and depth. Ground cumin is essential — it’s warm, earthy, and distinctly Mexican in character. Chili powder (not the spice blend, but pure chili powder) contributes color and mild heat without overwhelming the beef. Many traditional recipes also include oregano, which adds a subtle herbaceous note. These spices don’t just sit on the surface; they infuse into the meat during marination, creating flavor at every level.
Soy sauce is a secret weapon in many authentic recipes. It adds umami depth and saltiness without requiring extra salt. The umami compounds in soy actually enhance the beef’s natural savory notes, making the meat taste more beefy. A couple of tablespoons in your marinade will intensify the overall flavor in ways salt alone can’t achieve.
Oil is essential but minimal. A bit of olive oil or avocado oil keeps the marinade balanced and helps carry the flavors into the meat. You don’t want an oily marinade — just enough to create a cohesive mixture. Oil also prevents the marinade from drying out the surface of the meat.
A basic but authentic marinade might look like this: lime juice, minced garlic, cumin, chili powder, a splash of soy sauce, and a touch of oil. That’s genuinely it. The simplicity is intentional. When you use fewer ingredients, each one stands out. There’s nowhere to hide poor-quality garlic or stale spices — they’ll taste like what they are.
Why Marination Time Matters
Marination is one area where patience genuinely rewards you. An hour of marinating is better than none, but it’s a floor, not a ceiling. The real magic happens after two or three hours, when the acid has had time to penetrate deeper into the meat and the spices have begun their infusion.
Two hours is the minimum if you’re working on a schedule. In that time, the outer quarter-inch of the meat will be noticeably tenderized and flavored. You’ll taste a clear difference compared to unmarinated beef, and it’s worth the wait.
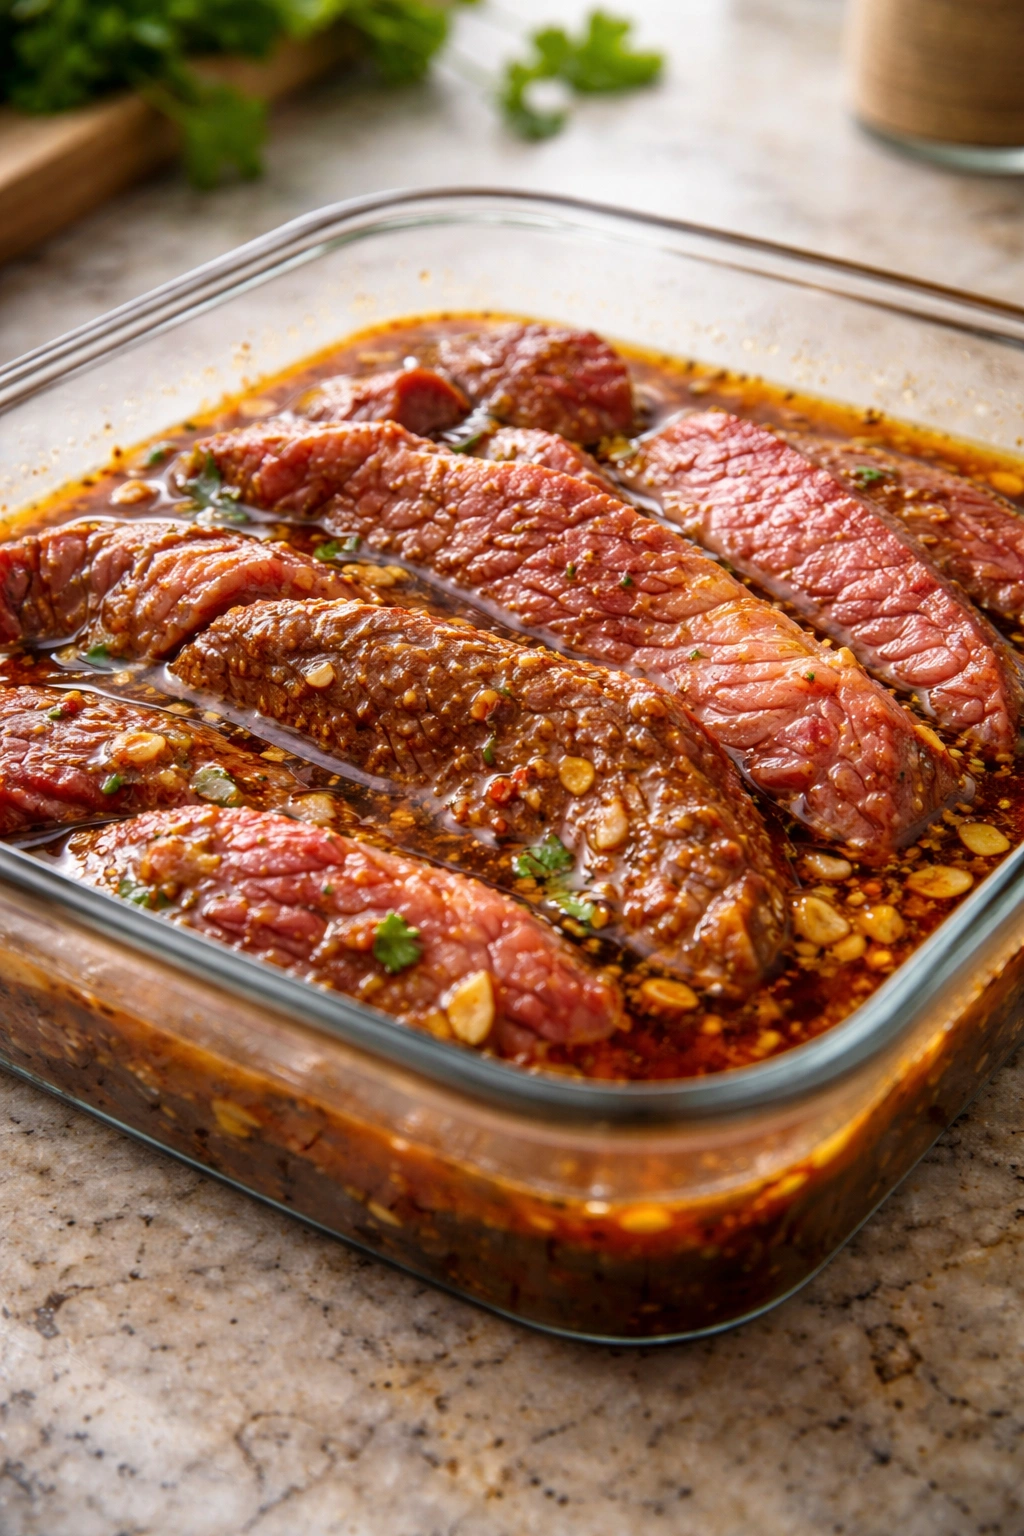
Four to six hours is the sweet spot. This is when the marinade has penetrated several eighths of an inch into the meat, creating flavor and tenderness throughout a thinner cut like skirt or flank steak. The beef will look slightly darker on the surface, and the flavor will be complex and well-developed.
Overnight marination is excellent if you have the time. Eight to twelve hours of marination creates outstanding results. The meat will be tender enough to shred with your fingers if you wanted to, and the flavor will be deep and layered. Just don’t exceed twelve to sixteen hours with a high-acid marinade, as the meat can begin to break down too much and turn mushy.
The marination happens fastest at room temperature, but marinating in the refrigerator is safer because it slows bacterial growth. Most recipes call for refrigerator marination, which does take slightly longer but is worth it for food safety. If you’re marinating at room temperature, keep it to two hours maximum.
The Cast Iron Skillet Advantage
The cooking vessel you choose matters more than you might expect. A cast iron skillet is the clear winner for street taco beef, and it’s not just sentimental preference — it’s physics and heat retention.
Cast iron heats unevenly compared to stainless steel (some spots get hotter than others), but this unevenness is actually beneficial for searing beef. Those hot spots create beautiful caramelization while the cooler areas prevent the meat from burning. Cast iron retains heat exceptionally well, so when you add cold beef from the marinade, the skillet bounces back to searing temperature quickly instead of dropping several degrees and steaming the meat instead of searing it.
Stainless steel pans can work if that’s what you have. Use medium-high to high heat and give the pan extra time to preheat, making sure it’s genuinely hot before the meat hits. Avoid nonstick pans — they don’t get hot enough to create the crust you’re after, and they’re not designed for high-heat searing.
Pat your meat completely dry before it hits the hot pan. Moisture is the enemy of browning — any water on the surface of the meat will create steam, which prevents that beautiful caramelized crust from forming. Paper towels and a quick but thorough drying step make a measurable difference in your final result.
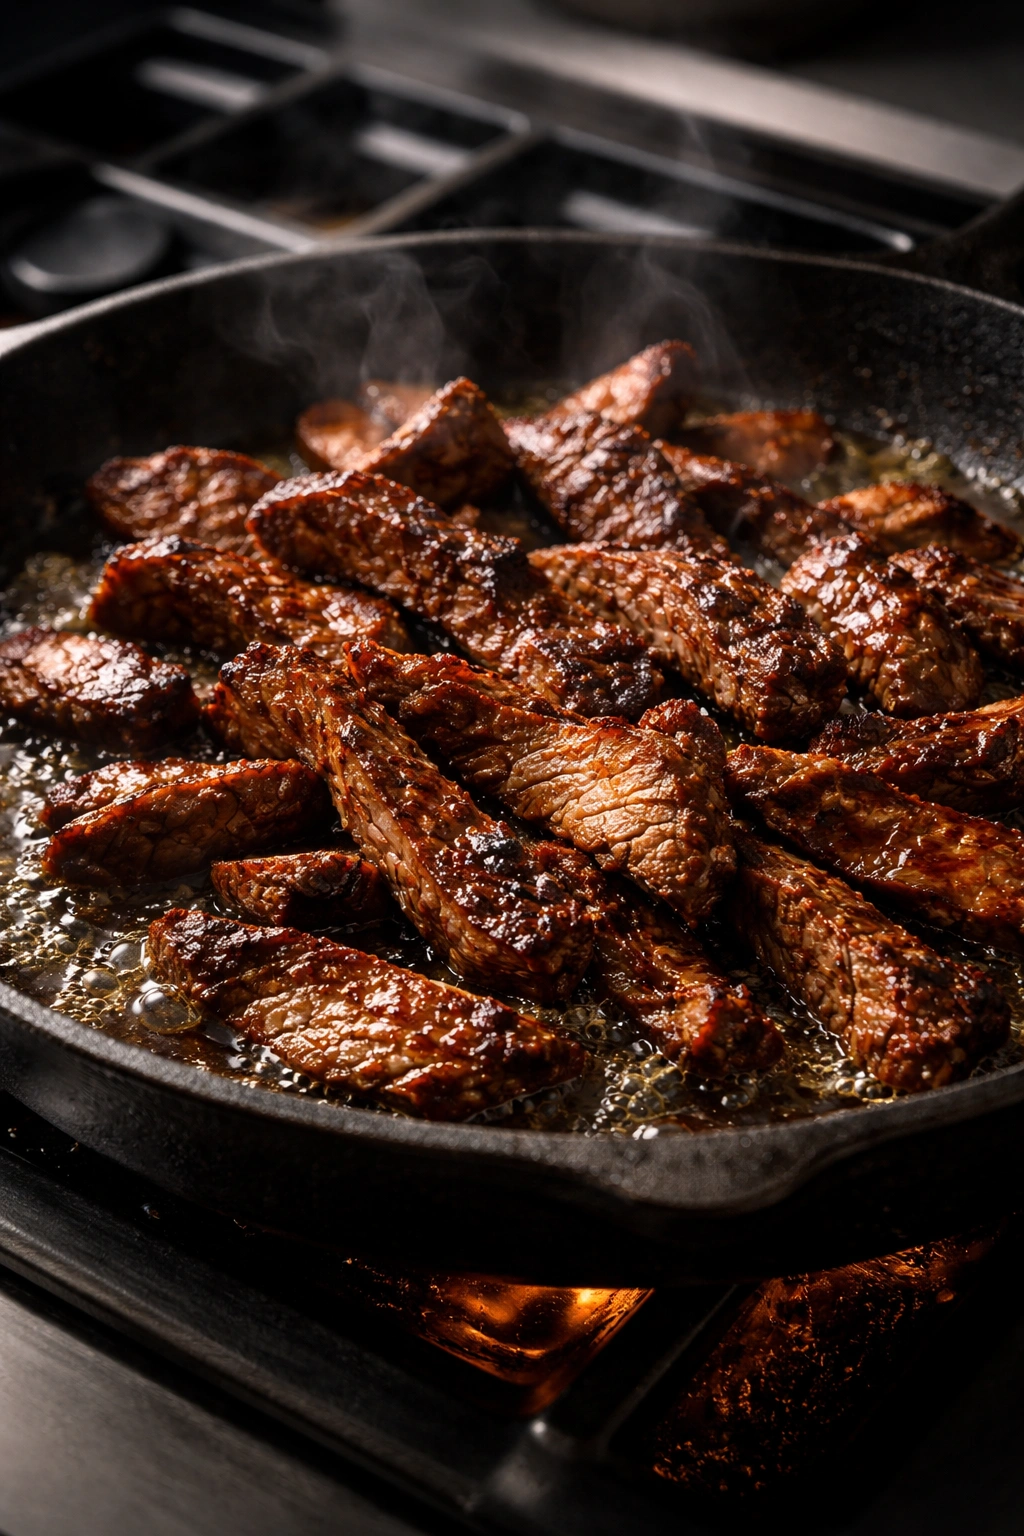
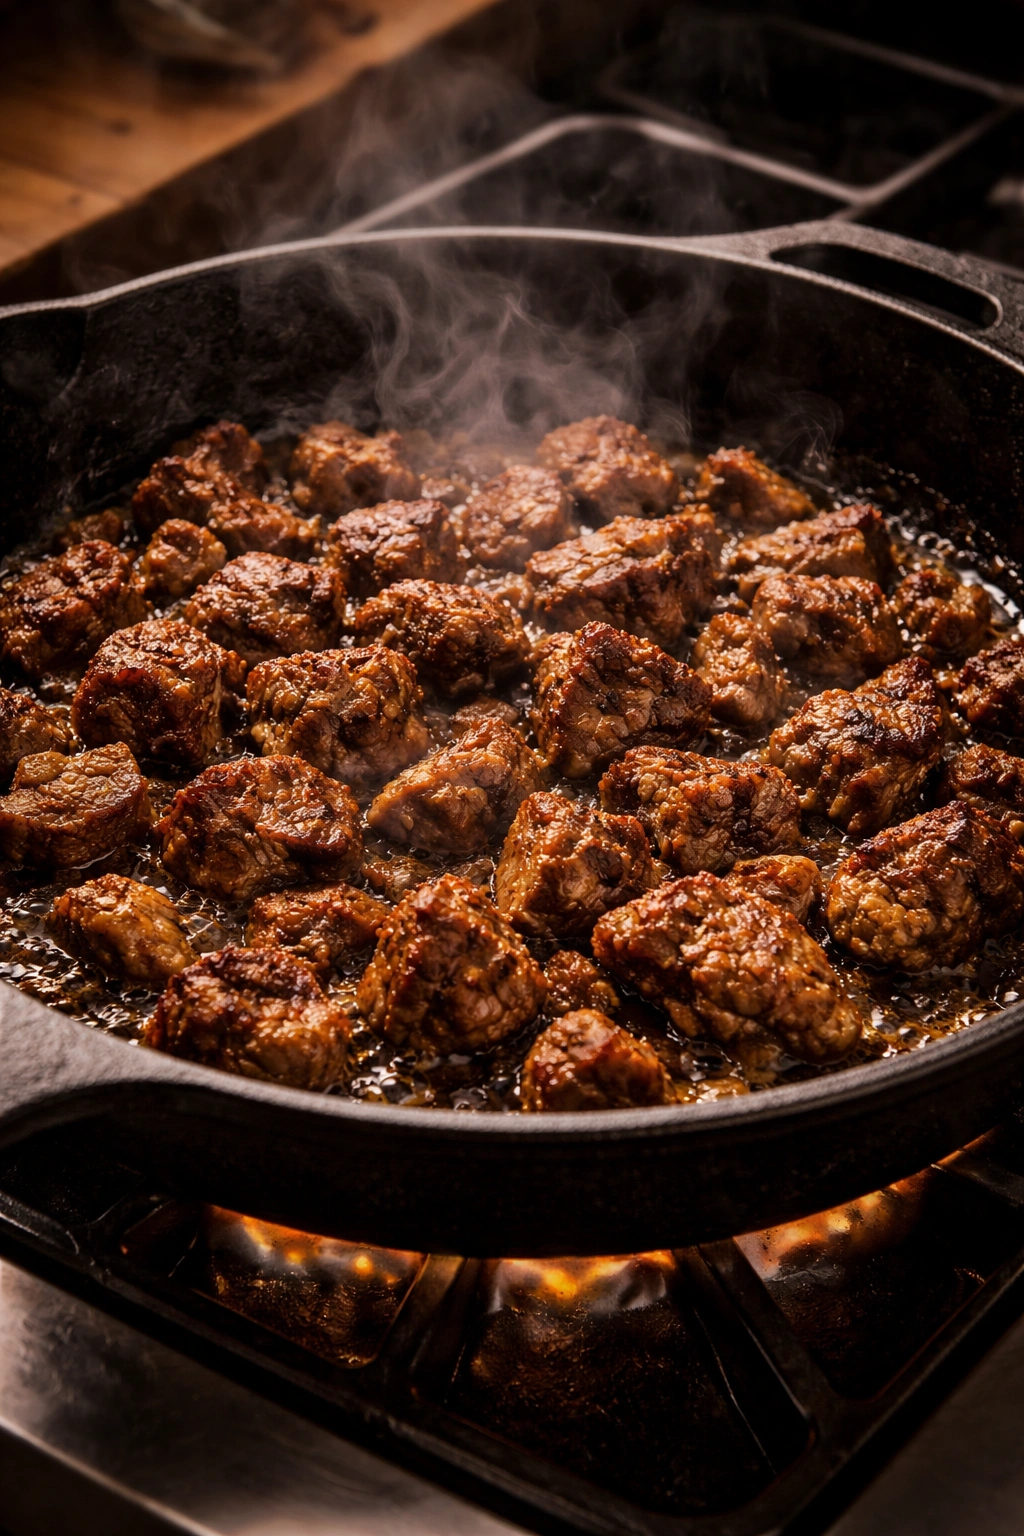
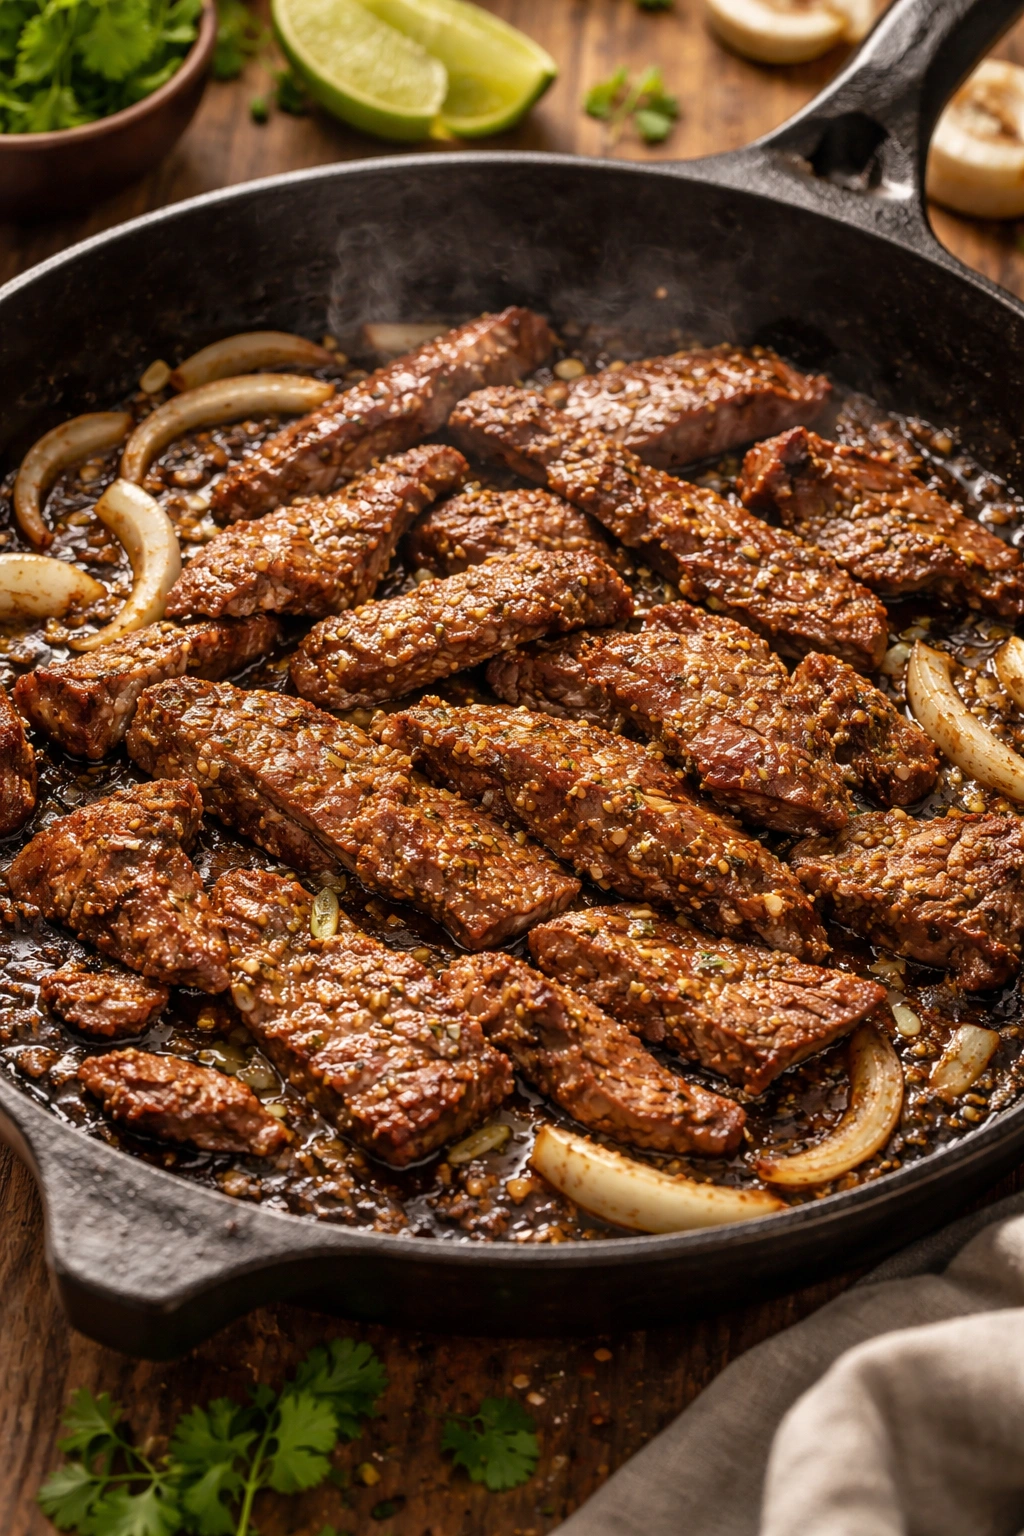
Searing Technique for Maximum Flavor
Searing is where the real transformation happens. The Maillard reaction — the chemical process that creates hundreds of new flavor compounds when proteins and sugars meet high heat — is what makes street taco beef taste like itself.
Get your pan genuinely hot. Heat your cast iron skillet over medium-high to high heat for three to four minutes. You want it hot enough that a bead of water flicked onto the surface sizzles immediately and evaporates in under a second. If the water just beads up and sits there, your pan isn’t hot enough yet.
Don’t overcrowd the pan. Cook the beef in two or three batches rather than cramming it all in at once. Overcrowding lowers the pan temperature and creates steam, which prevents proper searing. You want each piece of meat in direct contact with the hot surface. Work in batches — it takes literally a few extra minutes but creates exponentially better results.
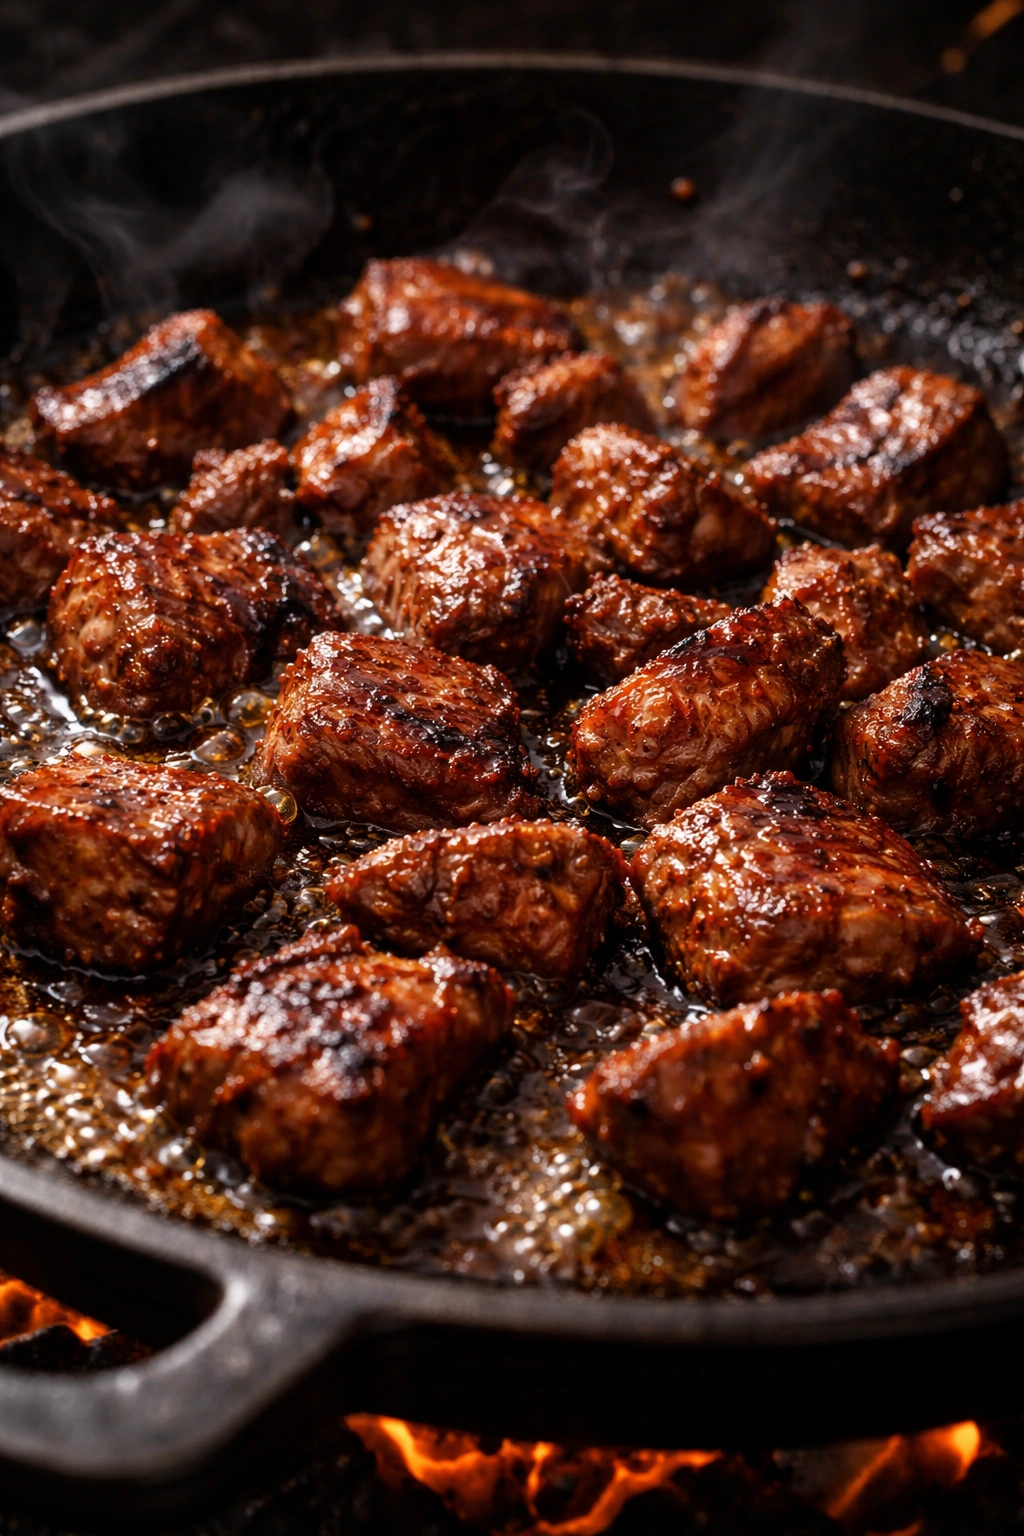
Let it sear undisturbed for one to two minutes. Resist the urge to move the meat around constantly. Let it sit on the hot surface and develop that beautiful caramelized crust. You’ll hear a satisfying sizzle. That’s the Maillard reaction happening. Don’t stir or flip until the bottom of the meat has clearly browned and begun to develop that crust.
Flip and sear the other side for another minute or so. Once you’ve got a crust on the first side, flip the pieces and sear the other side. Thin strips of meat cook incredibly fast — you’re looking at a total of two to four minutes per batch, max. The interior will still be pink, and that’s exactly right. The carryover heat will continue cooking the meat after you remove it from the pan.
Work quickly and keep batches separate. As each batch finishes, transfer it to a clean plate. Don’t let the batches sit on top of each other, as they’ll continue cooking from residual heat and may overcook. This separation also prevents the cooked beef from steaming in its own moisture.
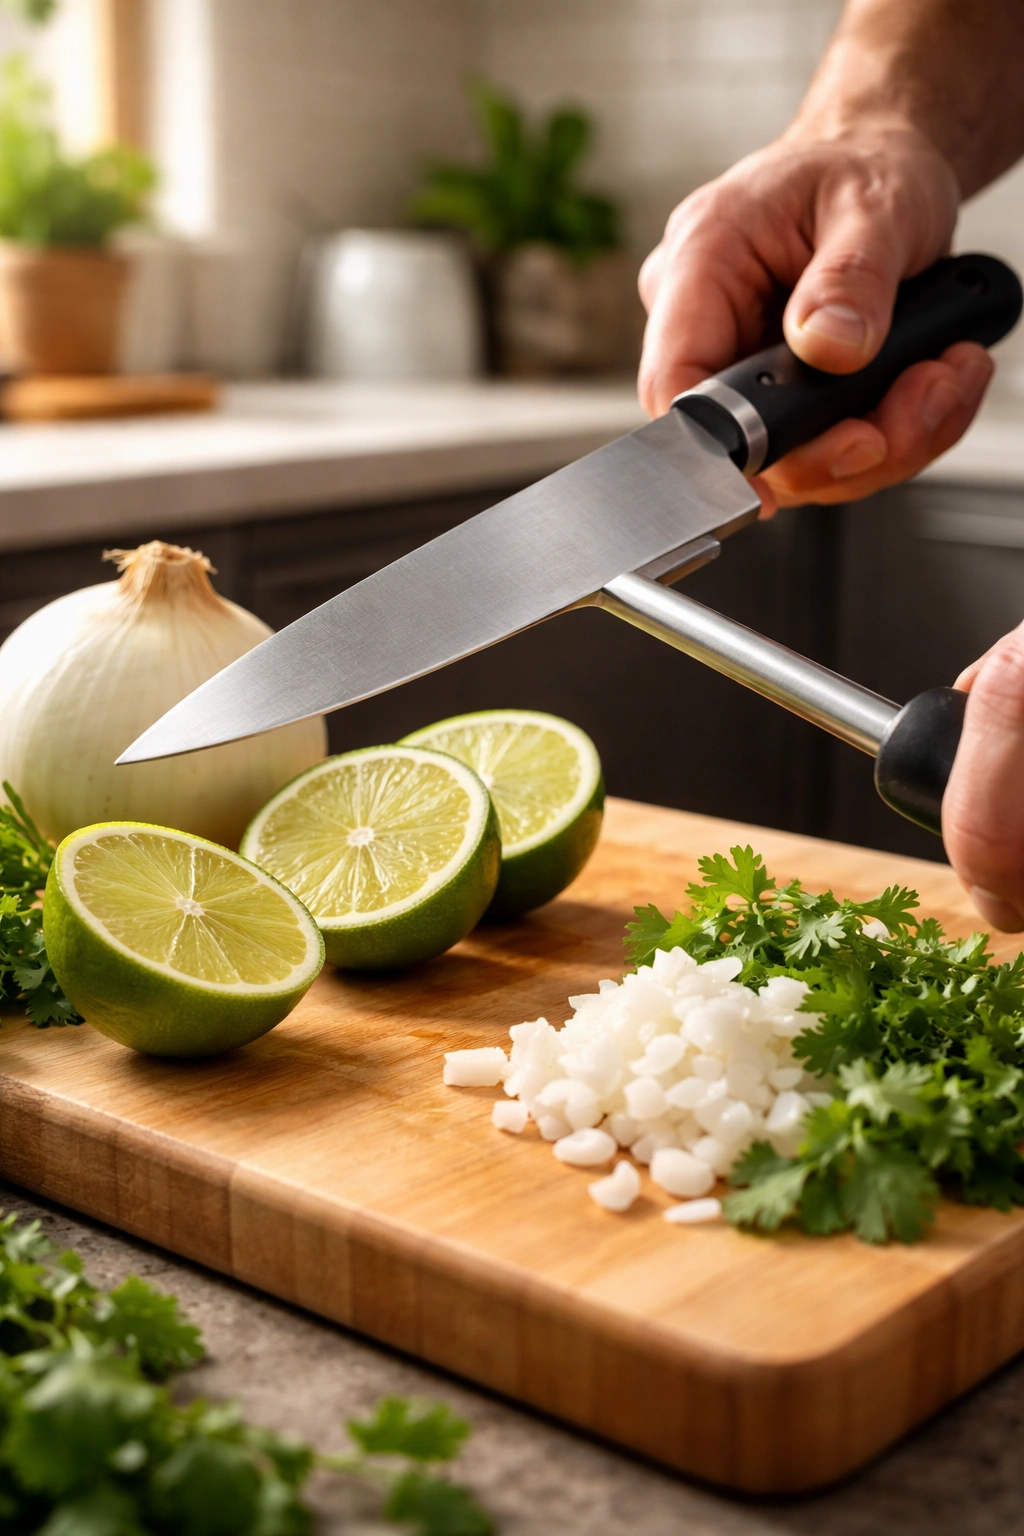
Slicing Against the Grain
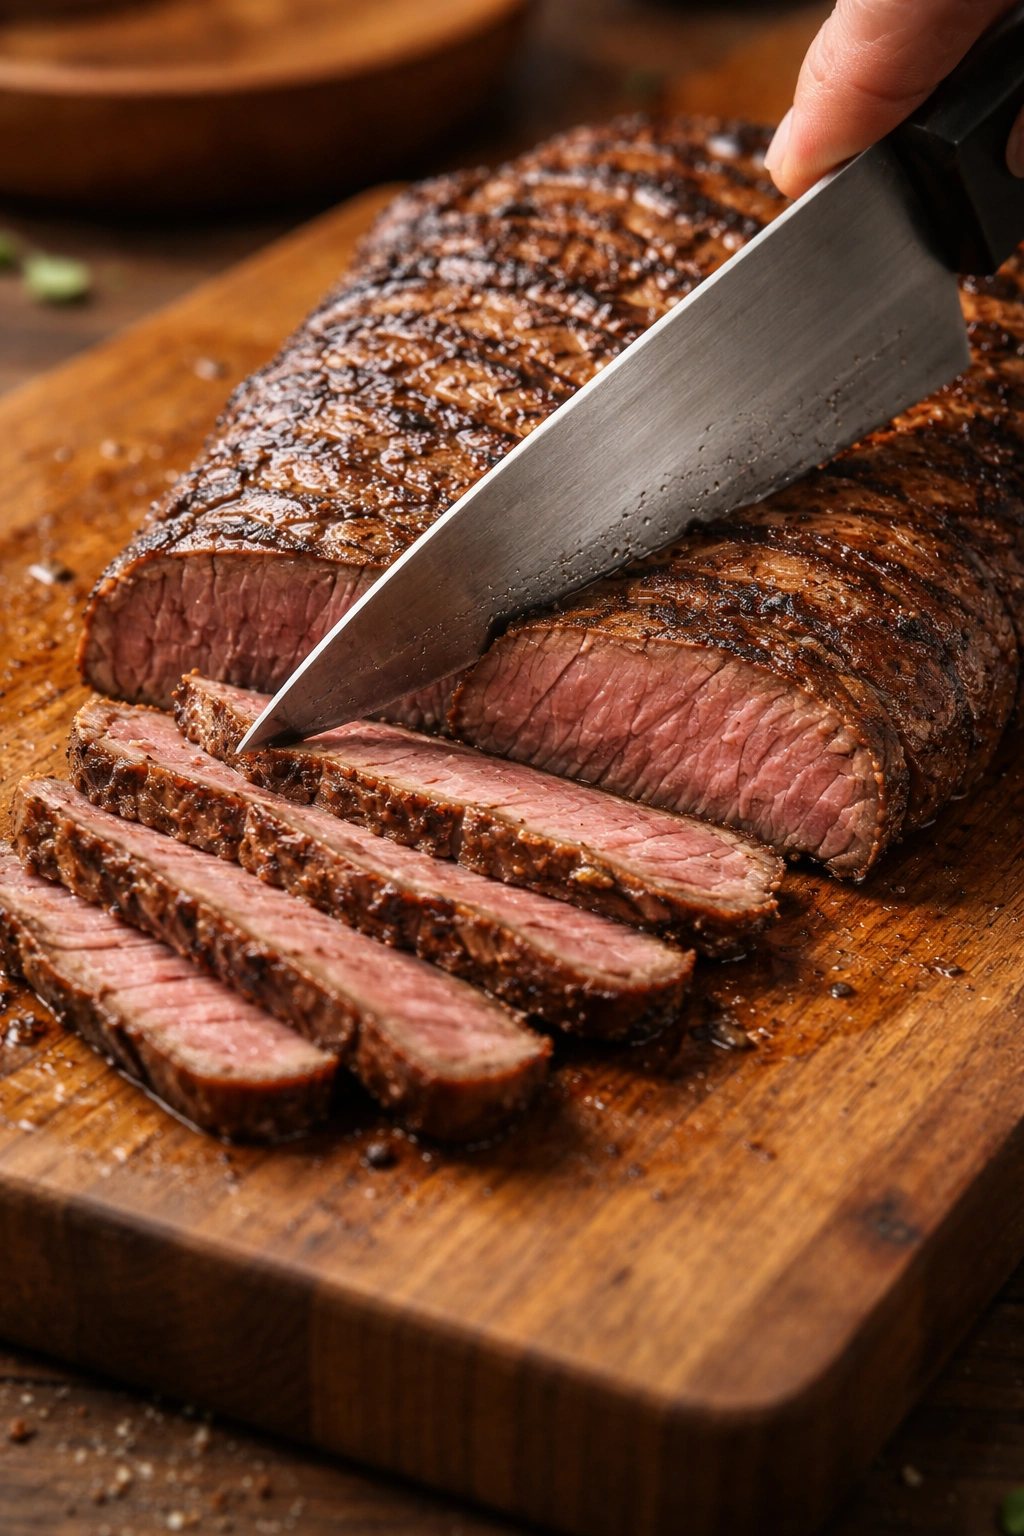
This single technique is where many home cooks stumble, and it completely changes your eating experience. Slicing against the grain transforms chewy meat into tender morsels. The grain refers to the long, fibrous muscle strands that run through the beef. When you slice parallel to these strands, you’re leaving them long and intact, which creates chewiness. When you slice perpendicular to them (against the grain), you’re cutting those long fibers short, which creates tenderness.
To identify the grain, look at your beef. You’ll see visible lines running through it — those are the muscle fiber bundles. They’re usually very obvious in skirt and flank steaks. Once you’ve identified the direction the grain is running, angle your knife at 90 degrees to that direction.
The slicing angle also matters for presentation and mouthfeel. Slice at a slight angle (about 30 degrees) rather than straight down. This increases the surface area of each piece, which means more charred exterior and more flavor per bite. Angled slices also feel more elegant and restaurant-like on the plate.
You don’t need super thin slices — thin enough that they bend slightly and fit comfortably on a small tortilla. Aim for roughly an eighth of an inch thick. Much thinner and the meat becomes almost transparent; thicker and it becomes difficult to chew.
Temperature Control and Doneness
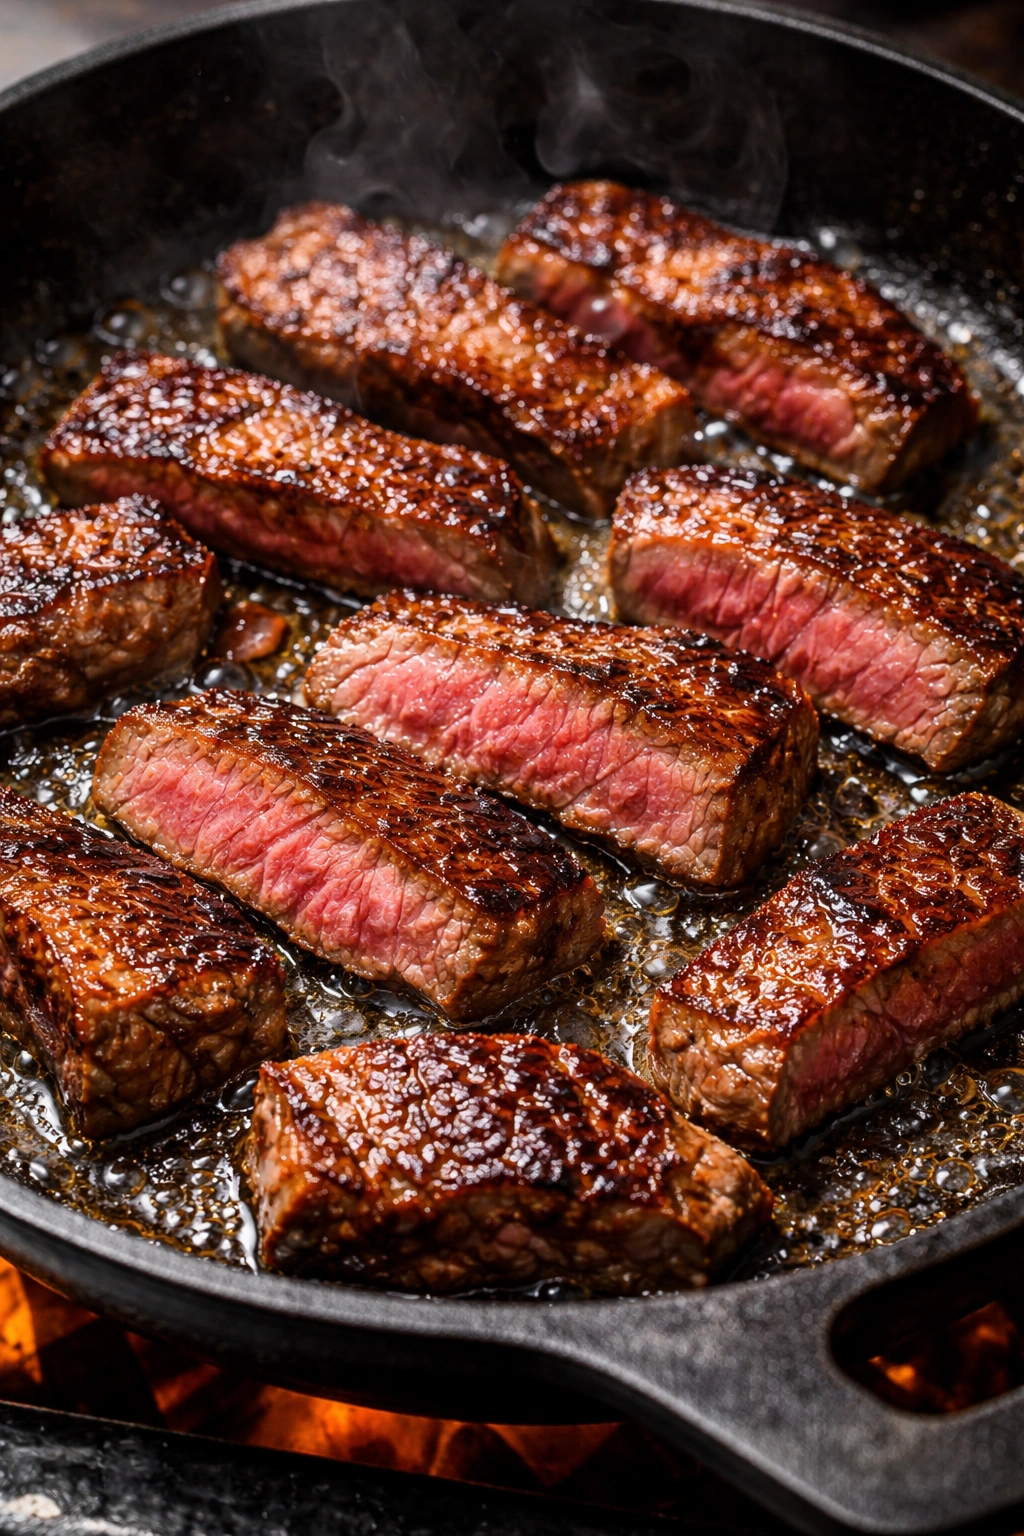
Cooking street taco beef perfectly means understanding doneness levels and how to hit them consistently. The beauty of thin-sliced meat is that you don’t need a meat thermometer — you can judge doneness by look and feel.
Medium-rare is the target. This means a warm pink center with a deeply caramelized exterior. Medium-rare keeps the meat juicy while being fully safe to eat. It also stays tender — any more done and thin-sliced beef can become tough.
For thin slices, aim for one to two minutes per side over high heat. The high temperature creates a crust while the thin thickness prevents overcooking the interior. You’re not trying to cook the inside — you’re trying to sear the outside while the inside stays gentle. The residual heat after removal from the pan will bring the internal temperature up slightly.
Resist the temptation to press down. Some cooks press the meat with their spatula, thinking it helps browning. What it actually does is squeeze out the juices, making the final result drier. Let the meat sit undisturbed and let gravity and heat do their job.
Recognize carryover cooking. When you remove the meat from the hot pan, it’s typically at around 120-125°F internally, which looks bright pink. By the time you’ve finished your last batch and transferred everything to a plate, that temperature has risen to about 130-135°F, which is perfect medium-rare. Plan for this carryover heat — don’t cook it longer in the pan trying to get it to the right temperature.
Simple Street Taco Beef Recipe
Yield: Makes approximately 8-10 street tacos (4 servings) | Serves 4
Prep Time: 15 minutes plus 4-6 hours marinating (hands-on prep only)
Cook Time: 10-15 minutes
Total Time: 4-6 hours marinating + 25 minutes active time
Difficulty: Beginner — This recipe requires no special equipment beyond a good knife and a hot skillet, and the steps are straightforward for anyone comfortable with basic cooking.
For the Beef Marinade:
- 1½ to 2 pounds skirt steak or flank steak, left whole at this stage
- ½ cup fresh lime juice (about 4 medium limes)
- 4 cloves garlic, finely minced
- 2 tablespoons soy sauce
- 1½ tablespoons ground cumin
- 1 tablespoon pure chili powder
- 1 teaspoon dried oregano
- 2 tablespoons olive oil or avocado oil
- 1 teaspoon kosher salt
- ½ teaspoon black pepper
For Cooking and Serving:
- 2 tablespoons olive oil or avocado oil (for the skillet)
- 8-12 small corn tortillas (4-inch street taco size)
- ½ large white onion, finely diced
- ½ cup fresh cilantro, roughly chopped
- 1 lime, cut into wedges
- Kosher salt and black pepper to taste
Instructions
Prepare the Marinade and Beef:
-
In a medium bowl, combine the lime juice, minced garlic, soy sauce, cumin, chili powder, oregano, olive oil, salt, and pepper. Whisk together until well combined. Taste the marinade — it should be boldly flavored, herbaceous, with a clear citrus tang and mild heat.
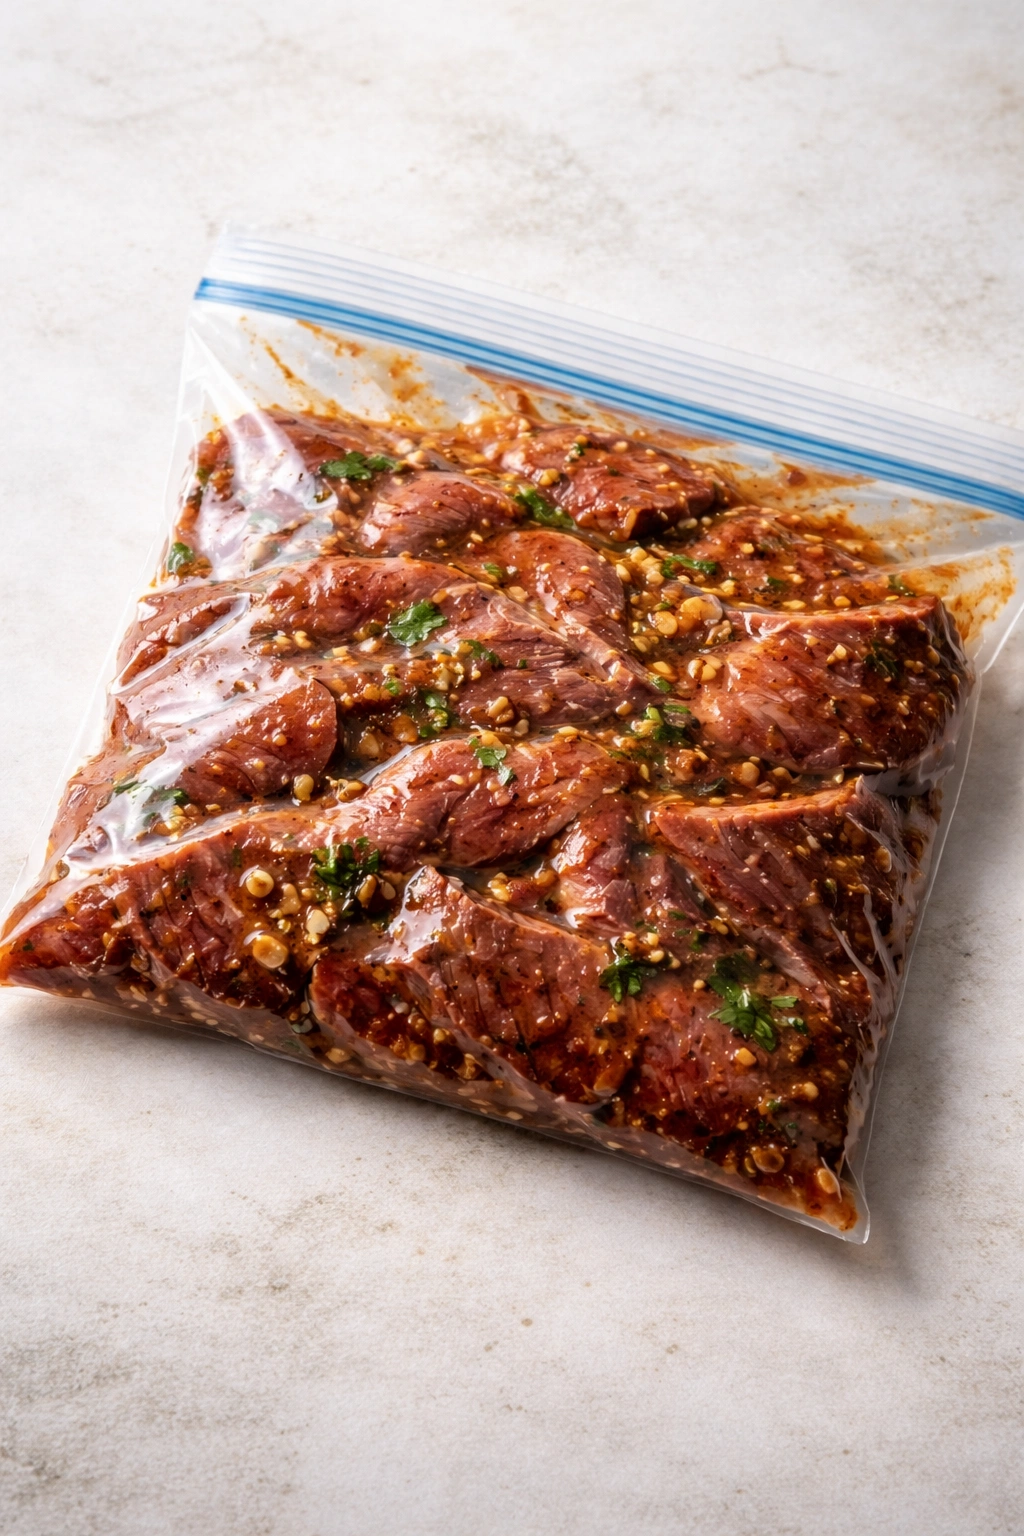
-
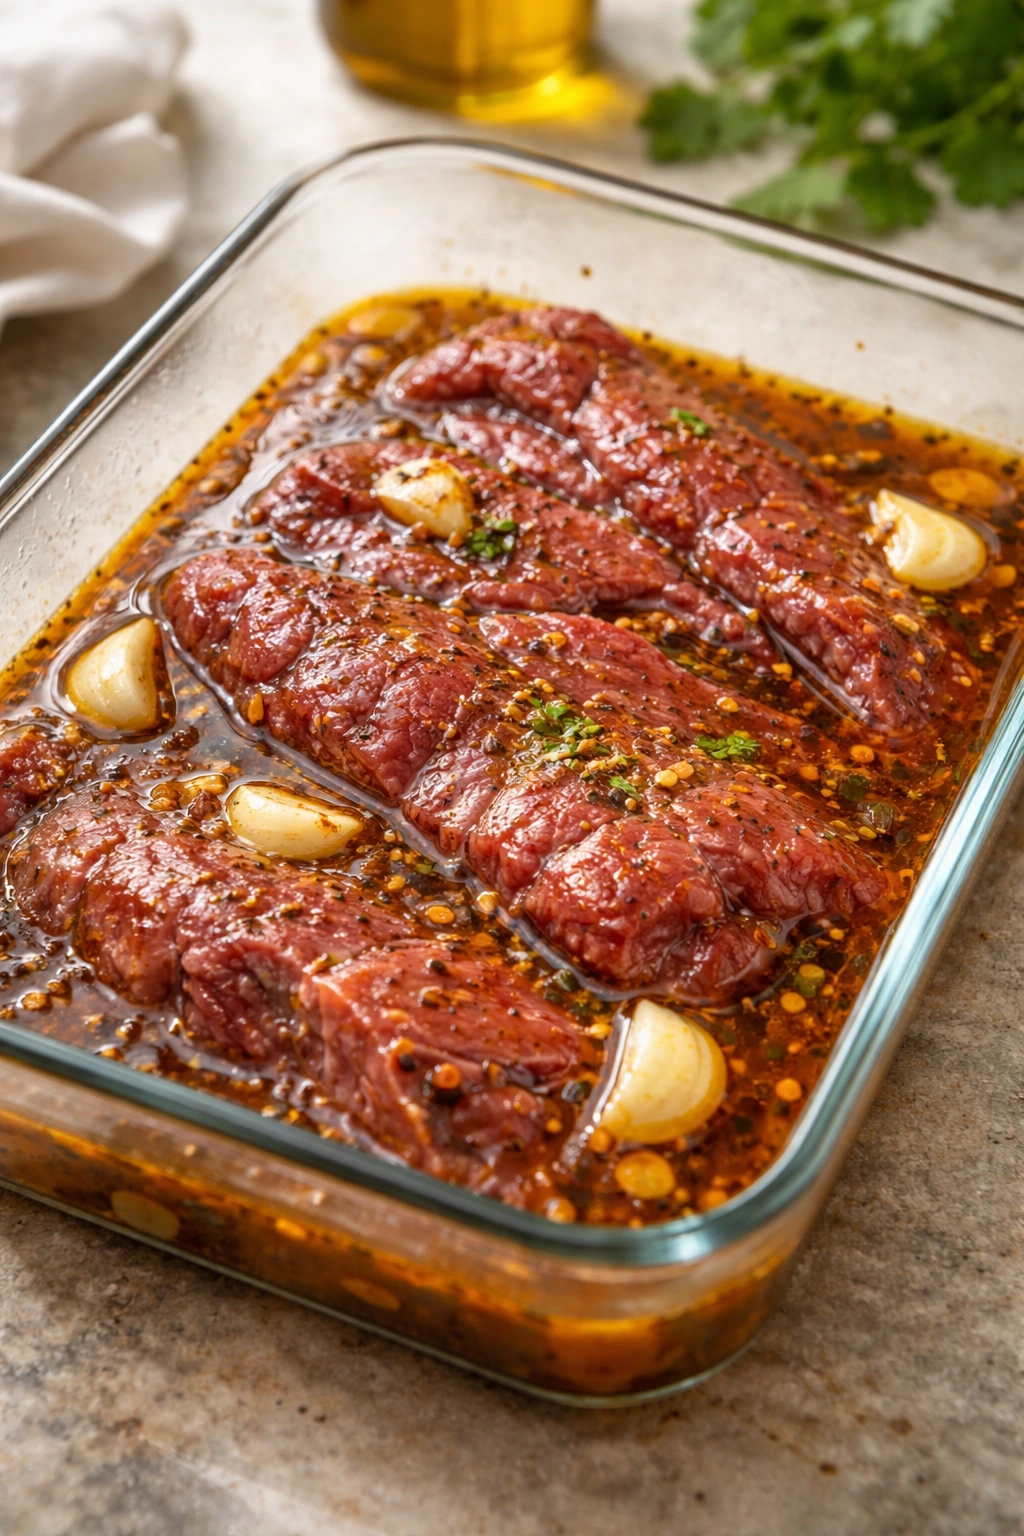
Place the whole skirt or flank steak into a large resealable plastic bag or a flat container with a tight-fitting lid. Pour the entire marinade over the beef, making sure every surface is coated. If using a bag, squeeze out as much air as possible before sealing. If using a container, press plastic wrap directly onto the surface of the meat to prevent it from oxidizing.
-
Refrigerate the beef for at least 4 hours, and ideally overnight (up to 12 hours). The longer it marinates, the more tender and flavorful it becomes. A few times during marinating, flip the bag or rotate the meat to ensure even marination. You’ll notice the meat will look darker and more deeply colored as the marinade penetrates.
Prepare to Cook:
-
Remove the beef from the refrigerator 10-15 minutes before cooking to bring it closer to room temperature. This helps it cook more evenly and reduces the temperature drop when it hits the hot pan.
-
While the beef comes to temperature, place a cast iron skillet (or heavy-bottomed stainless steel pan) over medium-high to high heat. Let it preheat for 3-4 minutes — you want it genuinely hot. You’ll know it’s ready when a bead of water flicked onto the surface evaporates in under a second.
-
Remove the beef from the marinade and pat it completely dry with paper towels. Do not skip this step — moisture prevents browning. Make sure every surface is dry, then transfer to a cutting board.
-
Using a very sharp knife, slice the beef against the grain (perpendicular to the direction the muscle fibers run) into thin strips, approximately ⅛-inch thick. Angle your cuts slightly (about 30 degrees) rather than straight down — this creates more surface area for browning.
Sear the Beef:
-
Once your pan is hot and the beef is prepped and dried, carefully add 1 tablespoon of oil to the hot skillet. Let it heat for about 10 seconds — you should see the oil shimmer and immediately smell its toasted aroma.
-
Working in batches to avoid overcrowding, add beef in a single layer. Don’t stir it — let it sit undisturbed for 1-2 minutes. You’ll hear a satisfying sizzle. This allows the Maillard reaction to create a beautiful caramelized crust on the bottom.
-
Stir the batch, and continue cooking for another 1-2 minutes, stirring occasionally, until the beef is seared on all sides and a deep golden-brown color. The beef should look mostly done but still have some bright pink peeking through — that’s perfect medium-rare. Remember that residual heat will continue cooking it after you remove it from the pan.
-
Transfer the finished batch to a clean plate (not on top of previous batches, as they’ll continue steaming and overcooking). Repeat with remaining beef, adding another tablespoon of oil to the pan for the second batch if needed.
-
Taste and adjust seasoning. Once all the beef has been seared, taste it. Add a pinch more kosher salt, black pepper, or a squeeze of fresh lime juice if you’d like. The beef should taste boldly seasoned and complex — not one-dimensional.
Advertisements
Serve the Tacos:
-
Warm the corn tortillas according to package directions — typically 30 seconds in the microwave wrapped in a damp paper towel, or a few seconds per side in a dry skillet over medium heat. If you have a gas stove, holding the tortillas directly over the flame for a few seconds creates beautiful charred spots and deeper flavor.
-
Keep the warm tortillas in a clean kitchen towel to maintain their warmth.
-
For each taco, layer two small tortillas together (this is called “la copia” and prevents the tortilla from tearing under the weight of the meat). Spoon a generous handful of the hot seared beef into the center.
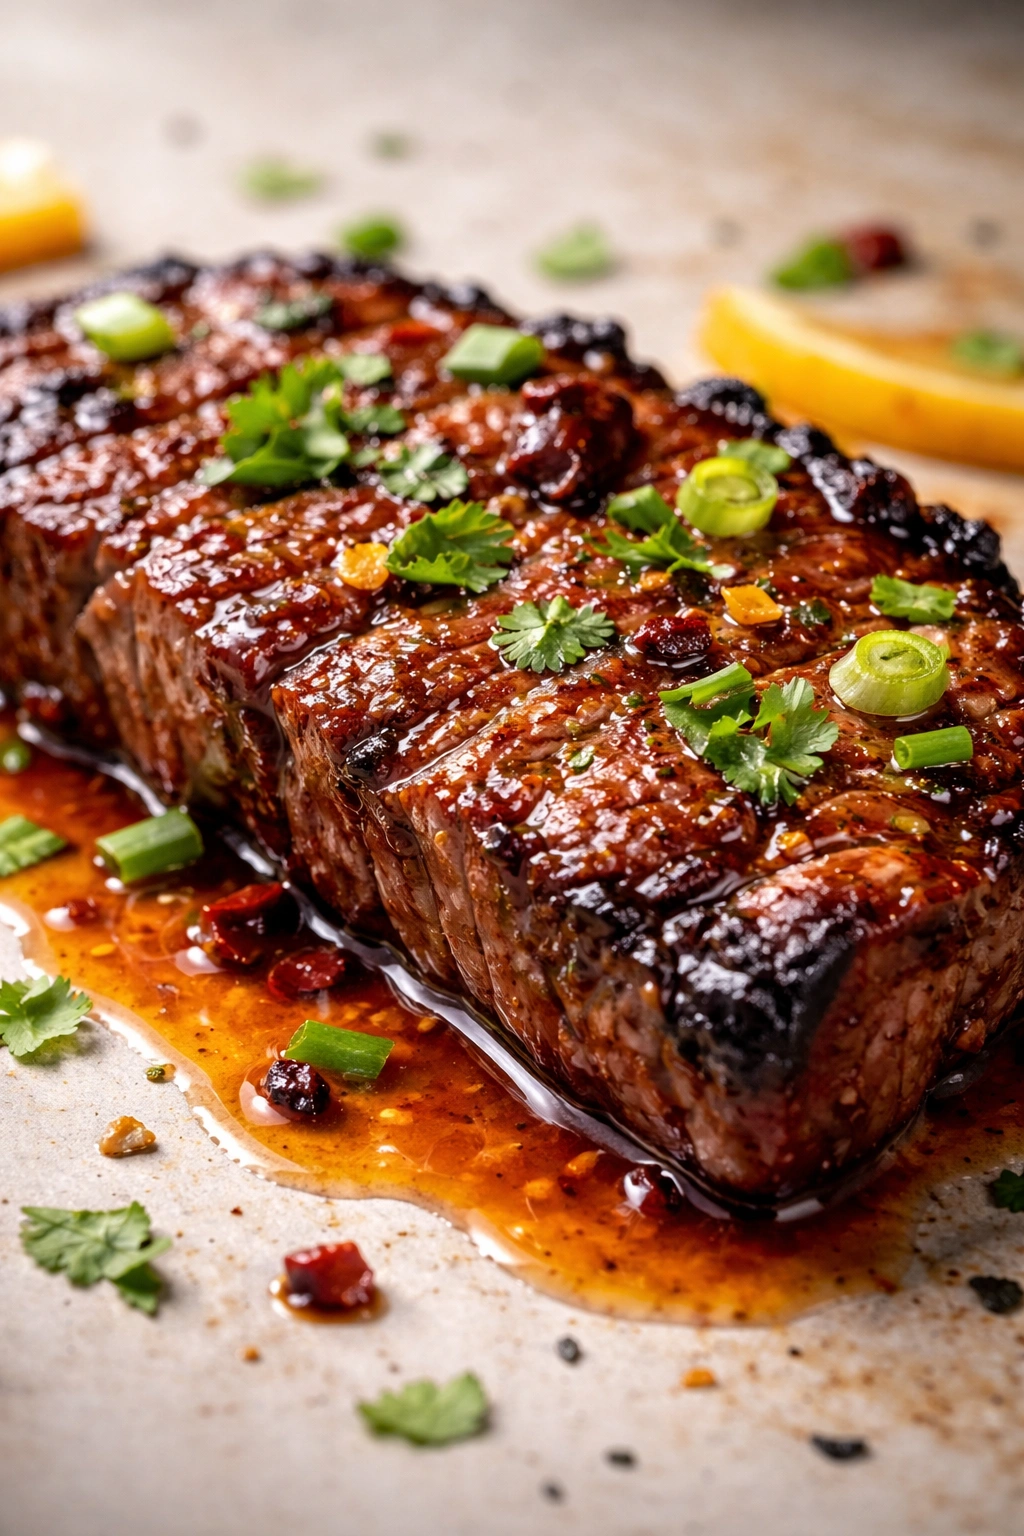
-
Top with diced white onion, fresh cilantro, and a squeeze of lime juice. That’s it — the beef is so flavorful that simple toppings are all it needs. Serve immediately while the beef is still hot.
Tips for Perfect Results Every Time
Fresh lime juice is non-negotiable. Bottled lime juice lacks the complexity and brightness of fresh-squeezed. Cut the limes in half and use a citrus reamer or squeezer — you’ll get more juice with less effort than using a fork.
Your knife matters tremendously. A dull knife will shred the meat instead of slicing it cleanly. Before you start slicing, run your knife through a honing steel or quick sharpener. The difference is immediately obvious when you start cutting.
Don’t let the beef rest too long after cooking. Street taco beef is best served immediately, while the exterior is still crispy and the interior is still warm and juicy. If you need to wait a bit, keep it in a warm spot (like on the turned-off burner of your stove, or in a low oven) rather than letting it cool on a plate.
The white onion is essential, not optional. Red onion is sweeter and less sharp. White onion has a pungent quality that cuts through the richness of the meat and complements the lime perfectly. Dice it finely so it distributes well across the taco.
Cilantro should be generous. Don’t hold back on fresh cilantro — it’s a key component that adds brightness and freshness. If someone at your table doesn’t like cilantro (some people have a genetic variant that makes it taste soapy), set aside their portions before adding it.
Variations and Flavor Twists
Once you’ve mastered the basic method, you can start playing with flavor variations while maintaining the authentic street taco foundation.
Orange juice version: Replace half the lime juice with fresh orange juice. This creates a sweeter, more complex marinade that’s traditional in some regions of Mexico. The combination of citrus creates a more rounded flavor profile.
Chipotle variation: Add one or two canned chipotle peppers in adobo sauce to your marinade, blended smooth or chopped finely. This creates a deeper, smokier beef with mild heat. It’s particularly good if you’re grilling instead of pan-searing.
Green onion addition: Chop green onions finely and add them to the marinade along with the garlic. They add a subtle allium note and pair beautifully with the cilantro in the finished tacos.
Worcestershire option: If you don’t have soy sauce, a tablespoon of Worcestershire sauce creates similar umami depth. It’s not traditionally Mexican, but it works if that’s what you have available.
Cilantro-forward version: Add fresh cilantro directly to the marinade (roughly a quarter cup, chopped). This infuses the beef with cilantro flavor from the inside, intensifying that herbal brightness.
Storage and Make-Ahead Options
The marinade and raw beef can be prepared up to 24 hours in advance. Prepare your marinade, combine with the beef, and refrigerate. This actually improves results — the longer marination time makes the beef more tender and flavorful. Just remove it from the fridge 10-15 minutes before cooking to bring it closer to room temperature.
Cooked beef lasts about 3-4 days in the refrigerator when stored in an airtight container. You can reheat it gently in a warm skillet over low heat, stirring occasionally, until it’s heated through. Add a squeeze of fresh lime juice when reheating to brighten the flavor.
Cooked beef freezes well for up to 2-3 months if you exclude it from the tomatoes and other fresh components. Let it cool completely, then transfer to a freezer-safe container or freezer bag, pressing out as much air as possible. Label it with the date. Thaw overnight in the refrigerator and reheat gently before serving.
You can also freeze the raw marinated beef for up to one month. This is great for meal planning — make the marinade and combine it with beef, freeze it all together, then thaw overnight in the fridge when you’re ready to cook. The marination continues during the freezing and thawing process, which some cooks find actually improves the final tenderness.
Serving Your Street Taco Beef

The beauty of street taco beef is its versatility. Beyond the obvious taco application, here are other delicious ways to use it:
Taco salad: Pile the warm beef over crispy greens with cotija cheese, avocado, and a lime-cilantro dressing for a hearty salad. The beef’s warmth wilts the greens slightly and creates wonderful textural contrast.
Nachos: Layer tortilla chips with the beef, melted cheese, jalapeños, sour cream, and salsa for a crowd-pleasing appetizer or casual dinner.
Tacos with pickled red onions: For extra complexity, quickly pickle thin slices of red onion in red wine vinegar and a bit of salt. The sharp, tangy pickled onions add a sophisticated layer that complements the rich beef beautifully.
Burrito filling: Roll the beef with rice, beans, cheese, and toppings into a flour tortilla for a heartier version of street food.
Taco bowl: Spoon the beef over rice and beans, then top with all your favorite taco toppings (cheese, lettuce, tomato, avocado, sour cream, salsa). It’s a deconstructed taco with all the same flavors and more vegetables.
Quesadillas: Place beef and cheese between flour tortillas, pan-fry until the tortillas are golden and the cheese melts, then slice into wedges and serve with sour cream and salsa.
The beef pairs beautifully with Mexican rice on the side, a simple black bean and corn salad, fresh pico de gallo, sliced radishes, or a cooling avocado salad with lime dressing. Keep it simple — the beef is flavorful enough that it doesn’t need elaborate sides.
Final Thoughts
Street taco beef that tastes like the real thing isn’t about secret ingredients or advanced cooking techniques. It’s about respecting a few fundamental principles: selecting the right cut of meat, building a flavorful marinade with acid to tenderize, creating a beautiful crust through high-heat searing, slicing against the grain for tenderness, and serving immediately with minimal, bright toppings.
The investment is mostly time — four to six hours of marinating that happens in your refrigerator while you live your life. The actual cooking takes ten to fifteen minutes. For this small commitment, you’ll have beef that rivals what you’d get from a food truck, and you’ll understand exactly why each step matters. Once you’ve made this beef a few times, it becomes second nature, and you’ll find yourself making it far more often than you’d originally planned. That’s the real mark of a recipe worth mastering.