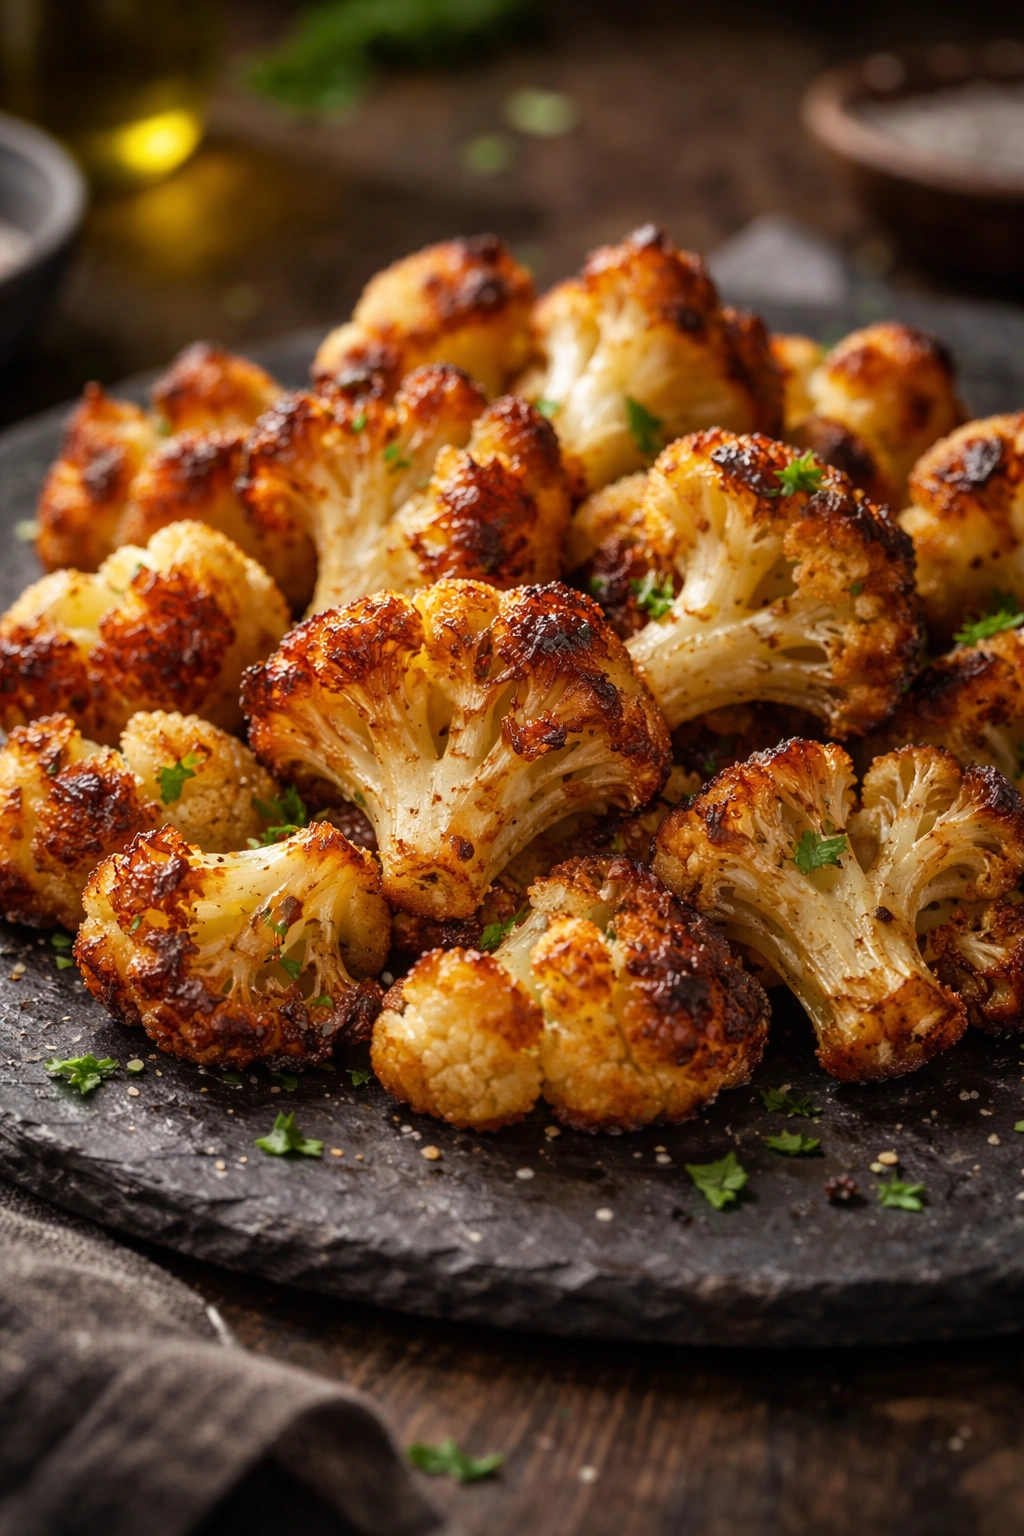
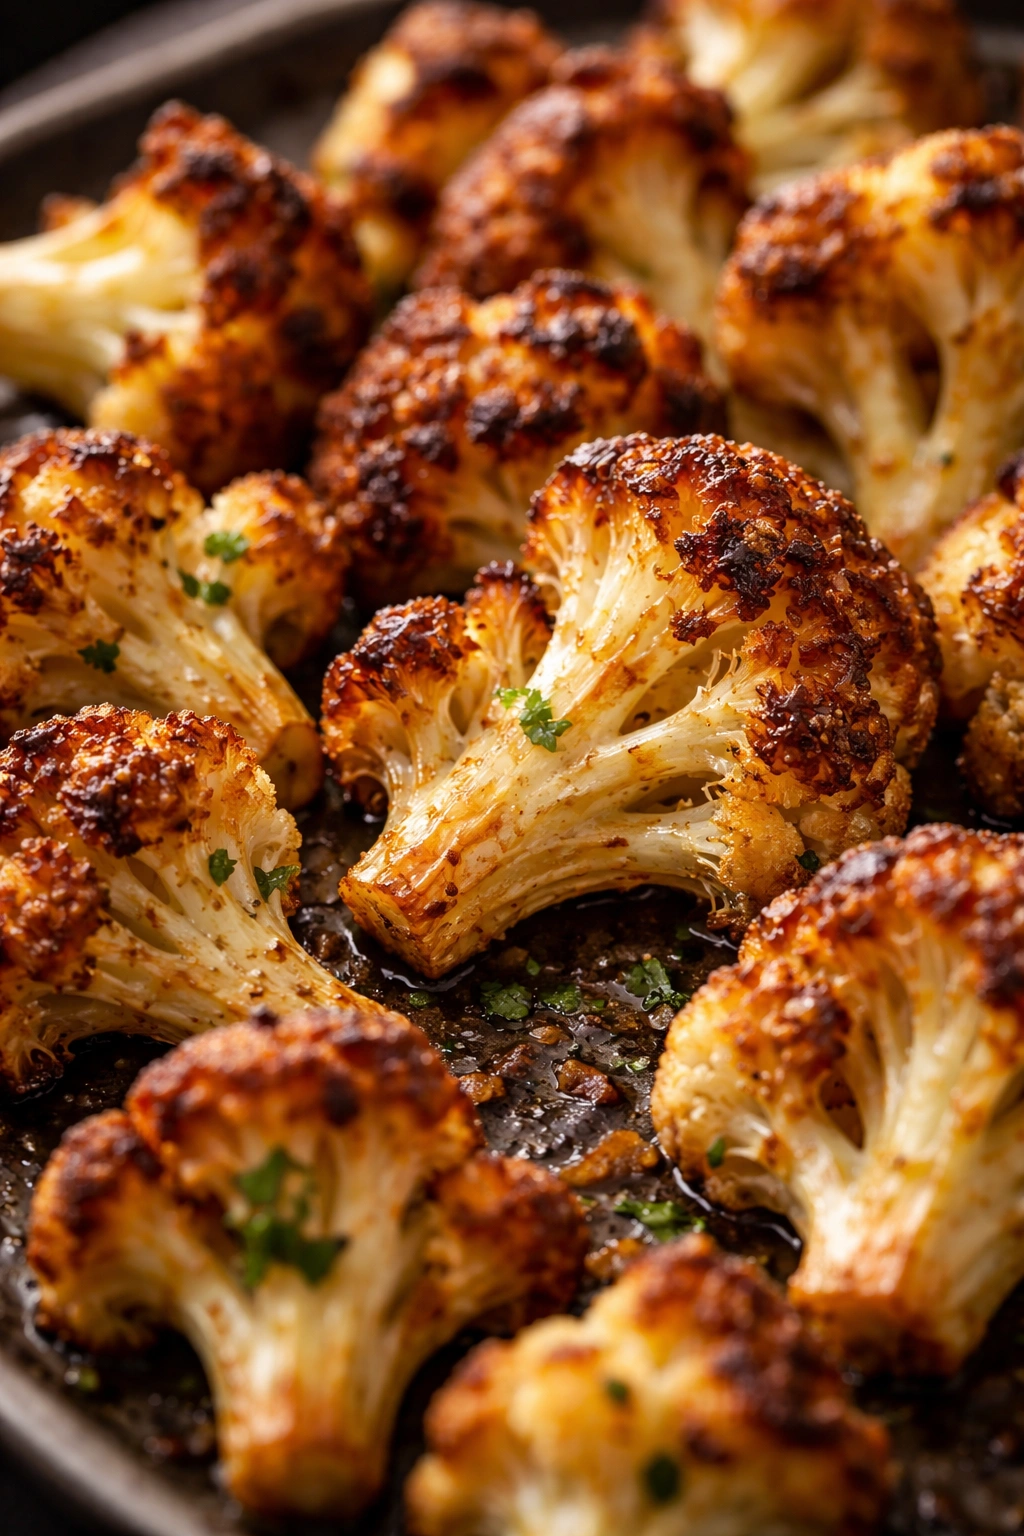
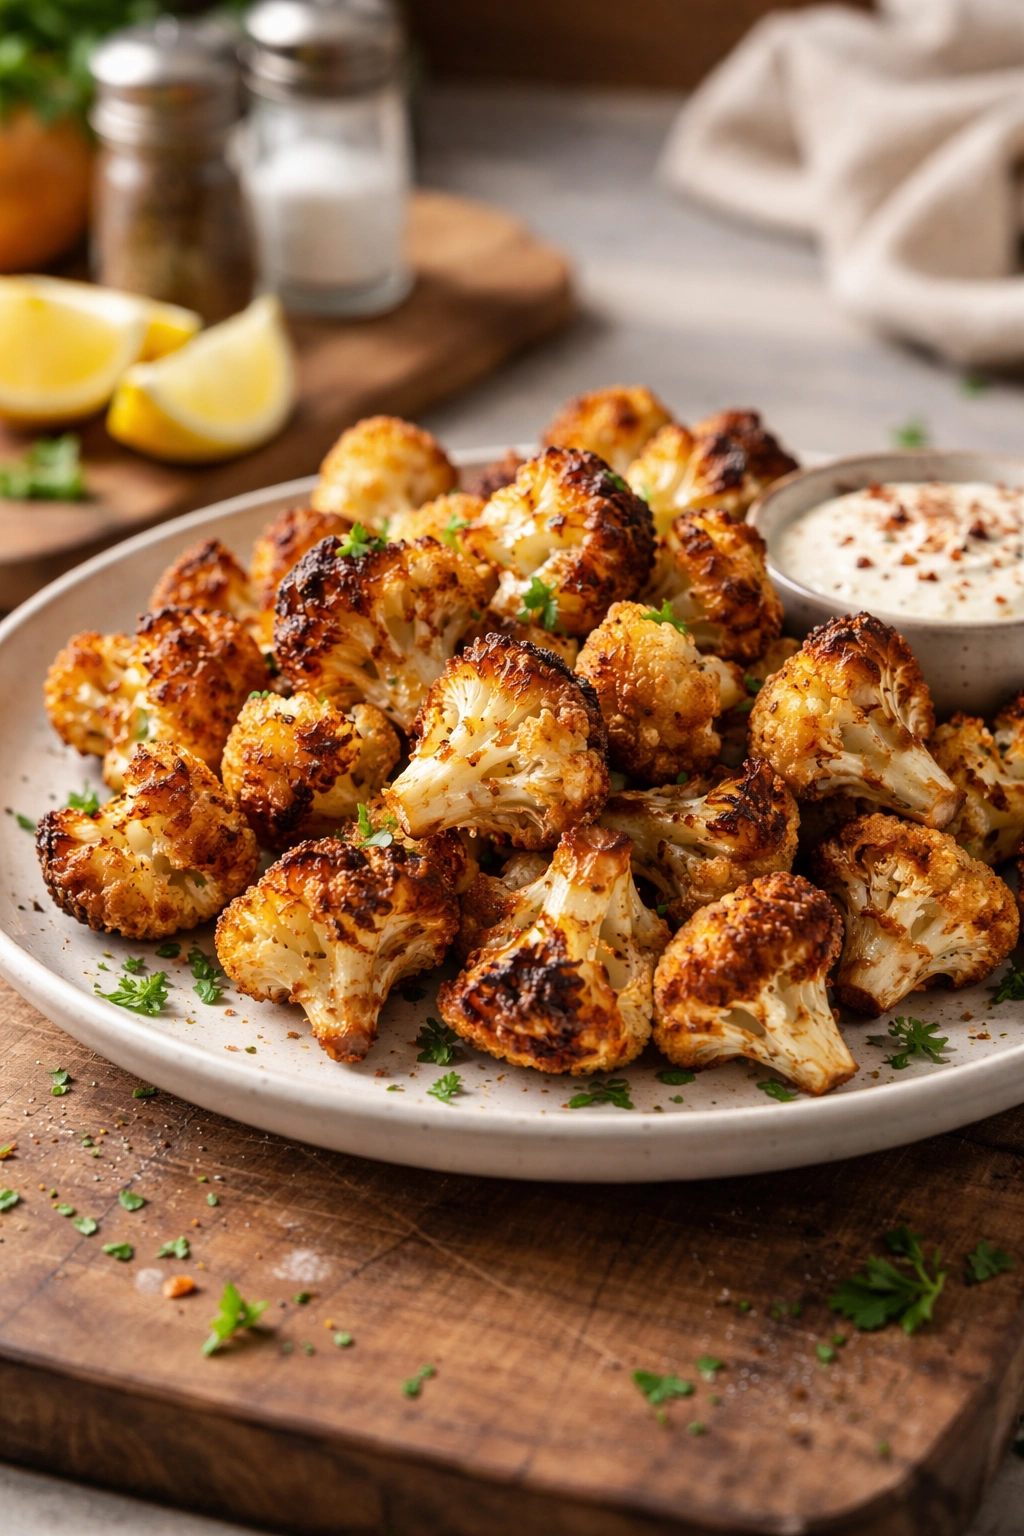
Cauliflower gets a bad reputation—something parents use to trick kids, something you eat because you’re supposed to. But there’s a reason roasted cauliflower became one of the most craveable vegetables at restaurants everywhere: when it’s cooked right, it transforms into something completely different. The florets develop caramelized, golden-brown edges that shatter between your teeth. The insides turn creamy and tender. The flavor becomes almost nutty and sweet, nothing like the bitter boiled cauliflower most people remember from childhood.
These crispy cauliflower bites take that concept and make it even more addictive. We’re talking about medium-sized florets that get a light, crunchy coating—sometimes it’s just olive oil and seasoning, sometimes it’s a quick dip in a light batter. They get roasted hard and fast at high heat until the outside is deeply golden and the edges are genuinely crispy, like the best parts of a roasted vegetable amplified. A single bite shatters in your mouth, gives you that satisfying crunch, then melts into tender cauliflower underneath. They’re the kind of snack you make for guests and have to hide a second batch for yourself.
What makes them work is simplicity combined with technique. You don’t need exotic ingredients or complicated steps. You need good cauliflower, decent olive oil, high heat, and the willingness to actually let them roast until they’re brown—not just heated through, but genuinely caramelized. That’s the difference between a mediocre roasted vegetable and one you’ll eat straight from the pan.
What Makes These Cauliflower Bites Impossible to Stop Eating
The appeal of crispy cauliflower bites goes beyond just flavor. It’s about texture contrast and the way they hit different expectations. Your brain expects a vegetable to be soft, maybe a little watery. Instead, you get crunch. You expect something virtuous and slightly boring. Instead, you get something savory and deeply satisfying.
The science is real, too. When cauliflower roasts at high temperature—we’re talking 425°F and above—the outer surfaces develop a Maillard reaction. That’s the chemical process that creates the complex, savory flavors you get when you brown meat or toast bread. The vegetable’s natural sugars caramelize. The whole thing becomes exponentially more flavorful than steamed or boiled cauliflower would ever be.
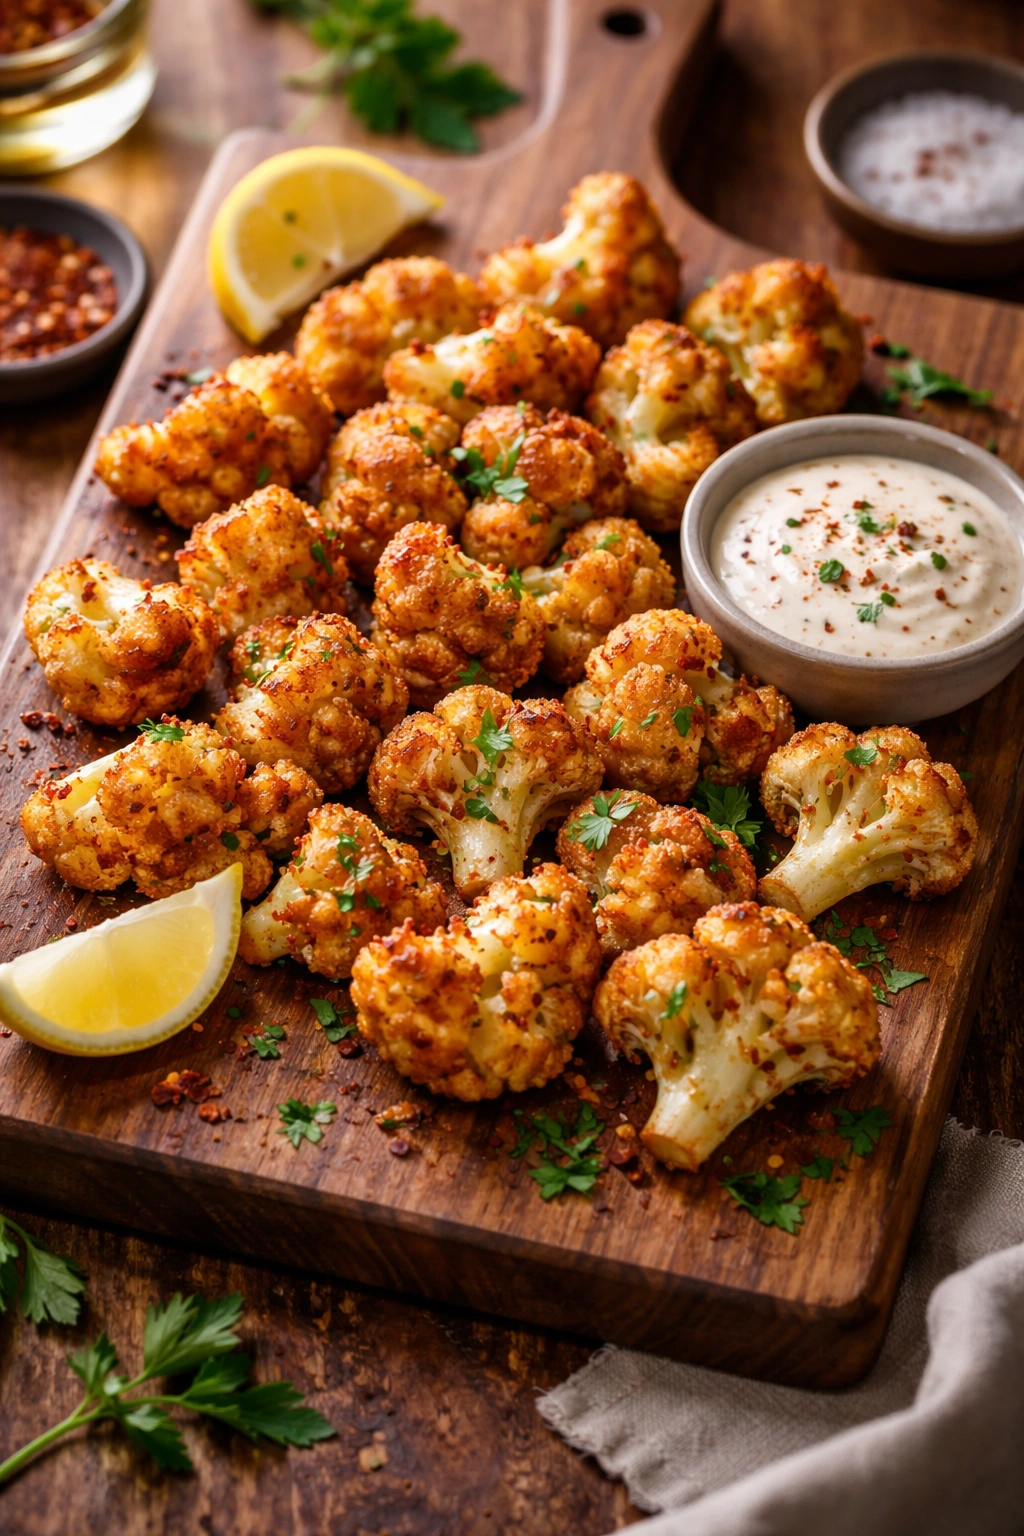
They’re also remarkably versatile. Serve them as a party appetizer with dipping sauces. Pack them cold in lunch boxes for afternoon snacks. Use them as a side dish next to roasted chicken or fish. Toss them into salads. Build a bowl around them with grains and greens. The same basic recipe becomes a completely different dish depending on what you pair it with and how you season it.
Another huge advantage: they’re genuinely quick to make. From raw cauliflower to table takes about 30 minutes total if you move efficiently. You’re not babysitting anything. You chop the cauliflower, toss it with oil and seasonings, spread it on a sheet pan, and let the oven do the work. It’s the kind of recipe that looks more impressive than it actually is.
Serving and Timing Block
Yield: Serves 4 as an appetizer | Makes about 32-36 bites
Prep Time: 10 minutes
Cook Time: 20-25 minutes
Total Time: 30-35 minutes
Difficulty: Beginner — The steps are straightforward, minimal knife work is required, and the only active technique is tossing the cauliflower with oil and seasonings. Even a first-time cook will have success.
Best Served: Immediately while still warm and crispy from the oven, or at room temperature within a couple of hours of roasting.
Ingredients for Perfectly Crispy Cauliflower Bites
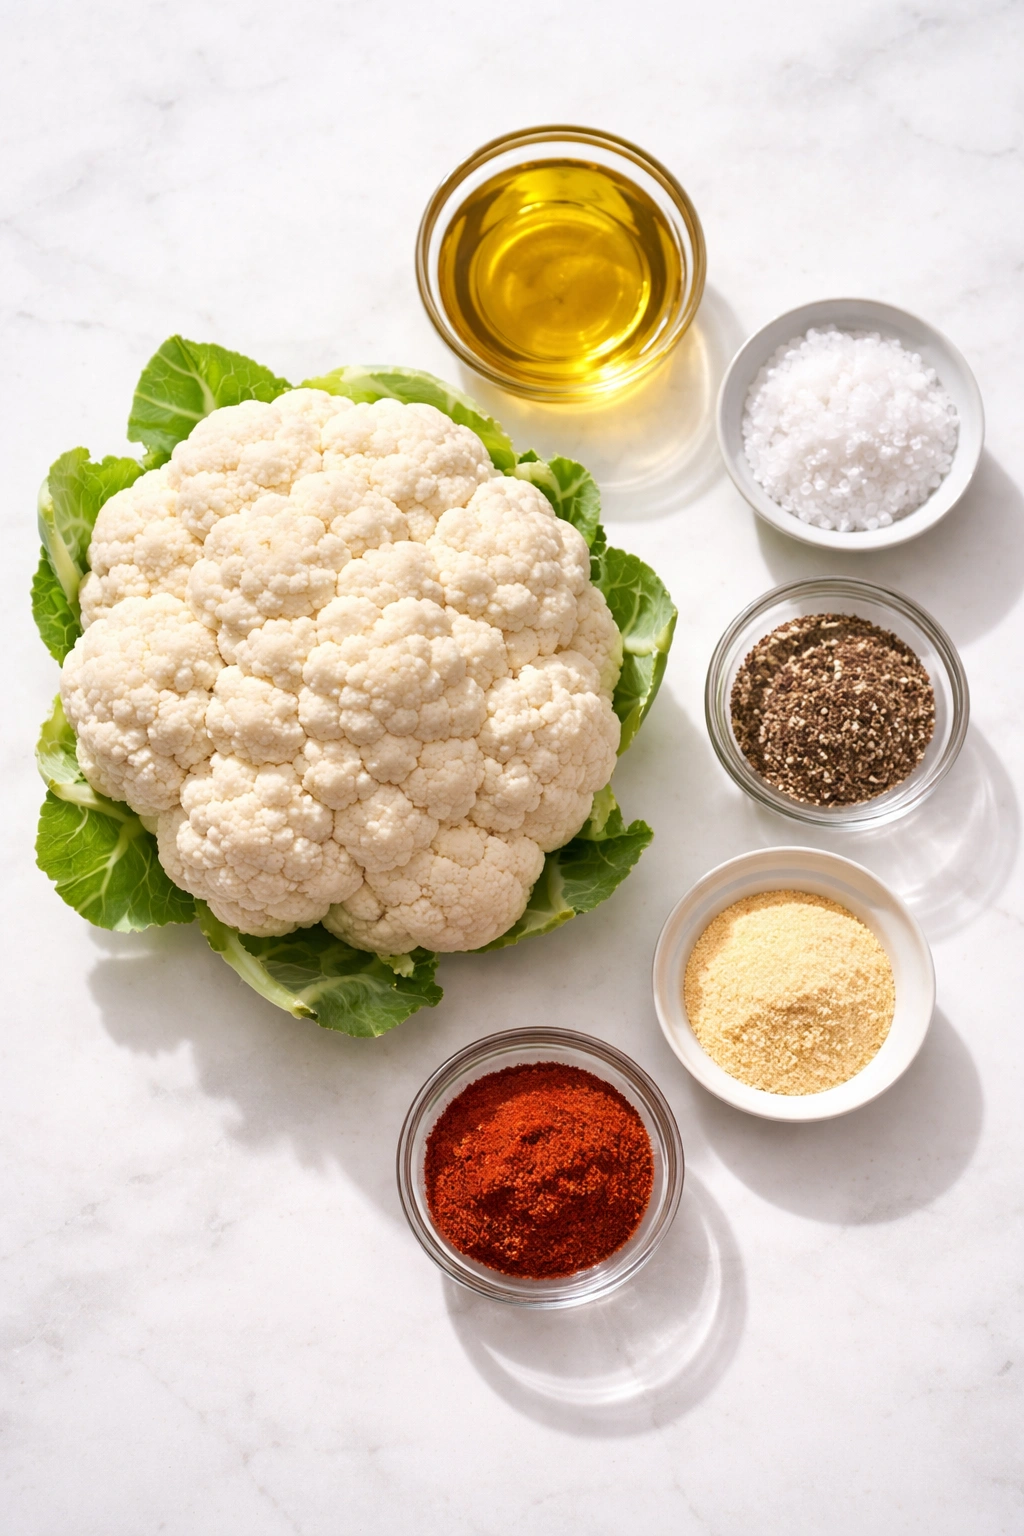
For the Cauliflower Base:
- 1 large head cauliflower (about 1.5 pounds), cut into bite-sized florets
- 3 tablespoons extra-virgin olive oil
- 1 teaspoon fine sea salt
- ½ teaspoon freshly ground black pepper
- ½ teaspoon garlic powder
- ¼ teaspoon smoked paprika (optional but recommended)
Optional: For a Crispy Battered Version:
- ½ cup all-purpose flour (or cornstarch for extra crispness, or use a gluten-free blend)
- ¼ cup grated Parmesan cheese
- ½ teaspoon garlic powder
- ½ teaspoon onion powder
- ¼ teaspoon cayenne pepper (optional)
- Pinch of fine sea salt
- 2 tablespoons water, mixed with 1 tablespoon cornstarch to create a thin slurry
For Serving (Choose Your Own Sauce):
- Buffalo sauce, ranch dip, sriracha mayo, garlic aioli, tzatziki, or your sauce of choice
Instructions for Crispy Cauliflower Bites
Prepare and Preheat:
-
Preheat your oven to 425°F (220°C) and position the rack in the center.
-
Line a large baking sheet (or two medium sheets) with parchment paper or aluminum foil — this prevents sticking and makes cleanup effortless. If you have a wire cooling rack that fits inside your baking sheet, place it on top of the parchment. This is optional but clever: it allows hot air to circulate underneath the cauliflower, making the bottoms even crispier while you roast.
-
Cut your cauliflower head into florets that are roughly 1.5 to 2 inches in size — they should be bite-sized, not huge chunks, but substantial enough that they don’t cook through before the outside browns. Smaller florets will crisp faster but may dry out inside; larger florets stay juicier but take longer to brown. This size is the sweet spot. Trim the stem ends so each floret sits flat, which helps with even browning.
Advertisements
Basic Method (No Batter — Recommended for Your First Batch):
-
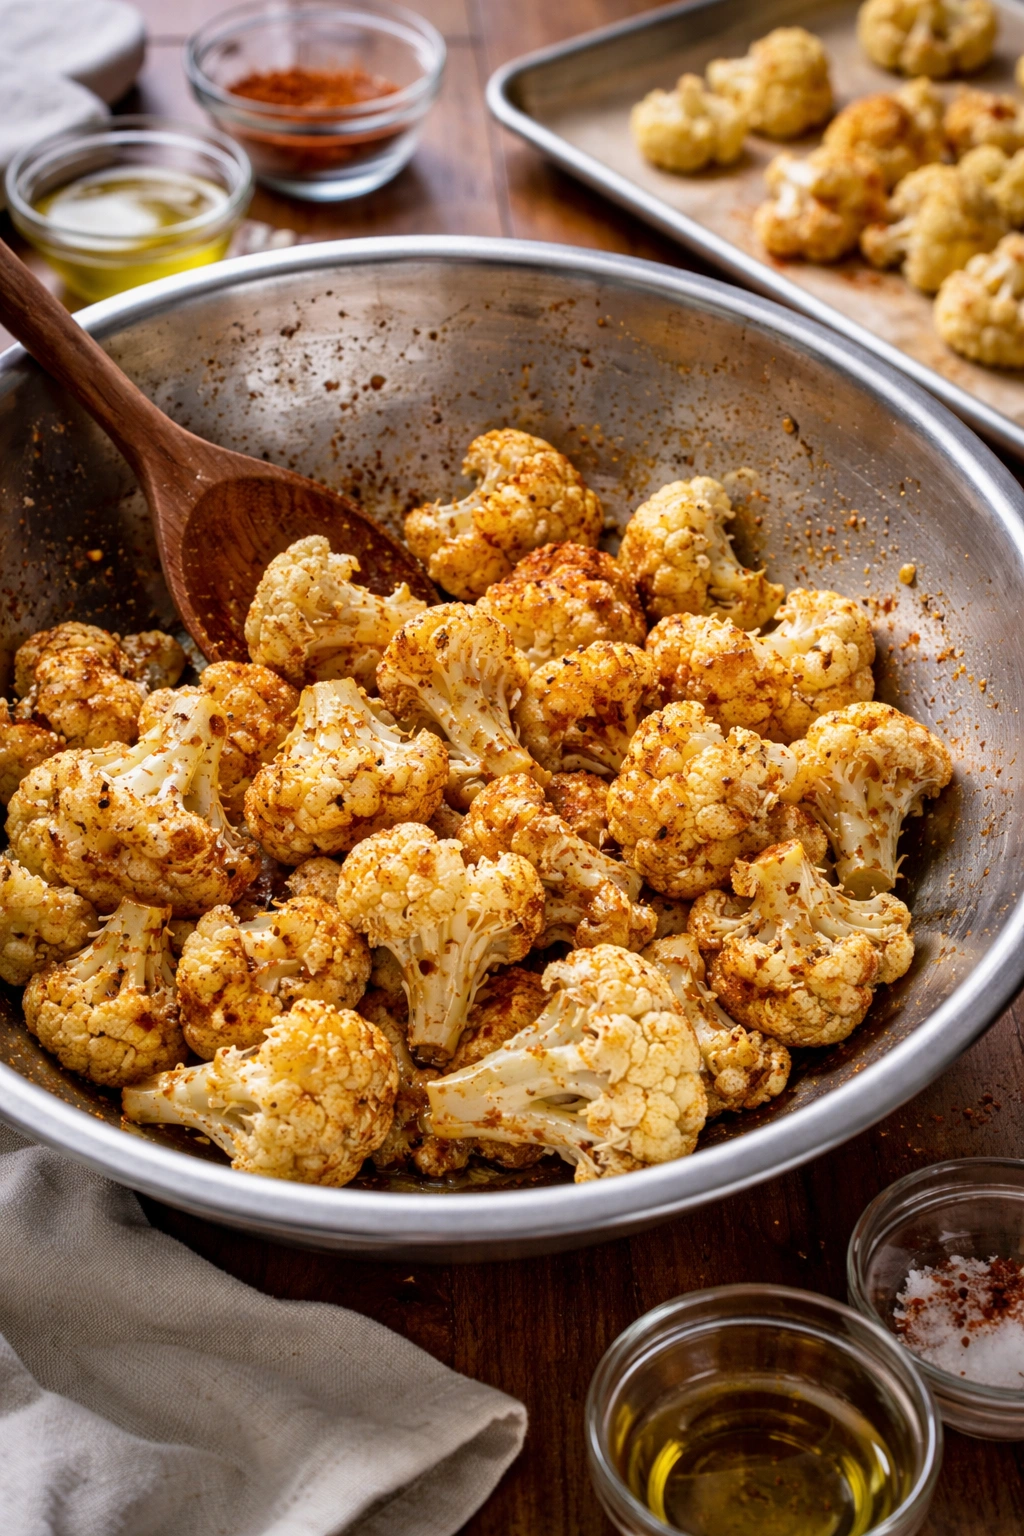
Place all your trimmed cauliflower florets in a large mixing bowl.
-
Drizzle the olive oil over the cauliflower and sprinkle the salt, black pepper, garlic powder, and smoked paprika over the top.
-
Toss everything together with your hands or two spoons until every floret is evenly coated with oil and the seasonings are distributed throughout. This takes about 30 seconds to 1 minute. Take a moment and actually look at each floret — you want them all coated with a visible thin film of oil. This is what creates the crispiness, so don’t skimp. If your cauliflower looks dry, add another half tablespoon of olive oil and toss again.
-
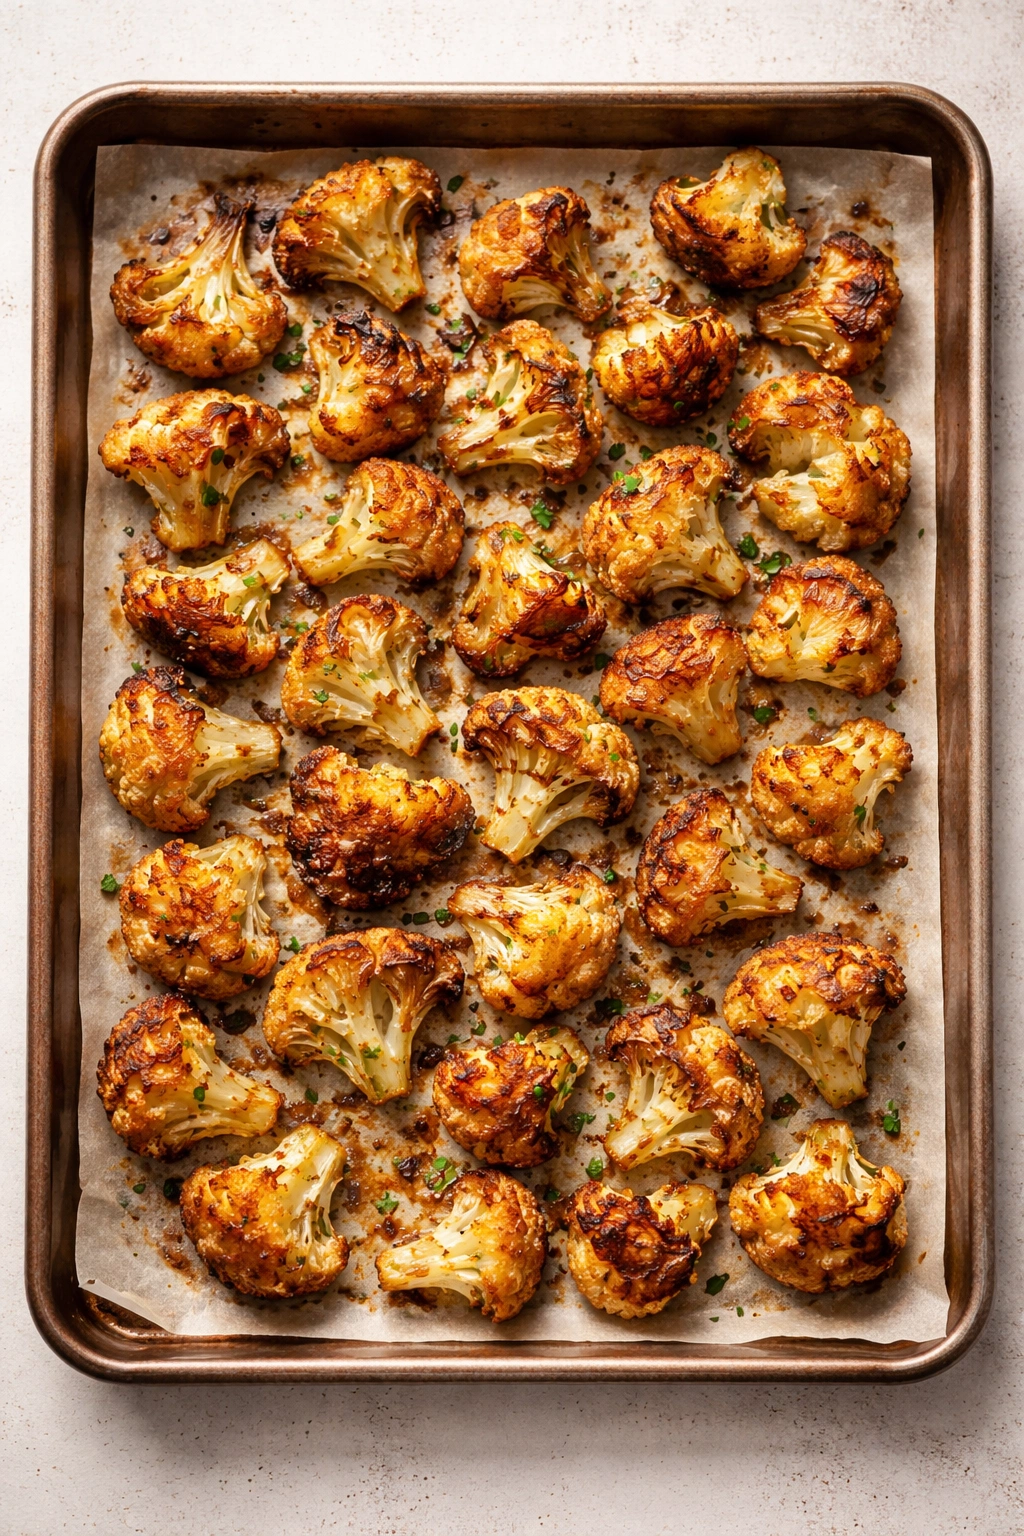
Spread the seasoned florets in a single layer on your prepared baking sheet. They should be close but not touching — a little crowding is fine, but they need space for steam to escape. If your sheet is too crowded, use two baking sheets and rotate them halfway through cooking.
-
Roast for 20 to 25 minutes, shaking the pan halfway through (at about the 12-minute mark). Don’t skip this step. Shaking the pan ensures all sides get exposed to the hot air and brown evenly. Shake firmly so the florets tumble around and rearrange themselves.
-
The cauliflower is done when the outermost edges are deeply browned—I’m talking golden to light caramel color, not pale tan. The tips of the florets should feel crispy when you touch one. Underneath that crispy exterior, the cauliflower should be completely tender when pierced with a fork. If your cauliflower isn’t brown enough, it won’t be crispy — keep it in for a few more minutes. The oven temperature varies, so trust your eyes, not a timer.
-
Remove from the oven and transfer to a serving platter. Do not store directly in a covered container while still hot — the steam will soften the crust. Let cool for 2 to 3 minutes if serving warm, or cool to room temperature before storing.
Optional: Crispy Battered Version:
-
If you’d like an extra-crunchy, more heavily coated version, you can add a light batter. In a separate small bowl, whisk together the flour (or cornstarch), Parmesan, garlic powder, onion powder, cayenne if using, and salt.
Advertisements -
In another small bowl, mix the water and cornstarch together to create a thin slurry — this should look like milk, not a paste.
-
Toss your raw cauliflower florets with 2 tablespoons of olive oil first. Then pour the cornstarch slurry over them and toss to coat lightly.
-
Sprinkle the flour mixture over the wet florets and toss until all pieces are evenly coated. The flour should stick to the wet surface and create a light, craggy coating. If it looks too dry and isn’t sticking, add 1 more tablespoon of water to the slurry.
-
Spread the battered florets on your prepared baking sheet and follow the same roasting instructions (425°F for 20-25 minutes, shaking halfway). The battered version may take 1-2 minutes longer to brown fully.
Secrets to Getting Them Perfectly Crispy Every Single Time
The biggest mistake people make with roasted vegetables is being afraid of the brown. There’s a psychological barrier — we’re trained to think brown means burnt. But with cauliflower, brown is your friend. The deeper the color, the more caramelization has happened, and the crispier and more flavorful the florets will be. You want them to look almost too dark. That deep golden-brown color is the signal that the Maillard reaction is complete and you’ve got texture.
The second secret is surface area. This is why you need to cut your florets into medium pieces, not large chunks and not tiny pieces. Larger pieces won’t brown on the outside before the inside dries out. Tiny pieces will turn to almost-chips and lose all juiciness. Medium-sized florets—roughly 1.5 to 2 inches—give you the ideal ratio of crispy exterior to tender interior.
Oil is critical. Don’t assume a light coating is enough. You need a visible film of oil on every piece. Olive oil has a relatively low smoke point, so if you’re worried about burning it at 425°F, use avocado oil instead—it can handle higher heat. Or use refined olive oil rather than extra-virgin. The oil is what creates the crust through the Maillard reaction, so you can’t cut corners here. Aim for about 3 tablespoons per head of cauliflower.
Temperature matters too. Home ovens vary, but 425°F is the minimum threshold where you’ll get real browning in a reasonable timeframe. If your oven runs cool, bump it up to 450°F. If it runs hot, you might need to watch more carefully and possibly rotate your pans. Most importantly, preheat fully. An oven that isn’t at temperature will cook your cauliflower through before it browns, leaving you with soft, pale florets instead of crispy, golden ones.
The shake at the halfway point is non-negotiable. It takes five seconds and completely changes the outcome. This ensures the florets that were on the bottom get exposed to the hot air circulation and brown all over.
One more pro move: arrange your florets so their flat sides (where they were cut from the head) sit down on the pan. This flat surface makes direct contact with the hot sheet pan, which creates intense heat and browning on that side. It’s a subtle detail, but it genuinely contributes to crispiness.
Common Mistakes and How to Avoid Them
Dense, soft cauliflower instead of crispy bites almost always comes down to one of three things: not enough oil, not hot enough oven, or not enough roasting time. If you’ve made a batch and they came out tender rather than crunchy, go back to these three variables first. Add more oil next time. Increase oven temperature by 25°F. Give them five extra minutes in the oven. Start with one variable and see which one was the culprit.
Unevenly cooked florets—some brown and crispy, some pale and soft—usually means the florets weren’t all the same size, or they weren’t spread in a single layer with adequate space. Spend the extra 30 seconds cutting consistently-sized pieces. Don’t crowd the pan. Use two pans if necessary rather than piling everything on one sheet.
Soggy bottoms are caused by moisture trapped underneath. If you don’t have a cooling rack, make sure you’re checking the underside occasionally and giving the pan a good shake or flip to break up any direct contact with steam. The parchment helps, but it’s not foolproof.
Overseasoning happens easily because the seasonings taste stronger raw than they will on the cooked, crispy florets. Start with the amount suggested here and taste one floret before deciding you need more salt next time. You can always add more seasoning, but you can’t remove it.
Flavor Variations You Can Try
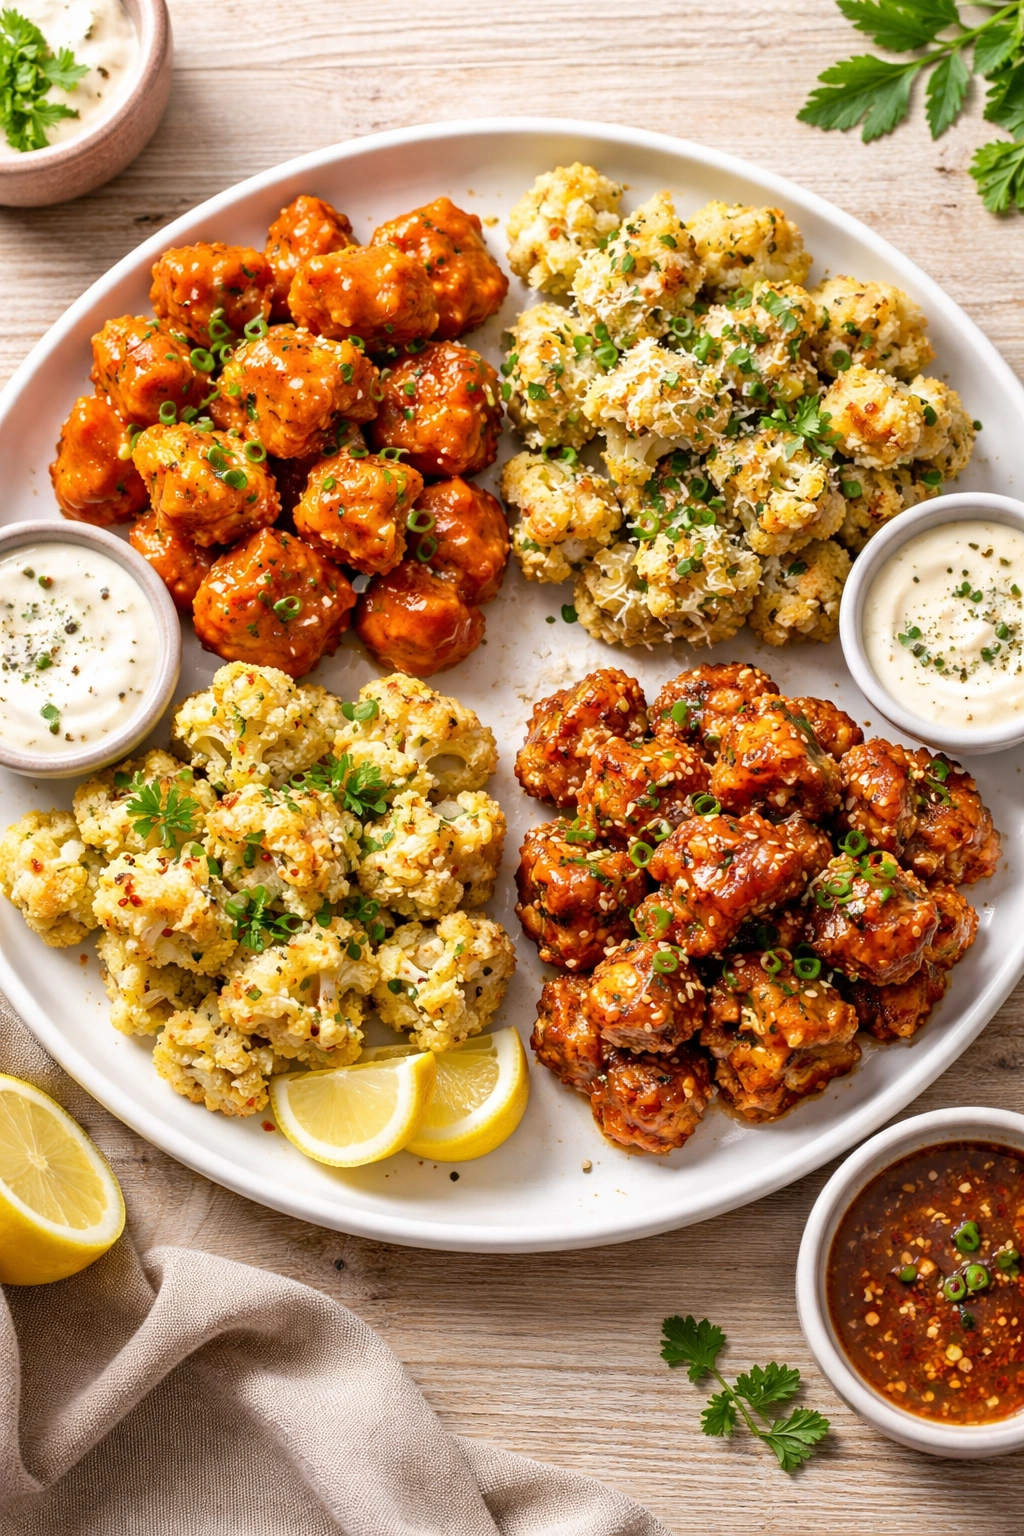
Once you’ve mastered the basic version, these bites are your canvas. The same roasting technique works with wildly different flavor profiles.
Buffalo style is probably the most popular variation. After roasting, immediately toss the hot cauliflower with buffalo sauce and a tablespoon of melted butter. The heat brings out the sauce’s flavors. Serve with blue cheese dressing. This transforms them into something that tastes genuinely indulgent.
Parmesan and herb involves tossing the roasted florets with melted butter, fresh or dried Italian herbs, minced garlic, and grated Parmesan cheese while they’re still warm. The butter and cheese coat everything and add richness. It’s less spicy, more elegant—great for a side dish with roasted chicken.
Lemon and garlic uses the basic roasted florets tossed with freshly grated lemon zest, minced raw garlic, fresh parsley, and a drizzle of really good olive oil after roasting. This version feels fresh and bright. It works beautifully as a side to fish.
Spicy honey glaze is sweet and spicy at once. Whisk together hot honey, a pinch of cayenne, and a splash of soy sauce, then toss it with the warm roasted cauliflower. It’s addictive and feels restaurant-quality.
Everything bagel seasoning has become more available in recent years and works perfectly here. Toss the roasted cauliflower with a little mayo or olive oil, then dust generously with everything bagel seasoning. You get sesame seeds, poppyseeds, dried garlic, and salt all at once.
Curry spiced uses curry powder or garam masala mixed into the oil before roasting, optionally with a pinch of cumin. Serve with a yogurt-based dipping sauce. It becomes something that tastes more sophisticated than basic roasted vegetables.
Truffle and Parmesan feels extravagant but uses the same technique. Use truffle oil instead of regular olive oil (use less since truffle oil is more intense), roast as usual, then finish with shaved Parmesan and a grind of black pepper. It’s perfect for impressing people.
Dietary Adaptations and Substitutions
These cauliflower bites are naturally gluten-free if you make them without the batter. If you do want a battered version and need it gluten-free, use a gluten-free all-purpose flour blend or buckwheat flour (which is naturally gluten-free despite the name) in place of regular flour. The results are just as crispy.
For a vegan version, skip the Parmesan and use nutritional yeast instead, which adds a savory, cheesy flavor without any animal products. Use olive oil instead of butter if you’re doing any post-roasting tossing. All the sauce options work too—just make sure your chosen dipping sauce is vegan if you want the whole thing to be plant-based.
Dairy-free works the same way. Most of the flavorings don’t rely on dairy at all. The one exception is if you want to toss them with Parmesan afterward—substitute with nutritional yeast or just skip that step and let the roasting and seasonings do all the work. They’re delicious either way.
For a lower-fat version, use half the oil. The florets won’t be quite as crispy, but they’ll still brown if your oven temperature is right. You could also try using a cooking spray in place of oil, though you’ll lose some of the flavor. I don’t recommend it—the oil is really what makes them special.
How to Store and Reheat Your Leftovers
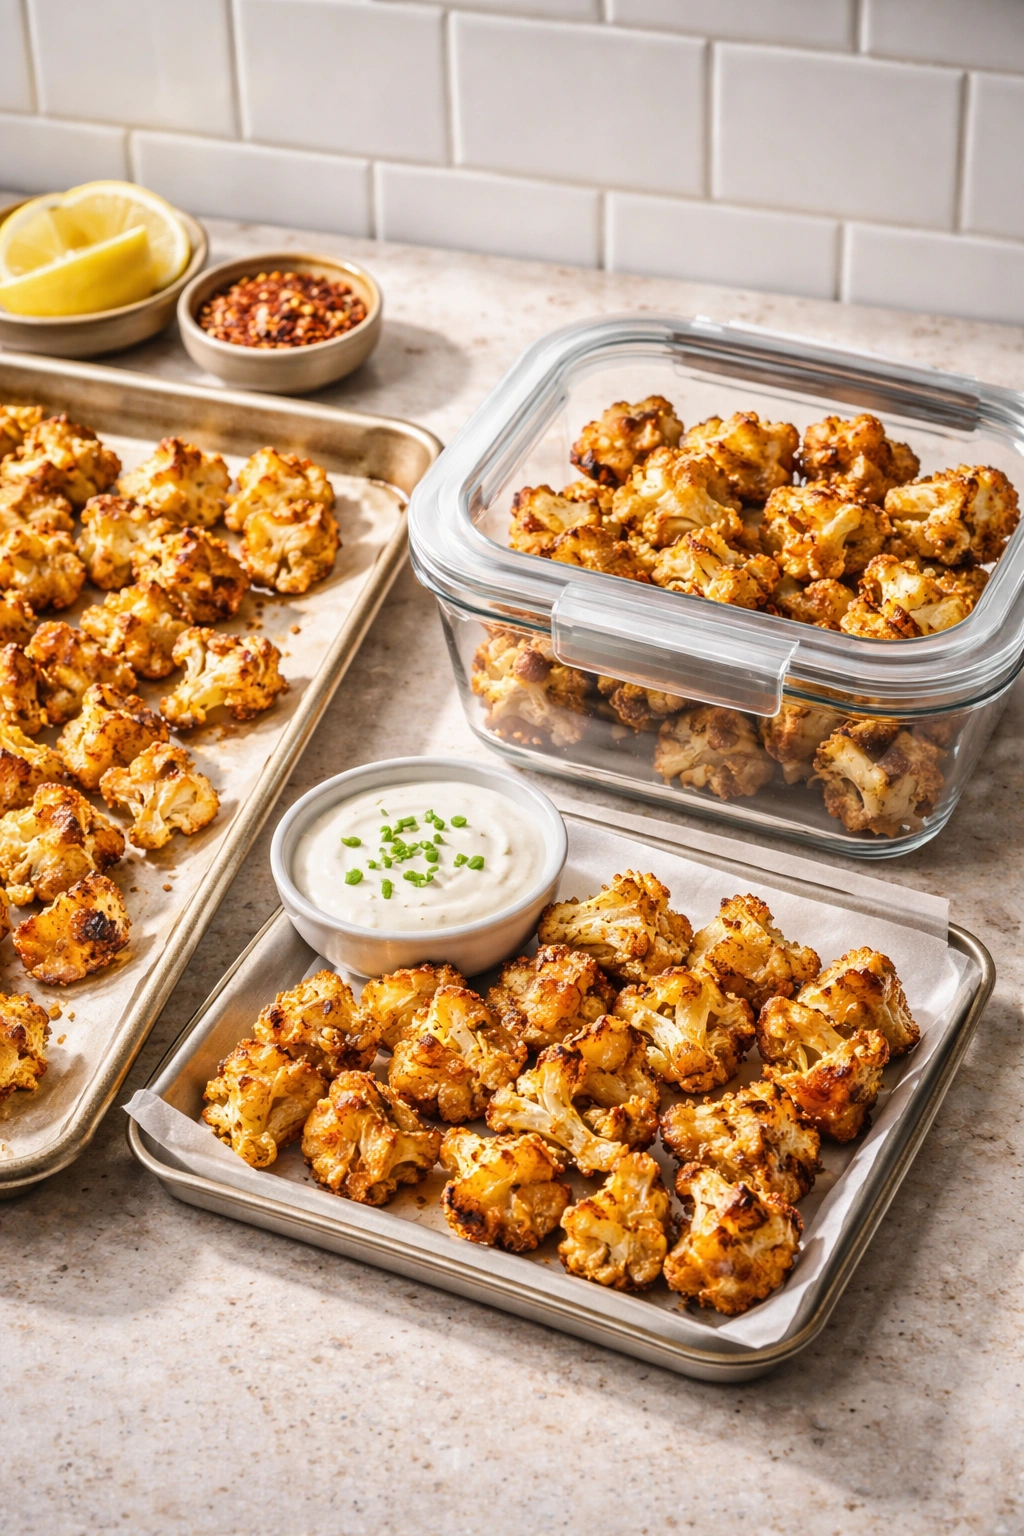
Fresh-roasted crispy cauliflower bites are peak perfection. But they keep well, and there are good ways to bring them back to their former glory.
Store cooled leftovers in an airtight container in the refrigerator for up to four days. They’ll soften slightly as they sit—the crispiness doesn’t last indefinitely in storage. But you can recrisp them.
To reheat, spread the cold cauliflower on a baking sheet and roast at 375°F for about 8-10 minutes until they’re warm and the outside starts to crisp up again. This is actually better than microwaving, which would make them soggy. You could also use an air fryer at 375°F for 5-7 minutes if you have one available—air fryers are genuinely the best tool for bringing back crispiness to roasted vegetables.
You can also freeze the roasted cauliflower bites. Let them cool completely, spread them on a baking sheet and freeze until solid (about 1-2 hours), then transfer to a freezer-safe container or bag. They’ll keep frozen for up to three months. To reheat from frozen, bake at 375°F for 12-15 minutes until warm and crispy again.
The unroasted, seasoned but uncooked cauliflower can also be frozen. Prepare through step 7 (spreading on the baking sheet), freeze until solid, then transfer to a freezer bag. When you want to cook them, you don’t even need to thaw—roast from frozen at 425°F for about 30-35 minutes, shaking halfway through.
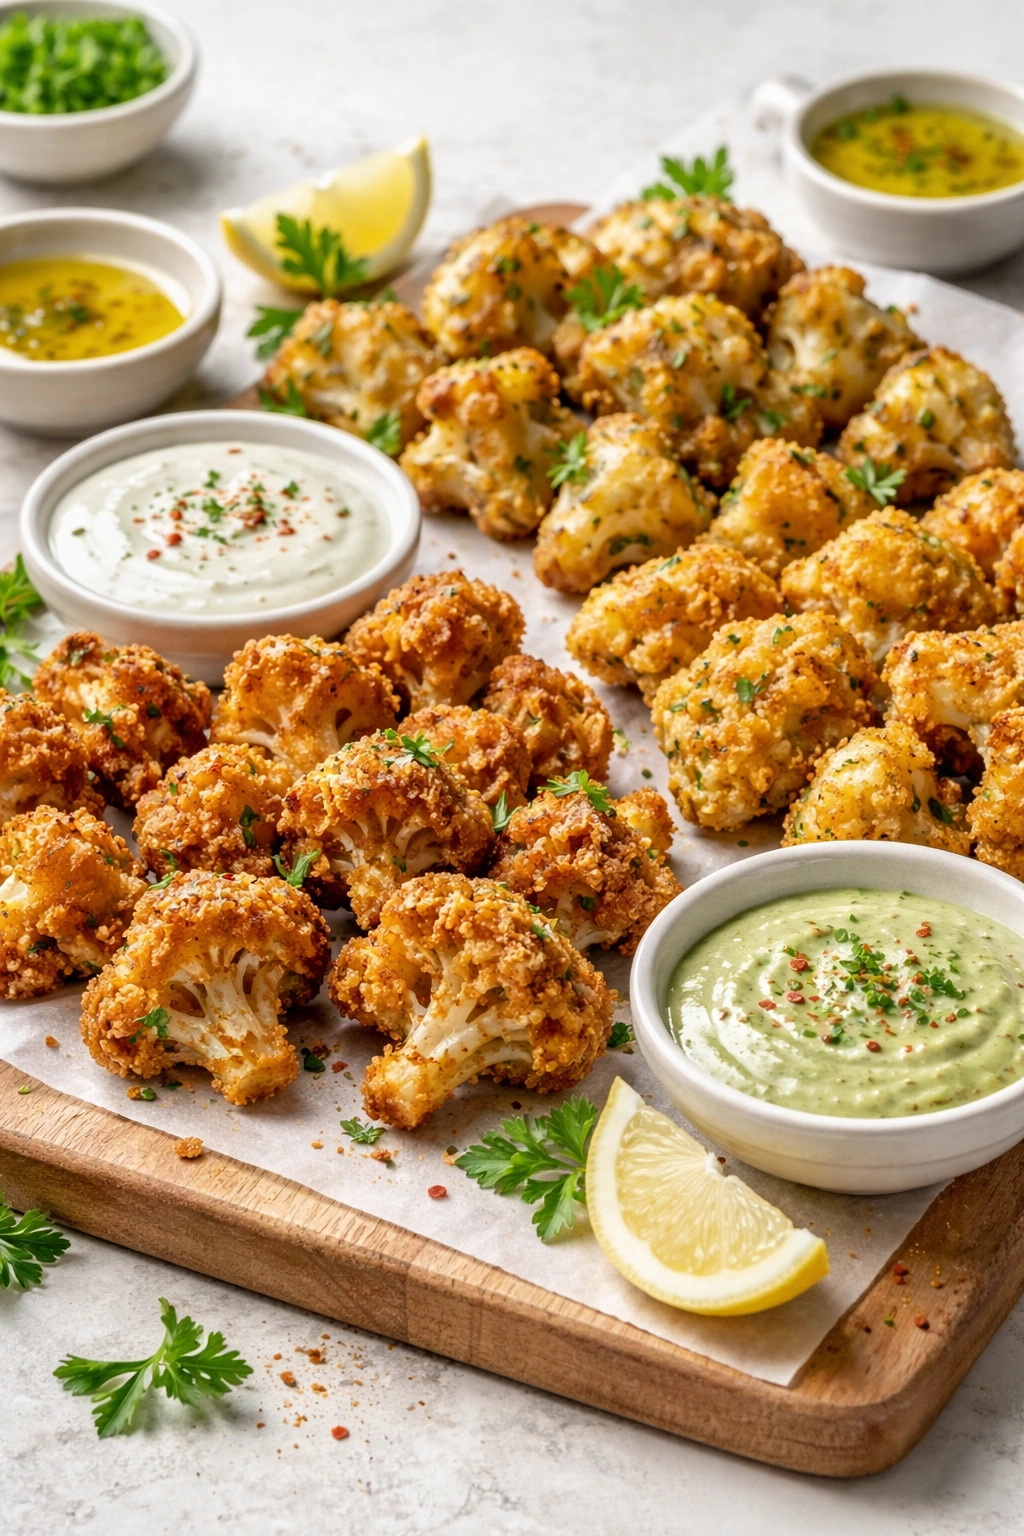
The Best Dipping Sauces to Serve Alongside
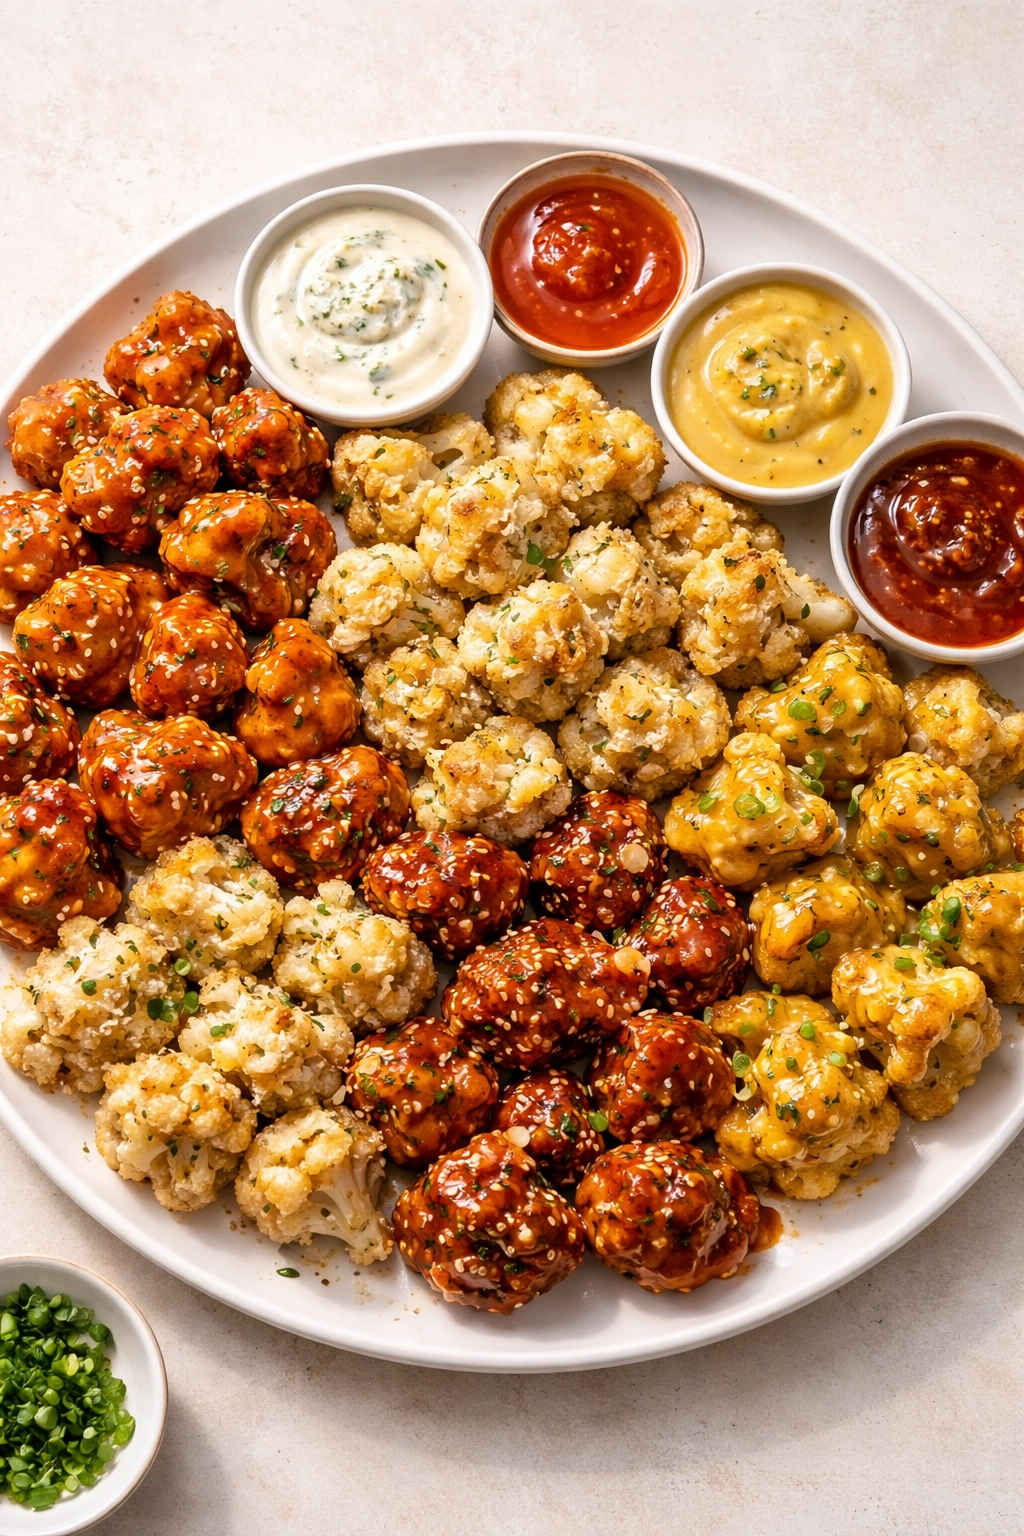
The cauliflower is good on its own, but the right dipping sauce elevates it entirely. Here’s what works best.
Ranch is the classic for a reason. Use a good quality ranch mix or make your own with mayo, sour cream, buttermilk, fresh herbs, garlic, and lemon juice. It’s cool, creamy, and not overpowering. The cool sauce also contrasts nicely with warm cauliflower.
Sriracha mayo is simple and has just enough kick. Mix two parts mayo with one part sriracha and a tiny squeeze of lime juice. The creaminess of the mayo tempers the heat while letting it shine.
Garlic aioli feels fancier and is easier to make than you’d think. Whisk together mayonnaise, minced roasted garlic, lemon juice, and a pinch of salt. It’s luxurious and garlicky without being overwhelming.
Yogurt-based sauces work beautifully. Mix Greek yogurt with dill and lemon juice for a fresh version, or with curry powder and a touch of honey for something spiced. Tzatziki (yogurt with cucumber, dill, and garlic) is excellent if you have it available.
Buffalo sauce straight from the bottle works if you prefer simplicity, but you can also make it at home by whisking hot sauce with melted butter and a splash of Worcestershire sauce. Mix it in equal parts with mayo or blue cheese dressing for a milder version.
Honey mustard is slightly sweet and works particularly well with the caramelized notes of the roasted cauliflower. Mix Dijon mustard with honey and a splash of apple cider vinegar.
Balsamic reduction or a regular balsamic glaze adds a sweet-tart complexity. Drizzle it over the warm cauliflower or serve it on the side for dunking.
Serving Ideas for Every Occasion
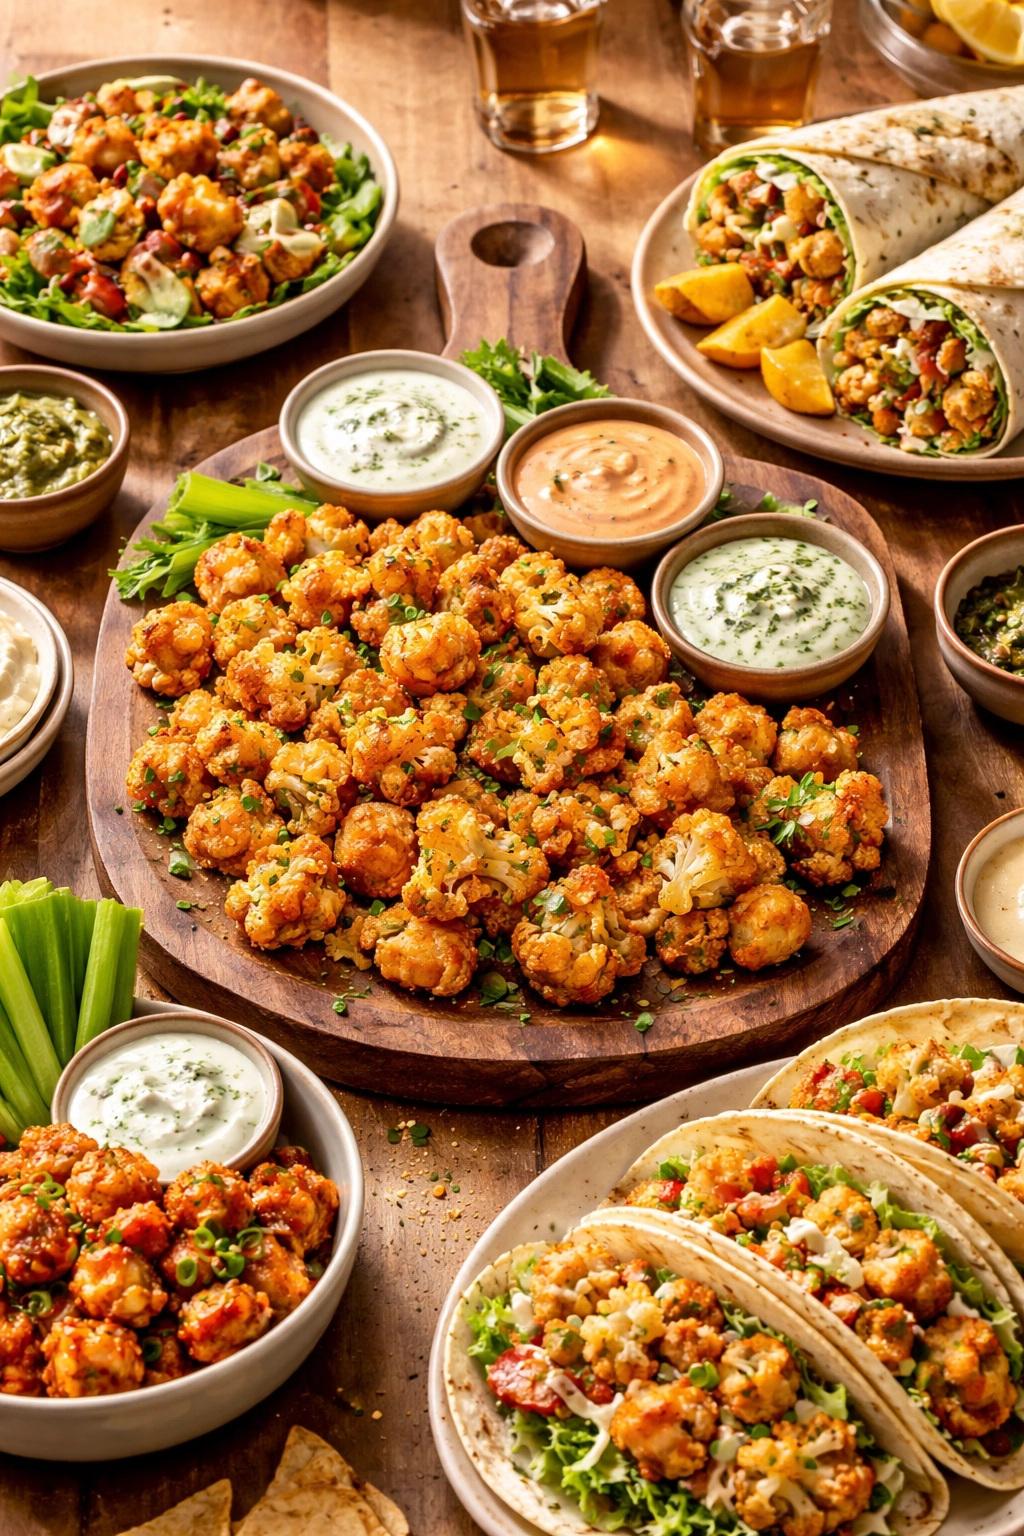
These work as an appetizer before a meal—arrange them on a platter with a couple of sauce options and let people help themselves. They disappear fast, so make extra.
Pack them cold in lunch boxes as an afternoon snack. They’re more interesting than chips and keep you satisfied for hours. Kids who won’t eat steamed broccoli often happily eat crispy cauliflower bites.
Serve them as a side dish with roasted chicken or fish. The crispy texture contrasts beautifully with moist proteins. They’re particularly good alongside lemon-herb roasted chicken.
Build a grain bowl around them. Use a base of quinoa or brown rice, add some greens, roasted sweet potato, maybe some chickpeas, then top with warm cauliflower bites and a tahini dressing. You’ve got a complete, satisfying meal.
Use them in salads. Toss warm cauliflower bites into a Caesar salad, a chopped salad, or a grain salad for texture and substance. They add crunch and make the salad feel more like a proper meal.
Make them the star of a game day appetizer spread. Pair them with other finger foods—wings, meatballs, sliders. People who expect cauliflower to be boring often become converts when they taste these.
Serve them alongside roasted vegetables at a vegetarian dinner. The variety of textures and flavors is more interesting than a single vegetable side.
Final Thoughts
Crispy cauliflower bites work because they hit a few critical notes at once: texture, flavor, satisfaction, and the surprising pleasure of something healthy that also tastes genuinely delicious. You’re not eating them because you should. You’re eating them because you want another one.
The technique itself is genuinely transferable. Once you understand how high heat and proper oil create that crust and caramelization, you can apply it to other vegetables—broccoli, Brussels sprouts, carrots, whatever you have in your kitchen. But cauliflower has a special quality here. Its natural sweetness comes alive when caramelized. The texture—crispy outside, tender inside—is particularly satisfying. It accepts seasoning and sauce variations beautifully.
Start with the basic version the first time. Get comfortable with the roasting temperature, the timing, and how deep the brown should go. Once you’ve made a batch that comes out perfect, you’ll know exactly what you’re aiming for next time. Then branch out into variations and sauces. Keep the ones that work for you in your regular rotation. You’ll find yourself making these not just as a side dish or snack, but as something genuinely craveable—the kind of recipe you tell people about because you want them to know this good thing exists.