Crispy Homemade Tortilla Chips Baked in the Oven
There’s nothing quite like the sound of a chip cracking between your teeth — that satisfying snap of something genuinely crispy, not the stale, oil-saturated version sitting in a bag at the grocery store. Homemade tortilla chips are one of those rare foods where the difference between store-bought and homemade is so dramatic that once you’ve made them yourself, going back feels almost impossible.
The best part? You need exactly five ingredients to make restaurant-quality chips at home, and your oven does all the heavy lifting. No deep fryer, no special equipment, just tortillas, a little oil, salt, and about 15 minutes of baking time. What emerges from your oven is something that tastes fresher, crispier, and more flavorful than anything you could buy — because you made it, probably, literally minutes ago.
Unlike fried versions that soak up oil and turn greasy or stale within hours, oven-baked tortilla chips strike that perfect balance. They’re crispy enough to satisfy that crunch craving, light enough that you can eat them guilt-free, and customizable in ways that store-bought chips could never match. Want lime and cilantro? Done. Spicy chili powder? Easy. Plain and salted? That’s the classic for a reason.
If you’ve never made tortilla chips before, this is your sign to try them this week. If you’ve made them before and they came out soggy or burnt or just meh, this guide will fix exactly what went wrong and show you how to nail it every single time.
Why Homemade Beats Store-Bought Tortilla Chips
Store-bought tortilla chips follow a formula designed for profit margins, not flavor. They sit in distribution centers, spend time on shelves, and are often made weeks before you buy them. By the time they reach your hand, they’ve already started losing their crispness — which is why manufacturers add extra oil and salt to mask staleness and extend shelf life.
Homemade chips have exactly zero time to go stale. You cut them, season them, bake them, and eat them while they’re still warm and at peak crispness. This freshness isn’t just a minor detail — it completely changes the eating experience. The tortilla itself tastes brighter and more authentic.
Cost is another game-changer. A package of premium tortilla chips costs $4 to $6. A bag of tortillas costs $2 to $3 and yields four to five times as many chips. If you make chips weekly, you’re saving money while eating better quality food.
You also control every single ingredient. Store-bought chips often contain preservatives, added sugars, and anti-caking agents that you simply don’t need when making chips from scratch. If you care about what goes into your body — or if anyone in your household has dietary restrictions — homemade chips let you build them exactly the way you want.
The flavor advantage is real too. Because your chips are fresh, the tortilla’s natural corn flavor comes through clearly. You taste the actual ingredient, not just salt and oil trying to mask something old.
Choosing Your Tortillas for Maximum Crispness
Not all tortillas work equally well for chip-making. The type and quality of tortilla you choose affects crispness, flavor, and how easily they crisp up in the oven.
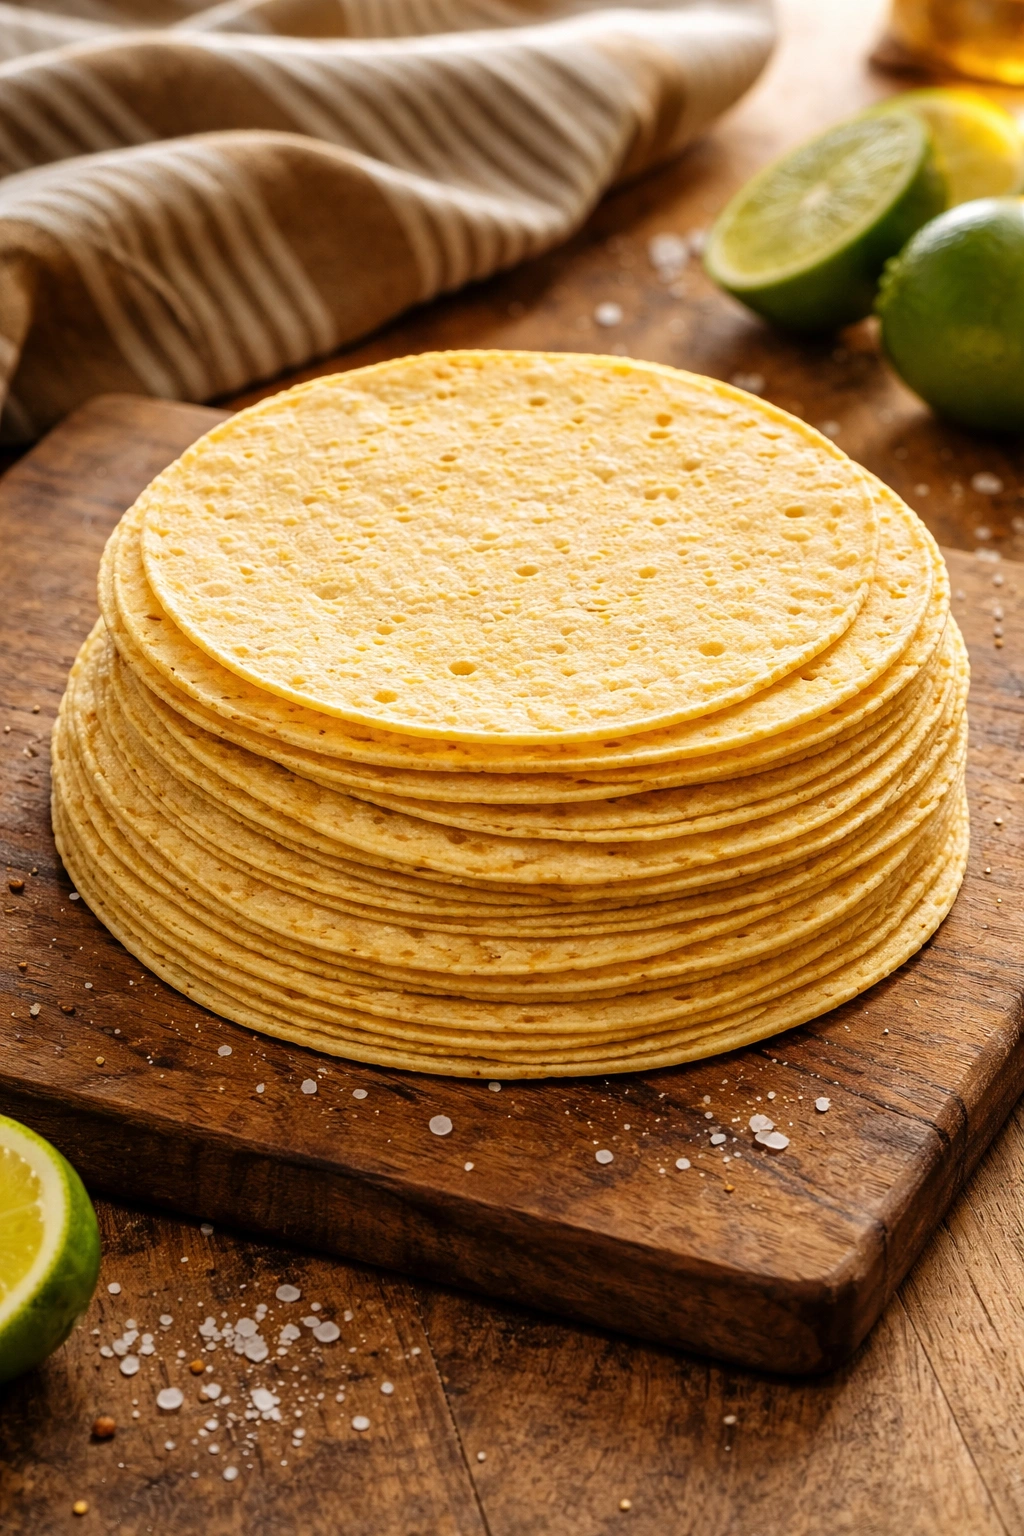
Corn tortillas are the gold standard. They’re thinner, slightly firmer when raw, and crisp up faster and more evenly than flour tortillas. They also have that authentic tortilla chip flavor — the kind you get from real corn. Look for tortillas made with just corn, water, and salt. Skip any that list vegetable oil or preservatives in the ingredient list.
Flour tortillas will work if that’s what you have on hand, but they crisp differently. They’re softer and more pliable, which means they need slightly more careful handling when cutting. They also don’t get quite as shattering-crispy as corn — they stay slightly more chewy. If you do use flour tortillas, look for thinner varieties marketed for burritos or street tacos, not the thick ones meant for wraps.
Freshness matters. Buy tortillas that are recently made if possible. Check the manufacture date if it’s printed on the package. Fresh tortillas contain more moisture, which will cook out and create that light, crispy texture. Tortillas that have been sitting in your fridge for two weeks will still work, but they’ll be drier to start with, so they crisp more quickly — watch them carefully to avoid burning.
The thickness question comes down to preference. Regular-thickness tortillas (the standard grocery store variety) yield chips that are satisfying to crunch through. If you like thinner, more delicate chips, buy the thin tortillas sometimes marketed as “thin & crispy” or “street tacos.” Thick flour tortillas meant for burritos will take longer to crisp and may not reach the same level of crispness you’re looking for.
Room-temperature tortillas are easier to cut than cold ones, so pull them out of the fridge 10 minutes before you plan to start prepping.
The Secret to Oil Distribution and Even Cooking
The biggest mistake people make when baking tortilla chips is using too much oil or applying it unevenly. Too much oil and your chips turn greasy. Too little and they come out dry and tough. The goal is just enough to crisp them up without leaving an oily residue.
You need roughly one tablespoon of oil per tortilla. This sounds like a lot until you realize you’re spreading it across a tortilla that’s being cut into eight to twelve pieces. The oil should coat each chip, not pool at the bottom of the pan.
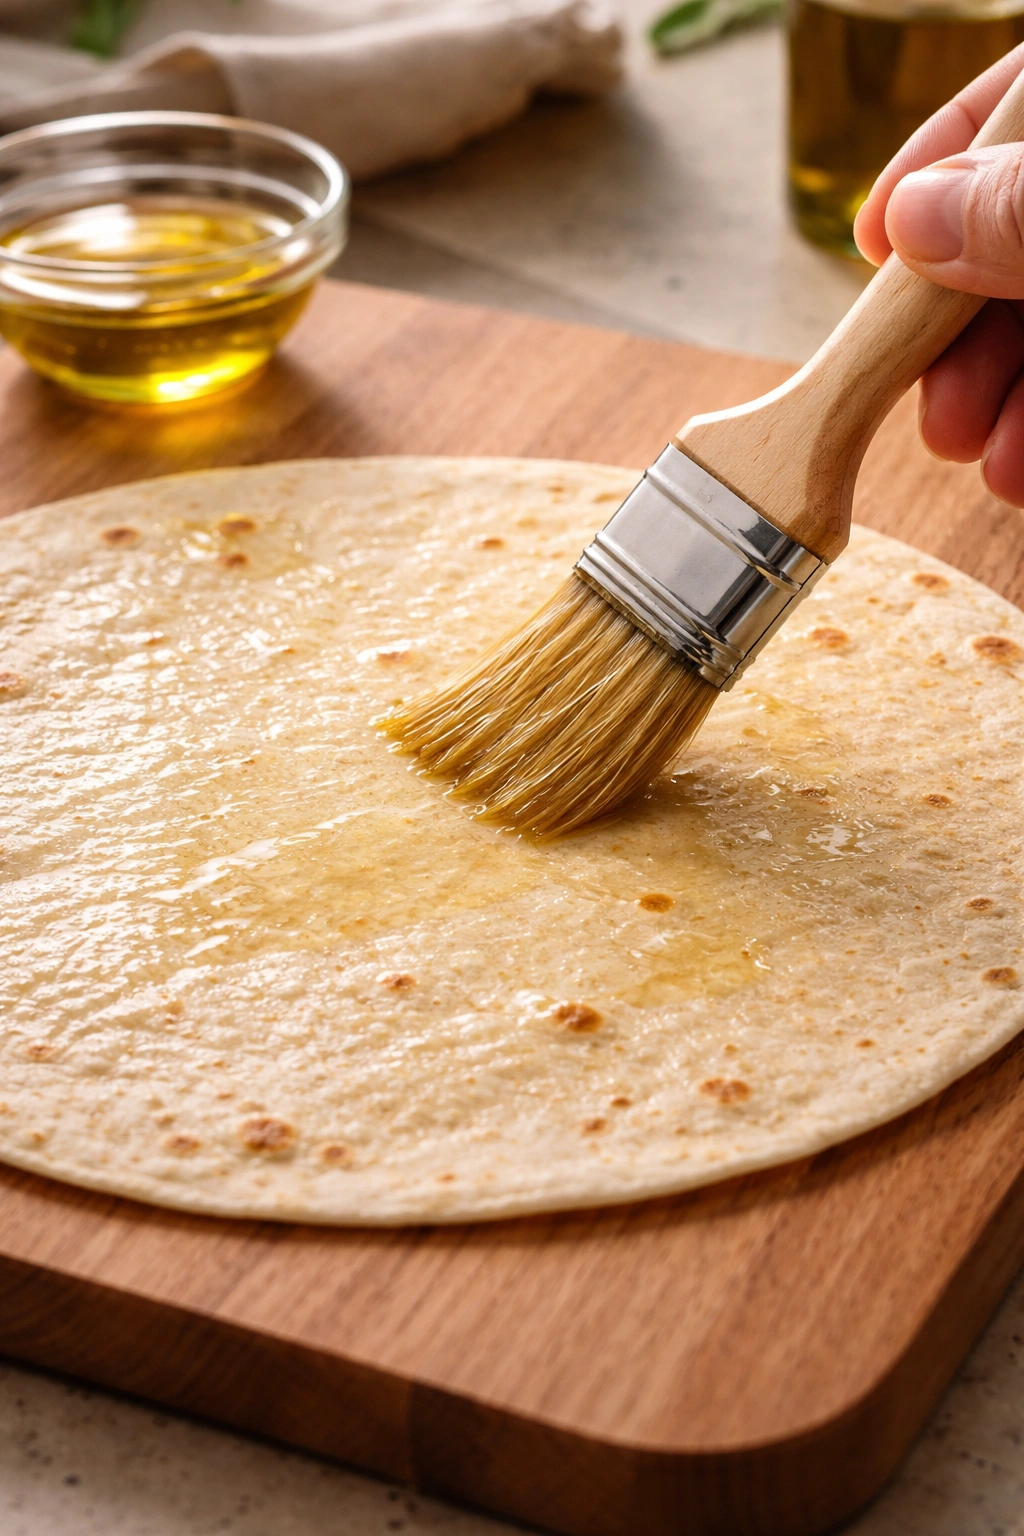
The best technique is to brush the whole tortilla lightly on both sides before cutting it. This distributes oil evenly and gives you better control than trying to oil individual chips after cutting. Use a pastry brush or a clean silicone brush — anything that lets you apply a thin, even coat. Olive oil works, but neutral oils like avocado oil or light vegetable oil are your better bet. Olive oil can smoke at higher temperatures, which can create a slightly burnt taste if your oven runs hot.
After brushing, lay the oiled tortilla flat on a cutting board and cut it into triangles or strips. Then, transfer the pieces directly to your baking sheet. At this point, they should look lightly coated — not shiny, not dry. If you see any chips that look particularly dry, a light drizzle and rub with your finger takes seconds and prevents disappointing chips.
Spacing on the pan is critical. Arrange chips in a single layer with a tiny bit of breathing room between each piece. They don’t need much space, but they shouldn’t be touching or stacked. If pieces are touching, the sides that touch each other will steam instead of crisping. A standard half-sheet baking pan (the kind that fits a standard oven) holds about three tortillas’ worth of chips perfectly.
If you’re making a big batch and have multiple pans, rotate them halfway through baking so they all cook evenly.
How to Cut Tortillas Into Perfect Chip Shapes
The way you cut your tortillas affects both how even they cook and how satisfying they are to eat and dip. There’s no single “right” shape — triangles, strips, and squares all work. The key is consistency and thinking about the dip application.
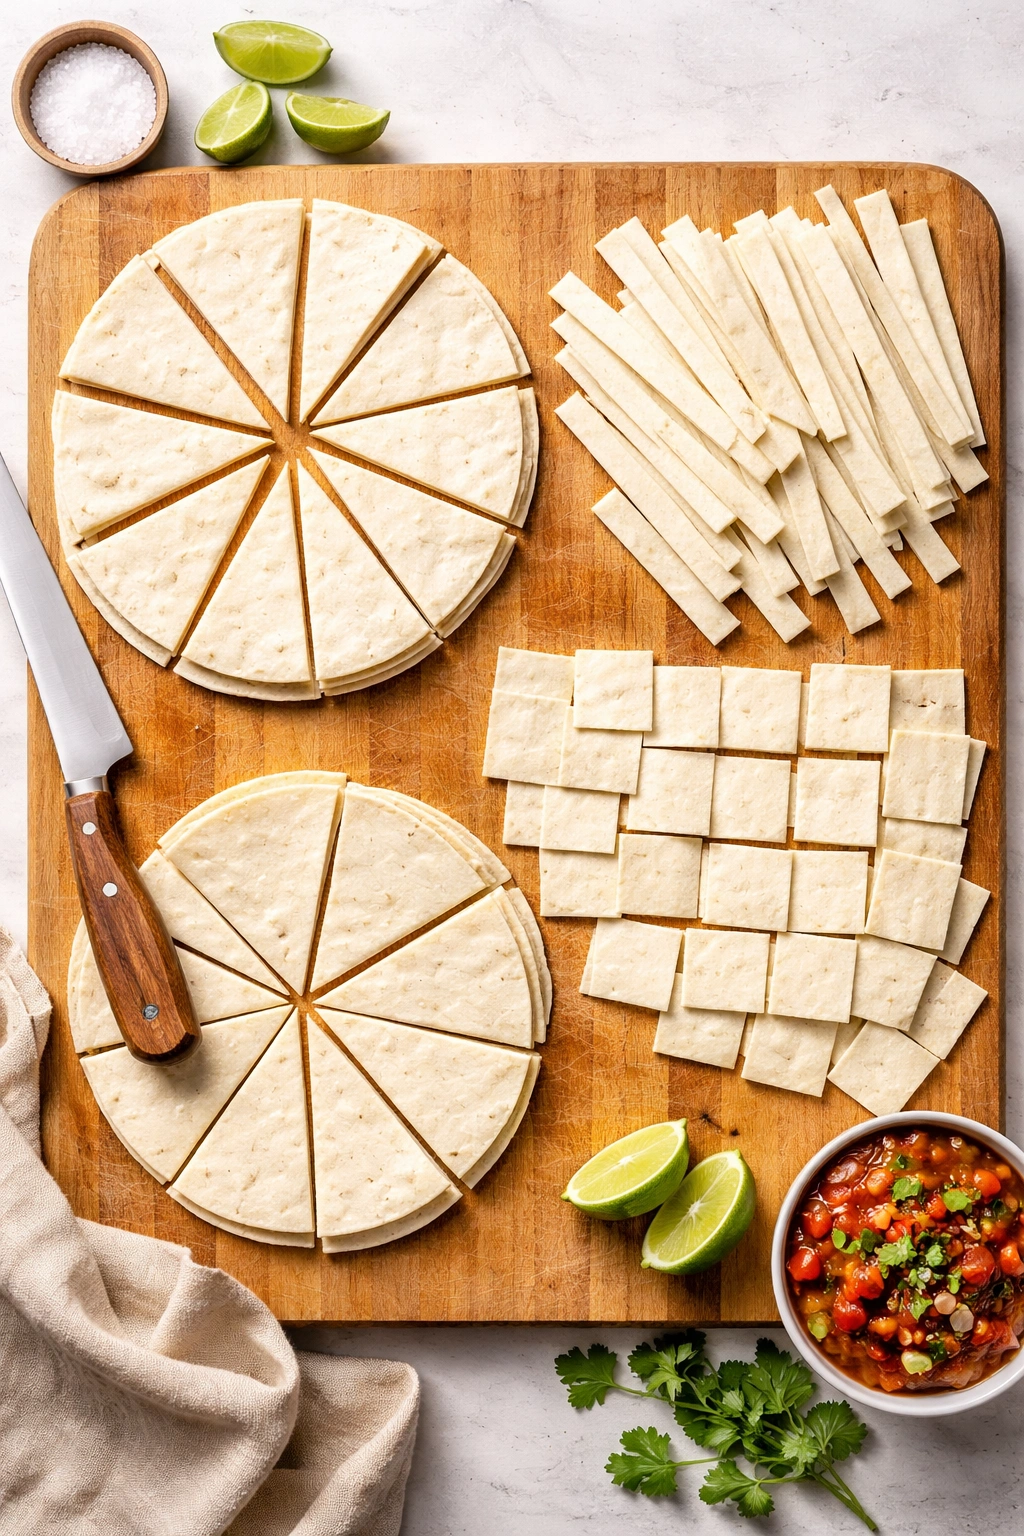
Triangle cuts are the classic. Cut the tortilla in half, then cut each half into four equal triangles. This gives you eight roughly equal pieces from one tortilla. Triangles are naturally easy to dip because the pointed end is perfect for scooping into dips, salsa, guacamole, or queso.
Strip cuts (sometimes called “straw” cuts) work beautifully for taco-shaped dips or for eating with chili. Stack two or three tortillas, cut the stack into half-inch-wide strips, then cut the strips in half. This creates shorter rectangles that are fun and easy to eat straight out of the bowl.
Square cuts happen if you cut tortillas into a grid pattern. These are less common but they’re actually ideal for even cooking since squares are the same size and shape. They also fit nicely in a dip bowl without much wasted space.
The size should be roughly similar — a piece should take two to three bites to eat, not one huge crunch and it’s gone. If some chips are significantly larger than others, the larger ones will be underdone while smaller ones get too dark.
A pizza cutter makes this job effortless. Press down firmly in one smooth motion rather than sawing back and forth. Sawing can tear tortillas; a decisive single cut is cleaner. For triangles, cut the tortilla in half first with a pizza cutter, then cut each half diagonally. For strips, cut parallel lines across the whole tortilla.
Room-temperature tortillas cut more cleanly than cold ones. If your tortillas come from the fridge, let them sit on the counter for ten minutes first.
Seasoning Your Chips With Flavor That Actually Sticks
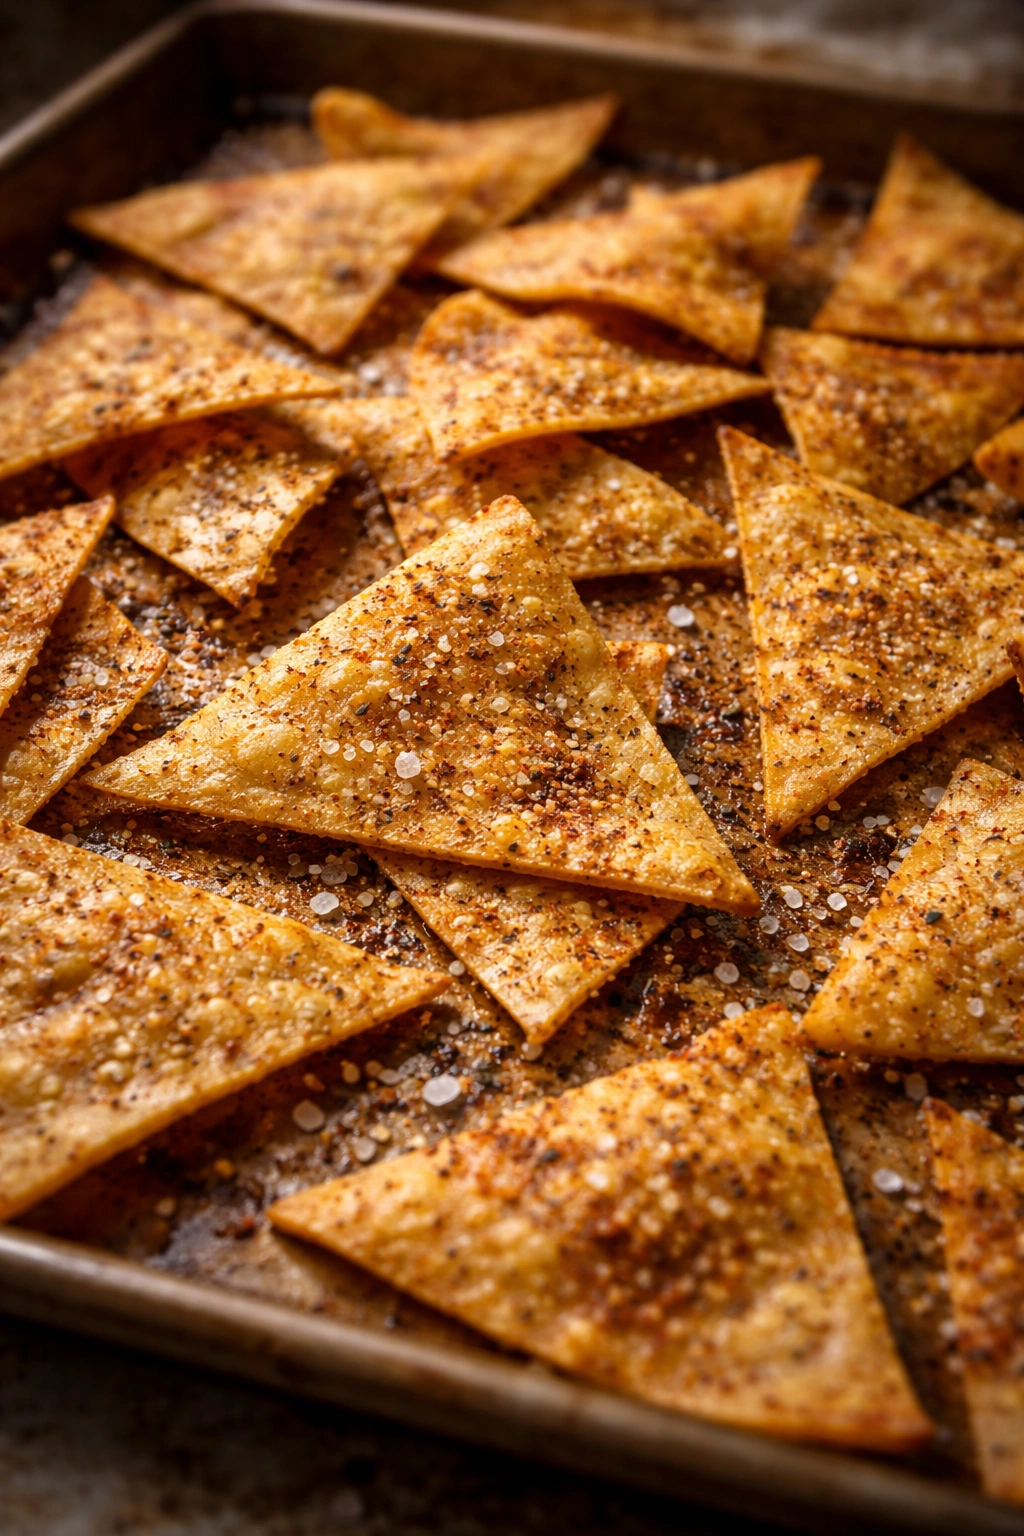
Salt is non-negotiable for good tortilla chips, but the timing and method of applying it makes the difference between salt that actually stays on the chip versus salt that falls off while you eat.
Add salt after the oil, when the chips are still moist. This is the crucial step most people skip. If the chips are completely dry, salt won’t adhere. Once you’ve brushed your tortilla with oil and cut it into chips, sprinkle salt generously over the pieces, toss them gently with your fingers or tongs, and taste one — it should taste properly salty. If it’s too subtle, add more.
Fine sea salt works better than kosher salt for chips because it sticks more easily and dissolves faster on your tongue. You only need about ¼ teaspoon of salt per tortilla, which might sound light, but remember that salt gets concentrated on the surface once the chips bake.
For flavored chips, add seasonings at the same time as salt. Combine your salt and spice blend in a small bowl, then sprinkle it onto the oiled chips and toss to coat. This works for chili powder, cumin, garlic powder, paprika, or any dry seasoning.
Wet ingredients like lime juice or fresh herbs should be added after baking. A squeeze of fresh lime juice right out of the oven tastes bright and alive. Fresh cilantro tossed on warm chips stays vibrant. If you add these before baking, the heat will cook them out and they’ll lose their fresh flavor.
A pro trick: make a simple lime salt blend by combining fine sea salt with dried lime powder (available at most grocery stores or online). This gives you lime flavor throughout the chip without moisture. Sprinkle it on with the oil, and you get consistent lime salt flavor that actually sticks.
Some seasonings benefit from a tiny bit of oil to help them adhere. For heavier spice blends, mix your seasonings with a tablespoon of oil, drizzle this mixture over the chips, and toss to coat before baking. This ensures even distribution of spices.
Baking Temperature and Timing for Maximum Crunch
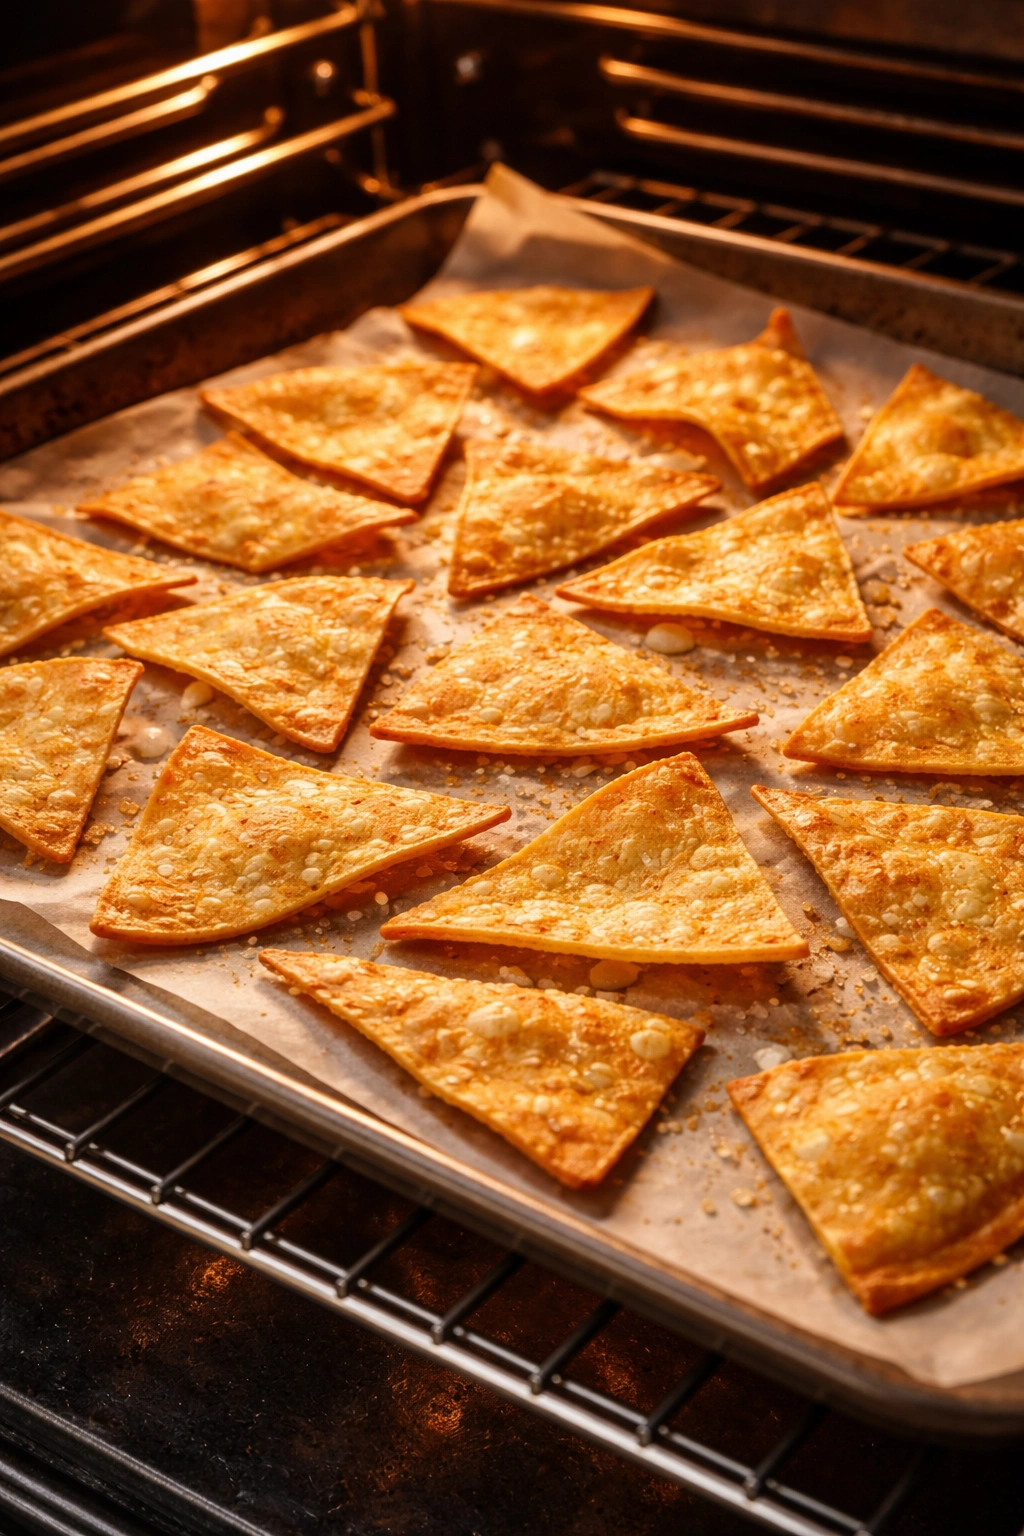
Temperature and timing are the two variables that separate crispy chips from burnt ones or disappointed soggy failures. Get these right, and you’ll nail perfect chips every single time.
Preheat your oven to 375°F (190°C). This temperature is hot enough to crisp the chips quickly without burning the exterior before the interior cooks through. If your oven runs hot (which many do), you might need to go down to 350°F (175°C). If it runs cool, 400°F (200°C) might be necessary. The only way to know is to make one batch and adjust from there.
Spread your seasoned chips in a single layer on your baking sheet. If the sheet doesn’t have raised edges, the chips might slide off — a standard baking sheet with a half-inch lip is perfect.
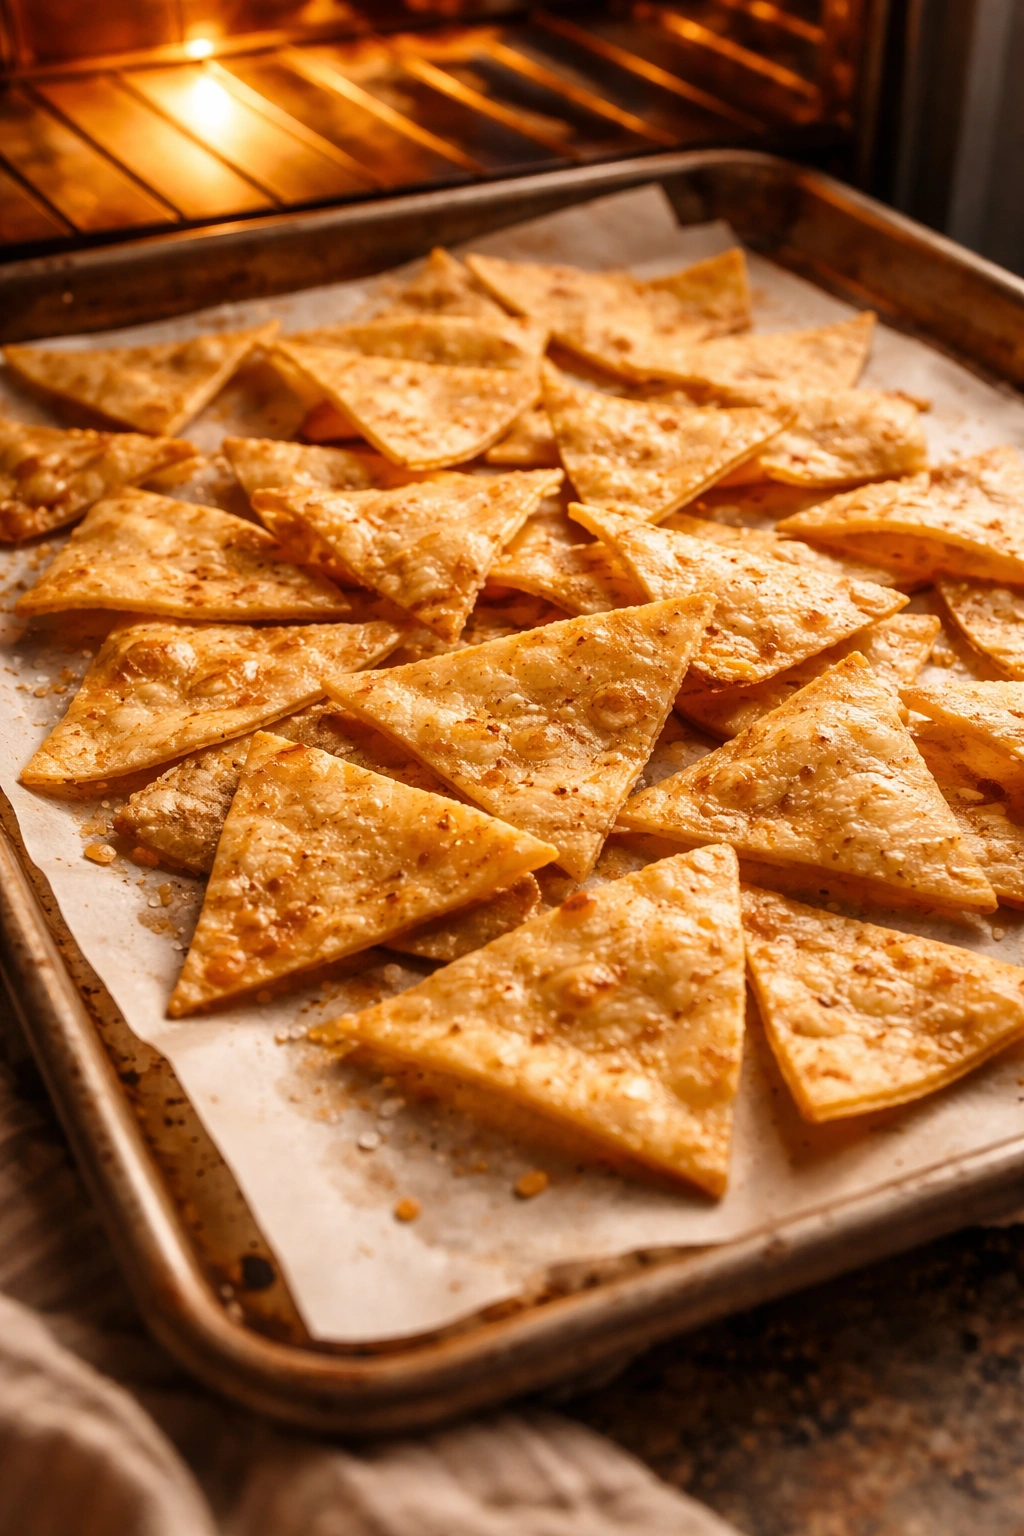
Bake for 12 to 15 minutes, rotating the pan halfway through. This halfway rotation ensures even cooking, especially if your oven has hot spots. At the midpoint, carefully pull out the pan, shake it gently to shift the chips, and put it back in. Set a timer for the second half.
Start checking for doneness around the 12-minute mark. You’re looking for chips that are just starting to show golden color on the edges. They should bend slightly when you pick one up, not crackle loudly — they’ll crisp more as they cool. If a chip cracks loudly and shatters when you bend it, it’s getting close to overdone.
Corn chips take about 12 to 13 minutes. Flour tortilla chips take 14 to 16 minutes because flour tortillas are denser. Thinner tortillas bake faster than thick ones.
The chips will continue to crisp as they cool on the pan. Don’t judge doneness by how soft they seem right out of the oven. Instead, judge by color. Golden edges with the center still pale yellow means perfect timing.
If your first batch comes out burnt, your oven is too hot — drop the temperature by 25 degrees and try again. If they come out soggy or tough, they didn’t bake long enough — increase the time by 2 minutes next batch.
Watching for the Golden Brown Color Cue
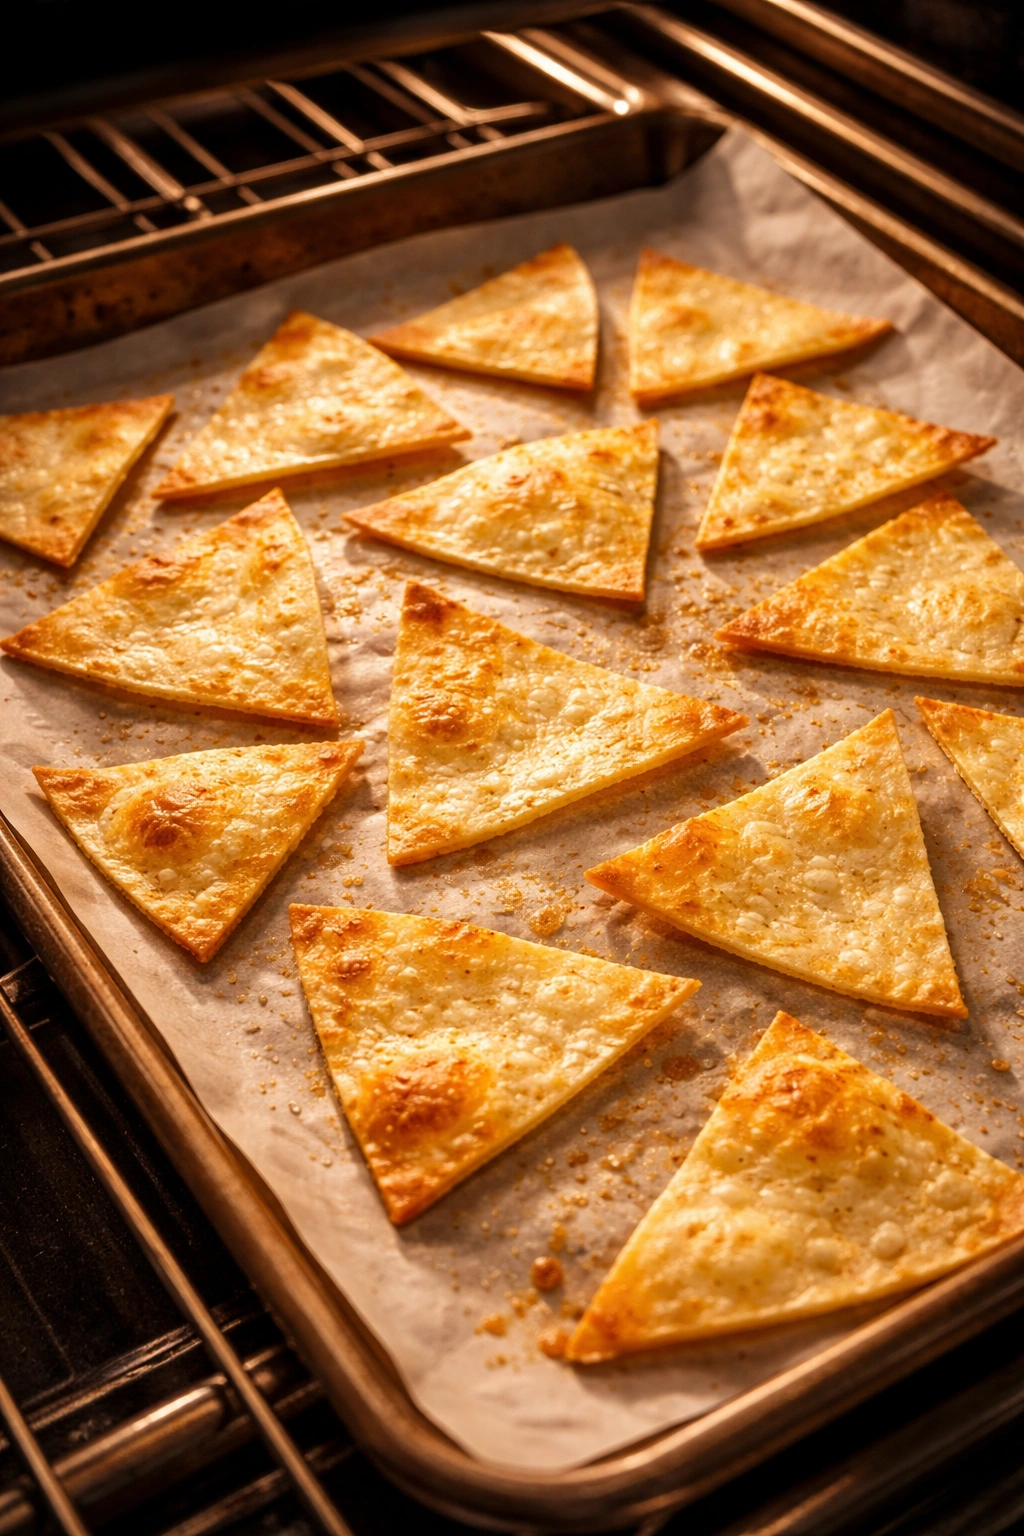
Color is your most reliable indicator that chips are done. Unlike baking bread or cookies, where you can use a toothpick or other tests, with chips you’re really watching for visual cues.
Perfectly baked chips should have golden or light tan edges with a pale yellow center. The edges darken first because they’re thinner and have more surface area exposed to heat. This is exactly what you want. The pale center means the tortilla still has some moisture, which helps it stay tender and crispy rather than becoming brittle and tough.
If you bake until the entire chip is dark golden, you’ve gone too far. The chips will still be edible, but they’ll be more fragile and might have a slightly burnt taste creeping in.
Some browning is fine and even desirable — it adds a hint of toasty flavor. But the browning should be light and even across the batch, not dark spotting or blackening. Dark spots usually indicate an oven hot spot, which means next time you should rotate the pan earlier or more frequently.
Color varies slightly depending on your tortillas. Thinner or older tortillas brown faster because there’s less moisture to evaporate. Thick, fresh tortillas take longer and might not brown as visibly. Judge by color and by the chip’s response to pressure. A properly done chip bends slightly and has a little give, then cracks cleanly when you bite it.
If you’re unsure, pull out a single chip and let it cool for 30 seconds on the counter. Cool chips show you their true final texture without the residual warmth of the oven. If it’s crispy but not shattered, and tastes good, pull the whole batch. If it’s still slightly soft or chewy, give it another minute or two and check again.
How to Store Tortilla Chips to Keep Them Crispy
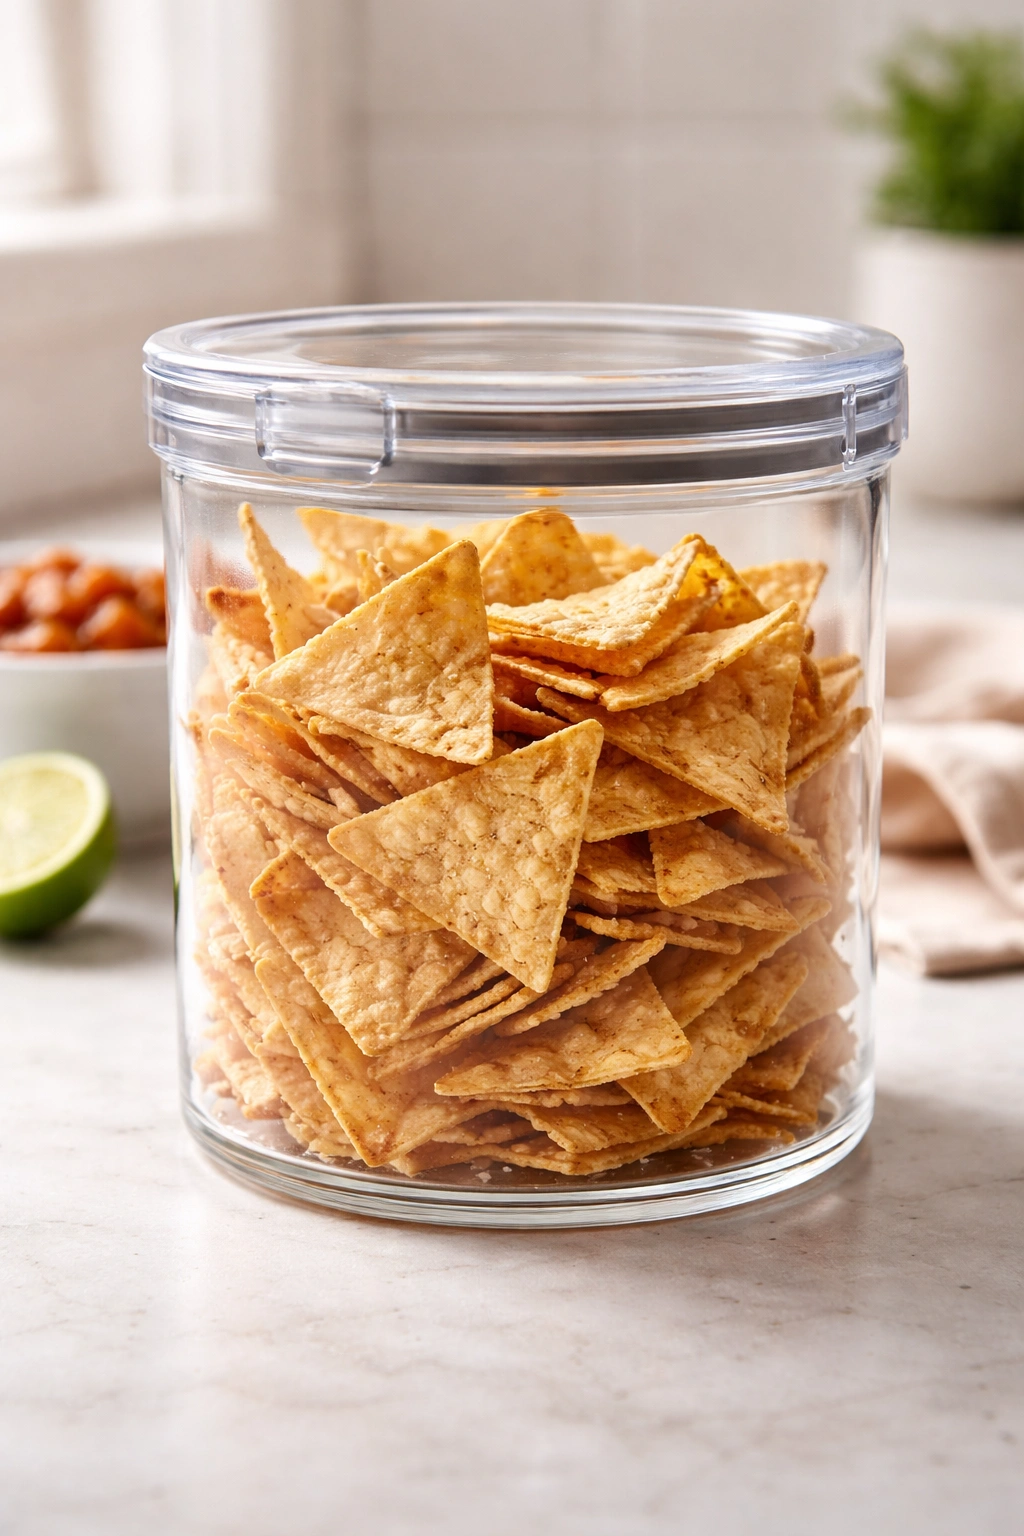
The enemy of tortilla chip crispness is moisture. Once they cool, they need an airtight environment to stay crispy.
Store chips in an airtight container at room temperature. A glass container with a tight-fitting lid works perfectly. Ziplock bags work too, but they’re more prone to air leaks. Press as much air out of the bag as possible before sealing. The goal is to prevent humidity from the air from being absorbed by the chips.
Homemade tortilla chips stay crispy for about three to five days in an airtight container. This is dramatically longer than I expected the first time I made them — I thought they’d go stale overnight. They don’t, as long as they’re sealed.
Don’t refrigerate chips. The cold makes them absorb moisture from condensation, and they go stale faster. Room temperature in an airtight container is the best storage method.
If your chips do start to soften after a few days, you can re-crisp them. Spread them on a baking sheet and bake at 300°F (150°C) for 5 to 8 minutes, just until they crackle again. They’ll perk right back up.
Freezing works if you need to store chips longer. Layer them in a freezer bag with parchment paper between layers so they don’t stick together. They’ll keep for two to three months frozen. Thaw them at room temperature for 10 minutes before eating, or reheat them in a 300°F (150°C) oven for 5 minutes to crisp them back up.
If you’re making chips for a party or gathering, prepare them a day ahead and store them. They actually taste better the next day — the flavors have a chance to settle and meld, and they’re still perfectly crispy. Just before serving, do a quick re-crisp in a 300°F (150°C) oven for 3 to 4 minutes to restore maximum crunch.
Flavor Variations That Go Beyond Plain Salted
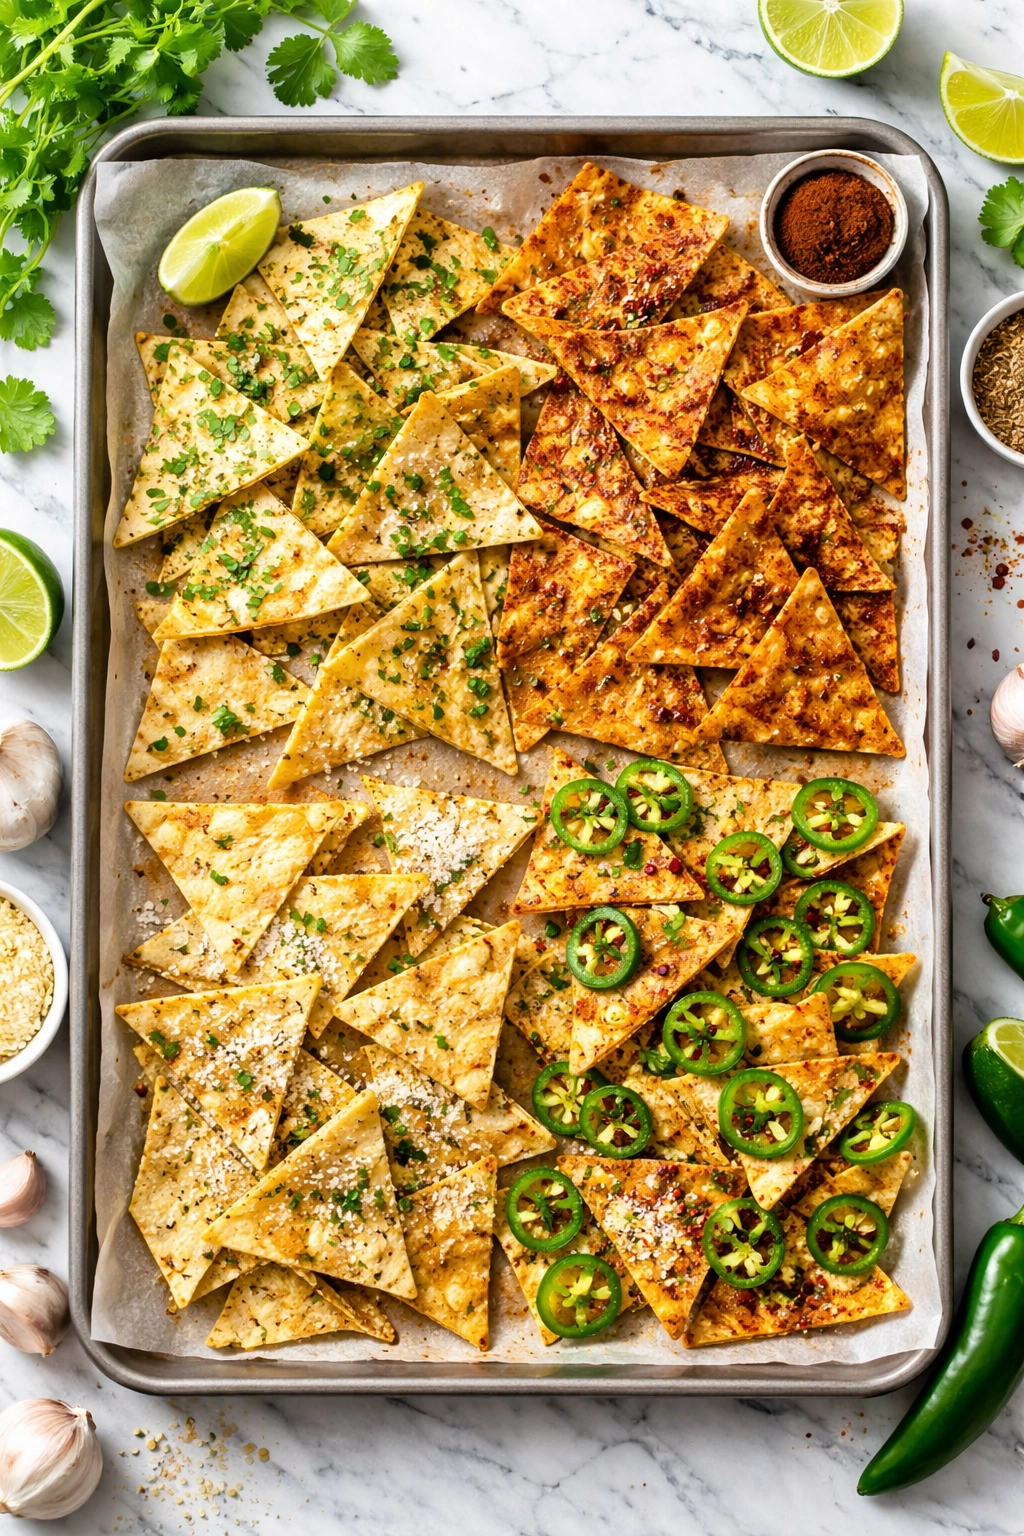
Plain salted chips are perfect, but once you’ve mastered them, the flavor possibilities are genuinely exciting.
Lime and Cilantro Chips
This is the most refreshing variation. Squeeze the juice of half a lime over warm chips right out of the oven, then toss with fresh cilantro leaves. The heat releases the cilantro’s oils, and it stays vibrant. A tiny pinch of salt before the lime ties everything together.
Chili Powder and Cumin
Mix one tablespoon of chili powder, one teaspoon of cumin, and ½ teaspoon of garlic powder with your salt. Combine this blend with your oil, drizzle over the chips, toss to coat, and bake. These are seriously addictive and taste like restaurant-quality chips.
Garlic Parmesan
Brush tortillas with oil mixed with minced fresh garlic (about one garlic clove per tortilla), then bake. Immediately after baking, while chips are still hot, sprinkle with freshly grated Parmesan cheese and a pinch of fine sea salt. The residual heat melts the cheese slightly.
Spicy Jalapeño
Add one teaspoon of finely minced fresh jalapeño, one teaspoon of chili powder, and ½ teaspoon of salt per tortilla. If you’re worried about the jalapeño burning, you can add it after baking by tossing the hot chips with freshly minced jalapeño and allowing the heat to infuse the flavor.
Cinnamon Sugar
This is technically a dessert variation, but it works as a snack. Mix together one tablespoon of granulated sugar, one teaspoon of ground cinnamon, and ¼ teaspoon of salt. Brush tortillas with melted butter (instead of oil), sprinkle the cinnamon-sugar mixture evenly, and bake. These are amazing with a cup of coffee or hot chocolate.
Nutritional Yeast and Herbs
If you eat plant-based, nutritional yeast transforms tortilla chips into something umami-rich and savory. Brush chips with oil, sprinkle with nutritional yeast and dried herbs (oregano, thyme, rosemary), and bake. It creates a cheesy flavor without any dairy.
Tahini and Everything Bagel Seasoning
Drizzle chips with tahini mixed with a tiny bit of water (to thin it), sprinkle with everything bagel seasoning, and bake. This creates a savory, nutty chip with a surprising textural complexity.
Troubleshooting Common Tortilla Chip Problems

Chips Came Out Soggy or Chewy
The cause: Usually too much oil or not enough baking time. Oil helps crisping, but too much moisture prevents browning and creates a greasy, chewy texture.
The fix: Next batch, use slightly less oil (about three-quarters of what you used). Make sure you’re baking long enough — chips should be in the oven for at least 12 minutes, and corn chips often need the full 15. If you rushed through before, give it more time. Also check that your oven is at the right temperature — if it’s running cool, you might need to increase the heat.
Chips Burnt or Taste Bitter
The cause: Oven temperature too high or baking time too long. Overcooked chips develop a burnt, bitter flavor.
The fix: Drop your oven temperature by 25 degrees. Check your chips earlier than you did before — somewhere around the 11-minute mark instead of waiting until 15. Some ovens have hot spots that burn the backs of pans; if you notice browning is uneven, rotate the pan more frequently.
Chips Aren’t Crispy Enough, More Chewy Than Crunchy
The cause: Under-baking or too much oil. Chips need enough time for the moisture to evaporate.
The fix: Increase baking time by 2 to 3 minutes. Use slightly less oil next time — oil helps crispness up to a point, but too much oil creates more moisture that takes longer to cook out. Also make sure you’re at 375°F (190°C) or higher; if your oven is hotter, chips might brown before they’ve crisped through.
Some Chips Are Dark and Some Are Pale
The cause: Uneven oven temperature or chips arranged too close together. Heat doesn’t distribute evenly.
The fix: Rotate your pan at the halfway point. Space chips out more so heat circulates around all of them. If you have multiple pans, stagger them on different oven racks — the top pan will cook slightly faster than the bottom. Rotate these racks halfway through.
Salt Falls Off When You Eat Them
The cause: Salt added after the chips were completely dry, or not enough oil on the tortillas for salt to adhere.
The fix: Salt the chips while they’re still slightly moist from the oil, right before baking. Make sure you’re brushing tortillas generously with oil so the surface is actually oily, not just lightly misted.
Serving Ideas and Dips That Pair Perfectly
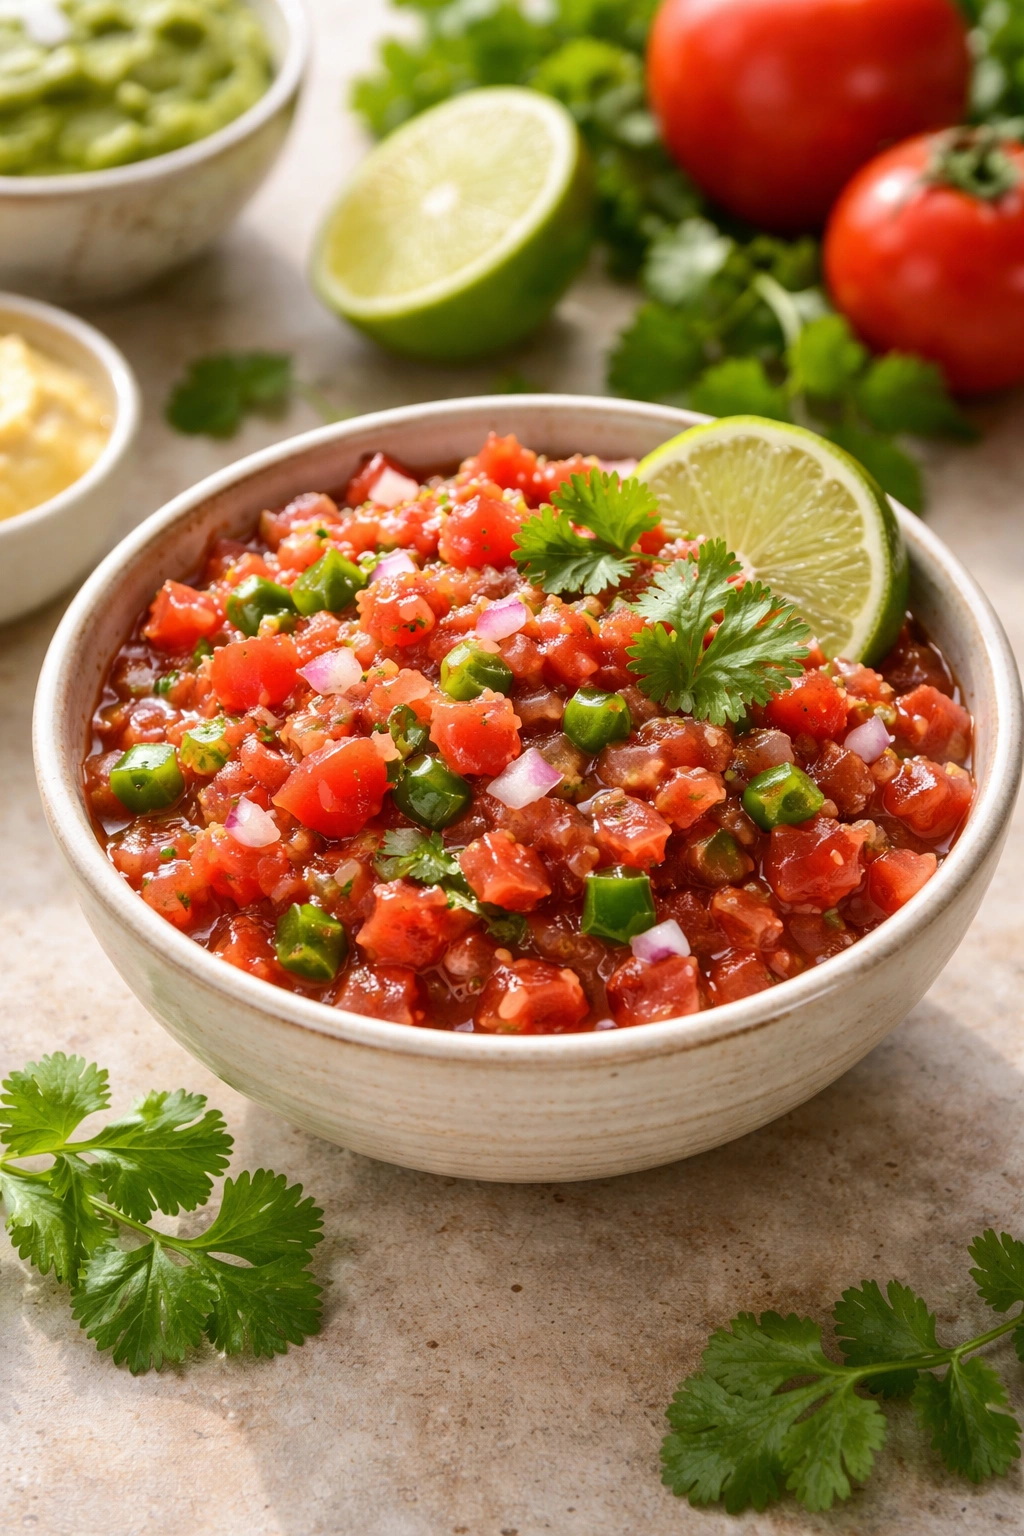
Homemade tortilla chips deserve better dips than what comes in a jar. Fresh dips take five minutes to make and transform your snack into something memorable.
Fresh salsa is the obvious choice, but try making it with fresh tomatoes, diced red onion, jalapeño, cilantro, lime juice, and salt. Taste as you go — you’re looking for the flavors to be bright and balanced. Make it thirty minutes before serving so the flavors meld.
Guacamole works when ripe avocados are in season. Mash with lime juice, diced tomato, red onion, cilantro, and a pinch of salt. Use it immediately since avocado oxidizes and browses.
Queso dip made from melted sharp cheddar, a splash of milk or cream to loosen it, diced jalapeño, and a pinch of cumin is restaurant-quality and takes five minutes. Keep it warm in a slow cooker if you’re serving a crowd.
Roasted red pepper hummus pairs beautifully with these chips. Blend canned chickpeas, jarred roasted red peppers, tahini, olive oil, lemon juice, and garlic. This is lighter than some dips and lets the chip flavor shine.
White queso made from cream cheese, sharp white cheddar, and a pinch of cumin is creamy and addictive. Melt it gently in a small pot, stirring frequently, and keep it warm while serving.
Corn salsa made with charred corn kernels, diced bell pepper, red onion, jalapeño, cilantro, lime juice, and a pinch of salt is unexpected and delicious. You can use fresh corn when in season or frozen corn (thawed and drained).
Black bean dip made from canned black beans (drained), lime juice, cumin, garlic powder, and a splash of olive oil is naturally vegetarian and pairs perfectly with lime-cilantro chips.
These chips also work as a base for more elaborate snacks. Layer them with seasoned ground beef, black beans, cheese, and toppings for nachos. Serve them alongside chili or a hearty soup. Crush them and use as a coating for baked fish or chicken. Use them to scoop fresh ceviche.
Make-Ahead Strategies and Batch Cooking
The best part about making tortilla chips at home is that you can make a huge batch and have them on hand all week.
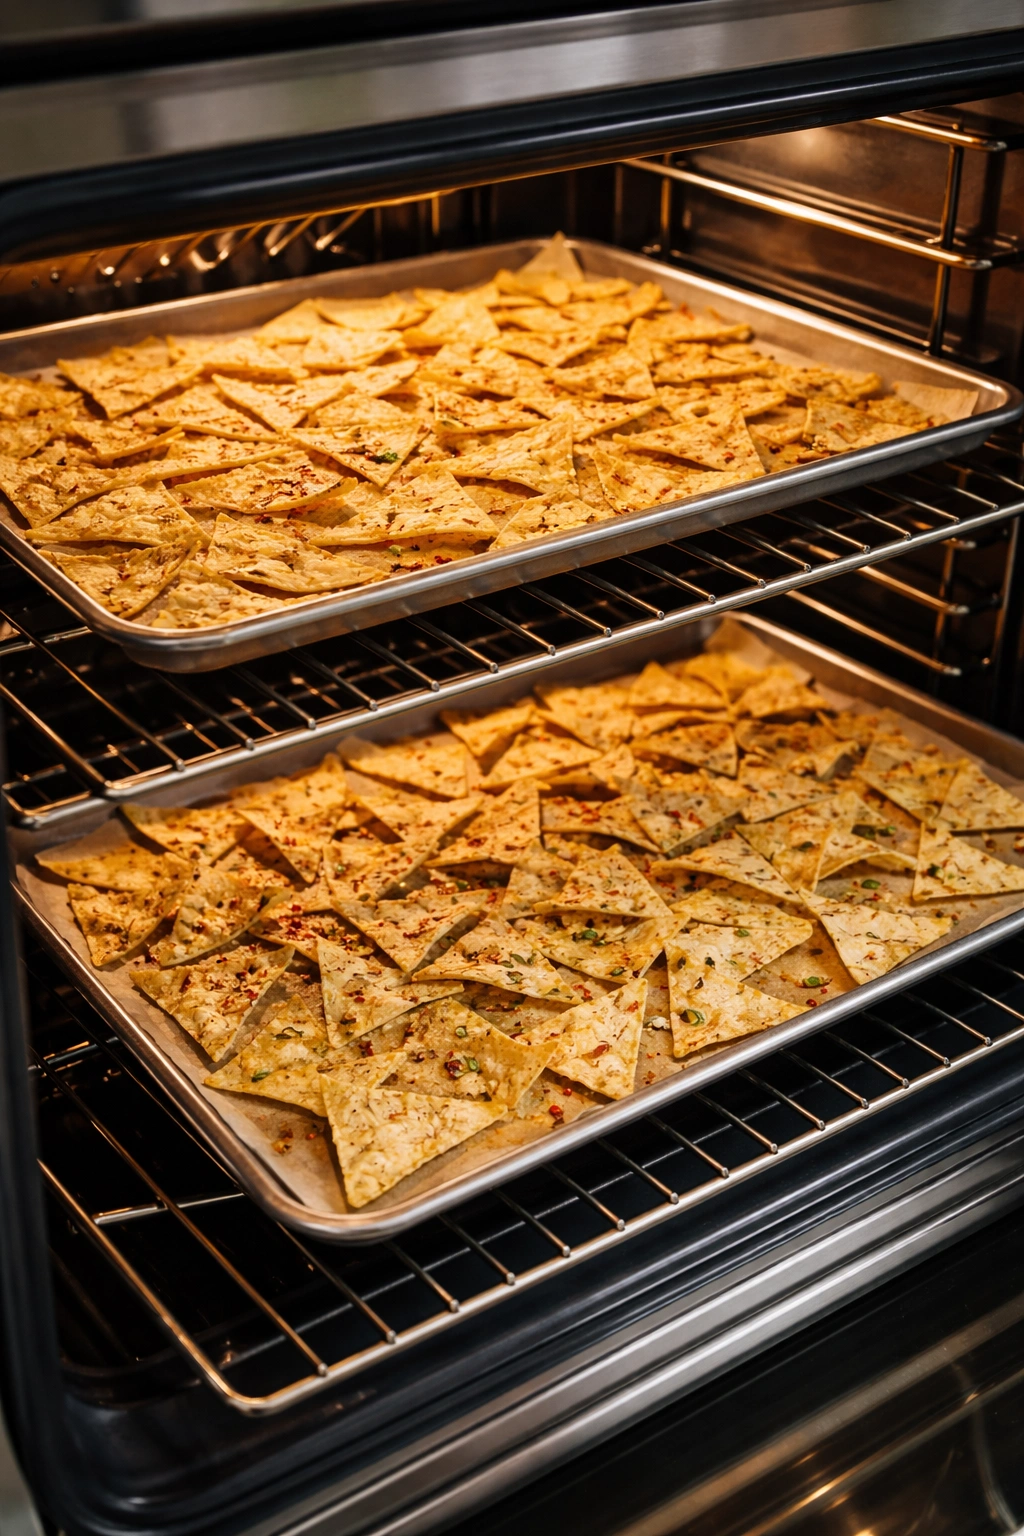
Set aside time for a batch-cooking session. If you’re making chips just once, make three to four bags of tortillas at once. You’ll fill two or three baking sheets, and since each batch takes only 15 minutes, you can have 20-30 servings of chips made in under an hour.
Use multiple racks in your oven if you have them. A standard oven fits two full sheet pans comfortably on different racks. If you have a convection setting, this is the perfect use for it — convection helps circulate heat evenly, which means chips crisp more consistently. Bake multiple batches and stagger the timings if needed.
Mix flavors. Make one batch plain, one with chili powder, one with lime-cilantro. Store them in separate airtight containers so they stay fresh and flavorful. You’ll have variety on hand for any craving or occasion.
Chips actually improve slightly on the second day as flavors settle, so making them the day before a party is smart strategy. Just pop them in a 300°F (150°C) oven for 4 to 5 minutes right before serving to restore maximum crispness.
If you have access to day-old tortillas from a bakery or a discount section at a grocery store, buy them for chip-making. They’re slightly drier, which means they crisp even faster, and the price is usually half of regular tortillas. These are perfect for batch-cooking.
Final Thoughts

Homemade tortilla chips are one of those rare foods where homemade is so dramatically better than store-bought that it justifies the minimal effort. You’ll taste the difference the first time you bite into a chip that’s warm, genuinely crispy, and made exactly the way you prefer it.
The technique is simple enough that you’ll remember it after making chips once, and the variables — temperature, timing, oil amount — are easy to adjust once you understand what each one does. Your first batch might not be perfect, but your second will be better, and by the third time you’ll be making restaurant-quality chips that cost a fraction of the price.
Keep a couple of bags of tortillas on hand for times when you want an impressive snack or appetizer made in 20 minutes. Make a giant batch to have on hand throughout the week. Experiment with flavors until you find your favorite combination. Share them with friends and watch their reaction when you tell them you made them in your oven at home.
This is one of those cooking skills that pays dividends every single time you use it.