Sometimes the best desserts aren’t complicated—they’re just clever. A three-ingredient cake mix cobbler is proof that you don’t need a culinary degree or a kitchen full of specialty tools to create something warm, delicious, and genuinely impressive. This is the kind of recipe that works whether you’re feeding a crowd, looking for a last-minute dessert, or simply want something comforting without the fuss.
The real magic here isn’t complicated baking science or obscure techniques. It’s understanding that three simple ingredients, when combined thoughtfully, create multiple textures and flavors at once—a thick, cake-like topping, a jammy fruit filling, and crispy-edged corners that everyone fights over. You’ll have a homemade cobbler ready in under an hour, from pantry to table, and no one will believe you didn’t spend the whole afternoon on it.
Why This Cobbler Works Better Than You’d Expect
A cobbler sits somewhere between cake, fruit pie, and crisp—the best parts of all three without the complexity of any single one. The traditional cobbler requires you to make biscuit topping from scratch: cutting cold butter into flour, measuring buttermilk, getting the texture just right. A cobbler topped with a full cake layer means mixing a cake batter. Both approaches work beautifully, but they demand attention and skill.
This version bypasses all of that. By starting with a boxed cake mix, you’re using a carefully engineered product designed to work under specific conditions. The leavening agents, flour blend, and sugar ratio are already balanced. You’re not reinventing the wheel; you’re repurposing a wheel that was made to roll smoothly. When you doctor it—and yes, we will doctor it—you’re not fighting against the formula. You’re working with it.
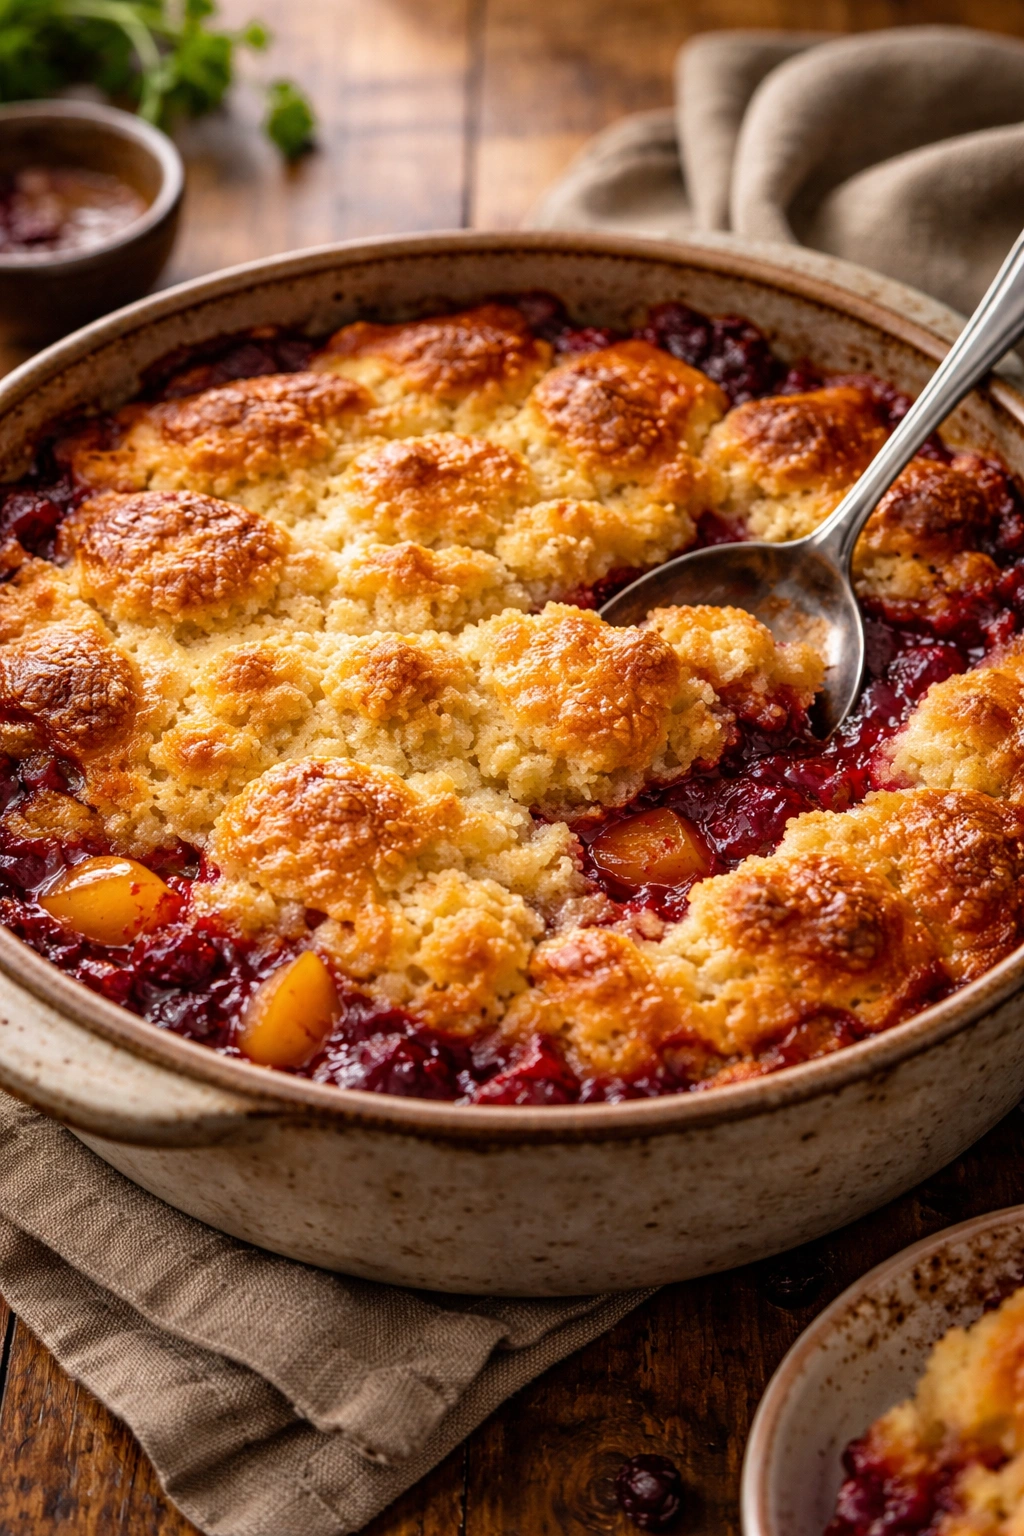
The secret is that the cake mix doesn’t sit on top of the fruit like a topping. Instead, you spread the batter directly onto the raw fruit, and as everything bakes together, the fruit juices migrate up into the cake layer, creating a tender, almost pudding-like bottom section. The top stays golden and cake-like. The edges crisp up beautifully as they caramelize slightly against the hot pan. What emerges from the oven is structurally a cobbler but textually far more interesting than that simple label suggests.
Most recipes you find online claim you can make this with literally just a cake mix, butter, and fruit—and technically, yes, you can. But here’s what those recipes don’t tell you: a cobbler made that way will be dry on top and oddly heavy. There’s no moisture to make the cake batter actually turn into cake. It becomes more like a dense sponge. The version we’re making here uses one additional ingredient (we’ll reveal it in a moment) that transforms this from passable to genuinely excellent—and it’s still just three ingredients total.
The Three Ingredients That Make Everything Work
Let’s be honest about what you’re working with: one box of cake mix (any flavor), one ingredient for moisture (which can be oil, butter, or juice), and fruit. That’s literally it. Some recipes specify the cake mix flavor or the fruit type, but those are variables, not requirements. The structure is what matters.
The cake mix is your leavening agent, thickener, and structure builder all in one. The moisture ingredient is what transforms the dry mix into an actual batter. And the fruit provides both the filling and the liquid that keeps everything moist during baking. These three elements, in the right proportions, create a complete dessert that’s greater than the sum of its parts.
This isn’t fancy baking. It’s smart baking. It’s understanding what each ingredient actually does and why those three elements are enough.
Choosing the Right Cake Mix for Your Cobbler
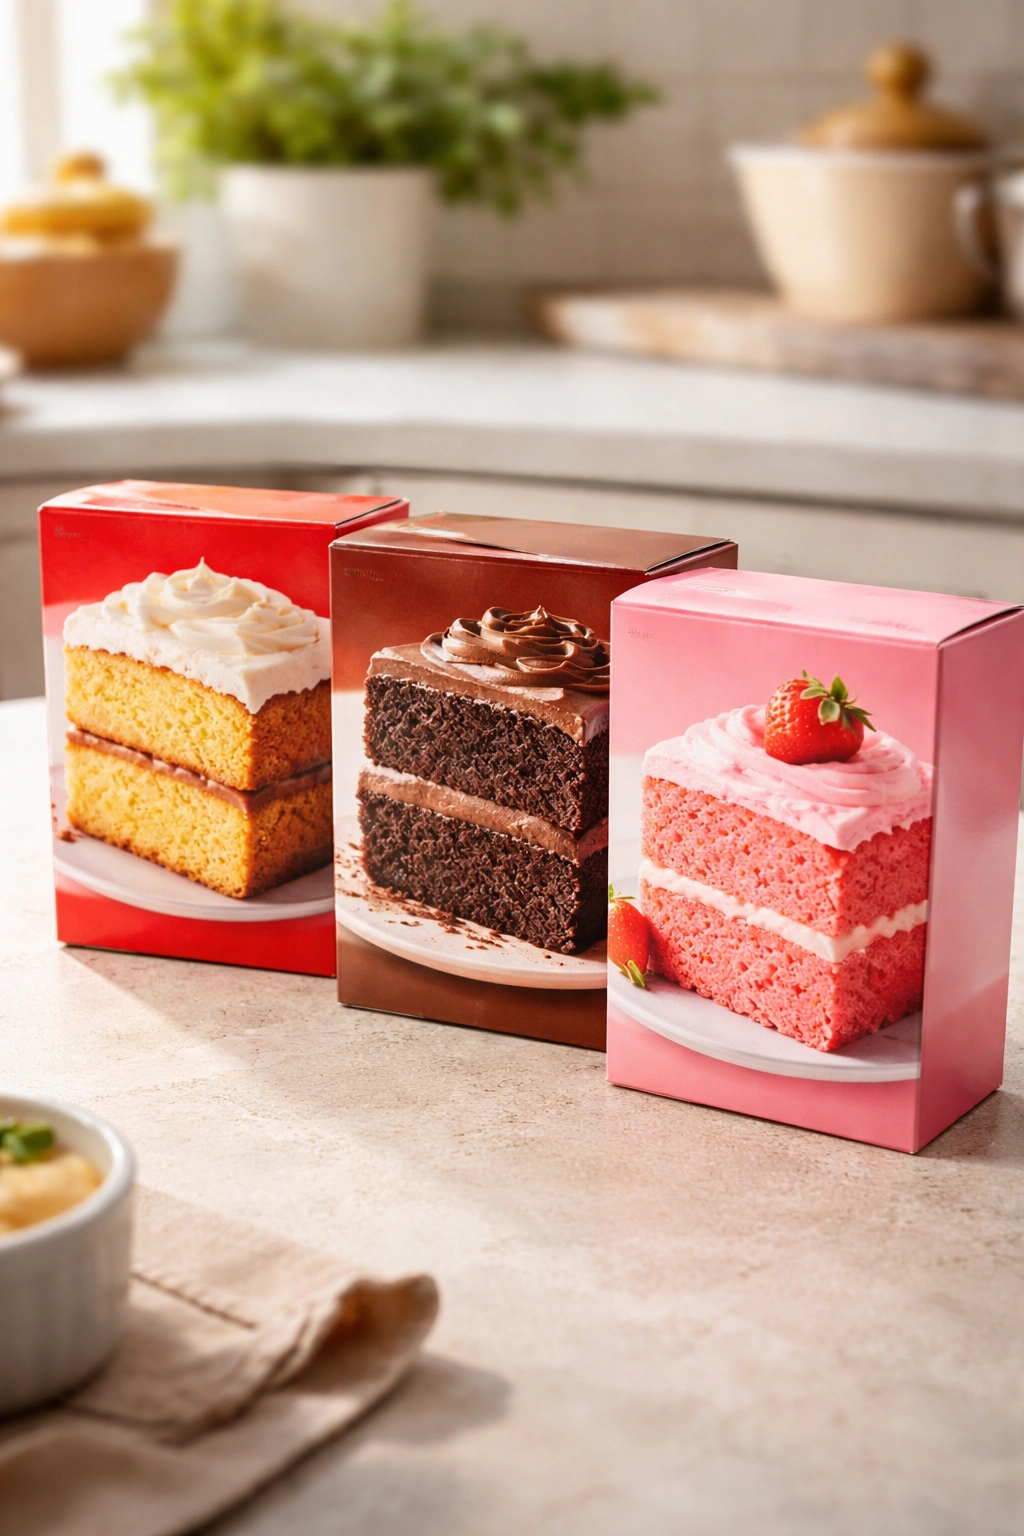
The cake mix you choose dramatically affects the final flavor, and this is where you get to customize the dessert without adding any additional ingredients. Yellow cake mix with peach fruit? Classic and nostalgic. Chocolate cake mix with cherry filling? Rich and slightly sophisticated. Lemon cake mix with blueberry? Bright and summery. Vanilla cake mix is the neutral choice—it plays nicely with any fruit and won’t compete.
Look at the ingredient label on the box, not the brand name. Some cake mixes include pudding powder as an ingredient; these tend to stay moister and more tender. Some are basic flour and leavening agents; these will work fine but might be slightly drier. Both approaches work beautifully in a cobbler because of the fruit juices you’re adding.
The box will say “serves 12” or “makes about 15 servings.” Ignore that for now. In a cobbler format, a standard box of cake mix is plenty. One box should work for a standard 9×13-inch pan, which will serve 8 to 12 people depending on portion size.
Avoid funky specialty cake mixes (like the ones marketed to make cookies or brownies) unless you’re specifically looking for that texture. Stick with traditional cake mix options. The formula has been tested on millions of cobblers across decades—it’s reliable precisely because it’s mainstream.
Picking Fruit That Actually Tastes Good
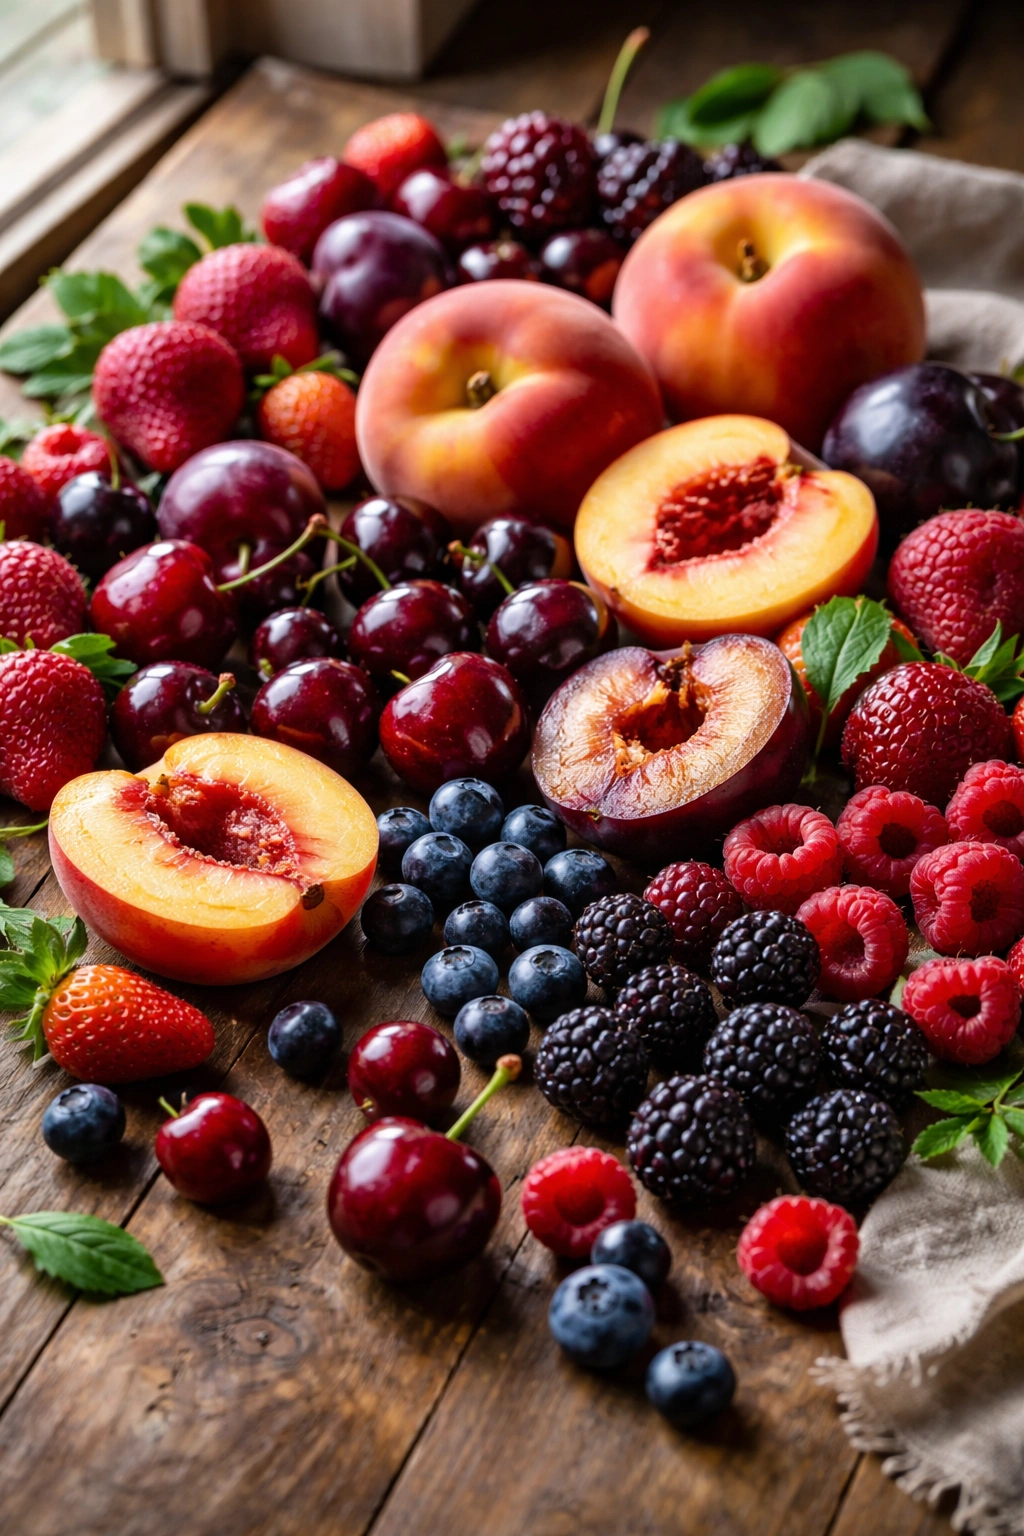
This is the real foundation of the entire dessert. The cobbler is only as good as the fruit. If you use mushy, flavorless, watery fruit, the cobbler will taste flavorless and mushy. If you use fruit with actual flavor and body, the cobbler will be extraordinary.
The best fruit for cobblers has enough natural pectin to hold together slightly as it bakes and enough juice to create a filling without turning into soup. Peaches, cherries, plums, blackberries, and blueberries all work beautifully. Strawberries work too, though they’re more delicate and release juice faster. Canned fruit works better than you might expect, especially if you drain it well and use the juice as your moisture ingredient.
Fresh fruit is wonderful, but frozen fruit is actually the unsung hero of cobbler making. It’s picked at peak ripeness and frozen immediately, so the flavor is locked in. It thaws slightly during baking, releasing its juices into the cake mix batter. A 12-ounce bag of frozen berries or a 10-ounce bag of frozen peaches is often the exact right amount. No peeling, no pitting, no chopping. Just dump it in.
Here’s something most recipes don’t mention: if you’re using very juicy fresh fruit (like fresh strawberries), you might want to drain off some liquid or add a tablespoon of cornstarch to the fruit to prevent the cobbler from being too wet. If you’re using drier fruit or fruit packed in heavy syrup, you might want to add a splash more of your moisture ingredient. There’s flexibility here, and that’s part of what makes this recipe so forgiving.
Serving and Timing Block
Yield: Serves 8 to 12 (one 9×13-inch cobbler)
Prep Time: 10 minutes
Cook Time: 35 to 40 minutes
Total Time: 45 to 50 minutes
Difficulty: Beginner — No special equipment, no culinary skills required, and the steps are straightforward even if you’ve never baked before. The “hardest” part is measuring, and the cobbler will still be delicious if you’re rough with those measurements.
Best Served: Warm, directly from the oven or within a few hours. Can also be served at room temperature or even cold (it’s technically a cobbler, but honestly, it’s almost a cake in some respects, so cold slices are genuinely good the next day).
The Three Ingredients You Actually Need
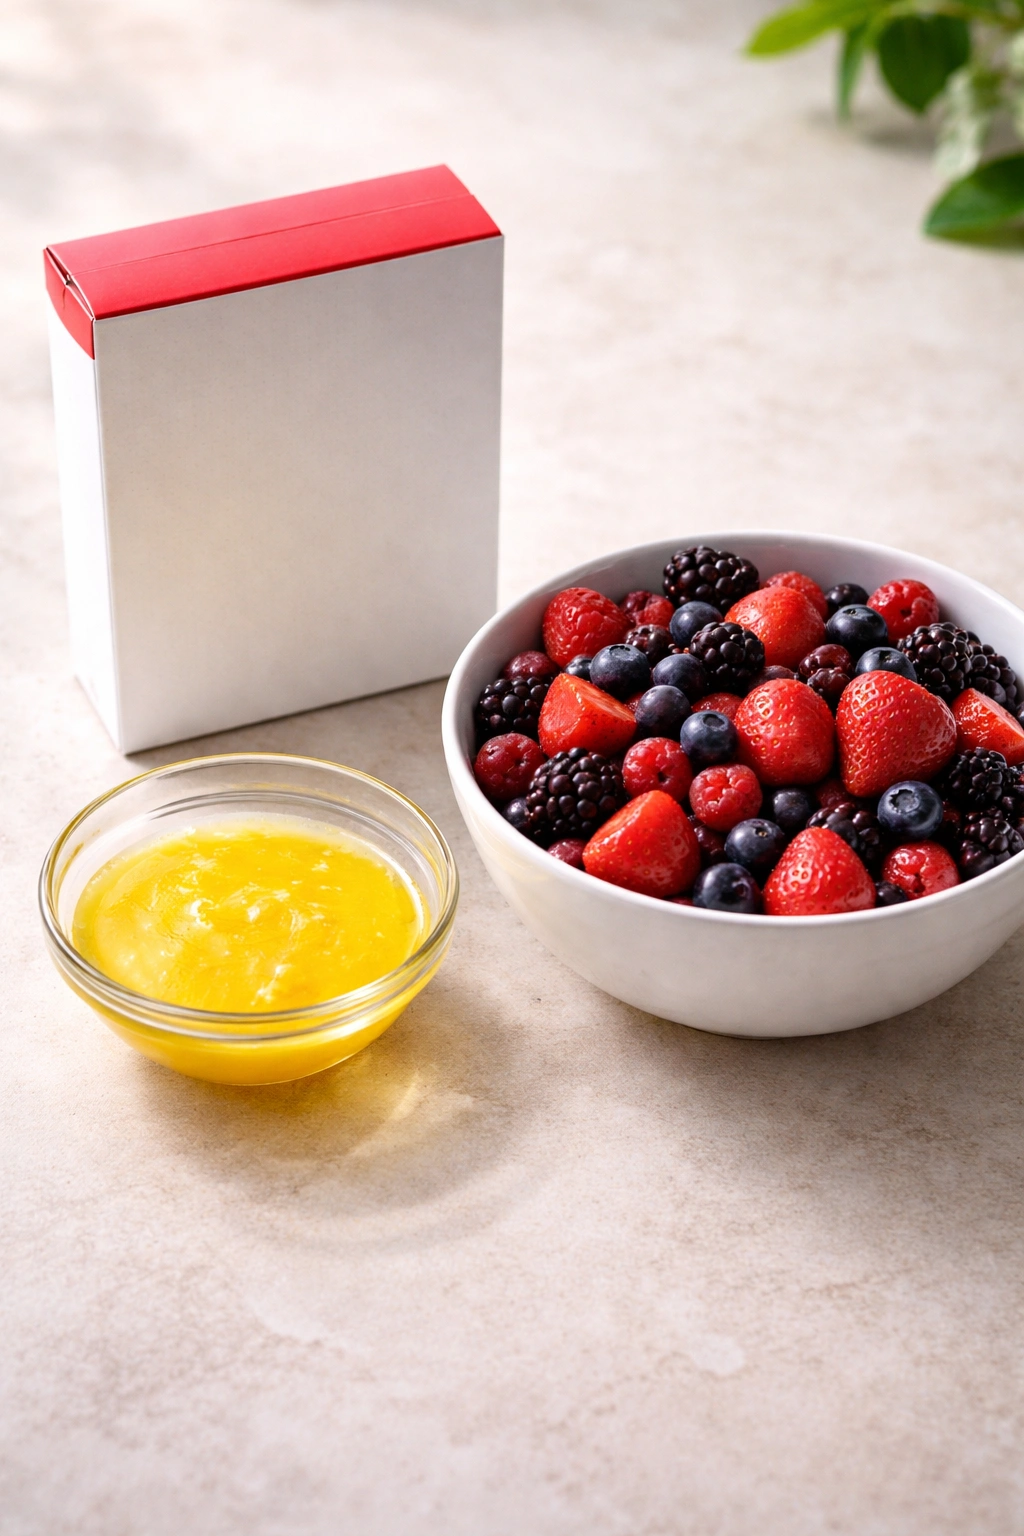
For the Cobbler:
- 1 box cake mix (any flavor: yellow, chocolate, vanilla, lemon, spice cake—your choice)
- 1 stick unsalted butter (4 ounces / 113 grams), melted (or ¼ cup vegetable oil, or ¼ cup fruit juice from canned fruit)
- 4 to 5 cups fruit (fresh or frozen; peaches, blueberries, blackberries, cherries, plums, or a mix—see variations below)
That’s truly all you need. The cake mix box already contains sugar, flour, leavening agents, salt, and flavorings. You’re adding fat for moisture and crumb, and fruit for filling and additional liquid. Everything else is built in.
Step-by-Step Instructions
Prepare the Pan and Preheat:
-
Preheat your oven to 350°F (175°C) and position the rack in the center of the oven.
-
Grease a 9×13-inch baking pan generously with butter or cooking spray, making sure to coat the bottom and all four sides. This matters more than you’d think—a well-greased pan prevents sticking and helps develop those crispy, caramelized edges.
Assemble the Cobbler:
-
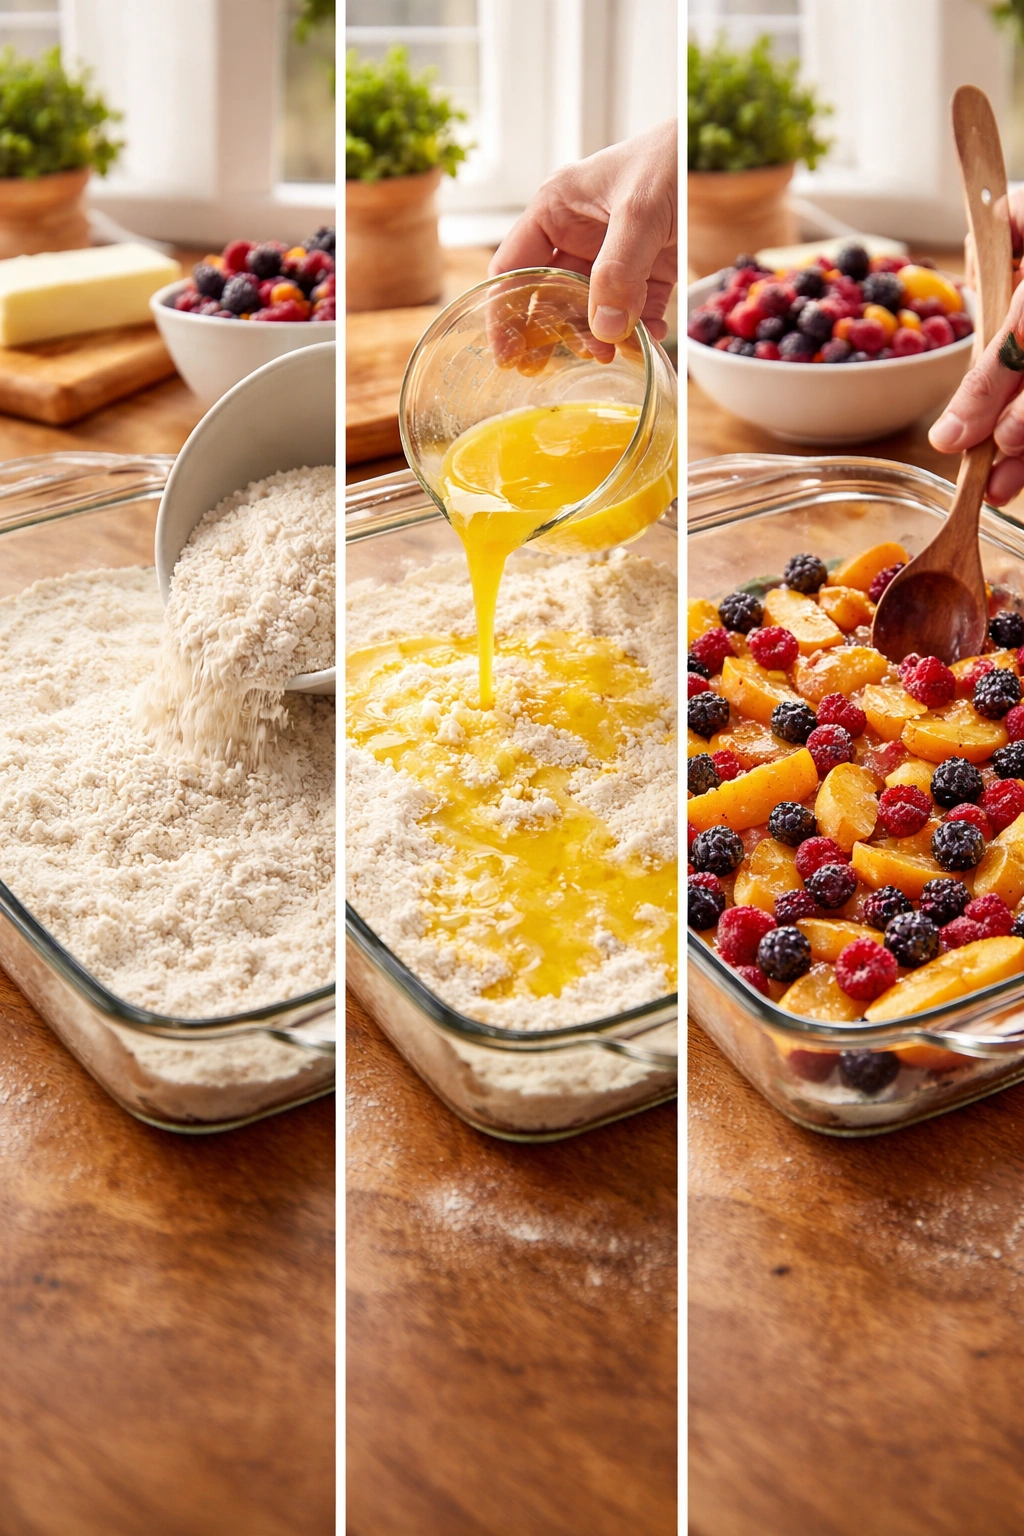
Pour the dry cake mix directly from the box into a large mixing bowl. Do NOT add water, eggs, or any of the ingredients called for on the cake mix box. You’re using the dry mix as-is.
Advertisements -
Pour the melted butter (or oil, or fruit juice) evenly over the dry cake mix. Using a fork, stir the mixture gently until it resembles coarse breadcrumbs with some pea-sized lumps still visible. The texture should be crumbly and uneven, not smooth like a traditional cake batter. This uneven texture is exactly what you want—it creates interesting texture variation in the final cobbler.
-
Spread the fruit evenly across the bottom of your prepared pan. If you’re using fresh fruit, don’t worry about arranging it perfectly; just distribute it so there aren’t huge gaps or huge piles. If you’re using frozen fruit, spread it directly from the bag without thawing it first. The frozen pieces will thaw as the cobbler bakes and release their juice exactly when you want them to.
-
Sprinkle the crumbly cake mix mixture evenly over the top of the fruit layer. Use your hands or a spatula to distribute it, pressing it down very gently and unevenly. Some spots will have thicker coverage; some will be thinner. This variation actually creates the best texture—thick spots stay cakey, thin spots where the fruit shows through will bake more like a fruit crisp. Don’t pack it down hard or smooth it out. You want it rustic and uneven.
Bake:
-
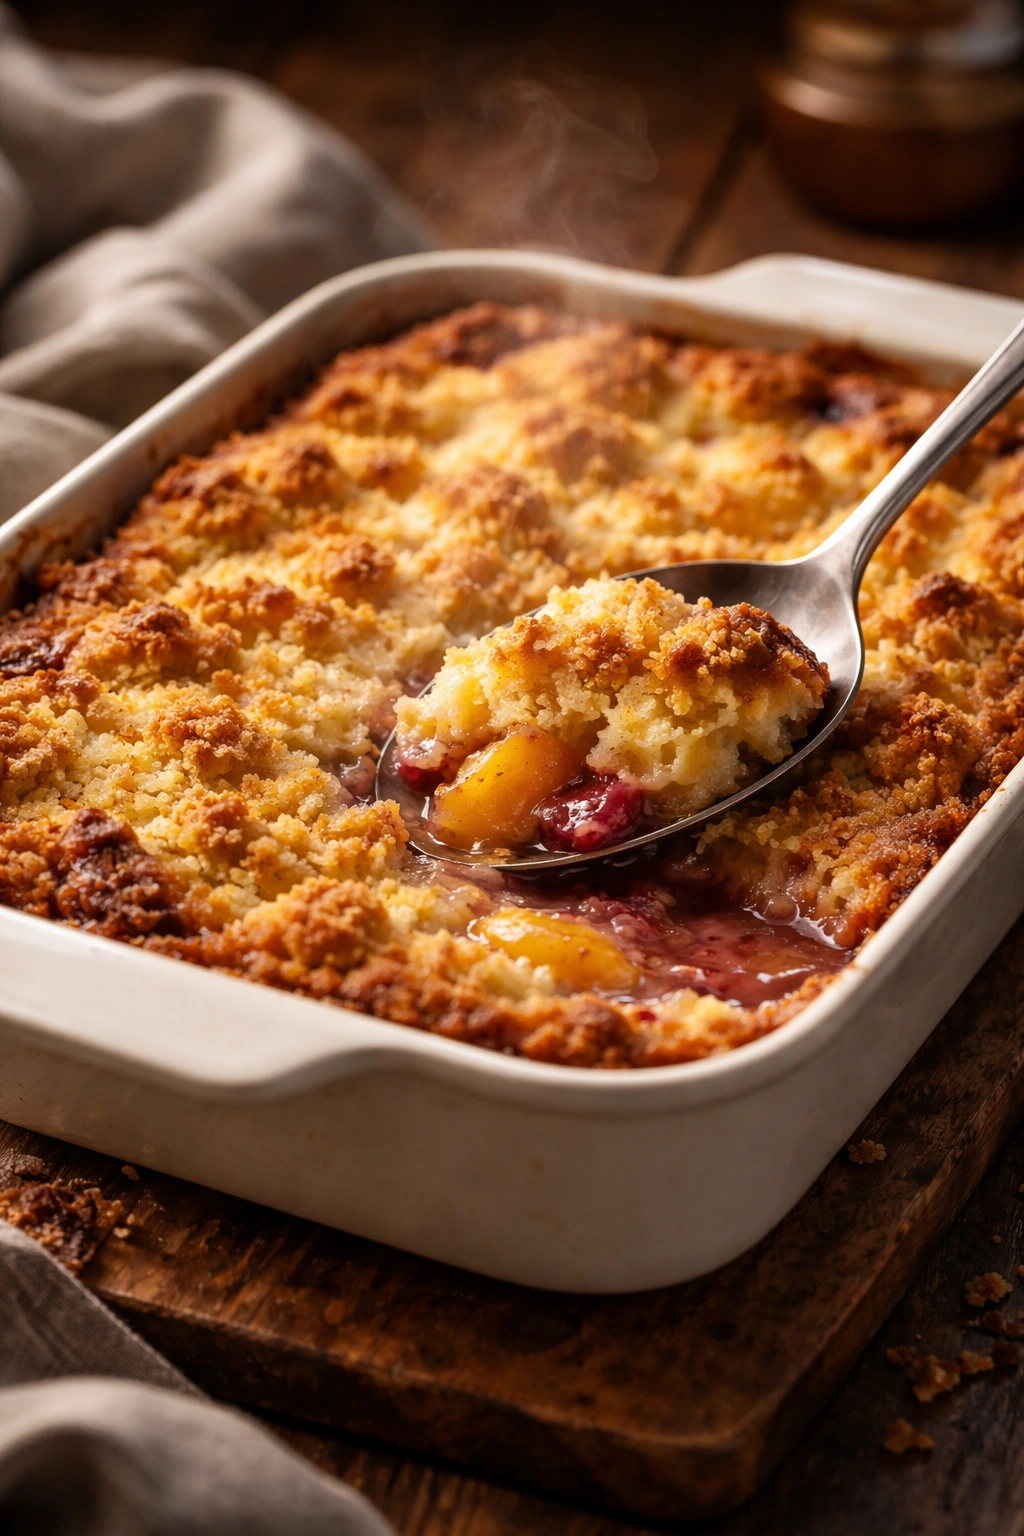
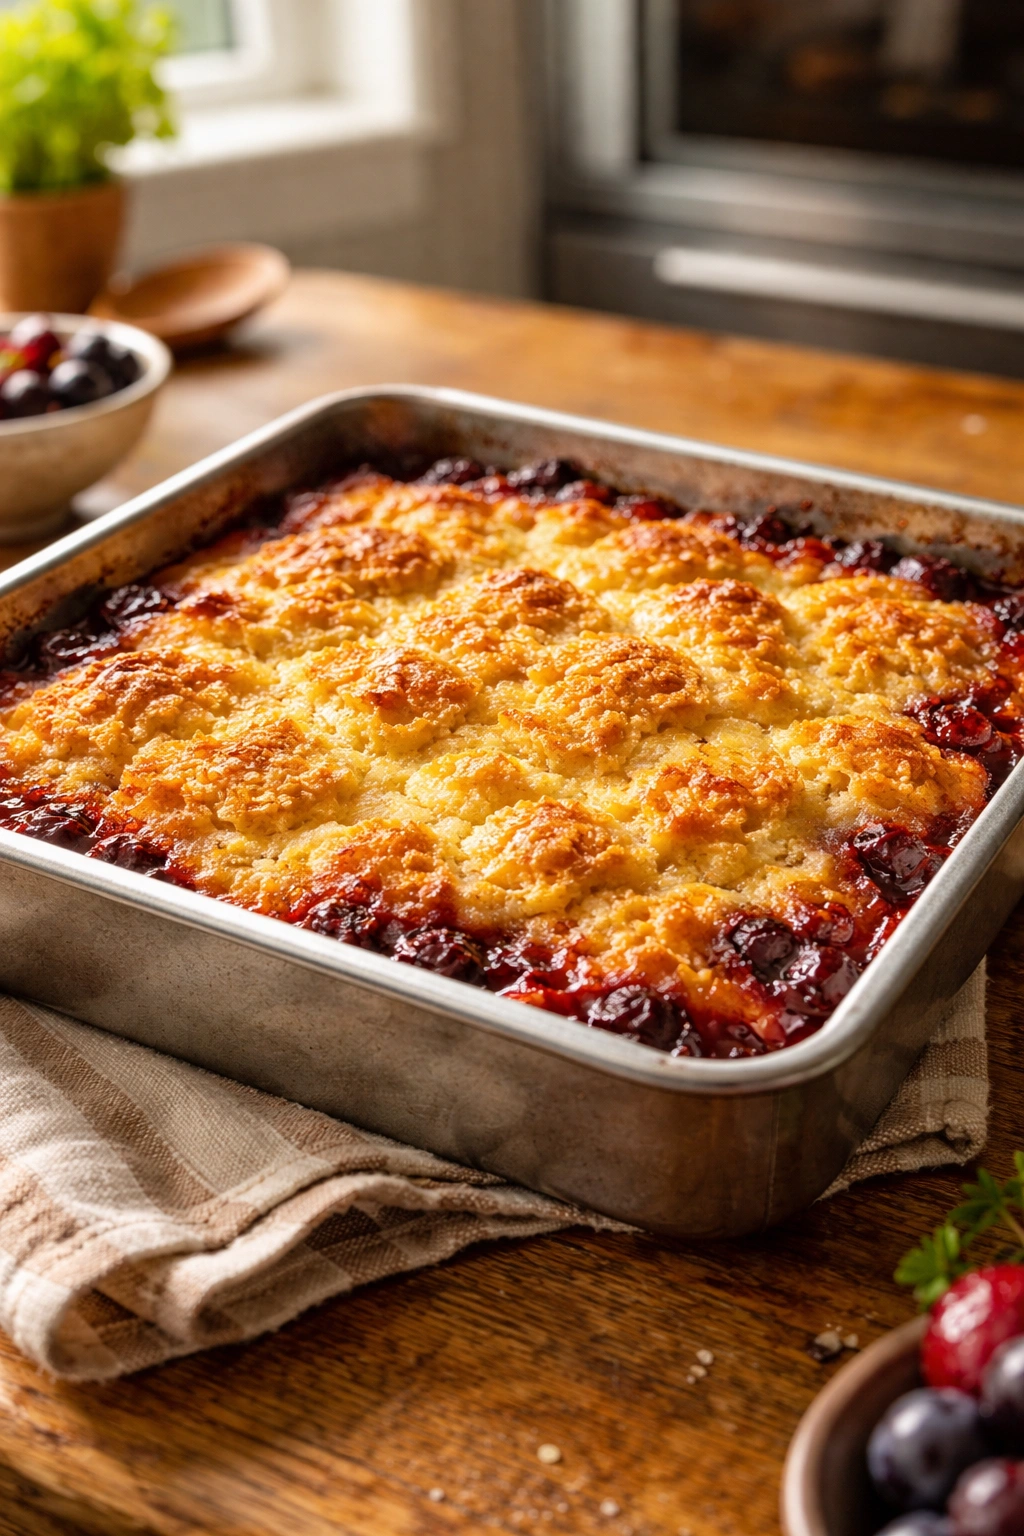
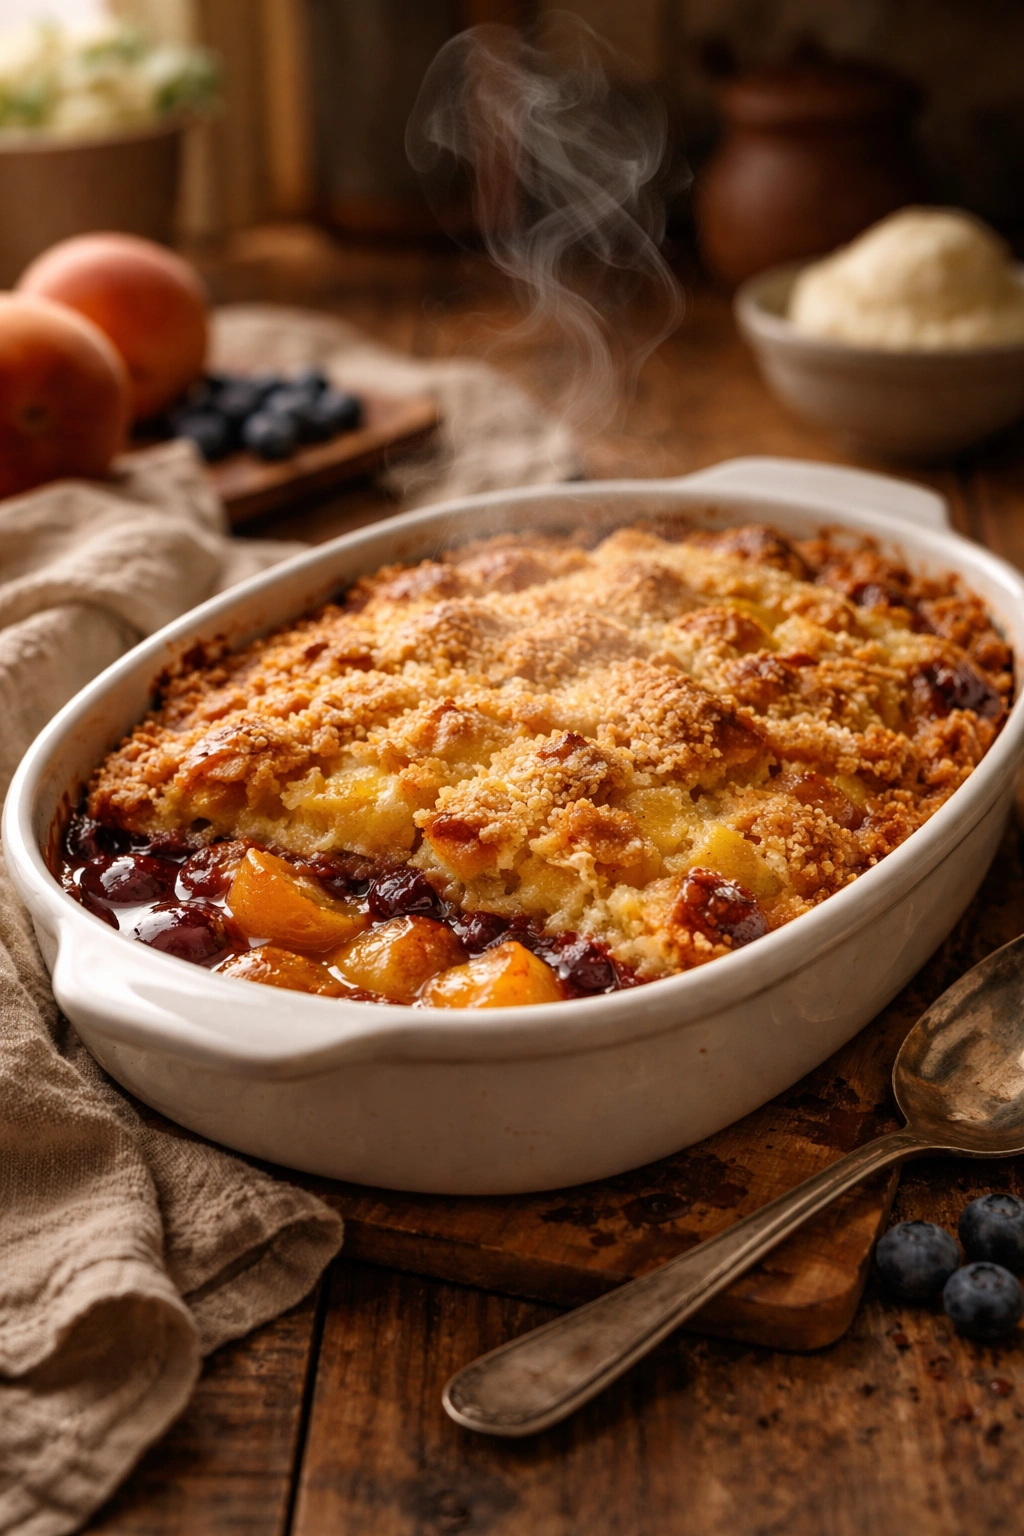
Place the pan in the preheated oven and bake for 35 to 40 minutes, rotating the pan halfway through baking (after about 18 minutes). The cobbler is done when the topping is golden brown across most of the surface, the edges have started to pull away from the sides of the pan, and you can see fruit juices bubbling up around the edges and through the cracks in the cake topping. The topping should look like golden cake, not pale or raw-looking.
-
Set the pan on a wire cooling rack and let the cobbler rest for at least 15 minutes before serving. This cooling time allows the fruit juices to set slightly, making the cobbler easier to scoop and serve. It’ll still be warm—comfortably warm, not piping hot—at this point, which is genuinely the best temperature to eat it.
Tips and Tricks for Perfect Results Every Single Time
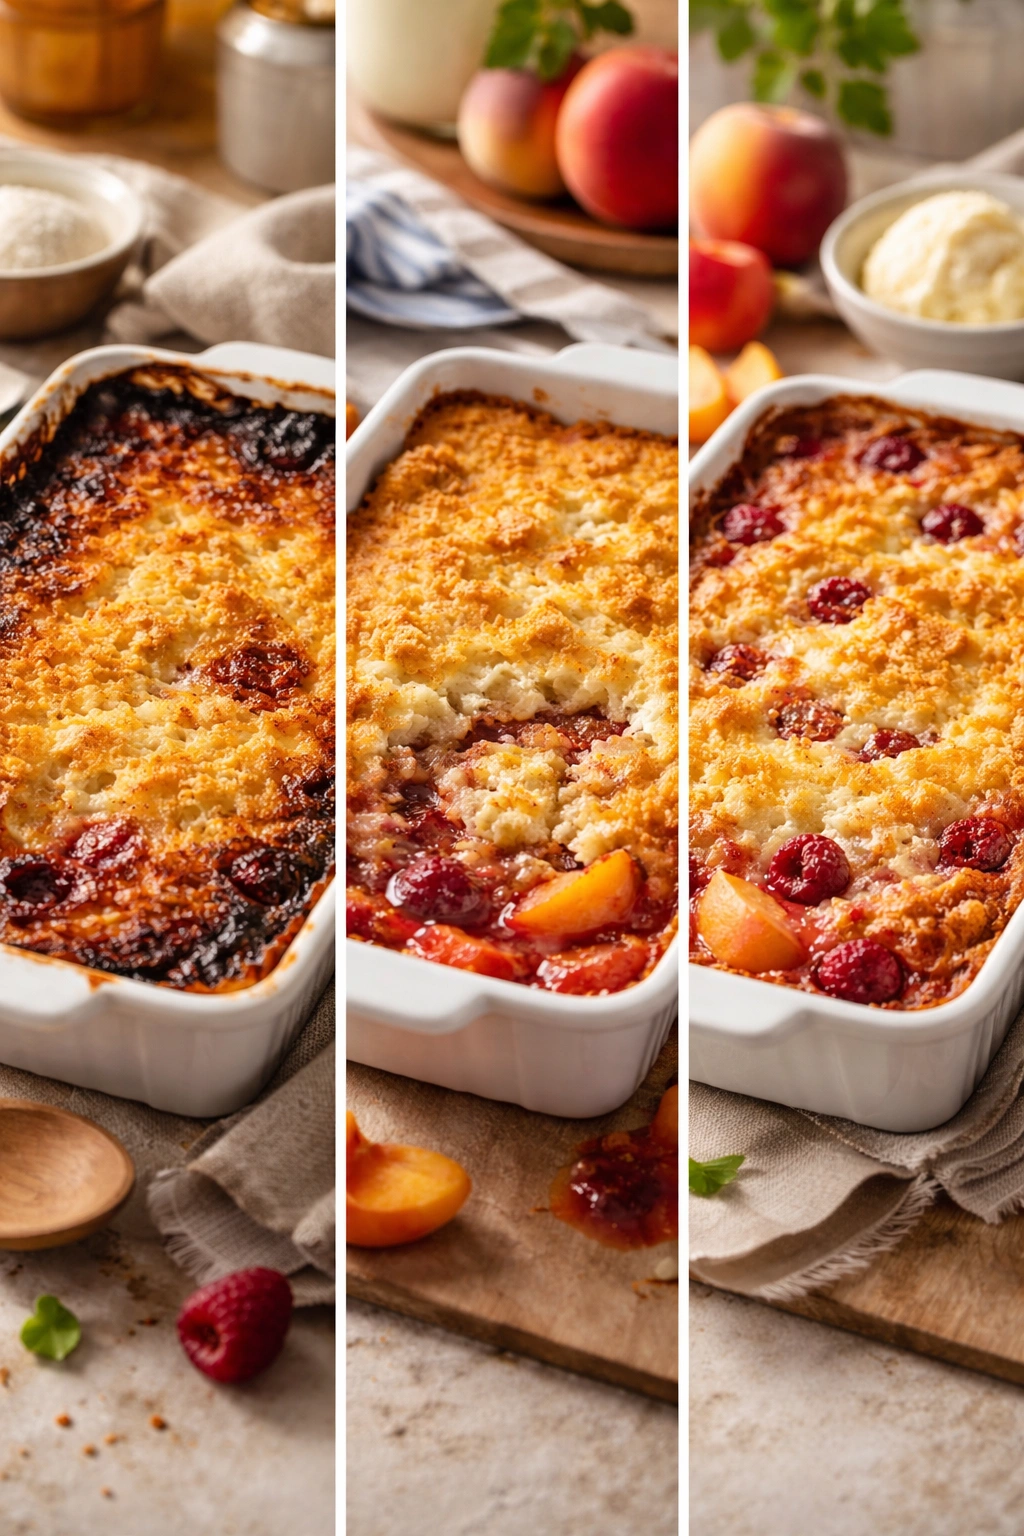
The most common mistake is underbaking. Thirty-five minutes might not be enough if your oven runs cool, and forty minutes might be plenty if it runs hot. The visual cue is what matters: golden brown topping and bubbling juices at the edges. If you’re not seeing that, give it another 5 minutes and check again.
Some ovens have hot spots. If you notice the cobbler browning unevenly—dark on one side, pale on the other—rotate the pan halfway through, which we’ve already built into the instructions. If one section is still browning much faster than the others, you can tent that section loosely with aluminum foil while the rest finishes baking.
The butter versus oil question comes down to flavor and texture. Melted butter creates a slightly richer, more cake-like texture and adds butter flavor. Vegetable oil creates a slightly more tender crumb. They’re honestly both great. If you’re using canned fruit, that syrup makes an excellent moisture ingredient too—drain the fruit and pour the syrup into the cake mix instead of (or in addition to) the butter. This adds sweetness and moisture simultaneously.
Don’t skip the resting time. A cobbler that goes straight from oven to plate will fall apart a bit as you scoop it. One that’s rested for 15 minutes will be set enough to scoop neatly while still being warm. If you prefer to eat it completely room temperature or even chilled, that’s fine too—the cobbler actually holds together better once it’s fully cooled.
Popular Variations and Flavor Twists

Peach Cobbler with Vanilla Cake Mix: This is the classic combination. Use fresh or frozen peaches, preferably at least 4 cups. The vanilla cake mix stays neutral enough that the peach flavor really shines. Serve with vanilla ice cream. This is what your grandmother probably made, and you’ll understand why.
Cherry Cobbler with Chocolate Cake Mix: Tart cherry juice with rich chocolate cake is genuinely sophisticated. Use fresh or frozen cherries (or canned in water, drained). The chocolate doesn’t compete with the fruit; instead, it deepens and enriches the cherry flavor. This is excellent slightly chilled or even at room temperature.
Blueberry Cobbler with Lemon Cake Mix: The brightness of lemon awakens blueberry flavor in a way that plain vanilla doesn’t. Use frozen blueberries (they hold their shape better than fresh during baking). This one is perfect for warm-weather gatherings and pairs beautifully with whipped cream.
Mixed Berry Cobbler: Combine blackberries, blueberries, and raspberries with either vanilla or lemon cake mix. The mixed flavors are complex and interesting. Use frozen mixed berries—you can buy them pre-mixed in most grocery stores.
Blackberry Cobbler with Vanilla or Spice Cake Mix: Blackberries are sturdy and flavorful; they’re nearly impossible to mess up. Spice cake mix adds warmth and complexity. This combination feels a bit more autumnal and sophisticated than fruit + vanilla.
Plum Cobbler with Almond or Vanilla Cake Mix: Plums are slightly tart and deeply flavorful. If you can find almond cake mix, it’s phenomenal with plum. Otherwise, vanilla works beautifully too. The slight tartness keeps this cobbler from feeling too sweet.
Storage, Make-Ahead Options, and Reheating
A cobbler is best eaten the day it’s made, while the cake topping is still tender and the fruit is still releasing its juices. That said, it keeps beautifully for several days and actually tastes good cold the next morning.
Store it covered (plastic wrap or aluminum foil works fine) at room temperature for up to 8 hours, then move it to the refrigerator. It’ll keep in the fridge for up to 4 days. The cake layer will absorb more of the fruit juices as it sits, making it moister and almost pudding-like by day two or three. Some people prefer it this way; others prefer it fresh. Both are genuinely good.
To reheat a cold cobbler, place a serving-size piece in a microwave-safe bowl and microwave for 20 to 30 seconds. It’ll warm through and the fruit layer will get slightly gooey again. You can also reheat the entire pan in a 300°F oven for about 15 minutes, loosely covered with foil, until warm throughout.
The cobbler does freeze well, though texture changes slightly. Cool it completely, wrap the entire pan tightly in plastic wrap and then in aluminum foil, and freeze for up to 3 months. Thaw it overnight in the refrigerator and reheat gently in a 300°F oven. The texture won’t be quite as fresh-from-the-oven tender, but it’ll still be delicious—honestly, no one will notice the difference if you’re serving it warm.
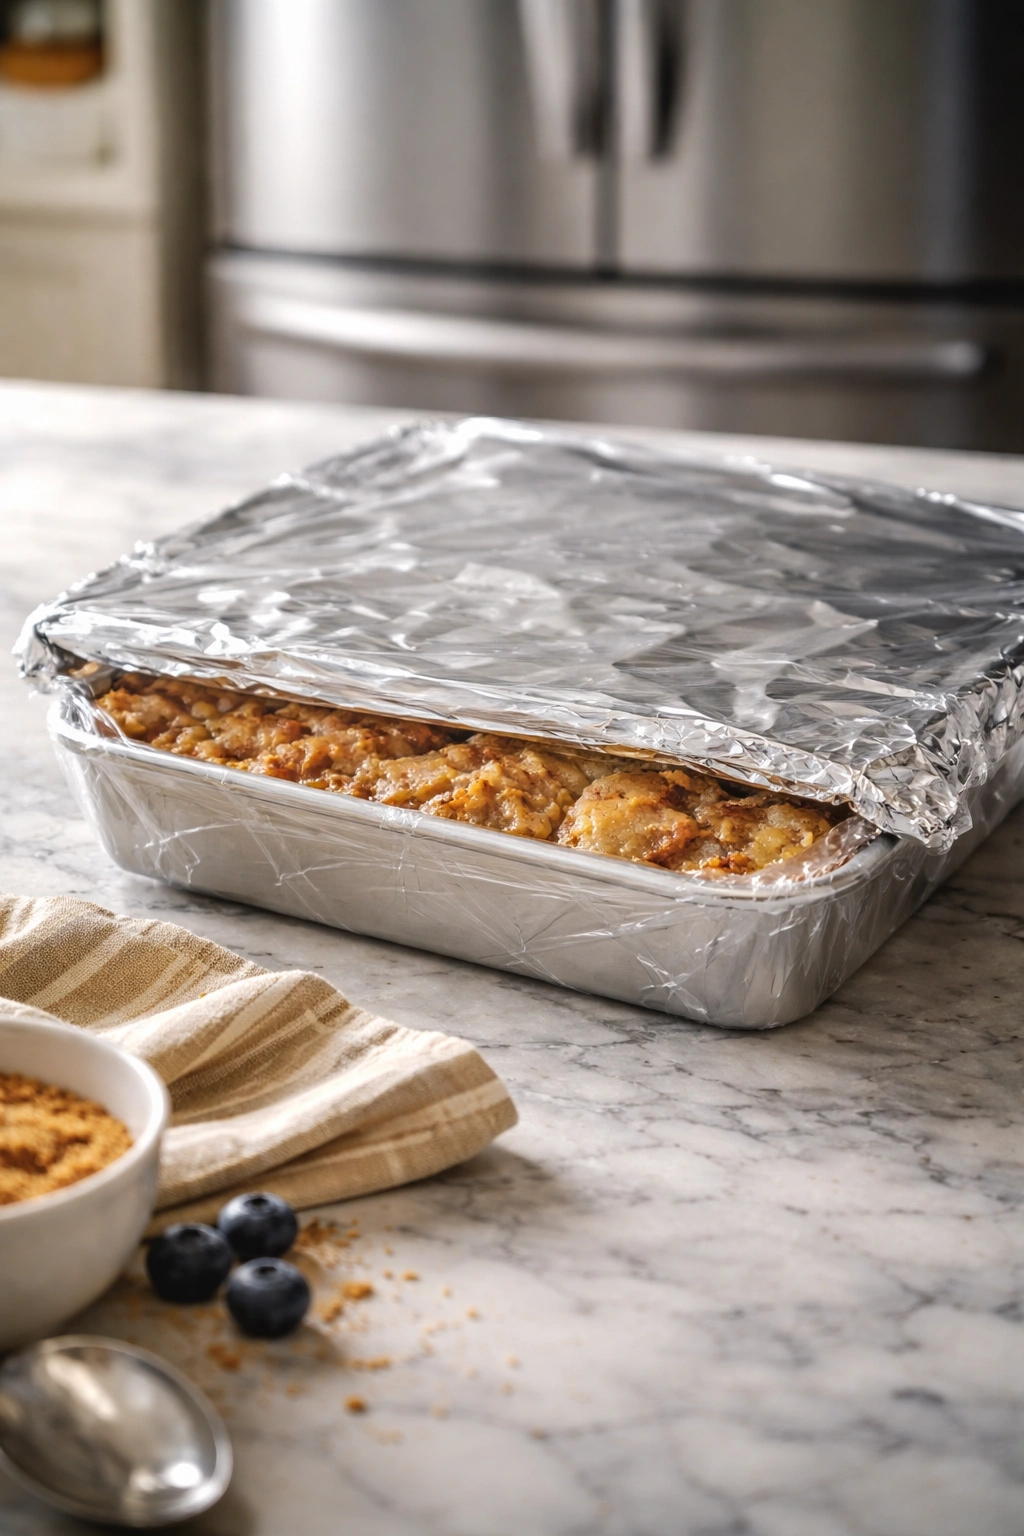
You can’t really make this cobbler ahead of baking (the dry cake mix gets clumpy and dense if it sits mixed with wet ingredients). However, you can have everything measured and ready to go: cake mix in a bowl, fruit in another bowl, butter melted and waiting. Assemble and bake when you’re ready.
Serving Suggestions and Perfect Pairings
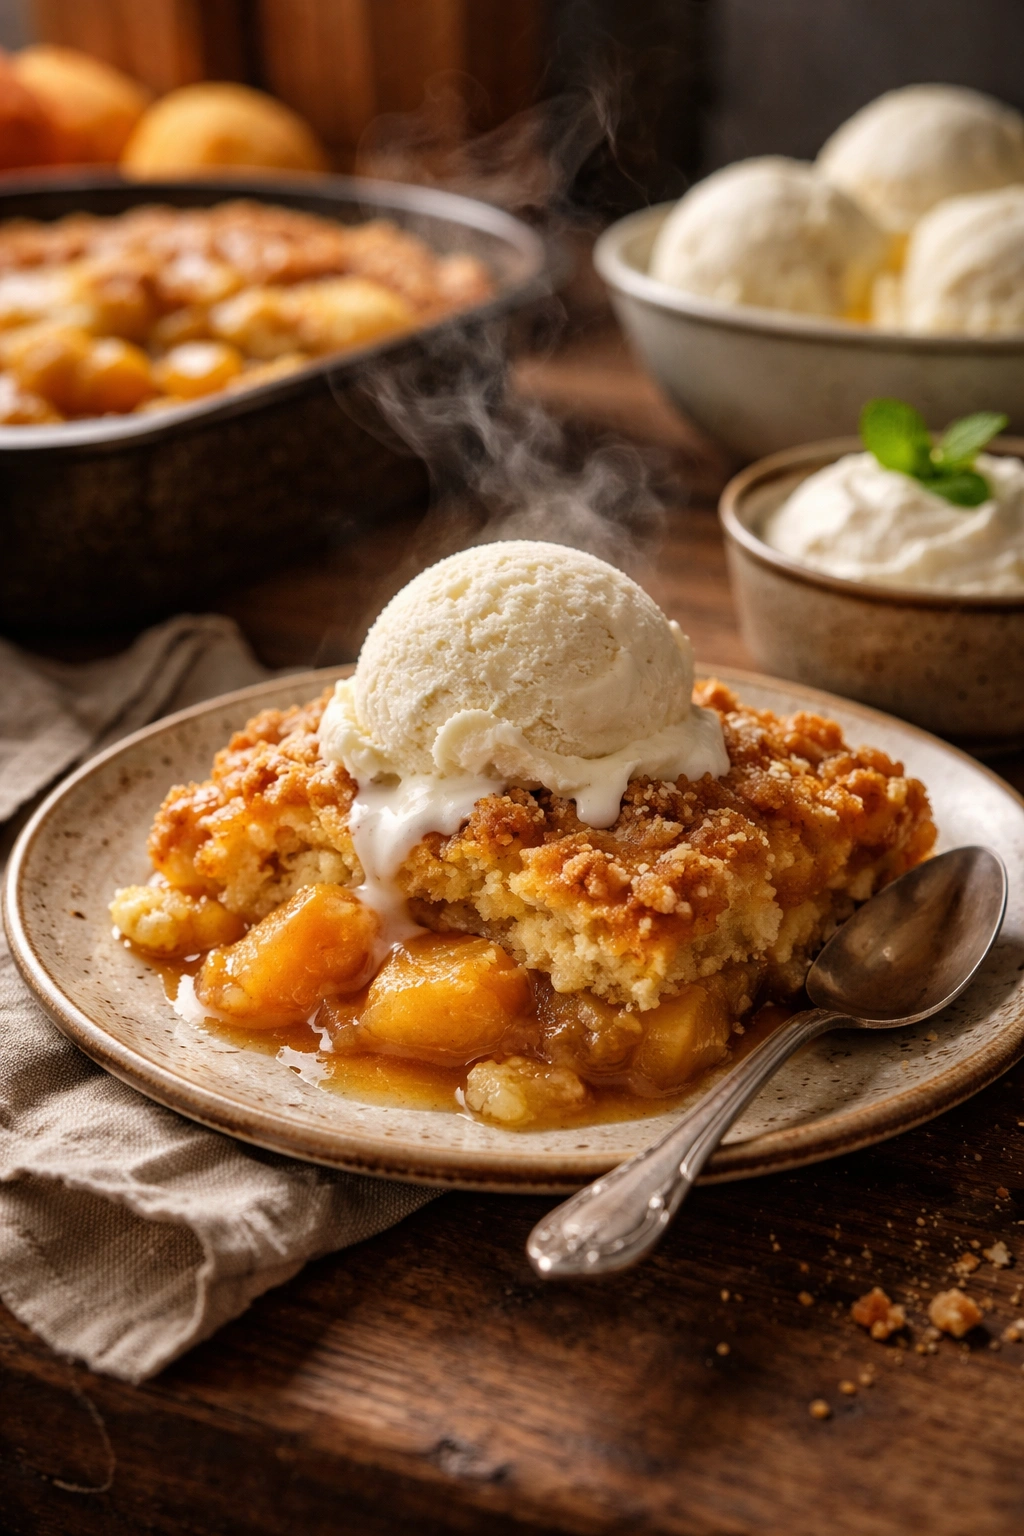
A warm slice of cobbler with a scoop of vanilla ice cream melting on top is the no-brainer pairing, and it’s genuinely perfect. The cold cream against the warm cake and juicy fruit is one of life’s simple pleasures. Vanilla ice cream is the classic, but honestly, most ice cream flavors work—salted caramel, butter pecan, cinnamon ice cream, even coffee ice cream pairs surprisingly well.
Whipped cream is another excellent option. Fresh whipped cream (not the canned stuff, though that works too) adds elegance and richness without the dairy chill of ice cream. A dollop of sour cream mixed with a bit of sugar and vanilla creates a tangy contrast that makes the fruit taste more vibrant.
Serve the cobbler straight from the pan into bowls, with a generous spoon and plenty of those crispy, caramelized edges if you can get them. The pan presentation is actually part of the appeal—it’s clearly homemade, clearly from-scratch feeling, even though it took you 45 minutes total. People love that.
A cobbler is perfect for casual gatherings, church potlucks, family dinners, or just-because desserts. It’s humble enough to feel approachable and delicious enough to feel impressive. It scales up easily (make two cobblers if you need to feed a crowd) and comes together quickly if someone asks you to bring dessert and you’re short on time.
Common Mistakes and How to Avoid Them
The cobbler is gummy and won’t set up: This usually means too much liquid and possibly underbaking. Use frozen fruit instead of fresh (frozen fruit releases juice more gradually), drain canned fruit carefully, or reduce the fat ingredient by a tablespoon. Make sure you’re baking long enough for the top to turn golden.
The top is cake-like but the fruit layer is basically applesauce: This is actually fine—many people love this texture. But if you prefer distinct fruit pieces, use frozen fruit instead of fresh. Frozen fruit holds its shape longer during baking.
The cake mix stays grainy and doesn’t mix properly with the butter: The butter might not be fully melted, or you might be overmixing. The mixture should stay crumbly and coarse; it shouldn’t be smooth like traditional cake batter. Use a fork and stir gently, just until combined.
The edges are burning while the center is still raw: Your oven probably runs hot. Lower the temperature by 25°F next time, or tent the edges loosely with foil while the center finishes baking.
It looks perfect but tastes bland: The fruit flavor needs to come through. Make sure you’re using fruit with actual taste—not pale, mealy, flavorless fruit. If you’re using canned fruit, choose varieties packed in juice, not heavy syrup (or drain the syrup carefully and replace it with less liquid).
The cobbler is too sweet: Use less butter and more fruit juice in place of it. The fruit itself provides plenty of sweetness, especially if you’re using fruit packed in syrup. Some people even prefer to reduce the sweetness by draining canned fruit thoroughly before using it.
Final Thoughts
This cobbler exists for a reason: it’s foolproof, it tastes genuinely good, and it comes together so quickly that it eliminates the excuse of “but baking takes forever.” You can have warm dessert on the table in under an hour using exactly three ingredients, most of which you probably have in your pantry right now.
The beauty of this recipe is how flexible it is. The cobbler works with whatever fruit is in season, whatever cake mix flavor you’re in the mood for, and whatever fat or juice you have available. It works whether you’re an experienced baker confident enough to improvise or someone who’s never baked anything more complex than a box mix before.
Once you’ve made this once, you’ll make it again and again. It’s the recipe you grab when someone’s coming over unexpectedly, when you need dessert in a hurry, when fresh fruit is on sale, when you want something warm and comforting on a cool day. It’s the recipe that proves you don’t need a complicated list of ingredients, fancy equipment, or culinary school training to create something genuinely delicious. You just need to understand what each ingredient does and why the combination works. That’s all it takes.