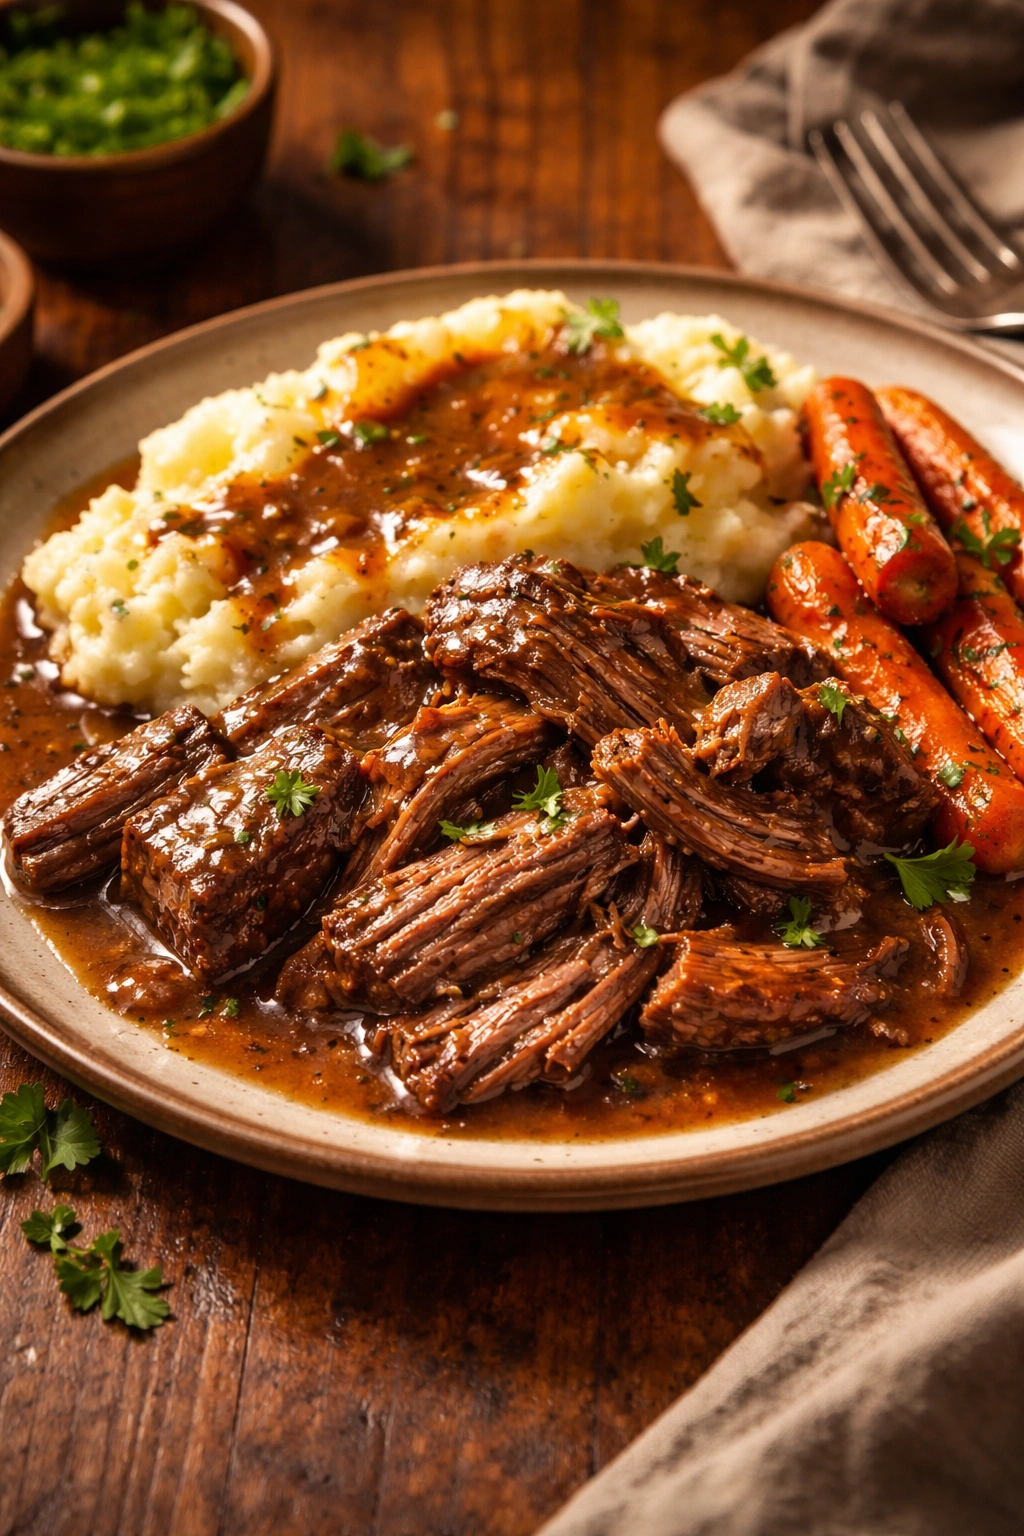
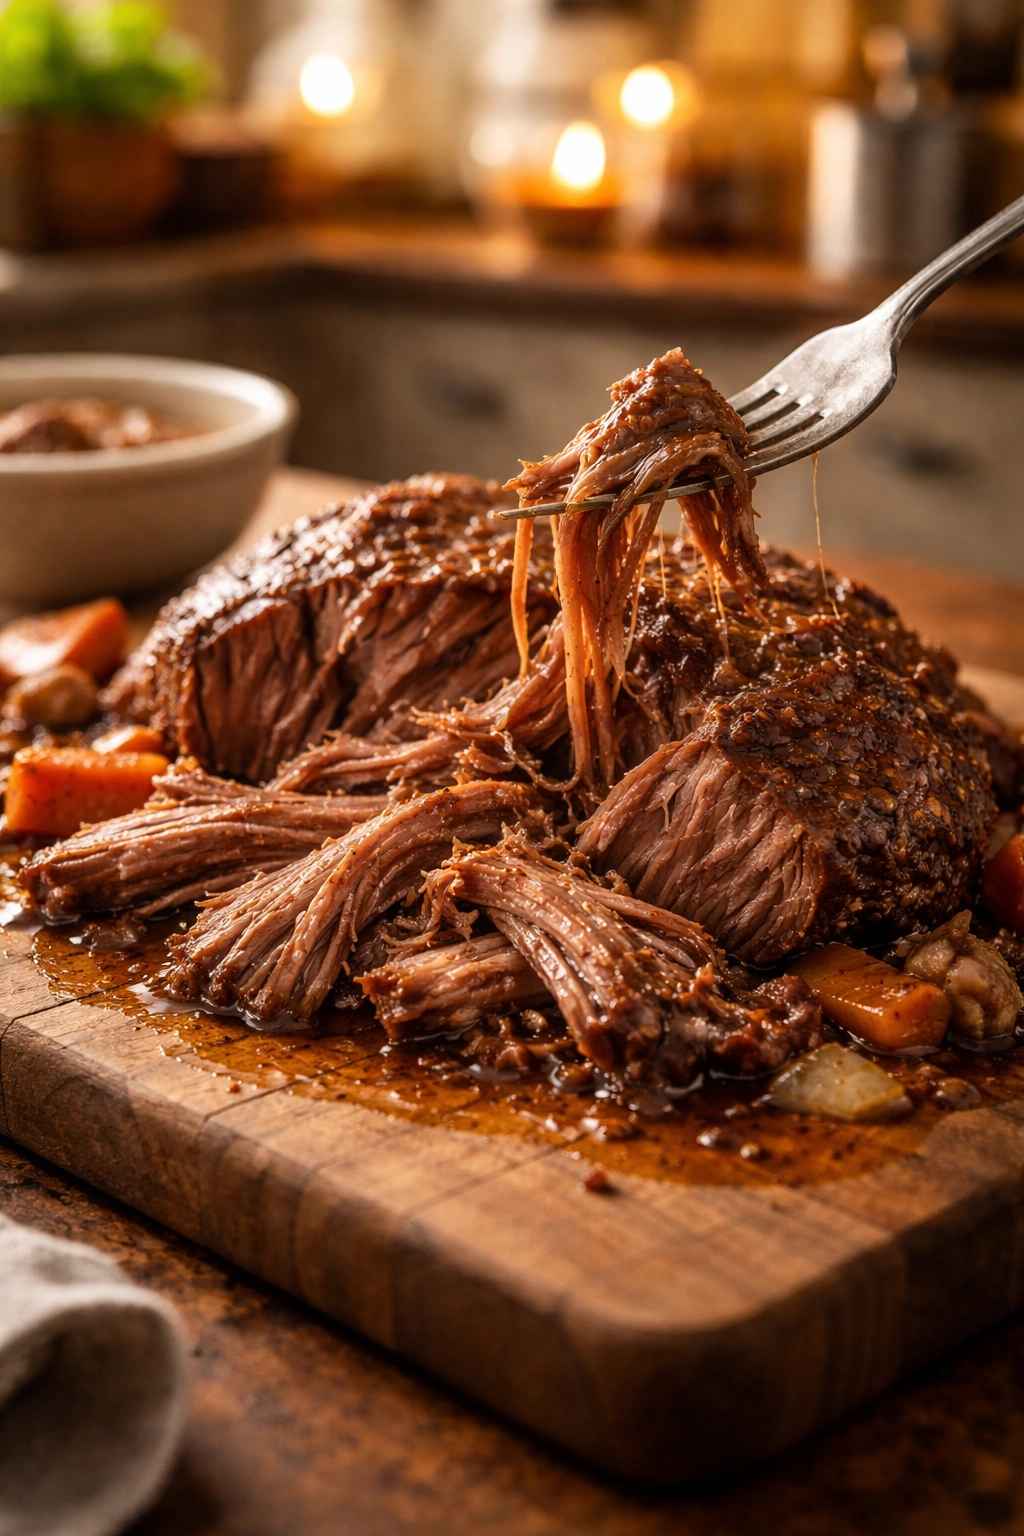
Crock Pot Roast That Falls Apart When You Touch It
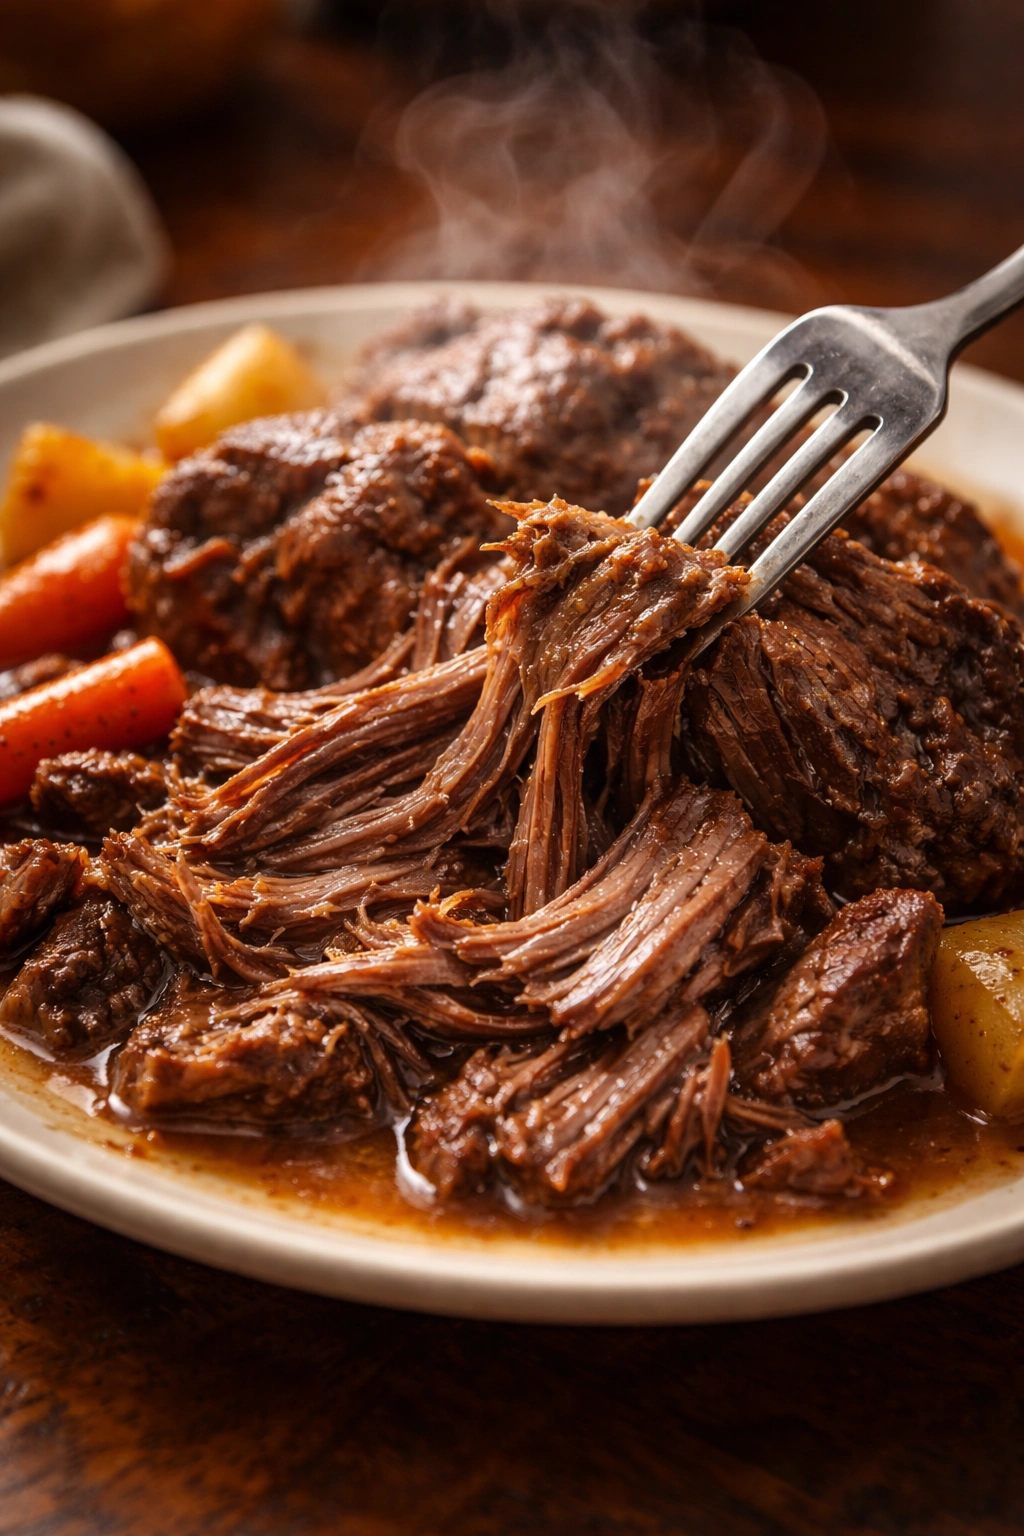
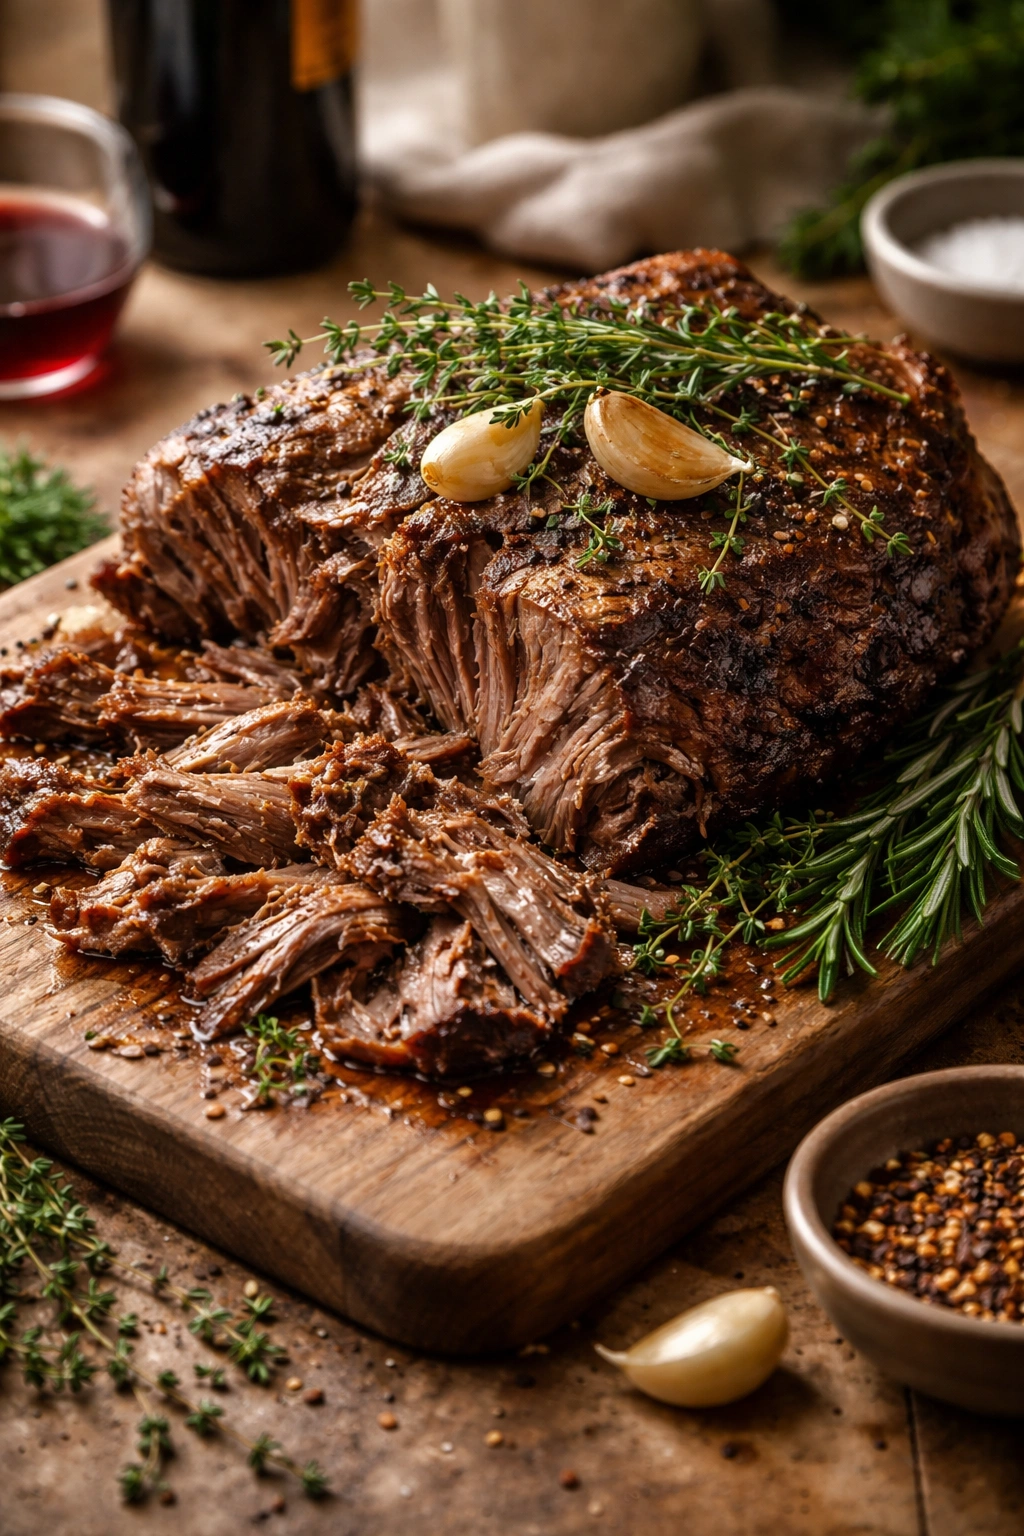
There’s nothing quite like the aroma of beef roast slow-cooking all day, filling your home with anticipation. When dinner time arrives and you lift the lid to find meat so tender it shreds with barely a touch of your fork, that’s the magic of a perfectly executed slow cooker roast. This isn’t the tough, chewy roast that takes forever to chew through—this is the kind of comfort food that melts in your mouth and leaves your family asking for seconds.
The challenge with roast, though, is that so many home cooks end up disappointed. They follow a recipe, wait all day, and serve meat that’s still tough, dry, or stubbornly resistant to being pulled apart. It doesn’t have to be this way. The difference between a mediocre roast and an absolutely show-stopping one comes down to understanding a few key principles: choosing the right meat, using the right liquid, respecting the cooking time, and resisting the urge to fiddle with it while it cooks. Once you nail these fundamentals, you’ll have a dinner that tastes like you spent hours at the stove when you barely did any work at all.
The beauty of this approach is that it transforms one of the most economical cuts of beef into something that rivals restaurant-quality meals. Chuck roast, which costs a fraction of premium cuts, becomes fork-tender and juicy through the magic of low, slow heat and moist cooking. It’s the perfect recipe for busy weeknights, meal planning, or impressing your family on the weekend. Your slow cooker becomes your secret weapon, handling all the heavy lifting while you go about your day.
Why Chuck Roast Is Perfect for the Slow Cooker
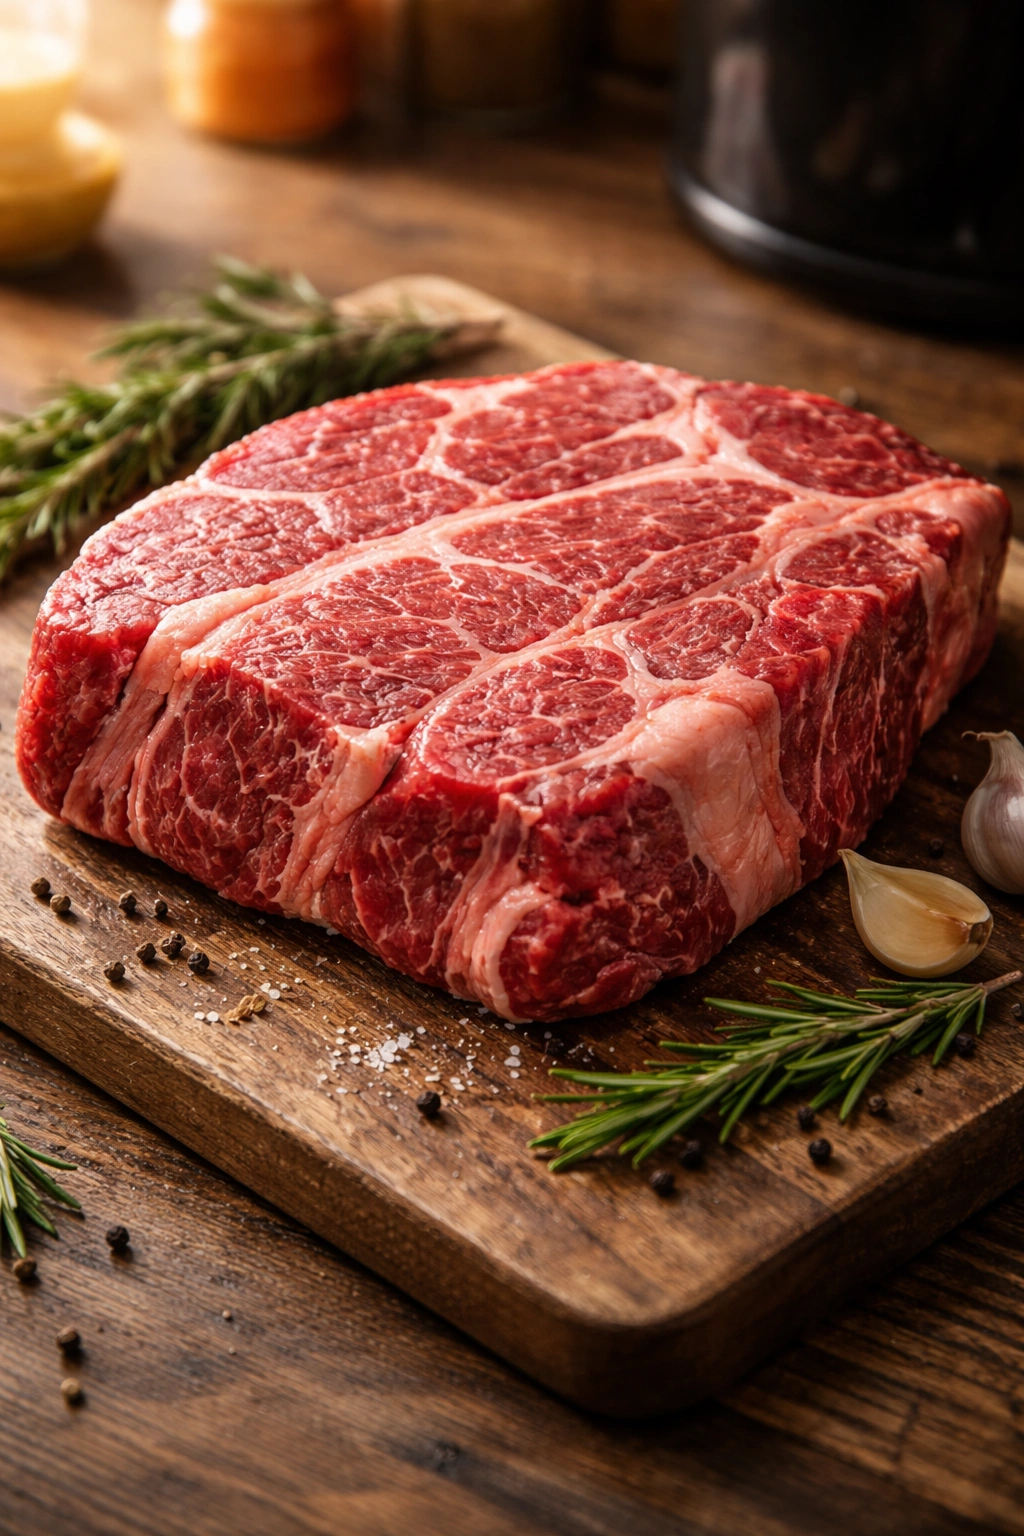
Chuck roast stands out as the gold standard for slow cooker cooking, and there’s solid reasoning behind this reputation. This cut comes from the shoulder area of the cow, a heavily muscled region that the animal uses constantly. That heavy use means the meat contains abundant connective tissue, sinew, and collagen—elements that would make this cut hopelessly tough if you tried to cook it quickly over high heat.
Here’s where the slow cooker completely transforms the equation. When chuck roast cooks at low temperature for extended periods in a moist environment, something remarkable happens to all that connective tissue. The collagen begins breaking down and converting into gelatin around 150°F, and by 160°F, that conversion accelerates dramatically. This gelatin is what gives fall-apart meat its incredible succulence and tenderness. The longer and slower you cook it, the more complete this transformation becomes.
The fat marbling throughout chuck roast also plays a critical role in the final result. That white veining you see throughout the meat isn’t a flaw—it’s insurance against a dry, disappointing roast. As the meat cooks, the fat slowly renders and bastes the meat from within, keeping it moist and flavorful. The fat also contributes substantially to the taste; don’t make the mistake of trimming it away thinking it’ll make the roast healthier. That fat is flavor, and it’s exactly what separates a memorable roast from a forgettable one.
When you compare chuck roast to leaner cuts like rump roast or round roast, the difference becomes obvious. Those leaner cuts have less connective tissue and less fat, which means they toughen up during long cooking rather than tenderize. You’ll need to cook them for even longer to achieve tenderness, and even then, they never quite reach the same luxurious texture as chuck roast. The marbling in chuck roast is your friend; embrace it completely.
The Science Behind Fall-Apart Tenderness
Understanding what happens inside the meat during slow cooking helps explain why patience and low temperature are non-negotiable. Meat is primarily made up of muscle fibers held together by connective tissue. When you apply high heat quickly, those muscle fibers contract violently and squeeze out moisture, leaving you with a dense, dry, tough result. But apply gentle heat over many hours? That’s a completely different story.
Collagen, the main component of connective tissue, requires time and heat to break down. This isn’t a quick process. At temperatures below 140°F, very little breaks down. But starting around 150°F and accelerating significantly at 160°F and above, collagen begins converting to gelatin. Gelatin is soft, moist, and gives meat that wonderful, tender quality you’re after. The longer you maintain that gentle heat, the more collagen converts, and the more tender the meat becomes.
The beauty of the slow cooker is that it maintains a consistent, low temperature—typically around 190°F on the low setting—which is perfect for this collagen conversion without overcooking the muscle fibers themselves. The covered environment also traps steam, creating a moist environment where the meat can braise rather than dry out. This combination is essentially unbeatable for tough cuts of meat.
Liquid is absolutely essential to this process. The moisture in the slow cooker prevents the surface of the meat from drying out while the interior slowly tenderizes. You don’t need the meat completely submerged; it typically needs liquid coming about one-third to halfway up the sides. This creates an ideal braising environment where the meat stays moist and the connective tissue has time to fully convert to gelatin.
Choosing the Right Cut of Meat
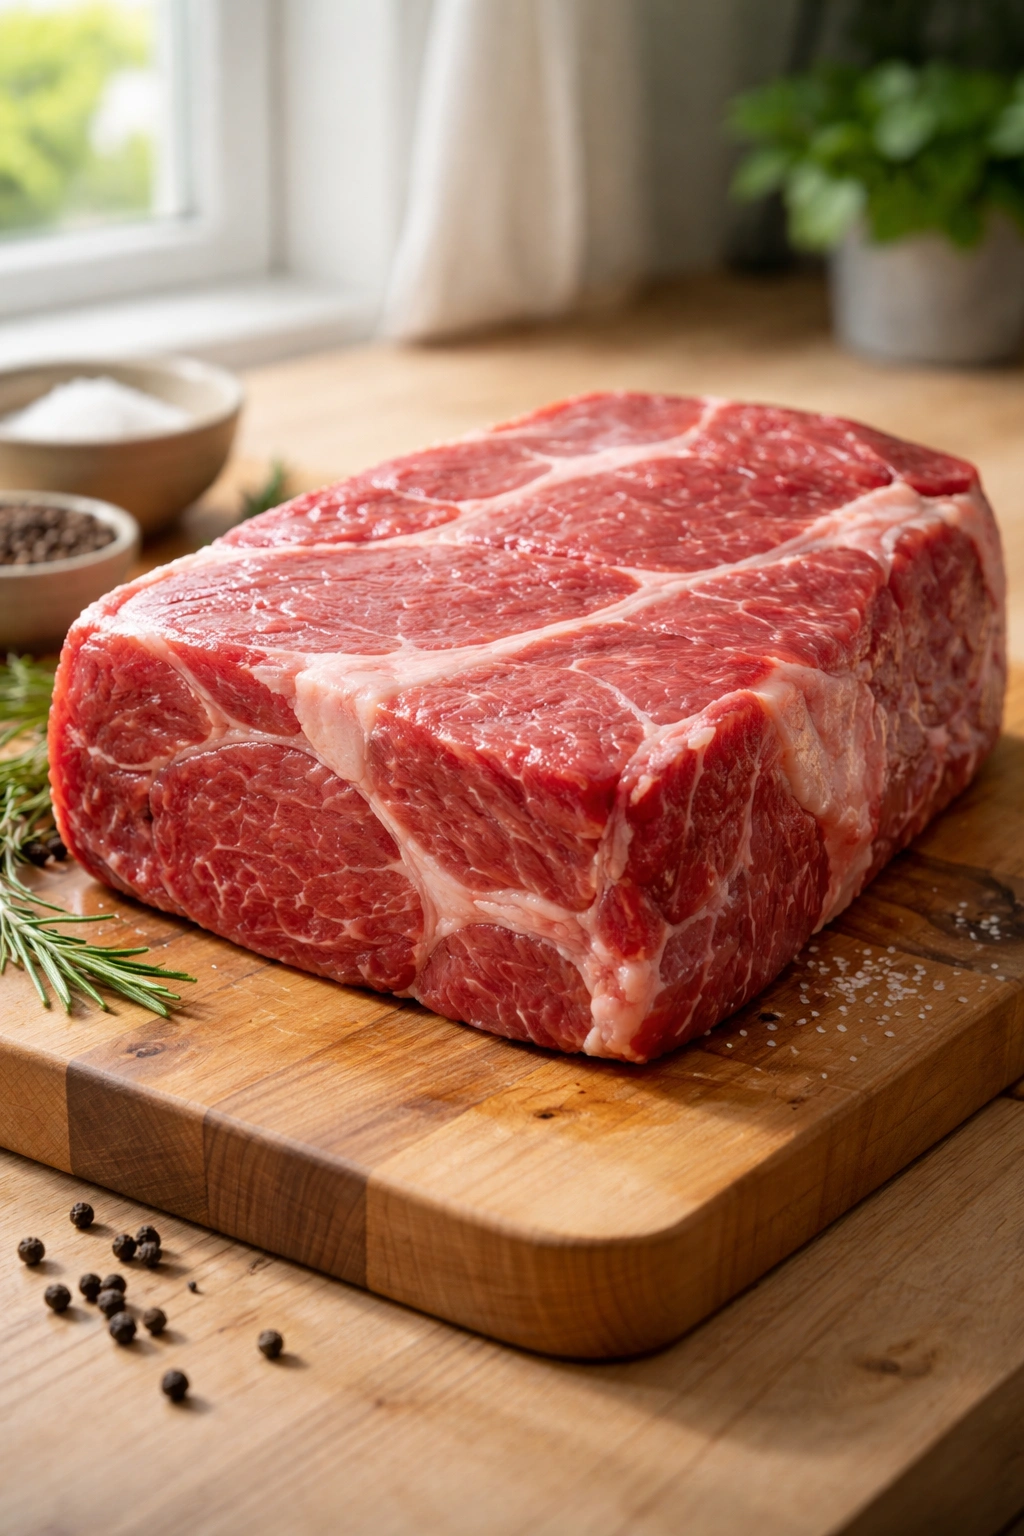
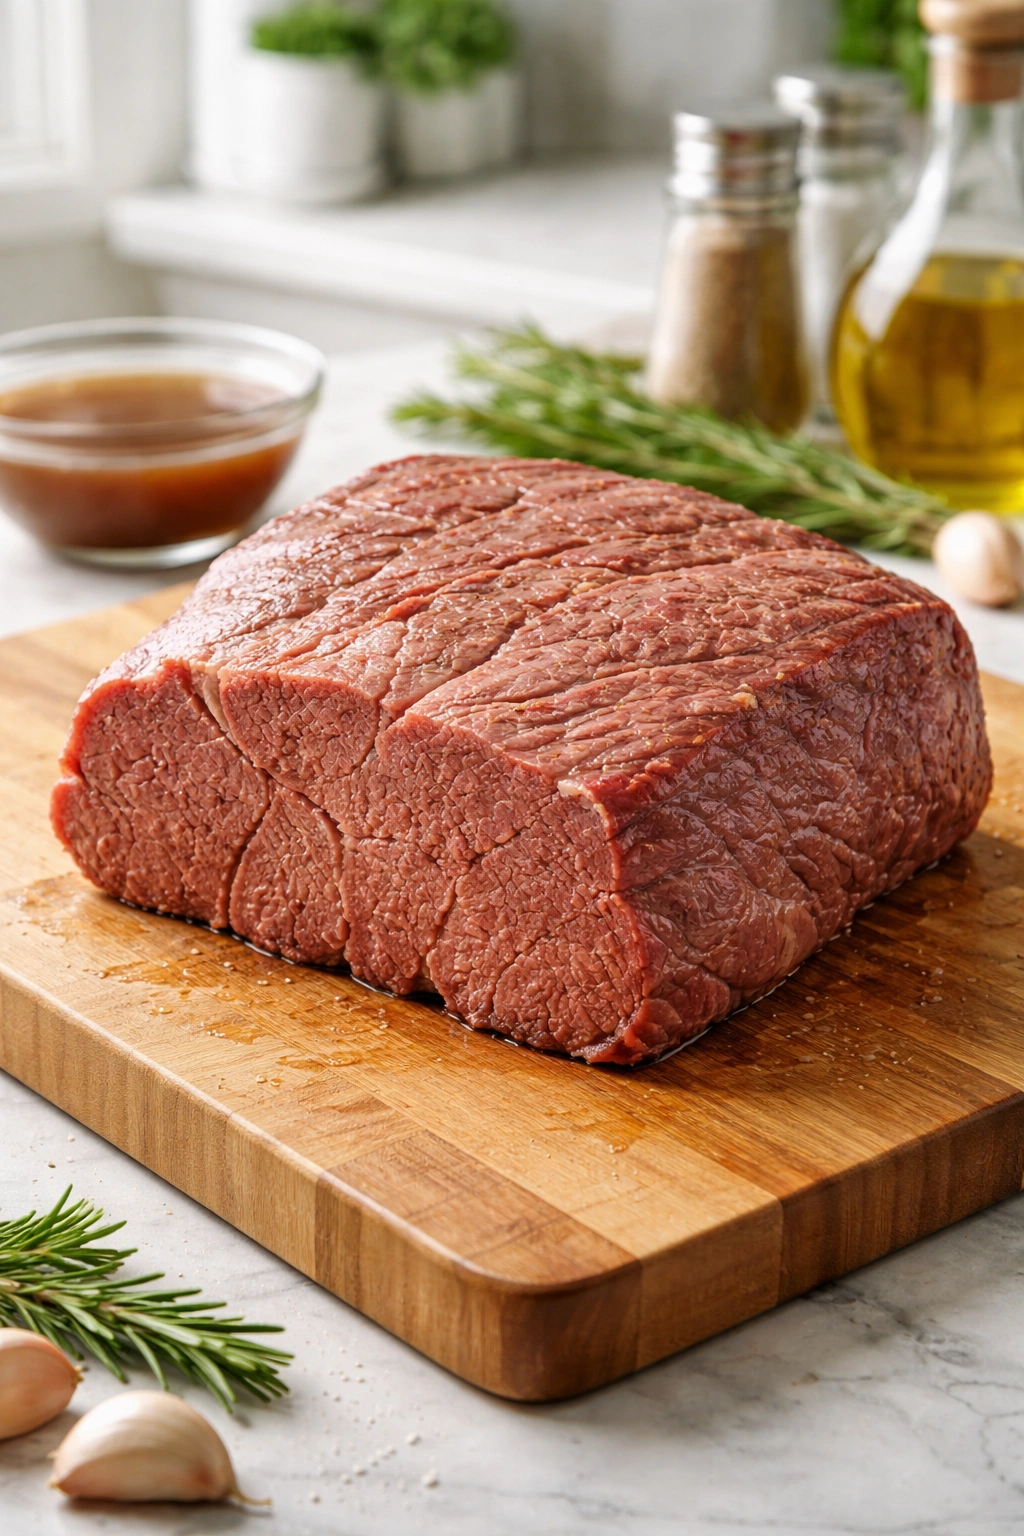
Not all roasts are created equal when it comes to slow cooking. Your success starts the moment you select the meat at the butcher counter or meat case. Look specifically for boneless chuck roast—sometimes labeled as chuck shoulder roast, boneless chuck roast, or chuck pot roast. The key word is “chuck,” not round, rump, or eye of round.
When examining chuck roast at the store, look for good marbling throughout the meat, which appears as thin white lines of fat running through the red meat. This marbling is exactly what you want. You’ll also notice a layer of fat on the outside; some is good (it contributes flavor and keeps the meat moist), but trim away any exceptionally thick chunks of exterior fat before cooking if you feel it’s excessive. A reasonable amount is fine—that outer fat layer actually helps keep the roast moist during the long cooking process.
Size matters, too. A roast that’s 2.5 to 3.5 pounds is ideal. This size range cooks relatively evenly without taking an excessively long time, and it serves a reasonable number of people without too much leftover. A roast significantly smaller might overcook before the inside fully tenderizes, while a very large roast might require 10+ hours to cook through completely, which starts pushing the limits of safe food handling.
Weight also affects cooking time, though it’s not a perfectly linear relationship. Generally, plan for about 6 to 8 hours on low for a 3-pound roast. Every slow cooker is slightly different—some run hotter than others—so this is a starting point, not an absolute guarantee. You’ll learn your specific slow cooker’s tendencies over time.
When you can’t find chuck roast, acceptable alternatives include cross-rib roast (which is really a chuck cut marketed differently), brisket, or shoulder roast. Each has slightly different characteristics, but all contain sufficient connective tissue to benefit from slow cooking. However, stick with chuck roast for your first attempt to ensure excellent results.
Essential Equipment for Perfect Results
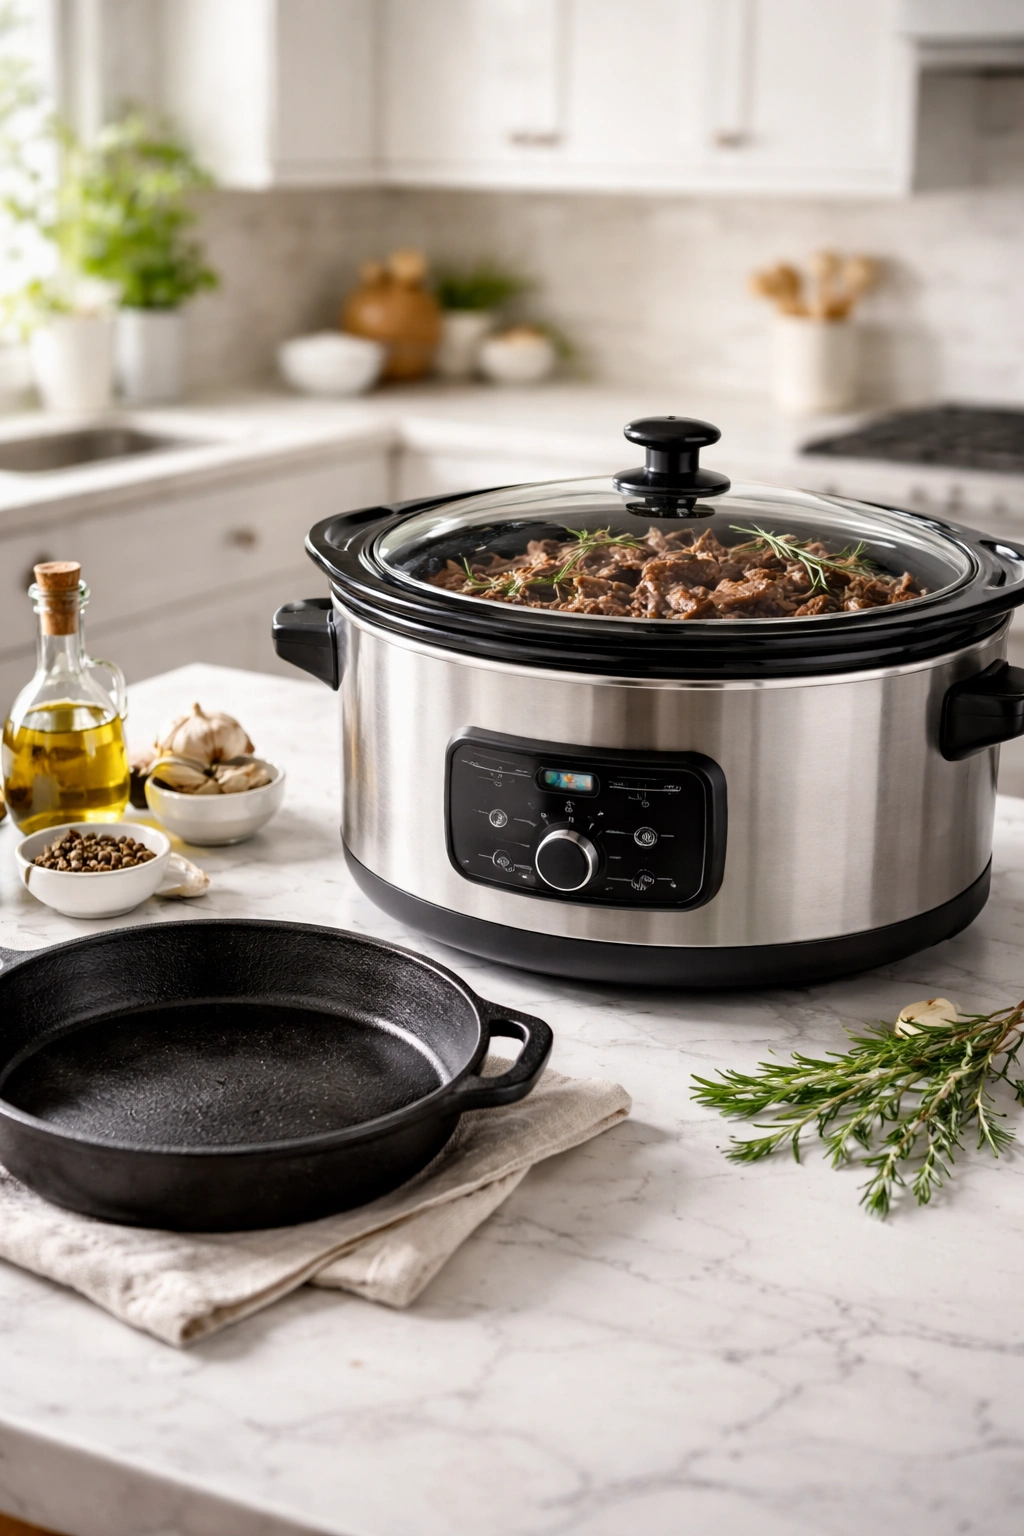
You’ll need very little equipment to make an exceptional slow cooker roast, but what you do use matters. A quality slow cooker is the obvious requirement. This doesn’t mean you need an expensive model with every bell and whistle; a basic 6-quart slow cooker works perfectly fine. What matters more is that it heats evenly and maintains a consistent low temperature. Many people find that oval-shaped slow cookers work better for roasts than round ones, as they accommodate the shape of the meat more naturally.
If you want to sear the roast before slow cooking (which adds flavor, though it’s optional), use a large heavy skillet—ideally cast iron, which holds heat exceptionally well. Stainless steel works too, though it’s more temperamental about heat retention. Make sure the skillet is hot enough to develop a good golden crust on the meat. A non-stick skillet is less ideal for searing because it doesn’t handle high heat as well, though it will work if cast iron isn’t available.
For making gravy at the end, have a small whisk and a small saucepan ready. If you’re thickening the gravy with cornstarch, you’ll need a small bowl to mix the cornstarch slurry. A meat thermometer is helpful if you want to verify doneness, though a fork test (whether the meat shreds easily) is equally reliable and more traditional.
Two forks are essential for shredding the finished roast. Unlike shredding chicken with two forks, shredding beef roast requires a bit more force, so make sure you have sturdy forks that won’t bend under pressure. Some people prefer to use them for shredding right in the slow cooker before transferring to a serving dish.
Serving and Timing Information
Yield: Serves 6 to 8 | Approximately 8-10 servings depending on portion size
Prep Time: 15 minutes (includes trimming meat, chopping vegetables, and assembling ingredients)
Cook Time: 8 hours on low (or 4 hours on high, though low is strongly preferred for best texture)
Total Time: 8 hours 15 minutes active + resting time
Difficulty: Beginner — This recipe requires minimal hands-on technique. Even someone who rarely cooks can follow these steps and achieve restaurant-quality results. The slow cooker does virtually all the work.
Chill/Rest Time: None required, though allowing the cooked roast to rest in its liquid for 15-20 minutes before shredding helps it cool to a handleable temperature and allows the juices to redistribute.
Best Served: Immediately while warm, served with generous quantities of the rich gravy poured over the tender meat.
Complete Ingredient List
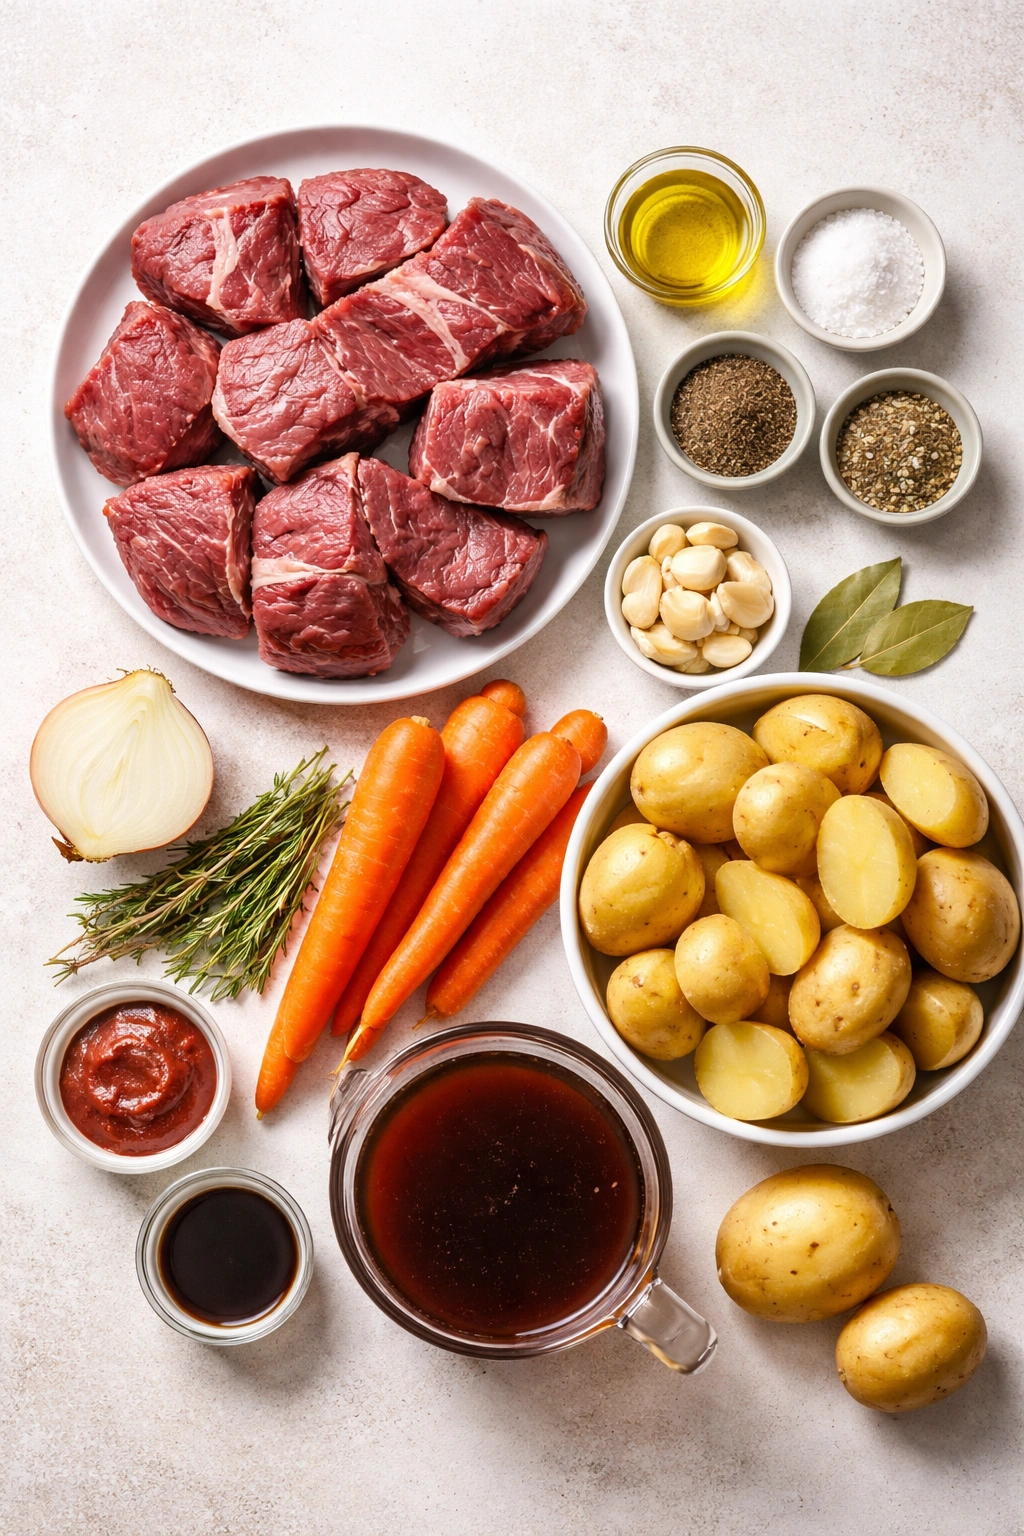
For the Roast:
- 3 to 3½ pounds boneless chuck roast, trimmed of excessive exterior fat
- 2 tablespoons olive oil or vegetable oil
- 2 teaspoons fine sea salt (divided: 1 teaspoon for initial seasoning, 1 for final adjustment)
- 1 teaspoon freshly ground black pepper
- 1½ teaspoons dried thyme (or 1 tablespoon fresh thyme leaves if available)
- 1 teaspoon dried rosemary (or 1 tablespoon fresh rosemary if available)
- ½ teaspoon garlic powder
- ¼ teaspoon ground black pepper (additional, for depth)
- 1½ cups beef broth (or beef stock; can substitute with bone broth for additional richness)
- 1 large yellow onion, roughly chopped into quarters or thick slices
- 4 to 5 medium carrots, peeled and cut into 2-inch pieces (or 2 cups baby carrots, left whole if using thicker ones)
- 4 to 5 medium Yukon Gold or red potatoes, cut into roughly 1½-inch pieces (optional but traditional)
- 3 to 4 cloves fresh garlic, minced or pressed
- 2 bay leaves
- 1 tablespoon tomato paste (optional but adds depth to the braising liquid)
- 1 tablespoon Worcestershire sauce (adds savory depth; can be omitted if not available)
For the Gravy:
- ¼ cup cornstarch
- ¼ cup cool water
- 2 cups of the pan juices from the slow cooker
- ½ teaspoon salt (adjust to taste)
- ¼ teaspoon freshly ground black pepper (adjust to taste)
- Optional: 1 tablespoon butter (swirled in at the very end for extra richness)
Step-by-Step Instructions
Prepare the Meat:
-
Remove the chuck roast from its packaging and pat it thoroughly dry with paper towels. Excess surface moisture prevents proper browning, so don’t skip this step.
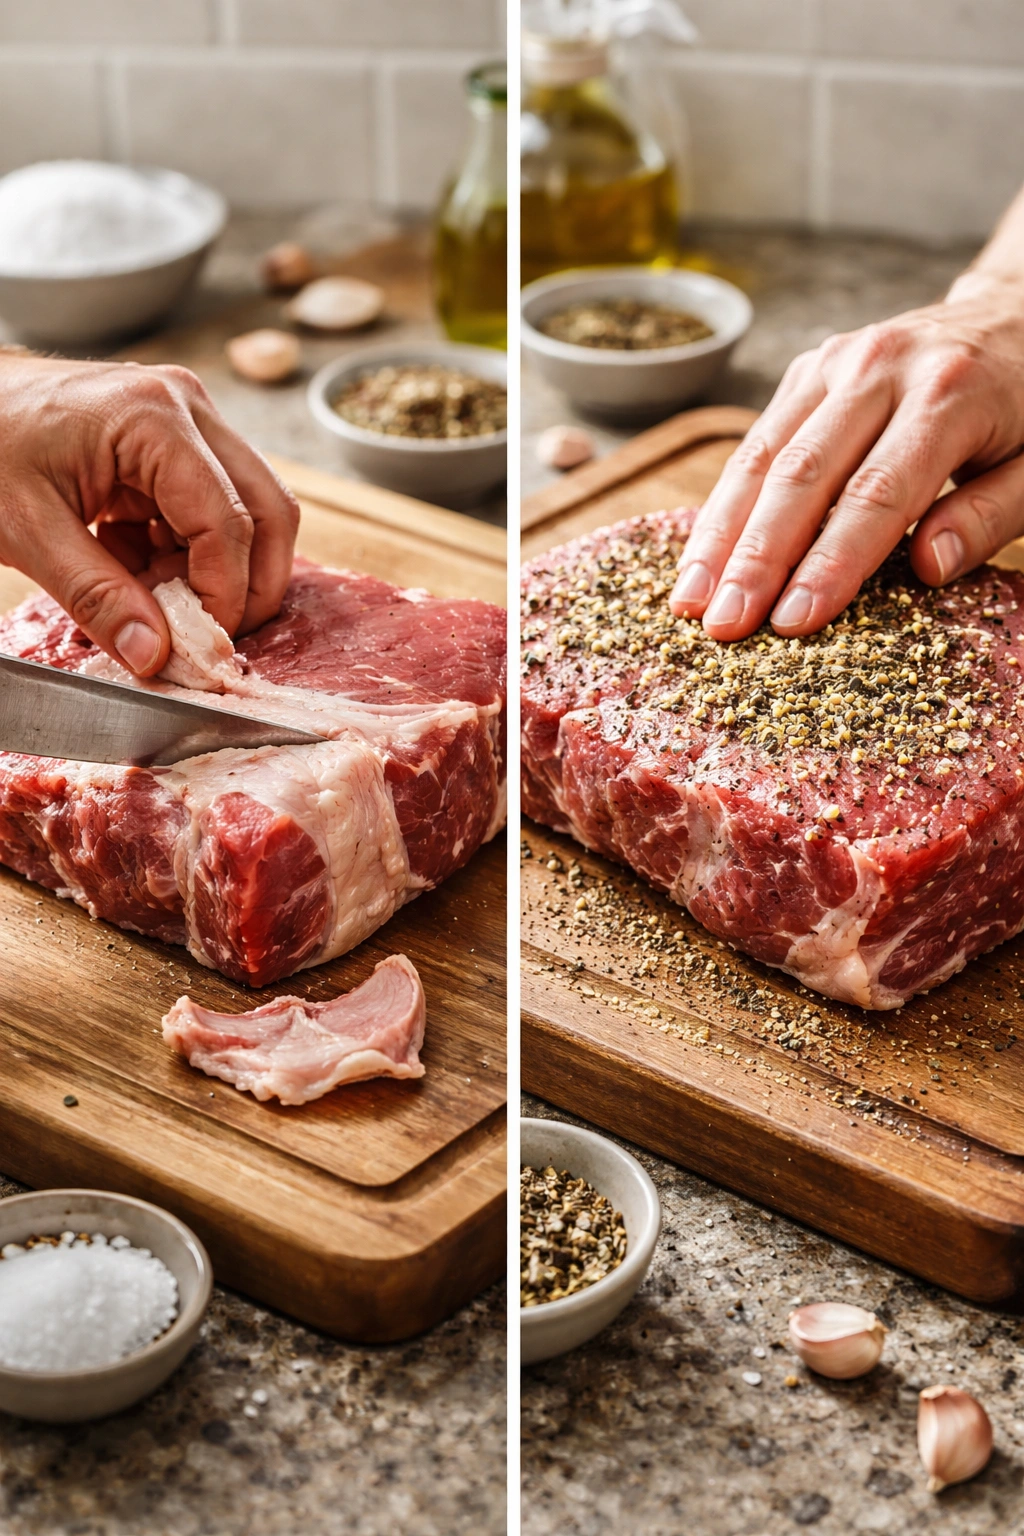
-
Examine the roast and trim any chunks of excessive exterior fat, leaving a thin layer. You want some fat for flavor and moisture retention, but you don’t need a thick white cap. Use a sharp knife to trim the fatty sections cleanly.
-
In a small bowl, combine 1 teaspoon salt, 1 teaspoon black pepper, dried thyme, dried rosemary, garlic powder, and the additional black pepper. Mix thoroughly to distribute the seasonings evenly.
-
Rub this seasoning mixture all over every surface of the roast, pressing it gently into the meat so it adheres. Don’t be shy with the seasoning; you’re coating a 3-pound piece of meat, and it needs enough seasoning to flavor that entire mass. This seasoning step can be done the night before; wrap the seasoned roast tightly in plastic wrap and refrigerate until ready to cook.
Sear the Meat (Optional but Recommended):
-
Heat olive oil in a large, heavy skillet over medium-high heat. The oil should shimmer and barely smoke when it’s ready; this takes about 2-3 minutes.
-
Once the skillet is properly hot, carefully place the seasoned roast in the center. Don’t move it around; let it sit undisturbed for 2-3 minutes so it can develop a golden-brown crust. This creates depth of flavor through the Maillard reaction.
-
Using tongs, flip the roast and sear the opposite side for another 2-3 minutes until deeply browned.
-
Sear the remaining sides and edges, including the thinner ends, for about 1-2 minutes per side. You’re aiming for a golden-brown crust all over, not to cook it through. The meat will still be rare in the center, which is exactly right at this stage.
-
Once all sides are seared, transfer the roast to a clean plate and set aside temporarily.
Advertisements -
Pour the beef broth into the hot skillet, immediately scraping the bottom with a wooden spoon to loosen all the caramelized, flavorful bits stuck to the pan. This process, called deglazing, dissolves all that browned flavor into the liquid. Let it simmer for about 30 seconds, then pour the entire mixture into the slow cooker. This step adds tremendous depth to your gravy, so don’t skip it.
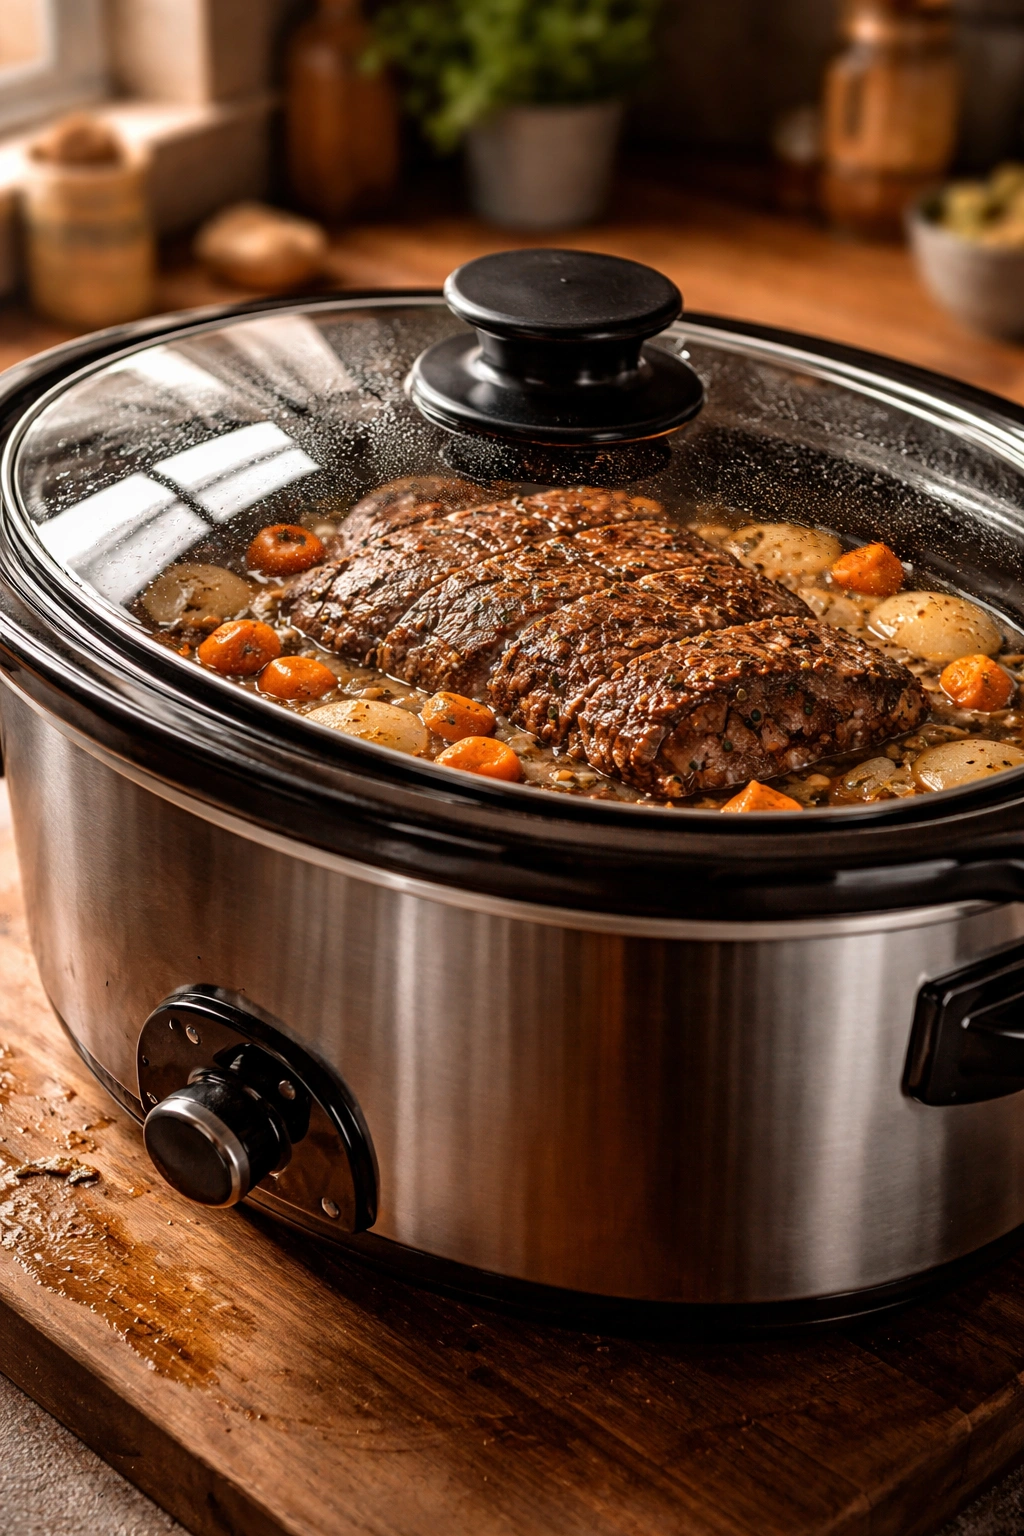
Assemble the Slow Cooker:
-
Place the chopped onion in the bottom of the slow cooker, spreading it out slightly to create a bed for the roast. The vegetables will partially elevate the roast off the bottom of the pot, improving heat circulation.
-
Arrange the carrot pieces and potato pieces (if using) around the roast, nestling them into the onions.
-
Place the seared roast on top of the vegetables, fatty side up. As the fat renders during cooking, it will baste the meat from above, keeping it moist.
-
Sprinkle the minced garlic over and around the roast. Scatter the bay leaves among the vegetables.
-
In a small bowl, combine the tomato paste and 2-3 tablespoons of the beef broth into a smooth paste, then stir this into the remaining broth along with the Worcestershire sauce.
-
Pour this liquid carefully over the roast, making sure some flows around the sides. The liquid should come up roughly one-third to halfway up the sides of the roast; you want braising, not boiling.
Cook Low and Slow:
-
Cover the slow cooker with its lid and set it to the LOW setting. Close the lid completely and do not lift it to peek or stir for at least the first 6 hours. Every time you open the lid, you release heat and steam, significantly extending the cooking time and potentially affecting the texture of the meat.
Advertisements -
Plan for approximately 8 hours of cooking time on low. At the 6-hour mark, you can carefully peek at the roast by looking through the glass lid (without opening it) to ensure everything is cooking properly, but don’t open the lid itself.
-
Around the 7-hour mark, carefully open the slow cooker and test the meat’s tenderness with a fork. The roast is done when the meat pulls apart easily with the tines of a fork, with little resistance. If it still feels firm and doesn’t shred easily, close the lid and cook for another 30 minutes to 1 hour before testing again.
-
When the roast is perfectly tender and pulls apart effortlessly with a fork, transfer it carefully to a large cutting board or serving platter, using tongs to avoid shredding it prematurely. Tent it loosely with aluminum foil to keep it warm while you prepare the gravy. Let the roast rest for 15-20 minutes; this allows it to firm up slightly, making it easier to handle.
Make the Gravy:
-
Carefully pour the pan juices and vegetables from the slow cooker into a fine-mesh strainer set over a medium saucepan, reserving the liquid. You should have roughly 2-3 cups of broth depending on how much liquid the roast released during cooking.
-
Bring this liquid to a boil over medium-high heat on the stovetop, skimming away any excess fat from the surface with a spoon if desired (though a small amount of fat adds flavor).
-
While the liquid heats, whisk the cornstarch and cool water together in a small bowl until completely smooth. This is crucial; if you skip the whisking and pour lumpy cornstarch into hot liquid, you’ll end up with a lumpy gravy.
-
Once the liquid is at a rolling boil, slowly pour the cornstarch mixture into the hot broth while whisking constantly. Pour it in a thin, steady stream and whisk continuously to prevent lumps from forming. The gravy will thicken noticeably as you whisk.
-
Continue cooking and whisking for another 2-3 minutes, until the gravy reaches your desired thickness. It will continue to thicken slightly as it cools, so don’t overdo it; you want it pourable, not gelatinous. If you accidentally make it too thick, whisk in a bit more broth or water to thin it back out.
-
Taste the gravy and adjust seasoning with salt and pepper as needed. Add the optional butter if you want extra richness, whisking it in off the heat until melted.
Advertisements -
Pour the gravy over the shredded roast and vegetables, or serve it on the side so people can add as much as they prefer.
Pro Tips for Guaranteed Tenderness
The difference between a good roast and an absolutely exceptional one often comes down to understanding and implementing a few critical techniques that experienced cooks have discovered over years of practice.
Resist the urge to open that lid. This single factor matters more than most home cooks realize. Every time you lift the lid to peek, check on things, or stir, you’re releasing significant heat and moisture that the slow cooker has been carefully building. That steam escaping means the cooking time extends and the meat may not achieve the same level of tenderness. If you absolutely must check progress, look through the glass lid without opening it. Your curiosity costs you 15-30 minutes of cooking time each time you open that lid.
Use the fattier cut without guilt. That marbling and that layer of fat on the outside aren’t flaws—they’re your secret weapons for a juicy, tender roast. The fat renders slowly during cooking, keeping the meat moist throughout the long cook. Lean meat dries out. Fatty meat gets better.
Don’t skip the searing step if you have time. While searing isn’t technically required—the roast will eventually become tender even without it—those golden-brown, caramelized bits on the surface add tremendous depth of flavor. The Maillard reaction (the chemical reaction that creates that brown color and complex flavors) doesn’t happen in a slow cooker because the temperature isn’t high enough. Spending 10-15 minutes searing on the stovetop dramatically improves the final flavor. It’s optional, but it’s worth it.
Trust your slow cooker’s timeline more than the clock. Slow cookers vary noticeably in temperature and cooking speed. Some run hot, others cool. A roast in one slow cooker might be perfectly tender at 7 hours, while the same roast in a different slow cooker needs 9 hours. The fork test is your most reliable indicator of doneness. When it shreds easily, it’s ready. Period.
Always deglaze the pan after searing. When you sear meat, flavorful compounds caramelize on the bottom of the skillet. Deglazing—pouring liquid into the hot pan and scraping—dissolves all that flavor into the liquid, which then goes into the slow cooker. This step is where some of the deepest, most savory flavors come from. Don’t skip it.
Temperature is more important than time. While 8 hours is a standard estimate, the real indicator is the internal temperature and the texture of the meat. If the roast reaches fall-apart tenderness at 7 hours, it’s done. If it needs 9 hours in your particular slow cooker, cook it 9 hours. Don’t remove it prematurely just because the clock says it’s been 8 hours.
Common Mistakes That Make Roast Tough
Even when you follow the recipe, certain pitfalls can still lead to disappointing results. Understanding what goes wrong helps you avoid these mistakes entirely.
Using the wrong cut of meat is the most common culprit. Rump roast, round roast, sirloin tip—these leaner cuts simply don’t have the connective tissue that transforms into gelatin during slow cooking. Without that conversion, they stay tough and dry no matter how long you cook them. The leanness also means they lack the fat needed to stay moist. This isn’t a failure of cooking method; it’s the wrong cut for this technique. Chuck roast, cross-rib roast, brisket, and shoulder roast are your reliable choices.
Not cooking it long enough is another frequent mistake. Some home cooks remove the roast after 5 or 6 hours, expecting it to be tender. If it doesn’t shred easily with a fork at that point, it needs more time. Connective tissue conversion is a process that requires hours of patient heat. Rushing it leaves you with meat that’s hot but still tough.
Adding insufficient liquid is surprisingly common. The roast needs that moist environment to braise properly. If the liquid is too low, the meat can dry out on the exposed surfaces. You don’t need the roast completely submerged, but you do need enough liquid to come up at least one-third to halfway up the sides. Use at least 1.5 cups; 2 cups is even better.
Overcooking the vegetables is easily preventable with planning. Carrots, potatoes, and onions can turn mushy if cooked for the full 8 hours. If you want vegetables in the roast, add heartier ones (like potatoes) about 2-3 hours into cooking and add more delicate ones (like green beans) even later. Alternatively, cook the vegetables separately and add them at the end, giving you complete control over their texture.
Opening the lid repeatedly extends cooking time. That “quick peek” you take every couple of hours adds up. Each opening releases heat and moisture, extending the time needed by 15-30 minutes cumulative. Trust the process and leave the lid closed.
Starting with cold meat straight from the refrigerator can affect evenness. If possible, remove the roast from the fridge 30 minutes before cooking. This allows it to come closer to room temperature, ensuring more even cooking. You don’t need it warm, just not ice-cold from the refrigerator.
Making gravy with flour instead of cornstarch sometimes leads to a gritty texture. Cornstarch thickens more cleanly and doesn’t require simmering to finish cooking the way flour does. If you prefer flour for some reason, make absolutely sure to simmer the gravy for at least 2-3 minutes after adding it, stirring constantly, to cook out the raw flour taste.
Flavor Variations You Can Try
Once you’ve mastered the basic technique, experimenting with different flavor profiles keeps this recipe from becoming monotonous, even if you make it frequently.
Wine-Based Braising Liquid: Replace half the beef broth with red cooking wine for a more sophisticated flavor. The wine adds acidity and complexity that deepens the savory notes. Use whatever wine you’d drink; expensive wine isn’t necessary—inexpensive table wine works perfectly. Add the wine along with the broth when deglazing the pan.
Asian-Inspired Version: Substitute 1 cup of the beef broth with low-sodium soy sauce and replace the fresh thyme and rosemary with 2 teaspoons of ground ginger and 1-2 teaspoons of five-spice powder. Add 3-4 sliced scallions during the last hour of cooking. Serve over rice instead of with potatoes for a completely different dish.
Italian Herbaceous Style: Skip the thyme and rosemary entirely and instead add 2 teaspoons of dried Italian seasoning, 1 teaspoon of dried oregano, and a pinch of red pepper flakes. Add a 14-ounce can of diced tomatoes (with juices) to the braising liquid for acidity and brightness.
Spanish-Style with Chorizo: Add 1 cup diced Spanish chorizo to the pan along with the other ingredients. The chorizo releases flavorful oils and spices into the liquid. Add 1 teaspoon of smoked paprika and ½ teaspoon of cumin to the seasoning blend.
Coffee and Spice: Add 2-3 tablespoons of strong brewed coffee and 2-3 tablespoons of barbecue sauce to the braising liquid. The coffee adds depth without tasting like coffee; the barbecue sauce contributes sweetness and tang. Add ½ teaspoon of chili powder to the seasoning mix.
Horseradish Cream Version: Make the roast as directed, but whip heavy cream with prepared horseradish and a bit of Dijon mustard to serve alongside slices of the roast instead of pouring gravy over top. This lends a piquant, New England-style approach.
Fresh Herb Finish: Make the roast traditionally, but finish it by stirring a handful of fresh parsley, thyme, and rosemary directly into the finished gravy just before serving. Fresh herbs added at the very end taste bright and vibrant in contrast to the long-cooked flavors.
Freezing and Make-Ahead Options
Planning ahead with this recipe opens up convenient meal-prep possibilities, especially valuable for busy families.
Prepping the roast the night before requires minimal additional work. Once you’ve seasoned the roast as directed in the recipe, wrap it tightly in plastic wrap and refrigerate it overnight. The next morning, sear it and proceed with the slow cooker steps. Some argue that resting the seasoning overnight actually improves flavor penetration, though the difference is subtle. This approach means you only have to sear and assemble the slow cooker before work, making the morning routine even simpler.
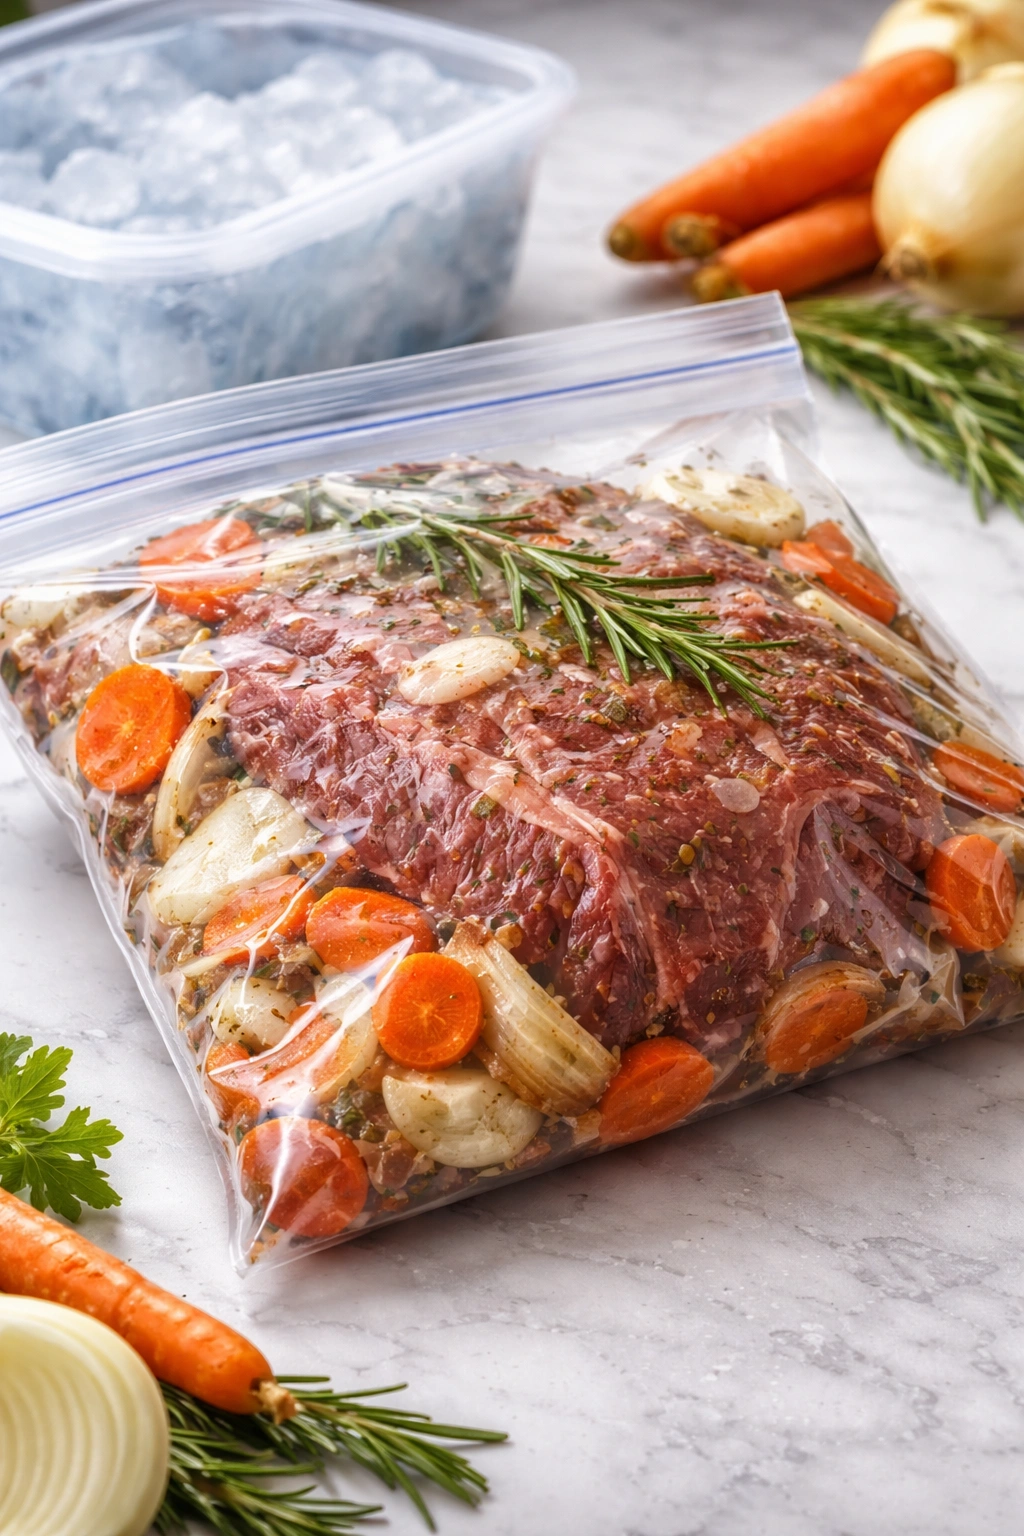
Making this as a freezer meal works beautifully. Season the roast as directed and, if you want to sear it first, sear it and let it cool completely. Place the cooled roast in a large gallon-sized freezer bag along with the chopped onion, carrots, potatoes (if using), garlic, bay leaves, and tomato paste. Don’t add the liquid yet; freeze the bag as-is.
On cooking day, thaw the bag overnight in the refrigerator. Pour the thawed contents into the slow cooker, add the beef broth and Worcestershire sauce, and proceed with cooking on low for 8 hours. The roast comes out just as tender as if you hadn’t frozen it.
Alternatively, you can freeze the entire assembled slow cooker with liquid included, though this takes up more freezer space. Thaw overnight in the refrigerator before cooking.
Cooking ahead and reheating is perfect for entertaining. Make the roast up to 2 days ahead, shred it, and store it in the refrigerator in its gravy. When you’re ready to serve, reheat it gently in a 350°F oven, covered, for about 20-30 minutes until it’s heated through. You can also reheat it gently on the stovetop over low heat, stirring occasionally. The meat may soften even further with reheating, which some people actually prefer.
Storing and Reheating Leftovers

Pot roast keeps beautifully when stored properly, and it reheats well, making it ideal for meal prep.
Refrigerated storage: Transfer any leftover roast and gravy to an airtight container and refrigerate immediately after the meal cools slightly. Properly stored, it keeps for 3-5 days. The meat actually deepens in flavor as it sits in the gravy, making it arguably better on day two or three than the first day.
Freezer storage: The roast freezes exceptionally well for up to 2-3 months when stored in an airtight freezer container or heavy-duty freezer bag. Remove as much air as possible before sealing to prevent freezer burn. Flat freezer bags take up less space than rigid containers and stack neatly.
Reheating from refrigerated: Place the roast in a covered baking dish and warm in a 350°F oven for 20-30 minutes, stirring occasionally, until heated through. Alternatively, reheat it gently on the stovetop over medium-low heat, stirring frequently. The low temperature prevents the meat from drying out.
Reheating from frozen: Thaw the roast overnight in the refrigerator, then reheat using either of the methods above. Alternatively, you can reheat it directly from frozen on the stovetop over very low heat, covered, stirring frequently and allowing extra time for it to warm through (30-45 minutes depending on quantity).
Serving Suggestions and Pairings
The beauty of this dish is its versatility with sides and accompaniments. Your choice of sides dramatically changes the entire character of the meal.
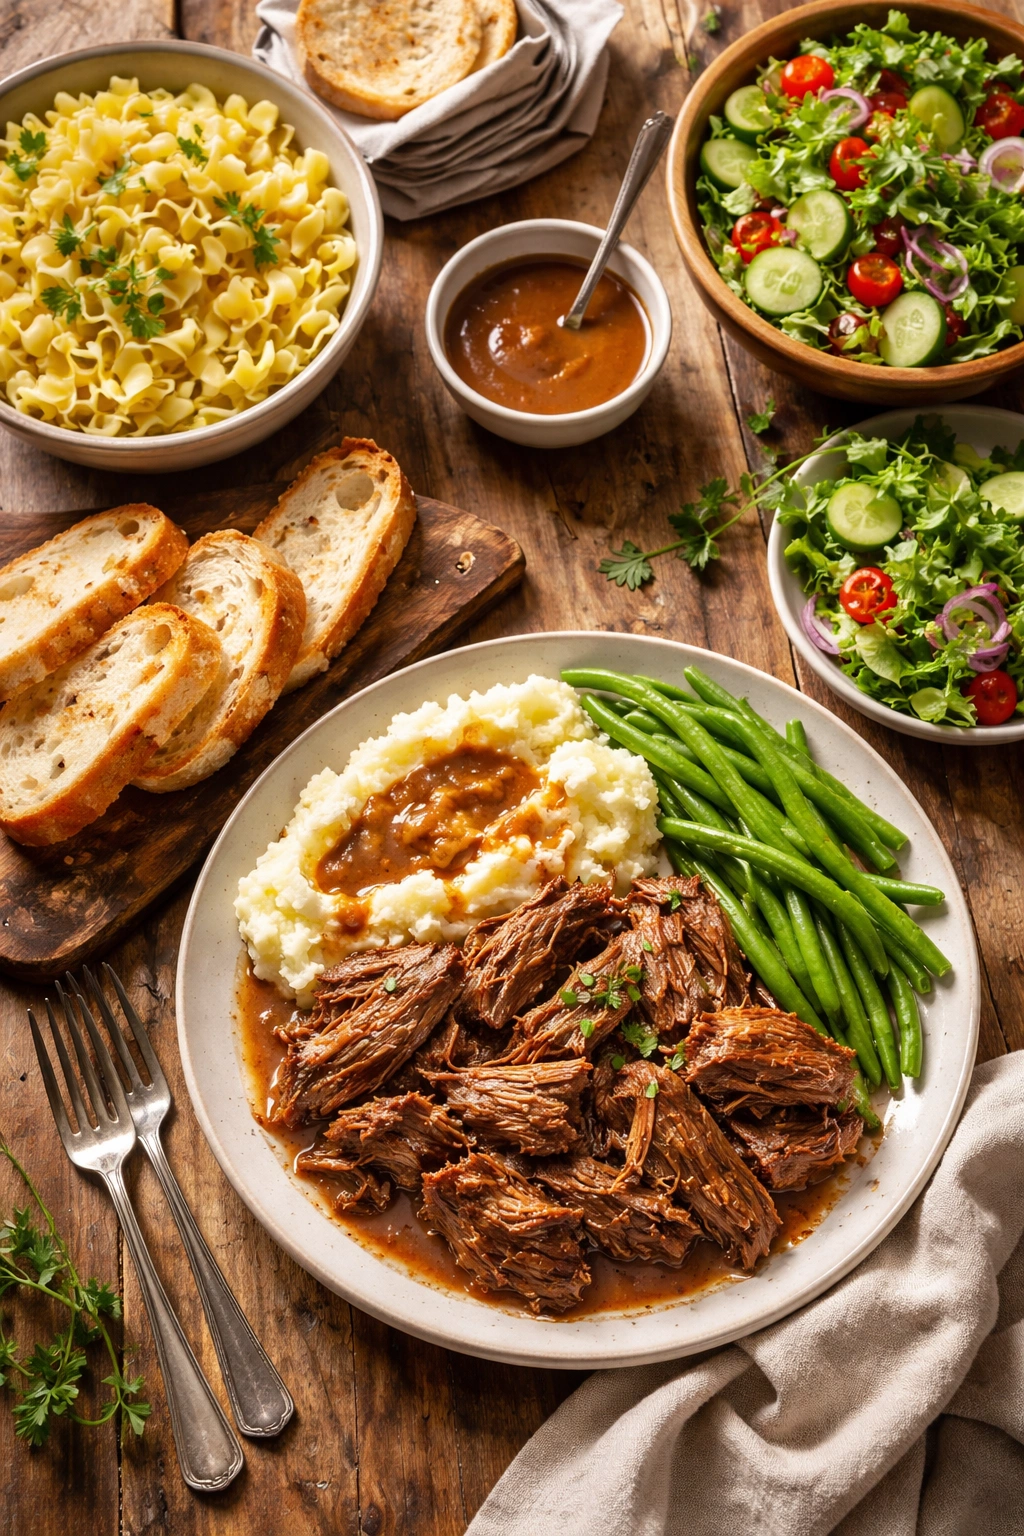
Classic American-style serving: Mashed potatoes are the traditional companion, absorbing the rich gravy perfectly. Make creamy mashed potatoes with butter and cream, or keep them simple with just butter and a bit of salt. The gravy from the roast becomes the sauce for the potatoes.
Sunday dinner approach: Serve alongside fresh steamed green beans, crusty bread for soaking up gravy, and a simple salad with vinaigrette to cut through the richness. This creates a complete, balanced meal that works for family dinners or entertaining.
Cozy comfort meal: Serve over buttered egg noodles instead of potatoes. The noodles catch the gravy differently than potatoes and create a cozier, almost stroganoff-like presentation.
Casual weeknight version: Serve shredded roast on toasted hoagie rolls with a spoonful of gravy for an upscale roast beef sandwich. This works particularly well if you made extra roast, as sandwiches stretch the meat further.
Hearty salad option: Serve sliced or shredded roast over a bed of mixed greens with roasted root vegetables and a blue cheese dressing. The warm meat on cool greens creates interesting temperature and texture contrasts.
Soup transformation: Shredded roast works beautifully in vegetable or beef barley soup, adding substantial protein and flavor to a lighter broth-based dish. This stretches remaining roast further and creates an entirely different meal from what you started with.
Beverages to serve: A full-bodied red wine like Cabernet Sauvignon or Merlot complements the rich, savory flavors beautifully. For non-alcoholic options, unsweetened iced tea or a dark beer works equally well. The acidity in these beverages cuts through the richness of the meat and gravy.
Final Thoughts
What transforms a casual dinner into something memorable is often the care and attention you bring to simple, foundational recipes. This pot roast represents one of the most rewarding applications of the slow cooker—taking an inexpensive, tough cut of meat and converting it through patient, low heat into something luxurious and deeply satisfying.
The magic isn’t in complicated techniques or expensive ingredients. It’s in understanding why each step matters: why you choose chuck roast over leaner cuts, why you respect the cooking time rather than rushing it, and why you resist opening that lid even when curiosity tempts you. Master these fundamentals, and you’ve got a dish that becomes a family favorite, something people specifically request and remember fondly.
Once you’ve made this roast successfully, you own a skill that serves you for years. You can vary the flavors, adjust the vegetables, adapt it to what you have on hand, and always know it will turn out wonderfully. That’s the confidence that comes with understanding the science behind what you’re doing and respecting the process. Your family’s dinner table will thank you for it.