Easy One-Pot Lentil Dahl Ready in 30 Minutes
There’s something magical about opening a pot of simmering lentil dahl—the aroma alone transports you somewhere warm and inviting, even if you’re cooking on an ordinary Wednesday night in your small kitchen. Red lentils melt into a naturally creamy stew without any dairy, infused with warming spices that build layers of flavor as they bloom in hot oil. What makes this dish truly special isn’t just how good it tastes; it’s how ridiculously easy it is to pull off restaurant-quality results in your own home using ingredients you probably already have hiding in your pantry.
Lentil dahl (also spelled dal, daal, or dhal) isn’t some obscure or complicated dish reserved for experienced cooks. It’s the opposite—it’s the kind of food that proves you don’t need hours of prep time, fancy equipment, or an intimidating ingredient list to create something deeply satisfying and genuinely delicious. This one-pot version comes together in about 30 minutes, which makes it perfect for busy weeknights when you want something wholesome without the stress of multiple pans and endless cleanup.
Whether you’re vegetarian, vegan, gluten-free, or just looking for an affordable meal that doesn’t sacrifice flavor, this lentil dahl delivers on every front. It’s naturally plant-based, fiber-packed, and loaded with plant-based protein—but more importantly, it tastes so good that everyone at the table will come back for seconds, regardless of their dietary preferences. Let me walk you through everything you need to know to make this dish successfully, every single time.
What Exactly Is Lentil Dahl?
Dahl is a foundational dish across Indian cuisine and the broader South Asian region, appearing in homes from India to Pakistan, Bangladesh, Nepal, and Sri Lanka. The word itself refers both to dried, split lentils and to the stew-like curry made from them—a dish that’s been feeding people affordably and nourishing them thoroughly for centuries.
Unlike some curries that require special ingredients or complex techniques, dahl celebrates simplicity. It’s traditionally made by simmering lentils with aromatics like onion, garlic, and ginger, layering in warm spices, and often adding coconut milk or tomatoes for richness and balance. The result is a thick, creamy stew that feels comforting without being heavy—the kind of meal that wraps around you like a warm blanket.
What’s remarkable about dahl is its versatility across regions. Different areas of India have their own signature versions—some add more spice, others are milder; some are brothier, others are thicker and stew-like. This recipe takes the best elements of various traditions and streamlines them into a version that works perfectly for home cooks working with a tight timeline.
Why Red Lentils Are Perfect for Quick Cooking
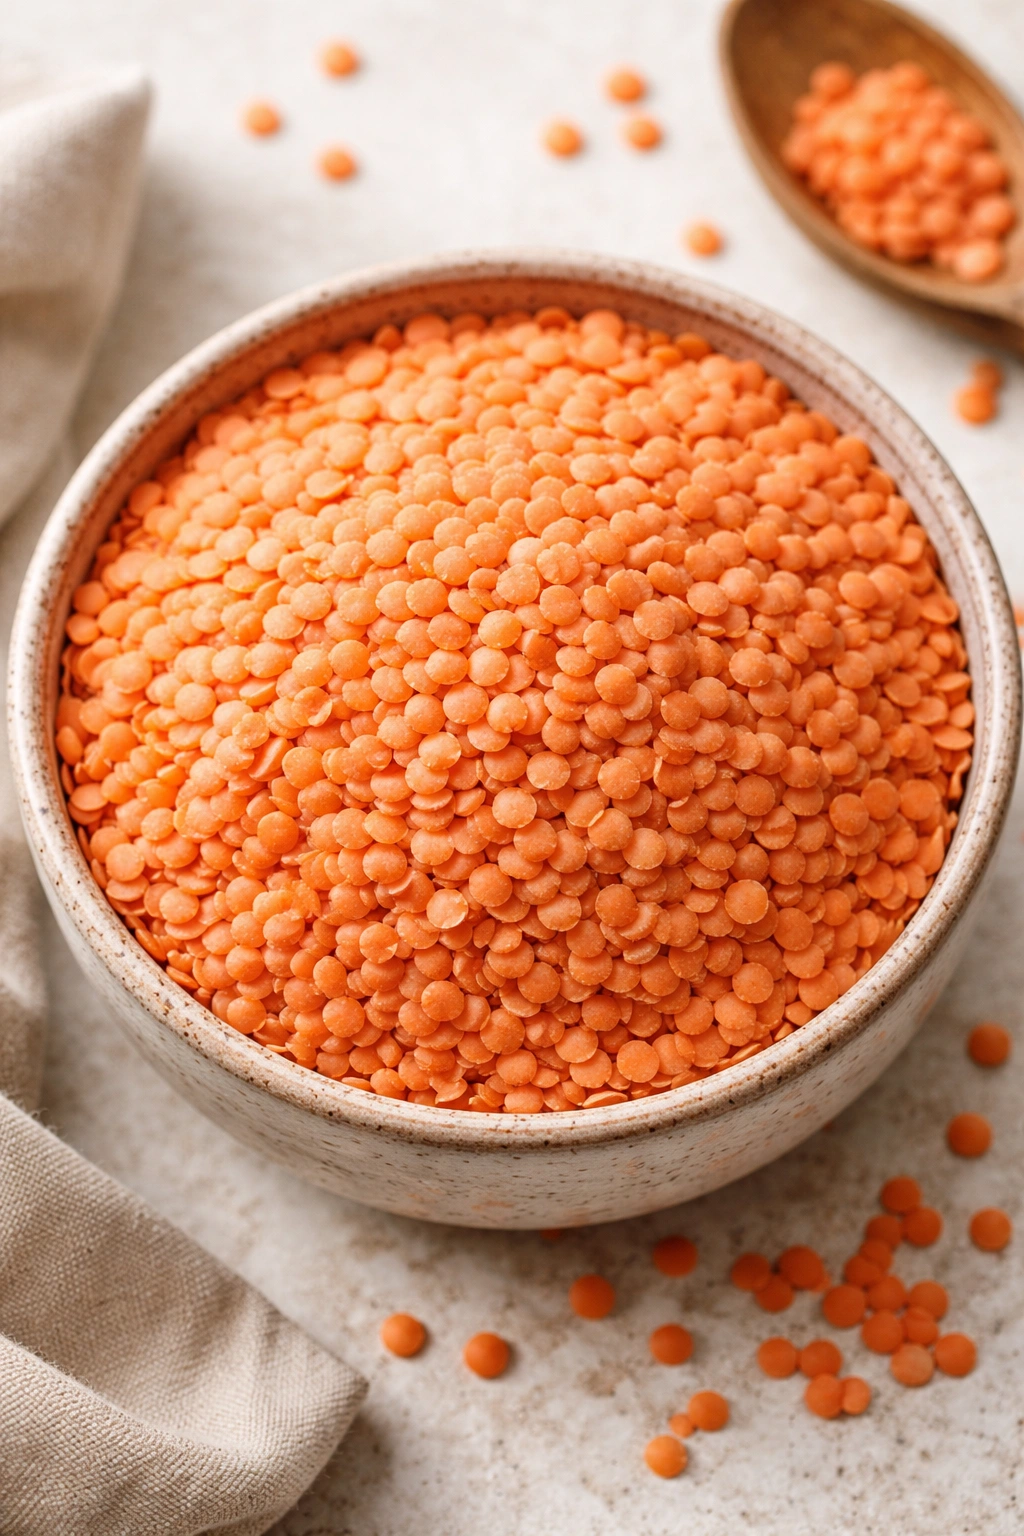
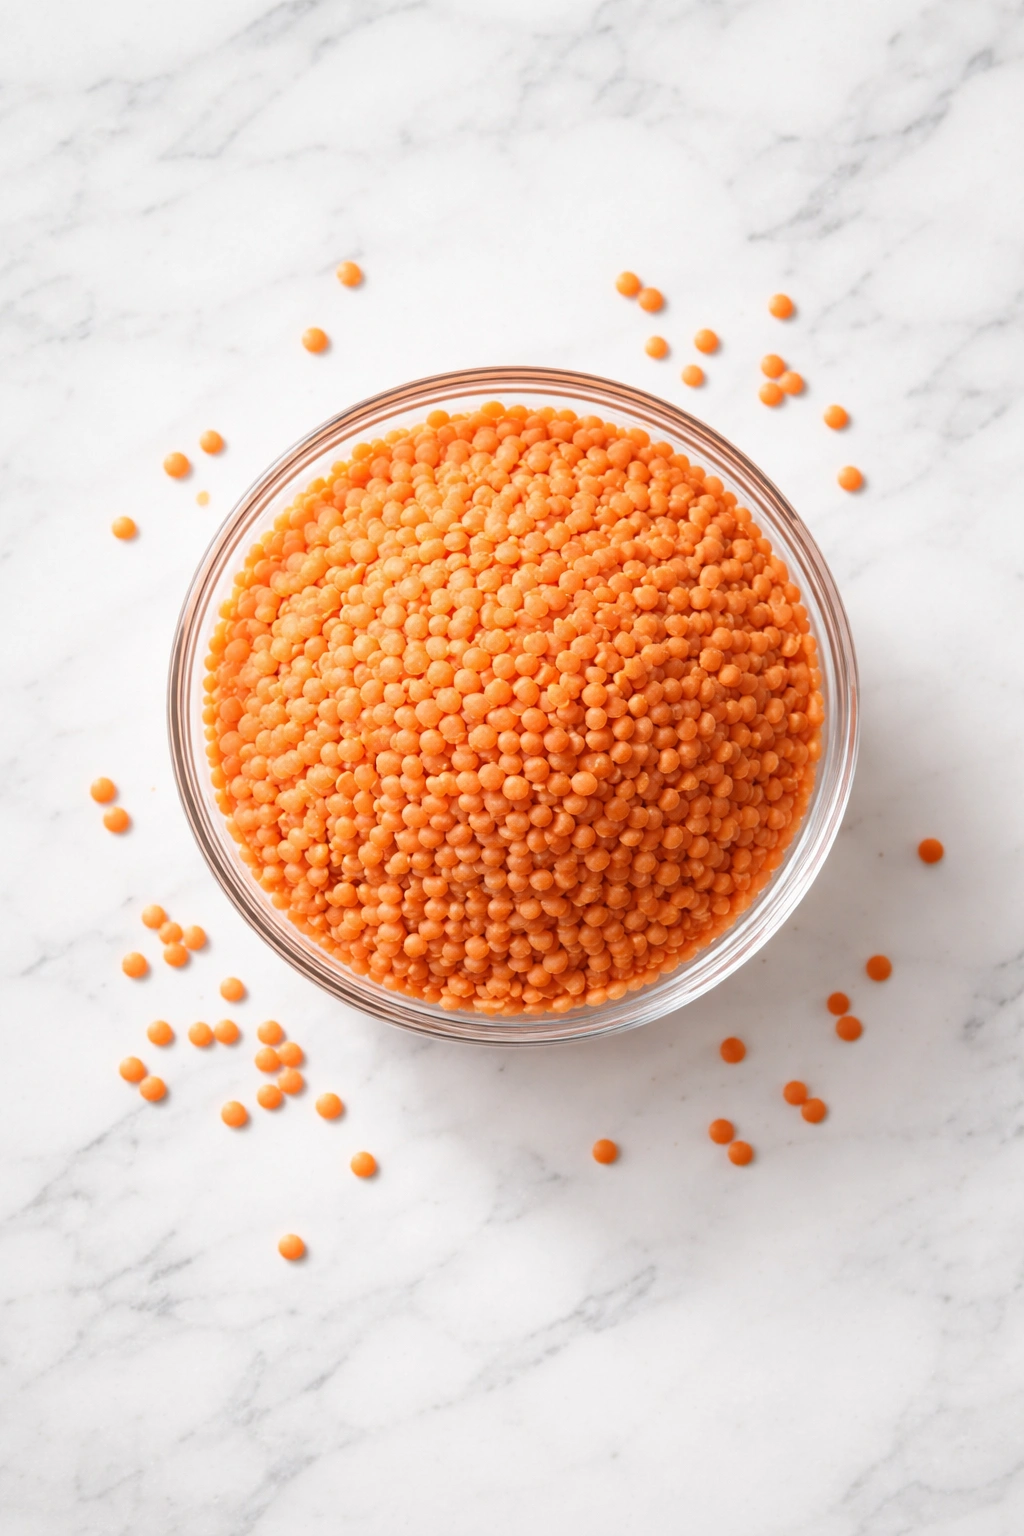
Red lentils (also called masoor dal when split) are the secret to achieving this 30-minute timeline. Unlike brown or green lentils, which hold their shape stubbornly and can take 45 minutes or longer to cook, red lentils soften rapidly and actually want to break down into a creamy consistency. This isn’t a flaw—it’s exactly what you’re after in a great dahl.
Red lentils don’t require soaking, which means you can literally go from opening the pantry to having dinner on the table in roughly the time it takes to watch a TV episode. They’re also incredibly nutritious, packing about 12 grams of protein and 8 grams of fiber into just a half cup of dried lentils. They’re budget-friendly too, which means you can feed a family of four for just a few dollars.
The reason red lentils create that signature creamy texture is their structure. As they cook, the outer edge softens first and begins to break apart, thickening the cooking liquid naturally. By the time they’re fully tender (around 15-20 minutes), many of the lentils have partially dissolved into the broth, creating a naturally creamy stew without any cream whatsoever. This is pure plant-based comfort, achieved through simple cooking science.
The Essential Pantry Staples You’ll Need
Building great dahl starts with understanding your ingredient categories. You’re working with three main layers: the aromatic base (onion, garlic, ginger), the spice blend that brings warmth and depth, and the liquid components that become your finished sauce.
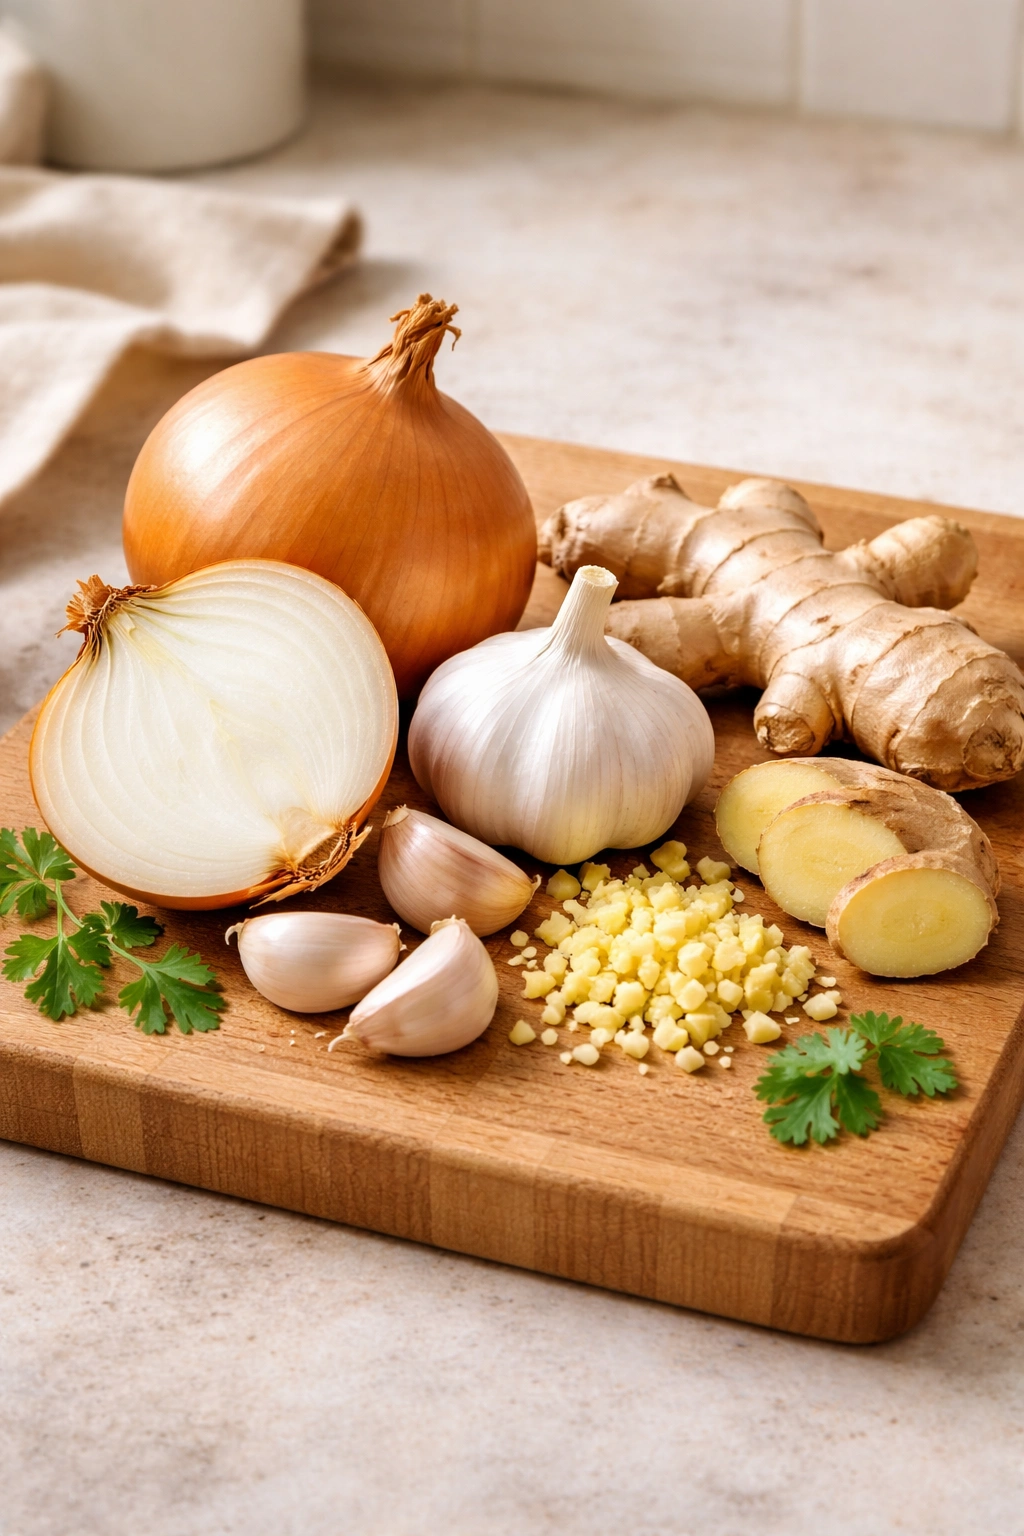
The aromatic base is non-negotiable—onion, garlic, and fresh ginger provide the foundational flavor that everything else builds on. These three ingredients are where you’ll spend most of your prep time, and it’s time well spent. When they’re cooked together until soft and fragrant, they create a flavor foundation so solid that the rest of the recipe practically builds itself.
The spice blend is where personality enters the dish. Garam masala, turmeric, cumin, and coriander are the core players, each contributing something distinct—garam masala brings warmth without excessive heat, turmeric adds earthy color and subtle bitterness that balances the richness, and cumin and coriander add complexity and brightness. These spices aren’t exotic or difficult to find; they’re available in every grocery store and will transform your entire pantry once you have them on hand.
Your liquid base combines vegetable broth (which adds savory depth), canned tomatoes (which provide acidity and body), and full-fat coconut milk (which delivers the creamy richness that makes this dish feel luxurious). The ratio matters—you want enough liquid that the lentils can cook through, but not so much that you end up with soup instead of a thick, spoonable stew.
Blooming Spices: The Technique That Changes Everything
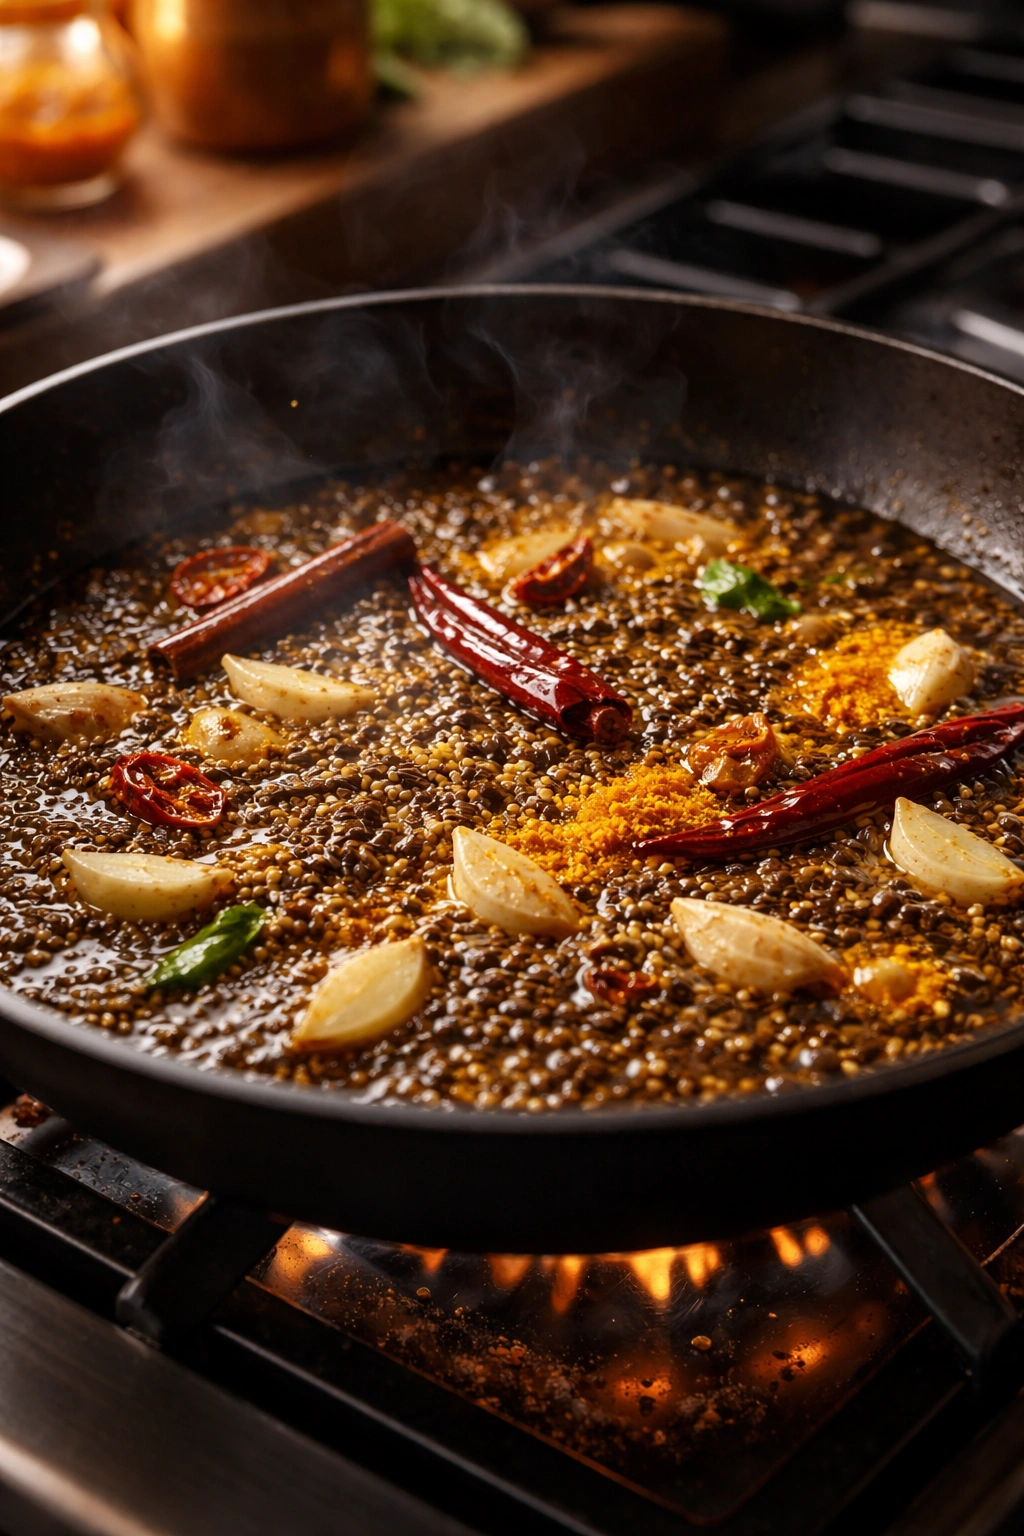
There’s a single cooking technique that separates mediocre lentil dahl from truly excellent dahl, and blooming your spices is it. This means adding your spices to hot oil for just 30-60 seconds, allowing the heat to unlock their essential oils and hidden flavors, before adding any other ingredients that would cool things down.
Many home cooks skip this step, assuming it doesn’t matter. It absolutely does. When you bloom spices, you’re essentially waking them up—you’re breaking down their physical structure and releasing volatile flavor compounds that would otherwise remain locked inside. A spice that’s been bloomed in hot oil tastes exponentially more vibrant and complex than one that gets dumped into a cold or barely warm mixture.
The good news is this technique takes almost no extra time. You bloom your spices for one minute—literally just one—while stirring constantly to prevent them from catching on the bottom of the pan. Your kitchen will smell incredible during this minute, which is your signal that everything is working exactly as it should.
Yield: Serves 4 to 6 | Makes approximately 6 cups
Prep Time: 15 minutes (mostly chopping and measuring)
Cook Time: 20 minutes (hands-off simmering)
Total Time: 35 minutes
Difficulty: Beginner — No special equipment required beyond a large pot, and the steps are straightforward even if you’ve never made Indian food before. Everything goes in one pot, and you only need to stir occasionally.
Ingredients for One-Pot Lentil Dahl
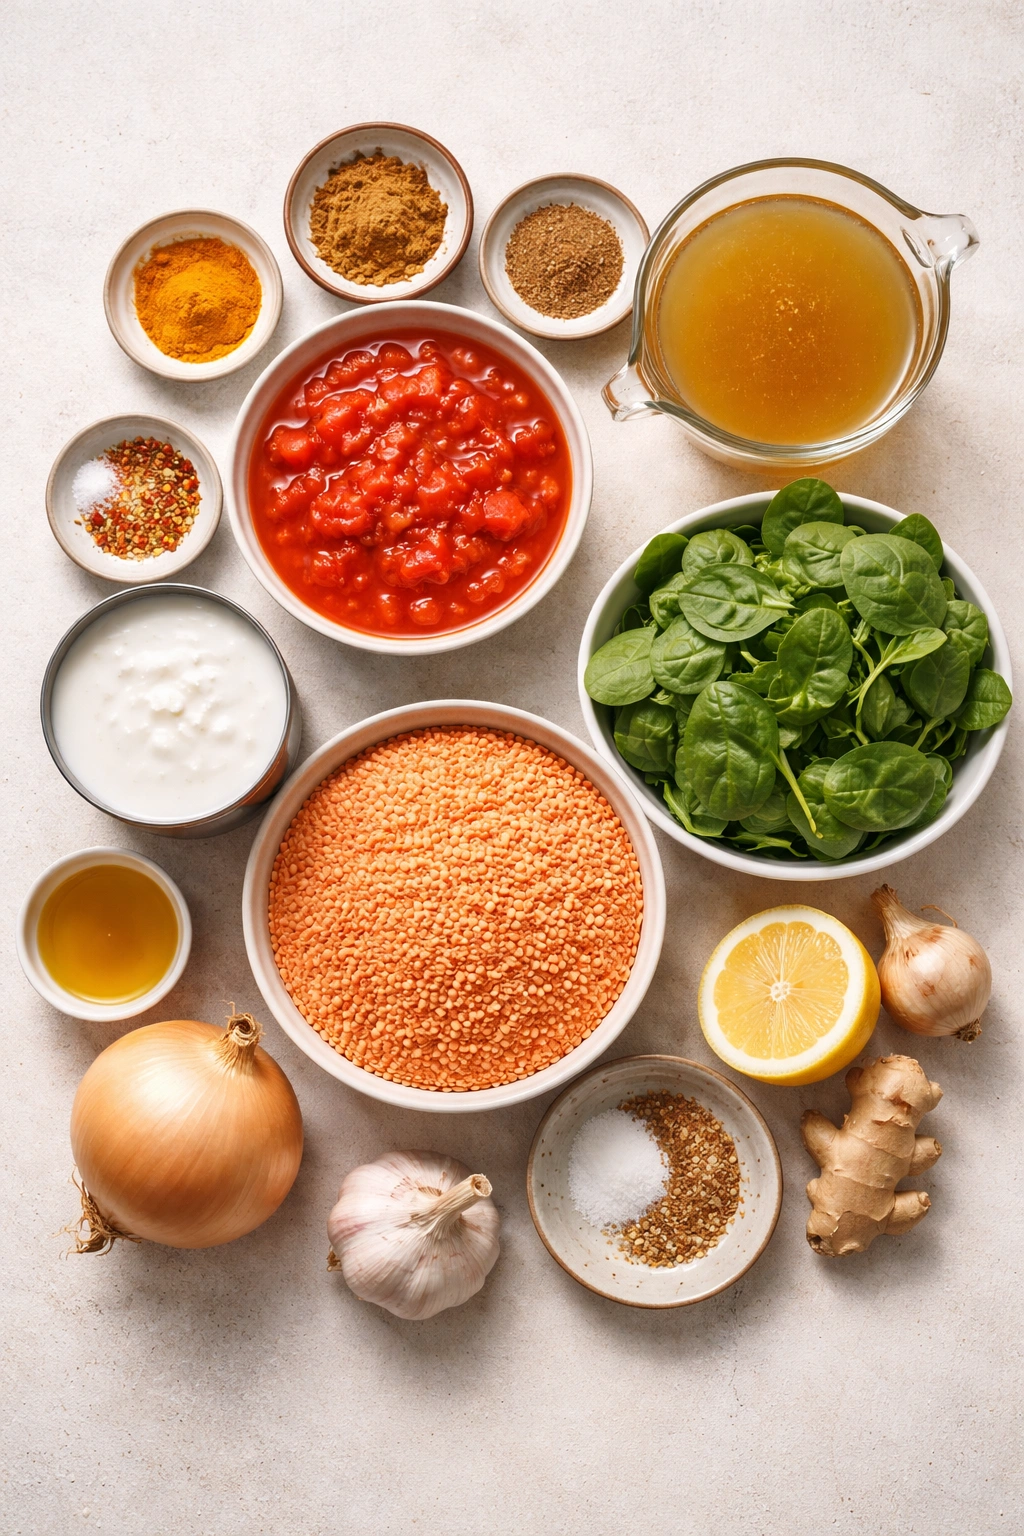
For the Base:
- 1 tablespoon coconut oil (or olive oil, avocado oil, or any neutral cooking oil)
- 1 large yellow onion, diced small (about 1½ cups)
- 4 cloves fresh garlic, minced
- 1 tablespoon fresh ginger, peeled and finely grated (about a 1-inch piece)
- ½ teaspoon red pepper flakes (adjust to your heat preference—use less if you’re sensitive to spice, more if you love heat)
For the Spices:
- 2 teaspoons garam masala
- 1 teaspoon ground turmeric
- ½ teaspoon ground cumin
- ½ teaspoon ground coriander
- ¼ teaspoon ground cinnamon (optional but recommended—adds subtle sweetness)
- Salt and freshly ground black pepper to taste
For the Stew:
- 1½ cups dried red lentils, rinsed and drained thoroughly
- 1 can (14 ounces) diced tomatoes, with their juices
- 1 can (13.5 ounces) full-fat coconut milk
- 3 cups vegetable broth (or water if necessary, but broth adds much better flavor)
- 3 to 4 cups fresh baby spinach (or chopped kale if you prefer)
- Juice of ½ large lemon or 1 small lemon (about 2 tablespoons fresh juice)
Optional Garnish & Serving:
- Fresh cilantro or parsley, roughly chopped
- Additional lemon wedges
- Plain yogurt or dairy-free yogurt (for serving)
- Flaked chili for extra heat (if desired)
Why This Recipe Works Every Single Time
The ingredient proportions are carefully balanced so that you end up with a thick, spoonable stew rather than something too brothy or too thick. The ratio of lentils to liquid is crucial—you’re using about 1 part lentils to 4 parts total liquid, which accounts for the fact that lentils will absorb some liquid as they cook and break down slightly.
The spice amounts are calibrated so that the flavors are present and noticeable without overwhelming the palate. These quantities create what I think of as “warm and comforting” heat—it’s not a dish that will make you gasp for water, but it’s definitely flavorful and noticeably spiced. If you’re sensitive to spice, cut the red pepper flakes in half or omit them entirely. If you love heat, add a fresh diced chili pepper along with the garlic and ginger, or increase the red pepper flakes to one full teaspoon.
The combination of tomatoes and coconut milk is what gives this dahl its signature character. The tomatoes provide acidity that cuts through the richness of the coconut milk, preventing the dish from feeling heavy or cloying. At the same time, the coconut milk softens the tomatoes’ sharpness and adds a subtle sweetness that balances everything beautifully.
Step-by-Step Instructions for Perfect Lentil Dahl
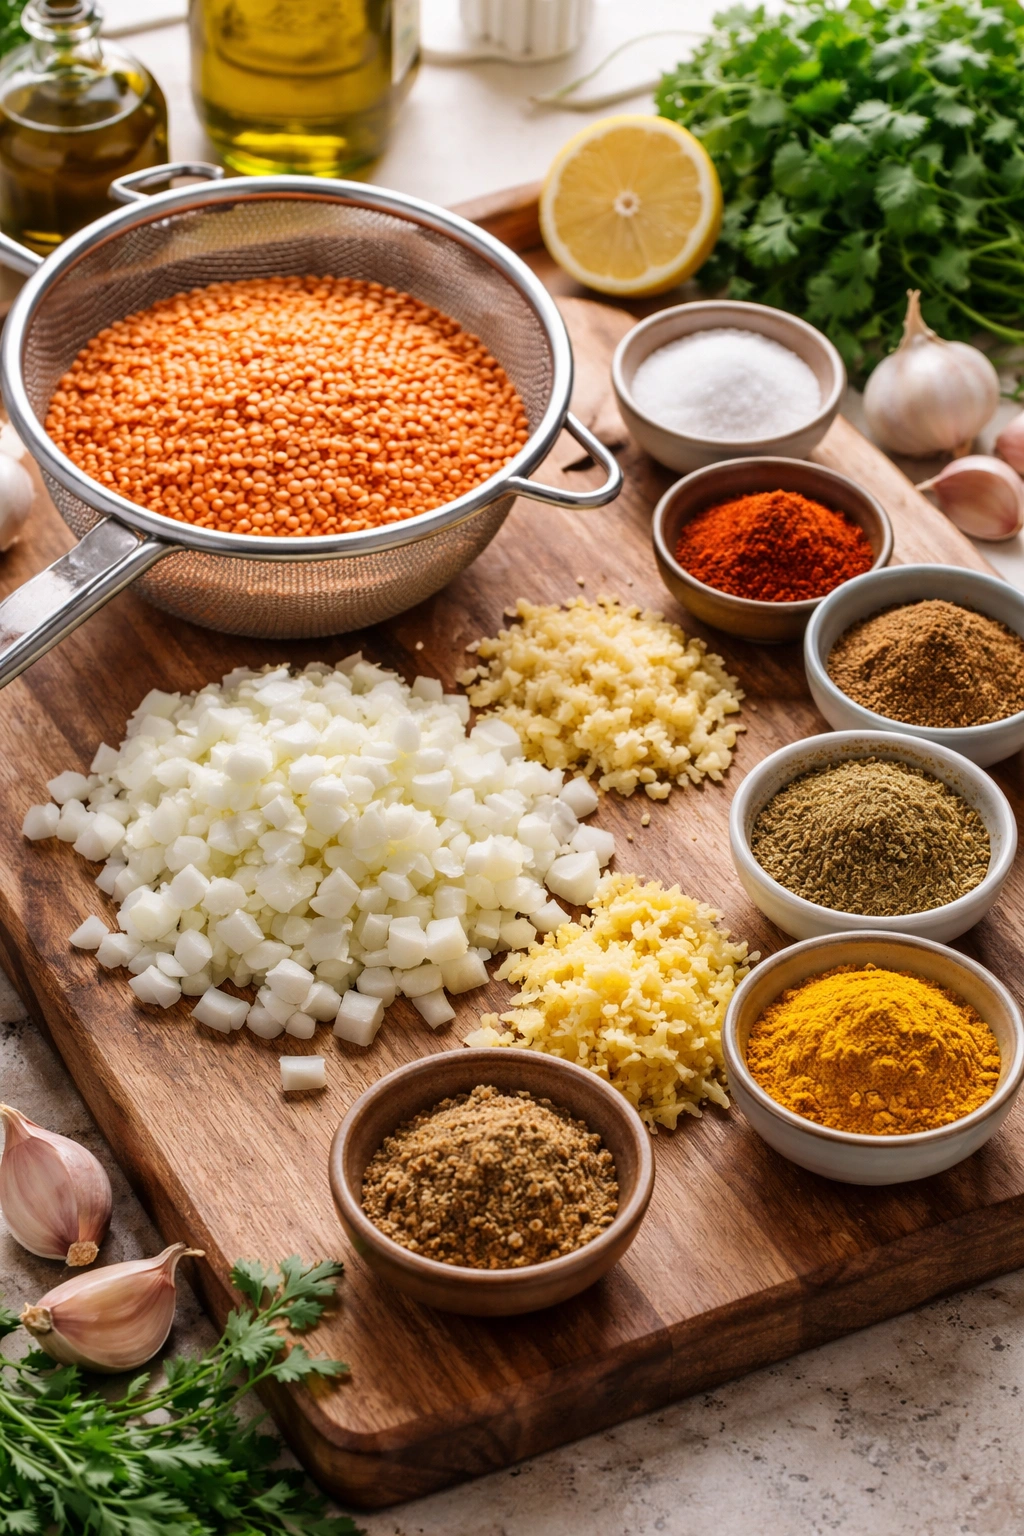
Prepare Your Ingredients:
-
Before you start cooking, rinse the dried red lentils thoroughly under cold running water in a fine-mesh strainer, stirring them gently with your fingers. Keep rinsing until the water runs mostly clear—this removes excess starch and helps prevent the finished dahl from becoming gummy. Set aside to drain completely.
Advertisements -
Dice the onion into small, relatively uniform pieces (about ¼-inch size). Mince the garlic cloves finely. Peel and grate the fresh ginger on a microplane or the small holes of a box grater. Have all your spices measured out and ready in a small bowl.
Build the Flavor Base:
-
Place a large pot or deep skillet over medium heat. Add the oil and let it warm for about 30 seconds until it shimmers slightly—you’ll see it flow easily across the pan bottom.
-
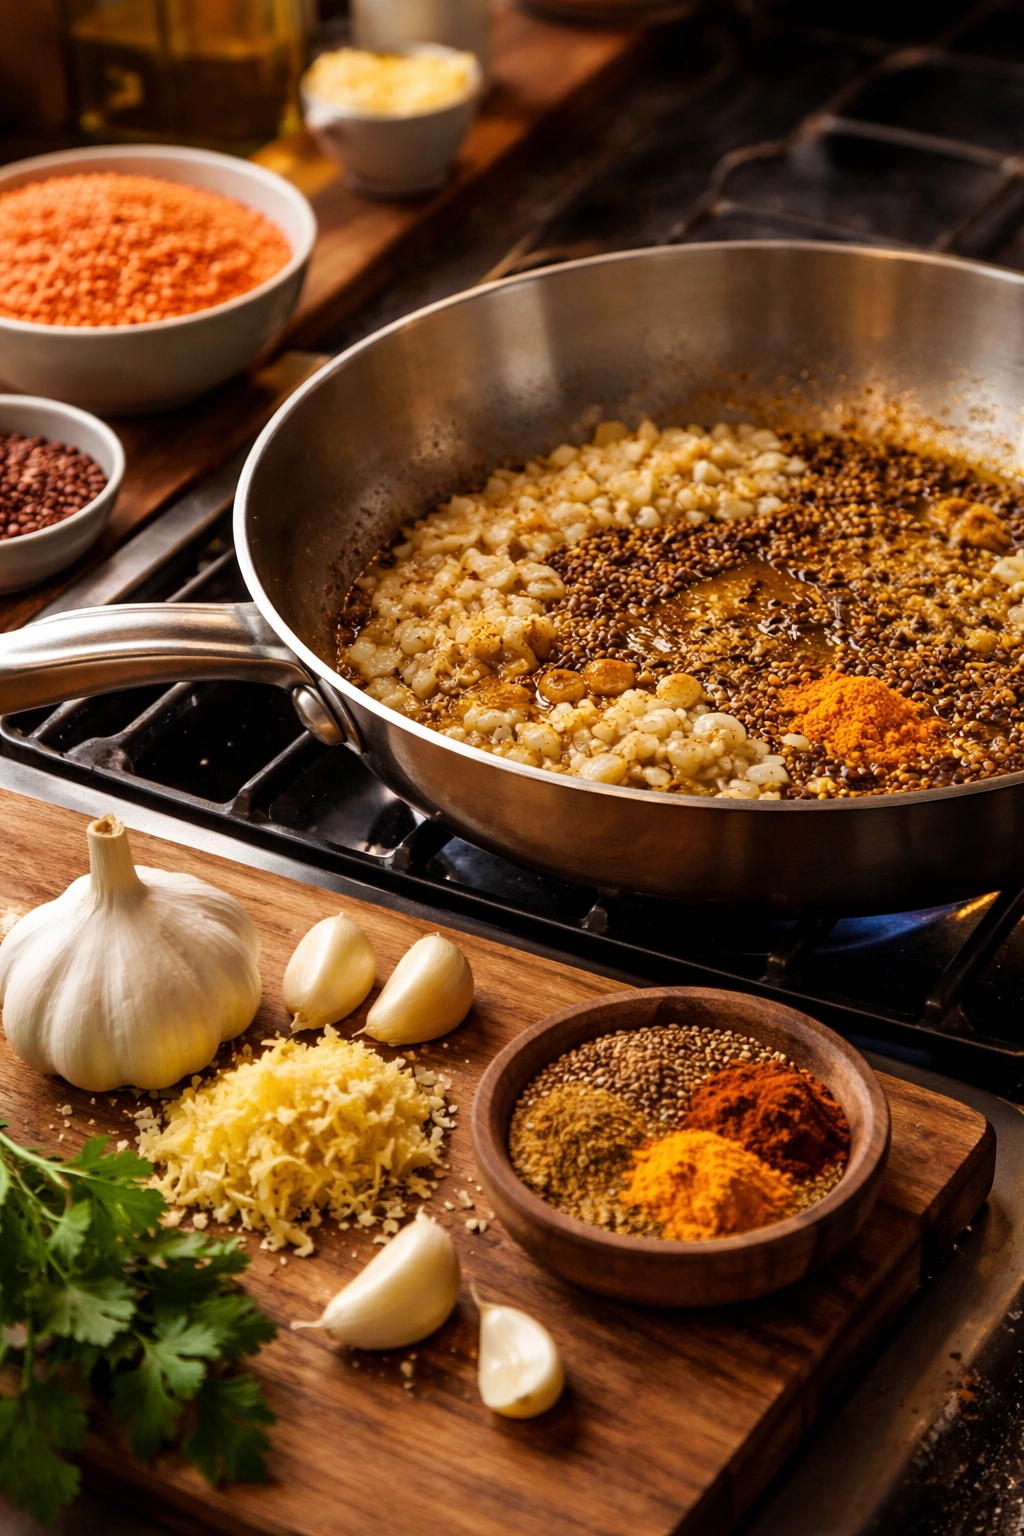
Add the diced onion and cook, stirring frequently, for about 5 minutes. You’re looking for the onion to become soft and translucent, with just the tiniest hint of golden color at the edges. Don’t rush this step. Properly cooked onions provide a sweet, caramelized foundation that makes the entire dish taste better.
-
Add the minced garlic, grated ginger, and red pepper flakes to the pan. Stir constantly and cook for exactly 1 minute, until the mixture becomes incredibly fragrant and the raw garlic smell disappears. You’ll know it’s ready when your kitchen smells unmistakably wonderful. If you detect any burning smell instead of a pleasant aroma, reduce the heat immediately—the pan is too hot.
Bloom the Spices:
- Add the garam masala, turmeric, cumin, coriander, and cinnamon to the pan. Stir constantly for exactly 1 minute, making sure every piece of spice contacts the hot oil. This blooming step is non-negotiable—it transforms raw spices into something infinitely more flavorful and integrated.
Combine Everything:
-
Pour in the rinsed lentils, the canned tomatoes with all their juices, the full can of coconut milk, and the vegetable broth. Stir everything together thoroughly, making sure nothing is stuck to the bottom of the pan and all the spices are distributed evenly throughout the liquid.
-
Season with ½ teaspoon of salt and several grinds of black pepper. Stir well and taste the broth—it should taste noticeably seasoned but not overly salty, since it will concentrate slightly as it cooks.
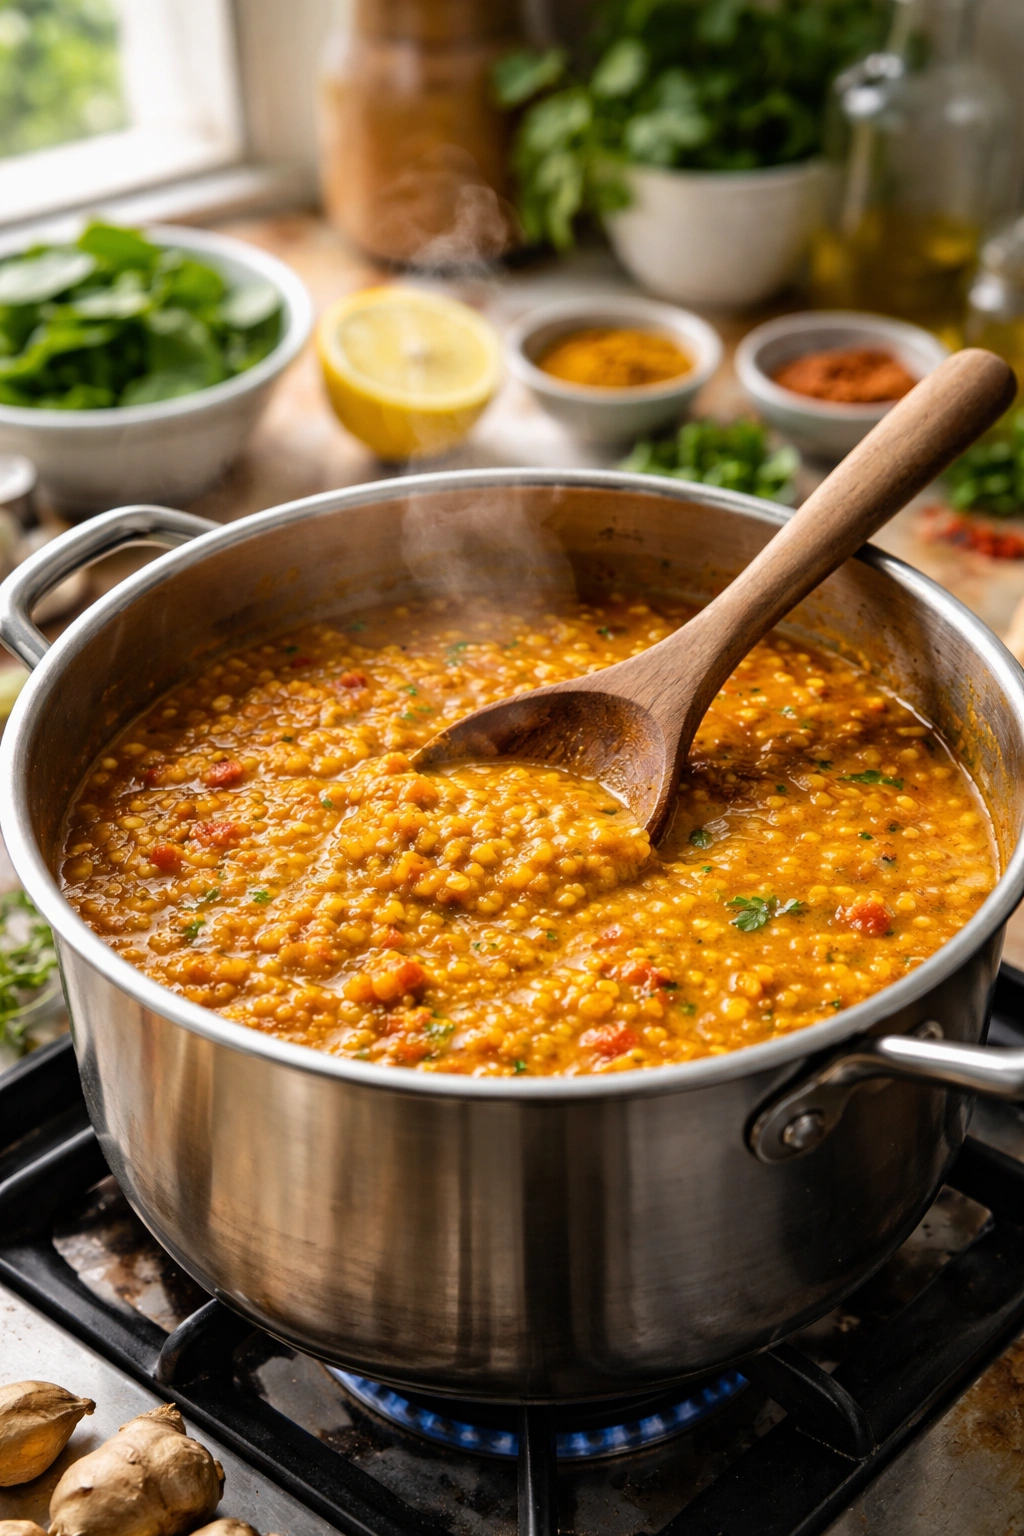
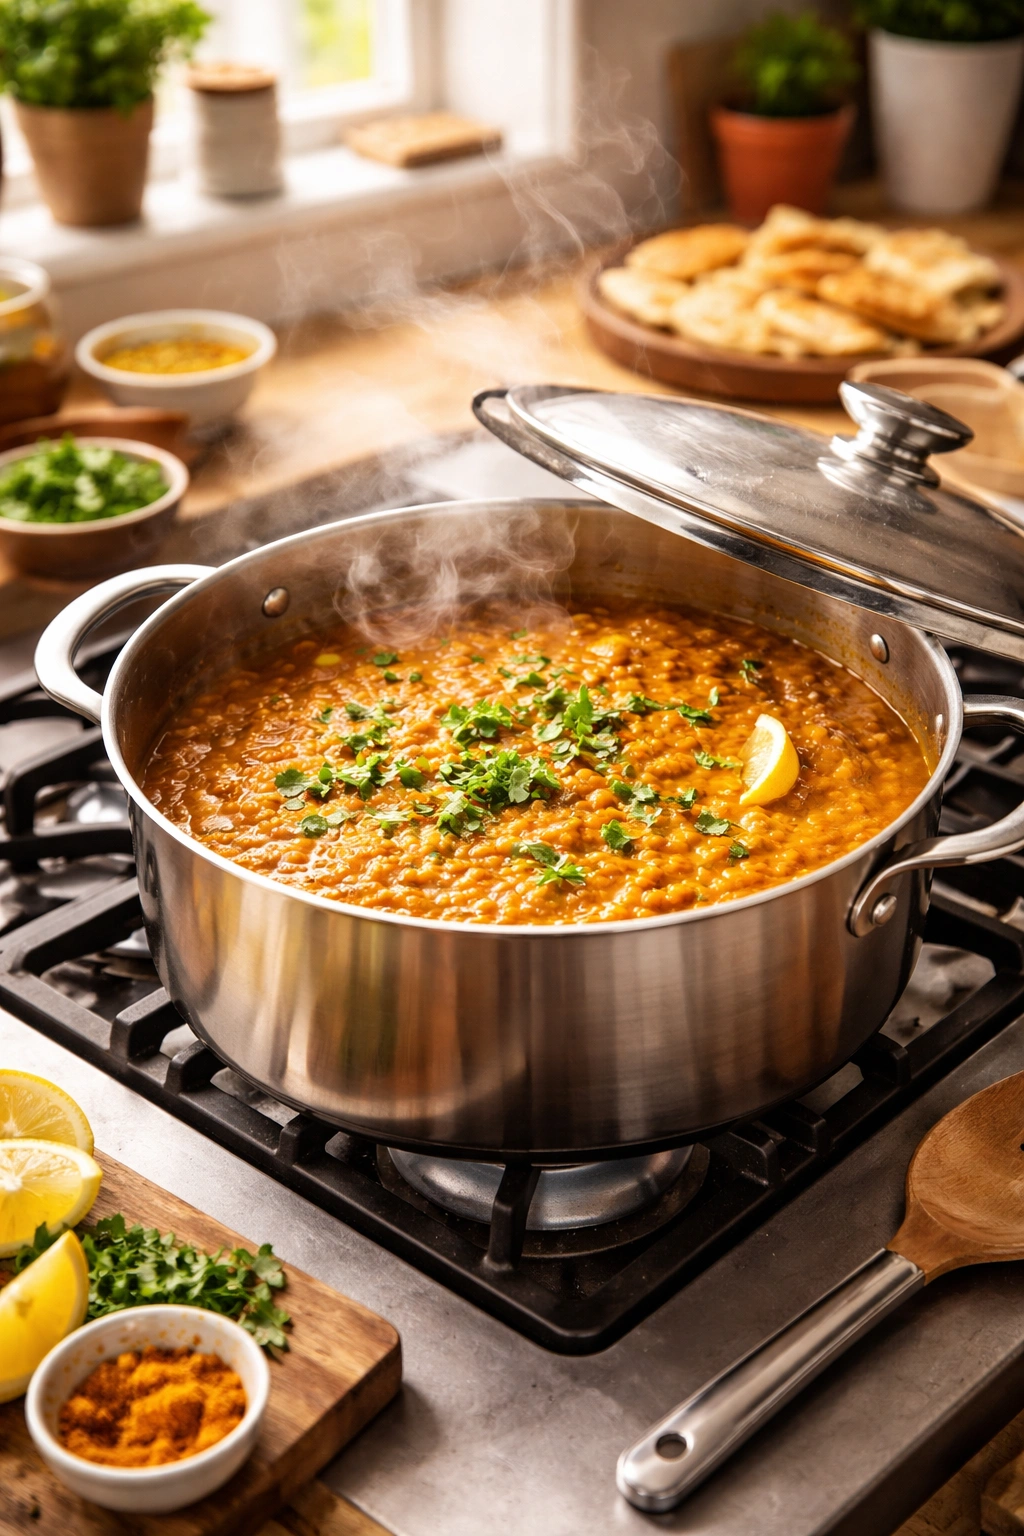
Simmer Until Creamy:
-
Increase the heat to medium-high and bring the mixture to a rolling boil—you should see large bubbles breaking the surface consistently, not just steam rising. This usually takes about 3-4 minutes.
-
Once boiling, immediately reduce the heat to medium-low and partially cover the pot with a lid, leaving a small gap for steam to escape. This prevents the mixture from boiling over while still allowing some evaporation.
-
Simmer, stirring occasionally (about every 3-4 minutes), for 15 to 20 minutes. You’re looking for the red lentils to become completely soft and many of them to have partially broken down into the broth. When you drag a spoon across the bottom of the pot, the mixture should move slowly and fill in the trail behind the spoon rather than immediately flowing back together. This is your signal that the lentils are done and the stew has reached the right consistency.
-
Near the end of cooking, if you notice the dahl is much thicker than you’d like (this can happen if your pot is wider and more liquid evaporates), stir in a bit more broth or water—about ¼ cup at a time—until you reach a consistency you’re happy with. Similarly, if it seems too thin, just let it simmer uncovered for another few minutes to reduce further.
Finish with Brightness:
-
Remove the pot from the heat. Squeeze the lemon juice directly into the pot and stir well—the acid brightens the dish and makes all the spices sing. Taste and adjust: add more salt if it needs it, more lemon juice if you want more brightness, or an extra pinch of red pepper flakes if it needs more heat.
-
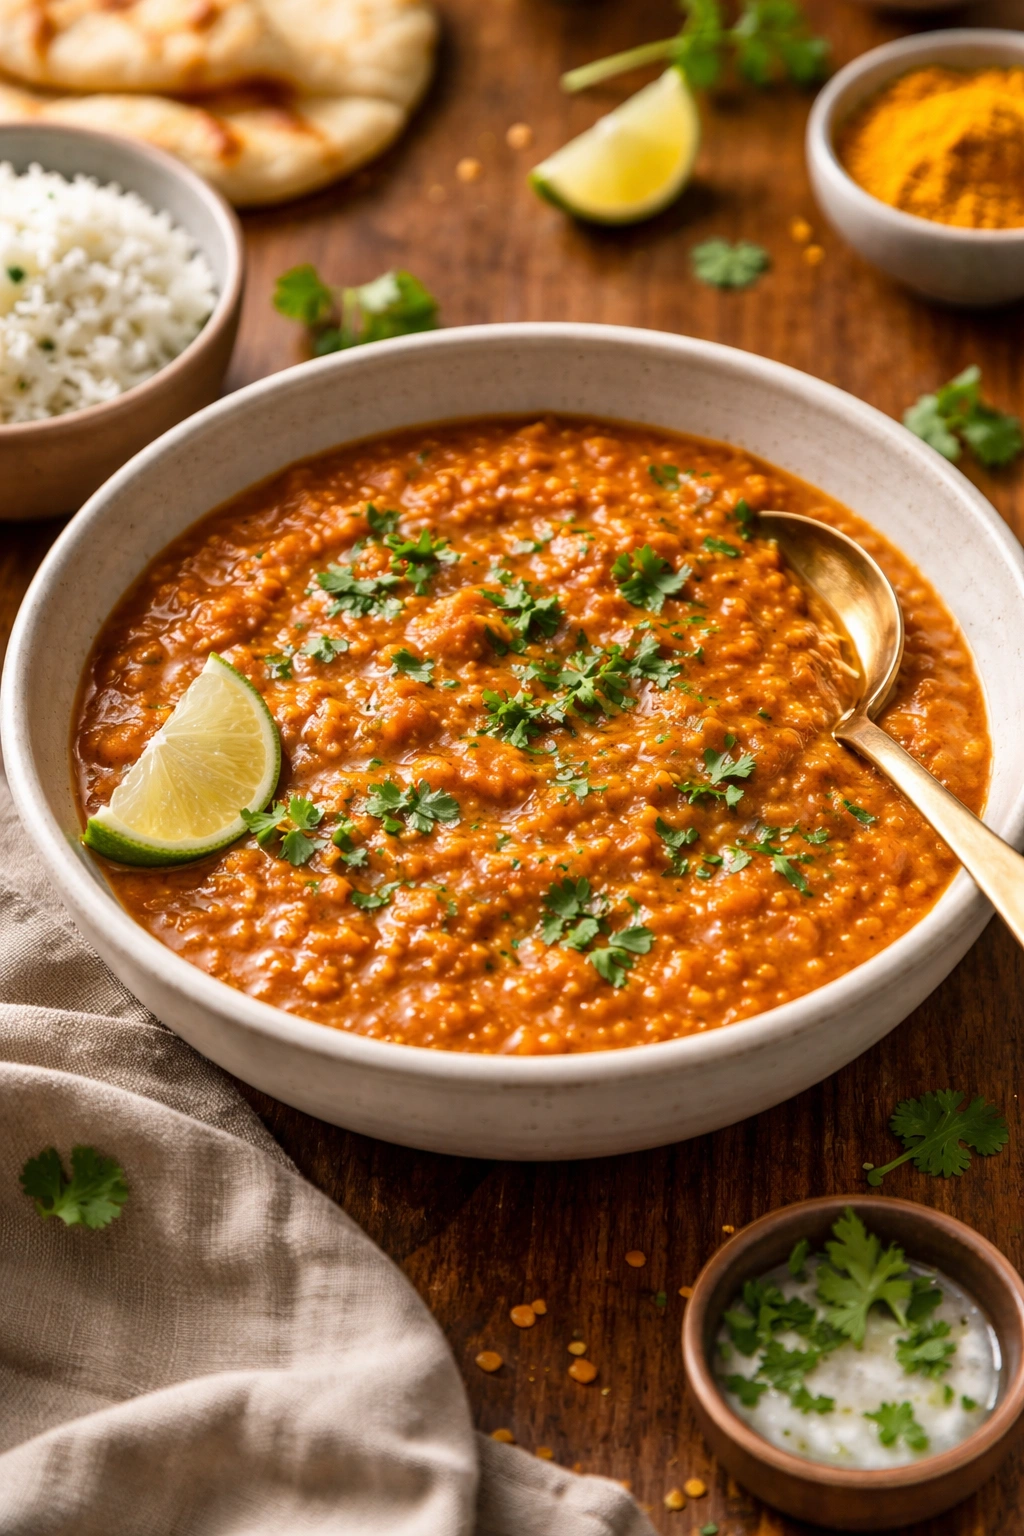
Add the fresh spinach in handfuls, stirring gently until it wilts completely, about 1-2 minutes. The residual heat will soften the spinach perfectly without turning it to mush.
-
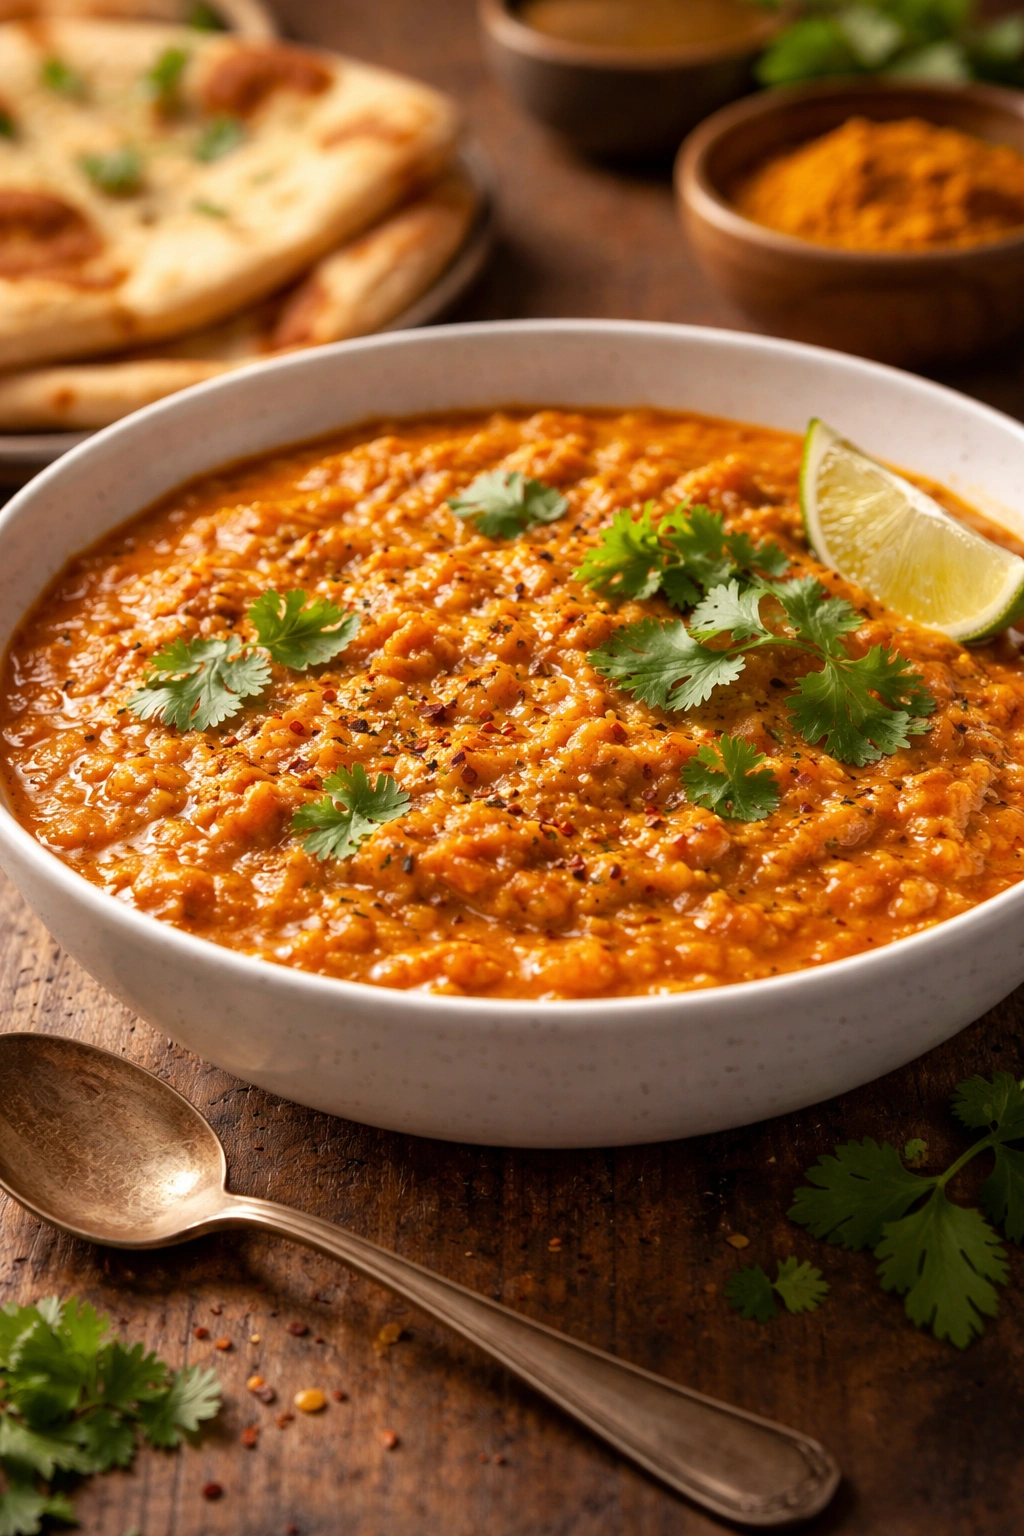
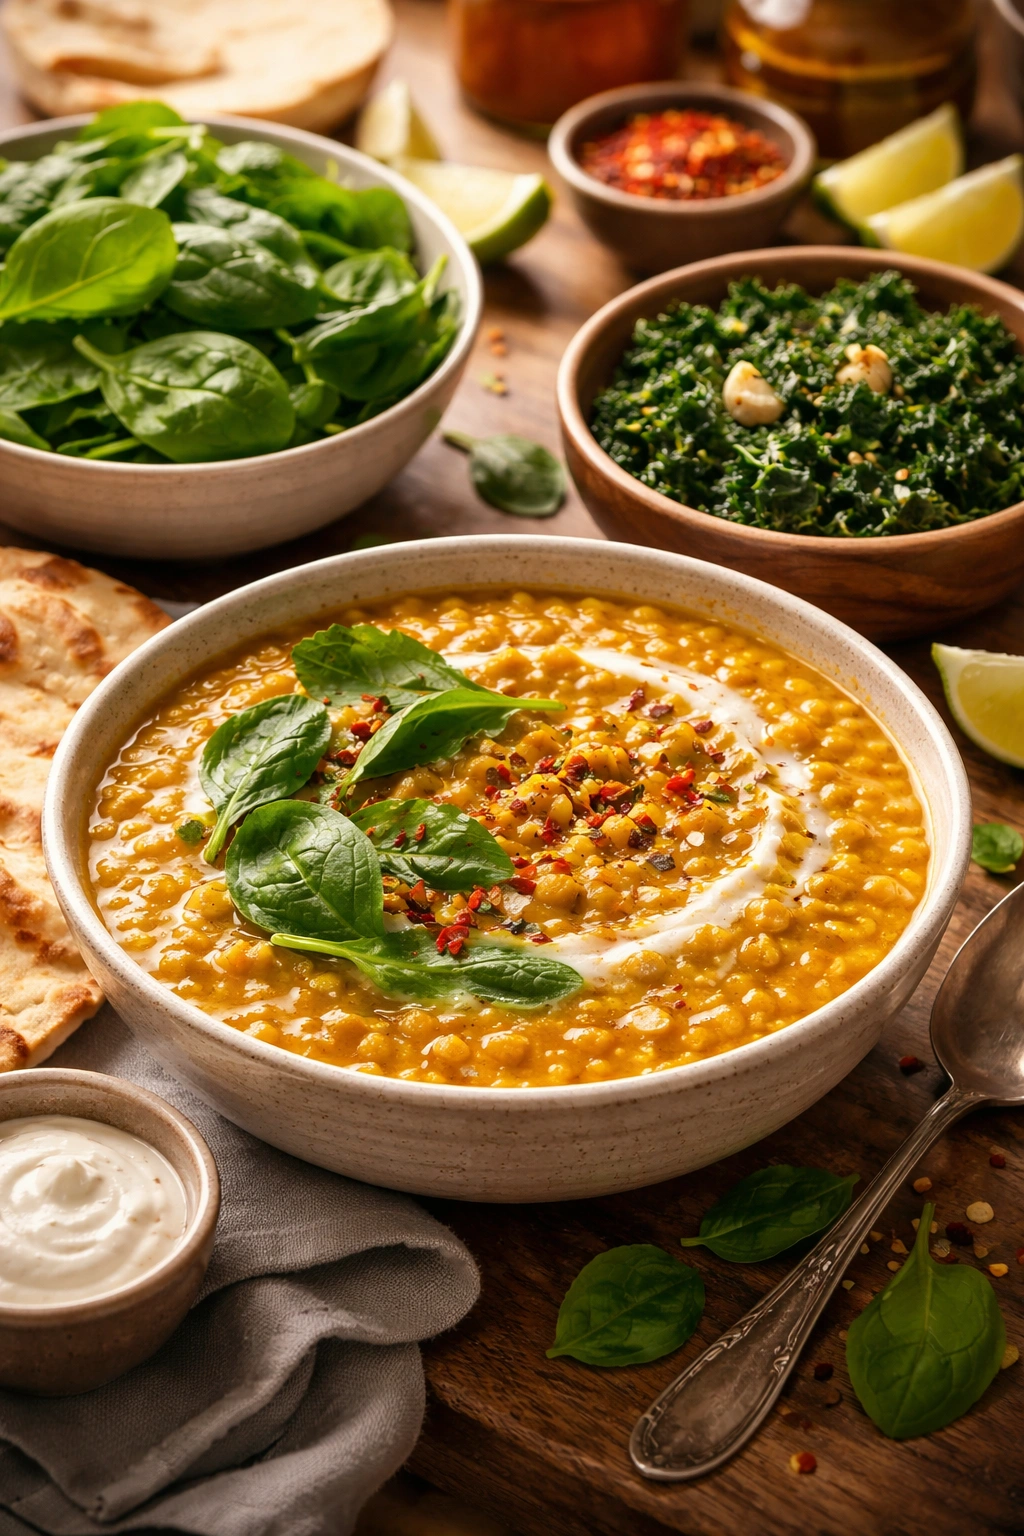
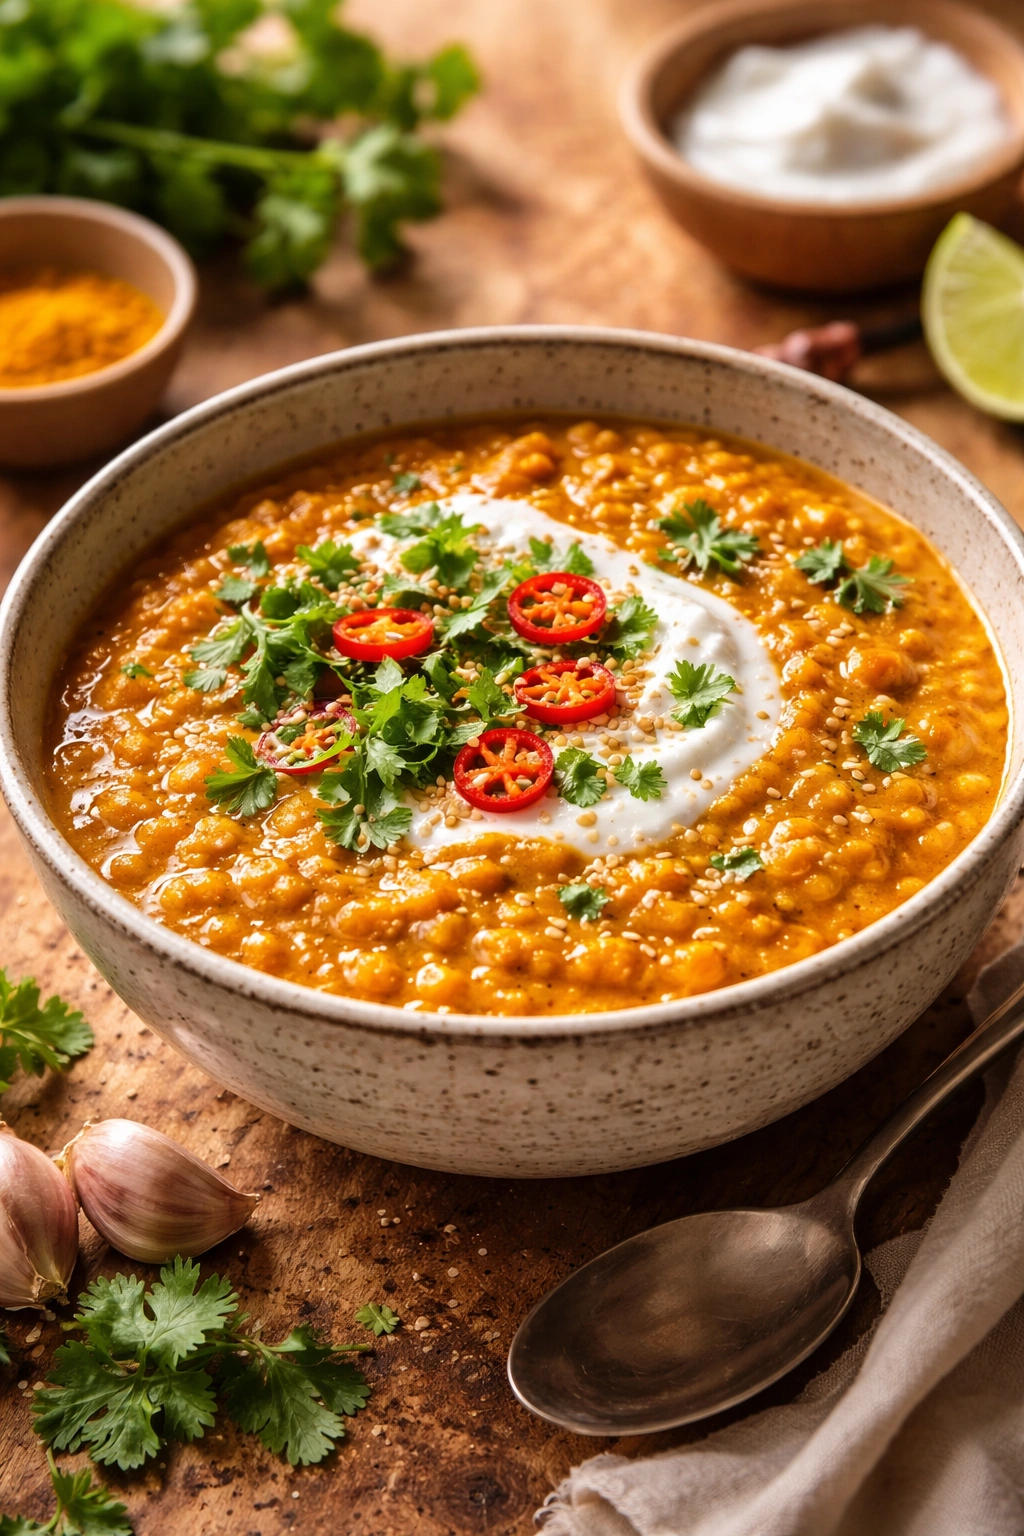
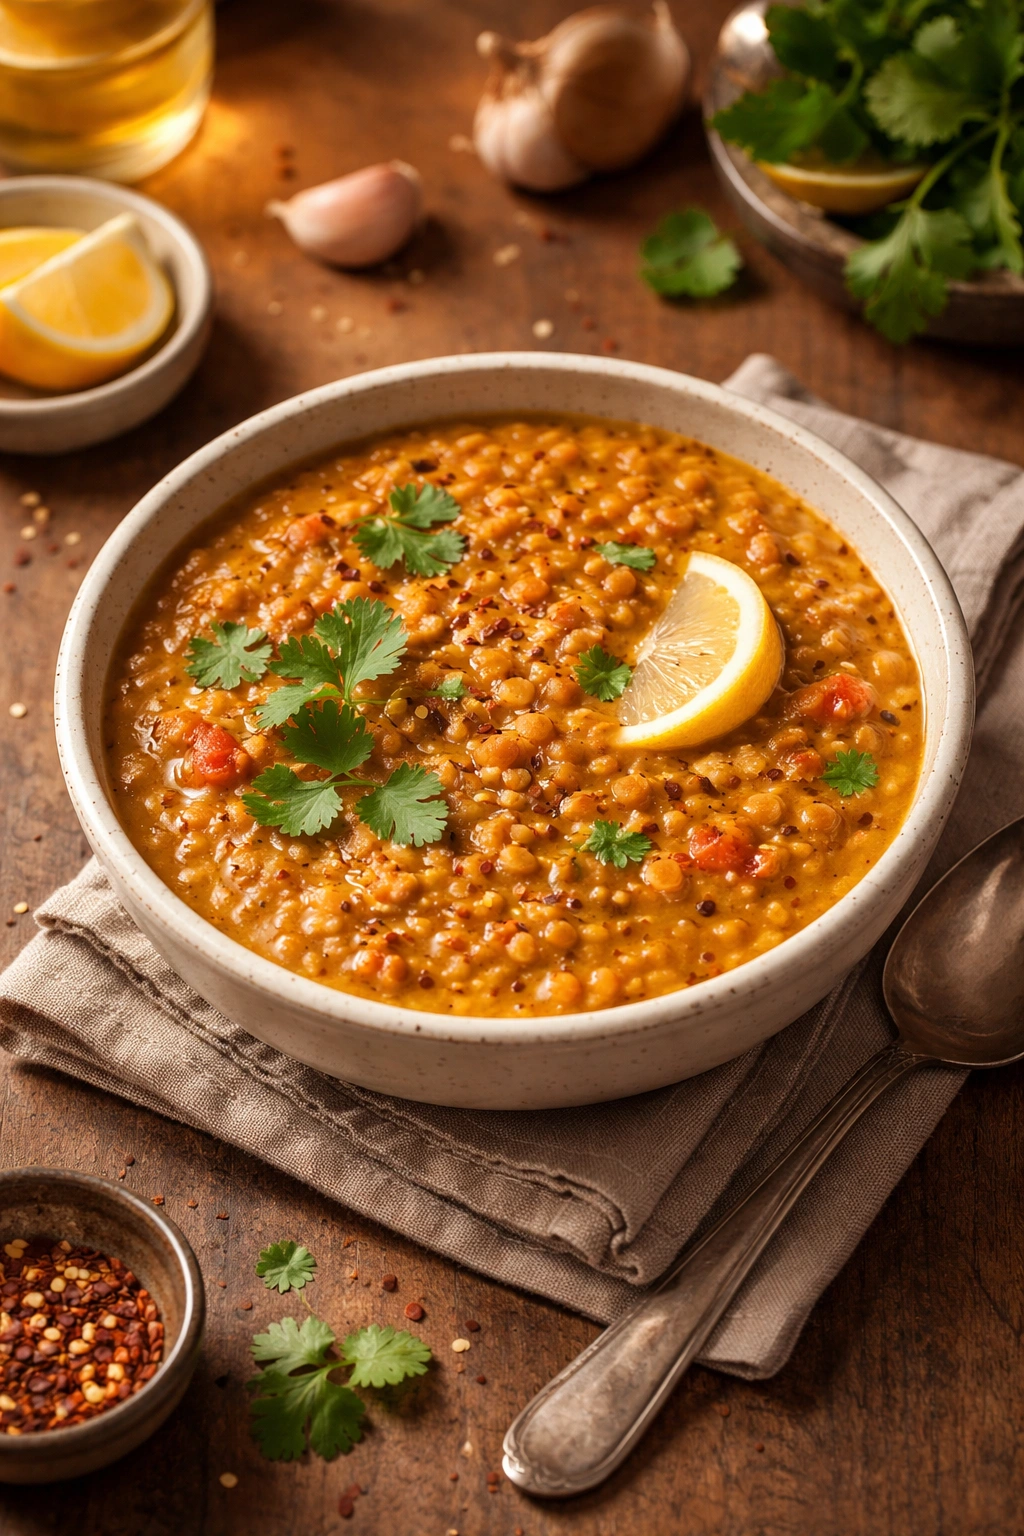
Serve immediately in shallow bowls, spooned over fluffy basmati rice or alongside warm naan bread. Garnish generously with fresh cilantro, a dollop of yogurt, a squeeze of fresh lemon, and extra red pepper flakes if desired.
Pro Tips for Flawless Execution
Rinse those lentils properly. I can’t overstate this—rinsing removes starch that would otherwise make your dahl gummy and unappetizing. Spend 30 seconds rinsing, and you’ll notice a dramatic difference in the final texture.
Use fresh ginger and garlic. Dried or jarred versions will work in a pinch, but fresh ingredients create noticeably better flavor. Fresh ginger has brightness that ground ginger simply can’t match, and fresh garlic has a more nuanced depth than jarred.
Bloom your spices without fail. This single minute of cooking transforms raw spices into something magical. It’s the difference between “this tastes like curry powder” and “this tastes like restaurant-quality dahl.”
Stir occasionally to prevent sticking. Red lentils are prone to sticking to the bottom of the pan if left undisturbed for too long, especially near the end of cooking. A good stir every few minutes ensures even cooking and prevents burnt bits at the bottom. If you do notice anything sticking slightly, reduce the heat further and stir more frequently.
Don’t skip tasting and adjusting. Every stovetop cooks slightly differently, and spices taste different based on their age and storage conditions. Taste your dahl before serving and adjust the salt, lemon, and spice level to your preference. This final taste-and-adjust step is what separates good dahl from absolutely perfect dahl.
Consider the consistency you prefer. Some people love dahl thick enough to stand a spoon in; others prefer it slightly looser, almost stew-like. Both are correct—it’s a personal preference. If you like yours thinner, add broth. If you like it thicker, let it simmer longer uncovered.
Common Mistakes and How to Avoid Them
Under-cooking the lentils is the most common error. If your lentils are still firm or slightly crunchy after 20 minutes, don’t worry—just keep simmering until they’re completely soft. Red lentils should break apart easily when pressed against the side of the pot with a spoon.
Burning the spices happens when the heat is too high. If you detect a bitter, burnt smell instead of the pleasant aroma of bloomed spices, your heat is too high. Lower it immediately and carry on—your dahl won’t be ruined, but the spice flavor won’t be as vibrant. This is why medium heat is specified for blooming rather than high heat.
Adding the spinach too early causes it to become mushy. Wait until the very end to add the spinach—it only needs a minute to wilt, and adding it earlier means it’ll break down into tiny pieces and lose its bright color.
Forgetting the lemon juice makes the dish taste flat. The acid from lemon juice is essential—it’s not optional garnish. It brightens the spices and prevents the dish from tasting one-dimensional or heavy. If you don’t have lemon, lime works beautifully as a substitute.
Overcooking causes the dahl to become too thick and paste-like. If you’ve simmered it longer than 25 minutes and it’s still cooking, you may end up with something too thick. This is easily fixed by stirring in more broth, but it’s easier to avoid by keeping an eye on the consistency after about 15 minutes.
Making This Recipe in Your Instant Pot
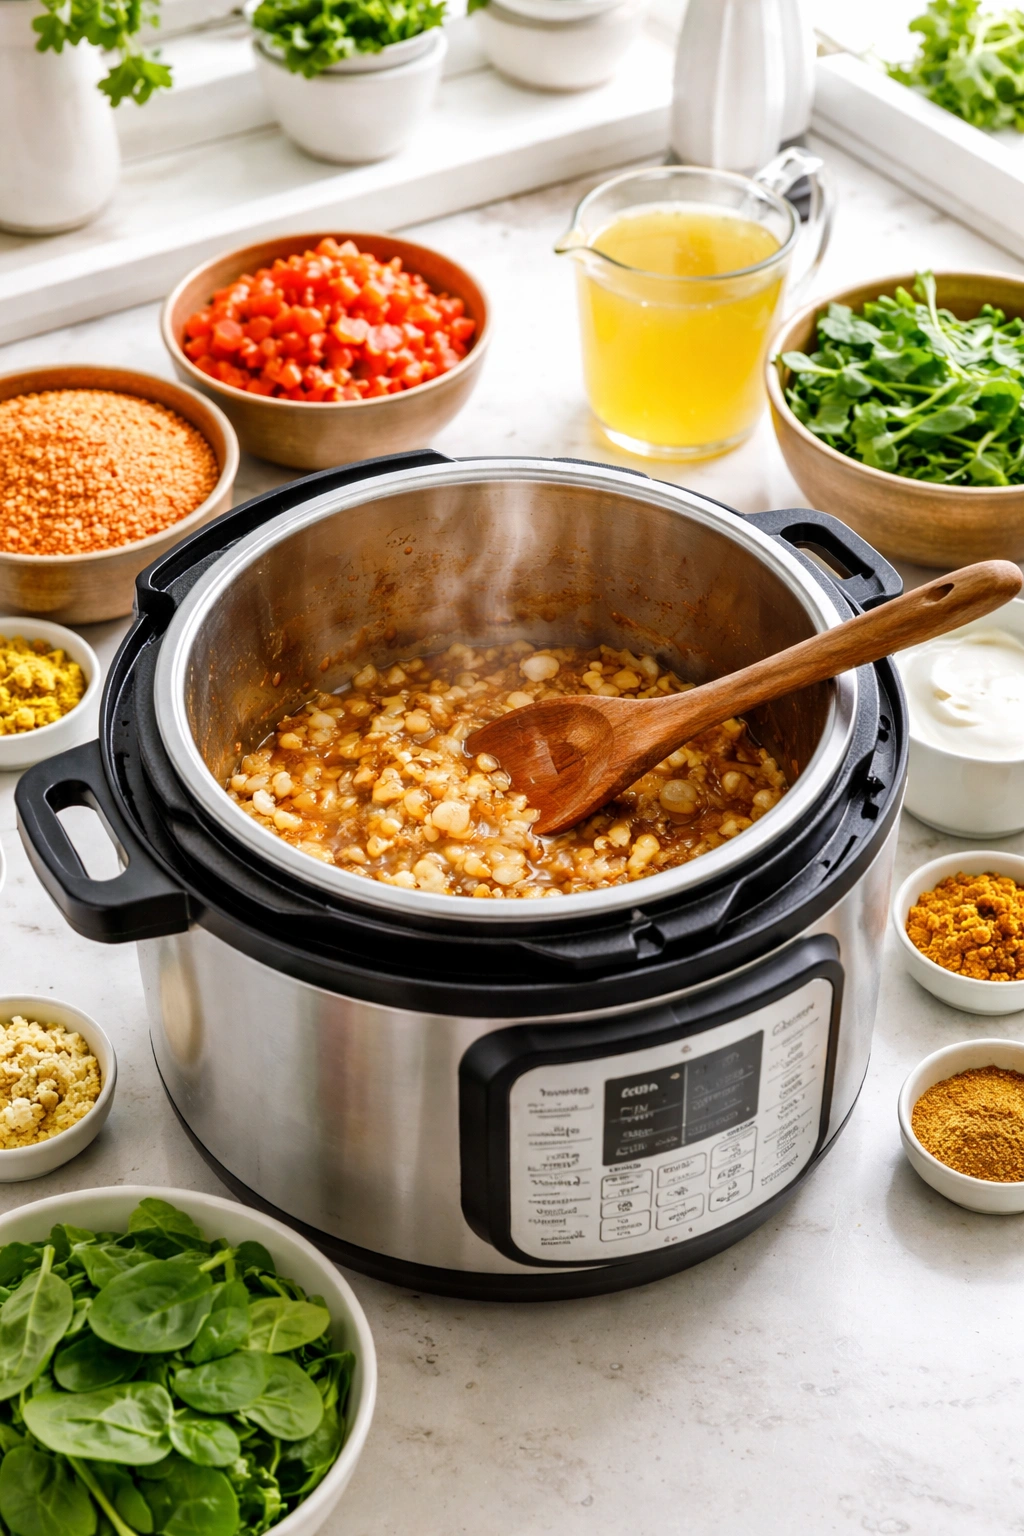
If you prefer pressure cooking, this dahl adapts beautifully to the Instant Pot. Set the pot to the sauté function and follow steps 3 through 6 above—cook the onion, then the garlic-ginger-spice mixture exactly as described. This step cannot be skipped because it’s crucial for developing flavor.
Once you’ve bloomed the spices, add the rinsed lentils, tomatoes, coconut milk, and vegetable broth. Lock the lid in place and set the Instant Pot to high pressure for 8 minutes. When the timer beeps, carefully do a quick release of the pressure valve. Stir in the lemon juice and spinach, and serve immediately.
The flavor will be virtually identical to the stovetop version, and you’ll save about 10 minutes of cooking time. The main advantage of the pressure cooker method is speed; the main advantage of stovetop is that you have more control over the final consistency and can adjust as you go.
Storage, Reheating, and Make-Ahead Instructions
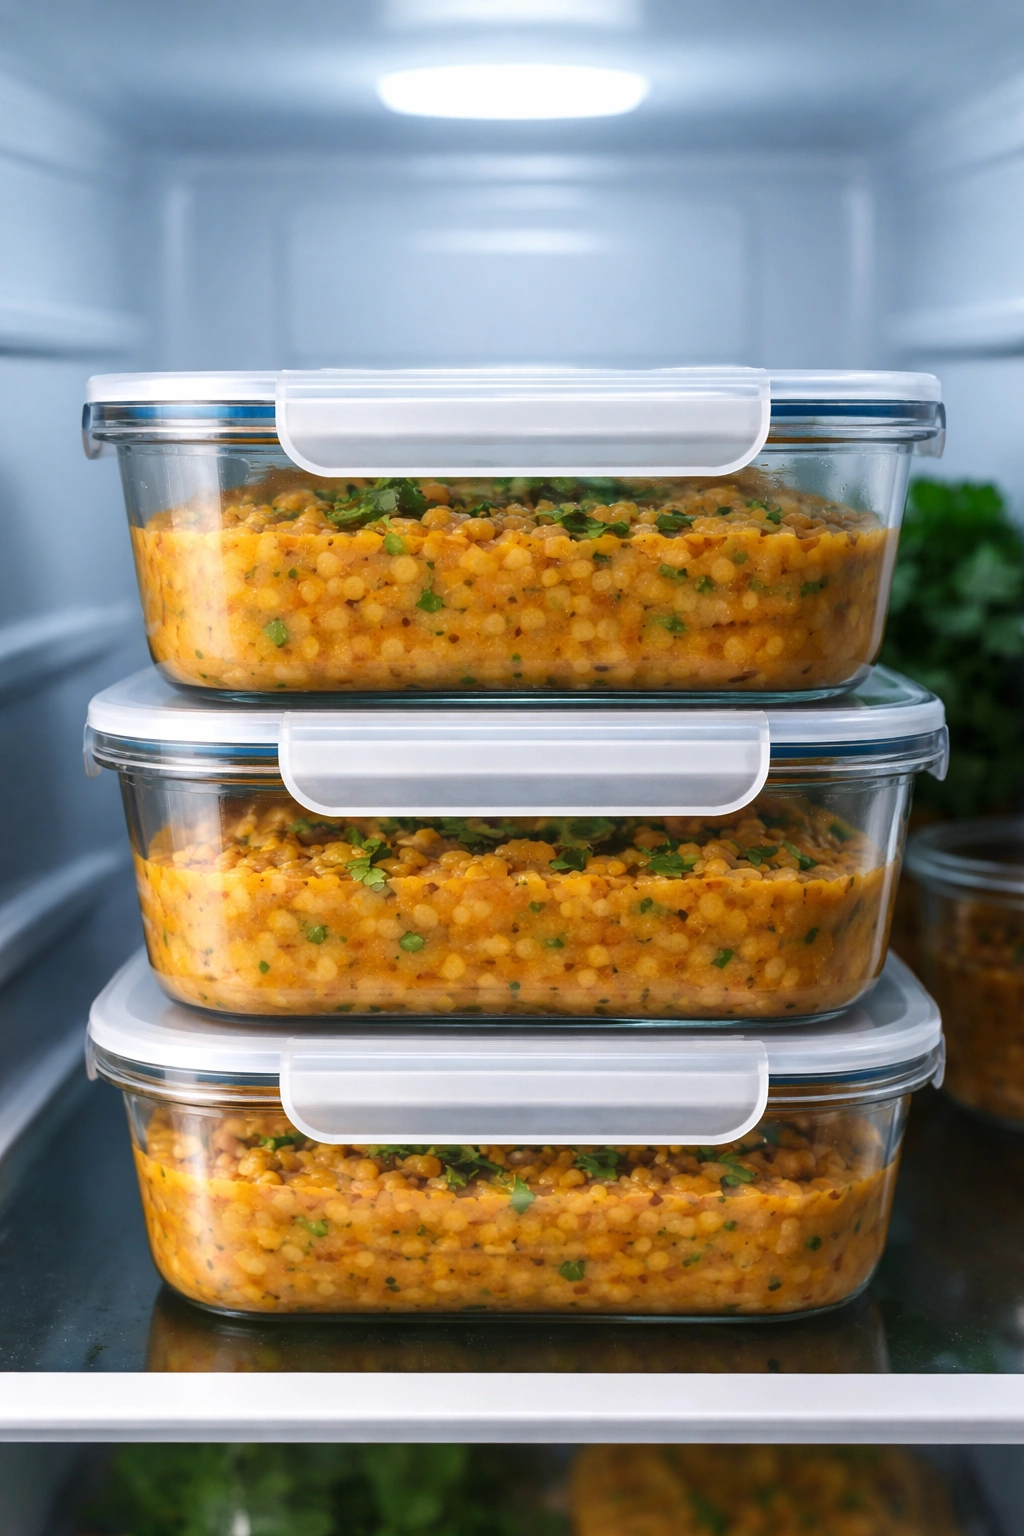
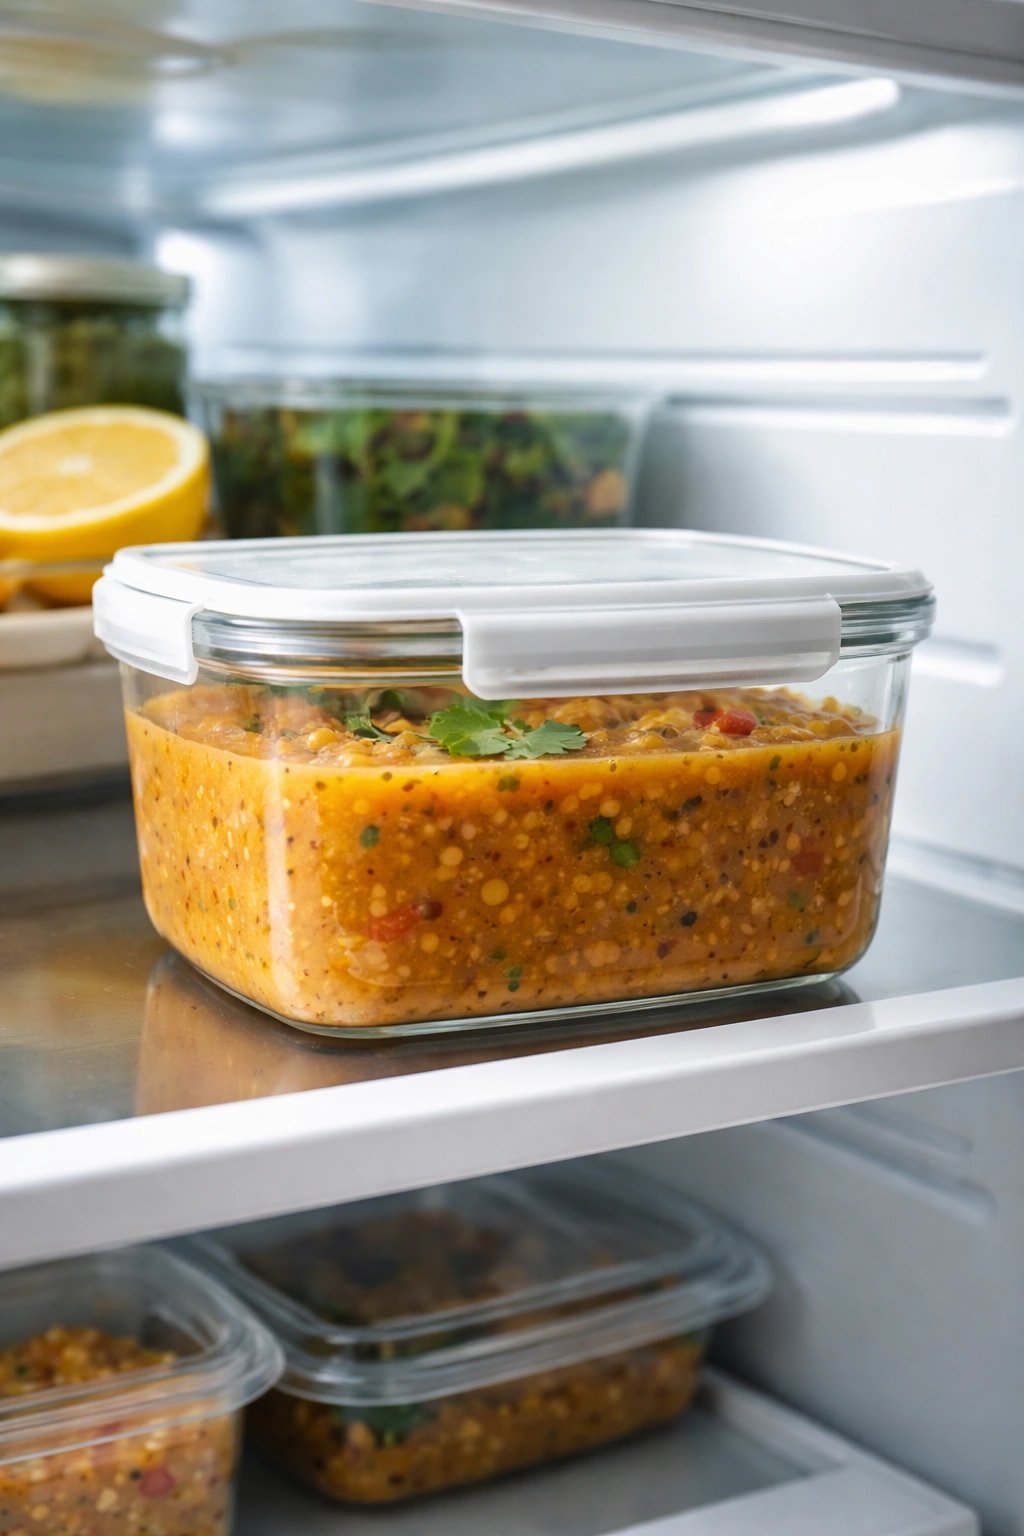
In the refrigerator: Cool the dahl completely before transferring to an airtight container. Properly stored, it will keep for up to 4-5 days in the fridge. The flavors actually deepen as it sits overnight, so leftovers often taste even better than the first night. The dahl will thicken as it cools due to the lentils continuing to absorb moisture—this is completely normal and actually adds to the comfort-food quality.
Reheating on the stovetop: Place the dahl in a pot over medium-low heat, stirring occasionally, until warmed through (about 5-7 minutes). If it’s thicker than you’d like, stir in a splash of water or broth to loosen it. Don’t use high heat, as this can cause sticking and scorching.
Reheating in the microwave: Transfer a portion to a microwave-safe bowl, cover loosely, and heat at 50% power for 2-3 minutes, stirring halfway through. This gentler approach prevents the edges from getting too hot while the center stays cold.
Freezing for later: Let the dahl cool completely, then transfer it to freezer-safe containers or even ice cube trays if you want individual portions. Freeze for up to 3 months. Leave a bit of headroom in containers since the dahl will expand slightly as it freezes. Thaw overnight in the refrigerator and reheat gently on the stovetop, adding broth as needed to reach your desired consistency.
Flavor Variations and Adaptations
For extra creaminess: Add an additional ½ cup of full-fat coconut milk along with the spinach. This creates an almost dessert-like richness while still tasting authentically spiced.
For more heat: Add a diced fresh green chili with the garlic and ginger, and increase the red pepper flakes to one full teaspoon. You can also finish with a pinch of cayenne pepper just before serving.
For a different green: Substitute the spinach with chopped kale, Swiss chard, or collard greens. Note that these heartier greens need 2-3 minutes to wilt rather than just 1-2 minutes, so add them slightly earlier.
For added vegetables: Diced sweet potato, butternut squash, or bell pepper all work beautifully. Add harder vegetables (like sweet potato) when you add the lentils, and softer vegetables (like bell pepper) during the last 5 minutes of cooking.
For a curried version: Substitute 3 teaspoons of a good-quality curry powder for the individual spices (garam masala, turmeric, cumin, coriander, and cinnamon). The flavor will be slightly different—more unified—but equally delicious and perfect if you don’t have individual spices on hand.
For a dairy version: Stir in heavy cream, Greek yogurt, or sour cream at the very end instead of (or in addition to) the coconut milk. Add it slowly and stir gently to avoid curdling. Taste as you go—you might need less dairy than you’d expect.
Perfect Serving Suggestions and Pairings
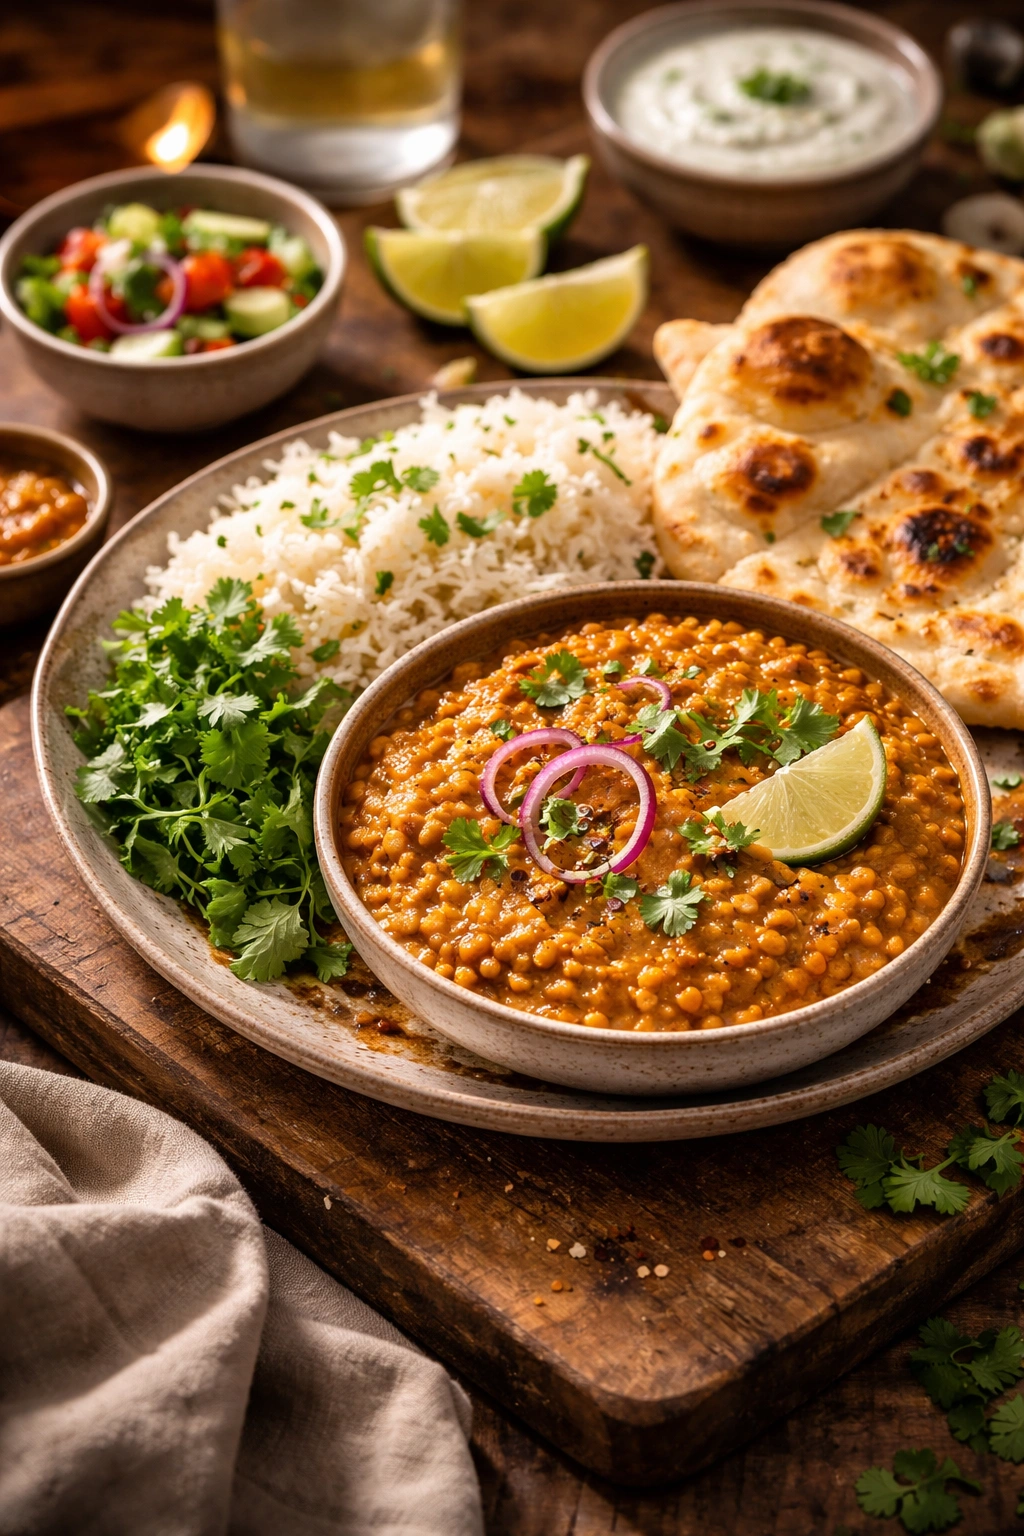
The classic pairing: Serve this dahl over fluffy basmati rice or jasmine rice with warm naan bread on the side. This is the traditional way and honestly the best way—the rice soaks up the flavorful broth, and the naan is perfect for scooping.
For a grain-free option: Serve over cauliflower rice or on a bed of fresh arugula or mixed greens. The bitter edge of arugula pairs beautifully with the warm spices, and the fresh greens add textural contrast.
Build a full Indian meal: Pair the dahl with Bombay potatoes (spiced roasted potatoes), a simple cucumber and tomato salad, warm flatbread, and a cooling raita (yogurt sauce). Add mango lassi as a drink, and you’ve got a complete, restaurant-quality meal.
For lunch bowls: Cool the dahl and pack it with rice, roasted vegetables, and a dollop of yogurt in containers for grab-and-go lunches throughout the week.
As a side dish: This dahl pairs beautifully alongside grilled tofu, roasted paneer cheese, or even roasted chickpeas if you’re building a vegetarian plate.
Frequently Asked Questions

Do You Have to Rinse Red Lentils Before Cooking?
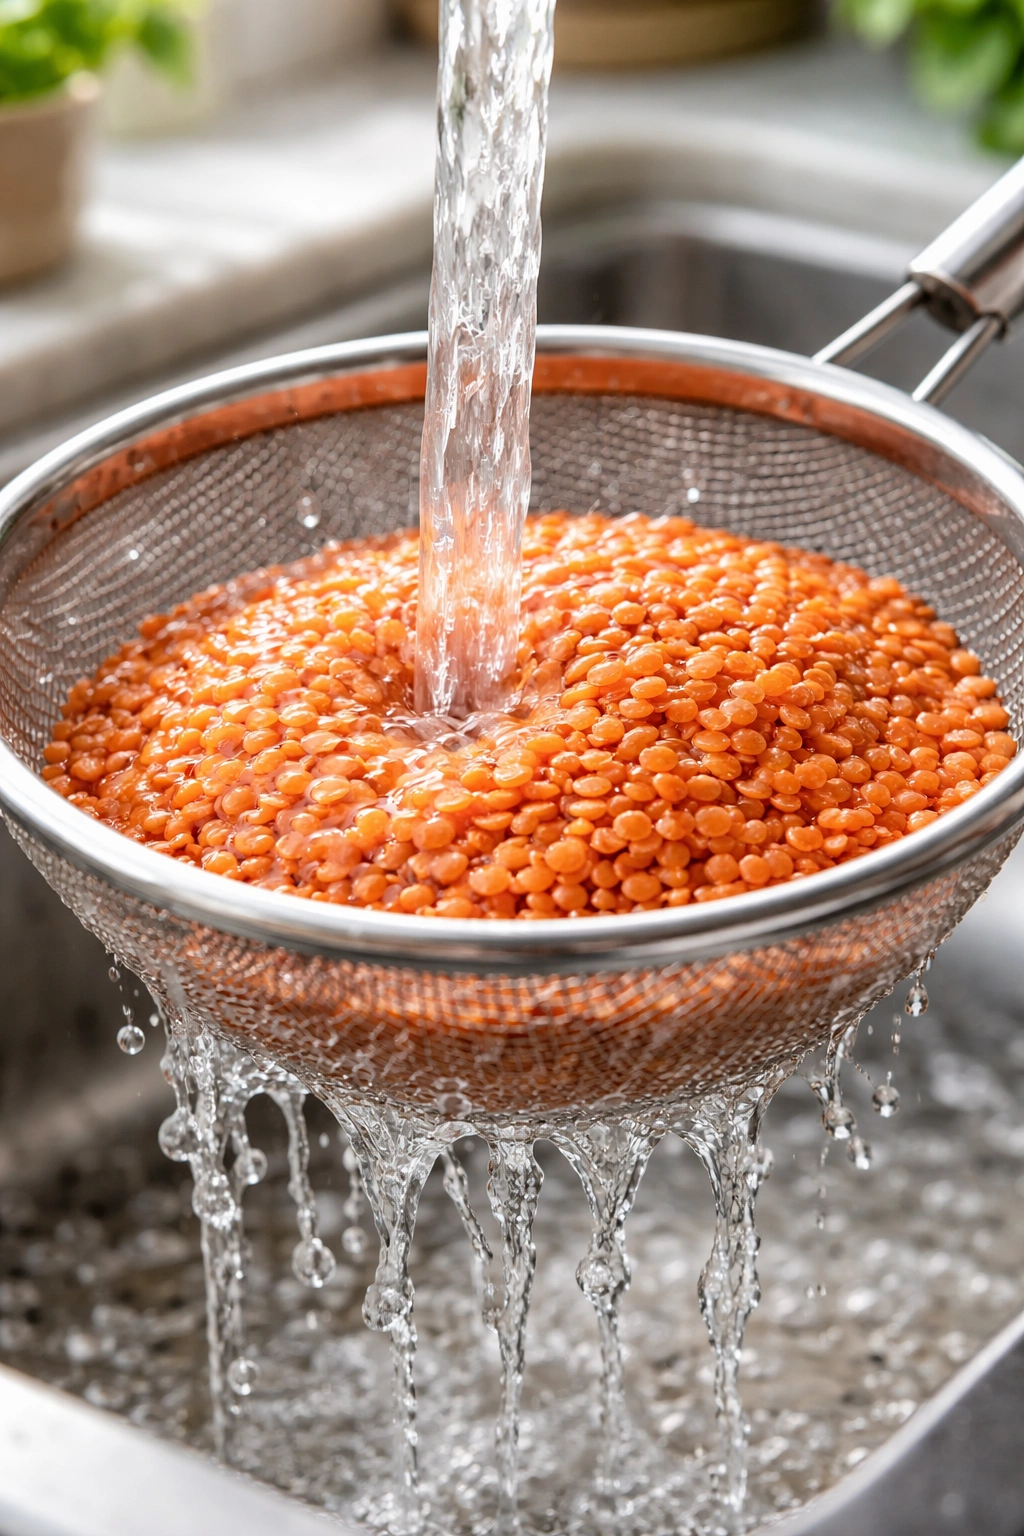
Absolutely, yes. Rinsing is essential, not optional. Red lentils are covered in starch and dust from processing and storage. When you rinse them thoroughly (until the water runs nearly clear), you remove this excess starch, which prevents the finished dahl from becoming gummy or paste-like. It takes about 30 seconds and makes an enormous difference in texture. Simply place the lentils in a fine-mesh strainer and rinse under cold running water, stirring them gently with your fingers, until the water drains clear or nearly clear.
Can You Use a Different Type of Lentil Instead of Red?
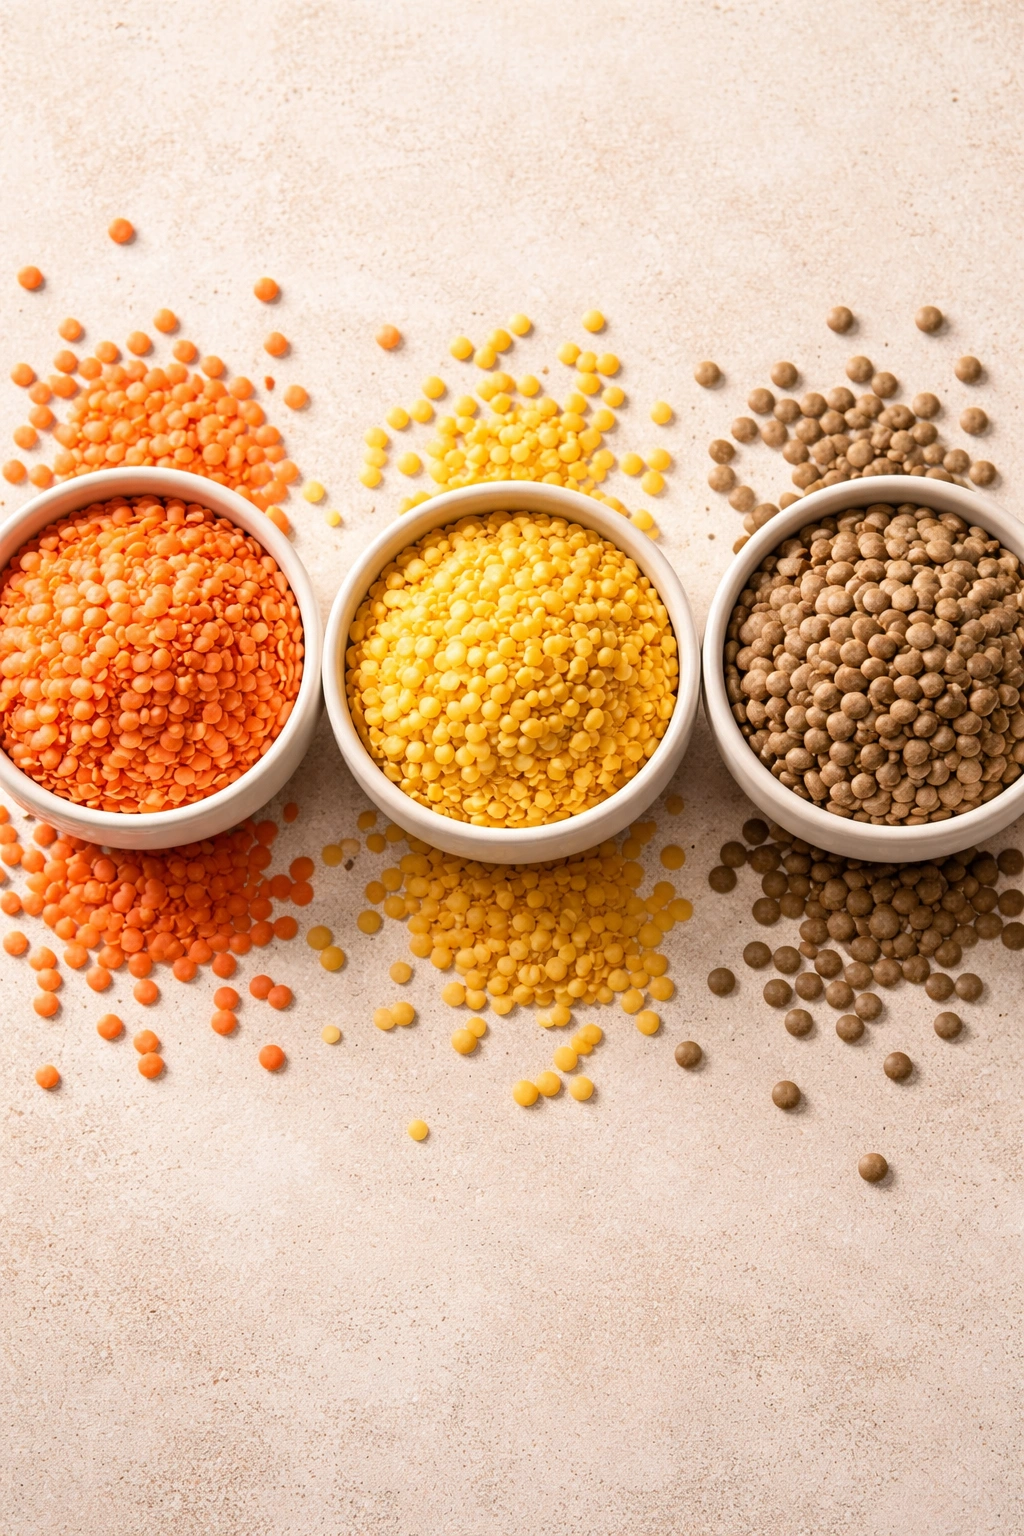
You can, but I don’t recommend it for this recipe. Red lentils are specifically chosen because they cook quickly and break down into a creamy consistency in about 15-20 minutes. Yellow split lentils will work similarly and will cook in roughly the same timeframe. Brown or green lentils are a different story—they hold their shape stubbornly, take 40-45 minutes to cook, and won’t create that naturally creamy texture. If you use them, you’ll need to increase the cooking time significantly and add more broth to compensate. The finished dahl will have a completely different texture—more like a chunky stew than the silky, spoon-coating dahl most people love.
What Can You Substitute for Coconut Milk?
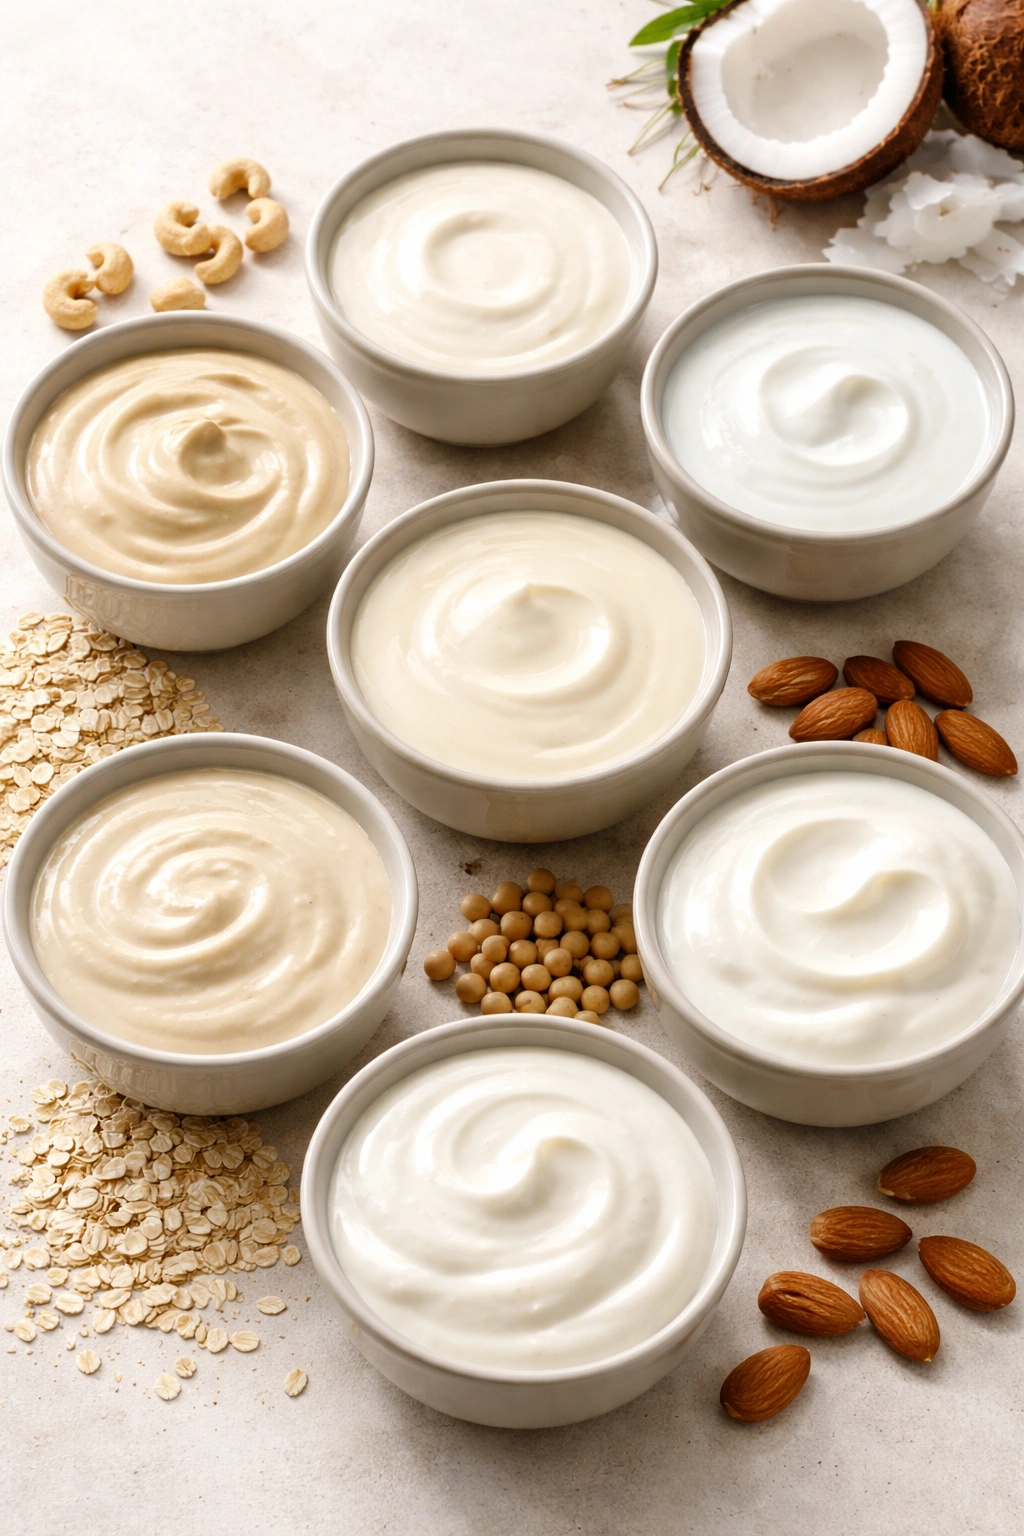
Full-fat coconut milk is ideal because it creates that luxurious, creamy texture while adding subtle sweetness. However, you have several alternatives: Cashew cream (blend soaked cashews with water) creates similar richness without coconut flavor. Heavy cream or sour cream adds richness and creaminess—stir it in at the very end to prevent curdling. Light coconut milk works but won’t be quite as creamy or rich. Plant-based creams like oat cream, soy cream, or almond cream work perfectly if you’re avoiding dairy and coconut. Greek yogurt or dairy-free yogurt can be stirred in at the end for tang and creaminess. Just add these dairy or yogurt-based additions slowly at the end while stirring gently, and taste as you go—you might not need the full amount.
How Long Does Lentil Dahl Last in the Fridge?
Properly stored in an airtight container, lentil dahl will keep for 4-5 days in the refrigerator. The flavors actually deepen over time, so leftovers often taste even better on day two or three than they do fresh. The dahl will thicken as it sits due to the lentils continuing to absorb moisture—this is completely normal. When reheating, simply stir in a splash of broth or water to return it to your desired consistency.
Is This Recipe Naturally Vegan and Gluten-Free?
Yes to both questions. The recipe as written contains no animal products and no gluten-containing ingredients. The dahl is naturally vegan, made with plant-based oil and coconut milk, and naturally gluten-free when using standard red lentils and certified gluten-free broth (if that’s a concern). Even the traditional serving accompaniments like rice and naan can be easily made vegan and gluten-free. The only ingredient you might need to swap is the yogurt garnish—use coconut yogurt, almond yogurt, or another plant-based option if you’re keeping it 100% vegan.
What’s the Difference Between Dahl and Dal?
There is no real difference—these are simply different romanized spellings of the same Hindi word. You’ll see it written as dahl, dal, daal, and dhal, all referring to the same ingredient (split lentils) and the same finished dish. In India, you might see regional variations in spelling based on local language, but all of these spellings refer to the exact same thing. Use whichever spelling feels most natural to you—there’s no “correct” version in English.
Can You Make This Ahead of Time for a Dinner Party?
Absolutely. Make this dahl up to 2 days ahead and store it in the refrigerator. Gently reheat it on the stovetop on low heat, stirring occasionally and adding a splash of broth if needed to loosen it. You can even reheat it in a slow cooker on low for 30-45 minutes, which keeps it warm without risk of scorching. The dahl’s flavors deepen as it sits, so advance preparation is actually beneficial. Just add the fresh cilantro garnish and lemon wedges right before serving for maximum brightness and visual appeal.
Final Thoughts
The beauty of this lentil dahl is that it proves you don’t need hours of work or complex techniques to create genuinely impressive food. You need an understanding of a few basic principles—how to build flavor through aromatics and bloomed spices, how to choose ingredients that work together, and how to give them enough time to meld into something greater than their individual parts.
What you’re actually doing when you make this dahl is connecting to a culinary tradition that feeds millions of people multiple times per week across an entire continent. You’re honoring the intelligence of cooks who figured out, years ago, that you could take the cheapest, most readily available ingredients and transform them into something so delicious and nourishing that families would request it repeatedly. That’s genuine food wisdom, and it’s available to you right now, in your own kitchen, for just a few dollars.
The 30-minute timeline isn’t a marketing claim or an exaggeration—it’s real and achievable every single time you make this. What varies is how much you love it, and I’m betting it’ll become a regular part of your cooking rotation, the same way it has for thousands of home cooks who’ve made it before you. Make it this week, adjust it to your taste preferences, and then make it again next week. By the third time, you’ll be making it from muscle memory, which is exactly when a recipe becomes truly yours.