There’s a reason baked salmon sits at the top of the weeknight dinner rotation for so many home cooks—it’s genuinely foolproof, cooks in minutes, and tastes restaurant-quality without a single complicated step. Whether you’re feeding a busy family, cooking for yourself after a long day, or suddenly remembering you have guests arriving in an hour, baked salmon delivers. The fish itself does most of the work; your only real job is not to overcook it. And with the right technique, you won’t.
The beauty of baked salmon isn’t just speed, though a perfectly cooked fillet takes just 12 to 15 minutes in the oven. It’s that the result—tender, flaky, buttery flesh that practically dissolves on your tongue—somehow feels indulgent even though it’s one of the healthiest proteins you can eat. A quick brush of garlic butter, a sprinkle of fresh herbs, maybe a squeeze of lemon, and you’ve built something that looks like you spent an hour in the kitchen when really you’ve barely cracked 20 minutes from start to finish. That gap between effort and reward is where weeknight cooking magic happens.
I’ve tested this recipe dozens of times, and every variable matters: the thickness of your fillet, the exact oven temperature, how far you cook it before it goes from perfect to dry. But once you understand those factors, you’ll develop an intuition for it that makes baked salmon your default go-to protein. The kind of recipe you don’t need to look up anymore because your hands just know what to do.
Why Oven-Baked Salmon Beats Every Other Cooking Method
Pan-searing salmon creates beautiful crust and crispy skin, but it requires constant attention and can send butter splattering across your stovetop. Grilling is fantastic in warm weather, but you need charcoal or a gas grill ready to go. Poaching keeps salmon incredibly moist but gives you pale, uninspiring flesh. Baking, though? Baking is the Goldilocks solution—it cooks salmon gently and evenly without requiring you to babysit it, delivers consistent moisture and tenderness, and lets you achieve that golden, slightly caramelized exterior if you want it.
The oven’s dry, surrounding heat cooks the salmon from all angles simultaneously. The skin acts as a natural moisture barrier when left on, which is why we keep it intact during baking and remove it only after cooking (or leave it on entirely if you like eating it). There’s no splattering, no pan-management stress, and you get 10 to 15 minutes of hands-off time to set your table, throw together a side dish, or simply breathe between work and dinner.
This method also scales effortlessly. Whether you’re cooking four individual fillets for your family or one large 2-pound side of salmon for a dinner party, the technique remains identical. Just adjust the baking time for the total thickness of what you’re cooking. That flexibility alone makes baked salmon worth mastering.
Choosing the Right Salmon Makes All the Difference
Walk up to the fish counter with confidence knowing exactly what to look for, and you’ll set yourself up for success before the salmon even hits the oven. The quality of your starting ingredient determines everything—mediocre salmon cooked perfectly still tastes mediocre, but great salmon cooked correctly becomes something genuinely memorable.
Wild-Caught vs. Farmed Salmon
Wild salmon commands a higher price but offers superior flavor and a firmer, more complex texture. Wild salmon spend their lives swimming against currents and hunting for food, which builds stronger muscles and denser flesh. The flavor is richer and more mineral-forward, less fatty overall, and the color is a vibrant deep pink that comes from their natural diet of krill and small crustaceans. Wild sockeye and coho are particularly excellent choices for baking.
Farmed salmon costs less and is available year-round, making it a practical choice for busy weeknight dinners. Farm-raised fish are fattier than their wild cousins, which actually makes them more forgiving when baking—the extra fat keeps them moist even if you accidentally leave them in the oven a couple minutes too long. The flavor is milder and buttery, which appeals to some palates and not others. Farmed salmon is perfectly fine for this recipe; just know what you’re getting.
Shopping for Salmon Quality
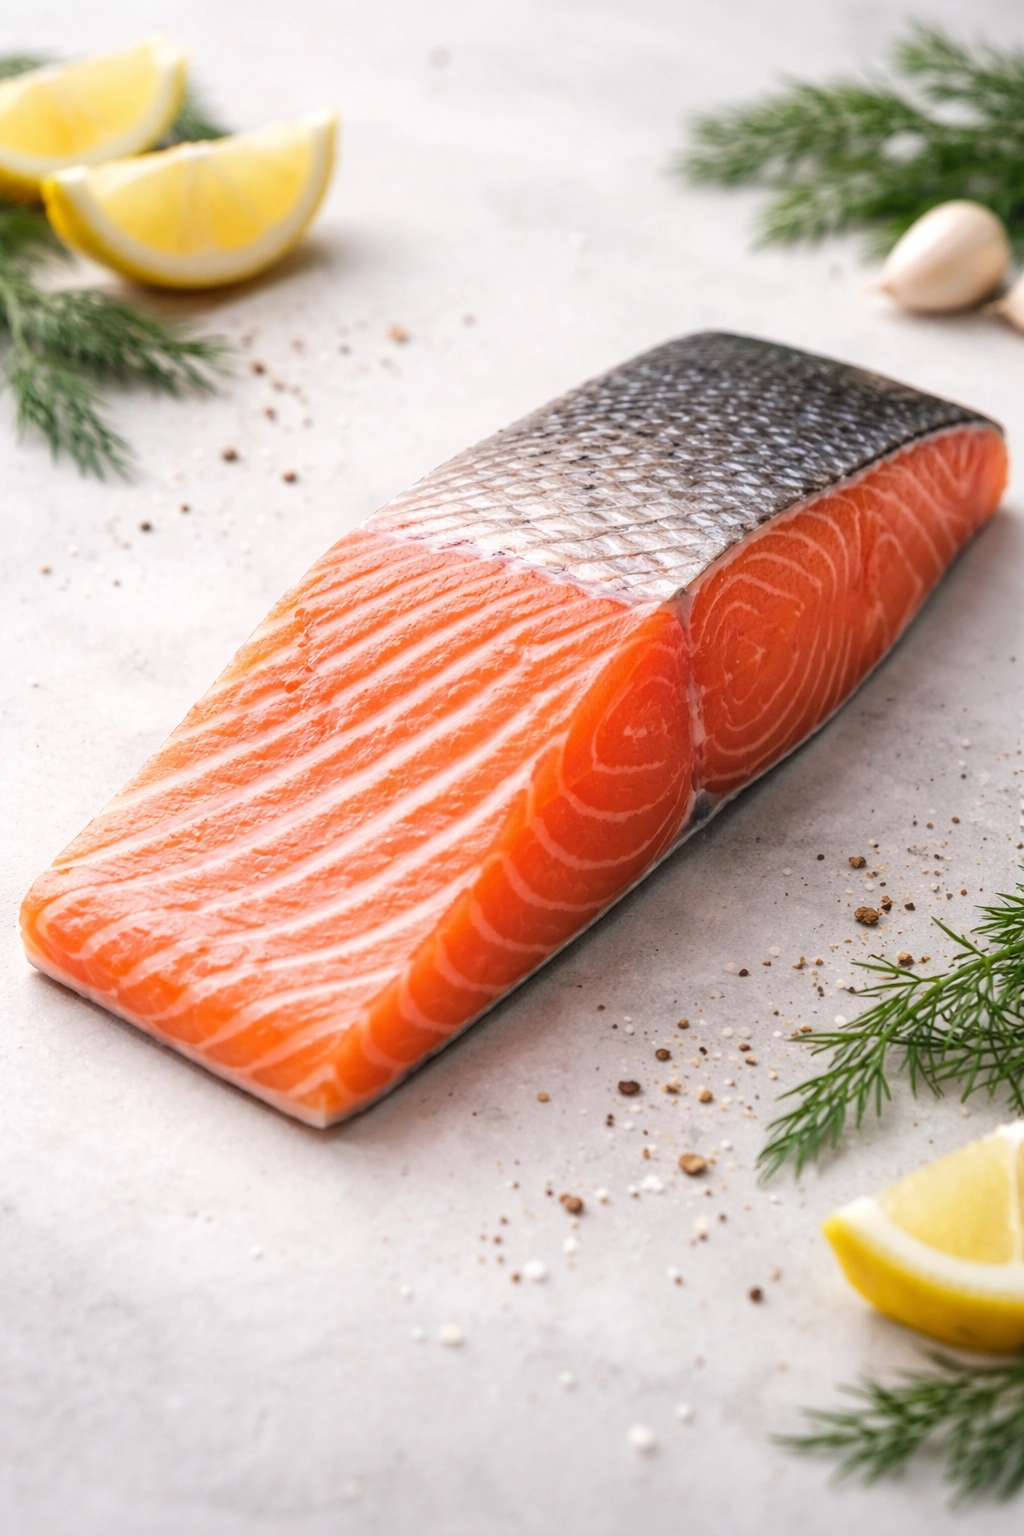
The flesh should be vibrant pink or deep red, never pale or grayish. Any brown discoloration, dark spots, or dull patches indicate the fish is older than you want. Press the flesh gently with your finger—it should spring back immediately, not leave an indentation. If it smells at all fishy or ammonia-like, that’s a sign the salmon is past its prime. Fresh salmon should smell clean and oceanic, almost subtly sweet.
Whether you’re buying fresh or frozen matters less than you’d think. Unless you live near a quality fish market and the catch of the day just arrived, frozen salmon is often your better bet. Fish are flash-frozen right after being caught, locking in freshness at peak quality. That “fresh” salmon on ice at the supermarket may have actually been frozen weeks ago and thawed before being displayed. When buying frozen, check that the packaging is tight with no ice crystals visible, which indicates freezer burn.
Pro tip: Buy salmon on sale and freeze individual fillets when you find a good price. Wrap each fillet tightly in plastic wrap, then place the wrapped fillets in a freezer bag to prevent freezer burn. They’ll keep perfectly for two to three months, giving you a reliable protein ready to bake on any weeknight.
The Simple Garlic Butter Foundation
This recipe builds on an almost embarrassingly simple base: melted butter, fresh lemon juice, and minced garlic. That trio is the holy trinity of seafood seasoning for a reason—the richness of butter carries the garlic’s savory punch while lemon juice brightens everything and cuts through the fattiness of the salmon itself. Together, they taste more complex than any three ingredients have a right to.
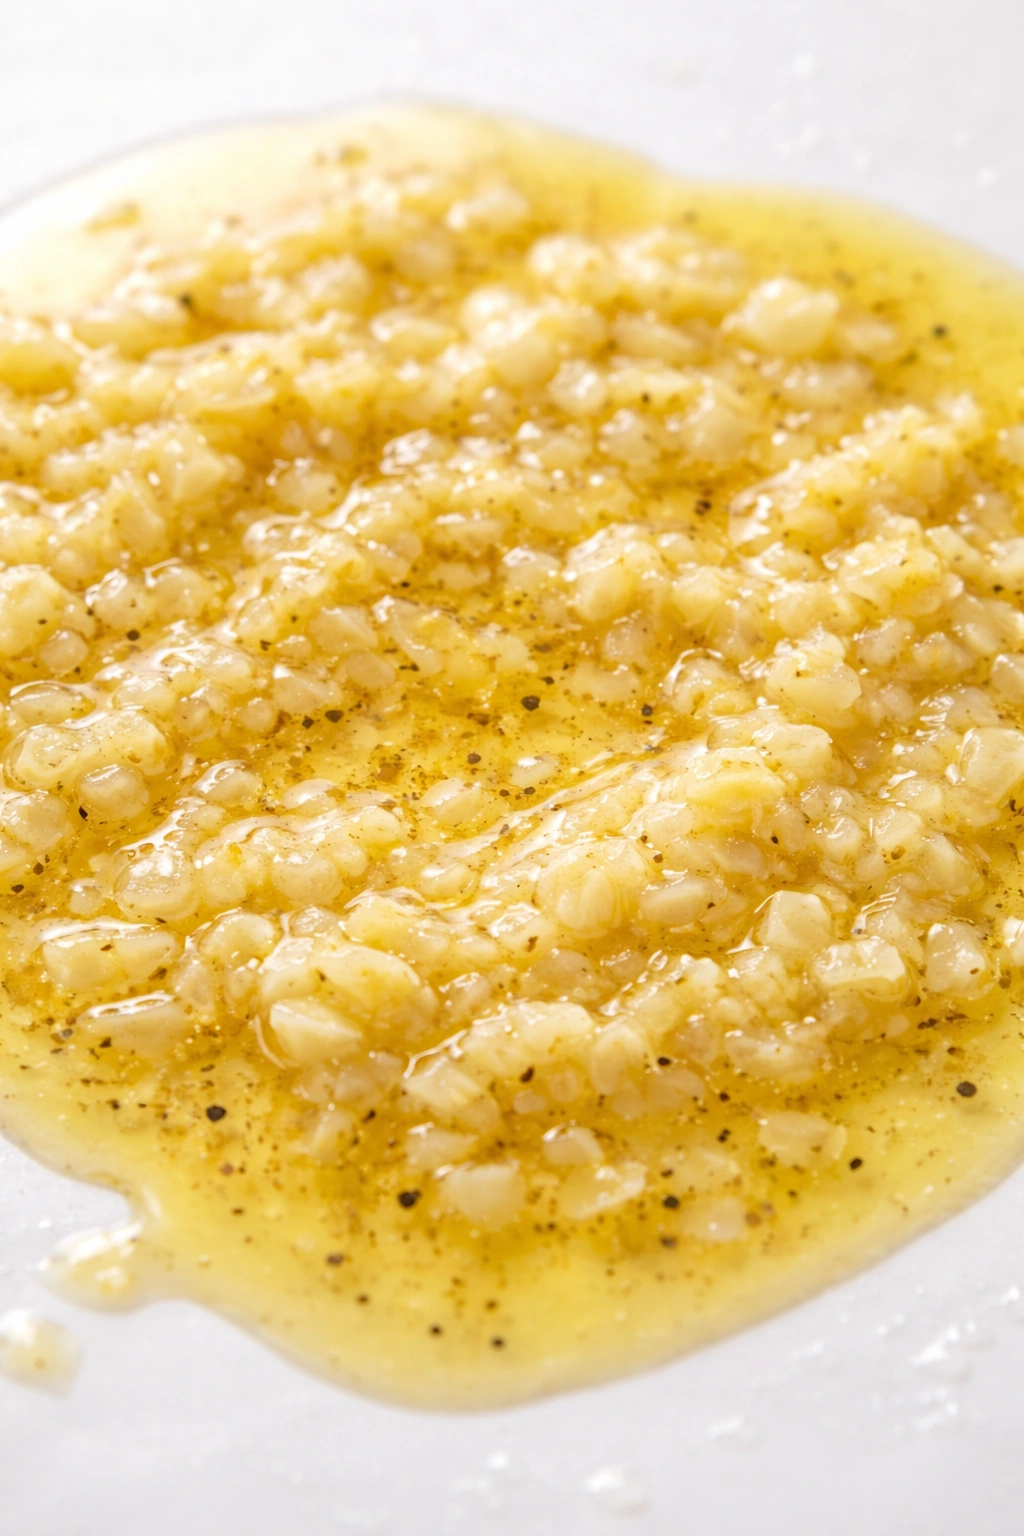
The garlic must be minced small, not sliced. Small pieces distribute evenly across the salmon and essentially cook into a paste as the fish bakes, integrating completely rather than leaving behind distinct garlic chunks. If you’re using jarred minced garlic, that works perfectly fine in a pinch—just make sure it’s packed in oil with no added sugar or weird preservatives.
Fresh lemon juice matters here more than it might for other recipes. Bottled lemon juice has a slightly metallic, less vibrant flavor. A whole fresh lemon takes two seconds to juice by hand or with a simple handheld juicer, and the difference is noticeable.
For the Garlic Butter Topping:
- 3 tablespoons unsalted butter, melted
- ½ tablespoon fresh lemon juice
- 2 cloves garlic, minced very fine
- ¼ teaspoon fine sea salt
- Pinch of freshly cracked black pepper
Mix these together in a small bowl while your oven preheats. The butter will warm everything slightly, helping the flavors meld before the salmon even enters the oven.
The Complete Baked Salmon Recipe
Yield: Serves 4 | One 1.5-pound side of salmon, or 4 individual 6-ounce fillets
Prep Time: 10 minutes
Cook Time: 15 minutes
Total Time: 25 minutes
Difficulty: Beginner — No special skills required, minimal prep work, and the oven does most of the cooking while you attend to other things.
For the Salmon:
- 1.5 to 2 pounds salmon fillet with skin, or 4 individual 6-ounce salmon fillets
- 3 tablespoons unsalted butter, melted
- ½ tablespoon fresh lemon juice
- 2 cloves garlic, minced
- ¼ teaspoon fine sea salt
- Pinch of freshly cracked black pepper
- 1 teaspoon fresh dill, chopped (optional but recommended)
- 1 teaspoon fresh parsley, chopped (optional but recommended)
- Lemon slices for garnish (optional)
Prepare the Pan:
-
Preheat your oven to 375°F (190°C) and position the oven rack in the center of the oven. Line a large rimmed baking sheet or shallow baking dish with parchment paper or a light coating of nonstick spray—this prevents sticking and makes cleanup effortless.
-
Remove the salmon from the refrigerator and let it sit on the counter at room temperature for about 15 minutes while you prepare everything else. Cold fish pulled directly from the fridge will cook unevenly, with the outside overcooking before the center reaches the proper temperature. Room temperature salmon bakes much more evenly throughout.
Make the Topping:
- In a small bowl, whisk together the melted butter, lemon juice, minced garlic, salt, and black pepper. Set aside. The mixture will be thin but will coat the salmon beautifully as it bakes.
Assemble and Season:
-
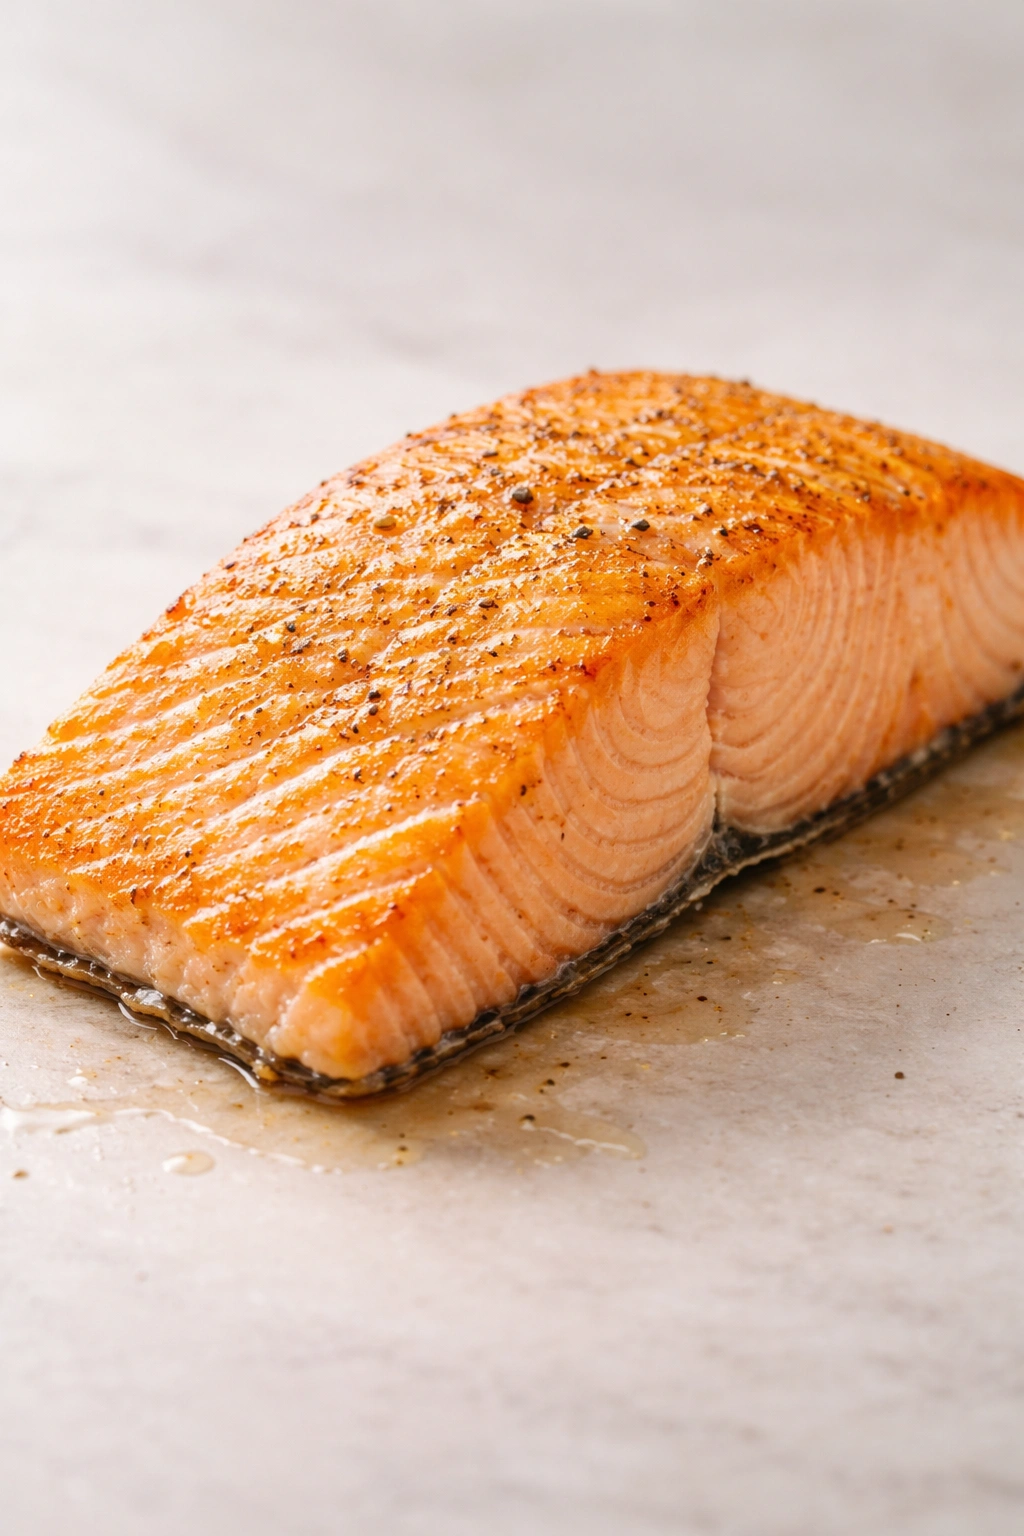
Place the salmon on the prepared baking sheet, skin side down. If using individual fillets, arrange them with a little space between each piece so heat circulates evenly. Pat the salmon dry with a paper towel—any excess surface moisture will steam off rather than allowing the top to brown slightly.
-
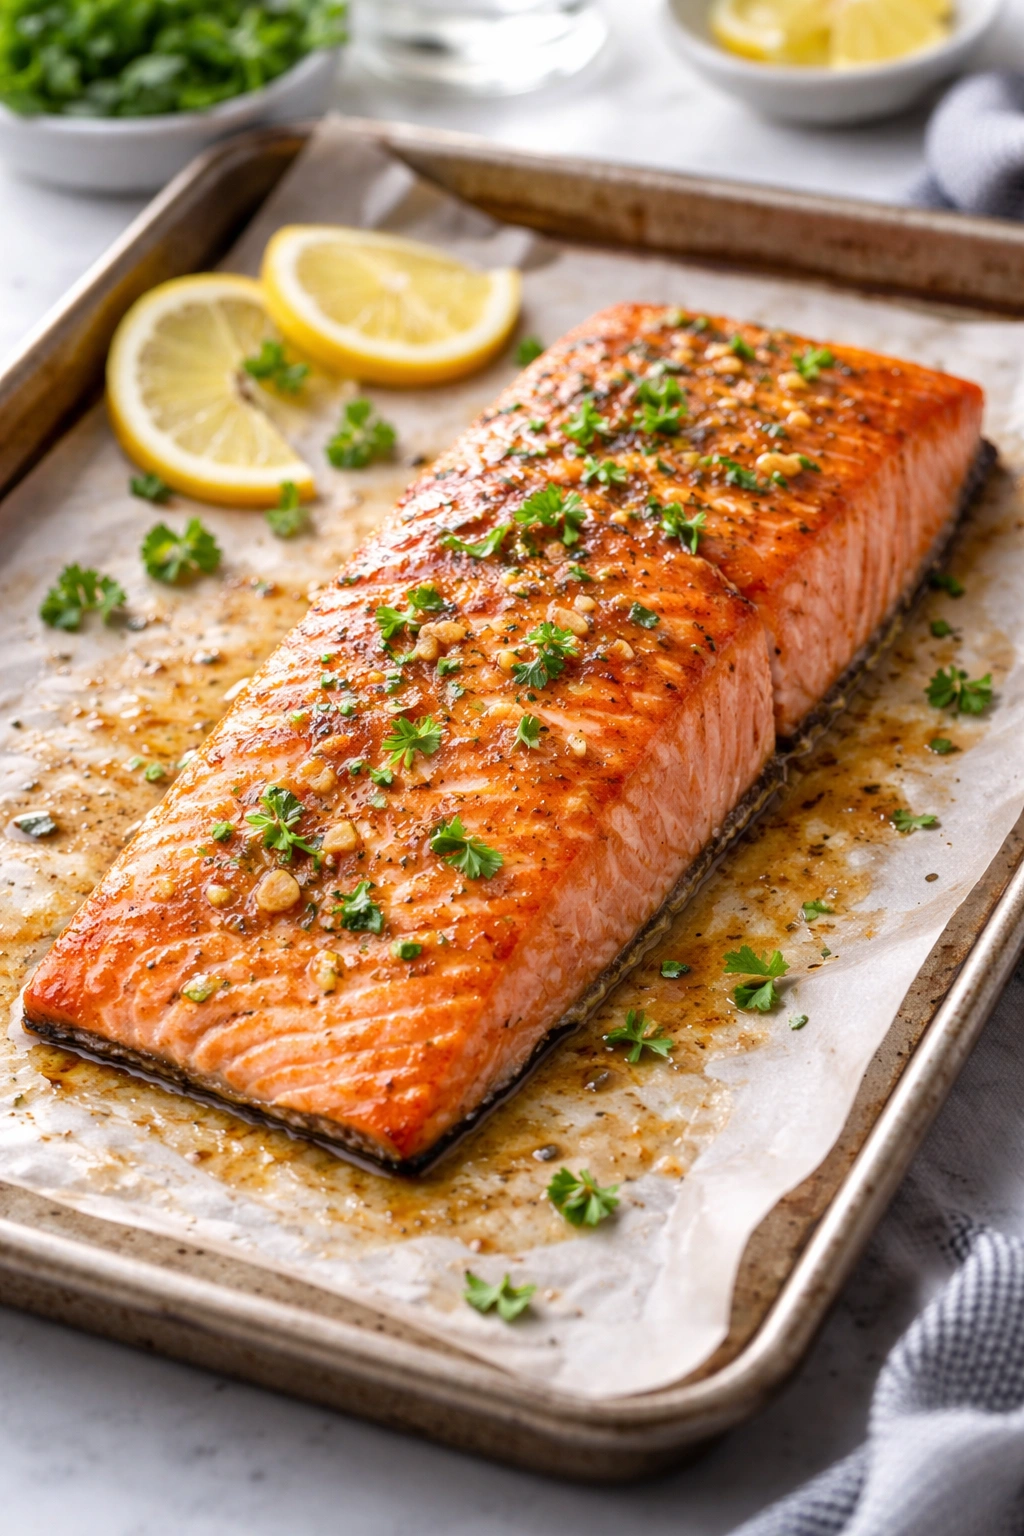
Brush the garlic butter mixture generously over the top and sides of the salmon, ensuring every part gets coated. It’s okay if some pools in the pan—that will create a light sauce as the salmon bakes.
Advertisements -
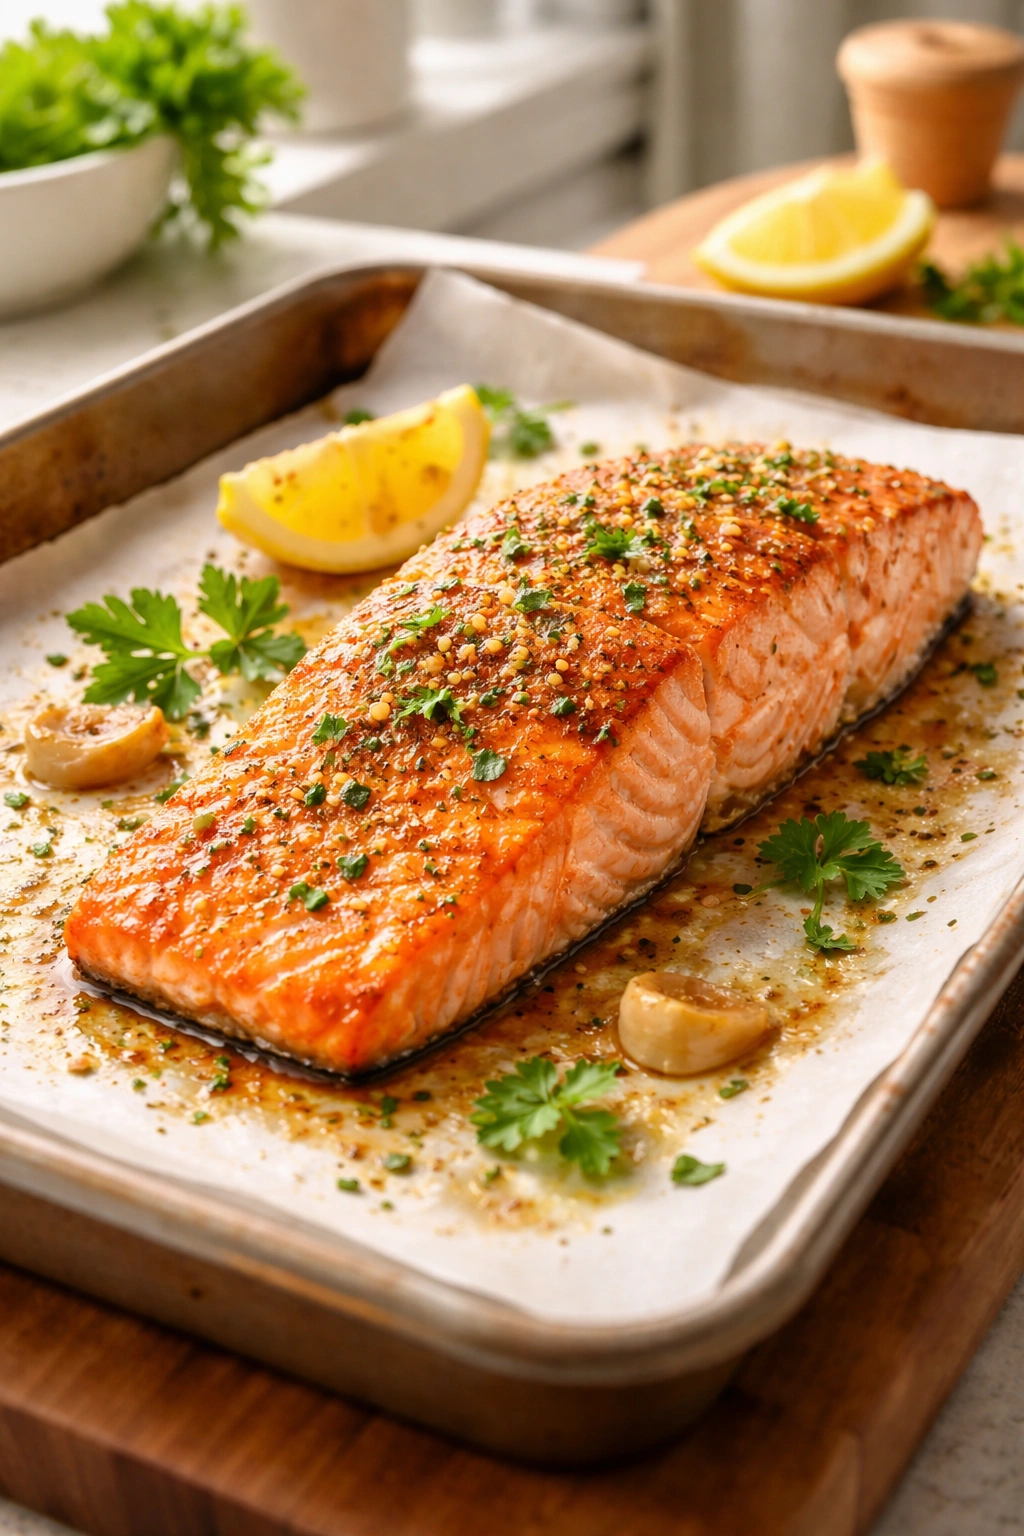
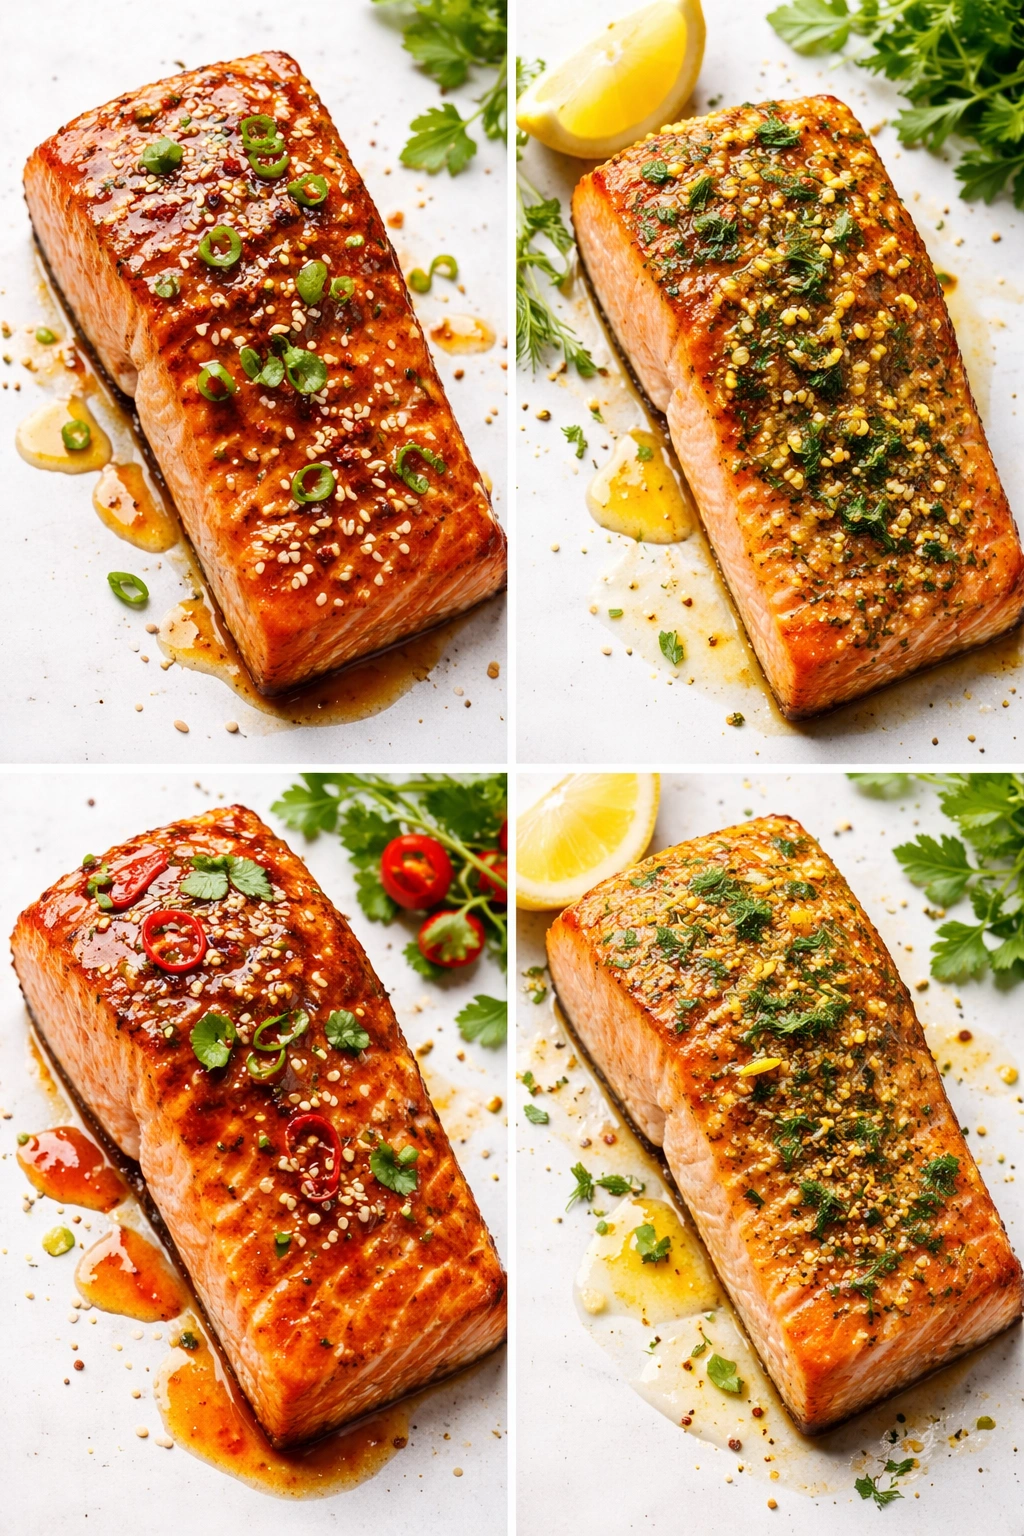
Sprinkle the fresh dill and parsley evenly over the top if using them. These delicate herbs complement salmon beautifully and add both visual appeal and fresh, bright flavor.
Bake:
-
Bake for 12 to 15 minutes, depending on the thickness of your salmon. A standard 1-inch-thick fillet will take about 12 to 13 minutes. Thicker cuts (1.25 to 1.5 inches) may need the full 15 minutes. A 2-pound side of salmon baking in one piece will need 15 to 18 minutes depending on its thickness at the thickest point.
-
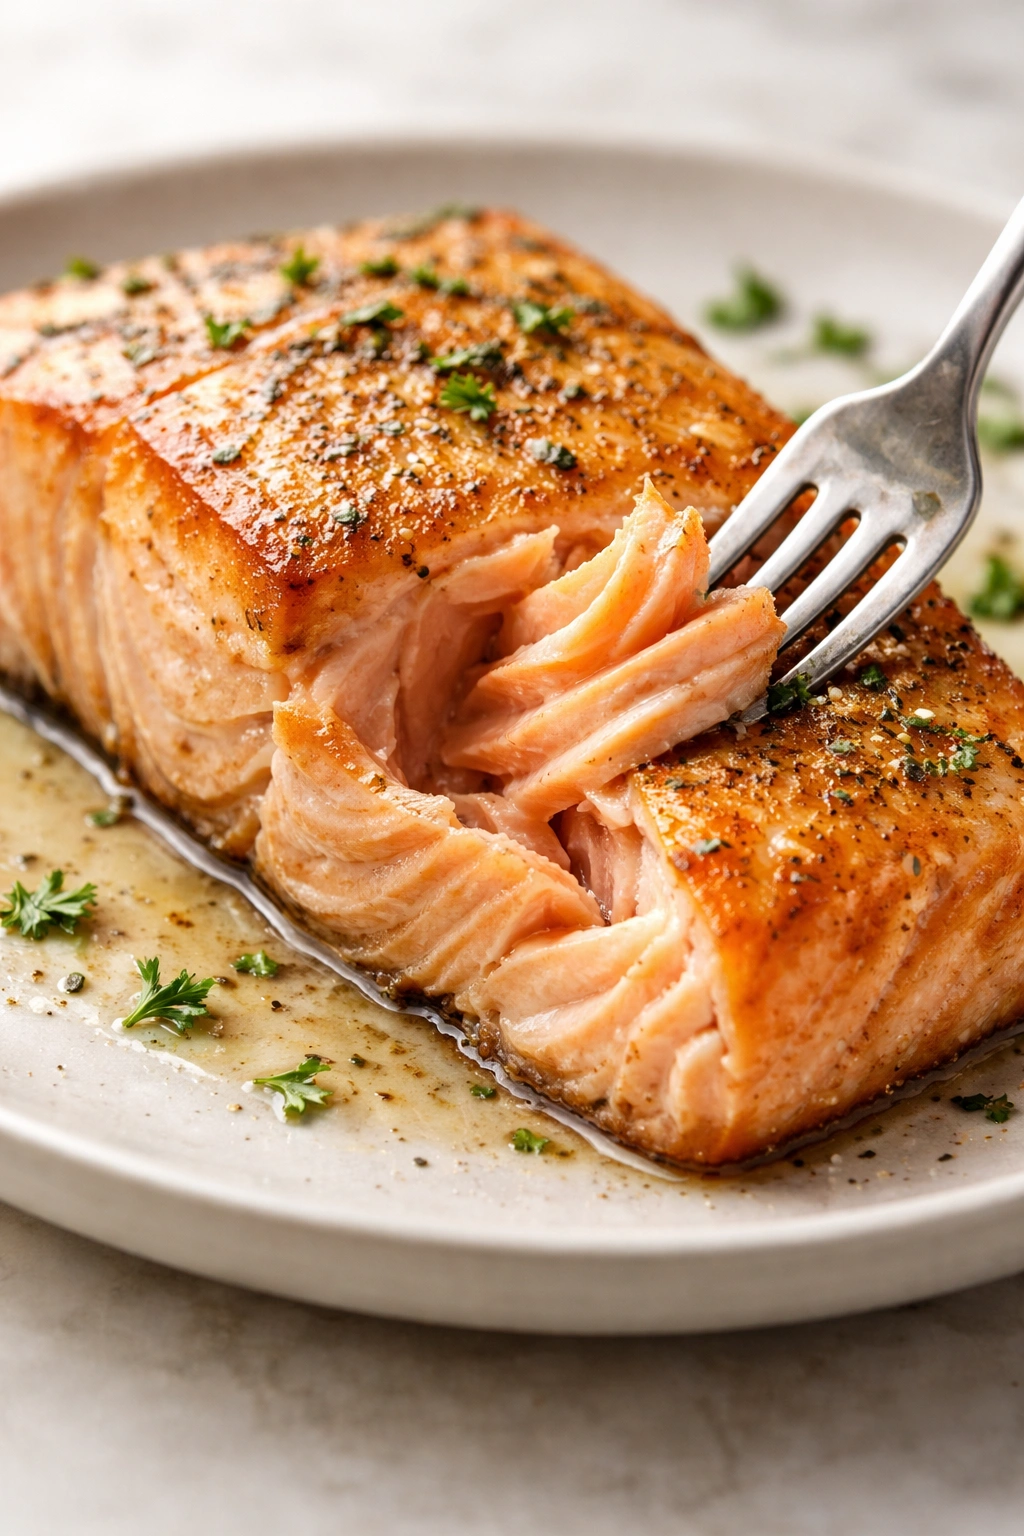
The salmon is done when the flesh turns from translucent to opaque and a fork inserted at the thickest point flakes the flesh apart easily. The internal temperature should read 125°F to 130°F at the center for perfectly moist salmon; 145°F is the FDA recommendation but will give you drier results. The salmon continues cooking for a minute or two after removal from the oven, so don’t wait for it to be completely firm in the center—pull it out when it still looks just barely translucent at the very middle.
-
Remove from the oven and let rest for 2 to 3 minutes before serving. This brief rest allows the juices to redistribute throughout the flesh, keeping it moist rather than allowing those delicious juices to run out onto the plate.
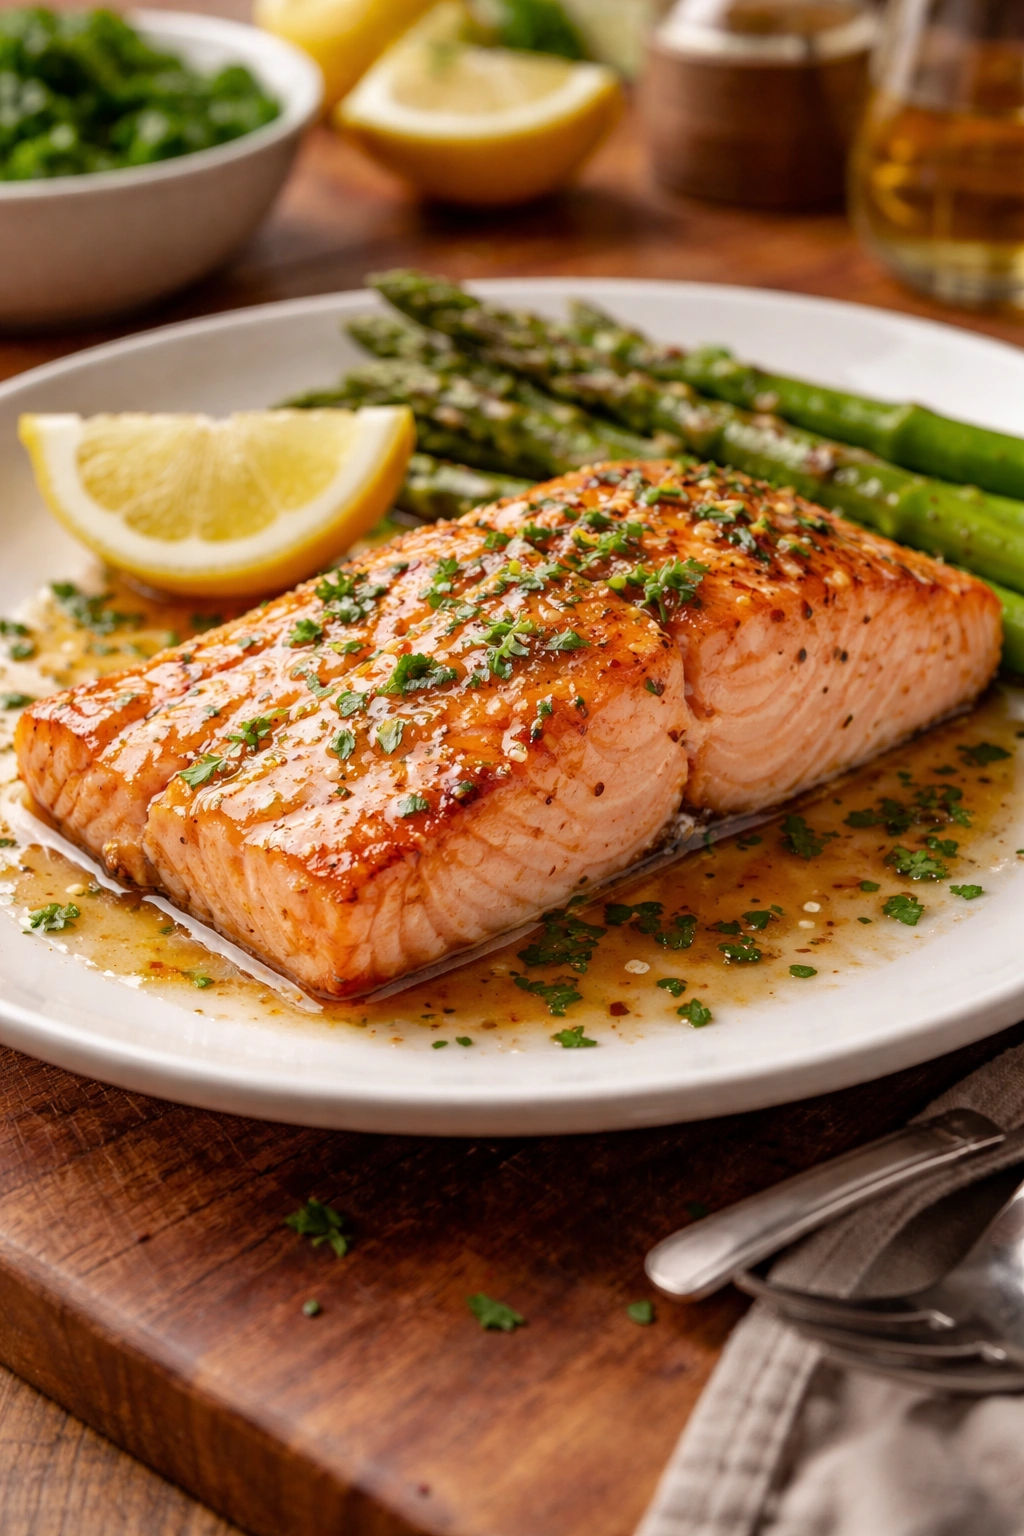
-
Squeeze additional fresh lemon juice over the salmon just before serving if you’d like extra brightness. Garnish with fresh lemon slices if desired. Serve immediately while still warm.
Critical Tips That Keep Your Salmon Perfect Every Time
Don’t overcook it. This is the single most important thing to understand about baked salmon. The difference between perfectly juicy salmon and dry, disappointing salmon is sometimes only one or two minutes. Set a timer and check the salmon early, especially the first few times you make it. You’re looking for the transition from translucent to opaque, not for the flesh to be completely firm. When you’re unsure, err on the side of slightly underdone—the residual heat will finish the cooking as it rests.
Keep the skin on during baking. The skin protects the delicate flesh from the direct heat of the pan and acts as a moisture barrier. It also makes the salmon easier to flip if needed and easier to remove from the pan. You can eat salmon skin if you like (it’s actually quite nutritious and becomes crispy when broiled separately), or remove it after cooking by sliding a thin spatula between the skin and flesh.
Bring the salmon to room temperature. Cold salmon straight from the refrigerator will cook unevenly, with the outside potentially overcooking while the center is still raw. Those 15 minutes on the counter before baking make a measurable difference in how evenly the salmon cooks.
Use parchment paper or nonstick spray. This prevents the salmon from sticking to the pan and makes cleanup about 30 seconds instead of 10 minutes of soaking and scrubbing. It’s a small thing that makes a real difference in the weeknight cooking experience.
Check the salmon’s thickness. Before you put it in the oven, take a moment to notice how thick your fillets are at the thickest point. This one observation determines your cooking time more than anything else. Thin fillets (¾ inch or less) might be done in 10 to 12 minutes. Thick fillets (1.5 inches) might need 15 to 18 minutes. Knowing this helps you dial in the exact timing instead of just guessing.
Variations and Flavor Swaps That Still Work Brilliantly
The garlic butter base is wonderful as-is, but salmon is flexible enough to accommodate countless flavor variations. Once you understand the basic technique, you can season it however your mood or pantry dictates.
Honey Garlic Glaze
Combine 1 tablespoon honey with 2 tablespoons melted butter, 1 tablespoon soy sauce, 2 minced garlic cloves, and 1 teaspoon minced fresh ginger. Brush this over the salmon before baking. The honey caramelizes slightly as the fish cooks, creating a sweet-savory crust. This works beautifully with an Asian-inspired side like steamed bok choy or fried rice.
Dijon Mustard and Herb Crust
Mix 2 tablespoons Dijon mustard with 1 tablespoon melted butter, 1 minced garlic clove, 1 teaspoon fresh thyme, and ½ teaspoon fresh rosemary. Spread this thicker paste over the salmon and bake as directed. The mustard creates a flavorful, slightly tangy crust and helps seal in moisture.
Lemon Thyme Variation
Skip the garlic butter entirely and instead brush the salmon with olive oil, then season generously with fine sea salt, cracked black pepper, fresh lemon zest, and fresh thyme leaves. Thinly slice a fresh lemon and lay the slices directly on top of each fillet. This creates an incredibly bright, herbaceous flavor that feels light and fresh.
Cajun Spice Rub
Mix 1 tablespoon paprika (not smoked), 2 teaspoons garlic powder, 2 teaspoons onion powder, 1 teaspoon dried oregano, 1 teaspoon dried thyme, ½ teaspoon cayenne pepper, and fine sea salt and black pepper to taste. Brush the salmon lightly with olive oil, then rub the spice mixture over the top. Bake as directed. The spices create a beautiful dark crust and warm, smoky flavor. Serve with crispy roasted potatoes and collard greens for a complete Cajun-inspired meal.
Mediterranean Olive and Tomato Topping
Toss ½ cup cherry tomatoes (halved), ¼ cup Kalamata olives (sliced), 2 minced garlic cloves, 1 teaspoon dried oregano, and 2 tablespoons olive oil together in a small bowl. Spread this mixture over the salmon before baking. The tomatoes and olives release their flavors as everything cooks together, creating a light sauce.
Maple Dijon Version
Whisk together 1 tablespoon pure maple syrup, 1 tablespoon Dijon mustard, 1 tablespoon melted butter, 1 minced garlic clove, and a pinch of fine sea salt. Brush over the salmon before baking. The maple and mustard combination is sweet and savory with just enough tang to keep it interesting.
None of these variations requires any adjustment to the baking time or temperature. The technique stays identical; only the flavoring on top changes.
Side Dishes That Complement Salmon Perfectly
Baked salmon’s mild, buttery flavor pairs beautifully with both earthy vegetables and bright, acidic side dishes. The key is choosing something that either balances the richness of the fish or complements the lemon and herb flavors you’ve built into it.
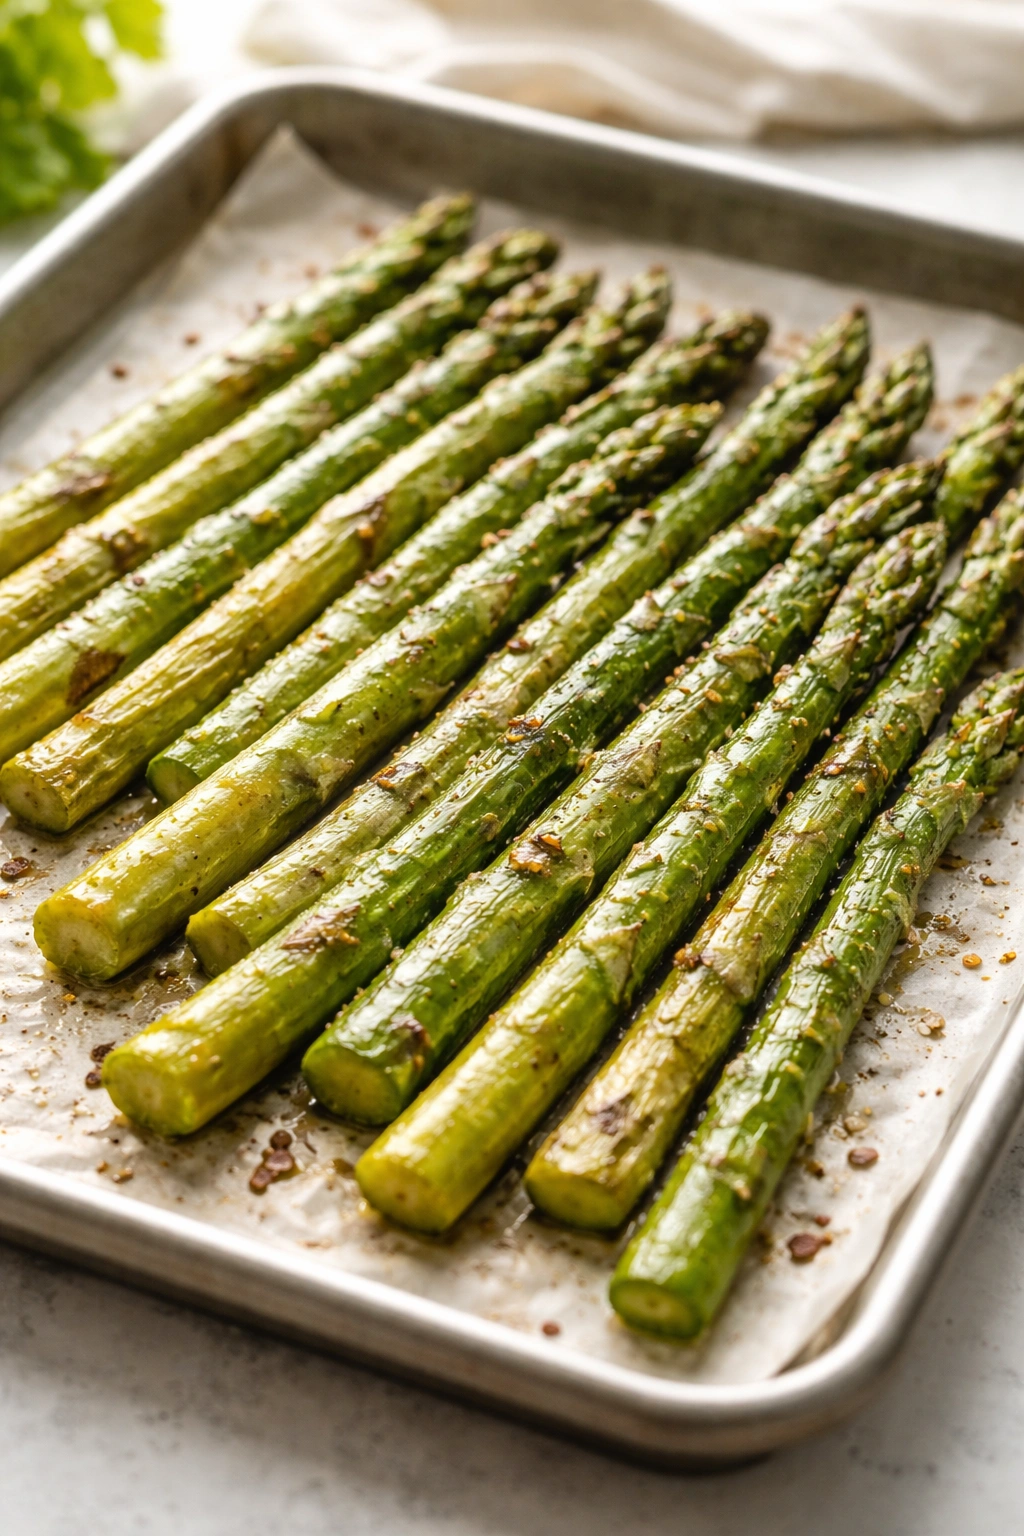
Roasted asparagus is perhaps the most classic pairing. Toss fresh asparagus spears with olive oil, fine sea salt, and cracked black pepper. Spread them on a baking sheet and roast at 400°F for 10 to 12 minutes while your salmon is baking. They finish right around the same time, creating a simple, elegant plate.
Steamed broccoli or broccolini offers a hearty green vegetable with natural sweetness that doesn’t compete with the salmon. Steam for 4 to 5 minutes until just tender-crisp, then toss with a little butter, salt, and pepper.
Simple white rice or brown rice provides a neutral, absorbent base that soaks up any pan juices. Cook while your salmon bakes so everything comes together at once.
Roasted baby potatoes create a more substantial, comforting dinner. Toss small potatoes (halved if they’re large) with olive oil, salt, pepper, and fresh rosemary. Roast at 400°F for about 20 minutes, or start them 5 minutes before the salmon so they’re done at the same time.
A simple green salad with lemon vinaigrette adds freshness and brightness, cutting through the richness of both the salmon and any butter-based sauce. Toss mixed greens with a little olive oil, lemon juice, salt, and pepper just before serving.
Creamy coleslaw or a simple cucumber salad adds cool crunch and acidity that balances the warm, buttery fish beautifully.
The point is not to overthink it. Any vegetable you enjoy, dressed simply, will work. The salmon itself carries the dish, so your sides just need to be clean-tasting and properly seasoned.
Storing, Reheating, and Using Leftovers
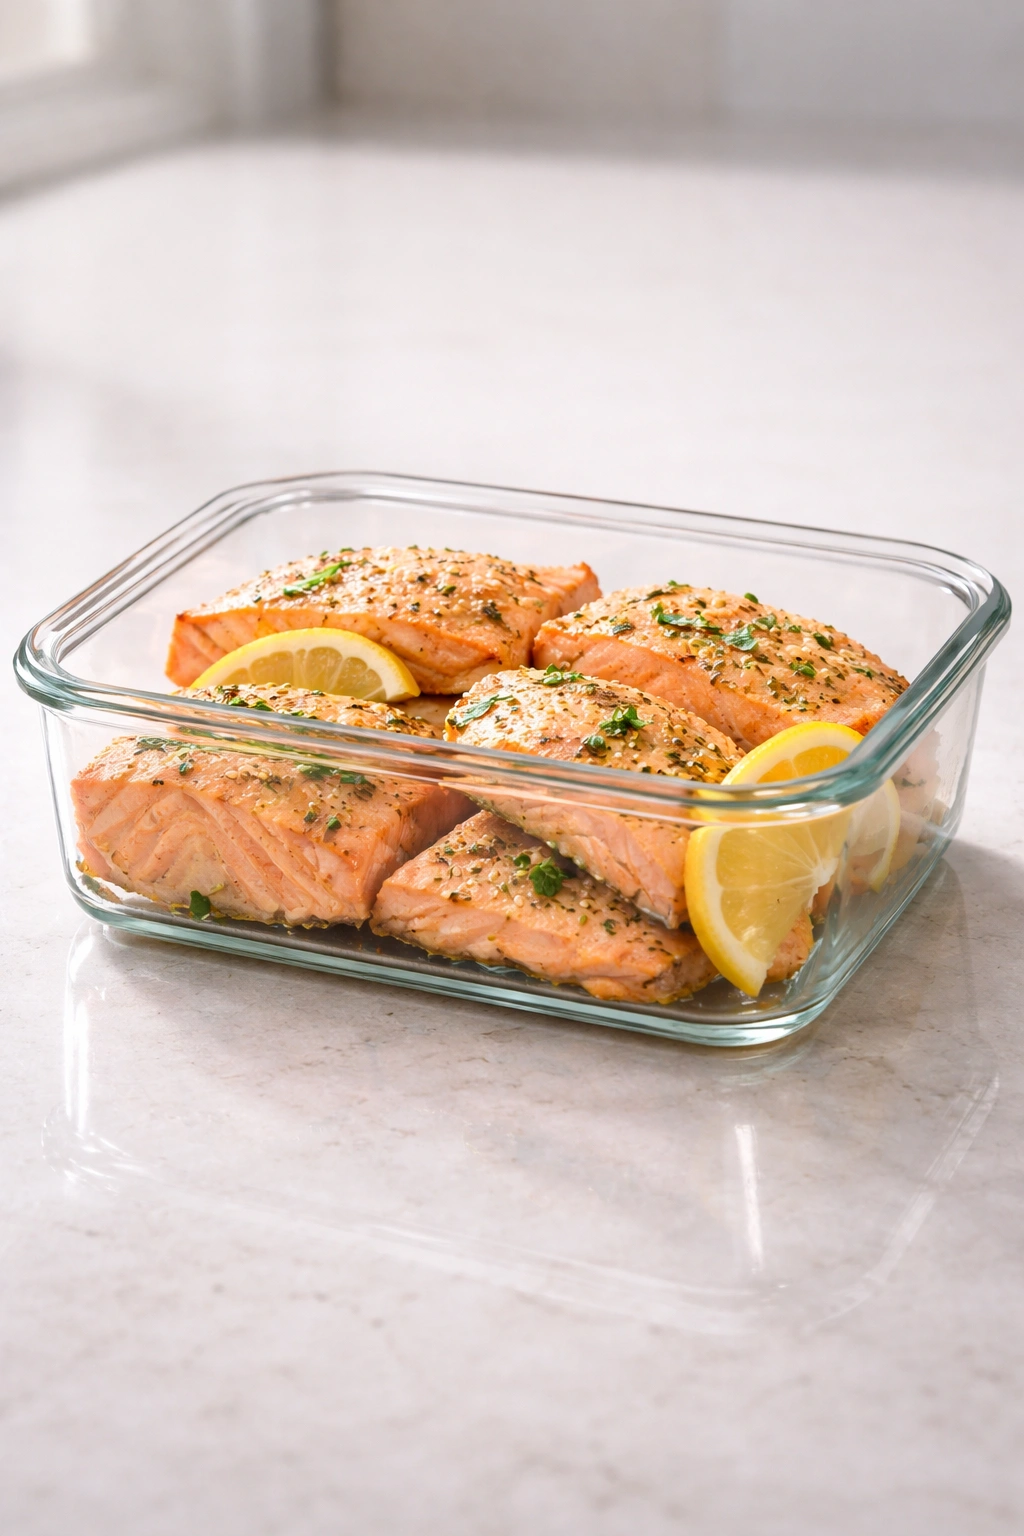
Leftover baked salmon is genuinely one of the best kitchen assets you can have. It’s delicious cold over salads, flaked into scrambled eggs at breakfast, or turned into salmon salad or salmon patties for lunch the next day.
Storage Guidelines
Store cooked salmon in an airtight container in the refrigerator for up to 3 to 4 days. Let it cool to room temperature before covering and refrigerating—putting hot food directly into the fridge raises the temperature and can compromise the other items stored there.
Salmon doesn’t freeze beautifully after cooking; the texture can become slightly grainy and the flavor becomes more pronounced in a way that’s not always pleasant. If you do freeze cooked salmon, wrap it tightly in plastic wrap and then place it in a freezer bag, and use it within a month for best results.
Reheating Without Drying It Out
The worst mistake people make is reheating salmon in the microwave or in a hot oven, both of which dry it out quickly. Instead, reheat gently and slowly. Place the salmon in a covered baking dish with a splash of water or stock, and warm it in a 275°F oven for 10 to 12 minutes until just heated through. Alternatively, reheat it gently in a covered pan over low heat on the stovetop, adding a splash of water or a pat of butter to maintain moisture.
Honestly, though, cold baked salmon is often better than reheated salmon. It’s delicious flaked over a fresh salad with lemon vinaigrette, mixed into a bowl of grains with roasted vegetables, or even eaten straight from the fridge as a protein-rich snack.
Creative Ways to Use Leftovers
Salmon salad: Flake the leftover salmon and mix it with mayonnaise, minced red onion, chopped fresh dill, a squeeze of lemon juice, and diced cucumber. Serve on toasted bread or over greens.
Salmon rice bowls: Layer cooked rice with flaked salmon, steamed vegetables, sliced avocado, and a drizzle of soy sauce or lemon vinaigrette.
Salmon pasta: Flake the salmon and toss it with warm pasta, a simple olive oil and garlic sauce, fresh lemon juice, and fresh herbs.
Salmon and egg scramble: Flake the salmon and fold it into scrambled eggs with fresh dill, chives, and a small amount of cream cheese for a protein-packed breakfast.
Salmon patties: Flake the salmon and mix it with a beaten egg, panko breadcrumbs, minced onion, fresh herbs, and a squeeze of lemon juice. Form into patties and pan-fry until golden brown.
Understanding Salmon Doneness and Temperature
The FDA recommends cooking salmon to an internal temperature of 145°F, and that’s perfectly safe. However, at that temperature, the salmon becomes noticeably drier and loses some of the buttery tenderness that makes it special. Many professional chefs and experienced home cooks prefer salmon cooked to 125°F to 130°F for maximum juiciness and tenderness.
The difference between 125°F and 145°F is about 10 to 15 percent less moisture in the flesh. For a fish as rich as salmon, that moisture makes all the difference in eating experience. If food safety is a concern, know that the 145°F recommendation is actually more conservative than necessary—salmon (like all fish) is far less likely to harbor dangerous bacteria than poultry, and flash-freezing (which most salmon undergoes) kills any parasites that might be present.
The visual test is often more reliable than thermometers for home cooking. Push a fork gently into the thickest part of the salmon and twist it slightly. The flesh should separate easily along its natural lines and flake apart with minimal resistance. The center should still look just barely translucent, not completely opaque throughout. This is the sweet spot—fully cooked, safe to eat, and at maximum deliciousness.
Remember that the salmon continues cooking for another 1 to 2 minutes after you remove it from the oven due to carryover cooking. Pull it out when it’s slightly underdone visually, let it rest for 2 to 3 minutes, and by the time you serve it, it will be perfectly cooked.
Why Baked Salmon Deserves a Permanent Spot in Your Rotation
There’s something deeply satisfying about a recipe that works every single time, requires minimal effort, produces genuinely delicious results, and comes together faster than it takes to change clothes after work. Baked salmon checks every single box. It’s the kind of recipe that doesn’t feel like you’re “making do” on a busy weeknight—it feels like you’re actually cooking something worth tasting.
Start with this simple garlic butter version until you know it inside and out. Once it’s second nature, explore the variations. Try it with different herbs, different glazes, different side dishes. Build it into your regular weeknight rotation alongside whatever other proteins anchor your family’s dinners. Buy salmon when it’s on sale and freeze it, so you always have it on hand for those nights when you need dinner to happen without complexity.
The more you make it, the faster you’ll be. Eventually you won’t need to check the recipe or set a timer—your hands will just know how much garlic butter to brush on, your eye will instantly judge how thick the fillet is and how long it needs in the oven, and you’ll pull it out at exactly the right moment when the center is just barely translucent.
That’s when baked salmon stops being a recipe you follow and becomes a skill you own. And that’s when weeknight cooking truly shifts from obligation to something you’re actually proud to put on the table.