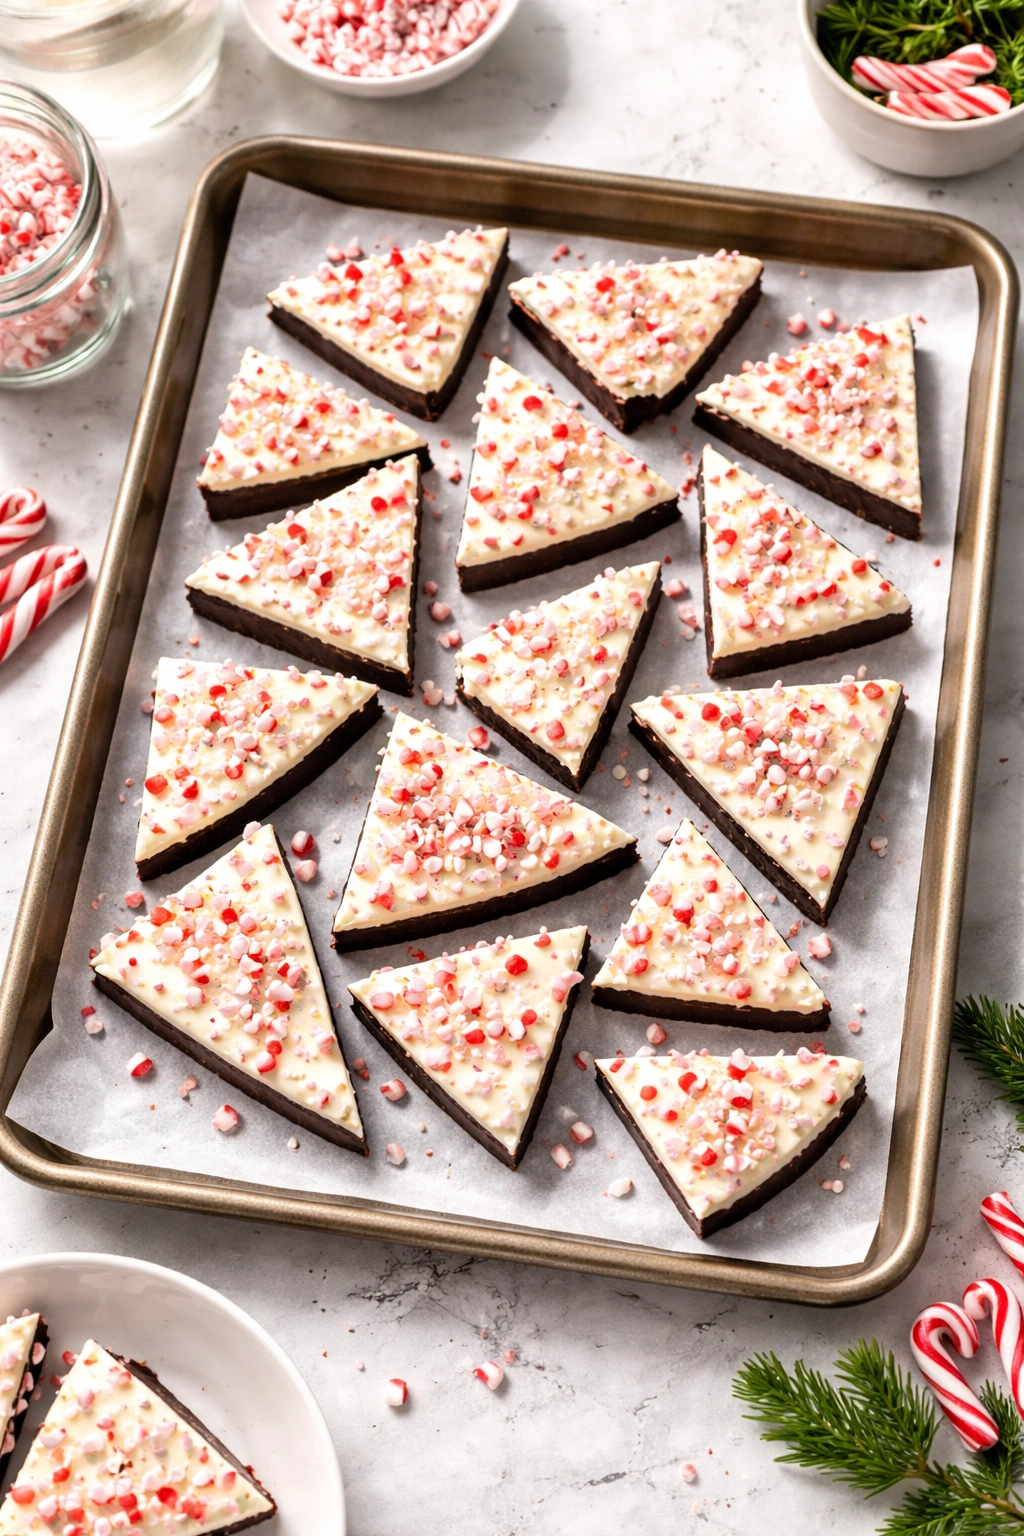
Peppermint bark has an almost magical way of turning up at holiday gatherings—the kind of homemade candy that looks like it requires professional equipment and years of confectionery training. But here’s what most people don’t realize: homemade peppermint bark is genuinely one of the easiest, most forgiving candies you can make at home, and it tastes dramatically better than any store-bought version. The difference between flat, waxy commercial bark and handmade peppermint bark with proper chocolate snap and real peppermint flavor is noticeable from the first bite.
The beauty of peppermint bark lies in its deceptive simplicity. You need exactly three things: chocolate, crushed candy canes, and a few minutes of hands-on time. There’s no tempering in the classical sense, no candy thermometer readings, no waiting for precise temperature drops. Yet somehow, when you break into a piece of your own homemade peppermint bark, it has the satisfying crack and clean snap that makes candy so addictive. This is the kind of project that looks impressive enough to give as gifts, tastes like you’ve spent hours perfecting it, but honestly comes together in under 30 minutes of active work.
What makes homemade peppermint bark different is that you have complete control over every single element. You can choose dark chocolate or white chocolate, decide exactly how much peppermint intensity you want, adjust the candy cane texture from fine powder to chunky pieces, and customize the whole thing to match your exact preferences. Store-bought bark tries to be everything to everyone and ends up being good at nothing. Your version can be absolutely, uncompromisingly perfect for you.
What Makes Homemade Peppermint Bark So Worth the Effort
Homemade peppermint bark beats commercial versions in almost every meaningful way, but it’s worth understanding exactly why before you invest even 20 minutes of your time. The chocolate in store-bought bark is formulated to survive shipping, extended shelf time, and temperature fluctuations—which means it’s stabilized with vegetable oils, thickeners, and emulsifiers that trade chocolate flavor for shelf stability. When you make it at home, you use actual chocolate, which tastes exponentially better because chocolate tastes like chocolate, not like a chocolate-flavored wax compound.
The peppermint flavor difference is equally dramatic. Commercial peppermint bark either uses synthetic peppermint flavoring or such a light hand with real peppermint that you’re basically eating sugar-coated cocoa butter. Homemade peppermint bark lets you control exactly how much real peppermint intensity you want—whether that’s a subtle minty whisper or a full, assertive peppermint punch that tingles on your tongue.
There’s also something psychologically satisfying about making candy. It’s simple enough that anyone can succeed, visual enough that you can see the transformation happening in real time, and impressive enough that when you hand it to someone in a little cellophane bag tied with ribbon, they genuinely believe you’ve done something difficult. You’ve created an edible gift that cost almost nothing and took no real skill, but looks and tastes like professional-quality confection.
The texture is another story entirely. Homemade peppermint bark, when made correctly, has a satisfying snap when you break it—your teeth meet real chocolate resistance before it melts on your tongue. That snap comes from using proper chocolate and from the way crushed candy canes scatter throughout the bark, creating structural integrity. The minty pieces aren’t just flavor; they’re texture, and that matters more than most candy recipes acknowledge.
Choosing the Right Chocolate for Your Base
The chocolate you choose determines about 80% of whether your peppermint bark is going to be genuinely delicious or just okay. This is not the place to grab the cheapest chocolate chips from the baking aisle and hope for the best. Chocolate chips are formulated with stabilizers and extra cocoa butter to keep them from melting in cookies—they’re not designed to be the star ingredient. For peppermint bark, you want real chocolate that actually tastes like chocolate.
Look for chocolate labeled as “couverture” or “chocolate discs” or just high-quality chocolate bars that you’ll chop up. These are formulated with enough cocoa butter that they melt smoothly and set with a clean snap. A good benchmark is chocolate that contains cocoa butter in the first five ingredients and doesn’t list palm oil, vegetable oil, or “chocolate compound” in the ingredient list. You don’t need to spend $20 per pound—solid mid-range chocolate at $3 to $5 per bar is absolutely fine.
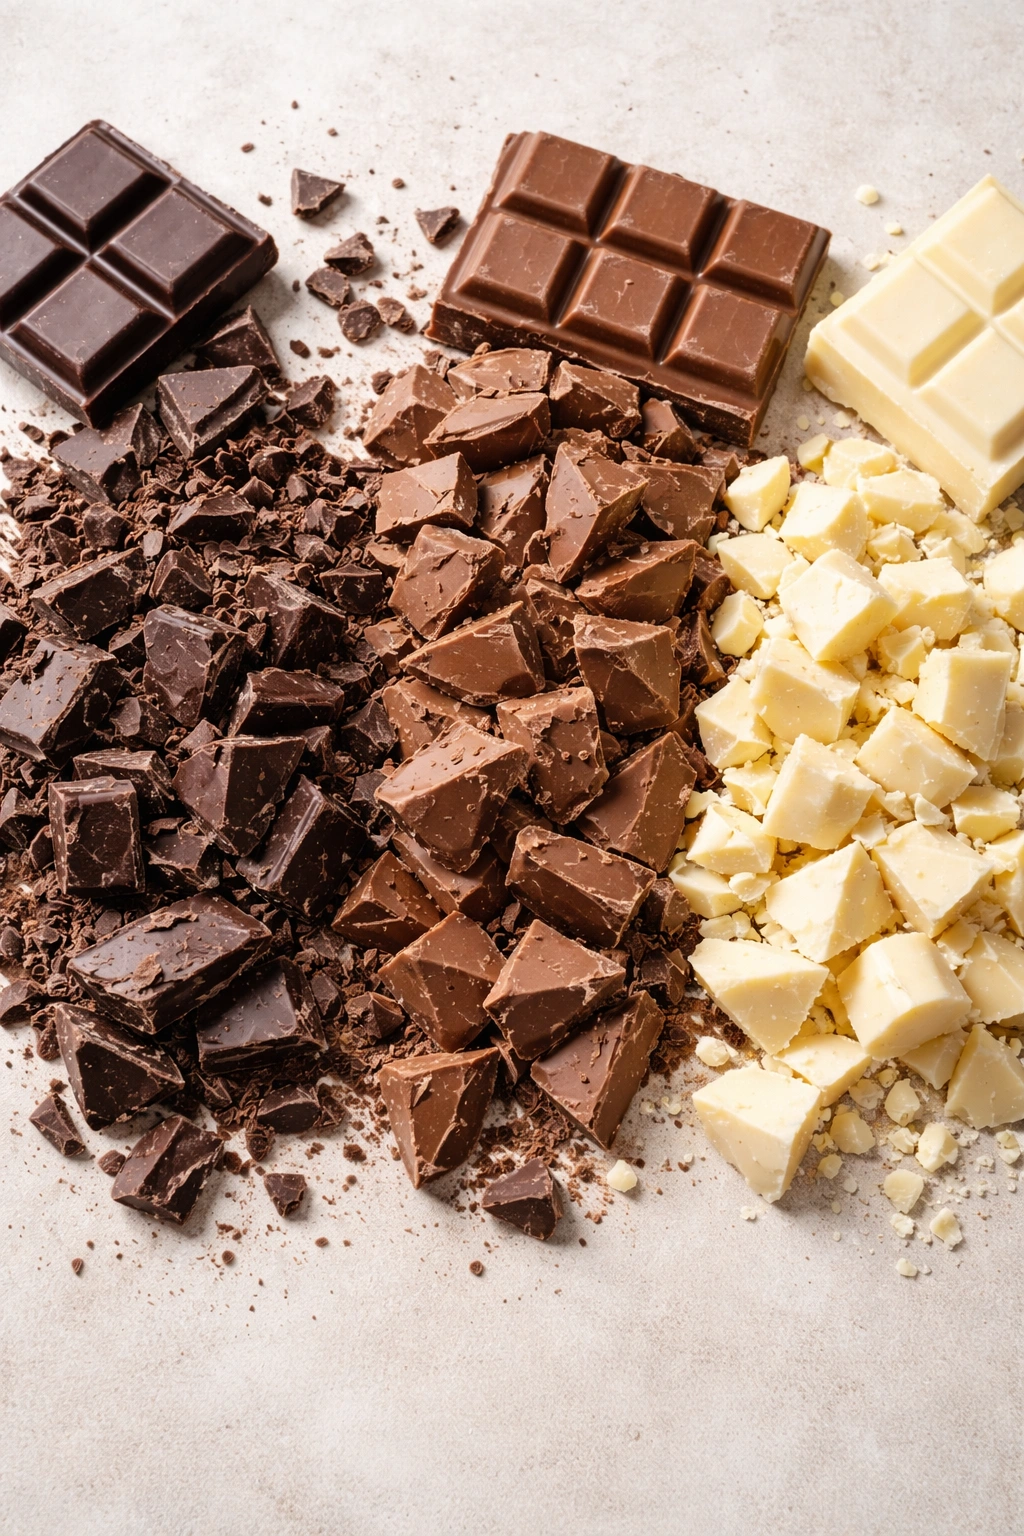
Dark chocolate is the classic choice for peppermint bark, and it’s genuinely the best option if you want the traditional flavor combination. The bitterness of dark chocolate (especially 60-70% cacao) plays beautifully against the sweet, cooling sensation of peppermint. It’s not cloying, and it lets the peppermint flavor actually shine instead of just adding sweetness to sweetness. If you prefer milk chocolate or white chocolate, both work perfectly—just understand that they’ll create a different flavor profile. Milk chocolate makes sweeter, richer bark; white chocolate makes it pure peppermint-forward candy with no chocolate depth.
One detail that makes a real difference: store your chocolate in a cool, dry place and use it within a few months of purchasing. Old chocolate develops gray streaks (cocoa butter bloom) and doesn’t melt as smoothly. Fresh chocolate melts evenly and sets into that satisfying snap you’re after. If you’re buying chocolate specifically for this project, choose what you’re going to make within a week or two—don’t store it for months.
Crushed Candy Canes—The Secret to Perfect Texture
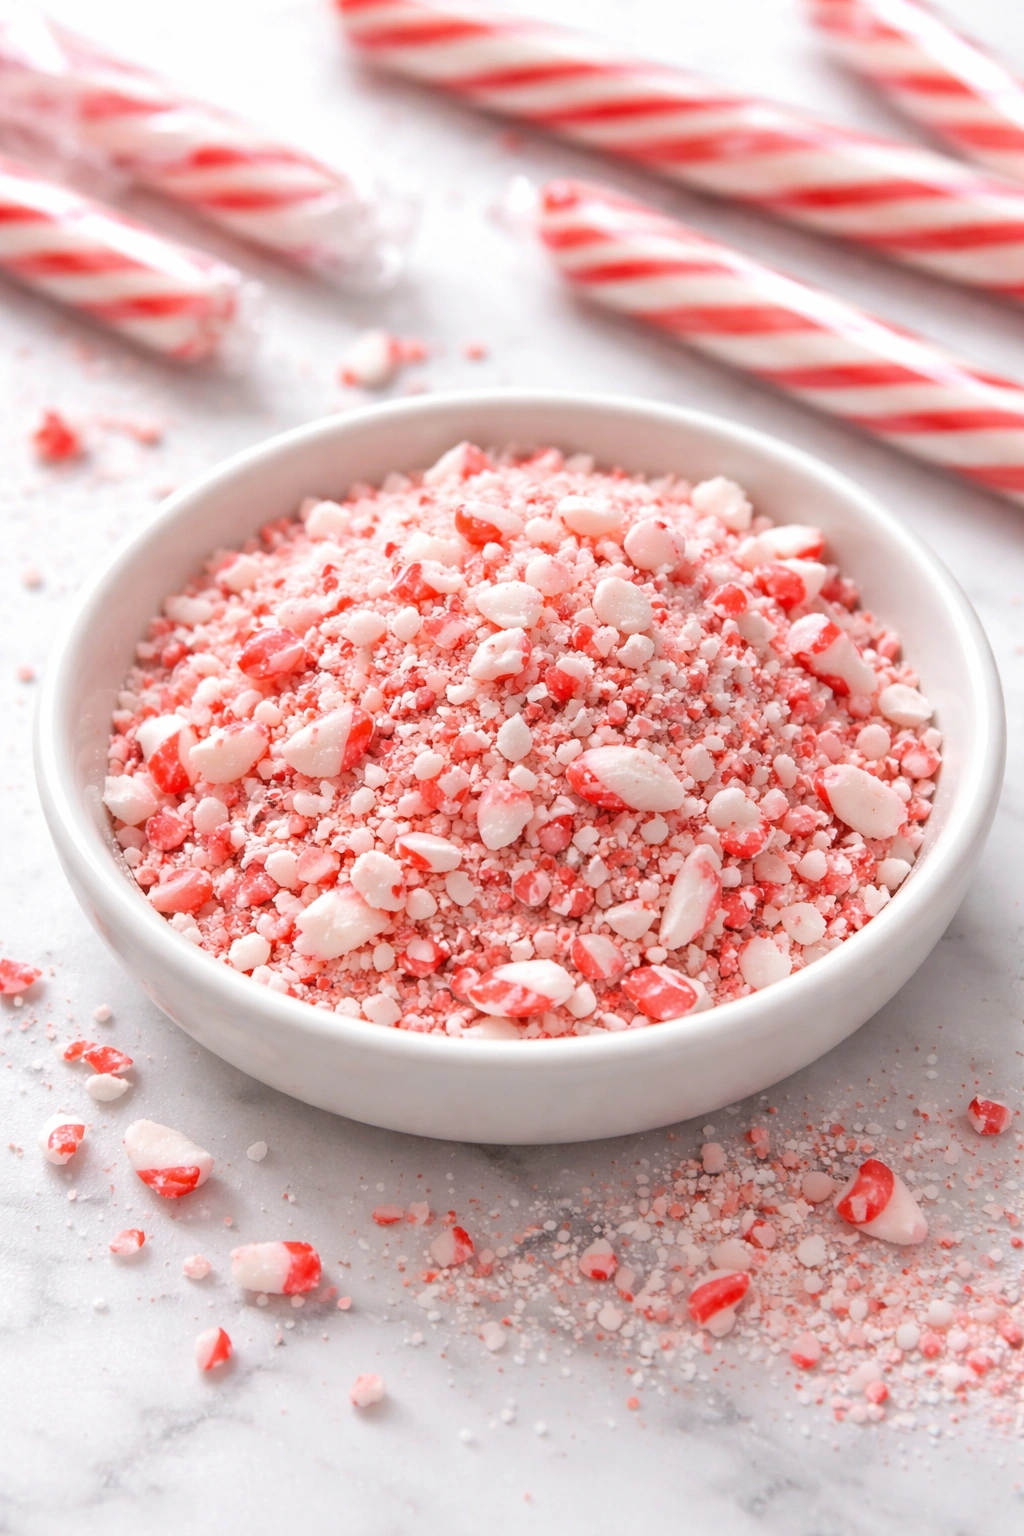
Candy canes are your peppermint source, and the way you crush them matters more than you’d think. The texture of crushed candy canes determines whether your peppermint bark has little flavor bursts scattered throughout or whether the peppermint just kind of dissolves into the chocolate in a one-note way. You’re not making candy cane dust; you’re creating texture.
The best approach is to start with candy canes that are in their wrapper—not because of any particular magic, but simply because wrapped candy canes are easier to crush without having the pieces scatter everywhere. Place a few candy canes in their wrapper inside a heavy-duty plastic bag, then use a rolling pin or the bottom of a heavy pan to crush them. Apply firm, rhythmic pressure rather than chaotic smashing. You’re aiming for pieces ranging from half-grain size (tiny) to maybe a quarter-inch (pea-sized). Some fine powder is inevitable and actually desirable—it distributes peppermint flavor evenly—but you also want enough larger pieces that you get distinct peppermint chunks in every bite.
Quality matters here too. Not all candy canes are created equal. Cheap candy canes made with artificial peppermint flavoring taste thin and slightly bitter in bark—they muddy the flavor rather than enhance it. Better candy canes (often found in specialty stores or premium grocery sections) are made with real peppermint oil and taste noticeably brighter and more authentic. If you’re making peppermint bark as a gift or for a special occasion, spending two extra dollars on good candy canes is absolutely worth it.
One trick: if you’re making peppermint bark multiple days before you plan to give it or serve it, crush your candy canes fresh the day you’re assembling the bark. Pre-crushed candy canes can absorb moisture from the air and lose that satisfying crunch. Freshly crushed candy canes stay crisp longer once they’re set into the chocolate.
Peppermint Oil vs. Extract—Which One Actually Works Best
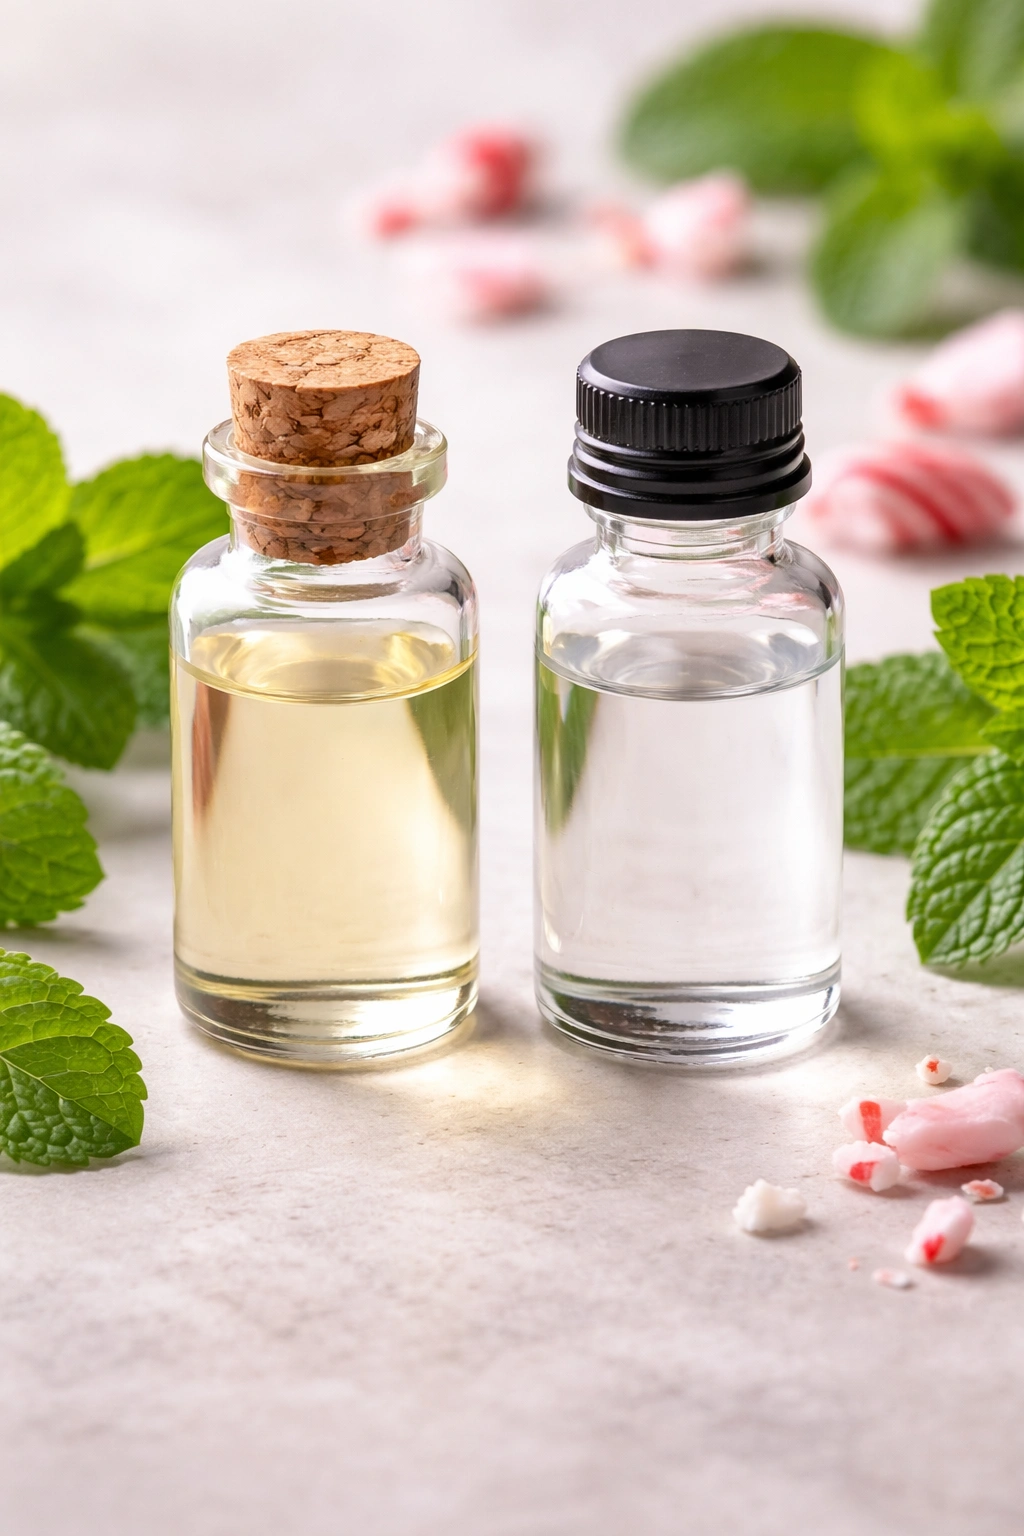
Here’s where a lot of homemade peppermint bark recipes go sideways: they tell you to add peppermint extract to the chocolate, and when you follow that instruction, your bark ends up tasting like toothpaste or like someone added food-flavoring drops to brown plastic. The problem is that peppermint extract is designed to flavor cakes and frostings, where it gets distributed throughout a large volume of crumb and batters. In chocolate, which has a much smaller volume and a very smooth texture, extract creates hot spots of artificial-tasting peppermint intensity.
Peppermint oil is an entirely different product, and it’s what you want for peppermint bark. Peppermint oil is the actual essential oil extracted from peppermint plants—it’s concentrated, it’s real, and it tastes and smells like actual peppermint rather than synthetic flavoring. The difference is similar to the difference between fresh lemon juice and lemon extract. You can find food-grade peppermint oil in specialty cooking stores, online, or increasingly in the baking sections of well-stocked grocery stores.
The amount you add matters more than you’d think. Start with about ¼ teaspoon per 8 ounces of chocolate, stir it in thoroughly, and taste a tiny bit on your finger. You’re looking for obvious peppermint flavor that doesn’t taste medicinal or overwhelming. If it tastes too mild, add a few more drops and taste again. If it ever tastes too strong, your chocolate is probably warm enough that you can add a bit more chocolate to the mixture and re-melt it. Remember that the crushed candy canes themselves will add more peppermint intensity, so the melted chocolate should taste strong enough that you’d notice the peppermint, but not so strong that you’d think you were eating a peppermint candy by itself.
Some recipes skip additional peppermint oil entirely and rely only on the crushed candy canes for flavor. That approach works if you’re using high-quality candy canes and crushing them relatively fine, but adding a tiny bit of peppermint oil ensures that every single bite has consistent peppermint flavor rather than depending on luck and how many candy cane pieces land in any given section of bark.
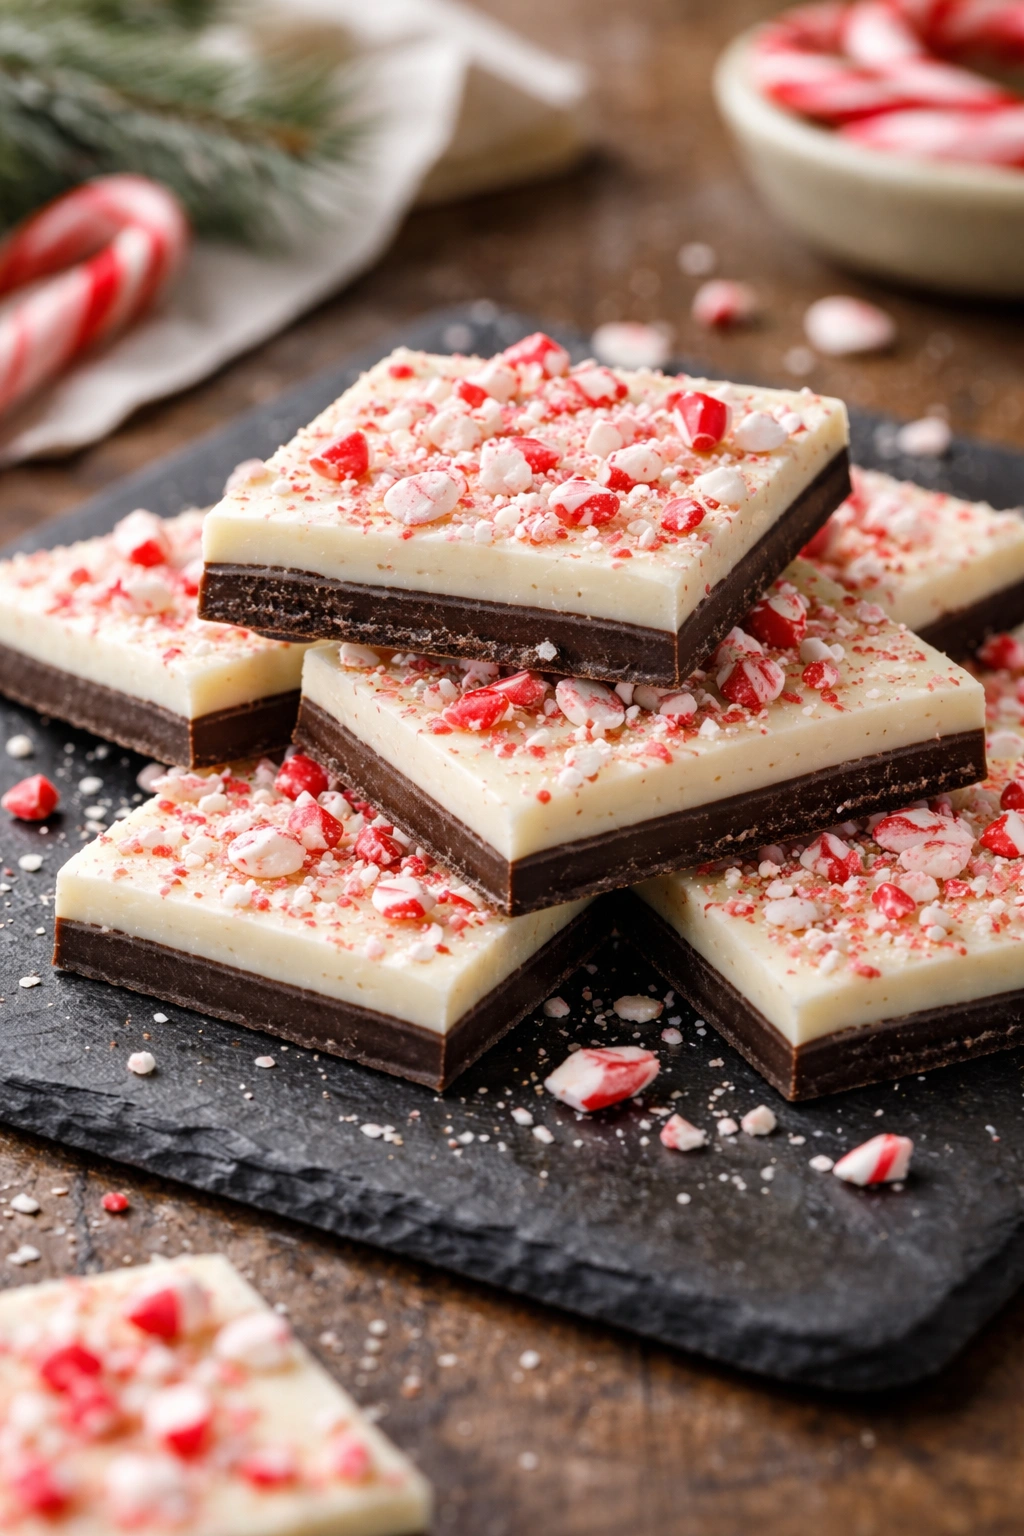
Understanding the Three-Layer Structure

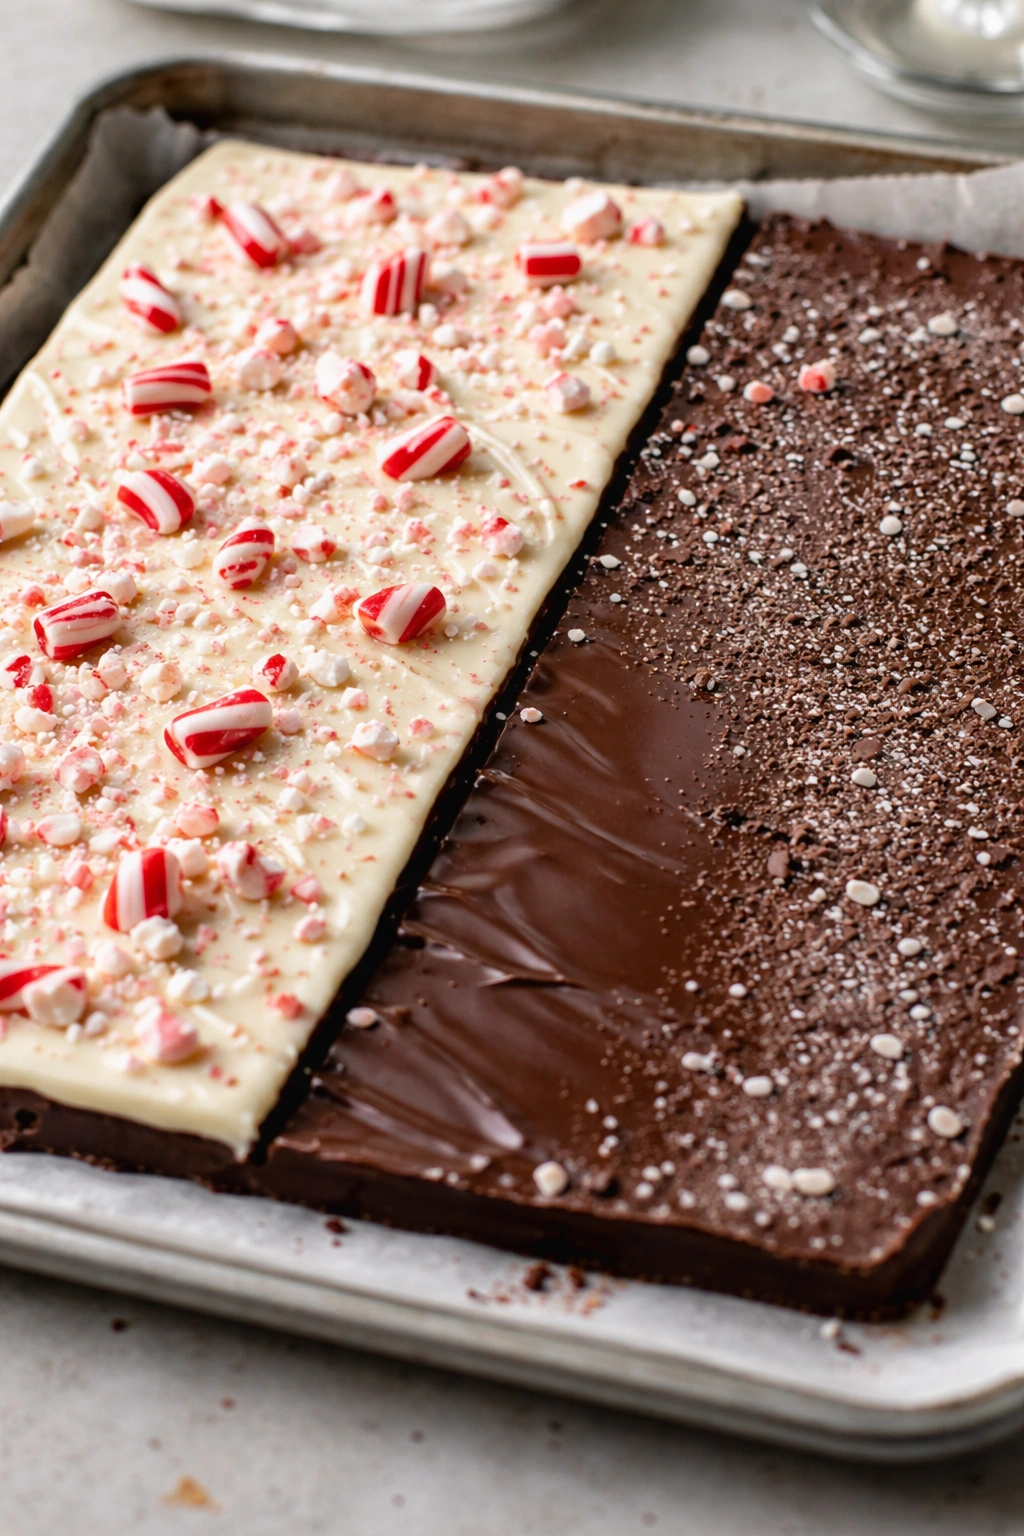
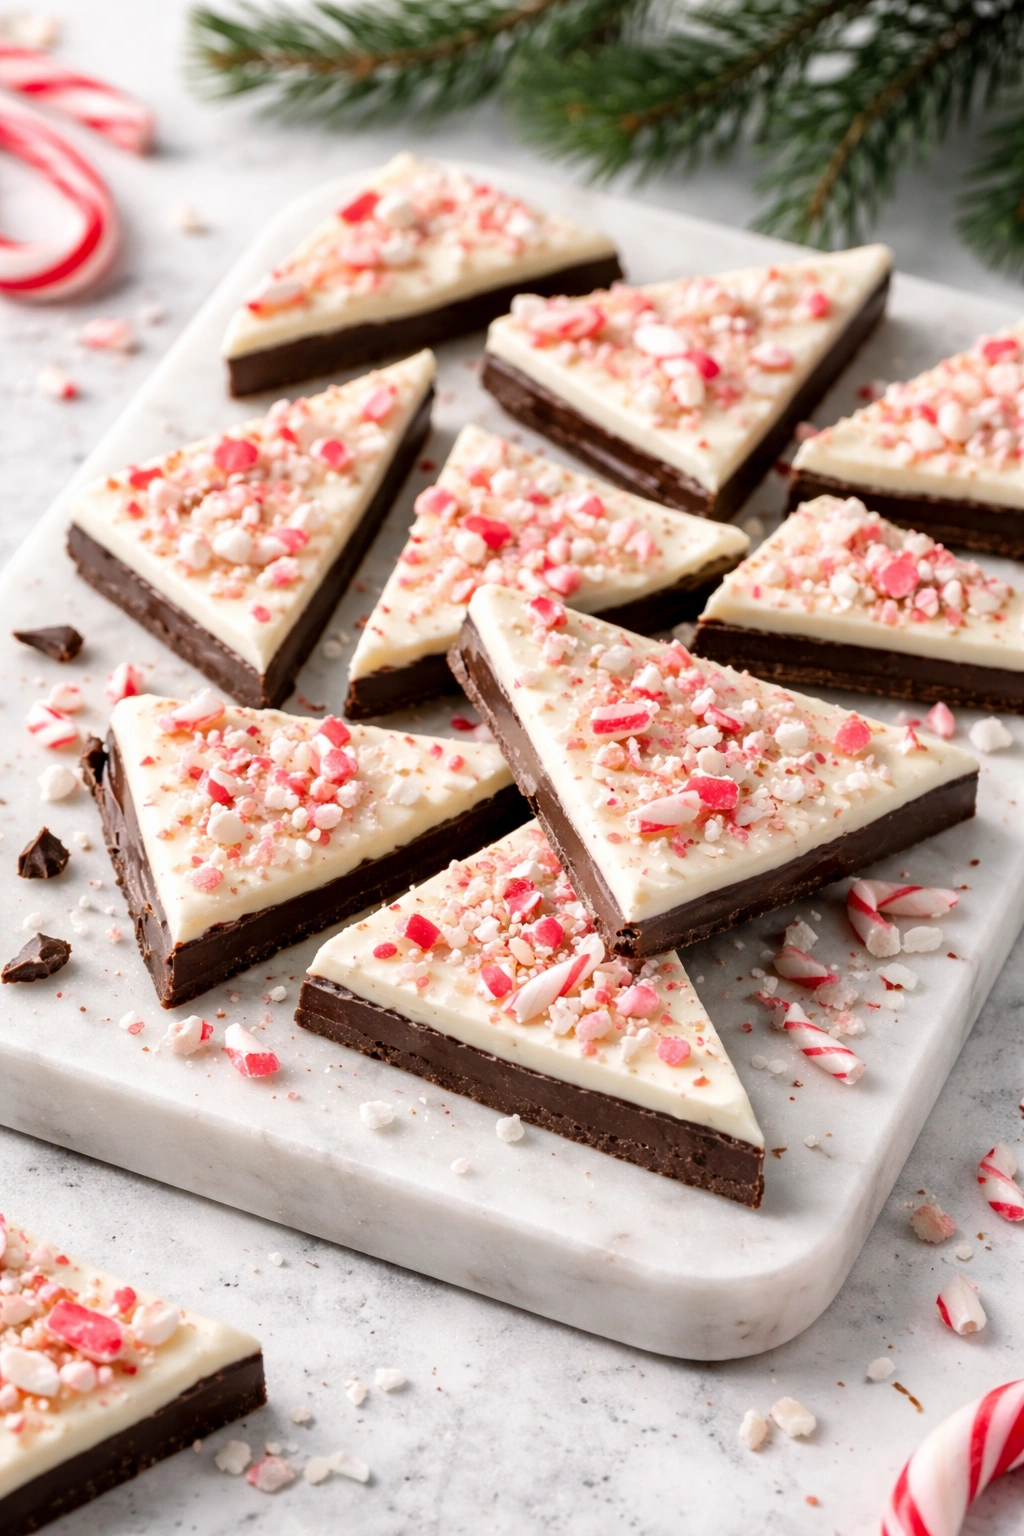
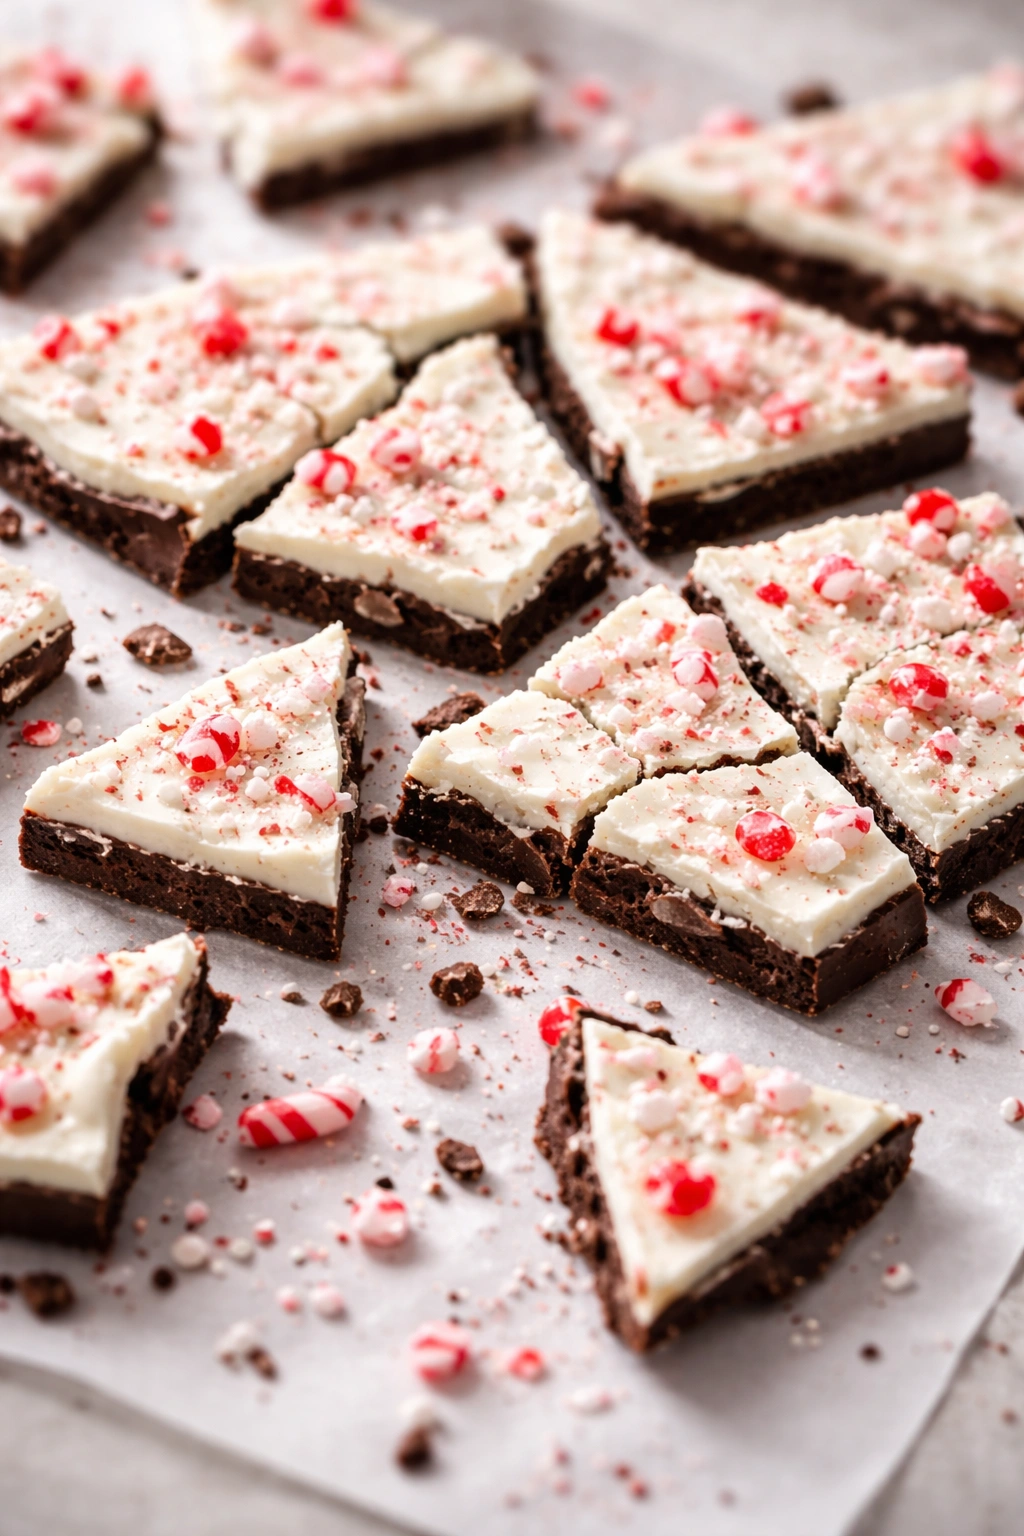
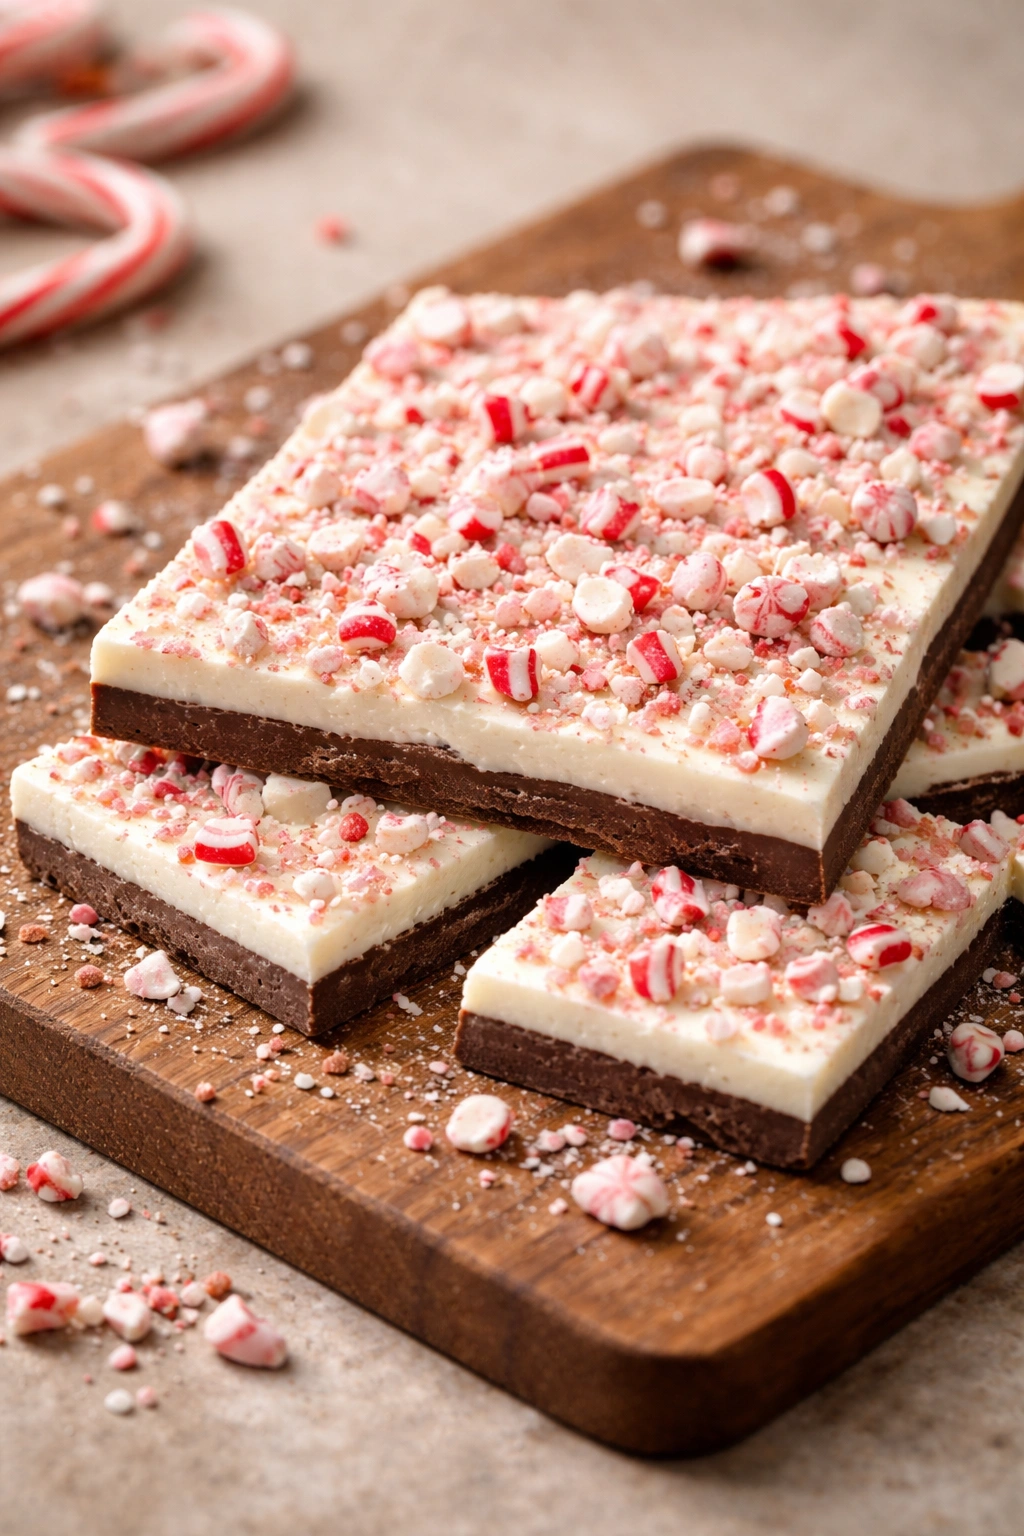
Traditional peppermint bark has three distinct layers: dark chocolate on the bottom, a white chocolate peppermint layer in the middle, and sometimes a thin top layer of dark chocolate. But honestly? The three-layer structure is just one approach, and it’s not necessarily the best one for flavor or ease. Understanding what each layer does helps you decide whether you want to follow tradition or create your own version.
The bottom dark chocolate layer serves as structural support and provides chocolate flavor. Dark chocolate sets firm and gives you something substantial to break. The white chocolate middle layer is where the peppermint happens—white chocolate is neutral enough that peppermint flavor really pops, and it creates visual contrast. The top dark chocolate layer adds more chocolate flavor and more structure. This combination is genuinely delicious, but it requires waiting for the bottom layer to set before adding the middle layer, then waiting again before topping it. That’s about 30 minutes of cooling time (unless you use the freezer).
Some people make single-layer peppermint bark: just dark chocolate or just white chocolate, mixed with crushed candy canes and set. This requires no layering, no waiting, no skill—just melt, add candy canes, spread, set, break. It’s less visually impressive than three-layer bark, but it tastes exactly as good if you use quality chocolate and good candy canes. If you’re short on time or patience, single-layer is absolutely legitimate.
Others go full decadent and do a thick white chocolate layer studded with crushed candy canes, then top with a thick layer of dark chocolate. This makes the peppermint effect even more prominent and gives you more surface area for decorative toppings. It requires the same wait-and-layer approach as traditional bark but results in a chunkier, more substantial piece.
Yield, Prep Time, Cook Time, and Difficulty
Yield: Makes approximately 20-24 pieces (one 8×12-inch baking sheet)
Prep Time: 10 minutes
Cook Time: 20 minutes (mostly waiting for chocolate to set)
Total Time: 30 minutes active + 20 minutes chilling
Difficulty: Beginner — No candy thermometer needed, no tempering required, and there’s almost nothing that can go wrong. If your chocolate seizes or your layers don’t layer perfectly, you’ve still got delicious homemade peppermint chocolate candy.
Best Served: At room temperature, within a few hours of making it for the crispest texture. Can be served chilled straight from the fridge for a slightly different mouthfeel—the chocolate will be more brittle and will snap even more dramatically.
Complete Ingredient List for Classic Three-Layer Peppermint Bark
The ingredient list for peppermint bark is refreshingly short. You’re working with chocolate, candy, and maybe one small flavor addition. That simplicity means every ingredient needs to be good quality—there’s nowhere for poor-quality components to hide.
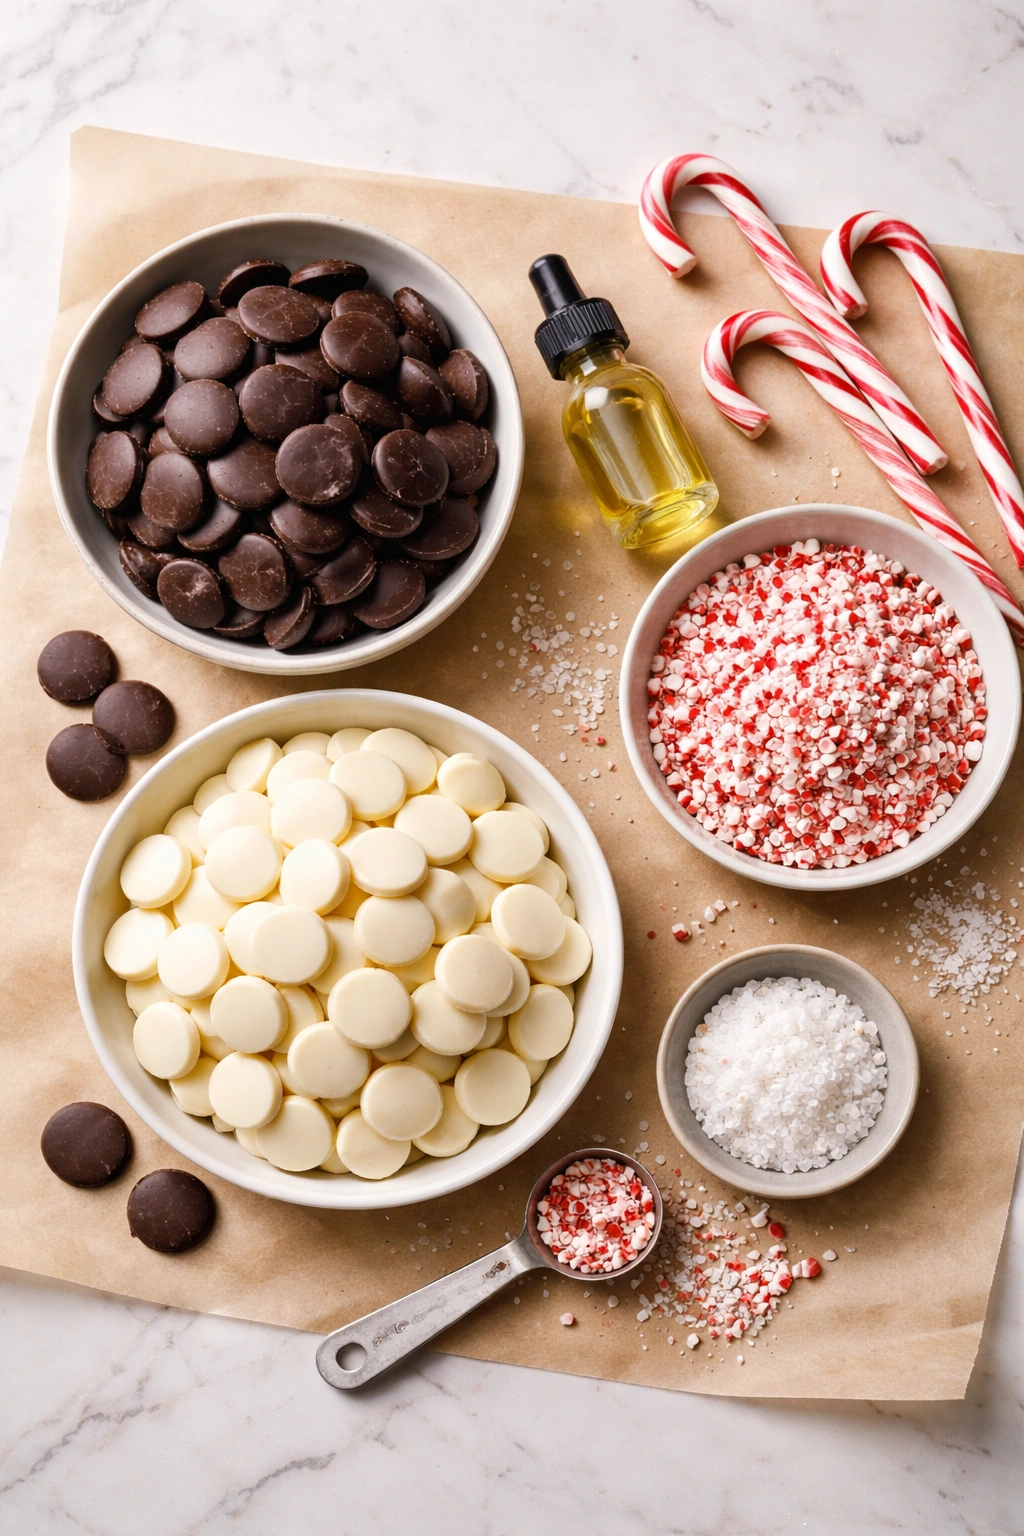
For the Bark:
- 8 ounces dark chocolate (60-70% cacao, chopped or in discs)
- 8 ounces white chocolate (chopped or in discs)
- 4-5 candy canes, crushed into small pieces
- ¼ teaspoon food-grade peppermint oil (or to taste)
- Pinch of fine sea salt (optional, but recommended)
- Extra crushed candy cane pieces for topping (about 2-3 tablespoons)
Equipment You’ll Need:
- One 8×12-inch baking sheet or similar flat pan
- Parchment paper
- Two heatproof bowls (glass or ceramic work best)
- One pot (for creating a makeshift double boiler)
- Wooden spoon or heat-resistant spatula for stirring
- Offset spatula or butter knife for spreading
- Optional: kitchen thermometer (not necessary, but helpful if you want to avoid overheating chocolate)
That’s genuinely all you need. No candy thermometer, no special molds, no fancy equipment. If you have a microwave, you can even melt the chocolate there instead of using a double boiler, though a double boiler gives you more control and is less likely to overheat the chocolate.
Step-by-Step Instructions for Making Peppermint Bark

Prepare Your Pan:
-
Line an 8×12-inch baking sheet with parchment paper, making sure it covers the bottom completely and has a little overhang on the sides. This makes it infinitely easier to lift the finished bark off and break it into pieces. If you don’t have a baking sheet this exact size, any flat pan works—a loaf pan makes thicker, smaller pieces; a larger sheet makes thinner, wider pieces. The thickness doesn’t really matter as long as the chocolate sets up.
-
Set your pan on a flat shelf in the fridge or freezer where it won’t be disturbed. You’ll be adding chocolate layers to it, and it needs to be level so the layers are even.
Melt the Dark Chocolate Base:
-
Chop or break your dark chocolate into small, uniform pieces (about the size of a pea) so it melts evenly. Uniform pieces melt faster and more smoothly than random chunks.
-
Fill a pot about one-third full with water and bring it to a gentle simmer—you’re not boiling it aggressively, just keeping it warm. Place a heatproof bowl on top of the pot (the bowl should sit on the pot’s rim without touching the water—this is your double boiler). The steam from the water will gently warm the bowl.
-
Add the chopped dark chocolate to the bowl and let it sit undisturbed for about 30 seconds. Then stir gently with a wooden spoon, scraping down the sides of the bowl, until about three-quarters of the chocolate is melted. Remove the bowl from heat and let it sit for another 10 seconds—the residual heat will finish melting the remaining pieces. Do not overheat chocolate; it will seize and become grainy. You’re looking for smooth, glossy chocolate, not hot chocolate.
Advertisements -
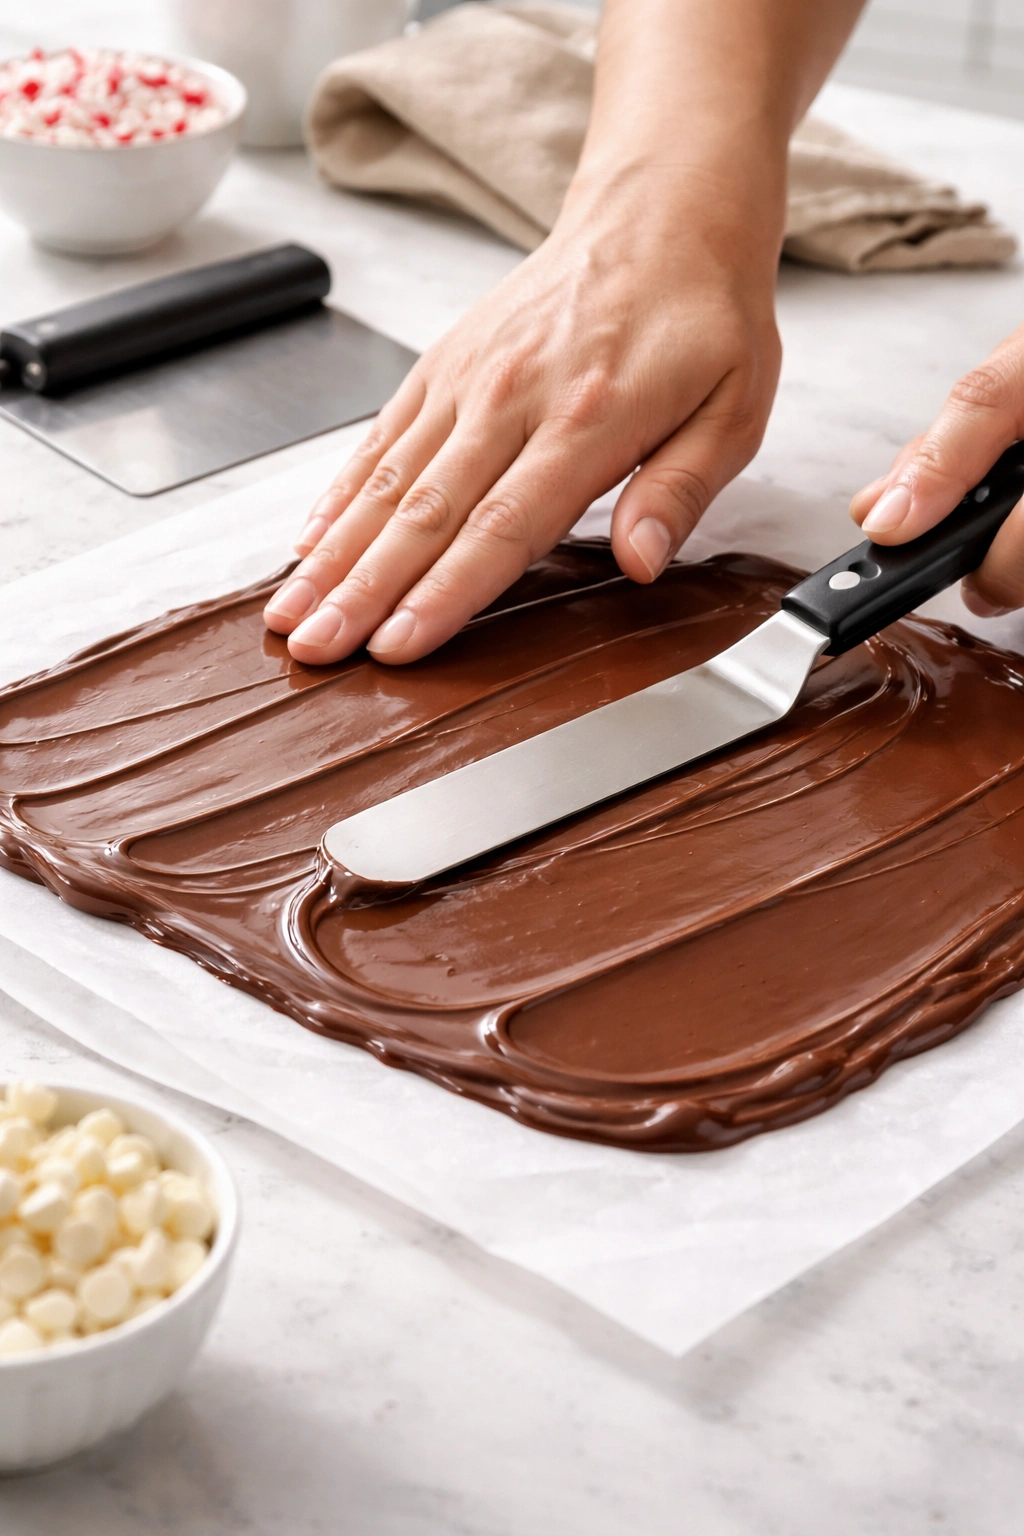
Spread the melted dark chocolate evenly across the prepared baking sheet in a thin, uniform layer. Use an offset spatula or butter knife and work gently—you’re not trying to manipulate the chocolate too much, just distributing it evenly. Aim for about ¼-inch thickness, which gives you a chocolate layer substantial enough to provide structure but thin enough that the bark snaps cleanly when you break it.
-
Place the pan in the fridge and let the dark chocolate layer set completely, about 10-12 minutes. You want it firm to the touch but not rock-hard; it should feel like a set chocolate bar, not like fudge.
Melt and Layer the White Chocolate:
-
While the dark chocolate is setting, prepare your white chocolate. White chocolate can be finicky—it contains cocoa butter but no cocoa solids, which means it can heat unevenly and scorch more easily than dark chocolate. Use the same gentle double-boiler method: chop it into small pieces, place it in a heatproof bowl over simmering (not boiling) water, and let it mostly melt before stirring.
-
Once the white chocolate is smooth and melted, stir in the peppermint oil (or extract if that’s what you have) and add a pinch of sea salt if you’re using it. The salt enhances the peppermint flavor and adds a subtle complexity that people can’t quite identify but love. Stir until completely combined.
-
Remove the dark chocolate layer from the fridge and spread the white chocolate mixture evenly over it. Again, use gentle, deliberate strokes with your offset spatula—you’re spreading, not blending. The two chocolate layers should stay mostly separate. If the white chocolate starts pulling up dark chocolate as you spread, the dark layer isn’t firm enough yet. Wait another 2-3 minutes and try again.
-
Immediately sprinkle crushed candy cane pieces over the white chocolate layer while it’s still warm and slightly soft. The heat of the white chocolate will slightly adhere the candy cane pieces, so they stay in place as the bark sets. Don’t be shy—you want visible peppermint pieces throughout. Use about 3-4 tablespoons of crushed candy canes for this layer.
-
Return the pan to the fridge and let the white chocolate layer set, about 8-10 minutes. You’re looking for the same firm-but-not-rock-hard texture as the first layer.
Add the Top Dark Chocolate Layer (Optional but Recommended):
-
Melt another 4 ounces of dark chocolate using the same gentle double-boiler method. This is your finishing layer, and it seals the peppermint pieces in and adds final chocolate flavor.
Advertisements -
Remove the pan from the fridge and spread the melted dark chocolate evenly over the white chocolate and candy cane layer, creating the finished surface. This layer doesn’t need to be perfectly smooth—a slightly textured top surface actually looks more artisanal and interesting. It does need to cover the entire white chocolate layer to keep moisture and air from degrading the bark during storage.
-
If you want extra visual flair, sprinkle a few more small pieces of crushed candy cane or a light dusting of peppermint powder on top of the dark chocolate while it’s still warm. These decorative pieces will set into the chocolate and make the bark look even more professional.
Final Set and Break:
-
Return the pan to the fridge and let the final layer set completely, about 10-15 minutes. The entire bark should be firm and set before you attempt to break it. To test if it’s ready, gently press your finger on the top—it should feel completely firm with no give, and your finger shouldn’t leave an indent.
-
Remove the pan from the fridge and let it sit at room temperature for about 2-3 minutes. This slight warming makes the bark easier to break cleanly—chocolate that’s too cold straight from the fridge can shatter jaggedly rather than breaking into pieces. Lift the parchment paper out of the pan and place it on a cutting board.
-
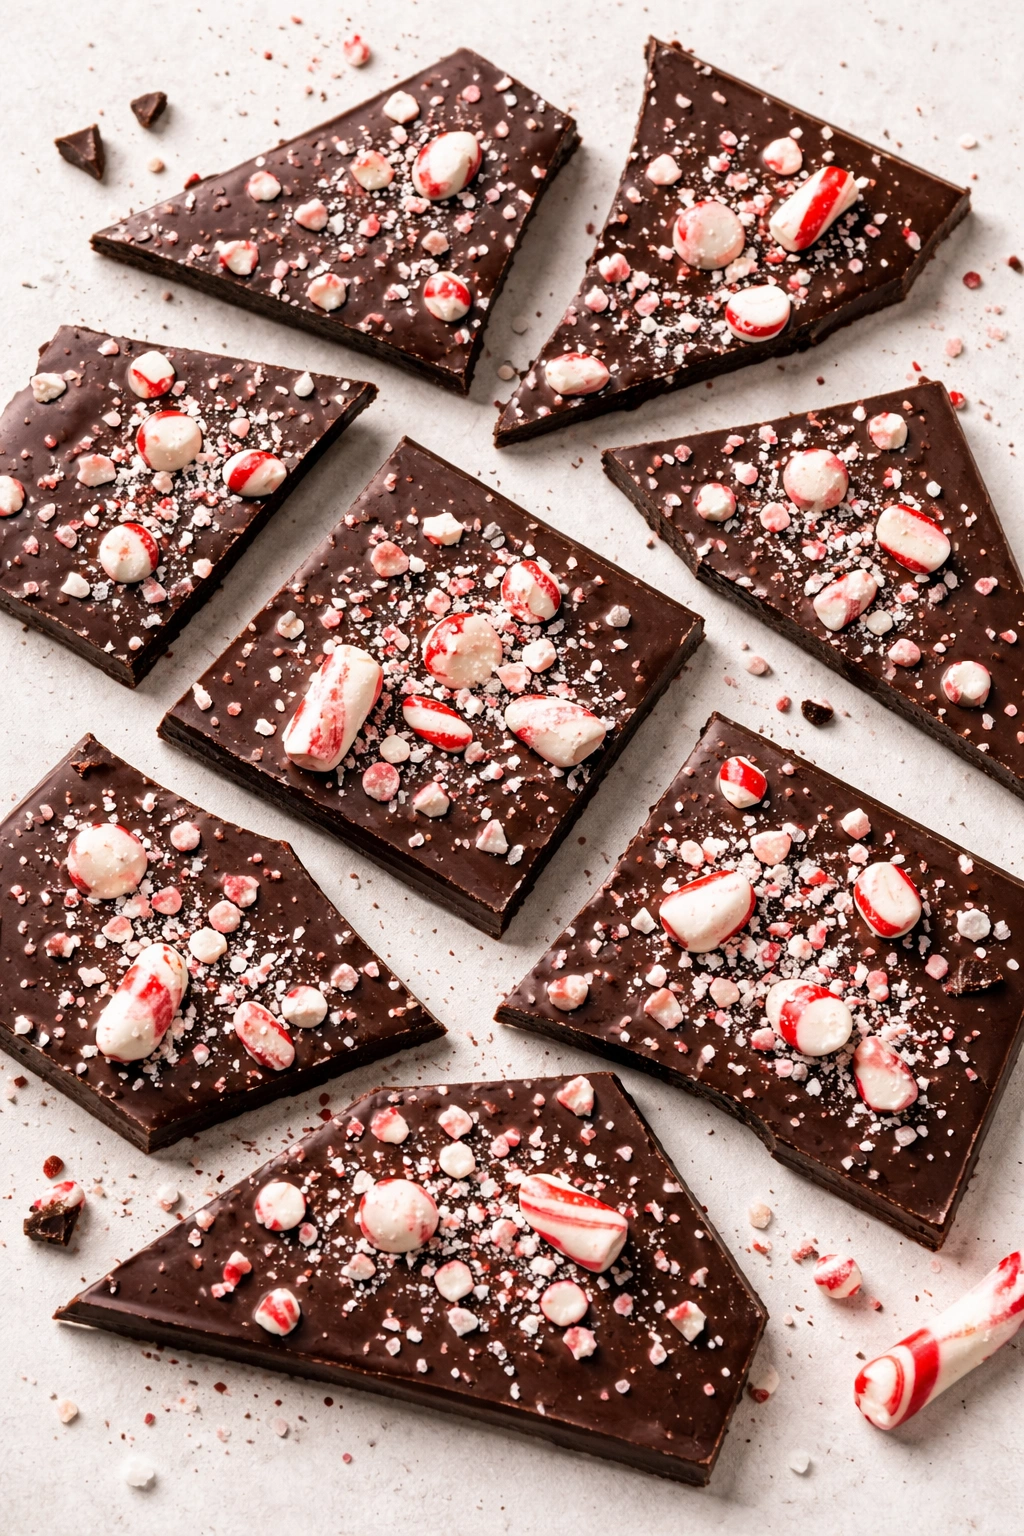
Using your hands, break the bark into irregular pieces ranging from about 1 inch to 2 inches. The rough, handmade-looking pieces are part of the charm—perfectly uniform pieces look manufactured. Hold the bark at a slight angle and apply firm, steady pressure; the chocolate should snap cleanly. If it’s shattering or cracking unevenly, it might have been too cold; let it warm up a few more minutes.
-
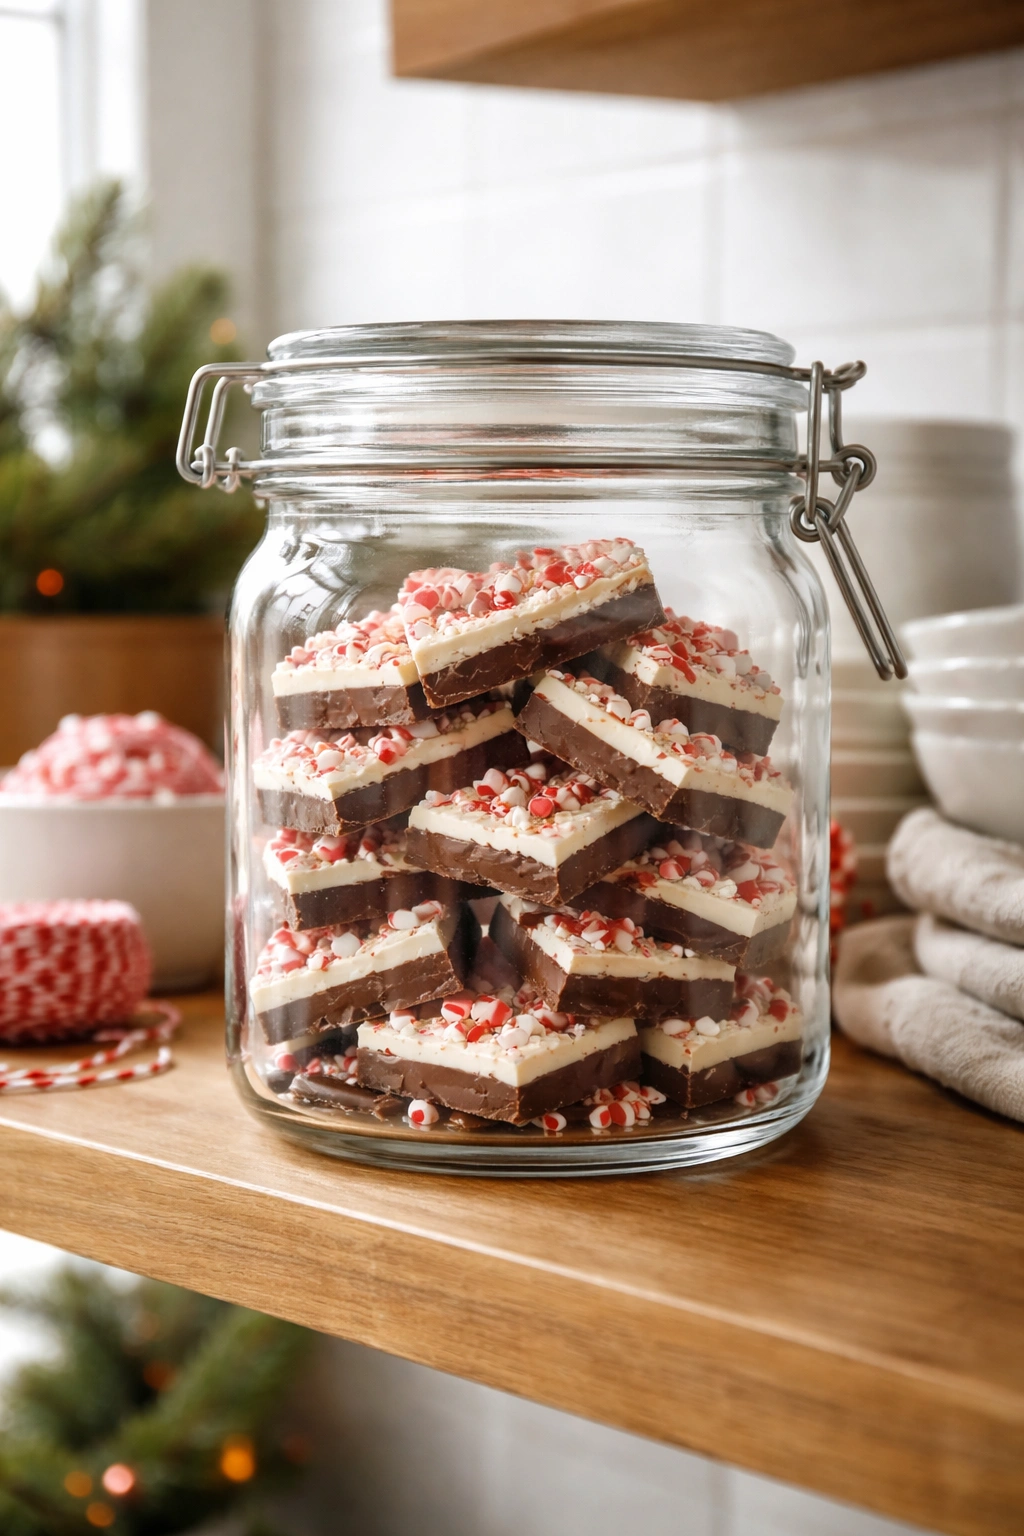
Once broken into pieces, transfer your peppermint bark to an airtight container (a glass container with a lid is ideal) or package it in cellophane bags tied with ribbon for gifting. Store at room temperature in a cool, dry place.
Pro Tips That Professional Candy Makers Swear By
The difference between adequate homemade peppermint bark and genuinely impressive peppermint bark often comes down to small details that most recipes don’t bother mentioning. These are the tricks that come from making it multiple times and paying attention to what actually works.
Work with slightly warm hands. This sounds odd, but slightly warm hands (not hot, just room temperature or warmer) make spreading chocolate layers dramatically easier. Cold hands cool the chocolate too quickly and make it thick and sticky. Warm hands keep the chocolate in a workable state just a bit longer. If you find yourself struggling with a chocolate layer that’s already starting to set, quickly wash your hands in warm water, dry them completely, and try again.
Use a bench scraper or offset spatula for spreading. A regular table knife works, but an offset spatula (a thin, angled metal spatula used in baking) or a bench scraper (a rectangular metal tool) gives you so much more control. The wider surface area distributes the chocolate more evenly and prevents gouging the layer below. These tools cost about $5-10 and are used for a thousand other baking projects, so they’re worth owning.
Don’t skip the chilling between layers. It’s tempting to just keep spreading layers one after another to speed things up, but if your layers aren’t set between applications, they’ll blend into a muddy, mixed-up mess rather than creating distinct flavor and visual layers. The 10-12 minute chill between layers isn’t wasted time—it’s the difference between structured, professional-looking bark and melted-together chocolate soup. If you’re really impatient, use the freezer instead of the fridge, which cuts the chilling time roughly in half.
Add a pinch of sea salt to the white chocolate. This is a subtle but important flavor trick. Salt doesn’t make chocolate taste salty; it enhances the chocolate and peppermint flavors and rounds out the sweetness. It’s the secret ingredient that people taste but can’t identify. Fine sea salt works better than kosher salt (kosher salt crystals are too large and can taste gritty in smooth chocolate). Use just a tiny pinch—you’re not seasoning; you’re enhancing.
Crush candy canes the day you’re making the bark. Candy canes that have been crushed for several days absorb moisture from the air and start losing their crunch. If you’re planning to make peppermint bark, crush the candy canes an hour or two before you start melting chocolate, then store the pieces in an airtight container. Fresh crushed pieces stay crisp and keep their satisfying texture in the finished bark.
Use real chocolate, not candy melts. Candy melts are specifically formulated to melt easily and set without special technique—and they taste like it. They’re waxy, they lack actual chocolate flavor, and they make candy that feels cheap. Real chocolate costs almost exactly the same price and tastes infinitely better. It’s a no-brainer upgrade.
Control your kitchen temperature. If your kitchen is very warm, your chocolate will be harder to work with and might not set properly at room temperature. If your kitchen is very cold, your chocolate might set too fast and become thick and difficult to spread. Ideally, you want to make peppermint bark in a kitchen that’s around 68-72°F. If it’s warmer, use the freezer for setting instead of the fridge, and work quickly. If it’s colder, the regular fridge is fine.
Common Mistakes That Ruin Peppermint Bark (And How to Fix Them)
Most peppermint bark problems come from overcomplicating something genuinely simple or from working with chocolate incorrectly. Understanding what goes wrong and why helps you prevent problems in your own batch.
Problem: White chocolate layer won’t spread smoothly over the dark chocolate base. This usually happens because the dark chocolate layer isn’t firm enough before you try to apply the white chocolate. When dark chocolate isn’t completely set, it’s still slightly soft and flexible, and the weight of the white chocolate and your spreading motion will push it around, creating a muddy layer. Solution: Wait the full 12 minutes before adding the white chocolate. If you’re impatient, use the freezer, which sets chocolate twice as fast as the fridge. Test by touching the dark layer—it should feel completely firm, like a set chocolate bar, not like slightly cooled fudge.
Problem: Chocolate is grainy and thick instead of smooth and glossy. This is overheated chocolate, or chocolate that’s been exposed to water (even a tiny drop of steam condensation). Once chocolate develops that grainy texture, you can’t fix it—you have to start over with fresh chocolate. Prevention: Use a proper double boiler with water simmering gently, not boiling aggressively. Keep a close eye on the chocolate and remove it from heat as soon as most of it is melted. Let residual heat finish the job. Never let water touch your chocolate bowl.
Problem: Chocolate seizes (becomes thick and clumpy) as you’re spreading it. This happens when the chocolate cools too quickly or when water accidentally gets into it. Once chocolate seizes, it’s basically impossible to spread smoothly. Prevention: Work quickly but not frantically. If your kitchen is very warm, chill your offset spatula in the freezer for 30 seconds before spreading—this keeps the spatula from over-warming the chocolate. If your chocolate starts thickening up too much, hold the bowl over warm (not hot) water for about 10 seconds to gently warm it back up.
Problem: Layers blend together into a muddy mixture instead of staying distinct. This happens when you apply each layer before the previous one is completely set. The weight and warmth of the new layer pushes into the old one, and you end up with all the colors mixed. Solution: Always wait the full chilling time between layers, and if you’re impatient, use the freezer instead of the fridge. Don’t rush; the layered appearance is part of the appeal of peppermint bark.
Problem: Bark won’t break cleanly—it shatters and splinters instead. This usually means the chocolate was too cold when you tried to break it. Chocolate straight from the fridge can be brittle and snap jaggedly. Solution: Let the finished bark sit at room temperature for 3-5 minutes before breaking it. It should still be firm but just slightly warmer, which allows it to break with satisfying clean snaps rather than chaotic shattering.
Problem: White chocolate layer tastes grainy and doesn’t have smooth mouthfeel. White chocolate is finicky and can develop a grainy texture if it’s overheated. Solution: Use the same gentle double-boiler technique and remove it from heat as soon as it’s mostly melted. White chocolate melts at a lower temperature than dark chocolate, so be extra careful not to overheat. Let residual heat finish the job.
Problem: Peppermint flavor is weak or barely noticeable. This usually means you didn’t use enough peppermint oil, or you used extract instead. Peppermint extract is much weaker and creates an artificial flavor rather than actual peppermint taste. Solution: Always use food-grade peppermint oil, not extract. Start with ¼ teaspoon per 8 ounces of chocolate and taste it on your finger—add more if needed. Remember that the crushed candy canes add peppermint flavor too, so don’t make the white chocolate so strong it tastes medicinal.
Variations and Flavor Combinations That Actually Work
The basic three-layer peppermint bark is genuinely perfect, but once you understand the structure, you can play with it. The best variations stick to one clear idea rather than trying to combine multiple flavors at once.
Dark Chocolate and Candy Cane Only (Single Layer). Skip the white chocolate entirely and make a simple dark chocolate bark studded with crushed candy canes. This requires no layering or waiting, just melt chocolate, spread it, sprinkle candy canes, and let it set. It’s less visually impressive than traditional bark but tastes exactly as good and takes half the time. Use about 4-5 tablespoons of crushed candy canes for 16 ounces of chocolate.
White Chocolate Peppermint with Macadamia Nuts. Make traditional three-layer bark but toast some coarsely chopped macadamia nuts and sprinkle them over the white chocolate layer before it sets. The buttery, slightly sweet nuts pair beautifully with peppermint. Use about 3 tablespoons of chopped nuts per batch. The nuts add textural interest and keep the candy from being overly sweet.
Dark Chocolate with Crushed Candy Canes and Sea Salt. Make a simple dark chocolate and candy cane bark, then finish the top with a thin sprinkle of fleur de sel (finishing sea salt). The salt enhances all the flavors and adds a sophisticated contrast. This is less sweet than traditional bark and appeals to people who find standard peppermint bark a bit cloying.
White Chocolate Peppermint with Dried Cranberries. Make white chocolate bark with crushed candy canes, but add about 2 tablespoons of finely chopped dried cranberries to the white chocolate layer before it sets. The tartness of the cranberries cuts through the sweetness and adds visual interest. Some people toast the cranberries lightly in a dry pan first to intensify their flavor.
Triple Chocolate (Dark-Dark-Dark with Peppermint Swirl). Make your bark entirely from dark chocolate—bottom layer, middle layer with crushed candy canes mixed in, and top layer. This is for dark chocolate lovers and requires no white chocolate. The result is more chocolate-forward and less sweet, with peppermint accents rather than peppermint being the main flavor.
Milk Chocolate Version. Substitute milk chocolate for some or all of the dark chocolate. Use milk chocolate for the base and top layers with a white chocolate peppermint middle layer, or use milk chocolate for all three layers. The result is sweeter and more approachable than dark chocolate versions, and it’s genuinely good if you prefer milk chocolate to dark. The peppermint flavor is slightly less pronounced but still prominent.
Chocolate and Candy Cane with Crushed Freeze-Dried Berries. Toast crushed freeze-dried raspberries or strawberries on the white chocolate layer along with crushed candy canes. The berries add tartness, color, and a completely different flavor dimension. Use about 2 tablespoons of crushed berries per batch. This variation is particularly striking visually and tastes like you’ve done something fancy.
Dark Chocolate Mint with Espresso. Add about ½ teaspoon of instant espresso powder (mixed into the melted chocolate until completely dissolved) to the dark chocolate layers. The espresso doesn’t make the bark taste like coffee—instead, it deepens the chocolate flavor and makes the peppermint brighter. This is for people who want sophistication and depth rather than pure sweetness.
Storage, Make-Ahead, and Shelf Life
Homemade peppermint bark keeps beautifully if you store it correctly, which makes it ideal for making several days in advance or for stockpiling a batch to give as gifts throughout the season.
Room Temperature Storage. Properly made peppermint bark keeps at room temperature in an airtight container for up to two weeks. Make sure your container is truly airtight—glass containers with snap lids work best, or you can use tightly sealed plastic containers. The bark should stay crisp and fresh-tasting for the entire time. If you live somewhere very humid, room temperature storage might not be ideal; humidity can make the chocolate slightly soft and can cause the candy cane pieces to lose their crunch.
Refrigerator Storage. Peppermint bark keeps in the fridge for up to three weeks in an airtight container. Refrigerated bark will be firmer and will have an even more pronounced snap when you break it. The downside is that it can pick up flavors from other foods in the fridge if the container isn’t truly airtight. If you store it in the fridge, keep it in a dedicated container that doesn’t share space with strong-smelling foods like onions or aged cheese.
Freezer Storage. Peppermint bark keeps in the freezer for up to three months. Store it in an airtight container with parchment paper between layers to prevent the pieces from sticking together. There’s no need to thaw it before eating—frozen peppermint bark is excellent, with an almost crunchy, glass-like texture that’s quite satisfying. Some people prefer it frozen. If you’re giving it as a gift, thaw it at room temperature for about 10 minutes before wrapping and presenting it.
Make-Ahead Strategy. You can make peppermint bark up to one week in advance and store it in an airtight container at room temperature. This lets you prepare gifts or entertaining platters early without stress. Beyond a week, the candy cane pieces can start to absorb moisture and lose their bright crunch, though the chocolate itself stays fine. For the crispest texture, make it no more than 3-4 days in advance if you’re particular about texture.
Packaging for Gifts. Peppermint bark looks beautiful when packaged in clear cellophane bags tied with ribbon or packed in layers in a pretty box. Place parchment paper between layers in boxes to prevent sticking. For gifts to people who live in warm climates or who will be traveling, pack the bark in a refrigerated shipping container or use the freezer to ship it, and include an instruction note that it should be stored in a cool place.
Serving Ideas and Presentation Tricks
Peppermint bark tastes good on its own, but there are ways to serve it that make it feel even more special and integrate it into larger entertaining or dessert scenarios.
The Simple Platter. Break your peppermint bark into irregular pieces and arrange it on a marble slab, wooden board, or white porcelain platter. The contrasts of dark chocolate, white chocolate, and red candy cane pieces make it visually striking without any fussy plating. Arrange the pieces in a slightly casual, organic way rather than in precise rows. This works beautifully as a dessert course after dinner or as part of a holiday cookie and candy spread.
Crushed on Top of Desserts. Crush peppermint bark into smaller pieces and use it as a topping for ice cream, hot chocolate, cheesecake, brownies, or whipped cream. It adds texture, flavor, and visual interest. For this application, make sure your peppermint bark is stored at room temperature so it stays crisp—refrigerated or frozen bark becomes too brittle to sprinkle evenly.
With Hot Chocolate or Coffee. Serve a piece or two of peppermint bark alongside a warm mug of hot chocolate or coffee. The warm beverage softens the chocolate slightly and creates a nice textural and temperature contrast. This is a lovely after-dinner pairing or a cozy winter moment.
In a Gift Box with Other Treats. Layer peppermint bark pieces in a pretty box with other homemade treats—cookies, brownies, candied nuts. Peppermint bark is sturdy enough that it travels well and doesn’t require special care in a mixed gift box. The combination of treats makes the gift feel generous and thoughtfully assembled.
As Part of a Dessert Tasting. Break peppermint bark into small 1-inch pieces and serve as part of a dessert tasting menu alongside other small sweets. It’s elegant, requires no utensils, and is small enough that people can taste multiple items without getting too full. The combination of chocolate, peppermint, and candy texture makes it memorable as a tasting component.
Melted Into Warm Milk. Drop a piece of peppermint bark into warm milk (dairy or non-dairy) and let it melt slightly. The chocolate and peppermint infuse the milk, creating a homemade peppermint hot chocolate that’s far superior to instant mixes. You can even blend it slightly with an immersion blender to create a smooth, rich drink.
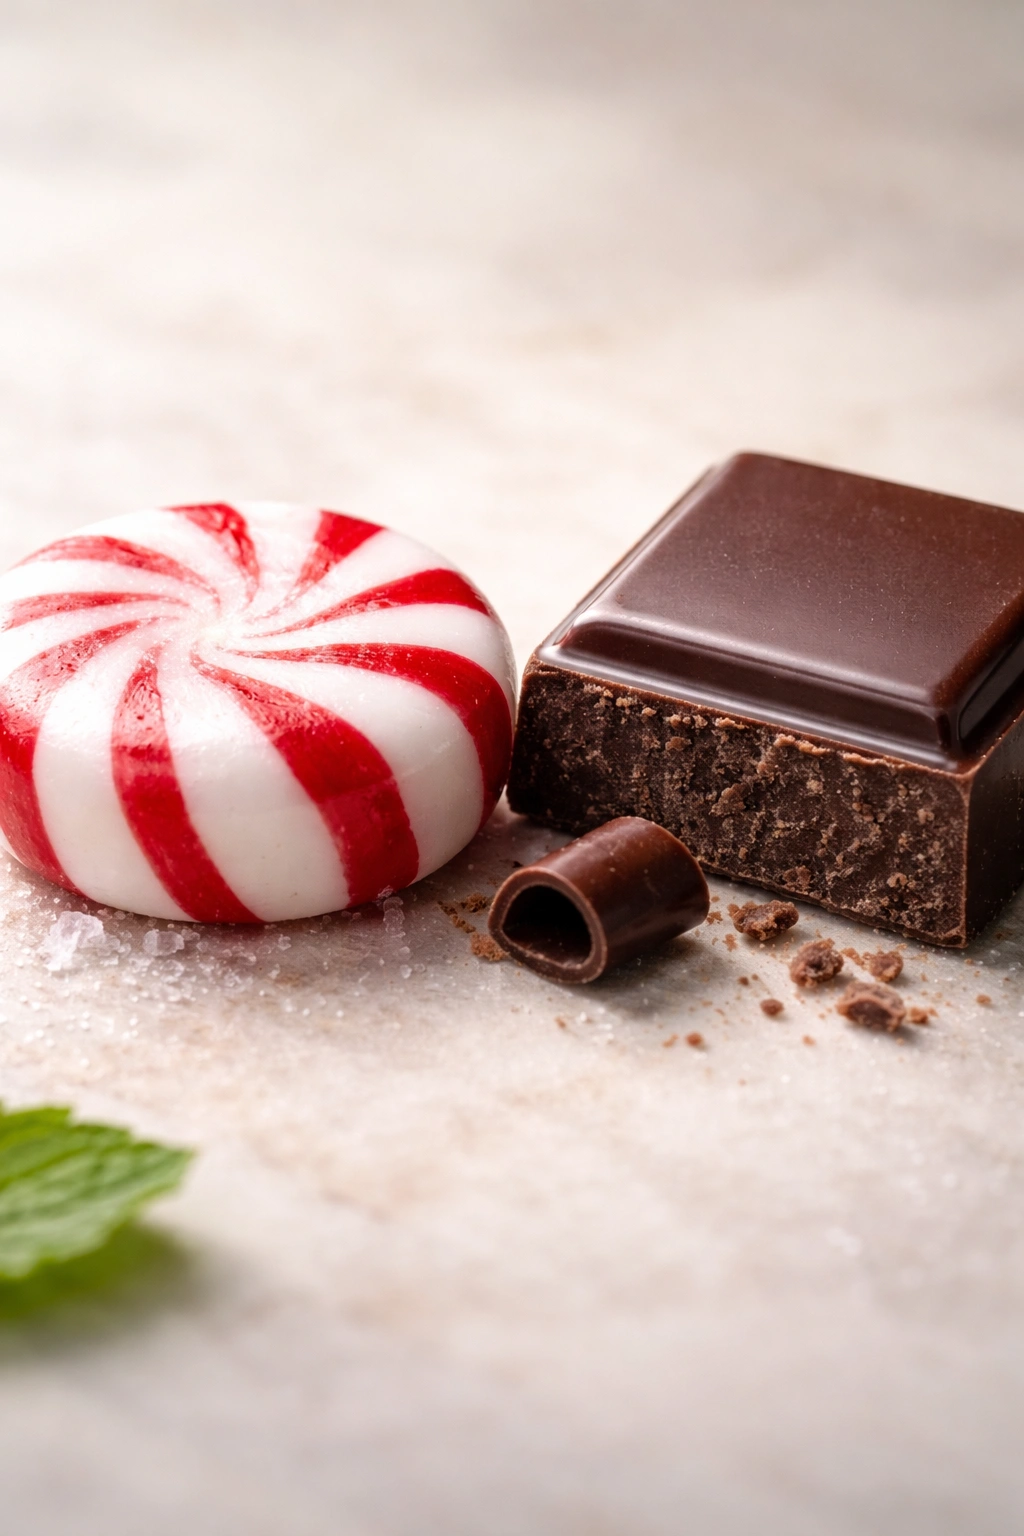
The Science of Why Peppermint and Chocolate Work So Well Together
It’s worth understanding why peppermint and chocolate are such a natural pairing, because understanding the science makes you a better candy maker and helps you make intuitive decisions about variations and flavor combinations.
Peppermint’s cooling sensation comes from a compound called menthol, which activates cold-sensing nerve endings on your tongue even though the candy isn’t actually cold. Your brain interprets this signal as coldness, which creates a refreshing, tingling sensation. Chocolate is fatty and rich, coating your mouth and providing a sensual mouthfeel but also a somewhat cloying sweetness if experienced on its own. Peppermint’s cooling, bright quality cuts through that richness and makes the chocolate taste less heavy and less overwhelmingly sweet.
Dark chocolate has subtle bitterness (from cocoa solids) that plays beautifully against peppermint’s sweetness and cooling sensation. The three flavors—sweet, bitter, and cool—create a more complex, interesting taste experience than any of them provides alone. This is why dark chocolate and peppermint is such a classic combination.
White chocolate, being pure cocoa butter and sugar with no cocoa solids, has no bitterness—it’s pure sweetness and creaminess. Peppermint’s brightness and cooling sensation cuts through that sweetness and prevents it from becoming cloying. The flavor combination is less sophisticated than dark chocolate and peppermint, but it’s more approachable and pure in its minty-sweet flavor.
Candy canes, being peppermint-flavored hard candy, contribute not just flavor but also a specific textural element. The hardness and slight grittiness of crushed candy cane provides little bursts of concentrated peppermint flavor and adds structural interest to what would otherwise be a smooth, uniform chocolate candy.
This is also why additions like sea salt, dark chocolate with espresso, or cranberries work well—they add complexity and prevent the candy from becoming one-note sweet. The best peppermint bark has multiple flavor dimensions: sweetness, peppermint, chocolate, and often some element of salt or sophistication that makes it taste more interesting than the sum of its simple ingredients.
Troubleshooting Your Batch If Something Didn’t Quite Work
Even if something goes slightly wrong in the process, you often still end up with something delicious. Understanding what to do with a slightly imperfect batch helps you recover and still create a gift-worthy product.
If your bark cracked or shattered unevenly. You’ve still got delicious peppermint chocolate candy. Chop or crush the pieces into smaller fragments and use them as a topping for ice cream or whipped cream, or layer them into a parfait with whipped cream and crushed candy canes. The uneven pieces become a feature rather than a flaw. You can also melt it down and re-pour it into fresh parchment if you want to try again, though the chocolate will have been re-melted, which affects texture slightly.
If your layers blended together and didn’t stay distinct. You have blended chocolate bark instead of layered bark. It tastes just fine—all the same flavors are there, just mixed together instead of in separate layers. It’s still good candy, still worthy of gifting, and still delicious. The visual impact is different, but the flavor is identical.
If your peppermint flavor is too strong. If the bark tastes medicinal or overly minty, you can balance it by melting it down and adding more chocolate to dilute the peppermint intensity, then re-setting it. Or you can simply enjoy it as is—some people genuinely like strong peppermint flavor. If you’re giving it as a gift to someone and you’re worried, include a note that it’s intensely peppermint-flavored so they know what to expect.
If your peppermint flavor is too weak. You can’t add peppermint to already-set bark without disrupting the chocolate, but you can enjoy it as is and make notes for next time (use more oil, crush the candy canes finer, use better-quality candy canes). Or you can melt it down and remix it with peppermint oil, then re-set it. The chocolate will have been re-melted, which affects texture slightly, but the flavor will improve.
If your bark is too soft and doesn’t snap properly. Your chocolate might not have set properly due to kitchen temperature or humidity, or you might have used lower-quality chocolate that doesn’t set as firmly. It still tastes good, but the mouthfeel is different. Store it in the fridge or freezer to firm it up, or enjoy it as a softer chocolate candy rather than a crisp bark.
If your candy cane pieces fell to the bottom instead of staying distributed throughout. This happens when the chocolate layer is still too warm when you add the candy canes—they sink instead of staying suspended. It doesn’t affect the flavor, but the visual appeal is different. The good news is that the bottom of the bark will have concentrated peppermint flavor, so you’re trading visual distribution for flavor concentration in certain pieces.
Final Thoughts
Homemade peppermint bark is one of those rare candies that looks impressive enough to give as a luxury gift but is actually simple enough that anyone can make it. You’re not required to develop advanced candy-making skills, follow precise temperature readings, or rely on special equipment. You’re just melting chocolate, combining it with crushed candy canes, and letting it set. The simplicity is part of the appeal.
What transforms it from simple to special is using quality ingredients and understanding why each step matters. Real chocolate tastes dramatically better than chocolate compound. Food-grade peppermint oil creates actual peppermint flavor rather than synthetic tasting extract. Properly set layers create visual interest and distinct flavor experiences in each bite. Fresh crushed candy canes stay crisp and provide satisfying texture. These details don’t add time or complexity—they’re not harder than doing it poorly, just slightly more intentional.
The best part about making peppermint bark is that it’s one of those projects where even if something goes slightly wrong, you still end up with delicious homemade candy. There’s almost nothing that can actually ruin it. Your kitchen will smell incredible while you’re making it, the finished product is shelf-stable enough to make in advance, and it’s the kind of gift that makes people believe you’ve spent hours in a professional kitchen even though you’ve actually spent about 20 minutes on the whole project.
Start with the basic recipe, make it several times until you’re comfortable with the process, then experiment with variations. You’ll quickly develop intuition about what works and what doesn’t, and you’ll end up making versions that are personalized to your exact preferences. That’s when peppermint bark transforms from a recipe you’re following to something you’re creating.