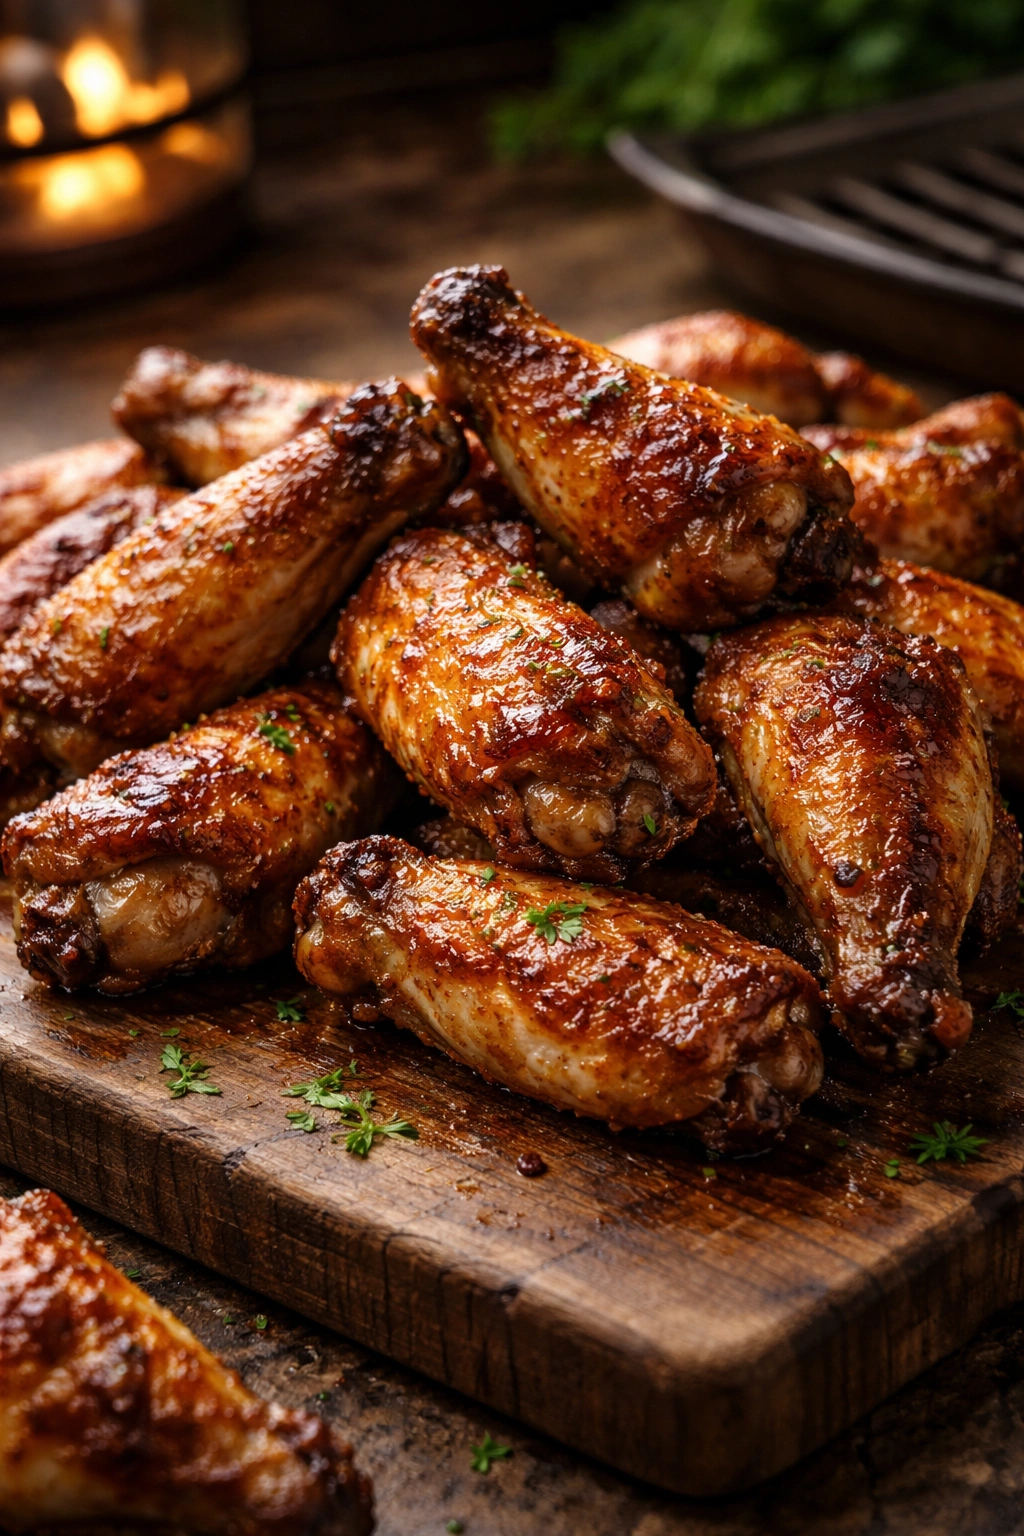
There’s a moment every grillmaster encounters when they watch chicken wings come off the grill with a shattering, golden-brown exterior and perfectly juicy meat underneath — and it never gets old. If you’ve been intimidated by the idea of achieving that restaurant-quality crispy skin without deep-frying, here’s what you need to know: it’s genuinely easier than you think, and the technique is surprisingly forgiving once you understand the mechanics.
The barrier between soggy, rubbery-skinned wings and those that snap between your teeth comes down to a handful of straightforward principles that have nothing to do with fancy equipment or complicated procedures. High heat renders the fat, moisture control creates the foundation for crispness, and a few unexpected tricks — like a humble pantry staple you’ve probably overlooked — transform ordinary grilled wings into the kind of crowd-stopping appetizer that earns you the title of backyard legend.
Over the past few years, grilling chicken wings has evolved from an afterthought to a genuine cooking technique worth mastering. The method works beautifully on gas grills, charcoal setups, and pellet smokers alike, which means you can achieve these results regardless of your equipment. Whether you’re planning a tailgate, a casual weeknight dinner, or hosting a gathering where people will be eating these straight off the platter, this approach delivers consistent, reliable crispiness that tastes like you spent hours fussing when you actually spent under an hour total.
What makes this guide different is the depth of explanation behind every step. You’ll understand not just how to grill wings, but why each technique matters, what goes wrong when you skip it, and how to troubleshoot if something doesn’t go as planned.
Why Grilled Chicken Wings Are Better Than You Think
Most people relegate chicken wings to one of two categories: deep-fried stadium food or baked oven versions that never quite taste right. Grilled wings occupy a completely different territory, and they deserve much more of your attention.
When you grill chicken wings, the direct heat renders the fat from under the skin more efficiently than any other cooking method except frying. That rendered fat is what creates the crispness — it’s not oil you’re adding, but the bird’s own natural fat transformed through high heat. The meat stays juicy because you’re controlling the cooking environment carefully, preventing the dry, stringy texture that often comes from wings that cook too slowly or unevenly.
The smoky, charred flavor that only grilling can deliver elevates wings beyond what you can achieve in an oven. There’s a depth to grilled wings that feels special and intentional, a subtle caramelization on the outside that your guests will taste immediately. This isn’t just another way to cook wings — it’s genuinely the best way to showcase the meat’s natural flavor while building that essential textural contrast.
Beyond the taste, grilled wings represent a clever cooking strategy. The process takes less than an hour from raw bird to finished plate, and most of that time is hands-off. You’re not standing over a pot of hot oil, you’re not heating your kitchen, and you’re not wrestling with multiple pans. It’s the kind of dinner that feels impressive but doesn’t demand complicated technique.
The Science Behind Perfectly Crispy Chicken Skin
Understanding what makes skin crispy helps you execute the technique with confidence rather than guessing whether you’re on the right track. Crispy skin requires three things working in concert: dry starting conditions, high enough heat to render fat, and moisture removal during cooking.
Chicken skin contains significant fat deposits under the surface. When exposed to temperatures above 300°F, this fat liquefies and cooks off, leaving behind a structure that’s crunchy rather than rubbery. If the skin retains surface moisture, steam forms during cooking and creates a barrier between the heat and the skin’s surface — that’s what produces the rubbery, chewy texture that frustrates so many home cooks.
This is where a counterintuitive ingredient comes into play. Baking powder (or cornstarch, depending on your preference) actually helps dry the skin’s surface before it even touches the grill. The powder draws moisture outward through osmosis, creating what cooks call a “dry brine.” This happens gradually over time, which is why some recipes recommend an overnight refrigeration step, though you can skip that if you’re short on time.
The pH change that baking powder creates also matters. By raising the skin’s pH level, baking powder helps the proteins break down in a way that promotes browning and crispness. You’re not adding flavor or altering taste — you’re simply creating the ideal conditions for the Maillard reaction, which is the chemical process that creates those gorgeous brown, flavorful surfaces.
Selecting and Preparing Your Chicken Wings
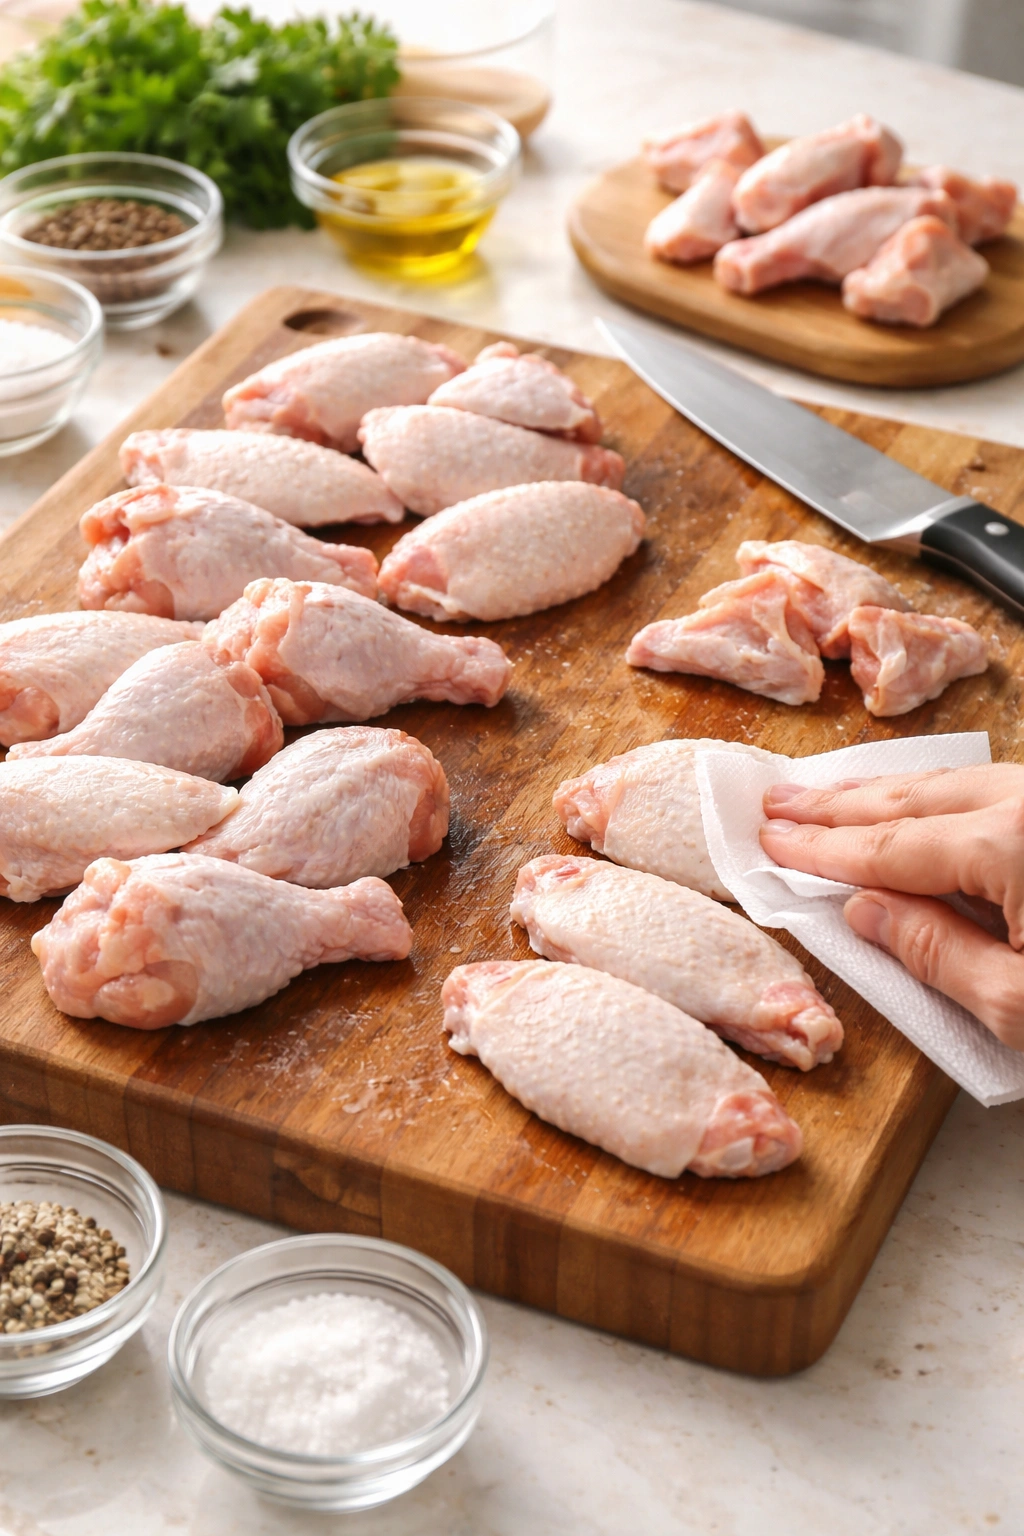
Start with quality chicken if you want quality results. Look for wings with the skin intact and, ideally, with the tips already removed — they cook unevenly and contribute little meat relative to their bone content. If your wings come with tips still attached, separate them and save them for stock.
Whole wings and pre-separated drums and flats both work perfectly fine. The advantage of pre-separated wings is convenience and more even cooking since drums and flats have different meat-to-bone ratios. If you’re starting with whole wings, the separation step takes about 60 seconds per wing with a sharp knife — just work the joint back and forth to find where it pivots, then cut cleanly through.
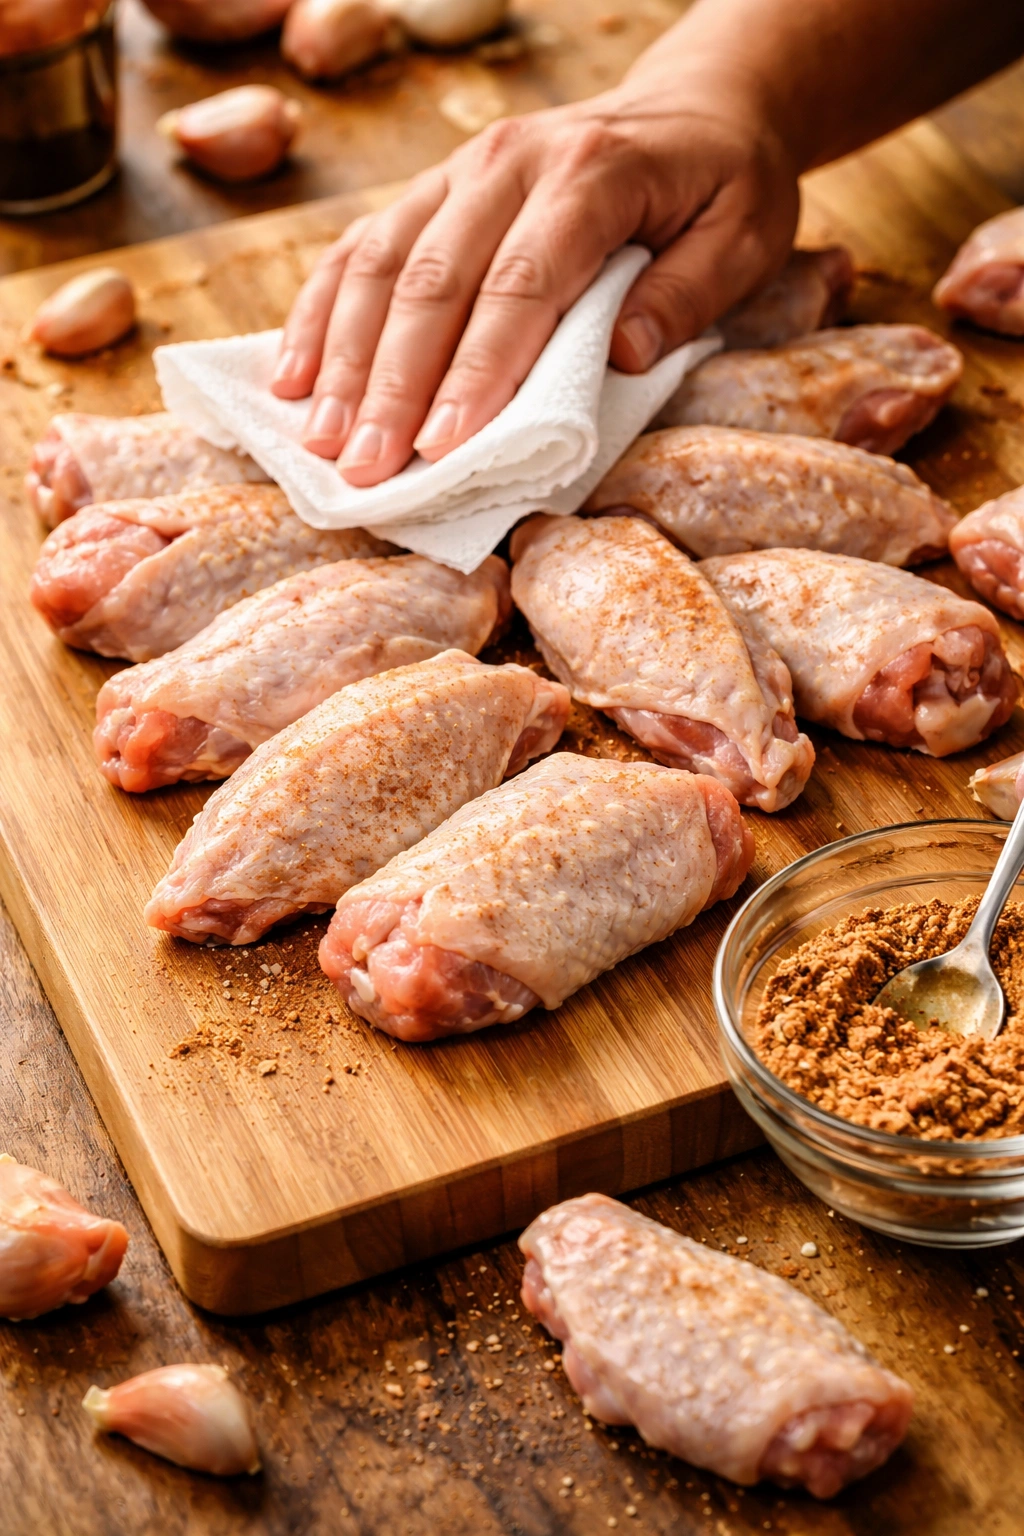
Pat your wings dry thoroughly before seasoning. This single step determines much of your success. Use paper towels and press firmly, paying special attention to the skin’s surface and any crevices. The drier your wings when they hit the grill, the crispier they’ll become. If you have time, you can even spread the wings on a baking sheet and let them air-dry uncovered in the refrigerator for an hour, which pushes the moisture-removal process even further.
The Secret Ingredient for Perfectly Crispy Skin
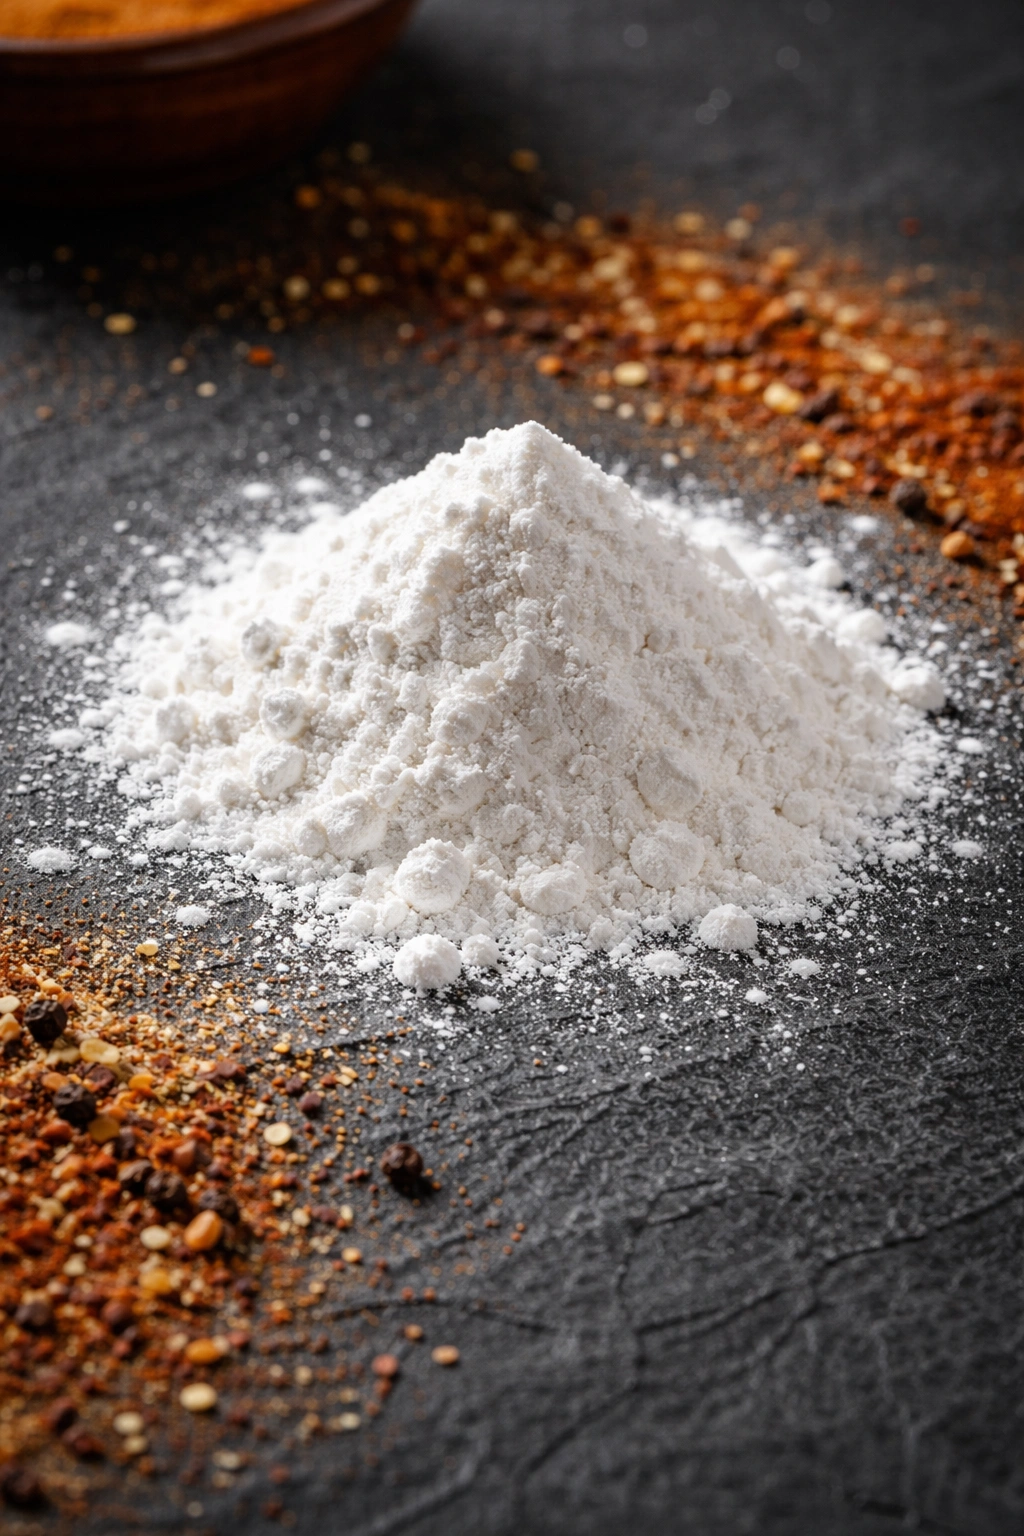
Here’s what separates amateur wings from ones that snap when you bite into them: aluminum-free baking powder mixed directly into your dry rub. This isn’t a suggestion or optional step — it’s the difference between good wings and unforgettable wings.
The reason baking powder works better than baking soda alone is the presence of cornstarch and an acidifying agent. Baking soda by itself would be too alkaline and might impart a metallic taste. Baking powder already contains the right balance of ingredients to dry the skin while promoting even browning. Use roughly 1 to 1.5 tablespoons of baking powder per pound of chicken wings, mixed directly into your salt and spices.
Some recipes suggest an alternative approach using cornstarch instead of baking powder, and it works beautifully too. Cornstarch directly dries the skin through the same osmotic mechanism. The ratio is roughly equal parts cornstarch to your dry rub — so if you’re using 2 tablespoons of spice blend, add 2 tablespoons of cornstarch. The advantage of cornstarch is that it contains no leavening agents, so there’s zero risk of any off-flavors, though in practice, quality baking powder produces no detectible flavor difference.
The method is simple: mix your baking powder and spices together, coat the wings thoroughly, and you’re ready to season them however you like.
Yield, Prep Time, Cook Time, and Difficulty Level
Yield: Serves 4 to 6 people | Makes about 24 wing pieces
Prep Time: 15 minutes
Cook Time: 45 to 50 minutes
Total Time: 1 hour
Difficulty: Intermediate — The technique isn’t complicated, but success depends on understanding the two-zone grilling method and having a reliable meat thermometer to confirm doneness without guesswork.
Ingredients for Perfectly Crispy Grilled Chicken Wings

For the Wings:
- 3 pounds chicken wings (drums and flats separated, tips removed)
- 2 tablespoons aluminum-free baking powder
- 1½ tablespoons kosher salt
- ½ tablespoon black pepper
- 1 teaspoon garlic powder
- 1 teaspoon onion powder
- 1 teaspoon smoked paprika
- ½ teaspoon cayenne pepper
- ½ teaspoon brown sugar
- 2 tablespoons olive oil (for the grill grates)
For Serving (Optional):
- 1 cup BBQ sauce, buffalo sauce, or your favorite wing sauce
- 4 tablespoons unsalted butter (if saucing)
- Fresh celery and carrot sticks
- Ranch dressing or blue cheese dip
Step-by-Step Instructions for Grilled Chicken Wings
Prepare the Wings:
-
Remove the chicken wings from their packaging and pat them completely dry with clean paper towels, pressing gently but firmly on both sides. Pay special attention to any creases or pockets where moisture tends to collect — even small amounts of surface moisture will steam during cooking rather than crisp.
-
If your wings still have tips attached, separate them now by working the joint back and forth with a sharp boning knife until you find the pivot point, then cut cleanly through. Discard the tips or save them for stock.
-
In a small bowl, whisk together the baking powder, salt, pepper, garlic powder, onion powder, smoked paprika, cayenne, and brown sugar, breaking up any clumps of baking powder with the back of a spoon so the coating will be even.
Advertisements
Season the Wings:
-
Place the dried wings in a large zip-top bag or on a clean sheet pan. Sprinkle the spice mixture evenly over all surfaces of the wings, working it in gently with your hands to ensure every piece gets thoroughly coated. The mixture should cling to the skin — if any falls off onto the pan, you can retrieve it and reapply to any bare spots.
-
If you have time, allow the seasoned wings to rest on a baking sheet, uncovered and skin side up, in the refrigerator for 30 minutes to 2 hours. This gives the baking powder additional time to draw surface moisture away from the skin, promoting even crispier results. This step isn’t mandatory for good results, but it’s worth the minimal effort if your schedule allows.
Set Up Your Grill:
-
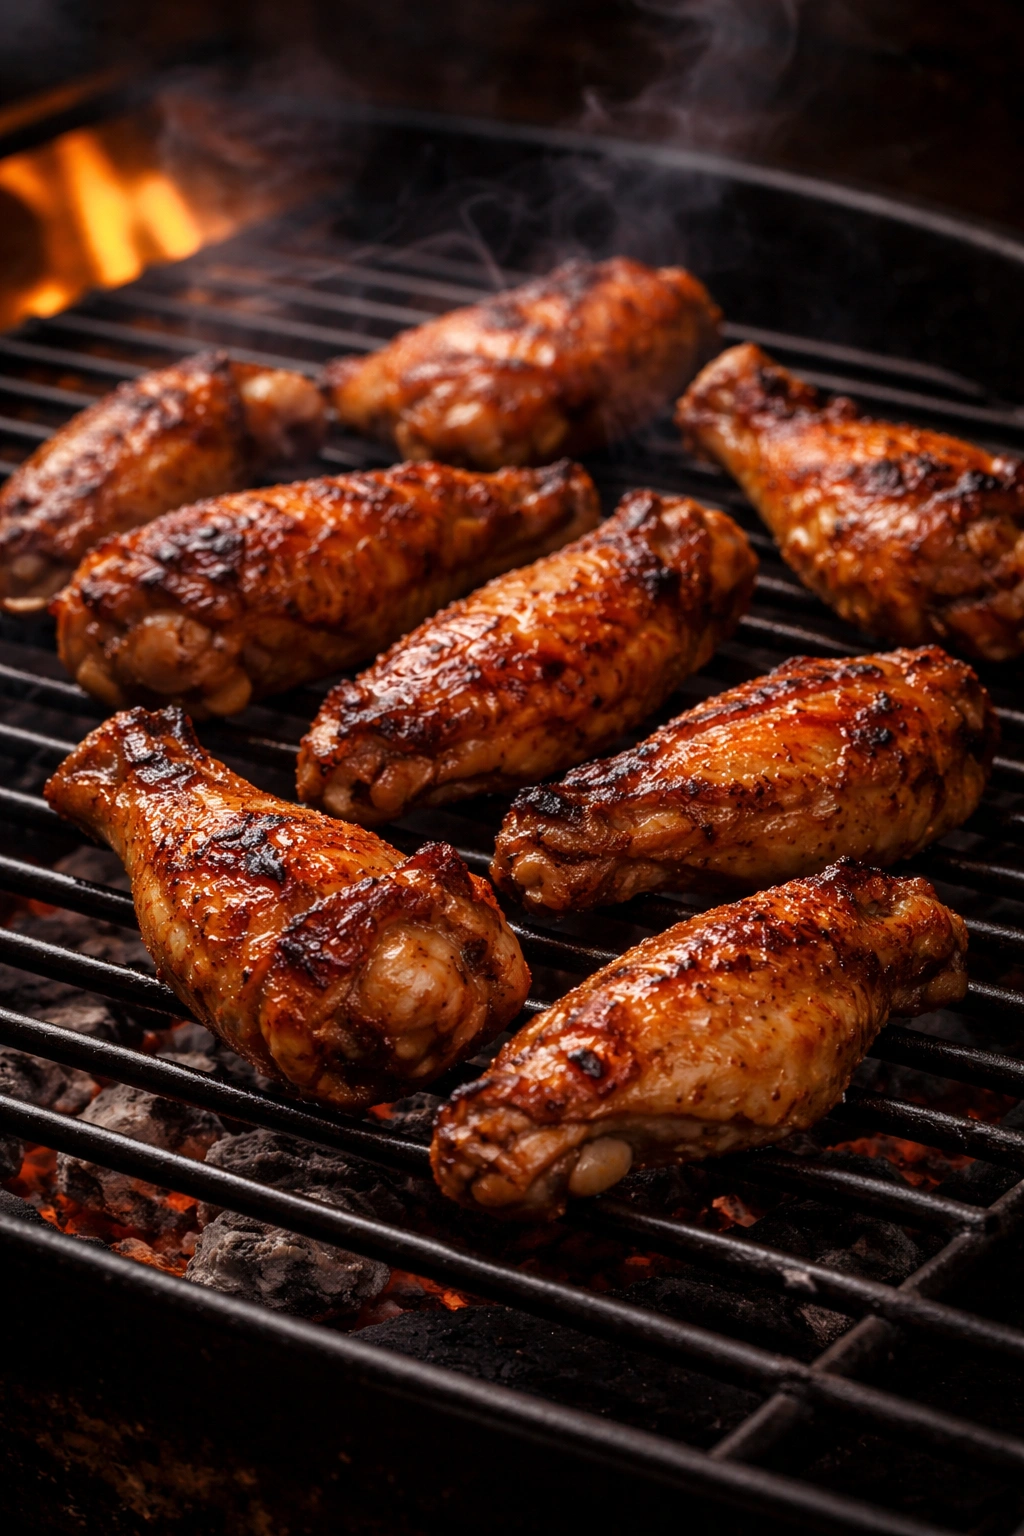
Heat your grill to 350°F for two-zone cooking, with one side hotter than the other — this could mean lighting one side of a gas grill on medium-high heat while leaving the other side off, or arranging charcoal on only half of your grill, or positioning the heat deflector plates appropriately on a pellet grill. Do not skip the two-zone setup — cooking over direct heat the entire time will burn the outside before the inside reaches safe temperature.
-
Once your grill reaches temperature and is stable, lightly oil the grates on the cooler side (indirect heat side) where the wings will start cooking. Use a folded paper towel dipped in olive oil, or hold it with tongs to avoid burns.
Begin Cooking with Indirect Heat:
-
Place the seasoned wings on the cooler side of the grill, skin side up if possible. Close the grill lid and allow them to cook undisturbed for the first 10 minutes, giving the seasonings time to set and the baking powder to do its work.
-
After 10 minutes, flip the wings so the skin is facing down, close the lid again, and continue cooking for another 10 minutes. The skin should look slightly golden but not blistered yet — if you see heavy charring or smell burning at this stage, your grill is too hot and you need to move the wings farther from the heat.
-
Flip the wings again, skin side up, and cook for another 10 to 15 minutes with the lid closed. At this point, they should register approximately 160°F on an instant-read thermometer inserted into the thickest part of a drumette without touching bone. The meat should be mostly cooked through and the skin should be turning a deep golden color.
Advertisements
Finish with Direct Heat for the Crispy Exterior:
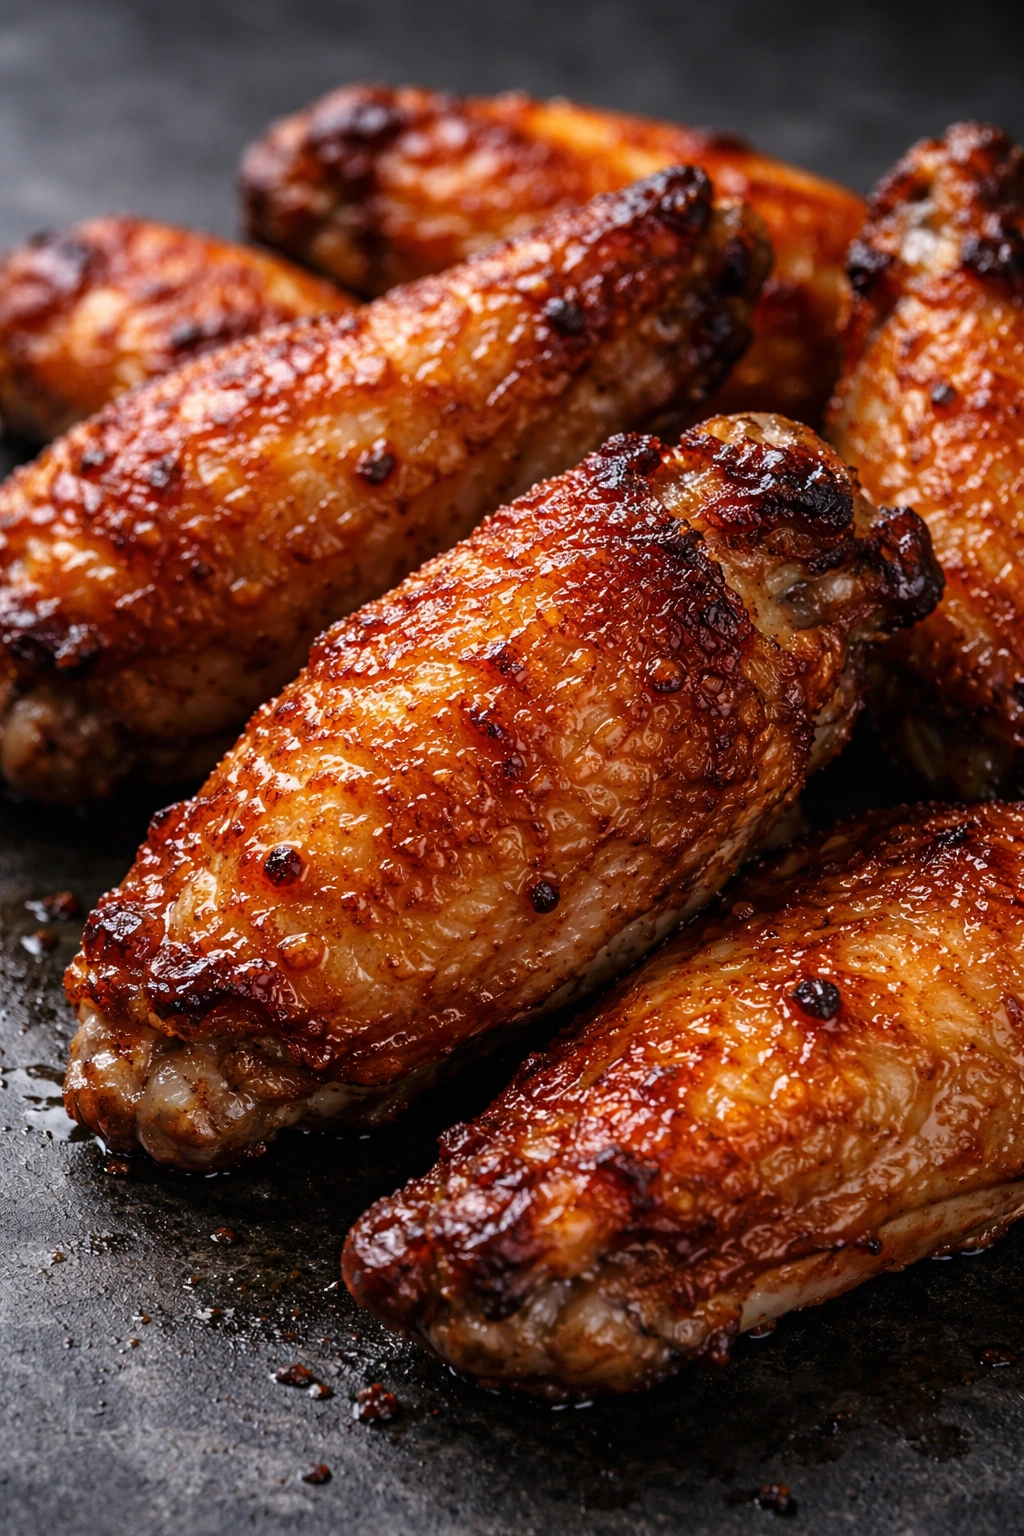
- Increase your grill temperature to 400-425°F (or move the wings directly over your heat source if you started them completely off to the side). Transfer the wings to the hotter side of the grill and cook them over direct heat for 2 to 5 minutes per side, flipping them every minute or two. Watch these closely — this is where wings go from perfectly crispy to overcooked in the span of about 90 seconds. You’re looking for light charring and blistering on the skin, with an internal temperature of 165°F minimum but ideally 175°F, which helps ensure all the interior fat is rendered for maximum juiciness.
Sauce and Rest:
-
Remove the wings from the grill and let them rest for 3 to 5 minutes before saucing or serving. This allows the juices to redistribute back into the meat, ensuring every bite stays tender rather than drying out.
-
If you’re adding sauce, toss the hot wings in your chosen sauce in a large bowl while they’re still warm. Alternatively, serve the sauce on the side for dipping so you can enjoy the crispy skin without softening it.
Expert Tips for Foolproof Results
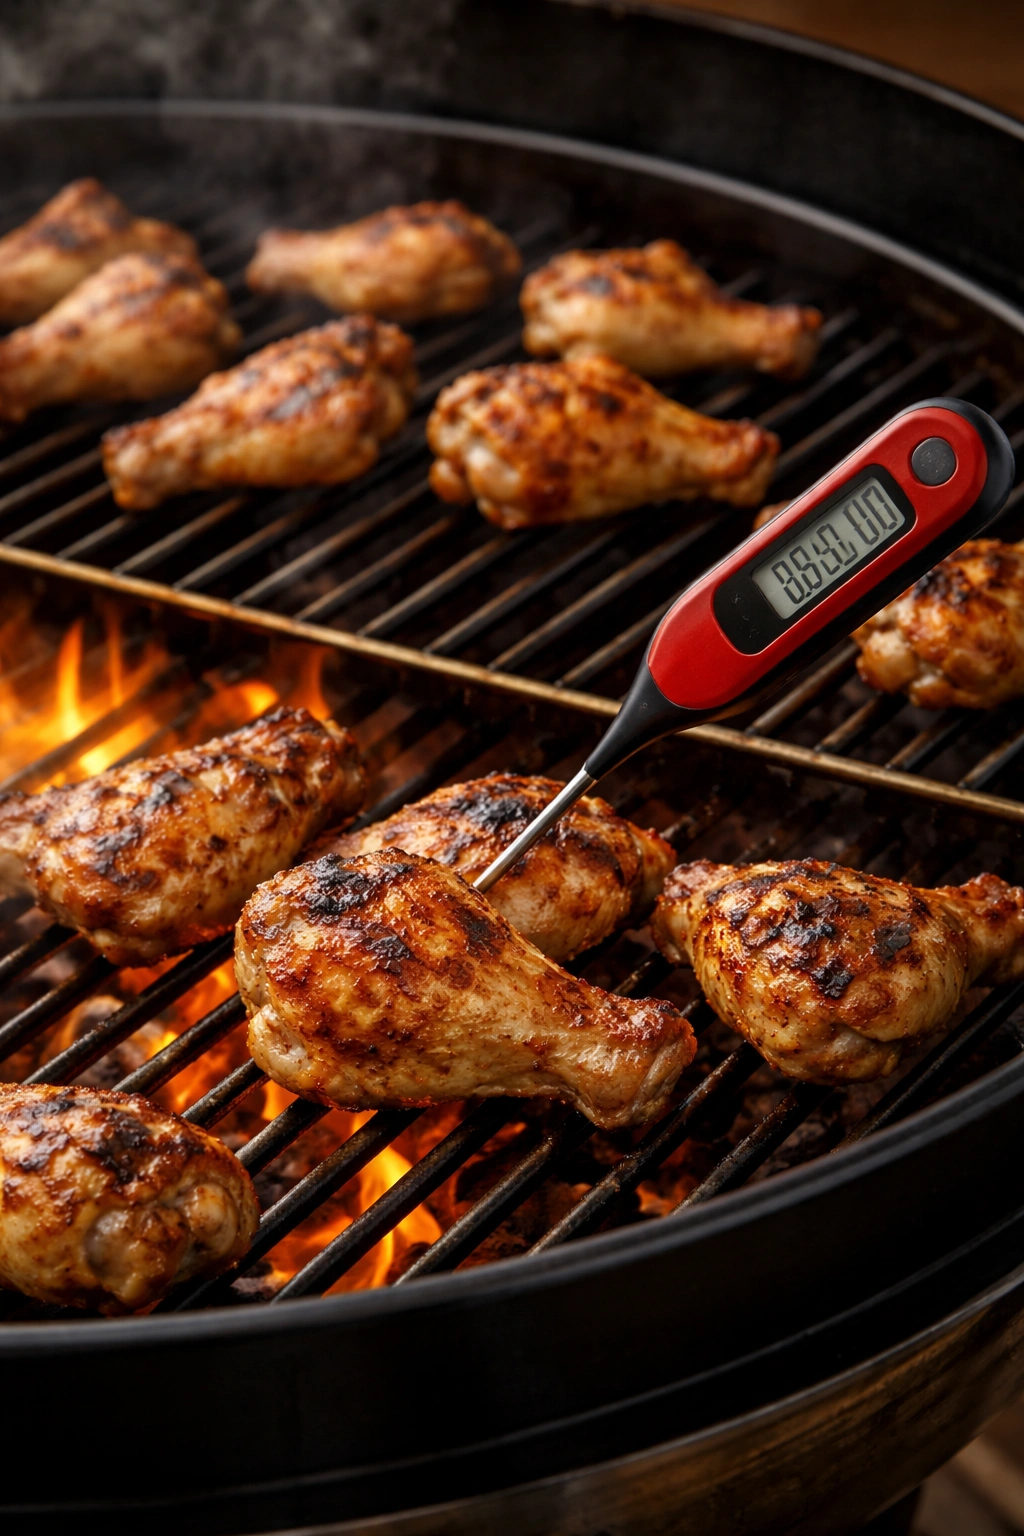
Use a reliable instant-read thermometer. Grilling can feel like guesswork without one. Chicken wings are safely cooked at 165°F, but pushing them to 170-180°F helps render more fat and produces juicier meat. The drumettes should reach this temperature in their thickest section without the thermometer touching bone, which would give a false reading.
Don’t crowd the grill. Leave at least an inch between wings so air circulates and they cook evenly rather than steaming. If you’re cooking for a large crowd and space is tight, cook in batches rather than piling everything on at once.
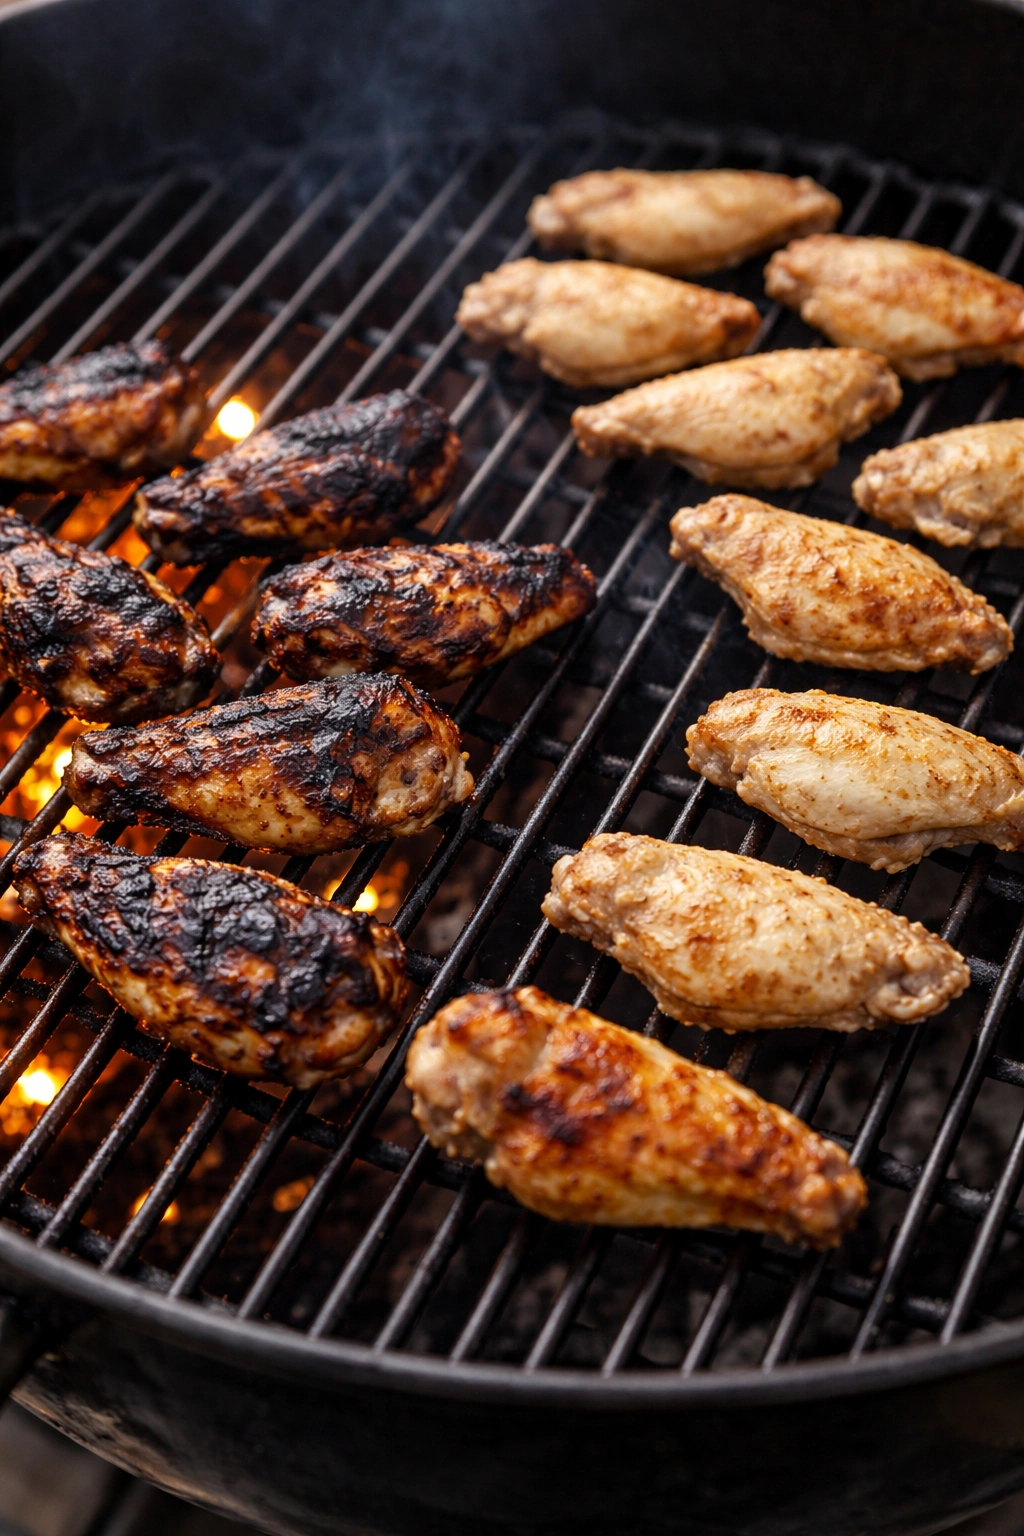
Flip consistently, especially over direct heat. During the final high-heat phase, flip the wings every 1-2 minutes to avoid flare-ups and ensure even charring without burning. This demands your attention for just a few minutes, but it’s the difference between golden wings and blackened ones.
Resist the urge to sauce too early. If you apply sauce during cooking, especially sugar-based sauces like BBQ or honey varieties, the sugar will burn before the wings finish cooking. Always sauce at the very end, right before serving, or let wings rest first and then toss them in room-temperature sauce if your sauce is relatively light.
Choose your wood wisely if you’re using a charcoal or pellet grill. Apple wood pairs beautifully with wings, offering smoke flavor that’s floral and slightly sweet. Hickory is classic and assertive. Oak is neutral and dependable. Mesquite can overwhelm delicate poultry. Avoid using wood that’s so wet it creates more steam than smoke.
Pat wings dry just before seasoning. The order matters — you want them dry for coating, but you don’t need to dry them hours in advance unless you’re doing the optional overnight refrigeration step. Drying them too far ahead can create a crusty surface that doesn’t accept seasoning evenly.
Common Mistakes That Ruin Your Wings
Skipping the two-zone setup. Cooking wings over direct heat for the entire time guarantees either burned skin or undercooked interiors. Low-and-slow cooking prevents crisping because the temperature never gets high enough to render fat effectively. Two-zone grilling solves both problems at once.
Overseasoning, especially with sugar. Brown sugar in small amounts helps with caramelization, but excess sugar burns over high heat and creates bitter, acrid flavors. Use a scant ½ teaspoon per pound of wings. If you want sweetness, add it through your final sauce instead.
Forgetting the moisture control step. Jumping straight from packaging to grill produces wings that are steamed rather than crispy. The baking powder step and dry-patting step aren’t optional — they’re fundamental to success.
Cooking at the wrong temperature. Below 350°F, wings take too long and dry out. Above 400°F for the initial phase, wings burn before cooking through. The two-phase approach (lower initial temp, then hot finish) balances crispiness with doneness.
Moving wings too frequently during indirect cooking. Resist the urge to flip constantly during the first phase. Once every 10 minutes is plenty. Constant flipping prevents the skin from making good contact with the heat source and extends cooking time unnecessarily.
Adding sauce before the wings reach final temperature. Saucing too early means the wings need additional cooking time, which dries them out or burns the sauce. Always reach target temperature, rest the wings, then sauce.
Using regular baking powder if the container doesn’t explicitly say “aluminum-free.” Aluminum-based baking powders can impart a faint metallic taste that some people notice and others don’t. It’s not a food safety issue, but aluminum-free varieties are inexpensive and guarantee clean flavor.
Flavor Variations and Sauce Options
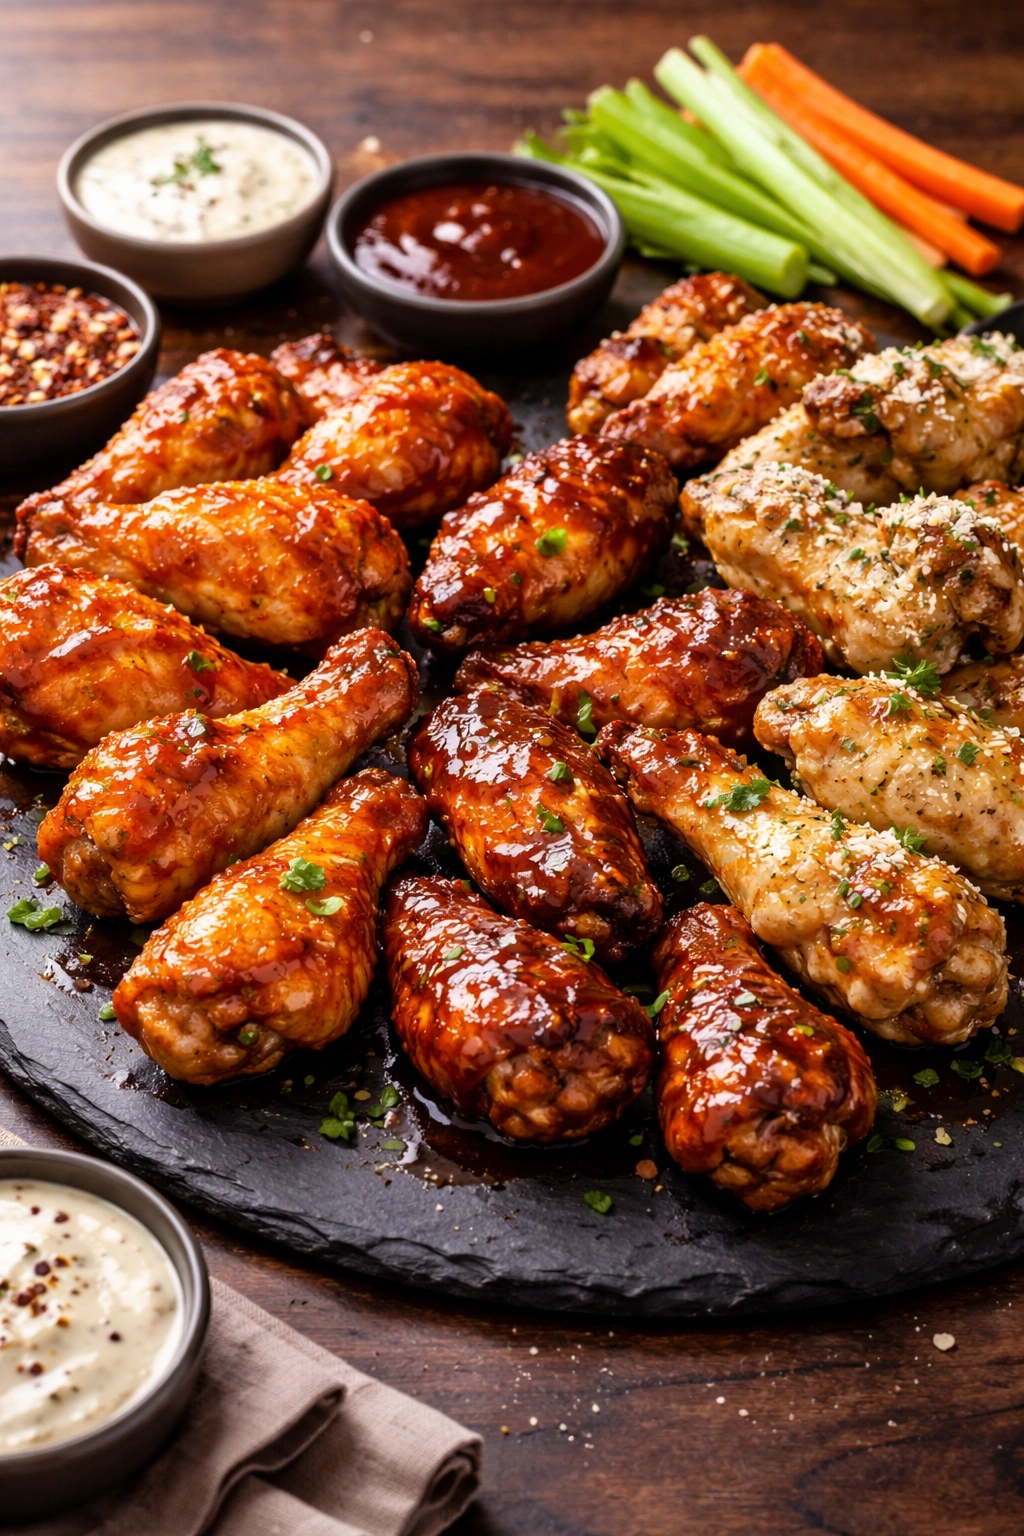
The beauty of this basic technique is its flexibility — the crispy wing is the canvas, and sauce is where your personality shines through.
Buffalo Wings remain the classic for good reason. Warm 1 cup of Frank’s RedHot Sauce with 6 tablespoons of unsalted butter over low heat until combined, whisking occasionally. Never let the sauce boil, or the butter will separate and the texture becomes greasy. Toss hot wings in the warm sauce and finish with a sprinkle of blue cheese crumbles if you like.
Honey BBQ variation delivers sweetness balanced with smoke. Combine ¾ cup of your favorite KC-style BBQ sauce with 3 tablespoons honey and 2 tablespoons butter, warming gently. The honey adds a glossy finish and caramel notes that complement the smoke flavor from the grill beautifully. This version pairs exceptionally well with crispy onion strings or a light dusting of smoked paprika on top.
Garlic Parmesan wings work best when you brush the hot wings with a mixture of melted butter and minced garlic (about 3 cloves per 4 tablespoons butter) immediately after they come off the grill, then finish with freshly grated Parmesan and cracked black pepper. The residual heat from the wings slightly toasts the cheese and releases the garlic aroma — it’s indulgent and sophisticated at the same time.
Spicy dry rub variation skips sauce entirely and focuses on building flavor into the base seasoning. Add more cayenne (up to 1 teaspoon per 3 pounds wings), include smoked chili powder, and consider adding a touch of dry mustard for complexity. Some people finish with a squeeze of fresh lime juice and fresh cilantro stirred together.
Asian-inspired glaze combines 3 tablespoons soy sauce, 2 tablespoons honey, 1 tablespoon rice vinegar, 1 teaspoon grated ginger, 1 minced garlic clove, and ½ teaspoon sesame oil. Toss hot wings in this mixture and finish with white sesame seeds and thinly sliced green onions.
The key with any sauce variation is making it separate from the cooking process itself — apply it after the wings reach final temperature and texture, not during cooking.
Make-Ahead and Storage Instructions
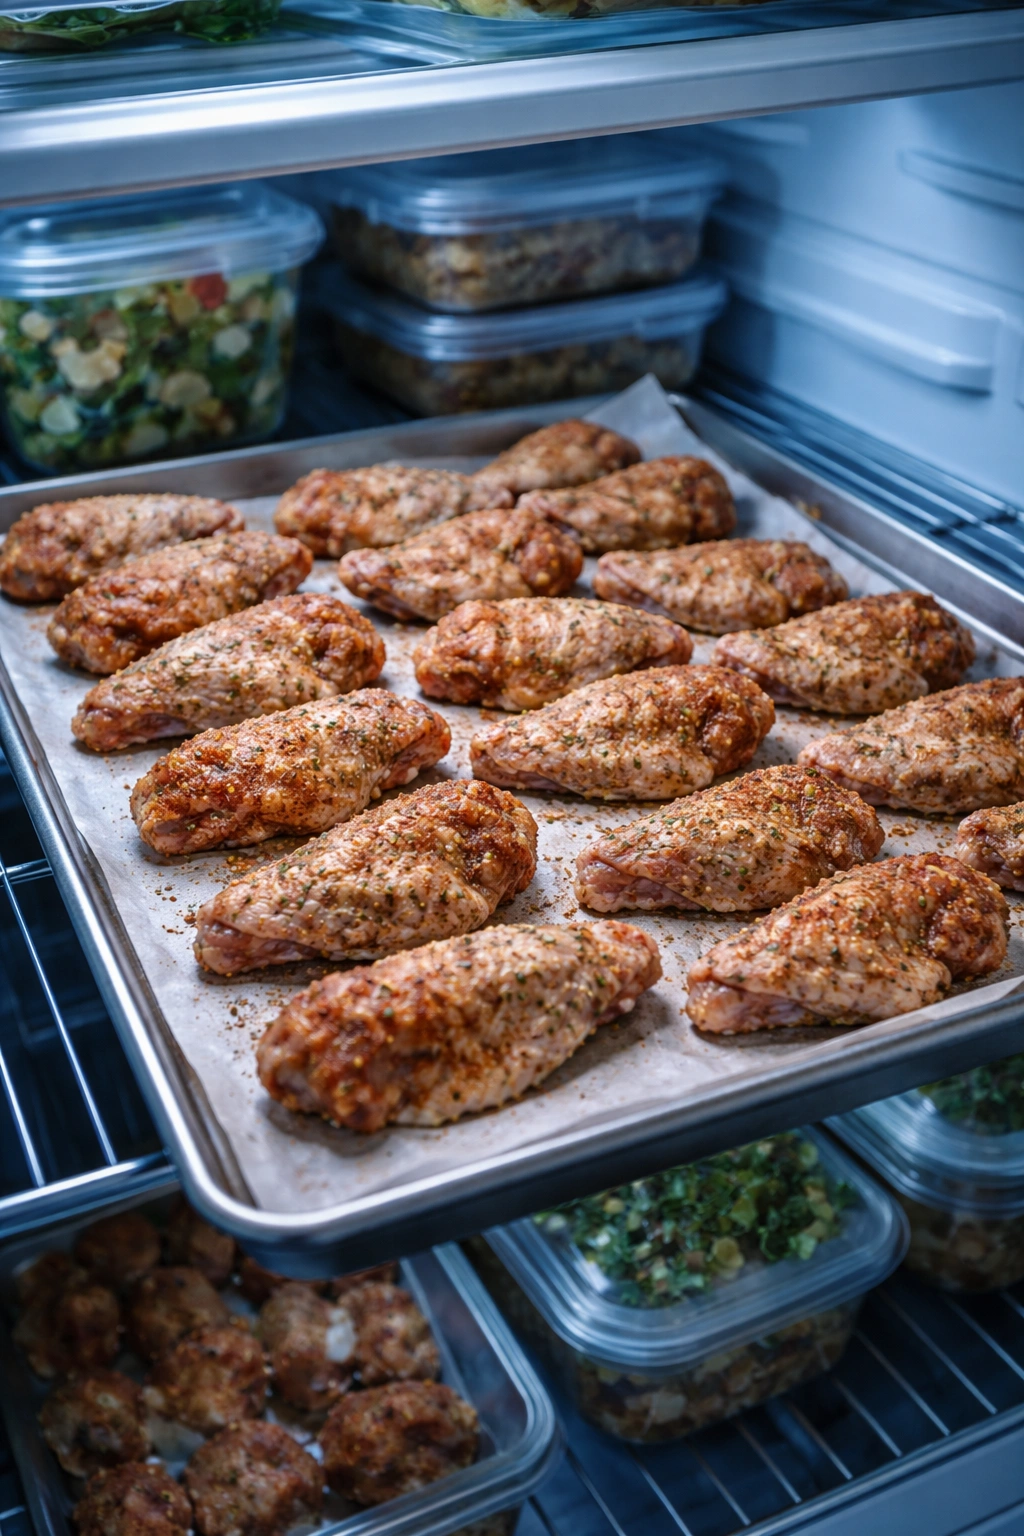
Preparing wings ahead of time saves you work on the day you’re grilling. You can season the wings with the baking powder mixture up to 24 hours in advance, then refrigerate them uncovered, skin side up on a sheet pan. The extended time allows the baking powder to dry the surface even more thoroughly, creating especially crispy results. Just allow the wings to come to room temperature for about 15 minutes before grilling — cold chicken requires longer cooking and may not crisp as effectively.
Storing leftover cooked wings requires an airtight container in the refrigerator, where they’ll keep for 3 to 4 days. The crispy skin will soften slightly as the meat releases moisture, but this is inevitable with refrigeration. They’re still delicious cold or at room temperature.
Reheating crispy wings demands a method that restores the crispiness. Your best option is an air fryer at 350°F for 6 to 8 minutes, which regenerates the skin’s crunch and warms the interior without drying it further. An oven at 375°F for 10-12 minutes works well too — arrange wings on a parchment-lined baking sheet so air circulates underneath. Avoid the microwave entirely, as it steams the wings and destroys the texture you worked to achieve.
Freezing wings for longer storage works beautifully. Let cooked wings cool completely, then layer them in an airtight container with parchment paper between layers to prevent sticking. They’ll keep for 2 to 3 months in the freezer. Thaw overnight in the refrigerator, then reheat using the air fryer method for best results.
Making wings partially ahead is another option. You can season the wings and cook them completely through the indirect heat phase (stopping when they reach 160°F), then refrigerate them for up to 8 hours. When you’re ready to serve, just finish them with 2-4 minutes over direct heat to crisp the skin and reach final temperature. This works brilliantly if you’re hosting and want to minimize last-minute grilling time.
Best Sides and Serving Suggestions
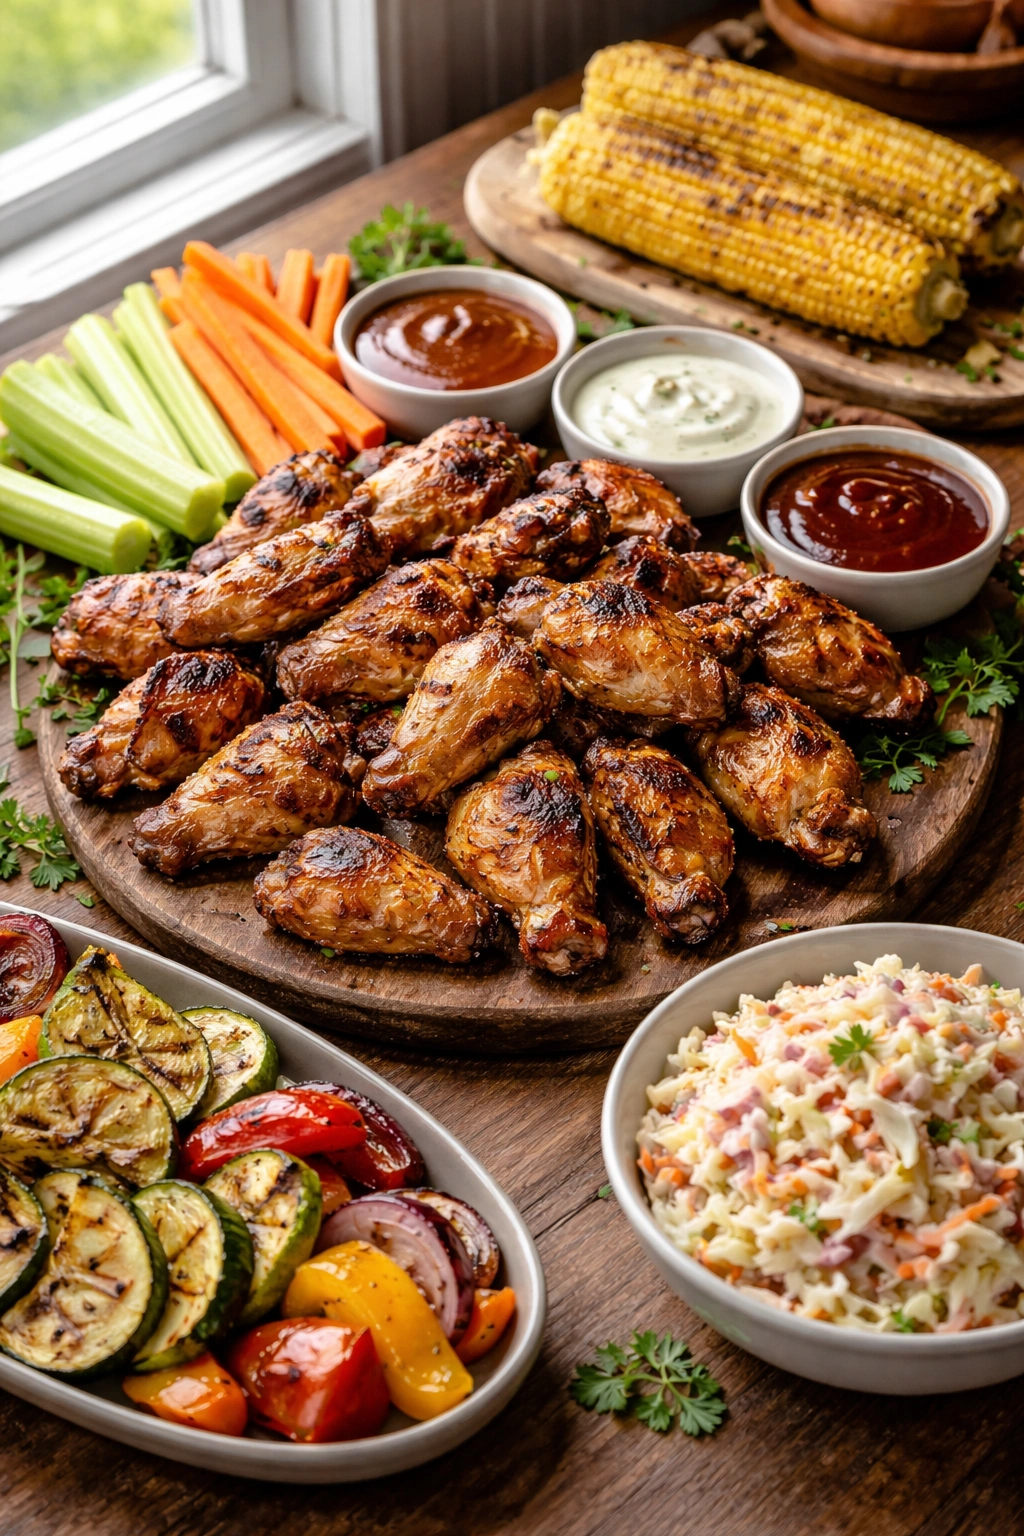
Crispy grilled wings deserve accompaniments that complement rather than compete. Fresh vegetables remain the traditional pairing — celery sticks and carrot sticks provide cooling crunch and textural contrast. The vegetables feel less like an afterthought and more like part of the experience when you arrange them thoughtfully on a platter rather than just dumping them in a corner.
Dipping sauces expand the wing experience. Beyond the obvious ranch and blue cheese, consider sour cream mixed with herbs for a lighter option, spicy mayo for those who want heat without overwhelming sauce, or a Greek yogurt-based sauce for anyone watching calories. Having 2-3 sauce options on the table ensures everyone finds something they love.
Sides that work beautifully with grilled wings include grilled corn with herb butter, coleslaw with a tangy dressing that cuts through the richness, or simple roasted potatoes. If you’re hosting and want to keep everything grilled, add some halved zucchini and asparagus spears seasoned simply with salt and pepper — they take about 15 minutes over moderate indirect heat.
Serving in a crowd is easier when you think in terms of a platter rather than individual plates. Arrange hot wings in the center, surround them with vegetables, and station sauce bowls at either end. Provide small plates and plenty of napkins — finger food by definition gets messy, and that’s part of the charm.
Beverage pairings matter more than you might think. Cold beer is the traditional choice and works perfectly because carbonation and bitterness cut through rich, fatty wing skin. Cold lemonade or iced tea offer refreshing contrast. If you’re serving sauce with significant heat, have cold beverages prominently available for those who want relief.
Timing your service ensures wings taste their best. They’re genuinely spectacular eaten within 5-10 minutes of coming off the grill, when the skin is still hot and supremely crispy. This isn’t to say they’re inedible after that — they stay good at room temperature for an hour or so — but there’s real magic in that first window.
Final Thoughts
Getting crispy, juicy grilled chicken wings into your regular rotation is genuinely one of the easiest ways to elevate your entertaining or weeknight dinner game. The technique isn’t intimidating once you understand that dry wings plus baking powder plus two-zone cooking equals success every single time.
The beauty of this approach is its reliability. You’re not hoping the wings turn out well or counting on luck — you’re following a repeatable process that works. After you nail the basic version, you have a foundation solid enough to experiment with different seasonings, sauces, and serving styles.
Start with this foolproof method, make it once or twice, and you’ll develop the intuition to adjust timing and temperature based on your specific grill’s personality. After that, these wings become the thing people ask you to bring to gatherings, the meal you make on weeknights when you want restaurant-quality food without restaurant-level effort, and proof that the best techniques are often simpler than you’d expect.