There’s a particular disappointment that comes with biting into a muffin only to find it dry, crumbly, and disappointing — like biting into a delicious memory of what the muffin could have been. The worst part? You made it yourself, and you’re not quite sure what went wrong. The thing is, making moist muffins isn’t actually complicated, but it does require understanding a few specific techniques and ingredient choices that most recipes gloss over. Once you learn what actually keeps muffins tender and moist all the way to the very last bite, you’ll never serve up a disappointing muffin again.
The difference between a dry, forgettable muffin and one that stays moist for days comes down to a handful of deliberate choices: which fat you use, how you handle the batter, what type of liquid you incorporate, and understanding the actual science of how muffins firm up as they cool. This isn’t about adding extra sugar or dumping in more liquid — that’s how you end up with dense, sunken muffins that are moist in all the wrong ways. Instead, it’s about making smart, informed decisions at every step of the process, from choosing your ingredients to storing the finished muffins properly.
Whether you’re a baker who’s been struggling with the texture of your homemade muffins or you’re just starting out and want to get it right from the beginning, this guide will walk you through exactly what makes muffins stay moist, tender, and absolutely delicious. You’ll learn the specific ingredients that make the difference, the mixing technique that prevents them from becoming tough, how to know when they’re done baking without overbaking them, and how to keep them soft even days after they come out of the oven.
The Science Behind Moist Muffins and Why Some Dry Out
Understanding why muffins dry out is the foundation for preventing it from happening. When you bake a muffin, the heat evaporates moisture from the crumb throughout the baking process and even after the muffin cools. The more moisture that evaporates, the drier the final muffin becomes. But moisture loss isn’t the only factor — the structure of the crumb also matters enormously.
Muffins are quick breads, which means they rely on chemical leavening agents (baking powder and baking soda) rather than yeast for their rise. This gives them their characteristic fine, tender crumb structure if baked correctly. The challenge is that the same factors that create that tender crumb can also make muffins prone to drying out, because tender crumbs have less structural integrity to hold onto moisture.
Additionally, many muffin batters are simply too lean — they don’t contain enough fat relative to the dry ingredients. Fat is what keeps baked goods moist and tender. It coats the flour particles and creates a barrier that slows moisture loss. Without enough fat, the muffin can only hold onto moisture for a short time after baking.
Overmixing the batter is another silent killer. When you overwork the dough, you develop the gluten network too much, which creates a tough, dense crumb that doesn’t hold moisture as effectively as a tender, properly developed crumb does. This is one of the most common and easily preventable mistakes in muffin baking.
The type of liquid you use also plays a role. Water-based liquids hydrate the flour evenly and create structure, but they evaporate more readily than liquids with fat or acid. This is why buttermilk, yogurt, and sour cream are so effective in muffin recipes — they add tenderness, moisture retention, and a subtle flavor depth that plain milk simply cannot match.
Finally, the way muffins cool matters. If you leave muffins in the hot pan too long after baking, they continue to dry out from residual heat. But if you move them to a cooling rack too quickly, they’re fragile and can break apart. Getting this timing right helps preserve the moisture that remains in the muffin.
Choosing the Right Flour and Leavening Agents for Tender Results
The flour you choose has a significant impact on how moist and tender your finished muffins will be. All-purpose flour is the standard choice for most muffin recipes, and for good reason — it has a moderate protein content (around 10-12%) that creates just enough structure without making the muffins tough. Bread flour, with its higher protein content, will create denser, tougher muffins that dry out more quickly. Cake flour, with its lower protein content, creates an exceptionally tender crumb, but it can sometimes result in muffins that are almost too delicate.
Stick with all-purpose flour as your default, and if you want an extra-tender result, you can replace 1-2 tablespoons of the all-purpose flour with cornstarch per cup of flour used. This slightly lowers the protein content and creates an even more delicate, moist crumb.
The leavening agents you use — baking powder and baking soda — also affect texture. Too little leavening and your muffins will be dense and heavy. Too much and they’ll rise rapidly, creating large air pockets that dry out quickly. The ratio is important: typically 1½ teaspoons of baking powder per cup of flour, with baking soda added only if your recipe includes an acidic ingredient like buttermilk or yogurt (roughly ¼ teaspoon per cup of flour, adjusted based on acid content).
Using fresh baking powder and baking soda matters more than people realize. Over time, these leavening agents lose their potency. If you’re not sure how old yours are, it’s worth replacing them — old leavening agents won’t create the proper rise, which means less volume and a denser crumb that dries out faster.
Why Buttermilk and Sour Cream Are Game-Changers for Moisture
If you want moist muffins, buttermilk or sour cream should be your default liquid choice. These ingredients are transformative because they do three things simultaneously: they add moisture, they create a more tender crumb through the reaction between the acid and the baking soda, and they add richness that helps the muffin retain moisture over time.
Buttermilk is traditionally the byproduct of making butter, with a tangy flavor and a thin consistency. It’s acidic, which means it reacts with baking soda to create additional lift and a more tender crumb than you’d get with regular milk and baking powder alone. The acid also breaks down the gluten slightly, creating softness without requiring you to undermix the batter.
Sour cream is thicker than buttermilk and has a higher fat content, which makes it exceptional for moisture retention. Muffins made with sour cream tend to stay moist longer because the fat in the sour cream slows moisture evaporation. It also creates a slightly denser, more luxurious crumb that many people prefer.
Greek yogurt is another excellent option if you don’t have buttermilk or sour cream on hand. It’s thicker than regular yogurt and has a higher protein content, which creates structure. Use it in a 1:1 ratio with buttermilk, though you may need to thin it slightly with water depending on the consistency of your batter.
If you only have regular milk on hand, you can make a substitute by combining milk with lemon juice or white vinegar (1 tablespoon of acid per cup of milk, let it sit for 5 minutes). This creates an approximation of buttermilk that will work in a pinch, though it won’t be quite as effective as actual buttermilk or sour cream.
The Overmixing Mistake That Ruins Texture and Dries Out Muffins
This single technique — mixing your muffin batter correctly — might be the most important factor in creating moist, tender muffins. Most home bakers overmix their muffin batter, and this is probably the #1 reason their muffins come out tough and dense.
Here’s what happens when you overmix: You’re developing the gluten network in the flour, which creates strength and elasticity. That’s exactly what you want in bread, but in muffins, a well-developed gluten network creates a tough, chewy crumb that doesn’t hold moisture well. Additionally, when gluten develops too much, it captures air bubbles that are too small and uniform, creating a dense, tight crumb rather than the open, tender structure that characterizes a great muffin.
The solution is to mix your dry ingredients together in one bowl, mix your wet ingredients together in another bowl, then combine them with just a few strokes of the spatula or wooden spoon. You’re aiming for a batter that looks a bit lumpy and rough — there should be visible streaks of flour throughout. You’re not looking for a smooth, homogeneous batter.
Here’s why this works: the streaks of flour will hydrate as the batter sits in the muffin cups during the few minutes before baking, and they’ll fully combine during the baking process. By not fully mixing the batter, you’re preventing gluten development, which keeps the muffins tender. You’re also creating an uneven hydration that results in a more interesting, open crumb structure.
A common concern is that lumpy batter will result in lumpy muffins, but that’s not how it works. Those flour streaks disappear during baking. What matters is that you’re not overworking the batter, which toughens it.
Using Oil Instead of Butter for Superior Moisture Retention
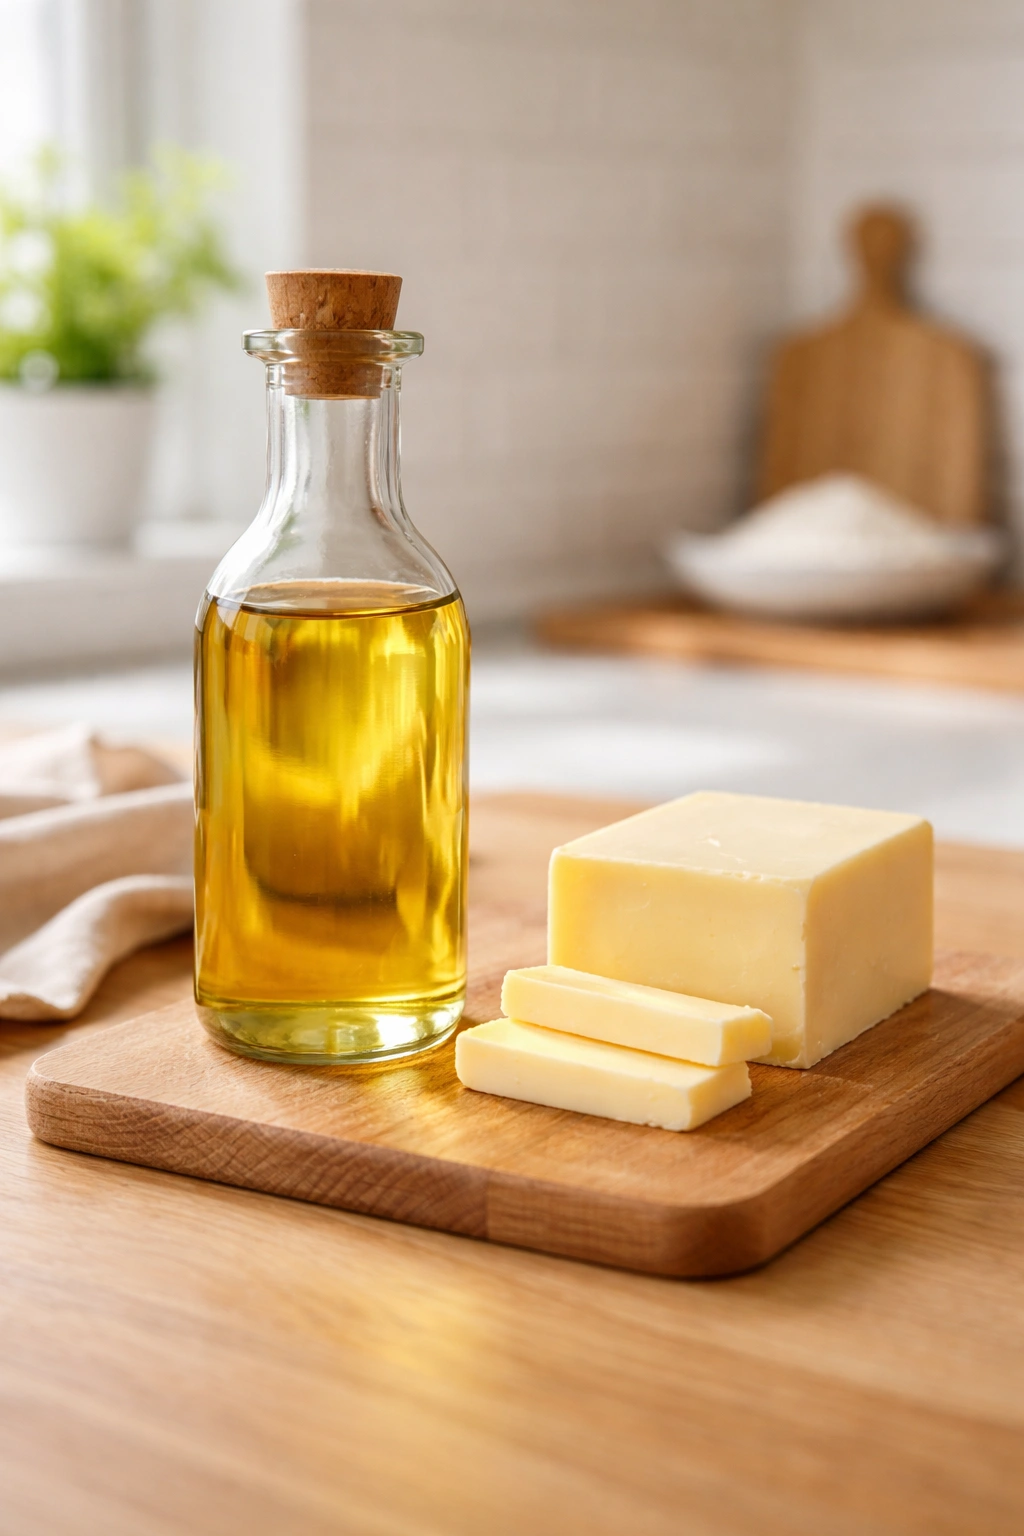
One of the most effective techniques for creating moist muffins is using oil as your primary fat instead of butter. This might sound like a small change, but it makes a dramatic difference in how long your muffins stay tender and moist.
Butter is about 80% fat and 15-20% water. When butter bakes into a muffin, that water content evaporates along with the other moisture in the batter. Oil, on the other hand, is 100% fat with no water. Oil doesn’t evaporate the way water does, which means it stays in the muffin crumb, keeping it moist long after the muffin is done baking.
Oil also distributes more evenly throughout the batter than butter, coating flour particles more uniformly. This creates a more consistent, tender crumb structure. Butter, especially if not melted properly, can create tiny pockets and uneven distribution, leading to inconsistent texture.
Additionally, oil creates a slightly more tender crumb without the greasiness you might expect. The key is using an oil with a neutral flavor — vegetable oil, canola oil, or light olive oil all work well. Avoid strong-flavored oils like extra-virgin olive oil or sesame oil, which can overpower delicate muffin flavors.
The ratio is typically 1 part oil to 1½ parts melted butter by volume (so if your recipe calls for ½ cup of butter, use ⅓ cup of oil). Some bakers prefer to use all oil, which is perfectly fine, though you might want to add back a tablespoon or two of butter for flavor if you do — oil is moisture-boosting but slightly neutral-flavored.
Room Temperature Ingredients and Why They Actually Matter
Using room temperature ingredients might seem like a minor detail, but it genuinely affects how well your batter combines and how the muffins bake. Room temperature eggs, buttermilk, and other wet ingredients blend more smoothly with the dry ingredients, creating a more uniform, emulsified batter even with minimal mixing.
When cold eggs are added to room temperature batter, they can create little pockets of cold batter that don’t fully incorporate. These pockets can bake into small, dense areas in the finished muffin. Room temperature eggs, on the other hand, incorporate smoothly with just a few gentle folds.
Cold buttermilk has a thicker consistency and doesn’t flow through the batter as evenly as room temperature buttermilk. This means some areas of the batter get more liquid hydration than others, resulting in an uneven crumb structure.
Getting ingredients to room temperature doesn’t require much planning. Remove eggs and buttermilk from the fridge 20-30 minutes before you plan to bake. If you forget, you can set the bowl of buttermilk in a larger bowl of warm water for a few minutes to bring it to room temperature quickly.
The dry ingredients don’t need to be room temperature, but they shouldn’t be cold either. If you’ve stored your flour in the fridge or freezer (which some people do during very hot weather), let it come to room temperature before using it.
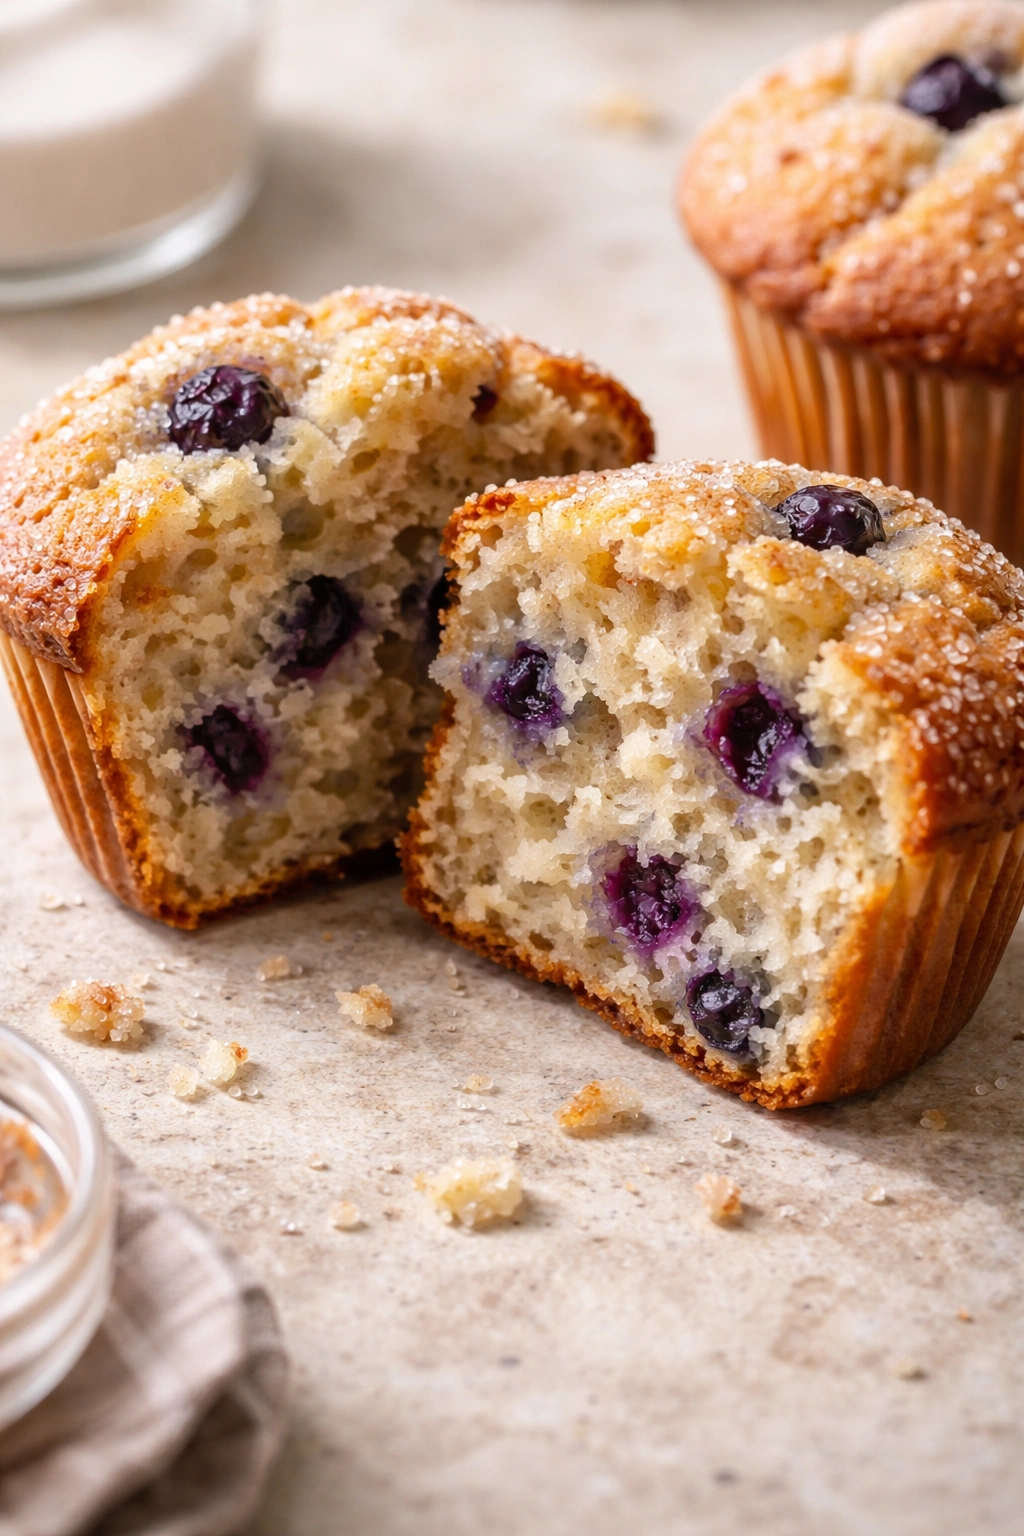
Classic Blueberry Muffins for Maximum Moisture
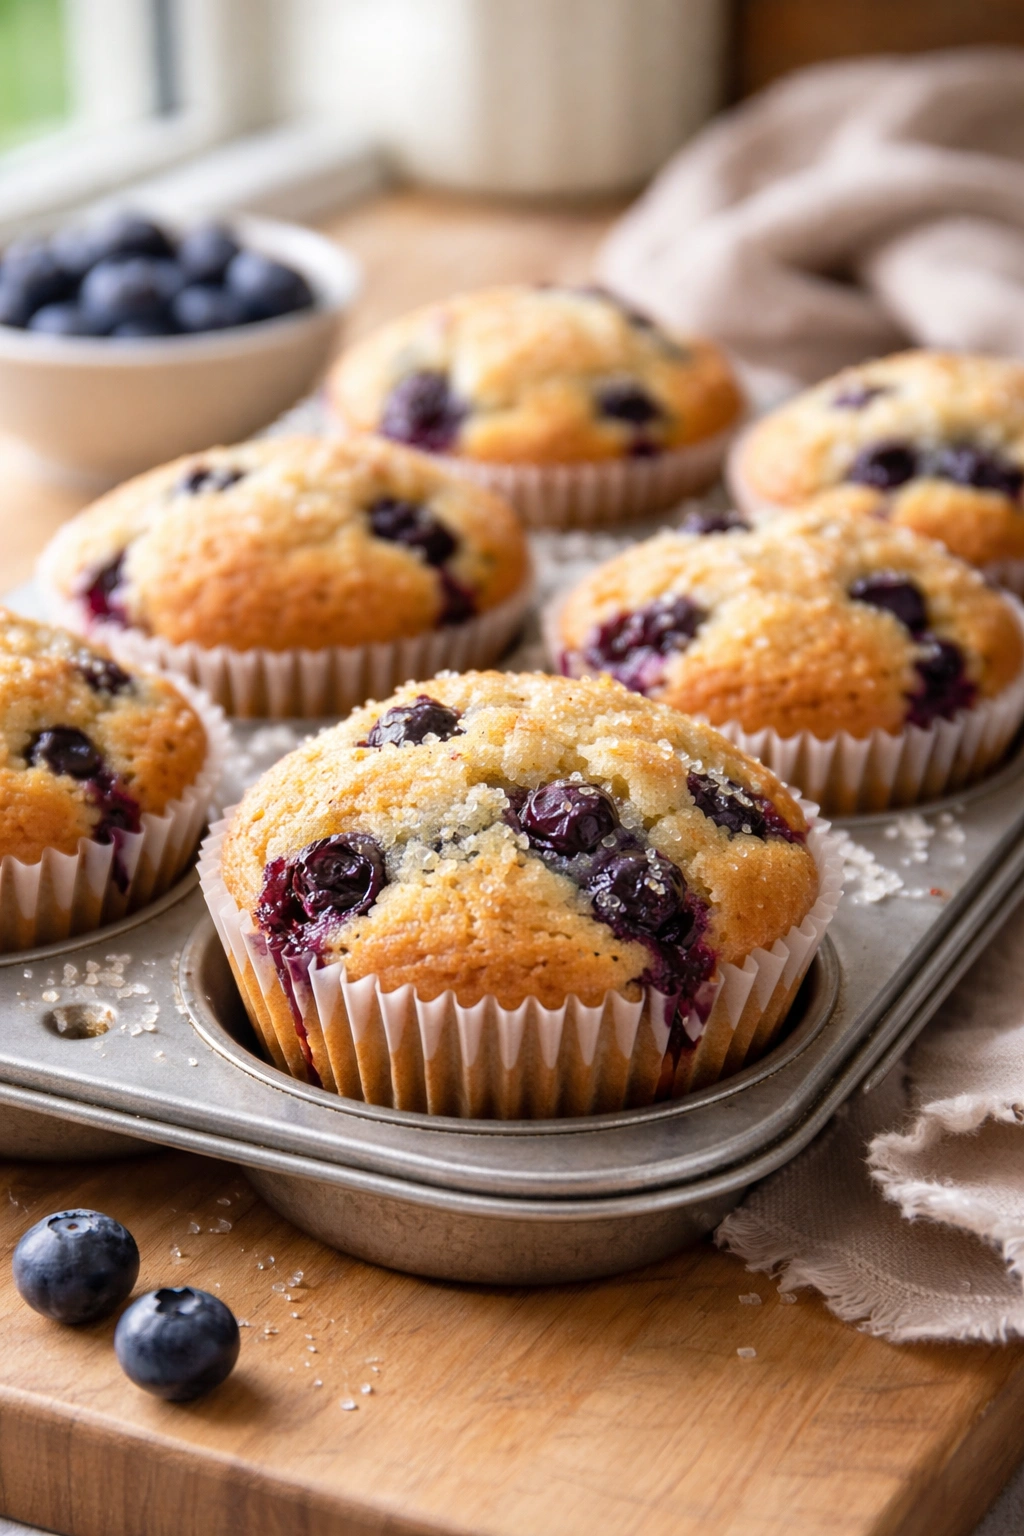
This recipe produces muffins with an incredibly tender crumb that stays moist for three full days. The combination of oil, sour cream, and buttermilk creates a trifecta of moisture retention, while the minimal mixing and proper mixing technique ensure the crumb stays tender rather than tough.
Yield: Makes 12 standard muffins | Makes 18 mini muffins
Prep Time: 15 minutes
Cook Time: 20-25 minutes (standard) or 12-15 minutes (mini)
Total Time: 35-40 minutes (not including cooling)
Difficulty: Beginner — This recipe is straightforward even if you’ve never made muffins before. There’s no special equipment required beyond basic mixing bowls and a muffin tin.
For the Muffins:
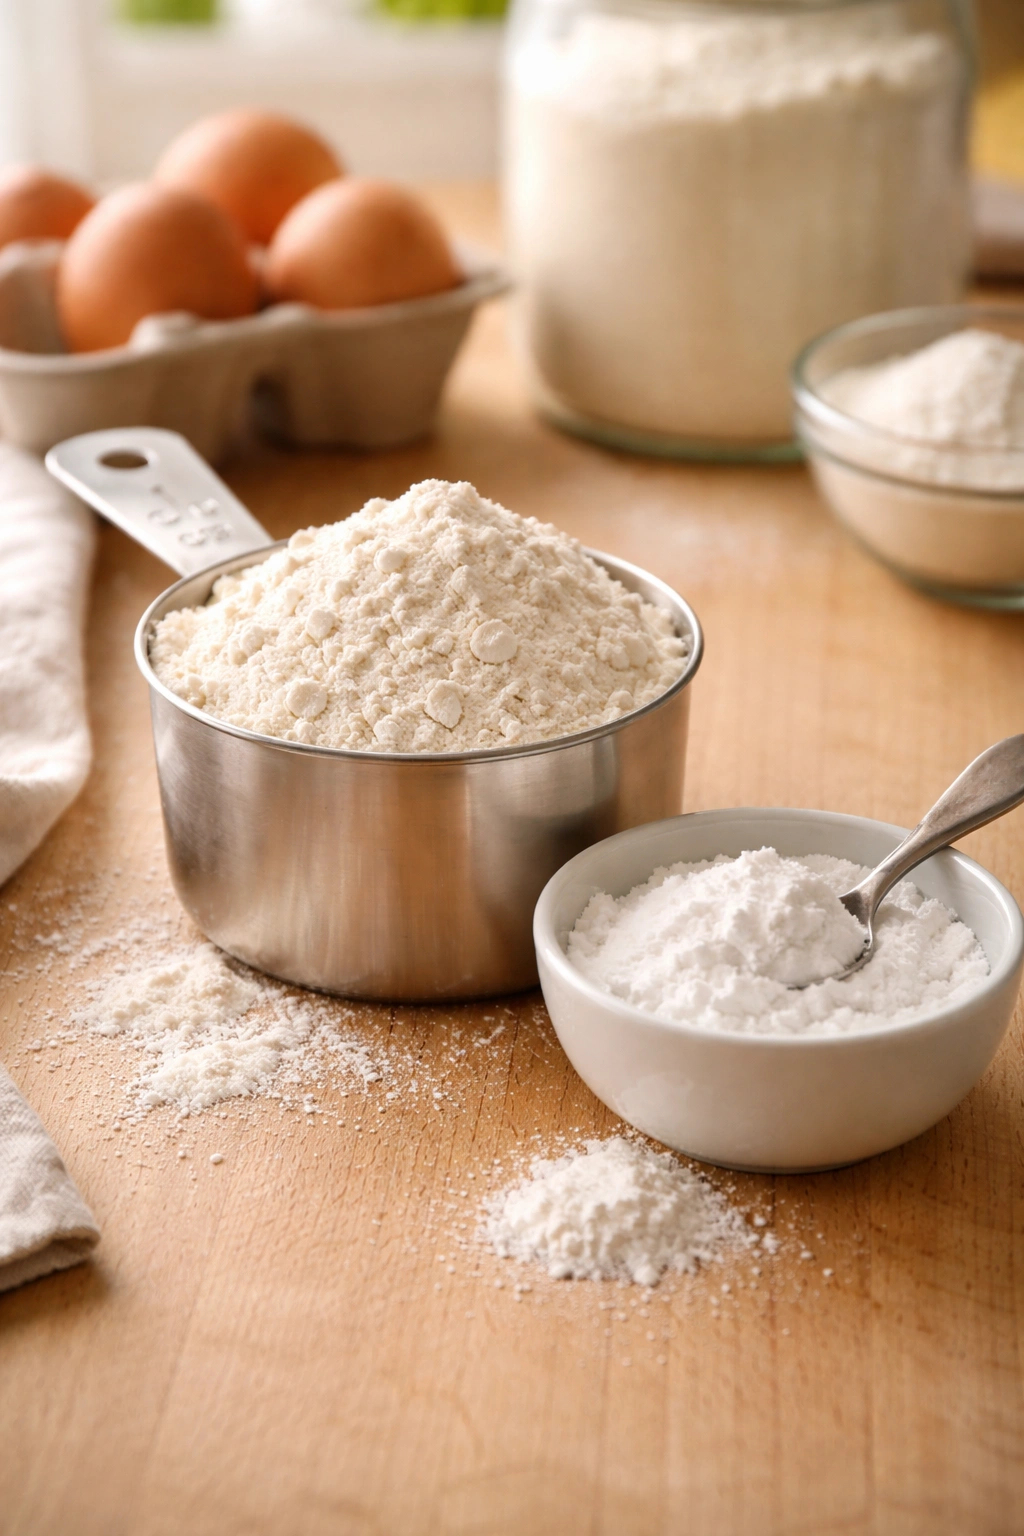
- 2 cups all-purpose flour
- 1½ teaspoons baking powder
- ½ teaspoon baking soda
- ½ teaspoon fine sea salt
- ⅓ cup neutral oil (vegetable, canola, or light olive oil)
- 2 tablespoons unsalted butter, melted
- ¾ cup granulated sugar
- ¼ cup packed light brown sugar
- 2 large eggs, room temperature
- 1 teaspoon pure vanilla extract
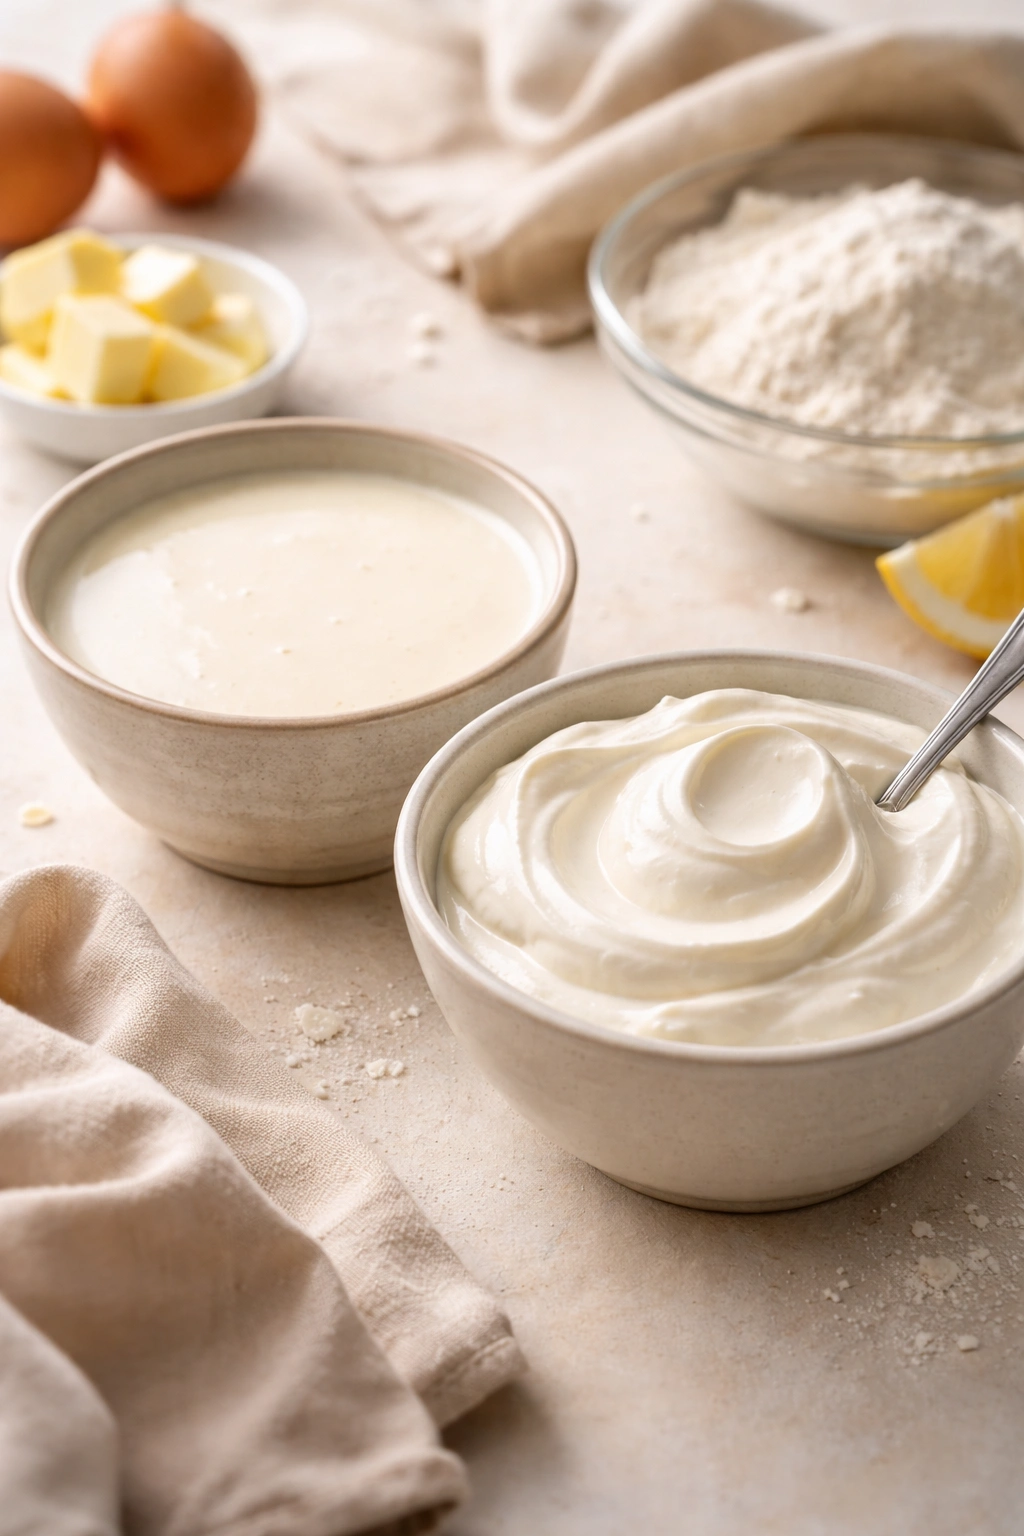
- ½ cup sour cream, room temperature
- ½ cup buttermilk, room temperature
- 1½ cups fresh or frozen blueberries (do not thaw if frozen)
- 1 tablespoon all-purpose flour (for tossing with blueberries)
For the Topping (Optional but Recommended):
- 3 tablespoons coarse sanding sugar (or regular sugar)
- ½ teaspoon ground cinnamon
- 1 tablespoon unsalted butter, melted
Prepare the Pan and Preheat:
-
Preheat the oven to 375°F (190°C) and position the rack in the center of the oven.
-
Insert paper liners into a standard 12-cup muffin tin, or grease the cups thoroughly with softened butter or non-stick spray. (Paper liners are optional but recommended — they make removal easier and keep the bottoms from browning too quickly.) If making mini muffins, prepare an 18-cup mini muffin tin the same way.
Mix the Dry Ingredients:
- In a medium bowl, whisk together the flour, baking powder, baking soda, and salt until fully combined. Set aside.
Prepare the Wet Ingredients:
-
In a large bowl, whisk together the oil, melted butter, granulated sugar, and brown sugar until the mixture is combined and the sugar shows no visible clumps — about 1 minute. The mixture will look somewhat separated, which is normal.
-
Add the eggs one at a time to the oil mixture, whisking vigorously after each addition for about 20 seconds. After the second egg, the mixture should look more emulsified and creamy.
-
Whisk in the vanilla extract until combined.
-
Add the sour cream to the egg mixture and whisk until mostly smooth — there may be a few small lumps of sour cream, and that’s completely fine.
Advertisements -
Pour in the buttermilk and whisk just until the wet mixture is combined. Some tiny lumps of sour cream or streaks of buttermilk are absolutely fine at this stage.
Combine and Fill:
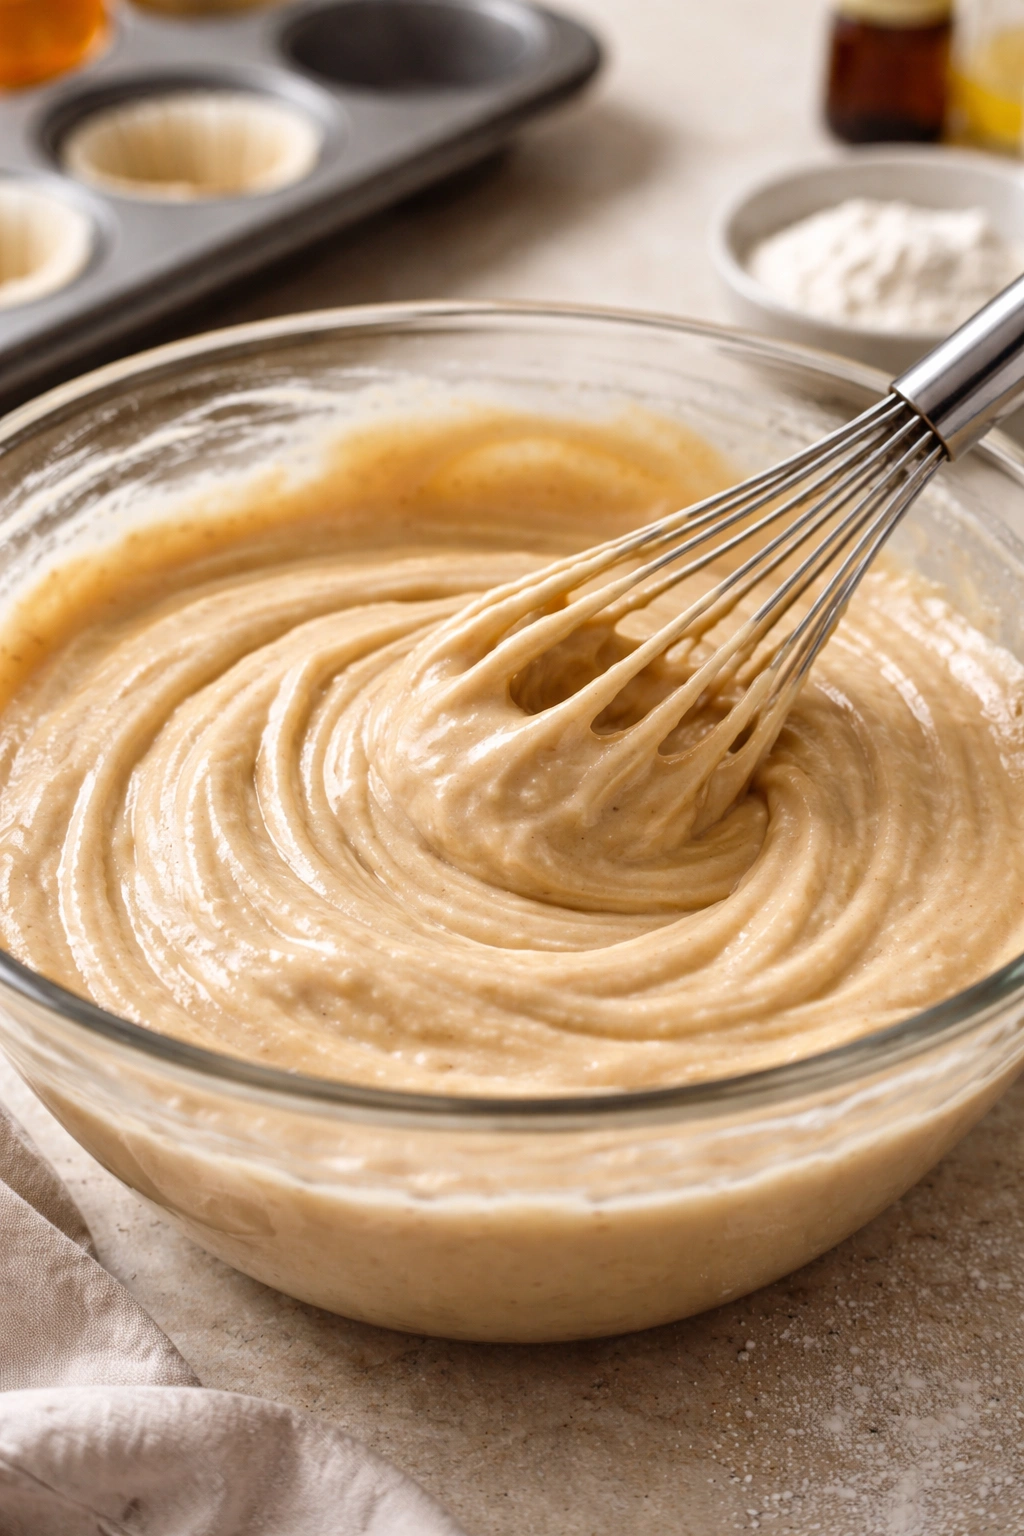
-
Pour the wet ingredients into the bowl with the dry ingredients. Using a spatula or wooden spoon, gently fold the wet and dry ingredients together using as few strokes as possible — literally 8-10 full strokes of the spatula. Stop as soon as you no longer see streaks of flour. Your batter will look lumpy, slightly rough, and decidedly un-smooth. This is exactly what you want. Do not stir it further or try to make it smooth. The lumps will disappear during baking.
-
In a small bowl, toss the blueberries with 1 tablespoon of flour — this helps them stay suspended in the batter rather than sinking to the bottom. Fold the floured blueberries into the batter using just 2-3 gentle folds. The batter may be streaky with flour at this point, which is absolutely fine.
-
Divide the batter evenly among the prepared muffin cups, filling each cup about ¾ full (slightly more full than a scoop would typically fill).
Add the Topping (Optional):
- If using the cinnamon-sugar topping: In a small bowl, stir together the coarse sugar and cinnamon. Brush the top of each muffin very lightly with melted butter (about ¼ teaspoon per muffin), then sprinkle about ½ teaspoon of the cinnamon-sugar mixture on top of each. This creates a crispy, slightly spiced topping that adds texture and appeal.
Bake:
-
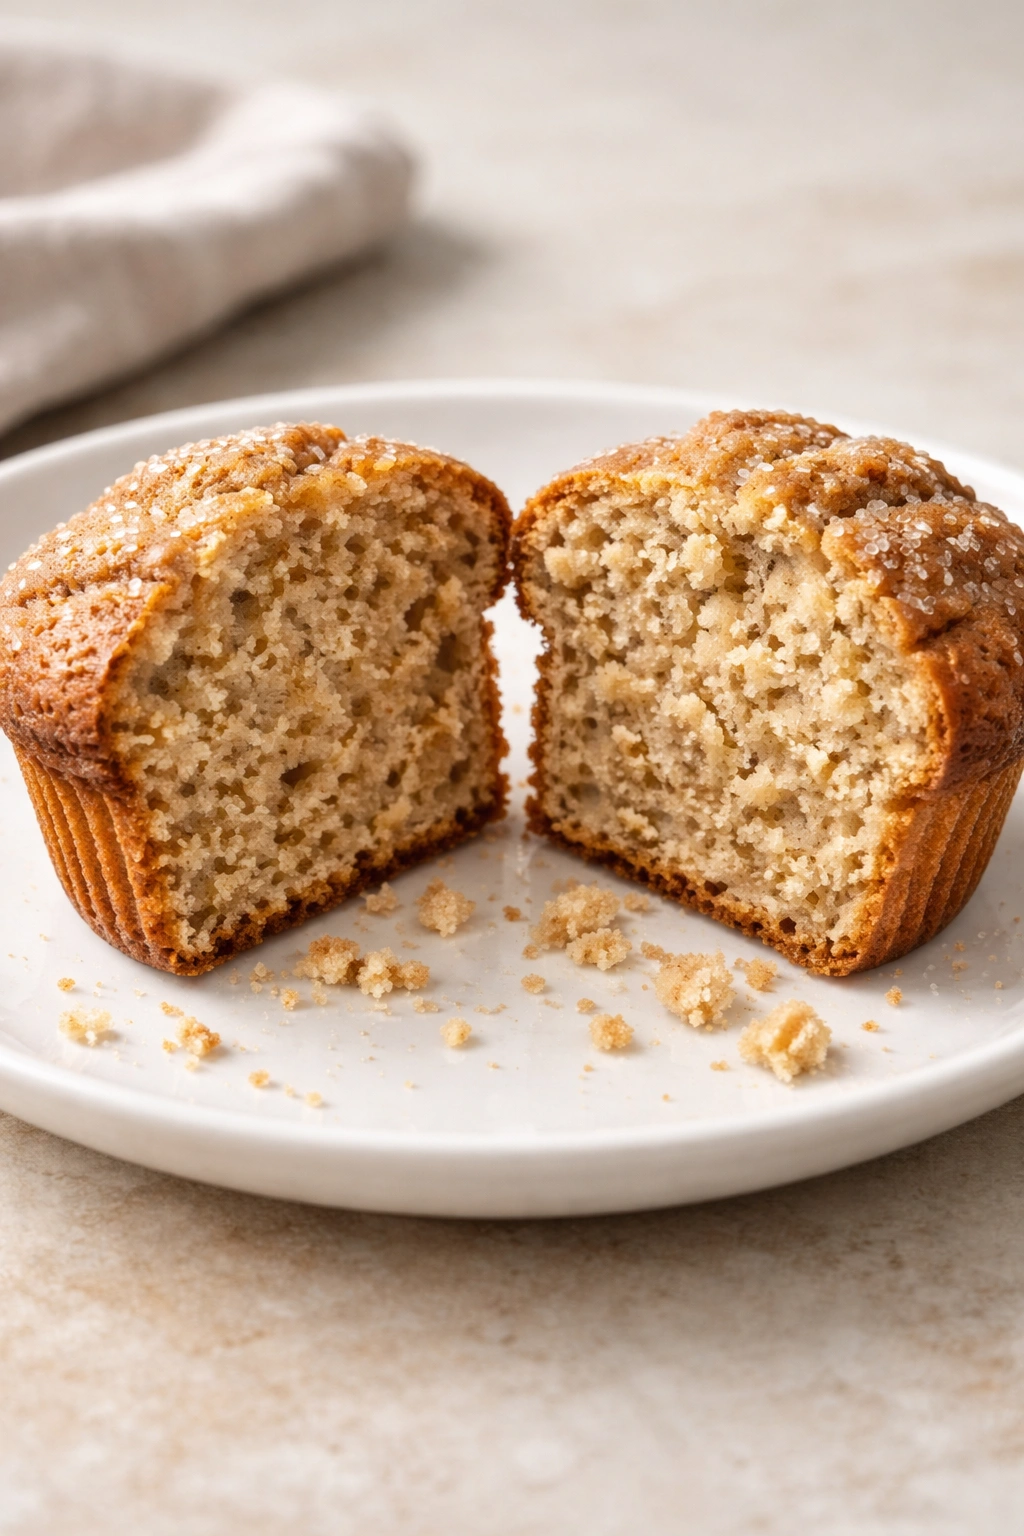
Bake for 20-25 minutes for standard muffins, or 12-15 minutes for mini muffins. The muffins are done when the tops are light golden brown and a toothpick inserted into the center of the tallest muffin comes out clean or with just a tiny bit of muffin crumb clinging to it — you should not see wet batter on the toothpick. Do not overbake — even one minute too long and you’ll notice a drier crumb.
-
Let the muffins cool in the pan for 5 minutes — this allows them to set enough to remove without crumbling, but the pan’s residual heat doesn’t cook them further and dry them out.
Cool:
- Turn the muffins out onto a wire cooling rack and let them cool to room temperature before serving — about 30 minutes. If you’re using a cooling rack, the air circulation underneath keeps them from steaming and drying out on the bottom.
Common Mistakes That Dry Out Muffins (And How to Prevent Them)
Even with the best recipe, a few common mistakes can still result in dry muffins. Knowing what to watch for helps you avoid these pitfalls.
Overbaking is the most common culprit. Muffins continue to bake slightly after you remove them from the oven because of residual heat. If you bake them until the toothpick comes out perfectly clean with no crumb at all, they’re already slightly overbaked at that point. Instead, aim for a toothpick that comes out clean or with just one or two tiny crumbs clinging to it. The carryover baking will take care of the rest.
Using old leavening agents means your muffins won’t rise properly. They’ll be denser, which means the crumb structure doesn’t hold moisture effectively. Replace your baking powder and baking soda every 6 months, or sooner if you bake frequently.
Not using acidic ingredients like buttermilk or sour cream limits how tender your muffins can be. The acid reacts with baking soda to create a more delicate crumb. If you only use baking powder with regular milk, you’re missing out on this tenderness advantage.
Measuring flour incorrectly creates too much flour relative to liquid, which results in a drier batter. Always fluff your flour with a fork before measuring, then spoon it into a measuring cup and level it off with a knife. Never scoop directly from the bag or pack the flour into the cup — both methods result in too much flour.
Leaving muffins in the hot pan too long continues the baking process. Remove them to a cooling rack after just 5 minutes to stop the carryover baking.
Storing muffins while still warm creates condensation inside the storage container, which then dries the muffins out when the moisture evaporates. Always let muffins cool completely before storing them.
Variations and Flavor Combinations for Every Preference
Once you’ve mastered the basic technique, you can experiment with countless flavor variations. The beauty of this recipe is that the ratio of wet to dry ingredients and the mixing technique remain the same — only the add-ins and flavorings change.
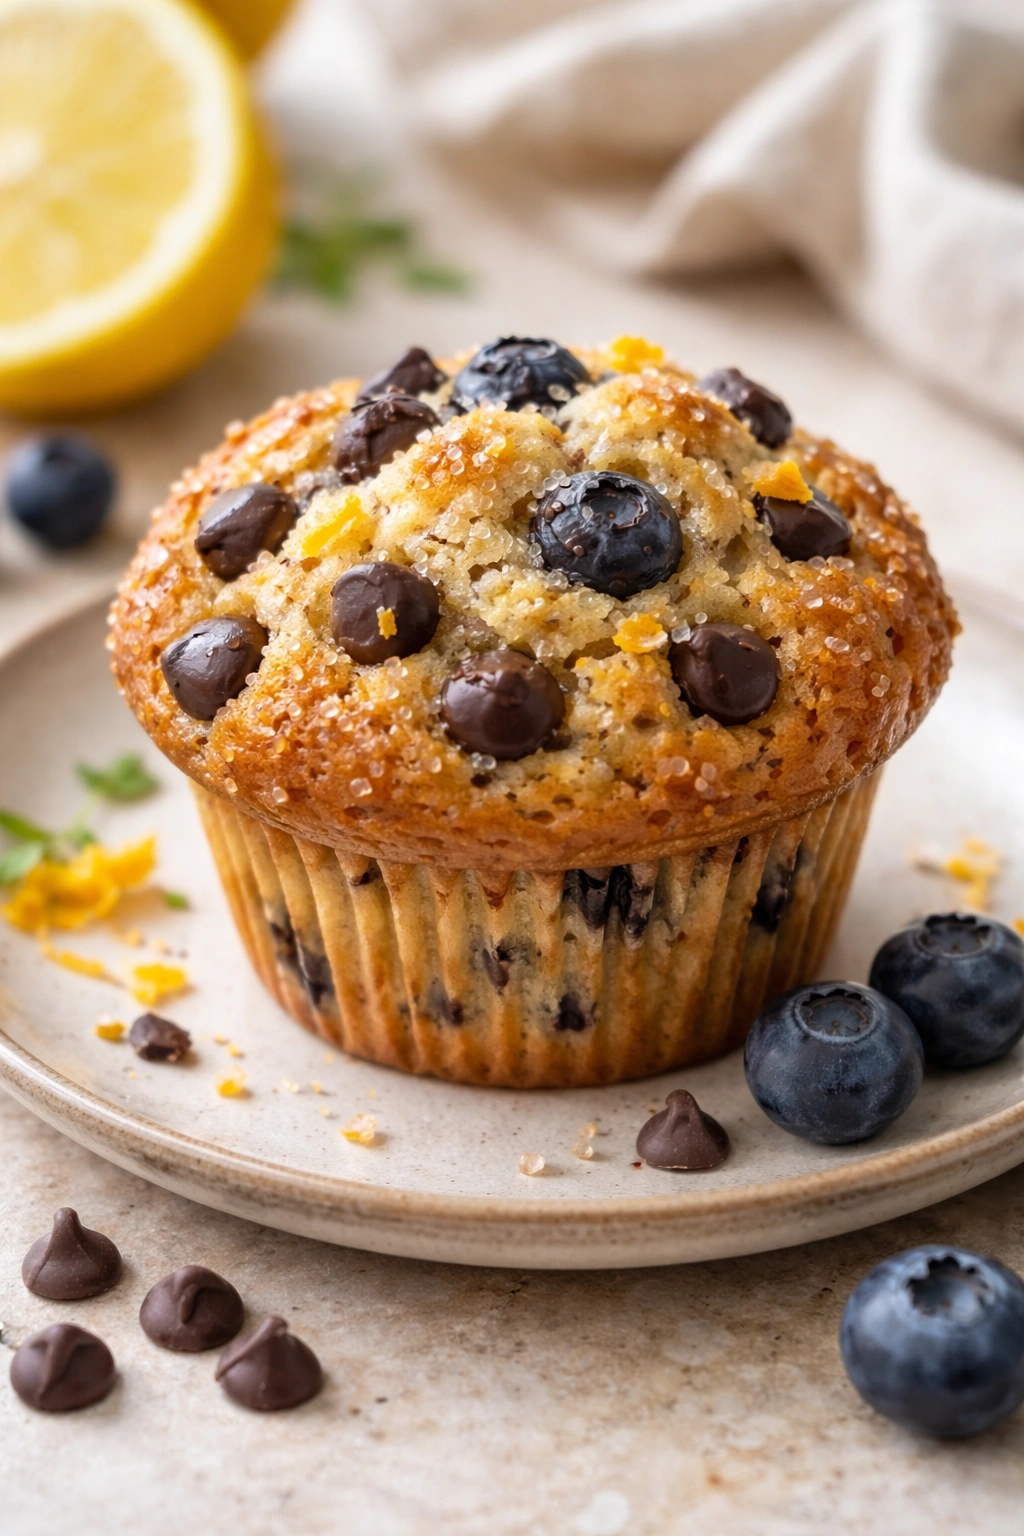
Chocolate Chip Muffins: Replace the blueberries with 1½ cups of chocolate chips (semi-sweet or a mix of semi-sweet and dark chocolate). Reduce the sugar to 1 cup total (½ cup granulated and ½ cup brown), since the chocolate adds sweetness. Add ½ teaspoon of espresso powder to the wet ingredients to deepen the chocolate flavor — this doesn’t make the muffins taste like coffee, just intensifies the chocolate.
Lemon Poppy Seed: Replace the blueberries with ½ cup of poppy seeds. Add the zest of 2 lemons to the wet ingredients and replace the vanilla extract with 2 tablespoons of fresh lemon juice. Reduce the buttermilk slightly (to ⅜ cup) to account for the lemon juice. These muffins are bright, tender, and slightly tangy.
Banana Walnut: Use 1 cup of mashed very ripe banana (about 3 medium bananas) and reduce the oil to ¼ cup. Reduce the buttermilk to ¼ cup. Replace the blueberries with ¾ cup of chopped toasted walnuts. The banana adds both moisture and a subtle sweetness, so you can reduce the sugar to 1 cup total if you prefer less sweet muffins.
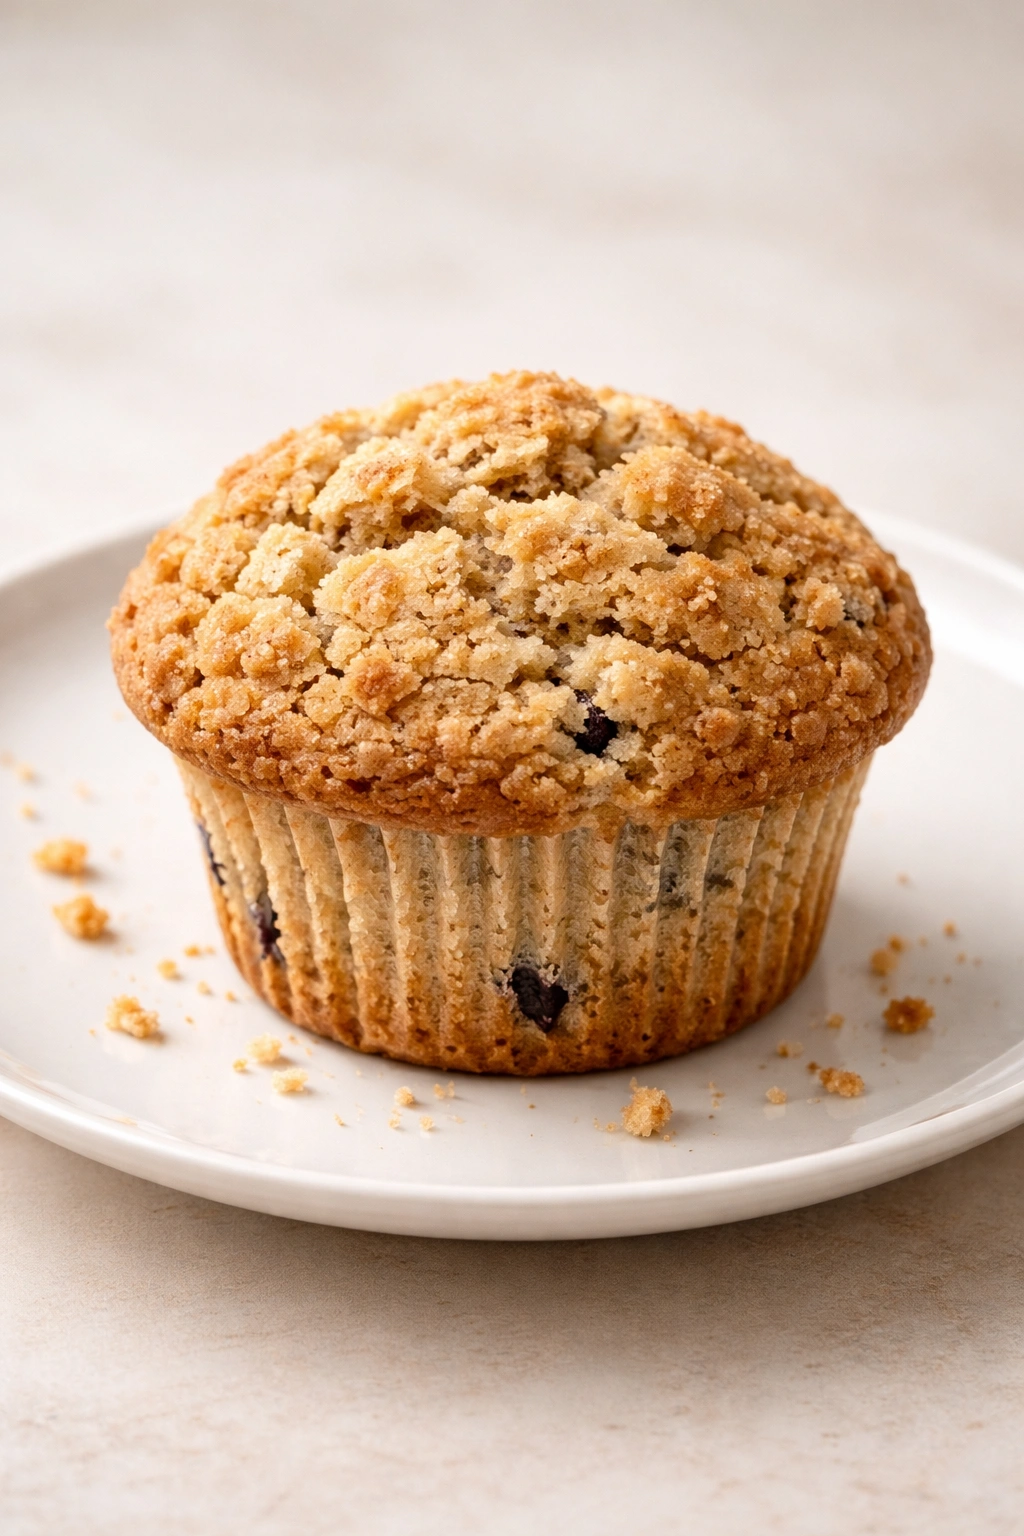
Apple Cinnamon Streusel: Replace the blueberries with 1½ cups of finely diced apple (Granny Smith, Honeycrisp, or a mix). Add 1½ teaspoons of ground cinnamon and ¼ teaspoon of ground nutmeg to the dry ingredients. For a streusel topping, mix ¼ cup oats, ¼ cup all-purpose flour, 3 tablespoons cold butter (cut into small pieces), 3 tablespoons brown sugar, and ¼ teaspoon of cinnamon. Sprinkle this mixture over the batter before baking — it creates a delicious crispy topping.
Pumpkin Spice: Use 1 cup of pumpkin puree instead of the sour cream and buttermilk combined. Add 1 tablespoon of pumpkin pie spice to the dry ingredients. Add ½ teaspoon of ground ginger and ⅛ teaspoon of ground cloves to intensify the spice flavor. These muffins are especially good made in the fall, though they’re delicious year-round.
Strawberry Rhubarb: Replace the blueberries with ¾ cup of diced strawberries and ¾ cup of diced rhubarb. Add 1 tablespoon of sugar to the fruit as you prepare it and let it sit for 10 minutes — the maceration draws out some juice and prevents the berries from browning. Toss with 1 tablespoon of flour as instructed to keep them suspended.
Gluten-Free Option: Replace the all-purpose flour with a high-quality gluten-free all-purpose blend that includes xanthan gum (or add ¼ teaspoon of xanthan gum if your blend doesn’t include it). The rest of the recipe remains the same. Gluten-free muffins baked with this technique stay moist just as well as traditional muffins.
Vegan Adaptation: Replace the eggs with 1 flax egg (1 tablespoon ground flaxseed mixed with 3 tablespoons water, let sit 5 minutes) plus one additional flax egg or ¼ cup of unsweetened applesauce. Replace the sour cream with dairy-free sour cream or additional Greek yogurt made from coconut milk. The rest of the recipe remains the same.
Storage and Make-Ahead Tips for Lasting Freshness
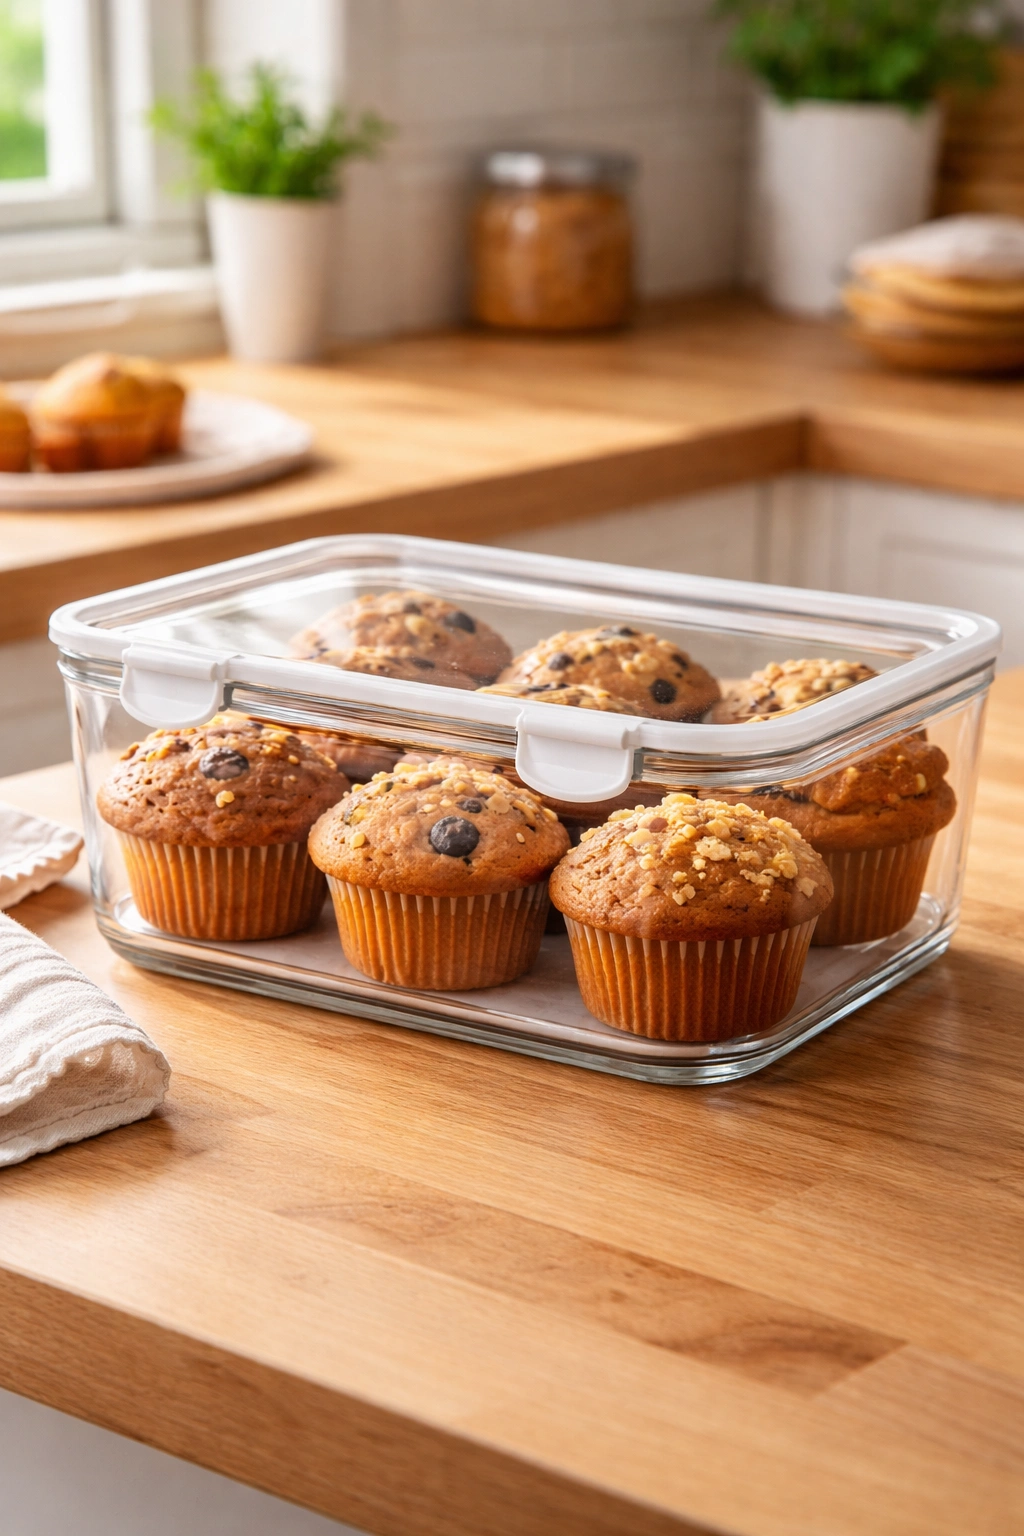
Properly stored muffins stay moist and delicious for three to four days at room temperature, and they freeze beautifully for up to three months. Knowing the best storage methods helps you enjoy your muffins at their best.
Room Temperature Storage: Once completely cooled, store muffins in an airtight container at room temperature for up to 3 days. An airtight container traps moisture inside, keeping the muffins soft. If you use a container that’s not airtight (like an open box), the muffins will dry out faster. Don’t store them in the fridge, as cold air speeds up staling.
Refrigerator Storage: If you need to store muffins longer than 3 days but aren’t ready to freeze them, store them in an airtight container in the refrigerator for up to 7 days. They’ll stay moist but should be served at room temperature or reheated gently before eating.
Freezing Muffins: Muffins freeze exceptionally well. Cool them completely, then wrap each muffin individually in plastic wrap or aluminum foil. Place the wrapped muffins in a freezer bag, remove as much air as possible, and freeze for up to 3 months. Individual wrapping prevents freezer burn and makes it easy to thaw just one or two muffins at a time.
Thawing Frozen Muffins: Thaw muffins at room temperature, still wrapped, for 2-3 hours. Or unwrap a frozen muffin and microwave it on 50% power for 1-2 minutes until warm. The lower microwave power prevents the muffin from becoming tough.
Reheating Refrigerated Muffins: Place a muffin on a microwave-safe plate and microwave on 50% power for 30-45 seconds to warm it through without drying it out. Alternatively, wrap the muffin in a damp paper towel and microwave for 20-30 seconds. The moisture from the paper towel helps keep the muffin tender.
Make-Ahead Options: You can prepare the dry ingredients the night before and store them in an airtight container. Prepare the wet ingredients the morning of baking. Combine them just before filling the muffin tin. This allows you to have fresh-baked muffins with minimal effort on the day you want to eat them.
Alternatively, you can prepare the entire batter the night before and store it in the refrigerator in an airtight container. However, the leavening agents will begin to activate as soon as the wet and dry ingredients combine, so the muffins won’t rise as dramatically the next morning. You’ll still get delicious muffins, but they’ll be slightly less tall and fluffy.
Troubleshooting: Why Your Muffins Still Came Out Dry
Even with all this information, sometimes muffins don’t turn out as expected. Here’s how to diagnose and fix common issues.
Your muffins are dry and dense: This usually indicates overbaking or overmixing. Reduce baking time by 1-2 minutes (use a toothpick to check for doneness earlier). If the problem persists, you’re likely mixing the batter too much — remember, you want a lumpy batter, not a smooth one. Count your mixing strokes and aim for fewer than 10.
Your muffins have large tunnels or a sunken center: This is a sign of overmixing or too much leavening agent. Both cause the muffins to rise too quickly, creating large air pockets. Reduce your mixing strokes, and double-check that you’re using the correct amount of baking powder and baking soda.
Your muffin bottoms are too dark: The oven rack was too low or the oven temperature is running hot. Move the rack to the center of the oven or use an oven thermometer to verify your oven temperature. If your oven runs hot, reduce the temperature by 25°F.
Your muffins bake unevenly: Most home ovens have hot spots. After 10 minutes of baking, rotate the muffin tin 180 degrees to ensure even baking.
Your muffins are dry by the next day: Ensure you’re storing them in an airtight container at room temperature, not in the fridge. Also verify that you’re not overbaking them — even slightly overbaked muffins dry out much faster.
Serving Suggestions and Perfect Pairings
Fresh muffins are wonderful on their own, but a few simple pairings elevate them into a more complete breakfast or brunch experience.
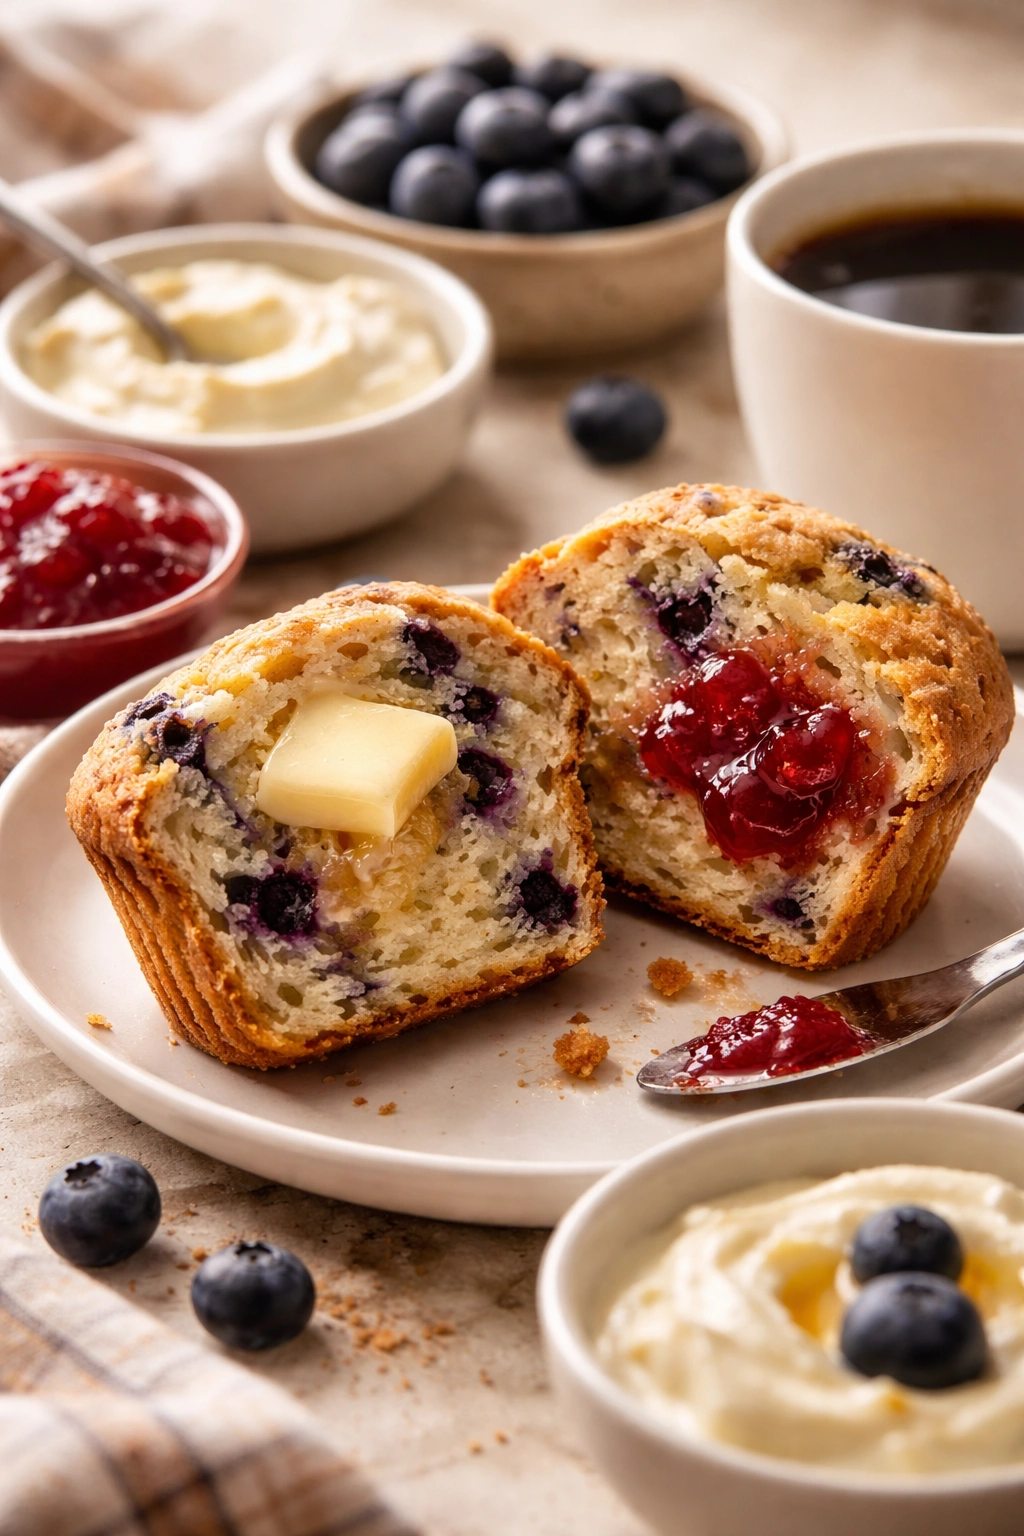
Butter and Jam: This classic pairing never goes out of style. Slice a warm muffin in half and spread it with soft butter and your favorite jam or preserves. The warmth of the muffin softens the butter, and the tart jam cuts through the sweetness beautifully.
Cream Cheese: For blueberry, lemon, or chocolate muffins, sliced in half and topped with a thin layer of softened cream cheese is indulgent and delicious. The tanginess of the cream cheese complements most muffin flavors.
Coffee or Tea: Muffins are the perfect accompaniment to coffee or tea. The slight sweetness of the muffin pairs beautifully with the bitterness of coffee or the subtle tannins in tea. This is probably the most classic pairing.
Yogurt and Granola: Make your muffins part of a more substantial breakfast by crumbling a muffin into a bowl with Greek yogurt and granola. This works especially well with blueberry or strawberry muffins.
Fresh Fruit: Serve muffins alongside fresh berries, sliced stone fruit, or citrus. This adds color, freshness, and additional nutrition to your breakfast.
Egg-Based Dishes: Muffins are an excellent complement to scrambled eggs, a veggie omelet, or a breakfast egg sandwich. The slightly sweet muffin balances the savory eggs perfectly.
Best Served: These muffins are best enjoyed at room temperature or slightly warmed within the first day of baking, but they stay perfectly moist and delicious for three full days stored properly. They’re ideal for make-ahead breakfasts — bake them on Sunday and enjoy them throughout the week.
Final Thoughts

Making moist, tender muffins comes down to making intentional choices at every stage: choosing the right fats and acidic ingredients, understanding why you must resist the urge to overmix, using room temperature ingredients, and baking just until a toothpick comes out almost clean. None of these techniques is complicated, but together they create a massive difference in the final result.
The best part is that once you understand the principles behind moist muffins, you can apply these techniques to virtually any muffin flavor you dream up. The base recipe and technique remain consistent — only the add-ins and flavorings change. This gives you the freedom to create muffins that are perfectly suited to your taste preferences and what you have on hand.
Start with the blueberry version above, master the technique, and then branch out into your own flavor creations. Keep notes on what works and what doesn’t. Before long, making reliably moist, delicious muffins will become so automatic that you won’t even need to think about it anymore — you’ll just reach for your mixing bowl with confidence, knowing that the muffins coming out of your oven will be tender, moist, and absolutely worth the minimal effort required to create them.