There’s something almost sacred about weekend mornings — that luxury of time, the absence of a clock’s tyranny, the permission to move slowly through breakfast. French toast captures that spirit perfectly. It’s indulgent without being complicated, elegant without demanding your full attention, and so fundamentally forgiving that even if something goes slightly sideways, you’ll end up with something delicious.
The beauty of easy French toast is that it doesn’t require a culinary degree, fancy equipment, or rare ingredients. You probably have everything you need in your kitchen right now. What it does require is understanding a few simple principles: how bread thickness affects cooking time, why the custard mixture matters more than most people realize, and what “golden brown” actually looks like when you’re standing in front of the stove.
This isn’t about rushing through breakfast. This is about creating something warm, comforting, and genuinely delicious in the time it takes to brew a second cup of coffee. Weekend French toast is a ritual, not a race.
What Makes French Toast Special
French toast works because it exists in that perfect middle ground between simple and luxurious. You’re taking humble bread and transforming it into something that tastes and feels special — silky interior, caramelized exterior, with a richness that comes entirely from eggs, milk, and a touch of vanilla.
The magic happens when bread and custard meet heat. The egg mixture creates a protective layer that prevents the bread from becoming soggy, while the sugar in the custard caramelizes on the surface. You’re not just soaking bread until it’s waterlogged; you’re creating a custard-coated exterior that cooks into something almost creamy on the inside.
What makes French toast ideal for weekend mornings is its flexibility. You can prep the custard while your griddle preheats. You can cook it at a leisurely pace, one or two pieces at a time, and serve them immediately or keep finished pieces warm in a low oven while you cook the rest. There’s no stress, no timing pressure, no last-minute assembly.
The best part? French toast tastes like a special occasion breakfast, but it takes less time and effort than most other weekend breakfast foods.
Choosing Your Bread for the Best Results
Bread choice matters more than most recipes acknowledge, but not in the way you might think. You don’t want the densest bread possible — that’s a myth. You want bread with structure, something sturdy enough to soak up the custard without falling apart, but with enough air pockets to become tender and custardy inside.
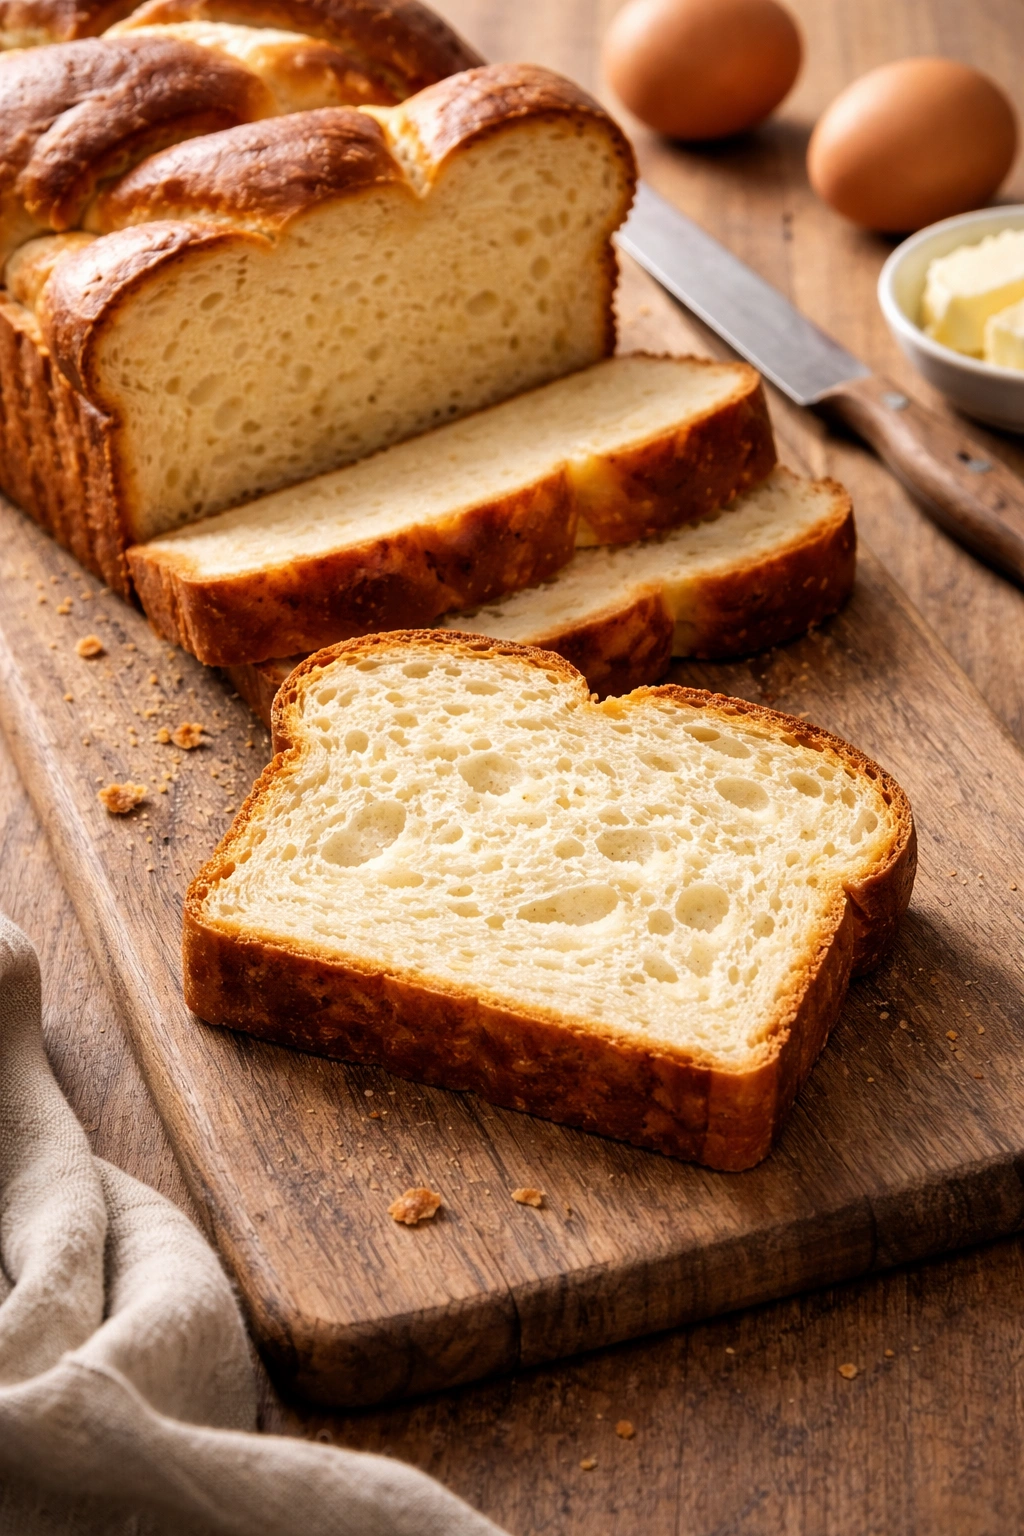
Brioche is the classic choice, and for good reason. It’s enriched with butter and eggs, which gives the finished French toast an almost pudding-like interior. If you go the brioche route, look for a day-old loaf — it’s slightly firmer and won’t tear as easily when you’re dipping it. Fresh brioche is too soft for French toast and will shred in the custard.
Challah works beautifully too. It’s slightly less rich than brioche but has that same tender crumb structure. It’s also easier to find than brioche in many areas. Texas toast or thick-cut white bread can work, but avoid ultra-soft sandwich bread — it’s too delicate and will turn into mush.
The ideal thickness is about three-quarters of an inch. Cut your bread this thick before you start, not after. Thinner slices cook through before they can develop that caramelized exterior; thicker slices take too long to cook through and the outside burns before the inside is done.
Pro tip: If your bread is perfectly fresh, refrigerate it for a few hours or buy it the night before. Day-old bread has firmed up just enough to handle the custard without disintegrating.
The Custard Mixture That Makes All the Difference
This is where people get nervous, but custard is genuinely simple. You need eggs, milk, a sweetener, and vanilla. That’s the foundation. Everything else is optional but encouraged.
The ratio matters: for every two large eggs, use about one-half cup of milk. This creates a custard that’s rich enough to coat the bread properly but not so heavy that the finished French toast feels dense or eggy. If you go too heavy on the eggs, you’ll taste raw egg. If you skimp on the eggs, you’ll just have soggy bread.
Whole milk creates the richest, most custardy interior. Half-and-half would make it even richer, but it can tip into heavy. If you only have low-fat milk, it’ll still work — your French toast just won’t be quite as luxurious. Evaporated milk works surprisingly well too, if that’s what you have.
For sweetening, granulated sugar or brown sugar both work. Brown sugar adds a subtle molasses note that some people love. Two tablespoons per egg mixture is enough to sweeten the custard noticeably without making it cloying. You’ll add additional sweetness with toppings anyway.
Vanilla extract is essential, not optional. A teaspoon per egg mixture gives you that sophisticated, warm flavor that makes French toast taste like dessert for breakfast. Almond extract is a beautiful alternative if you want to try something different, though use it sparingly — a quarter-teaspoon is enough because the flavor is more intense.
Some people add a pinch of cinnamon, nutmeg, or ginger to the custard. These are completely optional, but they add a warm, spiced note that feels special. If you go this route, start with a quarter-teaspoon of cinnamon and adjust to taste. You want the vanilla to remain the dominant flavor.
Essential Equipment and Setup
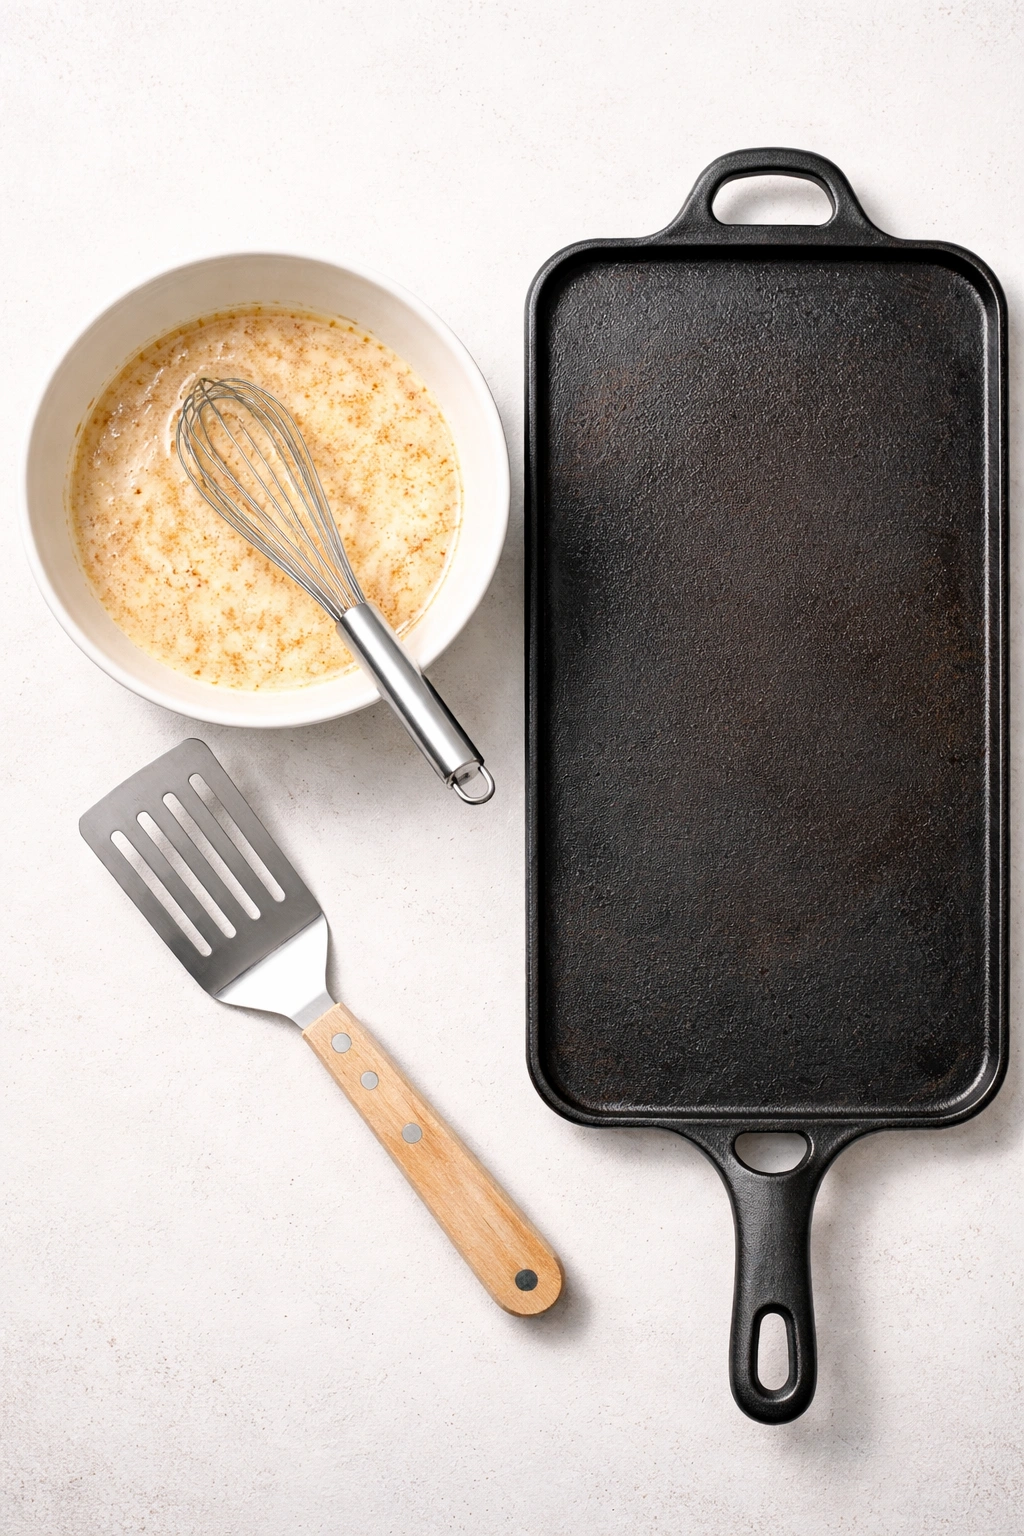
You don’t need much to make excellent French toast. A wide, shallow bowl for the custard mixture — something where you can easily lay a slice of bread flat. A whisk or fork for beating the custard (a fork works fine). A griddle or large skillet — cast iron is ideal, but nonstick works beautifully too. A spatula for flipping.
That’s actually it. Everything else is preference.
A griddle is better than a skillet for French toast if you’re cooking for multiple people, because you can work with several pieces at once. But a 12-inch skillet works perfectly well. The key is having a cooking surface that’s large enough to work comfortably without crowding.
Get your cooking surface preheated and to the right temperature before you start dipping bread. Medium heat for a nonstick pan, medium-high for cast iron. You’ll know it’s ready when a few drops of water sizzle immediately on the surface. If the water beads up and rolls around, it’s too hot. If it just sits there, you need more heat.
Have your finished French toast somewhere warm and ready. A 200°F oven with a plate inside works perfectly. Finished pieces will stay warm and crispy there while you cook the rest.
Yield, Prep Time, Cook Time, Total Time, Difficulty
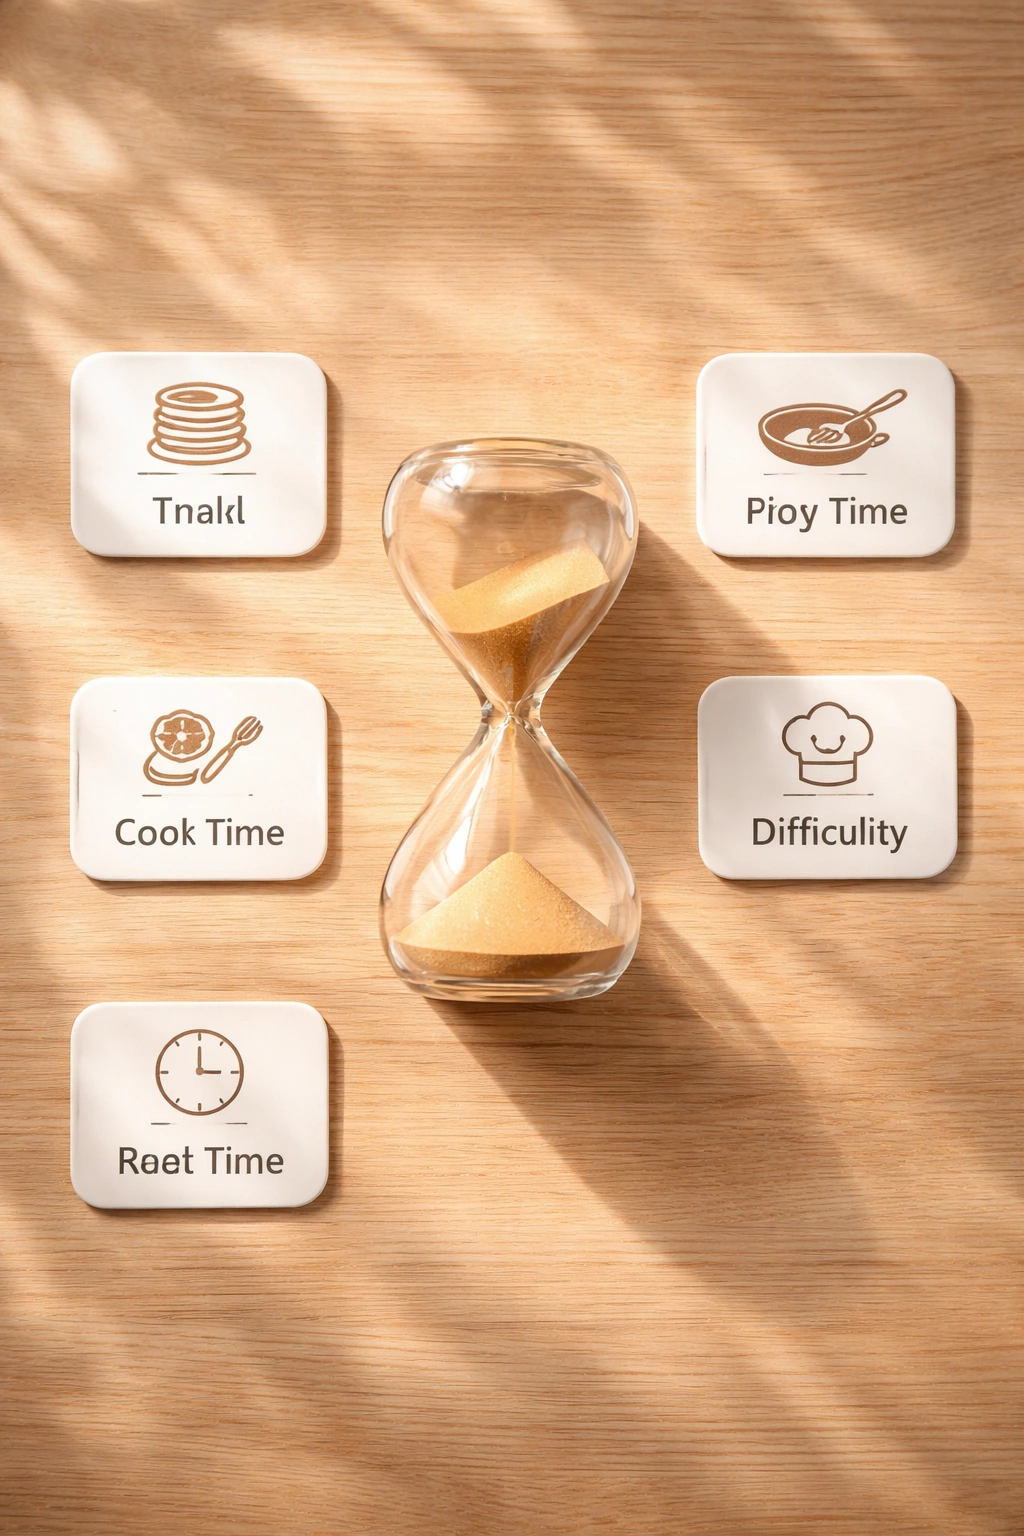
Yield: Serves 2 to 3 (makes 4 to 6 slices)
Prep Time: 10 minutes
Cook Time: 8 to 12 minutes (depending on batch size)
Total Time: 20 to 25 minutes
Difficulty: Beginner — This requires no special techniques, a completely forgiving custard mixture, and straightforward stovetop cooking. Even a first-time French toast maker will have success.
Complete Ingredient List
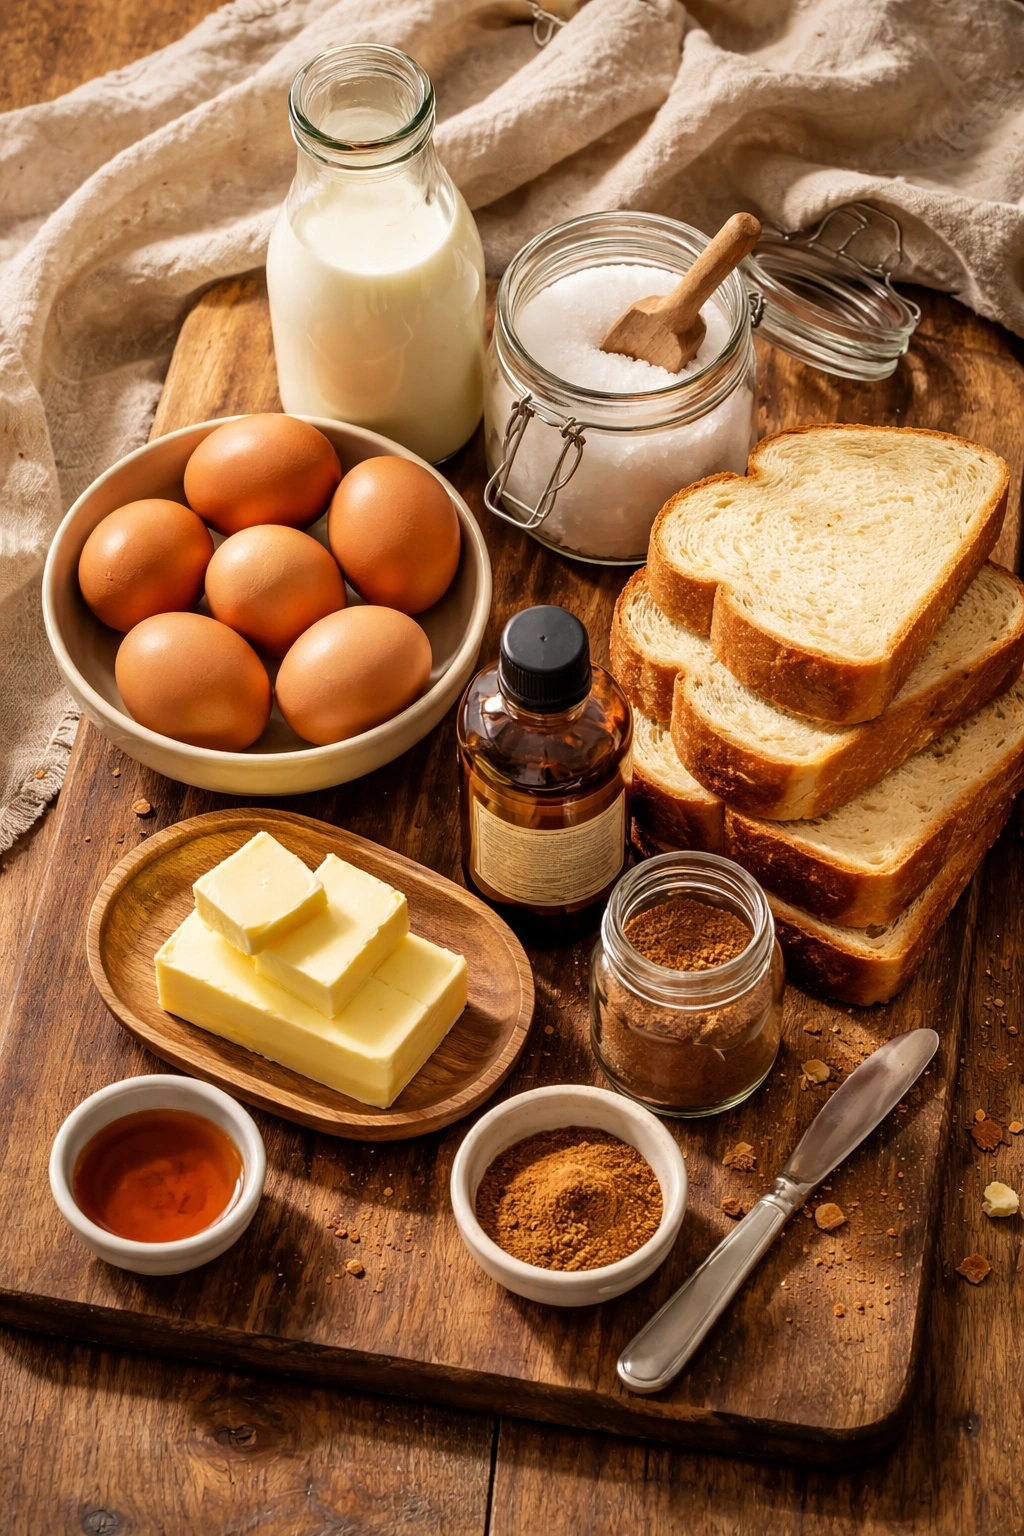
For the Custard:
- 2 large eggs, room temperature
- ½ cup whole milk (or half-and-half for extra richness, or low-fat milk if that’s what you have)
- 2 tablespoons granulated sugar (or light brown sugar)
- 1 teaspoon pure vanilla extract
- ¼ teaspoon ground cinnamon (optional, but adds beautiful depth)
- Pinch of fine sea salt
- 1 tablespoon unsalted butter (for the griddle, plus more if needed between batches)
For Cooking and Serving:
- 4 to 6 slices brioche, challah, or thick-cut white bread, cut ¾-inch thick (day-old bread preferred)
- Butter, for serving
- Maple syrup (real maple syrup makes a noticeable difference)
- Fresh berries, whipped cream, or other toppings as desired
Step-by-Step Instructions
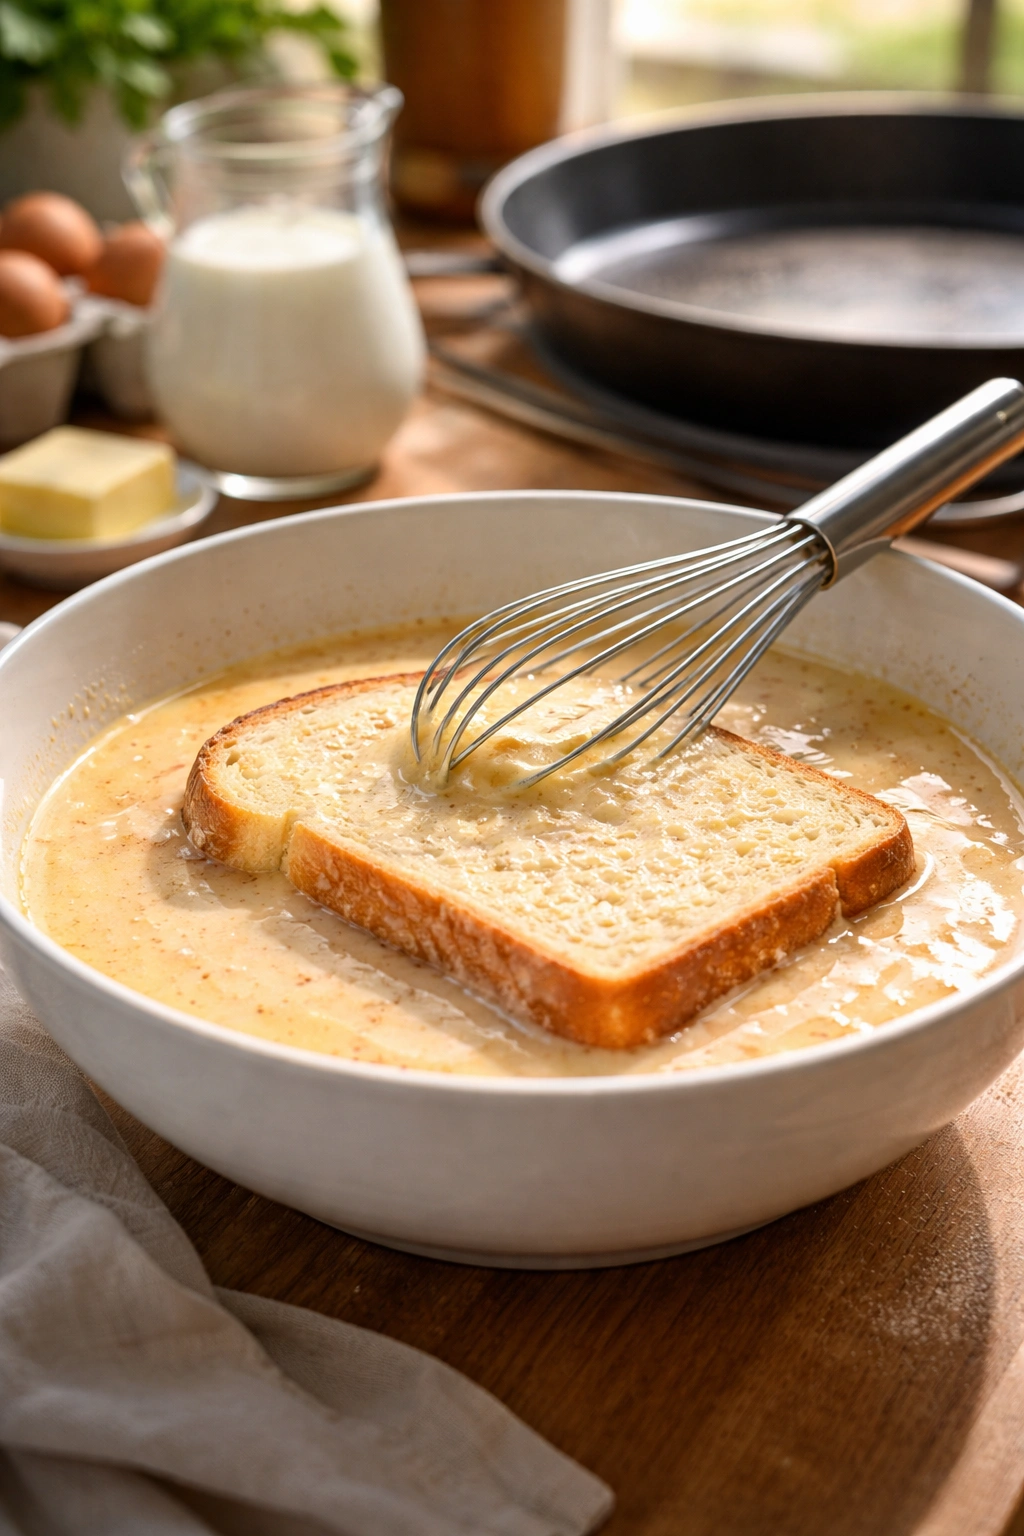
Prepare the Custard:
-
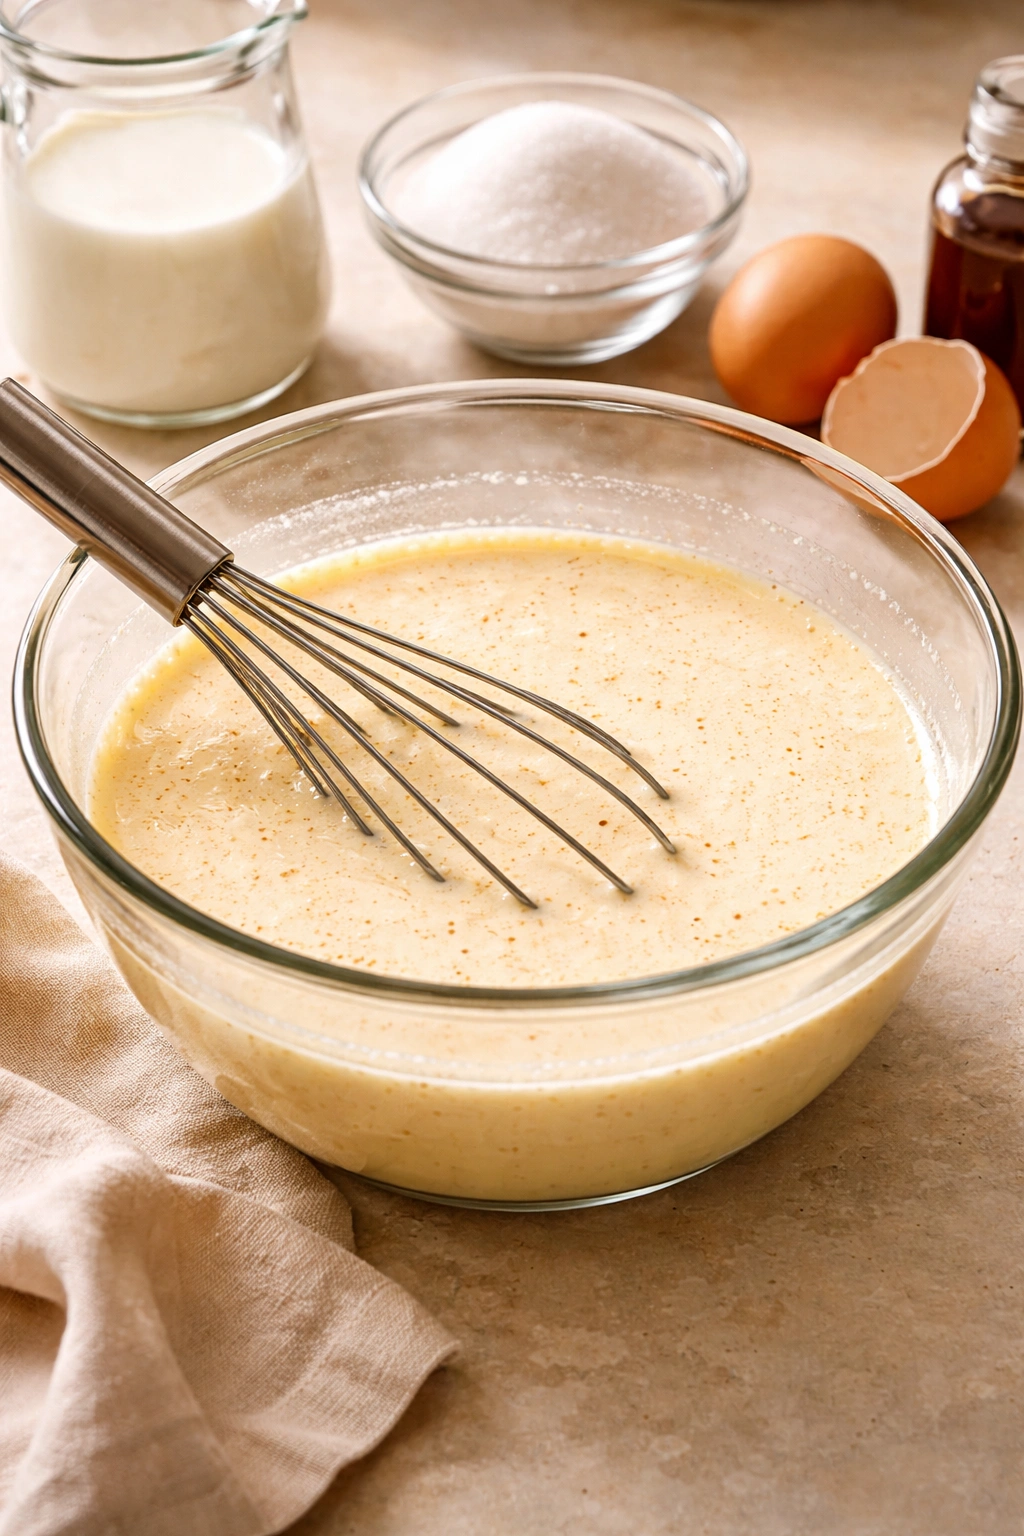
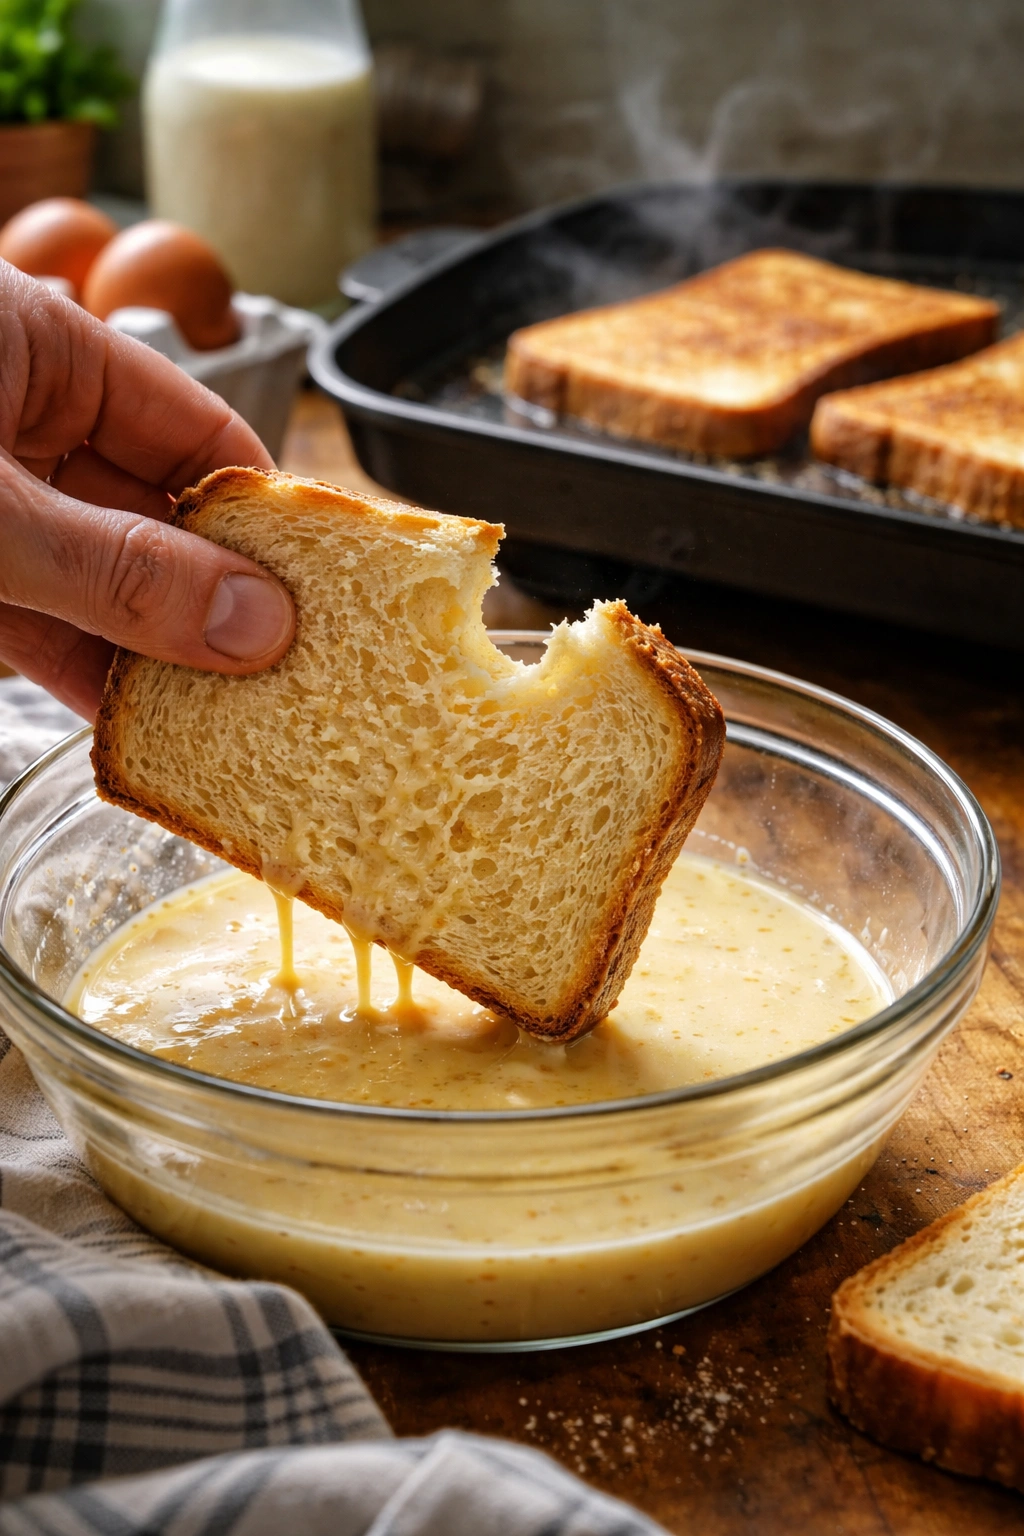
Crack the eggs into a wide, shallow bowl — a pie dish or a dinner plate with sides works perfectly. This setup matters because you need enough space to lay bread slices flat without them folding or cracking. Add the milk, sugar, vanilla extract, cinnamon if using, and salt to the bowl.
-
Whisk everything together until the sugar is mostly dissolved and the mixture is well combined and smooth. Do not overmix — you’re just combining the ingredients, not aerating the custard. The mixture should be pale and uniform with no visible streaks of egg white. Let it sit for a minute while you move to the next step.
Heat the Griddle:
-
Place your griddle or skillet over medium heat (medium-high for cast iron). Let it preheat for 3 to 4 minutes while you prepare everything else. You want the cooking surface noticeably hot but not smoking or spitting.
-
Test the temperature by flicking a few drops of water onto the surface. They should sizzle immediately and evaporate in just a second or two. If the water sits on the surface without sizzling, the pan needs more time. If it violently hisses and pops, it’s too hot — let it cool for a minute before proceeding.
-
Add 1 tablespoon of butter to the hot griddle and let it melt and foam. The foam will subside, and you’ll see a thin film of melted butter coating the surface — this is when you’re ready to start cooking.
Cook the French Toast:
-
Working with one slice at a time, lay the bread into the custard and count slowly to two: “one… two.” Flip it over and soak the other side for two seconds as well. This creates a custard coating on both sides without drowning the bread. Do not let the bread sit in the custard — quick dips only.
-
Immediately place the custard-coated bread slice onto the hot buttered griddle. You should hear a sizzle the moment it makes contact — if you don’t hear sizzle, your griddle isn’t hot enough, and you’ll get soggy instead of crispy French toast.
Advertisements -
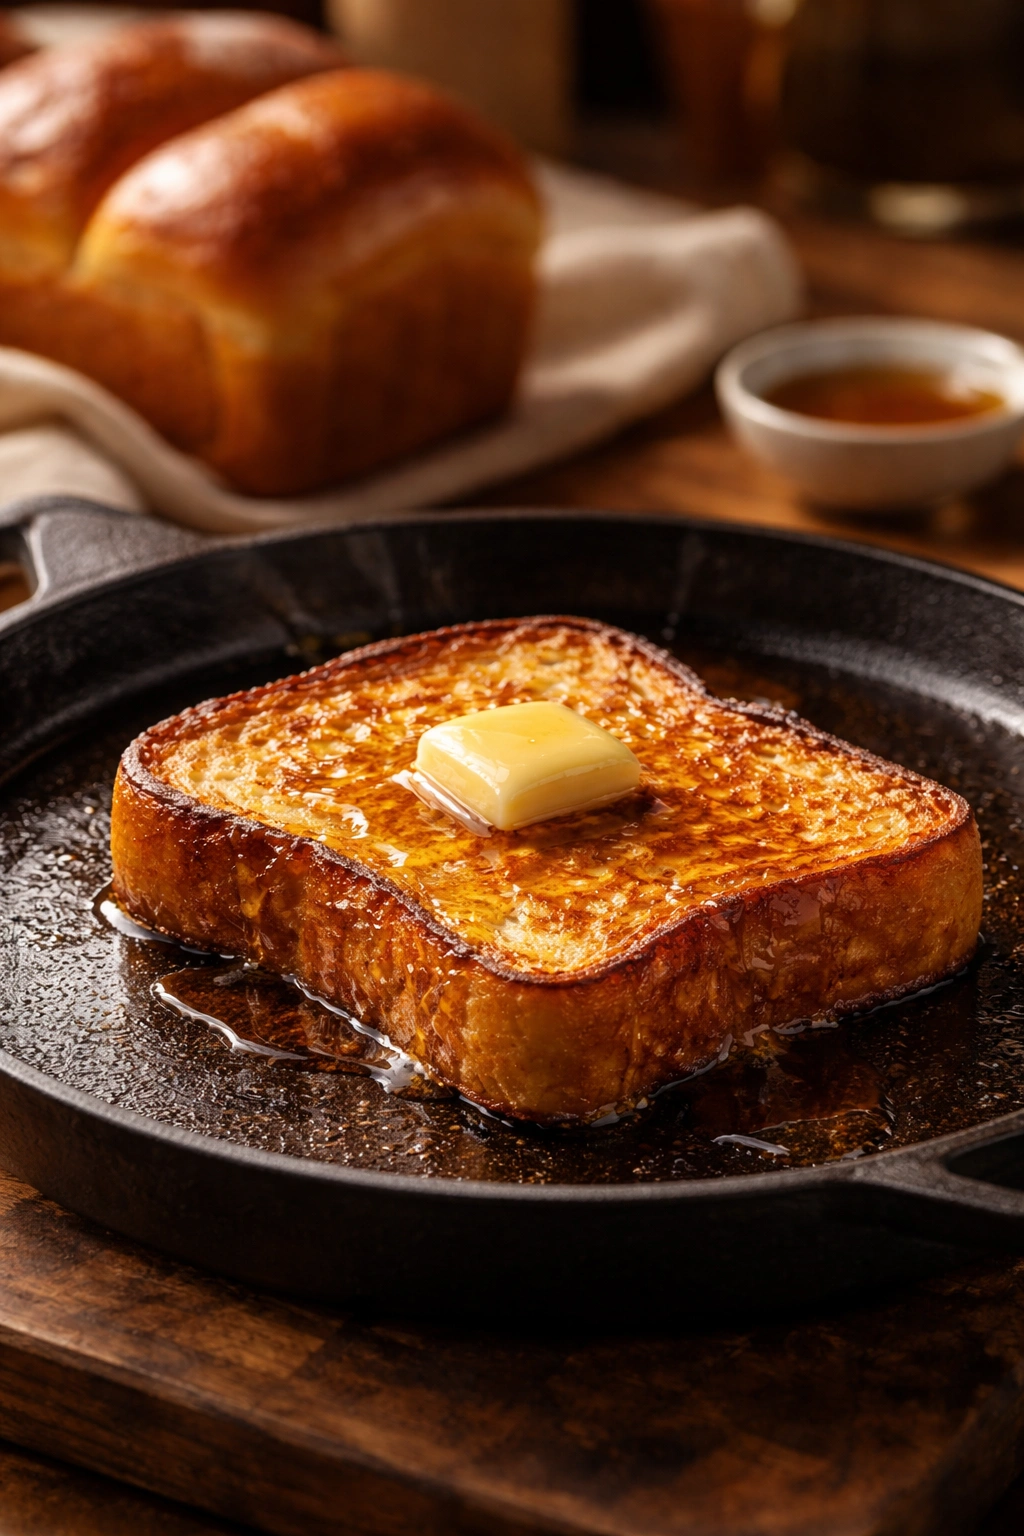
Cook the first side for 3 to 4 minutes without moving it. The bottom side needs time to develop that beautiful golden-brown color and slightly caramelized exterior. Don’t flip early — this is the most common mistake. Toward the end of cooking, tilt the pan slightly and peek underneath. You’re looking for deep golden brown, not pale tan.
-
Flip the French toast carefully using a spatula. If it’s sticking slightly, let it cook another 30 seconds more and try again — it’ll release when it’s truly ready. Cook the second side for 2 to 3 minutes until it’s also golden brown.
-
Transfer the finished slice to a warm plate or to the 200°F oven to keep warm while you cook the remaining slices. Add a bit more butter to the griddle between batches — even a small amount makes a noticeable difference in the final texture.
-
Repeat with the remaining bread slices until you’ve cooked as many as you need.
Serve Immediately:
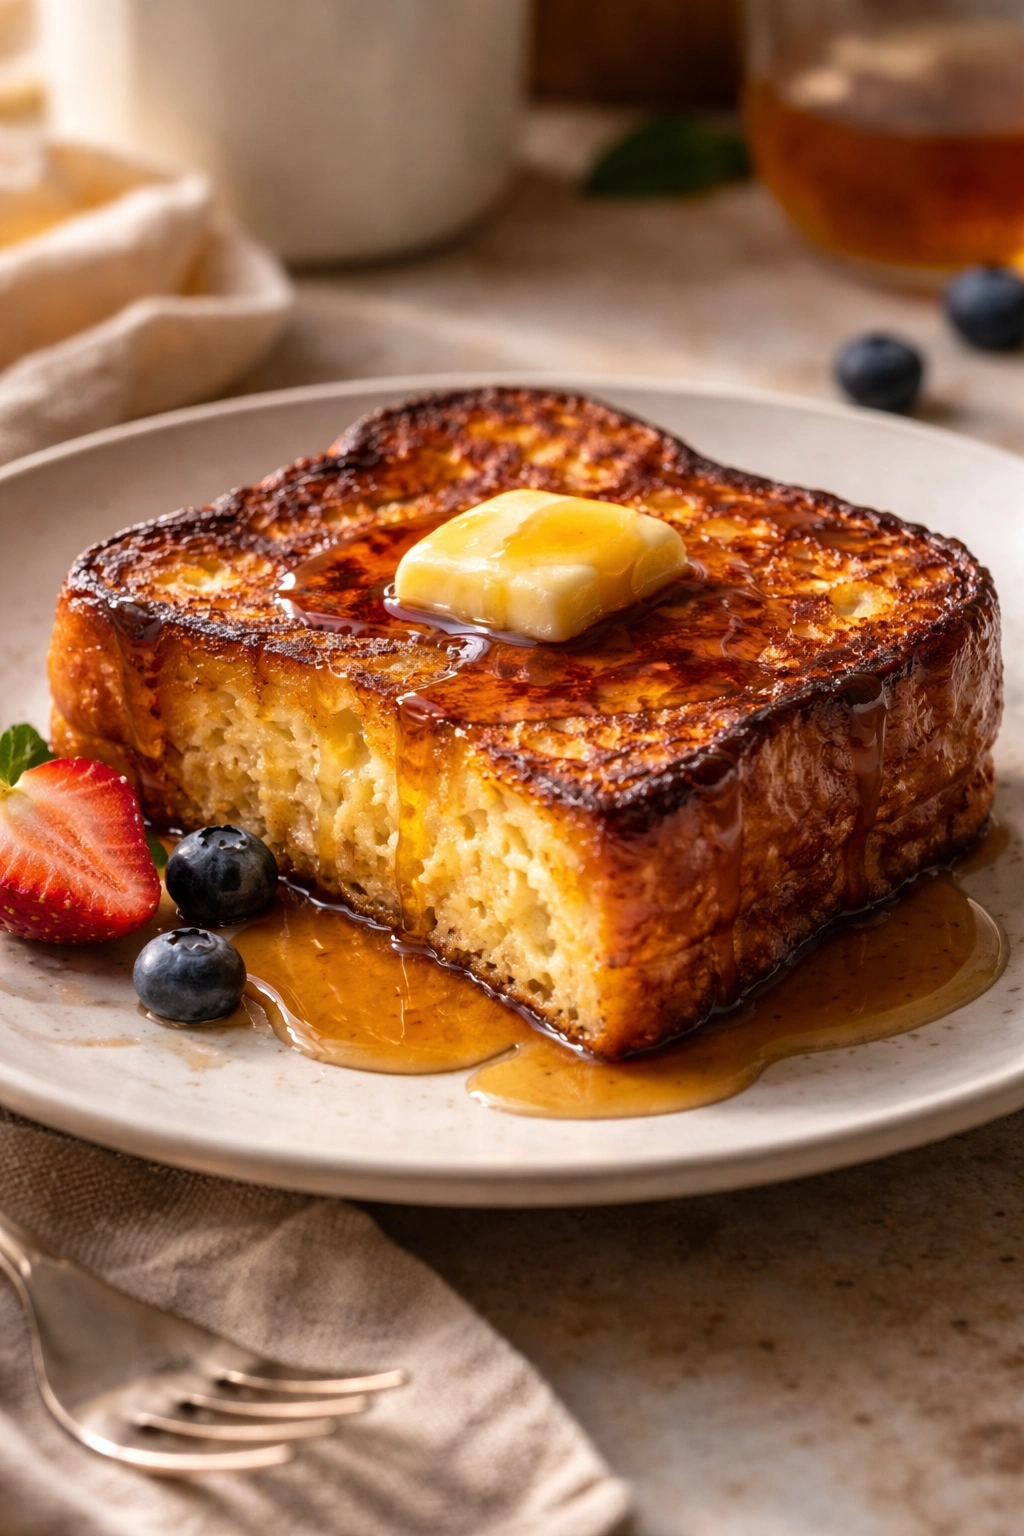
- Arrange the warm French toast on plates, top with a pat of butter (it’ll melt into all those caramelized nooks), pour maple syrup over the top, and add toppings of your choice. Serve immediately while it’s warm and the toast is still crispy on the outside.
Insider Tips for Perfect French Toast Every Time
The biggest secret to exceptional French toast is not overcrowding the custard time. Two seconds per side is all you need. The bread absorbs liquid quickly — more time doesn’t make it better, just wetter and more likely to fall apart on the griddle.
Temperature control matters more than you’d think. Medium heat is genuinely the sweet spot for most home stoves. Too low and you’ll get pale, rubbery French toast that tastes slightly raw even when fully cooked. Too high and you’ll burn the outside before the inside is done. If your first piece comes out darker than you want, turn the heat down fractionally for the next batch.
Make the custard mixture while the griddle is preheating. This way, everything is ready at exactly the right moment — you’re not scrambling to prepare the custard while your pan sits there cooling down.
The bread matters more than the custard recipe. A beautiful brioche with a mediocre custard beats perfect custard on crummy bread every single time. Spend a moment selecting bread you actually enjoy eating on its own.
Butter matters. Real butter creates a flavor and texture that margarine simply cannot replicate. It’s the difference between good French toast and restaurant-quality French toast.
Keep the finished pieces warm in a low oven, but don’t let them sit there for more than 15 minutes. They’re best eaten immediately, while they’re still crispy on the outside and warm on the inside.
Common Mistakes and How to Avoid Them
The number one mistake is using bread that’s too fresh and soft. It tears during dipping and falls apart on the griddle, creating a mess that tastes fine but looks sloppy. Day-old bread has firmed up just enough to handle the custard without disintegrating. If you’re stuck with fresh bread, chill it for an hour before using.
Soaking the bread for too long is the second most common problem. People think more time means more flavor, but actually it just turns the bread into mush. Two seconds per side is genuinely enough. The bread will continue to absorb custard even after you remove it from the mixture — by the time it hits the hot griddle, it’ll have absorbed the right amount.
Flipping too early creates pale, soggy French toast. Resist the urge to check on it. Let the first side cook undisturbed for the full 3 to 4 minutes. You’ll know it’s ready when it looks deeply golden when you peek underneath.
Cooking at too low a temperature yields French toast that tastes slightly raw or eggy because the interior never fully sets and the exterior never caramelizes. The custard needs heat to cook properly. Your griddle should be noticeably hot.
Using milk that’s straight from the refrigerator can make the custard too thick to work with. Let it sit at room temperature for 30 minutes, or use it straight from the fridge — it’ll work either way, but room temperature milk mixes more smoothly into the custard.
Easy Variations You Can Make
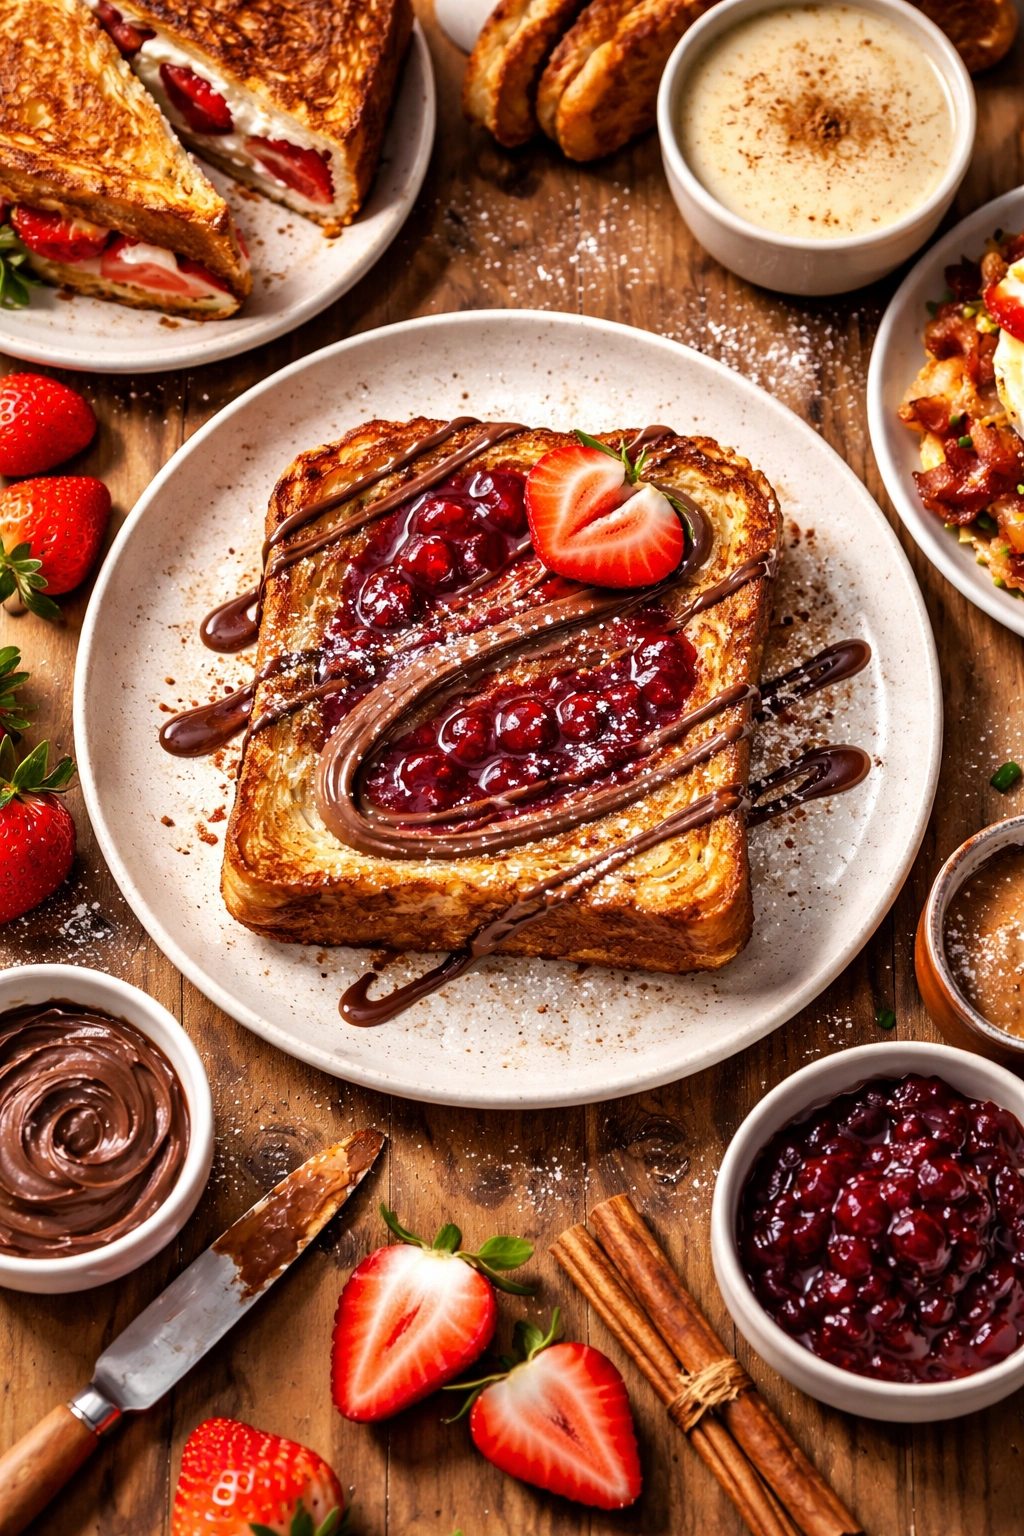
The Stuffed Version: Spread a thin layer of cream cheese or jam on one slice of bread, top it with another slice, and dip the whole sandwich into the custard. Cook it the same way, and you’ll have a French toast that’s filled with something special in the center.
Brown Butter French Toast: Brown your butter in the pan before adding it to the griddle — let it foam and cook for a few minutes until it turns golden and smells nutty. The deeper, toastier flavor is incredible. Watch carefully so it doesn’t burn.
Eggnog French Toast: During the holiday season, substitute eggnog for the milk. Use the same amount and follow the rest of the recipe exactly. The result tastes like a special holiday breakfast.
Nutella Version: Spread a small amount of Nutella on each bread slice before dipping into the custard. The chocolate hazelnut flavor becomes melted and gooey in the center.
Custard-Free: If you’re in a hurry or want something lighter, you can make French toast with just an egg, a splash of milk, and vanilla whisked together quickly. It won’t be quite as custardy or rich, but it’s faster and lighter.
Savory French Toast: Replace the sugar with salt, skip the vanilla, and add herbs like thyme or rosemary to the custard. Serve with fried eggs and bacon instead of syrup. It’s completely different but equally delicious.
Dairy-Free Version: Use full-fat coconut milk or oat milk in place of regular milk. Add an extra egg yolk to keep it rich. The flavor changes slightly but stays delicious.
Storage and Make-Ahead Strategies
You can prep the custard mixture up to 8 hours in advance. Mix it in a shallow container, cover it, and refrigerate. Let it come to room temperature for 10 minutes before using, or use it straight from the fridge — it works either way, just takes slightly longer to absorb into the bread.
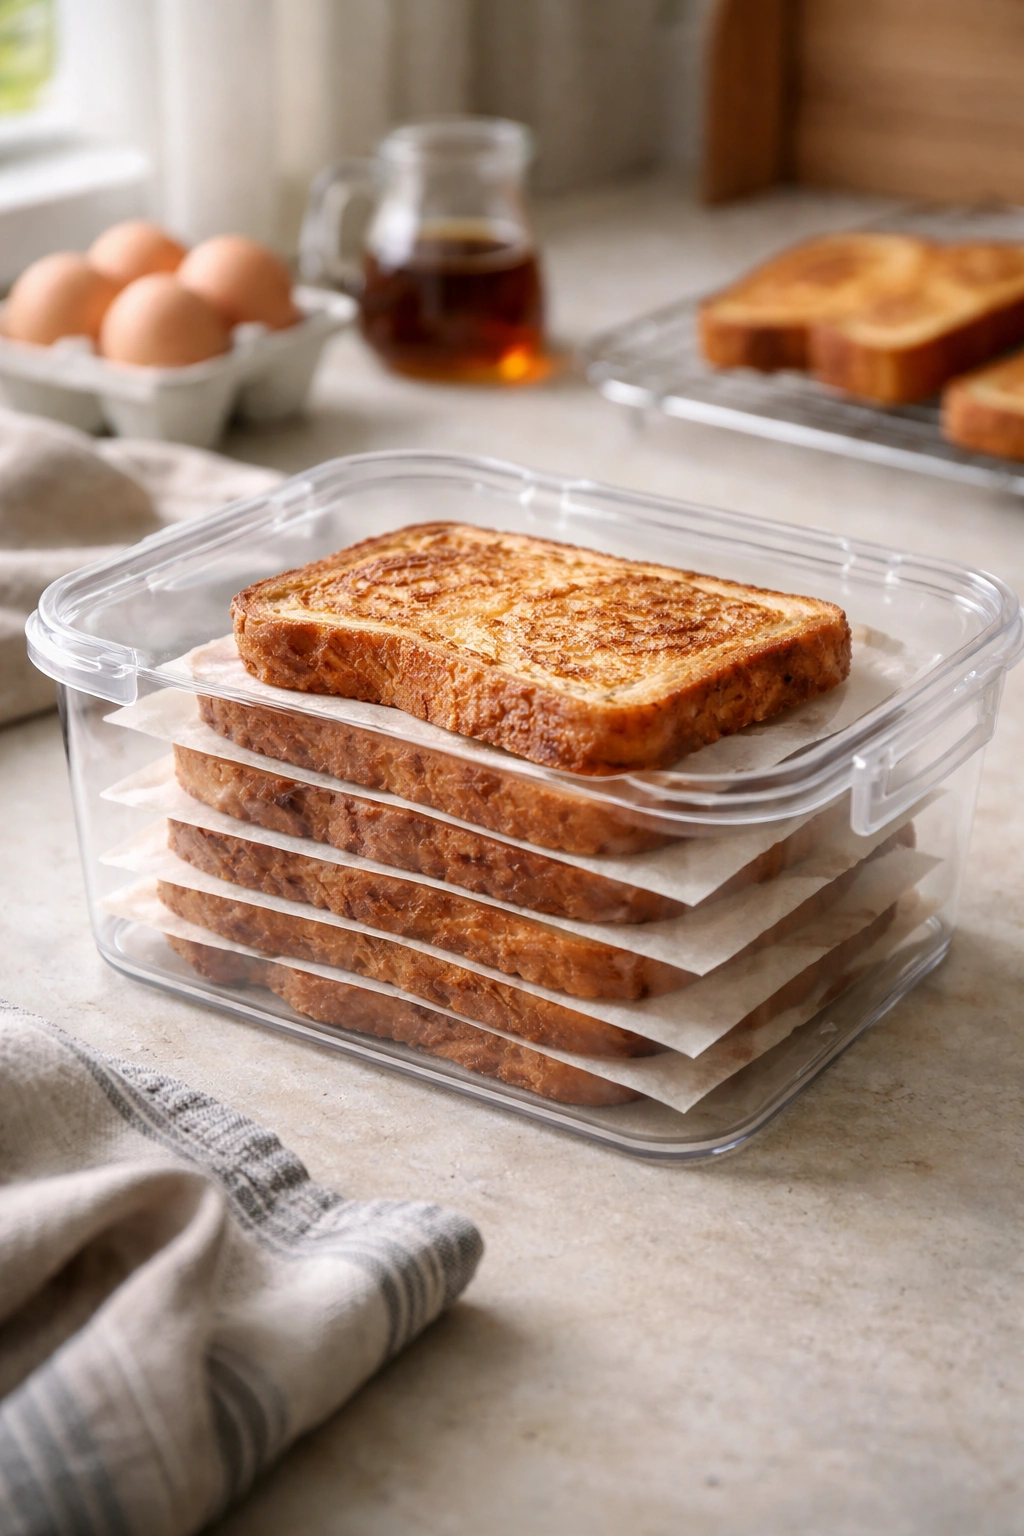
Cooked French toast keeps in the refrigerator for up to 3 days. Let it cool completely before storing it in an airtight container. To reheat, place it on a baking sheet and warm it in a 350°F oven for about 5 minutes. This keeps the exterior crispy instead of steaming it soft in the microwave.
You can freeze cooked French toast for up to 3 months. Layer the cooled pieces between parchment paper in a freezer-safe container. To reheat frozen pieces, warm them in a 350°F oven for 8 to 10 minutes until heated through and crispy again.
The brilliant shortcut: Cook your French toast the night before a busy morning, refrigerate it, and reheat it in a low oven while you’re getting ready. You’ll have fresh, hot French toast without any active cooking time in the morning.
You can also cut your French toast into strips and reheat it gently in a low oven, then layer it in a casserole dish with whipped cream and fruit for an easy, fancy brunch dessert.
Serving Ideas and Toppings
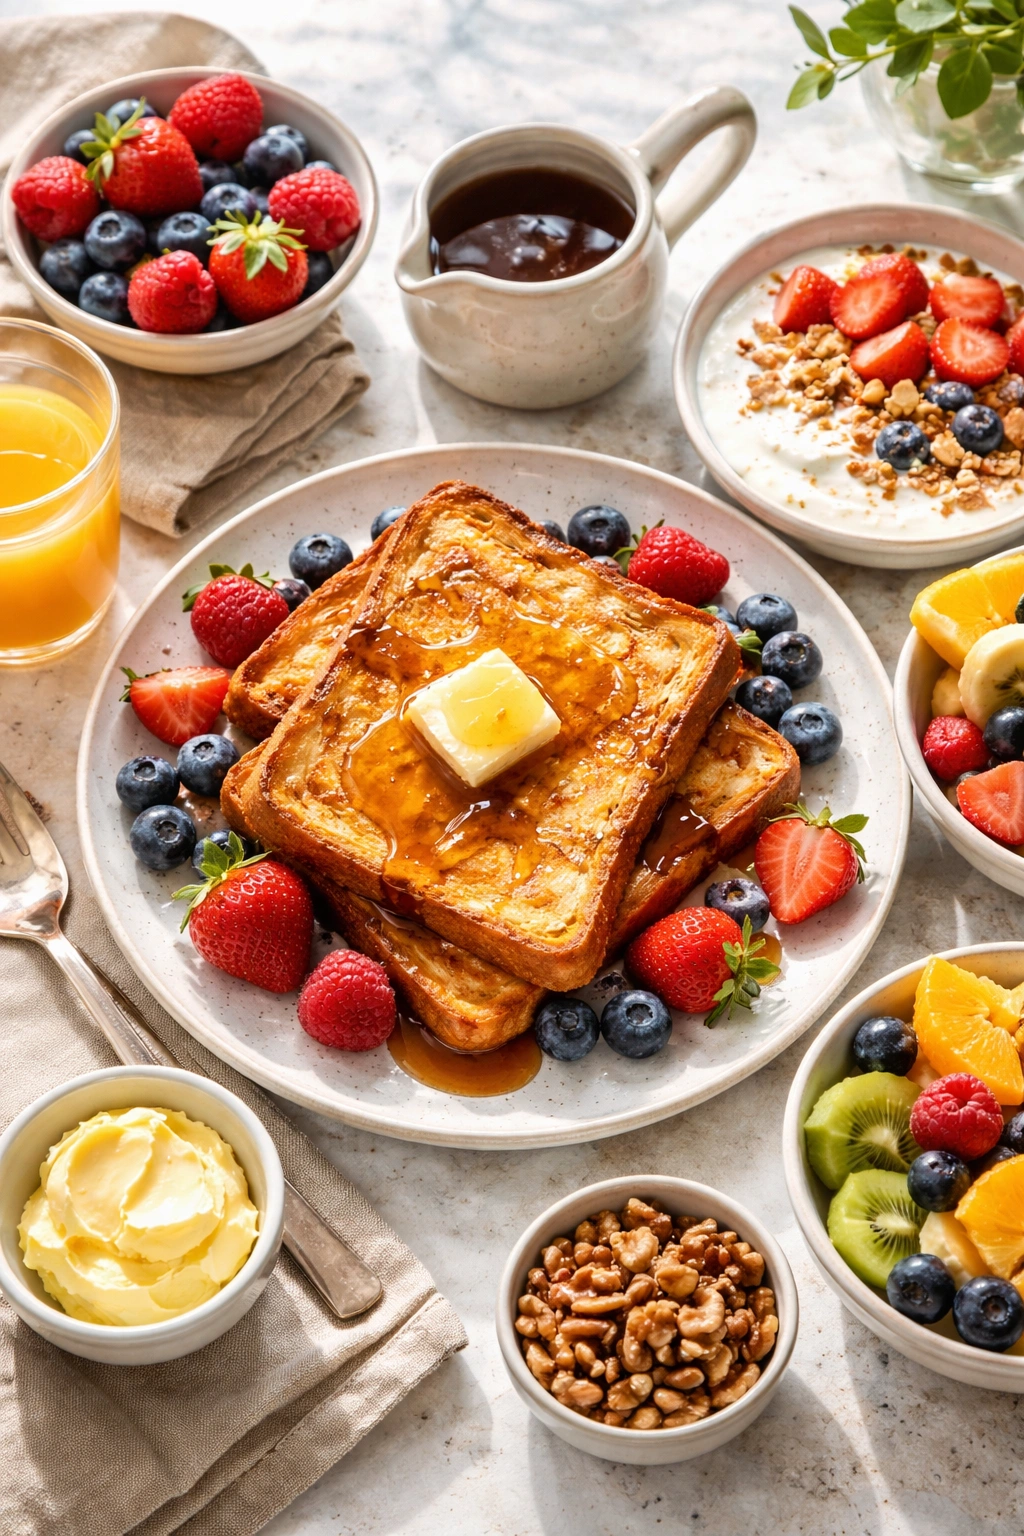
The simplest version is the best: warm French toast, a pat of melting butter, and real maple syrup. Nothing else needed.
But if you want to dress it up, fresh berries are always welcome — strawberries, blueberries, raspberries, or blackberries scattered on top. A dollop of whipped cream or Greek yogurt adds richness and a subtle tang that balances the sweetness.
Sliced fresh fruit works beautifully: sliced peaches, fresh figs, sliced pears, or thin-sliced apples all pair wonderfully. The fresh, natural sweetness complements the caramelized toast perfectly.
A drizzle of honey instead of syrup gives you a different flavor profile — it’s floral and less aggressively sweet than maple. Dusting with powdered sugar creates an elegant, simple presentation.
Toasted nuts add a wonderful textural contrast and depth — chopped pecans, sliced almonds, or crushed pistachios scattered on top. A sprinkle of cinnamon or a tiny pinch of sea salt on top of the syrup creates a sophisticated sweet-and-salty combination.
For something richer, crumbled crispy bacon or a side of fresh fruit balances the indulgence. Or serve it alongside a simple green salad dressed with lemon vinaigrette if you want to add something fresh and light to the plate.
The ultimate pairing is fresh-squeezed orange juice and strong black coffee, but that’s more about the ritual than the recipe.
Final Thoughts

Easy French toast is the perfect weekend breakfast because it feels special without demanding anything special from you. You’re not stressed, you’re not rushing, you’re just standing at the stove making something delicious while the morning unfolds around you.
The real magic of French toast is its fundamental simplicity. There are no hidden techniques, no secret ingredients, no tricks that require years of practice to master. Just bread, eggs, milk, vanilla, heat, and butter. Understanding the why behind each step — why thickness matters, why dipping time is crucial, why temperature makes the difference — is what separates good French toast from exceptional French toast.
Give yourself permission to enjoy the process. Weekend mornings aren’t meant to be rushed. Make the custard while the griddle preheats. Cook at a leisurely pace, one or two slices at a time. Plate them as they finish cooking. Sit down and actually eat without checking your phone. This is what weekend mornings are for — not the rushing, but the deliberate slowness of creating something warm and nourishing and delicious, just for yourself or the people you love.
The next time you want a breakfast that feels indulgent but requires almost no effort, you know exactly where to start.