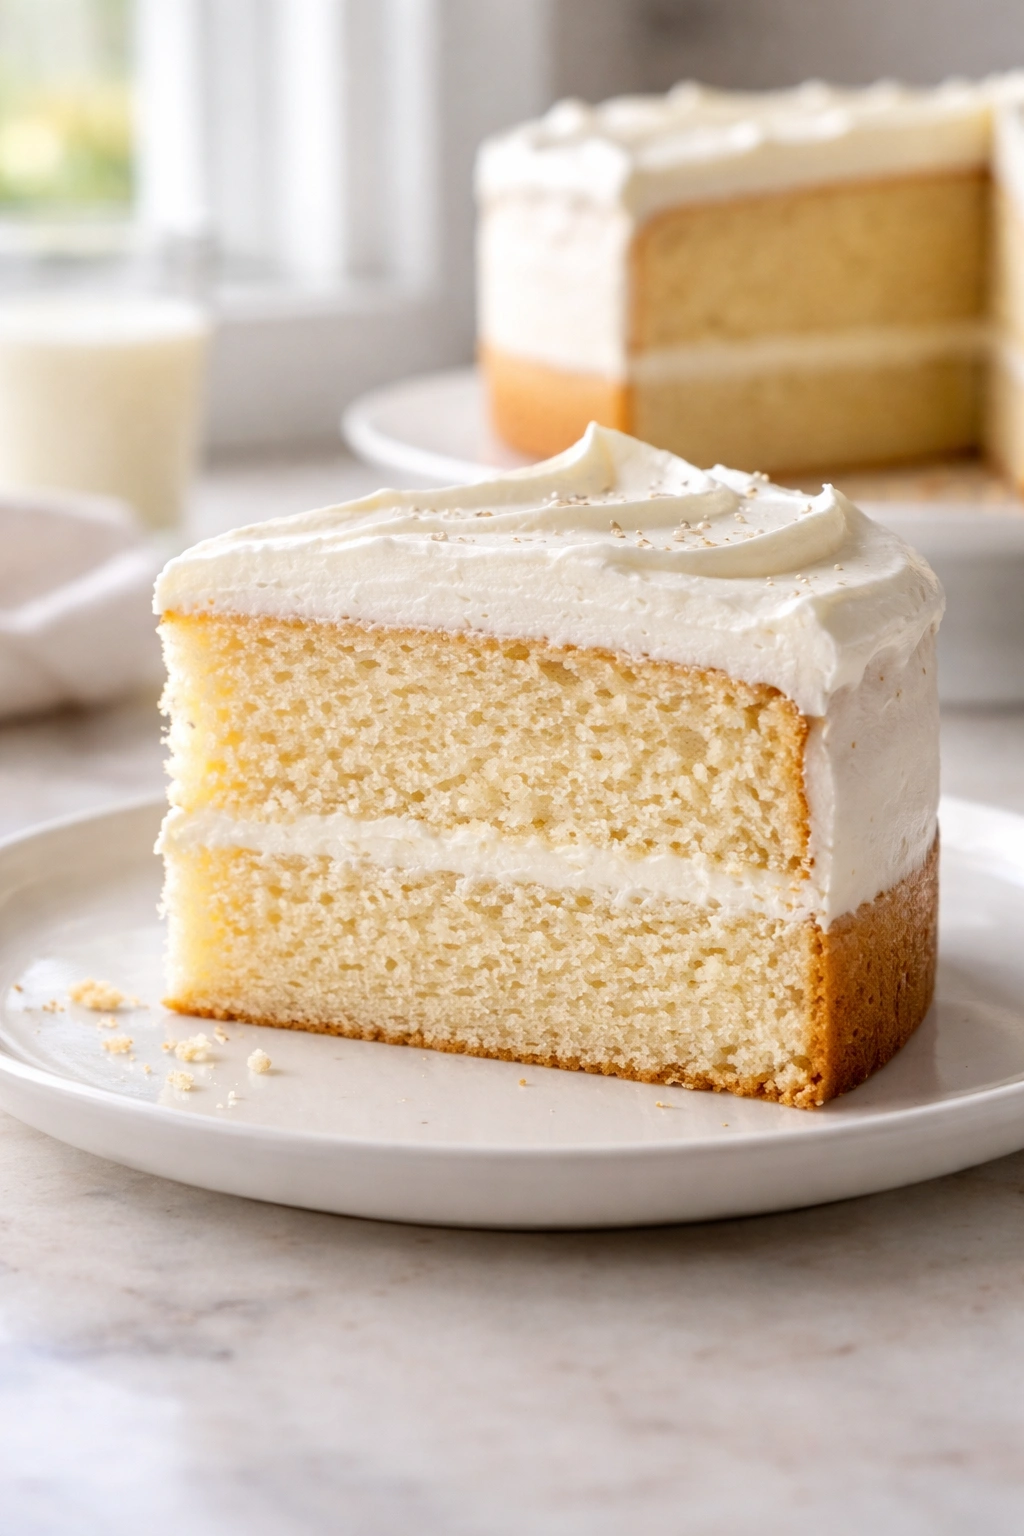
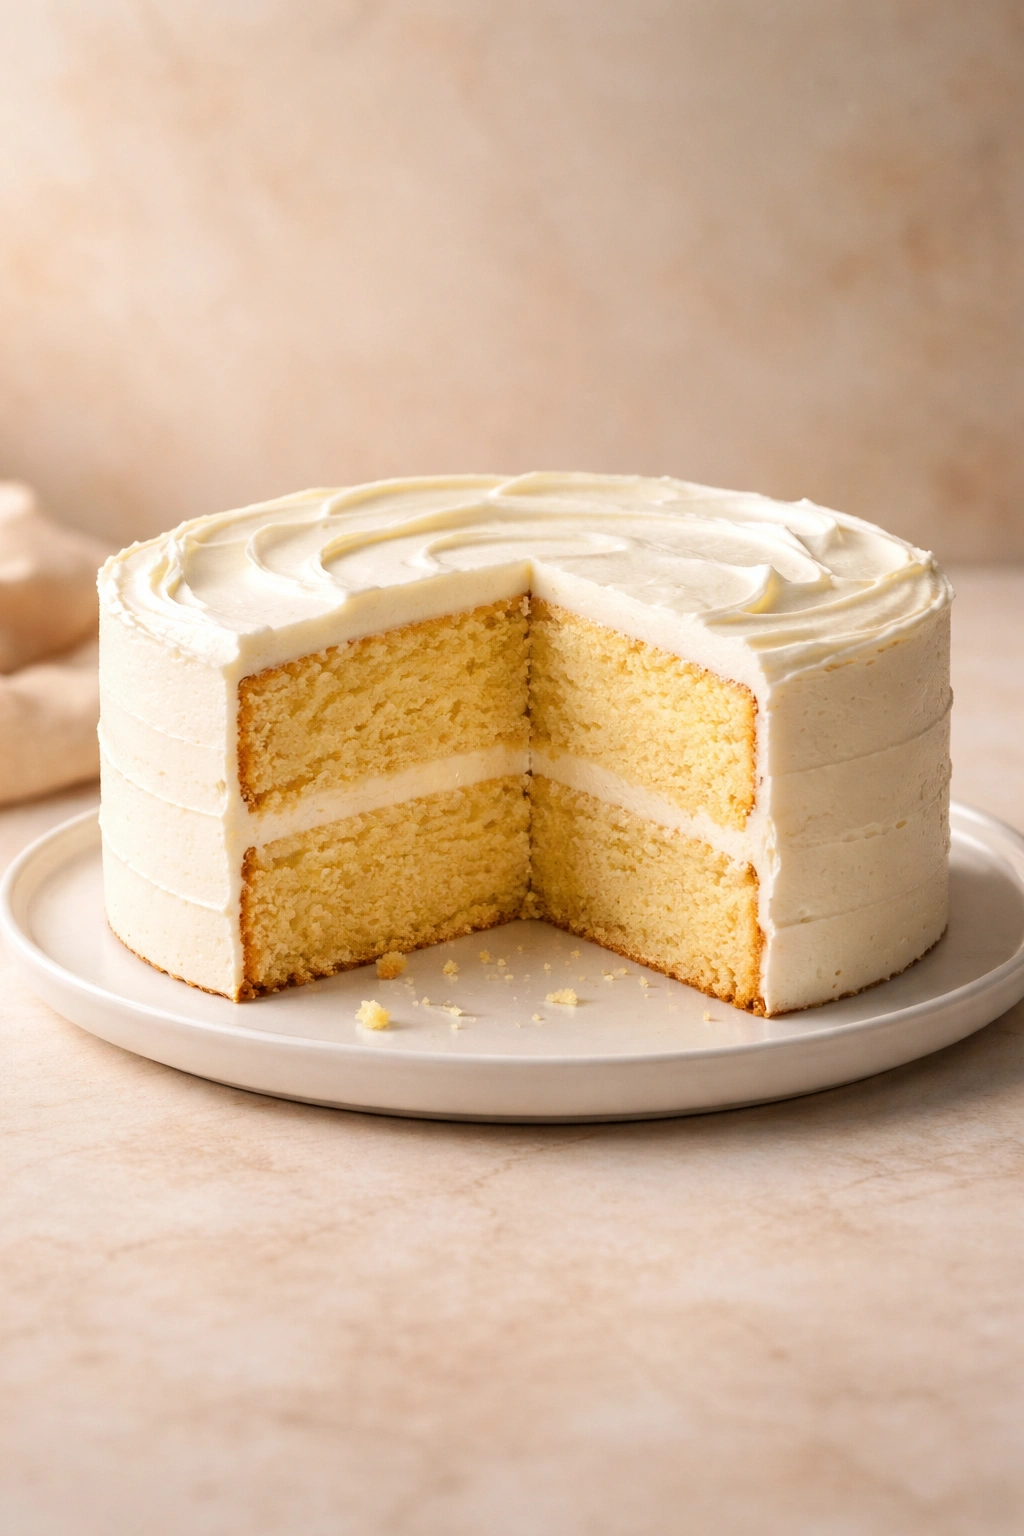
There’s something almost spiritual about a truly excellent vanilla cake. It’s not fancy or intimidating—just tender crumb, bright vanilla flavor that doesn’t scream artificially of almond extract, and a texture so soft it practically melts on your tongue. This is the cake you reach for on Tuesday afternoon when you want something special but don’t have three hours or five specialty ingredients. It’s also the cake that shows up to birthday parties, potlucks, and holiday tables without apology because it’s genuinely good—moist but not dense, vanilla-forward but not cloying, sturdy enough to frost and layer but delicate enough to feel indulgent.
The secret to this kind of cake isn’t some hidden technique or expensive ingredient. It’s understanding how a few basic principles work together: how creaming butter and sugar creates the air pockets that give you that tender crumb, why room-temperature eggs incorporate more smoothly, how alternating dry ingredients with milk keeps your batter perfectly balanced, and what visual and sensory cues tell you it’s baked exactly right. Once you nail these fundamentals, you’ve got a recipe that works reliably whether you’re making a simple frosted layer cake, a decorated celebration cake, or a plain sheet cake for Wednesday dinner.
This vanilla cake has fed my family through countless occasions. I’ve made it hastily for school bake sales, dressed it up with buttercream and fresh berries for dinner parties, baked it on ordinary Thursdays just because someone asked, and frosted it with dedication for milestone birthdays. It’s never let me down, and neither will it for you. What makes it special is the precision in how it’s built—not complicated steps, but the right technique at each stage—combined with the quality of vanilla extract you choose. That one ingredient is where you taste the difference between adequate and genuinely delicious.
Why This Vanilla Cake Stands Apart
Most vanilla cakes you encounter are either boxed mixes (convenient but lacking real vanilla depth) or overly complicated recipes that demand cake flour, cornstarch, and a food processor. This cake takes a middle path: simple enough for a beginner to execute successfully, but built on methods that actually matter. It uses all-purpose flour because that’s what most home cooks have on hand, yielding a crumb that’s tender without being fragile—sturdy enough to frost and layer, but soft enough to feel special.
The magic comes from creaming butter with sugar for a full 3 to 4 minutes until the mixture is pale and noticeably increased in volume. This isn’t just mixing—it’s aerating the batter with thousands of tiny air bubbles that expand in the heat of the oven, creating that desirable tender crumb. You’ll notice the transformation immediately if you’ve never done it: the mixture starts buttery and grainy, and within a couple of minutes, it becomes light, fluffy, and pale enough that you’d swear you’d added whipped cream to it.
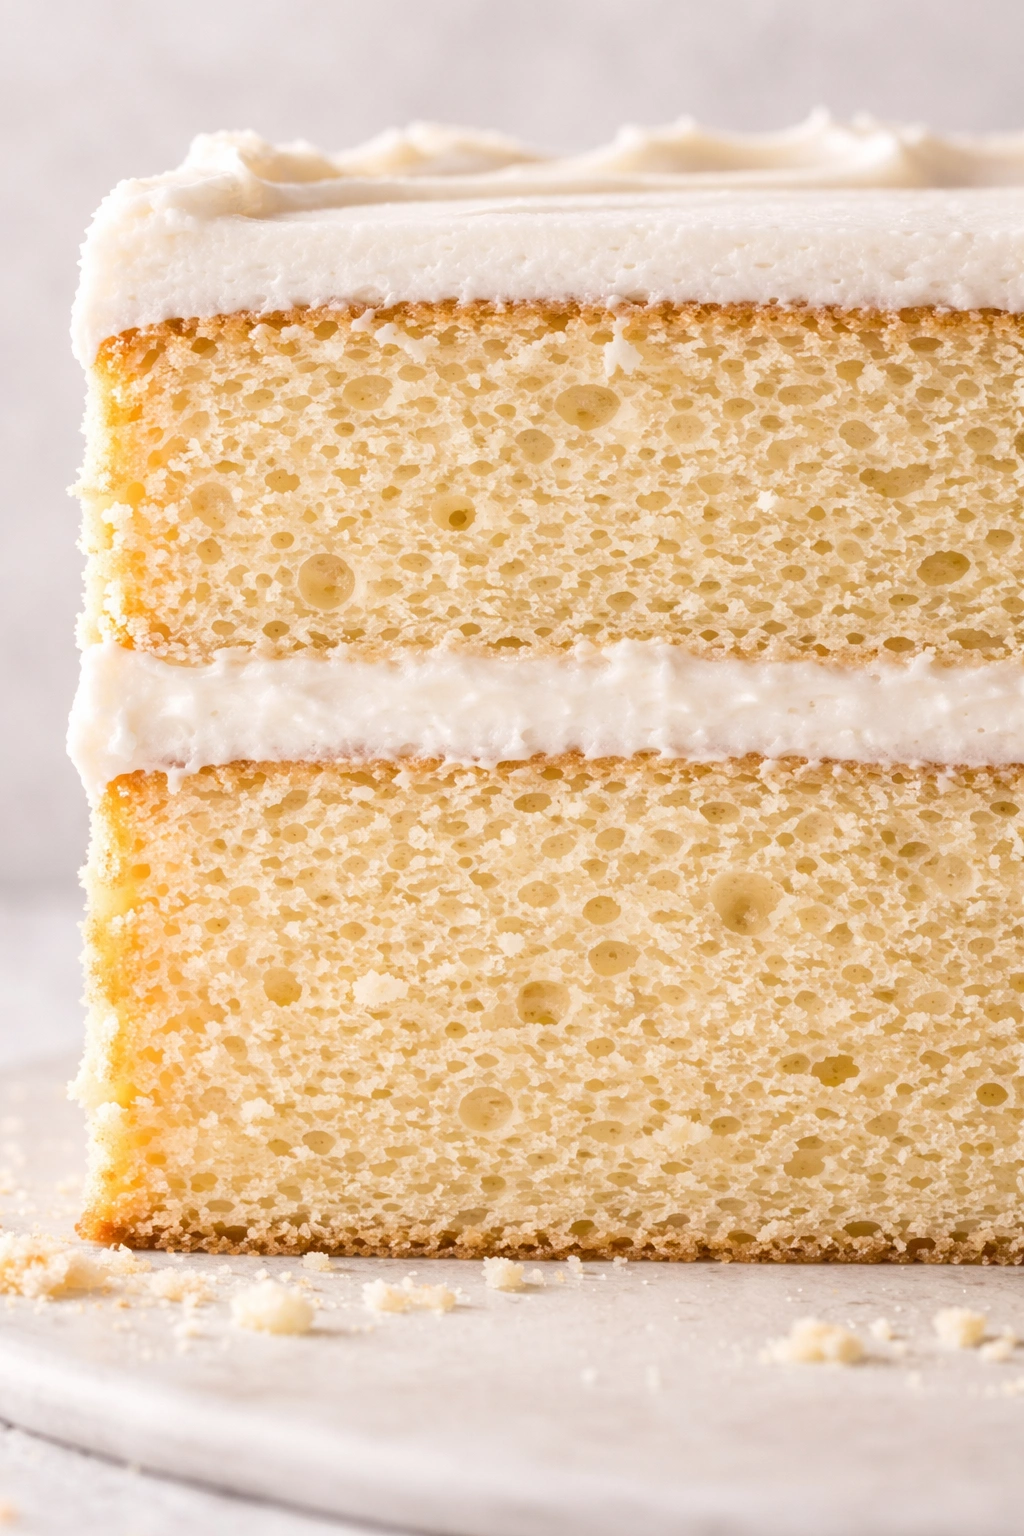
The Crumb Quality You Can Feel
A properly made vanilla cake has what bakers call a fine, even crumb. This means each bite contains evenly distributed tiny pockets of air rather than a few large holes or a dense, spongy texture. You achieve this through the creaming step (introducing air early), through careful mixing (folding ingredients gently after creaming), and through proper baking (correct oven temperature and timing). The result is a cake that’s moist and tender—it yields slightly when you press your finger into a fresh slice, but it doesn’t fall apart or crumble uncontrollably.
Vanilla Flavor That Tastes Like Vanilla
This recipe calls for pure vanilla extract, not imitation. Pure vanilla extract is made from real vanilla beans and contains vanillin alongside hundreds of other flavor compounds that create depth and complexity. Imitation vanilla contains only vanillin, the single compound that makes vanilla taste like vanilla—it’s technically accurate but lacks the nuance. For a cake where vanilla is the star flavor, that difference matters. You’ll taste the brightness, the slight floral note, and a clean finish that imitation extract simply can’t deliver.
Understanding Cake Structure and Why It Matters
Before you start, it helps to understand what’s actually happening inside your cake as it bakes. Unlike quick breads (which rely on baking soda and acidic ingredients for leavening) or yeast breads (which rise through fermentation), this cake rises through a combination of creamed-in air and chemical leavening from baking powder. The butter and sugar, when beaten together, capture thousands of air bubbles. The baking powder releases additional carbon dioxide when it hits the oven’s heat, expanding those bubbles further and creating rise.
The alternating additions of dry ingredients and milk are not arbitrary. Dry ingredients coat the fat molecules in the batter—if you add all the flour at once, you can overwork the gluten and end up with a tough crumb. Milk dissolves some of those particles and keeps the batter from becoming dense. By alternating them (flour, milk, flour, milk, flour), you’re distributing everything evenly without overworking the gluten.
How Eggs Build Structure
Eggs do multiple jobs in a cake. Their proteins coagulate when heated, setting the cake’s structure. Their fat (in the yolk) keeps the crumb tender and moist. When you add them one at a time to creamed butter and sugar, they incorporate fully and evenly, distributing throughout the batter rather than forming streaks. Room-temperature eggs blend more smoothly into the batter than cold ones, which is why temperature matters.
Why Oven Temperature Is Non-Negotiable
Cakes need a moderately hot oven to rise properly. At 350°F (175°C), the heat is gentle enough that the outside doesn’t brown too quickly while the inside is still cooking, but hot enough to activate the baking powder and expand all those air bubbles. Too hot (375°F+), and the edges set before the center finishes rising, creating a dome or a dry perimeter. Too cool (325°F), and the cake rises sluggishly and often ends up dense.
Essential Ingredients and Quality Choices
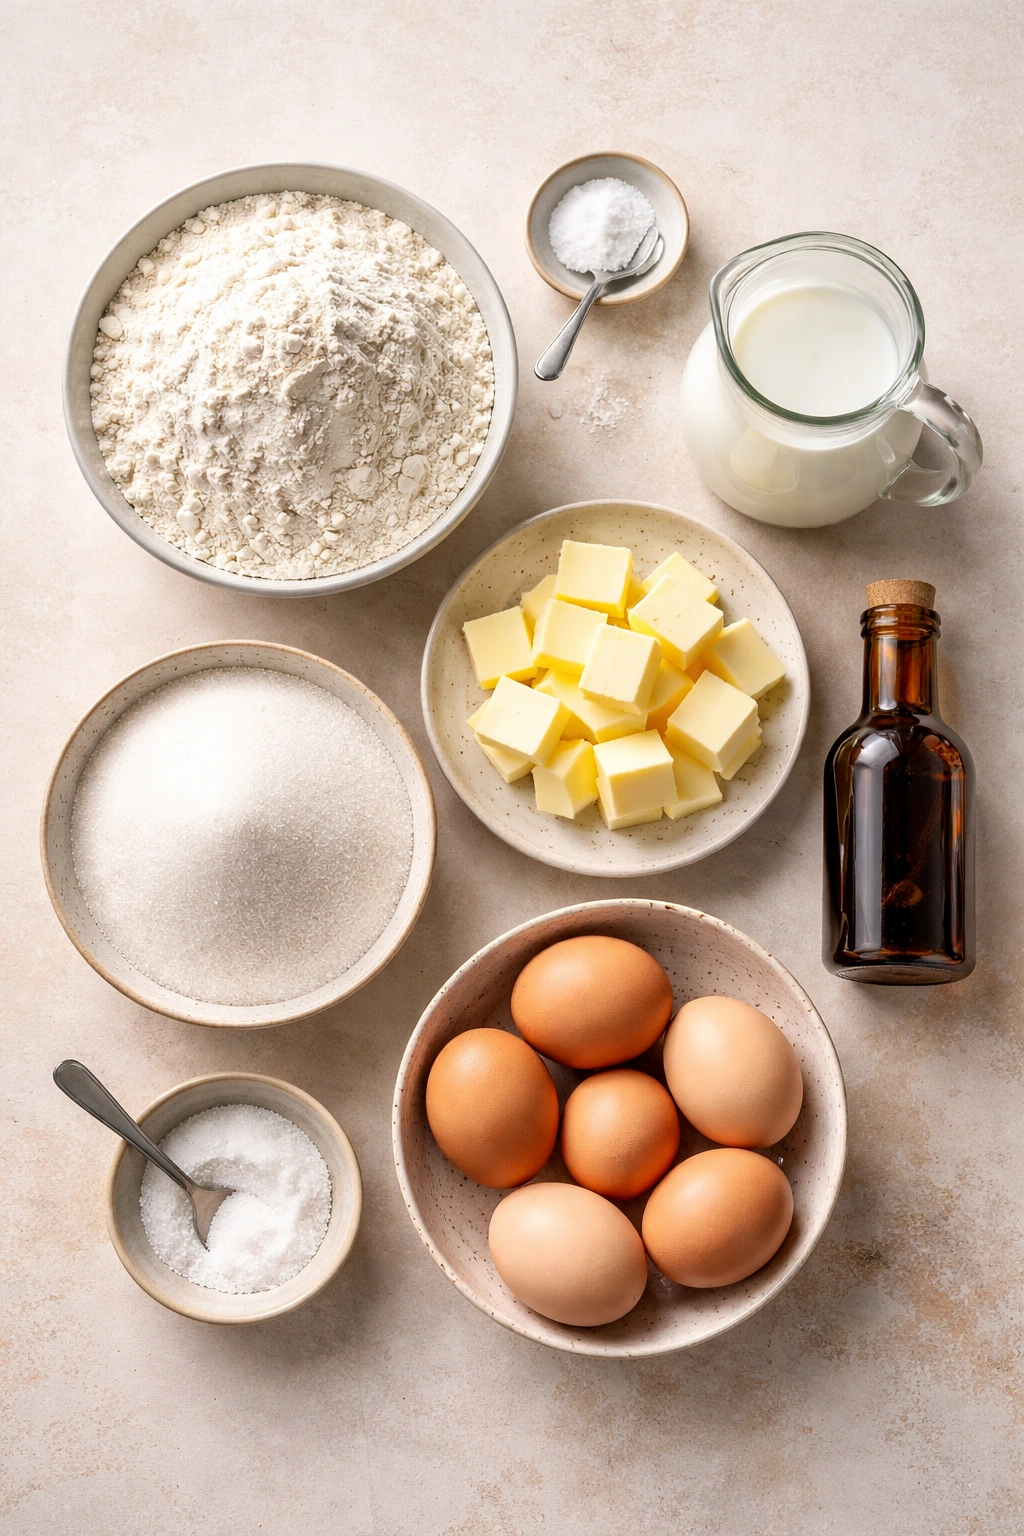
This cake contains just eight ingredients: flour, baking powder, salt, butter, sugar, eggs, milk, and vanilla extract. Each one matters, and choices about quality actually show up in the final result.
About the Flour
Use all-purpose flour—it has a moderate protein content (10-12%) that creates a tender crumb without being fragile. Cake flour, with its lower protein content, would yield a slightly more delicate crumb but isn’t necessary. Don’t sift unless the flour is visibly lumpy, which rarely happens with modern all-purpose flour. Measuring by weight (if you have a kitchen scale) gives you more consistent results than scooping, but scooping-and-leveling with a knife works well too.
The Butter Makes a Difference
Use unsalted butter so you control the salt content completely. Salted butter can vary significantly in how much salt it contains, which throws off balance. Let it sit on the counter for at least an hour before you start baking so it’s genuinely soft—not melted or oily, but soft enough that you can easily press your finger through it. Cold butter won’t incorporate properly, leaving your cake dense and greasy.
Sugar Types and Their Effects
Granulated white sugar is standard here. Don’t substitute brown sugar, which adds moisture and would change both the flavor and texture. The sugar doesn’t just sweeten—its crystals help aerate the batter during creaming, and it draws moisture into the cake as it bakes, keeping it tender. This is why creaming for a full 3-4 minutes matters so much.
Why Baking Powder, Not Baking Soda
Baking powder contains baking soda plus acidic compounds and starch. It releases carbon dioxide in two stages—once when it’s wet and again when it’s heated—giving the cake a gentler, more even rise. Baking soda alone would need an acidic ingredient (buttermilk, brown sugar, chocolate) to activate, which this cake doesn’t have. Use aluminum-free baking powder if you can find it; some people detect a slight metallic aftertaste from the aluminum compound in standard baking powder, though it’s subtle.
Milk Choice and Temperature
Whole milk adds the most richness and creates the most tender crumb. If you use low-fat or skim milk, you’ll still get a good cake, but it might be slightly less moist. The milk should be room temperature—cold milk can shock the warm batter and make the fat in the butter seize up, creating graininess. Let milk sit on the counter for 15 minutes if you’ve just taken it from the fridge, or place the measuring cup in a warm water bath for a few minutes.
Yield: Serves 10 to 12 | Makes one 9-inch layer cake or one 9×13-inch sheet cake
Prep Time: 20 minutes
Cook Time: 30 to 35 minutes
Total Time: 50 minutes to 1 hour active time, plus 1 to 2 hours cooling before frosting
Difficulty: Beginner — This cake requires no special equipment beyond a mixer and standard baking pans, and every step is straightforward even for first-time bakers. Mistakes are forgiving; the cake is nearly impossible to ruin.
Creaming Butter and Sugar for the Perfect Crumb
The creaming step is where everything begins. This is the single most important stage for achieving that tender, moist crumb that sets excellent homemade cake apart from dense, dry grocery store versions. It takes only 3 to 4 minutes, but those minutes transform the batter entirely.
Start with softened butter—it should be soft enough that your finger leaves a light impression when you press it, but still hold its shape. If it’s too warm or melted, it won’t incorporate air properly. Cut the butter into large chunks and place it in the bowl of a stand mixer (or a large mixing bowl if you’re using a hand mixer). Add the sugar.
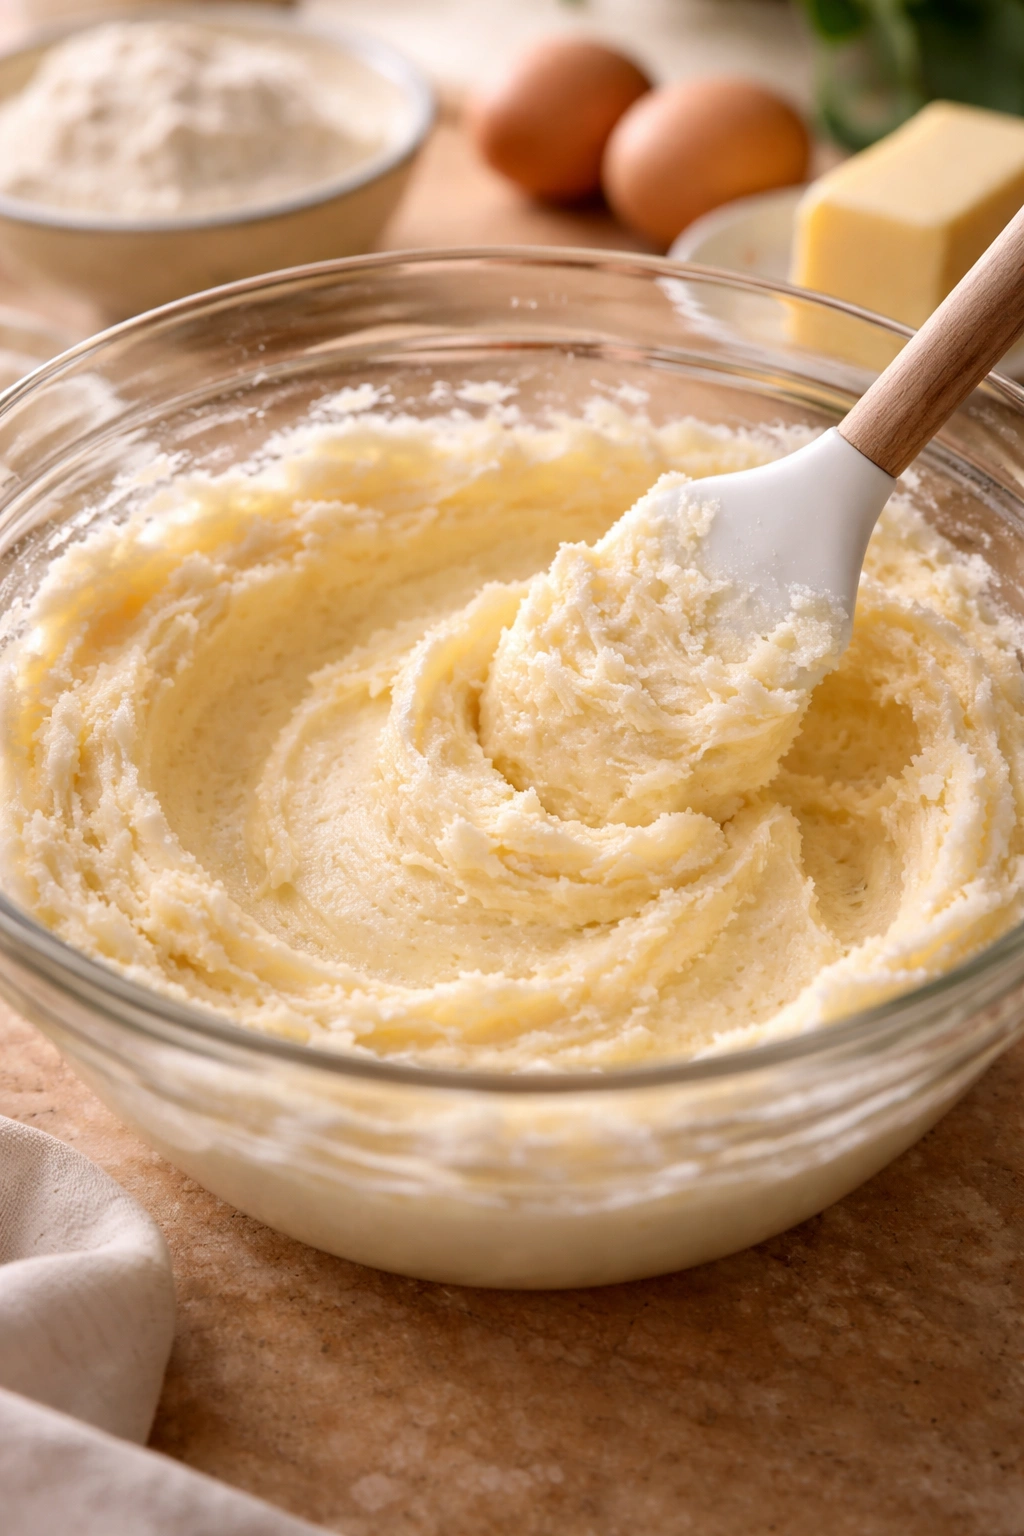
Turn the mixer to medium speed and beat for 3 to 4 minutes, occasionally stopping to scrape the sides and bottom of the bowl with a rubber spatula. Watch the transformation: it starts as chunky butter-and-sugar mixture, grainy and yellow-gold. Within 2 minutes, it becomes lighter in color. By 3 minutes, it’s noticeably paler—almost cream-colored—and visibly fluffier. This pale, voluminous mixture is your signal that you’ve beaten enough air into it. If you lift the beaters and a dollop falls from them, it should take a moment to hit the bowl’s surface rather than dropping immediately.
What You’re Actually Creating
Those air bubbles—thousands of them—are the whole point of creaming. As the mixer beats, it breaks the sugar crystals against the butter, creating tiny cavities filled with air. In the oven, these air bubbles expand, making the cake rise and creating that delicate crumb structure. If you skip this step or rush it, you’ll still have cake, but it will be denser and less tender.
Why Scraping the Bowl Matters
As you beat, the mixture gradually climbs up the sides of the bowl and sticks there. If you don’t scrape it down and stir it back into the center, those portions won’t incorporate fully, and you’ll end up with streaks of unmixed butter in the final batter. Scrape down at least twice during the creaming process, especially around the bottom where unmixed butter can hide.
Incorporating Eggs Without Curdling the Batter
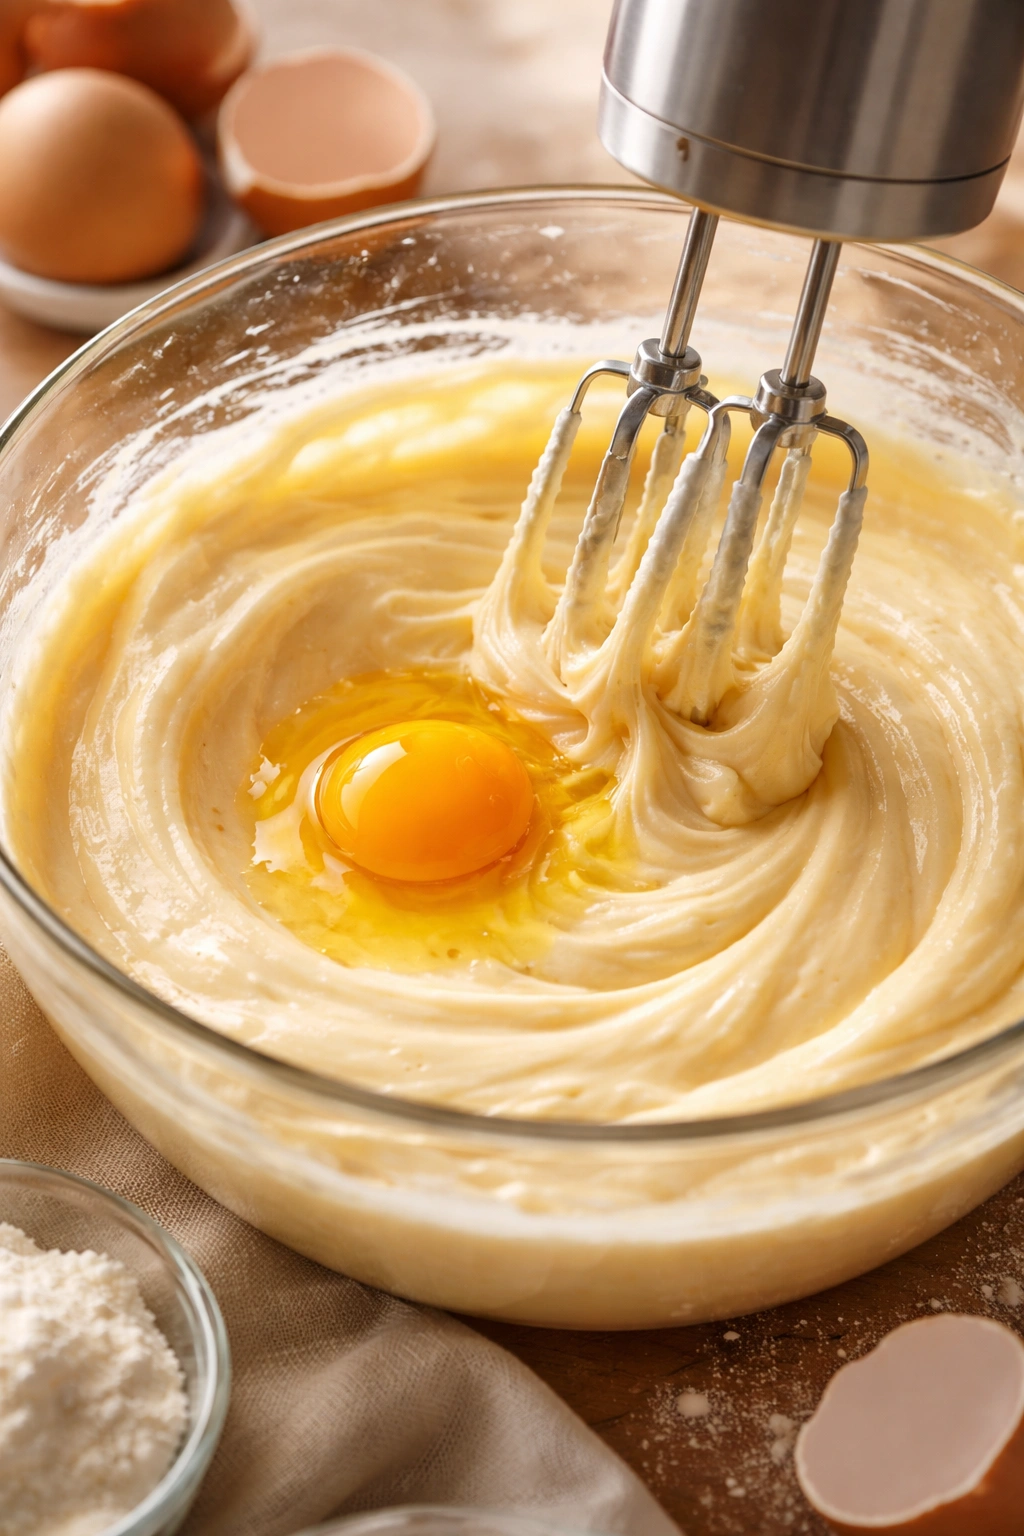
Once your butter and sugar are pale and fluffy, you’re ready for the eggs. Room-temperature eggs are crucial here—they blend smoothly into the creamed batter without shocking it and causing it to seize (when fat and liquid separate, creating a grainy, broken-looking mixture).
Remove eggs from the refrigerator about 15 minutes before you start baking, or place them in a bowl of warm (not hot) water for 5 minutes. Add eggs one at a time, beating on medium speed for 30 seconds after each addition. The mixture may look slightly curdled after you add an egg—it might have visible streaks and a bumpy texture. This is normal and not a mistake. Beat for 30 seconds and it will smooth out. Do not add the next egg until the previous one has been fully incorporated.
After the second egg, stop and scrape the bowl thoroughly. This prevents one egg from sitting unmixed on the bowl’s side while you’re beating in the third. After all three eggs are incorporated, the batter should look pale, smooth, and noticeably thicker than it was before you added them. You’ve essentially created a thick emulsion—a stable blend of fat (from butter and egg yolks) and liquid (from eggs) bound together by the sugar and flour particles you’ll add next.
What “Curdled” Batter Actually Looks Like
If your batter breaks or “curdles,” it means the butter, eggs, and sugar have separated rather than emulsifying. It looks visibly grainy, almost lumpy, and significantly thinner than it should be. The cause is usually cold eggs mixed with warm butter, or adding too much egg too quickly. If this happens, don’t panic. Keep beating—over time, the mixture will usually come back together as more fat particles break down. You can also add a tablespoon of the flour mixture to the bowl and beat it in; this helps stabilize the emulsion by introducing more solid particles.
Alternating Dry Ingredients and Milk for Balance
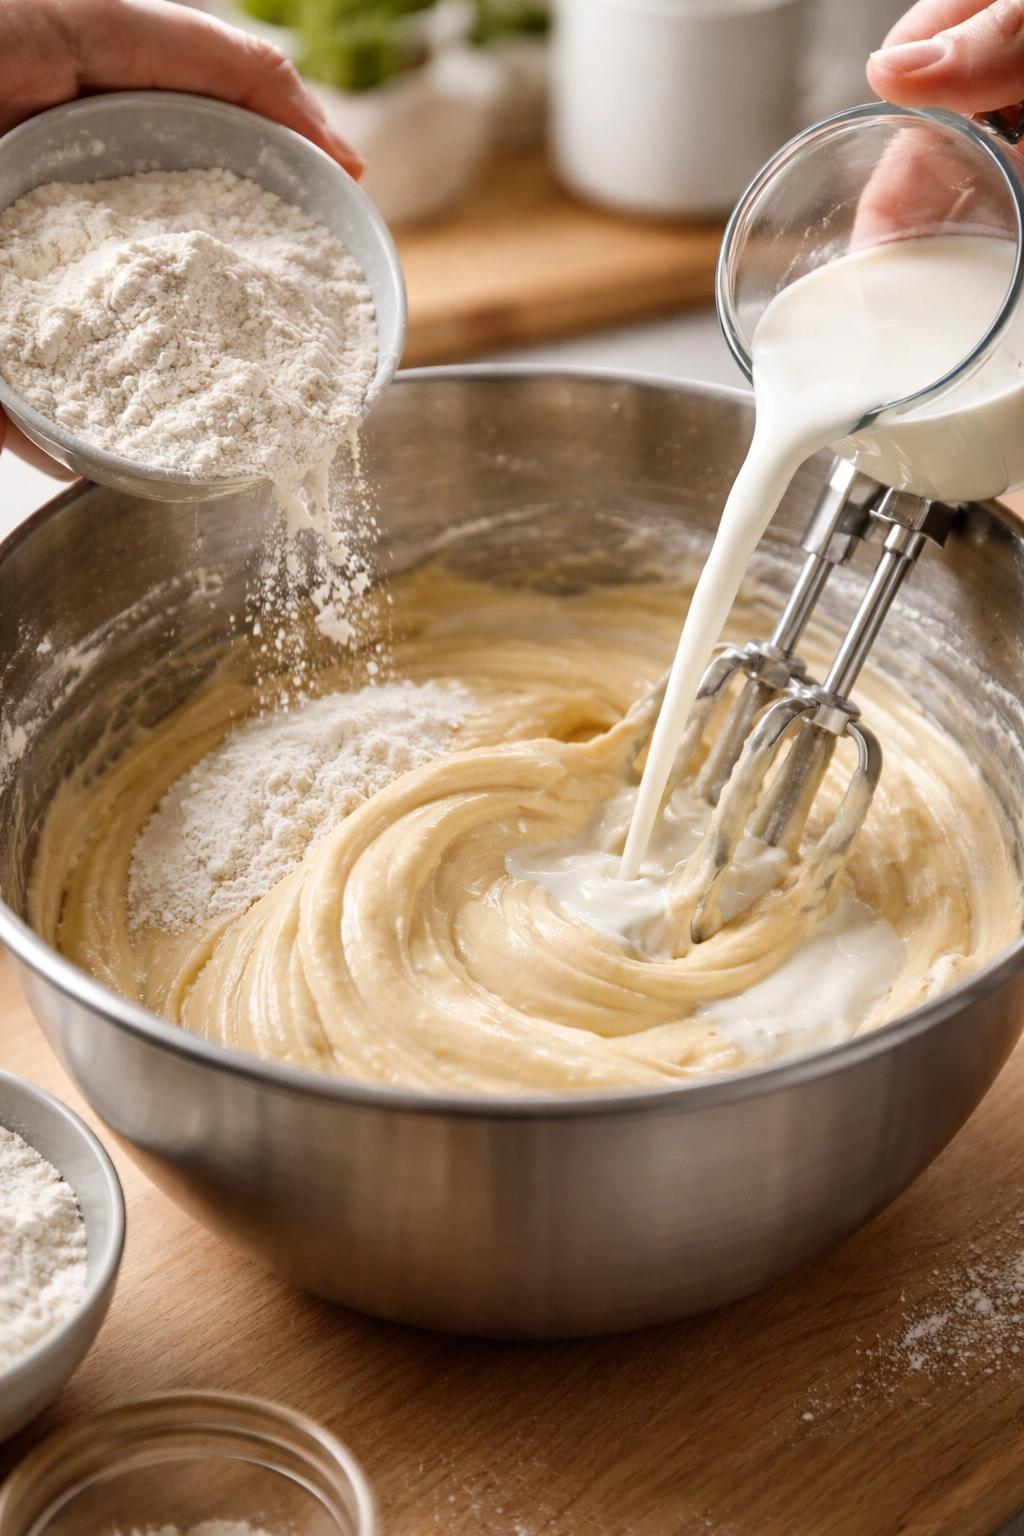
Now comes a step that requires a gentle hand. With the mixer on low speed, add the flour mixture and milk in three additions of flour and two additions of milk: flour, milk, flour, milk, flour. Wait until each addition has mostly disappeared into the batter (just 10-15 seconds of mixing) before adding the next. Scrape the bowl between additions to ensure even mixing.
Why This Alternating Method Works
If you added all the flour at once, the mixer would overwork the gluten, toughening the crumb. If you added all the milk at once, the batter would become too thin to properly incorporate the flour. By alternating, you’re introducing everything gradually. The flour coats the fat molecules and distributes throughout the batter. The milk dissolves and loosens things slightly, preventing the batter from becoming stiff and hard to mix. The final result is a batter with perfect consistency—pourable but still thick enough to cling to a spatula.
The “Just Combined” Standard
“Just combined” doesn’t mean beat until perfectly smooth. It means beat until you don’t see streaks of flour or white patches of unmixed powder. A few barely-visible swirls are fine and actually preferable—they signal that you’ve stopped before overworking. The batter will look smooth and thick, with a slight sheen from the butter. Overmixing at this stage toughens the gluten and creates a dense, tough crumb.
For the Cake:
- 2¼ cups (280 grams) all-purpose flour
- 2½ teaspoons baking powder (aluminum-free if available)
- ½ teaspoon fine sea salt
- 1 cup (2 sticks / 226 grams) unsalted butter, softened to room temperature
- 1¾ cups (350 grams) granulated white sugar
- 3 large eggs, room temperature
- 2 teaspoons pure vanilla extract
- 1¼ cups whole milk, room temperature
Achieving Even Rise and Golden Cake
Pour the batter into your prepared pans—either two 9-inch round cake pans for a layer cake, or one 9×13-inch pan for a sheet cake. If using round pans, divide the batter as evenly as possible between them. You can weigh the batter on a kitchen scale for perfect equality, or divide it visually by pouring it roughly in half into each pan, then adjusting by eye. An offset spatula helps spread the batter into an even layer, though for round pans you can also tap the pan gently on the counter a couple of times to settle the batter and level itself.
Prepare the Pan and Preheat:
-
Preheat the oven to 350°F (175°C) and position the rack in the center of the oven. If baking two round pans simultaneously, position one rack in the center-lower third and another in the center-upper third, staggering the pans so heat circulates freely around each one.
-
Grease two 9-inch round cake pans (or one 9×13-inch pan) with softened butter, coating the bottom and sides evenly. Dust with a light coating of flour, tapping out the excess. Line the bottom of each round pan with a round of parchment paper, or line just the bottom of the sheet pan. The parchment paper prevents sticking and makes removal easier. For round pans, you can cut parchment circles ahead of time, or place a cold pan on parchment paper, trace around it with a pencil, and cut out circles.
Make the Batter:
-
In a large bowl, whisk together the flour, baking powder, and salt until combined—about 30 seconds of whisking. This distributes the leavening evenly throughout the flour so you don’t get pockets of batter without baking powder. Set aside.
-
Using a stand mixer fitted with the paddle attachment (or a hand mixer), beat the softened butter and sugar on medium speed for 3 to 4 minutes, until the mixture is pale, noticeably fluffy, and increased in volume by roughly half. Stop the mixer and scrape down the sides of the bowl at least twice during beating.
-
Add the eggs one at a time, beating on medium speed for 30 seconds after each addition. After each egg, scrape down the sides of the bowl, paying attention to the bottom where unmixed egg can hide. The mixture may look slightly grainy or curdled after adding an egg—this is normal. Continue beating and it will smooth out. After the final egg, the batter should be pale, thick, and noticeably increased in volume.
-
Add the vanilla extract and beat on low speed for 15 seconds until combined. Add just 30 seconds—you don’t want to overbeat at this point.
-
Reduce the mixer to low speed. Add the flour mixture in three additions, alternating with the milk in two additions: flour, milk, flour, milk, flour. After each addition, beat for just 10-15 seconds—only until you don’t see streaks of white flour or unmixed powder. Scrape the bowl between additions. Do not overmix at this stage—overworking develops gluten and creates a tough, dense crumb. Mixing just until combined is exactly right.
-
Divide the batter evenly between the prepared pans (if using round pans) or pour it into the sheet pan. Smooth the surface gently with an offset spatula or the back of a spoon to level it. The batter should fill the pans about two-thirds full.
Bake Until Golden:
- Bake in the preheated 350°F (175°C) oven for 30 to 35 minutes for round cake pans (they bake slightly faster due to their shape), or 32 to 38 minutes for a 9×13-inch sheet pan. If baking two round pans on different racks, rotate them halfway through (move the upper pan to the lower position and vice versa) so they bake evenly. The edges of the cake will just begin to pull away from the sides of the pan, and the top will be golden-brown, not pale or dark.
Testing Doneness: When to Pull It From the Oven
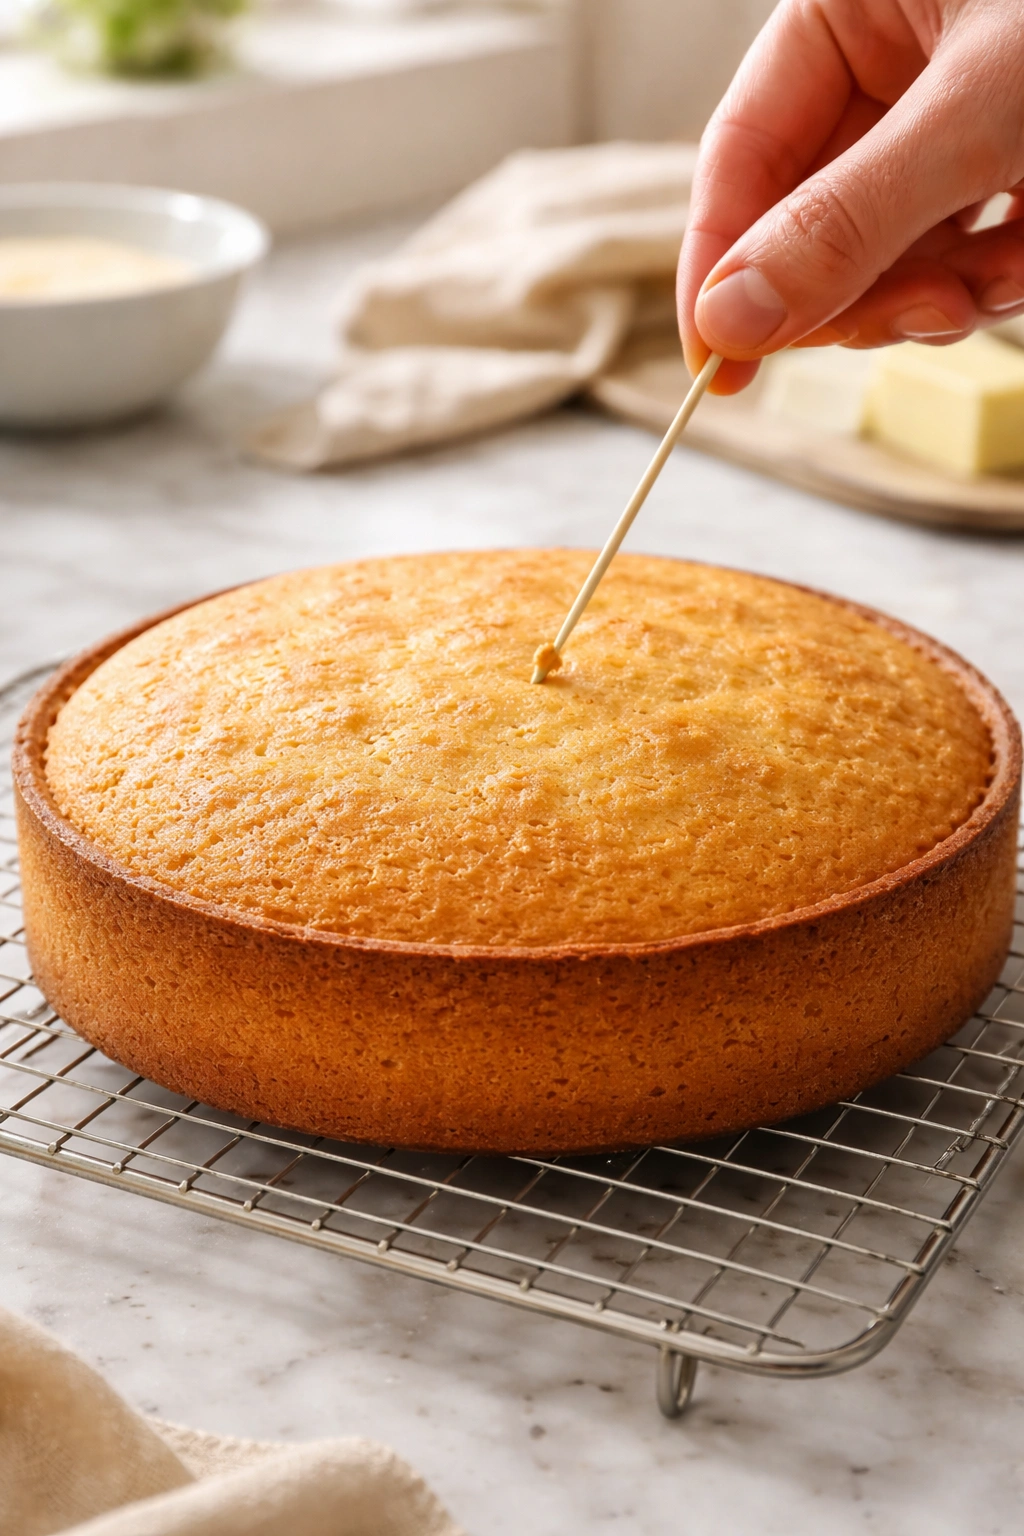
Knowing precisely when to remove the cake from the oven is the difference between moist, tender cake and one that’s dried out around the edges. Underbaked cake is still raw and falls apart; overbaked cake is tough and dry. The right moment is somewhere in between, and visual and tactile cues tell you when you’ve hit it.
At the 30-minute mark (for round pans) or 32 minutes (for sheet pan), peek into the oven without opening the door fully. The cake’s surface should be golden-brown or light tan—not pale yellow, but not dark brown either. The edges should appear to be pulling away from the pan’s sides by just a hairline. If the cake looks very pale and jiggles noticeably when you gently shake the oven rack, it needs another 3-5 minutes.
Insert a toothpick into the very center of the cake (equidistant from all edges). The toothpick should come out clean or with just a few moist crumbs clinging to it. A few moist crumbs are actually the sign of perfectly baked cake—still tender and moist. If the toothpick comes out with wet batter streaking down it, the cake needs another 2-3 minutes. If the toothpick comes out absolutely clean and dry, you may have baked it slightly too long, but it will still be fine.
The Jiggle Test
A second test is the gentle jiggle. Set your oven mitts on top of the oven and gently shake the oven rack (without opening the oven door—heat must stay in). The cake should jiggle very slightly in the center, almost imperceptibly, but should feel fairly set. The edges should not jiggle at all. Too much jiggle means more baking time is needed.
What Happens If You Overbake It
If you’ve baked the cake slightly too long, it will be drier around the edges, but it will still be fine—the frosting will add moisture, and the crumb will soften as it sits. Don’t stress about perfection. Underbaked cake (raw batter in the center) is actually the only real problem, but the toothpick test catches that easily.
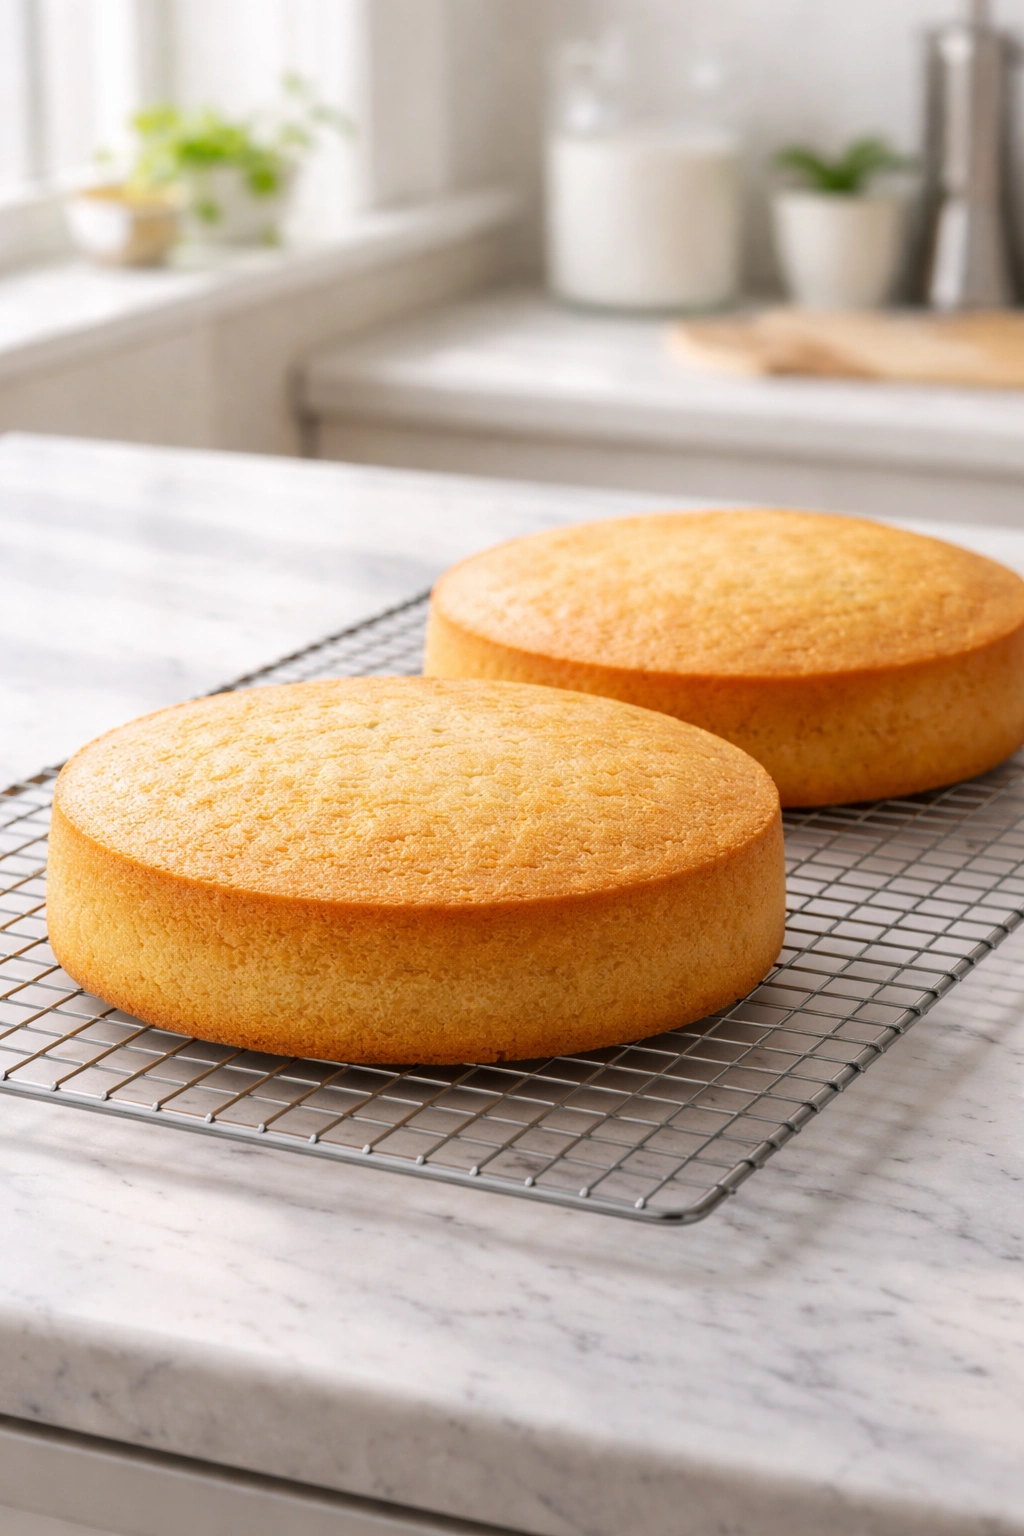
Cooling and Preventing Common Texture Problems
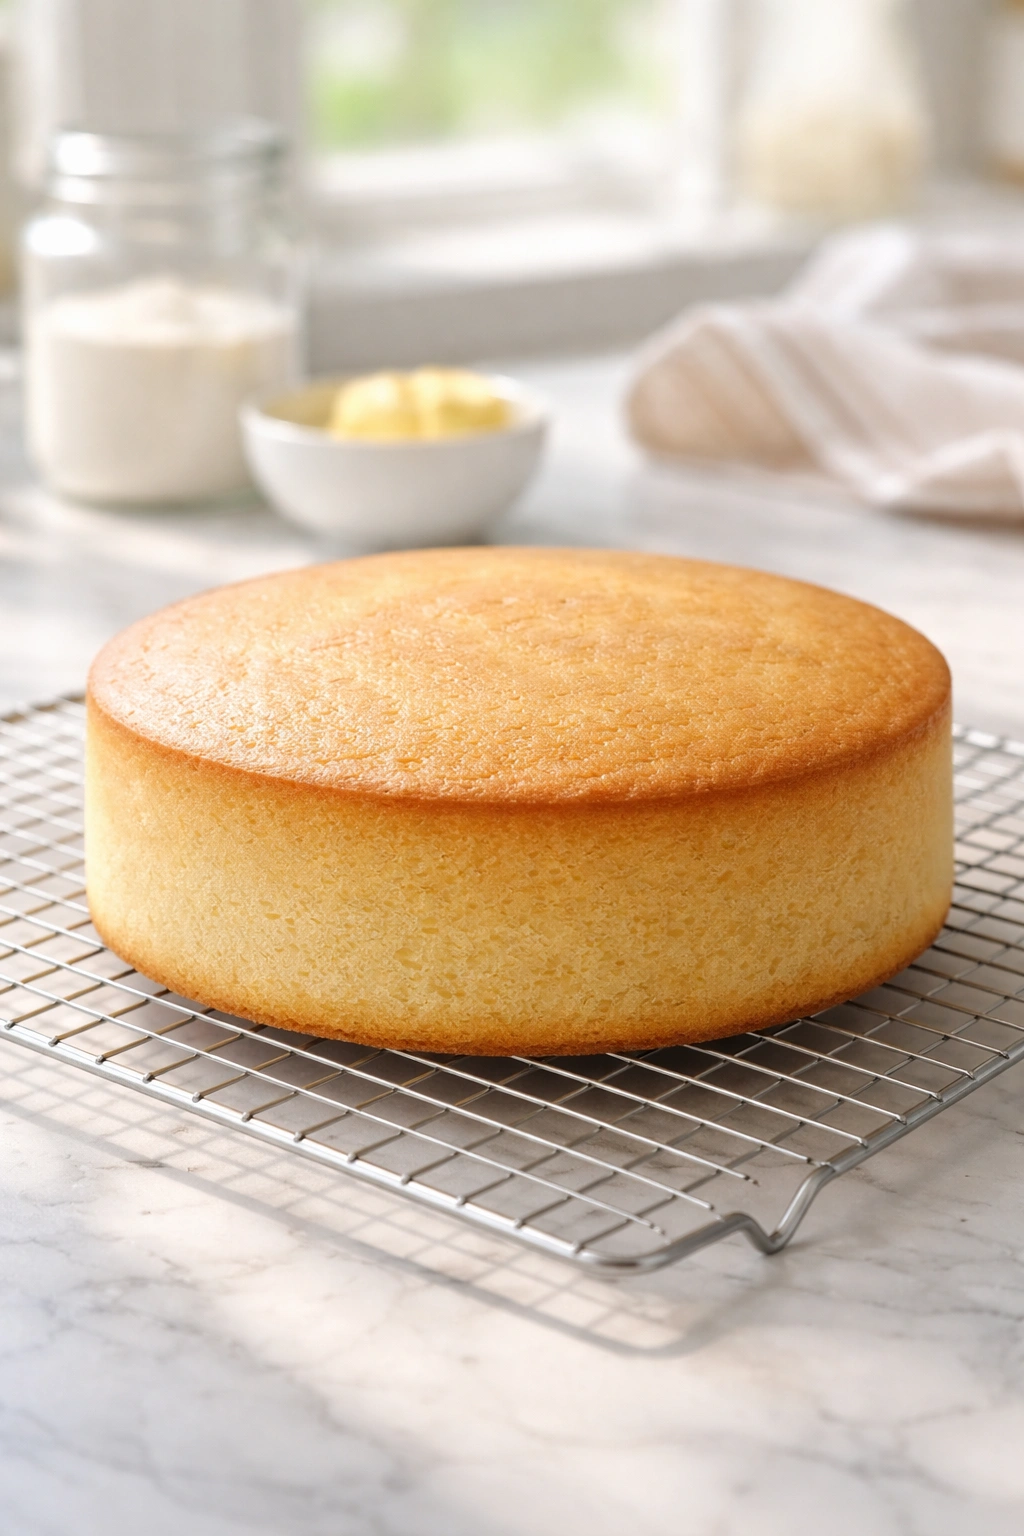
Remove the cakes from the oven and place the pans on wire cooling racks. This is crucial—you must allow the cake to cool in the pan for 15 to 20 minutes. This waiting period allows the structure to set enough that the cake won’t fall apart when you turn it out.
Why Cooling in the Pan Matters
Straight from the oven, cake is extremely delicate—the crumb is still setting, and the cake is structurally weak. If you flip it out of the pan immediately, it may collapse or crack. The 15-20 minute wait gives the cake time to firm up while the residual heat continues cooking the very center and setting the structure. The pan’s heat also gently continues the baking process, preventing the center from staying raw-textured.
After 15-20 minutes, the cake will have pulled away from the sides of the pan noticeably (you should be able to see a small gap all the way around). Run an offset spatula or thin-bladed knife around the perimeter of each pan to loosen any edges that are still clinging, then invert the pan onto a wire cooling rack. The cake should slide out easily. If it sticks, gently run the spatula around the edges again.
For sheet cakes, invert onto the rack the same way, or leave in the pan to cool completely if you prefer—sheet cakes don’t need to be removed unless you’re stacking or decorating them.
Complete Cooling Is Essential
Never frost or decorate a warm cake. Let the cake cool completely to room temperature, which takes 1 to 2 hours depending on the room temperature. Warm cake is fragile and will tear under the weight of frosting. Warm frosting will slide off warm cake. Cold cake holds up to frosting beautifully and allows the frosting to set neatly. If you’re in a hurry, you can refrigerate the cooled cake for 30 minutes to firm it up further before frosting.
Simple Frosting Options and Variations
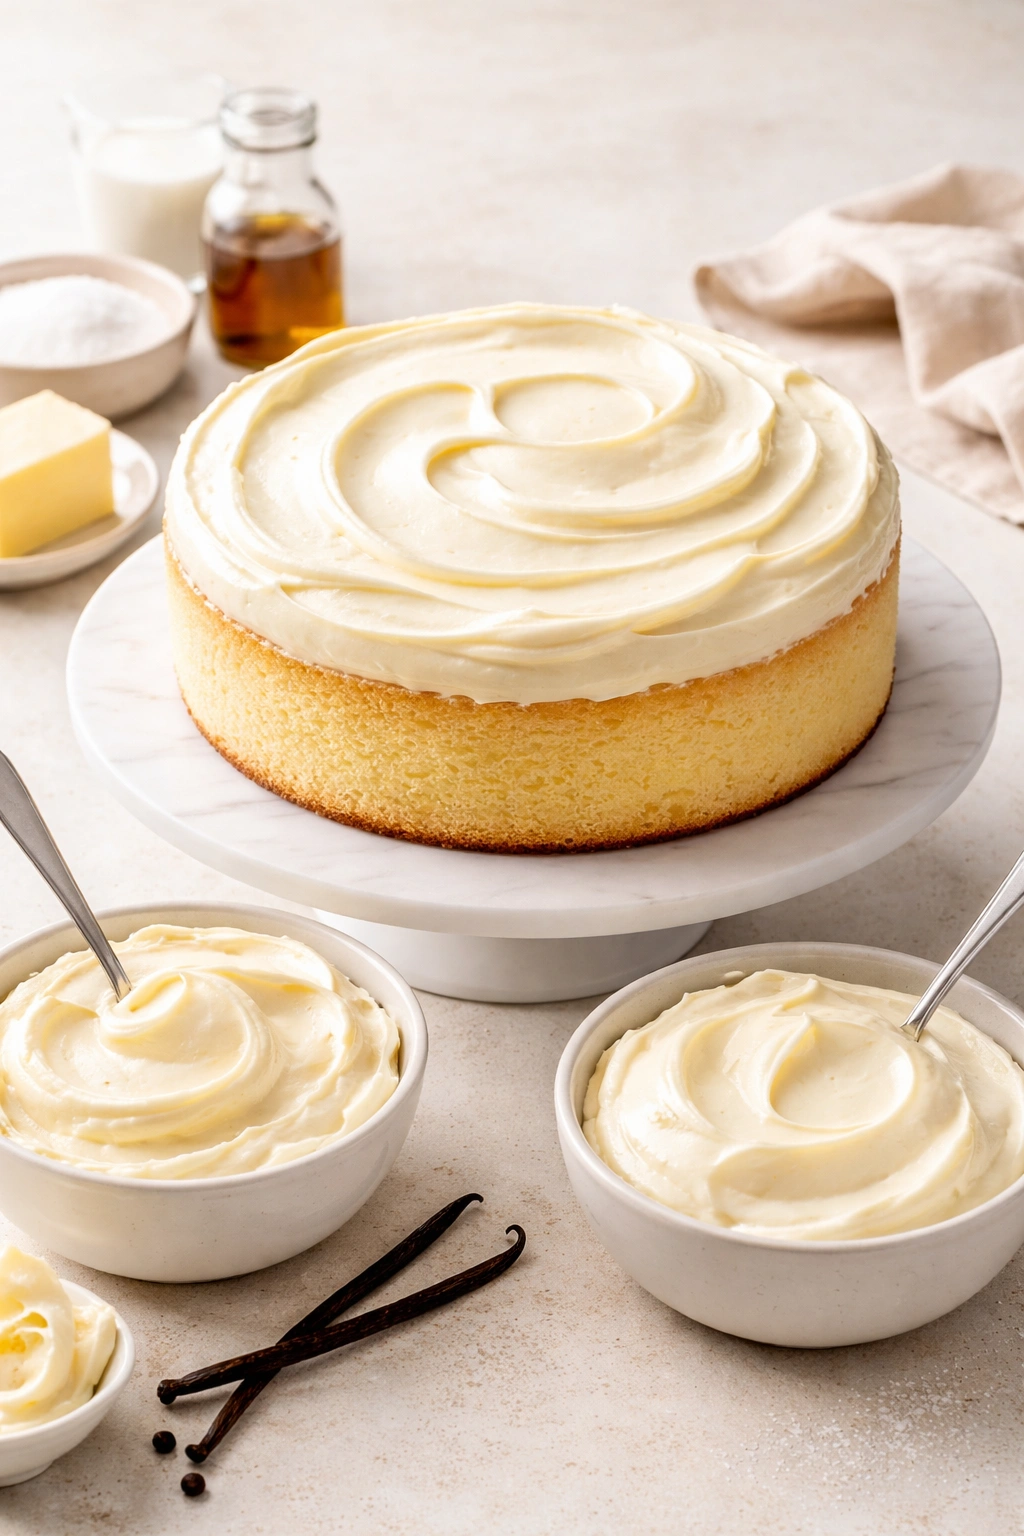
This vanilla cake pairs beautifully with simple buttercream frosting. The cake itself is rich enough that you don’t need an elaborate frosting—a basic American buttercream (butter, powdered sugar, milk, vanilla) shows off the cake perfectly.
Classic American Buttercream
Beat 1 cup (2 sticks / 226 grams) of softened unsalted butter on medium speed for 2-3 minutes until pale and fluffy. Add 3-4 cups sifted powdered sugar in two additions, beating on low speed until combined, then increasing to medium speed and beating for 1-2 minutes until light and fluffy. Add 2-3 tablespoons of heavy cream or whole milk (or a combination), one tablespoon at a time, beating until you reach the desired consistency—it should be spreadable but still hold peaks. Add 2 teaspoons pure vanilla extract and a tiny pinch of salt, beating until combined.
This quantity frosts the top and sides of a two-layer cake generously or covers a sheet cake completely. If you want frosting between the layers too, make 1.5 times the recipe.
Cream Cheese Frosting Variation
Replace half the butter with 8 ounces of softened cream cheese. Beat the butter and cream cheese together until smooth, then add powdered sugar, then milk as above. This frosting is tangier and slightly more sophisticated—it pairs beautifully with this vanilla cake. Do not use cold cream cheese or cold butter, or the frosting will be lumpy. Let both sit on the counter for 30 minutes before beating.
Whipped Cream Frosting
For a lighter frosting, whip 2 cups heavy cream with 3-4 tablespoons powdered sugar and 1 teaspoon vanilla extract until stiff peaks form. This creates a frosting that feels almost cloud-like. Use this frosting the same day you make it—it doesn’t hold up well overnight. Whipped cream frosting is perfect for casual occasions and everyday desserts.
Storage, Freezing, and Make-Ahead Strategies
The beauty of this cake is its flexibility for make-ahead baking and storage. You can bake it days in advance and freeze it, or frost it a day ahead and refrigerate it, depending on your timeline.
Room Temperature Storage
An unfrosted, cooled cake can sit at room temperature, covered loosely with plastic wrap or aluminum foil, for 2 to 3 days. Cover it loosely enough that air can circulate—plastic wrap pressed directly against the cake traps steam and can make the surface soggy.
A frosted cake should be stored in an airtight container or under a cake dome at room temperature for up to 2 days, depending on the frosting type and room temperature. Buttercream frosting is very stable at room temperature, even in warm weather. Whipped cream frosting should be refrigerated.
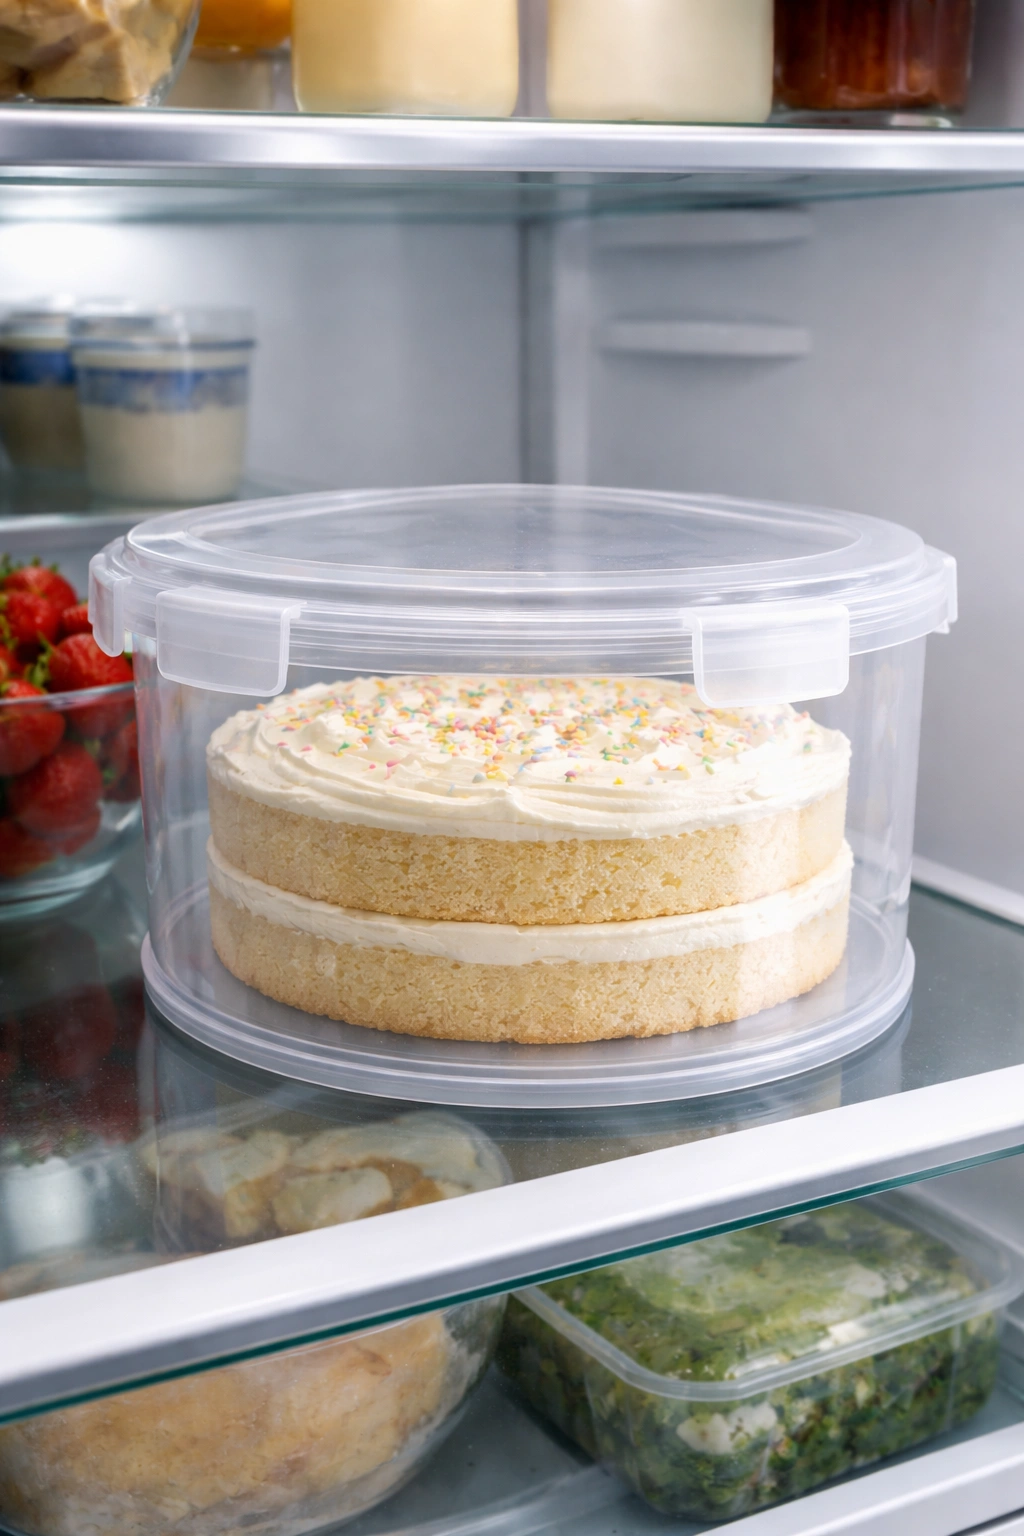
Refrigerator Storage
An unfrosted or frosted cake keeps beautifully in the refrigerator for 3 to 4 days, covered in plastic wrap or in an airtight container. Refrigeration actually makes the cake taste slightly more moist and tender because the cold extends the shelf life and the moisture stays locked in the crumb. Remove it from the refrigerator 30 minutes before serving to bring it to pleasant room temperature.
Freezing for Later
This cake freezes exceptionally well. Unfrosted cake layers keep in the freezer for up to 3 months. Wrap each cooled, completely dry layer tightly in plastic wrap, then place both layers together in a freezer bag or airtight container. Frost frozen layers directly from the freezer, or thaw them at room temperature for about 30 minutes before frosting.
A completely frosted, fully assembled cake can also be frozen. Freeze it uncovered for 2-3 hours until the frosting is solid, then wrap it tightly in plastic wrap and place in a freezer bag. It keeps for 2-3 months. Thaw it completely in the refrigerator (overnight) before serving.
Make-Ahead Planning
For a special occasion, bake the cake 2-3 days ahead, wrap and freeze the layers, then thaw and frost the day before your event. Or bake it the day before, allow it to cool completely, wrap it loosely, and refrigerate it overnight. Frosted cakes keep in the refrigerator for 3-4 days without any decline in quality—in fact, the flavors meld slightly and taste even better the next day.
Serving Ideas and Pairing Suggestions
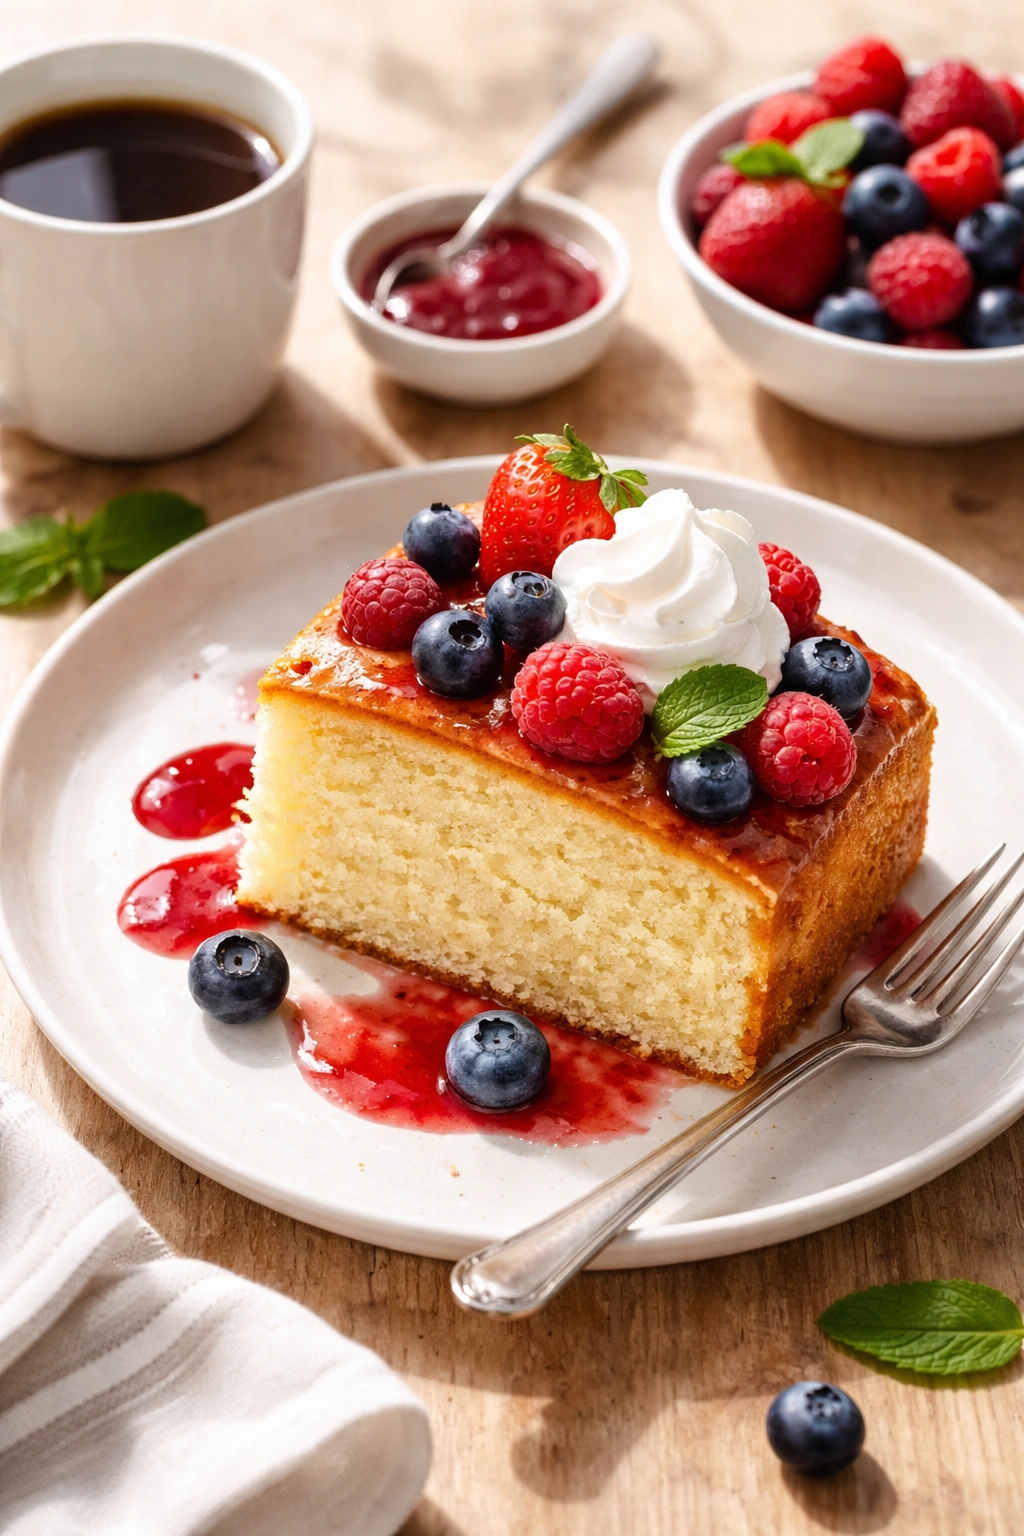
This vanilla cake is genuinely versatile. It works as a simple dessert with just a cup of coffee, dressed up for celebrations with fresh berries and whipped cream, or paired with beverages and complementary flavors.
Everyday Serving
For casual eating, slice the cake while it’s cool or at room temperature and serve it with a cup of hot coffee or tea. The simplicity of vanilla cake and the slight bitterness of coffee is a perfect pairing. A cold glass of milk is equally good.
Dressed-Up Presentations
For special occasions, frost the cake with buttercream and decorate with fresh berries—raspberries, blueberries, or strawberries all look beautiful arranged on top or around the sides. A dusting of powdered sugar adds elegance with no effort.
Add a dollop of whipped cream on each slice for richness. A small drizzle of raspberry sauce, salted caramel sauce, or chocolate ganache transforms the cake into something restaurant-quality without requiring advanced pastry skills.
Flavor Pairings
Raspberry and vanilla is a classic combination. Serve the cake with fresh raspberries on the side, or layer fresh raspberries between the cake layers before frosting.
Lemon and vanilla works beautifully. A thin layer of lemon curd between cake layers, topped with lemon-flavored buttercream, creates brightness and depth.
Strawberry and vanilla is quintessential. Serve slices with fresh strawberries macerated in a little sugar and a squeeze of lemon juice.
Brown butter and vanilla elevates the cake. Make the buttercream with brown butter instead of regular butter—heat butter in a saucepan over medium heat, swirling occasionally, until the milk solids turn brown and the butter smells nutty (about 5-8 minutes). Cool it completely before making frosting.
Chocolate and vanilla is never wrong. Frost the cake with chocolate buttercream, or serve slices with a small piece of quality dark chocolate on the side.
Variations and Flavor Adaptations
Once you’re comfortable with this basic recipe, it’s easy to adapt it for different flavors and occasions.
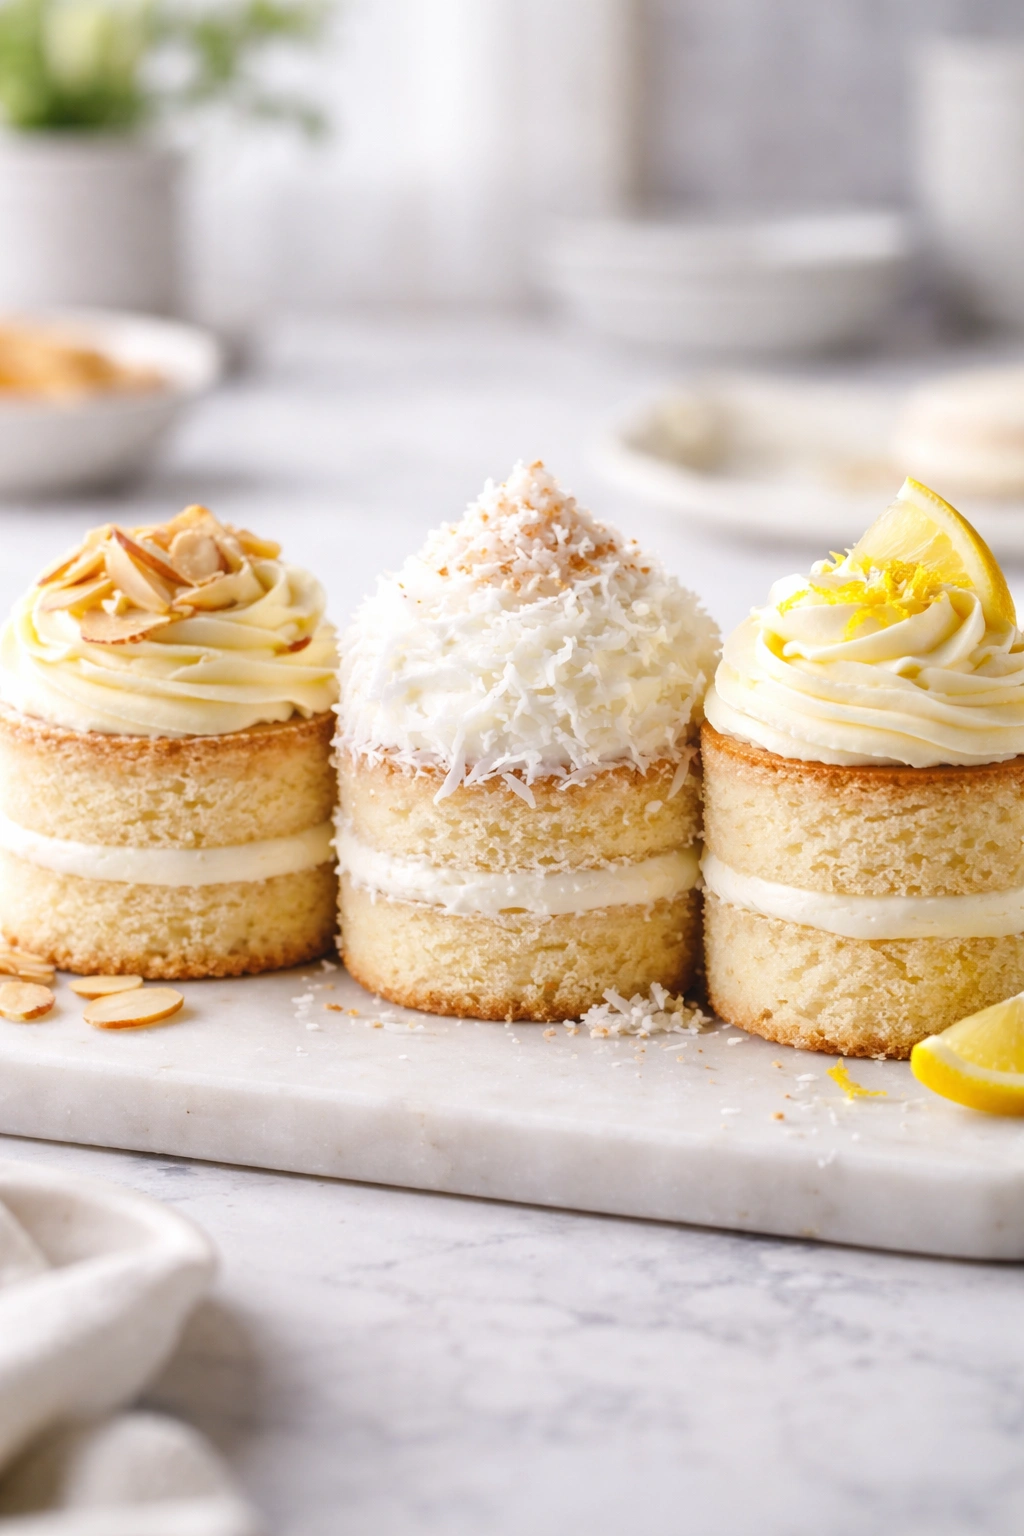
Almond Vanilla Cake
Replace half a teaspoon of vanilla extract with half a teaspoon of almond extract (go slowly—almond extract is potent). The result is a cake that tastes subtly of almond and vanilla together—sophisticated and slightly floral. This variation works especially well with raspberry filling and frosting.
Coconut Cake
Add ¾ cup unsweetened shredded coconut to the flour mixture before combining it with the batter. Increase the vanilla to 2½ teaspoons and add ¼ teaspoon of coconut extract if you have it. The cake develops a delicate coconut flavor without tasting tropical or artificial. Pair it with cream cheese frosting.
Lemon Vanilla Cake
Reduce the vanilla extract to 1½ teaspoons and add 1 tablespoon of freshly grated lemon zest to the batter when you add the eggs. Add 1 tablespoon of fresh lemon juice to the flour mixture. The cake will taste like vanilla with a bright, subtle lemon edge. Frost with a lemon buttercream made by mixing 2 tablespoons of fresh lemon juice and 1½ teaspoons of lemon zest into the basic buttercream recipe.
Dairy-Free Adaptation
Replace the milk with unsweetened almond milk or oat milk (coconut milk will work but adds a slight coconut flavor). Use dairy-free butter in the cake and frosting. The results are nearly identical to the original—the cake is moist and tender. Dairy-free butter should be softened the same way as regular butter.
Gluten-Free Version
Replace the all-purpose flour with a high-quality gluten-free all-purpose flour blend that includes xanthan gum (King Arthur or Bob’s Red Mill are reliable). The cake will bake in approximately the same time, though it may be slightly more delicate. Everything else remains the same. Gluten-free cakes sometimes benefit from an extra 5 minutes of cooling in the pan before turning out, as the structure sets more slowly.
Final Thoughts
This vanilla cake isn’t trying to be anything other than what it is: straightforward, reliable, and genuinely delicious. It works for milestone celebrations, unexpected gatherings, quiet Tuesday afternoons, and every occasion in between. The recipe succeeds because it respects the basics—room-temperature ingredients, proper creaming, gentle mixing, and correct baking temperature.
After you’ve made it a couple of times, you’ll find yourself making it automatically. You’ll know by feel when the butter and sugar are sufficiently creamed, you’ll listen to the mixer and trust when it’s time to stop, and you’ll develop an intuition about when the cake’s done baking. This is when a recipe truly becomes yours—when you move from following instructions to actually understanding what’s happening inside the oven.
The best vanilla cake is the one you make regularly, tweak according to your preferences, and serve with confidence. This recipe gives you that foundation. Once you trust it, you can serve it plain or dress it up, share it casually or present it proudly, and know that you’re offering something genuinely good. That’s what matters.