You’ve probably walked past a Korean restaurant and caught that incredible aroma wafting from their grill — that perfect blend of caramelized beef, garlic, and sesame oil that makes your mouth water instantly. That’s bulgogi, and here’s the best-kept secret: you don’t need to spend hours marinating or visit a restaurant to get it. You can have restaurant-quality Korean beef bulgogi on your table in just 20 minutes, without sacrificing any of that deep, complex flavor that makes it so craveable.
Most people think bulgogi requires an overnight marinade, careful slicing of expensive steaks, and special equipment. The truth? That’s the fancy, celebratory version. The everyday version — the one Korean home cooks have been making for generations on weeknights after work — uses a few smart shortcuts that deliver the same explosive flavors in a fraction of the time. Once you understand the techniques, you’ll find yourself making this dish on repeat because it’s faster than ordering takeout, costs less, and actually tastes better.
This isn’t about cutting corners or using inferior ingredients. It’s about understanding what actually creates bulgogi’s signature taste and texture, and applying that knowledge efficiently. The magic isn’t in how long the meat sits in marinade — it’s in the quality of the marinade itself, the heat of your pan, and the technique you use while cooking. Master those three things, and you’ve got dinner on the table before your family even sits down.
What Makes Bulgogi So Addictively Good
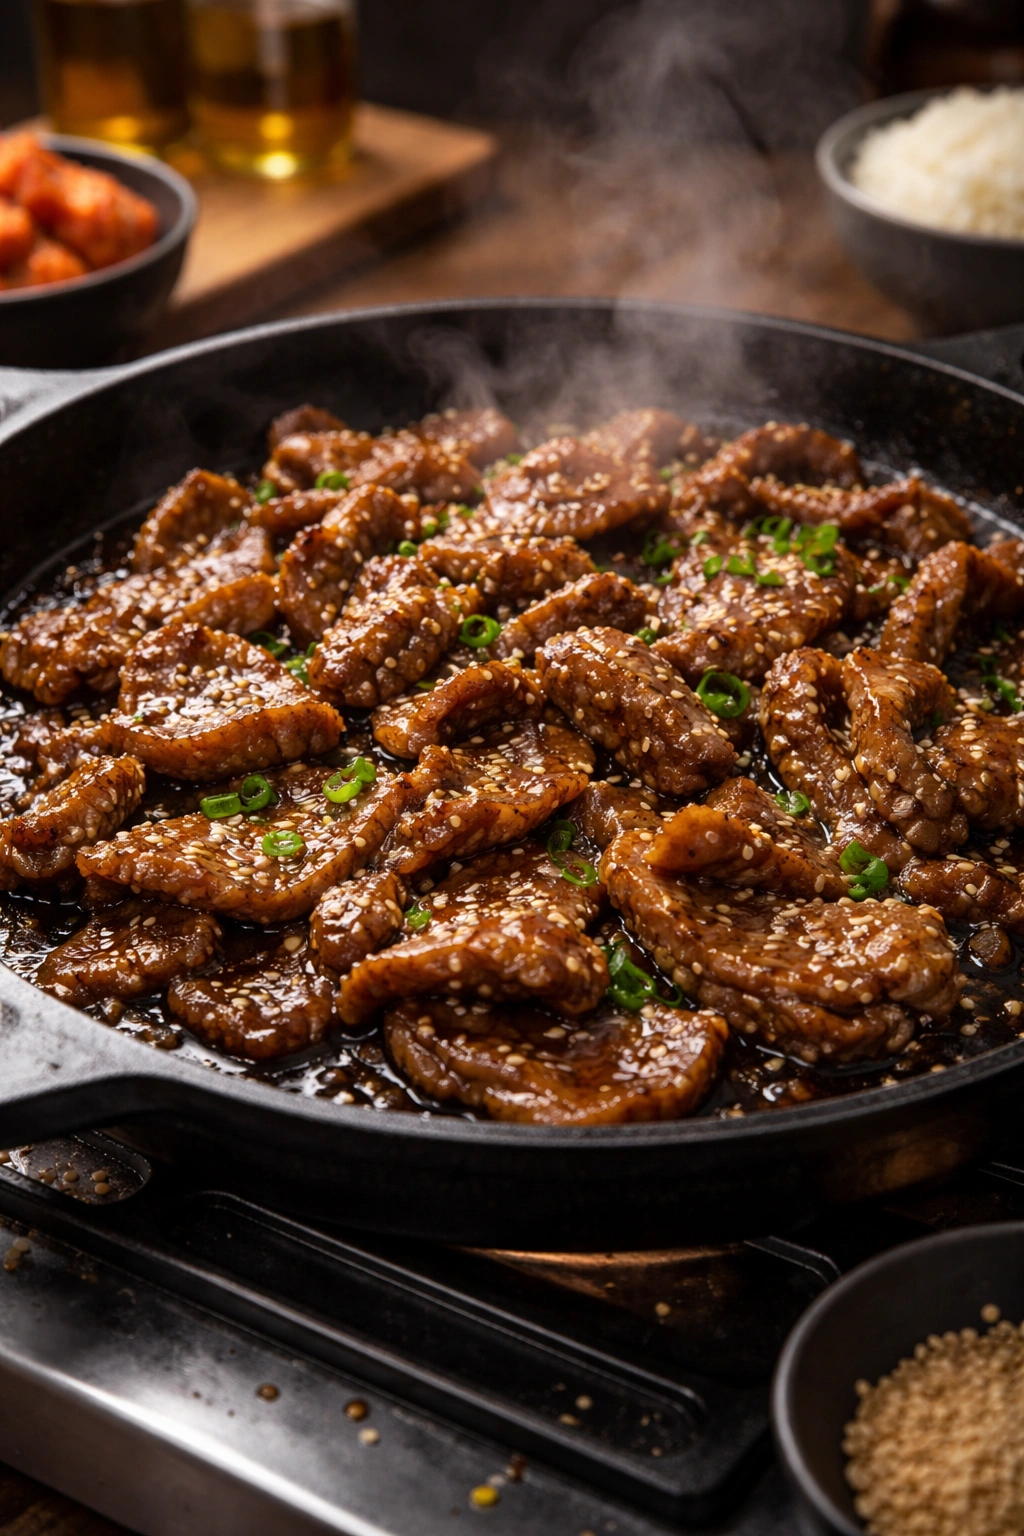
Bulgogi (불고기) literally translates to “fire meat,” and that name tells you everything about how it’s meant to be cooked. It’s one of Korea’s most iconic dishes, with roots going back centuries, though the modern version as we know it solidified around the mid-20th century. The dish represents the intersection of Korean culinary tradition and the global influence of sugar and soy sauce becoming kitchen staples.
What sets bulgogi apart from every other grilled beef dish is its unique flavor profile — a careful balance of sweet, salty, savory, and umami that shouldn’t work together but absolutely does. You’ve got soy sauce bringing saltiness and umami depth, brown sugar adding sweetness and helping with caramelization, garlic providing pungent aromatics, sesame oil contributing toasty nuttiness, and ginger adding subtle heat and complexity. When these elements hit thin slices of beef over high heat, they create a glaze that coats every fiber of meat.
The other crucial element is the meat’s texture. Traditional bulgogi uses paper-thin slices of tender beef that cook in seconds and become impossibly tender. The thinness is key — it means maximum surface area for browning and caramelization, and it means the marinade can penetrate the meat quickly rather than slowly over hours. Thinner meat also means you get a better ratio of the caramelized, slightly crispy exterior to the juicy interior, which is what makes the dish sing.
Why the 20-Minute Version Actually Works
Here’s where conventional bulgogi wisdom breaks down for weeknight cooking: the marinating time isn’t primarily about tenderization — it’s about flavor absorption. Yes, extended marinating helps, especially with thicker cuts. But if you’re using properly thin-sliced beef (which you should be), the marinade starts penetrating immediately and reaches maximum flavor saturation relatively quickly.
Most of the flavor transfer happens in the first 30-60 minutes. Beyond that, you’re getting diminishing returns, especially when you’re dealing with already-tender, thin meat. The extended overnight marination is more about convenience — getting prep done the night before so cooking is genuinely effortless on busy nights. But if you’re cooking the same day, you don’t need to wait.
The second insight is that you can use a more concentrated, punchy marinade when cooking immediately. Think of it like the difference between steeping tea for five minutes versus thirty minutes — you can adjust the strength of the liquid based on how long it’s going to infuse. A quick marinade doesn’t have time to be subtle and delicate, so it needs to be bold. That’s actually fine, because bold is exactly what bulgogi should be.
The third factor is ground beef changes the game entirely. Minced or ground beef has exponentially more surface area than slices, which means the marinade coats it completely in seconds. You literally cannot make this faster than with ground meat — the texture reaches equilibrium almost instantaneously. Some bulgogi purists will argue ground beef isn’t “real” bulgogi, and they’re technically right from a traditionalist perspective. But flavor-wise? It delivers. And for a quick weeknight dinner, it’s honestly preferable because you skip the slicing step entirely.
The Secret Ingredient That Makes It All Work

Every authentic bulgogi recipe includes one ingredient that most Western cooks skip or substitute, and it’s the reason the dish actually tastes like restaurant bulgogi instead of generic Asian beef. That ingredient is Asian pear — specifically Korean pear (also called Asian pear or Nashi pear), though Fuji apples work almost as well.
The pear isn’t just adding sweetness (though it is doing that). It contains an enzyme called calpain that actively tenderizes meat by breaking down muscle proteins. More importantly for our 20-minute timeline, it adds a subtle, sophisticated sweetness and fruity depth that regular sugar simply cannot replicate. If you’ve ever wondered why restaurant bulgogi tastes noticeably different from homemade versions, this ingredient is often the answer.
When you grate or blend pear into your marinade, you’re creating a liquid that’s both enzymatically active (breaking down meat fibers) and flavor-active (infusing sweetness and complexity). In traditional recipes, you grate the pear and strain it, using only the juice while discarding the pulp. This creates a clear marinade that looks sophisticated and cooks more cleanly. For a 20-minute version, you can skip the straining step entirely and let those pear solids do the work.
If you can’t find Korean pear or Asian pear, red apple varieties work surprisingly well. Granny Smith apples are too tart, but Fuji, Gala, Pink Lady, or Honeycrisp apples all deliver similar results. Some cooks swear by kiwi or pineapple, but these are stronger tenderizers — overuse them and the meat texture can actually become mushy or the color can degrade. Stick with pear or apple for best results.
Choosing Your Beef and Preparation
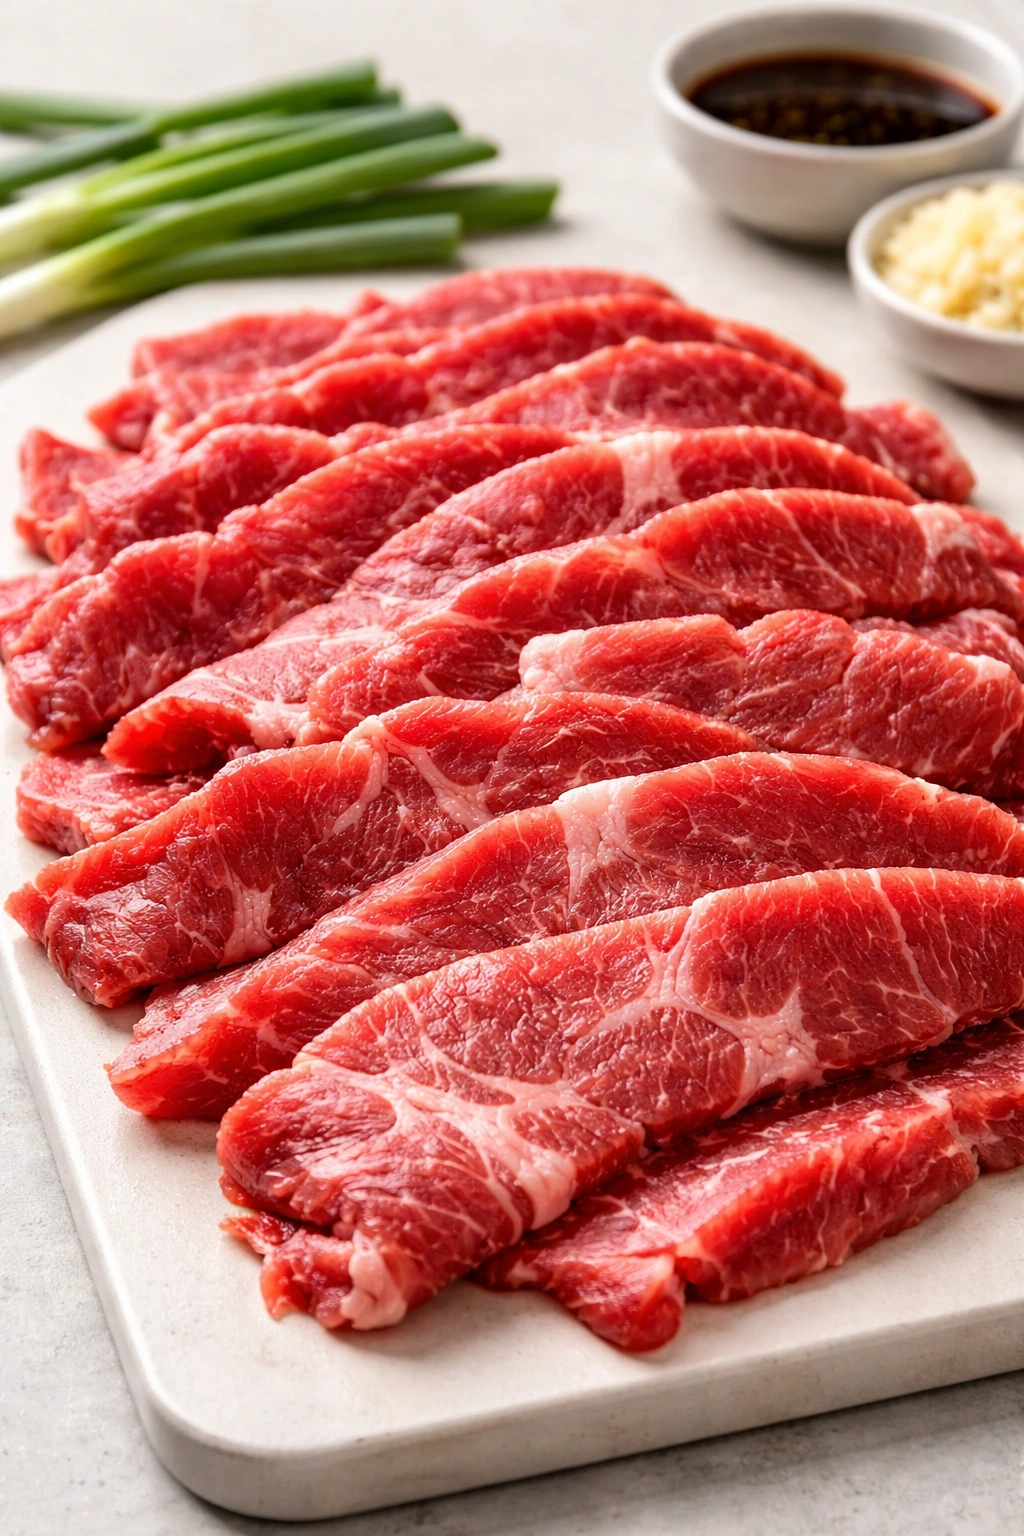
The meat you choose makes or breaks this dish, so let’s be specific about what works and why. Traditional bulgogi uses tender cuts of beef because you’re cooking it hot and fast. The standard options are beef tenderloin (also called filet mignon — expensive and buttery), top sirloin (mid-range price, good flavor), and rib eye (also called scotch fillet — more marbling, more flavor, more forgiving if you accidentally overcook it).
For the 20-minute version, rib eye is honestly the best choice. It’s more flavorful than tenderloin, less finicky than sirloin, and the marbling means you can get a beautiful sear without drying out the meat. You’re paying slightly more per pound, but you’re using a smaller amount than you would with leaner cuts, and you get better results. If budget is your primary concern, sirloin works fine — just watch the heat carefully so you don’t overcook it.
The game-changer is buying pre-sliced bulgogi beef from an Asian grocery store. Yes, this is a legitimate shortcut, and no, it’s not cheating. Korean and Japanese markets specifically carry beef packaged as “bulgogi meat,” “hot pot beef,” or “spencer cut” — it’s already sliced to the perfect thickness (usually 2-3mm, which is 1/8 inch). You skip the entire slicing process, which means you skip one of the most annoying parts of bulgogi prep.
If you’re slicing the beef yourself, freeze it first. Wrap your beef in plastic wrap and freeze it for 20-30 minutes until it’s firm but not solid. A partially frozen steak is exponentially easier to slice thinly than room temperature meat. Use a very sharp knife (really, sharpen it before you start) and slice across the grain, which means cutting perpendicular to the lines you see running through the meat. Slicing against the grain makes the cooked meat more tender because you’re cutting through the muscle fibers rather than along their length.
The Quickest Marinade Method That Still Tastes Authentic
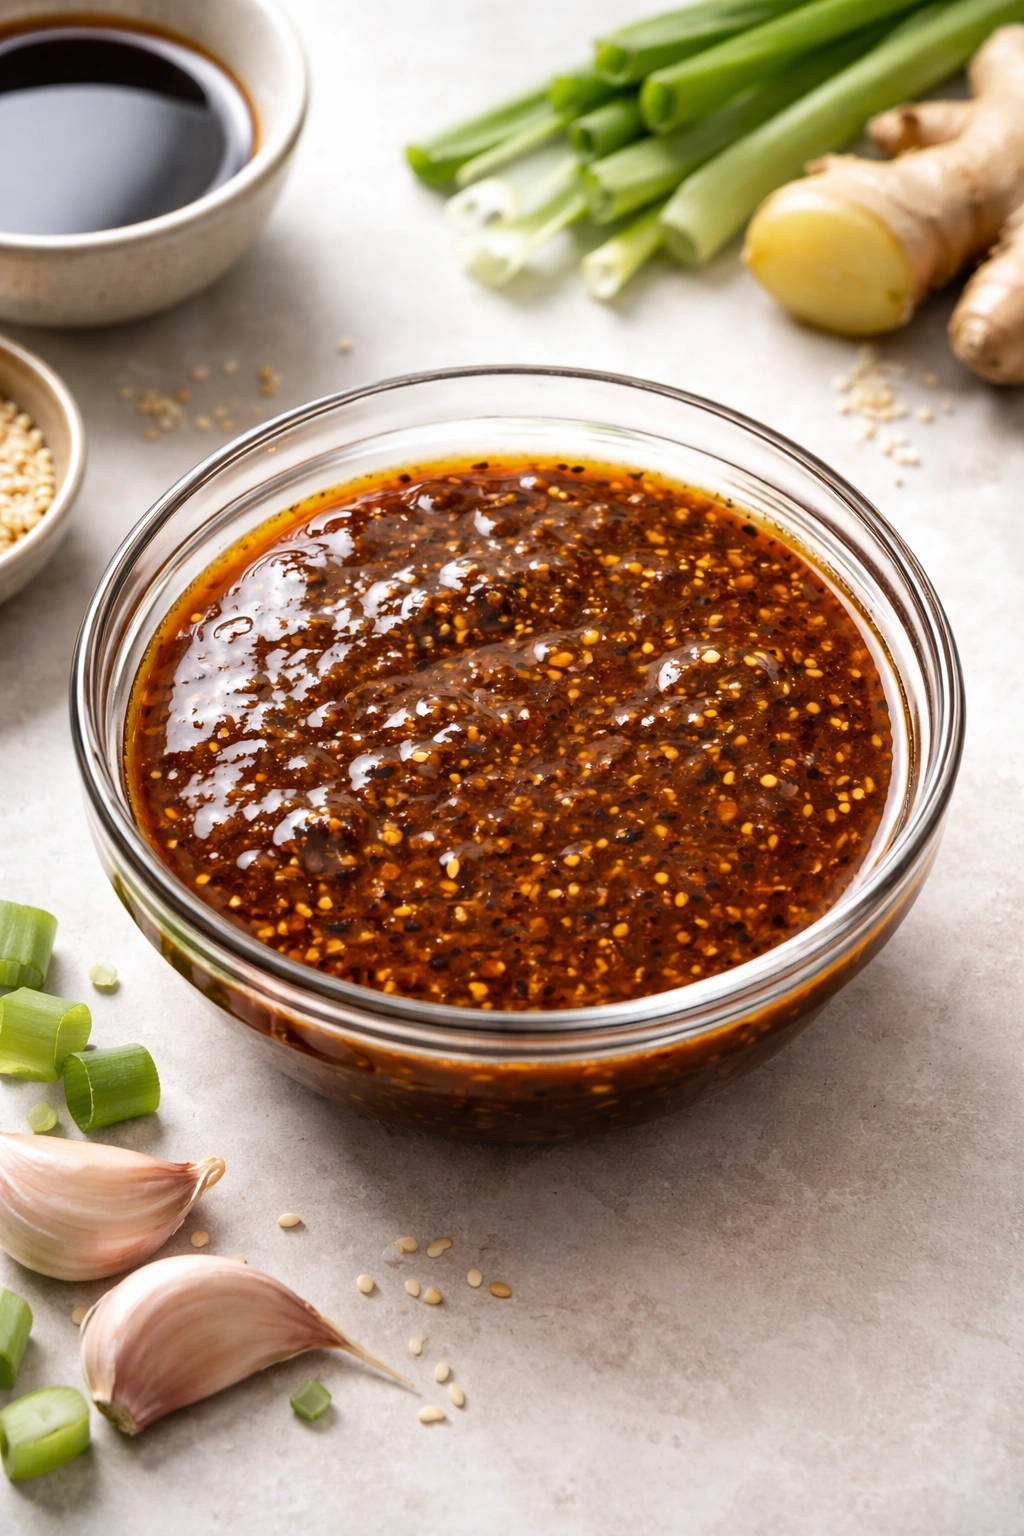
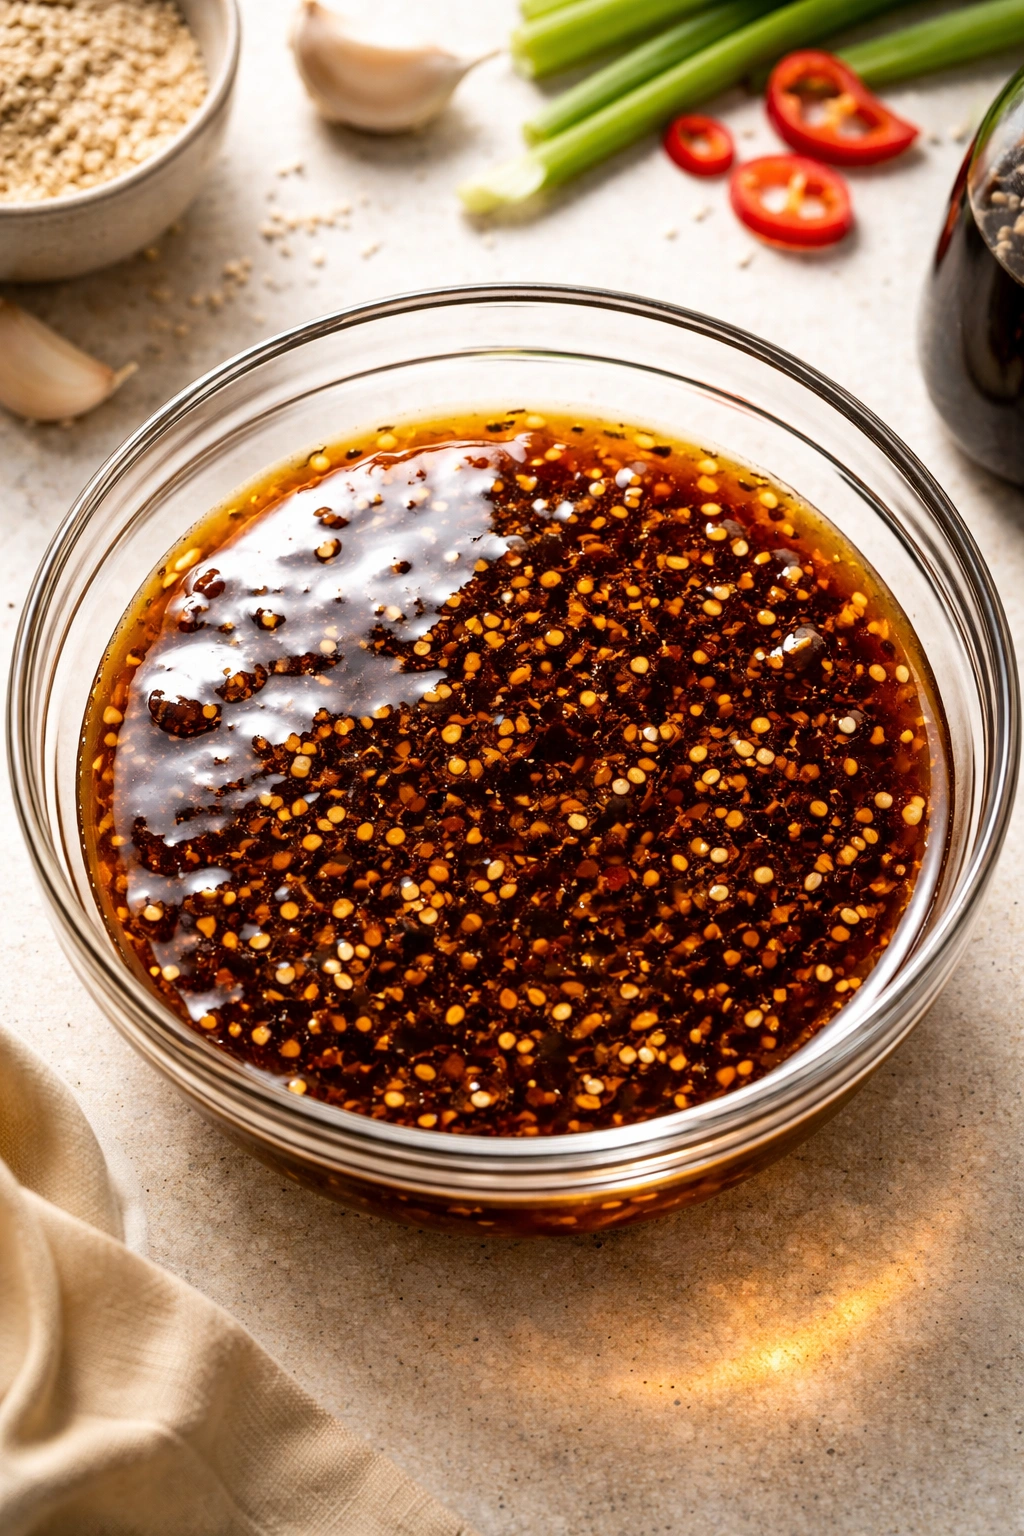
Here’s the move for maximum flavor with zero waiting: blend your marinade ingredients rather than just mixing them. When you blend pear, onion, garlic, and ginger into the soy sauce and sesame oil, you’re creating an emulsion where every drop of liquid is infused with the flavor of those aromatics. This is different from simply dicing them and hoping they distribute evenly.
Use a blender, food processor, or even an immersion blender with a cup. Add roughly 1/2 medium Asian pear (peeled), 1/4 medium onion, 3-4 garlic cloves, 1 teaspoon fresh ginger, then pour in 1/3 cup soy sauce, 2 tablespoons brown sugar, 1 tablespoon sesame oil, and 1 tablespoon rice wine (mirin) or water. Blend until completely smooth.
Here’s the important part: strain the blended marinade through fine mesh or cheesecloth to remove the pulp. You’re left with a clear, concentrated liquid that’s maximally flavorful and cooks without any texture issues. This straining step takes about two minutes and is worth every second because it changes how the marinade behaves in the pan — it caramelizes cleanly instead of scorching, and the beef glazes beautifully instead of steaming.
If you skip the straining, you’ll end up with cooked pear and onion solids in your pan, which isn’t necessarily bad but looks less polished and can burn slightly. If you’re eating at home and don’t mind, honestly skip it — the flavor is still amazing. But if you want that restaurant-quality appearance, strain it.
Why This Marinade Works So Fast
Once you understand what’s actually happening in the marinade, the speed makes sense. Soy sauce is salty and umami-rich, and salt is a natural meat tenderizer because it denatures muscle proteins and allows them to retain more moisture. This happens immediately — you don’t need to wait hours for salt to work, though more time does mean deeper penetration.
Pear contains calpain, which breaks down proteins instantly and continuously. It’s not a time-dependent process like marinading; it’s an enzymatic process that’s constantly working whenever the enzyme contacts raw meat. With thin slices of meat in blended pear marinade, every surface is exposed to the enzyme immediately. You get the benefits of tenderization in minutes rather than hours.
Sugar enhances browning and caramelization through the Maillard reaction and caramelization reactions when the meat is cooked. These reactions happen in the pan during cooking, not during marinating. The sugar in your marinade isn’t creating flavor during marinating — it’s creating flavor when the heat is applied. So there’s literally no flavor or texture benefit to letting sugar sit on raw meat for extended time.
Sesame oil and garlic are volatile and aromatic. They’re transferring flavor through direct contact, not through a slow infusion process. Minutes are plenty for these to flavor the meat adequately. And ginger’s heat and flavor also transfer quickly through direct contact with the meat surface.
When you add all this up, there’s no scientific reason you need to wait more than 30-60 minutes for thin-sliced beef to be fully marinated with a blended, concentrated marinade. You absolutely can wait longer if you’re prepping ahead, but you don’t need to for flavor or texture.
Equipment You Actually Need (and What’s Optional)
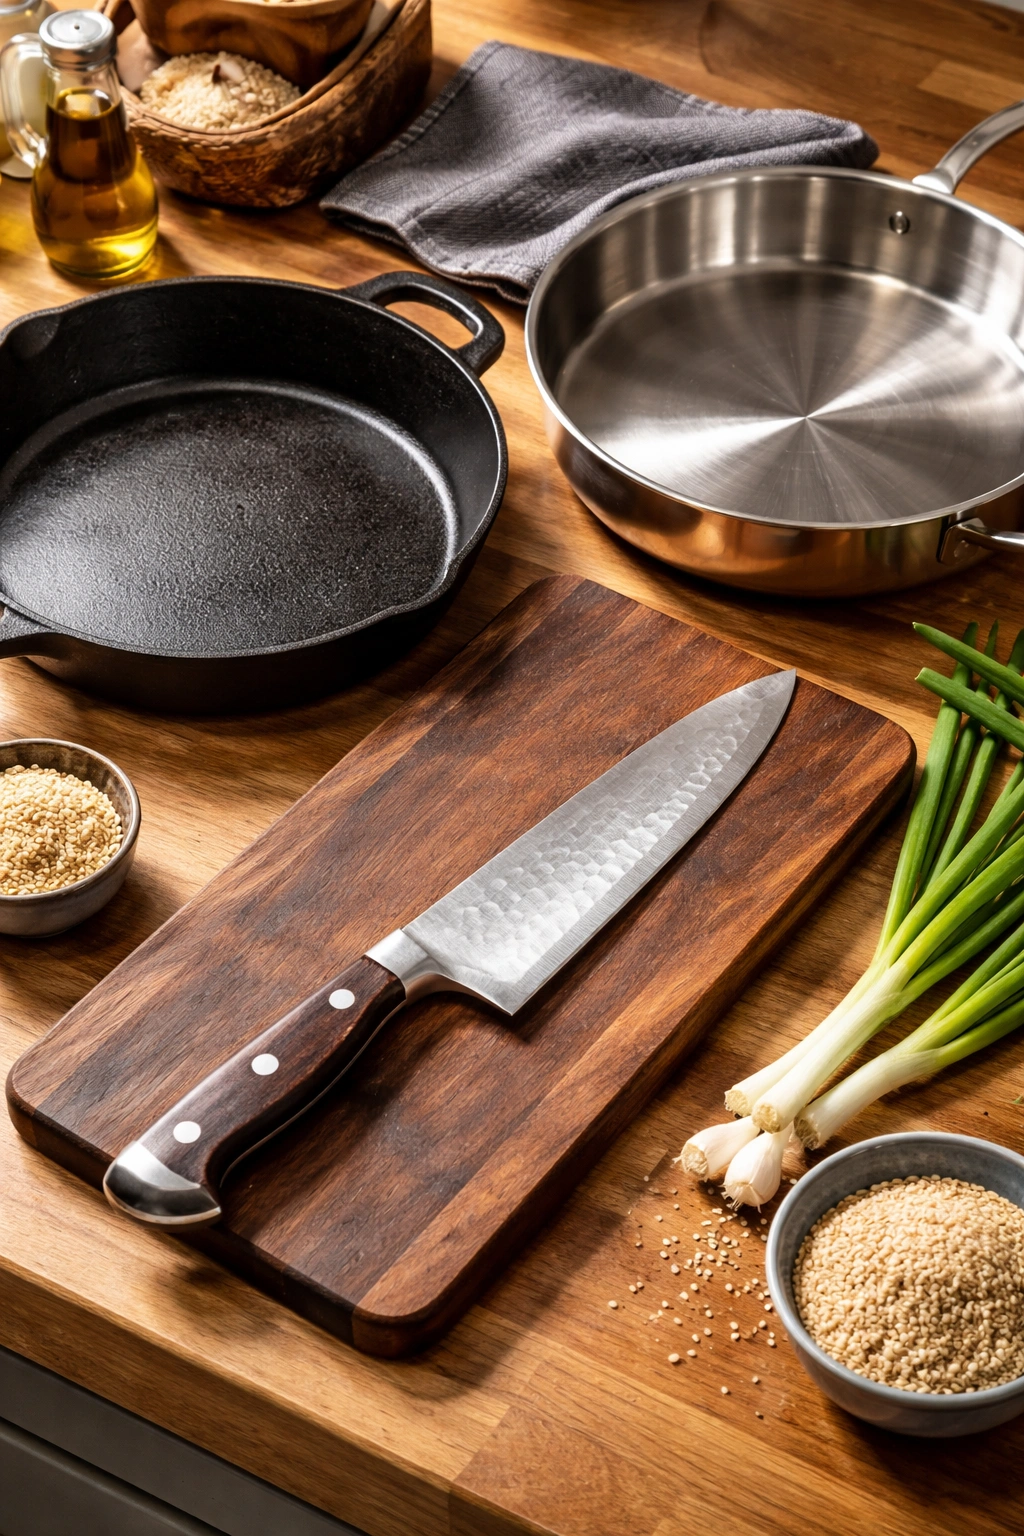
You don’t need specialized Korean BBQ equipment to make bulgogi at home, though certain tools make the job easier. A cast iron skillet or cast iron grill pan is genuinely useful — not because it’s required, but because cast iron’s superior heat retention means you get a better sear and more caramelization on the meat. If you don’t have cast iron, a heavy-bottomed stainless steel skillet works fine, though you may not get quite as much browning.
A regular non-stick skillet works, especially if you’re watching your fat intake and using less oil. The trade-off is that you’ll get less caramelization and more gentle cooking, which is fine if that’s your preference. Just avoid thin, cheap non-stick pans that don’t heat evenly — you want something with a thick, heavy bottom.
A wok or large wide skillet is helpful simply because you can spread the meat out more, which means better browning and less crowding. Crowding your pan is one of the biggest mistakes people make with bulgogi — too much meat in too small a space means the pan temperature drops and the meat steams instead of sears.
For slicing beef, a very sharp knife is essential. Not optional. A dull knife will crush the meat fibers instead of cutting cleanly through them, creating meat that’s shredded and tough instead of sliced and tender. If your knife is questionable, use a knife sharpener or steel before you start.
For the marinade, a blender or food processor is highly recommended for the 20-minute method because blended marinade is so much more flavorful and infuses so much faster than chopped-and-mixed ingredients. An immersion blender works too.
Everything else is optional. Korean grills over open flames are fun but not necessary. Sophisticated plating equipment is nice but not needed. You can absolutely make excellent bulgogi with just a sharp knife, a hot pan, and a bowl for the marinade.
The 20-Minute Recipe: Start to Finish
Yield: Serves 4
Prep Time: 10 minutes
Cook Time: 10 minutes
Total Time: 20 minutes
Difficulty: Beginner — no special techniques required, straightforward steps, impossible to mess up
For the Marinade:
- 1/2 medium Asian pear or Fuji apple, peeled and roughly chopped
- 1/4 medium yellow onion, roughly chopped
- 3-4 garlic cloves
- 1 teaspoon fresh ginger, peeled
- 1/3 cup soy sauce (use low-sodium if you prefer less salt)
- 2 tablespoons brown sugar
- 1 tablespoon toasted sesame oil
- 1 tablespoon mirin (Japanese sweet rice wine) or water
- 1/8 teaspoon ground black pepper
For the Beef:
- 1.5 pounds beef (rib eye, top sirloin, or tenderloin), very thinly sliced (2-3mm or 1/8 inch thick), or use pre-sliced bulgogi beef from an Asian market
- 1 tablespoon neutral cooking oil (canola, vegetable, or rice bran oil)
For Serving:
- Steamed white or brown rice (about 2 cups cooked)
- 2-3 green onions, thinly sliced
- 1-2 tablespoons toasted sesame seeds
- Optional: kimchi, sliced cucumbers, lettuce leaves, Korean ssamjang sauce
Make the Marinade:
-
Add the pear, onion, garlic, and ginger to a blender or food processor. Pour in the soy sauce, brown sugar, sesame oil, mirin, and black pepper.
-
Blend until completely smooth, about 1-2 minutes. The mixture should look like a thin, uniform sauce with no visible chunks. If using an immersion blender, place all ingredients in a measuring cup or bowl and blend until completely smooth.
-
Pour the marinade through a fine-mesh strainer or cheesecloth into a large bowl, pressing gently on the solids to extract as much liquid as possible. You should have about 3/4 cup of clear marinade. (Optional: if you’re eating at home and don’t mind the texture, you can skip this step and use the marinade as-is.)
Combine the Beef with Marinade:
-
Place the thinly sliced beef in the bowl with the strained marinade. Using your hands (or wearing food-prep gloves), gently mix and massage the beef to ensure every piece is coated evenly with the marinade. The beef should look wet and glossy.
Advertisements -
Let sit for 5-10 minutes at room temperature while you prepare your pan and rice. The meat doesn’t need to marinate longer — this time is purely for maximum flavor absorption. Do not refrigerate if you’re cooking within 15 minutes — cold beef won’t sear properly.
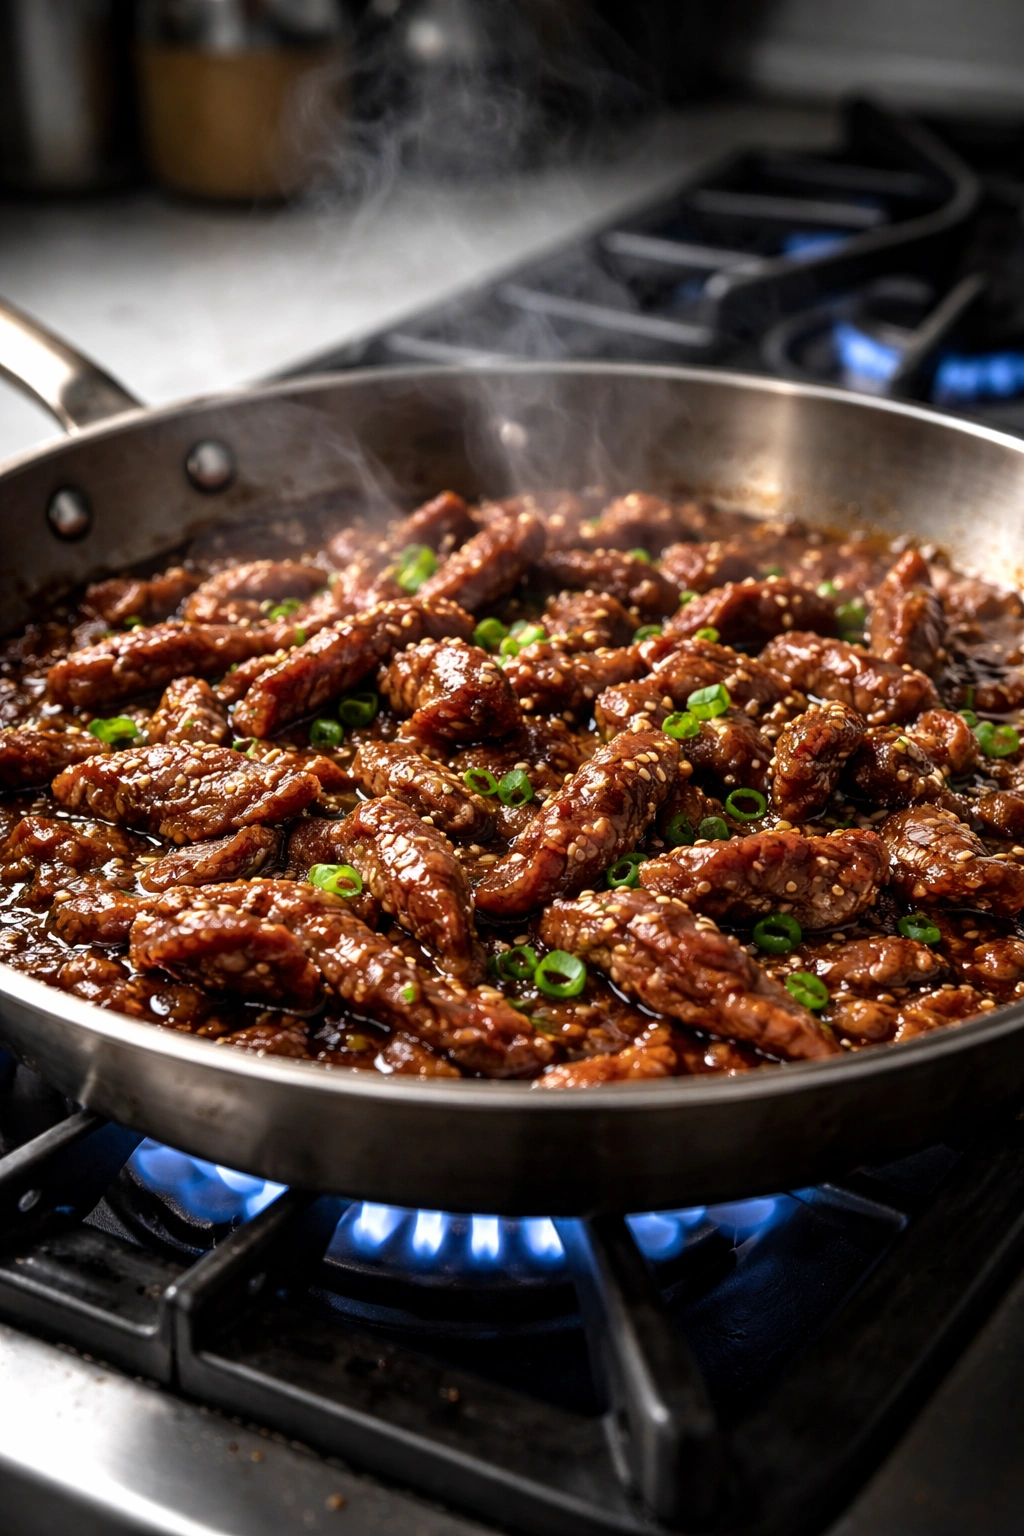
Cook the Bulgogi:
-
Place a cast iron skillet or heavy-bottomed stainless steel skillet over medium-high to high heat. Let it heat for 2-3 minutes until it’s noticeably hot — if you sprinkle a drop of water on the surface, it should sizzle immediately.
-
Add the cooking oil and tilt the pan to coat the bottom evenly. Let the oil heat for 30 seconds until it shimmers.
-
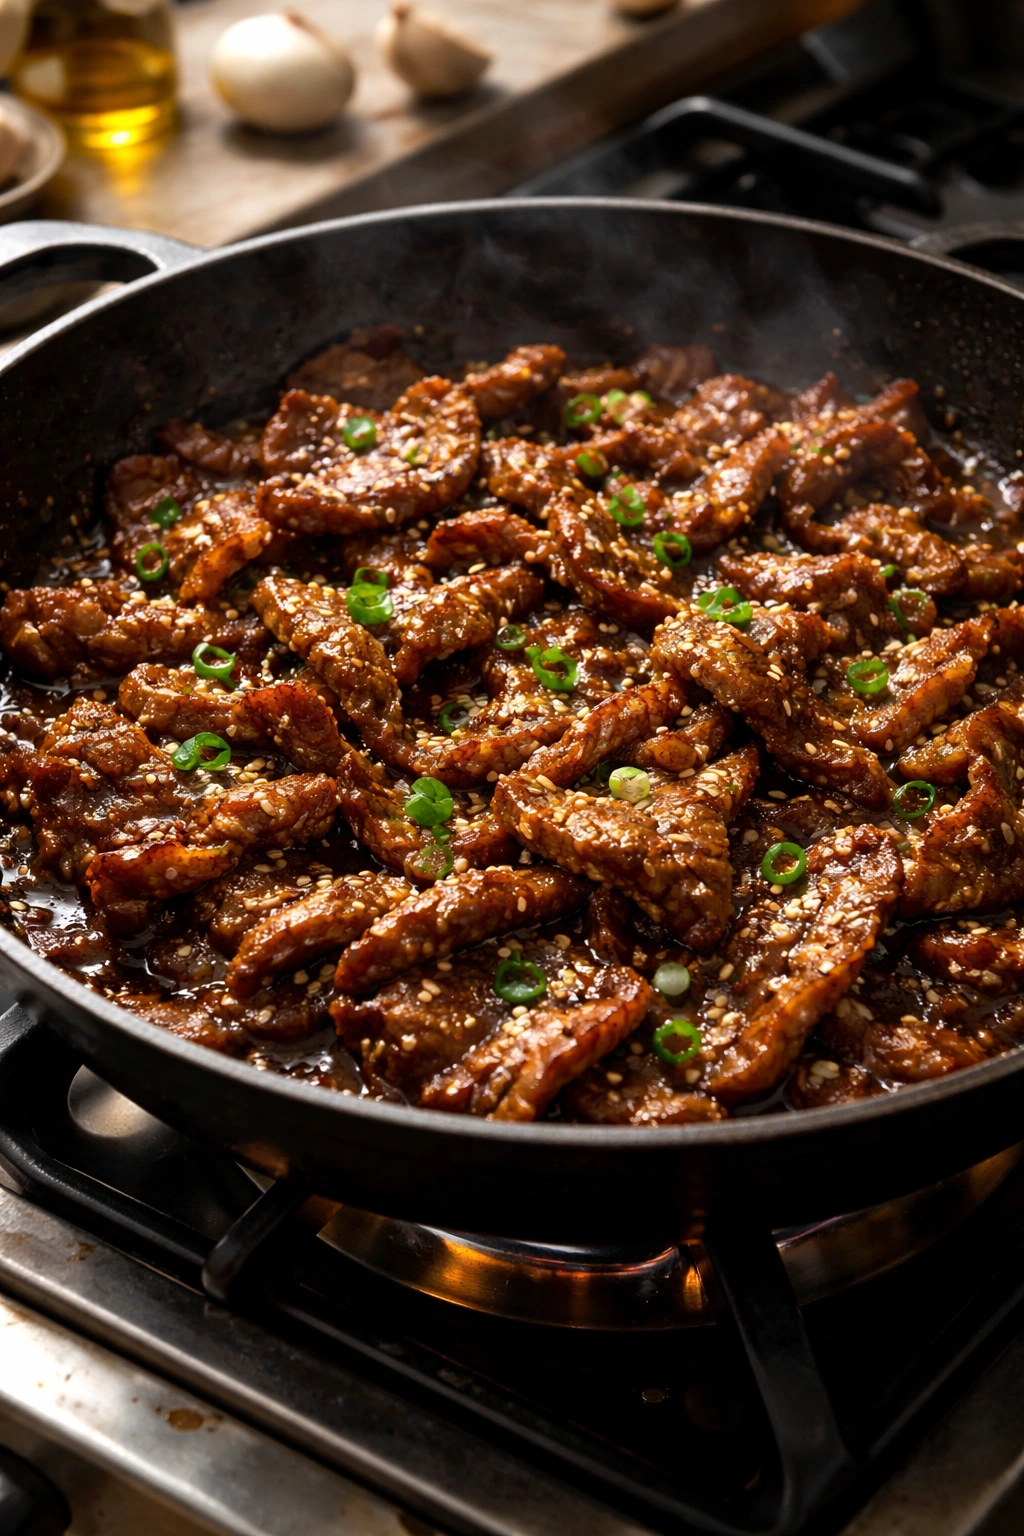
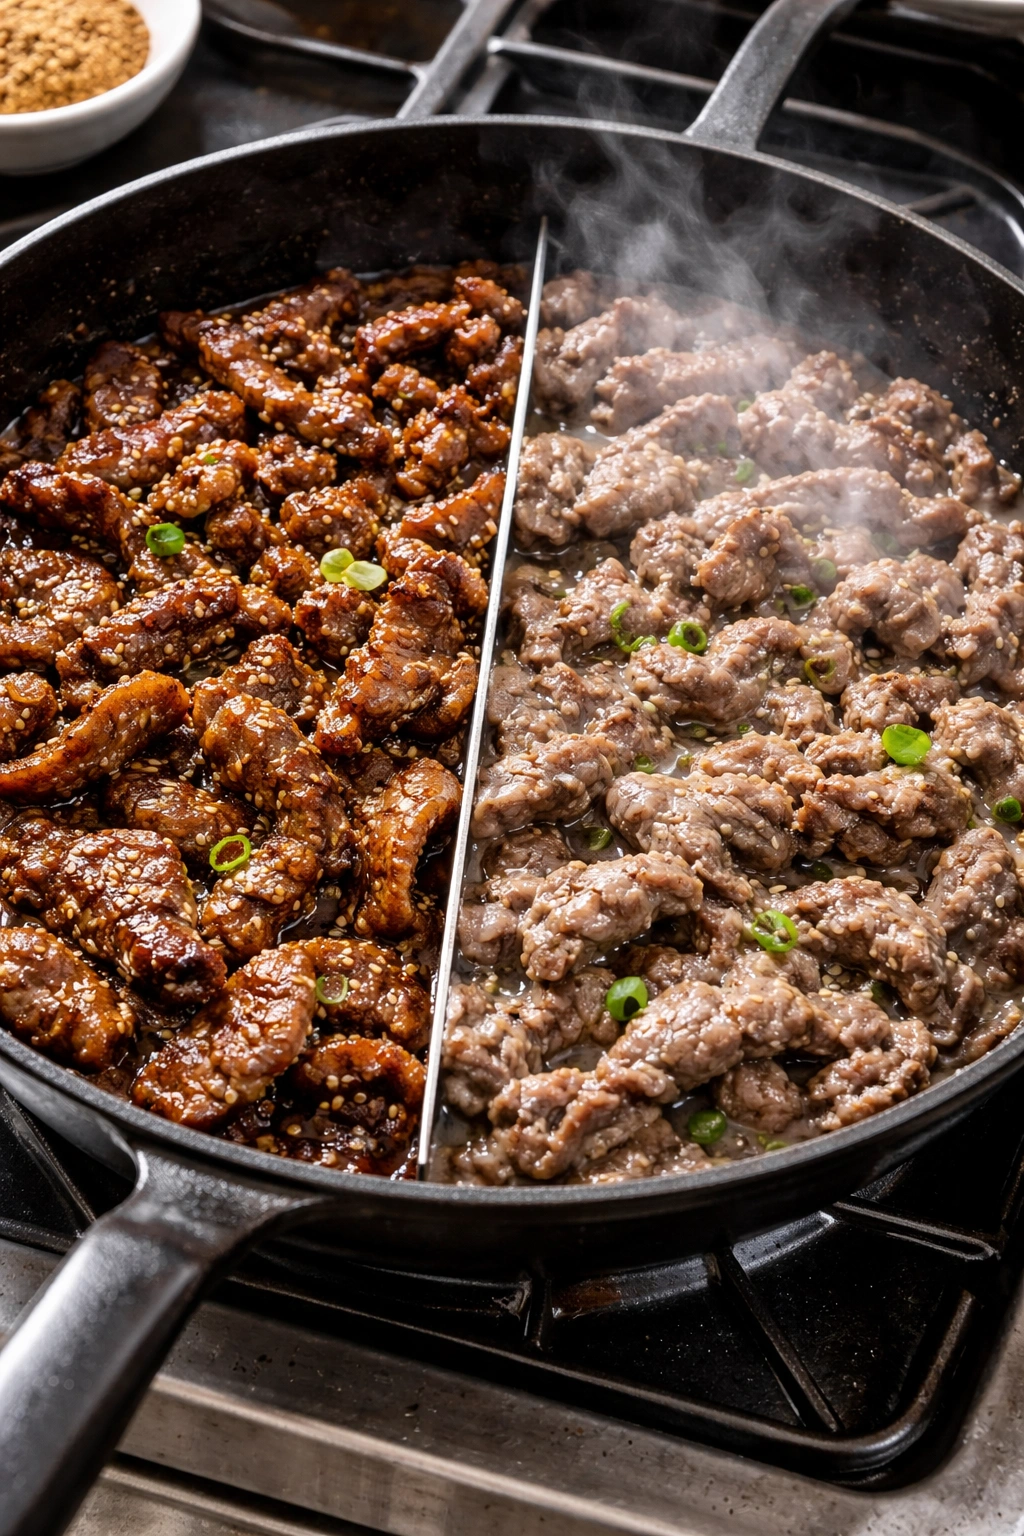
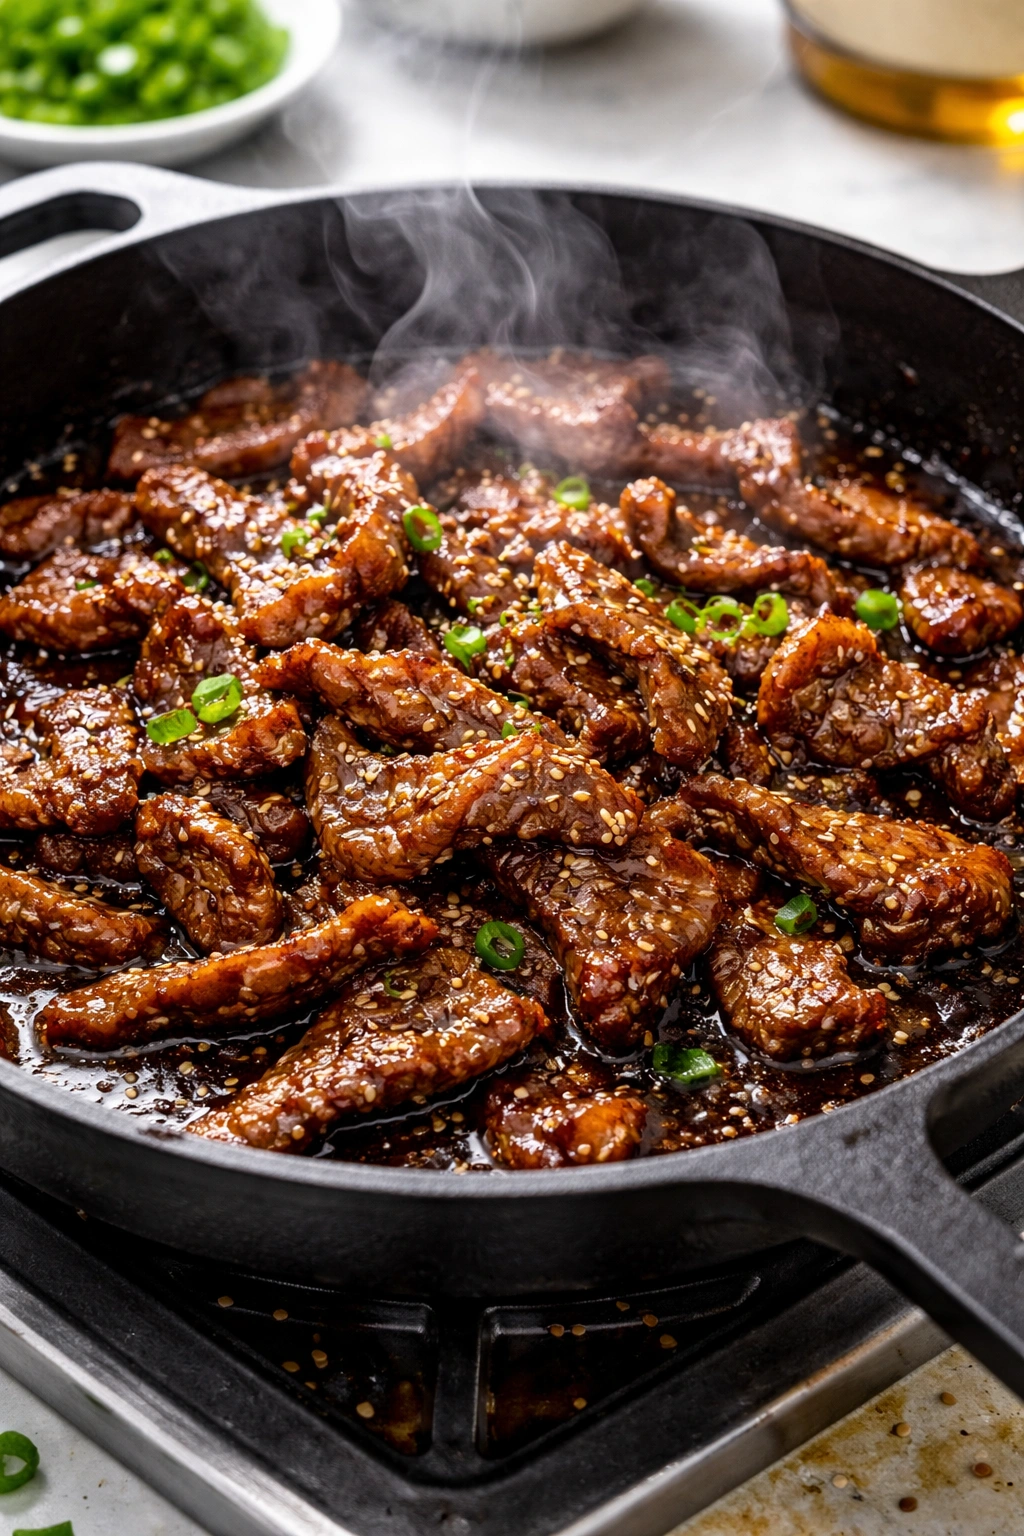
Working in two batches is crucial — add only half the beef and marinade to the hot pan. You want a single layer of meat that’s not crowded. If everything goes in at once, the temperature will drop and the beef will steam instead of sear. Stir and cook for 2-3 minutes, continuously stirring, until the liquid has mostly evaporated and the beef is cooked through and lightly caramelized. The meat should look glossy and slightly browned, not gray and wet.
-
Transfer the cooked beef to a serving plate using a slotted spoon, leaving as much liquid behind in the pan as possible (this liquid has flavorful browned bits that we want to stay in the pan).
-
Add the remaining half of the beef and marinade to the pan and repeat — cook for 2-3 minutes, stirring frequently, until the liquid has reduced and the beef is caramelized. Do not overcook — the beef is thin enough that it can go from perfectly cooked to slightly tough very quickly.
-
Return the first batch of beef to the pan and toss everything together for about 30 seconds, just until combined and heated through.
Serve and Eat:
-
Divide steamed rice among serving bowls. Top with the bulgogi and any juices that have accumulated. Sprinkle generously with sliced green onions and sesame seeds.
Advertisements -
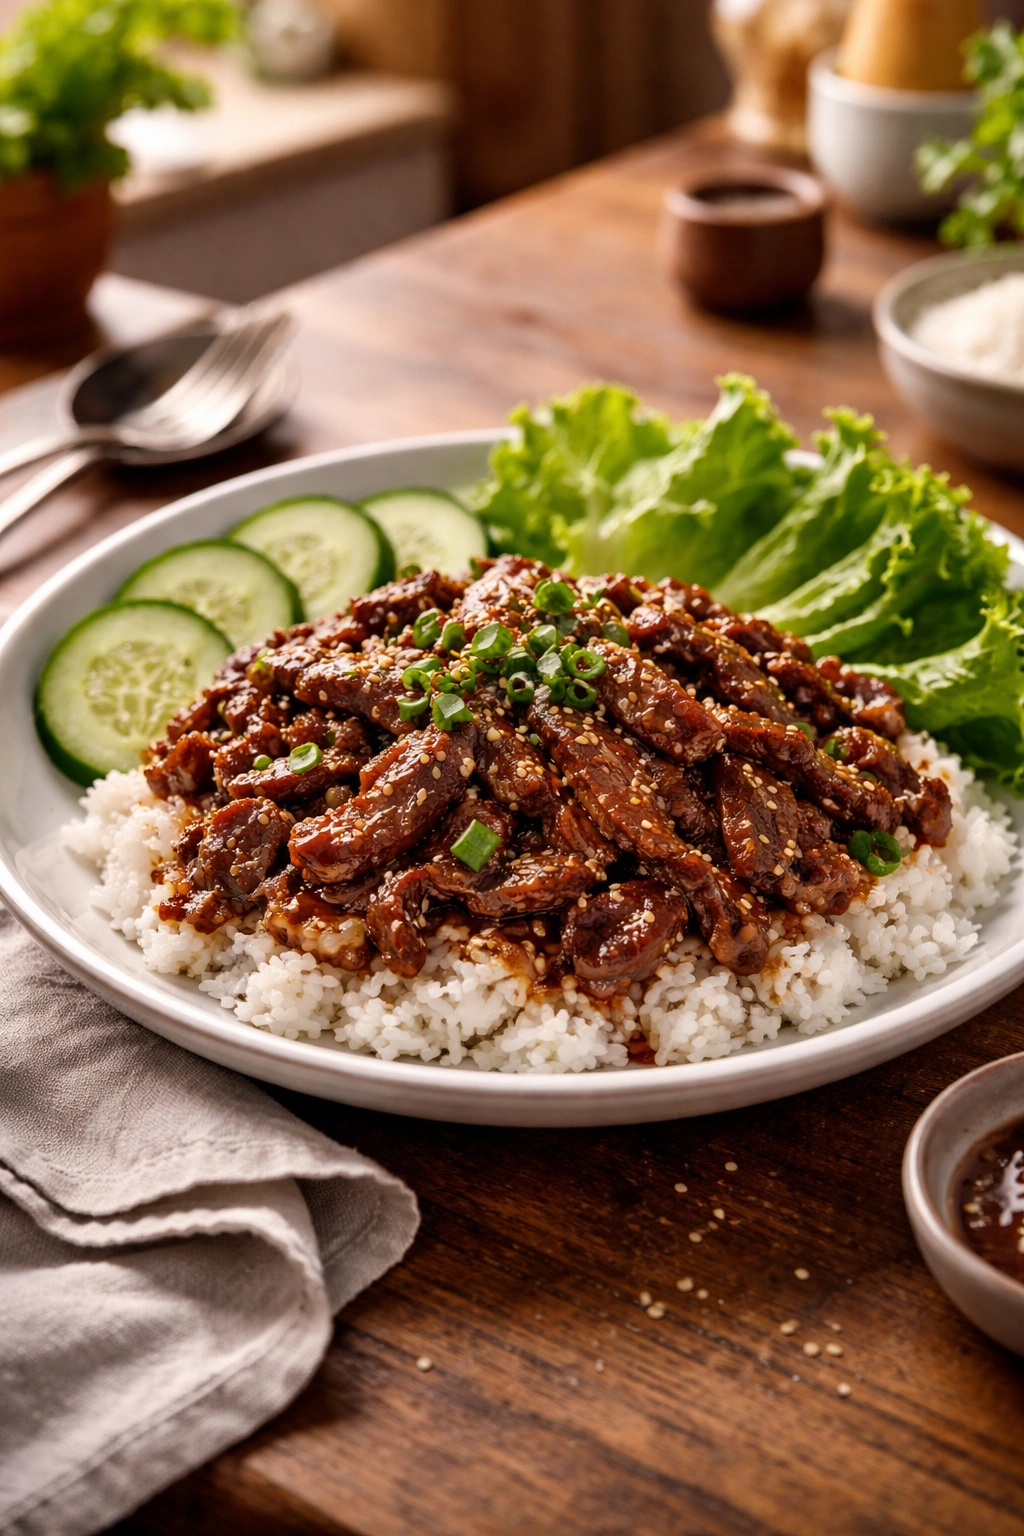
Serve with additional accompaniments on the side — sliced cucumber, kimchi, lettuce leaves, or ssamjang (Korean BBQ dipping sauce). Traditionally, you wrap small spoonfuls of rice, bulgogi, and a bit of ssamjang in a lettuce leaf and eat it as a hand-held bite. This is genuinely the best way to experience bulgogi.
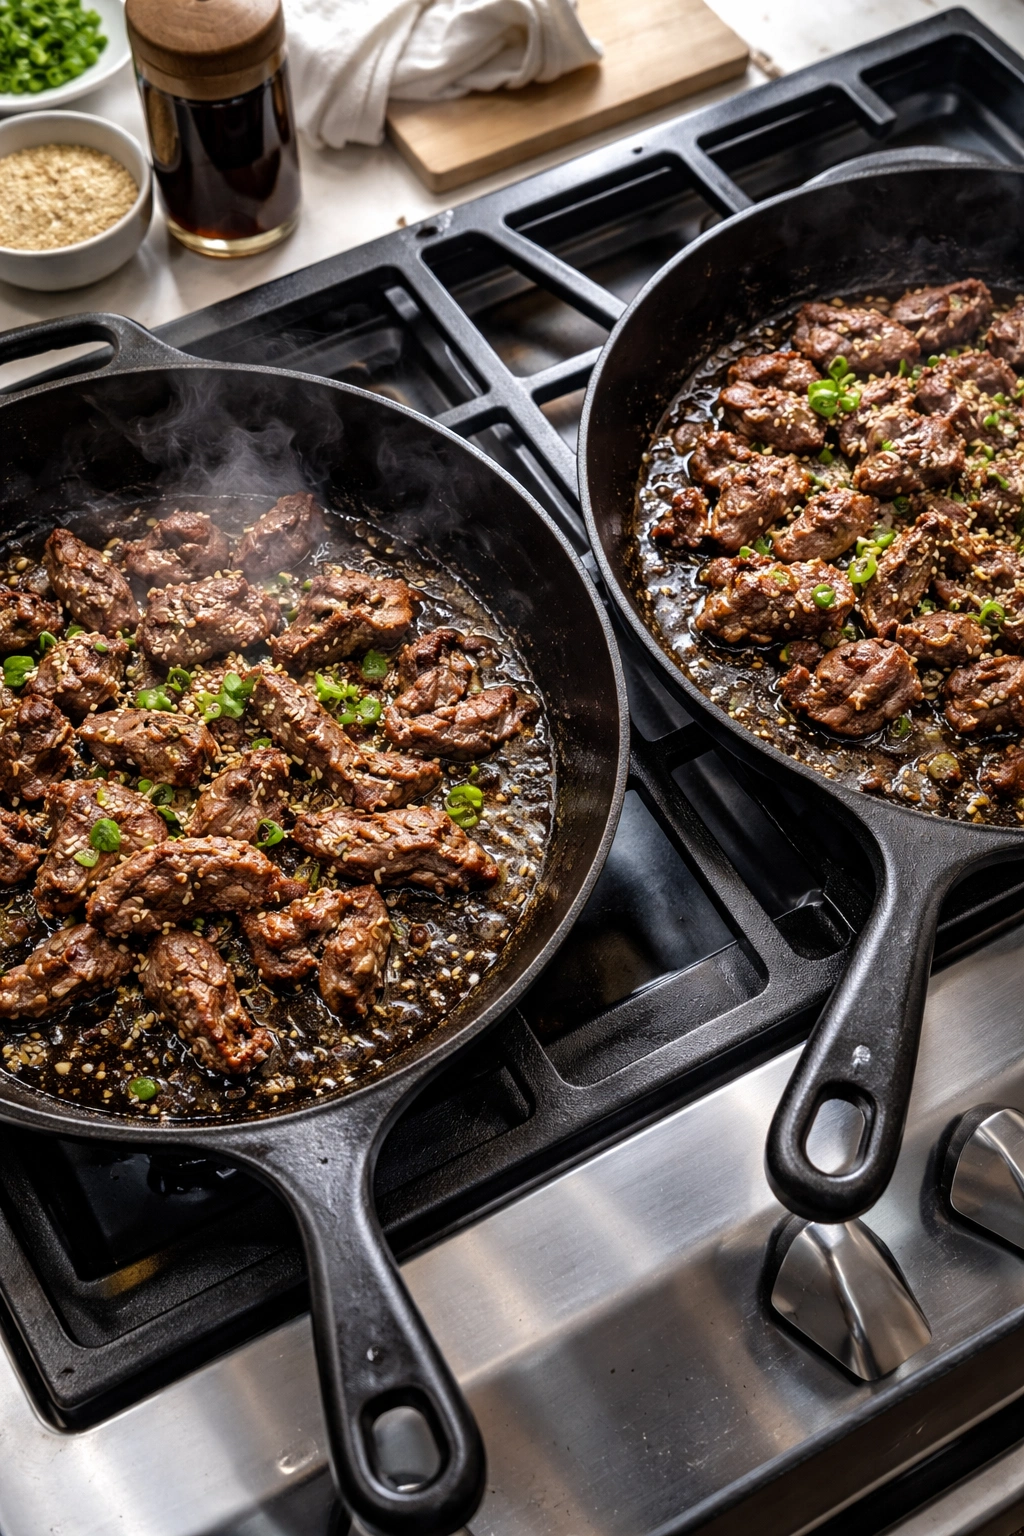
Why Cooking in Batches Actually Saves Time
This might seem counterintuitive — wouldn’t adding all the beef at once be faster? No, and here’s why. A crowded pan loses heat instantly and dramatically. When you dump a pound and a half of cold beef into a hot pan, the temperature plummets. The meat releases moisture, which evaporates slowly, and the beef essentially steams in its own juice rather than searing.
Steamed beef lacks color, lacks that caramelized exterior, and lacks those browned, flavorful bits called fond that develop on the pan surface. You also end up with watery sauce that never reduces and clings to the meat. The whole dish tastes flat and one-dimensional.
When you cook in batches, the pan stays hot. Each piece of meat hits the pan and immediately sears, creating that brown crust. The marinade reduces quickly instead of evaporating slowly, creating a sticky glaze instead of a thin sauce. The whole process is actually faster — two 3-minute batches take 6 minutes total, versus one crowded batch that might take 8-10 minutes to finally cook through.
The same applies to stir-frying other dishes — whether it’s chicken, vegetables, or any protein, never crowd the pan. It’s one of the most common mistakes home cooks make, and it’s usually based on the assumption that bigger batches are faster. They’re not. Proper batching is faster, produces better results, and teaches you discipline in the kitchen.
The Critical Difference Between Searing and Steaming
This distinction will level up all your stir-frying forever, not just bulgogi. Searing happens when food contacts a very hot, dry surface. The heat is so intense that the meat’s surface proteins denature and brown rapidly through the Maillard reaction. This creates color, flavor, and those irresistible caramelized bits.
Steaming happens when moisture accumulates between the food and the pan surface. Instead of the meat contacting the hot metal directly, it’s sitting in a tiny layer of humidity, which prevents the high temperatures needed for browning. The food cooks through, but it doesn’t develop color or crust. It tastes boiled or braised rather than grilled.
The cure is heat management. When you’re going for a sear, your pan needs to be hot enough that whatever you’re cooking dries out immediately. The moisture it releases evaporates instantly rather than accumulating. If your pan is too cool or too crowded, that doesn’t happen.
For bulgogi, medium-high to high heat is your target. The pan should be hot enough that the marinade sizzles audibly when it hits the surface. If it doesn’t sizzle, your pan isn’t hot enough. Heat it for another 30 seconds and try again. This might seem fussy, but it’s the single biggest factor determining whether your bulgogi tastes homemade-mediocre or restaurant-quality.
Variations That Still Hit the 20-Minute Mark
The beautiful thing about this quick marinade method is that it’s incredibly flexible once you understand the core flavor profile. You’re not locked into beef, just as you’re not locked into rice.
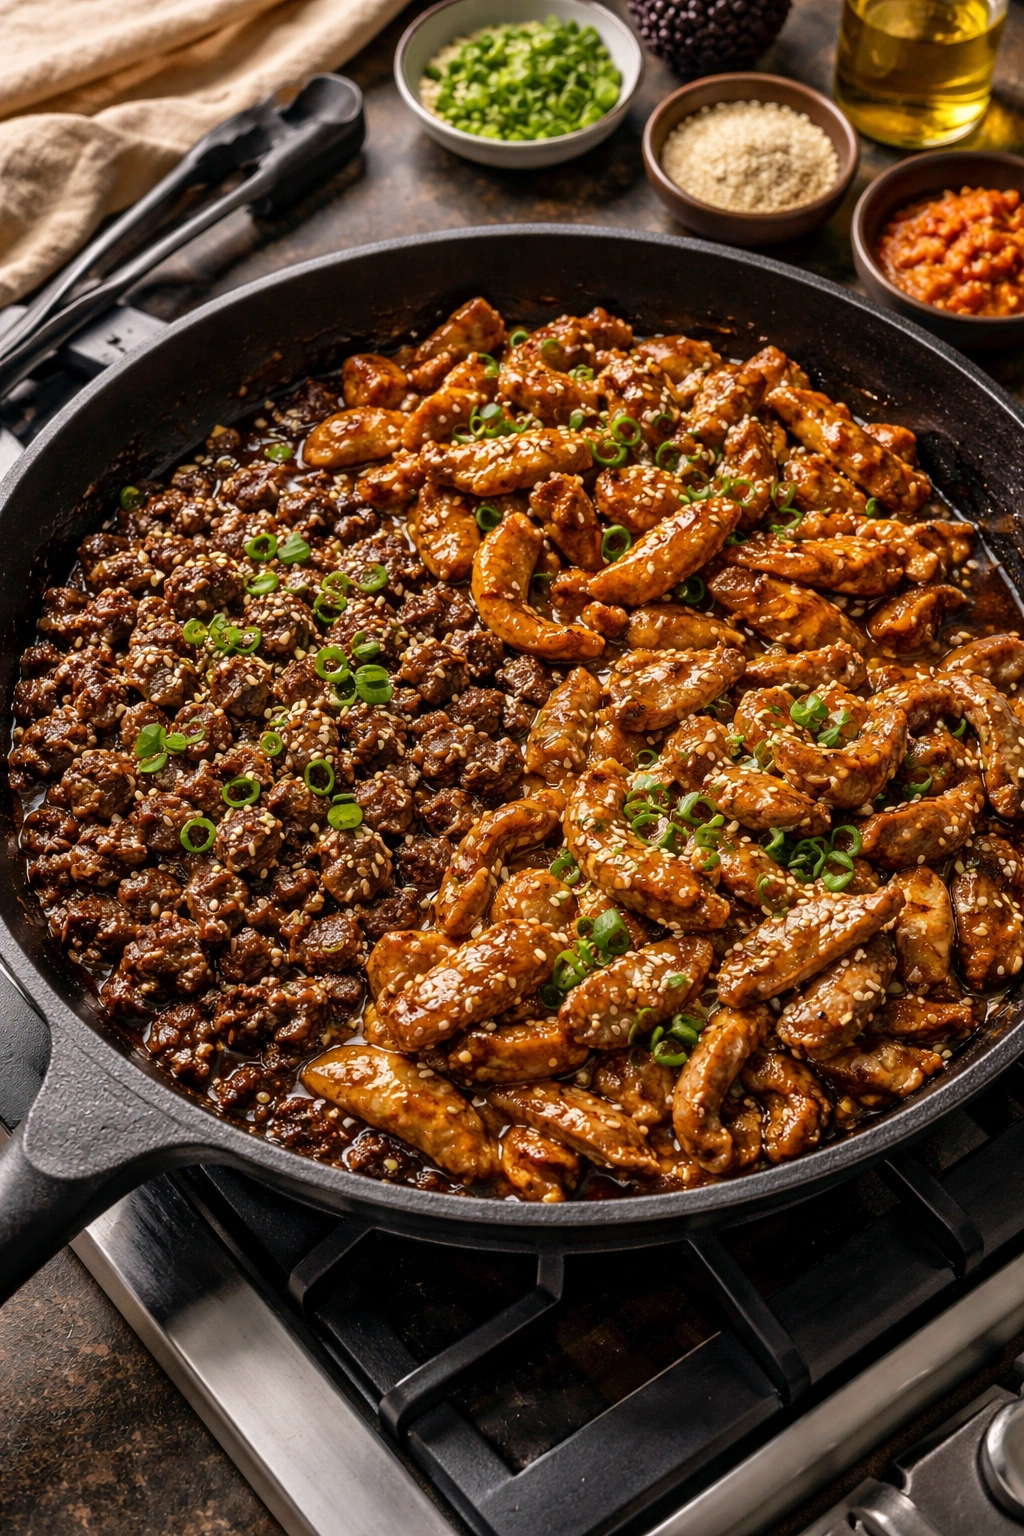
Ground Beef Version: Skip the slicing entirely and use 1.5 pounds of ground beef (80/20 blend works well). Brown the ground beef in your skillet first, breaking it up as it cooks, then add the marinade and let it cook until reduced and caramelized. This is genuinely the fastest version and works beautifully. Ground beef bulgogi over rice or in lettuce wraps is a completely legitimate way to eat this dish.
Chicken Bulgogi: Use the exact same marinade with 1.5 pounds of thinly sliced chicken breast or thighs. Chicken takes slightly longer to cook than beef — probably 4-5 minutes per batch instead of 3 — but the flavor profile works perfectly. Thighs are more forgiving than breasts and have better flavor; use thighs if you have a choice.
Pork Bulgogi: Thin-sliced pork shoulder or pork belly works beautifully with this marinade. Pork has slightly different texture than beef but benefits from the same cooking technique and timing.
Rice Bowl Over: Don’t serve this over plain rice. Make a quick sauce by mixing 2 tablespoons soy sauce, 1 tablespoon sesame oil, 1 teaspoon rice vinegar, and 1 teaspoon brown sugar. Drizzle this over your rice bowl before adding the bulgogi. The rice should be dressed and flavorful, not plain.
Noodle Version: Serve over cooked ramen noodles or thin wheat noodles instead of rice. The marinade clings to noodles beautifully and creates something closer to a noodle stir-fry.
Lettuce Wraps: Skip the rice entirely. Serve the bulgogi with a side of crisp lettuce leaves (romaine, butter lettuce, or Korean perilla leaves), steamed rice on the side, and ssamjang. This is actually how bulgogi is traditionally eaten at Korean BBQ restaurants — you wrap a lettuce leaf around spoonfuls of rice, bulgogi, and sauce, then eat it as a hand-held bite.
Taco or Burrito: This might sound weird, but bulgogi in a flour tortilla or corn tortilla is genuinely delicious. Make a simple slaw with thinly sliced cabbage and a bit of rice vinegar, build your tacos with rice, bulgogi, slaw, and avocado, and drizzle with a mixture of gochujang and mayonnaise. It’s not traditional, but it’s really good.
Storage, Make-Ahead, and Freezing
The absolute best thing about this recipe is how well it stores and reheats. You can make a double or triple batch on a weekend and have bulgogi ready for multiple meals throughout the week.
Cooked bulgogi keeps in an airtight container in the refrigerator for 3-4 days. The flavor actually deepens slightly as it sits, similar to curry or stew. Reheat gently in a skillet over medium heat with a splash of water if needed to keep it from drying out. It should only take 2-3 minutes to warm through. Avoid microwaving if possible — the beef can become tough and rubbery.
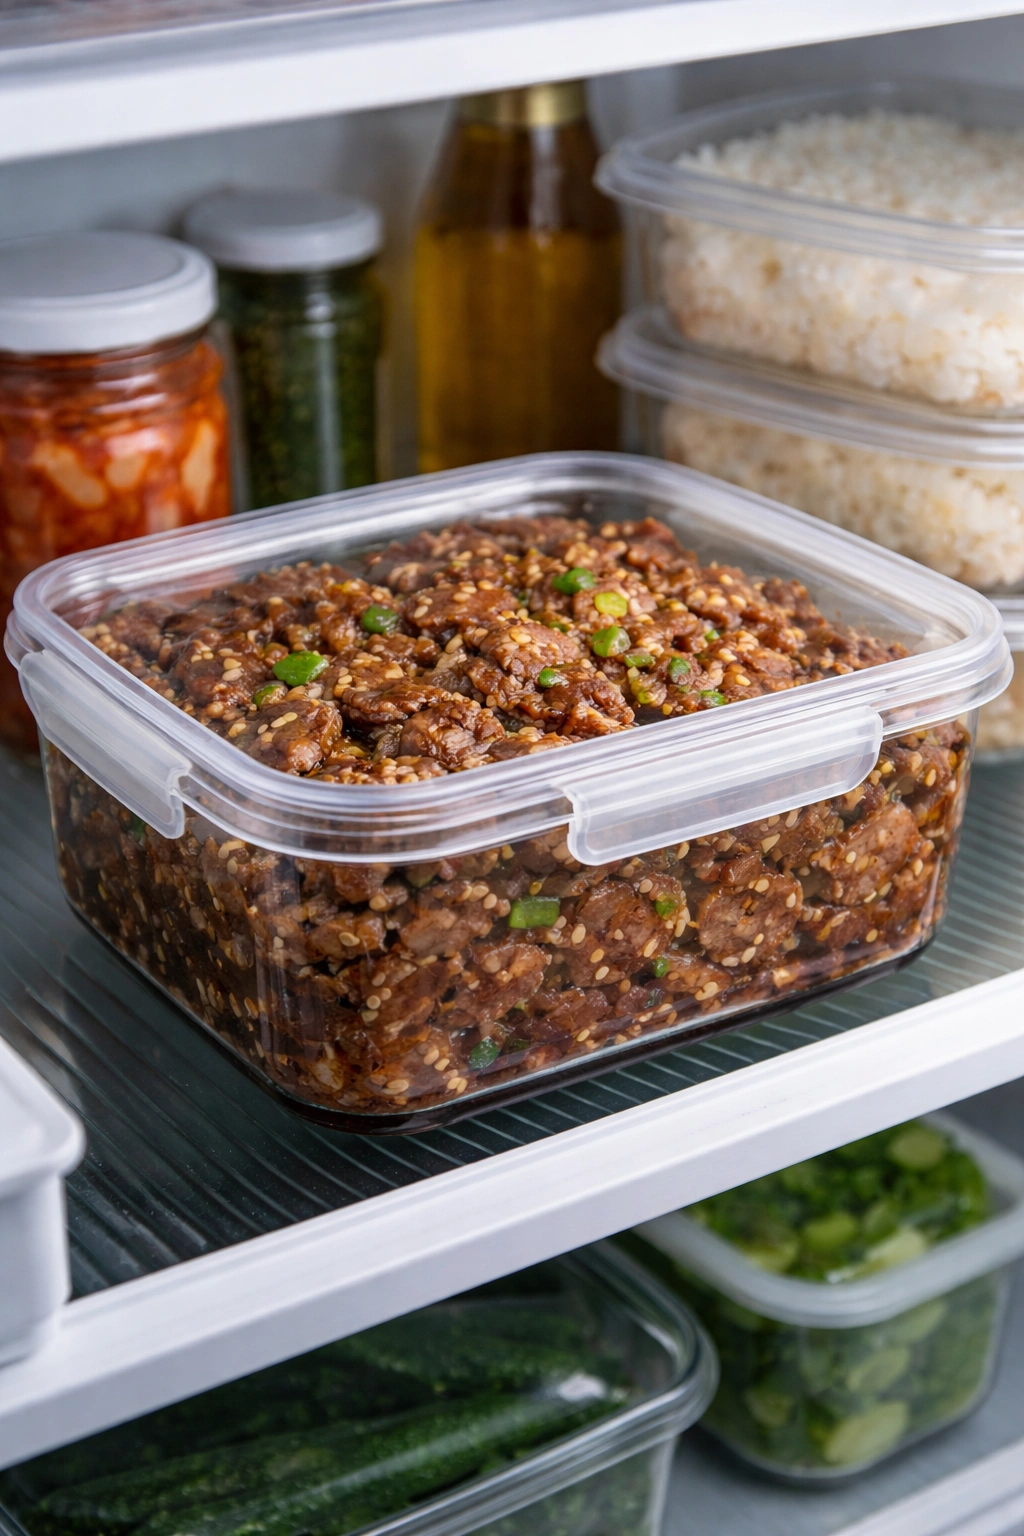
Marinated (uncooked) bulgogi keeps for 3-5 days in an airtight container in the refrigerator. This is genuinely useful — you can prepare the marinade and beef one evening, let it sit in the fridge while you sleep and work the next day, and come home to beef that’s already marinated and ready to cook in 5 minutes. This is the opposite of the 20-minute constraint — it’s the maximum-flavor version where the beef has been steeping for 24+ hours.
Freezing is where this gets exciting. Marinated beef can be frozen for 2-3 weeks in an airtight container or freezer bag. Portion it into individual meal-sized portions before freezing — freeze it flat in a gallon-size freezer bag and you can break off only what you need. Thaw overnight in the refrigerator and cook as directed; it might take an extra minute or two per batch since the beef will be colder, but the results are identical to fresh.
Cooked bulgogi also freezes beautifully for 2-3 weeks. Thaw overnight in the fridge and reheat gently. This is your secret weapon for actually having bulgogi available whenever the craving strikes.
Serving Suggestions and Pairings

Bulgogi is a complete meal all on its own — rice, protein, and inherent flavor — but it becomes genuinely special when you build a proper Korean spread around it. At Korean BBQ restaurants, your bulgogi arrives with banchan, which are small side dishes.
Essential accompaniments: Kimchi (spicy fermented vegetables, which you can buy at any grocery store), sliced cucumber dressed with a tiny bit of sesame oil and salt, and lettuce leaves for wrapping. These three things create a complete eating experience — the richness of the beef is balanced by the acidity and funk of kimchi, the freshness of cucumber, and the ability to customize each bite by wrapping it differently.
Sauces: Ssamjang is traditional — it’s a thick, spicy Korean dipping sauce made from fermented red chili paste, soy sauce, garlic, and sesame oil. It’s intensely flavorful and available at any Asian grocery store. One jar lasts forever because you use such small amounts. Alternatively, a simple mixture of gochujang (Korean red chili paste) and mayonnaise works beautifully as a modern Korean fusion sauce.
Vegetables: Beyond the essentials, consider steamed broccoli, sautéed spinach, stir-fried mushrooms, or pickled radish. These can be prepared while the bulgogi cooks if you’re being efficient.
Drinks: Cold barley tea is traditional, but honestly, cold beer pairs better with bulgogi than almost anything. A crisp lager or wheat beer cuts through the richness beautifully. Iced green tea or ginger ale are excellent non-alcoholic options.
Troubleshooting Common Problems
The beef came out tough instead of tender: Your pan probably wasn’t hot enough, or you cooked it longer than needed. Thin-sliced beef cooks very quickly — 3 minutes per batch is usually all it needs. If it’s tough, you overcooked it. Next time, reduce your cooking time or increase your heat so it cooks faster.
The sauce didn’t reduce and stayed watery: Your pan wasn’t hot enough or was too crowded. The marinade needs to evaporate quickly to create a glaze. If it’s lingering in the pan, you’re essentially steaming the beef. Use higher heat and cook in smaller batches.
The beef looks gray instead of brown: Same issue — not enough heat. Make sure your pan is genuinely hot before adding the meat. The surface should be hot enough that a drop of water sizzles immediately.
The marinade burned and tastes bitter: Your heat was too high. The sugar in the marinade can burn if the pan temperature is extreme. Use medium-high heat instead of maximum heat. The marinade should sizzle enthusiastically, but not aggressively.
I don’t have all the ingredients: The absolute core of bulgogi is soy sauce, brown sugar, sesame oil, and garlic. If you have those four things, you have bulgogi. The pear/apple adds complexity and natural tenderization, but it’s not strictly necessary — your bulgogi will still taste good without it. Ginger is also optional. The one thing you shouldn’t substitute is the sesame oil — it’s not optional. Toasted sesame oil specifically (not regular sesame oil) is key to the flavor profile.
Final Thoughts
The revelation in making bulgogi at home is realizing that restaurant-quality food doesn’t require complicated techniques or excessive time — it requires understanding the fundamentals and applying them correctly. You don’t need an overnight marinade. You don’t need expensive equipment. You don’t need to be some kind of culinary genius.
What you do need is very hot heat, very thin beef, and a concentrated marinade with real flavor. Get those three things right and you’re essentially guaranteed success. The fact that this all comes together in 20 minutes is almost secondary — the fact that it tastes genuinely exceptional is the real point.
Once you’ve made this a few times, you’ll find yourself making it constantly. It’s faster than delivery, cheaper than restaurants, and endlessly customizable based on what’s in your kitchen. You’ll serve it over rice some nights, in lettuce wraps other nights, in tacos when you’re feeling adventurous. You’ll double the marinade recipe and keep marinated beef in your freezer so dinner is always available.
This is the kind of recipe that becomes a kitchen cornerstone — not because it’s challenging or impressive, but because it’s genuinely useful and genuinely delicious. And that’s ultimately what cooking is about.