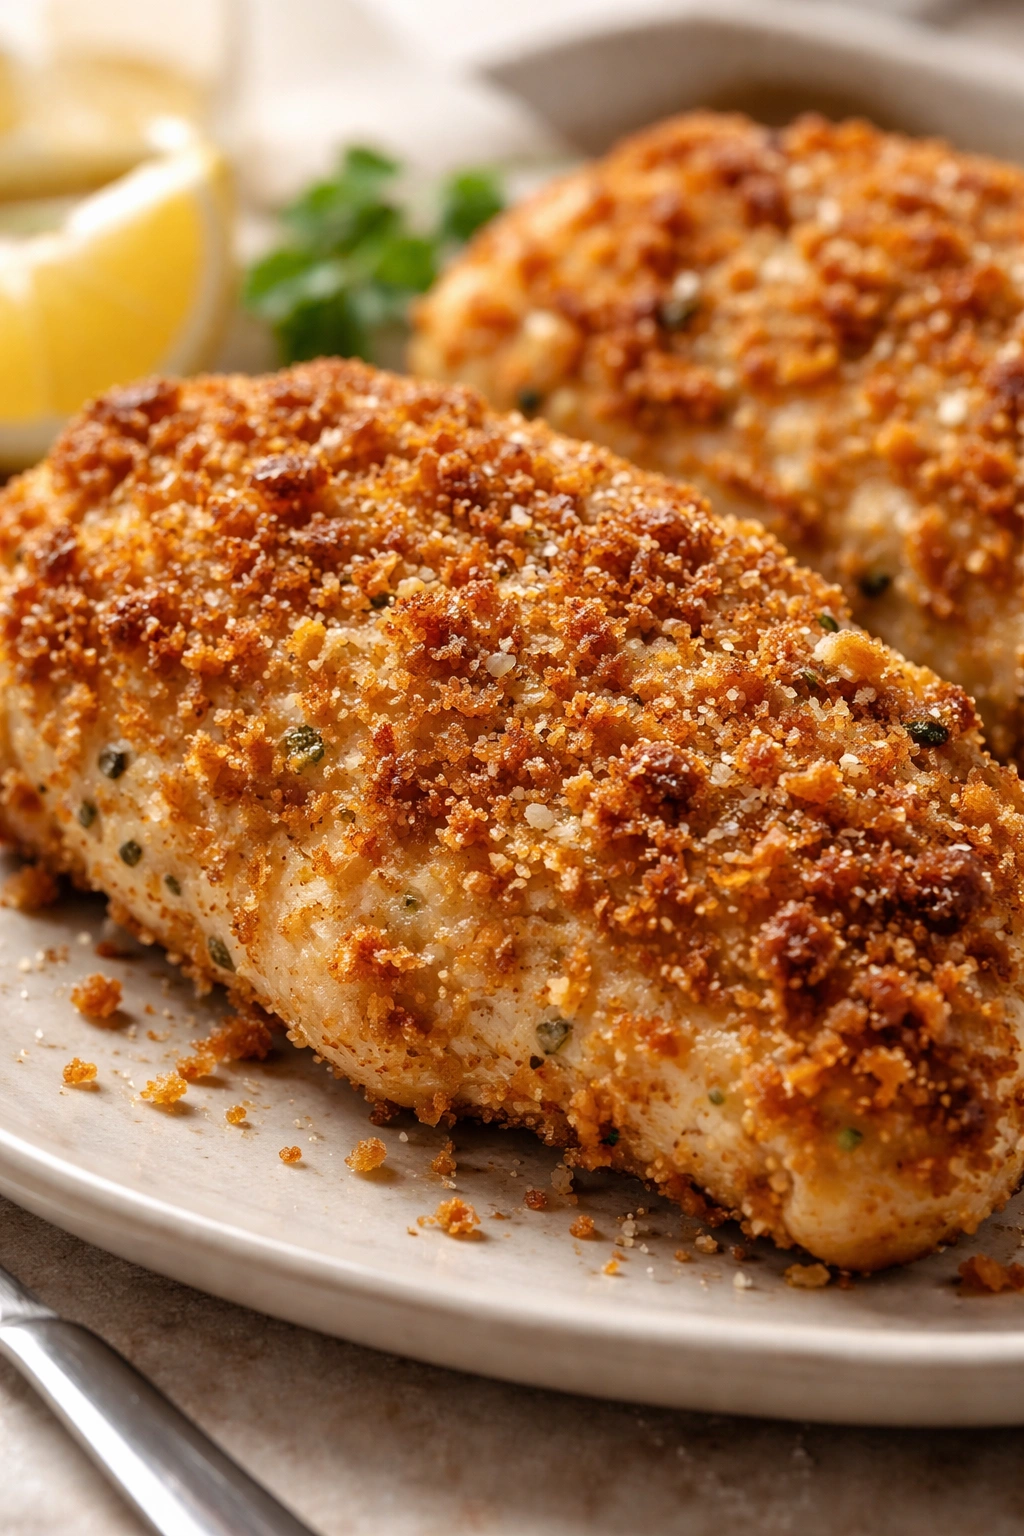
There’s something magical that happens when you pull a golden, crunchy piece of chicken from the oven and realize you didn’t need a deep fryer to achieve that satisfying crunch. Crispy oven-baked Parmesan crusted chicken delivers everything you want from a comfort food dinner—juicy meat, savory cheese, a crackling crust—without the mess, oil splatters, or guilt that comes with deep frying. This is the kind of recipe that becomes a weeknight staple because it’s genuinely easy, genuinely delicious, and genuinely hard to mess up once you understand the few tricks that make it work.
The beauty of this dish is that it bridges two worlds. It gives you the indulgent satisfaction of fried chicken, but it’s baked, so it’s lighter, faster, and leaves your kitchen smelling like herbs and Parmesan instead of hot oil. You can have dinner on the table in under an hour, and unlike many breaded chicken recipes, this one actually stays moist inside while the coating transforms into something wonderfully crispy. That’s not luck—that’s technique.
Why Parmesan Crusted Chicken Beats Other Breaded Chicken Recipes
The magic of this particular version lies in understanding what Parmesan brings to the table. Unlike plain breadcrumb coatings, Parmesan adds nutty depth, salty complexity, and something almost savory that makes people ask for seconds before they’ve even finished their first bite. The cheese also helps the coating brown more evenly and develop that golden, almost caramelized exterior you’re after.
What makes this recipe different from chicken Parmesan (the dish with sauce and melted mozzarella) is that these cutlets stand alone. They’re about the purity of the coating, the quality of the seasoning, and the contrast between the tender, juicy meat and that satisfying crunch. This is also why it works so beautifully as a versatile protein—serve it with pasta, toss it on a salad, make it into a sandwich, or just eat it as is with roasted vegetables.
The approach here avoids some of the common pitfalls of oven-fried chicken. You won’t end up with soggy bottoms, burnt edges, or a coating that separates from the meat. You also won’t have a rubbery, overcooked interior. Instead, you’ll have chicken that’s cooked through perfectly, with a crust that stays attached and actually crisps up in the oven.
The Science Behind the Crust
Before we get into the recipe itself, it’s worth understanding why this technique actually works. The combination of panko breadcrumbs and freshly grated Parmesan creates a coating that’s both sturdy and crispy. Panko is larger and flakier than regular breadcrumbs, which means it crisps up instead of compacting into a dense shell. When you add grated Parmesan—not the pre-shredded kind from a can—it melts slightly during baking and helps bind the crust while adding flavor and browning power.
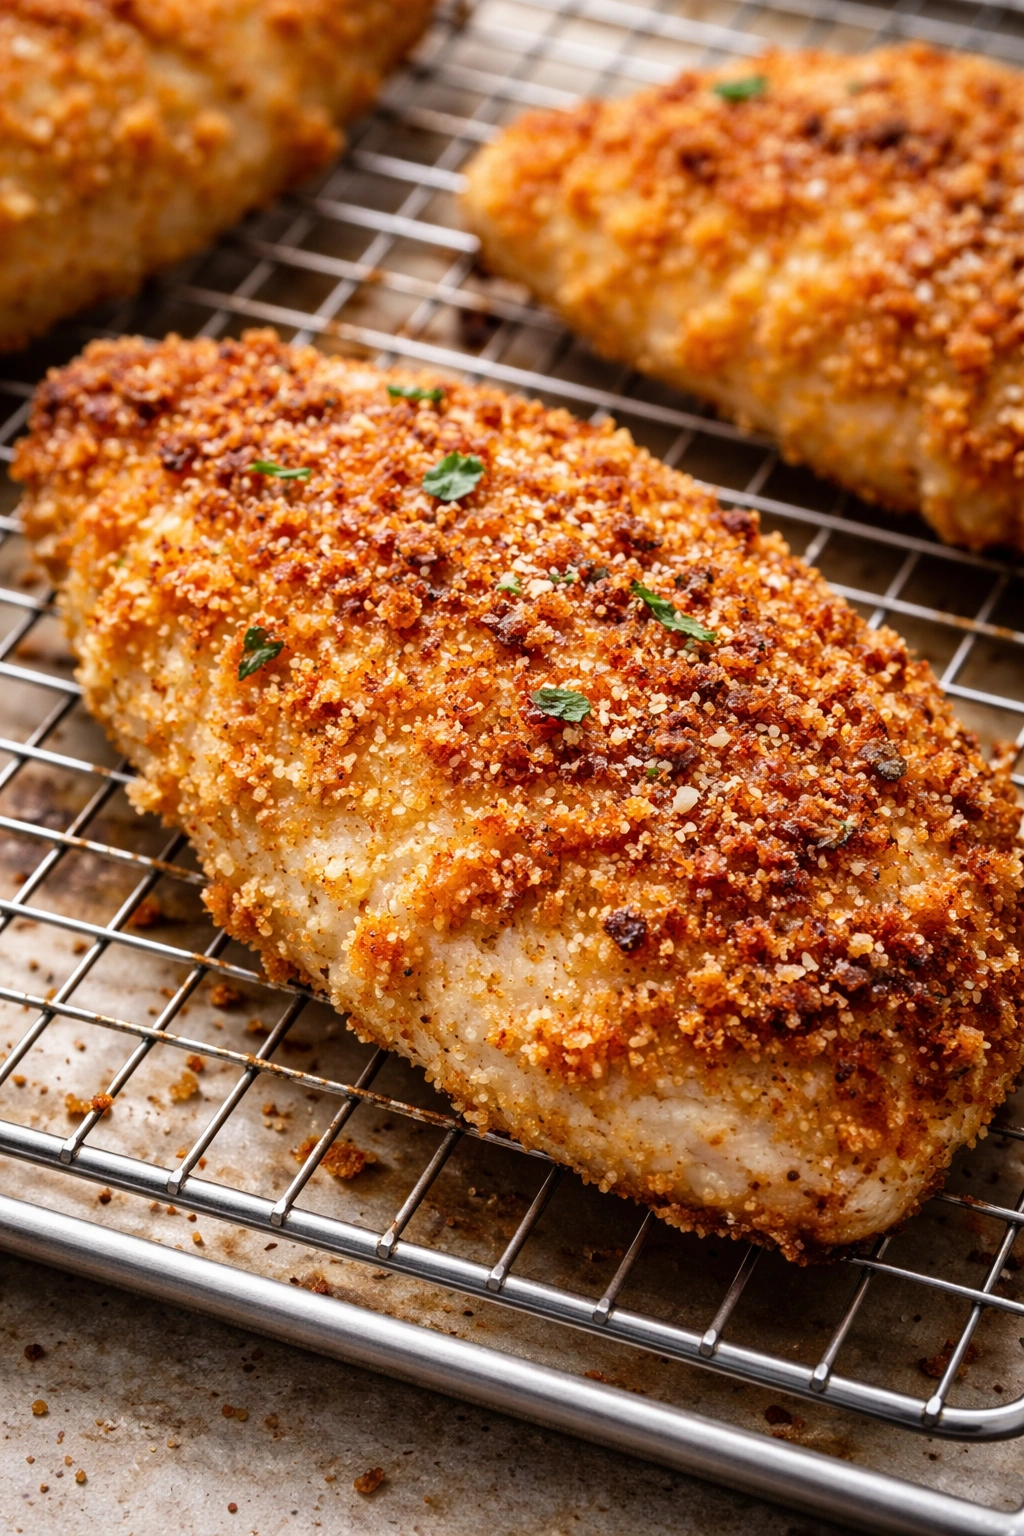
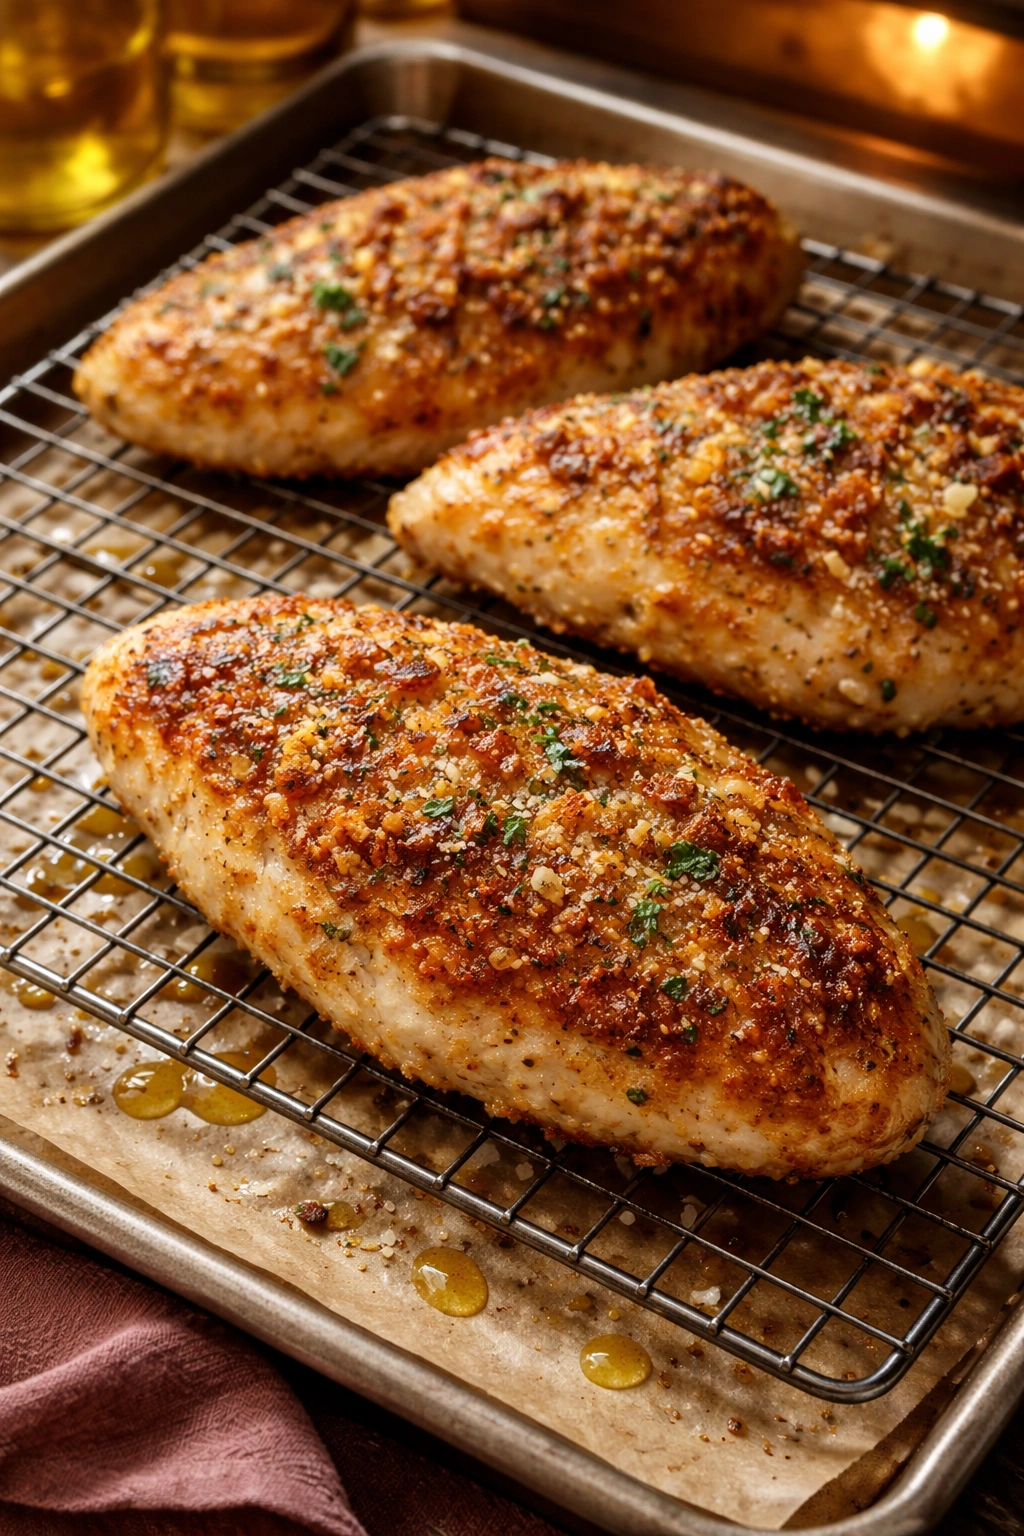
The key to crispiness in the oven is air circulation. By baking the chicken on a wire rack instead of directly on a baking sheet, air flows underneath the cutlet, creating the same kind of crust you’d get from pan-frying. The butter drizzled on top (or the oil, depending on your preference) also matters—it adds fat that helps the coating brown and creates those little crispy bits that make every bite satisfying.
What You’ll Actually Get When You Make This

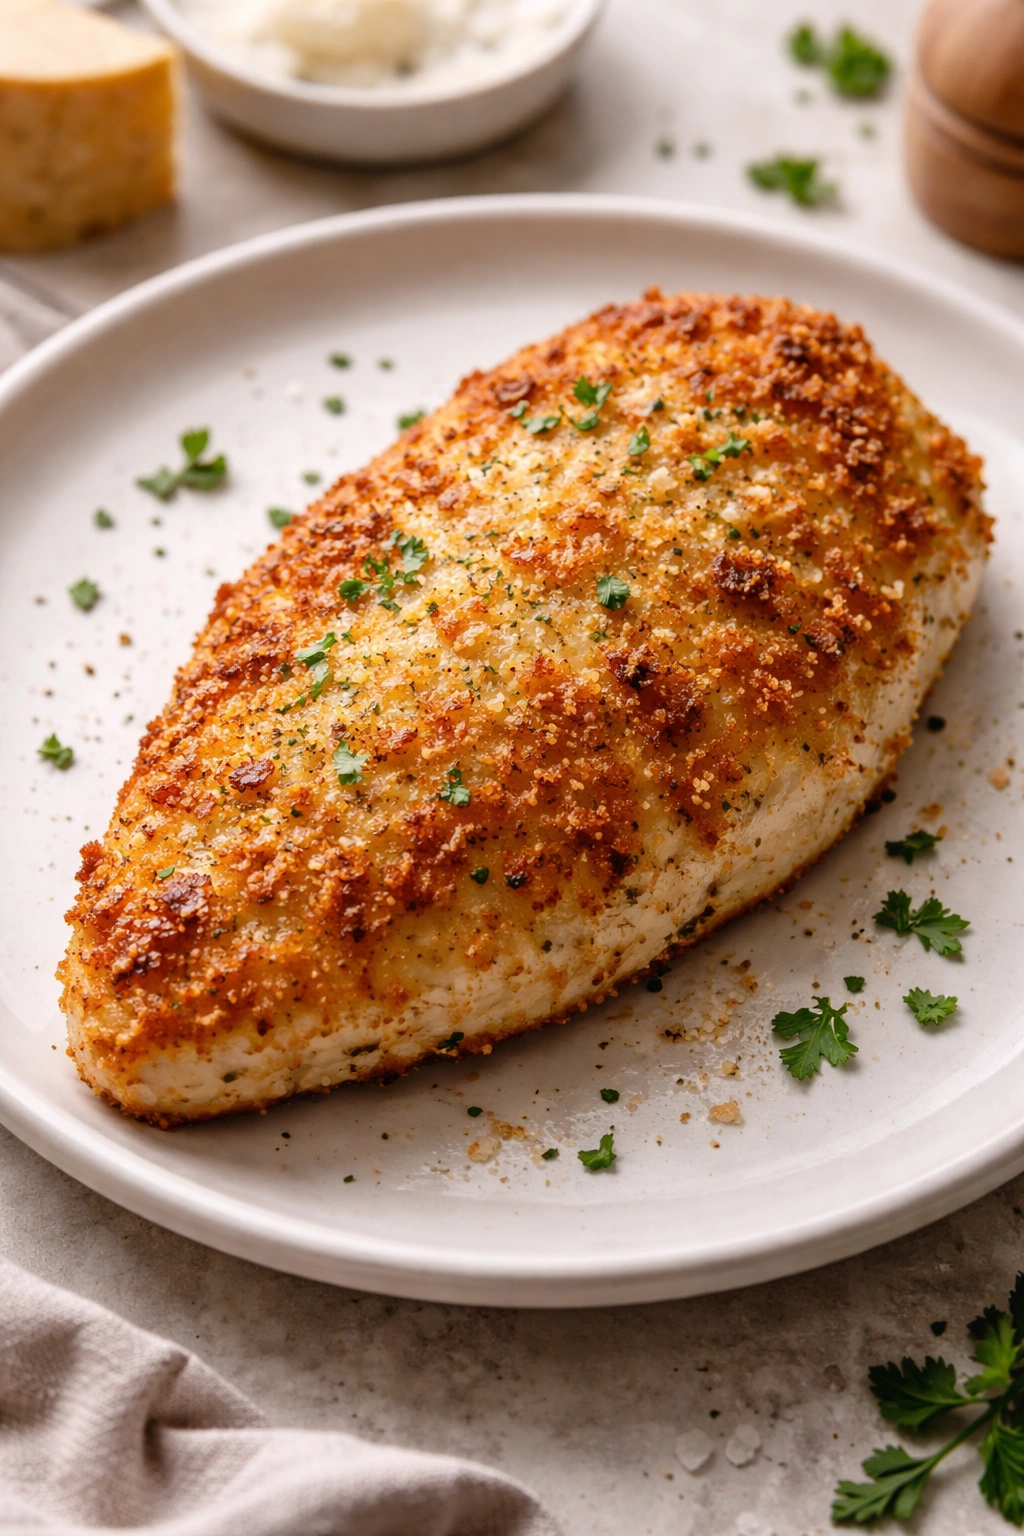
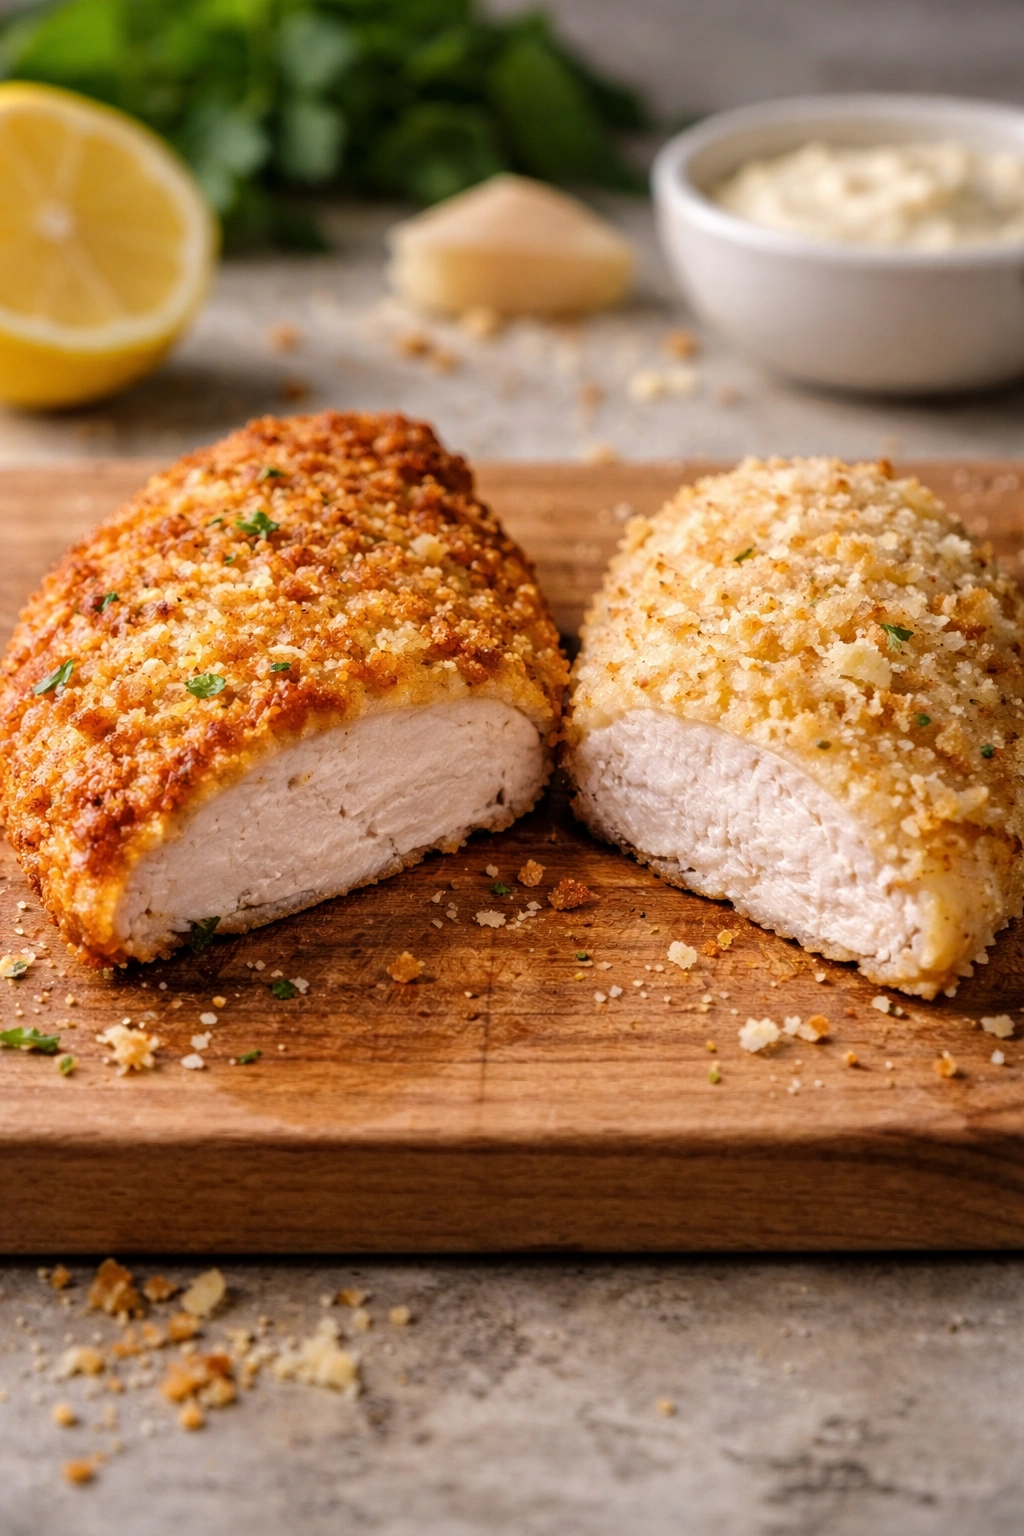
The finished chicken is tender, juicy, and flavorful underneath a thin, golden, crunchy exterior that stays crispy even as it cools slightly. It doesn’t taste “healthy” or “baked”—it tastes delicious, period. The Parmesan flavor is subtle but present in every bite, and the herbs (whether you use Italian seasoning, fresh herbs, or a combination) tie everything together.
The beauty is that this works with boneless, skinless chicken breasts, which are lean, affordable, and cook quickly. If you pound them to even thickness, they cook uniformly without drying out. The marinade (if you use one) keeps the meat incredibly moist, while the coating delivers the texture contrast that makes the dish interesting.
Yield: Serves 4 | Makes 4 large cutlets
Prep Time: 20 minutes
Cook Time: 25 minutes
Total Time: 45 minutes
Difficulty: Beginner — No special skills required, and the steps are straightforward. If you can beat an egg and press breadcrumbs onto chicken, you can make this.
Best Served: Immediately while the coating is still at its crispiest, though leftovers remain good for a day in the refrigerator
Ingredients
For the Chicken:
- 4 boneless, skinless chicken breasts (about 6 ounces each)
- Salt and freshly ground black pepper, to taste
- ½ cup all-purpose flour
- 2 large eggs
- 1 tablespoon water or milk
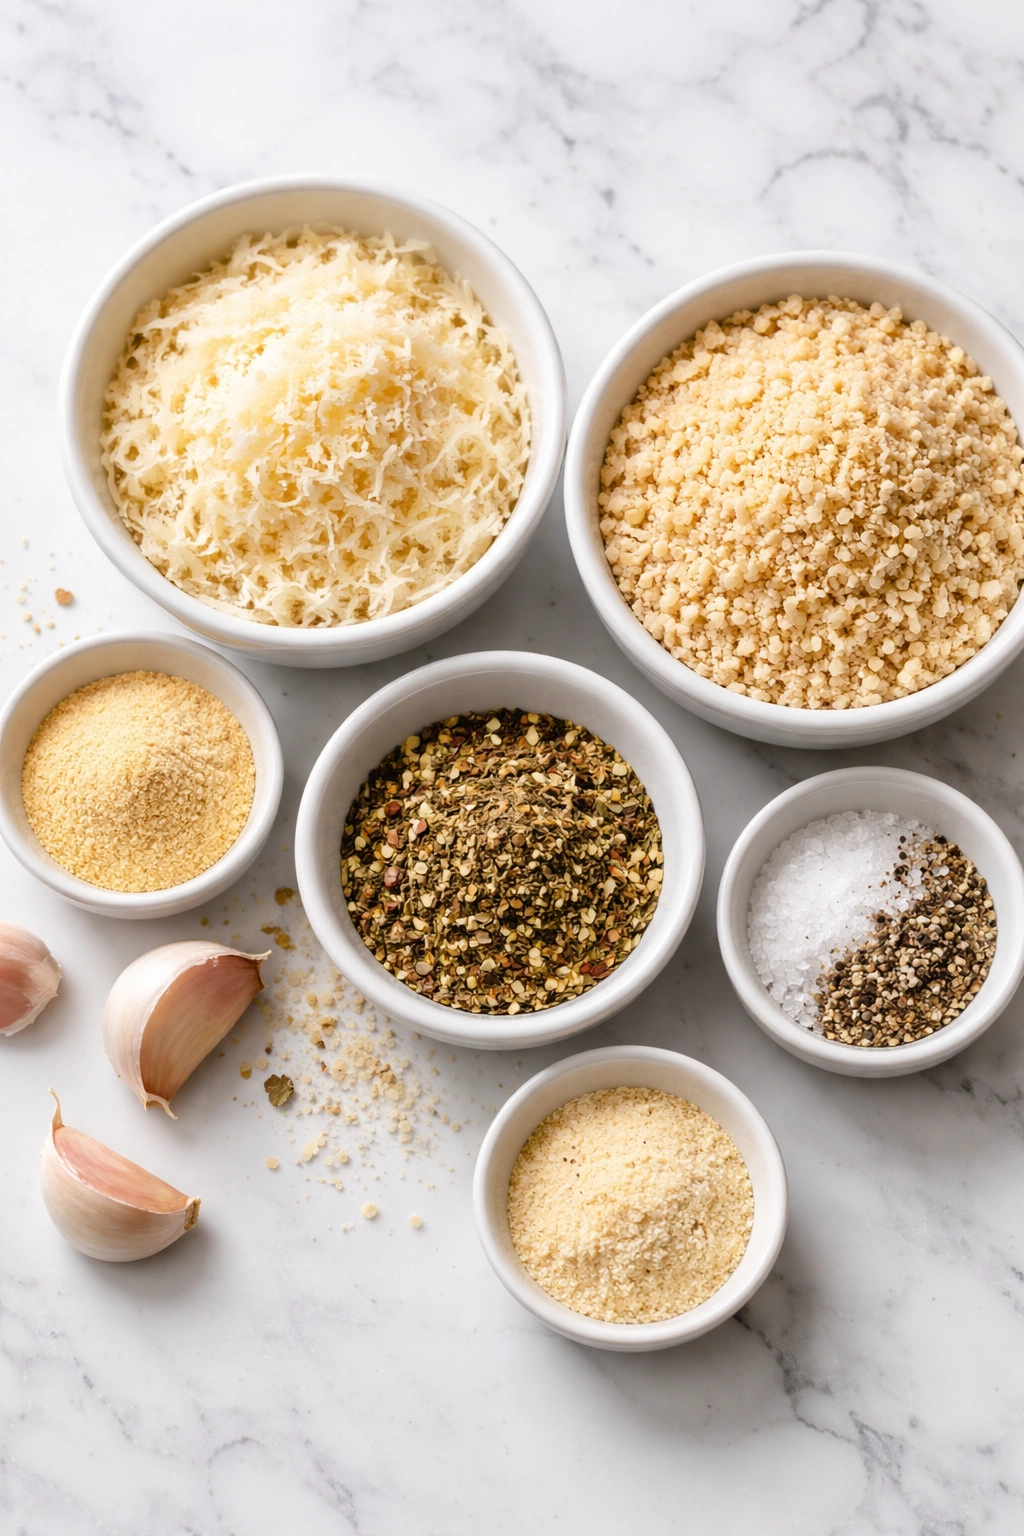
For the Parmesan Coating:
- 1 cup panko breadcrumbs
- ⅔ cup freshly grated Parmesan cheese (not pre-shredded)
- 1½ teaspoons Italian seasoning (or 1 teaspoon dried oregano + ½ teaspoon dried basil)
- 1 teaspoon garlic powder
- ½ teaspoon kosher salt
- ¼ teaspoon ground black pepper
- Optional: 2 tablespoons chopped fresh parsley
For Baking:
- 3 tablespoons unsalted butter, melted (or 2 tablespoons olive oil, or a combination of both)
- Optional garnish: Fresh parsley, chopped; lemon wedges; flaky sea salt
Step-by-Step Instructions
Prepare Your Equipment:
-
Preheat your oven to 400°F and position the rack in the center. If you have a wire cooling rack, place it on a large rimmed baking sheet and lightly spray the rack with cooking spray. If you don’t have a wire rack, spray the baking sheet directly with cooking spray. The wire rack is worth using if you have one—it makes a noticeable difference in crispiness because it allows air to circulate underneath the chicken.
Advertisements -
Line up three shallow bowls or dishes in a row (pie dishes work great for this). This is your dredging station, and having everything set up before you start makes the process much faster and less messy.
Prepare the Chicken:
-
Remove the chicken breasts from the refrigerator and pat them completely dry with paper towels—this is important because excess moisture prevents the coating from adhering properly and browning evenly.
-
Using a sharp knife, carefully slice each chicken breast in half horizontally to create two thinner cutlets. Hold your hand flat on top of the breast to keep it steady, then slice from the thickest side, working your way through. You should end up with 8 thinner cutlets total (though you can also pound whole breasts to ½-inch thickness if you prefer—it takes about 30 seconds per breast with a meat mallet).
-
Place the cutlets on a cutting board and season both sides generously with salt and pepper. Let them sit for a minute while you prepare the dredging stations.
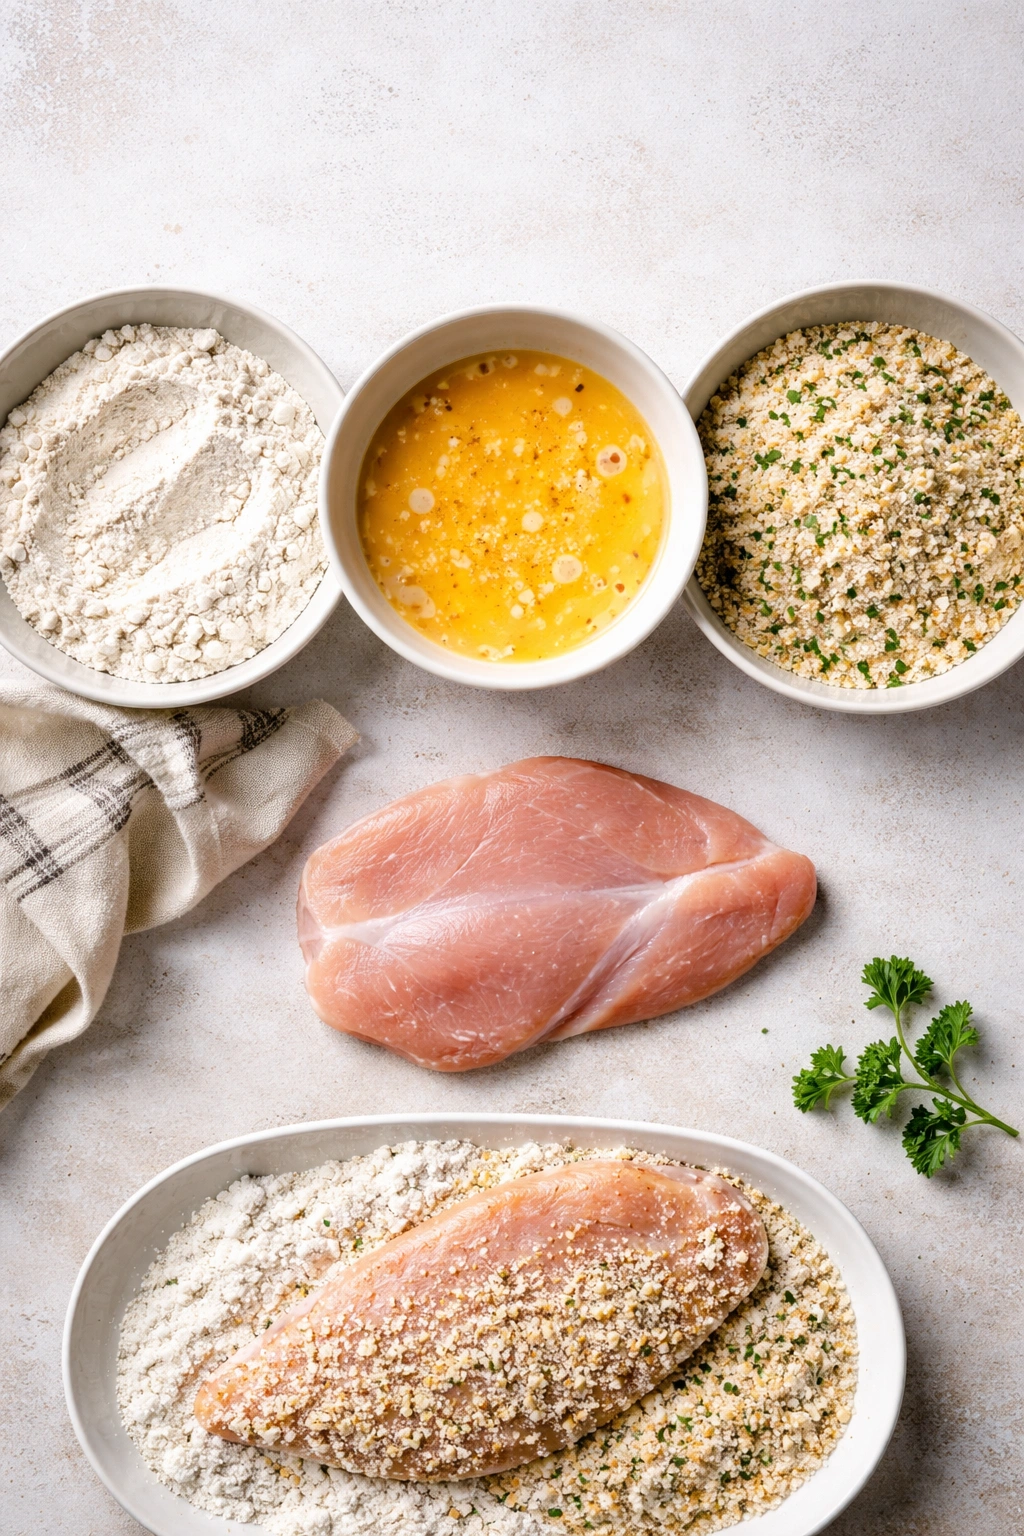
Set Up Your Dredging Stations:
-
In the first bowl, add the ½ cup flour and stir in a pinch of salt and pepper.
-
In the second bowl, whisk together the 2 eggs with 1 tablespoon of water or milk until well combined and slightly foamy.
-
In the third bowl, combine the panko breadcrumbs, grated Parmesan cheese, Italian seasoning, garlic powder, salt, pepper, and fresh parsley if using. Whisk everything together thoroughly, breaking up any clumps of Parmesan so the mixture is evenly distributed. This is the coating mixture—good distribution of the cheese and seasoning is what makes the difference.
Bread the Chicken:
-
Working with one cutlet at a time, lightly dredge it in the flour mixture on both sides, shaking off any excess—you want just a thin coating that will help the egg adhere to the chicken.
-
Transfer the floured cutlet to the egg mixture and coat both sides completely, letting excess drip back into the bowl.
-
Immediately place the egg-coated cutlet into the breadcrumb mixture and press gently but firmly, making sure the coating adheres to both the top and bottom. Flip it and press again, then gently turn the edges to make sure they’re coated as well. This pressing step is important—it makes the coating stick to the chicken instead of sliding off during baking.
-
Transfer the breaded cutlet to the prepared baking sheet or wire rack. Arrange them in a single layer without touching. Repeat with the remaining cutlets.
Apply the Butter and Bake:
-
Drizzle or brush the melted butter evenly over all the chicken cutlets. If you’re using a combination of butter and oil, mix them together first and apply evenly. The butter is what helps the coating brown and crisp up in the oven.
-
Place the baking sheet in the preheated 400°F oven and bake for 12 to 15 minutes, until the coating is light golden and crispy-looking. Do not flip yet—let the bottom side develop color and crunch without interruption.
-
Carefully flip each cutlet using tongs or a thin spatula. Return to the oven and bake for another 10 to 12 minutes, or until the second side is golden brown and an instant-read thermometer inserted into the thickest part of a cutlet reads 165°F. The total cook time is usually 22 to 27 minutes depending on the thickness of your cutlets and how hot your oven runs. Thinner cutlets will cook on the faster end; thicker ones may need the full time.
Finishing Touches:
-
Remove the chicken from the oven and let it rest on the baking sheet for 3 to 5 minutes. This allows the juices to redistribute and the coating to set. Don’t skip this step, as it keeps the chicken juicy and helps the crust stay attached when you bite into it.
Advertisements -
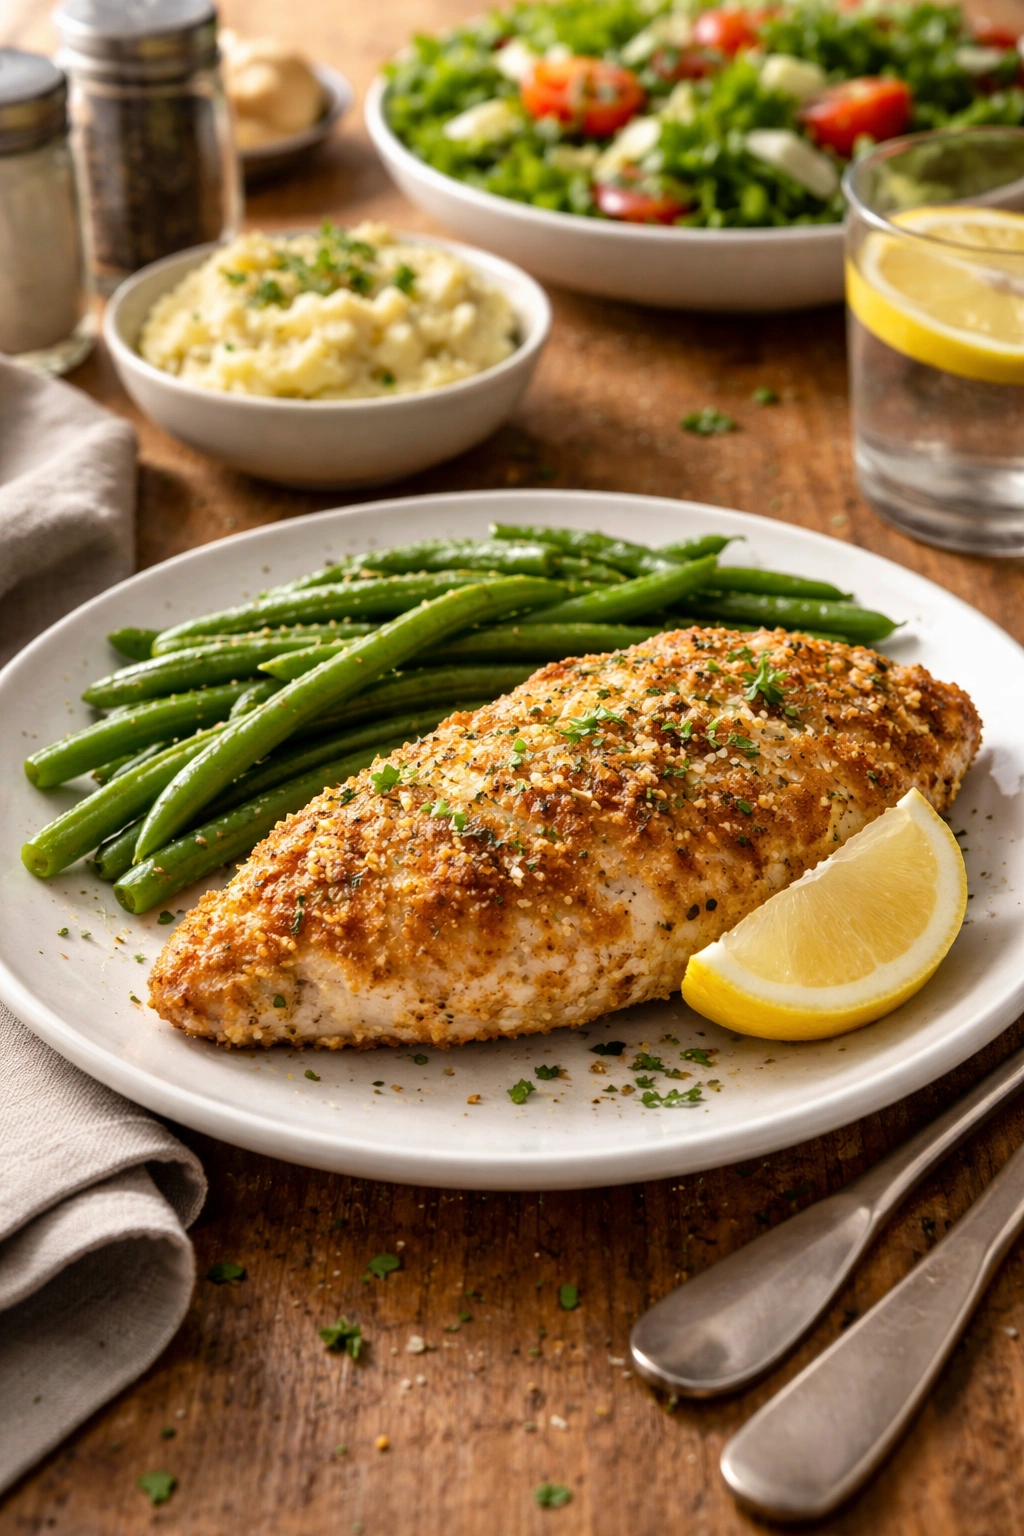
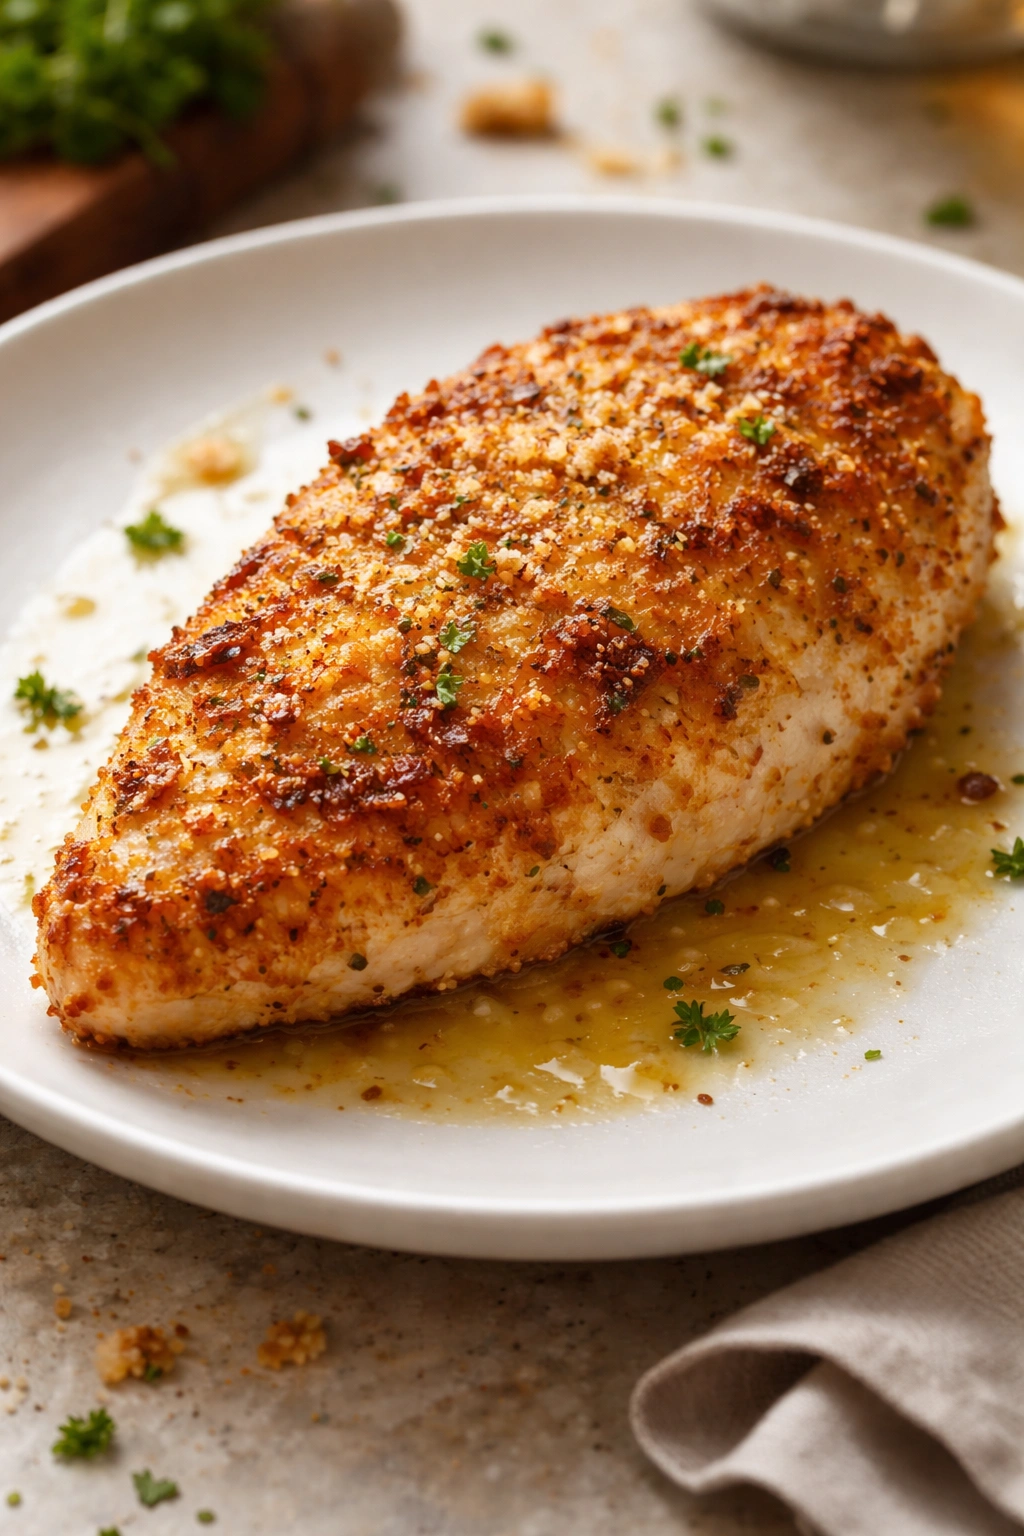
Transfer to a serving platter and garnish with fresh chopped parsley and a squeeze of lemon juice if desired. Serve immediately while the coating is at its crispiest.
The Secrets to Maximum Crispiness
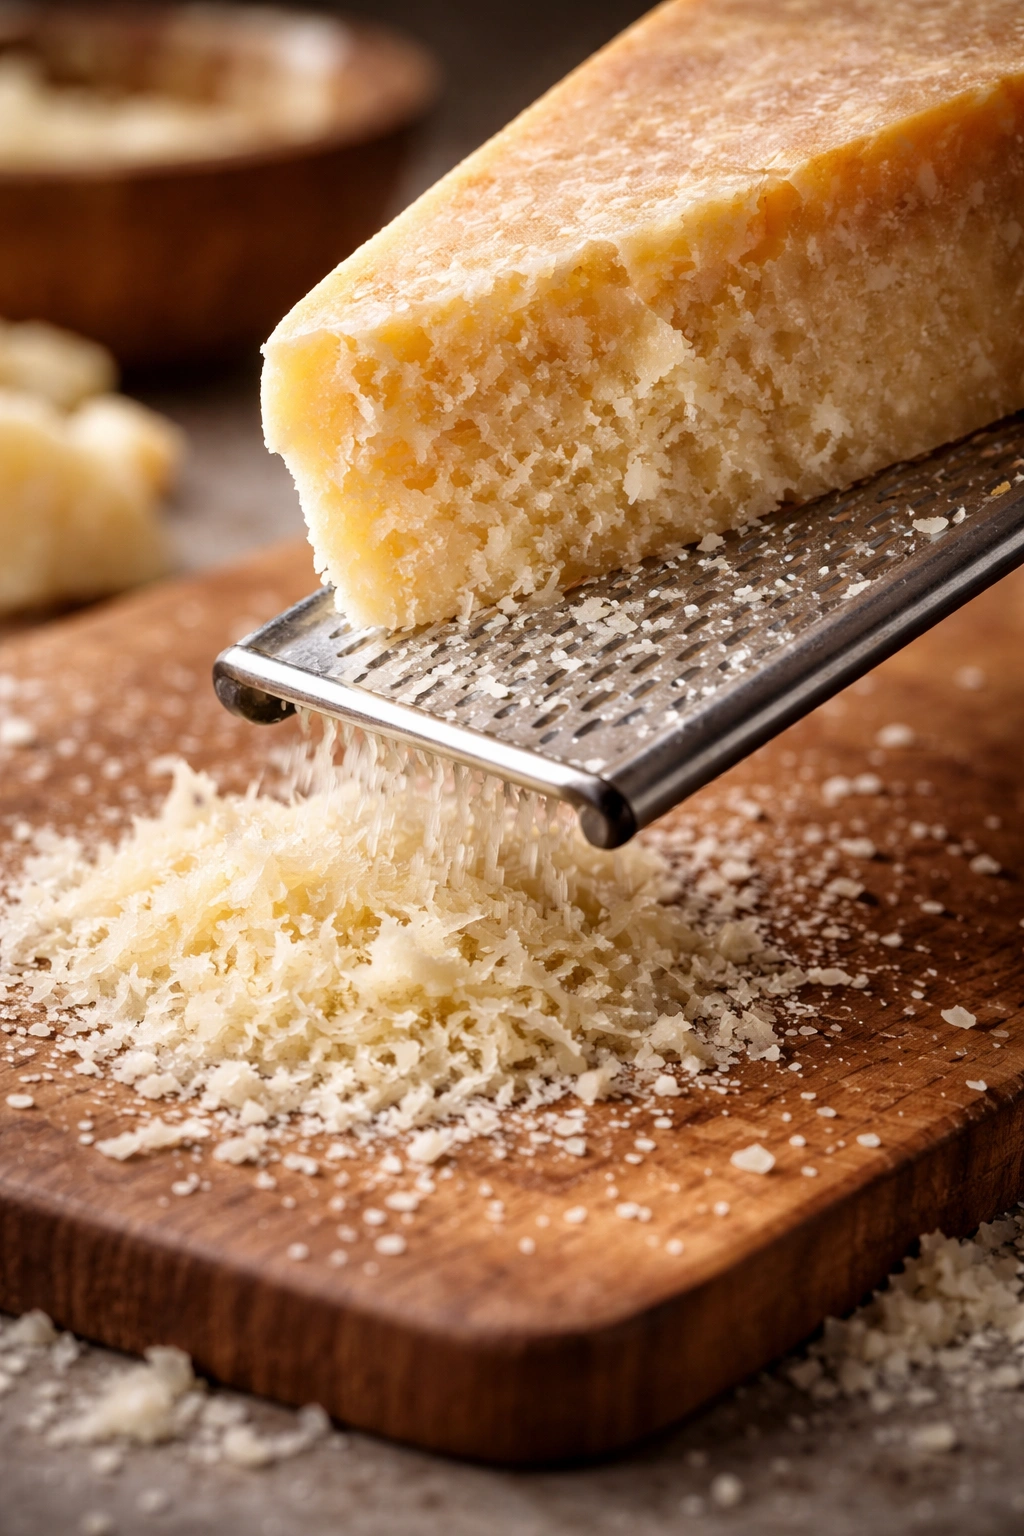
Getting that restaurant-quality crunch is all about understanding the few details that matter most. First, use freshly grated Parmesan, not the pre-shredded kind. The anti-caking agents in bagged cheese prevent it from melting and crisping properly—you’ll end up with a softer, less golden coating. Grating your own cheese from a block takes maybe two minutes and makes a real difference.
Second, don’t skip the flour step. Coating the chicken in a light flour dredge before the egg helps the egg and breadcrumbs adhere much better. It seems like an extra step, but it’s actually a shortcut because it prevents the coating from sliding off during baking.
Third, toast your panko breadcrumbs if you have time. Spread them on a baking sheet and toast at 350°F for 3 to 5 minutes, stirring occasionally, until they smell nutty and are just beginning to turn golden. Cool them completely before mixing with the Parmesan and seasonings. This extra step browns the coating significantly in the oven and adds a subtle toasted flavor. If you’re pressed for time, this step is optional—you’ll still get good results without it—but it genuinely improves the finished dish.
Fourth, use a wire rack. If you bake the chicken directly on a baking sheet, the bottom steams instead of crisps. A wire rack lifts the chicken off the surface, allowing air to circulate underneath and creating that all-over crunch you’re after.
Finally, watch your oven temperature. If your oven runs hot, start checking for doneness around the 20-minute mark. If it runs cool, you might need the full 27 minutes. Use an instant-read thermometer—it’s the only way to know for certain that your chicken is cooked through without overcooking it.
Common Mistakes That Cost You Crispiness

Not pounding the chicken to even thickness. If your cutlets vary significantly in thickness, the thin parts will overcook while you’re waiting for the thick parts to finish. You want them all roughly ½-inch thick so they cook uniformly.
Using shredded Parmesan from a can or bag. I can’t stress this enough. Pre-shredded cheese is coated with cellulose to prevent clumping, and that cellulose prevents the cheese from melting and crisping. Grated cheese melts into a golden, savory crust. There’s a massive difference.
Skipping the egg step or using too much egg. The egg is what binds the breadcrumbs to the chicken. But too much and the coating becomes thick and dense instead of crispy. One egg mixed with a tablespoon of water coats four cutlets perfectly.
Not seasoning aggressively enough. Chicken needs salt to taste good. Season it before coating, and make sure your breadcrumb mixture is well-seasoned too. This isn’t the place to hold back.
Baking without butter or oil. The fat is what enables browning. Without it, you get a pale, rubbery coating. Just 3 tablespoons is enough to make a huge difference.
Opening the oven constantly to check on it. Every time you open the door, heat escapes and the coating dries out instead of crisping. Check once at the midway point to flip, and that’s it.
Variations That Work Beautifully

Buttermilk-Marinated Version:
If you want extra-juicy, tender chicken, marinate the cutlets in ½ cup buttermilk mixed with 1 teaspoon salt and ½ teaspoon black pepper for at least 30 minutes (or up to overnight) before dredging. You can use homemade buttermilk if you don’t have the real thing—just stir 1 tablespoon white vinegar or lemon juice into ½ cup regular milk and let it sit for 5 minutes. The acid tenderizes the chicken beautifully. Pat the cutlets completely dry before flouring and breading them.
Herb-Forward Version:
Double the fresh herbs if you can—use 3 tablespoons chopped fresh parsley, 1 tablespoon fresh thyme, and 1 tablespoon fresh oregano mixed into the breadcrumb coating. The fresh herbs add brightness and flavor that dried herbs can’t quite match. Add them at the very end so they don’t fade from the oven heat.
Cajun-Spiced Version:
Replace the Italian seasoning and garlic powder with 2 teaspoons Cajun seasoning, 1 teaspoon smoked paprika, ½ teaspoon cayenne pepper (or less if you don’t like heat), and ½ teaspoon garlic powder. This creates a spicier, more exciting coating without losing the Parmesan’s savory depth.
Pecorino Romano Alternative:
If you’re out of Parmesan or prefer something sharper, swap the Parmesan for grated Pecorino Romano and add an extra ¼ teaspoon of black pepper. Romano is more pungent and funky—some people prefer it.
Panko + Cornflake Combination:
For extra crunch and a slightly sweeter note, use ¾ cup panko mixed with ¼ cup crushed cornflakes (or other crispy cereal) instead of all panko. The cornflakes add a subtle sweetness and make the coating exceptionally crunchy. This variation is especially popular with kids.
Gluten-Free Version:
Swap the all-purpose flour for a one-to-one gluten-free flour blend, and use gluten-free panko breadcrumbs. The results are virtually identical—gluten-free panko is now readily available at most grocery stores.
Storage, Reheating, and Make-Ahead Tips
Fresh Out of the Oven:
Parmesan crusted chicken is absolutely best eaten fresh from the oven when the coating is at its crispiest. That said, it stays delicious for several hours at room temperature if you’re making it for a picnic or outdoor meal.
Refrigerator Storage:
Store leftover chicken in an airtight container in the refrigerator for up to 3 days. The coating will soften slightly as it sits, but it’s still delicious cold, sliced on salads, or room temperature as a snack.
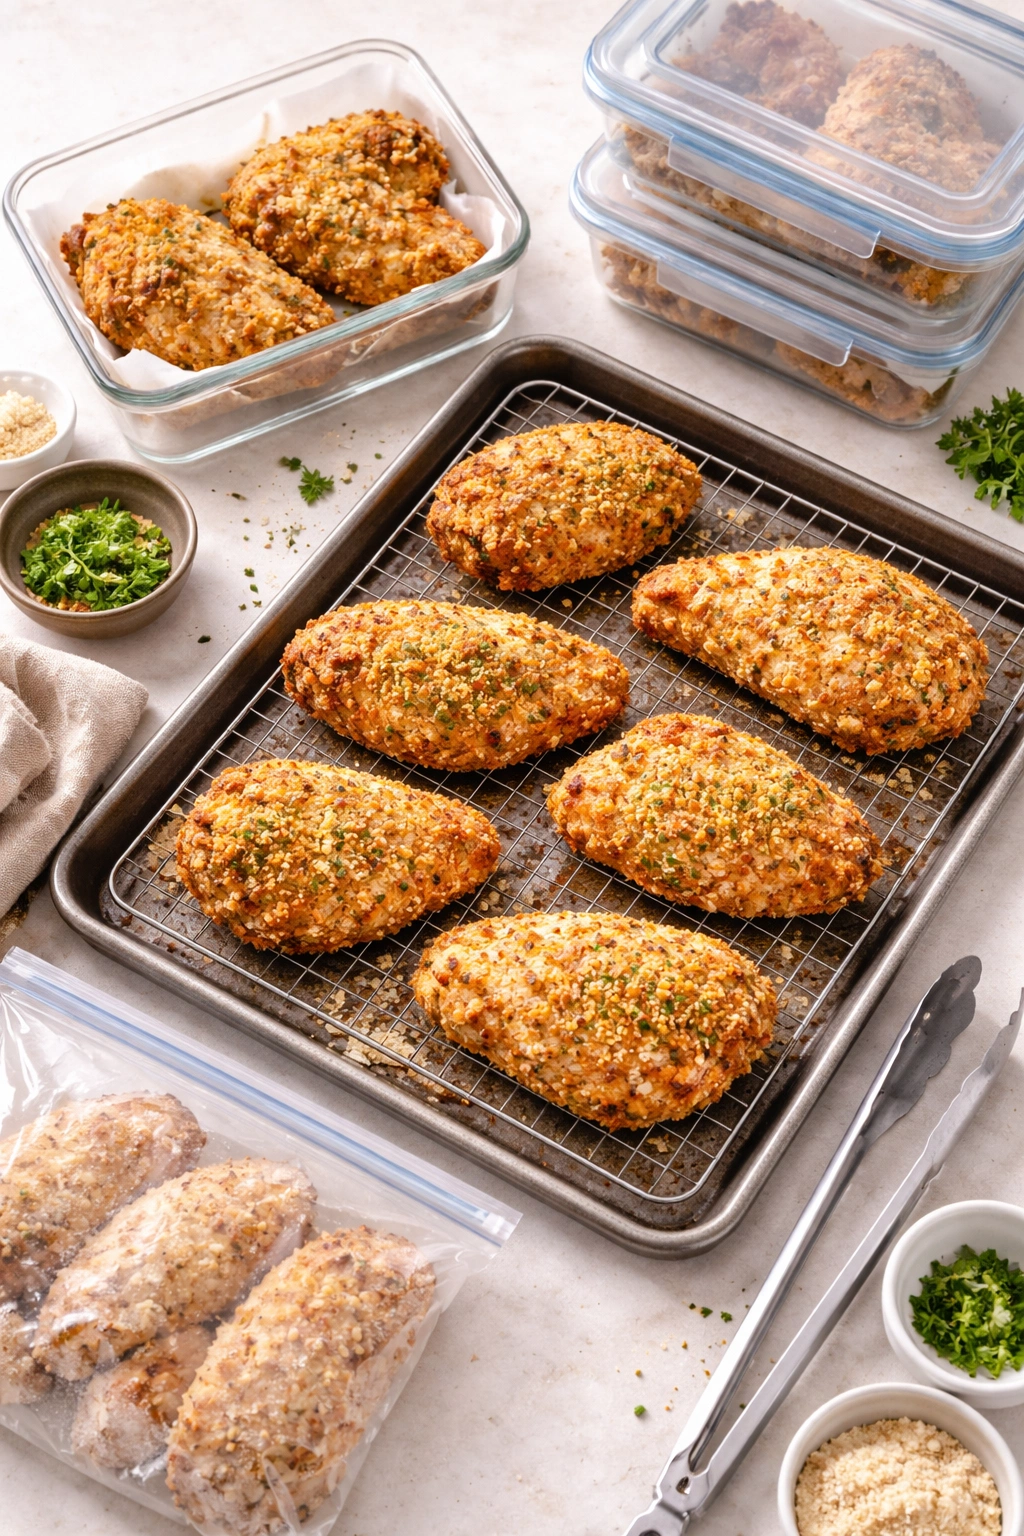
Freezer Storage:
You can freeze uncooked, breaded chicken cutlets for up to 3 months. Freeze them on a baking sheet first so they don’t stick together, then transfer to a freezer bag. Bake directly from frozen—add about 8 to 10 extra minutes to the cooking time. Alternatively, freeze cooked chicken in an airtight freezer-safe container for up to 2 months.
Reheating Oven Method (Best):
Preheat your oven to 375°F. Place the leftover chicken on a wire rack over a baking sheet and bake for 10 to 12 minutes, until warmed through. This method restores crispiness far better than microwaving because the dry heat of the oven doesn’t steam the coating.
Reheating Stovetop Method:
Heat a skillet over medium-high heat, add a tiny bit of butter or oil, and warm the chicken for 1 to 2 minutes per side. This works reasonably well for bringing back some crunch, though it’s not quite as good as the oven method.
Do Not Microwave:
Microwaving makes the coating soggy and ruins the whole point. If you’re in a hurry, eat it cold—it’s still good.
Make-Ahead Assembly:
You can bread the chicken up to 8 hours in advance. Arrange the breaded cutlets on a baking sheet, cover loosely with plastic wrap, and refrigerate. When you’re ready to cook, let them sit at room temperature for 10 minutes, then bake as directed. The chilling actually helps the coating adhere better, so this is a nice shortcut.
Serving Suggestions and Perfect Pairings
With Vegetables:
This chicken pairs beautifully with almost any vegetable. Try roasting broccoli, Brussels sprouts, green beans, or zucchini at the same time (on a different rack) for a complete one-oven meal. Toss the veggies with olive oil, salt, and pepper, and roast at 400°F for 15 to 20 minutes while the chicken cooks.
With Starches:
Serve over buttered egg noodles with a squeeze of fresh lemon juice, with creamy mashed potatoes, or alongside crispy roasted potatoes. You could also serve it with pasta and a simple marinara sauce, though that ventures into chicken Parmesan territory.
As a Salad Topper:
Slice the finished chicken and lay it on top of a green salad with fresh lemon vinaigrette. The warm, crispy chicken and cool lettuce create a wonderful contrast. A Caesar salad works beautifully here, as does a simple arugula salad with Parmesan shavings and lemon.
In a Sandwich:
Layer sliced Parmesan chicken on a roll or ciabatta bread with fresh tomato, arugula, and a smear of pesto or aioli. It’s incredibly good this way.
With Dipping Sauces:
Serve alongside simple marinara for dipping, or a homemade honey mustard, ranch, or even a garlicky yogurt sauce. The coating is flavorful enough to stand alone, but sauce always adds fun.
For Meal Prep:
Make a batch on Sunday and use it throughout the week. It’s delicious cold from the fridge as a protein addition to grain bowls or salads, sliced and added to pasta, or simply reheated and eaten as is.
The Ingredient Quality That Actually Matters
The Chicken:
Use fresh, high-quality boneless, skinless chicken breasts. They should be pale pink with no gray spots. If they smell “off” in any way, don’t use them. The fresher the chicken, the better your final result.
The Parmesan:
This is the one place where ingredient quality truly matters. Buy a wedge of Parmigiano-Reggiano or Grana Padano if you can—it tastes better and grates beautifully. At minimum, avoid the green can. The flavor difference is striking.
The Breadcrumbs:
Panko is worth seeking out specifically. Regular breadcrumbs are finer and create a denser crust. Panko creates that distinctive flaky crunch that makes oven-fried chicken actually taste fried.
The Butter:
Real butter, not margarine. The flavor matters, and margarine contains water that interferes with browning. If you want to use oil, choose a neutral one like vegetable or canola, or a light olive oil.
Troubleshooting Your Results
The coating slid off during baking:
You didn’t flour the chicken first, or you didn’t press the breadcrumbs firmly enough. Next time, make sure to do both steps.
The outside burned but the inside wasn’t cooked through:
Your oven temperature is too high, or your cutlets were too thick. Check your oven temperature with an oven thermometer (ovens are often inaccurate), and next time, pound the chicken to ½-inch thickness.
The coating is pale instead of golden:
You likely used pre-shredded Parmesan, which doesn’t brown well. You might also need to increase the butter slightly, or your oven temperature is running cool. Try toasting the breadcrumbs next time.
The chicken is dry:
You likely cooked it too long. Use an instant-read thermometer and remove the chicken at 165°F—it will continue to cook slightly as it rests.
The coating is hard and tough instead of crispy:
You probably used too much egg, or your dredging mixture was too wet. Use the exact amount of egg specified, and if your breadcrumb mixture seems wet, you likely over-whisked it. Just stir until combined.
Why This Recipe Wins Every Time
What makes this version of crispy Parmesan chicken different from the dozens of other recipes out there is that it actually delivers on the promise. It’s not dry, it’s not soggy, it’s not bland, and it’s genuinely easy enough to make on a Tuesday night when you’re tired.
The combination of pounding the chicken to even thickness, using fresh Parmesan, and baking on a wire rack with plenty of butter creates a finished dish that tastes like you spent far more effort than you actually did. Your family will ask for it again. Your friends will want the recipe. And best of all, you’ll actually want to make it again because it works, it’s delicious, and it never lets you down.
This is the kind of recipe worth committing to memory, the one you come back to when you need something reliable, impressive, and genuinely satisfying. It’s comfort food that doesn’t feel guilty, it’s easy enough for beginners but good enough for guests, and it fits into almost any meal pattern or dietary approach (just swap ingredients as needed). That’s why crispy oven-baked Parmesan crusted chicken deserves a permanent place in your cooking rotation.
Final Thoughts
The real secret to great Parmesan crusted chicken isn’t complicated—it’s just attention to detail. Fresh Parmesan. Proper thickness. A wire rack. Enough butter. An accurate thermometer. Do these things right, and you’ll have crispy, golden, juicy chicken that rivals anything you’d order from a restaurant, but faster, cheaper, and in your own kitchen.
Start with the basic recipe, master it, then feel free to play with variations. Add herbs. Switch up the seasonings. Marinate in buttermilk. Make it your own. But always come back to the fundamentals that make this work—because they’re the reason this recipe is worth making over and over again.