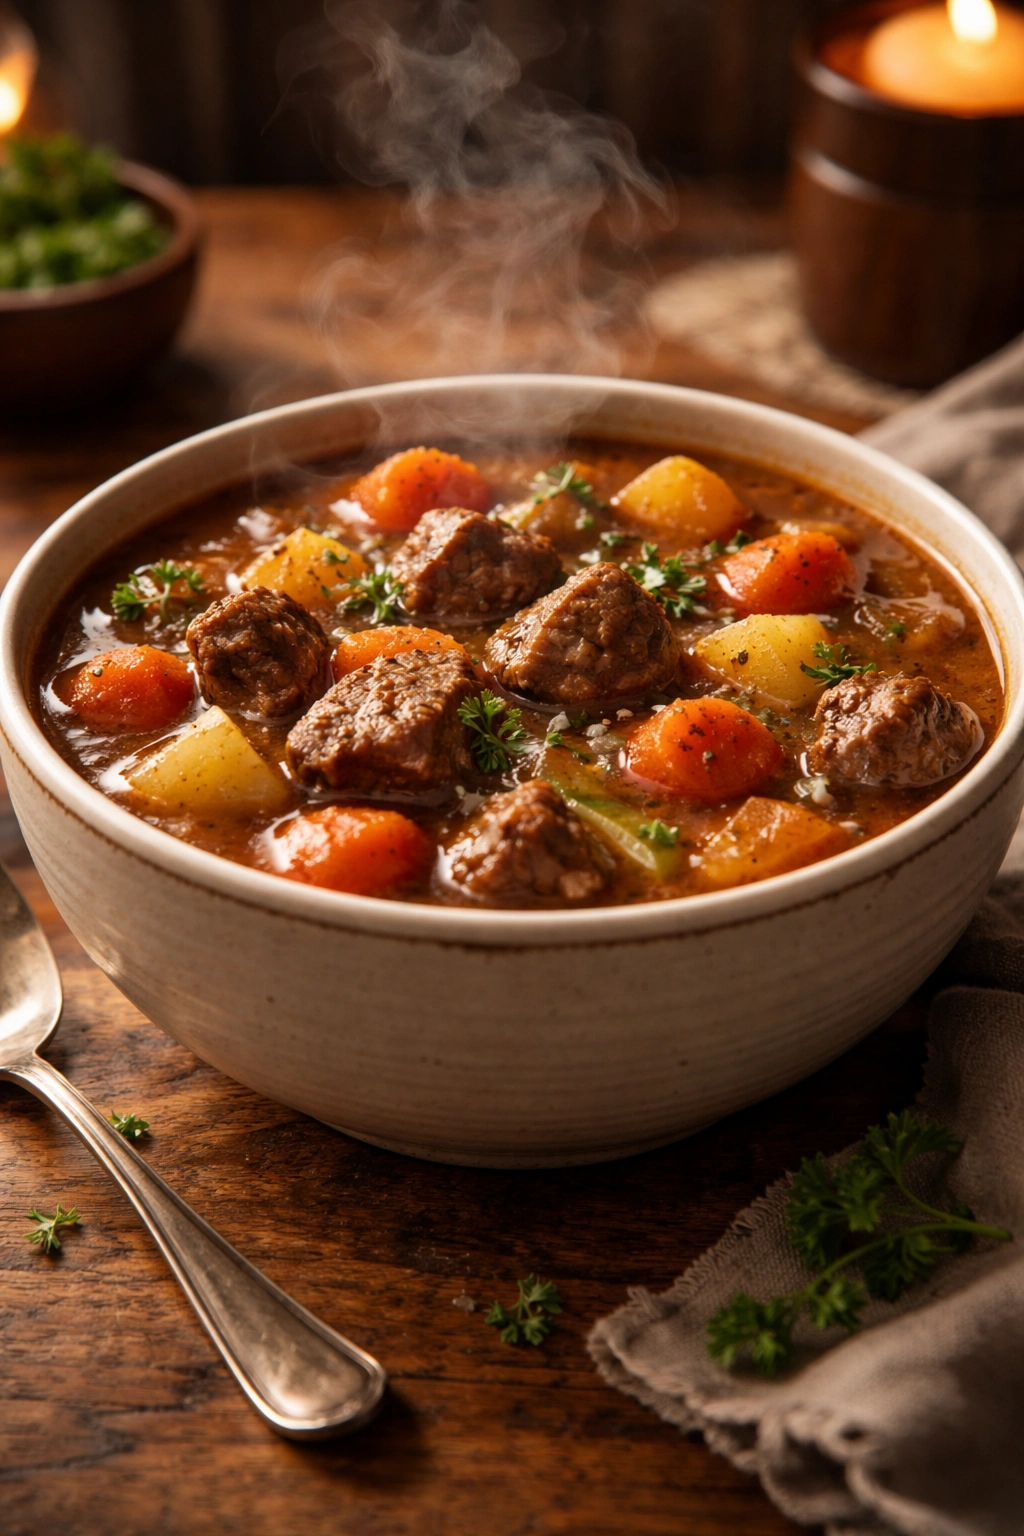
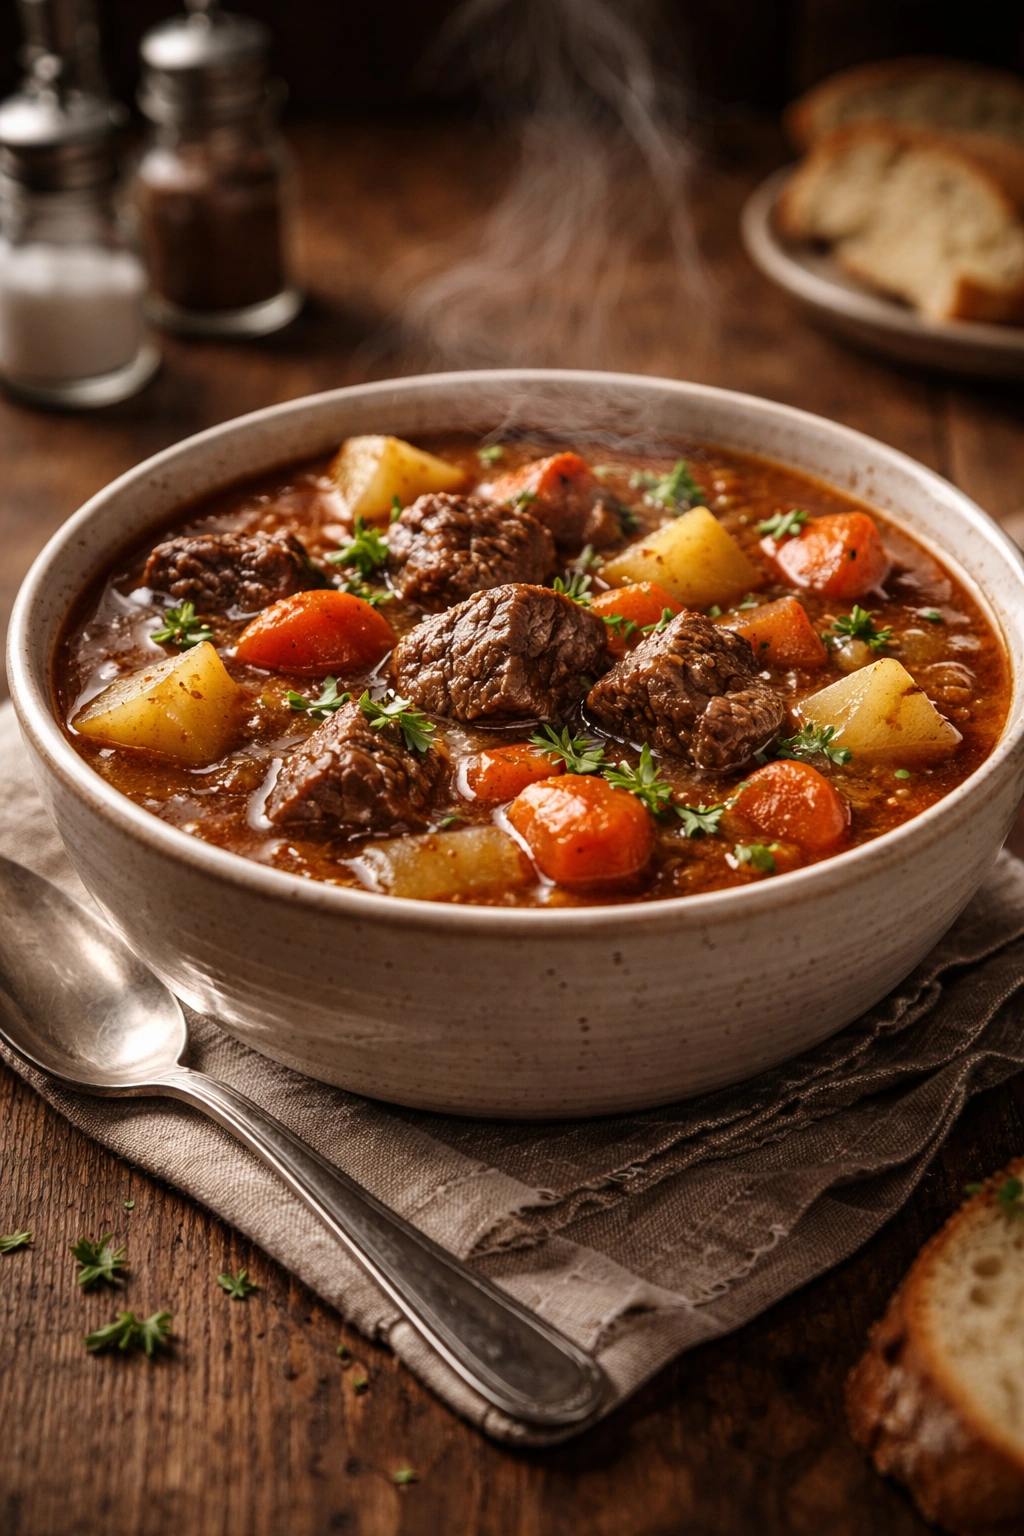
There’s something deeply satisfying about settling into a cold evening with a steaming bowl of beef stew. The rich, savory broth clinging to tender chunks of meat, vegetables soft enough to melt on your tongue, and that warm, full feeling that spreads through you as you eat — it’s comfort food at its most essential. The problem is, traditional beef stew has always demanded time. Hours of low, slow simmering on the stovetop or in a slow cooker, planning ahead, and patience. But the Instant Pot changes everything. You can now have that same deep, complex, all-day-simmered flavor in about an hour, with most of that time completely hands-off. This isn’t a rushed version that compromises on taste — it’s genuinely better than many stovetop versions because the pressure cooker’s sealed environment locks in moisture and flavor that would otherwise escape. If you’ve been hesitant about pressure cooking, beef stew is the recipe that will convert you.
Why Instant Pot Beef Stew Works So Well
The magic of making beef stew in a pressure cooker comes down to physics and time manipulation. Beef chuck roast, the ideal cut for stew, contains plenty of connective tissue and fat. Under normal cooking conditions, breaking down these tough fibers requires hours of low, moist heat. The Instant Pot accomplishes in 35 minutes what would take three to four hours on the stovetop because of the pressurized environment. The steam trapped inside the pot raises the temperature and pressure significantly above boiling point (reaching about 250°F/121°C at high pressure), which accelerates the conversion of collagen to gelatin — the process that transforms tough meat into fall-apart tender bites.
What many home cooks don’t realize is that pressure cooking actually does more to preserve flavor than slow cooking. Because no steam escapes the sealed pot, all those rendered meat juices, vegetable starches, and seasonings stay right where they belong — in your stew. With stovetop cooking, much of this flavor literally evaporates into your kitchen. The result is a broth that tastes like it’s been developing for hours, with a silky mouthfeel from the natural gelatin, and beef so tender it practically dissolves. You’re not just saving time; you’re often making a better stew than traditional methods would produce.
Understanding the Right Cut of Beef
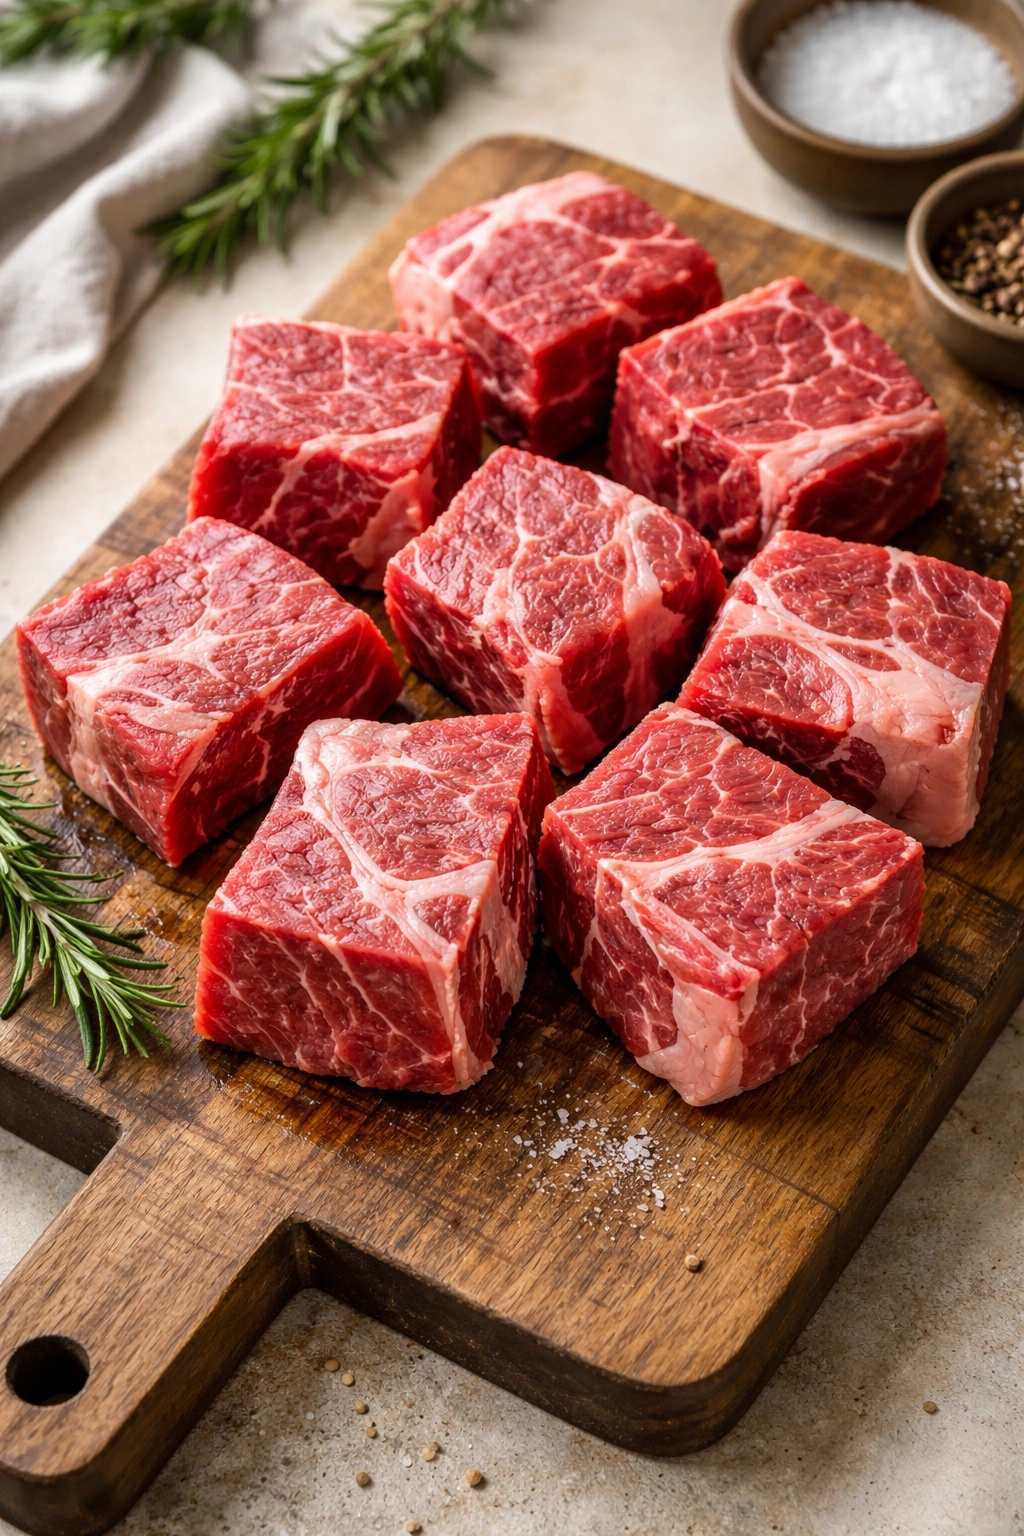
Not all beef cuts work equally well for stew, and choosing the right one is the first critical decision. Boneless beef chuck roast is the gold standard — it contains ideal fat marbling throughout the meat, which means as it cooks, this fat renders slowly and keeps the beef moist and tender. If you cut it yourself from a chuck roast, you have complete control over which pieces to use and can trim away the largest chunks of exterior fat while preserving the internal marbling.
Pre-cut beef stew meat sold in grocery stores is convenient but inconsistent. Some packages contain excellent cuts from the chuck, while others might include tougher pieces from different parts of the animal. If you go this route, inspect the package and choose meat that shows good marbling rather than lean, red muscle. The fat is your friend in stew.
Other acceptable cuts include boneless short ribs (which can be even more flavorful than chuck but are often pricier) and brisket, both of which benefit from pressure cooking. Whatever you choose, trim away the largest exterior fat pieces — you want marbling inside the meat, not a thick fat cap that won’t render properly. Size matters too: aim for roughly 1.5 to 2-inch cubes. Smaller pieces can overcook and turn stringy; larger pieces won’t cook through evenly.
The Flavor Foundation: Building Layers of Taste
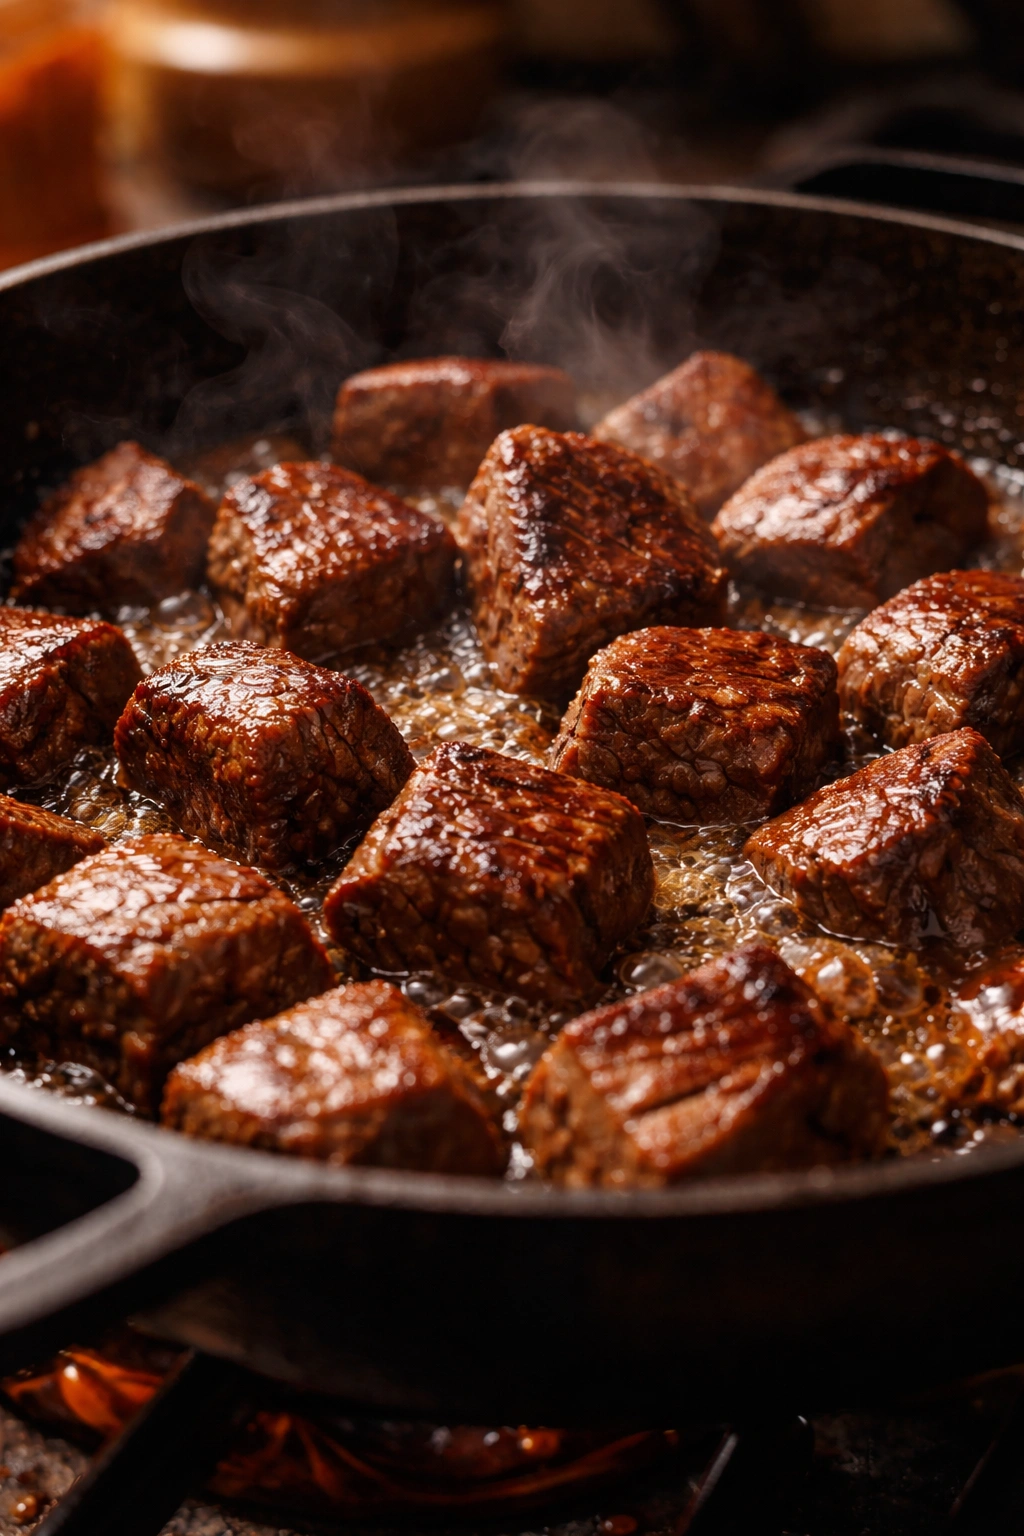
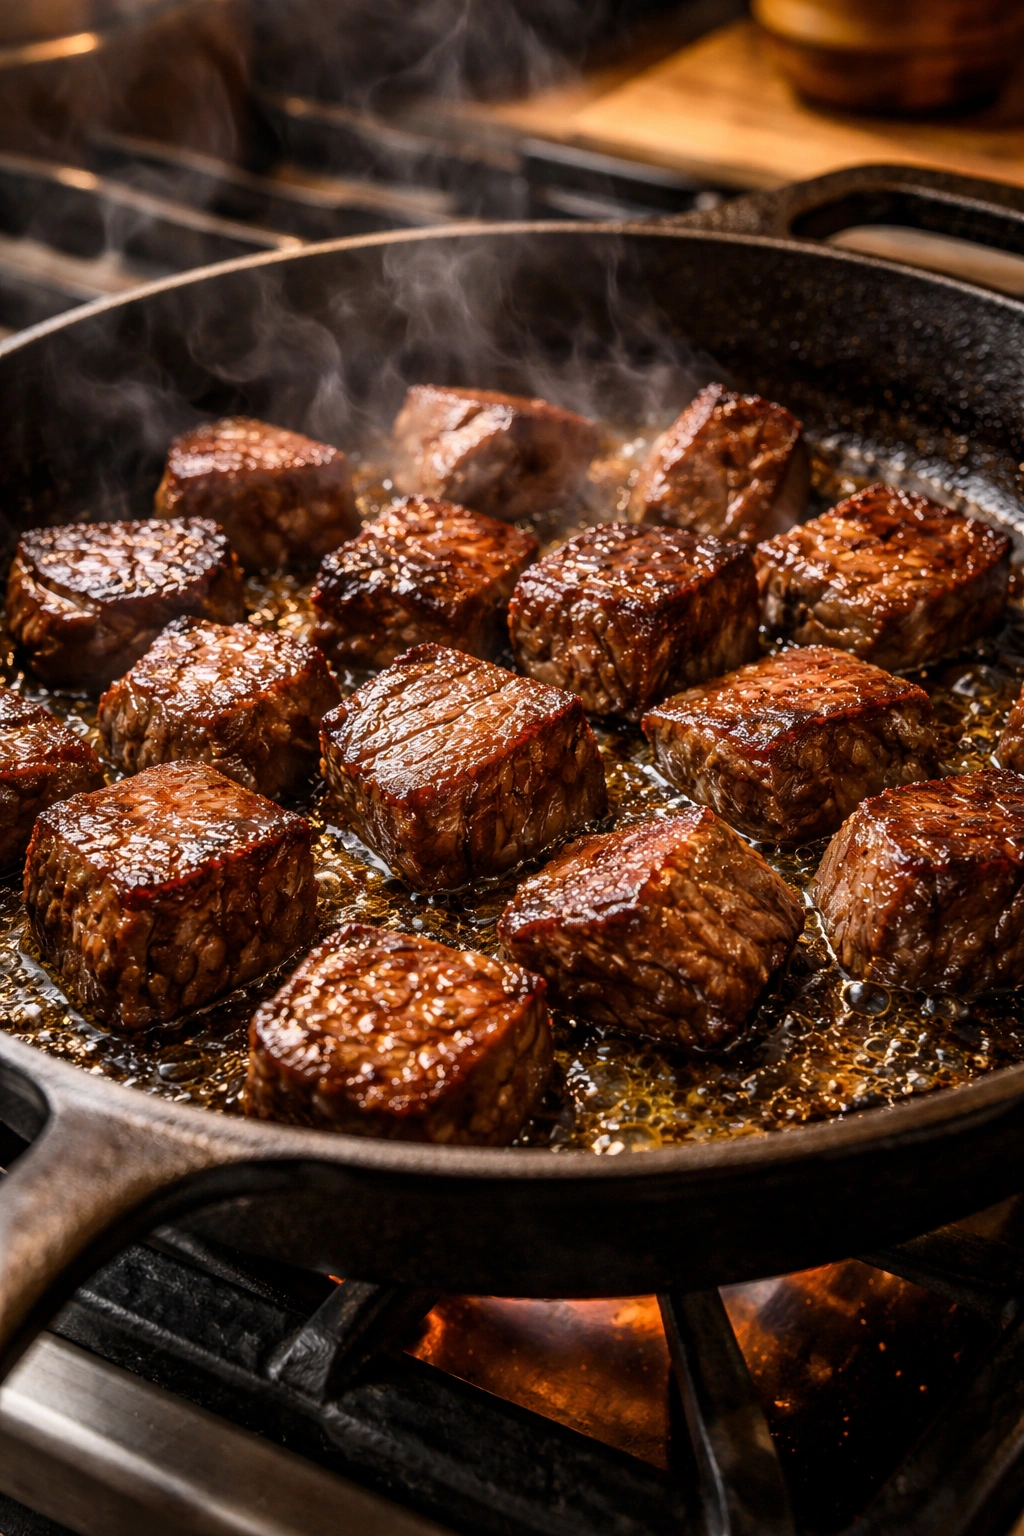
Great stew isn’t built by throwing everything together; it’s constructed intentionally, layer upon layer. The foundation begins with browning the beef in the Instant Pot using the sauté function. This step is non-negotiable if you want a stew that actually tastes rich and complex. When beef browns, the Maillard reaction occurs — proteins and sugars in the meat interact with heat, creating hundreds of new flavor compounds that simply don’t exist in unbrowned meat. The dark, crusty coating on each piece of beef is pure flavor gold.
Don’t crowd the pot during browning. If you pile all the beef in at once, pieces will steam rather than sear, and you’ll miss this crucial step entirely. Work in batches, allowing each piece to develop a deep golden-brown crust on all sides before removing it to a plate. This takes patience — about 4 to 5 minutes per side depending on your stove’s heat — but it’s the single most important factor in whether your stew tastes homestyle or gourmet.
After the beef is browned and set aside, the aromatic vegetables enter the pot. Onions, garlic, and celery are the holy trinity of stew flavor base. Sauté diced onions until they begin to soften and caramelize slightly, picking up all those browned bits stuck to the pot bottom (this is called deglazing, and it captures every molecule of flavor you just created). Add minced garlic, cook for just 30 seconds until fragrant, then pour in beef broth and use a wooden spoon to scrape up every last brown bit from the bottom. This step prevents the Instant Pot’s “burn” warning and ensures every bit of flavor transfers into your broth.
Tomato paste, Worcestershire sauce, and seasonings complete the flavor architecture. Tomato paste adds depth, slight sweetness, and natural umami — that savory richness that makes people ask for seconds without knowing why. Worcestershire sauce brings concentrated umami from fermented anchovies and molasses. Fresh herbs like thyme or Italian seasoning add aromatic complexity. Balsamic vinegar or a splash of red wine introduces subtle acidity and sophistication that rounds out the heavier meat and vegetable flavors.
Vegetable Prep: Size Matters More Than You Think

One of the most common mistakes people make with pressure-cooked stew is cutting vegetables too small. In a high-pressure environment with intense steam and heat, vegetables cook much faster than they would on the stovetop. Cut all vegetables — potatoes, carrots, celery — into roughly 1-inch to 1.5-inch pieces. They’ll still be tender after cooking, but they’ll maintain their shape rather than dissolving into mush.
Choose waxy potatoes like Yukon Golds or red potatoes rather than starchy russets. Waxy varieties hold their shape beautifully during pressure cooking, developing a creamy interior while maintaining their structure. Starchy potatoes break down too easily and can turn the broth gluey. Cut them into roughly three-quarter-inch to 1-inch chunks, similar in size to your beef pieces so they cook evenly.
Carrots cut diagonally into half-inch-thick slices add visual appeal and cook to the perfect tender-crisp texture. Celery pieces should be about an inch long. The key is consistency in size — when everything’s roughly the same dimensions, you avoid the problem of some vegetables overcooked while others are still firm. Keep vegetables separate if you’re prepping ahead; store cut potatoes covered in water in the refrigerator to prevent browning, and keep onions and garlic in separate containers to prevent them from spreading their pungent odor throughout your fridge.
Building Your Instant Pot
Before you start cooking, take a moment to understand your Instant Pot’s quirks. Different models have slightly different pressure levels, sauté functions, and release mechanisms. Familiarize yourself with where your steam release valve is located and understand the difference between natural pressure release (letting the pot sit undisturbed as pressure naturally drops) and quick release (manually moving the valve to let steam escape rapidly). For beef stew, a natural release of at least 10 minutes is crucial — rushing the pressure release can cause the meat to seize and become tough rather than tender.
Make sure your Instant Pot is clean, particularly the bottom of the inner pot. Any stuck-on food or residue from previous cooking can cause false “burn” warnings. Some people use a trivet (the metal rack that comes with the pot) for certain recipes, but for stew, you won’t need it — everything cooks together in the same liquid.
Yield: Serves 6 to 8 | Makes about 10 cups
Prep Time: 25 minutes
Cook Time: 35 minutes
Total Time: 1 hour 20 minutes active, plus natural pressure release
Difficulty: Beginner to Intermediate — The Instant Pot handles most of the work, and the steps are straightforward. Even first-time pressure cooker users can succeed with this recipe.
Recipe: Instant Pot Beef Stew for Cozy Evenings

For the Beef and Browning:
- 2.5 to 3 pounds boneless beef chuck roast, trimmed and cut into 1.5 to 2-inch cubes
- 3 tablespoons olive oil, divided
- 1.5 teaspoons kosher salt, divided
- 0.75 teaspoon freshly ground black pepper, divided
For the Stew Base:
- 1 large yellow onion, cut into large chunks or diced
- 4 cloves garlic, minced
- 2 ribs celery, cut into 1-inch pieces
- 3 tablespoons tomato paste
- 1 tablespoon balsamic vinegar or red wine (optional but recommended)
For the Liquid and Seasoning:
- 4 to 5 cups unsalted or low-sodium beef broth
- 1 tablespoon Worcestershire sauce
- 1 teaspoon dried Italian seasoning
- 1 teaspoon dried thyme
- 1 bay leaf
- 1 teaspoon sugar (optional, balances flavors)
For the Vegetables:
- 1 pound Yukon Gold potatoes, peeled and cut into 0.75-inch chunks
- 1 pound carrots (about 5 to 6 medium), peeled and sliced diagonally into 0.5-inch-thick pieces
- 1 to 1.5 cups fresh or frozen peas (added after cooking)
For Thickening (Optional):
- 2 to 3 tablespoons cornstarch or all-purpose flour
- 3 tablespoons water
For Serving:
- 2 tablespoons fresh parsley, chopped
- Extra salt and pepper to taste
Brown the Beef:
-
Pat the beef cubes dry with paper towels using gentle pressure — this is crucial for browning. Any surface moisture prevents proper searing. Divide the dried beef into two batches.
-
Set the Instant Pot to SAUTÉ mode (high if available), add 1.5 tablespoons of the olive oil, and let it heat for 2 to 3 minutes until shimmering. A drop of water should sizzle immediately when it hits the hot oil.
-
Add the first batch of beef in a single layer without crowding the pot. Sprinkle with 0.75 teaspoon salt and 0.375 teaspoon pepper. Do not move the pieces for 4 to 5 minutes. Resist any urge to stir or flip early. You’re looking for a deep golden-brown crust to develop on the bottom of each piece. When you peek underneath with a wooden spoon, the meat should release easily from the pot bottom.
Advertisements -
Flip each piece carefully and brown the second side for another 4 to 5 minutes until dark and golden all over. Transfer the browned beef to a clean plate or bowl, making sure to capture any meat juices.
-
Add the remaining 1.5 tablespoons oil to the pot and repeat the browning process with the second batch of beef, seasoning with the remaining salt and pepper. This step takes time but is absolutely essential — don’t skip it or rush it.
Build the Stew Base:
-
Once the second batch is browned and removed, add the diced onion to the pot with the rendered beef fat still in the bottom. Sauté for 3 to 4 minutes, stirring occasionally, until the onion begins to soften and turn slightly golden at the edges. This deep sauté of the onions adds sweetness and prevents harsh, raw onion flavor.
-
Add the minced garlic and cook for exactly 30 seconds, stirring constantly, until fragrant. Be careful not to let the garlic burn — it should smell sweet and aromatic, not bitter.
-
Stir in the tomato paste and cook for 1 to 2 minutes, stirring frequently, until it darkens slightly and coats the bottom of the pot. This caramelization deepens the flavor significantly. Add the balsamic vinegar at this point if using (it adds subtle complexity).
-
Pour in 1 cup of the beef broth slowly, scraping the bottom and sides of the pot vigorously with a wooden spoon. You’re releasing every last bit of caramelized meat and vegetable stuck to the surfaces — this is pure, concentrated flavor. Continue scraping until the pot bottom is clean and the broth is dark and rich-looking.
-
Stir in the remaining 3 to 4 cups of beef broth, Worcestershire sauce, Italian seasoning, thyme, bay leaf, and sugar. The total liquid should be enough to cover the vegetables once they’re added, but not so much that you have a thin soup (you want a thick, brothy consistency).
-
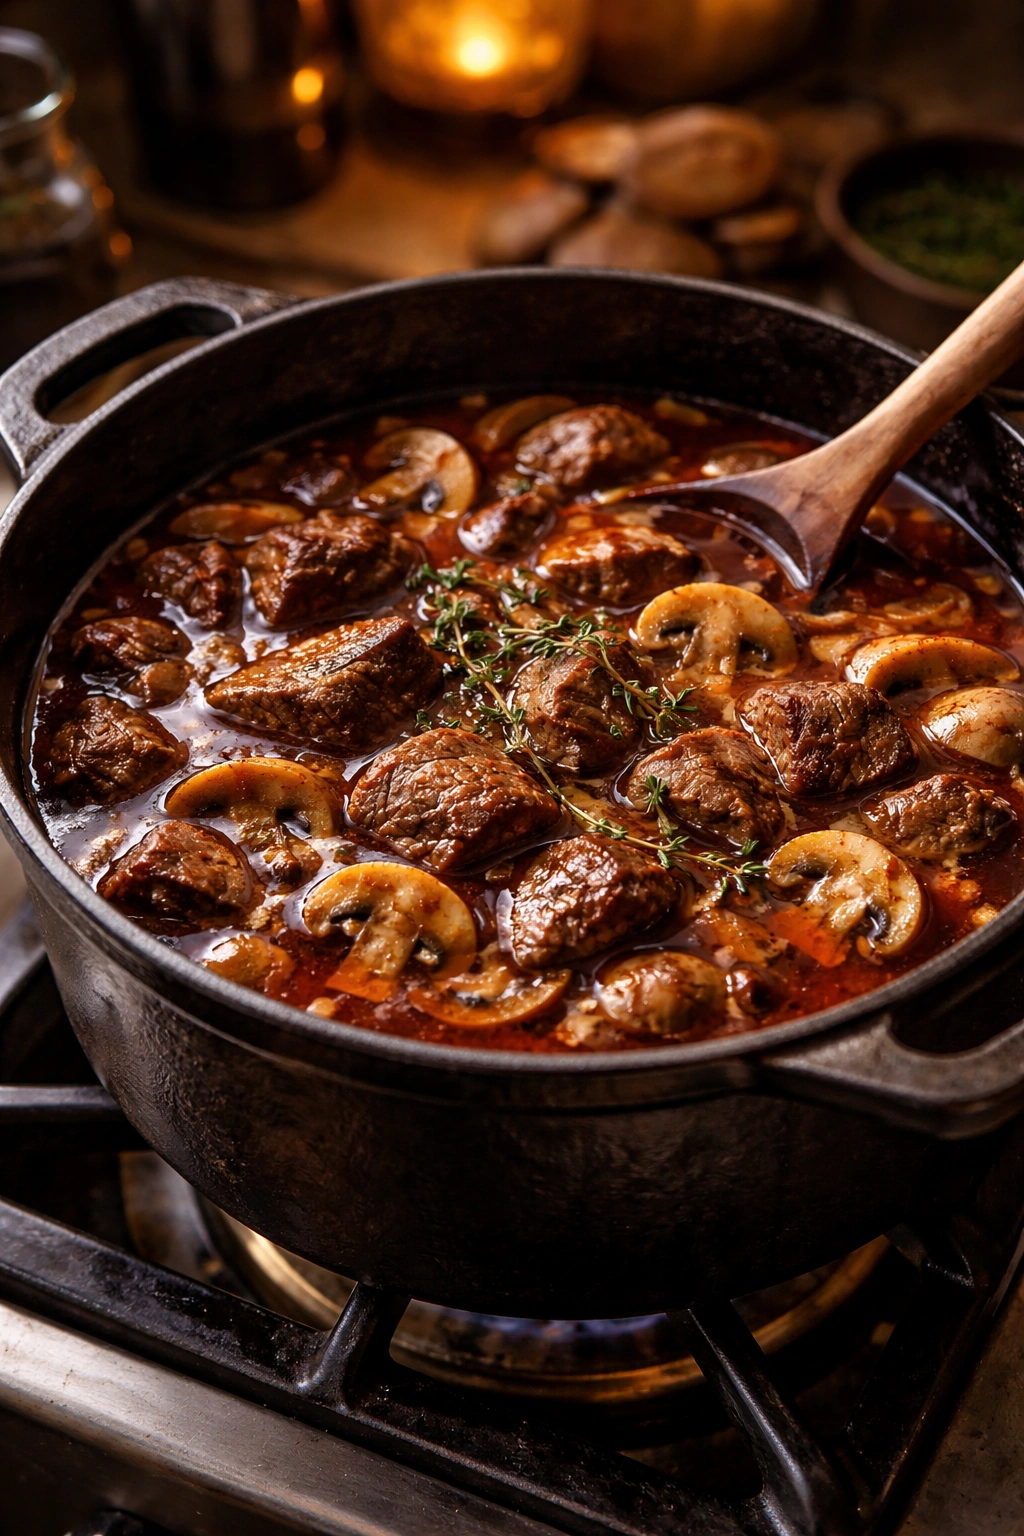
Add the browned beef back to the pot along with any accumulated juices on the plate. Stir well. Arrange the carrots, potatoes, and celery on top of the beef — do not stir after adding these vegetables. This prevents the starchy vegetables from sinking and sticking to the pot bottom, which could cause a burn warning.
Pressure Cook:
-
Close and seal the Instant Pot lid. Make sure the steam release valve is in the SEALING position (not venting). Press the PRESSURE COOK or MANUAL button and set the time to 35 minutes at HIGH pressure. The pot will take 10 to 15 minutes to reach full pressure before the countdown begins — this is normal and part of the cooking process.
-
Once the cooking time ends, turn off the Instant Pot and allow the pressure to release naturally for at least 10 minutes. During this time, the pressure inside gradually decreases, and the meat becomes even more tender. Do not quick-release immediately — this can cause the meat fibers to seize and toughen. Set a timer and let the pot sit completely undisturbed.
-
After 10 minutes of natural release, carefully move the steam release valve to the VENTING position using the handle of a long spoon (keep your face and hands back from the steam). Listen for any hissing. Once the steam stops and no more pressure remains, it’s safe to open the lid.
Thicken and Finish:
-
Carefully open the lid and use tongs or a slotted spoon to discard the bay leaf. At this point, the stew should smell absolutely incredible — rich, savory, deeply flavorful.
-
If you prefer a thicker stew, make a slurry by whisking 2 to 3 tablespoons cornstarch (or all-purpose flour) with 3 tablespoons cool water in a small bowl until completely smooth with no lumps. Set the Instant Pot to SAUTÉ mode and stir the cornstarch slurry into the hot stew. Cook for 2 to 3 minutes, stirring gently and occasionally, until the broth thickens noticeably — it should coat the back of a spoon. Do not overstir once you’ve added the thickener, as this can break down the vegetables.
-
Stir in the peas (fresh or frozen) and cook for 1 to 2 minutes until heated through. Taste the stew and adjust seasoning with additional salt and pepper as needed — you may find you want more than you expected because pressure cooking concentrates flavors significantly.
-
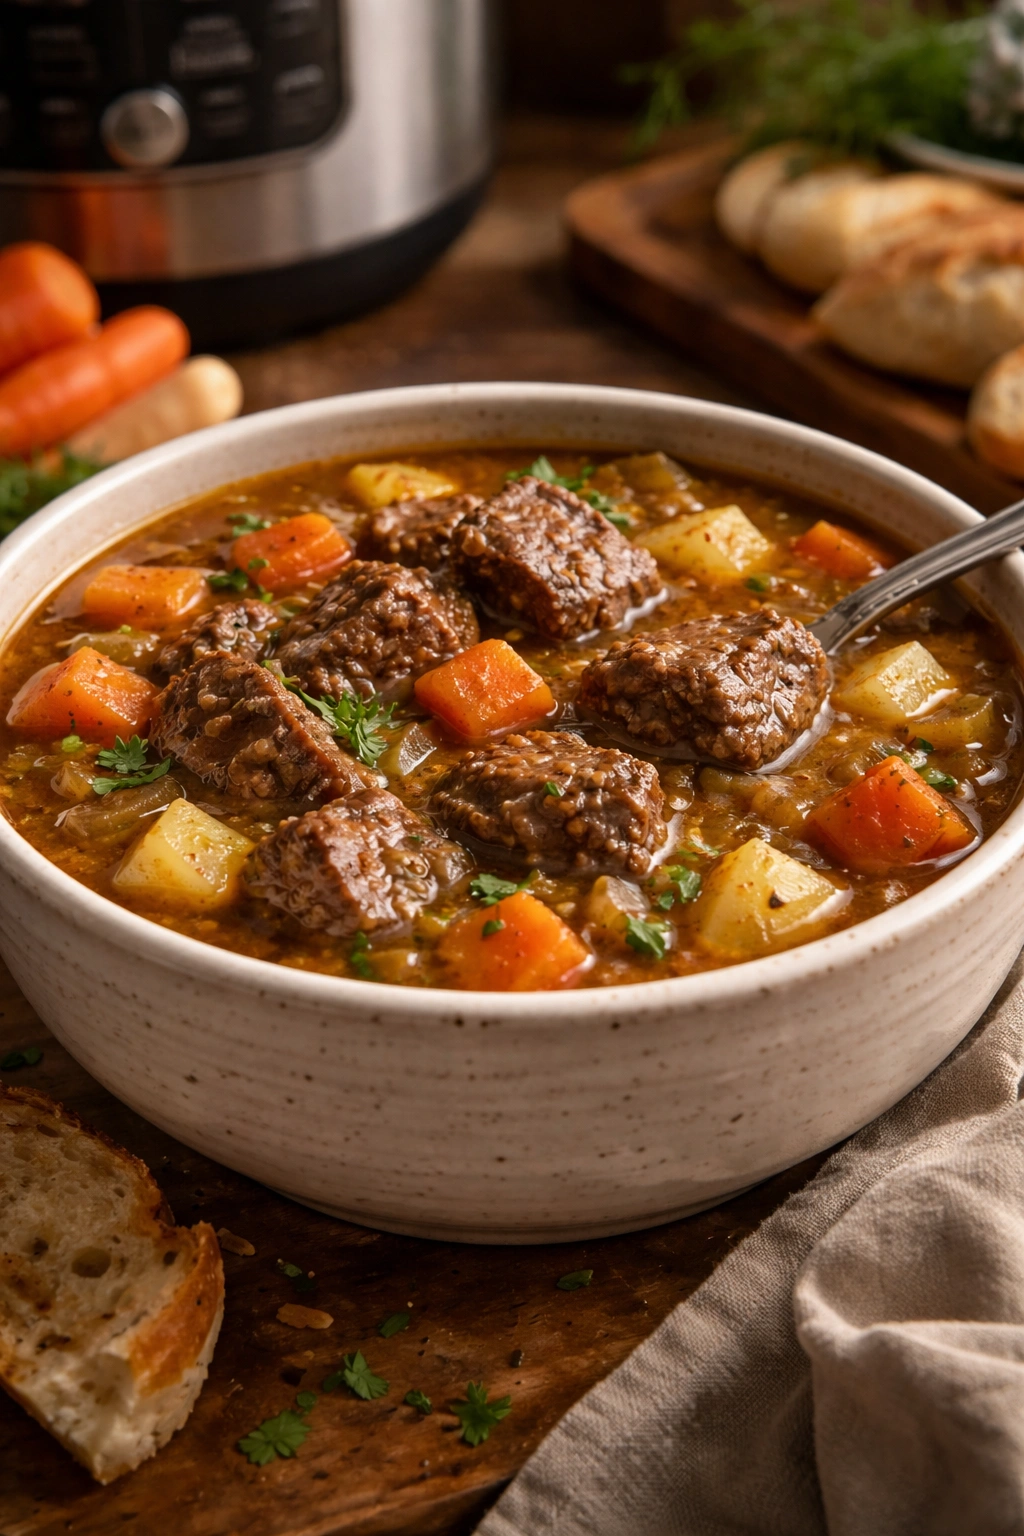
Ladle the stew into bowls and garnish generously with fresh chopped parsley. Serve immediately while piping hot.
Tips and Tricks for Stew Success
The difference between good stew and exceptional stew often comes down to small details. Don’t skip the browning step — this is where about 60% of your final flavor comes from. Yes, you can technically skip it and dump everything into the pot at once, but you’ll end up with something that tastes more like boiled beef soup than proper stew. The browning takes about 15 to 20 minutes total, but it’s the most important 15 to 20 minutes you’ll spend.
When browning the meat, pat it completely dry first. Any moisture on the surface creates steam, which prevents browning. Use paper towels and gentle pressure to dry the cubes right before they go into the hot pot. If some pieces stick slightly when you try to move them, leave them longer — they’ll release when truly ready. Forcing them releases them underdone.
Don’t crowd the pot during browning. If beef pieces are stacked or touching, they steam rather than sear. Work in batches even if it feels inefficient. The time is worth it. Similarly, if your pot feels dry as you’re browning the second batch, add a tiny bit more oil.
The deglazing step is non-negotiable for achieving both flavor and avoiding burn warnings. When you pour in the broth and scrape the pot bottom, you’re capturing the caramelized proteins and juices that will make your broth silky and rich. Don’t just pour the broth and walk away — scrape vigorously for at least 30 seconds.
Size consistency matters. When prepping vegetables, aim for uniform sizes so everything cooks evenly. A tiny diced onion cooks much faster than a large chunk — this affects texture and flavor integration.
Allow natural pressure release. This is where patience pays dividends. Quick-releasing can cause meat to seize and vegetables to break apart. The 10-minute natural release is part of the cooking process and produces noticeably more tender results than quick release.
Taste and adjust seasoning after cooking. Pressure cooking concentrates flavors, so you may need less salt than a stovetop recipe calls for. Alternatively, you might want more. Taste with a spoon before serving and season to your preference.
Variations and Flavor Customizations
One of beef stew’s greatest strengths is its adaptability. You can make it your own while maintaining that essential cozy comfort. For a red wine version, replace 1 cup of the beef broth with a full-bodied red wine like Malbec, Cabernet Sauvignon, or even Pinot Noir. Add the wine during the deglazing step, which allows its alcohol to cook off while the wine’s complex flavors integrate into the broth. Wine adds sophistication and depth that transforms stew into something restaurant-worthy.
For mushroom lovers, add 8 to 10 ounces of chopped mushrooms (cremini, button, or a mix) along with the other vegetables. Mushrooms contribute umami — that savory richness that makes people ask for more without knowing why. They cook down slightly and their liquid contributes to the broth.
For a spicier version, add 0.5 teaspoon cayenne pepper, 2 to 3 minced jalapeños, or even a splash of hot sauce to the broth. Start conservatively and adjust to your heat preference.
For low-carb or keto versions, replace potatoes with turnips or large cauliflower florets cut into chunks. The cauliflower becomes very tender and absorbs stew flavor beautifully. For paleo or whole-food-focused cooking, replace the wheat-based thickener with arrowroot powder using the same cornstarch proportions.
For Whole30 compliance, skip the Worcestershire sauce (or use coconut aminos instead) and thicken with arrowroot powder rather than cornstarch or flour. The stew loses nothing in flavor and maintains full compliance.
To add more vegetables, include diced bell peppers, chopped Brussels sprouts, cubed sweet potato, or even peas mixed in with the other vegetables. Remember to cut everything into similar-sized pieces and don’t add so much that you exceed the pot’s fill line (generally two-thirds full for pressure cooking).
Storage, Make-Ahead, and Freezing
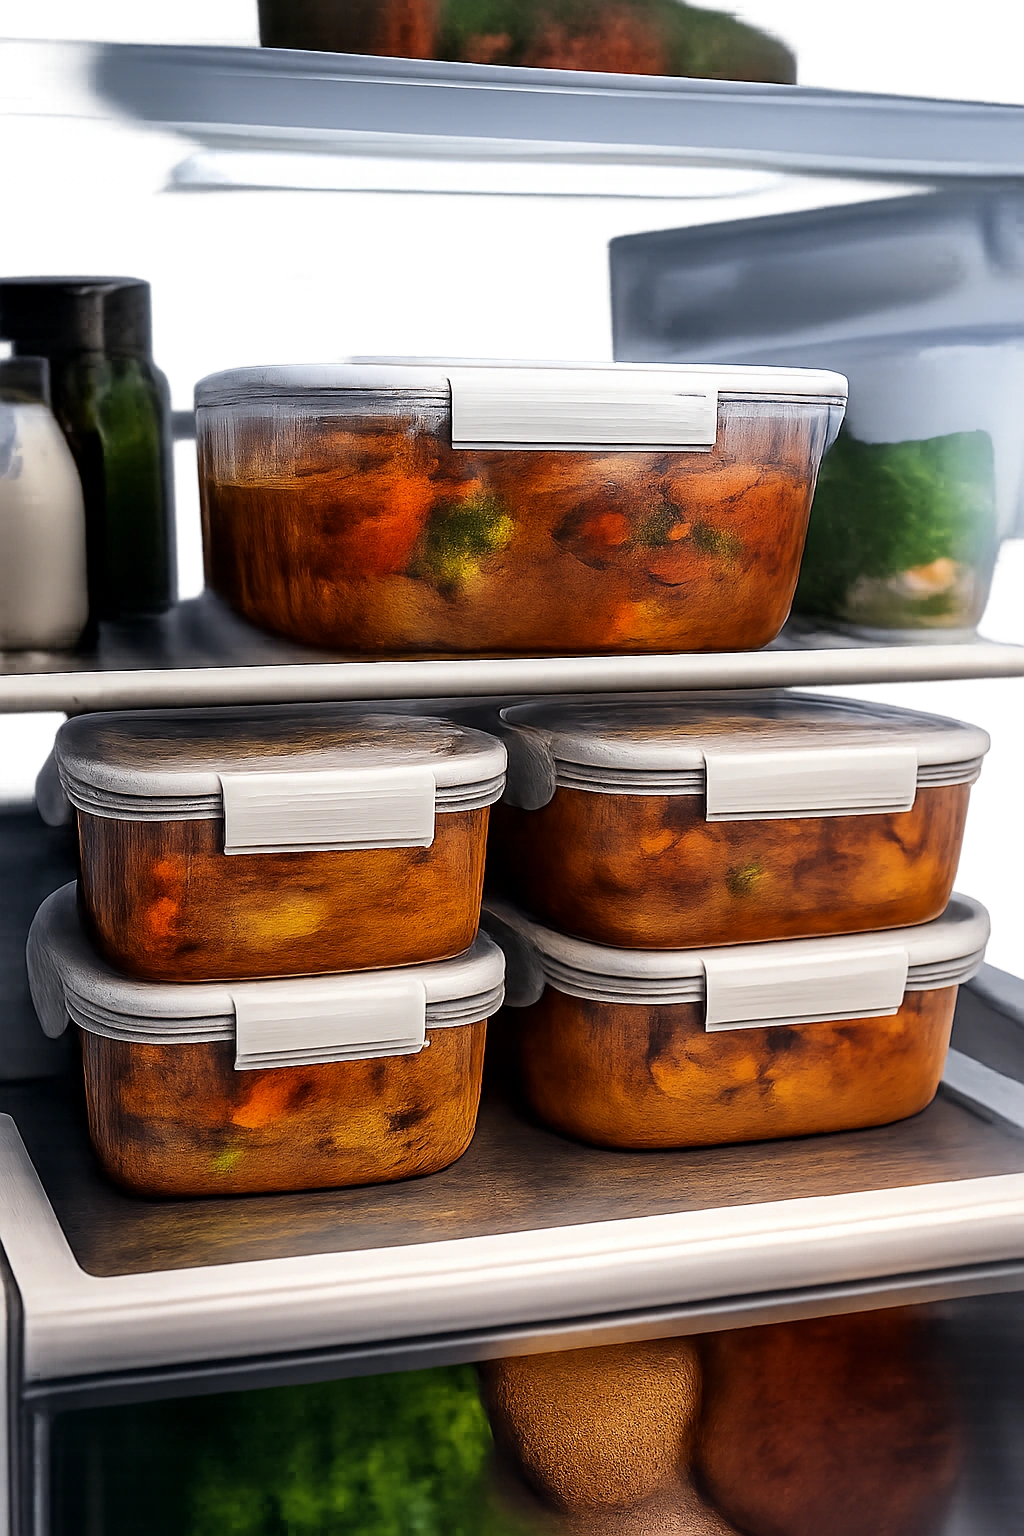
Beef stew improves overnight, making it perfect for make-ahead meals. The flavors have more time to meld, and the broth becomes even silkier as any remaining gelatin from the beef sets slightly. Store cooled stew in airtight glass containers in the refrigerator for up to 4 days. Never store hot stew directly in the refrigerator; always cool it to room temperature first (but not sitting out for more than 2 hours for food safety).
For freezing, allow the stew to cool completely, then transfer to airtight freezer-safe containers or vacuum-sealed bags, leaving at least an inch of headspace to allow for expansion. Properly frozen stew keeps for up to 3 months. Label with the date so you know when it was made. Thaw frozen stew overnight in the refrigerator before reheating.
To reheat, warm gently on the stovetop in a covered pot over medium-low heat, stirring occasionally, until heated through. This preserves the texture of vegetables and meat better than microwave reheating. If the stew seems too thick after freezing and thawing, add a splash of beef broth as you reheat.
You can also freeze the stew before cooking it. Prepare all ingredients, place everything except the broth and seasonings in freezer bags or containers, and freeze. When ready to cook, add thawed ingredients to the pot and follow the recipe, though you may need slightly more cooking time if starting from completely frozen. This makes weeknight meals effortless — just thaw the bag in the refrigerator the night before and cook in the morning.
What to Serve Alongside Your Stew
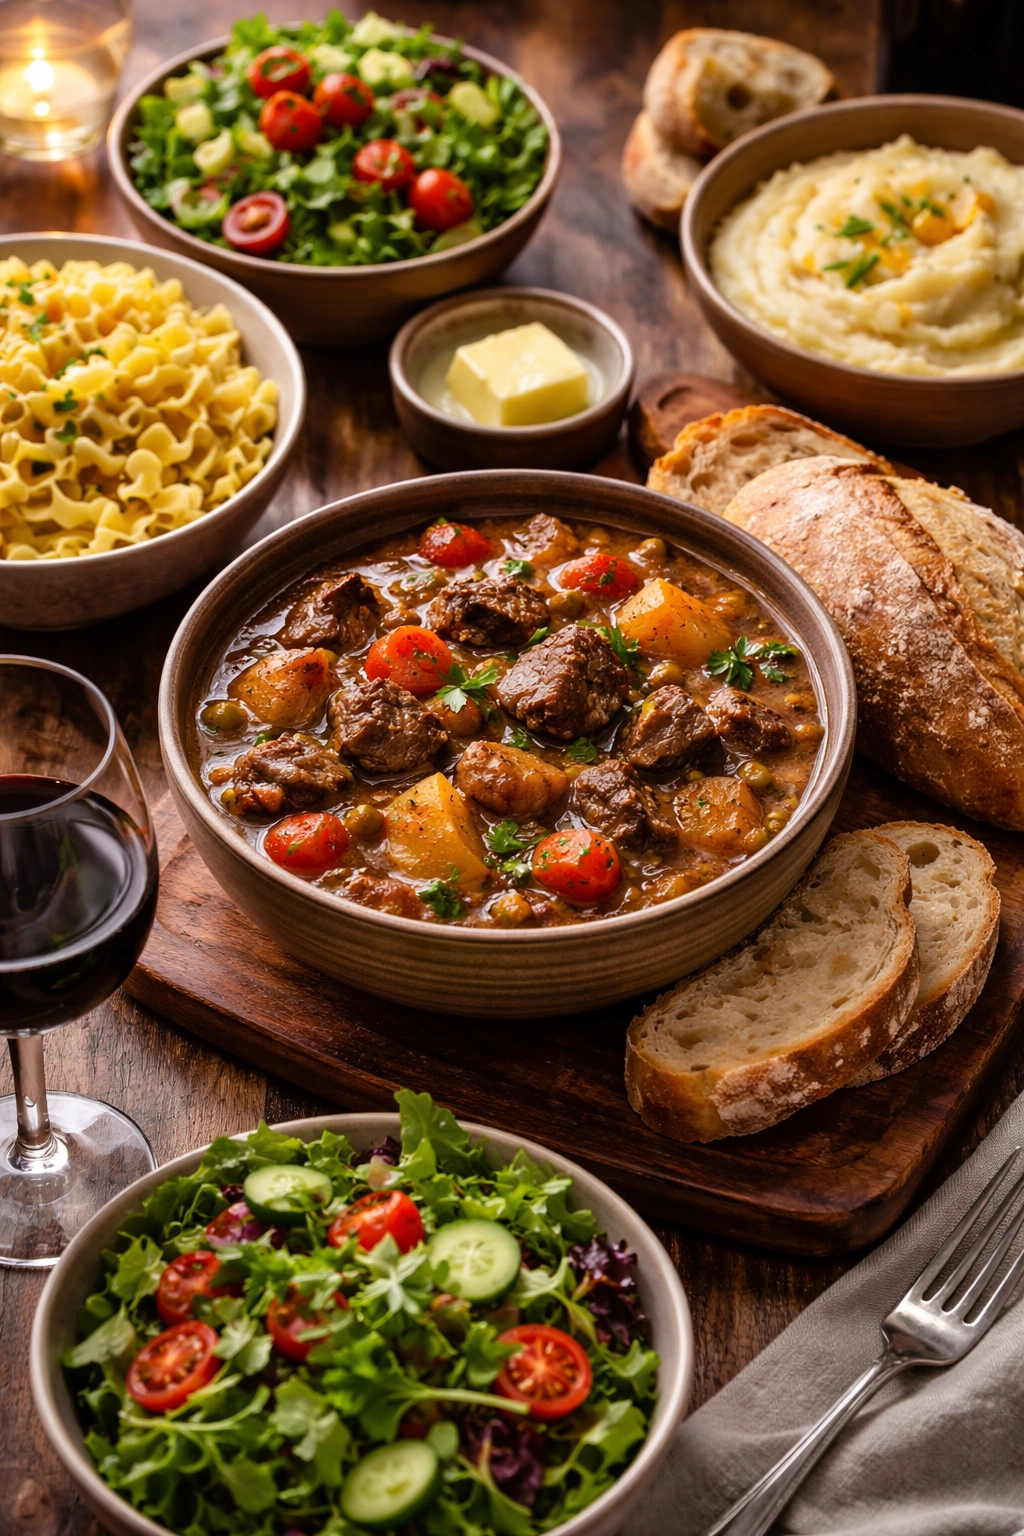
Beef stew is essentially a complete meal in one bowl, but pairing foods elevate it from comfort food to special occasion dinner. Crusty bread is non-negotiable. A thick slice of sourdough, focaccia, or a sturdy baguette does double duty: it’s delicious on its own and, more importantly, serves as a vehicle for soaking up every last drop of that precious, rich broth. Butter the bread lightly if you’re feeling indulgent — it won’t regret it.
Buttered egg noodles or creamy mashed potatoes transform stew into something different but equally satisfying. Ladle the stew over a bed of noodles or potatoes, and you’ve got something that feels both rustic and elegant. The starch soaks up the broth beautifully.
A crisp green salad provides bright contrast to the stew’s richness. Dress simple greens with a sharp vinaigrette — something with mustard and vinegar that cuts through the heaviness of the beef and cream from the broth. The acidity refreshes your palate between spoonfuls.
Roasted vegetables on the side — Brussels sprouts, root vegetables, or simple green beans — add textural contrast and nutrition without competing with the stew’s flavors.
A glass of the same wine you used in the stew, if you made the wine version, ties everything together. If you made the traditional beef broth version, a full-bodied red wine still pairs beautifully.
Beer pairs wonderfully too. A rich amber ale, brown ale, or even a stout complements the beef’s savory depth.
The Comfort of a Perfect Bowl
There’s something almost magical about serving stew on the kind of evening when the weather turns cold and the outside world feels unwelcoming. The steam rising from the bowl, the aroma filling your kitchen, the warmth spreading through your body as you eat — these are the moments that matter. Beef stew made in an Instant Pot delivers all of this without demanding hours of your day. You get restaurant-quality flavor and texture in roughly the same time it would take to pick up takeout, except yours tastes better and costs a fraction of the price.
This recipe has a way of becoming a staple in households that try it. People find themselves making it repeatedly, sometimes tweaking it slightly each time, eventually knowing it so well they don’t need to consult the recipe. It becomes the meal you turn to when you need comfort, when you want to impress someone, when you need a make-ahead dinner for a busy week, or simply when you want to eat something that tastes like it was made with care.
The Instant Pot’s reputation for transforming everyday cooking is built on recipes exactly like this one. It takes something traditionally time-consuming and makes it accessible without sacrificing quality. More importantly, it doesn’t just save time — it often improves the final result. The sealed environment concentrates flavors, the high-pressure steam tenderizes meat more evenly than traditional methods, and the entire process is more forgiving than stovetop cooking.
Final Thoughts
Making Instant Pot beef stew is one of those cooking skills worth developing. Once you understand the fundamentals — the importance of browning, the value of proper deglazing, why natural pressure release matters, and how to season thoughtfully — you can apply these principles to countless other pressure cooker recipes. You’ll find yourself using this pot far more often than you expected, discovering that pressure cooking isn’t intimidating or dangerous but rather a genuine shortcut to home-cooked food that tastes like you spent all day in the kitchen.
The next time cold weather arrives, or whenever you’re craving something deeply satisfying and comforting, remember that beef stew is no longer an all-day project. It’s a dinner you can have on the table in under two hours with minimal hands-on effort and maximum flavor. Your kitchen will smell incredible, your family will gather around hungry, and you’ll serve something genuinely special. That’s worth every bit of the care you put into selecting the right beef, taking time to brown it properly, and letting the Instant Pot work its magic.